

Bosch HBN 13M2.O Installing And Operating Instructions
a
Installing and
Operating Instructions
HBN 13M2.O
Internet: http://www.bosch-hausgeraete.de
Bosch Info-Team: de Tel. 01 80/5 30 40 50 (E 0,14/Min. DTAG)

2
Making cooking as much fun as eating
Please read this instruction manual. This will ensure that you
make use of all the technical benefits the cooker has to offer.
It will provide you with important safety information. You will
then be familiarised with the individual components of your
new cooker. And we will show you how to make settings
step by step. It is quite simple.
The tables list the settings and shelf positions for numerous
well-known dishes. All these dishes are tested in our cooking
studio.
In the unlikely event of a fault, look here for information on
how to rectify minor faults yourself.
A detailed table of contents will help you to find your way
around quickly.
Enjoy your meal!
a

3
Table of contents
Important information . . . . . . . . . . . . . . . . . . . . . . 6
Before installation . . . . . . . . . . . . . . . . . . . . . . . . . . 6
Safety information . . . . . . . . . . . . . . . . . . . . . . . . . . 6
Reasons for damage . . . . . . . . . . . . . . . . . . . . . . . . 8
Your new cooker . . . . . . . . . . . . . . . . . . . . . . . . . . 9
The control panel . . . . . . . . . . . . . . . . . . . . . . . . . . 9
Temperature selector (hot air) – Main oven . . . . . . . 9
Function selector – Mini oven . . . . . . . . . . . . . . . . . 10
Temperature selector – Mini oven . . . . . . . . . . . . . . 10
Control buttons and display panel . . . . . . . . . . . . . . 11
Push-in control knobs . . . . . . . . . . . . . . . . . . . . . . . 11
Types of heating – Main oven . . . . . . . . . . . . . . . . . 12
Types of heating – Mini oven . . . . . . . . . . . . . . . . . . 13
Oven and shelving accessories . . . . . . . . . . . . . . . . 14
Cooling fan . . . . . . . . . . . . . . . . . . . . . . . . . . . . . . . 15
Before using for the first time . . . . . . . . . . . . . . . 18
Heating up the oven . . . . . . . . . . . . . . . . . . . . . . . . 18
Pre-cleaning the accessories . . . . . . . . . . . . . . . . . 18
Setting the oven . . . . . . . . . . . . . . . . . . . . . . . . . . 19
Setting procedure – Main oven . . . . . . . . . . . . . . . . 19
Setting procedure – Mini oven . . . . . . . . . . . . . . . . . 20
If the oven is to switch off automatically –
Main oven . . . . . . . . . . . . . . . . . . . . . . . . . . . . . . . . 21
If the oven is to switch on and off automatically
– Main oven . . . . . . . . . . . . . . . . . . . . . . . . . . . . . . 22
Time . . . . . . . . . . . . . . . . . . . . . . . . . . . . . . . . . . . . 23
Setting procedure . . . . . . . . . . . . . . . . . . . . . . . . . . 23

4
Table of contents
Timer . . . . . . . . . . . . . . . . . . . . . . . . . . . . . . . . . . . 24
Setting procedure . . . . . . . . . . . . . . . . . . . . . . . . . . 24
Basic settings – Main oven . . . . . . . . . . . . . . . . . 25
Changing the basic settings . . . . . . . . . . . . . . . . . . 26
Childproof lock . . . . . . . . . . . . . . . . . . . . . . . . . . . 27
Care and cleaning . . . . . . . . . . . . . . . . . . . . . . . . . 27
Oven exterior . . . . . . . . . . . . . . . . . . . . . . . . . . . . . 27
Oven . . . . . . . . . . . . . . . . . . . . . . . . . . . . . . . . . . . . 28
Cleaning the rails . . . . . . . . . . . . . . . . . . . . . . . . . . . 30
Seal . . . . . . . . . . . . . . . . . . . . . . . . . . . . . . . . . . . . 30
Accessories . . . . . . . . . . . . . . . . . . . . . . . . . . . . . . 30
Troubleshooting . . . . . . . . . . . . . . . . . . . . . . . . . . 31
Replacing the oven light . . . . . . . . . . . . . . . . . . . . . 31
After-sales service . . . . . . . . . . . . . . . . . . . . . . . . 32
Packaging and old appliances . . . . . . . . . . . . . . . 33
Tables and tips . . . . . . . . . . . . . . . . . . . . . . . . . . . 34
Cakes and pastries . . . . . . . . . . . . . . . . . . . . . . . . . 34
Baking tips . . . . . . . . . . . . . . . . . . . . . . . . . . . . . . . 37
Meat, poultry, fish . . . . . . . . . . . . . . . . . . . . . . . . . . 38
Tips for roasting and grilling . . . . . . . . . . . . . . . . . . 40
Convenience Food . . . . . . . . . . . . . . . . . . . . . . . . . 41
Defrosting – Main oven . . . . . . . . . . . . . . . . . . . . . . 41
Energy saving tips . . . . . . . . . . . . . . . . . . . . . . . . . . 42
Acrylamide in food . . . . . . . . . . . . . . . . . . . . . . . . 42
What can you do? . . . . . . . . . . . . . . . . . . . . . . . . . 43
Test dishes . . . . . . . . . . . . . . . . . . . . . . . . . . . . . . 44

5
Table of contents
Assembly instructions . . . . . . . . . . . . . . . . . . . . . 45
For the installer and kitchen expert . . . . . . . . . . . 45
Important installation notes . . . . . . . . . . . . . . . . . . . 45
Installation of the built-in oven . . . . . . . . . . . . . . . . . 46

6
Important information
Read this instruction manual carefully.
Only then will you be able to operate your cooker
safely and correctly.
Please keep the instruction and installation manual in
a safe place. Please pass on the instruction manual
to the new owner if you sell the appliance.
Before installation
Transport damage Check the appliance after unpacking it.
Do not connect the appliance if it has been
damaged in transport.
Electrical connection The cooker may only be connected by an approved
specialist. Losses resulting from damage caused by
incorrect connection will invalidate warranty claims.
Safety information
This appliance is intended for domestic use only.
Only use the cooker for food preparation.
Hot oven Open the oven door carefully. Hot steam may
escape.
Never touch the internal surfaces of the oven or the
heating elements. There is a risk of burning. Children
must be kept at a safe distance from the appliance.
Never store combustible items in the oven.
Risk of fire.
Never clamp leads of electrical appliances in the hot
oven door. The insulation on the leads could melt.
There is a risk of short-circuiting.

7
Be careful with food that is prepared with drinks with
a high alcohol content (e.g. cognac, rum).
Alcohol evaporates at high temperatures. In
unfavourable circumstances, the alcoholic vapours
could catch fire in the oven. There is a risk of
burning.
Only use small quantities of drinks with a high
alcohol content and open the oven door carefully.
Repairs Incorrectly done repairs are dangerous.
There is a risk of electrocution.
Repairs may only be carried out by after-sales
service technicians who have been fully trained by
BSH.
If there is a fault, switch off the oven fuse at the fuse
box. Call the after-sales service.

Reasons for damage
Baking tray, aluminium foil Do not place the baking tray on the oven floor.
or dishes on the oven floor Do not cover it with aluminium foil.
Do not place dishes on the oven floor.
This will cause heat accumulation. The baking and
roasting times will no longer be correct and the
enamel will be damaged.
Slide-in accessories To avoid damage, insert slide-in accessories
carefully.
Water in the oven Never pour water directly into a hot oven.
This could damage the enamel.
Fruit juice When baking very moist fruit cakes, do not put too
much on the baking sheet. Fruit juice dripping from
the baking sheet leaves stains that cannot be
removed.
It is recommended that you use the deeper universal
pan.
Cooling with the oven door Only leave the oven to cool with the door closed. Do
open not allow anything to become trapped in the oven
door. Even if you only leave the oven door open
slightly, the fronts of adjacent units may become
damaged over time.
Very dirty oven seal If the oven seal is very dirty, the oven door will no
longer close properly when the oven is in use. The
fronts of adjacent units could be damaged. Keep the
oven seal clean.
Using the oven door as a Do not stand or sit on the oven door.
seat
8

9
Your new cooker
Here you will learn more about your new oven. The
control panel and its switches and indicators are
explained here. The heating modes and the
accessories included with your oven will be explained
here.
The control panel Details vary according to the appliance model.
Temperature selector
Main oven
Use the temperature selector to select the type of
heating for the oven.
Settings
0 Oven light
50–200 Hot air temperature in °C
e
Defrost
The oven light switches on when you select a
temperature.
The red oven temperature control lamps illuminates
when the oven is first switches on.
Function selector
Temperature selector
with control lamp
Temperature
selector
with control lamp
Display panel and
control buttons
Mini oven
Main oven
10
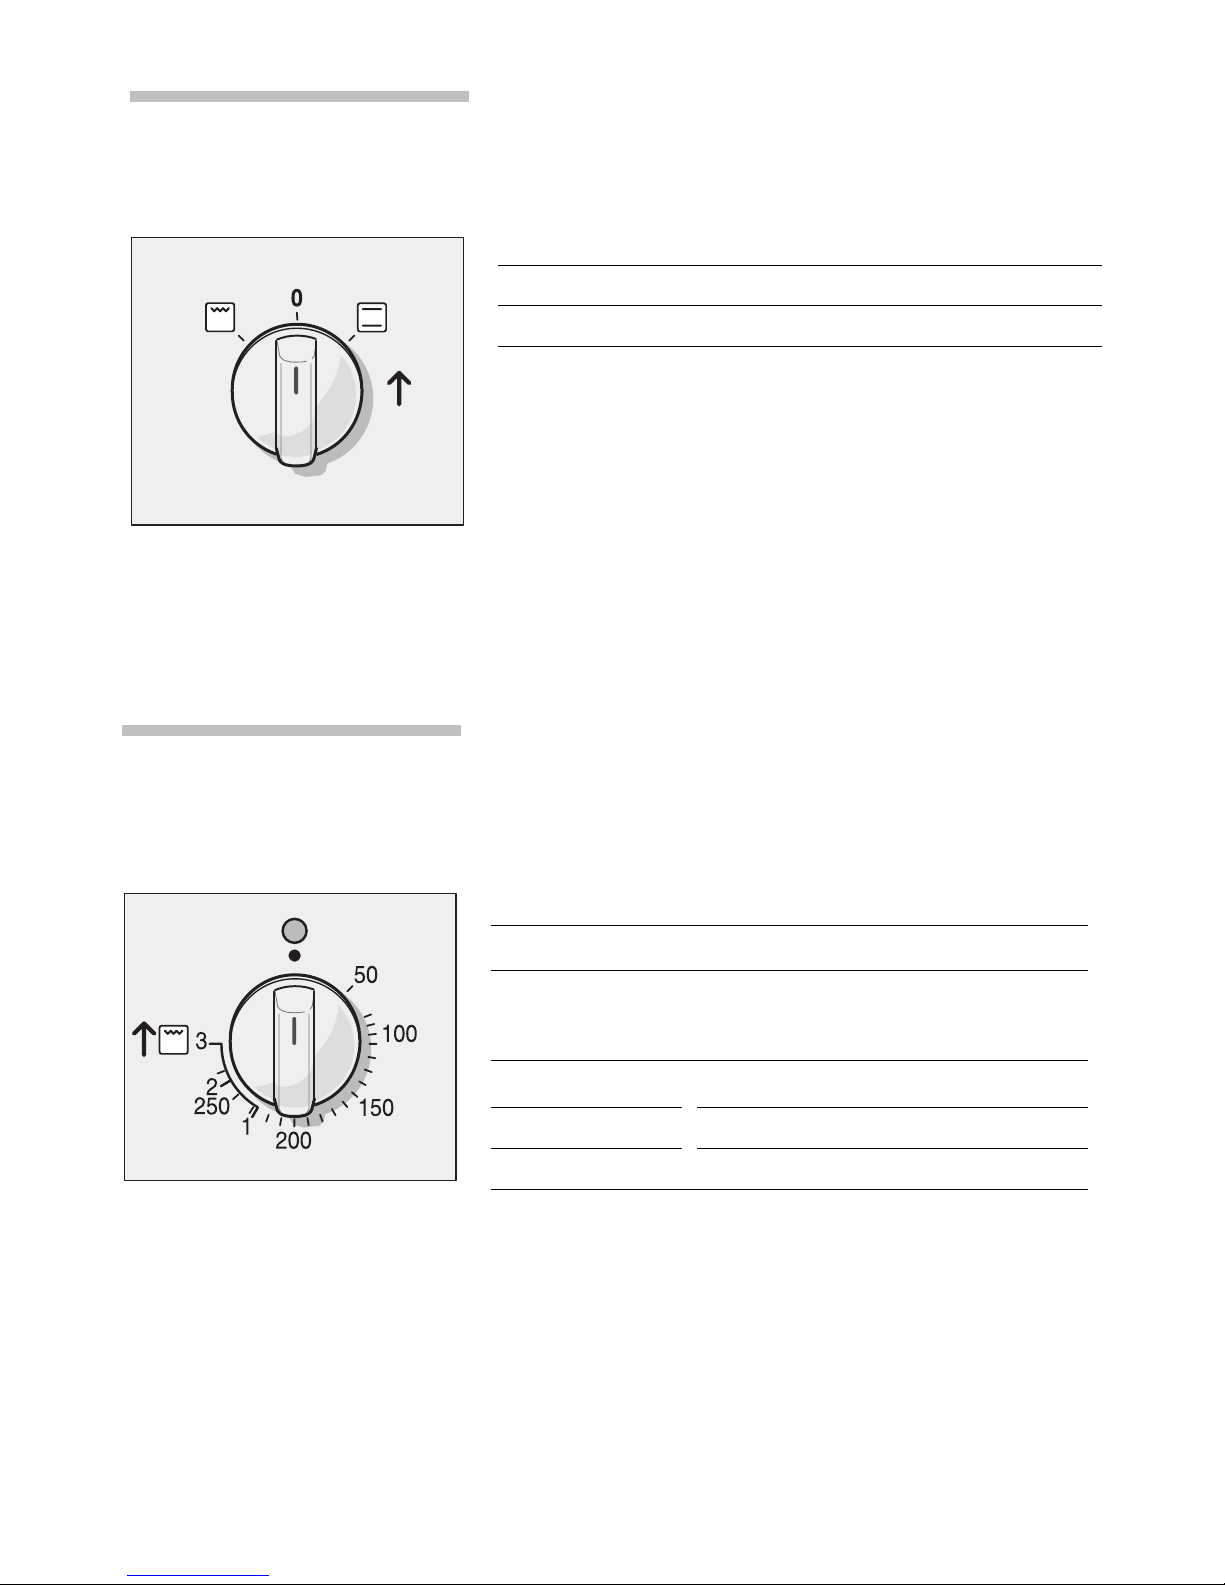
Function selector
Mini oven
Use the function selector to select the type of
heating for the oven.
Settings
/ Conventional heat
) Radiant grill – large area
The oven light switches on when you select a
function.
Temperature selector
Mini oven
Use the temperature selector to set the temperature
or grill setting.
Temperature
50–270 Temperature range in ºC
Grill
)
1 Low grill
2 Medium grill
3 High grill
The temperature symbol in the display lights up while
the oven is heating up.
Grill settings You can select a grill setting on the radiant grill )
using the temperature selector.
11
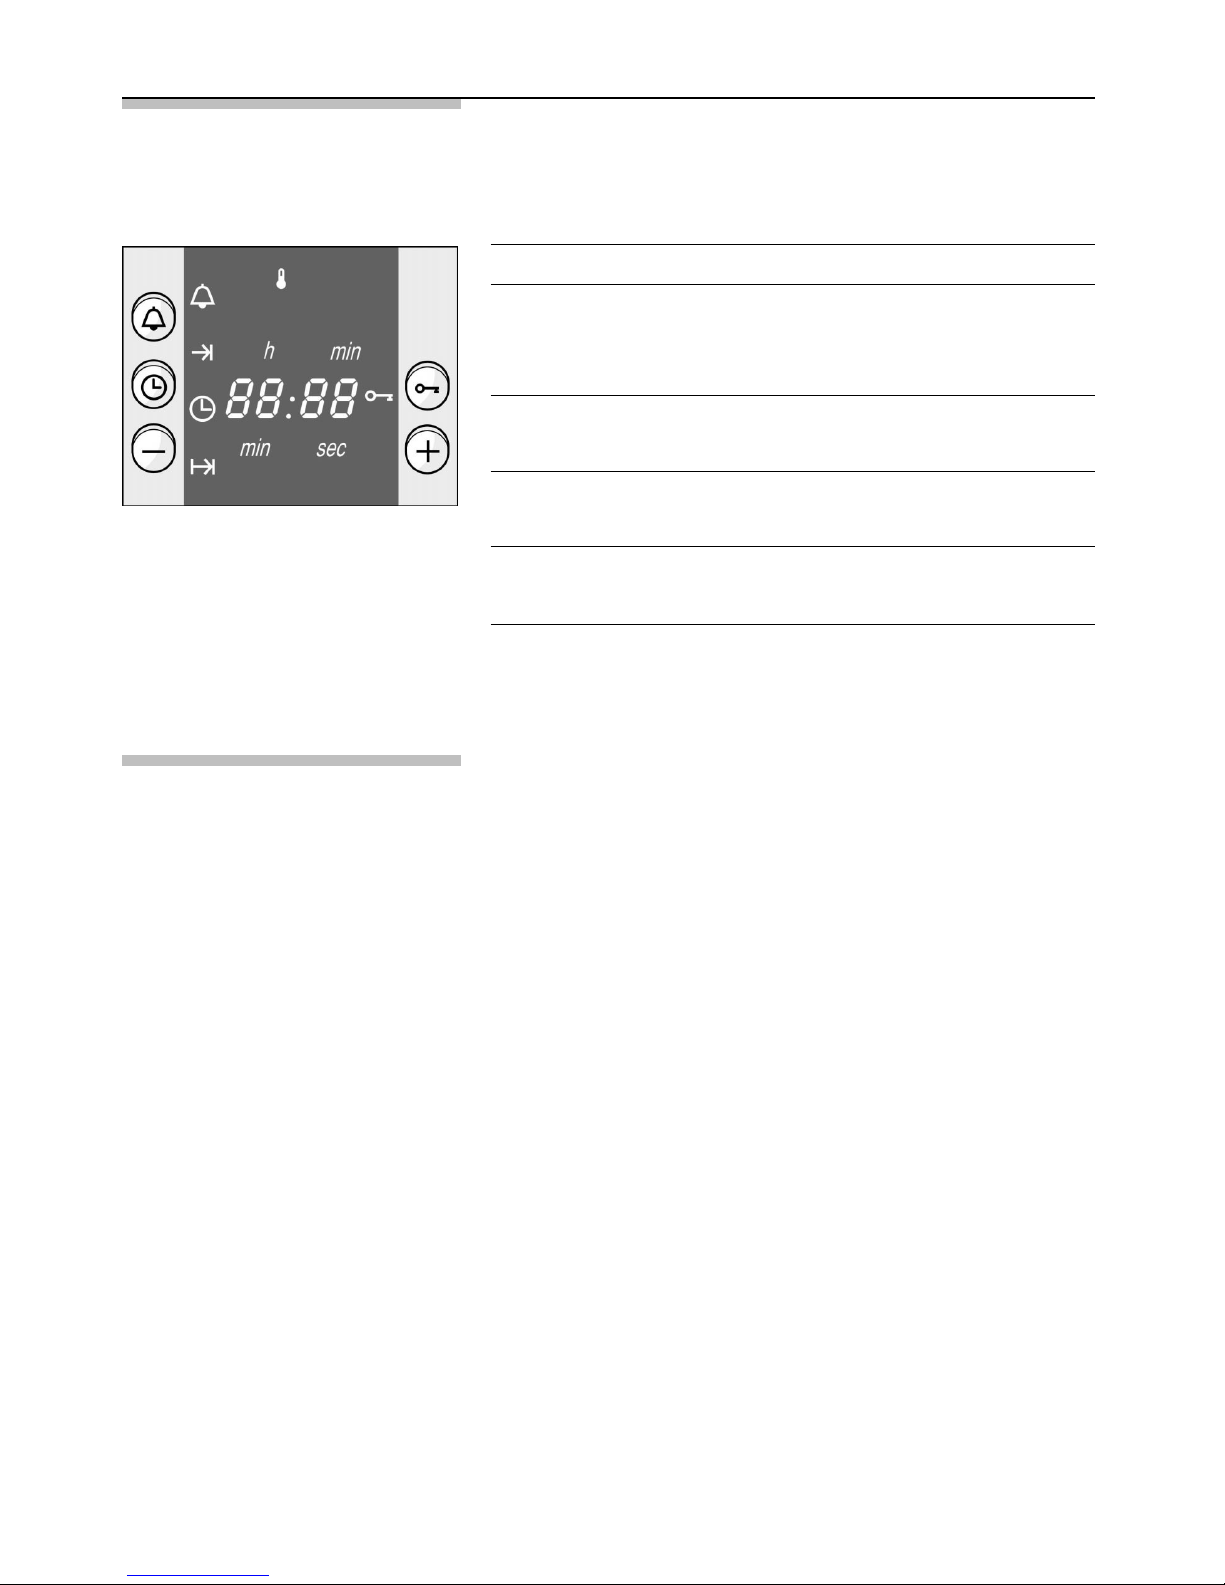
Control buttons and
display panel
Timer button 8 Use this button to set the timer
Clock button
6 Use this button to set the time of
day, the cooking time * and
the completion time +
Minus button – Use this button to reduce the
values set.
Plus button + Use this button to increase the
values set.
Key button E Use this button to switch the
childproof lock on and off.
The values set can be seen in the display panel.
Push-in control
knobs
The control knobs can be pushed in. Simply press
the control knob to release or lock it.
The function selector can be turned clockwise or
anticlockwise, whereas the temperature selector can
only be turned clockwise.
12
Types of heating
Main oven
Different types of oven heating are available. You can
therefore select the best method for cooking any
dish.
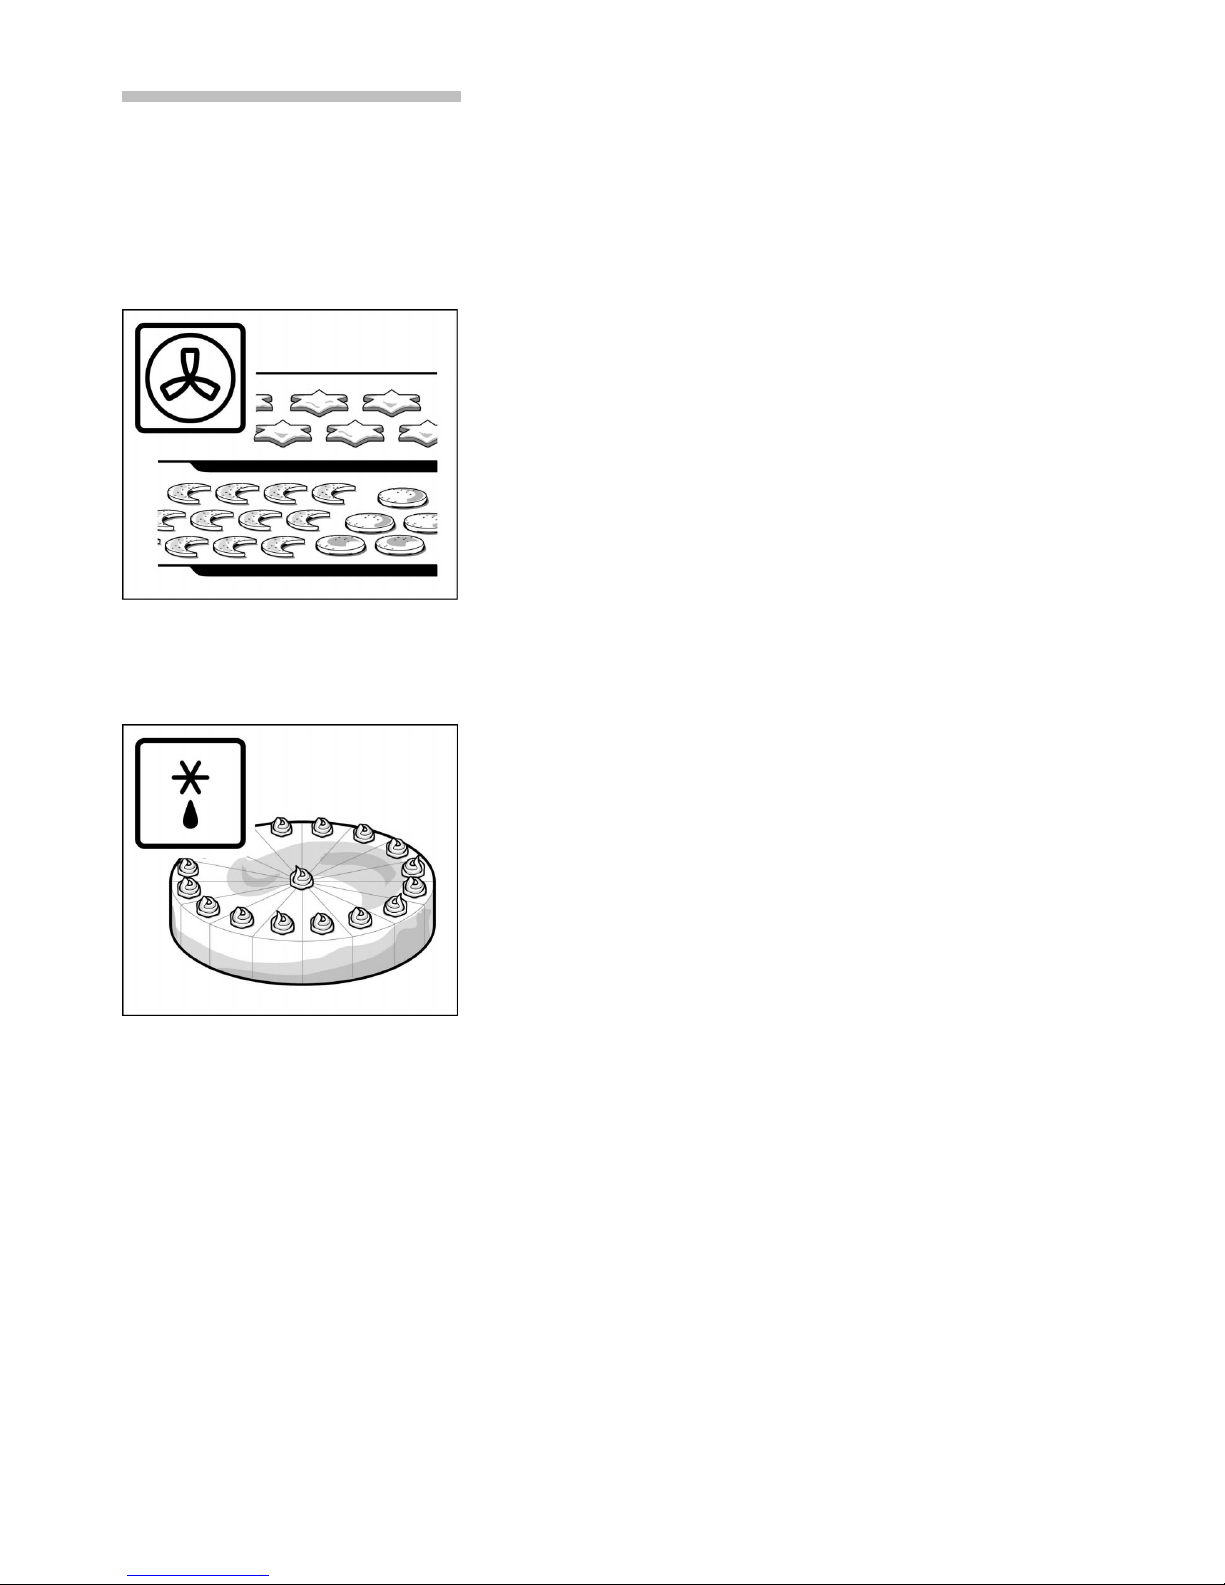
3D hot air
A fan in the rear panel distributes the heat from the
ring heating element evenly inside the oven.
Using 3D hot air, it is possible to bake cakes and
pizza on two shelves. You can cook biscuits and puff
pastry on three levels at the same time. The required
oven temperatures are lower than those for top and
bottom heating. Additional baking trays may be
obtained from specialist shops.
3D hot air is ideal for drying food.
Defrosting
A fan in the rear panel circulates the air in the oven
around the frozen food. Frozen pieces of meat,
poultry, bread and cakes defrost evenly
13
Types of heating Different types of oven heating are available. You can
Mini oven
therefore select the best method for cooking any
dish.
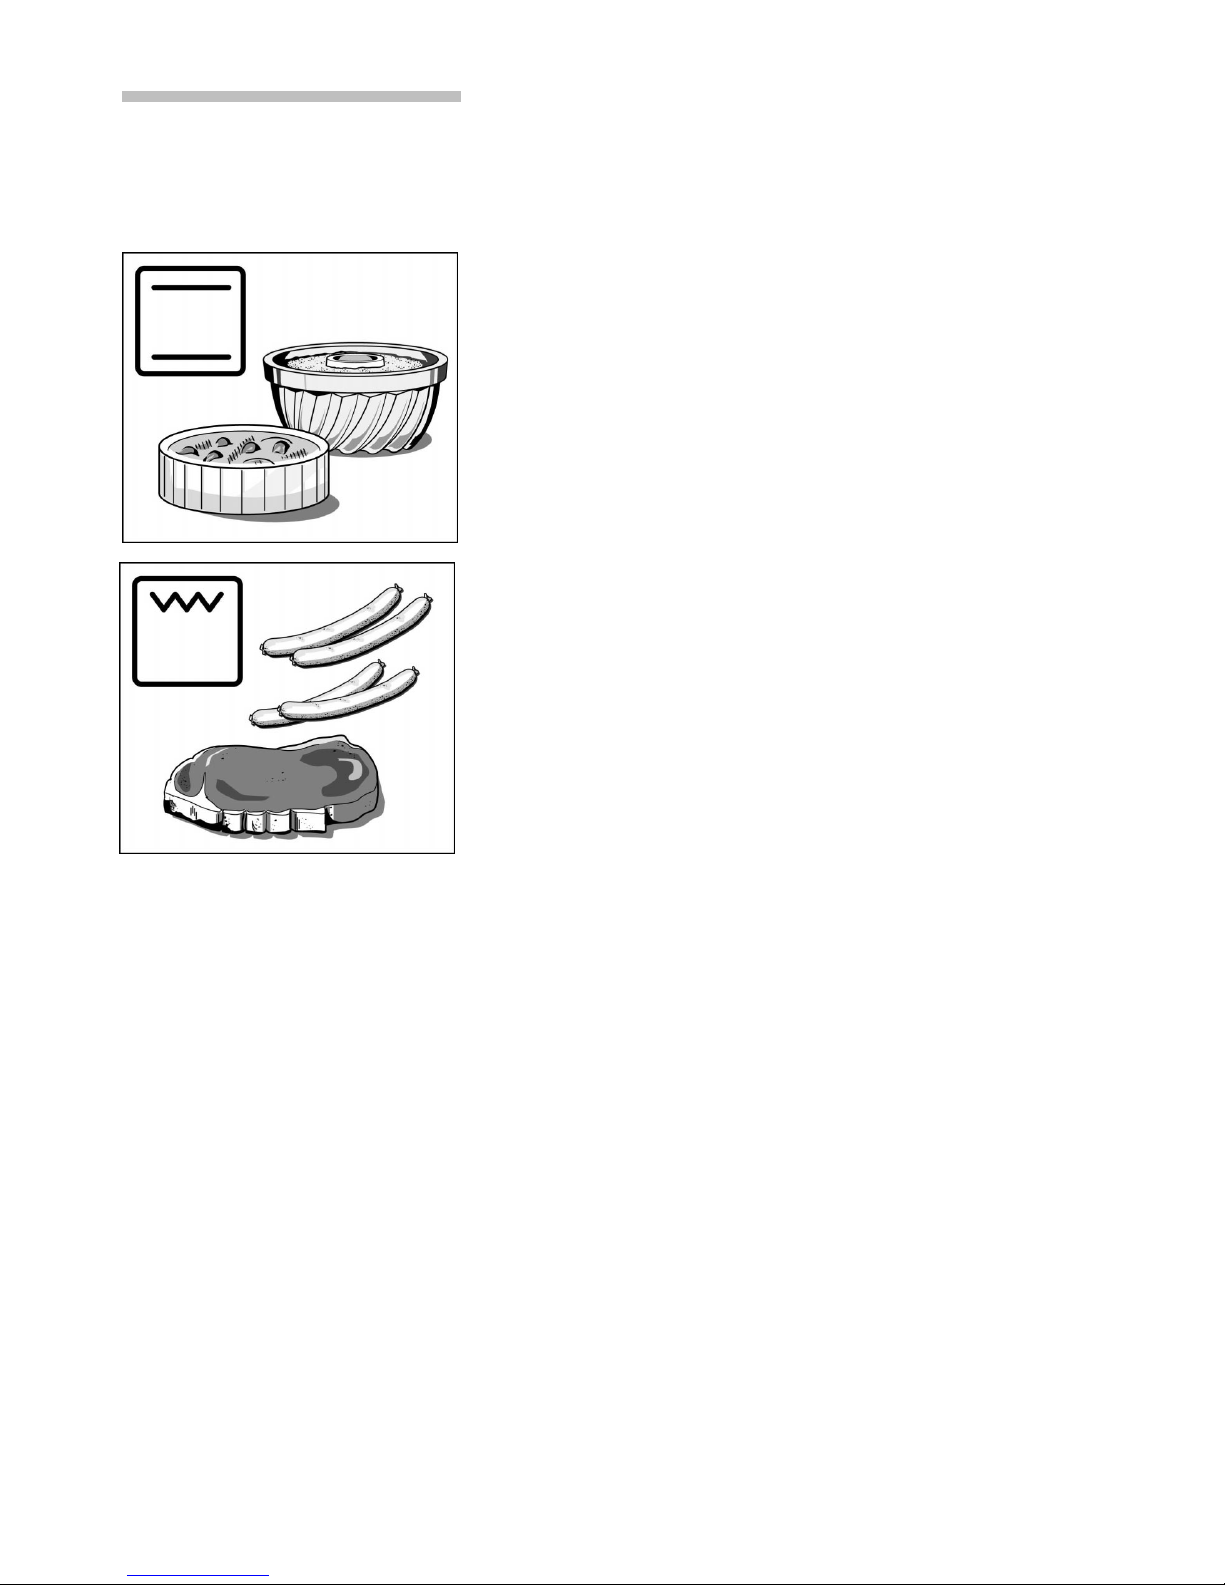
Top and bottom heating
This ensures the even distribution of heat onto the
cake or roast from the top and bottom of the oven.
This type of heating is best for cake mixtures in tins
or for bakes. Top and bottom heating is also suitable
for cooking lean roasts of beef, veal and game.
Radiant grill – large area
The entire area under the grill element becomes hot.
This is ideal if you wish to cook several steaks,
sausages, fish or slices of toast.
14
Oven and shelving
accessories
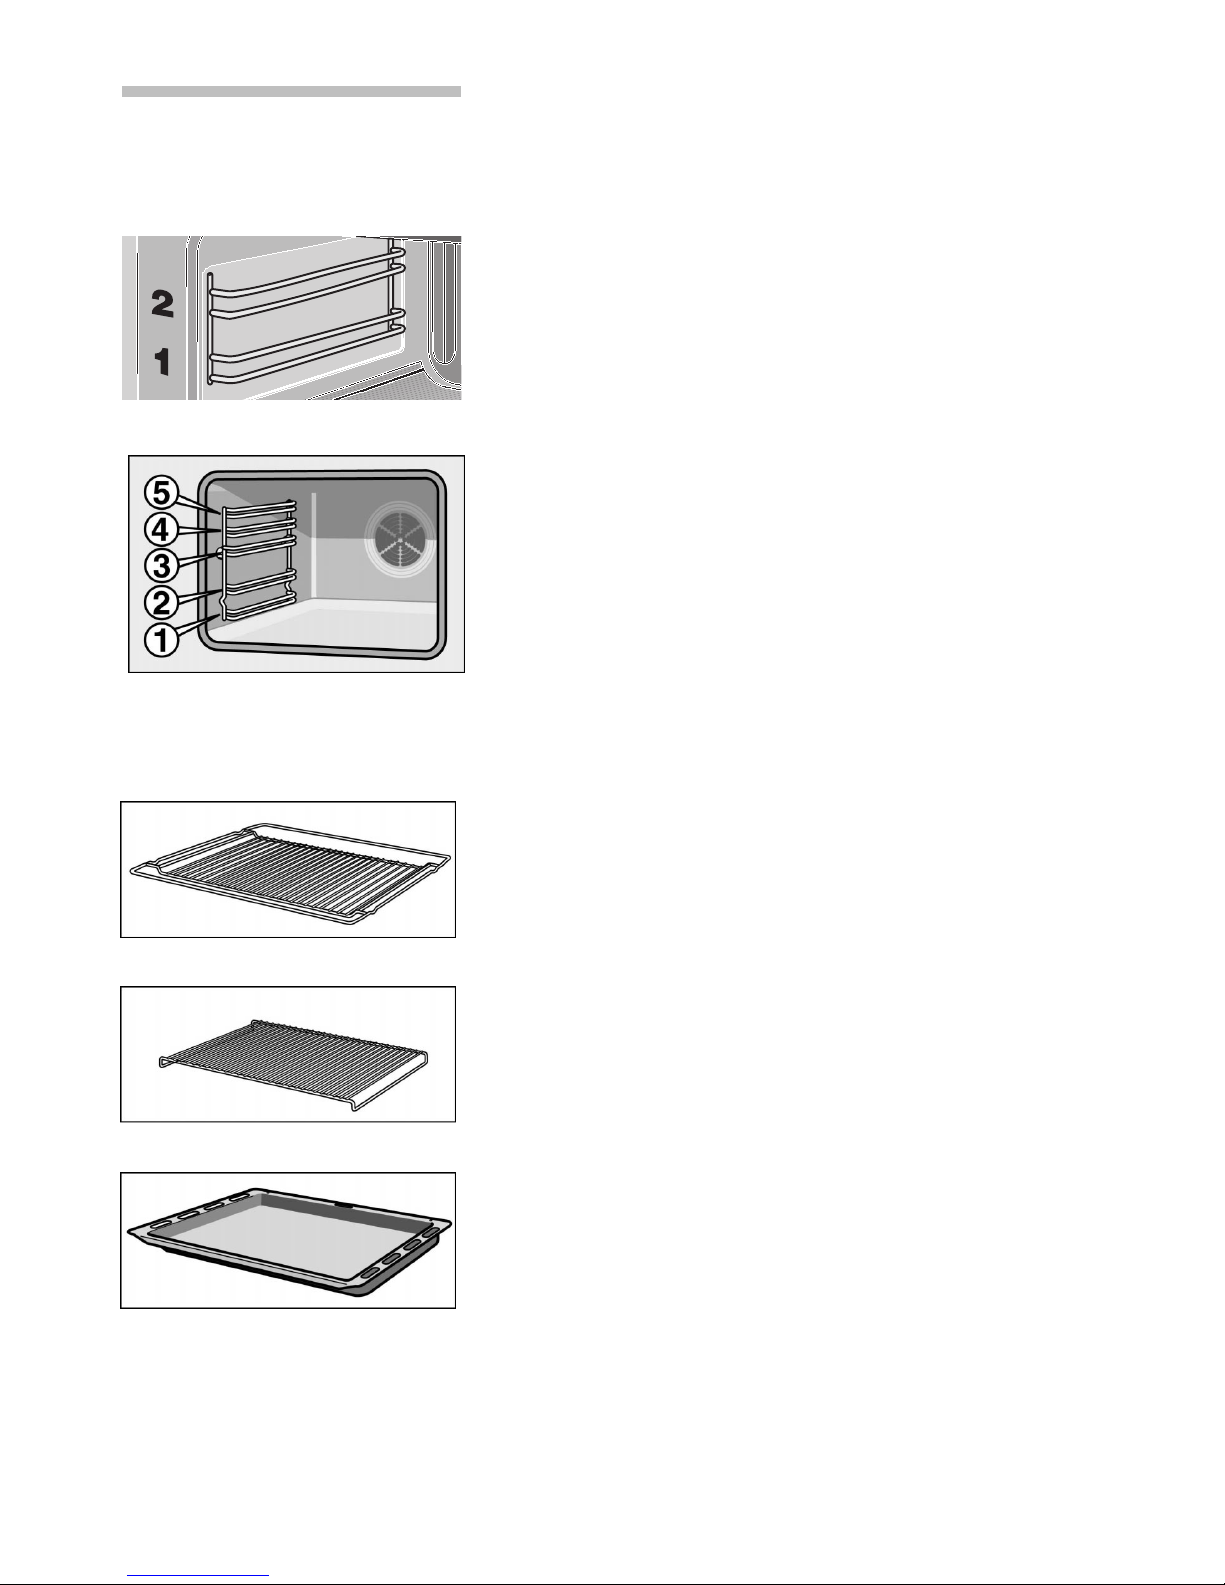
Mini oven Your oven features 2 shelf positions.
The shelf positions are counted from bottom to top.
The numbers are marked in the oven.
Main oven The shelf can be inserted at 5 different heights in the
oven.
You can remove the shelf two thirds of the way
without it tipping. This makes it easier to take food
out of the oven.
Accessories Accessories may be purchased at a later date from
the after–sales service or from specialist shops.
Please specify the HEZ number.
HEZ 334000 wire shelf
For ovenware, cake tins, roasts, grilling and frozen
meals.
Place the wire shelf curved downwards
(.
HEZ 324000 wire insert
for grilling. Always place the wire insert in the
universal pan. Fat and meat juices are collected.
Universal pan HEZ 332000
for moist cakes, pastries, frozen food and large
roasts. It can also be used to catch dripping fat
when you are grilling directly on the wire shelf.
Push the universal pan with the sloping edge facing
towards the oven door.
15
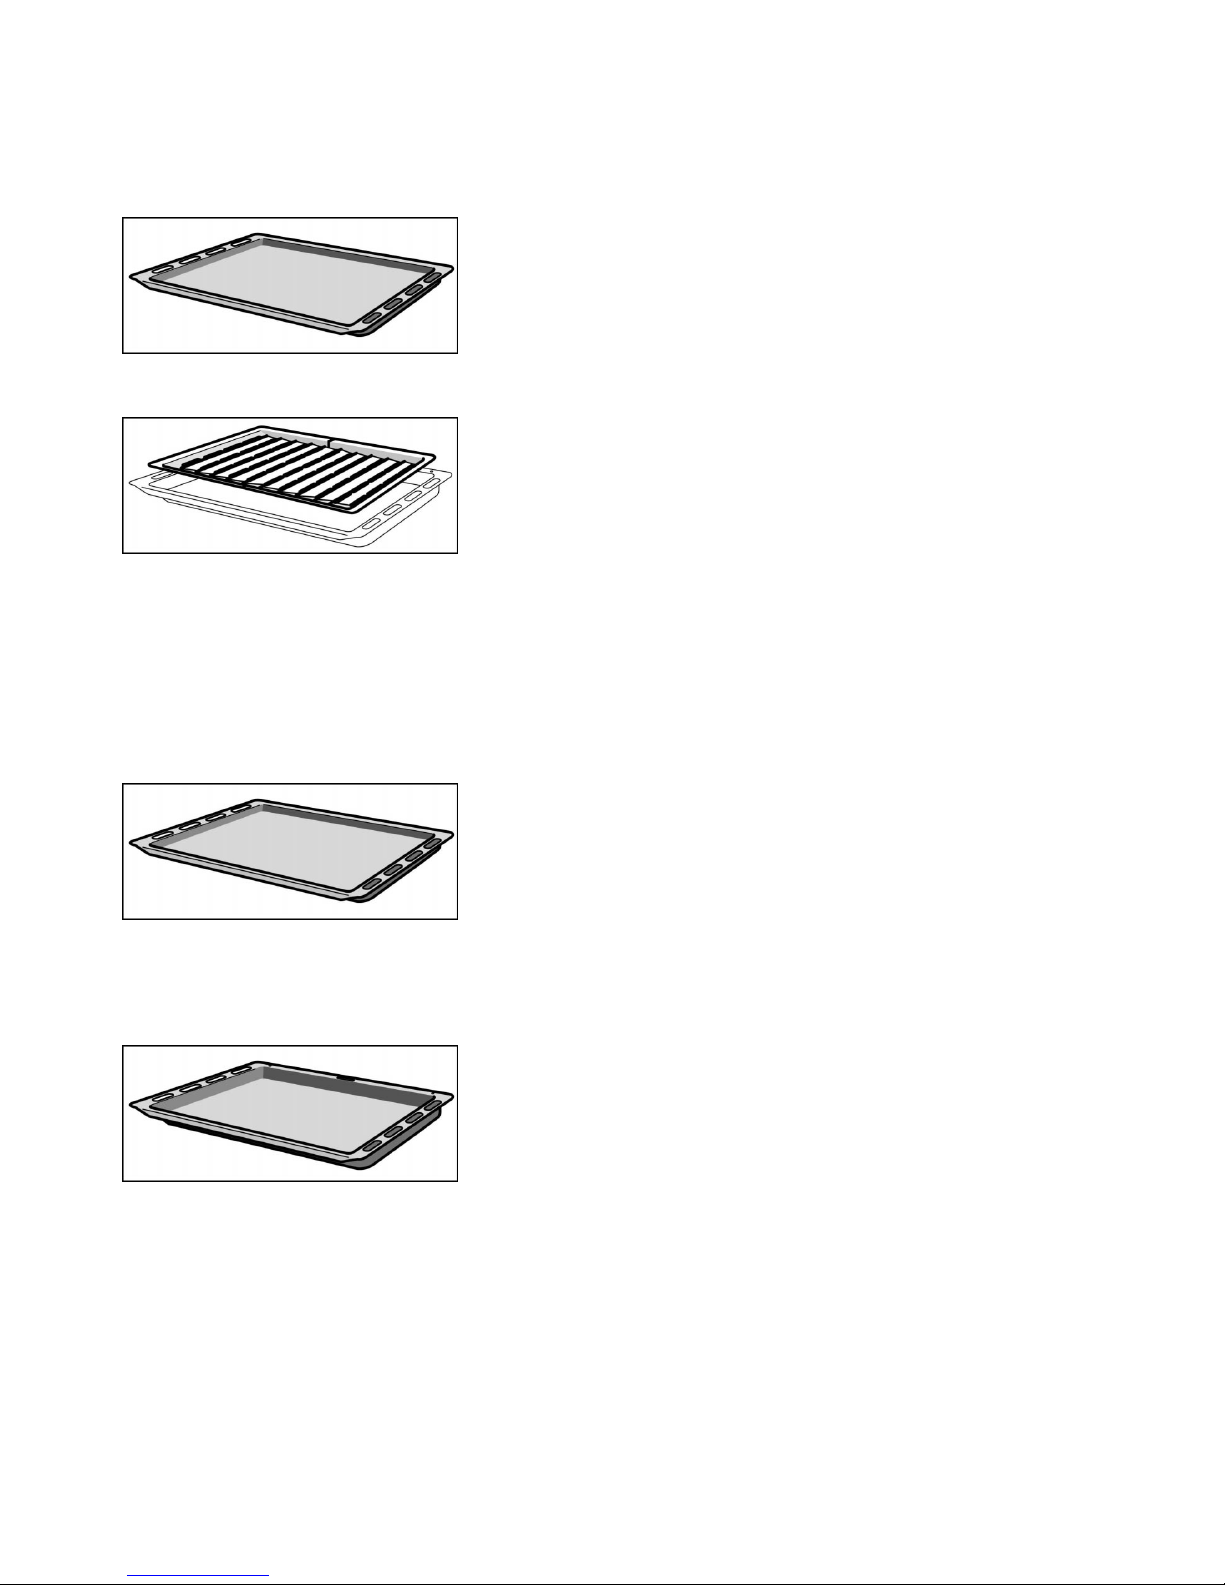
Optional accessory Optional accessories may be purchased from the
after-sales service or from specialist shops.
Enamel baking tray HEZ 331000
for cakes and biscuits.
Push the baking tray with the sloping edge facing
towards the oven door.
Grill pan HEZ 325000
Can be used for roasting instead of the wire insert or
as a spray guard to protect the oven against dirt.
Only use the grill pan in the universal pan.
To roast using the grill pan: use the same shelf height
as for the universal pan with wire insert.
Using the grill pan as a spray guard when grilling:
insert the universal pan with the grill pan under the
wire shelf.
Enamel baking tray HEZ 331010
with non-stick coating
Cakes and biscuits can be removed from the baking
tray more easily.
Push the baking tray with the sloping edge facing
towards the oven door.
Universal pan HEZ 332010 with non-stick coating
Moist cakes, biscuits, frozen meals and large roast
joints come away from the universal pan more easily.
Push the universal pan with the sloping edge facing
towards the oven door.
 Loading...