

Bosch HBG5575S0A User Manual
Oven
HBG5575.0A
[en] Instruction manual


en
Table of contents
[en]Instruction manual
8 Intended use . . . . . . . . . . . . . . . . . . . . . . . . . . . . . 4
( Important safety information . . . . . . . . . . . . . . . 4
General information . . . . . . . . . . . . . . . . . . . . . . . . . . . 4
Halogen lamp. . . . . . . . . . . . . . . . . . . . . . . . . . . . . . . . 5
Meat thermometer . . . . . . . . . . . . . . . . . . . . . . . . . . . . 5
Cleaning function . . . . . . . . . . . . . . . . . . . . . . . . . . . . . 5
] Causes of damage . . . . . . . . . . . . . . . . . . . . . . . . 6
General information . . . . . . . . . . . . . . . . . . . . . . . . . . . 6
D Cleaning . . . . . . . . . . . . . . . . . . . . . . . . . . . . . . . 19
Suitable cleaning agents . . . . . . . . . . . . . . . . . . . . . .19
Surfaces in the cooking compartment . . . . . . . . . . . .20
Keeping the appliance clean . . . . . . . . . . . . . . . . . . .20
. Cleaning function. . . . . . . . . . . . . . . . . . . . . . . . 21
Cleaning recommendation . . . . . . . . . . . . . . . . . . . . .21
Prior to initiating the cleaning function . . . . . . . . . . . .21
Setting the cleaning function . . . . . . . . . . . . . . . . . . .21
Once the cleaning function has ended . . . . . . . . . . . .21
7 Environmental protection . . . . . . . . . . . . . . . . . . 6
Saving energy . . . . . . . . . . . . . . . . . . . . . . . . . . . . . . . 6
Environmentally-friendly disposal . . . . . . . . . . . . . . . . . 7
* Getting to know your appliance . . . . . . . . . . . . . 8
Control panel . . . . . . . . . . . . . . . . . . . . . . . . . . . . . . . . 8
Buttons and display . . . . . . . . . . . . . . . . . . . . . . . . . . . 8
Types of heating and functions . . . . . . . . . . . . . . . . . . 9
Temperature. . . . . . . . . . . . . . . . . . . . . . . . . . . . . . . . . 9
Cooking compartment . . . . . . . . . . . . . . . . . . . . . . . . 10
_ Accessories . . . . . . . . . . . . . . . . . . . . . . . . . . . . 10
Control accessories . . . . . . . . . . . . . . . . . . . . . . . . . . 10
Inserting accessories . . . . . . . . . . . . . . . . . . . . . . . . . 10
Optional accessories . . . . . . . . . . . . . . . . . . . . . . . . . 12
K Before using for the first time. . . . . . . . . . . . . . 13
Initial use . . . . . . . . . . . . . . . . . . . . . . . . . . . . . . . . . . 13
Cleaning the cooking compartment and accessories 13
1 Operating the appliance . . . . . . . . . . . . . . . . . . 13
Switching the appliance on and off . . . . . . . . . . . . . . 13
Setting the heating function and temperature . . . . . . 13
Rapid heating. . . . . . . . . . . . . . . . . . . . . . . . . . . . . . . 14
O Time-setting options . . . . . . . . . . . . . . . . . . . . . 14
Setting the cooking time . . . . . . . . . . . . . . . . . . . . . . 14
Setting the end time . . . . . . . . . . . . . . . . . . . . . . . . . . 15
Setting the timer . . . . . . . . . . . . . . . . . . . . . . . . . . . . . 16
Setting the time . . . . . . . . . . . . . . . . . . . . . . . . . . . . . 16
@ Meat thermometer . . . . . . . . . . . . . . . . . . . . . . . 17
Types of heating. . . . . . . . . . . . . . . . . . . . . . . . . . . . . 17
Inserting the meat probe into the food . . . . . . . . . . . . 17
Setting the core temperature . . . . . . . . . . . . . . . . . . . 17
Core temperatures of different foods . . . . . . . . . . . . . 18
p Rails. . . . . . . . . . . . . . . . . . . . . . . . . . . . . . . . . . . 22
Detaching and refitting the rails . . . . . . . . . . . . . . . . .22
Fitting and removing the pull-out rails. . . . . . . . . . . . .22
q Appliance door . . . . . . . . . . . . . . . . . . . . . . . . . . 24
Removing and installing the door panels . . . . . . . . . .24
3 Trouble shooting . . . . . . . . . . . . . . . . . . . . . . . . 25
Rectifying faults yourself . . . . . . . . . . . . . . . . . . . . . . .25
Replacing the bulb in the top of the cooking
compartment . . . . . . . . . . . . . . . . . . . . . . . . . . . . . . .26
4 Customer service . . . . . . . . . . . . . . . . . . . . . . . . 26
E number and FD number . . . . . . . . . . . . . . . . . . . . .26
P Programmes . . . . . . . . . . . . . . . . . . . . . . . . . . . . 27
Cookware . . . . . . . . . . . . . . . . . . . . . . . . . . . . . . . . . .27
Preparing food . . . . . . . . . . . . . . . . . . . . . . . . . . . . . .27
Programmes. . . . . . . . . . . . . . . . . . . . . . . . . . . . . . . .27
Setting a programme . . . . . . . . . . . . . . . . . . . . . . . . .28
J Tested for you in our cooking studio . . . . . . . . 29
General information . . . . . . . . . . . . . . . . . . . . . . . . . .29
Cakes and pastries. . . . . . . . . . . . . . . . . . . . . . . . . . .30
Bakes and gratins . . . . . . . . . . . . . . . . . . . . . . . . . . .33
Poultry, meat and fish . . . . . . . . . . . . . . . . . . . . . . . . .33
Vegetables and side dishes . . . . . . . . . . . . . . . . . . . .36
Desserts . . . . . . . . . . . . . . . . . . . . . . . . . . . . . . . . . . .36
Acrylamide in foodstuffs . . . . . . . . . . . . . . . . . . . . . . .36
Drying . . . . . . . . . . . . . . . . . . . . . . . . . . . . . . . . . . . . .36
Preserving . . . . . . . . . . . . . . . . . . . . . . . . . . . . . . . . .37
Proving dough . . . . . . . . . . . . . . . . . . . . . . . . . . . . . .38
Defrosting . . . . . . . . . . . . . . . . . . . . . . . . . . . . . . . . . .39
Keeping warm . . . . . . . . . . . . . . . . . . . . . . . . . . . . . .39
Test dishes . . . . . . . . . . . . . . . . . . . . . . . . . . . . . . . . .40
A Childproof lock. . . . . . . . . . . . . . . . . . . . . . . . . . 18
Activating and deactivating . . . . . . . . . . . . . . . . . . . . 18
Q Basic settings. . . . . . . . . . . . . . . . . . . . . . . . . . . 19
List of basic settings . . . . . . . . . . . . . . . . . . . . . . . . . 19
Changing the basic settings. . . . . . . . . . . . . . . . . . . . 19
Produktinfo
Additional information on products, accessories,
replacement parts and services can be found at
www.bosch-home.com and in the online shop
www.bosch-eshop.com
3

en Intended use
8Intended use
Intended use
Read these instructions carefully. Only then
will you be able to operate your appliance
safely and correctly. Retain the instruction
manual and installation instructions for future
use or for subsequent owners.
This appliance is only intended to be fully fitted
in a kitchen. Observe the special installation
instructions.
Check the appliance for damage after
unpacking it. Do not connect the appliance if it
has been damaged in transport.
Only a licensed professional may connect
appliances without plugs. Damage caused by
incorrect connection is not covered under
warranty.
This appliance is intended for domestic use
only. The appliance must only be used for the
preparation of food and drink. The appliance
must be supervised during operation. Only
use this appliance indoors.
This appliance is intended for use up to a
maximum height of 4000 metres above sea
level.
This appliance may be used by children over
the age of 8 years old and by persons with
reduced physical, sensory or mental
capabilities or by persons with a lack of
experience or knowledge if they are
supervised or are instructed by a person
responsible for their safety how to use the
appliance safely and have understood the
associated hazards.
Children must not play with, on, or around the
appliance. Children must not clean the
appliance or carry out general maintenance
unless they are at least 15 years old and are
being supervised.
Keep children below the age of 8 years old at
a safe distance from the appliance and power
cable.
Always slide accessories into the cooking
compartment the right way round.
~ "Accessories" on page 10
(Important safety
information
Important safety information
General information
:Warning – Risk of fire!
■ Combustible items stored in the cooking
compartment may catch fire. Never store
combustible items in the cooking
compartment. Never open the appliance
door if there is smoke inside. Switch off the
appliance and unplug it from the mains or
switch off the circuit breaker in the fuse box.
Risk of fire!
■ Loose food remnants, fat and meat juices
may catch fire. Before using the appliance,
remove the worst of the food remnants from
the cooking compartment, heating elements
and accessories.
Risk of fire!
■ A draught is created when the appliance
door is opened. Greaseproof paper may
come into contact with the heating element
and catch fire. Do not place greaseproof
paper loosely over accessories during
preheating. Always weight down the
greaseproof paper with a dish or a baking
tin. Only cover the surface required with
greaseproof paper. Greaseproof paper
must not protrude over the accessories.
:Warning – Risk of burns!
■ The appliance becomes very hot. Never
touch the interior surfaces of the cooking
compartment or the heating elements.
Always allow the appliance to cool down.
Keep children at a safe distance.
Risk of serious burns!
■ Accessories and ovenware become very
hot. Always use oven gloves to remove
accessories or ovenware from the cooking
compartment.
Risk of burns!
■ Alcoholic vapours may catch fire in the hot
cooking compartment. Never prepare food
containing large quantities of drinks with a
high alcohol content. Only use small
quantities of drinks with a high alcohol
content. Open the appliance door with care.
4

Important safety information en
:Warning – Risk of scalding!
■ The accessible parts become hot during
operation. Never touch the hot parts. Keep
children at a safe distance.
Risk of scalding!
■ When you open the appliance door, hot
steam can escape. Steam may not be
visible, depending on its temperature. When
opening, do not stand too close to the
appliance. Open the appliance door
carefully. Keep children away.
Risk of scalding!
■ Water in a hot cooking compartment may
create hot steam. Never pour water into the
hot cooking compartment.
:Warning – Risk of injury!
■ Scratched glass in the appliance door may
develop into a crack. Do not use a glass
scraper, sharp or abrasive cleaning aids or
detergents.
Risk of injury!
■ The hinges on the appliance door move
when opening and closing the door, and
you may be trapped. Keep your hands away
from the hinges.
:Warning – Risk of electric shock!
■ Incorrect repairs are dangerous. Repairs
may only be carried out and damaged
power cables replaced by one of our
trained after-sales technicians. If the
appliance is defective, unplug the appliance
from the mains or switch off the circuit
breaker in the fuse box. Contact the aftersales service.
Risk of electric shock and serious injury!
■ The cable insulation on electrical
appliances may melt when touching hot
parts of the appliance. Never bring
electrical appliance cables into contact with
hot parts of the appliance.
Risk of electric shock!
■ Do not use any high-pressure cleaners or
steam cleaners, which can result in an
electric shock.
Risk of electric shock!
■ A defective appliance may cause electric
shock. Never switch on a defective
appliance. Unplug the appliance from the
mains or switch off the circuit breaker in the
fuse box. Contact the after-sales service.
Halogen lamp
:Warning – Risk of electric shock!
When replacing the cooking compartment
bulb, the bulb socket contacts are live. Before
replacing the bulb, unplug the appliance from
the mains or switch off the circuit breaker in
the fuse box.
Meat thermometer
:Warning – Risk of electric shock!
The insulation of an incompatible meat
thermometer may be damaged. Only use the
meat thermometer which is recommended for
this appliance.
Cleaning function
:Warning – Risk of burns!
; The appliance will become very hot on the
outside during the cleaning function. Never
touch the appliance door. Allow the appliance
to cool down. Keep children away from the
appliance.
:Warning – Hazard due to magnetism!
Permanent magnets are used in the control
panel or in the control elements. They may
affect electronic implants, e.g. heart
pacemakers or insulin pumps. Wearers of
electronic implants must stay at least 10 cm
away from the control panel.
5
en Causes of damage
]Causes of damage
Causes of damage
General information
Caution!
■ Accessories, foil, greaseproof paper or ovenware on
the cooking compartment floor: do not place
accessories on the cooking compartment floor. Do
not cover the cooking compartment floor with any
sort of foil or greaseproof paper. Do not place
ovenware on the cooking compartment floor if a
temperature of over 50 ºC has been set. This will
cause heat to accumulate. The baking and roasting
times will no longer be correct and the enamel will
be damaged.
■ Aluminium foil: Aluminium foil in the cooking
compartment must not come into contact with the
door glass. This could cause permanent
discolouration of the door glass.
■ Water in a hot cooking compartment: do not pour
water into the cooking compartment when it is hot.
This will cause steam. The temperature change can
cause damage to the enamel.
■ Moisture in the cooking compartment: Over an
extended period of time, moisture in the cooking
compartment may lead to corrosion. Allow the
cooking compartment to dry after use. Do not keep
moist food in the closed cooking compartment for
extended periods of time. Do not store food in the
cooking compartment.
■ Cooling with the appliance door open: Following
operation at high temperatures, only allow the
cooking compartment to cool down with the door
closed. Do not trap anything in the appliance door.
Even if the door is only left open a crack, the front of
nearby furniture may become damaged over time.
Only leave the cooking compartment to dry with the
door open if a lot of moisture was produced whilst
the oven was operating.
■ Fruit juice: when baking particularly juicy fruit pies,
do not pack the baking tray too generously. Fruit
juice dripping from the baking tray leaves stains that
cannot be removed. If possible, use the deeper
universal pan.
■ Extremely dirty seal: If the seal is very dirty, the
appliance door will no longer close properly during
operation. The fronts of adjacent units could be
damaged. Always keep the seal clean.
~ "Cleaning" on page 19
■ Appliance door as a seat, shelf or worktop: Do not
sit on the appliance door, or place or hang anything
on it. Do not place any cookware or accessories on
the appliance door.
■ Inserting accessories: depending on the appliance
model, accessories can scratch the door panel
when closing the appliance door. Always insert the
accessories into the cooking compartment as far as
they will go.
■ Carrying the appliance: do not carry or hold the
appliance by the door handle. The door handle
cannot support the weight of the appliance and
could break.
7Environmental protection
Environmental protection
Your new appliance is particularly energy-efficient. Here
you can find tips on how to save even more energy
when using the appliance, and how to dispose of your
appliance properly.
Saving energy
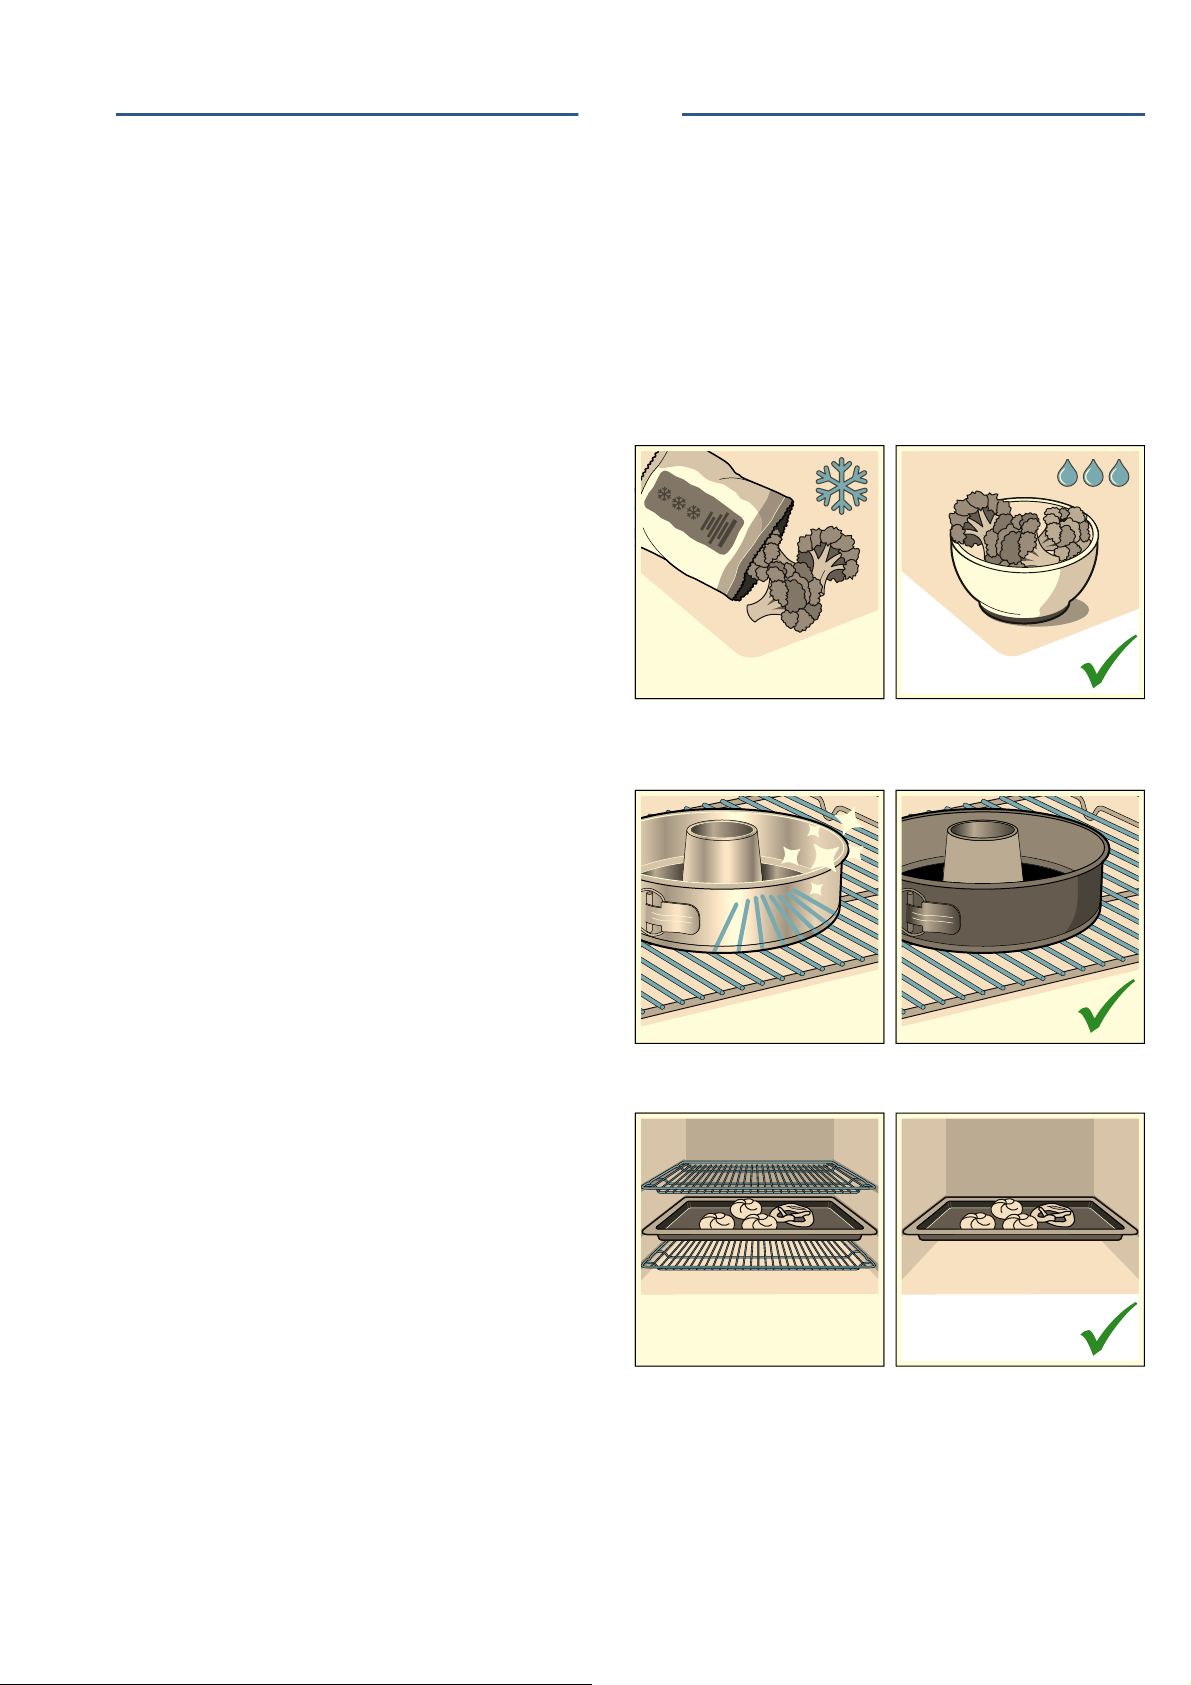
■ Only preheat the appliance if this is specified in the
recipe or in the tables in the operating instructions.
■ Leave frozen food to defrost before placing it in the
cooking compartment.
■ Use baking tins that are dark-coloured, painted black
or have an enamel coating. These absorb the heat
particularly well.
■ Remove any unnecessary accessories from the
cooking compartment.
6

Environmental protection en
■ Open the appliance door as infrequently as possible
when the appliance is in use.
■ It is best to bake several cakes one after the other.
The cooking compartment stays warm. This reduces
the baking time for the second cake. You can place
two cake tins next to each other in the cooking
compartment.
Environmentally-friendly disposal
Dispose of packaging in an environmentally-friendly
manner.
This appliance is labelled in accordance with
European Directive 2012/19/EU concerning
used electrical and electronic appliances
(waste electrical and electronic equipment WEEE). The guideline determines the
framework for the return and recycling of used
appliances as applicable throughout the EU.
■ For longer cooking times, you can switch the
appliance off 10 minutes before the end of the
cooking time and use the residual heat to finish
cooking.
7
en Getting to know your appliance
*Getting to know your
appliance
Getting to know your appliance
In this chapter, we will explain the indicators and
controls. You will also find out about the various
functions of your appliance.
Note: Depending on the appliance model, individual
details and colours may differ.
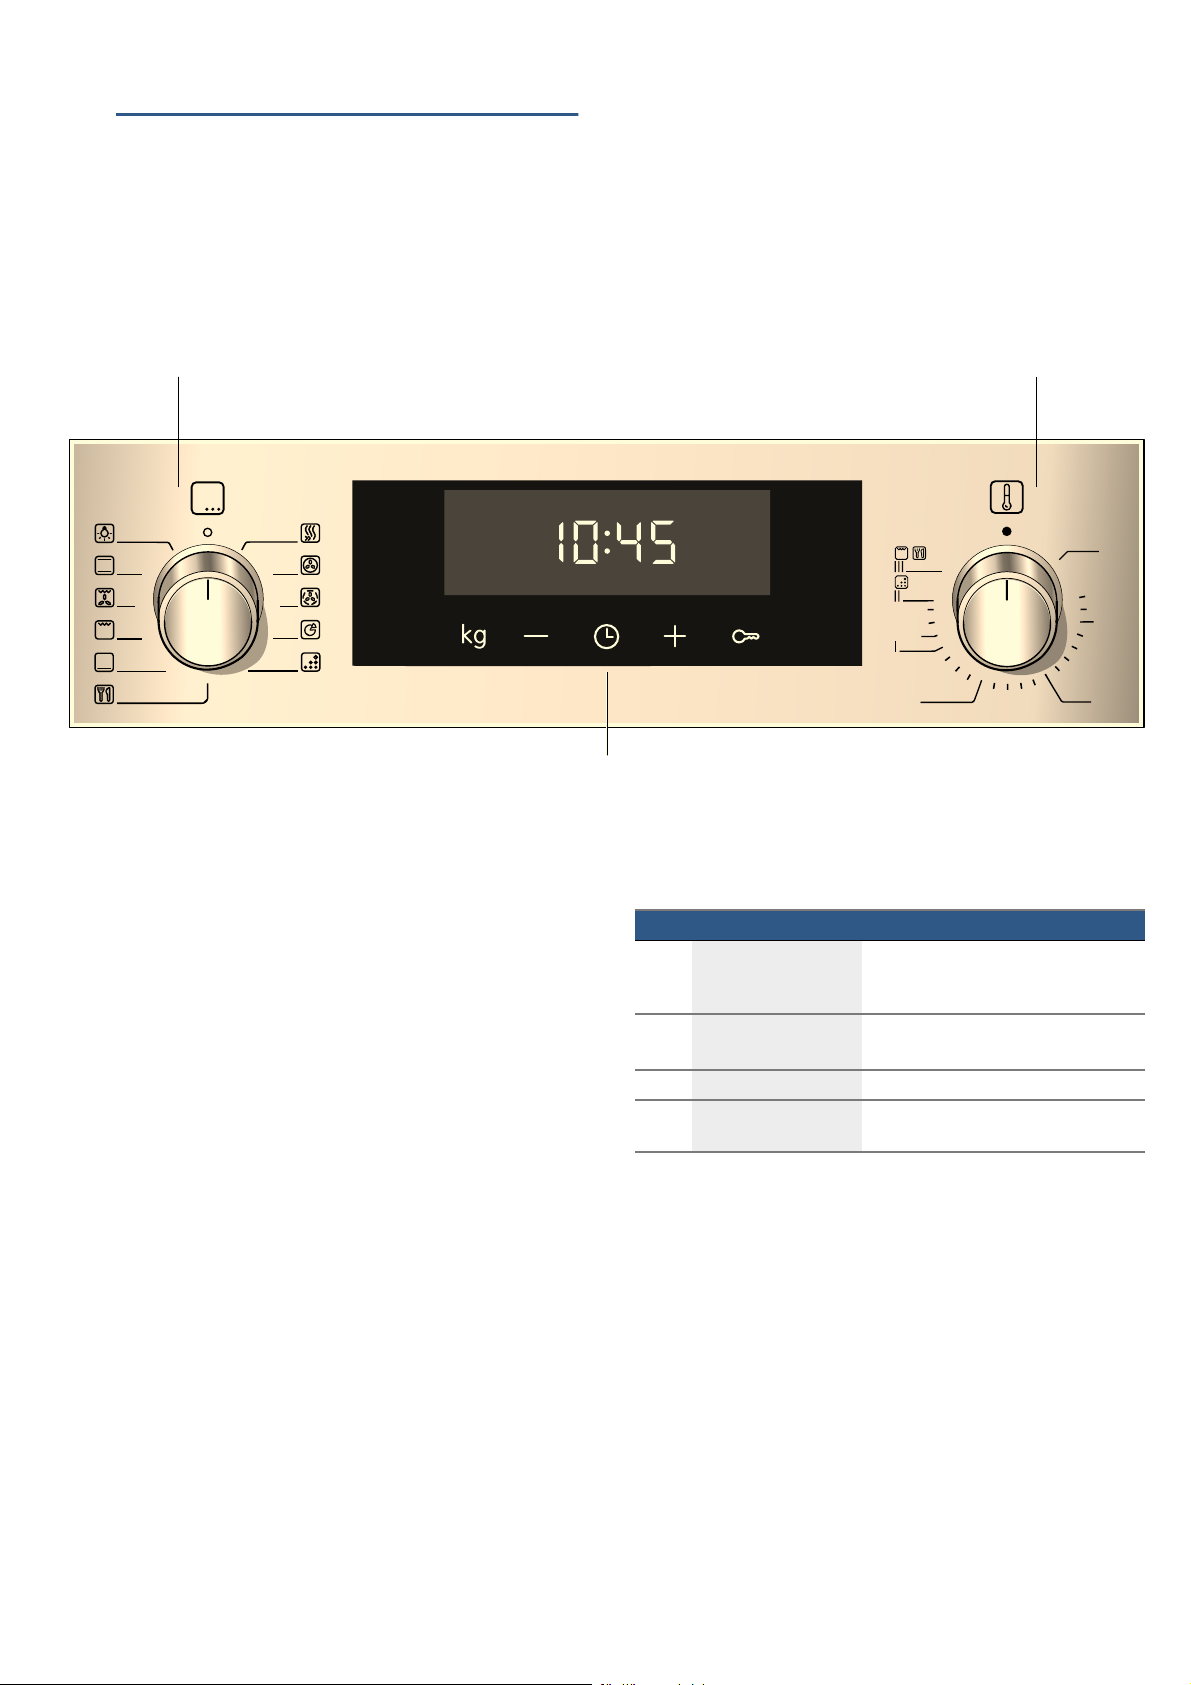
Control panel
You can set your appliance's various functions on the
control panel. Below, you will see an overview of the
control panel and the layout of the controls.
( Buttons and display
The buttons are touch keys with sensors
underneath. Simply touch a symbol to select the
function it represents.
The display shows symbols for active functions
and the time-setting options.
0 Function selector
Use the function selector to set the heating
function or other functions.
You can turn the function selector clockwise or
anti-clockwise from the "Off" position.
8 Temperature selector
Use the temperature selector to set the
temperature for the heating function or select the
setting for other functions.
You can only turn the temperature selector
clockwise from the "Off" position, until it offers
resistance. Do not turn the selector beyond this
point.
Note: On some appliances, the control knobs can be
pushed in. To push the control knob in and engage it or
to release it again, turn it to the "Off" position.
Buttons and display
You can use the buttons to set various additional
functions on your appliance. You will be able to see the
values for these on the display.
Symbol Meaning
v Time-setting options Tap the symbol repeatedly to select
the time v, timer t, duration y and
end time {.
A
Minus
@
Plus
h Weight Select a weight for the programmes.
D Childproof lock Lock and unlock the oven functions
--------
Display
The value that can be set at the present time or that is
elapsing will be shown in large digits on the display.
To use the individual time-setting options, tap the
v button several times.If there is a red bar above or
below a symbol, this means that the value being shown
in large digits on the display refers to the function that
this symbol represents.
Reduce setting values.
Increase setting values.
on the control panel.
8
Types of heating and functions
Getting to know your appliance en
Use the function selector to set the types of heating and
other functions.
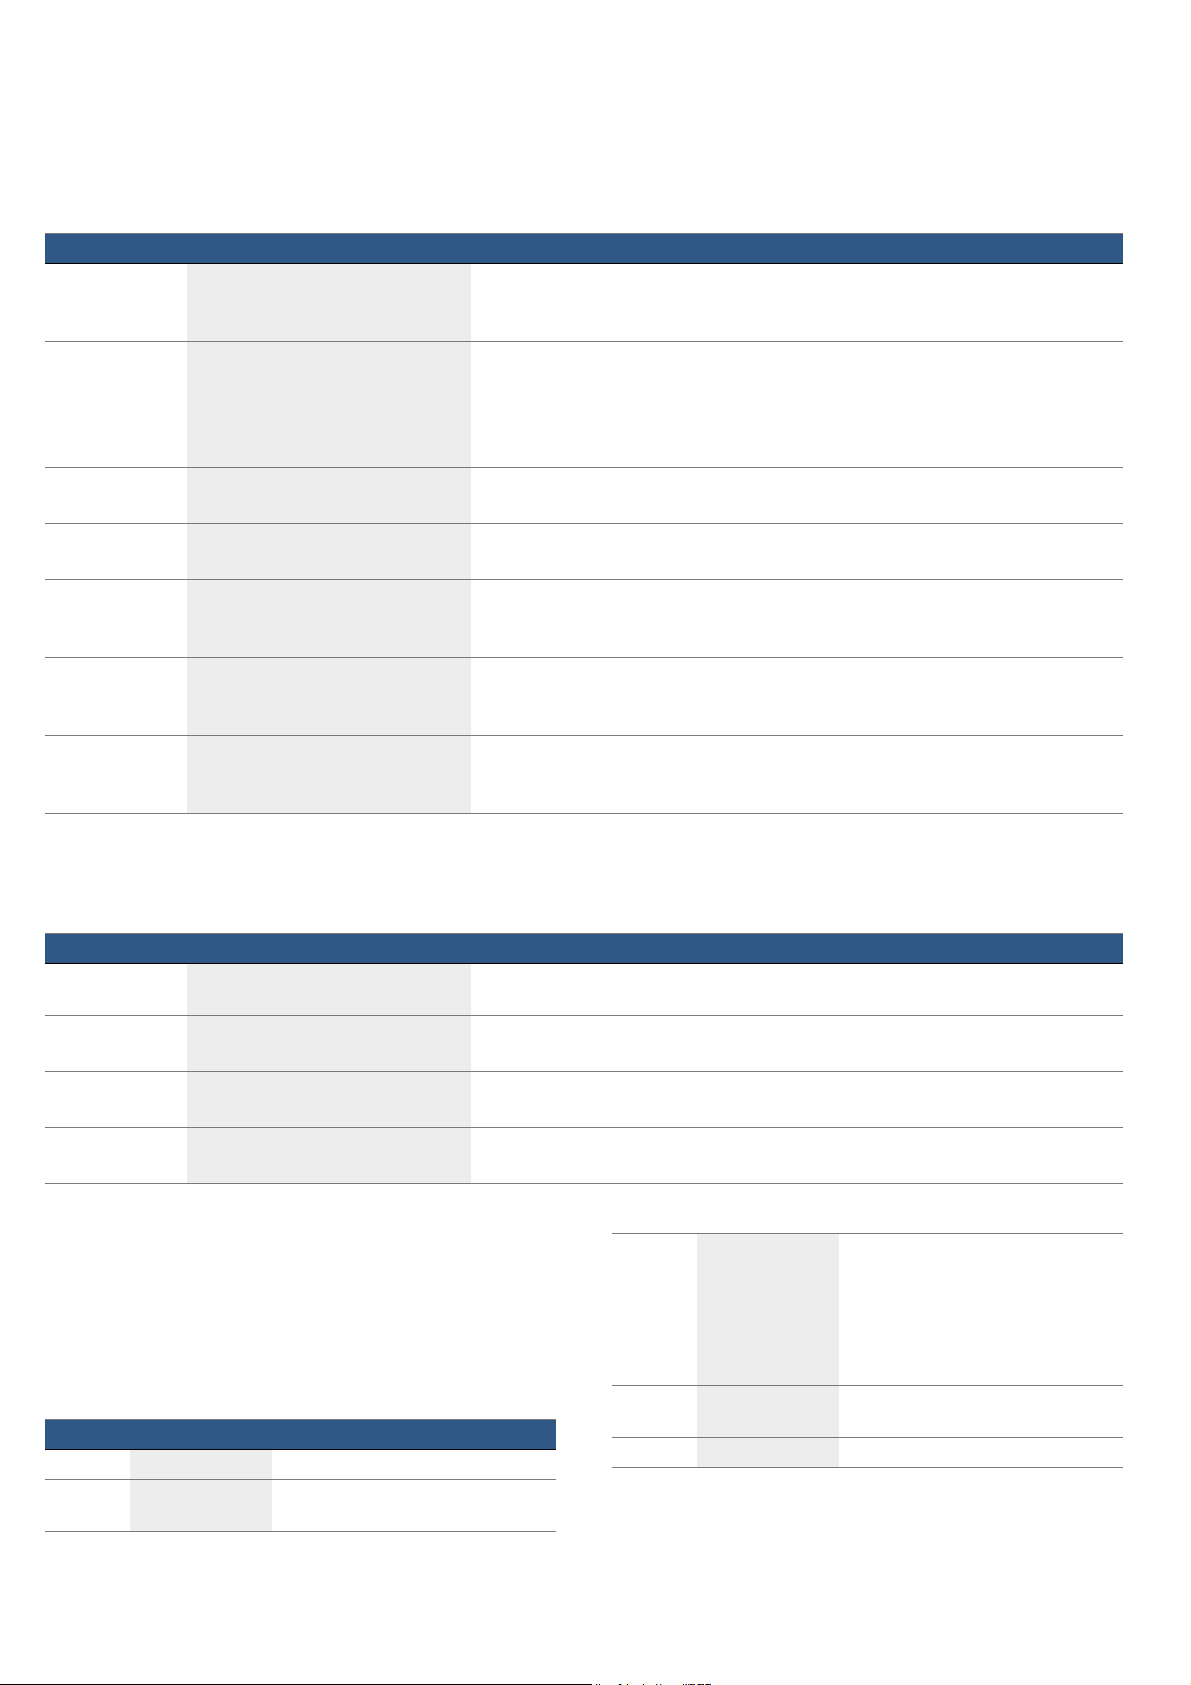
Type of heating Use
<
6
$
$
(
7
%
--------
3D hot air For baking and roasting on one or more levels.
The fan distributes the heat from the ring heating element in the back panel evenly around
the cooking compartment.
Hot air gentle An intelligent heating type for the gentle preparation of meat, fish and pastries.
The appliance optimally controls the supply of energy to the cooking compartment. The
food is prepared in phases using residual heat. This means that it remains more succulent
and browns less. Energy can be saved, depending on the preparation and food.
This heating function is used to determine the energy efficiency class.
Pizza setting For cooking pizza and dishes that require a lot of heat from underneath.
The bottom heating element and the ring heating element in the back panel heat up.
Bottom heating For cooking in a bain marie and for baking food for extra time.
Heat is emitted from below.
Grill, large area For grilling flat items, such as steaks or sausages, for making toast, and for browning
food.
The whole area below the grill element becomes hot.
Circulated air grilling For roasting poultry, whole fish and larger pieces of meat.
The grill element and the fan switch on and off alternately. The fan circulates the hot air
around the food.
Top/bottom heating For traditional baking and roasting on one level. Especially suitable for cakes with moist
toppings.
Heat is emitted evenly from the top and bottom.
To make sure you always use the right type of heating
to cook your food, we have explained the differences
and applications below.
Other functions
Your new oven has yet more functions; see below for a
brief description of these.
Function Use
Rapid heating Preheats the cooking compartment rapidly without accessories.
F
^
%
p
--------
Temperature
Use the temperature selector to set the temperature in
the cooking compartment. You can also use it to select
the settings for other functions.
When cooking at very high temperatures, the appliance
lowers the temperature slightly after an extended
period.
Position Meaning
Ú "Off" position The appliance is not heating.
50-275 Temperature
Interior lighting Switches on the interior lighting; all other functions remain off.
Makes it easier to clean the cooking compartment, for example.
Programmes For many dishes, the appliance has preprogrammed setting values that you can use.
~ "Programmes" on page 27
EcoClean Direct The EcoClean Direct cleaning function cleans the cooking compartment almost by itself.
~ "Cleaning function" on page 21
The temperature that can be set in the
range
cooking compartment in °C.
1, 2, 3
or
I, II, III
% Programmes The setting for the programme func-
p EcoClean The setting for the cleaning function.
--------
Grill settings The configurable settings for the grill,
large area ( and small area *
(depending on the appliance model).
Setting 1 = low
Setting 2 = medium
Setting 3 = high
tion.
9
en Accessories
Temperature indicator
The line at the bottom of the display turns red in three
increments, from left to right, as the cooking
compartment heats up.
When you are preheating the appliance, the optimal
time to place your food in the cooking compartment is
as soon as all three sections of the line have turned red.
When the appliance is in operation, one of the red
sections of the line will go out during the heating
phases.
Note: Due to thermal inertia, the temperature displayed
may be slightly different to the actual temperature inside
the oven.
Cooking compartment
Various functions in the cooking compartment make
your appliance easier to use. For example, the cooking
compartment is well lit and a cooling fan prevents the
appliance from overheating.
Opening the appliance door
If you open the appliance door when the appliance is in
operation, the appliance will continue to operate as
before.
Interior lighting
With most heating functions and other functions, the
interior lighting in the cooking compartment will remain
lit while the oven is in operation. When the function
selector is turned to bring operation to an end, the
lighting will go out.
By turning the function selector to the interior lighting
setting, you can switch on the lighting without heating
the oven. This makes it easier to clean your appliance,
for example.
Cooling fan
The cooling fan switches on and off as required. The
hot air escapes above the door.
Caution!
Do not cover the ventilation slots. Otherwise, the
appliance may overheat.
So that the cooking compartment cools down more
quickly after operation, the cooling fan continues to run
for a certain period afterwards.
_Accessories
Accessories
Your appliance is accompanied by a range of
accessories. Here, you can find an overview of the
accessories included and information on how to use
them correctly.
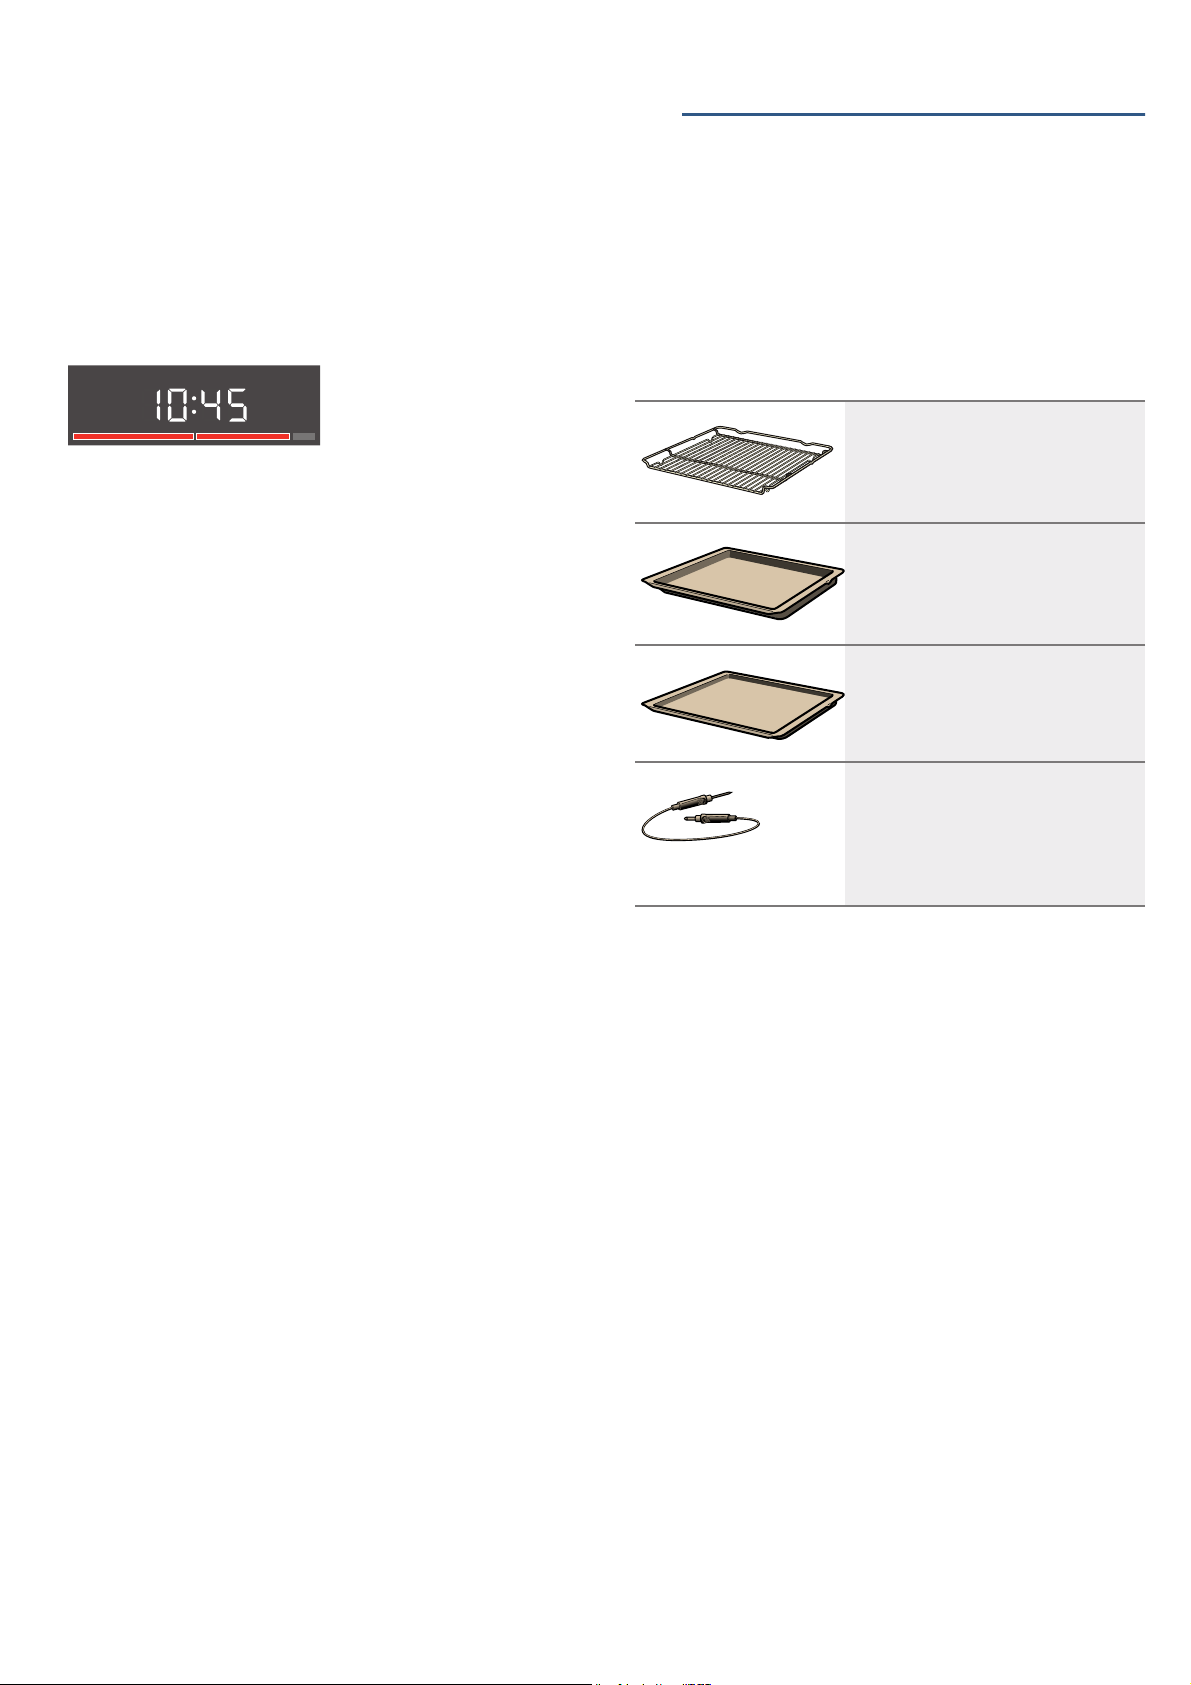
Control accessories
The accessories supplied may differ depending on the
appliance model.
Wire rack
For ovenware, cake tins and ovenproof
dishes.
For roasts, grilled items and frozen
meals.
Universal pan
For moist cakes, pastries, frozen meals
and large roasts.
It can be used to catch dripping fat when
you are grilling directly on the wire rack.
Baking tray
For tray bakes and small baked products.
Meat thermometer
Enables precision roasting to your exact
requirements.
Its use is described in the relevant section. ~ "Meat thermometer"
--------
Only use original accessories. They are specially
adapted for your appliance.
You can buy accessories from the after-sales service,
from specialist retailers or online.
Note: The accessories may deform when they become
hot. This does not affect their function. Once they have
cooled down again, they regain their original shape.
Inserting accessories
The cooking compartment has five shelf positions. The
shelf positions are counted from the bottom up.
In some appliances, the highest shelf position is
marked on the cooking compartment by the grill
symbol.
Depending on the appliance model, your cooking
compartment will have one or more pull-out rails or one
or two clip-on pull-out rails. The pull-out rails are fixed in
place and cannot be removed. The clip-on pull-out rails
can be fitted as required to levels that are not currently
being used.
on page 17
10
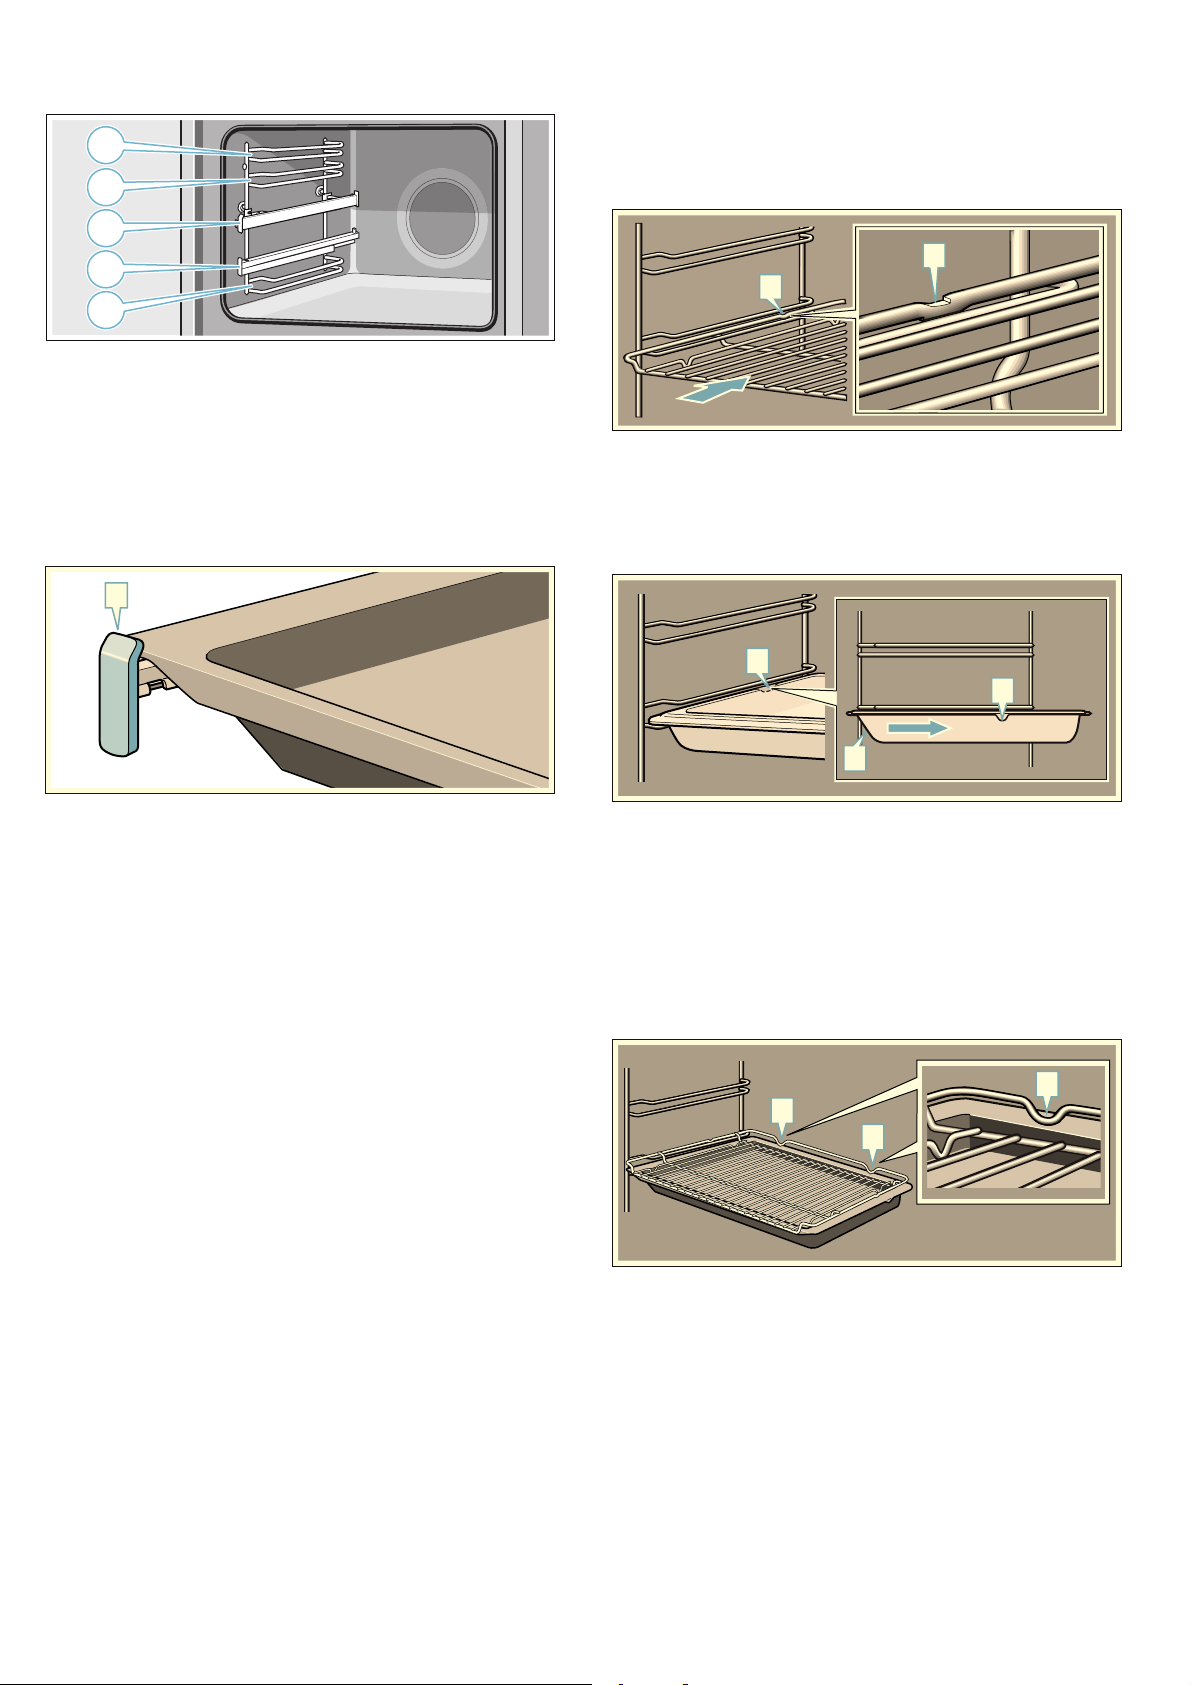
Always insert accessories between the two guide rods
for the shelf position.
Accessories can be pulled out approximately halfway
without tipping. You can use the pull-out rails to pull the
accessories out further.
Make sure that the accessory is placed behind the lug
‚ on the pull-out rail.
Example in the picture: Universal pan
D
Accessories en
When inserting the wire rack, ensure that lug ‚ is at the
rear and is facing downwards. The open side must be
facing the appliance door and the outer rail must be
facing downwards ¾.
D
D
When inserting baking trays, ensure that lug ‚ is at the
rear and is facing downwards. The sloping edge of the
accessory ƒ must be facing towards the appliance
door.
Example in the picture: Universal pan
The pull-out rails lock in place when they are fully pulled
out. This makes it easy to place the accessories in
position. To unlock the pull-out rails, use a little force to
push them back into the cooking compartment.
Notes
■ Make sure that you always insert the accessories
into the cooking compartment the right way round.
■ Always insert the accessories fully into the cooking
compartment so that they do not touch the appliance
door.
■ Take any accessories that you will not be using out
of the cooking compartment.
■ The shelves can be taken out of the cooking
compartment for cleaning. ~ Page 22
Locking function
The accessories can be pulled out approximately
halfway until they lock in place. The locking function
prevents the accessories from tilting when they are
pulled out. The accessories must be inserted into the
cooking compartment correctly for the tilt protection to
work properly.
D
D
E
Combining accessories
You can insert the wire rack and the universal pan at
the same time to catch drops of liquid.
When inserting the wire rack, ensure that both spacers
‚ are at the rear edge. When inserting the universal
pan, the wire rack is on top of the upper guide rod of
the shelf position.
Example in the picture: Universal pan
D
D
D
11

en Accessories
Optional accessories
You can buy optional accessories from the after-sales
service, from specialist retailers or online. *You will find
a comprehensive range of products for your appliance
in our brochures and online.
Both availability and whether it is possible to order
online differ between countries. Please see your sales
brochures for more details.
Note: Not all optional accessories are suitable for every
appliance. When purchasing, please always quote the
exact identification number (E-no.) of your appliance.
~ "Customer service" on page 26
Optional accessories
Wire rack
For cookware, cake tins and ovenproof dishes, and for roasts and
grilled food.
Baking tray
For tray bakes and small baked items.
Universal pan
For moist cakes, baked items, frozen food and large roasts.
It can be used to catch dripping fat when you are grilling directly on
the wire rack.
Wire insert
For meat, poultry and fish.
For inserting into the universal pan to catch dripping fat and meat
juices.
Universal pan, non-stick
For moist cakes, baked items, frozen food and large roasts.
Allows baked items and roasts to be removed more easily from the
universal pan.
Baking tray, non-stick
For tray bakes and small baked items.
Allows baked items to be removed more easily from the baking tray.
Two universal pans, narrow style
For moist cakes, baked items and frozen food.
Do not use the universal pans in conjunction with the clip-on pull-out
rails or place them on the wire rack.
Professional pan
For preparing large quantities of food. Also ideal for moussaka, for
example.
Professional pan with wire insert
For preparing large quantities of food.
Lid for the professional pan
The lid turns the professional pan into a professional roasting dish.
Pizza tray
For pizzas and large round cakes.
Grill tray
Use for grilling in place of the wire rack or as a splatter guard. Use in
the universal pan only.
Baking stone
For home-made bread, bread rolls and pizzas that you wish to have a
crispy base.
The baking stone must be preheated to the recommended temperature.
Glass roasting dish
For stews and bakes.
Particularly suitable for "Dishes" mode.
Glass tray
For large roasts, moist cakes and bakes.
Glass pan
For bakes, vegetable dishes and baked items.
Clip-on rail
The pull-out rails can be used at any level. Rails can be fitted on any
and all free levels.
Pull-out system, one level
Fitting pull-out rails at position 2 will allow you to pull accessories out
further without them tipping.
Pull-out system, two levels
Fitting pull-out rails at positions 2 and 3 will allow you to pull accesso-
ries out further without them tipping.
Pull-out system, three levels
Fitting pull-out rails at positions 1, 2 and 3 will allow you to pull acces-
sories out further without them tipping.
--------
12
Before using for the first time en
KBefore using for the first
time
Before using for the first time
Before you can use your new appliance, you must
make some settings. You must also clean the cooking
compartment and accessories.
Initial use
The time will appear on the display once the appliance
is connected to the power supply. Set the current time.
Setting the time
Make sure that the function selector is set to the "Off"
position.
The time starts at "12:00".
1. Use the A or @ button to set the time.
2. Touch the v button to confirm.
The current time will be shown on the display.
Cleaning the cooking compartment and
accessories
Before using the appliance to prepare food for the first
time, you must clean the cooking compartment and
accessories.
Cleaning the cooking compartment
To eliminate the new-appliance smell, heat up the
cooking compartment when it is empty and with the
oven door closed.
Make sure that there is no leftover packaging, such as
polystyrene pellets, in the cooking compartment and
remove the adhesive tape that is in or on the appliance.
Before heating the appliance, wipe the smooth surfaces
in the cooking compartment with a soft, damp cloth.
Keep the kitchen ventilated while the appliance is
heating.
Apply the settings indicated below. You can find out
how to set the heating function and the temperature in
the next section. ~ "Operating the appliance"
on page 13
1Operating the appliance
Operating the appliance
You have already learnt about the controls and how
they work. Now we will explain how to apply settings on
your appliance.
Switching the appliance on and off
Use the function selector to switch the appliance on or
off. Turning the function selector to any position other
than the "Off" position switches on the appliance. To
switch off the appliance, always turn the function
selector to the "Off" position.
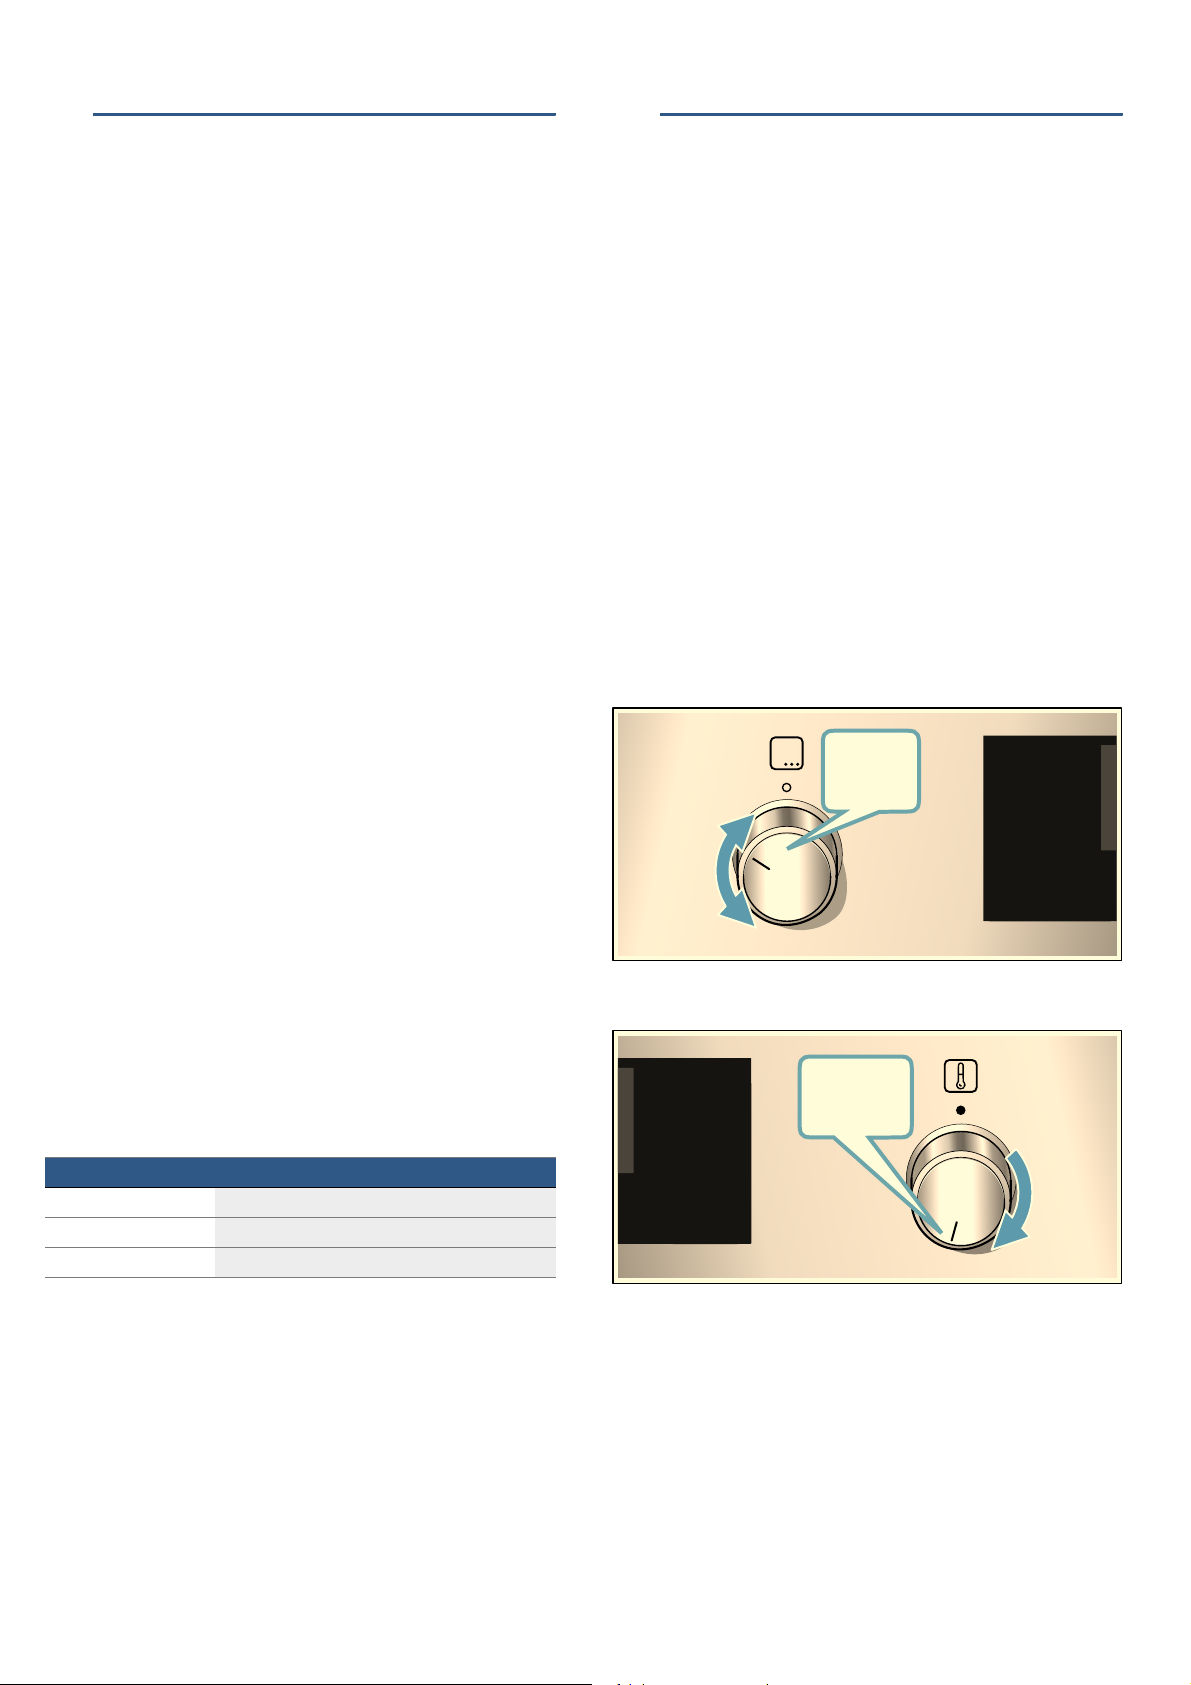
Setting the heating function and temperature
The function selector and temperature selector make it
very easy to apply the settings you require to your
appliance. To find out which heating function is best for
which type of food, please refer to the beginning of the
instruction manual.
Example in the picture: Top/bottom heating % at
190 °C.
1. Use the function selector to set the heating function.
2. Use the temperature selector to set the temperature
or grill setting.
&
Settings
Heating function Top/bottom heating %
Temperature 240 °C
Time 1 hour
Switch off the appliance after the time indicated.
Once the cooking compartment has cooled down,
clean the smooth surfaces with soapy water and a dish
cloth.
Cleaning the accessories
Clean the accessories thoroughly using soapy water
and a dish cloth or soft brush.
The appliance will start heating after a few seconds.
Once your food is cooked, turn the function selector to
the "Off" position to switch the appliance off.
Note: You can set both a cooking time and an end time
on the appliance. ~ "Time-setting options" on page 14
Changing
The heating function and temperature can be changed
at any time using the relevant selector.
13
en Time-setting options
Rapid heating
With Rapid heating, you can shorten the heat-up time.
Then, for best results, use:
■ < 3D hot air
Only use Rapid heating when a temperature of over
100 °C has been selected.
To achieve an even cooking result, do not place your
food into the cooking compartment until Rapid heating
is complete.
1. Set the function selector to F.
2. Use the temperature selector to set the temperature.
The oven will start heating after a few seconds.
Once Rapid heating is complete, an audible signal will
sound. Place your food in the cooking compartment.
OTime-setting options
Time-setting options
Your appliance has different time-setting options.
Time-setting option Use
y Cooking time Once the set cooking time has elapsed, the
appliance will automatically stop heating.
{ End time Enter a cooking time and the required end
time. The appliance will start up automatically
so that it finishes cooking at the required time.
t Timer The timer functions like an egg timer. It runs
independently of the appliance when it is
heating and of other time-setting options and
does not affect the appliance.
v Time When no other function is running in the fore-
ground, the appliance will show you the time
of day on the display.
Before you can call up the cooking time using the
v button, you will need to set a heating function.Once
you have set a cooking time, the end time can be called
up. The timer can be set at any time.
An audible signal will sound once the cooking time or
timer duration has elapsed. You can cancel the audible
signal early by touching the v button.
Note: You can change how long the audible signal
sounds for in the basic settings. ~ "Basic settings"
on page 19
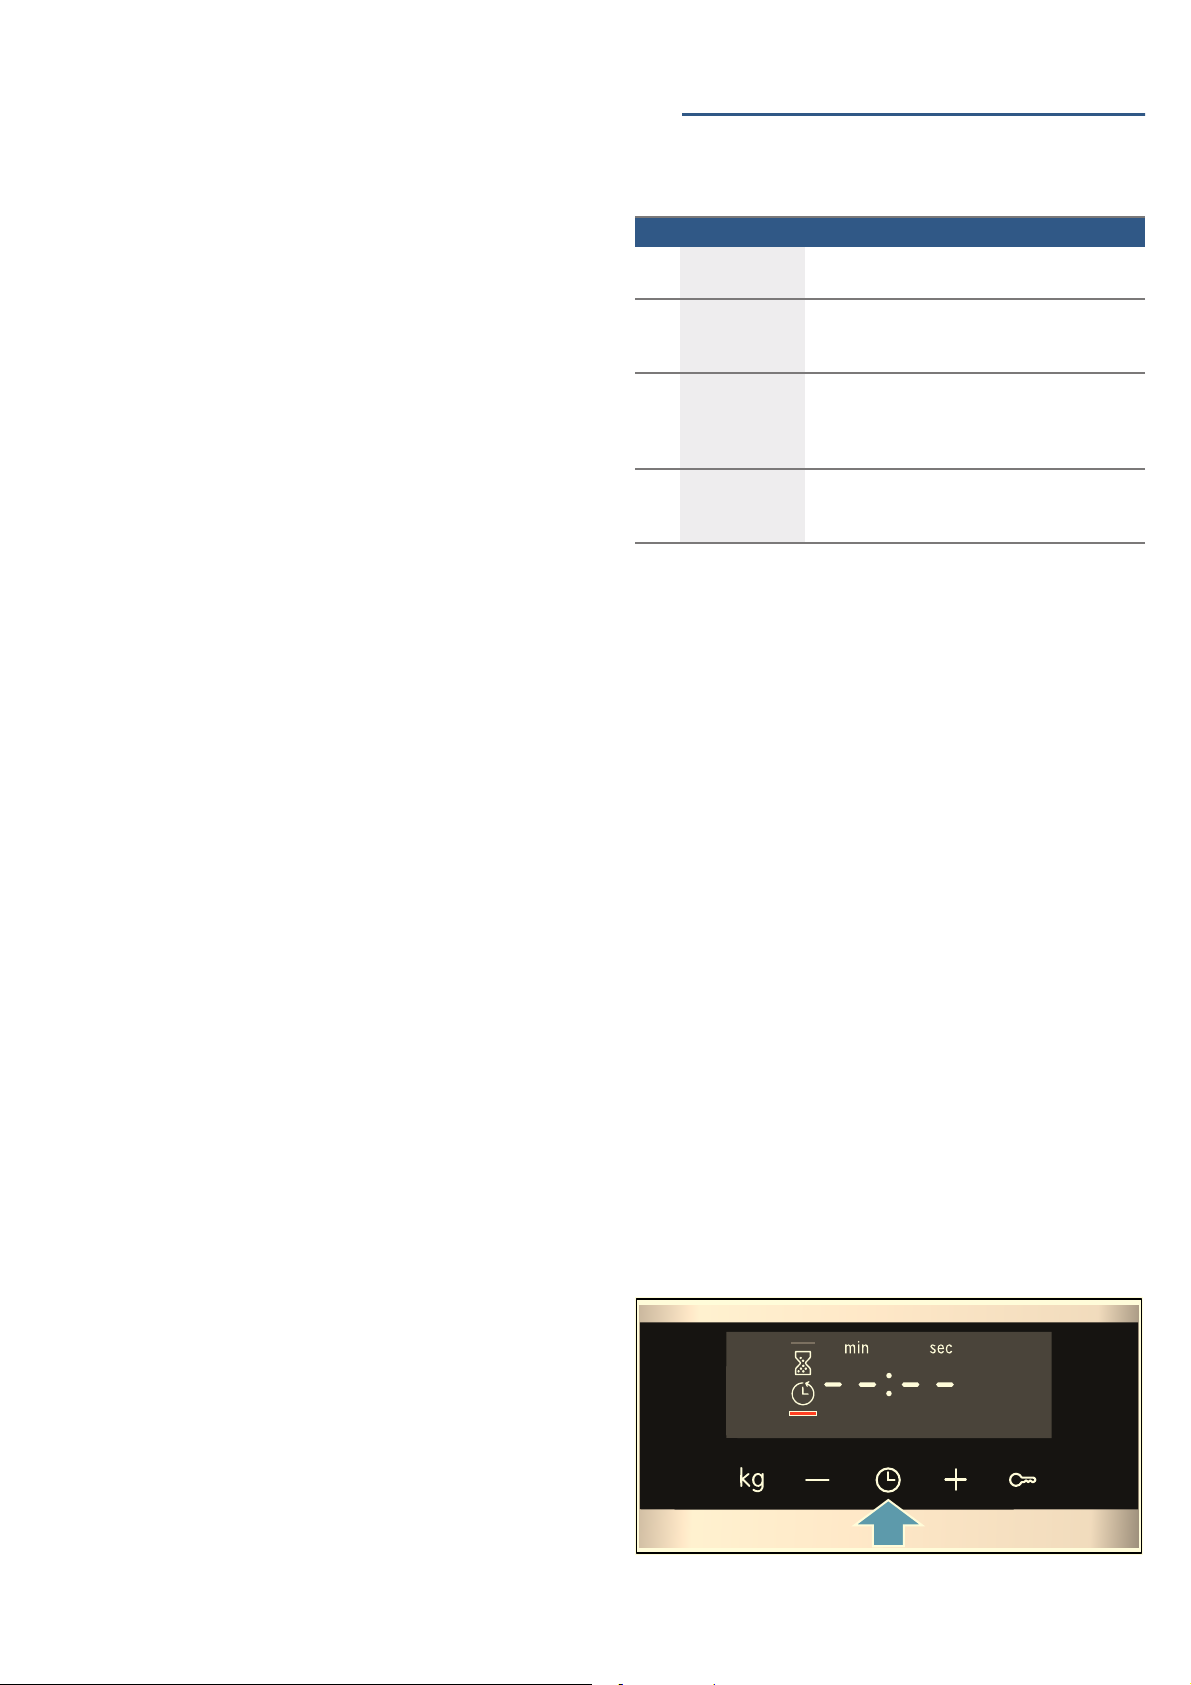
Setting the cooking time
You can set the cooking time for your food on the
appliance. This prevents the food from accidentally
being cooked for too long, and means that you do not
have to stop what you are doing to switch off the oven.
The maximum time that can be set is 23 hours and 59
minutes. The cooking time can be set in 1-minute
increments up to one hour, and then in 5-minute
increments.
The cooking time will start at a different default value
depending on which button you touch first:
10 minutes if you touch the A button and 30 minutes if
you touch the @ button.
Example in the picture: Cooking time of 45 minutes.
1. Set the type of heating and temperature or setting.
2. Touch the v button twice.
The cooking time y will be highlighted on the
display.
14
[
 Loading...