

Page 1
OBJ_DOKU-12341-004.fm Page 1 Tuesday, November 29, 2016 1:50 PM
Robert Bosch Power Tools GmbH
70538 Stuttgart
GERMANY
www.bosch-pt.com
1 609 92A 364 (2016.11) O / 25
GWS Professional
6-100 | 6-100 E
en Original instructions
ko 사용 설명서 원본
Page 2

OBJ_BUCH-710-004.book Page 2 Tuesday, November 29, 2016 1:50 PM
2 |
English . . . . . . . . . . . . . . . . . . . . . . . . . . . . . . . . . . . . . . . . . . Page 6
한국어 . . . . . . . . . . . . . . . . . . . . . . . . 페이지 14
1 609 92A 364 | (29.11.16) Bosch Power Tools
Page 3
OBJ_BUCH-710-004.book Page 3 Tuesday, November 29, 2016 1:50 PM
| 3
Bosch Power Tools 1 609 92A 364 | (29.11.16)
Page 4
6
1
4
2
5
3
8
7
9
10
12
11
13
7
9
14
11
23
24
OBJ_BUCH-710-004.book Page 4 Tuesday, November 29, 2016 1:50 PM
4 |
1 609 92A 364 | (29.11.16) Bosch Power Tools
Page 5
GWS 6-100 E
11
21
9
20
6
22
5
16
17
18
15
19
15
OBJ_BUCH-710-004.book Page 5 Tuesday, November 29, 2016 1:50 PM
| 5
Bosch Power Tools 1 609 92A 364 | (29.11.16)
Page 6
OBJ_BUCH-710-004.book Page 6 Tuesday, November 29, 2016 1:50 PM
6 | English
Prevent unintentional starting. Ensure the switch is in
English
Safety Notes
General Power Tool Safety Warnings
WARNING
instructions may result in electric shock, fire and/or serious
injury.
Save all warnings and instructions for future reference.
The term “power tool” in the warnings refers to your mainsoperated (corded) power tool or battery-opera ted (cordless)
power tool.
Work area safety
Keep work area clean and well lit. Cluttered or dark areas
invite accidents.
Do not operate power tools in explosive atmospheres,
such as in the presence of flammable liquids, gases or
dust. Power tools create sparks which may ig nite the dust
or fumes.
Keep children and bystanders away while operating a
power tool. Distractions can cause you to lose control.
Electrical safety
Power tool plugs must match the outlet. Never modify
the plug in any way. Do not use any adapter plugs with
earthed (grounded) power tools. Unmodified plugs and
matching outlets will reduce risk of electric shock.
Avoid body contact w ith earthed or grounded surfaces,
such as pipes, radiators, ranges and refrigerators.
There is an increased risk of electric shock if your body is
earthed or grounded.
Do not expose power tools to rain or wet conditions.
Water entering a power tool will increase the risk of electric
shock.
Do not abuse th e cord. Never use the cord for carrying,
pulling or unplugging the power tool. Keep cord away
from heat, oil, sharp edges and moving parts. Damaged
or entangled cords increase the risk of electric shock.
When operating a power tool outdoors, use an exten-
sion cord suitable for outdoor use. Use of a cord s uitable
for outdoor use reduces the risk of electric shock.
If operating a power tool in a damp location is unavoid-
able, use a residual current device (RCD) protected
supply. Use of an RCD reduces the risk of electric shock.
Personal safety
Stay alert, watch what you are doing and use common
sense when operating a power tool. Do not use a power
tool while you are tired or under the influence of drugs,
alcohol or medication. A moment of inattention while op-
erating power tools may result in serious personal injury.
Use personal protective equipment. Always wear eye
protection. Protective equipment such as dust mask,
non-skid safety shoes, hard hat, or hearing protection used
for appropriate conditions will reduce personal injuries.
1 609 92A 364 | (29.11.16) Bosch Power Tools
Read all safety warnings and all instructions. Failure to follow the warnings and
the off-position before connecting to power source
and/or battery pack, picking up or carrying the tool.
Carrying power tools with your finger on the switch or energising power tools that have the switch on invites accidents.
Remove any adjusting key or wrench before turning
the power tool on. A wrench or a key left attached to a ro-
tating part of the power tool may result in personal injury.
Do not overreach. Keep proper footing and balance at
all times. This enables better control of the power tool in
unexpected situations.
Dress properly. Do not wear loose clothing or jewel-
lery. Keep your hair, clothing and gloves away from
moving parts. Loose clothes, jewellery or long hair can be
caught in moving parts.
If devices are provided for the connection of dust ex-
traction and collection facilities, ensure these are connected and properly used. Use of dust collection can re-
duce dust-related hazards.
Power tool use and care
Do not force the power tool. Use th e correct power tool
for your application. The correct power tool will do the
job better and safer at the rate for which it was designed.
Do not use the power tool if the switch does not turn it
on and off. Any power tool that cannot be controlled with
the switch is dangerous and must be repaired.
Disconnect the plug from the power source and/or the
battery pack from the power tool before making any
adjustments, changing accessories, or storing power
tools. Such preventive safety measures reduce the risk of
starting the power tool accidentally.
Store idle power tools out of the reach of children and
do not allow persons unfamiliar with the power tool or
these instructions to operate the power tool. Power
tools are dangerous in the hands of untrained users.
Maintain power tools. Check for misalignment or bind-
ing of moving parts, breakage of parts and any other
condition that may affect the power tool’s operation. I f
damaged, have the power tool repaired before use.
Many accidents are caused by poorly maintained power
tools.
Keep cutting tools sh arp and clean. Properly maintained
cutting tools with sharp cutting edges are less likely to bind
and are easier to control.
Us e the power tool, accessories and tool bits etc. in ac-
cordance with these instructions, taking into account
the working conditions and the work to be performed.
Use of the power tool for operations different from those
intended could result in a hazardous situation.
Service
Ha ve your power tool serviced by a qualified repair per-
son using only identical replacement parts. This will en-
sure that the safety of the power tool is maintained.
Page 7
OBJ_BUCH-710-004.book Page 7 Tuesday, November 29, 2016 1:50 PM
English | 7
Safety Warnings for Angle Grinder
Safety Warnings common for Grinding, Sanding, Wire
Brushing or Abrasive Cutting Off Operations
This power tool is intended to function as a grinder,
sander, wire brush or cut-off tool. Read all safety warnings, instructions, illustrations and specifications provided with this power tool. Failure to follow all instruc-
tions listed below may result in electric shock, fire and/or
serious injury.
Operations such as polishing are not recommended to
be performed with this power tool. Operations for which
the power tool was not designed may create a hazard and
cause personal injury.
Do not use accessories which are not specifically de-
signed and recommended by the tool manufacturer.
Just because the accessory can be attached to your power
tool, it does not assure safe operation.
The rated speed of the accessory must be at least equal
to the maximum speed marked on the power tool. Ac-
cessories running faster than their rated speed can break
and fly apart.
The outside diameter and the thickness of your acces-
sory must be within the capacity rating of your power
tool. Incorrectly sized accessories cannot be adequately
guarded or controlled.
Threaded mounting of accessories must match the
grinder spindle thread. For accessories mounted by
flanges, the arbour hole of the accessory must fit the
locating diameter of the flange. Accessories that do not
match the mounting hardware of the power tool will run out
of balance, vibrate excessively and may cause loss of control.
Do not use a damaged accessory. Before each use in-
spect the accessory such as abrasive wheels for chips
and cracks, backing pad for cracks, tear or excess
wear, wire brush for loose or cracked wires. If power
tool or accessory is dropped, inspect for damage or install an undamaged accessory. After inspecting and installing an accessory, position yourself and bystanders
away from the plane of the rotating accessory and run
the power tool at maximum no-load speed for one minute. Damaged accessories will normally break apart during
this test time.
Wear personal protective equipment. Depending on
application, use face shield, safety goggles or safety
glasses. As appropriate, wear dust mask, hearing protectors, gloves and workshop apron capable of stopping small abrasive or workpiece fragments. The eye
protection must be capable of stopping flying debris generated by various operations. The dust mask or respirator
must be capable of filtrating particles generated by your
operation. Prolonged exposure to high intensity noise may
cause hearing loss.
Keep bystanders a safe distance away from work ar ea.
Anyone entering the work area must wear personal
protective equipment. Fragments of workpiece or of a
broken accessory may fly away and cause injury beyond
immediate area of operation.
Bosch Power Tools 1 609 92A 364 | (29.11.16)
Hold the power tool by insulated gripping surfaces on-
ly, when performing an operation where the cutting accessory may contact hidden wiring or its own cord. Cut-
ting accessory contacting a “live” wire may make exposed
metal parts of the power tool “live” and could give the operator an electric shock.
Position the cord clear of the spinning accessory. If you
lose control, the cord may be cut or snagged and your hand
or arm may be pulled into the spinning wheel.
Never lay the power tool down until the accessory has
come to a complete stop. The spinning wheel may grab
the surface and pull the power tool out of your control.
Do not run the power tool while carrying it at your side.
Accidental contact with the spinning accessory could snag
your clothing, pulling the accessory into your body.
Regularly clean the power tool’s air vents. The motor’s
fan will draw the dust inside the housing and excessive accumulation of powdered metal may cause electrical hazards.
Do not operate the power tool near flammable materi-
als. Sparks could ignite these materials.
Do not us e accessories that require liquid coolants. Us-
ing water or other liquid coolants may result in electrocution or shock.
Kickback and related warnings
Kickback is a sudden reaction to a pinched or snagged ro-
tating wheel, backing pad, brush or any other accessory.
Pinching or snagging causes rapid stalling of the rotating
accessory which in turn causes the uncontrolled power
tool to be forced in the direction opposite of the accessory’s rotation at the point of the binding.
For example, if an abrasive wheel is snagged or pinche d by
the workpiece, the edge of the wheel that is entering into
the pinch point can dig into the surface of the material
causing the wheel to climb out or kick out. The wheel may
either jump toward or away from the operator, depending
on direction of the wheel’s movement at the point of pinching. Abrasive wheels may also break under these conditions.
Kickback is the result of power tool misuse and/or incorrect operating procedures or conditions and can be avoided by taking proper precautions as given below.
Mai ntain a firm grip on the power tool and position your
body and arm to allow you to resist kickback forces.
Always use auxiliary handle, if provided, for maximum
control over kickback or torque reaction during
start-up. The operator can control torque reactions or
kickback forces, if proper precautions are taken.
Never place your hand near the rotating accessory.
Accessory may kickback over your hand.
Do not position your body in the area where power tool
will move if kickback occurs. Kickback will propel the
tool in direction opposite to the wheel’s movement at the
point of snagging.
Use special care when working corners, sharp edges,
etc. Avoid bouncing and snagging the accessory. Cor-
ners, sharp edges or bouncing have a tendency to snag the
rotating accessory and cause loss of control or kickback.
Page 8
OBJ_BUCH-710-004.book Page 8 Tuesday, November 29, 2016 1:50 PM
8 | English
Do not attach a saw chain woodcarving blade or
toothed saw blade. Such blades create frequent kickback
and loss of control.
Safety warnings specific for Grinding and Abrasiv e Cutting-Off operations
Use only wheel types that are recommended for your
power tool and the specific guard designed for the selected wheel. Wheels for which the power tool was not de-
signed cannot be adequately guarded and are unsafe.
The grinding surface of the centre depressed wheels
must be mounted below the plane of the guard lip. An
improperly mounted wheel that projects through the plane
of the guard lip cannot be adequately protected.
The guard must be securely attached to the power tool
and positioned for maximum safety, so the least
amount of wheel is exposed towards the operator. The
guard helps to protect operator from broken wheel fragments, accidental contact with wheel and sparks that
could ignite clothing.
Wheels must be used only for recommended applica-
tions. For example: do not grind with the side of the
cut-off wheel. Abrasive cut-off wheels are intended for
peripheral grinding; side forces applied to these wheels
may cause them to shatter.
Always use undamaged wheel flanges that are of cor-
rect size and shape for your selected wheel. Proper
wheel flanges support the wheel thus reducing the possi-
Support panels or any oversized workpiece to minimize
the risk of wheel pinching and kickback. Large work-
pieces tend to sag under their own weight. Supports must
be placed under the workpiece near the line of cut and near
the edge of the workpiece on both sides of the wheel.
Use extra caution when making a “pocket cut” into ex-
isting walls or other blind areas. The protruding wheel
may cut gas or water pipes, electrical wiring or objects that
can cause kickback.
Safety warnings specific for sanding operations
Do not use excessively oversized sanding disc paper.
Follow manufacturers recommendations, when selecting sanding paper. Larger sanding paper extending be-
yond the sanding pad presents a laceration hazard and
may cause snagging, tearing of the disc, or kickback.
Safety warnings specific for wire brushing operations
Be aware that wire bristles are thrown by the brush
even during ordinary operation. Do not overstress the
wires by applying excessive load to the brush. The wire
bristles can easily penetrate light clothing and/or skin.
If the use of a guard is recommended for wire brushing,
do not allow any interference of the wire wheel or
brush with the guard. Wire wheel or brush may expand in
diameter due to work load and centrifugal forces.
Additional safety warnings
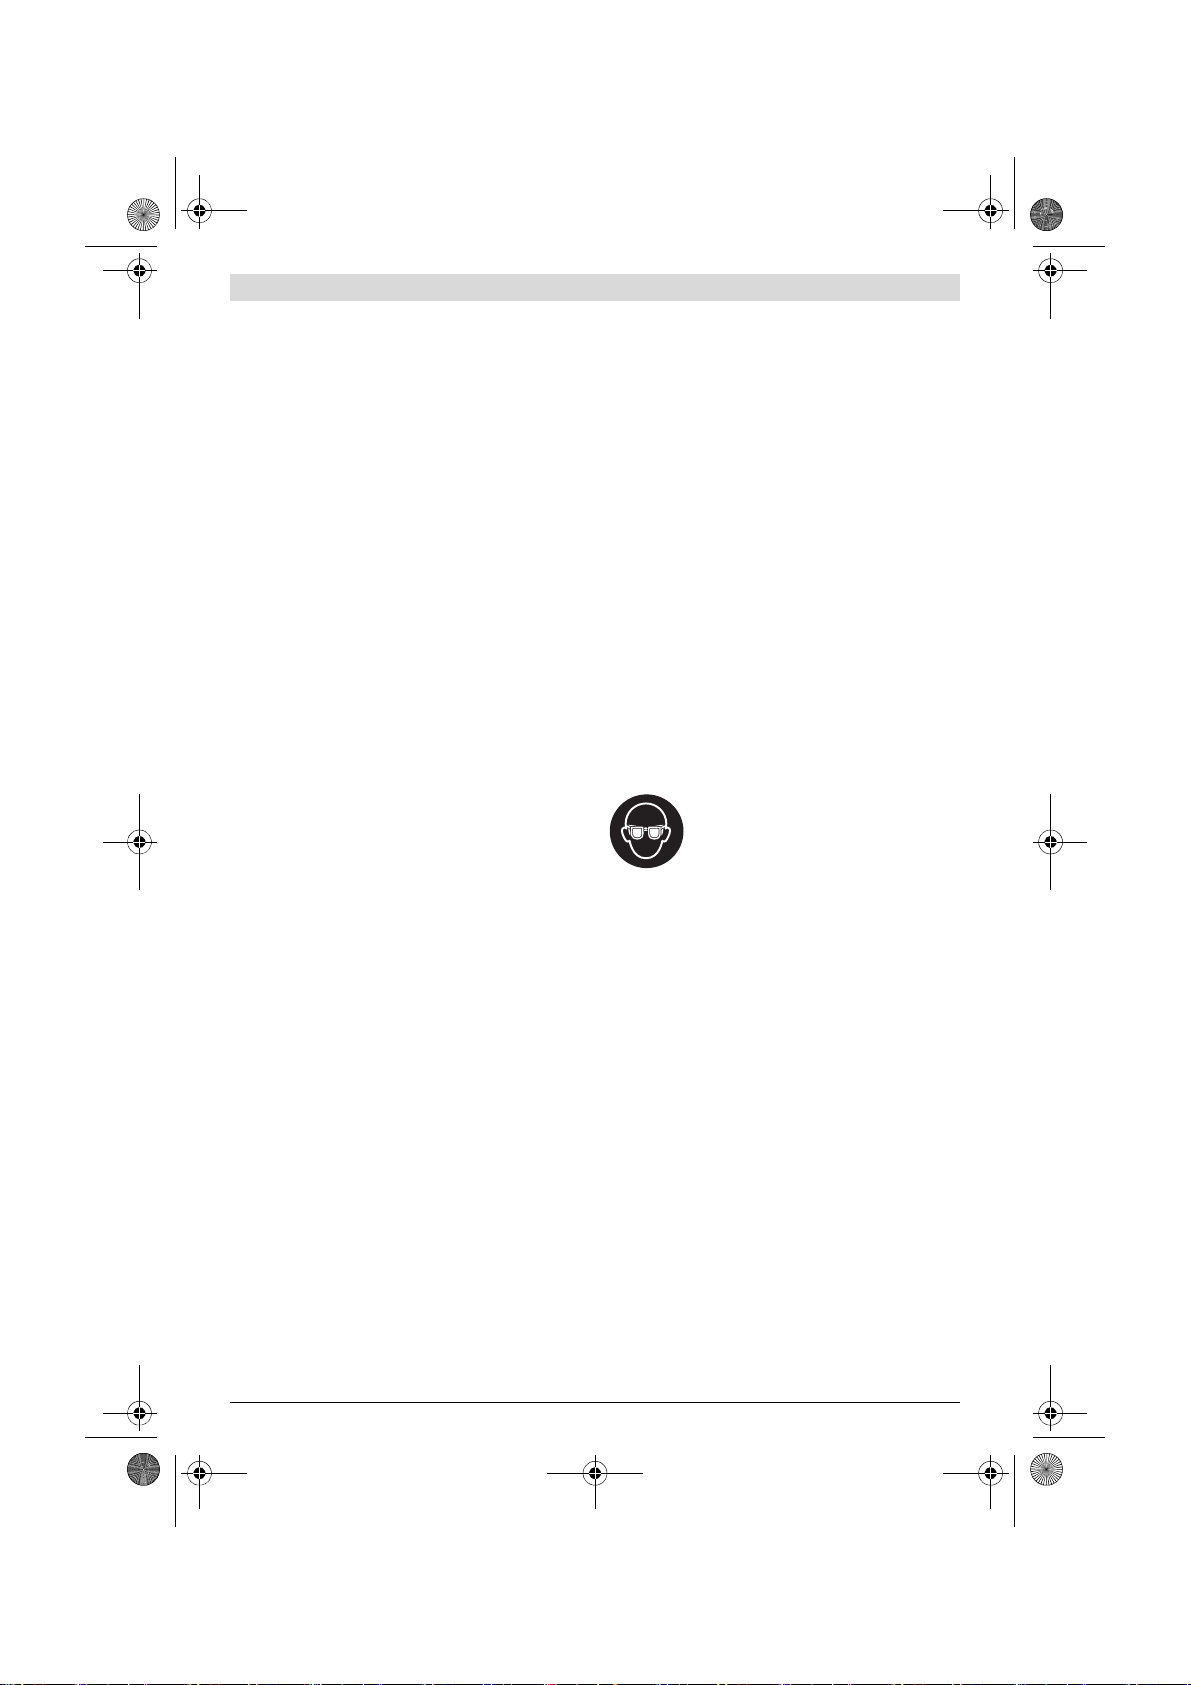
Wear safety goggles.
bility of wheel breakage. Flanges for cut-off wheels may be
different from grinding wheel flanges.
Do not use worn down reinforced wheels from larger
power tools. Wheels intended for larger power tools are
not suitable for the higher speed of a smaller tool and may
burst.
Additional safety warnings specific for abrasive cutting
off operations
Do not “jam” the cut-off wheel or apply excessive pres-
sure. Do not attempt to make an excessive depth of cut.
Overstressing the wheel increases the loading and susceptibility to twisting or binding of the wheel in the cut and the
possibility of kickback or wheel breakage.
Do not position your body in line with and behind the
rotating wheel. When the wheel, at the point of operation,
is moving away from your body, the possible kickback may
propel the spinning wheel and the power tool directly at
you.
When wheel is binding or when interrupting a cut for
any reason, switch off the power tool and hold the power tool motionless until the wheel comes to a complete
stop. Never attempt to remove the cut-off wheel from
the cut while the wheel is in motion otherwise kickback
may occur. Investigate and take corrective action to elimi-
nate the cause of wheel binding.
Do not restart the cutting operation in the workpiece.
Let the wheel reach full speed and carefully re-enter
the cut. The wheel may bind, walk up or kickback if the
power tool is restarted in the workpiece.
Use suitable detectors to determine if utility lines are
hidden in the work area or call the local utility company
for assistance. Contact with electric lines can lead to fire
and electric shock. Damaging a gas line can lead to explosion. Penetrating a water line causes property damage or
may cause an electric shock.
Relea se the On/Off switch and set it to the off position
whe n the p ower suppl y is in terr upted , e. g ., in case o f a
power failure or when the mains plug is pulled. This pre-
vents uncontrolled restarting.
Do not touch grinding and cutting discs before they
have cooled down. The discs can become very hot while
working.
Secure the workpiece. A workpiece clamped with clamp-
ing devices or in a vice is held more secure than by hand.
Products sold in GB only: Your product is fitted with a
BS 1363/A approved electric plug with internal fuse
(ASTA approved to BS 1362).
If the plug is not suitable for your socket outlets, it should
be cut off and an appropriate plug fitted in its place by an
authorised customer service agent. The replacement plug
should have the same fuse rating as the original plug.
The severed plug must be disposed of to avoid a possible
shock hazard and should never be inserted into a mains
socket elsewhere.
Products sold in AUS and NZ only: Use a residual current
device (RCD) with a rated residual current of 30 mA or less.
1 609 92A 364 | (29.11.16) Bosch Power Tools
Page 9

OBJ_BUCH-710-004.book Page 9 Tuesday, November 29, 2016 1:50 PM
Product Description and Specifications
Read all safety warnings and all instructions. Failure to follow the warnings and in-
structions may result in electric shock, fire
and/or serious injury.
Intended Use
The machine is intended for cutting, roughing and brushing of
metal and stone materials without the use of water.
For cutting with bonded abrasives, a special cutting guard
(accessory) must be used.
When cutting in stone, provide for sufficient dust extraction.
With approved sanding tools, the machine can be used for
sanding with sanding discs.
Product Features
The numbering of the product features refers to the illustration of the machine on the graphics page.
1 Spindle lock button
2 On/Off switch
3 Hex key
4 Thumbwheel for speed preselection (GWS 6-100 E)
5 Auxiliary handle (insulated gripping surface)
6 Grinder spindle
7 Locking screw for protection guard
8 Protection guard for grinding
9 Mounting flange
10 Grinding wheel *
11 Clamping nut
12 Carbide grinding head*
13 Protection guard for cutting *
14 Cutting disc*
15 Hand guard *
16 Rubber sanding plate *
17 Sanding sheet*
18 Round nut *
19 Cup brush *
20 Cutting guide with dust extraction protection guard *
21 Diamond cutting disc *
22 Handle (insulated gripping surface)
23 Combination spanner for M 14 grinder spindle *
24 Combination spanner for M 10 grinder spindle *
*Accessories shown or described are not part of the standard delivery scope of the product. A complete overview of accessories
can be found in our accessories program.
English | 9
Technical Data
Angle Grinder GWS 6-100 GWS 6-100 E
Article number
Rated power input
Output power
Rated speed
Speed control adjustment
Grinding disc diameter, max.
Thread of grinder spindle
Thread length (max.) of grinder spindle
Speed preselection
Weight according to EPTA-Procedure 01:2014
Protection class
The values given are valid for a nominal voltage [U] of 230 V. For different vol tages and models for specific countries, these values can vary.
Assembly
Protection Guard for Grinding
min
min
mm 100 100
mm 17 17
Mounting the Protective Devices
Before any work on the machine itself, pull the mains
plug.
Note: After breakage of the grinding disc during operation or
damage to the holding fixtures on the protection guard/power
tool, the machine must promptly be sen t to an afte r-sales service agent for maintenance. For addresses, see section “After-sales Service and Application Service”.
0 601 375 0.. 0 601 375 7..
W 670 670
W 400 400
-1
-1
kg 1.8 1.8
11000 1100 0
– 2800–11000
M 10 M 10
–
/II / II
Place the protection guard 8 on the
spindle collar. Adjust the position
of the protection guard 8 to the requirements of the operation. Lock
the protection guard 8 tightening
the locking screw 7 with a hex key
3.
Bosch Power Tools 1 609 92A 364 | (29.11.16)
Page 10

OBJ_BUCH-710-004.book Page 10 Tuesday, November 29, 2016 1:50 PM
10 | English
Adjust the protection guard 8 in such a manner that
sparking is prevented in the direction of the operator.
Note: The encoding keys on the protection guard 8 ensure
that only a protection guard that fits the machine type can be
mounted.
Protection Guard for Cutting
For cutting with bonded abrasives, always use the pro-
tection guard for cutting 13.
Provide for sufficient dust extraction when cutting
stone.
The protection guard for cutting 13 is mounted in the same
manner as the protection guard for grinding 8.
Cutting Guide with Dust Extraction Protection Guard
The cutting guide with dust extraction protection guard 20 is
mounted in the same manner as the protection guard for
grinding 8.
Auxiliary Handle
Opera te your machine only with the auxiliary handle 5.
Screw the auxiliary handle 5 on the right or left of the machine
head depending on the working method.
Hand Guard
For operati ons with the rubber sanding plate 16 or with
the cup brush/wheel brush/flap disc, always mount the
hand guard 15.
The hand guard 15 is fastened with the auxiliary handle 5.
Mounting the Grinding Tools
Before any work on the machine itself, pull the mains
plug.
Do not touch grinding and cutting discs before they
have cooled down. The discs can become very hot while
working.
Clean the grinder spindle 6 and all parts to be mounted.
After mounting the grinding tool and before switching
on, check that the grinding tool is correctly mounted
and that it can turn freely. Make sure that the grinding
tool does not graze against the protection guard or other parts.
Mounting flange for grinding spindle M 10: The mounting
flange can be used on both sides.
Flap Disc
For operations with the flap disc, always mount the
hand guard 15.
Rubber Sanding Plate
For operations with the rubber sanding plate 16, al-
ways mount the hand guard 15.
See graphics page for the mounting sequence.
Screw on the round nut 18 and tighten with the two-pin span-
ner.
Cup Brush/Disc Brush
For opera tions with the cup brush/wheel brush, always
mount the hand guard 15.
See graphics page for the mounting sequence.
The cup brush/disc brush must be able to be screwed onto
the grinder spindle until it rests firmly against the grinder
spindle flange at the end of the grinder spindle threads. Tighten the cup brush/disc brush with an open-end spanner.
Approved Grinding Tools
All grinding tools mentioned in these operating instructions
can be used.
The permissible speed [min
[m/s] of the grinding tools used must at least match the values
given in the table.
Therefore, observe the permissible rotational/circumferen-
tial speed on the label of the grinding tool.
For clamping and loosening the grinding tools, lock the grinder spindle with the spindle lock button 1.
Actuate the spindle lock button only when the grinder
spindle is at a standstill. Otherwise, the machine may be-
come damaged.
Grinding/Cutting Disc
Pay attention to the dimensions of the grinding tools. The
mounting hole diameter must fit the mounting flange without
play. Do not use reducers or adapters.
D
When using diamond cutting discs, pay attention that the direction-of-rotation arrow on the diamond cutting disc and the
direction of rotation of the machine (see direction-of-rotation
arrow on the machine head) agree.
See graphics page for the mounting sequence.
b
To fasten the grinding/cutting disc, screw on the clamping nut
11 and tighten with the two-hole sp anner.
-1
] or the circumferential speed
max.
[mm]
[mm]
D b d [min-1] [m/s]
100 6 16.0 11 000 80
100 – – 11 000 80
d
70 30 M 10 11 000 45
D
1 609 92A 364 | (29.11.16) Bosch Power Tools
Page 11

OBJ_BUCH-710-004.book Page 11 Tuesday, November 29, 2016 1:50 PM
Rotating the Machine Head
Before any work on the machine itself, pull the mains
plug.
The machine head can be
rotated with respect to
the machine housing in
90° steps. In this manner, the On/Off switch
can be brought into a
more convenient position for special working
situations, e.g. for lefthanded persons.
Completely unscrew the
four screws. Rotate the
machine head carefully,
without removing it from the housing, to the new position.
Screw in and tighten the four screws again.
Dust/Chip Extraction
Dust from materials such as lead-containing coatings,
some wood types, minerals and metal can be harmful to
one’s health. Touching or breathing-in the dust can cause
allergic reactions and/or lead to respiratory infections of
the user or bystanders.
Certain dust, such as oak or beech dust, is considered carcinogenic, especially in connection with wood-treatment
additives (chromate, wood preservative). Materials containing asbestos may only be worked by specialists.
– As far as possible, use a dust extraction system suitable
for the material.
– Provide for good ventilation of the working place.
– It is recommended to wear a P2 filter-class respirator.
Observe the relevant regulations in your country for the
materials to be worked.
Prevent dust accumulation at the workplace. Dust can
easily ignite.
Operation
Starting Operation
Observe correct mains voltage! The voltage of the pow-
er source must agree with the voltage specified on the
nameplate of the machine. Power tools marked with
230 V can also be operated with 220 V.
When operating the machine with power from mobile generators that do not have sufficient reserve capacity or are not
equipped with suitable voltage control with starting current
amplification, loss of performance or untypical behavior can
occur upon switching on.
Please observe the suitability of the power generator being
used, particularly with regard to the mains voltage and frequency.
Switching On and Off
To start the power tool, push the On/Off switch 2 forwards.
To lock the On/Off switch 2, press the On/Off switch 2 down
at the front until it latches.
To switch off the power tool, release the On/Off switch 2 or,
if it is locked, briefly push down the back of the On/Off switch
2 and then release it.
Check grinding tools before using. The grinding tool
must be mounted properly and be able to move freely.
Carry out a test run for at least one minute with no load.
Do not use damaged, out-of-centre or vibrating grinding tools. Damaged grinding tools can burst and cause in-
juries.
To save energy, only switch the power tool on when using it.
English | 11
Speed preselection (GWS 6-100 E)
The required speed can be preselected with the thumbwheel 4 (also while running).
The data in the following table are recommended values.
Material Application Accessory Thumbwheel Position
Metal Removing paint Sanding disc 2 – 3
Wood, metal Brushing, rust removal Cup brush, sanding disc 3
Metal, masonry Grinding Grinding disc 4 – 6
Metal Rough grinding Grinding disc 6
Masonry, stone Cutting Cutting disc and cutting guide
Working Advice
Ex ercise caution when cutting slots in structural walls;
see Section “Information on Structures”.
Clamp the workpiece if it does not remain stationary
due to its own weight.
Do not strain the machine so heavily that it comes to a
standstill.
Bosch Power Tools 1 609 92A 364 | (29.11.16)
(Cutting masonry/stone is permitted only with use
of the cutting guide)
After heavily straining the power tool, continue to run
it at no-load for several minutes to cool down the accessory.
Do not touch grinding and cutting discs before they
have cooled down. The discs can become very hot while
working.
Do not use the power tool with a cut-off stand.
6
Page 12

OBJ_BUCH-710-004.book Page 12 Tuesday, November 29, 2016 1:50 PM
12 | English
Rough Grinding
Never use a cutting disc for roughing.
The best roughing results are achieved when setting the machine at an angle of 30 ° to 40°. Move the machine back and
forth with moderate pressure. In this manner, the workpiece
will not become too hot, does not discolour and no grooves
are formed.
Flap Disc
With the flap disc (accessory), curved surfaces and profiles
can be worked.
Flap discs have a considerably higher service life, lower noise
levels and lower sanding temperatures than conventional
sanding sheets.
Cutting Metal
For cutting with bonded abrasives, always use the pro-
tection guard for cutting 13.
When cutting, work with moderate feed, adapted to the material being cut. Do not exert pressure onto the cutting disc, tilt
or oscillate the machine.
Do not reduce the speed of running down cutting discs by applying sideward pressure.
The machine must always work in an upgrinding motion. Otherwise, the danger exists
of it being pushed un-
controlled out of the
cut.
For cutting especially hard material, e. g., concrete with high
pebble content, the diamond cutting disc can overheat and
become damaged as a result. This is clearly indicated by circular sparking, rotating with the diamond cutting disc.
In this case, interrupt the cutting process and allow the diamond cutting disc to cool by running the machine for a short
time at maximum speed with no load.
Noticeably decreasing work progress and circular sparking
are indications of a diamond cutting disc that has become
dull. Briefly cutting into abrasive material (e. g. lime-sand
brick) can resharpen the disc again.
Information on Structures
Slots in structural walls are subject to the Standard DIN 1053
Part 1, or country-specific regulations.
These regulations are to be observed under all circumstances. Before beginning work, consult the responsible structural
engineer, architect or the construction supervisor.
Switch on the machine
and place the front part
of the cutting guide on
the workpiece. Slide the
machine with moderate
feed, adapted to the material to be worked.
Maintenance and Service
Maintenance and Cleaning
Before any work on the machine itself, pull the mains
When cutting profiles and square bar, it is best to start at the
smallest cross section.
Cutting Stone
Provide for sufficient dust extraction when cutting
stone.
Wear a dust respirator.
The machine may be used only for dry cutting/grinding.
For cutting stone, it is best to use a diamond cutting disc.
When using the cutting guide with dust extraction protection
guard 20, the vacuum cleaner must be approved for vacuuming masonry dust. Suitable vacuum cleaners are available
from Bosch.
1 609 92A 364 | (29.11.16) Bosch Power Tools
plug.
For safe and proper working, always keep the machine
and ventilation slots clean.
In extreme conditions, always use dust extraction as
far as possible. Blow out ventilation slots frequently
and install a portable residual current device (PRCD).
When working metals, conductive dust can settle in the interior of the power tool. The total insulation of the power
tool can be impaired.
Please store and handle the accessory(-ies) carefully.
If the replacement of the supply cord is nece ssary, this has to
be done by Bosch or an authorized Bosch service agent in order to avoid a safety hazard.
Page 13

OBJ_BUCH-710-004.book Page 13 Tuesday, November 29, 2016 1:50 PM
English | 13
After-sales Service and Application Service
Our after-sales service responds to your questions con cerning maintenance and repair of your product as well as spare
parts. Exploded views and information on spare parts can also be found under:
www.bosch-pt.com
Bosch’s application service team will gladly answer questions
concerning our products and their accessories.
In all correspondence and spare parts orders, please always
include the 10-digit article number given on the nameplate of
the product.
People’s Republic of China
China Mainland
Bosch Power Tools (China) Co., Ltd.
567, Bin Kang Road
Bin Jiang District 310052
Hangzhou, P.R. China
Service Hotline: 4008268484
Fax: (0571) 87774502
E-Mail: contact.ptcn@cn.bosch.com
www.bosch-pt.com.cn
HK and Macau Special Administrative Regions
Robert Bosch Hong Kong Co. Ltd.
21st Floor, 625 King’s Road
North Point, Hong Kong
Customer Service Hotline: +852 2101 0235
Fax: +852 2590 9762
E-Mail: info@hk.bosch.com
www.bosch-pt.com.hk
Indonesia
PT Robert Bosch
Palma Tower 10
Jl. RA Kartini II-S Kaveling 6 Sek II
Pondok Pinang, Kebayoran Lama
Jakarta Selatan 12310
Indonesia
Tel.: (021) 3005 5800
Fax: (021) 3005 58 01
E-Mail: boschpowertools@id.bosch.com
www.bosch-pt.co.id
Philippines
Robert Bosch, Inc.
28th Floor Fort Legend Towers,
3rd Avenue corner 31st Street,
Fort Bonifacio Global City,
1634 Taguig City, Philippines
Tel.: (02) 8703871
Fax: (02) 8703870
matheus.contiero@ph.bosch.com
www.bosch-pt.com.ph
Bosch Service Center:
9725-27 Kamagong Street
San Antonio Village
th
Floor
Malaysia
Robert Bosch Sdn. Bhd.
No. 8A, Jalan 13/6
G.P.O. Box 10818
46200 Petaling Jaya
Selangor, Malaysia
Tel.: (03) 79663194
Fax: (03) 79583838
E-Mail: cheehoe.on@my.bosch.com
Toll-Free: 1800 880188
www.bosch-pt.com.my
Thailand
Robert Bosch Ltd.
Liberty Square Building
No. 287, 11 Floor
Silom Road, Bangrak
Bangkok 10500
Tel.: 02 6393111
Fax: 02 2384783
Robert Bosch Ltd., P. O. Box 2054
Bangkok 10501, Thailand
www.bosch.co.th
Bosch Service – Training Centre
La Salle Tower Ground Floor Unit No.2
10/11 La Salle Moo 16
Srinakharin Road
Bangkaew, Bang Plee
Samutprakarn 10540
Thailand
Tel.: 02 7587555
Fax: 02 7587525
Singapore
Powerwell Service Centre Ptd Ltd
65 Ubi Crescent, #06-03 Hola Centre
Singapore 408559
Tel.: 6746 9770/71
Fax: 6746 9760
E-Mail: powerwellsc@gmail.com
Toll-Free: 1800 3338333
www.bosch-pt.com.sg
Vietnam
Robert Bosch Vietnam Co. Ltd
13th Floor , 194 Golden Building
473 Dien Bien Phu Street
Ward 25, Binh Thanh District
84 Ho Chi Minh City
Vietnam
Tel.: (08) 6258 3690
Fax: (08) 6258 3692
Hotline: (08) 6250 8555
E-Mail: tuvankhachhang-pt@vn.bosch.com
www.bosch-pt.com.vn
www.baohanhbosch-pt.com.vn
Makati City, Philippines
Tel.: (02) 8999091
Fax: (02) 8976432
E-Mail: rosalie.dagdagan@ph.bosch.com
Bosch Power Tools 1 609 92A 364 | (29.11.16)
Page 14

OBJ_BUCH-710-004.book Page 14 Tuesday, November 29, 2016 1:50 PM
14 | 한국어
Australia, New Zealand and Pacific Islands
Robert Bosch Australia Pty. Ltd.
Power Tools
Locked Bag 66
Clayton South VIC 3169
Customer Contact Center
Inside Australia:
Phone: (01300) 307044
Fax: (01300) 307045
Inside New Zealand:
Phone: (0800) 543353
Fax: (0800) 428570
Outside AU and NZ:
Phone: +61 3 95415555
www.bosch-pt.com.au
www.bosch-pt.co.nz
Egypt
Unimar
Western Cape – BSC Service Centre
Democracy Way, Prosperity Park
Milnerton
Tel.: (021) 5512577
Fax: (021) 5513223
E-Mail: bsc@zsd.co.za
Bosch Headquarters
Midrand, Gauteng
Tel.: (011) 6519600
Fax: (011) 6519880
E-Mail: rbsa-hq.pts@za.bosch.com
Disposal
The machine, accessories and packaging should be sorted for
environmental-friendly recycling.
Do not dispose of power tools into household waste!
Subject to change without notice.
20 Markaz kadmat
El tagmoa EL Aoul – New Cairo
Tel: +2 02 224 76091 - 95 / + 2 02 224 78072 - 73
Fax:+2 02 224 78075
한국어
E-Mail: adelzaki@unimaregypt.com
Ethiopia
Forever plc
Kebele 2,754, BP 4806,
안전 수칙
전동공구용 일반 안전수칙
Addis Ababa , Ethiopia
Tel: +251 111 560 600, +251 111 560 600
E-Mail: foreverplc@ethionet.et
Nigeria
C. Woermann Ltd.
P.O. Box 318
6, Badejo Kalesanwo Street
Matori Industrial Estate
Lagos, Nigeria
Tel: +234 17 736 498, +234 17 730 904
E-Mail: d.kornemann@woermann-nigeria.com
Republic of South Africa
Customer service
Hotline: (011) 6519600
Gauteng – BSC Service Centre
35 Roper Street, New Centre
Johannesburg
Tel.: (011) 4939375
Fax: (011) 4930126
E-Mail: bsctools@icon.co.za
KZN – BSC Service Centre
Unit E, Almar Centre
143 Crompton Street
Pinetown
Tel.: (031) 7012120
Fax: (031) 7012446
E-Mail: bsc.dur@za.bosch.com
을 준수하지 않으면 화재 위험이 있으며 감전 혹은 중
상을 입을 수 있습니다 .
앞으로의 참고를 위해 이 안전수칙과 사용 설명서를 잘
보관하십시오 .
다음에서 사용되는 “ 전동공구 ” 라는 개념은 전원에
연결하여 사용하는 전동 기기 ( 전선이 있는 ) 나 배터리
를 사용하는 전동 기기 ( 전선이 없는 ) 를 의미합니다 .
작업장 안전
작업장을 항상 깨끗이 하고 조명을 밝게 하십시오 .
작업장 환경이 어수선하거나 어두우면 사고를 초래
할 수 있습니다 .
가연성 유체 , 가스 또는 분진이 있어 폭발 위험이 있
는 환경에서 전동공구를 사용하지 마십시오 . 전동공
구는 분진이나 증기에 점화하는 스파크를 일으킬 수
있습니다 .
전동공구를 사용할 때 구경꾼이나 어린이 혹은 다른
사람이 작업장에 접근하지 못하게 하십시오 . 다른
사람이 주의를 산만하게 하면 기기에 대한 통제를 잃
기 쉽습니다 .
전기에 관한 안전
전동공구의 전원 플러그가 전원 콘센트에 잘 맞아야
합니다 . 플러그를 조금이라도 변경시켜서는 안됩니
다 . 접지된 전동공구를 사용할 때 어댑터 플러그를
사용하지 마십시오 . 변형되지 않은 플러그와 잘 맞
는 콘센트를 사용하면 감전의 위험을 감소할 수 있
습니다 .
모든 안전수칙과 지시 사항을 상세히 읽고 지
켜야 합니다 . 다음의 안전수칙과 지시 사항
1 609 92A 364 | (29.11.16) Bosch Power Tools
Page 15

OBJ_BUCH-710-004.book Page 15 Tuesday, November 29, 2016 1:50 PM
한국어 | 15
파이프 관, 라디에이터, 레인지, 냉장고와 같은 접지
표면에 몸이 닿지 않도록 하십시오 . 몸에 닿을 경우
감전될 위험이 높습니다 .
전동공구를 비에 맞지 않게 하고 습기 있는 곳에 두
지 마십시오 . 전동공구에 물이 들어가면 감전될 위
험이 높습니다 .
전원 코드를 잡고 전동공구를 운반하거나 걸어 놓아
서는 안되며 , 콘센트에서 전원 플러그를 뽑을 때 전
원 코드를 잡아 당겨서는 절대로 안됩니다 . 전원 코
드가 열과 오일에 접촉하는 것을 피하고 , 날카로운
모서리나 기기의 가동 부위에 닿지 않도록 주의하십
시오 . 손상되거나 엉킨 전원 코드는 감전을 유발할
수 있습니다 .
실외에서 전동공구로 작업할 때는 실외용으로 적당
한 연장 전원 코드만을 사용하십시오 . 실외용 연장
전원 코드를 사용하면 감전의 위험을 줄일 수 있습
니다 .
전동공구를 습기 찬 곳에서 사용해야 할 경우에는 누
전 차단기를 사용하십시오 . 누전 차단기를 사용하면
감전 위험을 줄일 수 있습니다 .
사용자 안전
신중하게 작업하십시오. 작업을 할 때 주의를 하며 ,
전동공구를 사용할 때 경솔하게 행동하지 마십시오 .
피로한 상태이거나 약물 복용 및 음주한 후에는 전
동공구를 사용하지 마십시오. 전동공구를 사용할 때
잠시라도 주의가 산만해지면 중상을 입을 수 있습니
다.
작업자 안전을 위한 장치를 사용하십시오 . 항상 보
안경을 착용하십시오 . 전동공구의 종류와 사용에 따
라 먼지 보호 마스크, 미끄러지지 않는 안전한 신발,
안전모 또는 귀마개 등의 안전한 복장을 하면 상해
의 위험을 줄일 수 있습니다 .
실수로 기기가 작동되지 않도록 주의하십시오 . 전동
공구를 전원에 연결하거나 배터리를 끼우기 전에 ,
혹은 기기를 들거나 운반하기 전에 , 전원 스위치가
꺼져 있는지 다시 확인하십시오 . 전동공구를 운반할
때 전원 스위치에 손가락을 대거나 전원 스위치가 켜
진 상태에서 전원을 연결하면 사고 위험이 높습니다 .
전동공구를 사용하기 전에 조절하는 툴이나 나사 키
등을 빼 놓으십시오 . 회전하는 부위에 있는 툴이나
나사 키로 인해 상처를 입을 수 있습니다 .
자신을 과신하지 마십시오 . 불안정한 자세를 피하고
항상 평형을 이룬 상태로 작업하십시오. 안정된 자
세와 평형한 상태로 작업해야만이 의외의 상황에서
도 전동공구를 안전하게 사용할 수 있습니다 .
알맞은 작업복을 입으십시오 . 헐렁한 복장을 하거나
장신구를 착용하지 마십시오 . 머리나 옷 또는 장갑
이 가동하는 기기 부위에 가까이 닿지 않도록 주의
하십시오 . 헐렁한 복장 , 장신구 혹은 긴 머리는 가
동 부위에 말려 사고를 초래할 수 있습니다 .
분진 추출장치나 수거장치의 조립이 가능한 경우, 이
장치가 연결되어 있는지 , 제대로 작동이 되는지 확
인하십시오 . 이러한 분진 추출장치를 사용하면 분진
으로 인한 사고 위험을 줄일 수 있습니다 .
Bosch Power Tools 1 609 92A 364 | (29.11.16)
전동공구의 올바른 사용과 취급
기기를 과부하 상태에서 사용하지 마십시오 . 작업할
때 이에 적당한 전동공구를 사용하십시오 . 알맞은
전동공구를 사용하면 지정된 성능 한도 내에서 더 효
율적으로 안전하게 작업할 수 있습니다 .
전원 스위치가 고장 난 전동공구를 사용하지 마십시
오. 전원 스위치가 작동되지 않는 전동공구는 위험
하므로 , 반드시 수리를 해야 합니다 .
기기에 세팅을 하거나 액세서리 부품을 교환하거나
혹은 기기를 보관할 때 , 항상 전원 콘센트에서 플러
그를 미리 빼어 놓으십시오 . 이러한 조치는 실수로
전동공구가 작동하게 되는 것을 예방합니다 .
사용하지 않는 전동공구는 어린이 손이 닿지 않는 곳
에 보관하고 , 전동공구 사용에 익숙지 않거나 이 사
용 설명서를 읽지 않은 사람은 기기를 사용해서는 안
됩니다 . 경험이 없는 사람이 전동공구를 사용하면
위험합니다 .
전동공구를 조심스럽게 관리하십시오 . 가동 부위가
하자 없이 정상적인 기능을 하는지 , 걸리는 부위가
있는지 , 혹은 전동공구의 기능에 중요한 부품이 손
상되지 않았는지 확인하십시오 . 손상된 기기의 부품
은 전동공구를 다시 사용하기 전에 반드시 수리를 맡
기십시오 . 제대로 관리하지 않은 전동공구의 경우
많은 사고를 유발합니다 .
절단 공구를 날카롭고 깨끗하게 관리하십시오 . 날카
로운 절단면이 있고 잘 관리된 절단공구는 걸리는 경
우가 드물고 조절하기도 쉽습니다 .
전동공구, 액세서리, 장착하는 공구 등을 사용할 때,
이 지시 사항과 특별히 기종 별로 나와있는 사용 방
법을 준수하십시오 . 이때 작업 조건과 실시하려는
작업 내용을 고려하십시오 . 원래 사용 분야가 아닌
다른 작업에 전동공구를 사용할 경우 위험한 상황을
초래할 수 있습니다 .
서비스
전동공구 수리는 반드시 전문 인력에게 맡기고, 수
리 정비 시 보쉬 순정 부품만을 사용하십시오 . 그렇
게 함으로써 기기의 안전성을 오래 유지할 수 있습
니다 .
앵글 그라인더용 안전 수칙
연마작업 , 샌딩작업 , 와이어 브러싱작업 및 절단작업
시 일반 안전 경고 사항
이 전동공구는 연마기 , 샌딩 그라인더 , 와이어 브러
시 그리고 절단기로 사용할 수 있습니다 . 전동공구
와 함께 공급되는 모든 안전 경고 사항 , 지시 사항 ,
도면과 사양서를 읽으십시오 . 다음의 지시 사항을
준수하지 않으면 감전 그리고 / 혹은 심각한 상해를
입을 수 있습니다 .
이 전동공구는 폴리싱작업을 하는 데 적당하지 않습
니다 . 전동공구의 사용 분야가 아닌 경우 사용하면
위험하며 상해를 입을 수 있습니다 .
본 전동공구를 위해 제조사가 특별히 생산하고 추천
하는 액세서리만을 사용해야 합니다 . 액세서리가 전
Page 16

OBJ_BUCH-710-004.book Page 16 Tuesday, November 29, 2016 1:50 PM
16 | 한국어
동공구에 고정될 수 있다고 해서 안전한 사용을 보
장하는 것은 아닙니다 .
허용되는 RPM이 적어도 전동공구에 나와있는 최고
무부하 속도보다 높은 연마석을 사용해야 합니다 .
허용치 이상으로 빨리 회전하는 액세서리는 깨지거
나 날아갈 수 있습니다 .
연마석의 외경과 두께는 전동공구의 크기에 맞는 것
이어야 합니다 . 크기가 맞지 않는 연마석은 충분히
커버할 수 없거나 통제하기가 어려워집니다 .
나사산이 있는 액세서리는 연삭 스핀들에 정확히 맞
아야 합니다 . 플랜지를 사용하여 조립하는 액세서리
의 경우 액세서리의 구멍 직경이 플랜지의 직경에 맞
는 것이어야 합니다 . 전동공구에 정확히 고정되지
않는 액세서리는 불규칙적으로 회전하고 심하게 진
동하여 제어가 불가능할 수 있습니다 .
손상된 연마석을 사용하지 마십시오 . 기기를 사용하
기 전에 항상 연마석에 금이 가거나 파손되거나 마
모 상태가 심하지 않은지 , 혹은 와이어 브러시 디스
크의 경우 와이어가 느슨하거나 부러지지 않았는지
확인하십시오 . 전동공구나 연마석이 떨어졌을 때 손
상되지 않았는지 확인하고 손상된 경우 새로운 연마
석을 사용하십시오 . 연마공구를 점검하고 삽입한 경
우 주위에 있는 사람이나 작업자가 회전하는 연마석
쪽에서 멀리 떨어져 있도록 하고 , 전동공구를 1 분
간 최고 속도로 작동하십시오 . 손상된 연마석은 대
부분 이 시험 단계에서 부러집니다 .
작업자는 보호장비를 착용해야 합니다 . 작업에 따라
안면 마스크나 보안경을 사용하십시오 . 필요한 경우
분진 마스크 , 귀마개 , 보호장갑을 사용하고 연마로
인한 미세한 소재 분자에 접하게 되는 것을 방지하
는 특수 작업용 애프런을 착용하십시오 . 다양한 작
업을 할 때 생겨 공중에 떠다니는 이물질로부터 눈
을 보호해야 합니다 . 분진 마스크나 호흡 마스크로
기기 사용 시 발생하는 분진을 여과해야 합니다 . 작
업자가 장기간 강한 소음 환경에서 작업하면 청력을
상실할 수도 있습니다 .
다른 사람이 작업장에서 안전 거리를 유지하도록 해
야 합니다 . 작업장에 들어오는 사람은 누구나 반드
시 보호장비를 착용해야 합니다 . 작업물의 파편이나
깨진 연마석이 날아가 작업대 이외의 곳에서도 상처
를 입을 수 있습니다 .
작업할 때 절단공구로 보이지 않는 전선이나 기기 자
체의 코드에 닿을 위험이 있으면 전동공구의 절연된
손잡이 면만을 잡으십시오 . 전류가 흐르는 전선에
접하게 되면 기기의 금속 부위에 전기가 통해 감전
될 위험이 있습니다 .
전원 코드를 회전하는 연마석에서 멀리 하십시오 .
전동공구에 대한 통제를 잃게되면 전원 코드가 잘려
나가거나 말려들 수 있고 , 또한 손이나 팔이 회전하
는 연마석 쪽으로 빨려 들어갈 수 있습니다 .
전동공구를 내려놓기 전에 연마석이 완전히 멈추었
는지 확인하십시오 . 회전하는 연마석이 작업대 표면
에 닿게 되면 전동공구에 대한 통제가 불가능할 수
있습니다 .
항상 스위치를 끈 상태로 전동공구를 운반하십시오 .
작업자의 옷이 실수로 회전하는 연마공구에 말려 들
어 연마석이 신체 부위를 찌를 수 있습니다 .
전동공구의 통풍구를 정기적으로 깨끗이 닦으십시
오. 모터 팬이 하우징 안으로 분진을 끌어 들이며 ,
금속 분진이 많이 쌓이면 전기적인 위험을 야기할 수
있습니다 .
전동공구를 가연성 물질 가까이에서 사용하지 마십
시오 . 스파크가 이 물질을 점화할 수 있습니다 .
액체 냉각제가 필요한 연마공구를 사용하지 마십시
오. 물이나 기타 액체 냉각제를 사용하면 감전될 수
있습니다 .
반동과 이에 따른 안전 경고 사항
반동은 회전하는 전동공구의 연마석, 고무판, 와이어
브러시 디스크 등의 연마공구가 걸리거나 차단된 경
우 갑자기 나타나는 작용입니다 . 걸림이나 차단 상
태가 되면 회전하는 연마공구가 갑자기 정지하게 됩
니다 . 그로 인해 통제가 안 되는 전동공구가 걸린 부
위에서 연마공구 회전방향 반대쪽으로 반동이 생깁
니다 .
예를 들어 연마석이 작업물에 박히거나 걸리면 연마
석 모서리가 작업물 안으로 들어가 걸릴 수 있습니
다 . 그로 인해 연마석이 부러지거나 반동을 유발할
수 있습니다 . 그러면 연마석이 걸린 부위의 연마석
회전 방향에 따라 작업자 쪽으로 혹은 그 반대 쪽으
로 움직입니다 . 이때 연마석이 부러질 수도 있습니
다.
반동은 전동공구를 잘못 사용하여 생기는 결과입니
다 . 이는 다음에 기술한 적당한 예방 조치를 통해 방
지할 수 있습니다 .
전동공구를 꽉 잡고 , 몸과 팔은 반동력을 저지할 수
있는 자세를 취하십시오 . 보조 손잡이가 있으면 , 고
속 작동 시 반동력이나 반작용 모멘트를 최대로 제
어하기 위해 항상 보조 손잡이를 사용하십시오 . 작
업자는 적당한 예방 조치를 통해 반동력과 반작용력
을 억제할 수 있습니다 .
절대로 회전하는 연마석에 손을 가까이 대지 마십시
오. 연마석의 반동으로 인해 손을 다칠 수 있습니다 .
반동이 생길 때 전동공구가 움직일 수 있는 곳에 있
지 마십시오 .
에 있는 연마석 방향 반대쪽으로 움직입니다 .
특히 모서리나 날카로운 가장자리 등에 작업할 때 주
의하십시오 . 연마석이 작업물에서 되튀어 나가거나
걸리지 않도록 하십시오 . 가장자리와 날카로운 모서
리에 작업할 경우 또는 연마석이 튕겨 나가는 경우 ,
회전하는 연마석이 걸리는 경향이 있습니다 . 이로 인
해 기기의 통제가 어려워지거나 반동이 생깁니다 .
우드카빙이나 이가 있는 톱날이 부착된 연마공구를
사용하지 마십시오 . 이러한 연마공구는 자주 반동을
유발시키고 전동공구에 대한 통제를 잃게 합니다 .
반동으로 인해 전동공구가 걸린 부위
1 609 92A 364 | (29.11.16) Bosch Power Tools
Page 17

OBJ_BUCH-710-004.book Page 17 Tuesday, November 29, 2016 1:50 PM
연마작업 및 절단작업 시 특별 안전 경고 사항
반드시 귀하의 전동공구용으로 허용된 연마석과 이
에 해당하는 안전반만을 사용하십시오 . 전동공구용
이 아닌 연마석은 충분히 커버하기 어려울 수 있으
며 안전하지 않습니다 .
오프셋 연마석은 그 연마면이 안전반 밖으로 나오지
않도록 조립해야 합니다 . 안전반 밖으로 잘못 조립
된 연마석은 충분히 커버될 수 없습니다 .
안전반을 전동공구에 확실히 고정하고 , 최대한 안전
하게 맞추어야 합니다 . 즉 가능한 한 연마석의 최소
부분이 작업자쪽으로 향해 있어야 합니다 . 안전반은
작업자가 파편에 다치거나 혹은 실수로 연마석이나
스파크에 접하게 되어 옷에 불이 붙는 것을 방지해
줍니다 .
연마석은 추천하는 사용 분야에만 사용해야 합니다 .
예를 들어 절단석의 옆면으로 연마해서는 절대로 안
됩니다 . 절단석은 그 모서리로 소재를 깎아 내는데
사용해야 합니다 . 이러한 절단석에 측면에서 힘을 가
하게 되면 깨질 수 있습니다 .
항상 사용하려는 연마석에 맞는 적당한 크기와 모양
의 손상되지 않은 고정 플랜지를 사용해야 합니다 .
적당한 플랜지를 사용하면 연마석을 받쳐 주어 연마
석이 파손될 위험이 줄어듭니다 . 절단석용 플랜지는
연마석용 플랜지와 상이할 수 있습니다 .
크기가 큰 전동공구에 사용하여 마모된 연마석을 사
용하면 안됩니다 . 대형 전동공구용 연마석은 소형
전동공구의 고속 작업에 맞게 설계되어 있지 않으므
로 파손될 위험이 있습니다 .
절단작업 시 기타 특별 안전 경고 사항
절단석을 걸리게 하거나 과도한 힘으로 누르지 마십
시오 . 절단작업 시 지나치게 깊게 절단하지 마십시
오. 절단석의 과부하로 인해 부하가 증가되고 걸리
거나 박히기 쉬워져 , 그 결과 반동이 생기거나 절단
석이 파손될 위험이 높아집니다 .
회전하는 절단석의 앞이나 뒤쪽에 있지 마십시오 . 절
단석을 작업물에서 작업자 신체 반대 방향으로 움직
일 때 , 반동이 생기는 경우 전동공구가 회전하는 디
스크와 함께 작업자 쪽으로 직접 튕길 수 있습니다 .
절단석이 걸려 움직이지 않거나 작업을 중단하고자
할 경우 , 전동공구의 스위치를 끄고 디스크가 완전
히 정지될 때까지 가만히 들고 계십시오 . 절대로 회
전하고 있는 절단석을 작업물에서 잡아 당기려고 하
지 마십시오 . 반동이 생길 위험이 있기 때문입니다 .
걸린 원인을 찾아 해결하십시오 .
전동공구가 작업물에 있는 상태에서 다시 스위치를
켜지 마십시오 . 먼저 절단석이 최고 속도가 될 때까
지 기다린 후에 절단작업을 조심스럽게 계속하십시
오. 그렇게 하지 않으면 디스크가 걸리거나 작업물
에서 튕겨 나오거나 반동이 생길 수 있습니다 .
절단석이 박혀 반동이 생기는 위험을 줄이기 위해 판
이나 대형 작업물은 받쳐 주십시오 . 대형 작업물은
그 자체의 중량으로 인해 휠 수 있습니다 . 작업물 절
단 부위 가까이와 모서리 부위에 양쪽으로 받침대를
대어 주어야 합니다 .
특히 벽이나 기타 보이지 않는 부위에 “ 포켓 절단
작업 ” 을 할 때 조심하 십 시 오 . 가스관이나 수도관 ,
전선 혹은 기타 물체에 절단작업을 할 때 안으로 들
어간 절단석이 반동을 유발할 수 있습니다 .
샌딩작업 시 특별 안전 경고 사항
지나치게 큰 샌딩 페이퍼를 사용하지 말고 샌딩 페
이퍼 크기에 관한 제조사의 추천 내용을 준수하십시
오. 고무판보다 큰 샌딩 페이퍼는 작업자에게 상해
를 입힐 수 있고 , 샌딩 페이퍼가 걸리거나 파손되며
반동이 생길 수 있습니다 .
와이어 브러시 디스크로 작업할 때 특별 안전 경고 사항
일반적으로 사용할 때도 와이어 브러시 디스크의 와
이어가 빠질 수 있다는 것에 주의하십시오 . 와이어
에 지나치게 압력을 가하여 과부하하지 마십시오 .
빠져 날아가는 와이어가 얇은 옷이나 피부에 쉽게 침
투할 수 있습니다 .
안전반 사용을 추천할 경우 , 안전반과 와이어 브러
시가 서로 닿지 않도록 하십시오 . 와이어 휠이나 컵
브러시는 누르는 압력과 원심력으로 인해 그 직경이
확장될 수 있습니다 .
추가 안전 경고 사항
보이지 않는 배관 설비를 확인하려면 적당한 탐지기
를 사용하거나 담당 에너지 공급회사에 문의하십시
오. 전선에 접하게 되면 화재나 전기 충격을 야기할
수 있습니다 . 가스관을 손상시키면 폭발 위험이 있
습니다 . 수도관을 파손하게 되면 재산 피해를 유발
하거나 전기 충격을 야기할 수 있습니다 .
전기가 나가거나 전원 플러그를 빼어 전원 공급이 중
단된 경우 전원 스위치를 풀고 오프 위치에 놓으십
시오 .
을 방지할 수 있습니다 .
완전히 식을 때까지 연마석이나 절단석을 만지지 마
십시오 . 작업 시 매우 뜨거워지기 때문입니다 .
작업물을 잘 고정하십시오 . 고정장치나 기계 바이스
에 끼워서 작업하면 손으로 잡는 것보다 더 안전합
니다 .
제품 및 성능 소개
한국어 | 17
보안경을 착용하십시오 .
이렇게 하면 실수로 기기가 다시 작동하는 것
모든 안전수칙과 지시 사항을 상세히 읽
고 지켜야 합니다 . 다음의 안전수칙과 지
시 사항을 준수하지 않으면 화재 위험이
있으며 감전 혹은 중상을 입을 수 있습니
다.
Bosch Power Tools 1 609 92A 364 | (29.11.16)
Page 18

OBJ_BUCH-710-004.book Page 18 Tuesday, November 29, 2016 1:50 PM
18 | 한국어
규정에 따른 사용
본 전동공구는 물을 사용하지 않고 금속이나 석재에 절
단작업 , 연마작업 또는 브러싱작업을 하는데 적당합니
다.
절단석을 이용하여 절단작업을 할 경우 , 특수한 절단작
업용 안전반을 사용해야 합니다 .
석재 절단 시에는 분진 추출장치가 설치되어 있어야 합
니다 .
허용된 연마용구를 사용하면 전동공구로 샌딩작업도 할
수 있습니다 .
제품의 주요 명칭
제품의 주요 명칭에 표기되어 있는 번호는 기기 그림이
나와있는 면을 참고하십시오 .
1 스핀들 잠금 버튼
2 전원 스위치
3 육각 키
4 속도 조절 다이얼 (GWS 6-100 E)
5 보조 손잡이 ( 절연된 손잡이 부위 )
6 연삭 스핀들
7 안전반용 잠금 나사
8 연마작업용 안전반
9 수용 플랜지
10 연마석*
11 클램핑 너트
12 카바이드 그라인딩 헤드*
13 절단작업용 안전반*
14 절단 디스크*
15 손 보호대*
16 샌딩 페이퍼용 고무판*
17 샌딩 페이퍼*
18 원형 너트*
19 와이어 컵 브러시*
20 절단 가이드가 있는 흡입 후드*
21 다이아몬드 절단석*
22 손잡이 ( 절연된 손잡이 부위 )
23 연삭 스핀들 M 14 용 콤비 스패너*
24 연삭 스핀들 M 10 용 콤비 스패너*
*도면이나 설명서에 나와있는 액세서리는 표준 공급부품에 속하
지 않습니다 . 전체 액세서리는 저희 액세서리 프로그램을 참고
하십시오 .
제품 사양
앵글 그라인더 GWS 6-100 GWS 6-100 E
제품 번호
소비 전력
출력
정격 속도
속도 설정 범위
연마석 직경 , 최대
연삭 스핀들 나사
연삭 스핀들의 최대 나사 길이
속도 설정
EPTA 공정 01:2014 에 따른 중량
안전 등급
자료는 정격 전압 [U] 230 V 를 기준으로 한 것입니다 . 전압이 낮거나 각국의 특수한 모델에 따라 달라질 수 있습니다 .
0 601 375 0.. 0 601 375 7..
W670670
W400400
rpm 11000 11 000
rpm - 2800 - 11000
mm 100 100
M 10 M 10
mm 17 17
-
kg 1.8 1.8
/II /II
조립
연마작업용 안전반
안전반 8 을 스핀들 넥에 끼웁니
안전장치 조립하기
전동공구를 보수 정비하기 전에 반드시 콘센트에서
전원 플러그를 빼십시오 .
다 . 작업 과정에 필요한 위치로
안전반 8 을 조절합니다 . 육각
키 3 으로 잠금 나사 7 을 조여
안전반 8 을 고정하십시오 .
주의: 기기가 작동 중에 연마석이 깨지거나 안전반이나
전동공구에 있는 홀더 장치가 손상된 경우 전동공구를
즉시 고객 서비스 센터에 보내야 합니다 ( 주소는 “ 보
쉬 AS 및 고객 상담 ” 참조 ).
1 609 92A 364 | (29.11.16) Bosch Power Tools
Page 19

OBJ_BUCH-710-004.book Page 19 Tuesday, November 29, 2016 1:50 PM
안전반 8 을 작업자에게 스파크가 튀지 않도록 맞춥
니다 .
주의 : 안전반 8 에 있는 눈금치에 따라 전동공구 모델
에 맞는 안전반만을 조립할 수 있게 되어 있습니다 .
절단작업용 안전반
절단석을 이용한 절단 시에는 항상 절단작업용 안전
반 13 을 사용해야 합니다 .
석재 절단 시에는 분진 추출장치가 설치되어 있어야
합니다 .
절단작업용 안전반 13 의 조립은 연마작업용 안전반 8
을 조립하는 것과 같습니다 .
절단 가이드가 있는 흡입 후드
절단 가이드가 있는 흡입 후드 20 의 조립은 연마작업
용 안전반 8 을 조립하는 것과 같습니다 .
보조 손잡이
반드시 보조 손잡이 5 를 장착하여 전동공구를 사용
하십시오 .
보조 손잡이 5 는 작업 방법에 따라 기어 헤드의 오른
쪽이나 왼쪽에 장착할 수 있습니다 .
손 보호대
고무판 16이나 컵 브러시 / 디스크 브러시/ 팬 그라인
딩 디스크를 사용하여 작업할 경우 항상 손 보호대
15 를 조립하여 사용해야 합니다 .
손 보호대 15 를 보조 손잡이 5 와 함께 고정시킵니다 .
연마공구 조립하기
전동공구를 보수 정비하기 전에 반드시 콘센트에서
전원 플러그를 빼십시오 .
완전히 식을 때까지 연마석이나 절단석을 만지지 마
십시오 . 작업 시 매우 뜨거워지기 때문입니다 .
연삭 스핀들 6 의 기타 조립할 부품을 모두 깨끗이 닦
습니다 .
연마공구를 조이거나 풀려면 , 스핀들 잠금 버튼 1 을 눌
러 연삭 스핀들을 잠급니다 .
스핀들 잠금 버튼은 연삭 스핀들이 완전히 정지된 상
태에서만 작동하십시오 . 그렇게 하지 않으면 전동공
구가 손상될 수 있습니다 .
연마석 / 절단석
연마공구의 치수를 확인하십시오 . 구멍의 지름은 수용
플랜지에 정확히 맞아야 합니다 . 변형 조각이나 어댑터
를 사용해서는 안됩니다 .
다이아몬드 절단석을 사용할 경우 , 다이아몬드 절단석
의 회전 방향 화살표와 전동공구의 회전 방향이 일치해
야 하는 것에 주의하십시오 ( 기어 헤드의 회전 방향 화
살표 참조 ).
조립 순서는 도면에 나와있습니다 .
연마석 / 절단석을 고정하려면 클램핑 너트 11 을 끼우
고 양구 스패너로 조입니다 .
연마석을 조립하고 나서 전원 스위치를 켜기 전에 연
마석이 제대로 조립되어 있는지 장애없이 잘 돌아가
는지 확인하십시오 . 연마석이 안전반이나 다른 부위
에 닿지 않도록 해야 합니다 .
연삭 스핀들 M 10 용 수용 플랜지 : 수용 플랜지는 양
면으로 사용할 수 있습니다 .
팬 그라인딩 디스크
팬 그라인딩 디스크를 사용하여 작업할 경우 반드시
손 보호대 15 를 조립해야 합니다 .
샌딩 페이퍼용 고무판
고무판 16 을 사용하여 작업할 경우 반드시 손 보호
대 15 를 조립해야 합니다 .
조립 순서는 도면에 나와있습니다 .
원형 너트 18 에 끼우고 투핀 스패너로 조입니다 .
컵 브러시 / 디스크 브러시
컵 브러시나 디스크 브러시를 사용하여 작업할 경우
반드시 손 보호대 15 를 조립해야 합니다 .
조립 순서는 도면에 나와있습니다 .
컵 브러시 / 디스크 브러시는 연삭 스핀들 나사산 끝에
있는 연삭 스핀들 플랜지에 바짝 닿도록 연삭 스핀들에
꽉 조여야 합니다 . 컵 브러시와 디스크 브러시는 양구
스패너로 조입니다 .
허용 연마공구
이 사용 설명서에 나와 있는 모든 연마공구를 사용할
수 있습니다 .
사용된 연마공구의 허용 속도 [min
[m/s] 는 적어도 다음의 도표에 나와 있는 수치와 일치
해야 합니다 .
그러므로 항상 사용하는 연마공구의 레벨에 나와 있는
허용 속도와 원주 속도를 확인하십시오 .
D
b
한국어 | 19
-1
] 와 원주 속도
max.
[mm]
D b d [min-1] [m/s]
100 6 16.0 11000 80
100 - - 11 000 80
[mm]
d
70 30 M 10 11000 45
D
Bosch Power Tools 1 609 92A 364 | (29.11.16)
Page 20

OBJ_BUCH-710-004.book Page 20 Tuesday, November 29, 2016 1:50 PM
20 | 한국어
기어 헤드 돌리기
전동공구를 보수 정비하기 전에 반드시 콘센트에서
전원 플러그를 빼십시오 .
기기의 헤드는 90°
각도로 돌릴 수 있습니
다 . 이렇게 함으로서
특수한 작업을 할 경우
전원 스위치를 기기 조
작이 수월한 위치로 움
직일 수 있습니다 , 예
를 들면 왼손잡이 작업
자에게 유리합니다 .
4 개의 나사를 완전히
풀어 줍니다 . 기어의
헤드를 조심스럽게 하
우징에서 빼지 않은 상태에서 새로운 위치로 돌립니다 .
4 개의 나사를 다시 조입니다 .
분진 및 톱밥 추출장치
납 성분을 포함한 페인트나 몇몇 나무 종류 , 또는 광
물 성분 그리고 철과 같은 재료의 분진은 건강을 해
칠 수 있습니다 . 이 분진을 만지거나 호흡할 경우 ,
사용자나 주변 사람들은 알레르기 반응이나 호흡기
장애를 일으킬 수 있습니다 .
떡갈나무나 너도밤나무와 같은 특정한 분진은 암을
유발시키며 , 특히 목재 처리용으로 사용되는 부가 원
료 ( 크로마트 , 목재 보호제 ) 와 혼합되면 암을 유발
시키게 됩니다 . 석면 성분을 포함한 재료는 오직 전
문가가 작업을 해야 합니다 .
– 가능하면 작업물 소재에 적당한 분진 추출장치를
사용하십시오 .
– 작업장의 통풍이 잘 되도록 하십시오 .
– 필터등급 P2 가 장착된 호흡 마스크를 사용하십시
오.
작업용 재료에 관해 국가가 지정한 규정을 고려 하
십시오 .
작업장에 분진이 쌓이지 않도록 하십시오 . 분진이 쉽
게 발화할 수 있습니다 .
작동
기계 시동
공공 배전 전압에 주의 ! 공급되는 전원의 전압은 전
동공구의 명판에 표기된 전압과 동일해야 합니다 .
전동공구를 이동 발전기에 연결하여 작동할 경우 이 장
치의 예비 출력이 충분하지 않거나 적당한 시동 전류
증폭 기능이 있는 전압 제어장치가 없으면 성능이 감소
하거나 스위치를 켤 때 이상한 현상이 나타날 수 있습
니다 .
특히 사용하는 발전기의 전원 전압과 주파수 등이 적당
한 것인지 확인해 보십시오 .
전원 스위치 작동
전동공구를 작동하려면 전원 스위치 2 를 앞쪽으로 밉
니다 .
전원 스위치 2 를 잠금 상태로 유지하려면 전원 스위치
2 의 앞 쪽 을 걸리는 소 리 가 날 때까 지 아 래 로 누릅니 다 .
전동공구의 스위치를 끄려면 전원 스위치 2 를 놓거나
잠금 상태인 경우에는 전원 스위치 2 를 뒷쪽을 잠깐
아래로 눌렀다가 다시 놓습니다 .
기기를 사용하기 전에 연마공구가 제대로 조립되었
는지 또는 아무런 장애없이 잘 돌아가는지 확인하십
시오 . 최소한 1 분간 무부하 상태로 시험 가동을 실
시하십시오 . 손상되었거나 원형이 아닌 진동하는 연
마공구는 사용하지 마십시오 . 손상된 연마공구는 파
손되어 이로 인해 상해를 입을 수 있습니다 .
에너지를 절약하기 위해 전동공구를 사용할 경우에만
스위치를 켜십시오 .
속도 설정 (GWS 6-100 E)
속도 조절 다이얼 4 으로 작업 중에도 필요한 속도를 선택할 수 있습니다 .
다음의 도표에 나온 자료는 권장 수치입니다 .
소재 사용 분야 연마공구 다이얼 위치
금속 페인트 제거 샌딩 페이퍼 2 - 3
목재 , 금속 브러싱작업 , 녹제거 작업 컵 브러시 , 샌딩 페이퍼 3
금속 , 석재 연마작업 연마석 4 - 6
금속 연마작업 연마석
석재 절단작업 절단석과 절단 가이드
( 석재 절단작업 시 반드시 절단 가이드를
사용해야 합니다 )
1 609 92A 364 | (29.11.16) Bosch Power Tools
6
6
Page 21

OBJ_BUCH-710-004.book Page 21 Tuesday, November 29, 2016 1:50 PM
사용방법
건물 벽면에 홈을 내는 작업을 할 때 주의하십시오
(“ 구조에 관한 정보” 참조 ).
작업물이 자체의 중량으로 위치가 안정되어 있지 않
으면 고정시켜야 합니다 .
전동공구에 무리하게 힘을 가하면 자동으로 작동이
중단됩니다 .
강한 부하 상태로 작업한 후에 전동공구를 몇 분간
무부하 상태로 돌아가게 하여 기기를 식혀 주십시오 .
완전히 식을 때까지 연마석이나 절단석을 만지지 마
십시오 . 작업 시 매우 뜨거워지기 때문입니다 .
전동공구를 그라인더 스탠드와 함께 사용하지 마십
시오 .
연마작업
절대로 절단석을 연마용으로 사용해서는 안됩니다 .
연마작업 시 접근 각도를 30
과가 아주 좋습니다. 전동공구를 적당한 힘으로 앞뒤로
움직여야만 작업물이 과열되지 않고 탈색되지 않으며
패임이 생기지 않습니다 .
팬 그라인딩 디스크
팬 그라인딩 디스크 ( 별매 액세서리 ) 를 사용하면 또한
곡면이나 측면에도 작업할 수 있습니다 .
팬 그라인딩 디스크는 기존의 연마석에 비해 훨씬 수명
이 길고 소음이 적으며 연마 온도도 낮습니다 .
금속 절단작업
절단석을 이용한 절단 시에는 항상 절단작업용 안전
반 13 를 사용해야 합니다 .
절단작업을 할 때 작업하려는 소재에 맞게 적당한 힘으
로 앞으로 밀어 작업하십시오. 절단석에 무리하게 힘을
가하지 말고 비스듬히 기울이거나 진동해서는 안됩니
다.
잔여 회전을 하고 있는 절단석을 측면에서 압력을 가해
정지해서는 안됩니다 .
° 에서 40° 로 하면 작업 결
전동공구는 항상 회전
반대 방향으로 작업해
야 합니다 . 그렇지 않
으면 절단선에서 저절
로 벗어날 위험이 있
습니다 .
석재 절단작업
석재 절단 시에는 분진 추출장치가 설치되어 있어야
합니다 .
분진 마스크를 착용하십시오 .
이 전동공구는 건식 절단 / 건식 연마를 하는 데에만
사용해야 합니다 .
석재를 절단할 경우 다이아몬드 절단석을 사용하는 것
이 좋습니다 .
절단 가이드가 있는 흡입 후드 20 을 사용할 경우 석재
분진 처리용으로 허용된 진공 청소기만을 사용해야 합
니다 . 보쉬사는 적합한 진공 청소기를 공급합니다 .
자갈이 많이 들어있는 콘크리트 등 특히 경도가 높은
작업 소재에 절단작업을 할 때 다이아몬드 절단석이 과
열되어 손상될 수 있습니다. 이때 다이아몬드 절단석이
회전하며 스파크가 생깁니다 .
이러한 경우 절단작업을 중지하고 다이아몬드 절단석을
무부하 상태로 최고 속도로 잠시 공회전 시키며 냉각시
킵니다 .
작업 속도가 현저하게 늦어지고 회전하는 스파크가 생
기면 다이아몬드 절단석이 무디어진 것을 의미합니다 .
이 경우 석회질 사암 등의 연마제에 잠깐 갈아주면 다
시 날카로워 집니다 .
구조에 관한 정보
들보 벽에 홈을 파는 작업을 할 때 DIN 규격 1053/1
항이나 각국의 규정에 맞게 작업해야 합니다 .
이 규정은 반드시 준수해야 합니다 . 작업을 시작하기
전에 담당 건축가나 건설 책임자와 상의하십시오 .
보수 정비 및 서비스
한국어 | 21
전동공구의 스위치를
켜고 절단 가이드의
앞 부분을 작업물에
댑니다 . 전동공구를
작업하려는 소재에 맞
게 적당한 힘으로 앞
으로 밀어 작업하십시
오.
보수 정비 및 유지
전동공구를 보수 정비하기 전에 반드시 콘센트에서
전원 플러그를 빼십시오 .
안전하고 올바른 작동을 위하여 전동공구와 전동공
구의 통풍구를 항상 깨끗이 하십시오 .
측면과 사각강을 절단할 때 가장 작은 모서리에서 시작
하는게 가장 좋습니다 .
Bosch Power Tools 1 609 92A 364 | (29.11.16)
Page 22

OBJ_BUCH-710-004.book Page 22 Tuesday, November 29, 2016 1:50 PM
22 | 한국어
열악한 환경에서 작업할 경우 가능한 한 추출장치를
항상 사용하도록 하십시오 . 통풍구를 자주 청소하고
누전 차단기 (PRCD) 에 연결하십시오. 금속 소재에
작업할 경우 전도성 분진이 전동공구 안에 쌓이게 되
면 전동공구의 보호 절연장치 기능에 장애가 생길 수
있습니다 .
액세서리를 조심스럽게 취급하고 보관하십시오 .
연결 코드를 교환해야 할 경우 안전을 기하기 위해 보
쉬사나 보쉬 지정 전동공구 서비스 센터에 맡겨야 합니
다.
보쉬 AS 및 고객 상담
보쉬는 귀하의 제품 및 수리에 관한 문의를 받고 있습
니다 .
AS 센터 정보 및 제품에 대 한 고객 상담은 하기 고객
콜센터 및 이메일 상담을 이용해주시기 바랍니다 .
고객 콜센터 : 080-955-0909
이메일 상담 :
Bosch-pt.hotline@kr.bosch.com
문의나 대체 부품 주문 시에는 반드시 제품 네임 플레
이트에 있는 10 자리의 부품번호를 알려 주십시오 .
Bosch Korea, RBKR
Mechanics and Electronics Ltd.
PT/SAX-ASA
298 Bojeong-dong Giheung-gu
Yongin-si, Gyeonggi-do, 446-913
Republic of Korea
080-955-0909
처리
기기와 액세서리 및 포장 등은 친환경적인 방법으로 재
활용할 수 있도록 분류하십시오 .
전동공구를 가정용 쓰레기로 처리하지 마십시오 !
위 사항은 사전 예고 없이 변경될 수도 있습니다 .
1 609 92A 364 | (29.11.16) Bosch Power Tools
Page 23

OBJ_BUCH-710-004.book Page 23 Tuesday, November 29, 2016 1:50 PM
standard
standard Metal
| 23
Inox
Bosch Power Tools 1 609 92A 364 | (29.11.16)
Page 24

2 605 703 030
2 603 340 018
1 607 950 040
1 619 P06 556
1 619 P06 546Ø 100 mm
1 619 P06 549Ø 100 mm
1 602 025 024
1 601 329 013
2 602 025 171
1 601 329 013
1 600 793 007
1 619 P06 514Ø 100/115/125 mm
OBJ_BUCH-710-004.book Page 24 Tuesday, November 29, 2016 1:50 PM
24 |
1 609 92A 364 | (29.11.16) Bosch Power Tools
 Loading...