


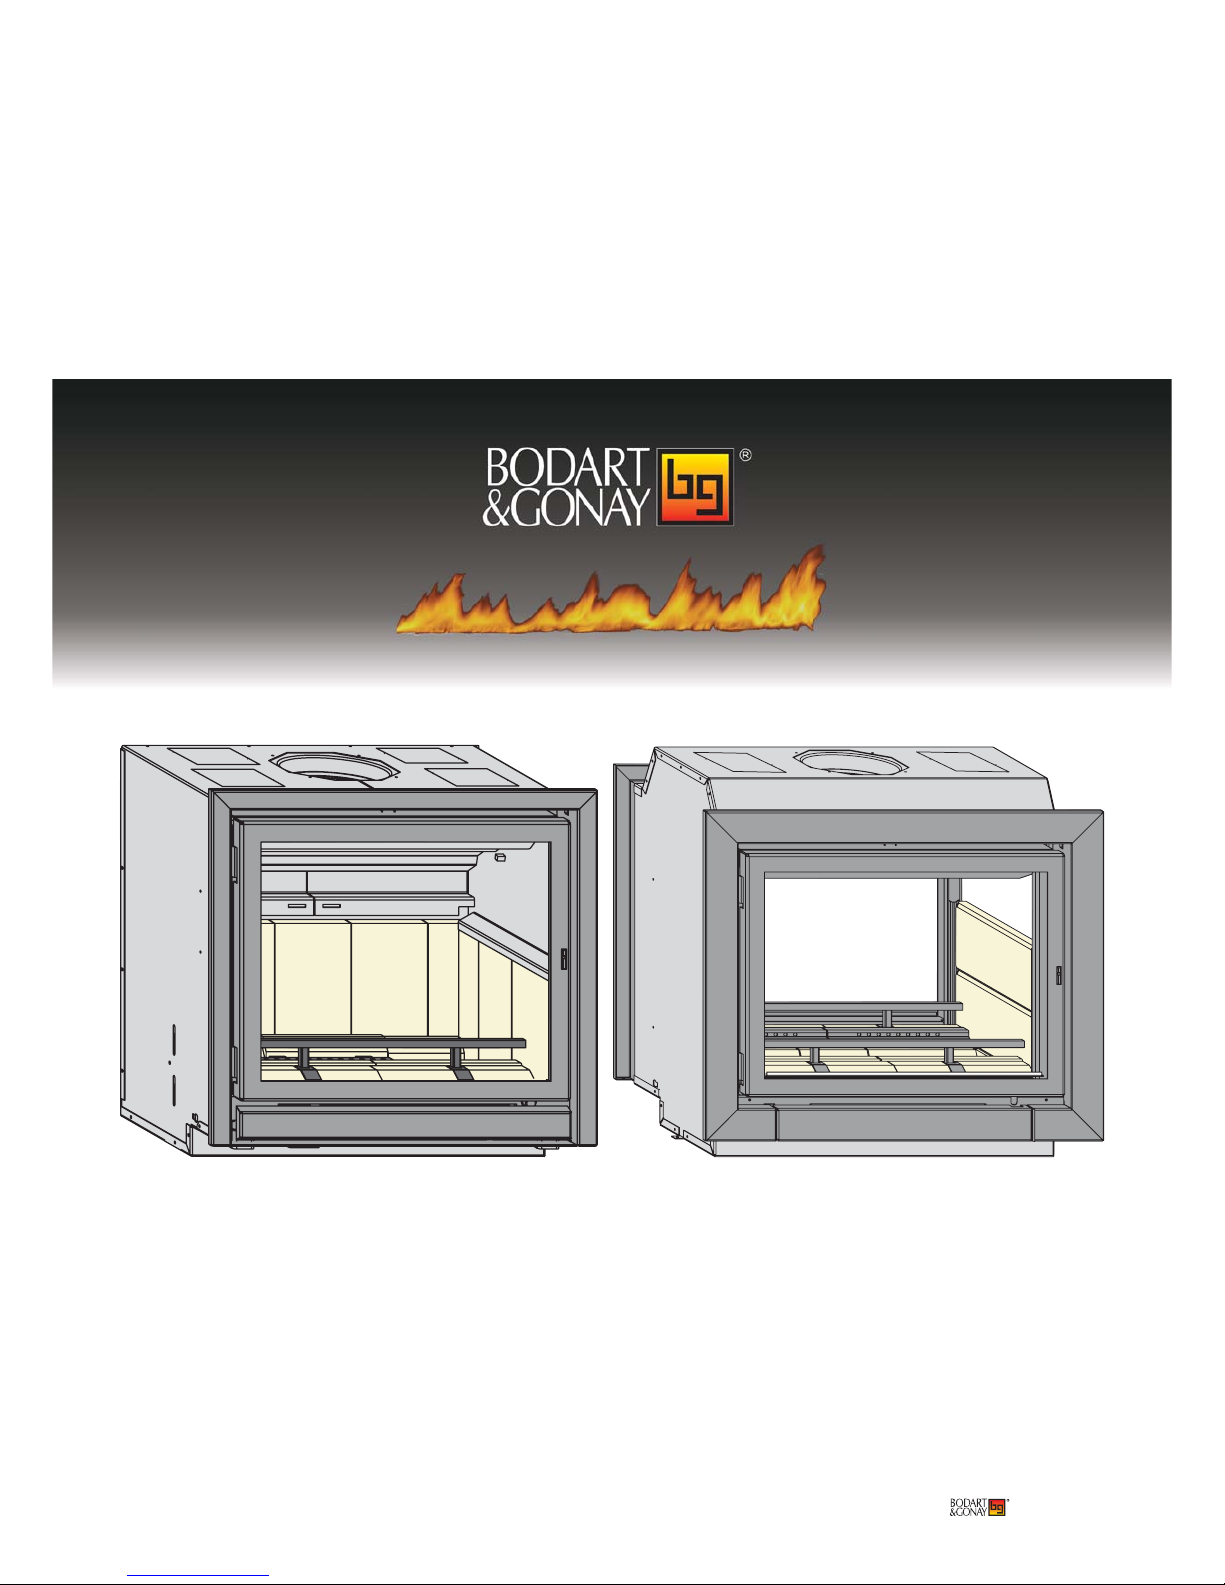
Optifire OPTI700
Bodart & Gonay Optifire OPTI700, Optifire OPTI760, Optifire OPTI760DF Instructions For Use And Maintenance Manual
Optifi re 1
01/09
Optifi re
07DHOPFV2
Instructions for use
and maintenance
Caution: Remove the instructions from the fi replace and give them
to the client, along with the necessary instructions (explanations and
demonstrations).
2 Opti-
For the chimney sweep, tick the correct position of the baffl es (see 1.5).

Optifi re 3
MEMO
(to be completed by the installer)
* APPLIANCE TYPE OPTIFIRE
*REFERENCE:
OPTI700 :
OPTI760 :
OPTI760DF:
* DATE OF PURCHASE: ..... / ..... / .....
* SERIAL NUMBER:
(visible on the fi replace’s identifi cation label, see
page 4 no.11 Description of elements)
…………………………………………………
*DISTRIBUTOR:
Name .........................................................
Street / No. ...................................................
Town ...............................................
Postcode .............................................
Tel. ...........................................................
Note:
Your supplier is the specialist chosen by BODART & GONAY to represent your region.
For your safety and satisfaction, we recommend that you have them carry out your installation
All local and national regulations and European standards must be observed when installing and using the
appliance.
If, however, you wish to carry out the installation yourself, to avoid any surprises, we recommend that you:
- consult the terms of our guarantee agreement,
- seek advice from your supplier.
Dear Client,
We congratulate you on the purchase of your Bodart & Gonay fi replace.
We are happy to inform you that you have chosen a quality product wholly designed and manufactured by our
company, using the most up-to-date production techniques.
To get the best use out of your appliance, we strongly recommend that you read these instructions carefully
and keep them safe.
Also keep your proof of purchase safe, as it will be used to determine the guarantee period.
We wish you lots of pleasure and warmth around your Bodart & Gonay fi replace.
Customer Services.
Concerning installation, given the impossibility of covering every particular case that might arise, we will
confi ne ourselves to the most important points.

4 Opti-
OK!
CONTENTS
RECOMMENDATIONS
1. Fuel 4
2. First fi re 4
3. With each fi re 4
1. Use: 5
1.1. Description of elements 5
1.2. Opening – closing the fi replace 6
1.3. Fire behaviour 6
1.3.1. Lighting 7
1.3.2. Ideal rate 7
1.3.3. Reduced rate 8
1.4. Operating with coal (occasional) 8
1.5. Adjusting baffl es 9
1.6. Fans and speed variator 10
2. Maintenance: 11
2.1. Everyday maintenance 11
2.2. Annual servicing 12
3. Faults 13
4. Spare parts 14
5. Guarantee 23
RECOMMENDATIONS
1. Fuel:
This appliance burns (well dried!) wooden logs and
logs of compressed wood shavings.
Do not put too much wood in at once.
You can also use briquettes.
This appliance may not under any circumstances be
used as an incinerator!
2. First fi re:
Bakes the paint, which causes a release of fumes and odours.
Ventilate the room!
Do not touch the paint until the fi replace has cooled down, as initially it softens
before hardening for good.
3. With each fi re:
- Close the door of the ash box
- Position the grill properly depending on the fuel
- Turn on the fan (except for minimum rate)
It can also occasionally burn coal (anthracite or lean coal) of 12/22 or 20/30 grade.
It is prohibited, however, to burn coke or other fuels containing sulphur.

Optifi re 5
6
8
1
7
5
3
4
2
12
11
10
9
1. The gate: Never leave it open when the
appliance is in operation
2. The thermostat: It regulates the quantity of
primary air for combustion according to its
position. Its valve closes and opens according to
the temperature of the combustion chamber. Its
control knob is telescopic to facilitate operation.
3. The ashtray door: It gives access to the ashtray
and to the deashing arm. It must always be
closed during a fi re (otherwise the combustion
air is no longer under control and the fi re fl ares
up -> overheating of appliance).
4. The deashing arm :To use it, pull it towards you.
It is used to adapt the fi replace to the type of fuel
(left-hand position: open grill for coal; right-hand
position: closed grill for wood). Deashing is done
by moving it from right to left.
5. The ashtray: In the form of a shovel to enable
collection of ashes right at the bottom of the
appliance. Monitor the amount of ash in the
ashtray and empty it before it overfl ows.
6. Door lock and removable handle: With the
gate closed, place the removable handle in the
hole in the door latch to open and close.
7. Microswitch: A switch that automatically stops
the fan on opening the door.
8. Fireplace identifi cation label
9. Log-guard: For safety.
10. Refractory bricks or cast iron plates: a natural
material that protects the heating unit whilst
limiting variations in temperature.
11. Baffl es: Made of heat-resisting stainless steel,
they lengthen the path of fumes optimising
secondary combustion and increasing heat
transfer. They enable the fi replace to be
adapted to the draught of the chimney.
12. Inner door: These are hardwearing stainless
steel seals, to guarantee air tightness of the
door and trouble-free clearing of smoke from
the glass.
13. Distributors: They enable regular distribution
of primary air.
14. Grills: They are made of heat-resisting cast
iron, and the upper grill is operated by the
deashing arm.
1. Use:
1.1. Description of elements
6 Opti-
OK!
1
3
2
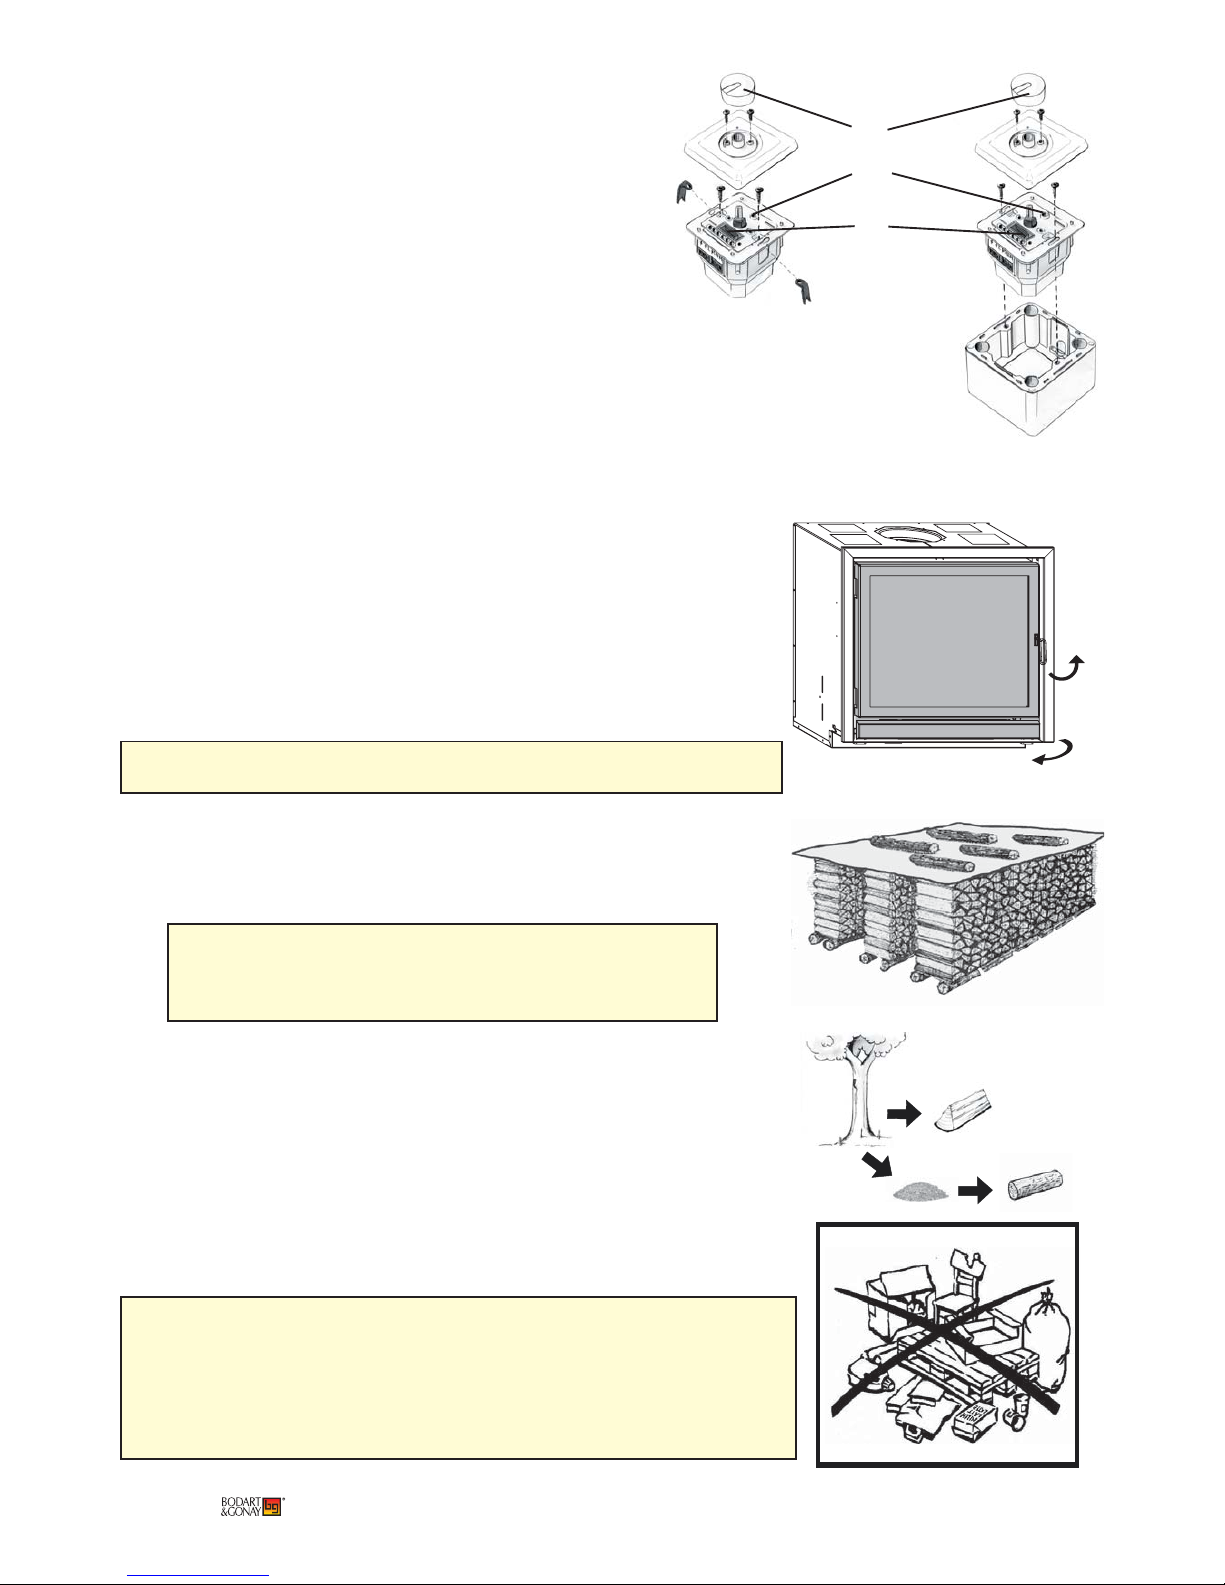
15. The variator: It enables adjustment of fan
speed.
1. Speed adjustment.
2. Minimum speed adjustment screw under the
knob
3. Fuse (Remove the knob, unscrew the plate,
remove old fuse, replace with identical fuse).
1.2. Opening – closing the door
1.3. Fire behaviour
Quality wood is:
- Dry wood that has been drying for at least 2 years in a ventilated
sheltered area.
- Use logs from broad-leaved trees in preference to those from coni-
fers, which tend to burn quickly and produce lots of soot. In order of
preference: hornbeam, oak, beech...
- It is also possible to use logs of compressed wood shavings and briquettes.
An excessive load of wood leads to:
- A reduction in yield and an increase in
wood consumption.
- A signifi cant loss of heat through the chimney.
- Premature ageing of the fi replace and chimney fl ue.
During the fi re, open the door slowly. Opening it suddenly causes a
temporary backdraft in the fi replace.
To close the door: lift the handle, press the door against the heating
unit so that the seal is gently compressed, then lower the handle until
it is locked.
It is normal for the fan to cut out when opening the door.
The quality and the drying of the wood are of prime
importance for the fi replace to operate at its best
(heater power and yield, cleanliness of glass).
Do not forget to calibrate the variator; refer to the
installation manual in options 6.

Optifi re 7
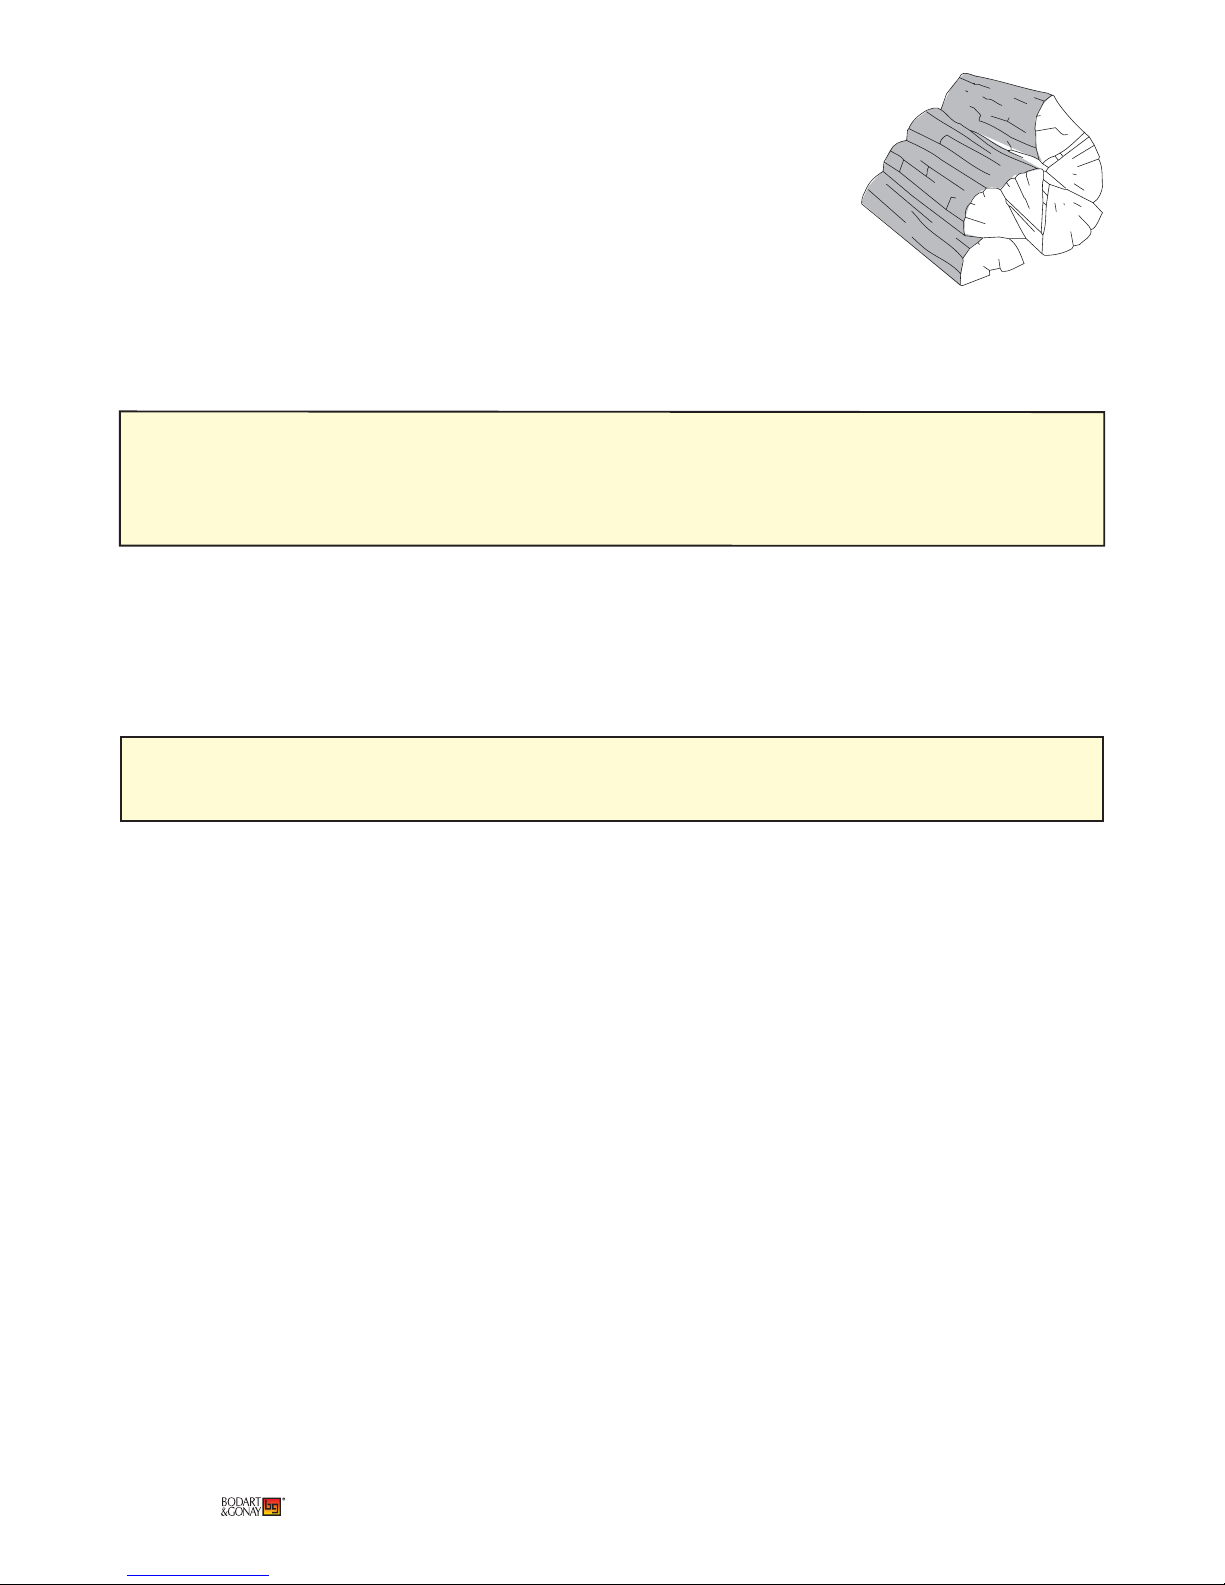
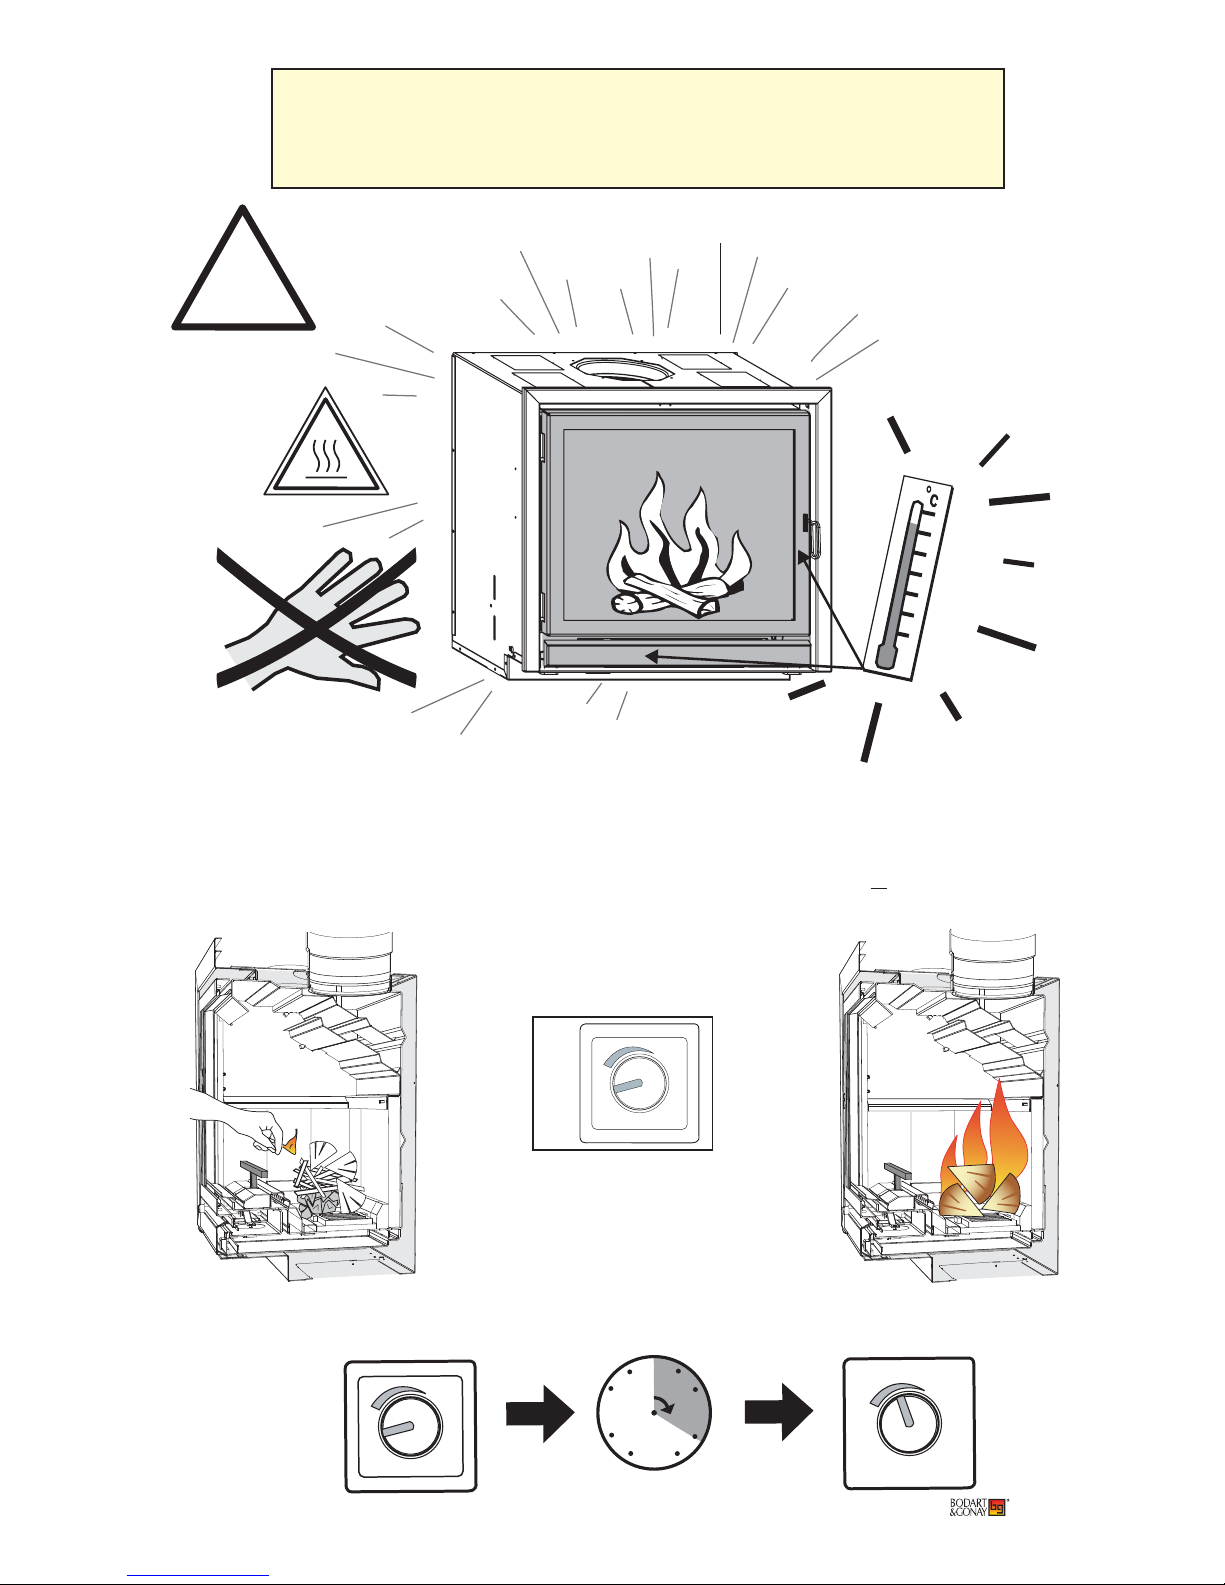
1.3.2. Ideal rate for good yield
1. Choose split logs (1or 2 depending on the quantity of heat needed)
2. Try to pile them in staggered rows to encourage gas exchanges.
3. Put the thermostat on 7-8.
4. Put the fan on maximum.
A sign of good combustion with wood, after a phase of degassing where the fi replace interior turns
black, during the actual combustion, this black tar must be burned and the fi replace interior must appear
clear, then blacken again with the following load and then be reburned once again.
1.3.1. Lighting
1. OPEN the air control to maximum: Thermostat 9.
Place the grill in open position (lever to the left).
2. Lay fi relighter or crumpled-up newspaper.
Finish off with kindling.
The use of infl ammable liquids is prohibited.
3. Set light to it.
4. To avoid condensation of fumes on the glass and to facilitate
starting the fi re: Leave the door slightly ajar to prevent the glass
sooting up, as its still too low temperature causes condensation and
deposit of particles.
5. Wait for the kindling to be well lit before LAYING the fi rst logs, choosing the smallest ones fi rst.
6. As soon as there are strong fl ames and the glass is suffi ciently warm, close the door completely.
7. When the fi re is blazing, close the grill and the ashtray and start the fan (Variator "ON" see 1.6).
8. When the appliance is hot, adjust the thermostat to the required position.
9. Adapt the fan speed to the quantity of hot air you need.
For better yield, it is best to have the thermostat on 7-8 and load log-by-log depending on the
quantity of heat you need.
This also enables you to keep the glass, bricks and chimney cleaner.
Also ensure that you close the baffl es as far as possible and ideally put in place the third baffl e
if your chimney allows it (see 1.5 Adjusting baffl es).
Maximum permitted load at maximum rate:
Model OPTI700 OPTI760 OPTI760DF
Maximum load (for
reduced rate):
9Kg 11Kg 11Kg
Recommended load
for 1 hour at maximum rate:
3,5Kg 4,5Kg 3,68Kg
8 Opti-
1.3.3. Reduced rate and long-lasting combustion
Maximum permitted load in one go at reduced rate (see previous table).
1. Keep a 3 to 5 cm bed of embers at the bottom of the fi replace.
2. Choose logs with a very wide section.
3. Position the thermostat according to the draught of your chimney. A redu-
ced rate is generally achieved between 0 and 3.
This kind of load can only be used at reduced rate, to produce a long-lasting
fi re.
Piling logs in parallel encourages a long-lasting fi re. Add more logs when there are only embers left, just
after the last fl ames die out.
Continuous use at reduced rate may, through condensation, cause an accumulation of soot in
the chimney, and thereby a risk of chimney fi re, and dirty the glass more quickly.
Avoid reduced rate during unfavourable atmospheric conditions (low pressure and high humi-
dity), as there is a risk of backdraft.
1. Position the GRILL in OPEN position.
2. OPEN the air control to maximum: THERMOSTAT 9.
3. Lay crumpled (non-glazed) paper and KINDLING in the fi replace.
4. SET LIGHT TO IT.
5. Leave the door slightly AJAR to prevent the glass sooting up, as its still too low temperature causes
condensation and deposit of particles.
6. As soon as the GLASS is suffi ciently HOT, CLOSE THE DOOR.
7. START the FAN in MEDIUM POSITION (see 1.6).
8. Put the coal WITHOUT SPREADING IT OUT on the grill.
9. When the fi re has penetrated the mass (appearance of fl ames), add a SECOND LOAD.
10. Allow the fi re to continue to progress before reducing GRADUALLY the air intake up to the position
corresponding to the calorifi c requirement.
11. ADJUSTING FAN SPEED.
Use coal only in an casual way.
Use coal (anthracite or lean coal) of 12/22 or 20/30 grade.
Fuels containing sulphur, like coke and its by-products for example, are prohibited.
1.4. OPERATING WITH COAL
NB. Do not use the appliance with coal in mild weather. As the draught and rate are reduced, combustion is liable to become incomplete.
Optifi re 9
!
MAX.
MINI.
OFF=
O
60
15
30
45
O
OFF=
ON
O
CAUTION!
When the fi replace is being used, and even if there are no more fl ames,
certain accessible parts of the appliance are at very high temperatures.
Do not leave children unsupervised near the fi replace.
1.6. Fans and speed variator
Caution ! The fan is engaged when the temperature switch is hot (+ 20 min.)
10 Opti-
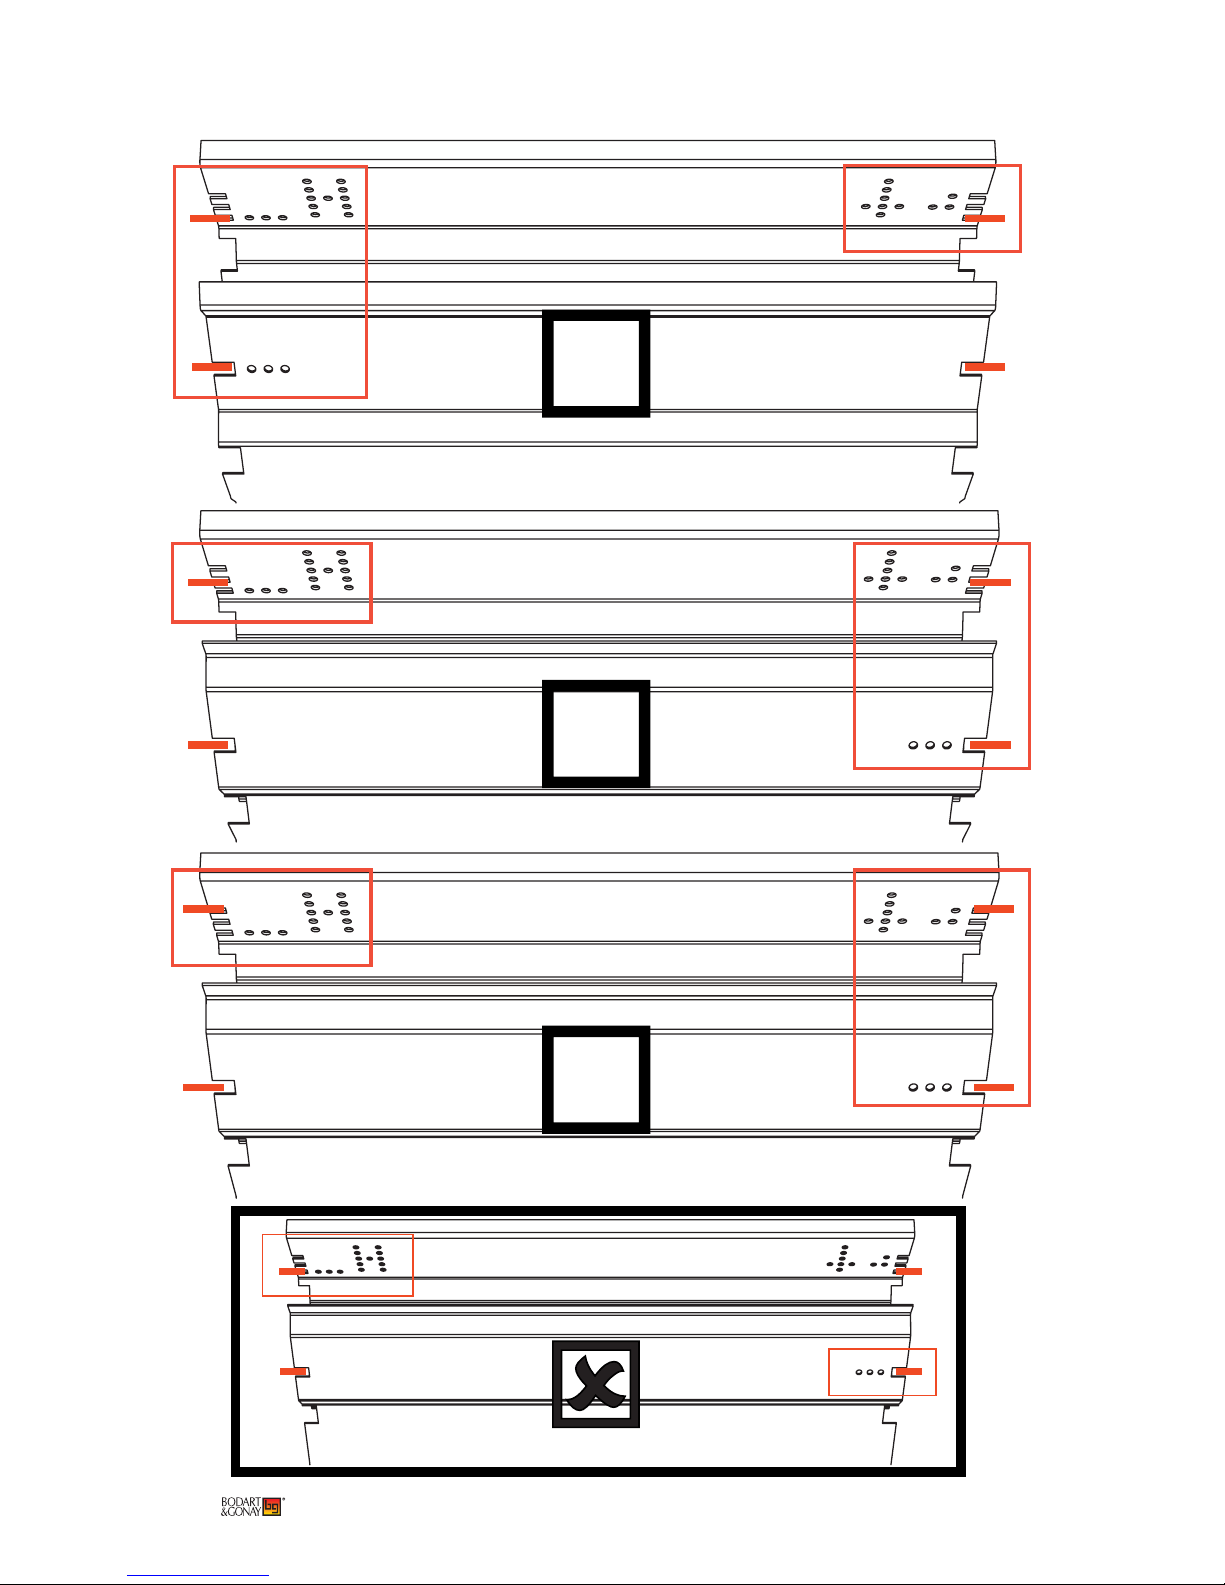
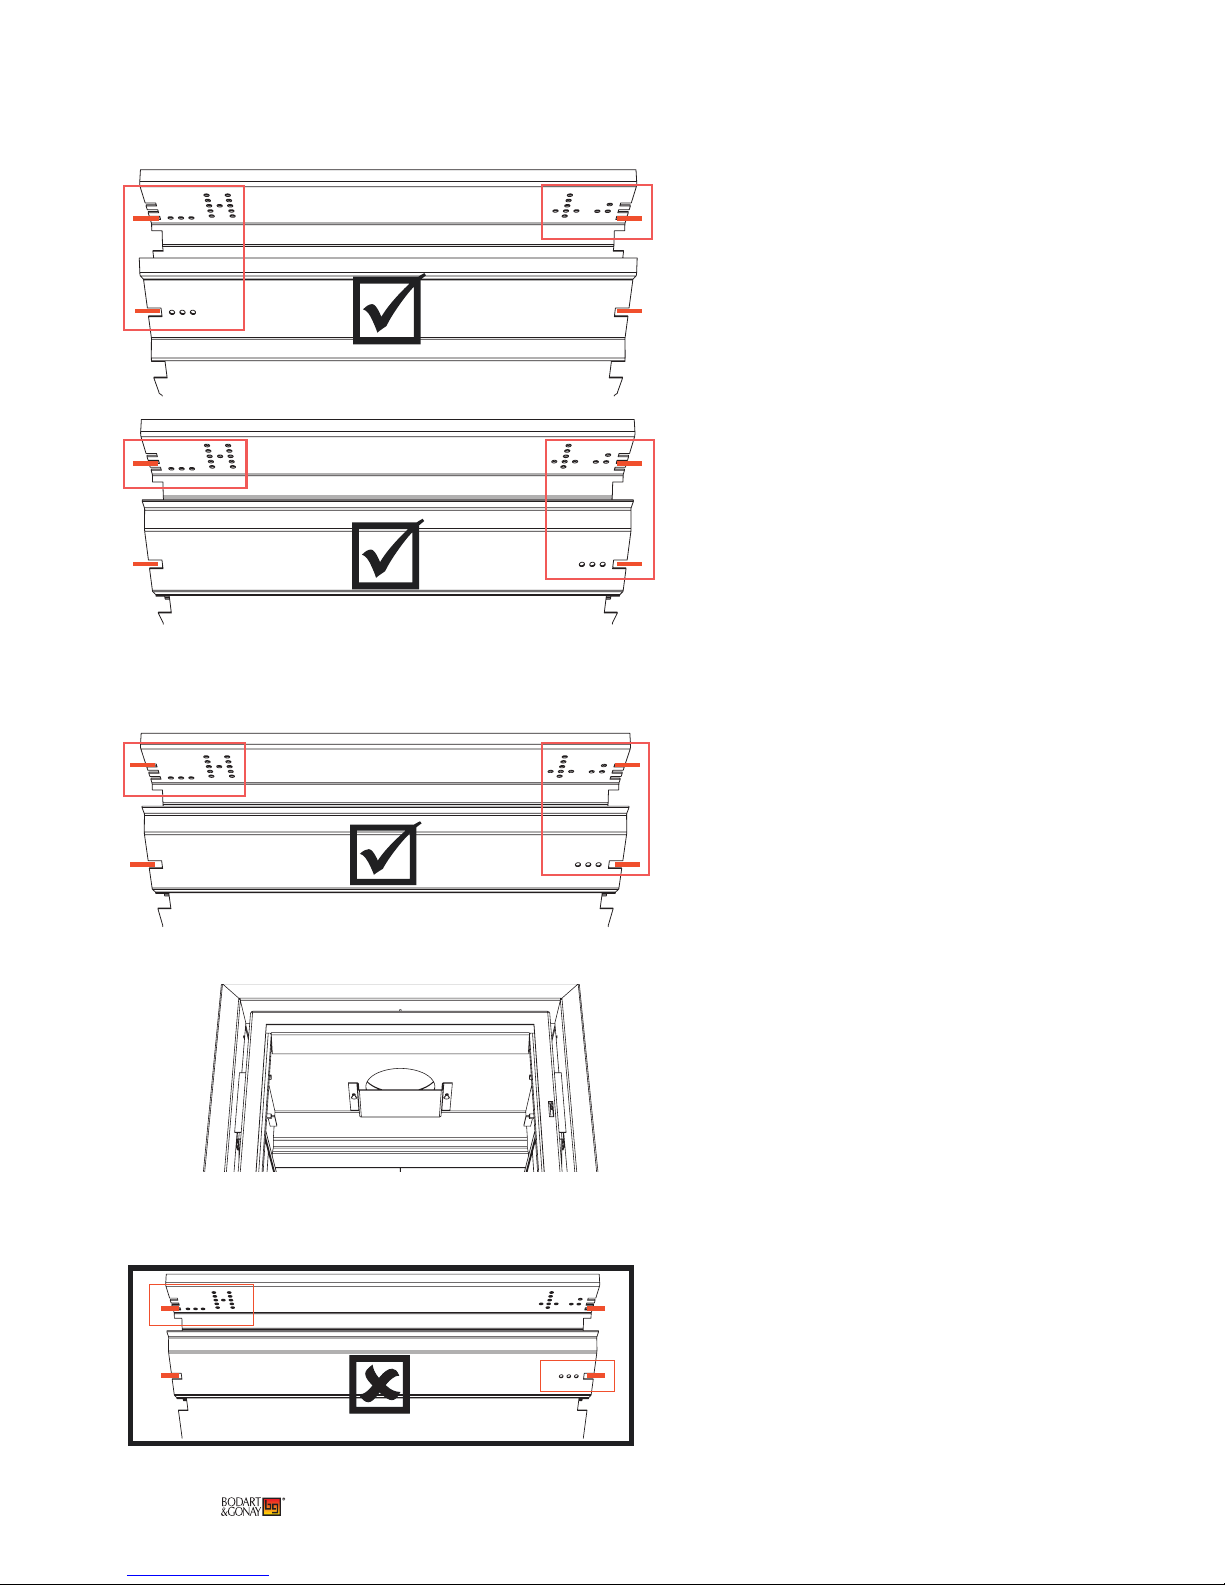
Prohibited position:
Most closed position: if there is still no
backdraft in intermediate position, close
it fully to always have the best yield the
fi replace can give in relation to the chimney.
Third baffl e: if there is still no backdraft
in closed position, you can install the
third baffl e. Again with the aim of obtaining the best yield the fi replace can give
in relation to the chimney.
Intermediate position: if no backdraft
is observed on opening, it is possible
to close the baffl es slightly to increase
yield.
Caution: lower baffl e perforations
on right, turn baffl e round.
Most open position: the fi replace is
delivered with this confi guration. It
allows easy passage of fumes.
Caution: lower baffl e perforations
on left.
1.5. Adjusting baffl es:

Optifi re 11
Most open position: the fi replace is
delivered with this confi guration. It
allows easy passage of fumes.
Intermediate position: if no backdraft
is observed on opening, it is possible
to close the baffl es slightly to increase
yield.
Most closed position: if there is still no
backdraft in intermediate position, close
it fully to always have the best yield the
fi replace can give in relation to the chimney.
Except: OPTI 760 D

12 Opti-
CAUTION!
- Do not clean the glass when it is hot.
- Spray the product* on the centre of the glass, then spread it using a cloth or absorbent paper.
- Do not use water and/or cleaning products on the painted areas.
- For stubborn marks, it is possible to use a blade for scraping ceramic hobs.
- Cleaning the glass is easier if done regularly.
*We recommend use of the cleaning product “BG Clean”, available from your dealer. “BG Clean” does not
contain caustic soda and is biodegradable.
ASHTRAY DOOR
Check the condition of the seal and if necessary replace it to ensure air tightness. Degradation of this seal
leads to poor fi re control and reduction in yield. Check the operation of the spring clips.
AIR DISTRIBUTORS
Where necessary, unblock the air inlet holes of the front distributor with a vacuum cleaner, as well as
those situated on both sides of the grill, which can easily be removed to facilitate the operation.
GRILLS
Make sure that there are no obstacles restricting their movement.
DUST FILTERS (if there are any, they are level with the air inlets)
Clean them with a vacuum cleaner and, where necessary, with water. New fi lters can be obtained form
your supplier.
THERMOSTAT
Check that it turns properly.
Your supplier is authorised to check the setting.
DOOR
Check that the stainless steel seal is airtight.
If necessary, your supplier can adjust and/or replace it. Check that both the lock and the opening safety
work properly. This is in order to ensure good yield and clean glass.
2. Maintenance:
2.1. Everyday maintenance
GLASS
To clean the glass, open the door using the following procedure:
 Loading...