

Page 1
AMBASSADOR
TM
Serial No.
®
OPERATOR, PARTS, AND
INSTALLATION MANUAL
BX7302
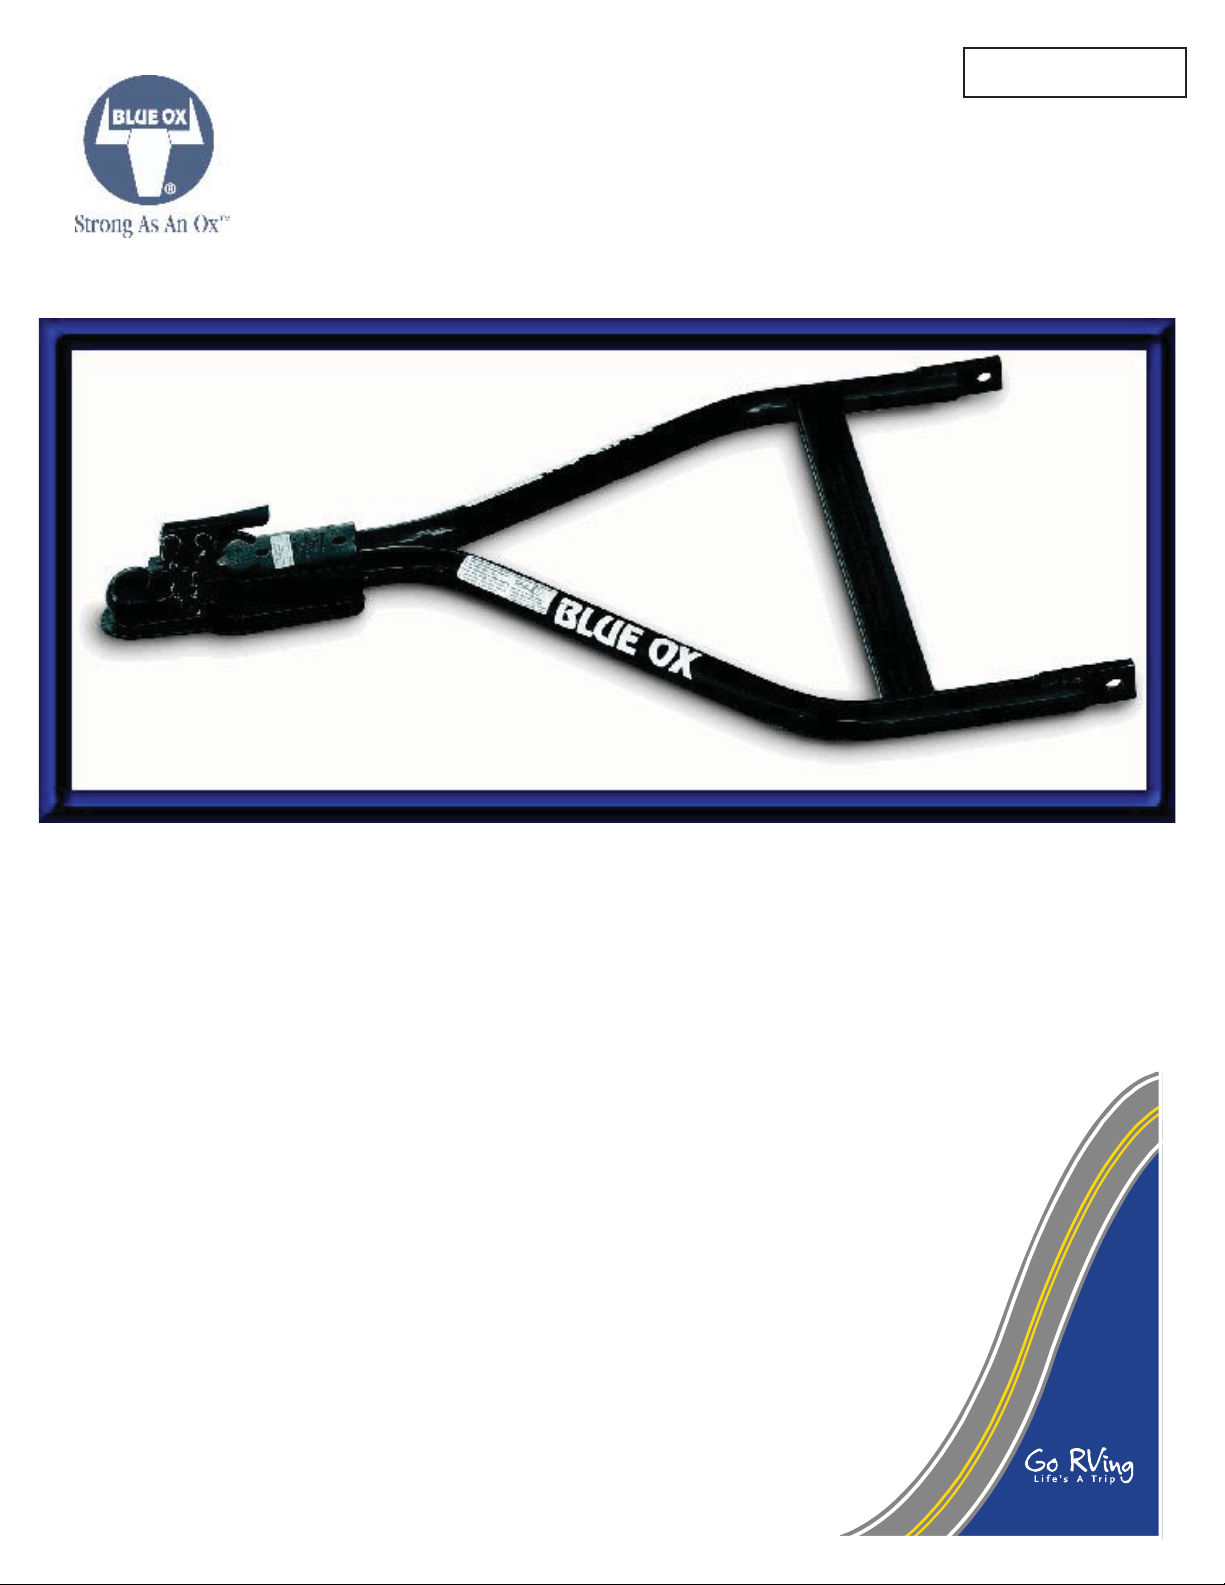
AMBASSADOR® Tow Bar
Class III (5000 lb) 2 Inch Ball Coupler
©2003, 05, 07, 08, 09 Automatic Equipment Mfg. Co.
One Mill Road, Industrial Park
Pender, Nebraska 68047
Page 2
Installation Instructions
BX7302 Ambassador Tow Bar
Tow Bar Installation
1. Hold the Tow Bar in position, with its tabs aligned inside the
baseplate tabs and insert the pins. Insert quick pins into the
baseplate pins to hold them in position.
2. Install safety cables or chains and adjust coupler.
3. Do not substitute other devices if the pins are lost.
4. DEALER OR INSTALLER: BE CERTAIN USER RECEIVES
INSTRUCTION SHEETS.
Notice
1. Blue Ox Tow Bars are designed for the coupler to be parallel
to the ground when it is attached to the towed and towing
vehicles. If the Tow Bar coupler is at an angle, damage or
accident may occur.
2. Blue Ox Tow Bars are designed to tow manual transmission
cars or automatics equipped with a transmission pump, drive
shaft disconnect or half shaft disconnect.
3. The transmission should be placed in neutral to tow. (Refer
to your vehicle's owners manual for details)
4. Unlock the steering wheel to allow the front wheels of the
towed vehicle to “track”.
5. Be sure front end of the car being towed is properly aligned.
6. The use of safety cables or chains is REQUIRED BY LAW.
Blue Ox Model BX8805 (5ft) or BX8806 (6ft) Safety Cables
are recommended. The shorter BX8805 is normally best.
7. Adjust the coupler for proper fi t to the ball (see coupler fi t
adjustment). For added security, place a lock, pin or bolt
through the hole provided in the coupler locking lever.
8. Check clearance between vehicles in while turning.
9. Most states require rear lighting on the towed car. A BX8869,
BX8811 or BX8847 Wiring Kit is recommended.
10. Prior to a towing trip, check to be sure all towing accessories
and attachment points are secure. Check for cracked
welds and loose bolts. This is important on all occasions
but particularly on a new installation, when they should be
checked just prior to initial towing and again after 100-200
miles of towing.
11. Do Not Back Up when towing. Backing up may damage the
Tow Bar assembly or the towed car’s chassis.
12. Avoid sharp turns and rough terrain. Check installation after
an unusual event and periodically on long trips.
13. Do not use towed vehicle for storing luggage, etc.; you may
exceed the towing capacity of the Tow Bar.
WARNING: Ensure that your towing vehicle is of adequate
size to properly control your towed vehicle. The weight and
braking capacity should be large enough to handle both
vehicles in an emergency situation. Check your towing
vehicle manufacturers recommendations for towing, hitch
load, and braking capacities. The hitch, ball, motorhome
chassis, and safety cables (each individual cable) need to be
rated at a minimum for the weight of the vehicle being towed.
SAFETY CABLE INSTALLATION
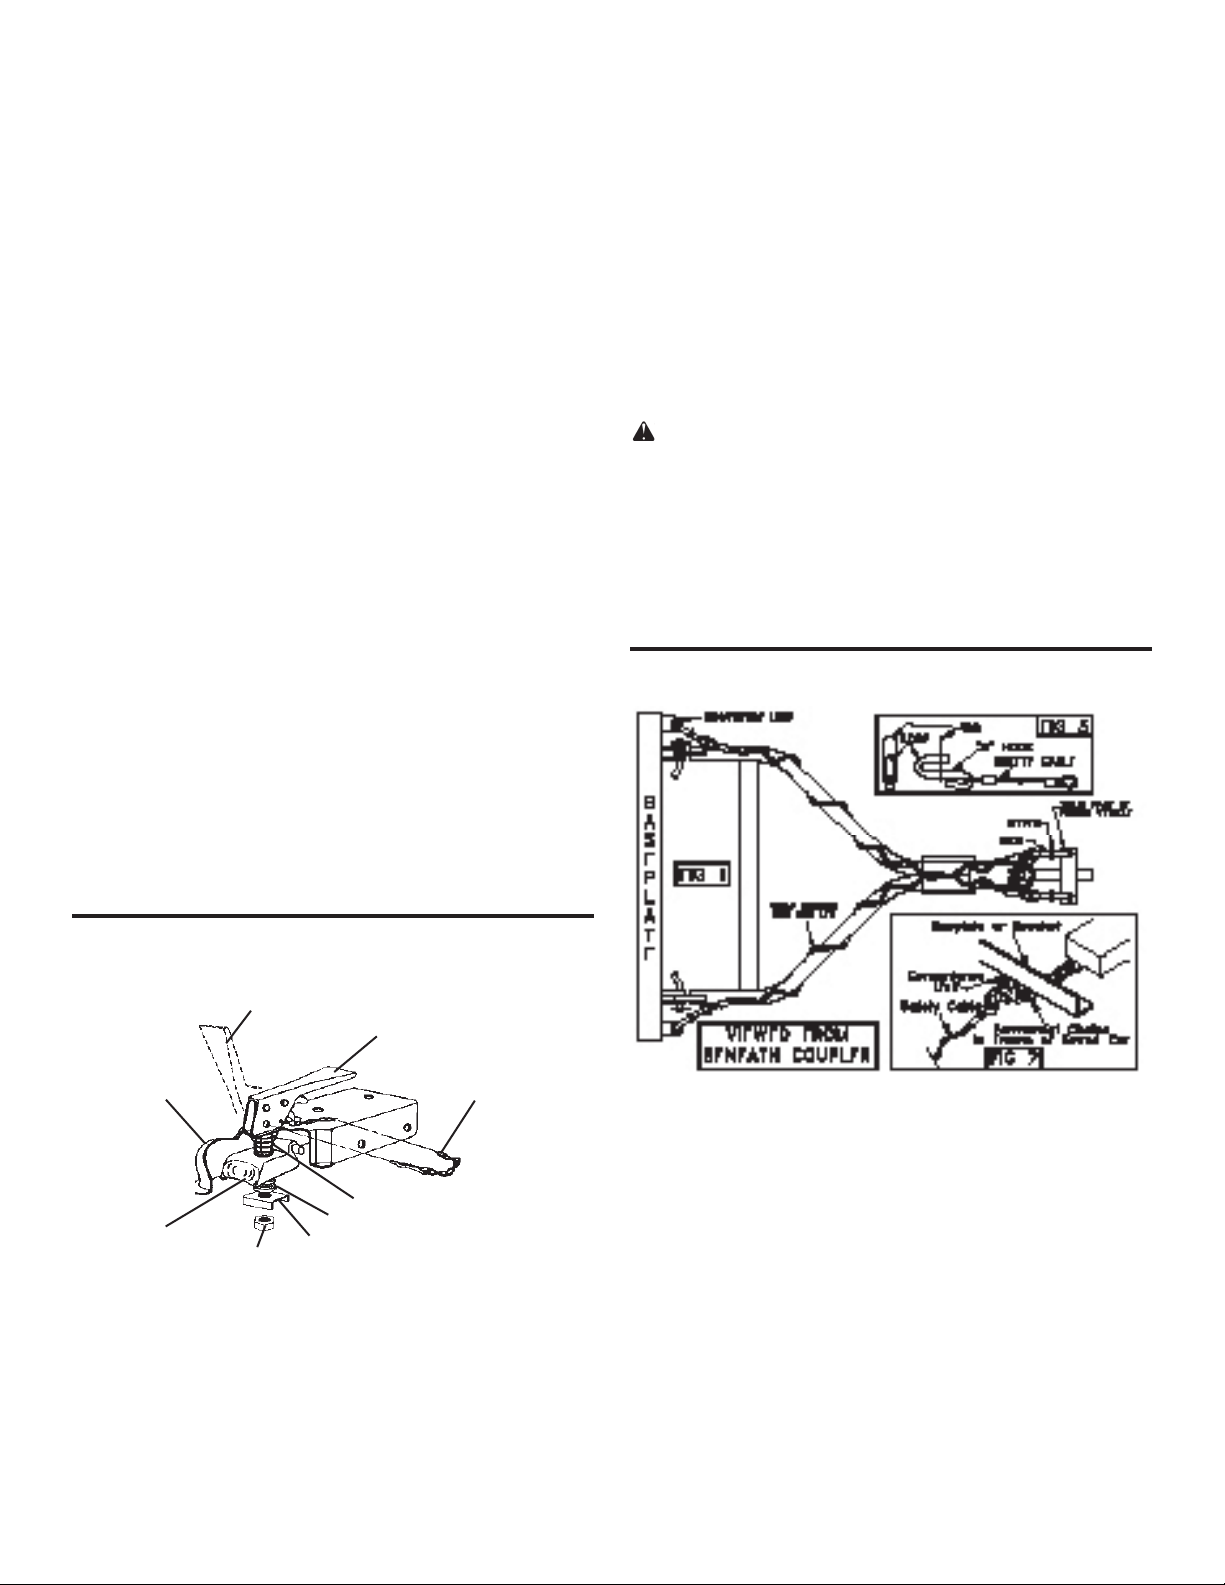
COUPLER FIT ADJUSTMENT
(Unlocked Position)
Housing
Ball
Clamp
Lock Nut
1. Using a 3/4" socket, tighten or loosen the nut until fi rm con-
tact between coupler and ball is established.
2. Check ball to housing tension periodically and tighten if
needed.
3. Lightly lubricate the ball.
A coupler repair kit is available from Automatic
Equip. by ordering P/N 293-0272.
Locking Lever
(Locked Position)
Pin & Chain
(Optional)
Light Spring
Heavy Spring
Channel Lock
©2003, 05, 07, 08, 09 Automatic Equipment Mfg. Co.
One Mill Road, Industrial Park
1. Using the cable hooks, attach the cables to a solid part of the
chassis of the towed vehicle or to the baseplate convenience
loops. Slip the end of the hook through the neoprene keeper
to prevent the hook from unhooking. (See Fig. 3) NOTE: It is
recommended to have permanent chains that connect the
convenience loops to the frame of the car. (See Fig. 2)
2. Wrap each cable once or twice around their respective tow bar
leg and cross them under the coupler area. (See Fig. 1)
3. Using the cable hooks, attach the opposite ends of the cables to
a solid part of the chassis of the towing vehicle if at all possible.
Slip the end of the hook through the neoprene keeper to prevent
the hook from unhooking. (See Fig. 3)
4. Adjust slack so that the cables cannot touch the ground or become caught beneath the ball. If either of these things happen,
the cables may become damaged and ineffective. DO NOT USE
DAMAGED CABLES!
Pender, Nebraska 68047
Page 2 of 2 292-0779 4/23/09
 Loading...