

Page 1
ADVENTURER
TM
Serial No.
®
OPERATOR, PARTS, AND
INSTALLATION MANUAL
BX7322
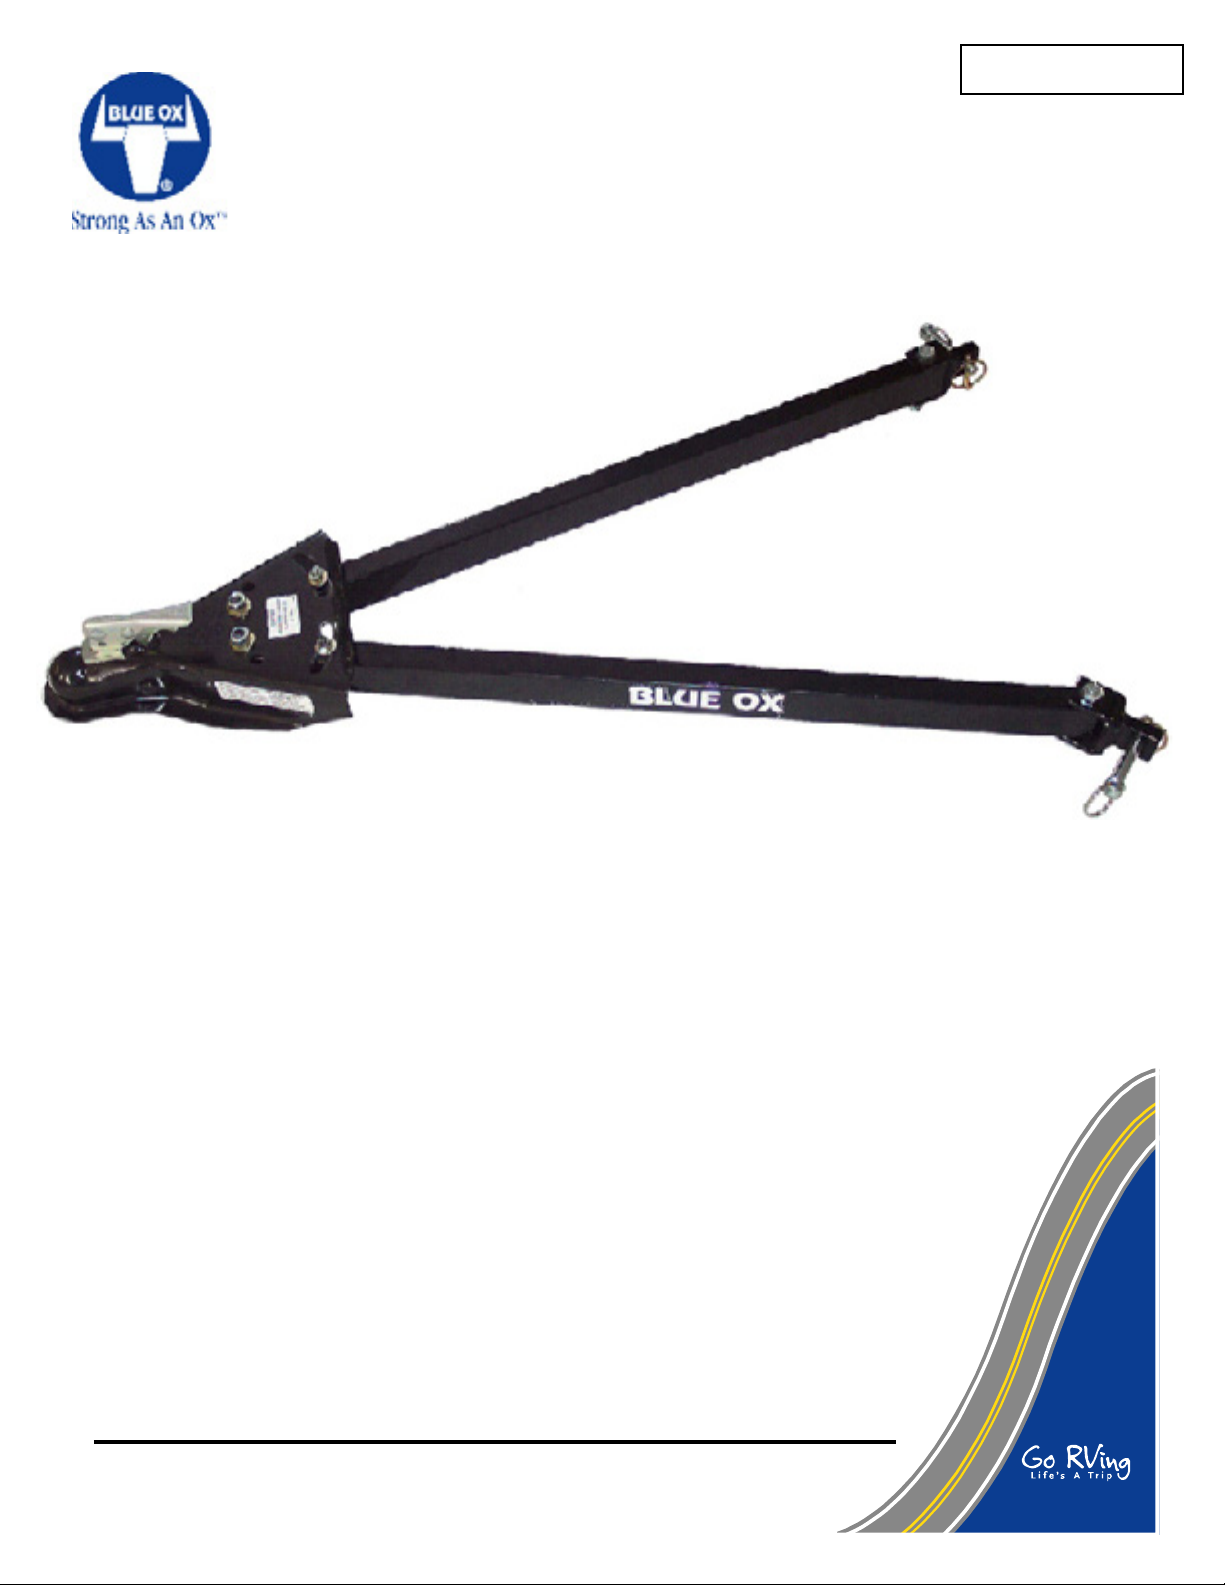
ADVENTURER® Tow Bar
Class III (5000 lb) 2 Inch Ball Coupler
Ensure that your product(s) are registered online at www.blueox.com. It is crucial to
register your product(s) so that you may be alerted of product offerings, updates,
upgrades, maintenance and safety bulletins, and/or recalls.
© 2003, 04, 07, 08, 09 Blue Ox Division, Automatic Equipment Mfg. Co. • One Mill Road, Industrial Park
Pender, Nebraska 68047 • Phone 402-385-3051 • Fax 402-385-3360 • www.blueox.us
Page 1 of 5 292-1263 Rev. H 8/19/09
Page 2

SAFETY
DO NOT INSTALL, OPERATE OR USE THIS EQUIPMENT UNTIL THE FOLLOWING
OPERATING AND SAFETY INSTRUCTIONS HAVE BEEN READ AND UNDERSTOOD.
This symbol is used to bring attention to safety precautions and instructions. When you see this symbol, be alert
and pay attention to all instructions. YOUR PERSONAL SAFETY IS INVOLVED.
1. Blue Ox Tow Bars should be used with cars designed or
2. Set the transmission for towing according to the owner's
3. Unlock the steering wheel for towing to allow the front
4. Be sure the front end of the towed vehicle is properly
5. The use of safety cables or chains is required by law
modied to be towed.
manual. Verify recreational towing procedures in the
vehicle owner's manual.
wheels of the towed vehicle to “track”.
aligned. Unaligned vehicles will cause poor tracking and
abnormal wear on the tires.
in some states of the United States and territories
of Canada. Check with the states or territories that
you plan to travel through prior to your trip. Blue
Ox strongly recommends the use of safety cables
(BX88196, Class III or BX88197, Class IV) and our
permanent baseplate safety cables (BX88207, Class III
or BX88208, Class IV) with all applications of towing.
Please refer to their specic installation instructions
for more information.
6. Check clearance between vehicles in a turning situation.
7. Rear lighting is required on the towed car. A BX8811 (Wiring
Kit), BX8847 (Wiring Kit) or BX8869 (Bulb & Socket) is
recommended.
8. Prior to a towing trip, check to be sure all the towing accessories
and attachment points are secure. Check for cracked welds and
loose bolts or pins on baseplate and tow bar. This is important
on all occasions, but particularly on a new installation, when
they should be checked just prior to initial towing and again after
100-200 miles of towing.
9. Do Not Back Up when towing. Damage to both vehicles and
towing system may occur.
10. Avoid sharp turns and rough terrain. Check installation after any
unusual event and periodically on a long trip.
11. Do not use the towed vehicle for storing luggage, etc.; you may
exceed the towing capacity of the Tow Bar and its accessories.
12. Do not substitute other devices if the pins and clips are lost.
TOW BAR INSTALLATION - EXISTING BLUE OX BASEPLATE
1. Blue Ox Tow Bars are designed for the coupler to be parallel
to the ground when it is attached to both the towed and
towing vehicles. If the Tow Bar coupler is at an angle,
damage or an accident could occur.
2. Adjust the coupler for proper t to the ball (See Figure 3).
For added security, place a lock, pin or bolt through the hole
provided in the coupler locking lever.
CAUTION: As with any mechanical product, care
should be taken during installation and operation, to
prevent your ngers from being pinched.
WARNING: Ensure that your towing vehicle
is of adequate size to properly control your
3. Position the Tow Bar with its tabs aligned inside the baseplate tabs and insert the 1/2" pins. Insert quick pin clips into
the pins to hold them in position. (See Figure 2)
4. Center the coupler with the tow bar legs, (See Figure 4)
and tighten the four coupler bolts completely. The leg width
may be adjusted to no less than 16" to not greater than 34".
Check that the hex bolts are snug but not so tight as to bend
the tow bar attachment lugs. After a few hours of use and
periodically thereafter check all bolts for tightness.
5. DEALER OR INSTALLER: BE CERTAIN USER RECEIVES
INSTRUCTION SHEETS.
towed vehicle. The weight and braking capacity
should be large enough to handle both vehicles
in an emergency situation. Check your towing
vehicle manufacturers recommendations for
towing, hitch load, and braking capacities. The
hitch, ball, motorhome chassis, and safety
cables (each individual cable) need to be rated
at a minimum for the weight of the vehicle
being towed.
© 2003, 04, 07, 08, 09 Blue Ox Division, Automatic Equipment Mfg. Co. • One Mill Road, Industrial Park
Pender, Nebraska 68047 • Phone 402-385-3051 • Fax 402-385-3360 • www.blueox.us
Page 2 of 5 292-1263 Rev. H 8/19/09
Page 3

SAFETY CABLE INSTALLATION
SAFETY CABLE INSTALLATION
Fig. 1
COUPLER FIT ADJUSTMENT
Fig. 3
1. Using a 3/4" socket or wrench, tighten or loosen
the nut until rm contact between coupler and
ball is established. Perform adjustment when
the coupler is in locked position. (Note: Bottom
of coupler is shown above in Fig. 3)
2. Check ball to housing tension periodically and
tighten if needed.
REFER TO #4 ON PAGE #2 FOR
INFORMATION TO TIGHTEN 4
COUPLER BOLTS
16" TO 34"
BETWEEN
CENTERLINES
Fig. 2
Fig. 4
1. Arrange the cables in an “X” pattern below the tow bar and make one or two wraps around the tow bar legs
if needed. (See Figure 1)
2. Solidly connect the cables to the chassis of both the towing and the towed vehicles or baseplate convenience
links if available. Insure the rubber keepers are in place. (See Figure 2) NOTE: Permanent chains will need
to be installed between the convenience links and the towed vehicle’s frame if the links are to be used.
3. Do not allow too much or too little slack in the cables.
4. If BX88196 cables are not used, be sure each cable or chain used has at least the load rating of the coupler.
© 2003, 04, 07, 08, 09 Blue Ox Division, Automatic Equipment Mfg. Co. • One Mill Road, Industrial Park
Pender, Nebraska 68047 • Phone 402-385-3051 • Fax 402-385-3360 • www.blueox.us
Page 3 of 5 292-1263 Rev. H 8/19/09
created with pdfFactory Pro trial version www.pdffactory.com
Page 4

REPLACEMENT PARTS
Tools Required
3/4" Socket 3/4" Wrench 9/16" Socket or 9/16" Wrench
Parts List
Ref. No. Qty. Part No. Description
1 1 229-0669 ......................................................................50 Deg. Ball Coupler, BX7322
2 2 61-3426 ...................................................................Wldm't, Tow Bar Attachment Lug
3 2 61-6001 ......................................................................................Wldm't, Leg, BX7322
4 2 61-6002 ............................................................................Wldm't , Nut Plate, BX7322
5 1 101-6595 .............................................................................. Plate, Support, BX7322
6 2 201-0369 .............................................................. 1/2-13 x 3 1/2 Hex Bolt, Grd. 5, ZP
7 2 202-0094 ............................................................. 1/2-13 Hex NYL. INS. Lock Nut, ZP
8 2 203-0156 ...................................................................Washer, 1/2, Nord-Lock (1/2 sp)
9 2 203-0155 ...................................................................Washer, 3/8, Nord-Lock (3/8 sp)
10 2 201-0051 .............................................................. 1/2-13 x 1 1/2 Hex Bolt, Grd. 5, ZP
11 2 201-0440 .............................................................. 3/8-16 x 1 1/2 Hex Bolt, Grd. 5, ZP
12* 2 229-0520 ....................................................................................... Pin, 1/2 x 2 5/8 Eff.
13* 2 84-0001 ........................................................................................Quick Pin Assembly
*Items not shown
IMPORTANT: Use only genuine factory replacement parts on your Tow Bar. Do not substitute homemade or nontypical
parts. If a bolt is lost or in need of replacement, for your safety and the preservation of your Tow Bar, be sure to use a
replacement bolt of the same grade (Usually Grade 5).
Repair parts may be ordered through your nearest Blue Ox dealer or distributor.
© 2003, 04, 07, 08, 09 Blue Ox Division, Automatic Equipment Mfg. Co. • One Mill Road, Industrial Park
Pender, Nebraska 68047 • Phone 402-385-3051 • Fax 402-385-3360 • www.blueox.us
Page 4 of 5 292-1263 Rev. H 8/19/09
Page 5

QUICK REFERENCE GUIDE
TM
HOOKING UP FOR TOWING
1. Align vehicles in towing position with straight driveway
ahead and parking brakes locked.
2. Place ball coupler on 2 inch ball. Pin legs to attachment tabs.
3. Install safety cables and towed vehicle lighting.
4. Detailed instructions appear on pages 2-3.
1. Park vehicles in a straight line on level surface. Apply
2. Remove safety cables and towed vehicle lighting.
3. Unpin drivers side leg from attachment tabs and
UNHOOKING & FOLDING FOR STORAGE
towing vehicle parking brake. Place towed vehicle in
park or 1st gear for manual transmissions.
repeat on the passenger side. Be careful not to drop
the towbar on feet or legs. Replace pins and quick
pins into respective holes on the towbar to store for the
next use.
4. When unhooking in tight jams, put the vehicle in neutral. Turn the wheels all the way to one side, then all
the way to the other and center.
TO BE VALID, THE WARRANTY CARD MUST BE COMPLETED IN ITS ENTIRETY BY AN AUTHORIZED
DISTRIBUTOR OR DEALER AND SENT TO AUTOMATIC EQUIPMENT MFG. CO., PENDER, NEBRASKA OR
REGISTERED ONLINE AT www.blueox.us.
FAILURE TO DO SO WILL VOID THE WARRANTY.
Repair parts may be ordered through your nearest
Automatic dealer or distributor.
Product Safety Policy Statement
It is, and shall continue to be, a primary objective of Automatic Equipment Manufacturing Company to provide customers with safe and reliable products. Automatic will, and has, established
safety procedures in product design, manufacture, promotion and sales; and will coordinate efforts
to promote customer safety to the greatest extent possible. Each department has primary responsibility for the promotion of safety under the guidelines of the Product Safety Committee.
WARNING: Ensure that your towing vehicle is of adequate size to properly control
your towed vehicle. The weight and braking capacity should be large enough to handle
both vehicles in an emergency situation. Check your towing vehicle manufacturers
recommendations for towing, hitch load, and braking capacities. The hitch, ball,
motorhome chassis, and safety cables (each individual cable) need to be rated at a
minimum for the weight of the vehicle being towed.
© 2003, 04, 07, 08, 09 Blue Ox Division, Automatic Equipment Mfg. Co. • One Mill Road, Industrial Park
Pender, Nebraska 68047 • Phone 402-385-3051 • Fax 402-385-3360 • www.blueox.us
Page 5 of 5 292-1263 Rev. H 8/19/09
 Loading...