

Page 1
TM
Installation Instructions
1
Ô
2
Ô
3
Ô
4
Ô
Trunnion Kit
84-0170 SwayPro Trunnion Kit
Ô
1
Ô
Serial No.
2
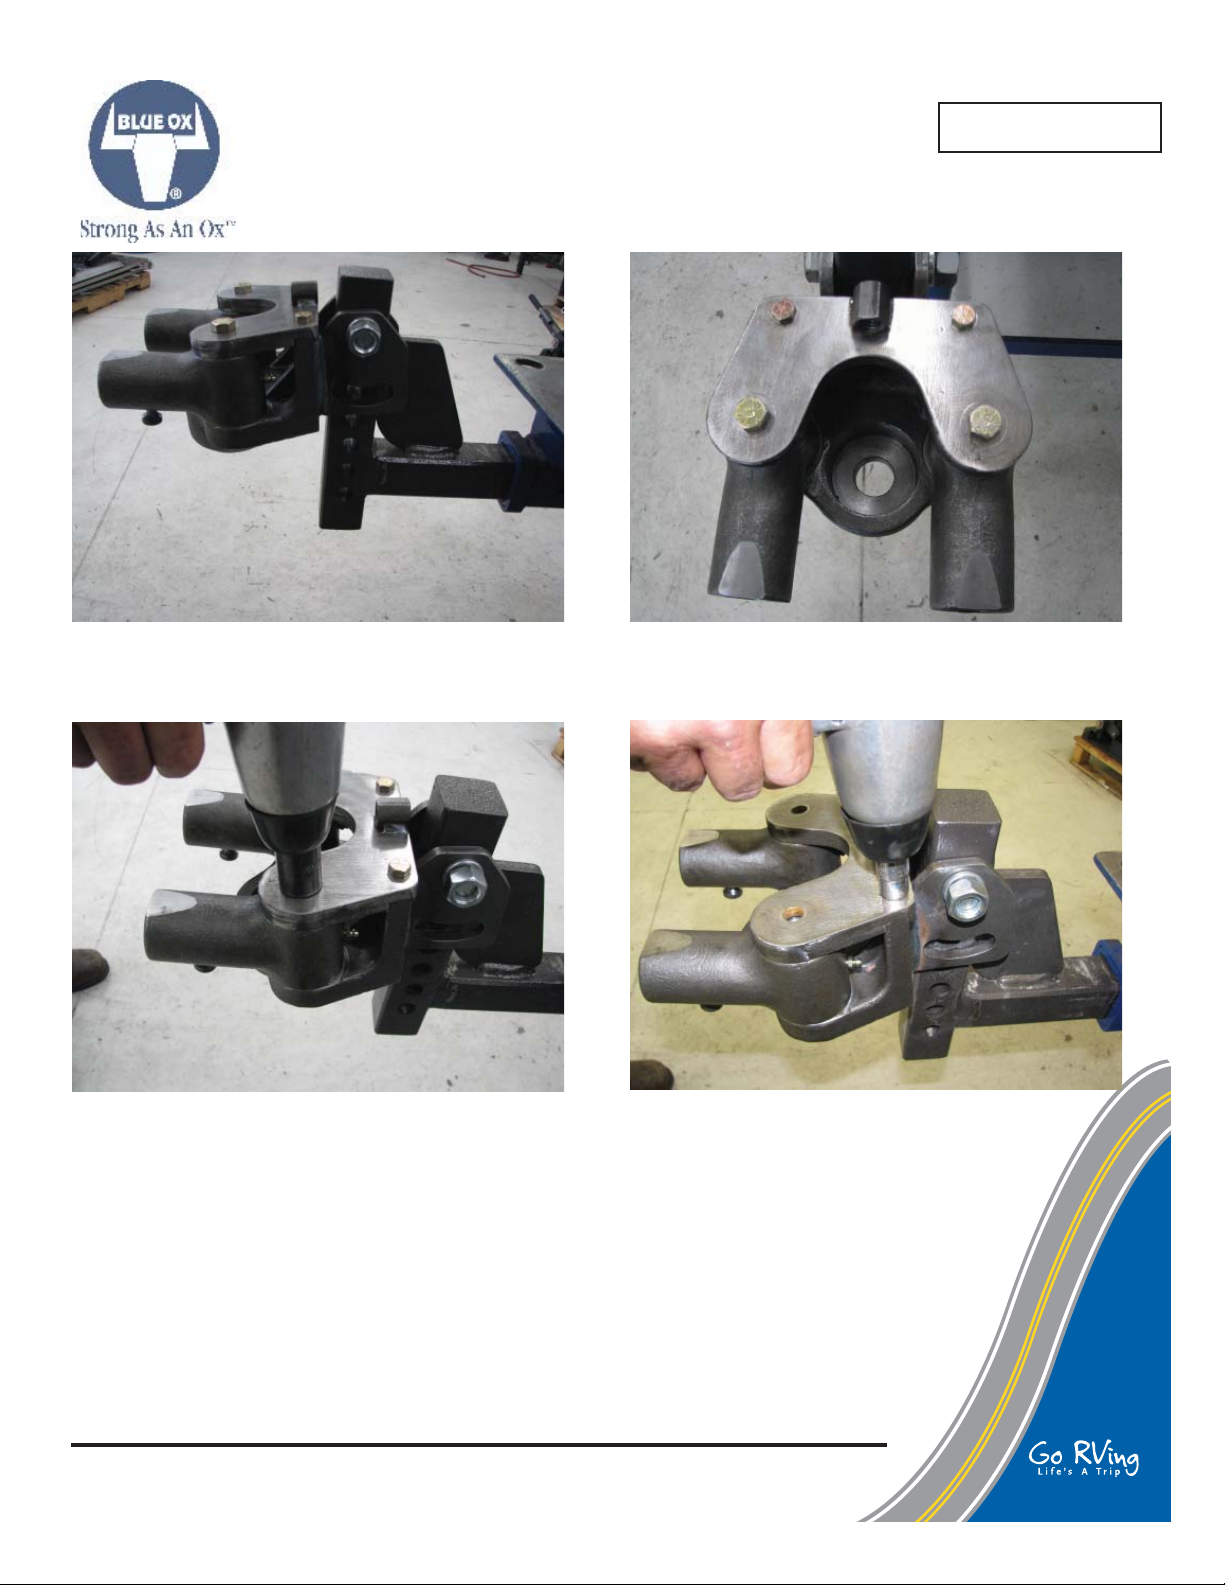
1. The trunnions on the SwayPro hitch need to be
replaced because the release pins for the spring
bars are too long and are breaking.
Ô
3
3. Remove the four bolts from the plate. Using a 3/4"
socket for the larger bolts.
2. Turn the hitch upside down in the receiver.
Ô
4. Using a 9/16" socket remove the smaller bolts.
4
© 2010 Blue Ox Division, Automatic Equipment Mfg. Co. • One Mill Road, Industrial Park
Pender, Nebraska 68047 • Phone 402-385-3051 • Fax 402-385-3360 • www.blueox.com
Page 1 of 3 405-0127 Rev. A 7/7/10
Page 2
TM
5
Ô
7
Ô
6
Ô
Ô
8
Ô
Ô
Installation Instructions
Trunnion Kit
84-0170 SwayPro Trunnion Kit
Ô
Ô
5
Ô
6
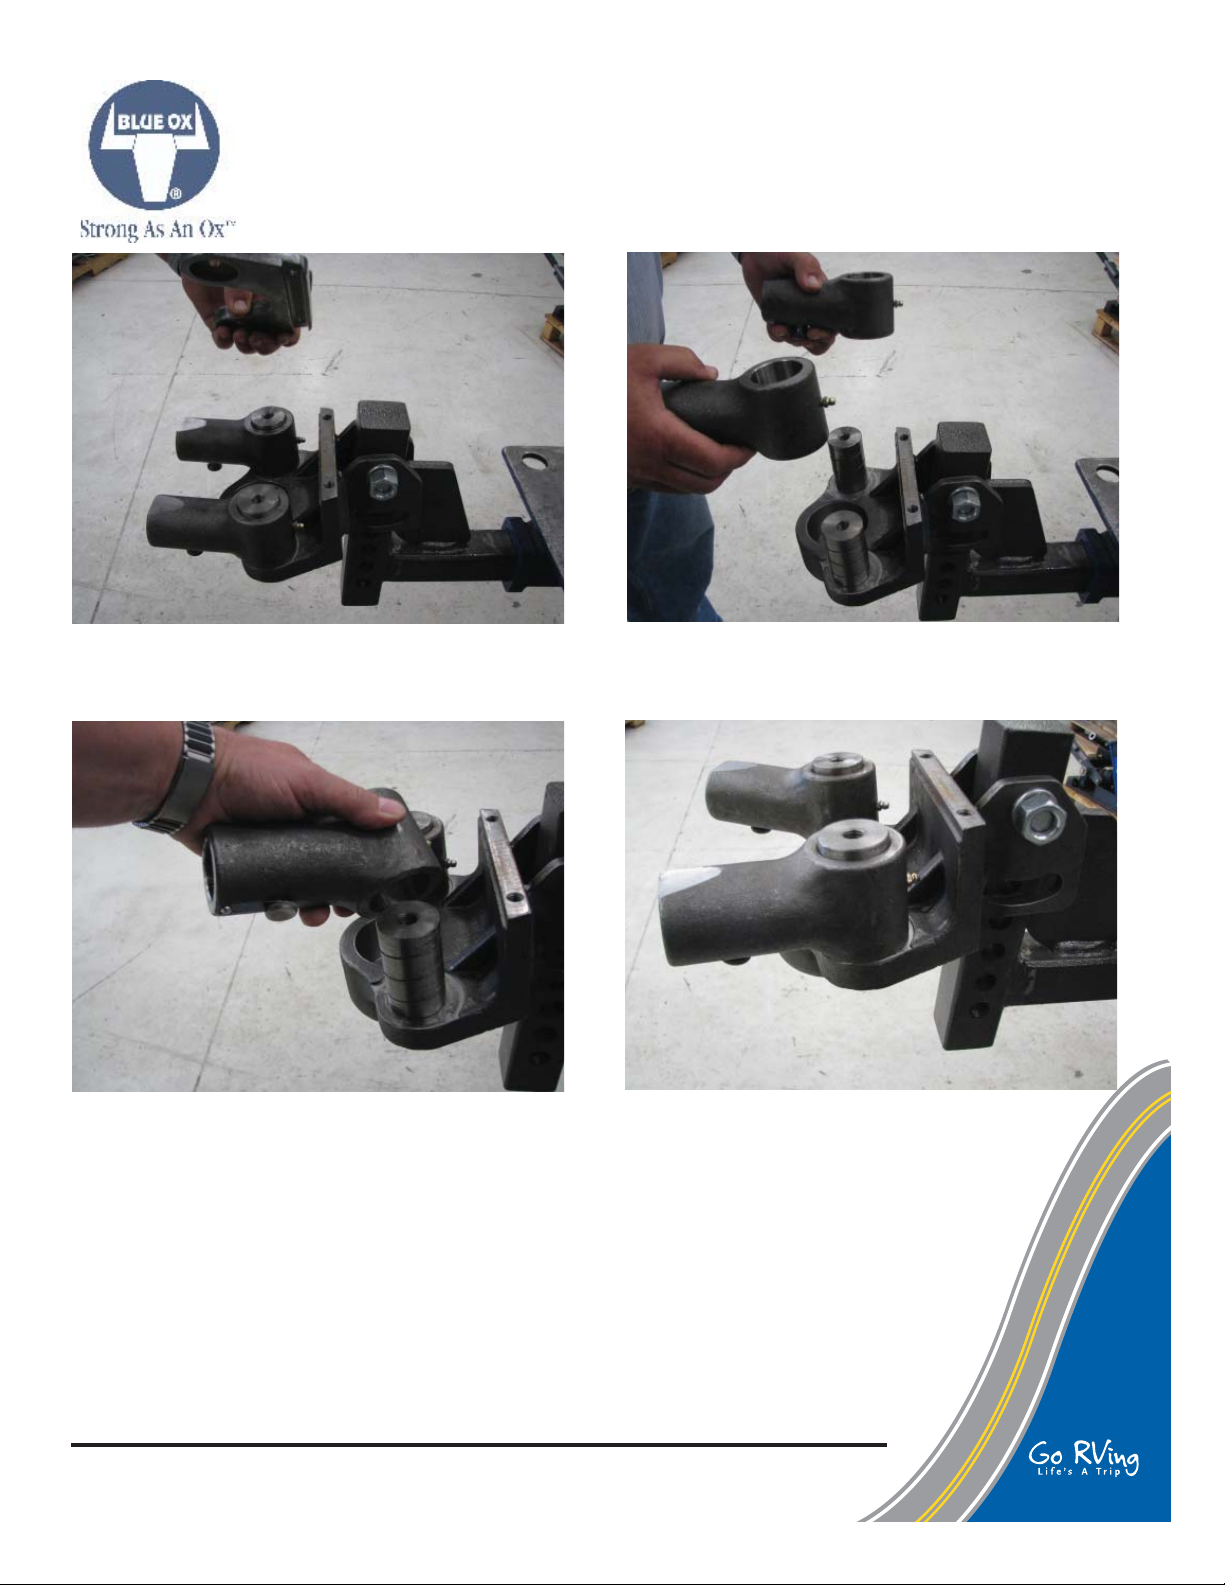
5. Remove the plate. Set aside to be reattached later.
Ô
7
7. Grease the new trunnions, with the pin down slide
on.
6. Remove the trunnions and return to the factory.
Ô
Ô
8. The trunnions have been replaced.
8
© 2010 Blue Ox Division, Automatic Equipment Mfg. Co. • One Mill Road, Industrial Park
Pender, Nebraska 68047 • Phone 402-385-3051 • Fax 402-385-3360 • www.blueox.com
Page 2 of 3 405-0127 Rev. A 7/7/10
Page 3

TM
9
Ô
11
Ô
Ô
10
Ô
12
Ô
Installation Instructions
Trunnion Kit
84-0170 SwayPro Trunnion Kit
Ô
Ô
9
Ô
10
9. Replace the plate and start the bolts. Use loctite
on the smaller bolts.
Ô
11
11. Tighten the 1/2" bolts to 60 ft. lbs. Note: 60 ft.
lbs. is a starting point, adjust to desired tension for
preferred sway.
10. Tighten the 3/8" bolts to 47 ft. lbs.
Ô
12. Turn the hitch right side up and install.
12
© 2010 Blue Ox Division, Automatic Equipment Mfg. Co. • One Mill Road, Industrial Park
Pender, Nebraska 68047 • Phone 402-385-3051 • Fax 402-385-3360 • www.blueox.com
Page 3 of 3 405-0127 Rev. A 7/7/10
 Loading...