


Care and use guide
Contents
page
Features |
2 |
Bluelab Combo Meter |
2 |
Introduction |
3 |
Preparing for use |
3 |
Calibration |
4 |
Changing nutrient and |
|
temperature display units |
6 |
Measuring hydroponic |
|
elements |
7 |
Battery replacement |
7 |
Cleaning the conductivity/ |
|
temperature probe |
8 |
Cleaning the pH probe |
9 |
Hydrating the pH probe |
10 |
Storing the Bluelab |
|
Combo Meter |
10 |
Error messages |
11 |
Technical specifications |
11 |
Troubleshooting guide |
12 |
Bluelab pH Probe replacement |
13 |
Bluelab probe care |
13 |
Product guarantee |
14 |
Limitation of liability |
14 |
Contact details |
14 |

English
Features
Measures pH, conductivity / nutrient (EC, CF, ppm 500 and ppm 700) and temperature (°C, °F)
Lightweight and portable
Large easy to read display
Simple push button pH calibration
Successful pH calibration indicator
No calibration required for conductivity and temperature
Bluelab Combo Meter
pH probe connection socket (BNC fitting)
Display
Bluelab
Conductivity/
Temperature
Probe
pH/calibrate button
Nutrient/units
button
Conductivity/ temperature probe shroud
Low battery indicator
ATTENTION
Bluelab
pH Probe
Temp/units button
pH probe storage cap
The pH probe tip must not be allowed to dry out. Always place the storage cap back onto the pH probe after each use. Ensure the cap contains enough Bluelab pH Probe KCl Storage Solution to cover the probe tip.
Nutrient units

 pH unit
Temperature units
Successful pH calibration indicators
Keep your pH probe tip wet
2If it dries, it dies!
at all times to avoid permanent damage
English
3
1.0Introduction
The Bluelab Combo Meter has three press buttons; ‘pH / calibrate’, ‘nutrient / units’ and ‘temp / units’. The buttons have a short press and long press function. A short press means a button is released in about one second. The long press is a button being held for at least three seconds and released when the display starts flashing.
Turning the Combo Meter on
1A short press of any button turns the Combo Meter on. The Combo Meter automatically turns off after four minutes if no buttons are pressed. If the Combo Meter turns off before the reading is taken, a short press of any button will turn the Combo Meter on again.
2.0Preparing for use
The following tasks must be performed before the Bluelab Combo Meter is used for the first time.
1Insert batteries.
See section 6.0.
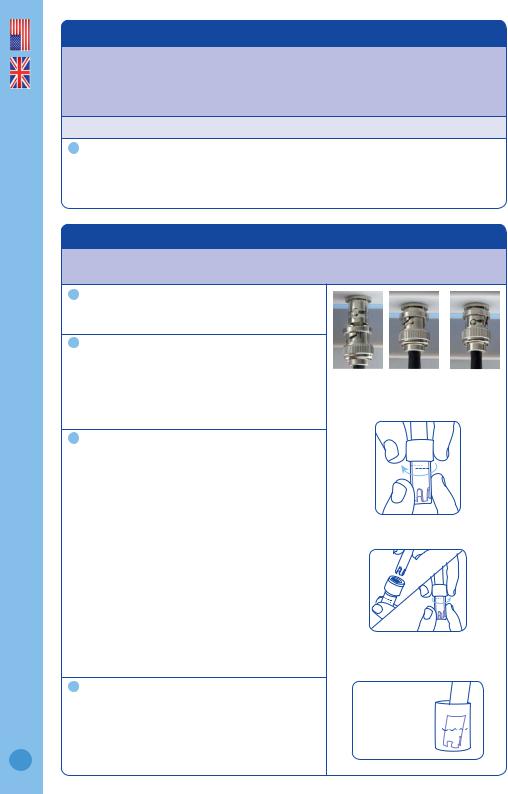
2Connect pH probe
Connect the pH probe to the pH meter by lining up the lugs of the BNC fittings. Fasten securely by pushing the pH probe connector on and twisting one quarter turn.
3Remove the storage cap
a)Remove the pH probe storage cap by gripping the top of the cap and gently twisting the base one rotation clockwise to loosen slightly. Next slowly slide the cap off the pH probe.
DO NOT completely remove the base of the cap from the top of the cap.
CAUTION: When the pH probe is not in use, add enough Bluelab pH Probe KCl Storage Solution to the storage cap so the probe tip is covered. Then replace the cap and store in a secure place.
DO NOT use RO (Reverse Osmosis), Distilled or De-ionized water. Pure water changes the chemistry in the reference, causing the probe to die.
4Calibrate the pH
Calibrate the combo meter by following the instructions in section 3.0 of this manual.
This must be done before the
Combo Meter is used for the first time.
Inserting Twisting Attached
Attaching the Bluelab pH Probe to the Meter
Removing pH probe storage cap
Ensure probe tip is covered by the KCl storage solution in cap
See section 3.0  for calibration
  steps
steps 

English
3.0Calibration
pH calibration is required before first use to ensure that the first reading is accurate.
•The Bluelab Conductivity/Temperature Probe DOES NOT require calibration.
•The pH of the Bluelab Combo Meter DOES require calibration.
For accurate pH readings the pH probe is cleaned and recalibrated when:
•The reading is different to what you were expecting.
•The batteries have been removed or changed.
•The pH probe is replaced with a new one or is disconnected from the Combo Meter.
•The pH calibration indicators have disappeared.
When calibrating the pH after first use the pH probe needs to be cleaned. See pH probe cleaning in section 8.0.
For best pH calibration
pH reading accuracy is dependant on the accuracy and age of the calibration solutions used, and use and cleanliness of the pH probe tip.
•Ensure the pH probe has been cleaned and rinse the pH probe with clean water between calibration solutions to reduce contamination of the pH solutions.
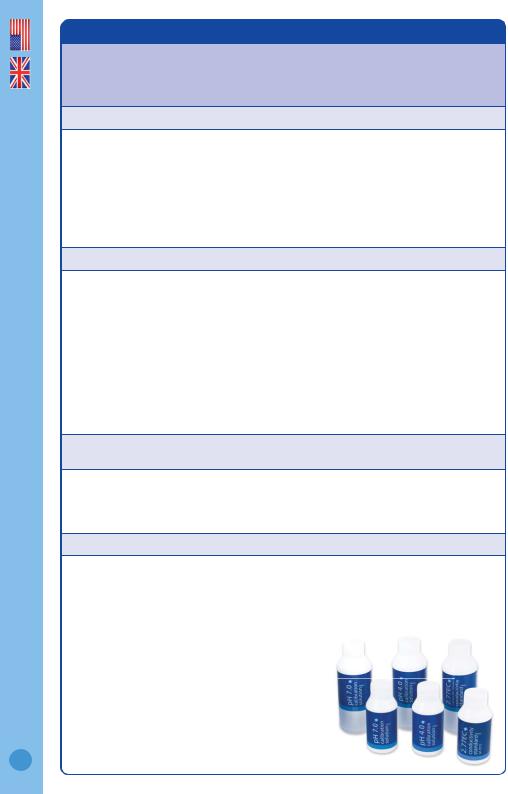
•Only fresh uncontaminated solutions should be used.
•Calibrate the pH at the same temperature as the solution to be measured.
•ALWAYS calibrate the pH probe with pH 7.0 then pH 4.0 or pH 10.0.
NOTE: The conductivity/temperature probe does not need to be calibrated, but must be cleaned to remove any build up of nutrient salts. See Section 7.0.
The pH calibration involves cleaning the pH probe tip and then calibrating in TWO SOLUTIONS.
If a reading below pH 7.0 is expected, use pH 7.0 and pH 4.0 calibration solutions. If a reading above pH 7.0 is expected, use pH 7.0 and pH 10.0 calibration solutions.
Follow the steps on the following page for Combo Meter pH calibration.
Storage and use of calibration solutions
•Always place the lid back onto the bottle after use or evaporation will occur rendering the solution useless.
•Store in a cool place.
•DO NOT measure directly into the bottle. Tip a small amount into a clean container and discard after use.
•Never add water to solutions.
pH reading accuracy is dependant on the accuracy and age of the calibration solutions used, and use and cleanliness of the pH probe tip.
4

English
5
3.0Calibration cont.
To calibrate the pH
1Clean pH probe tip.
See Section 8.0 (the pH probe does not require cleaning before the first use).
2 pH 7.0 calibration |
|
|
a) Turn pH meter on. Rinse pH probe tip in fresh |
clean the pH probe |
|
water, shake off excess water and place in a |
||
|
||
pH 7.0 calibration solution. Wait for at least |
|
|
one minute or longer if required for reading to |
|
|
stablize to a constant value. |
pH 7.0 |
|
b) Long press the ‘calibrate’ button. When the |
||
calibration |
||
display shows CAL release button. |
solution |
pH 7 indicator is displayed indicating a successful pH 7 calibration.
The pH 4 indicator will now flash indicating pH 4.0 or pH 10.0 calibration is now required.
c) If Err appears during the calibration process see |
|
Section 11.0. |
rinse in tap water |
d)The combo meter must be calibrated to two points. If after an hour the combo meter has not
|
|
been calibrated with a second calibration point |
|
|
|
the calibration indicators disappear and the |
pH 4.0 or |
|
|
combo meter reverts to an uncalibrated state. |
pH 10.0 |
|
|
Calibration is required. |
calibration |
|
|
solution |
|
3 |
pH 4.0 / 10.0 calibration |
|
|
|
a) |
Rinse the pH probe tip in fresh water, shake |
|
|
|
off excess water and place the pH probe tip in |
|
|
|
either pH 4.0 or pH 10.0 calibration solution. |
|
|
b) |
Wait for at least one minute for reading to |
|
|
|
stabilize to a constant value. |
|
|
c) |
Long press the ‘calibrate’ button. When the |
|
|
|
display shows CAL release button. |
|
|
|
pH 7 / pH 4 is displayed |
|
|
|
or pH 7 / pH 10 is displayed |
|
|
d) |
The pH meter is now calibrated and ready for use. |
Successful pH 7 |
|
and pH 4 calibration |
||
|
e) |
After 30 days, the calibration indicators |
|
|
|
disappear to let you know calibration is required. |
|
4 |
Store the pH probe |
|
|
|
Add enough Bluelab pH Probe KCl Storage Solution |
|
|
|
into the probe storage cap to fully submerge the pH |
|
|
|
probe tip. Place storage cap on probe. |
Ensure probe tip is covered by |
|
|
|
|
|
|
|
|
the KCl storage solution in cap |
 Loading...