

Page 1
Connects you
with the people who matter
when it matters
HP4 Issue 1 August 2013
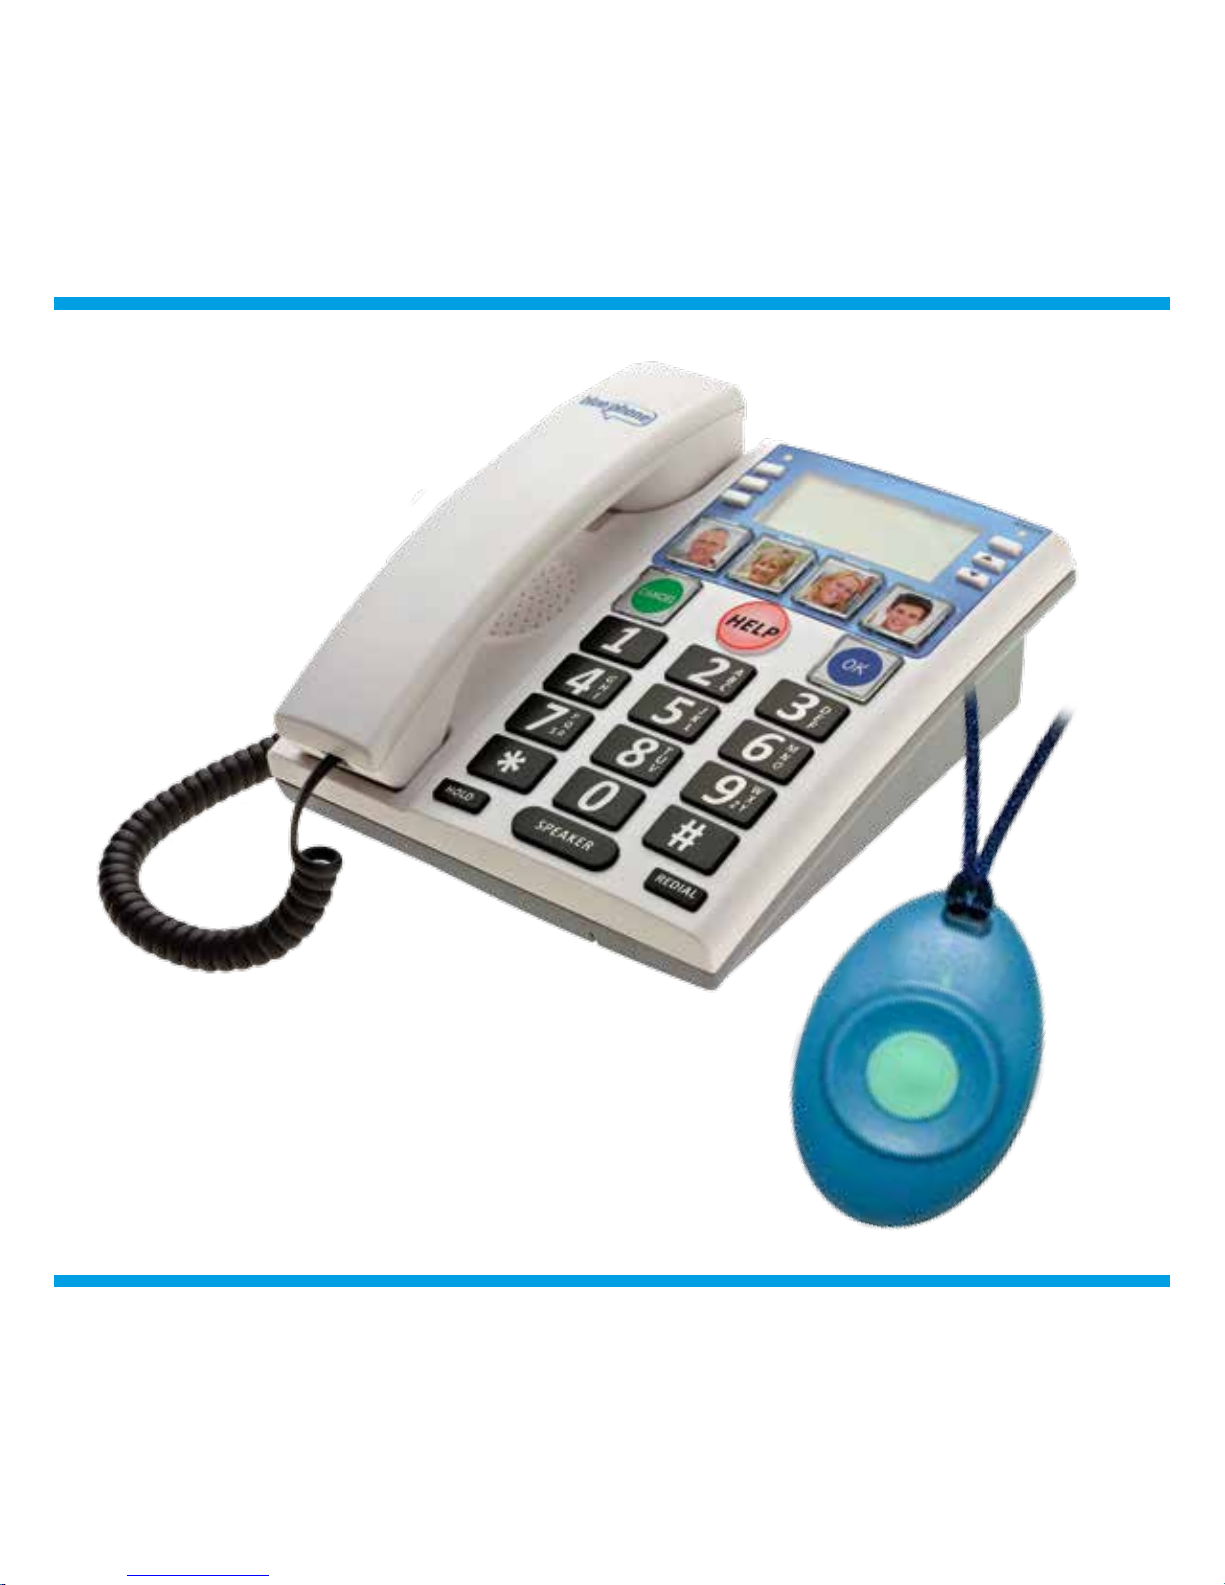
Blue Phone
Instructional Manual
Page 2

2
WARNING – ANSWERING MACHINES AND VOICE MAIL BOXES.
The above devices may at times for some reason generate a hash tone
when answering or while recording an incoming message.
If the Blue Phone is delivered a hash tone after the prompt to accept an
alarm call the Blue Phone will accordingly believe the alarm call has been
acknowledged and not dial the next carer.
It is advised to dispatch an emergency call to any carer’s that have
an answering machine or voice mail box to test their device does not
interfere with the genuine acknowledgment of the alarm call.
You may want to add the requirement of a second acceptance digit to
acknowledge an alarm call having been received.
This would mean that after the # button has been pressed there will be a
second prompt instructing you to “now press 1”. Only then will the Blue
Phone acknowledge the acceptance of the alarm call.
To enable the second prompt requirement to accept an alarm call.
Enter *4 1698 27 1
To restore to normal (# only) enter *4 1698 27 0
See Ref 8 in the programming schedule.
WARNING - MODE 3 CONNECTION
If you have more than one phone or device that accesses the phone line
at your premises, it is important to know that under normal circumstances
if the second phone is off hook and you generate an
alarm call, Blue Phone will not be able to access the line to dial out.
To overcome this potential problem, a licensed installer can install a
‘Mode 3’ connection at the point where the Blue Phone is located. This
will allow an alarm call to be generated even if another phone in the
home is off hook. Blue Phone is Mode 3 compatible.
SELF INSTALLED AND MAINTAINED
Your Blue Phone is self installed and maintained. It is the purchaser’s
responsibility to be aware of the Mode 3 issue and ensure answering
machines’ and voice mail boxes will not emit a hash tone and interfere
with the genuine acceptance of an alarm call. The Blue Phone should be
tested regularly to ensure reliable operation.
Page 3

3
2
No on-going Costs
Since alarm calls go directly to your family’s mobile phones and
landlines, there are no professional monitoring costs, and your family
and/or friends are the first to be informed.
Alarm calls cost the same as a normal phone call to that phone
number.
The Professional Monitoring Option
If your family support network is not as strong as it once was, and
you find you require professional 24 hour monitoring, this can be
arranged simply by contacting Smart Caller on 03 9588 0833
The necessary adjustments to your phone can be made remotely
by the monitoring service.
A nominal once-off set up fee and a monthly monitoring fee is payable
for this 24-hour professional monitoring service.
Call Smart Caller to enquire about the professional monitoring option.
For your nearest Blue Phone service centre visit
www.bluephone.com.au
or phone 03 9588 0833
© Smart Caller Pty Ltd
PO Box 78
Mentone VIC 3194
www.smartcaller.com.au
Blue Phone Model: BP – HP4
Important Notes:
• Ensure the power pack is always plugged into the mains socket and
switched on.
• Always use the power pack supplied with the phone as it is
specifically
specified for this phone and forms part of the government authority
connection permit.
• When your Blue Phone is being stored or transported, turn the
battery on-off switch on the rear of the phone to the 'off' position.
Page 4

4
3
1.0 CAUTION
• The handset may pick up small metallic objects such as pins and
staples if placed in their vicinity.
• Do not remove or switch off the power pack supply. In-use light will flicker
and “Power Fail” will display if power is removed.
• To preserve its appearance, avoid putting your Blue Phone in
direct sunlight.
• When you first install your Blue Phone, allow 24
hours to fully charge the battery back-up.
• We recommend your pendant and Blue Phone be periodically
checked, at least once per month.
• In the event of liquid damaging your Blue Phone, return the phone
to your nearest service centre.
• Lightning and major electrical surges can damage this device.
2. MODE 3 CONNECTION
If you have more than one phone or device that accesses the phone line at
your premises, it is important to know that under normal circumstances if the
second phone is off hook and you generate an
alarm call, Blue Phone will not be able to access the line to dial out.
To overcome this potential problem, a licensed installer can install a
‘Mode 3’ connection at the point where the Blue Phone is located. This will
allow an alarm call to be generated even if another phone in the home is off
hook. Blue Phone is Mode 3 compatible.
3. YOUR BLUE PHONE CONTENTS
• Blue Phone
• Power Pack
• Telephone Line cord
• Personal Pendant
• Blue 'OK' Label
• Owner's Manual
Please advise your supplier without delay should a listed item
be missing.
Page 5

5
4. SETTING UP AND PLUGGING IN
• Plug the power pack to mains power point and connect the other
end to the Blue Phone. The power socket is located at the rear of
the phone Marked “Power”
• Connect the line cord to the phone wall socket and to the socket on
the rear of the phone marked 'line in'.
• Switch the Blue Phone on at the ‘Battery on/off’ switch located on
the rear panel.
5. QUICK START
WARNING – ANSWERING MACHINES AND VOICE MAIL BOXES.
– P
ROGRAMMING INSTRUCTIONS
Refer to Page 5 for programming instructions.
Whilst we recommend you read the whole manual to discover all of Blue
Phones features. The “Quick Start” Instructions’ is all you need to read to get
you up and running quickly and easily.
6.0
The above devices may at times for some reason generate a hash tone when
answering or while recording an incoming message.
If the Blue Phone is delivered a hash tone after the prompt to accept an alarm
call the Blue Phone will accordingly believe the alarm call has been acknowledged and not dial the next carer.
It is advised to dispatch an emergency call to any carer’s that have an
answering machine or voice mail box to test their device does not interfere
with the genuine acknowledgment of the alarm call.
You may want to add the requirement of a second acceptance digit to
acknowledge an alarm call having been received.
This would mean that after the # button has been pressed there will be a
second prompt instructing you to “now press 1”. Only then will the Blue
Phone acknowledge the acceptance of the alarm call.
To enable the second prompt requirement to accept an alarm call.
Enter *4 1698 27 1
To restore to normal (# only) enter *4 1698 27 0
Page 6

6
7.0 QUICK START – PROGRAMMING INSTRUCTIONS
7.1 Programming Dial Up Numbers
Note: All programming is done with the handset in the cradle (the
hung up position).
1. Enter the master access code [*4 1698]
2. Enter the address code [30]
3. Enter [1] for the first Dial Up number (or enter [2] for the second
Dial Up number, [3] for the third and so on)
4. Enter [2] to program
5. Enter the phone number of your first carer
6. Press [CANCEL] to finish.
To program the second dial up number repeat steps 1 to 6 but enter
a 2 at step 3.
To assist in programming and keeping record of who has been
nominated as carer, we have provided the table below. Write the carers
name and number down and with the handset in the cradle begin
programming.
Carer’s Name Carer’s Phone No.
1st _______________*4 1698 30 1 2 ___________________ CANCEL
2nd ______________ *4 1698 30 2 2 ___________________ CANCEL
3rd _______________*4 1698 30 3 2 ___________________ CANCEL
4th _______________*4 1698 30 4 2 ___________________ CANCEL
5th _______________*4 1698 30 5 2 ___________________ CANCEL
6th _______________*4 1698 30 6 2 ___________________ CANCEL
7th _______________*4 1698 30 7 2 ___________________ CANCEL
8th _______________*4 1698 30 8 2 ___________________ CANCEL
7.2 To check the Dial Up numbers you programmed
Enter [*4 1698]
Now enter [49].Now enter [1] to hear the first phone number. Then [2] to hear
the second and so on. Press [CANCEL] when finished.
Page 7

7
6
7.3 Recording Your Outgoing Personal Identification Message
While programming is normally done with the handset in the cradle,
for this task the handset microphone is used to record your message.
Therefore you will need to hold the handset cradle down (as if the handset
was still in position) while to talk into the phone handset.
1. Enter the master access code [*4 1698]
2. Enter [10]. The “in use” light will glow
3. Speak into the handset microphone to record your message.
4. Press [CANCEL] to end recording.
Your outgoing message can be up to15 seconds long.
To check your outgoing message enter [*4 1698 55 1]
Press [CANCEL] when finished.
7.4 Making and (Aborting) an Alarm Call
To make an alarm call press your pendant or the [HELP] Button on the Blue
Phone.
To abort an alarm call, press the [CANCEL] button within 10 seconds, or
once the phone is sounding the call in progress beeps you may lift and
replace the handset.
7.5 Receiving an Alarm Call – Carer instructions
Answer your phone as normal.
You will hear the outgoing identification message played on an endless
loop arrangement. Don’t panic – you can listen to this message in its
entirety before doing anything. It will play six times before hanging up and
calling the next number.
After you are asked to press the ‘Hash key now” Press the [#] digit on your
phone and the Blue Phone will now go into 'hands-free loud speaking mode'
allowing you to make voice contact via the Blue Phone’s speaker phone.
Before you hang up press the [*] button twice on your phone. This will
hang the Blue Phone up. If you forget, don’t worry; the Blue Phone will
reset to normal after a few minutes.
When you press [**] before hanging up, the Blue Phone is left in auto
answer mode for about five minutes. This means that you can call back
and the Blue Phone will answer and automatically go into hands-free
loud speaking mode. When calling back for a second time, the Blue Phone
will not accept the call from you unless you press [#] within the first 5
seconds after the call is answered. If you forget to press [#], the Blue Phone
Page 8

8
will hang up on you and you will have to call back.
8. Other Benefits and Features
• Big buttons for numbers and characters
• Photo fit speed dial buttons
• Personal duress applications
•
•
•
– silent alarm
Medication/Pill reminder
• Handset volume boost
• 3 position ringer volume control
• Extra loud sounding ringer
• Hearing aid induction loop
Sounding of keypad buttons
• Announcement of time and day
• Two-way loud speaking
• Backlit “HELP” button
•
Last number redial
Caller ID and Phone Book
• Voice announcement of a “handset off hook” and “line disconnect”
• Voice announcement reporting of a pendant low battery condition
• Normal phone functions are telephone line powered
• Approximately 100 hours battery back-up
• Mode 3 secure connection compatible
• Remote programming capability
• Integral system watchdog with auto reset
• Walk test – Range test of pendant/transmitters
• Doorbell or granny flat local alar
m
• PIN, wireless and remote arm-disarm of security facility
• Can be wall mounted
Page 9

9
LIST OF CONTENTS
No on going costs
The professional monitoring option
1.0 Caution
2.0 Mode 3 connection
3.0 Your Blue Phone contents
4.0 Setting up & plugging in
5.0 Ref: Quick start programming instructions
6.0 WARNING – Answering Machines & Voice Mail Boxes
7.0 Quick start programming instructions
7.1 Programming dial up numbers
7.2 Checking dial up numbers
7.3 Recording/ & checking your personal ID message
7.4 Making and aborting an alarm call
7.5 Receiving and alarm call – carer Instructions
8. Ot
her benefits and features
9. Programming your Blue Phone – General tips
10. Getting to know your Blue Phone
10.1 Introduction
10.2 Messages and announcements
10.3 Built in messages are:
10.4 Power fail / Power removed – Important
10.5 Battery backup
10.6. Phone controls – Front
10.6.1 Phone controls – Rear
10.7 Speed dial buttons with photo fit caps
10.8 Photo fit speed dial buttons
10.9 The talking clock
10.10 Sounding of the key pad buttons
10.11 Ringer & extra loud rin
ger
10.12 Hearing aid induction loop
10.13 The “Hold” button
10.14 Last number “Redial”
10.15 “Speaker” phone mode
10.16 Smoke alarm reporting
11. Daily “OK” Facility
12. Home security – Intruder Alarm
13. Maintaining correct time
14 Pendants
14.1 Personal pendant
Page 10

10
14.2 Pendant range test
14.3 Adding extra pendants
14.4 Pendant low battery warning
14.5 Answering the phone with your pendant
14.6 Door bell/ Granny flat – Local alarm
15 Making an alarm call
15.1 The pendant and Help button
15.2 Cancelling an alarm call
15.3 Receiving an alarm call
15.4 Carer remote commands
15.5 If your carers aren’t available
15.6 Adjusting the fixed speaker volume for alarm calls
16. Phone disconnect and off hook warning
17. Clean start default
17.1 Default programming
17.2 Remove ID message
17.3 Remove all taught programmed transmitters
17.4 Remove singular transmitters from slots
18. Remote programming
18.1 Remote programming procedure
18.2 Bar access to remote programming
19. HELP button – Backlighting
20. Introduction to the LCD screen
20.1 How to program a contact list number
20.2 How to call a contact from the contact list
20.3 The LCD screen Some more special features
20.4 Daylight savings adjustment
20.5 Eight optional “User control” functions
20.6 To access control functions
20.7 Set away mode
20.8 Set home mode
20.9 Set pill reminder
20.10 Stop pill reminder
20.11 Set loud ringer
20.12 Stop loud ringer
20.13 Stop strobe
20.14 Start walk test
20.15 Display options
20.16 Caller ID
20.16.1 To view missed calls
20.16.2 To dial back a missed call
Page 11

11
20.16.3 To delete a missed call
20.16.4 To delete an entire missed call list
21. Trouble shooting
22. Accessories and warranties
23. Product warranty
24. Product liability
25. Manufactured to export quality
26. Set up Caller ID advanced settings - optional
27. Programming schedules
Page 12

12
11
9. PROGRAMMING YOUR BLUE PHONE - General Tips
This manual will guide you through the necessary steps to program
your phone.
You will only need to program the functions you wish to use. However,
please keep this manual in a safe place in case you wish to make a
change, or use another feature later on.
Programming is done via the phone key pad with the phone in the hung up
position or via the LCD screen or in some instances both methods can be
used.
When programming via the keypad for some programming entries you will
be asked to press the “Cancel” button to complete a data entry step.
To begin any programming, you need to enter the Access Code *4 1698
followed by the code of the function you wish to program or change.
When you do this, a tone will sound to indicate that you are keying
information.
When you are keying appropriate information using the correct keys,
the tone is a (low-HIGH) “beep-BEEP" (happy) tone.
If you are keying inappropriate information or using incorrect keys,
the tone is a different (HIGH-low) “BEEP-beep” (unhappy) tone.
1
Note: While programming, if there is a pause between keypad presses
of more than 25 seconds, the programming mode will end (the
unhappy tone will sound). You will have to repeat that part of the
programming.
Page 13

13
12
10. GETTING TO KNOW YOUR BLUE PHONE -
10.1 Introduction
Once your Blue Phone is programmed pressing the “HELP” or pendant
button, the Blue Phone will call
the emergency contacts you have stored in it. By following the prompts the
carer will be able to speak with you via the Blue Phones speaker phone
providing you are not too far away and are able to speak.
When a called number doesn't answer or the call is switched to a
Message bank or answering machine, the Blue Phone will call the next
contact number.
Eight contact numbers, mobile or landline, can be stored on your Blue
Phone and Blue Phone can make a total of nine redial attempts.
Your Blue Phone also operates as a normal everyday phone and can also
provide assistance with difficulties concerning sight, hearing, mobility and
forgetfulness.
10.2 Messages and Announcements
Blue Phone is able to deliver precise messages to both the user and to
the called parties due to its in-built voice messages and pre-recorded
identification (ID) message.
10.3 The built-in messages include:
“Your alarm call is in progress”
“Your alarm call has been received”
“Your alarm call was unsuccessful – please press your pendant
and try again”
“Press access digit to acknowledge"
“If you are ‘OK’ please press your cancel button”
“If you have taken your medication please press your cancel button”
“If you have eaten, please press your cancel button”
“Warning, the telephone line is disconnected or you have a phone
off the hook”.
“The device you are using needs a new battery”
“Your security system is switched on”
“Your security system is switched off”
Page 14

14
10.4 POWER FAIL / POWER REMOVED - IMPORTANT
If the ‘In-Use’ LED light flickers red this is an indication of the Blue Phone’s
plug pack having become dislodged from the 240 v mains power point or a
power outage has occurred.
Red IN-Use light Flicker and “Power Fail” on display = POWER FAIL
If the ‘Help’ button’ ceases to illuminate this means that the battery back-up
is depleted and Blue Phone will be unable to generate an alarm call.
10.5 BATTERY BACK UP
Your Blue Phone’s internal rechargeable battery has a life expectancy
of between 3 to 5 years, however depending on its condition can last
longer.
If your Blue Phone is professionally monitored, both power failure and
battery failure situations will be reported to the monitoring centre
as a system trouble report. This is part of the Blue Phone’s diagnostic
facilities and is only available when Blue Phone is being professionally
monitored via a comput
er-based monitoring centre.
In the event of a power failure, depending on the age and condition
of Blue Phone’s internal battery, it will continue to operate for up to
80 hours. When Blue Phone’s battery back-up is depleted
the alarm signaling call functions will not operate.
To conserve Blue
Phone’s internal battery back-up duration, Blue Phone will not sound
local announcements whilst operating off battery back up.
Page 15

15
14
10.6 Phone Controls - Front Panel
• HELP Button = To send an alarm
• CANCEL = To cancel an alarm call
• Photo Fit Speed Dial Buttons. The speed dial button to the right of the “
“HELP” button has dual purposes. Speed dial or “OK” button for
Inactivity monitoring.
• HOLD = PBX or PSTN (public telephone network) recall (hook-flash)
also with phone in its cradle, use Flash to add in a pause
• Redial = Last number redial
• Volume = Handset and speakerphone volume control
• Speaker = Activates loud speaking hands-free operation.
• LCD screen Menu, Select, Delete, list and Volume – (LCD function buttons)
10.6.1 Phone Controls - Rear of Phone
Battery on-off & system reset switch
• Ringer volume low-medium-high switch
• Socket for connecting the phone power and line
10.7 Speed Dial Buttons (with Photo Fit Caps)
You can program up to ten speed dial telephone numbers into your Blue
Phone using the 4 large buttons below the LCD screen and the 5
th
large
button to the right of the Help button.
Two speed dials are contained within each button. The first of these has
single touch access; the other requires you to press the SELECT button
before accessing the speed dial. Programming the speed dial buttons is
done via the LCD screen commands. The first ten speed dial buttons
correlate to the first ten locations in the Blue Phone’s phone book contacts.
10.8 Photo Fit Speed Dial Buttons - GENERAL COMMENT
Behind the lens caps fitted over each speed dial button is a white label for
you to write the name of the person for which that dial-up button will be used.
Alternatively this label can be replaced with a photo of that person.
Please take care when removing and replacing lens caps – each is slightly
different and will only fit its corresponding button.
We strongly recommend that you remove and replace one cap at a time.
Each cap’s location (1 to 6) is marked on the cap’s top edge and should be
re-fitted to its correct location with this marked edge to the top of its button
location.
Page 16

16
15
10.9 The Talking Clock
If you press the number 5 button twice [55] the Blue Phone will sound the
time and day. The button 5 also has a raised dimple in the centre of the
button for easy location.
10.10 Sounding of the Key Pad Buttons
Blue Phone can sound the keypad number buttons when pressed.
To turn this ON press [* Select 4 1] Off = [* Select 4 0]
10.11 Ringer and Extra Loud Sounding Ringer
(This can also be accessed by the LCD screen)
The three-position switch at the rear of the phone allows you to adjust
the ringer volume. The options are Low, Medium, High.
For users with a hearing problem the “Extra Loud” ring can also be used.
To turn loud sounding ring on via the key pad
Press [* SELECT 1 ]
To return the loud sounding ringer volume to the normal setting:
Press [* SELECT 0 ]
10.12 Hearing Aid Induction Loop
The Blue Phone handset incorporates a hearing aid induction loop
allowing it to be used with compatible hearing aids.
However, using the Blue Phone in 'Speaker Phone' mode, pressing
[SPEAKER] and adjusting the volume via the 'Volume'
button may provide more satisfactory results.
10.13 The Hold Button
To Place a Call on Hold
Press the [HOLD ] button.
To return to the call:
Press the [HOLD ] button again.
Whether you can use this feature will depend on it being available
through your external (e.g. Telstra) or internal (e.g. community living)
telephone network.
10.14 Last Number Redial
To redial the last number you entered:
First lift the handset or press the 'Speaker Phone' button.
Press the [REDIAL ] button.
The phone will then redial the last number you entered via the normal
keypad buttons.
Page 17

17
16
10.15 Speaker Phone Mode
To place your Blue Phone in hands-free, two-way loud speaking mode:
Press the [SPEAKER ] button.
The volume button is located to the right of the LCD screen. You can make
or answer a call using the handset and then press the
Speaker Phone button then replace the handset in its cradle for handsfree
operation.
10.16 Smoke Alarm Reporting
If you have purchased a Blue Phone wireless smoke detector, Once
programmed, when activated it will trigger your Blue Phone to report a
“smoke alarm”
to your carer network. As with a normal alarm call, a two-way voice
communication path will open between the carer and your residence.
See Programming Schedule Ref 23 for instructions on how to program a
wireless Smoke detector.
11. DAILY 'OK' FACILITY - Inactivity Monitoring
You may choose to use the Blue Phones “Daily OK” feature. This would
require the user to press the “OK” button every day before a certain time.
Failure to do this and Blue Phone will sound a reminder announcement
every 10 seconds for approx 18 minutes. Still if the “OK” button is not
pressed an alarm call will be despatched. This is a great facility for people
living alone.
Installing a suitable passive infrared movement sensor (PIR) – linked
to your Blue Phone – in an area you pass through every morning, will
automatically satisfy the OK requirement, provided you pass through
that area. This function is particularly useful for users who regularly
forget to press the ‘OK’ button. This PIR is programmed into the Blue Phone
using the same sequence as programming a security device. As described in
the Programming Schedule Ref 22.6
If you wish to use this daily 'OK' facility:
Remove the Speed Dial button cap the right of the help button and replace it
after inserting the blue 'OK' label supplied underneath the white blank. Then
complete the programming as described in the Programming Schedule Ref
21.1.
If you’re going away and want to turn the Daily OK facility off, This is referred
to the away mode. Refer to the LCD Screen Programming section called
Page 18

18
17
Home and away.
12. Home Security – Intruder Alarm
Once you have a Blue Phone Wireless Passive Infrared (PIR) motion
detector installed at your home, your Blue Phone can be programmed
to detect if an intruder has entered your premises. All you need to do
is to arm your Blue Phone before you leave home.
Home security is armed and disarmed by entering the security PIN *8 1234
via the key pad or by a dedicated pendant taught into slots 46 and 47. (the
security PIN can be changed). See the Programming Schedule Ref 22.1 for
programming instructions.
When you switch the system on, exit delay tones will sound for
30 seconds while you leave the premises.
When you enter the premises, the system is set with a 30 second
(silent) delay to allow you time to disarm the system at the keypad.
Both the exit and entry delay periods can be altered if necessary.
See Programming Schedule Ref 22.4 & 22.5 for detailed programming
instructions.
Once armed, and the security detectors programmed in correctly your Blue
Phone will now verbally report a “security alarm” to your support network.
And two-way voice contact will automatically be opened between your
premises and your network member who accepts the call.
See Programming Schedule Ref 22.6 for programming a security detector
such as a PIR.
13. MAINTAINING CORRECT TIME
Your Blue Phone has an inbuilt real time clock with day of the week, hour
and minute being displayed on the LCD screen or can be sounded by voice
annunciation. Pressing the key pad ‘5’ button twice with handset on hook (in
its cradle) will cause the Blue Phone to announce the day of the week and
time including am or pm period.
There will be occasions that require you to adjust the clock this can be done
via the LCD screen controls or via the key pad. Simple adjustment for
daylight saving is done via the LCD screen as described in section 20.4.
To Adjust the time by the use of the phone key pad:Press [* SELECT 9] “Beep-Beep” now enter 5 digits to set the day, hours
and minutes.
Page 19

19
Where:- 1 digit [Day 1-7] 1 = Monday 2= Tuesday etc..7 = Sunday
[Hour 00-23] 2 digits [Min 00-59] 2 digits
Example to set the time via key pad:-
The following sets the day and time to Tuesday at 9.45pm:[* SELECT 9] “Beep-Beep” 22145 “Beep-Beep”. The acknowledgment
‘beeps’ identify that the information has been accepted by the Blue Phone.
Page 20

20
19
14. PENADANTS
14.1 Personal Pendant
When you receive your Blue Phone, your personal pendant will have
already been programmed before delivery.
The pendant uses a high quality lithium battery which should have
a life expectancy of two years. However depending on usage it can last
up to five years or longer. The range of the pendant is up to 80 metres
depending on the building construction.
14.2 Pendant Range Test
You should conduct a pendant range test around your residence, pressing
your pendant button at increasing intervals from your Blue Phone to
establish the limits of its range.
Range/walk test can be activated by the keypad (or LCD screen commands
Ref: 20.14)
To enter walk test mode by the keypad
Press [* SELECT 3 ]
To end the walk test:
Press [CANCEL].
Your Blue Phone will drop out of walk test mode if it has not received
a signal within approximately 5 minutes.
14.3 Adding Extra Pendants
Refer to the Programming Schedule Ref 10 for the quick method of
programming another pendant.
Up to 48 wireless devices can be programmed into one Blue Phone. Each
pendant or wireless device will be taught into its own slot. These slots are
numbered 00 to 47. Slots 44 to 47 have special attributes. 43 Door Chime,
44 & 45 Answer the phone via the Pendant and 46 & 47 Remote Arming of
Blue Phones security system.
14.4 Pendant Low Battery Warning
When your pendant has a low battery it will continue to operate for
approximately three months before it becomes inoperative. If a low
battery condition is detected when the pendant is activated, Blue
Phone will sound the announcement “The device you are using needs
a new battery” followed by the normal massage “Your alarm call is in
progress” It is important to press the pendant weekly to both test that
the pendant is working and its battery status. If your pendant requires
Page 21

21
a new battery the pendant can be snapped open and the battery replaced.
14.5 Answering the Phone with Your Pendant
When your pendant has been programmed to do so, you can answer
an incoming call by pressing the pendant button. Your phone will be
switched automatically to two-way loud speaking mode.
Similarly, the pendant can then be used to hang up the call. At all other
Times pressing the pendant will generate an alarm call.
This is highly beneficial for those with mobility problems.
Your Blue phone has been supplied with the pendant taught into slot 00. To
allow this pendant to answer the phone remotely you will need to remove it
from slot 00 and re teach it into slot 44 or 45. Blue Phone allows for 2
pendants which are able to answer the phone remotely.
To remove the pendant from slot 00 enter [*4 1698 18 00]
To program this pendant in slot 44 enter [*4 1698 17 44] Now press the
pendant and phone will beep. Now press [Cancel].
Also detailed Programming Schedule Ref 11
Note: There is a 10 second receive lock-out period on the Blue Phone
receiver once the phone has been answered and hung up via the pendant.
This is so a call can’t be answered and hung up accidently by pressing the
pendant more than once in short secession.
If you remove any programmed transmitters It is also important to check all
or any other programmed transmitters in case you have accidently removed
one that should have remained.
14.6 Door Bell/Granny flat – Local Alarm
Your Blue Phone can be programmed to respond to a 'door bell'
transmitter or other sensors that may require a local alarm e.g. in a
granny flat or to monitor bed exit or perhaps as an electronic door bell.
In each of these situations it would be necessary to purchase additional
Blue-Phone wireless transmitting devices. Unlike other types of alarms,
a local alarm is one where Blue Phone will not dial out and report this
to your carer network. To program a RF device for the Chime Only alert
enter [*4 1698 17 43] [Now press the pendant]. Phone will beep. Now
press [CANCEL]
Also detailed in Programming Schedule Ref 17
Page 22

22
15. MAKING AN ALARM CALL
15.1 The Pendant and HELP button
To make an alarm call simply press your pendant or the Blue Phone’s HELP
button. That’s all you have to do. Blue Phone will respond with the
announcement, “Your Alarm Call is in Progress”.
15.2 Cancelling an Alarm Call
An alarm call can be cancelled both within and after the ten-second
'pre-alarm' period.
To cancel the call within the pre-alarm period:
Press [CANCEL ].
To cancel the call after the pre-alarm period:
Lift and replace the handset.
15.3 Receiving an Alarm Call – What Your Carers Should Do
When an alarm call is made, the carer who answers the call will hear
your recorded identification message play as an endless loop. They
should not panic – they can listen to this message in its entirety before
acknowledging the call. (The message will play six times before the
Blue Phone hangs up and dials the next carer Dial Up number.)
The carer will hear:
the message “Alarm”,
then the recorded identification (ID) message,
then the prompt “To acknowledge press hash key now”.
The carer is required to press the [#] button on their phone after the prompt.
This will place the Blue Phone in speaker phone mode.
Before the carer hangs up they should press the * button twice [**]. This will
hang up the Blue Phone placing it in “auto answer mode” for about 4
minutes) This will allow the carer to call back subsequent times to advise an
ambulance has been called for example.
Note: If they forget to press the * button twice, it does not matter.
Your Blue Phone will reset itself after a few minutes.
Alternatively, if you lift/replace the handset, it will revert to its normal off-line
condition.
15.4 Carer Remote commands
The carer can remotely increase and decrease the Blue phone’s volume by
pressing buttons 6 and 9 respectively. Pressing button 3 will cut off the Blue
Phone’s speaker and increase the microphone pick up. Pressing button 3
again will return the speakerphone to normal.
Page 23

23
22
15.5 If Your Carers aren't Available
You can program Blue Phone to call both landlines and mobile numbers
for your carer network. When a carer’s phone does not answer, your
identification message will be recorded on mailboxes and answering
machines if the carer has this facility. Similarly, a 'missed call' message
will normally be left on the carer’s mobile phone.
Blue Phone will rotate through up to eight programmed carer numbers
and in total can make nine re-dial attempts. i.e. if you only have three
carers’ numbers programmed, Blue Phone will make nine attempts
rotating through these three numbers. After making nine dial attempts
and no one answers the call, Blue Phone will sound the announcement,
“Your alarm call was unsuccessful. Press your HELP button to try
again”.
15.6 Adjusting the Fixed Speaker Phone Volume for Alarm Calls
This volume is set to level 4 out of 7 [0-7]
If the volume is too low you can increase it by entering [*4 1698 51] then a
digit [0 to 7] If the speaker phone clips because the speaker is too loud
decrease the speaker volume. This volume can also be increased remotely
during the call back. See 15.4
16. Phone Disconnect and off Hook Warning
Your Blue Phone will announce 'Warning your telephone line is
disconnected or you have another phone off hook' if either of these
conditions occur.
The warning will sound every hour except during the night period.(between
10 pm and 8 am)
While this is an important safeguard, it can be disabled or the
length between warning announcements altered.
See Programming Schedule Ref 122
Page 24

24
17. Clean start Default
17.1 Default Programming
To remove all the emergency dial up numbers and any other parameters you
may have adjusted do a “Clean Start Default”
This is done by entering [*4 1698 48]
17.2 Remove ID Message
This will not remove the recorded ID message. To remove the ID message,
enter [*4 1698 10] and then do not record a new message, just press
Cancel.
17.3 Remove all Taught Programmed Transmitters
If you want to remove all taught radio devices i.e. pendants
enter [*4 1698 11].
17.4 Remove singular transmitters from slots
If you want to delete single transmitters from a slot [*4 1698 18] now enter the two digit number of the slot [##]
18. REMOTE PROGRAMMING
Almost all Blue Phone programming can be carried out remotely.
Exceptions are user functions such as programming the LCD Screen phone
book and Walk Test i.e. checking the range of your pendant.
If opting for professional monitoring, the monitoring control centre,
can implement professional monitoring, remotely.
Remote programming can be conducted while your residence is vacant
without disturbing you, other than one or two bursts of ringing
the phone at the commencement of the remote programming.
18.1 Remote Programming Procedure
To program your Blue Phone from a remote location:
Dial the Blue Phone’s number and let it ring for no more than
3 bursts (i.e. “ring-ring…ring”), then hang up.
If four or more ring bursts occur, then the Blue Phone will not open
its remote access “ring-back” window.
The 'ring-back' window commences 10 seconds after the original ring
burst (as above) and remains open for 10 seconds. The 'ring back' must
therefore occur within this 10-second window of opportunity.
Ring back into Blue Phone and it will automatically accept the
incoming call on the initial ring burst.
After 10 seconds Your Blue Phone will sound an acknowledgement Beep
and then you may begin programming remotely. As you enter a command
Page 25

25
successfully “A” (=Accept) will sound. If you hear “F” (Fail) you will have to
enter that part of the programming again.
All programming is done via the remote phone’s keypad. However as
the remote phone being used for programming does not have [CANCEL ]
and [SELECT ] buttons, it is necessary to substitute those commands
as follows:
[# ] when [CANCEL ] is required, and
[*] when [SELECT ] is required.
When remote programming a pendant you can enter the five digit code for
that pendant (instead of pressing the pendant to teach it). Refer to
”Announce TX code function”. See Programming Schedule 16 to learn how
to extract the code from a pendant.
When the programming session is completed, enter the Access Code
[*4 1689] followed by the address [43 ]. This will terminate the call and end
the remote programming session.
18.2 Bar Access to Remote Programming
To disable the ability to remote program your Blue Phone remotely enter
[*4 2936 45 0] To re-establish remote programming enter [*4 2936 45 1]
19. THE HELP BUTTON BACK LIGHTING
The HELP Button has been pre-set at the factory to suit medical
alarm applications. Simply pressing the Help button will do the same as the
pendant. It is Backlit so it’s easy to find during the night. The back lighting is
supported by the battery backup. If the Blue Phone is running of battery
backup and this becomes depleted you can expect there is not enough
power to generate an alarm call from the units battery backup.
Page 26

26
25
20. INTRODUCTION TO THE LCD SCREEN.
The LCD screen will display the DAY, DATE and the TIME and illuminate
when the handset is lifted or if the ‘Speaker’ button or a ‘Function’ button
(located to the left and right of the screen) is pressed. It also has capability to
program up to 50 (including photo fit speed dials) names and phone
numbers into its Phone Book ‘Contacts List’.
Other useful functions are also accessed by the LCD screen. Some of these
functions are also accessible via the keypad.
The first 10 contacts in the contacts list can be accessed simply by pressing
the large photo fit speed dial buttons. The first 5 are ‘one touch’ speed dials.
Contacts 6 to 10 are ‘two touch’ speed dials where the [SELECT] button is
pressed before the large speed dial button. If you are using the Daily “OK”
feature, the 5
th
Photo Fit Speed Dial button will be dedicated to daily “OK”
and not available for speed dial purposes.
20.1 How to Program a Contact List Name & Number
To enter programming mode
(a) Press List. This will display the full details of the first [01]
contact number and name details. The memory number is shown top
right search for the next or to select the required memory location)
(b) Press Menu. The screen will now also show the word EDIT? This
is an invitation to commence entering or editing the required phone
number followed by the required name for that particular memory
location.
To enter or edit phone number followed by contact name
(a) Press ‘Select’. The word EDIT? will be replaced by the word
‘TEMP?’ and the curser will be displayed for the commencement of
entering or editing the required phone number for that memory location.
Now commence to Enter the number of the first contact. However, if
an existing number needs to be removed continue to press the ‘Delete’
button until all number are removed in order to achieve a ‘clean start’.
(b) Press ‘Down Arrow’ Button. The curser will now be in the position to
commence entering the Contact’s name. If a previous name exists use
the ‘Delete’ button to achieve a ‘clean start’.
Page 27

27
26
(c) Press ‘Select’. This will lock in the entered information.
(d) Press ‘List’. To continue with further programming or
(e) Press ‘List Twice’ To Exit the programming mode
20.2 How to Call a Contact from the Contact list
(a) Press List. Then use arrow Up and Down buttons to find the required
name and phone number.
(b) Lift Handset or Press ‘SPEAKER’ button – to access phone line,
(c) Press ‘REDIAL’ button - to activate the call.
20.3 THE LCD SCREEN – SOME SPECIAL FUNCTIONS
Setting the Clock.
(a) Press Menu ‘USER’ will be displayed
(b) Press Select ‘CLOCK SETTING’ will be displayed
(c) Press Select ‘HOUR’ will be displayed - now enter the
Hour/Minute/Date progressing by pressing the ‘Down’ button until the word
‘SAVE’ appears then:Press Select to Save.
20.4 Daylight Savings (DLS) Adjustment
The following procedure will set the Blue Phone’s (DLS) clock forward or
back one hour.
Press Menu ‘USER’ will be displayed.
Press Select ‘Clock Setting’ will be displayed.
Press Arrow Down ‘Day Light Savings’ will be
displayed.
Press ‘Select’ ‘DLS ENTER’ will be displayed.
Press ‘Arrow ‘UP’ button To advance time by one hour [or]
Press ‘Arrow Down’ To decrease time by one hour.
Press ‘Select’ To save time change
NOTE. When entering NAME in the Contact List it is necessary to
progress to the next letter by pressing the ‘Speaker’ button.
Pressing the Delete Function key will delete the last letter entered.
Page 28

28
20.5 Eight optional ‘User Control’ functions
Although there is a wide range of special control functions available to
installers and monitoring service providers certain ‘User Friendly’ options are
made available to the Blue Phone user. These are enabled or disabled by
use of the Function Keys located on each side of the LCD display screen.
The following provides access and control commands to enable up to eight
such facilities. The following commands will allow access to those selected
facilities.
20.6 TO ACCESS CONTROLS
Press Menu ‘USER’ will be displayed.
Press Select ‘CLOCK SETTING’ will be displayed
Press Down Arrow twice ‘CONTROLS’ will be displayed
Press Select. First of the Optional Controls is displayed
this being the ‘Set Away Mode’ described
below.
20.7 SET AWAY MODE
Having already selected this Controls options programming mode above:Press Select
NOTE: The Away and Home activity mode option is only applicable if your
Blue Phone has The Daily “OK” Feature enabled.
This facility allows you to easily turn off the inactivity monitoring if you’re
leaving your home for a period of time.
Having entered the ‘Away Mode’ the button with the label [OK] will flash until
you return in order to draw your attention to reactivating the Inactivity
monitoring Mode when returning home.
Upon your return home simply press the flashing ‘OK’ button which will then
automatically reinstate the inactivity monitoring facility. The Blue Phone will
then confirm your action by announcing “Home -Thank You”.
Home and away modes also available via keypad commands
[* SELECT 6] =ON [* SELECT 7] = Off)
Note: If Blue Phone is switched off at the battery on/off switch or resets its
self by way of its internal watch dog facility, the home and away will revert to
the home Mode
Page 29

29
28
20.8 SET HOME MODE (Also available via keypad [* SELECT 7]
Having selected the Controls option as described in 20.6 and continued to
press the Arrow Down button to select ‘Home Mode’ :-
Press Select
This reinstates Inactivity monitoring for the DAILY “OK” feature.
20.9 SET PILL REMINDER
Having selected the Controls option as described in 20.6 above and
continued to press the Arrow Down button to select ‘Set Pill Reminder’ :-
Press Select
Having enabled the medication reminder the Blue Phone will sound the
reminder message to “….take your medication”. This message will sound at
the same time each day and pressing the OK button will stop this
announcement.
The “OK’ button will flash to draw your attention to the need for you to press
it. This is a local alarm only and will not dial out if the OK button is not
pressed. The reminder announcement will sound for one hour and after
which time the OK button will continue to flash until pressed.
NOTE: As previously mentioned The OK button is the button to the right of
the Help button. The ‘OK’ label is stored underneath the white blank label
within the lens cap. This button has dual functions.
20.10 STOP PILL REMINDER
Having selected the Controls option as described in 20.6 above, continue to
press the Arrow Down button to select ‘Stop Pill Reminder:Press Select
Selecting the ‘Stop Pill Reminder’ option will disable that option and stop the
medication reminder message from sounding each day.
Note: If Blue Phone is switched off at the battery on/off switch or resets its
self by way of its internal watch dog facility, the Pill reminder will revert back
to its off mode.
20.11 SET LOUD RINGER
Page 30

30
29
Having selected the Controls option as described in 20.6 above, continued
to press the Arrow Down button to select ‘SET LOUD RINGER’
Press Select
This facility is particularly useful for people that suffer hearing loss, use in
large houses or when the user is in the garden.
Also available via keypad command [*SELECT 1] = on
20.12 STOP LOUD RINGER
Having selected the Controls option as described in 20.6 above, continue to
press the Arrow Down button to select ‘STOP LOUD RINGER
Press Select
Also available via keypad command [* SELECT 0]= off
20.13 STOP STROBE
Having selected the Controls option as described in 20.6 continue to press
the Arrow Down button to select ‘STOP STROBE’
Press Select
NOTE: This is only applicable if an outside strobe alert light is fitted to your
home and operated via Blue Phone. This command allows you to turn off the
strobe manually whereas it is usually turned off automatically when pressing
the Cancel button to cancel a prior alarm call.
20.14 START WALK TEST
Having selected the Controls option as described in 20.6 above, continue to
press the Arrow Down button to select ‘START WALK TEST’
Press Select
NOTE: This facility is also available via the key pad. [* SELECT 3] = on
Press cancel to drop out of walk/range test mode or the Blue Phone will
automatically drop out after a few minutes of not receiving a transmition.
20.15 DISPLAY OPTIONS
You can choose what is to be displayed on the LCD screen for everyday
use.
Press Menu USER will be displayed
Press Select CLOCK SETTING will be displayed
Press Down Arrow 4times …DISPLAY OPTIONS will be displayed
Press Select
Page 31

31
30
Use the Arrow down buttons to move through the options then use the dial
keypad buttons to make your selection for each option as shown below.
Press the ‘Down Button’ between options.
• Display the day of the week 1= Yes, 2=No
• Phone call duration (timer) 1=Yes, 2= No
• List (Contacts) 0 = Normal, 1=Locked,
2= Hidden)
NOTE.
Locked = Contact list cannot be changed/edited
Hidden = Remove contact list feature. However the photo-Fit speed dialing is
still accessible.
Press Save To save your selection of above options
Explanations for programming of display options:
Day of the week: Enter 1 for Monday through to 7 for Sunday, however this
will have been pre-set if Blue Phone has been correctly programmed for date
and time.
Page 32

32
31
20.16 Caller ID
Your Blue Phone has the ability to display a calling party’s phone number
but this feature is only available if your service provider has enabled this
facility and you have activated Caller ID on your Blue Phone.
Press Menu USER will be displayed
Press Select CLOCK SETTING will be displayed
Press Down Arrow 3 times CALLER ID will be displayed
Press Select CALLER ID Enter 1=On 0=Off
Press arrow down FLASH LCD Enter 1=On 0=Off
LCD screen will flash is you have a new call
Press Arrow Down Group Calls will be displayed
Press Arrow Down INFO will be displayed
Press Arrow Down Save? will be displayed
Press Select Saved will be displayed
Note: Group Calls and INFO are advanced options see Section 26 for these
options
Some phone lines will automatically have this service enabled. If your phone
line has caller ID enabled you will need to enable caller ID on your Blue
Phone.
When enabled “From” will be displayed on the LCD screen followed by the
calling parties number or name if they are in the Blue Phone’s contact list.
20.16.1 To View Missed Calls
Press Arrow up or down while the phone has its handset in its cradle (on
hook)
20.16.2 To dial back a Missed Call
Lift the handset and Press Redial
20.16.3 To Delete a Missed Call - Having viewed ‘missed calls’ as above;
Press Delete
20.16.4 To Delete Entire Missed Call List Having viewed ‘missed calls’ as
above.
Press Delete and hold for 5 seconds
NOTE: When multiple calls are received from the same caller, only the most
recent will appear in the list. The Missed call Icon appears in the list when
there are new calls in the “From” list that have not yet been viewed.
Page 33

33
32
21. TROUBLE SHOOTING
Q. After switching on I don’t get a dial tone.
A. Check your phone connections. It is possible the wiring at the phone
socket is not compatible. Try another socket in the house to see
if this remedies the problem.
Q. I have a line but no announcements are made from the phone.
A. Is the unit switched on at the On/Off battery switch located at the
rear of the phone? Check that the power is connected.
Blue Phone requires external power for its local voice
announcements.
Q. When I’m on the other phone I hear the announcement “Your
phone line is disconnected or you have another phone off hook”.
If you are on the other phone for more than an hour you will hear
this announcement.]
A. A line disconnect and another phone being off-hook are both
detected by a drop in line voltage. This feature partially helps
to overcome the mode 3 line seize issue.
This is a valuable feature but you can extend the time period out
to two or more hours or disable it completely. See Ref 12 in the
Programming schedule.
Q. I hear a loud busy tone after an alarm call.
A. This is because the person (carer) who answered the alarm call
did not press [**] before hanging up. The phone will also give an
engaged or busy tone signal if that person tries to call back.
However, Blue Phone will restore itself to normal operation after
a few minutes or you can lift and replace the hand piece on the
Blue Phone to restore it to its normal condition.
Q. As a carer, during an alarm call, when I’m talking in two-way
handsfree, after two minutes I hear a ‘beep’ tone and then five
seconds later the Blue Phone hangs up.
A. During an alarm call the carer has control and can talk on handsfree
for hours, but every two minutes the carer will hear a ‘beep’
tone. The carer is required to press the [ #] button again within
five seconds of hearing this ‘beep’. This will re-start the two-minute
timer.
Q. I have a message programmed to sound at a particular time, and
I want to replace this message for another but the Blue Phone
won’t allow me to make this change.
A. You will need to disable this message event by setting its hour
to 00. You can program all three messages to sound at different
times once per day. You must disable a message by entering 00
Page 34

34
33
for its hour before replacing it with another.
Q. I am programming a pendant correctly but it still won’t work
A. Is the pendant already programmed into the phone? If a pendant
is programmed into more than one slot it will respond according
to the lowest slot it is programmed to. The Blue Phone comes with
the pendant programmed into its allocated slot [00].
See Ref 20.2 and 20.3 in the Programming Schedule.
Q. I program a pendant correctly but my other pendants now don’t
work.
A. You can program up to 48 pendants (transmitters) into one Blue
Phone but you can only program one pendant per slot. Are you
programming more than one pendant to the same slot and
overwriting the first pendant programmed to that slot?
Q. My Blue Phone beeps sometimes.
A. The only beeps Blue Phone will sound is during programming,
during an exit delay after arming the intrusion alarm or call
in progress beeps while dialling out after an alarm is activated.
Electronic beeping sounds are often difficult to pin point where
they are coming from. Is it some other device in the premises such
as a smoke detector reporting a low battery condition?
Q. False alarms: My Blue Phone goes into alarm by its self.
A. An alarm can only occur by pressing the Assist button or by
receiving a signal from a pendant that has been programmed into
the Blue Phone. Were you wearing your pendant at the time? Is it
possible you accidentally pressed your pendant? Check that the
Assist button has not been fouled by anything. Each pendant has
its own distinct code. It is very unlikely that another device in your
area is on the same frequency and also has the same distinct code.
Q. My Daily Call announcement sounds at the wrong time of the day.
A. Have you programmed the correct time for the announcement
to sound?
Page 35

35
34
22. ACCESSORIES
Blue Phone Accessory Items
Accessory Items and spare parts are available from
Smart-Caller Pty Ltd
Visit our website
www.bluephone.com.au
or Phone 03 9588 0833 to place
your order.
Standard Pendant – Part No: BP-PET-304-GRA
The pendant supplied with your blue phone is designed to be worn
around the neck and the cord supplied has a weak link designed
to break to avoid strangulation.
The pendant is waterproof but if it is worn in the shower regularly,
the pendant should be tested more frequently.
If the pendant requires a battery replacement it should be returned
to the manufacturer or service agent.
Utility Transmitter – Part No: BP-UTIL-01
This transmitter is lithium battery powered and comes in a mounting
Box approx 40 x 50 x 15 mm. It is ideal to attach to any closing
contact where you may have a special requirement.
Wireless Passive Infrared (PIR) Motion Detector – Part No: BP-PIR-01
This passive infrared motion detector is ideal for detecting an
intruder,or for use as an inactivity sensor.
Wireless Reed Switch – Part No: DOOR-REED-01
This wireless reed switch can detect the opening of a door or
window.
It is programmed into the Blue Phone the same as a PIR.
Wireless Smoke Detector – Part No: FIDSC-9VDC-01
For programming into your Blue Phone and have smoke alarms
reported to your support network.
Wall Mount Bracket – Part No: HP4-WM-01
Where wall mounting is required, the Blue Phone uses a standard
international format wall mount bracket.
Power Pack – Part No: HP4-PP-RJ-01
A 9-Volt DC 300 mA power plug-pack with a special interference
filter.(This model plug-pack must be used with Blue Phone as it
forms part of Blue Phone’s connection permit).
Phone Battery Part No: BAT-5V\HP/HD3
NiMH4.8 v Replacement batter for Blue Phone
Curly Cord Part No: CURLY-CRD HP2
Replacement curly cord for HP4 Blue Phone
Page 36

36
35
23. PRODUCT WARRANTY
Your Blue Phone and pendant (‘The products’) are warranted for 12 months
from the date of purchase. Subject to the conditions of this warranty,
Smart Caller or its Authorised Service Centre will perform
necessary service on the products without charge for parts or labor if,
in the sole opinion of Smart Caller, the products are found
to be faulty within the above warranty period.
This Warranty only applies to products which are sold by Smart Caller
or its Authorised Distributors or Dealers and only where
the products are used and serviced within Australia or its territories. This
warranty covers only service carried out by the Blue Phone – Authorised
Service Centre and is only valid if proof of purchase is presented at the
same time as service is requested.
This warranty is valid only if the products have been installed and used
in accordance with the manufacturers’ recommendations (as noted in the
enclosed operating instructions) under normal use and reasonable care
(in the sole and unfettered opinion of Smart Caller).
This warranty covers normal domestic use only and does not cover any
damage, malfunction or failure which has been caused by or contributed
to by the use of non-genuine parts and accessories, liquid ingression,
use of incorrect voltage, accident, misuse, neglect, build-up of dirt or dust,
abuse, maladjustment of controls, power failures or surges, thunderstorm,
lightning strikes, infestation by insects or vermin, tampering or repair
by unauthorized persons (including unauthorized alterations), exposure
to corrosive conditions or any foreign object or matter having entered
the products.
This warranty does not cover any consumable items unless the fault
or defect being complained of existed at the time of purchase:
If warranty service is required you should:
Telephone the Blue Phone Customer Care Centre on 03 9588 0833
or visit our website www.bluephone.com.au.
Provide a copy of your purchase receipt as proof of date of purchase.
This warranty does not extend to any costs associated with the delivery,
handling, freighting or transportation of the product or any part thereof
or replacement of and does not extend to any damage or loss occurring
during or associated with transit.
Subject to relevant legislation, this warranty does not extend to any
consequential loss, damage or injury to either person or property, or to any
loss, damage or injury which may be suffered or incurred even if the initial
fault in or of the product was due to the negligence of Smart Caller.
Unless otherwise expressly specified, the benefits conferred by this
Page 37

37
36
warranty are additional to all other conditions, warranties, guarantees,
rights and remedies expressed or implied by the Trade Practices Act (1974 )
and similar consumer protection provisions contained in legislation of
the States and Territories of Australia. All other obligations and liabilities
on the part of the manufacturer or supplier contained herein shall not
restrict or modify such statutory rights, remedies, obligations or liabilities.
Any variation to these terms shall not be recognized unless such variation
is in writing and signed by and on behalf of Smart Caller.
THE PURCHASE DOCKET OR SIMILAR PROOF OF PURCHASE
SHOULD BE RETAINED BY THE CUSTOMER AT ALL TIMES
24. PRODUCT LIABILITY
Blue Phone and its accessory items (the product) is designed to be self
installed and maintained by the purchaser (the owner) and the on-going
maintenance and testing is solely the owner’s responsibility.
The manufacturer has no control or means of surveillance in relation
to the installation, programming and continuous on-going reliable
operation of the product.
If the product is not professionally monitored it is important to note that
various in-built diagnostics that assist in providing on-going connection
and reliable operation are not available.
25. MANUFACTURED TO EXPORT QUALITY
Blue Phone is designed and manufactured in Australia for Australian
and overseas markets.
In Australia and New Zealand it complies with the following standards:
AS/ACIF040 “Needs for persons with disabilities”.
AS/NXS9001:2000 “Quality Management Systems”.
When used with a professional monitoring centre it also complies
with standards:
AS4607 “Personal Response Systems”,
AS2999 “Alarm Systems for the Elderly”.
26. SETUP Caller ID Advanced settings Optional
- GROUP-CALLS (Yes/No): Selects whether repeated calls from the same
Page 38

38
number are grouped as a single entry with a repeat count
(i.e. previous calls from this number are deleted from the list).
Otherwise all calls are recorded.
- INFO: Selects what information is shown when "FROM" calls are reviewed.
NONE - No call number or repeat count is shown.
REPEAT# - Show repeat count only.
CALL# - Show call number only (i.e. CALL#01 is the oldest).
CALL/RPT# - Show call number with flashing repeat count.
USE SELECT - Pressing select will toggle through the above options.
Page 39

39
27. PROGRAMMING SCHEDULE
Note: All programming is done with the handset in the cradle.
General set up and options
Ref
Description Access
Code
Addr
ess
code
Programming
1
Programing
the First Dial
Up Number
*4 1698
30
• Enter [1] for first dial up number
• Enter [2] to program a dial up number
• Enter [Phone Number]
• Now press [CANCEL]
The only difference between entering the 1
st
subsequent dial up
numbers is the destination slot [1 to 8]
2
Programing
the Second
Dial Up
Number
*4 1698
30
• Enter [2] for the send dial up number.
• Enter [2] to program
• Enter [Phone Number]
•
Now press [CANCEL] to end
3
To check Dial
Up Numbers
*4 1698
49
• Now enter [1] Blue phone will sound 1
st
dial up number
• Now enter [2] Blue Phone will sound 2
nd
dial up number
And so on. Press CANCEL to drop out of this mode
Page 40

40
4
Recording
Your Personal
ID Message
*4 1698
10
• Now [Speak Message] into handset Mic
• Press [CANCEL] when finished.
Note: As all programming is done with the cradle but you need
to speak into the handset mic. You
must hold the hook switch leaver down whist handset is not in
cradle. Record time is approx 15 seconds.
5
Checking your
ID message
*4 1698
55
• Enter [1]
6
Sound key pad
ON & OFF
• [ * SELECT 41] = On [ *SELECT 40] = Off]
Blue Phone will sound the keypad numbers as you dial if you have
turned this feature on. Great for people with sight problems.
7
Outgoing
message
loops
*4 1698
28
• Enter 2 digits [04 to 06]
Default is 06
This is the Number of times the outgoing ID message will play
before the Blue Phone hangs up and dials the next dial up
number. Each loop is approx 30 seconds long depending on the
length of the ID message. Sometimes 6 times is too many times
and takes too long. This can be shortened to 4 times by entering
04
Page 41

41
8
Adding a 2nd
prompt and
acceptance
digit to
acknowledge
an alarm call
9
Read
Firmware
Revision
*4 1698
*4 1698
53
27
Sounds the firmware version
10
Quick method
to program a
2
nd
pendant
*4 1698
17
programmed to slots 02 to 10
Now [Press the Pendant]. Blue Phone will respond with a beep.
• Enter [1]
If you add a 2nd prompt after pressing the # button there will be
another ( 2nd ) prompt instructing you to “now press 1”. Only after
pressing the 1 button will the alarm call be accepted.
To disable and restore to normal (press # only)
Enter *4 1698 27 0
Page 42

42
11
Quick Method
of
programming
a pendant that
will answer
and hang up
an incoming
call remotely
*4 1698
17
function, use slots 44 and 45
Now Press the Pendant to program. The phone will respond with a
beep.
Now press[CANCEL]
Note; if a pendant is already programmed into a lower slot number it
will respond as programmed into that slot. You may have to delete
the pendant from that slot by using address code 18 or (11 delete all
transmitters) See Ref 20.2 & 20.3 in Prog Schedule
Note: When you hang up via the pendant there is a 10 second delay
before you can active an alarm. This is so a quick double press will
not create a faulse alarm call.
12 Changing Line
Disconnect /
handset off
hook Interval
*4 1698
12
The factory default is 060 = 60 seconds (1 hour)
13
Changing Pre
alarm Interval
*4 1698
33
The pre-alarm period is the delay between when you press the
pendant and Blue Phone dials out for the alarm. It is during the pre-
alarm period you can cancel the alarm by pressing the Cancel button
Page 43

43
14
Altering the
night window
*4 1698
24
{####]
Default is start 22 =10 pm and finish 08=8 am
Diagnostic announcements will not occur during the night window. This
includes line down or phone off hook warning.
15
Pulse or Tone
Dialing
Only Tone dialing supported
16
Announce
Pendant TX
code
*4 1698
42
code of that pendant
This is useful if you want to remotely program a pendant or have a
special requirement
Page 44

44
17
Door Chime
*4 1698
17
Now press [CANCEL]
Activating a transmitter programmed as “Door Chime” will make the
Blue Phone emit a loud tone. Ideal for door bell or other special
requirement sensor.
18
Fully Optioned
Method of
Programming
a Wireless
Transmitter
*4 1698
17
special Purposes. And you can only program 1 device to each slot
[Activate the transmitter] and phone will respond with a beep
Enter [1 or 2 ] 1= 24 hour device such as a medical pendant
. 2=security device i.e. PIR detector
Enter 1 digit [1] You can program a radio device to begin the dial
sequence starting at any dial up number [1 to 8]
Enter a [1] (for zone) Always enter a 1 when dialing family & friends
Enter a [1] (for client) Always enter a 1 when dialing family & friends
Enter one digit to tag outgoing message. [0 to 5] 0=”Alarm”
1= ‘Duress” 2= “Medical” 3=”Smoke” 4= “Security”
Enter 1 digit. Do you want pre-alarm message 1=yes 0=no
Enter one digit. Do you want alarm received acknowledgement
announcement [0=no 1=yes]
Page 45

45
the Cancel button? [0=no 1=yes]
Enter 1 digit. Do you want a (10 second) delay before Blue Phone
starts to dial out [0=no 1=yes]
Enter 1 digit [0]= Normal Pendant [2] = Duress silent
[3] = Security detector and PIR used for inactivity monitoring.
19
Programming
Duress
Pendant
*4 1698
17
pendants. Slots 12 to 20 have been allocated to this purpose.
[Press the Transmitter] The phone will respond with a beep
Enter [1]
Enter [1]
Enter [1]
Enter [1]
Enter [1]
Enter [0]
Enter [0]
Enter [0].
Enter [0]
Enter [2] (2= silent no call in progress beeps)
Page 46

46
A Clean Start - Removing all Programming to Re- program
20.1
Clean Start
*4 1698
48
emergency dial up numbers
and any other parameters
that have been changed
20.2
Delete all
programmed
transmitters
*4 1698
11
This will remove all pendant/transmitters that have been
programmed
20.3
Delete Single
wireless
device
*4 1698
18
47]
20.4
Delete voice
announcement
*4 1698
10
Page 47

47
Programming The Daily OK Facility [A THREE PART PROCESS]
Note: Remember to place the Blue OK label inside the lens cap on the OK button. The label can be found
underneath the white blank inside the lens cap. Also make sure you have the correct time programmed into your
Blue Phone clock
21.1
Select
Message
& Time to
Sound
Message.
(Message No1
most used)
*4 1698
21
Alternatively you can enter 2 or 3 as below.
1 = “If you are OK please press your OK Button
2 = “If you have taken your medication please press your Cancel
button”
3 = “If you have eaten please press your Cancel button”
Enter 2 digits –Hour to sound message. [01 to 24] i.e. 09 =9 am
Enter 8 for daily
21.2
Setting the OK
Button
*4 1698
44
function will dedicate this button to the Daily OK function.
To restore to Speed dial enter 0
21.3
Setting the
Inactivity
Period
*4 1698
47
This is the hour you want the inactivity period to begin.
It ends at the time the reminder announcement is set to sound. Ie If
you set the reminder message to sound at 9 am you can set your
inactivity period to commence at 7am
Page 48

48
This allows two hours before 9 am where the user can press the
“OK” button to satisfy the Daily Call for that day.
To disable enter 00
21.4
Temporarily
Turning the
Daily OK On &
Off
Permanently
Turning Daily
OK Off
There are two ways to turn the Daily OK facility OFF and ON
Press [* SELECT 6] – phone will sound “AWAY” and Cancel button
will flash.
To turn ON press the [CANCEL] button, “HOME” will sound.
Alternatively you can access the Home and Away (On /Off) via the
LCD screen
Restore address codes 21, 44 and 47 back to the default
*4 1698 21 0000
*4 1698 44 0 Restores OK button to speed dial
*4 1698 47 00
Page 49

49
Security Function Options
22.1
Changing Your
Security PIN to
arm/disarm
security
feature
*4 1698
37
The factory default setting
is *8 [1234]
Note: Do not use 55 in your new PIN as this is reserved for the
talking
clock activation.
22.2
Changing The
Master Access
Code
*4 1698
38
Note: the *4 is fixed it is the following four digits that can be
changed.
Note: Do not use 55 in your new PIN as this is reserved for the
talking
clock activation.
22.3
Programming
a pendant to
Arm & Disarm
Security
*4 1698
17
Slots 46 & 47 are special slots reserved for remote Arm/Disarm
pendants into.
22.4
Setting The
Security Entry
Delay
*4 1698
15
The factory default is 30 seconds delay. Only change if you want a
longer or shorter delay
Enter 2 digits [01 to 12] 01= one ten second period. 02=20
second period
Page 50

50
22.5
Setting
Security Exit
Delay
*4 1698
34
The factory default is 30 seconds delay. Only change if you want a
longer or shorter delay
Enter 3 digits [001 to 255]
The default is 30 seconds i.e. [030]
22.6
Programming
a PIR or other
security
sensor
Also a PIR
used for
inactivity
monitoring
*4 1698
17
Activate the detector. Phone will beep as transmission is captured
Enter [2]
Enter [1]
Enter [1]
Enter [1]
Enter [4]
Enter [0]
Enter [0]
Enter [0]
Enter [1]
Enter [3]
Note after arming your Blue Phone allow up to another 2 minutes
before security detectors will become active
Page 51

51
23
Quick
method of
Programming
a Smoke
Detector
*4 1698
17
to 30]
Now [Trigger your smoke detector] until Blue Phone beeps. This
may take up to 8 seconds.
[1]
[1]
[1]
[1]
[3]
[1]
[1]
[1]
[1]
[0]
Note Slots 21 to 31 have been allocated to Smoke Detectors
Page 52

52
Phone Specifications
Power Source: 9VDC 300 mA Plug Pack
Back Up Battery: Rechargeable, 750MA. Nickel metal
hydride.
Battery backup duration: Approx 100 Hours
Radio Frequency 303.825 Mhz
Receiver Range: Up to 80 M
Wall Mountable Yes
PSTN/PABX compatible Yes
Analogue Yes
Signaling Format Voice to Voice and (Ademco)
Pendant Specifications:
Power Source: 3V Lithium
Typical Battery Life: Approx 2 + yrs
Radio Frequency 303.825 Mhz
Low battery reporting Yes
Illuminated actuator Yes
Battery replaceable Yes
Water Proof IP65
Dimensions 39x60x16
Neck cord weak link Yes
Specifications and manual subject to change without notification.
 Loading...