

Page 1
Page 2

– 1 –
Safety Precautions . . . . . . . . . . . . . . . . . . . . . . . . . . . . . . .2
Safety Concerns . . . . . . . . . . . . . . . . . . . . . . . . . . . . . . . .3
Key Features . . . . . . . . . . . . . . . . . . . . . . . . . . . . . . . . . . .4
Playable Discs . . . . . . . . . . . . . . . . . . . . . . . . . . . . . . . . . .4
What is MP3? . . . . . . . . . . . . . . . . . . . . . . . . . . . . . . . . . .4
Installation Warnings . . . . . . . . . . . . . . . . . . . . . . . . . . . . .5
Installation Tools . . . . . . . . . . . . . . . . . . . . . . . . . . . . . . . .5
Terms for Discs . . . . . . . . . . . . . . . . . . . . . . . . . . . . . . . . .5
Technical Specifications . . . . . . . . . . . . . . . . . . . . . . . . . .6
Troubleshooting . . . . . . . . . . . . . . . . . . . . . . . . . . . . . . . . .6
Note on Copyright . . . . . . . . . . . . . . . . . . . . . . . . . . . . . . .6
Preparation Before Operation
Remote Control . . . . . . . . . . . . . . . . . . . . . . . . . . . . . .7
Front Panel . . . . . . . . . . . . . . . . . . . . . . . . . . . . . . . . . .7
Display . . . . . . . . . . . . . . . . . . . . . . . . . . . . . . . . . . . . .8
Rear Panel . . . . . . . . . . . . . . . . . . . . . . . . . . . . . . . . . .8
Names and Layout of Remote Controls . . . . . . . . . . . .8
Connect to a Mobile Amplifier . . . . . . . . . . . . . . . . . . .9
Connect to a TravelPilot DX-N . . . . . . . . . . . . . . . . . . .9
Connect to a TV/Monitor . . . . . . . . . . . . . . . . . . . . . .10
Connect to Home Amplifier . . . . . . . . . . . . . . . . . . . .10
Basic Operations
TV/Video Selection . . . . . . . . . . . . . . . . . . . . . . . . . . .11
Play Discs . . . . . . . . . . . . . . . . . . . . . . . . . . . . . . . . . .11
System Settings . . . . . . . . . . . . . . . . . . . . . . . . . . . . .11
Pause . . . . . . . . . . . . . . . . . . . . . . . . . . . . . . . . . . . . .11
OSD (On-Screen-Display) . . . . . . . . . . . . . . . . . . . . .12
Volume Control . . . . . . . . . . . . . . . . . . . . . . . . . . . . . .12
DVD Menu Play . . . . . . . . . . . . . . . . . . . . . . . . . . . . .12
Audio Mode . . . . . . . . . . . . . . . . . . . . . . . . . . . . . . . .12
Play Discs in Various Ways
Mute . . . . . . . . . . . . . . . . . . . . . . . . . . . . . . . . . . . . . .13
Fast Play . . . . . . . . . . . . . . . . . . . . . . . . . . . . . . . . . . .13
Slow Play . . . . . . . . . . . . . . . . . . . . . . . . . . . . . . . . . .13
Repeat Play . . . . . . . . . . . . . . . . . . . . . . . . . . . . . . . .14
Select Subtitles . . . . . . . . . . . . . . . . . . . . . . . . . . . . .14
Select Angles . . . . . . . . . . . . . . . . . . . . . . . . . . . . . . .14
Zoom Play . . . . . . . . . . . . . . . . . . . . . . . . . . . . . . . . .14
Function Setting
Menu Setting . . . . . . . . . . . . . . . . . . . . . . . . . . . . . . .15
TV Display . . . . . . . . . . . . . . . . . . . . . . . . . . . . . . . . .16
TV Type . . . . . . . . . . . . . . . . . . . . . . . . . . . . . . . . . . . .16
Angle Mark . . . . . . . . . . . . . . . . . . . . . . . . . . . . . . . . .16
Captions . . . . . . . . . . . . . . . . . . . . . . . . . . . . . . . . . . .16
Screen Saver . . . . . . . . . . . . . . . . . . . . . . . . . . . . . . .16
Compression . . . . . . . . . . . . . . . . . . . . . . . . . . . . . . .16
Dual Mono . . . . . . . . . . . . . . . . . . . . . . . . . . . . . . . . .16
Dynamic Ring . . . . . . . . . . . . . . . . . . . . . . . . . . . . . . .16
Front Speaker . . . . . . . . . . . . . . . . . . . . . . . . . . . . . . .16
Password Set Up . . . . . . . . . . . . . . . . . . . . . . . . . . . .17
Preferences . . . . . . . . . . . . . . . . . . . . . . . . . . . . . . . .17
MP3 Operations
Play Discs . . . . . . . . . . . . . . . . . . . . . . . . . . . . . . . . . .18
Repeat Play . . . . . . . . . . . . . . . . . . . . . . . . . . . . . . . .18
Other Functions . . . . . . . . . . . . . . . . . . . . . . . . . . . . .18
Others
Using Headphone . . . . . . . . . . . . . . . . . . . . . . . . . . .19
Installation Guide . . . . . . . . . . . . . . . . . . . . . . . . . . . .19
Limited Warranty Information . . . . . . . . . . . . . . . . . . . . .20
TABLE OF CONTENTS
Page 3

– 2 –
CAUTION TO PREVENT ELECTRIC SHOCK MATCH WIDE BLADE OF PLUG TO WIDE SLOT, FULLY INSERT.
CAUTION This unit employs a laser system. To ensure the proper use of the unit, read this manual carefully and keep it for
future reference. If the unit requires servicing, contact the retailer and or Blaupunkt service center - see "Limited
Warranty Information". To prevent direct exposure to the laser radiation, do not open the cabinet or back of the unit.
NOTE: This equipment has been tested and found to comply with the limits for a Class B digital device, pursuant to part
15 of the FCC Rule. These limits are designed to provide reasonable protection against harmful interference in a
residential installation. This equipment generates, uses, and can radiate radio frequency energy and if not
installed and used in accordance with the instructions, may cause harmful interference to radio communications.
However, there is no guarantee that interference will not occur in a particular installation. If this equipment does
cause harmful interference to radio or television reception, which can be determined by turning the equipment off
and on, the user is encouraged to try to correct the interference by one or more of the following measure:
* Reorient or relocate the receiving antenna
* Increase the separation between the equipment and receiver.
* Connect the equipment to an outlet on a circuit different from that to which the receiver is connected.
* Consult the dealer or an experienced radio/TV technician for help.
WARNING! To reduce the risk of fire or electric shock, do not expose this appliance to rain or moisture.
Dangerous high voltages are present inside the enclosure. To prevent electrical shock, do not
open the cabinet.
The lightning flash with arrowhead symbol within and equilateral triangle is intended to alert
the user to the presence of uninsulated "dangerous voltage" within the product's enclosure
that may be of sufficient magnitude to constitute a risk of electric shock to persons.
The exclamation point within and equilateral triangle is intended to
alert the user to the presence of important operating and maintenance
(servicing) instructions in the literature accompanying the product.
SAFETY PRECAUTIONS
CAUTION
RISK OF ELECTRICAL SHOCK
DO NOT OPEN
Page 4

SAFETY CONCERNS
– 3 –
We always recommend you have your Blaupunkt DVD/MP3 player professionally installed but the installation process is
often so easy that the average consumer can achieve success with little trouble. All operating instructions should be
followed. Regardless of person installing, you should be sure to review the following points before proceeding with the
installation:
■
READ THE MANUAL! Understanding the product and installation limitation before lifting a screwdriver. Follow
Instructions -
■
POWER SOURCES - Make sure to use operate only from the type of power source indicated on the rear panel. For
products intended to operate from battery power, or other sources, refer to the operating instructions. Do not overload
the power source to prevent a risk of fire or electric shock.
■
POWER LINES - An outside antenna system should not be located in the vicinity of overhead power lines or other
electric light or power circuits, or where it can fall into such power lines or circuits. When installing an outside antenna
system, extreme care should be taken to keep from touching such power lines or circuits as contact with them might
be fatal.
■
POWER CABLE - Make sure to route power cables appropriately so that they are not likely to be walked on or pinched
by items placed upon or against them, paying special attention to cords at plugs, convenience receptacles, and the
point where they exit from the product.
■
CLEANING - Disconnect this product from the power source before cleaning. Do not use liquid cleaners or aerosol
cleaners. Use a damp cloth.
■
WATER & MOISTURE - Do not use this product near water.
■
ACCESSORIES - Do not place this product on an unstable object. Any mounting of the product should follow the
manufacturer's instructions, and should use a mounting accessory recommended by the manufacturer.
■
LIGHTNING - During a lightning storm, or when it is left unattended and unused for long periods of time, unplug it from
the power source prevent damage to the product due to lightning and power-line surges.
■
OBJECT & LIQUID ENTRY - Never push objects of any kind into this product and/or liquid entry to product could result
in a fire or electric shock.
■
SERVICING - Any attempt to service this product yourself as opening or removing covers may expose you to
dangerous voltage or other hazards.
■
DAMAGES REQUIRING SERVICE - Disconnect this product from the power source and refer servicing to qualified
service personnel under the following conditions;
a) Damage to the power cord or plug
b) Water damage
c) Product malfunction or change in performance
d) If the product has been dropped
■
PART REPLACEMENT - Make sure to use the replacement parts specified and/or approved by the manufacturer to
prevent potential fire, electric shock or other hazards. Upon completion of any service or repair, be sure to perform
safety checks by qualified service personnel.
■
WEAR SAFETY GLASSES AT ALL TIMES - Flying debris are always dangerous.
■
PROTECT THE VEHICLE - Always disconnect the negative battery cable before starting any kind of installation work.
This prevents a possible high current electrical short (potential fires).
■
HEAT - Keep all products away from nearby hot components such as amplifiers, radiators, heat registers, stoves or
vehicle components that heat up over time such as hoses, high current wires, and braking systems components.
Make sure to leave enough room for ventilation on openings and slots to protect if from over-heating.
■
GIVE YOURSELF LOTS OF TIME - Rushing to complete an installation nearly always ends up with problems.
■
WHILE DRIVING, KEEP EYES ON THE ROAD AND NOT ON THE MONITOR. KEEP THE VOLUME LOW.
Please record the model and serial number located at rear panel.
Model No. Serial No.
Page 5
Congratulations! You are the now the owner of an exceptional in-car (12VDC) & home (110VAC) DVD/MP3 player from
the audio and video enthusiasts at Blaupunkt. Not only do we offer you a great product but also a supportive owner's
manual. Although technically informative, we are also are very concerned about the end consumer using proper
installation techniques for the highest performance possible from their new in-car & home DVD/MP3 player. Most
important to us are concerns with safety and the installation process. Since our Blaupunkt retail dealers have the tools
and experience for an optimized and safe installation, we always recommend they do the final vehicle integration. But,
should you choose to install these products yourself, please take the time to read this manual completely and abide by
all precautions.
THANK YOU FOR CHOOSING BLAUPUNKT!
– 4 –
KEY FEATURES
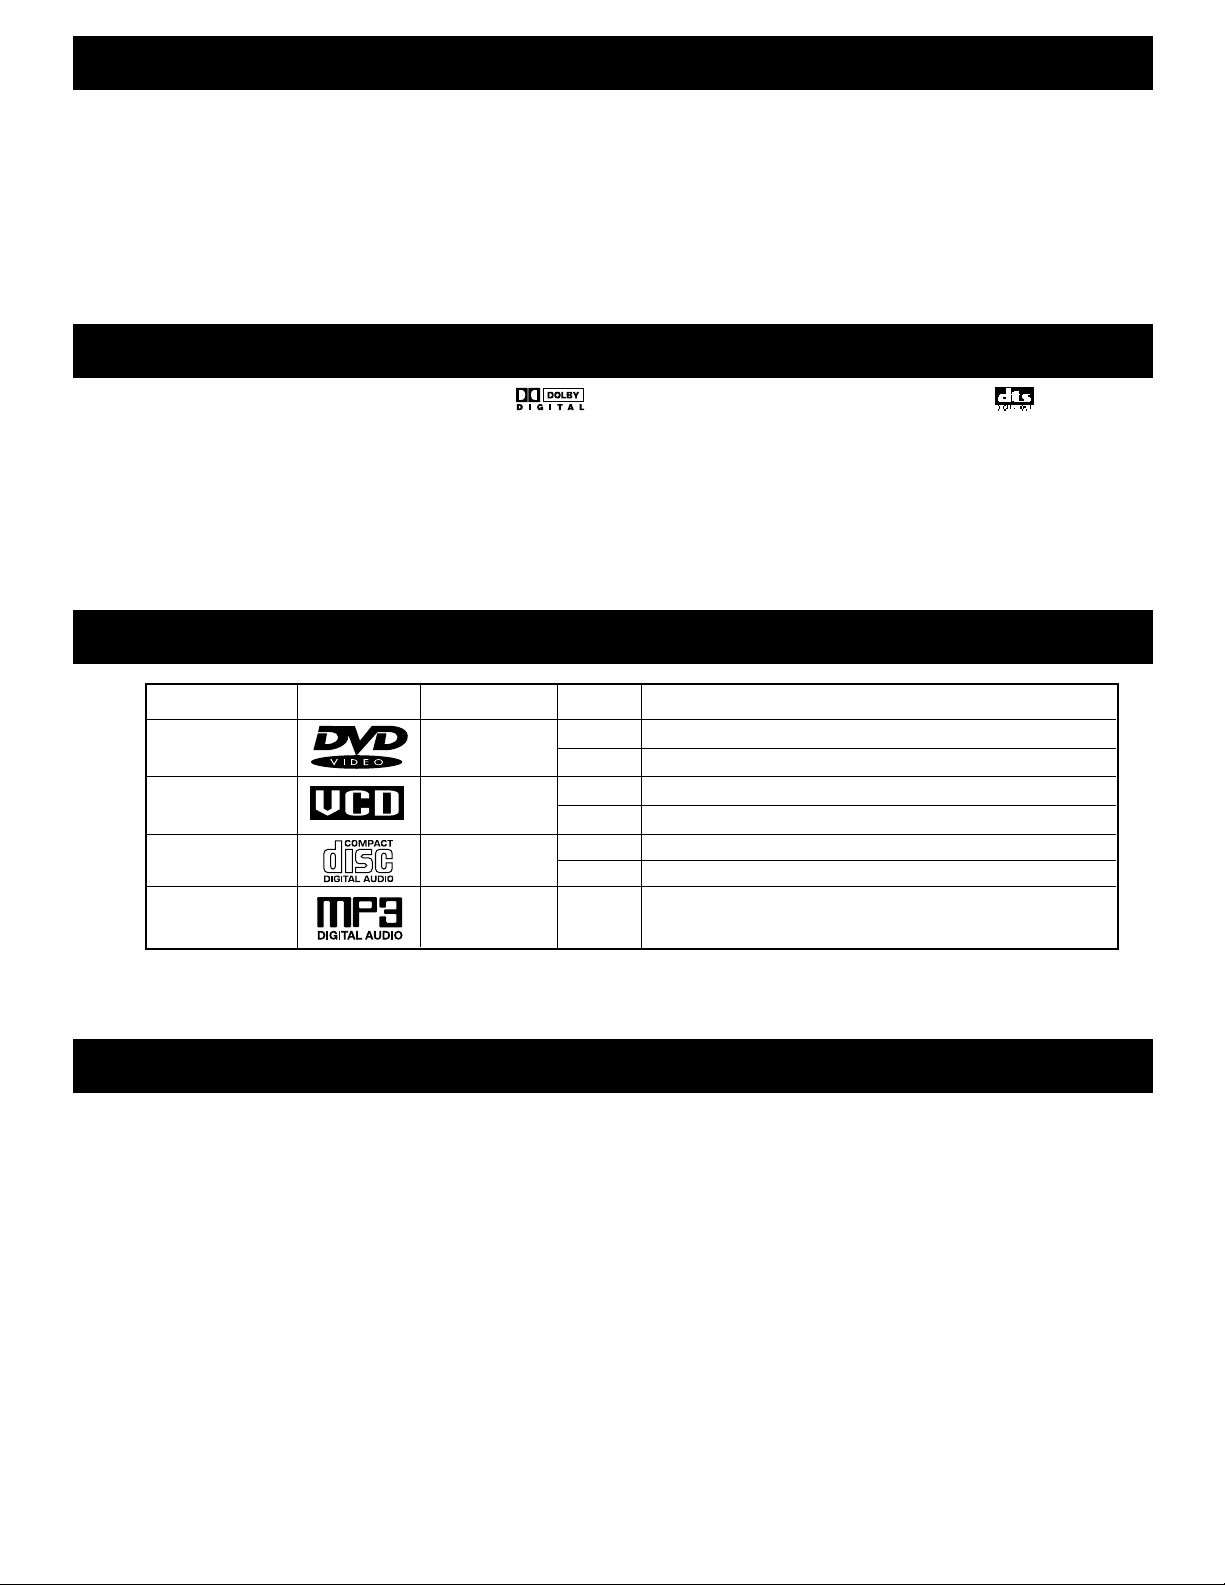
1. SUPERB SOUND QUALITY: Dolby Digital system developed by Dolby laboratories and DTS
developed by DTS Inc., features in DVD and audio CD. *Some DVD/MP3 player might not
ready for DTS features.
2. HIGH DEFINITION: The unit adopts MPEG2 coding format and brings the horizontal resolution over 500 lines.
3. UNIQUE FUNCTIONS: Multi-angle and multi-language bring unique functions if your DVD media has capability.
4. COMPATIBILITY: Compatible with most DVD, SVCD (Super Video CD), VCD (Video CD), CD & MP3
formatted disc (see below).
5. ZOOM & ANGLE: Enjoy up to 4 times larger pictures on your monitor.
WHAT IS MP3?
It is the compression technology developed by MPEG (the Moving Picture Experts Group) in 1988. MPEG had
developed a compression system for digital television video data and their accompanying soundtracks. The part of the
MPEG format is MPEG audio Layer-3, abbreviated as MP3. It is a special compression technology to fit in smaller
spaces for example, DVD movies, HDTV broadcasts and DSS satellite systems.
A typical MP3 files is about 1/11 the size of an equivalent CD-audio file. Therefore, about 13 hours of CD-quality songs
can be stored in MP3 format. A CD stores songs as digital information. The data on a CD uses a high-resolution,
uncompressed format. Music's analog waveform on digital media (CDs and CD-Rs) is sampled 44,100 times per
second (44.1KHz). The samples are 2 bytes (16 bits) long, and there are 2 separate channels for left and right speakers
for stereo sound. Thus, CD stores 1,411,200 bits per second. (44,100 samples/second x 16 bits/sample x 2 channels)
1.4 million bit per second is 176,400 bytes per second. If an average music is 3 minutes long, music consumes about
32Mbytes of space on CD. An audio CD has a capacity of 654.7 MB, and can store up to 74 minutes of music. The
most common bit rate for MP3 is 128,000 bits per second (128K), which produces very close to CD-quality sound,
1,411,200 bits per second. Now, you see a tremendous space reduction to 9 percent. The more bit rate is the better
sound quality, but more space to store.
NOTE on MP3: For high quality sound, we recommend converting MP3 files with sampling frequency of 44.1KHz and a
fixed bit rate of 128kpbs. Note that the unit may not play tracks in the order that you record them to the disc.
PLAYABLE DISCS
TYPE DISC LOGO CONTENTS DISC SIZE PLAY TIME (appox.)
DVD Video* Audio + Video 12cm 2h (for single-sided DVD), 4h (for double-sided DVD)
(motion pictures) 8cm 80min (for single-sided DVD), 160min (for double-sided DVD)
Super Video CD/ Audio + Video 12cm SVCD (45 mins), VCD (74 mins)
Video CD (motion pictures) 8cm VCD (20 mins)
CD Audio 12cm 74 mins
8cm 20 mins
MP3** Audio 12cm 10+ hours (128kbits per second or higher compression
recommended)
* Region codes for DVD disc is printed on the rear panel, only the disc with same code can be played.
**This product reads MP3 formatted CD-Rs (CD-Recordable). CD-RW (CD-rewritable) media does not work in the player.
Page 6

Before disassembling your beautiful new car you need some basic installation knowledge and skill with common hand
and power tools. Following such basic installation tips and warnings will prevent possible damage to the vehicle and also
prevent possible fires.
■
AGAIN...READ THE MANUAL! There is a lot of helpful information in this manual that will save time and prevent
problems later.
■
COVER THE VEHICLE WORK AREAS - Use fender covers or blankets to protect the work areas from scratches or dings.
■
DISCONNECT THE (-) LEAD ON THE BATTERY - No sparks or fires please!
■
"REVIEW" THE INSTALLATION - Before using any tools or moving vehicle components, take five minutes to review the
installation intentions.
■
"REVIEW" THE VEHICLE - Before drilling any holes or cutting into any surfaces, make sure there are no fuel or hydraulic
lines behind the surfaces. Also make sure there are no wires routed directly behind or near the desired mounting.
■
ENSURE PROPER FIT - Before cutting or drilling, make sure the DVD/MP3 player will physically fit in its desired location.
Check for clearance around rear deck torsion bars or other structural elements.
■
EVERY CAR IS ASSEMBLED DIFFERENT - Every auto manufacturer uses different assembly techniques. Take care in
removing/modifying all trim panels and mounting surfaces since they often use unique screws or snap fasteners that are
difficult to replace if they are lost or broken.
■
BE CAREFUL WITH CABLE ROUTING - When routing audio cables, make sure RCA and speaker wires are routed away
from high current power lines for audio amplifiers and vehicle systems lines when possible. This will help prevent noises
from creeping into the audio system, plus prevent potential damage to the vehicle wiring itself.
■
BE CAREFUL WITH ALL CONNECTIONS - When making connections, make sure each connection is clean and properly
secured. Observe all polarity markings carefully to ensure proper end performance.
■
CAUTION - FUEL TANKS AND FUEL LINES ARE NOW LOCATED DIRECTLY BENEATH THE REAR DECK IN MANY
CARS - CHECK FOR ADEQUATE CLEARANCE BEFORE EVEN CONSIDERING SUCH A MOUNTING LOCATION!
INSTALLATION WARNINGS!
For most installations, simple hand tools are adequate to install an aftermarket products. Depending upon the mounting
locations used, you will need power tools for drilling and cutting plastics and metal. A good starting list is summarized below:
■
Tape measure and ruler
■
Marking pen and starting punch
■
Phillips and flat blade screwdrivers (small and medium sizes)
■
Nylon wire bundle ties
■
Pliers: standard vice-grip and needle nose styles
■
Light-duty trim pry-bar for removing door trim
■
Cutting shears or nibbling tool for cutting thin and medium gauger metal
■
Wire cutters, wire strippers, electrical tape, crimping pliers and appropriate crimp-on terminals
■
Power drill with appropriate sized drill bits
INSTALLATION TOOLS
■
TITLE: The longest sections of a picture or music segment on a DVD. Each title has an indication number, which makes
it easy to locate.
■
CHAPTER: It is smaller than title. A title is composed by several chapters. Each chapter has an assigned number for
search.
■
TRACK: The image or music in a CD. Each track has a number for search.
■
SCENE: The menu pictures, motion & motionless pictures for SVCD with PBC function can be divided into some pats,
the parts are scenes.
■
PBC: Playback operations on SVCD/VCDs. Some playback operations of VCDs may be embedded by software
producers. This feature may not be available all VCDs. Please refer to the supplied manual in your VCDs.
CONDENSATION: Water will appear on the pick up lens with sudden temperature increase. Please do not use this unit
is a humid place. In case of malfunctioning of the unit due to high condensation, unload the disc
and leave the unit on for about an hour to evaporate condensation.
CLEANING: Use soft cloth with a little neutral detergent to wipe the cabinet, panel and controls. Never use any
type of solvent, such as thinner or benzene.
HANDLING DISC: Do not touch the play side of the disc. Do not attach paper or tape on the disc. Keep the disc away
from direct sunlight or heat source. Store the disc in a disc case after playback. Wipe the disc
outwards from the center with clean clothe before playback
TERMS FOR DISCS
– 5 –
Page 7
No power: Check power connection to the unit +12 volt, ground, and remote lines. Use voltmeter to
verify voltages are at terminals of the unit.
No picture: Check video cable connection, color adjustment, and monitor operation.
No sound: Check audio cables connection, amplifier or source connection to set receiving DVD signal
output. Check audio mode setting.
Image distortion: Check signal system (NTSC, PAL, AUTO). Eject the disc and clean it.
Remote control trouble: Check batteries. Point the remote control at the remote control sensor of the unit.
No disc playback: Make sure insert a playable disc (check the disc type, region code and color system).
Place disc playback side down in the proper guide. Clean the disc. Cancel or change the
parental lock function. (The factory pre-set is 99999.) Turn power switch or power
connection on and off.
TROUBLESHOOTING
■
This product incorporates copyright protection technology that is protected by method claims of certain U.S. patents
and other intellectual property rights owned by Macrovision Corporation and other rights owners. Use of this copyright
protection technology must be authorized by Macrovision Corporation, and is intended for home and other limited
viewing uses only unless otherwise authorized by Macrovision Corporation. Reverse engineering or disassembly is
prohibited.
■
Manufactured under license from Dolby Digital Laboratories. "Dolby" and the Double-D symbol are trademarks of
Dolby Laboratories. Confidential unpublished works. (c) 1992-1997 Dolby Laboratories, Inc. All rights reserved.
■
DTS and DTS Digital Out are trademarks of Digital Theater System, Inc.
NOTE ON COPYRIGHT
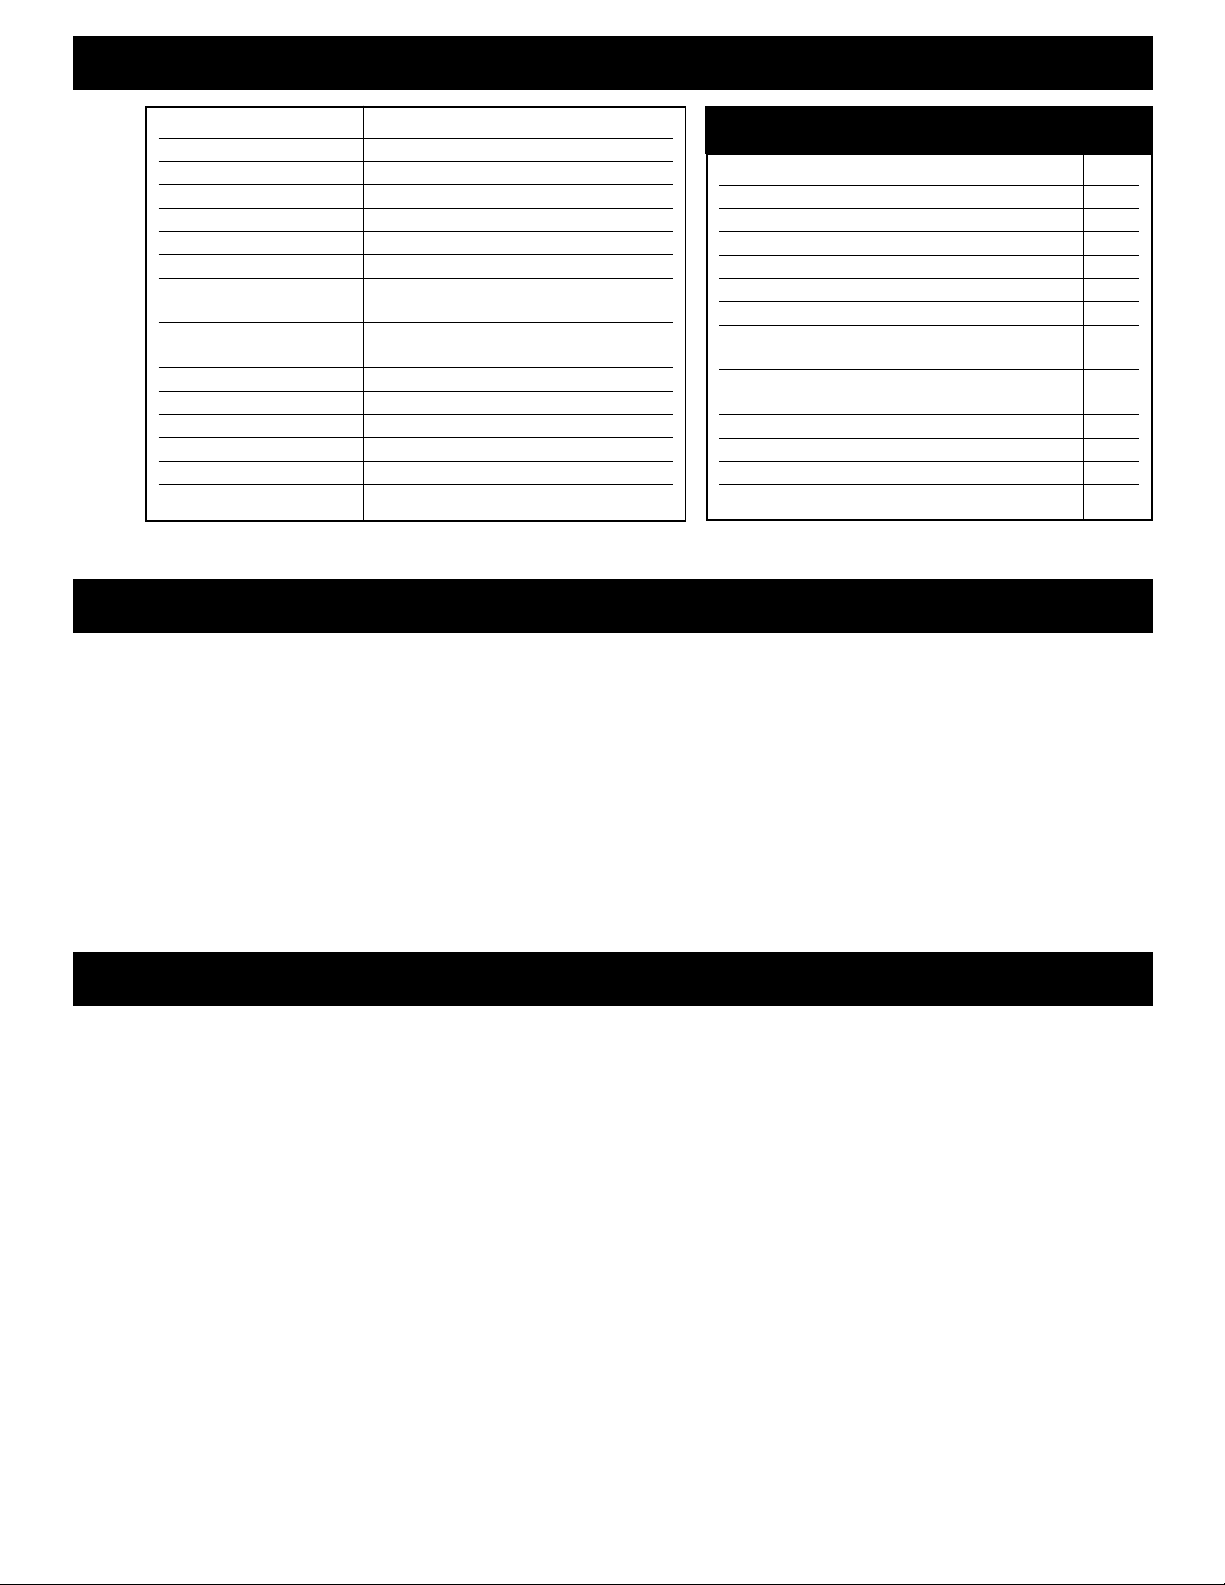
TECHNICAL SPECIFICATIONS
– 6 –
Power supply DC12V, 1.5A
Power Consumption ≤ 20W
Operating Temp. 5˚C to 35˚C (41˚F to 95˚F)
Dimensions 170 x 73 x 215 mm (W/H/D)
Weight 1.4Kg
Signal system NTSC (US)/PAL/AUTO
Laser Wavelength 650nm
Audio Output (Analog) Output level: 1.5 ± 0.25V
Load impedance: 10KΩ
Video output Output level: 1 ± 0.2V
Load impedance: 75Ω
Headphone out Jack type: Ø 3.5mm headphone jack
Frequency response 10Hz~20KHz ± 0.5dB
Signal/noise ratio ≥ 110dB (“A” weighted)
Audio distortion + noise ≤ -70dB (1KHz)
Channel separation ≥ 85dB (1KHz)
Dynamic range ≥ 90dB (1KHz)
Audio cable (red and white, 18 ft.) 1 pair
Video cable (white, 18 ft.) 1
Remote control 1
AAA batteries 2
External remote sensor 1
Face bezel 1
DC 12V Power cord (mobile) 1
AC adapter Input: 100-240V~30W 50/60Hz 1
Output: DC 12V 1.5A (home)
Mounting brackets 2
(horizontal & trunk mount)
Mounting screws 8
Protecting pad 1
Noise filter for power source 1
Owner's manual 1
Supplied Accessories
Page 8

Remote Control
Front Panel
3. Close the battery cover.2. Insert two AAA batteries, make sure
to match “+” and
“–” on the
batteries to
marks inside the
battery
compartment,
4. Point the remote control at the external remote sensor or point the remote control at the display window, operate in the
range of 5 meters and 30° from the front of the remote sensor. Make sure there is no barrier between them.
Notes:
1. The batteries can last about 6 months generally. Change the batteries if the remote control does not work.
2. If the remote control is not used for a long time, remove the batteries to prevent battery leakage.
1. Open the battery cover
PREPARATIONS BEFORE OPERATION
– 7 –
Power On/Standby
Disc Tray
Play
Open/Close
Pause
1
2
3
4
5
1 2 3 4
5
Stop
Display
Standby Indicator
Headphone Jack
6
7
8
9
6789
Page 9

PREPARATIONS BEFORE OPERATION
Display
Rear Panel
Names and Layout of Remote Controls
Title indicator
Repeat play
indicator
Dolby digital
indicator
Angle
indicator
Chapter/track
indicator
Lock
indicator
DVD indicator
CD indicator
PLAY indicator
Pause indicator
PBC indicator
Title/chapter/track
indicator
Hour
indicator
Minute
indicator
Second
indicator
REMOTE IN
VIDEO OUT
RL
AUDIO OUT
DC
12V 1.5A
Remote In
1
Video Out
2
Audio Out
3
DC In
4
Open/Close
DVD & MV/TV Select
Subtitle
Language
Repeat
A-B repeat
Volume
FR/FF Search
Bright –, + (For MV/TV)
P.B.C. (Left Side)
Slow (Right Side)
SetUp Menu
Direction Buttons
Channel –, + (For MV/TV)
Play
Title
Zoom
Menu
Pause
Stop
Previous/next
Color –, + (For MV/TV)
Audio Mode
TV Display (For MV/TV)
Return
OSD (On-Screen-Display)
System
Angle
TV/AV Select (For MV/TV)
Mute
Power
Remote Transmitter
1
2
3
4
– 8 –
1
2
3
4
5
6
7
8
9
10
11
12
13
14
15
16
17
18
19
20
21
22
23
24
25
26
1
2
3
4
5
6
7
8
9
10
11
12
13
14
15
16
17
18
19
20
21
22
23
24
25
26
TITLE
CD
DVD
PBC
CHP/ TRK
A - B ALL
PROG
Page 10

PREPARATIONS BEFORE OPERATION
– 9 –
Connect to a Mobile Amplifier Turn off all the equipment before connections.
Connect to a TravelPilot DX-N Navigation System Turn off all the equipment before connections.
In the connection diagram, the system’s power leads should be connected at the same point to minimize noise.
REMOTE IN
VIDEO OUT
RL
AUDIO OUT
DC
12V 1.5A
Video In
Audio In
Monitor
Mobile Amplifier
Filter
Fuse
External
Remote
Sensor
12V
+
–
■
This schematic describes the installation of an After
Market video source, such as VCR, DVD, TV Tuner, or
Video Game, connected to a Blaupunkt DX-N
Navigation System through a Blaupunkt Video
Converter, P/N 7 607 005 718. The Video Converter is
necessary to convert the source’s video signal into a
usable format for the DX-N.
■
Signal connections include: (a) RCA connection from
the video source’s output to the converter’s input, (b) 15
pin serial connection between the converter' s output
and the DX-N ROM 15 pin input, and (c) DX-N ROM
connection to the DX-N screen, using the supplied
video cable.
■
Note: When using a gooseneck mounting adapter, P/N
7 612 001 204, the supplied cable will take the place of
the DX-N monitor cable supplied with the DX-N
package.
■
Note: Video source audio connection can be made via
RF modulator to any factory radio or via RCA cable
through an After Market radio if an auxiliary input is
available.
Video Line Output
DX-N Screen
DVD-ME1
34
56
12
Pin 1: 12vdc Constant
Pin 2: Ground
Pin 3: Reverse Trigger
Pin 4: 12vdc Output
Pin 5: 12vdc Ignition
Pin 6: Video Trigger (Plus=FBAS)
Video In
Video Converter
7 607 005 718
Input Output
RCA Cable
DX-N Main Unit (Rear View)
15 Pin Serial Cable
(supplied with converter)
DX-N Monitor Cable
(supplied with DX-N)
Page 11

PREPARATIONS BEFORE OPERATION
– 10 –
Connect to a TV/Monitor Turn off all the equipment before connections.
Connect to an Ordinary Home Amplifier Turn off all the equipment before connections.
Set the unit. You have to set the unit
according to the TV/monitor to be
connected.
■
If the system of the TV/monitor is PAL,
push SYSTEM and select PAL.
■
If the system of the TV/monitor is NTSC,
push SYSTEM and select NTSC.
■
If the system of the TV/monitor is AUTO
(multi-system), push SYSTEM and select
AUTO.
■
Connect the unit to a wide-screen TV. Set
the ”TV Display” to “16:9 WIDE” in the
function setting column.
■
Connect the unit to an ordinary TV. Set the
“TV Display to “4:3/PS” or “4:3/LB” in the
function setting column.
CONNECT TO AC ADAPTOR (supplied)
1. Connect the output terminal of the AC
adaptor to DC IN jack of this unit.
2. Connect the other plug to AC power
source.
If you want to enjoy the music by yourself,
please connect the headphone (not
supplied) to the jack on the front panel.
There is no sound output from the output terminal when a DTS disc is played.
REMOTE IN
VIDEO OUT
RL
AUDIO OUT
DC
12V 1.5A
Video In
Audio In-R
TV/Monitor
AC Adaptor
External
Remote
Sensor
Audio In-L
(to AC)
REMOTE IN
VIDEO OUT
RL
AUDIO OUT
DC
12V 1.5A
Video In
Audio In-R
TV/Monitor
AC Adaptor
External
Remote
Sensor
Audio In-L
(to AC)
Page 12

BASIC OPERATIONS
– 11 –
TV/Video Selection
Press POWER on the TV and audio system.
1. Press “TV/VIDEO” on
the TV/monitor, select
VIDEO mode.
Play Discs
1. Press POWER to
turn on the unit.
According to the
system of the
TV/monitor, set the
system of the unit
to make it match
the TV/monitor.
WHEN PLAYING
PICTURES
If the pictures of DVD are
played, press to
make playback pause.
The unit enters step play
status. Each time you
press , the picture
advances one frame.
WHEN PLAYING MUSIC CD
Press to make playback
pause.
Press (PLAY) to resume
playback.
1. If the system of the
TV/monitor is PAL:
Press SYSTEM ,
select PAL.
The screen shows:
2. Press to
open the disc tray
and load a disc
with the label side
up.
2. Select the correct audio input for your system.
■
Each amplifier is different from another, please refer to the
manual of the amplifier. (e.g., connect the audio output of
the DVD player to the DVD audio input of an amplifier.)
Note: this step can be cancelled if you are utilizing the
auxiliary input of a Blaupunkt receiver.
Pause
DVD CD
System Settings
DVD
Front Panel
3. Press again to
close the disc tray. The
unit begins to read the
disc.
5. Stop playback.
Press
Front Panel
Open/Close
4. Press (PLAY) to
play the disc.
6. Remove the disc and
turn off the power. You
have to push this button
twice to stop playback of
a DVD disc.
AFTER STEP 4 IS FINISHED:
■
PLAY DVD
The TV screen shows DVD menu or title
menu.
■
PLAY CD
Press (PLAY), the unit plays the disc
according to the track numbers.
PAL
STEP
NTSC
2. If the system of the
TV/monitor is NTSC:
Press SYSTEM ,
select NTSC.
The screen shows:
System
Pause
DVD CD
TV/Video
DVD/LD
Page 13

BASIC OPERATIONS
– 12 –
OSD (On-Screen Display)
When the OSD is pressed, the
TV/monitor screen shows the
operation functions and
information about the disc.
Press OSD to select:
DVD CD
Volume Control
■
Press VOLUME on the TV/monitor or
amplifier to adjust the volume.
■
Press VOLUME on the remote control.
1. Press + to raise
the volume.
2. Press - to lower
the volume.
DVD CD
DVD Menu Play
Some DVD’s have title menus and chapter menus.
Press (PLAY), the screen shows the menu.
Press or to skip the next or previous page,
select with direction buttons.
DVD
Audio Mode
■
You may select a needed language from a multi-language DVD.
■
You may select the right channel or left channel or stereo from a
multi-channel CD.
DVD CD
OSD
Volume +, –
Language
Mode
OSD OFF
ROOT
MENU
1.
2.
11.
Example: select track 13.
1. Press to select track 13.
2. Press (PLAY) to start playing track 13.
Press TITLE once to return to the title menu.
Press MENU once to return to the root menu;
press it again to return to the current playback.
ROOT
MENU
12.
13.
14.
15.
Page 14

PLAY DISCS IN VARIOUS WAYS
– 13 –
Mute
When playing a disc, this
function can remove the sound.
1. REMOVE SOUND
Press MUTE , the
screen shows “MUTE”.
2. RESUME SOUND
Press MUTE again, the
screen shows “MUTE OFF”.
DVD CD
Fast Play
When playing a
disc, you may play
it forward fast or
reverse it fast to
find what you want.
1. Press to
play forward fast.
Each time you
press the button,
the screen shows
orderly:
DVD CD
Slow Play
Enjoy slow motions
by the following
steps.
1. Press to play slowly.
The screen shows orderly:
DVD
WHEN PLAYING DVD
Press , the screen shows orderly:
WHEN PLAYING CD
AUDIO 1/2:AC-3 2CH
MONO L
AUDIO 2/2:AC-3 2CH
MUTE
Mode
MONO R
Mode
STEREO
Mode
Different discs differ in
languages.
1 FF 2X
2 FF 4X
3 FF 6X
4 FF 8X
5 PLAY
2. Press to
reverse the disc
fast. Each time
you press the
button, the screen
shows orderly:
3. Press (PLAY) to
switch to normal play
while FF or FR
playing.
1 FR 2X
2 FR 4X
3 FR 6X
4 FR 8X
5 PLAY
SF 2X SF 4X SF 6X
PLAY
Slow
2. Press (PLAY) to play normally.
Page 15

PLAY DISCS IN VARIOUS WAYS
– 14 –
Repeat Play
This function can be
used to repeatedly
play a title, chapter,
track, disc, or some
part on a disc.
DVD
You may repeat a title or chapter.
1. Repeat a chapter.
Press REPEAT , the screen will show:
3. Remove “REPEAT” function.
Press REPEAT until “TITLE REPEAT” disappeared.
DVD CD
Select Subtitles
This operation
works only with
discs on which
multiple subtitle
language are
recorded.
DVD
Repeat
Repeat
CD
You may repeat a track, a disc
according to the following steps.
CD can play repeatedly directly.
1. Repeat a track.
Press REPEAT , the screen shows
“REPEAT ONE”. The unit plays the
current track.
CHAPTER REPEAT
PLAY DVD
1. Press SUBTITLE repeatedly until
the desired language is selected.
The screen shows:
Subtitle
Subtitle
2. Remove the subtitle.
Press SUBTITLE until the screen
shows “SUBTITLE OFF”.
Notes:
■
For some discs, subtitles can not be removed.
■
Different discs differ in the language of subtitles.
■
If the subtitles of discs can not be selected, press SUBTITLE, the screen shows “NO SUBTITLE”.
SUBTITLE01/03:ENGLISH
Repeat
REPEAT ONE
2. Repeat a disc.
Press REPEAT , the screen shows
“REPEAT ALL”. The unit plays all the
tracks on the disc.
3. Remove “REPEAT” function.
Press REPEAT till “REPEAT OFF”
displayed on TV screen.
Repeat
REPEAT ALL
REPEAT SOME PARTS
You may press A-B to enjoy some
parts repeatedly when playing a disc.
PLAY DVD, CD.
1. Set a starting point A.
The screen shows:
A-B
REPEAT A
2. Set an end point B.
The screen shows:
Afterwards, the unit plays from A to B.
3. Press REPEAT again until “REPEAT
AB” disappeared.
A-B
REPEAT AB
2. Repeat a title.
Press REPEAT twice, the screen will show:
Repeat
TITLE REPEAT
Page 16

PLAY DISCS IN VARIOUS WAYS
– 15 –
Select Angles
Some discs have
images with different
viewing angles, you
may select among
them. For example,
when you watch a
running train, you
may watch it from the
front the left window
or the right window
without stopping it.
DVD
FUNCTION SETTING
Menu Setting
According to the
recorded information
and external
equipment, set the
following functions
for the player to
obtain the best
playing status.
1. Press SETUP to set the main menu.
The screen shows:
DVD CD
Zoom Play
This function can be
used to watch a
motion or motionless
picture.
DVD
1. Press ZOOM during playback, the
screen shows:
The picture is enlarged twice the size.
3. Push , , , to move the
enlarged picture.
4. To resume the picture, push ZOOM
until the screen shows “ZOOM OFF”.
DVD
Zoom
ZOOM X2
SETUP MENU -- MAIN PAGE
GENERAL SETUP
DOLBY DIGITAL SETUP
PASSWORD SETUP
PREFERENCES
EXIT SETUP
1/4
Screen
2. Press ZOOM again, the screen
shows:
The picture is enlarged four times the size.
ZOOM X4
Example:
A DVD has four viewing angles at your
option.
1. Press to select ANGLE 1.
2. Press to select other angles, the
screen shows respectively:
2/4 (select ANGLE2)
3/4 (select ANGLE3)
4/4 (select ANGLE4)
3. To resume normal playback, press
to select original angle.
SetUp
SetUp
2. Press direction buttons ( , ) to
select and press (PLAY) to confirm.
Example:
Select “ DOLBY DIGITAL SETUP”
■
Press direction button to select.
The screen shows:
After Entering the menu, the unit
automatically selects a column.
■
Press the directional button to
select “DUAL MONO”.
The screen shows:
■
Press direction button , to
select “LEFT MONO”
The screen shows:
■
Press (PLAY) to confirm selection.
Set “DUAL MONO” in “DOLBY DIGITAL
SETUP” to “LEFT MONO”.
■
Press (PLAY) to confirm and enter
“DOLBY DIGITAL SETUP”. The
screen shows the submenu for your
selection.
The screen shows:
SETUP MENU -- MAIN PAGE
GENERAL SETUP
DOLBY DIGITAL SETUP
PASSWORD SETUP
PREFERENCES
EXIT SETUP
--DOLBY DIGITAL SETUP PAGE-COMPRESSION >> LINE OUT
DUAL MONO
DYNAMIC RING
FRONT SPEAKER
MAIN PAGE
--DOLBY DIGITAL SETUP PAGE-COMPRESSION STEREO
DUAL MONO >> LEFT MONO
DYNAMIC RING RIGHT MONO
FRONT SPEAKER MIXED MONO
MAIN PAGE
--DOLBY DIGITAL SETUP PAGE-COMPRESSION STEREO
DUAL MONO >> LEFT MONO
DYNAMIC RING RIGHT MONO
FRONT SPEAKER MIXED MONO
MAIN PAGE
Page 17

FUNCTION SETTING
– 16 –
3. Exit from menus.
■
Press direction buttons and
(PLAY) to select the relevant exit
column.
■
Press the direction buttons , to
exit from “DUAL MONO”.
■
Press the direction button to select
“MAIN PAGE”, press (PLAY) to
exit from the current column and
return to the main menu.
The screen shows:
■
Press , to select “EXIT SETUP” ,
then press (PLAY) to exit from the
menu setting.
GENERAL SETUP
The setting structure is as follows:
GENERAL SETUP PAGE
TV DISPLAY >> 4:3/PS
4:3/LB
16:9 WIDE
TV TYPE >> PAL
AUTO
NTSC (US)
ANGLE MARK >> ON
OFF
CAPTIONS >> ON
OFF
SCREEN SAVER >> ON
OFF
MAIN PAGE
SETUP MENU -- MAIN PAGE
GENERAL SETUP
DOLBY DIGITAL SETUP
PASSWORD SETUP
PREFERENCES
EXIT SETUP
TV Display
1. 4:3/PS
This is selected when the unit is
connected to a normal TV. Wide-screen
images are shown on the screen, but
with some parts cut automatically.
TV Type
You may select according to the color
system of the TV/monitor to be
connected.
■
Select “AUTO” for a multi-system
TV/monitor.
■
Select “NTSC” for ra NTSC
TV/monitor. (US)
■
Select ”PAL” for a PAL TV/monitor.
Screen Saver
Start the screen saver, the screen
saver image appears when the unit
stops or the image is frozen for a few
minutes. This saver can keep the
screen from being damaged.
■
ON: Start the screen saver.
■
OFF: Remove the screen saver.
Angle Mark
This only works when there is an angle
mark on the disc.
■
Select “ON” , the screen shows the
mark when playing DVD.
■
Select “OFF” , the mark is not
shown.
Compression
■
LINE OUT: Compress input signals
linearly.
Dual Mono
This is the output mode of the L and R
signals of the set audio output. If it is
set to “MIXED MONO”, the function
only works when the DVD being played
is 5.1 channel.
Dynamic Range
When the compression mode is set to
“LINE OUT”, this is selected to adjust linear
compression rate to obtain the different
compression results of the signals.
Front Speaker
■
STEREO Lt/Rt
Select this when you play a disc with
dolby Pro Logic stereo, the disc signals
can be decoded by the unit and be
reproduced the realistic theater effects
in your room.
■
STEREO
Select this, the audio output is
produced as an ordinary stereo
signals.
Captions
■
ON
The hidden subtitle is shown.
■
OFF
The hidden subtitle is turned off.
2. 4:3/LB
This is selected when the unit is
connected to a normal TV. Wide-screen
images are shown on the screen, with
black belt on the top and bottom.
3. 16:9 WIDE
This is selected when the unit is
connected to a wide-screen TV.
The screen shows:
DOLBY DIGITAL SETUP
The setting structure is:
--DOLBY DIGITAL SETUP PAGE--
COMPRESSION >> LINE OUT
DUAL MONO >> STEREO
LEFT MONO
RIGHT MONO
MIXED MONO
DYNAMIC RNG
FRONT SPEAKER >> STEREO Lt/Rt
MAIN PAGE
Page 18

FUNCTION SETTING
– 17 –
Password SetUp
The setting structure is:
Preferences
The setting structure is:
■
PASSWORD MODE
• ON: The password works,
“PREFERENCES” is dim and can
not be selected.
• OFF: The password is locked,
“PREFERENCES” can be selected.
■
LANGUAGE SELECTION
If a language mentioned above is
recorded on the disc, you can select
sounds, subtitle or disc menu
languages. If not, the language
recorded on the disc is shown.
■
PARENTAL LOCK
When playing the disc with parental
lock function, you may select an age
control grade according to to grade of
disc and your desire.
Example: Select “PG” , you cannot
play DVD video disc rated higher than
the PG grade. Parental control grades
are listed from high to low, kids is the
highest grade , adults is lowest grade.
■
DEFAULT>> RESET
Each function setting returns to the
initial status in the factory if you select
this option.
Note:
• “PREFERENCES” only can be
selected password OFF after the unit
goes into stop mode.
Enter the password according to the
screen.
Note: The factory set password is:
next symbol, next symbol, next
symbol, next symbol, next symbol
(press next button 5 times).
AUDIO >> ENGLISH
FRENCH
SPANISH
CHINESE
JAPANESE
SUBTITLE >> ENGLISH
FRENCH
SPANISH
CHINESE
JAPANESE
OFF
DISC MENU >> ENGLISH
CHINESE
FRENCH
SPANISH
JAPANESE
COUNTRY >> CHINA
FRANCE
HONG-KONG
JAPAN
TAIWA N
GBR
USA
PARENTAL >> 1. KID SAFE
2. G
3. PG
4. PG 13
5.
6. PG-R
7. NC-17
8.ADULT
DEFAULTS >> RESET
--PASSWORD SETUP PAGE--
PASSWORD MODE >> ON
OFF
Page 19

MP3 OPERATIONS
– 18 –
Play Discs
MP3 is an audio compression mode
which adopts the Layer 3 in
international standard MPEG. It
compresses audio signals with a ratio
of 12:1. With MP3, a disc may record
over 600 minutes of music or 170
songs, but the sound quality ia as
good as a CD.
Note: 128 kbps or higher only.
SELECT TRACKS WITH MENUS
1. Load a disc, the screen shows the
home menu after the unit finishes the
search.
Repeat Play
You may use repeat function to enjoy
some track.
Other Functions
When playing an MP3 disc, the unit has
functions like mute, volume control,
pause, previous/ next track, and
channel selection. You may operate as
you do with a CD.
NOTE on MP3: For high quality sound,
we recommend converting MP3 files
with sampling frequency of 44.1KHz
and a fixed bit rate of 128kpbs. Note
that the unit may not play tracks in the
order that you record them to the disc.
1. Select tracks to play.
2. Press REPEAT until the screen
shows “REPEAT ONE”.
The screen shows:
Press (PLAY) to enter the submenu.
3. Press or to select tracks
according to the sub-menu.
Example: Select track 2 on CD3. (The
80th song on the disc.)
The screen shows:
The unit will play the tracks you
selected a few seconds later.
4. Press RETURN to return to the
home menu.
If the menu is shown on different
pages, the screen shows or
to instruct you to look at the next or
previous page.
2. Select the content of the home
menu.
Press or to select (if you select
CD3), the screen shows:
TOTAL 170
MP3 DISC
CONTINUE
MENU1
CD1 CD2
CD3 CD4
REPEAT ONE
TOTAL 170
MP3 DISC
CONTINUE
MENU1
CD1 CD2
CD3 CD4
TRACK 80 00:15
MENU2 CD3
01 02
03 04
05 06
07 08
Repeat
3. Remove repeat function.
The screen shows:
Repeat
REPEAT OFF
Page 20

OTHERS
– 19 –
Using Headphone
• Insert the headphone into the
PHONE jack.
• Use the VOLUME button on the
remote to adjust the volume of the
phone.
• When enjoying stories and music
using headphone, set the volume to
min before playing, then slowly
adjust the volume control to suitable
location.
Flat washer
Spring washer
Bracket
Screws
DVD-ME1
Flat washer
Spring washer
Bracket
Cushion plate
DVD-ME1
Installation Guide
Connect the unit to car mobile DC 12V.
Impending installation
1. Fix the bracket to the unit with screws.
2. Fix the unit to the car through mounting holes.
1. Fix the bracket to the unit with screws.
2. Fix the unit to the car through mounting holes.
Note: Please remove the disc when the unit is not in use.
Horizontal placement
Page 21

Robert Bosch Corporation warrants new Blaupunkt car audio and video products it distributes in the United States
through authorized Blaupunkt dealers, or which are imported as original vehicle equipment by the automobile
manufacturer, to be free from defects in material and workmanship, in accordance with the following: For twelve (12)
months after delivery to you, the original consumer purchaser, we will repair or at our option replace at no charge to you
any car audio and video product which, under normal conditions of use and service, proves to be defective in materials
or workmanship. However, this warranty does not cover expenses incurred in the removal or reinstallation of any car
audio and video product, whether or not proven defective, and does not cover products not purchased from an
authorized Blaupunkt dealer. This warranty is limited to the original consumer purchaser and is not transferable.
Repaired and replacement car audio and video products shall assume the identity of the original for purpose of this
warranty and this warranty shall not be extended with respect to such products. To obtain performance of this
warranty, contact the nearest Blaupunkt authorized repair facility or our nearest office. A dated purchase receipt or other
proof that the product is within the warranty period will be required in order to honor your claim. Carefully pack the unit
and ship prepaid to the servicing location. For further information, write to the Robert Bosch Corporation, 2800 South
25th Avenue, Broadview, Illinois, 60155, attention Blaupunkt Customer Service Department or call 1-800-266-2528.
Specifically excluded from this warranty are failures caused by misuse, neglect, abuse, improper operation or
installation, dropping or damaging, unauthorized service or parts, or failure to follow maintenance instructions or
perform normal maintenance activities. Normal maintenance activities for car audio and video products include but are
not limited to cleaning and other minor maintenance activities and adjustments that are outlined in the owner's manual
or that are normally required for continued proper operation. Also excluded from this warranty is the correction of
improper installation and the elimination of any external electromagnetic interference. This warranty sets forth your
exclusive remedies with respect to the products covered by it. We shall not be liable for any incidental, consequential,
special or punitive damages arising from the sale or use of any Blaupunkt car audio and video products, whether such
claim is in contract or tort. No attempt to alter, modify, or amend this warranty shall be effective unless authorized in
writing by an officer of Robert Bosch Corporation. THIS WARRANTY IS IN LIEU OF ALL OTHER WARRANTIES OR
REPRESENTATIONS, EXPRESS OR IMPLIED, INCLUDING ANY WARRANTY IMPLIED BY LAW, WHETHER FOR
MERCHANTABILITY OR FITNESS FOR A PARTICULAR PURPOSE OR OTHERWISE AND SHALL BE EFFECTIVE ONLY
FOR THE PERIOD THAT THIS EXPRESS WARRANTY IS EFFECTIVE. In the event any provision, or any part or portion
of this warranty shall be held invalid, void or otherwise unenforceable, such holding shall not affect the remaining part or
portions of that provision or any other provision hereof.
NOTICE TO CALIFORNIA OWNERS: If your Blaupunkt car audio product needs warranty repair service and there is no
authorized service center reasonably close to you, you can return the defective unit to the dealer from whom you
purchased it, or you can return it to any dealer who sells Blaupunkt car audio and video products. The dealer may, at
the dealer's option, replace, repair or refund the purchase price for any Blaupunkt car audio and video products which
prove defective under conditions of normal use. If the dealer fails to repair, replace, or partially refund your money, you
may take your Blaupunkt car audio and video product to any repair shop and they can repair your unit at our expense
unless the repair cost exceeds the depreciated value of the unit, but you must contact Blaupunkt to receive
authorization to do this before your car audio and video product is repaired.
ROBERT BOSCH CORPORATION
BLAUPUNKT CUSTOMER SERVICE
2800 SOUTH 25TH AVENUE
BROADVIEW, IL 60155
TEL: 1-800-266-2528
LIMITED WARRANTY INFORMATION (UNITED STATES ONLY)
This player is designed to install quickly and easily into most vehicles. Should you experience installation problems, we
will make all reasonable efforts to help you, the end purchaser or Installation Technician, to competently install these
components. Before calling us please carefully review this owners manual for the answers to your questions. Should
you need navigation system tech support, please refer to www.blaupunktusa.com before picking up the phone. In case,
you need individual assistance, please call 1-800-266-2528 from 9AM to 4 PM (CST).
BLAUPUNKT TECHNICAL SUPPORT
– 20 –
Page 22

Robert Bosch Corporation
Sales Group - Blaupunkt Division
2800 S. 25th Avenue, Broadview, Illinois 60155 U.S.A.
www.blaupunktusa.com
Copyright 2001 by the Robert Bosch Corporation
No portion of this work may be reproduced in any form without the written consent of the Robert Bosch Corporation Printed in China (5/01)
 Loading...