

User's Manual
Mobile Printer
http://www.samsungminiprinters.com

Information to the user
NOTE: This equipment has been tested and found to comply with the limits for a Class B digital device,
pursuant to part 15 of the FCC Rules.
These limits are designed to provide reasonable protection against harmful interference in a residential
installation.
This equipment generates, uses and can radiate radio frequency energy and, if not installed and used in
accordance with the instructions, may cause harmful interference to radio communications. However, there
is no guarantee that interference will not occur in a particular installation. If this equipment does cause
harmful interference to radio or television reception, which can be determined by turning the equipment off
and on, the user is encouraged to try to correct the interference by one or more of the following measures:
- Reorient or relocate the receiving antenna.
- Increase the separation between the equipment and receiver.
- Connect the equipment into an outlet on a circuit different from that to which the receiver is connected.
- Consult the dealer or an experienced radio/TV technician for help.
CAUTION : Changes or modifications not expressly approved by the party responsible for compliance could
void the user’s authority to operate the equipment.
Rev. 1.00
■ Safety Precautions
In using the present appliance, please keep the following safety regulations in order to
prevent any hazard or material damage.
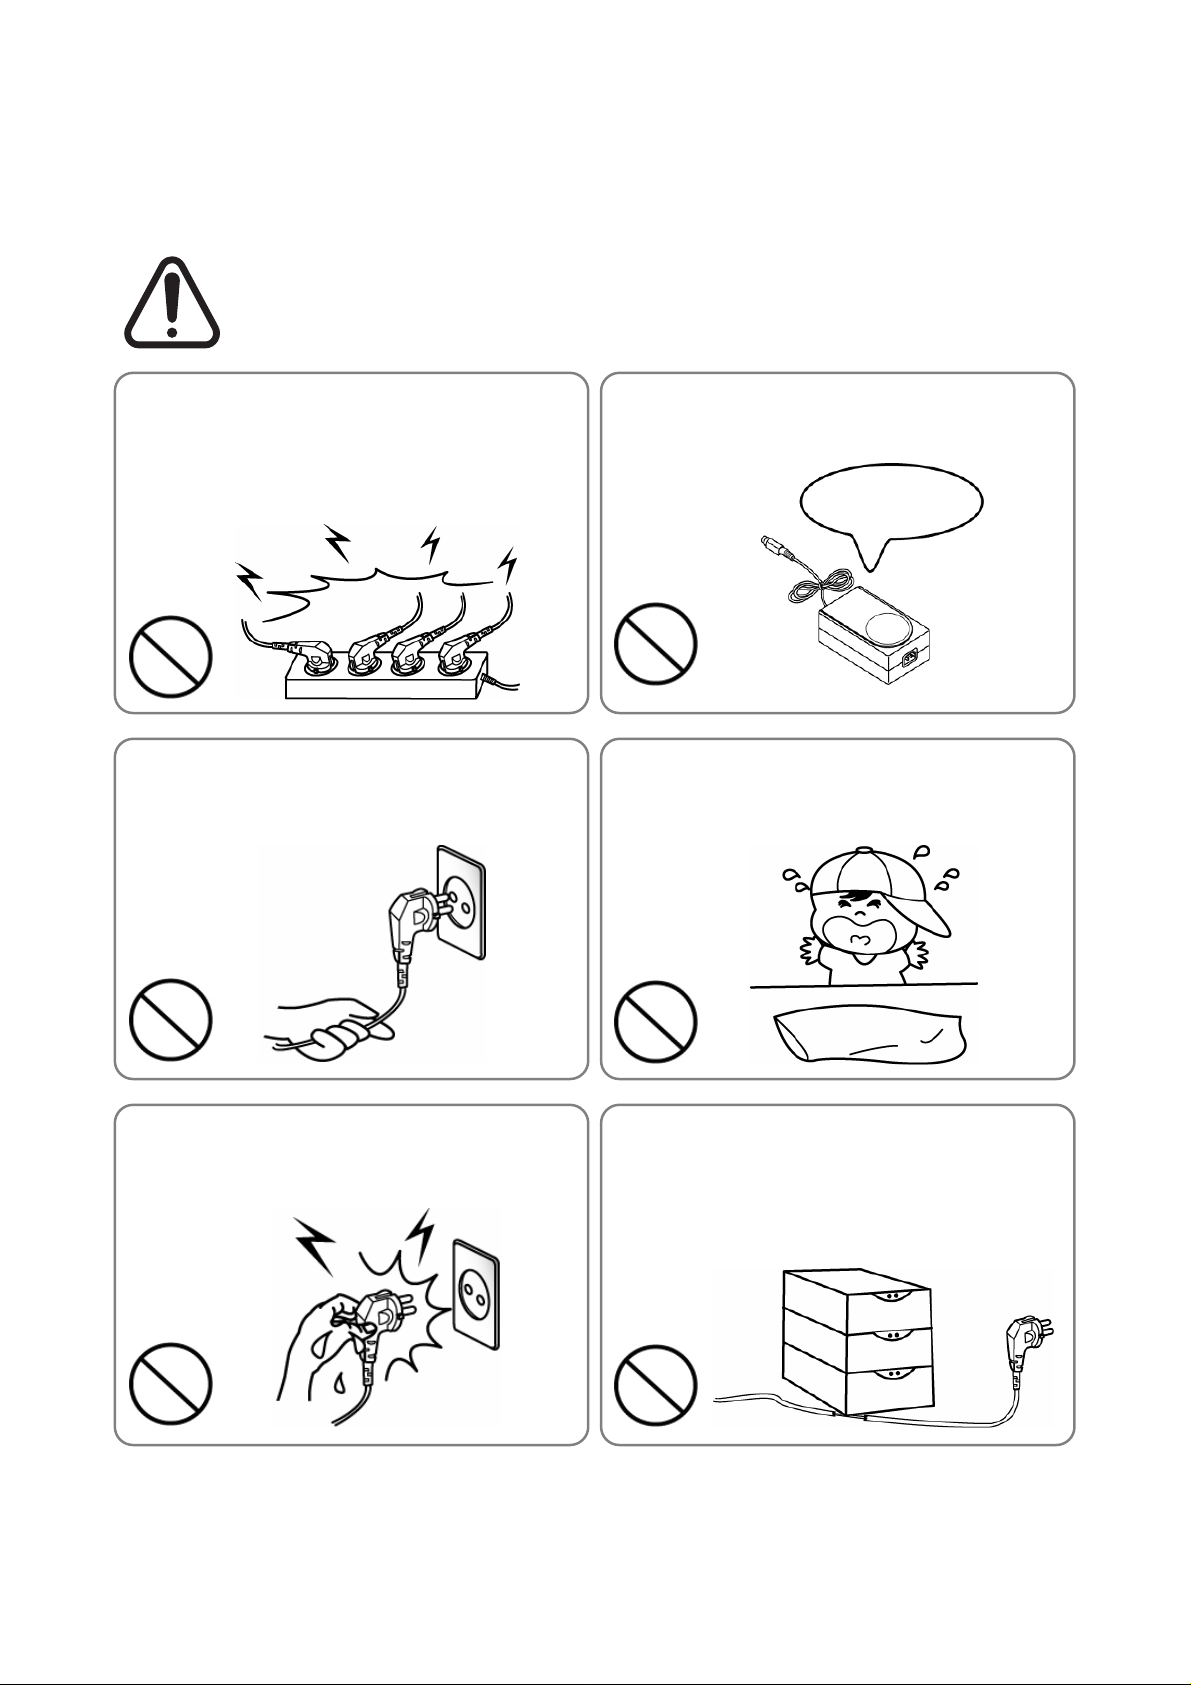
WARNING
Violating following instructions can cause serious injury or death.
Do not plug several products in one multi-outlet.
• This can provoke over-heating and a fire.
• If the plug is wet or dirty, dry or wipe it before usage.
• If the plug does not fit perfectly with the outlet, do not plug in.
• Be sure to use only standardized multi-outlets.
PROHIBIT
Do not pull the cable to unplug.
• This can damage the cable, which is the origin of a fire or a
breakdown of the printer.
PROHIBIT
You must use only the supplied adapter.
• It is dangerous to use other adapters.
ONLY SUPPLIED ADAPTER
PROHIBIT
Keep the plastic bag out of children’s reach.
• If not, a child may put the bag on his head.
PROHIBIT
Do not plug in or unplug with your hands wet.
• You can be electrocuted.
PROHIBIT
Rev. 1.00
Do not bend the cable by force or leave it under any
heavy object.
• A damaged cable can cause a fire.
PROHIBIT
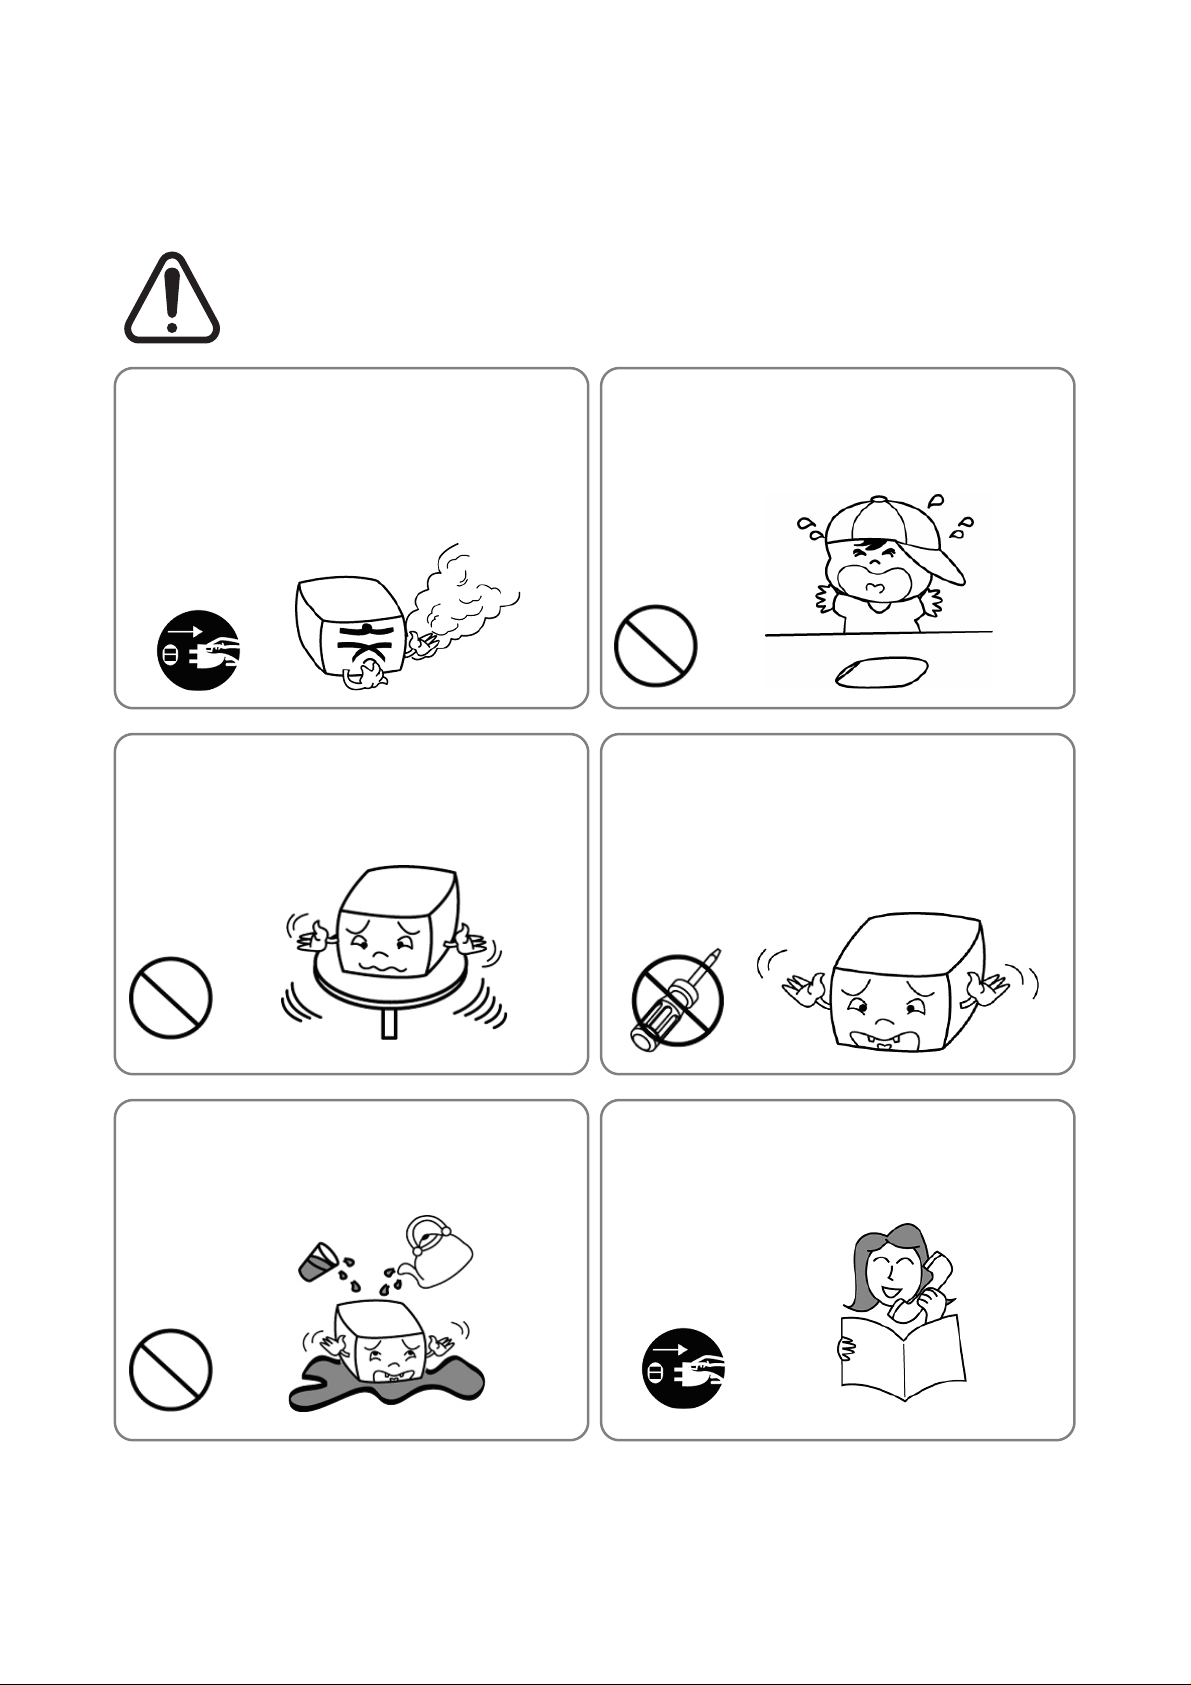
CAUTION
Violating following instructions can cause slight wound or damage the appliance
.
If you observe a strange smoke, odor or noise from
the printer, unplug it before taking following
measures.
• Switch off the printer and unplug the set from the mains.
• After the disappearance of the smoke, call your dealer to
repair it.
TO UNPLUG
PRINTER
Install the printer on the stable surface.
• If the printer falls down, it can be broken and you can hurt
yourself.
PRINTER
PROHIBIT
Keep the desiccant out of children’s reach.
• If not, they may eat it.
PROHIBIT
Use only approved accessories and do not try to
disassemble, repair or remodel it for yourself.
• Call your dealer when you need these services.
• Do not touch the blade of auto cutter.
DISASSEMBLING
PROHIBITED
PRINTER
Do not let water or other foreign objects in the
printer.
• If this happened, switch off and unplug the printer before
calling your dealer.
PROHIBIT
PRINTER
Do not use the printer when it is out of order. This
can cause a fire or an electrocution.
• Switch off and unplug the printer before calling your dealer.
TO UNPLUG
PRINTER
DEALER
Rev. 1.00

All rights reserved. No part of this publication may reproduced, stored in a retrieval, or
transmitted in any form or by any means, electronic, mechanical, photocopying, recording,
or otherwise, without the prior written permission of BIXOLON.
No patent liability is assumed with respect to the use of the information contained herein.
While every precaution has been taken in the preparation of this book, BIXOLON assumed
no responsibility for errors or omissions. Neither is any liability assumed for damages
resulting from the use of the information contained herein.
Neither BIXOLON nor its affiliates shall be liable to the purchaser of this product or third
parties for damages, losses, costs, or expenses incurred by purchaser or third parties as a
result of : accident, misuse, or abuse of this product or unauthorized modifications, repairs,
or alterations to this product, or (excluding the U.S.) failure to strictly comply with
BIXOLON s operating and maintenance instructions.
BIXOLON shall not be liable against any damages or problems arising from the use of any
options or ant consumable products other than those designated as Original Samsung
products or Samsung Approved products by BIXOLON.
■ Notice
The contents of this manual are subject to change without notice.
Copyright© 2007 BIXOLON CO., LTD
■ WARNING
The connection of a non-shielded printer interface cable to this printer will invalidate the
EMC standards of this device. You are cautioned that changes or modifications not
expressly approved by the party responsible for compliance could void your authority to
operate the equipment.
■ Waste Electrical and Electric Equipment (WEEE)
This marking shown on the product or its literature, indicates that is should not
be disposed with other household wastes at the end of its working life, To
prevent possible harm to the environment or human health from uncontrolled
waste disposal, please separate this from other types of wastes and recycle it
responsibly to promote the sustainable reuse of material resources. Household
users should contact either the retailer where they purchased this product, or their local
government office, for details of where and how they can take this item for environmentally
safe recycling. Business users should contact their supplier and check the terms and
conditions of the purchase contract. This product should not be mixed with other
commercial wastes for disposal.
■ Label Material
* Rating Label: PP
* Other Labels: PET
Rev. 1.00

■ Introduction
The SPP-R200 is a high-quality Mobile printer.
This mobile printer has the following features.
• Elegant design of outer case and light-weight
• High-speed printing (80mm/s) but low noise
• Drop durability (Applied cushion rubber and high-strength material)
• Easy paper loading (Drop in and print) and easy separable Lithium-ion battery pack
• High speed wireless interface and reliable data reception
• Indication of battery consumption and low battery alarm (4 stages)
• Power save mode (time set up by user’s choice)
• Long lating battery by electric circuit design for low power consumption
• Cover open switch and Paper end sensor is standard
• Download of firmware and font (cable/wireless)
• Download of NV image
• Download of Bluetooth firmware (cable)
• Survival function (recovery of main board damaged by error of firmware download)
• Memory switch
• Automatic recognition of connection either cable or wireless
• Support status of printer
• Variable option
- Cradle for recharge of battery
- Spare battery
- A battery charger in the car
- A portable case
- Belt strap
- Interface cable for both Serial and USB
Rev. 1.00
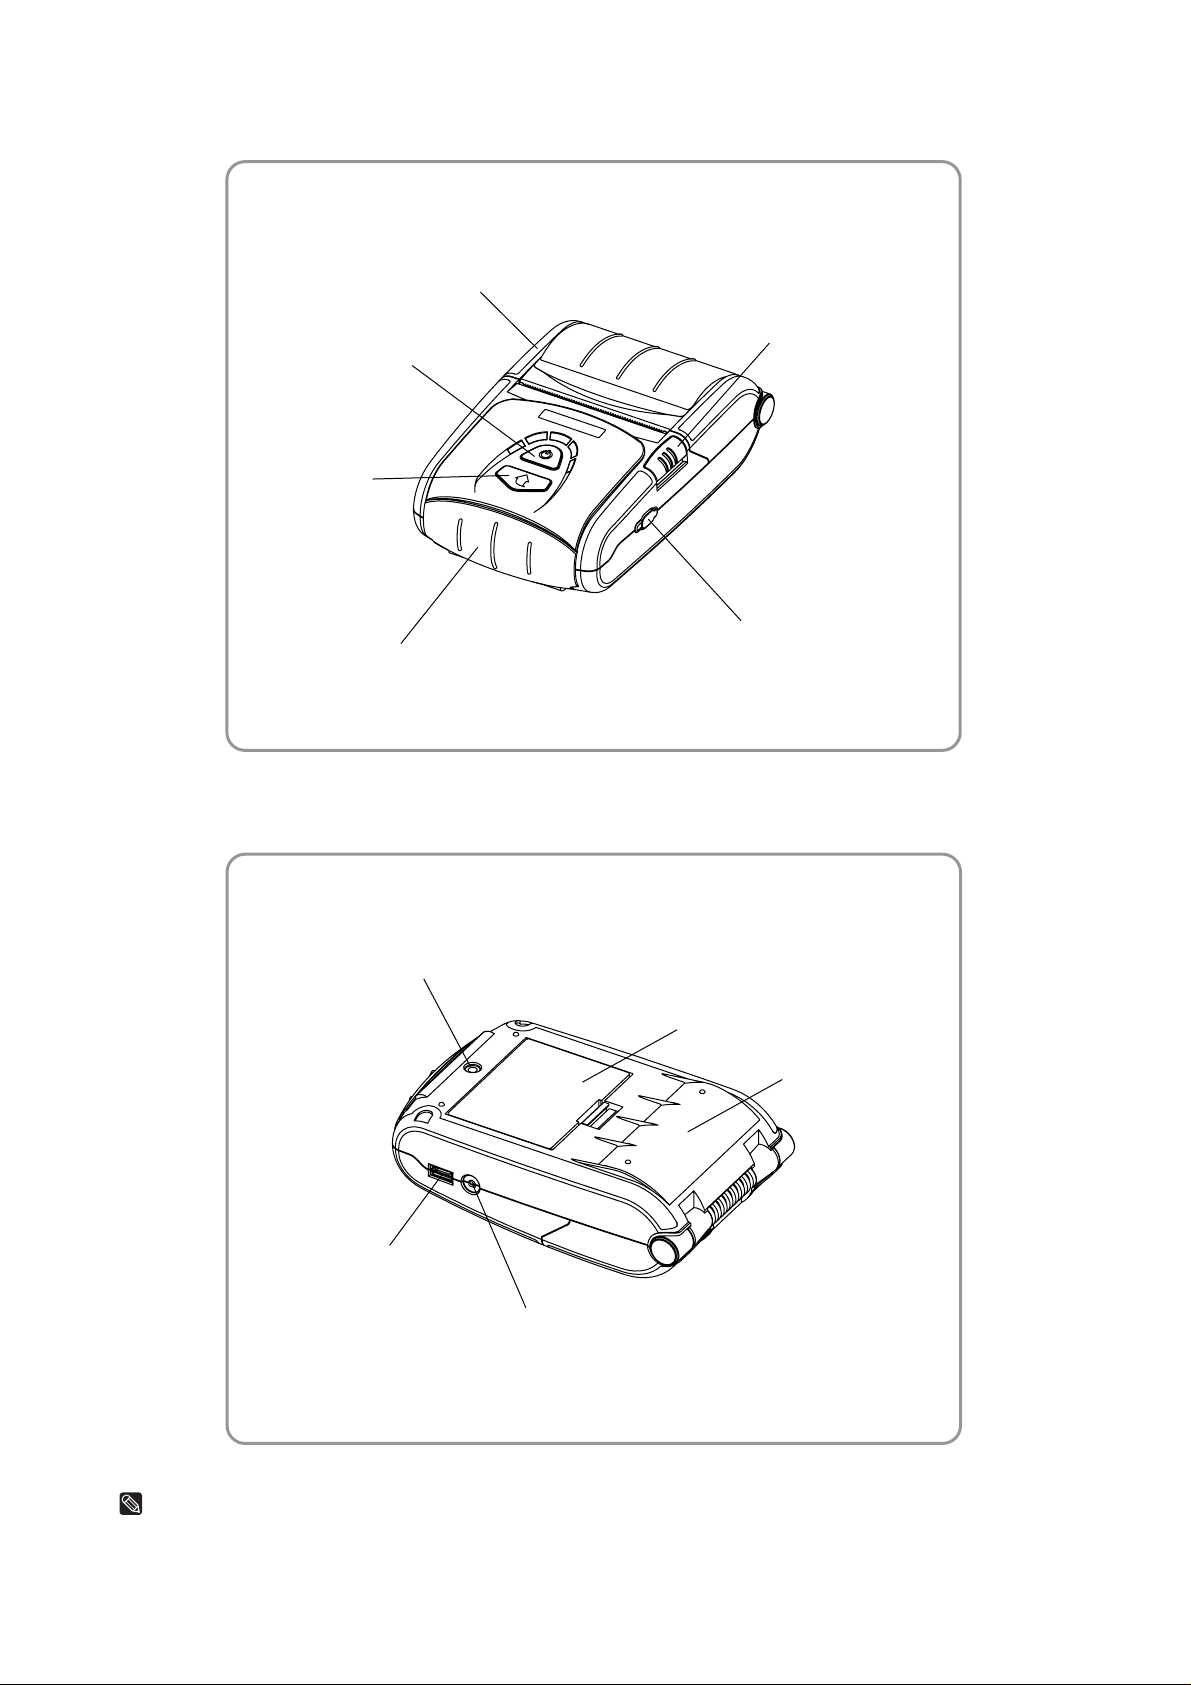
• Front view
Power button
Feed button
Rear cover
Open button
• Rear view
BT cap (Bluetooth download connector)
Front cover (MSR)
Belt strap fixing hole
Battery pack
Lower cover
Serial/USB
cable connector
Power connector
NOTES
Please be sure to read the instructions in this manual carefully before using your new printer.
Rev. 1.00

■ Table of Contents
1. Unpacking······························································································ 9
2. Installation and Operation·································································· 10
2.1 Installing the Battery ························································································10
2.2 Charging the Battery························································································10
2.3 Using the MSR·································································································10
2.4 Connecting the interface cable (Option)···························································11
2.5 Installing the paper roll·····················································································12
2.6 Using the belt strap··························································································13
2.7 Using the control panel ····················································································14
3. Setting the Memory Switches ···························································· 16
3.1 Memory Switch 1 ·····························································································16
3.2 Memory Switch 2 ·····························································································17
3.3 Memory Switch 5 (Power off time selection)····················································18
3.4 Memory Switch 6 (Idle mode time selection)····················································18
3.5 Memory Switch 7 (Selecting MSR read mode) ················································19
3.6 Memory Switch 8 ·····························································································19
3.7 Serial communication·······················································································19
4. Self Test································································································ 20
5. Hexadecimal Dumping········································································ 20
6. Specifications······················································································ 21
7. Overall dimensions············································································· 22
Rev. 1.00

1. Unpacking
Your printer box should include the items shown in the illustration below.
If any items are damaged or missing, please contact your dealer.
SPP-R200 Battery Battery charger
Power cord Belt strap Paper
CD Quick guide Safety precautions
Rev. 1.00

2. Installation and operation
2.1 Installing the battery
2.2 Charging the battery
1) Insert two hook of battery into two hole of
printer.
2) Lock the battery into the printer until it
makes a clicking sound.
NOTES
The battery is packed uncharged. For the
printer works, you must charge the battery using
the battery charger or the battery cradle
(option). (See “2.2 Charging the battery”.)
2.3 Using the MSR
1) Make sure the printer is turned off.
2) Connect the power cord to the battery
charger.
3) Plug the battery charger into the printer’s
power connector.
4) Plug the power cord into the outlet.
CAUTION
Before connecting the printer to the battery
charger, make sure that the voltage and power
specifications match the printer’s requirements.
Using an incorrect battery charger can cause
serious damage to the printer.
1) Open the front cover by pushing the
Front cover.
2) Insert the card as shown and then swipe
in the direction of arrow.
3) Close the front cover by pushing the front
cover.
NOTES
Be sure to note the correct card direction.
Rev. 1.00

2.4 Connecting the interface cable (Option)
1) Connect the interface cable to the
printer’s interface connector.
• Communication cable
Pin No. Signal name Direction Function
1 GND - Ground
2 TXD Output Transmit data
3 RXD Input Receive data
Request to send
4 nRTS Output
Set high when printer is ready to
accept a command or data
5 nCTS Input Clear to send from host
6 GND - Ground
7 GND - Ground
8 D + - Differential data line
9 D - - Differential data line
10 nINDEX Output Check the interface cable
Rev. 1.00

2.5 Installing the paper roll
1) To prevent data loss, make sure that the
printer is not receiving data.
2) Open the rear cover by pushing the open
button.
3) Insert the paper roll as shown.
(Remove the used paper roll core if there
is one.)
4) Be sure to note the correct direction that
the paper should come off the paper roll.
5) Pull out small amount of paper as shown.
Then close the rear cover.
6) Tear off the extra paper by pulling it
toward the front of the printer.
Rev. 1.00

2.6 Using the belt strap
1) Insert the screw of the belt strap in a hole
of lower cover.
2) Fasten the screw of the belt strap by
rotating a coin as shown.
3) Spread the velcro fasteners of the belt
strap.
4) Insert the belt strap to the belt.
5) Attach to the Velcro fasteners as shown.
Rev. 1.00

2.7 Using the control panel
Most of the functions of this printer are governed by software, but you can monitor the
printer’s status by looking at the lights on the control panel and for some procedures you
will use the buttons.
• POWER button
Use this button to turn on the power or to turn off the power. If you
press this button when the printer is turn off, the printer is turn on.
And if you press this button during 2 seconds when the printer is
turn on, the printer is turn off.
• FEED button
Use this button to feed the paper or to start the self test and for the
hexadecimal dump mode. (See “4. Self test” for self test. See “5.
Hexadecimal dump” for hexadecimal dump mode.)
• BATT. LED (Blue or red color)
This indicator lights are on when the power is turned on. And this
indicator lights show the battery charge rate. When three LEDs in
blue is on, it means that the battery is fully charged. When two LEDs
or one LED in blue is on, it means that the battery is not fully
charged. And if only one LEDs in red is on, it means that the battery
needs to be charged or changed.
• ERROR LED (Red Color)
This indicator light is on (but not blinking) when the printer is errors.
When this light is on, it means printer rear cover is open. When this
light is blinking, it means the printer is out of paper or the printer
head is heating. If you see this light blinking, turn off the printer for a
few seconds and then turn it back on. If the light is still blinking, call
your supervisor or a service person.
• BT LED (Green Color)
This indicator light is on when the printer is ready to communicate
with host. When this light is on, it means printer interfaces are the
serial communication or the USB communication. Otherwise it
means the Bluetooth communication is connection.
When this light is blinking, it means the Bluetooth communication is
Rev. 1.00

disconnection. After all it means the printer is not ready to
communicate with host.
Rev. 1.00

3. Setting the Memory Switches
This printer has “Memory Switch” set which is software switches. Memory Switch set has
“MSW 1”,“MSW 2”, “MSW 5”(Power OFF time selection), “MSW 6”(Power idle mode time
selection),”MSW 7(MSR read mode selection)”, “MSW 8” and “Serial communication
condition”. “Memory Switch setting utility” can change the Memory Switch set to ON or
OFF as shown in the table below (default : all OFF):
The Memory Switch is available to be changed by two methods:
- Memory Switch setting utility
- Control from command
Settings of the Memory Switch are stored in the NV memory; therefore, even if the printer
is turned OFF, the settings are maintained.
3.1 Memory Switch 1
Switch Function ON OFF
1~3 Print density selection(*1) Refer to the following table
4 Reserved - Fixed to OFF
5 Print speed Selection Print speed 50mm/s Print speed 70mm/s
6 BUSY condition Receive buffer full
7 Reserved - Fixed to OFF
8 Reserved - Fixed to OFF
Receive buffer full or offline
NOTES
(*1) Print density selection
MSW 1-3 MSW 1-2 MSW 1-1 Function
OFF OFF OFF Print density 130%
OFF OFF ON Print density 120%
OFF ON OFF Print density 110%
OFF ON ON Print density 105%
ON OFF OFF Print density 100%
ON OFF ON Print density 95%
ON ON OFF Print density 90%
ON ON ON Print density 80%
Rev. 1.00

3.2 Memory Switch 2
Switch Function ON OFF
1~2 Interface selection (*1) Refer to the following table
3 Reserved - Fixed to OFF
4~8 Codepage selection (*2) Refer to the following table
NOTES
(*1) Interface selection
MSW 2-2 MSW 2-1 Function
OFF OFF Bluetooth Interface
OFF ON RS-232C(serial) Interface
ON OFF USB Interface
Desired code page can be selected using Memory Switch 2-4~ 8 by sett ing as followin g.
(*2) Code page selection
MSW 2-8 MSW 2-7 MSW 2-6 MSW 2-5 MSW 2-4 Character Table
OFF OFF OFF OFF OFF Page 0 - PC437 (USA, Standard Europe)
OFF OFF OFF OFF ON Page 1 – Katakana
OFF OFF OFF ON OFF Page 2 - PC850 (Multilingual)
OFF OFF OFF ON ON Page 3 - PC860 (Portuguese)
OFF OFF ON OFF OFF Page 4 - PC863 (Canadian-French)
OFF OFF ON OFF ON Page 5 - PC865 (Nordic)
OFF OFF ON ON OFF Page 16 - WPC1252 (Latin I)
OFF OFF ON ON ON Page 17 - PC866 (Cyrillic #2)
OFF ON OFF OFF OFF Page 18 - PC852 (Latin II)
OFF ON OFF OFF ON Page 19 - PC858 (Euro)
OFF ON OFF ON OFF Reserved
OFF ON OFF ON ON Page 22 - PC864 (Arabic)
OFF ON ON OFF OFF Page 23 - Thai character code 42
OFF ON ON OFF ON Page 24 - WPC1253 (Greek)
OFF ON ON ON OFF Reserved
OFF ON ON ON ON Reserved
ON OFF OFF OFF OFF Page 27 - Farsi
ON OFF OFF OFF ON Page 28 - WPC1251 (Cyrillic)
ON OFF OFF ON OFF Page 29 - PC737 (Greek)
ON OFF OFF ON ON Reserved
ON OFF ON OFF OFF Page 31 - Thai character code 14
ON OFF ON OFF ON Reserved
ON OFF ON ON OFF Page 33 - WPC1255 (Hebrew New code)
ON OFF ON ON ON Reserved
ON ON OFF OFF OFF Reserved
ON ON OFF OFF ON Page 36 - PC855 (Cyrillic)
ON ON OFF ON OFF Page 37 - PC857 (Turkish)
ON ON OFF ON ON Reserved
ON ON ON OFF OFF Reserved
ON ON ON OFF ON Reserved
ON ON ON ON OFF Reserved
ON ON ON ON ON Reserved
Rev. 1.00

3.3 Memory Switch 5 (Power off time selection)
MSW 5-8 MSW 5-7 MSW 5-6 MSW 5-5 MSW 5-4 MSW 5-3 MSW 5-2 MSW 5-1 Value
OFF OFF OFF OFF OFF OFF OFF OFF 0
OFF OFF OFF OFF OFF OFF OFF ON 1
OFF OFF OFF OFF OFF OFF ON OFF 2
OFF OFF OFF OFF OFF OFF ON ON 3
OFF OFF OFF OFF OFF ON OFF OFF 4
OFF OFF OFF OFF OFF ON OFF ON 5
.
.
.
OFF OFF OFF OFF ON OFF ON OFF 10
.
.
.
OFF OFF OFF ON OFF ON OFF OFF 20
.
.
.
OFF OFF OFF ON ON ON ON OFF 30
.
.
.
OFF OFF ON OFF ON OFF OFF OFF 40
.
.
.
OFF OFF ON ON OFF OFF ON OFF 50
.
.
.
OFF OFF ON ON ON ON OFF OFF 60
.
.
.
OFF ON OFF OFF OFF ON ON OFF 70
.
.
.
OFF ON OFF ON OFF OFF OFF OFF 80
.
.
.
OFF ON OFF ON ON OFF ON OFF 90
.
.
.
.
.
.
.
.
.
.
.
.
.
.
.
.
.
.
.
.
.
.
.
.
.
.
.
.
.
.
.
.
.
.
.
.
.
.
.
.
.
.
.
.
.
.
.
.
.
.
.
.
.
.
.
.
.
.
.
.
.
.
.
.
.
.
.
.
.
.
.
.
.
.
.
.
.
.
.
.
.
.
.
.
.
.
.
.
.
.
.
.
.
.
.
.
.
.
.
.
.
.
.
.
.
.
.
.
.
.
.
.
.
.
.
.
.
.
.
.
.
.
.
.
.
.
.
.
.
.
.
.
.
.
.
.
.
.
.
.
.
.
.
.
.
.
.
.
.
.
.
.
.
.
.
.
.
.
.
.
.
.
.
.
.
.
.
.
.
.
.
.
.
.
.
.
.
.
.
.
.
.
.
.
.
.
.
.
.
.
.
.
.
.
.
.
.
.
.
.
.
.
.
.
.
.
.
.
.
.
.
.
.
.
.
.
NOTES
Power OFF time ranges : 1 ~ 90 minutes
3.4 Memory Switch 6 (Power idle mode time selection)
MSW 6-8 MSW 6-7 MSW 6-6 MSW 6-5 MSW 6-4 MSW 6-3 MSW 6-2 MSW 6-1 Value
OFF OFF OFF OFF ON OFF ON OFF 10
OFF OFF OFF OFF ON OFF ON ON 11
OFF OFF OFF OFF ON ON OFF OFF 12
OFF OFF OFF OFF ON ON OFF ON 13
OFF OFF OFF OFF ON ON ON OFF 14
OFF OFF OFF OFF ON ON ON ON 15
.
.
.
OFF OFF OFF ON ON ON ON OFF 30
.
.
.
OFF OFF ON ON ON ON OFF OFF 60
.
.
.
OFF ON ON ON ON OFF OFF OFF 120
.
.
.
ON OFF ON ON OFF ON OFF OFF 180
.
.
.
ON ON ON ON OFF OFF OFF OFF 240
.
.
.
ON ON ON ON ON ON ON ON 255
.
.
.
.
.
.
.
.
.
.
.
.
.
.
.
.
.
.
.
.
.
.
.
.
.
.
.
.
.
.
.
.
.
.
.
.
.
.
.
.
.
.
.
.
.
.
.
.
.
.
.
.
.
.
.
.
.
.
.
.
.
.
.
.
.
.
.
.
.
.
.
.
.
.
.
.
.
.
.
.
.
.
.
.
.
.
.
.
.
.
.
.
.
.
.
.
.
.
.
.
.
.
.
.
.
.
.
.
.
.
.
.
.
.
.
.
.
.
.
.
.
.
.
.
.
.
.
.
.
.
.
.
.
.
.
.
.
.
.
.
.
.
.
.
NOTES
Idle mode time ranges : 10 ~ 255 seconds
Rev. 1.00

3.5 Memory Switch 7 (MSR read mode selection)
Switch Function ON OFF
1~3 MSR read mode selection (*1) Refer to the following table
2 Reserved - Fixed to OFF
3 Reserved - Fixed to OFF
4 Reserved - Fixed to OFF
5 Reserved - Fixed to OFF
6 Reserved - Fixed to OFF
7 Reserved - Fixed to OFF
8 Reserved - Fixed to OFF
NOTES
(*1) MSR read mode selection
MSW 7-3 MSW 7-2 MSW 7-1 Function
OFF OFF OFF Track 1 & 2 read mode command
OFF OFF ON Track 2 & 3 read mode command
OFF ON OFF Track 1 read mode AUTO trigger
OFF ON ON Track 2 read mode AUTO trigger
ON OFF OFF Track 1 & 2 read mode AUTO trigger
ON OFF ON Track 2 read mode AUTO trigger
ON ON OFF Track 3 read mode AUTO trigger
ON ON ON Track 2 & 3 read mode AUTO trigger
3.6 Memory Switch 8
Switch Function ON OFF
1 Reserved - Fixed to OFF
2 Font selection Font B (9x24) Font A (12x24)
3 Beeps for paper end selection
4 Reserved - Fixed to OFF
5 Reserved - Fixed to OFF
6 Reserved - Fixed to OFF
7 Reserved - Fixed to OFF
8 Reserved - Fixed to OFF
No beeps for paper end
Beeps for paper end
3.7 Serial communication
Function Selectable value
2400 bps
4800 bps
9600 bps
Baud rate
Parity
Handshake
Data length
19200 bps
38400 bps
57600 bps
115200 bps
None
Odd
Even
DSR/DTR
XON/XOFF
7 bit
8 bit
Rev. 1.00

4. Self Test
The self test let you know if your printer is operating properly. It checks the printing quality,
ROM version and memory switch settings.
The test is independent of any other equipment or software, so it is a good idea to run it
when you first set up the printer or if you have any trouble. If the self test works correctly,
the problem is in the other equipment or the software, not the printer.
• Running the self test
1) Make sure the printer is turned off and the printer cover is closed properly.
2) While holding down the FEED button, turn on the printer and continue to hold until the
paper begins to feed.
3) Press the FEED button to continue printing the rolling ASCII pattern.
4) The self test mode terminates after printing the rolling ASCII pattern automatically.
5. Hexadecimal Dumping
• Hexadecimal dump
This feature allows experienced users to see exactly what data is coming to the printer.
This can be useful in finding software problems. When you turn on the hexadecimal
dump function, the printer prints all commands and other data in hexadecimal format
along with a guide section to help you find specific commands.
• To use the hexadecimal dump feature, follow these steps:
1) After you make sure that the printer is off, open the rear cover of the printer.
2) Hold down the FEED button while you turn on the printer.
3) Close the rear cover.
4) Run any software program that sends data to the printer. The printer prints
"Hexadecimal dump" and then all the codes are received in a two column format. The
first column contains the hexadecimal codes and the second column gives the ASCII
characters that correspond to the codes.
Hexadecimal Dump
To terminate hexadecimal dump
Press FEED button three times
1B 21 00 1B 26 02 40 40 . ! . . & . @ @
1B 25 01 1B 63 34 00 1B . % . . c 4 . .
41 42 43 44 45 46 47 48 A B C D E F G H
<Online Hex Dump Completed>
(A period(.) is printed for each code that has no ASCII equivalent.)
5) When the printing finishes, turn off the printer.
Rev. 1.00

6. Specifications
Item Description
Print method Direct thermal
Print speed 80 mm/sec
Resolution 203 DPI
Paper supply method Easy paper loading
Character size
Character per line
Print
Paper roll
Reliability
Connectivity
Battery
charger
Battery
Dimension
Weight
Accessories
Character sets
Barcodes
Emulation ESC/POS
Drivers WinCE 4.2
Sensor Paper end sensor, Rear cover open switch
Cutter type Manual cutter
Language Buyer language support
Paper type Thermal paper
Width 58 ± 0.5 mm (2.28” ± 0.2”)
Diameter Max. ø40 mm (1.57”)
TPH 50 km
Battery 500 cycles rechargeable
Interface Serial/USB, Bluetooth
Input
Output
Type Lithium-ion
Output
Charging time 2.5 Hrs
Printer
Printer
Packing
Unpacking
Font A : 12 × 24
Font B : 9 × 24
Font A : 32
Font B : 42
Alphanumeric character : 95
Extended graphic : 128 × 20 pages
International character : 32
1D : Codabar, ITF, UPC A, UPC B
CODE 39, CODE 93, Code 128,
EAN 8, EAN 13, EAN 18,
2D : PDF417
Voltage : 100 ~ 250 VAC
Current : 1.0A (Max. at 110VA)
Voltage : 8.4 VDC
Current : 0.8A
Voltage : 7.4 VDC
Capacity : 1100 mAh
81mm × 127.4mm × 44.7mm
(3.19″ × 5.02″ × 1.76″)
Printer : 184g (0.41lbs)
Printer+battery : 236g (0.52lbs)
Printer+battery+paper roll : 293g (0.65lbs)
Shipping : Approximately 680g (1.5lbs)
Battery
Battery charger
Belt strap
Battery
Battery cradle
Leather case
Interface cable
Rev. 1.00

7. Overall dimensions
Rev. 1.00
 Loading...