

Page 1
QUICK START GUIDE
DIGIPRO® ROBOTIC VACUUM
Assembly Instructions
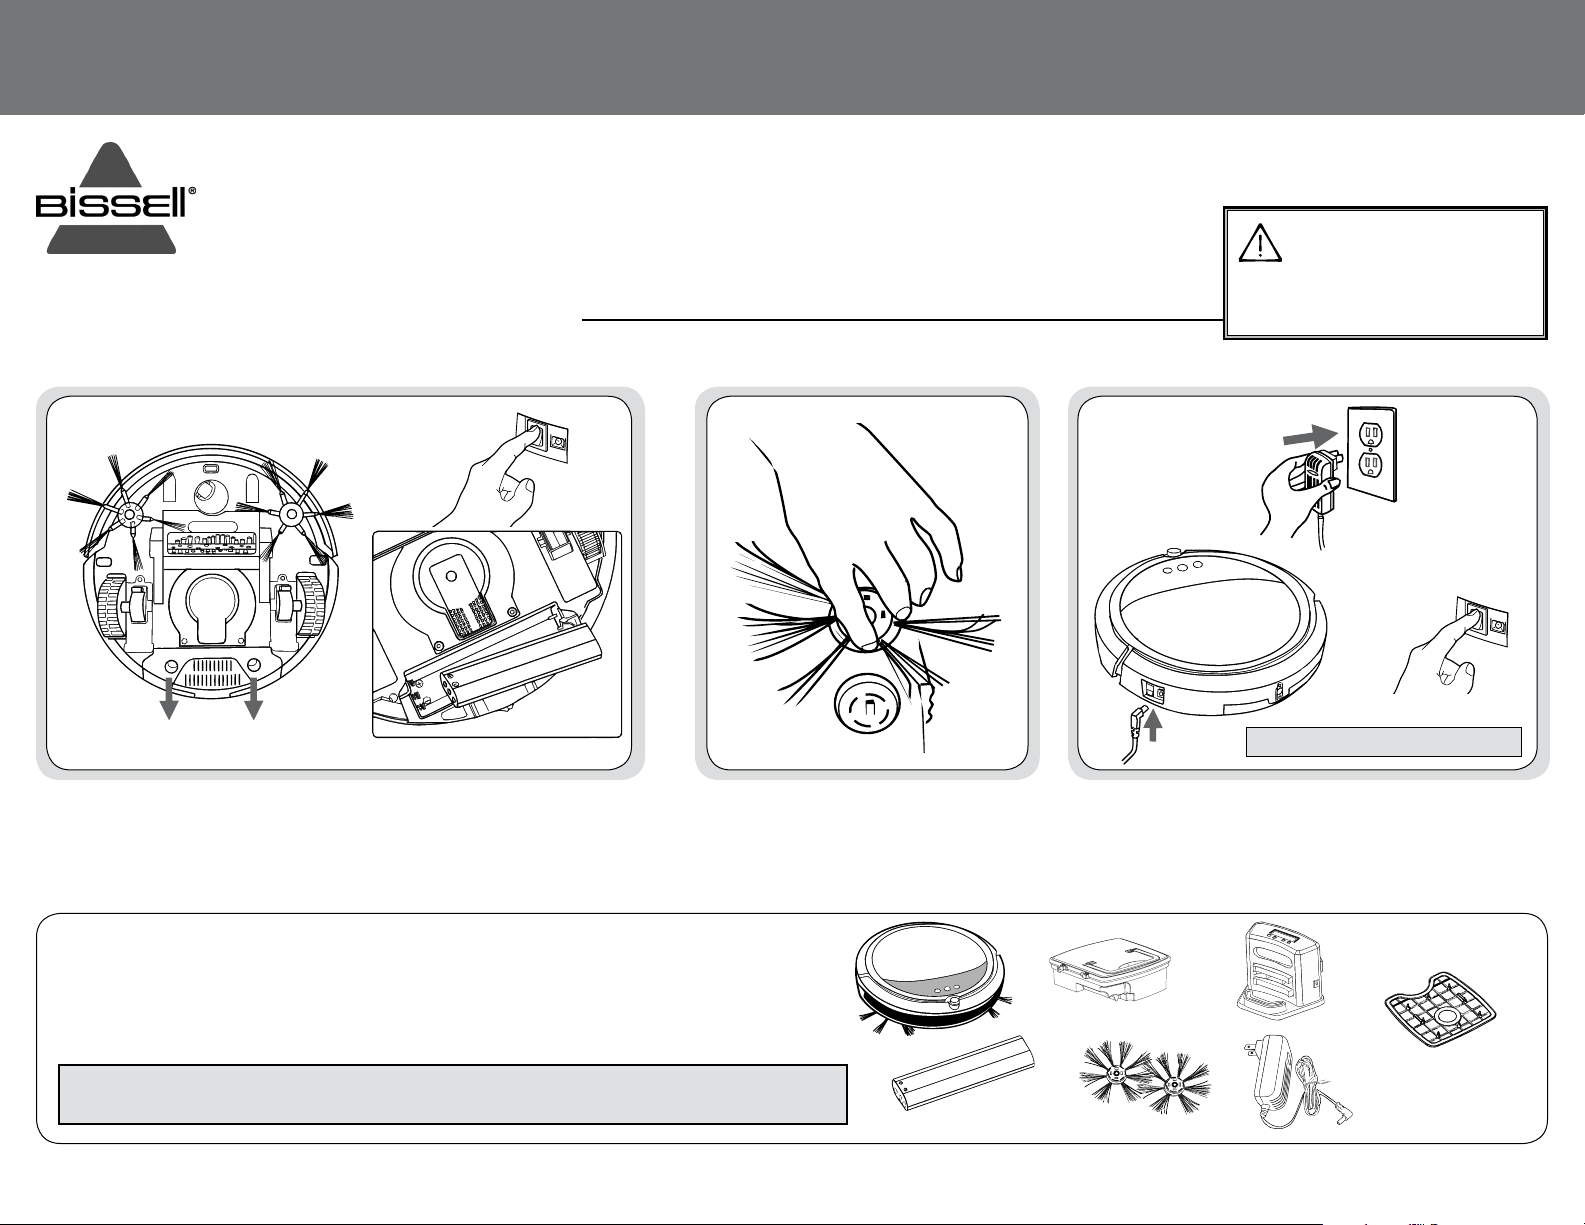
Battery Installation Getting Ready to Clean
Power Switch
2142 SERIES
WARNING
Refer to the enclosed user guide for complete
instructions and important safety notices.
Power Switch
**DO NOT REMOVE THE PLASTIC SHRINK SLEEVE FROM THE BATTERY PACK.
First, turn the power switch to the
OFF position. Press on the two
circles of the battery cover and
slide the cover towards you and
insert the battery.
Install the battery in the
compartment, ensuring the +/-
terminals of the battery match
the +/- indicators in the battery
compartment.
1. Install the edge cleaning brush by
pushing directly in to the holder.
PARTS INCLUDED
1. BISSELL DigiPro® Robotic Vacuum
2. Rechargeble Li-Ion Battery
3. Dust Bin
4. Edge Cleaning Brushes
NOTE: Not all accessories come with every model. Be sure to check the carton for additional tools.
161-1450 01/17 RevA
5. Programmable Docking Staton
6. Power Adapter
7. Filter
(Located inside Dust Bin)
Note: Initial charge will take 4-5 hours.
2. Turn ON the power switch and charge the battery
directly from the power cord for 4-5 hours prior to
first operation.
1.
2.
3.
4.
5.
7.
6.
(Located inside Dust Bin)
Page 2
For further instructions
www.BISSELL.com
QUICK START GUIDE
reference the User Guide or visit
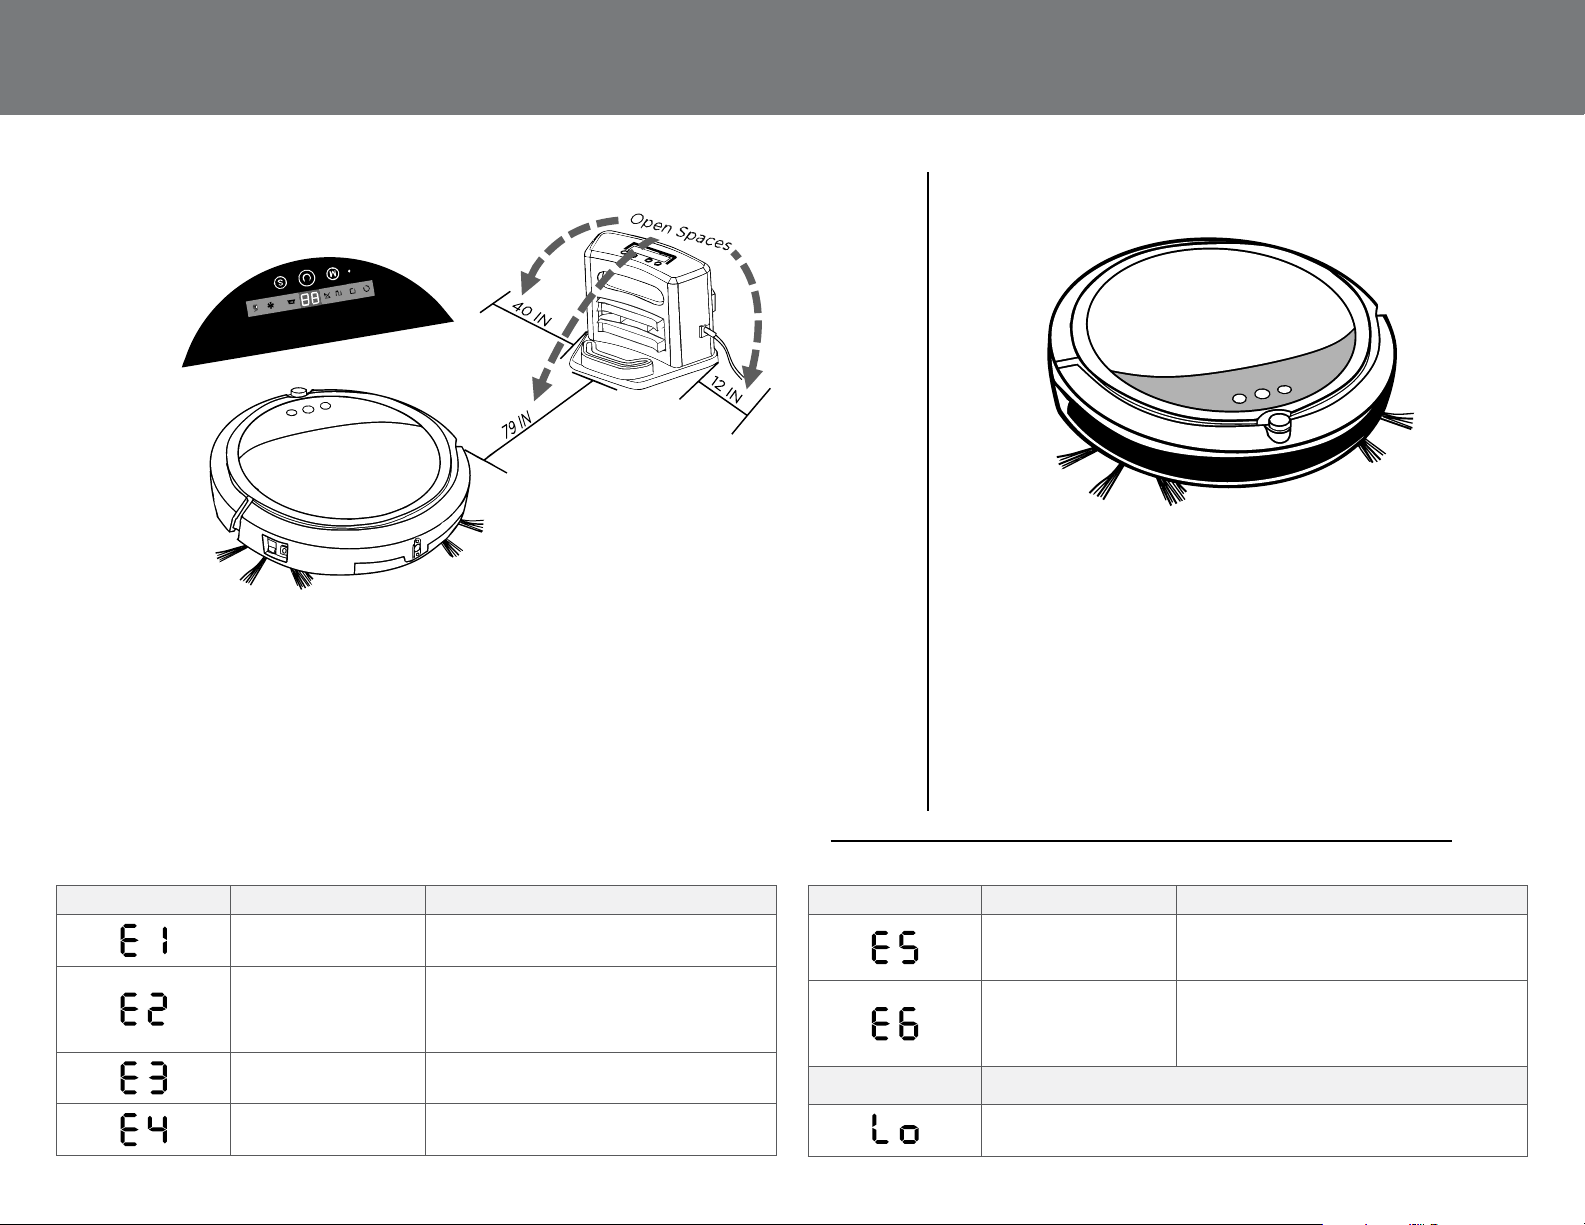
Setting up the Docking Station Starting the Initial Clean
Make sure the docking station is installed
correctly with at least 40 inches to one
side, 12 inches to the opposing side and no
obstructions in front of the docking station.
After the initial charge is complete, plug the
wall adaptor directly into the docking station.
FOR DETAILED INSTRUCTIONS ON HOW TO SETUP THE SCHEDULED CLEANING
FEATURE OF THE DOCKING STATION, SEE PAGE 8 IN THE USER GUIDE.
To test the auto-charge feature of the dock,
turn the power switch on the vacuum ON,
and select “00“ with the center button.
The vacuum should back into the dock for
recharging if the appropriate spacing was
provided for the docking station.
LED E Alerts (Power LED Flashes Red)
Display on screen Possible cause Solution
The wheel is stuck. Remove vacuum from obstacles, and
The top cover or dust
bin is not installed
properly.
The bumper is stuck. Remove vacuum from obstacles. The unit
The unit was lifted up
from the floor.
restart the power switch.
Install the top cover and dust bin properly.
The unit will detect the error and fix
automatically. If the unit does not fix
automatically, turn the unit off and back on.
will detect the error and fix automatically.
Put vacuum back on the floor.
Ensure the floors are clear
from obstructions such as
blankets, clothing, cords
and toys.
To begin the initial clean, set
the robot on the floor and
ensure the power switch
is ON. Wait for the center
button on the display to
FOR ADDITIONAL MANUAL CLEANING MODES AND FUNCTIONS OF
THE LED DISPLAY, PLEASE REFER TO PAGE 9 IN THE USER GUIDE.
Display on screen Possible cause Solution
The color of the floor
is too dark.
The battery is not
installed properly.
Charging error.
(Power switch is off)
Display on screen Indication
Battery Low: Battery needs to be charged.
(Power LED turns Red).
Remove robot from the flooring. Do not
operate robot on flooring where error
occurred.
To install the battery properly, please
refer to page 5 for battery installation,
and turn on the power switch after
installation is complete.
turn green, and then press
the button once. (Display
will light up and 99 will
show on the screen.)
In this manual setting, the
robot will clean until the
battery requires a charge
and will automatically return
to the docking station.
 Loading...