

COMPACT
®
1427
CLEANVIEW

IMPORTANT SAFETY INSTRUCTIONS
READ ALL INSTRUCTIONS
BEFORE USING YOUR VACUUM.
When using an electrical appliance, basic precautions should be
observed, including the following:
WARNING
TO REDUCE THE RISK OF FIRE, ELECTRIC
SHOCK, OR INJURY:
» This appliance can be used by children
aged from 8 years and above and
persons with reduced physical, sensory
or mental capabilities or lack of
experience and knowledge if they have
been given supervision or instruction
concerning use of the appliance in a
safe way and understand the hazards
involved. Cleaning and user
maintenance shall not be made by
children without supervision.
» Children should be supervised to ensure
that they do not play with the appliance.
» If the supply cable is damaged, it must
be replaced by the manufacturer, its
service agent or similarly qualified
persons in order to avoid a hazard.
» Keep hair, loose clothing, fingers, and
all parts of body away from openings
and moving parts of the appliance and
its accessories.
» Use indoors only.
» For dry pick up only.
» Do not leave machine when it is plugged in.
» Do not service machine when it is plugged in.
» Do not use with damaged cable or plug.
» If appliance is not working as it should, has been
dropped, damaged, left outdoors, or dropped into
water, have it repaired at an authorized service center.
» Do not handle unit with wet hands.
» Do not pull or carry by cable, use cable as a handle,
close door on cable, pull cable around sharp corners
or edges, run appliance over cable, or expose cable
to heated surfaces.
» Do not unplug by pulling on cable. Unplug by
grasping plug.
» Do not run appliance over cable.
» Do not handle plug or appliance with wet hands.
» Do not expose hair, loose clothing, fingers or body
parts to openings or moving parts.
» Do not pick up hot or burning objects such as
cigarettes, matches, or hot ashes.
» Do not pick up flammable or combustible materials
(lighter fluid, petrol, kerosene, etc.) or use in the
presence of explosive liquids or vapours.
» Do not use appliance in an enclosed space filled with
vapours given off by oil base paint, paint thinner, some
moth proofing substances, flammable dust, or other
explosive or toxic vapours.
» Remove plug from electrical socket before cleaning
or maintaining the appliance.
» Do not pick up toxic material (chlorine bleach,
ammonia, drain cleaner, petrol, etc.).
» Do not use for any purpose other than described in
this User’s Guide.
» Use only manufacturer’s recommended attachments.
» Keep appliance on a level surface
» Turn off all controls before unplugging.
» Be extra careful when cleaning stairs.
» This appliance is provided with double insulation.
Use only identical replacement parts.
» Pay close attention when working around children.
SAVE THESE INSTRUCTIONS
FOR FUTURE USE
FOR OPERATION ON A 220-240 VOLT A.C. 50/60 HZ POWER SUPPLY ONLY.
This model is for household use only.
www.BISSELL.com
2
Thanks for buying a BISSELL vacuum
We’re glad you purchased a BISSELL vacuum. Everything we
know about floor care went into the design and construction of
this complete, high-tech home cleaning system.
Your BISSELL vacuum is well made, and we back it with a limited
one-year guarantee. We also stand behind it with a knowledgeable,
dedicated Consumer Care department, so, should you ever have a
problem, you’ll receive fast, considerate assistance.
My great-grandfather invented the floor sweeper in 1876. Today,
BISSELL is a global leader in the design, manufacture, and service
of high-quality homecare products like your BISSELL vacuum.
Thanks again, from all of us at BISSELL.
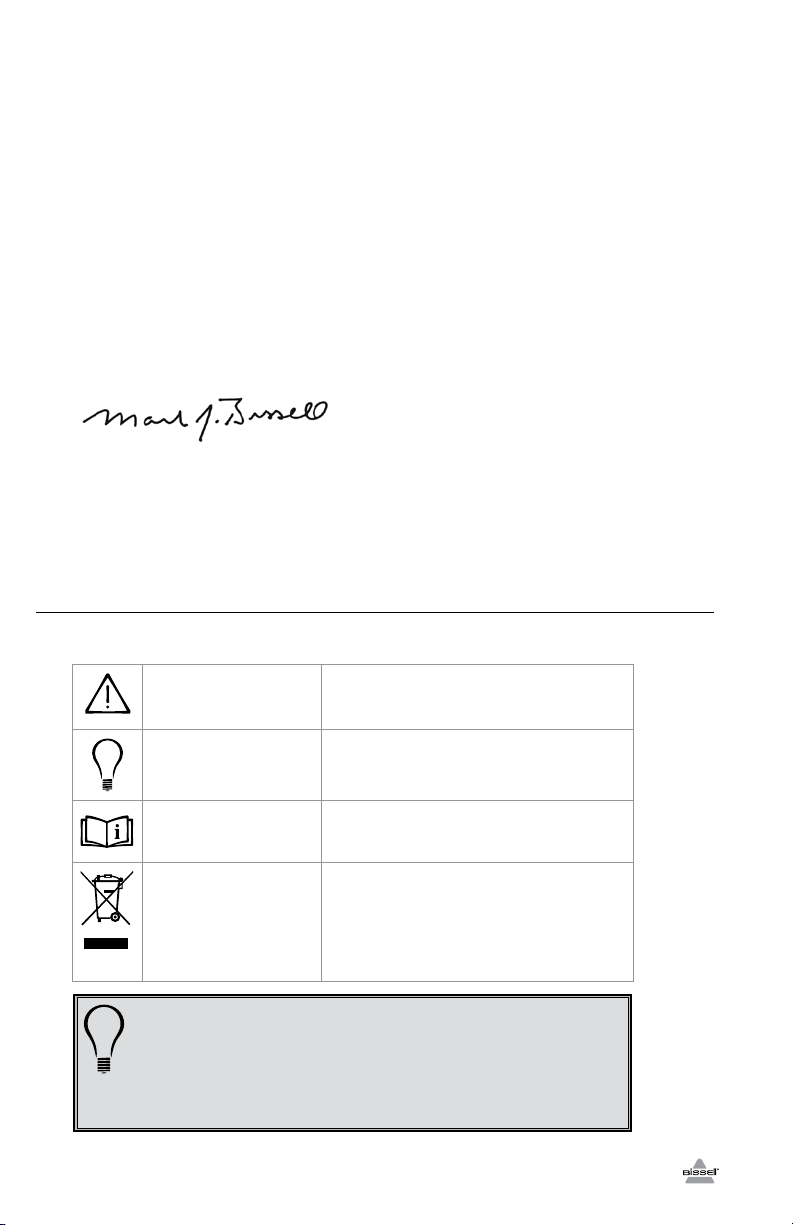
Mark J. Bissell
Chairman & CEO
Symbol Definitions
WARNING
TIP
GUIDE
WEEE
» Before cleaning under low furniture, check
area first for objects that might harm the unit
or block the hose.
» Hair, string and small objects can block the
hose and tools. Check them occasionally
for obstructions.
AN ACTION OR ATTENTION IS NEEDED TO
THIS AREA IN ORDER TO REDUCE THE RISK
OF ELECTRIC SHOCK, FIRE, OR INJURY
NOTE OR HINT WHICH IS NOT ESSENTIAL
BUT MAY IMPROVE USABILITY
READ USER GUIDE FOR COMPLETE
SAFETY AND USER INSTRUCTIONS
DO NOT THROW THE APPLIANCE AWAY
WITH THE NORMAL HOUSHOLD WASTE
AT THE END OF ITS LIFE, BUT HAND IT IN
AT AN OFFICIAL COLLECTION POINT FOR
RECYCLING. BY DOING THIS YOU WILL
HELP TO PRESERVE THE ENVIRONMENT.
» Use the air flow regulator to reduce air flow
as needed when using the tools.
» For maximum cleaning performance,
check the filters often and clean or replace
if necessary.
www.BISSELL.com
3

A
2
1
3
4
7
6
5
8
9
10
11
12
13 14
B
1.
1.
3.
4.
C1
2.
5.
C2
a b
D1
2.
3.
D2 D3
2.
www.BISSELL.com
4
3.
4.
2.

Product View
A
Operations
C
Do not plug in your cleaner until you have
completely assembled it per the following
instructions and are familiar with all instructions
and operating procedures.
1 Air Flow Regulator
2 Handle
3 Extension Wands
4 Hose
5 Hose Connector
6 Carry Handle
7 Dirt Cup Release Button
8 Dirt Cup Filter
Assembly
B
1. Connect hose to vacuum by inserting hose
connector on the end of the hose into the
suction inlet. Make sure the hose is positioned so the tabs on the hose connector
line up with the notches on the suction inlet.
Once inserted into the suction inlet, turn
counter clockwise to lock into place.
2. Attach extension wands section together
by inserting into one another and twisting
slightly to tighten.
3. Connect hose handle to the end of the
extention wand and twist slightly to tighten.
4. Connect floor nozzle to the end of the
extension wand and twist slightly to tighten.
5. Once assembled, you can store your
vacuum by inserting the storage clip
(located on the back of the floor nozzle) into
the storage slot on the rear of the vacuum.
Colours may vary from models shown.
9 Emptying Button
10 Easy Empty™ Dirt Cup
11 Brush Switch
12 Multi-Surface Floor Nozzle
13 Combination Crevice Tool/
Dusting Brush
14 Pet TurboBrush™ Tool
Power cord
The power cord is located at the rear of the
vacuum. Gently pull out the power cord,
watching for the yellow line. Stop pulling the
power cord once the yellow line is visible.
There is also a red line, which indicates the
end of the usable cord. Do not pull the
power cord out beyond the red line.
C1 - Automatic cord rewind
Your vacuum is equipped with an automatic
cord rewind. When cleaning is finished, press
the power button OFF and grasp the plug to
disconnect from the electrical outlet. Hold
the plug and press the automatic cord rewind
button to rewind the cord automatically.
C2 - Power button
Turn the power ON or OFF by pressing lightly
downward on the power button (
).
Special tools
Your BISSELL CleanView Pet Compact vacuum is not only a powerful carpet and rug
vacuum cleaner, it’s also a versatile bare floor
and above floor vacuum cleaner when you
select one of the special tools.
Floor nozzle (12)
Use to vacuum carpets, rugs and bare floors.
Swivel head turns to get into tight spaces
and fits under cabinets.
1. To vacuum carpets and rugs, push the brush
switch to the carpet position
pull the brushes up into the floor nozzle.
2. To vacuum bare floors, push the brush
switch to the bare floor position
This will extend the brus hes down from
the floor nozzle.
. This will
.
Before using your vacuum, make sure that the dirt
cup and all filters are in place. Do not operate your
vacuum without the dirt cup and filters.
Be careful to avoid injury as cord retracts very quickly.
Plastic film can be dangerous. To avoid danger of
suocation, keep away from babies and children.
Combination Crevice Tool/Dusting
Brush (13)
Use the crevice tool in tight, narrow spaces.
Use the dusting brush to clean curtains,
draperies, cushions and fabrics.
Pet TurboBrush™ Tool (14)
(select models only)
Use rotating brush action for small, flat areas
such as cushions and beds.
NOTE: Press down gently and pull toward
you in a raking motion. Too much pressure
will cause the brush to stop rotating.
www.BISSELL.com
5

Air flow regulator (2)
Open the air flow regulator by sliding the
regulator up towards the extension wand to
an open position. This will reduce the suction
power for vacuuming delicate fabrics.
For full suction power, close the air flow
regulator by sliding the regulator down to
the closed position.
Care & Storage
D
D1 - Empty the dirt cup
Empty the dirt cup as soon as the dirt
reaches the “FULL” lines on the sides of
the dirt cup.
1. Unplug the vacuum from the electrical
outlet.
2. Remove the hose by turning the hose
connector counter clockwise and pulling it
out from the suction inlet. Set hose aside.
3. Press the dirt cup release button on
the carry handle and lift up to remove the
dirt cup.
4. Choose an emptying method. Method
#2 is recommended for allergy suffers.
Method #1 – Hold the dirt cup over a
rubbish bin and push the emptying
button to open the bottom. Close the
bottom after the dirt empties.
Method #2 – Place a plastic bag over
the bottom of the dirt cup. Push the
emptying button through the plastic
to open the bottom. After the dust
settles, close the bottom and remove
the bag to discard.
5. Replace the dirt cup by placing it back
into the vacuum and pushing down on the
carry handle until it snaps back into place.
D2 - Cleaning the dirt cup filter
Use only BISSELL replacement filters in
your vacuum.
1. Unplug the vacuum from the electrical
outlet.
2. The dirt cup filters can be reached by
removing the dirt cup from the vacuum,
grasping the handle on the bottom of the
dirt cup filter assembly and turning counter
clockwise to unlock. Pull straight down to
remove.
3. Remove the dirt cup filter screen by
grasping the bottom of the filter frame base
and pulling straight up.
www.BISSELL.com
6
4. The dirt cup filter screen and dirt cup filter
can be hand washed in cold water with a
mild detergent. Rinse well and air dry thoroughly before placing back onto the filter
frame base.
5. Attach the dirt cup filter back onto the
filter frame base by lining up the tabs on the
filter base with the notches on the dirt cup
filter and turning clockwise to lock back into
place.
6. Attach the dirt cup filter screen back on to
the dirt cup filter by sliding it down over the
dirt cup filter, making sure that the tabs on
the bottom of the dirt cup filter screen line
up with the notches on the dirt cup filter.
7. Insert the dirt cup filter assembly back
into the dirt cup by lining up the tabs on
the top of the dirt cup filter assembly with
the notches inside the top of the dirt cup
and turning the handle on the bottom of
the dirt cup filter assembly clockwise to lock
into place.
D3 - Replacing the
post-motor filter
The post-motor filter assists in the filtration
process to return cleaner air to the room.
Use only BISSELL replacement filters.
1. Unplug the vacuum from electrical outlet.
2. Remove the filter door (located on the back
of the vacuum) by pushing down on the tab
and pulling out and away from the vacuum.
3. The post-motor filter can be hand washed
in cold water with a mild detergent. Rinse
well and air dry thoroughly before placing
back into the vacuum.
4. Replace the filter door by placing the
tabs on the bottom of the filter door into
the notches on the bottom of the postmotor filter compartment and pushing the
tab forward back into the vacuum to lock
into place.
To reduce the risk of electric shock, turn power switch
o and disconnect plug from electrical socket
before performing maintenance or care.
Do not operate cleaner with damp or wet filters
or without all filters in place.
This product is intended for household use only and not for
commercial or industrial use. Vacuuming of dust from products
like plaster, concrete or ashes will damage the motor and void
the guarantee.

Clearing clogs from the dirt cup
1. Unplug the vacuum from electrical outlet.
2. Remove the dirt cup from the vacuum,
following steps 1-3 of Emptying the dirt cup
on page 6.
3. Remove the dirt cup filter assembly from
the dirt cup, following step 2 of Clean the
dirt cup filter on page 6.
4. Tap the dirt cup filter assembly over a
garbage container to remove any dirt or
debris from the cyclone screen that surrounds the dirt cup filter.
5. Reach up into the dirt cup to clear any dirt
or debris from the dirt cup.
6. Check to see if there are any clogs
in the suction inlet.
7. After clearing any dirt or debris from
the dirt cup, replace the dirt cup filter
assembly back in the dirt cup following step
8 of Cleaning the dirt cup filter on page 6.
Maintaining the Pet
TurboBrush
The Pet TurboBrush™ Tool should be
checked regularly for clogs or debris wrapping around the brush.
1. Unplug the vacuum from the outlet.
2. If the clog is present or debris is vis-
ible, turn the collar on the neck of the Pet
TurboBrush™ Tool counterclockwise to the
unlocked position to remove the faceplate
and clear any obstructions.
3. To clean debris from the brush, remove
the brush from the drive belt and clean
debris.
4. Reposition the drive belt on the brush.
Place the ends of the brush in the slots on
the sides. Reposition the faceplate and turn
the collar clockwise to the locked position.
™
Tool
Replacement Parts
These items are available for purchase as accessories for your BISSELL vacuum:
To purchase visit www.BISSELL.com.
PART # PART NAME PART # PART NAME
203-1771 Dirt Cup Filter Screen
203-1772 Dirt Cup Filter
203-1786 Post-Motor Filter 160-3821 Floor Nozzle
203-1537 Hose with Handle 203-1538 Extension Wands (2)
203-1539 Combination Crevice Tool/
Dusting Brush
160-3063 Pet TurboBrush™ Tool
7

Consumer Guarantee
This Guarantee only applies outside of the USA and Canada. It is
provided by BISSELL International Trading Company BV (“BISSELL”).
This Guarantee is provided by BISSELL. It gives you specific rights.
It is offered as an additional benefit to your rights under law. You
also have other rights under law which may vary from country
to country. You can find out about your legal rights and remedies
by contacting your local consumer advice service. Nothing in this
Guarantee will replace or lessen any of your legal rights or remedies.
If you need additional instruction regarding this Guarantee or have
questions regarding what it may cover, please contact BISSELL
Consumer Care or contact your local distributor.
This Guarantee is given to the original purchaser of the product from
new and is not transferable. You must be able to evidence the date
of purchase in order to claim under this Guarantee.
Limited One-Year Guarantee
Subject to the *EXCEPTIONS AND EXCLUSIONS identified below,
BISSELL will for one year from the date of purchase by the original
purchaser repair or replace (with new or remanufactured components or products), at BISSELL’s option, free of charge, any defective
or malfunctioning part or product.
BISSELL recommends that the original packaging and evidence of
the date of purchase be kept for the duration of the Guarantee
period in case the need arises within the period to claim on the
Guarantee. Keeping the original packaging will assist with any
necessary re-packaging and transportation but is not a condition
of the Guarantee.
If your product is replaced by BISSELL under this Guarantee, the
new item will benefit from the remainder of the term of this
Guarantee (calculated from the date of the original purchase).
The period of this Guarantee shall not be extended whether
or not your product is repaired or replaced.
*EXCEPTIONS AND EXCLUSIONS FROM
THE TERMS OF THE GUARANTEE
This Guarantee applies to products used for personal domestic use and
not commercial or hire purposes. Consumable components such as
An unauthorised repair (or attempted repair) will void this Guarantee
whether or not damage has been caused by that repair/attempt.
Removing or tampering with the Product Rating Label on the
product or rendering it illegible will void this Guarantee.
SAVE AS SET OUT BELOW BISSELL AND ITS DISTRIBUTORS ARE NOT
LIABLE FOR ANY LOSS OR DAMAGE THAT IS NOT FORESEEABLE
OR FOR INCIDENTAL OR CONSEQUENTIAL DAMAGES OF ANY
NATURE ASSOCIATED WITH THE USE OF THIS PRODUCT INCLUDING
WITHOUT LIMITATION LOSS OF PROFIT, LOSS OF BUSINESS, BUSINESS
INTERRUPTION, LOSS OF OPPORTUNITY, DISTRESS, INCONVENIENCE OR
DISAPPOINTMENT. SAVE AS SET OUT BELOW BISSELL’S LIABILITY WILL
NOT EXCEED THE PURCHASE PRICE OF THE PRODUCT.
BISSELL DOES NOT EXCLUDE OR LIMIT IN ANY WAY ITS LIABILITY FOR
(A) DEATH OR PERSONAL INJURY CAUSED BY OUR NEGLIGENCE OR THE
NEGLIGENCE OF OUR EMPLOYEES, AGENTS OR SUBCONTRACTORS; (B)
FRAUD OR FRAUDULENT MISREPRESENTATION; (C) OR FOR ANY OTHER
MATTER WHICH CANNOT BE EXCLUDED OR LIMITED UNDER LAW.
Consumer Care
If your BISSELL product should require
service or to claim under our Limited
One-Year Guarantee, please visit:
Website or E-mail:
www.BISSELL.com
For UK inquiries:
Telephone: 0844.888.6644
Monday – Thursday 9am - 5pm
Friday 9am - 4pm
Or write:
BISSELL Homecare (Overseas) Inc.
Ground Floor
226 Berwick Avenue
Slough
Berkshire, SL1 4QT
United Kingdom
filters, belts and mop pads, which must be replaced or serviced by the
user from time to time, are not covered by this Guarantee.
This Guarantee does not apply to any defect arising from fair wear
and tear. Damage or malfunction caused by the user or any third
party whether as a result of accident, negligence, abuse, neglect, or
any other use not in accordance with the User Guide is not covered
by this Guarantee.
Visit the BISSELL website:
www.BISSELL.com
When contacting BISSELL, have model number of cleaner available.
Please record your Model Number: _____________
Please record your Purchase Date: _____________
NOTE: Please keep your original sales receipt. It
provides proof of the date of purchase in the event
of a Guarantee claim. See Guarantee for details.
ENERG
енерги
A
B
C
D
E
F
G
ENERGIA - ЕНЕРГИЯ - ΕΝΕΡΓΕΙΑ
ENERGIJA - ENERGY - ENERGIE - ENERGI
ABCDEF
G
●
ενεργεια
R
kWh/annum
Y IJA
IE IA
C
39.4
1427
85dB
©2014 BISSELL Homecare, Inc
Grand Rapids, Michigan
All rights reserved. Printed in China
Part Number 160-3820 Rev 04/14
Visit our website at: www.BISSELL.com
ABCDEFG
665/2013 - I
ABCDEFG
 Loading...