

Page 1

Benchtop Shaking Incubator
Benchtop Shaking Incubator
Instruction Manual
Catalog #
17002944
17002945
17002946
17002947
Instruction Manual
Catalog #
170 02945
170 02946
170 02947
170 02 94 4
Page 2

Bio-Rad Technical Support Department
The Bio-Rad Technical Support Department in the U.S. is open Monday through Friday, 5:00 AM to 5:00 PM, Pacifi c time.
Phone: 1-800-424-6723, option 2
Email: Support@bio-rad.com (U.S./Canada only)
For technical assistance outside the U.S. and Canada, contact your local technical support offi ce or click the Contact us
link at www.bio-rad.com.
Legal Notices
Bio-Rad reserves the right to modify its products and services at any time. This instruction manual is subject to change without notice.
Although prepared to ensure accuracy, Bio-Rad assumes no liability for errors, or for any damages resulting from the application or use
of this information.
Warranty
The Benchtop Shaking Incubator and associated accessories are covered by a standard Bio-Rad warranty. Contact your local Bio-Rad
Laboratories offi ce for details of the warranty.
Safety Warnings
A Warning! symbol in this manual warns you about potential sources of injury or harm, including risk of electrical shock.
Warning! Do not attempt to repair or remove the outer case of the Benchtop Shaking Incubator or other accessories. If
you open this instrument, you put yourself at risk for harm to body or equipment from electrical shock.
WEEE Disposal Requirements
The Benchtop Shaking Incubator contains electrical or electronic materials and is marked with the crossed-out wheeled
bin. It should not be disposed of as unsorted waste and must be collected separately, according to European Union
Directive 2012/19/EU on waste and electronic equipment — WEEE Directive.
Before disposal, contact your local Bio-Rad representative for country-specifi c instructions.
Ordering Information
Catalog# Description
17002944EDU Benchtop Shaking Incubator Starter Set
17002945EDU Benchtop Shaking Incubator Expanded Set
17002946EDU Benchtop Shaking Incubator Starter Set, 230 V EU/UK
17002947EDU Benchtop Shaking Incubator Expanded Set, 230 V EU/UK
12005512EDU Flask Clamp for Shaking Incubator, 1,000 ml
12005511EDU Flask Clamp for Shaking Incubator, 500 ml
12005490EDU Flask Clamp for Shaking Incubator, 250 ml
12005514EDU Flask Clamp for Shaking Incubator, 125 ml
12005504EDU Petri Dish Shelf for Shaking Incubator
Copyright © 2017 by Bio-Rad Laboratories, Inc. All rights reserved.
i | Benchtop Shaking Incubator Instruction Manual
Page 3

Table of Contents
1. Introduction . . . . . . . . . . . . . . . . . . . . . . . . . . . . . . . . . . . . . . . . . . . . . . . . . . . . . . . . . . . . . . . . . 1
Key Features . . . . . . . . . . . . . . . . . . . . . . . . . . . . . . . . . . . . . . . . . . . . . . . . . . . . . . . . . . . . . . . . 2
Specifi cations . . . . . . . . . . . . . . . . . . . . . . . . . . . . . . . . . . . . . . . . . . . . . . . . . . . . . . . . . . . . . . .2
General Safety Recommendations . . . . . . . . . . . . . . . . . . . . . . . . . . . . . . . . . . . . . . . . . . . . . . .3
Startup Checklist . . . . . . . . . . . . . . . . . . . . . . . . . . . . . . . . . . . . . . . . . . . . . . . . . . . . . . . . . . . . .3
2. Instrument Installation . . . . . . . . . . . . . . . . . . . . . . . . . . . . . . . . . . . . . . . . . . . . . . . . . . . . . . . . 4
Instrument Components . . . . . . . . . . . . . . . . . . . . . . . . . . . . . . . . . . . . . . . . . . . . . . . . . . . . . . .4
Unpacking the Instrument . . . . . . . . . . . . . . . . . . . . . . . . . . . . . . . . . . . . . . . . . . . . . . . . . . . . . . 4
Instrument Placement . . . . . . . . . . . . . . . . . . . . . . . . . . . . . . . . . . . . . . . . . . . . . . . . . . . . . . . . . 5
Connecting Power . . . . . . . . . . . . . . . . . . . . . . . . . . . . . . . . . . . . . . . . . . . . . . . . . . . . . . . . . . . .5
Installing the Platform . . . . . . . . . . . . . . . . . . . . . . . . . . . . . . . . . . . . . . . . . . . . . . . . . . . . . . . . .6
Installing Accessories . . . . . . . . . . . . . . . . . . . . . . . . . . . . . . . . . . . . . . . . . . . . . . . . . . . . . . . . . 6
Flask clamps . . . . . . . . . . . . . . . . . . . . . . . . . . . . . . . . . . . . . . . . . . . . . . . . . . . . . . . . . . . . .6
Petri dish shelf . . . . . . . . . . . . . . . . . . . . . . . . . . . . . . . . . . . . . . . . . . . . . . . . . . . . . . . . . . . . 7
Attaching Lid . . . . . . . . . . . . . . . . . . . . . . . . . . . . . . . . . . . . . . . . . . . . . . . . . . . . . . . . . . . . . . . . 8
3. Operating the Benchtop Shaking Incubator . . . . . . . . . . . . . . . . . . . . . . . . . . . . . . . . . . . . . .9
Introduction . . . . . . . . . . . . . . . . . . . . . . . . . . . . . . . . . . . . . . . . . . . . . . . . . . . . . . . . . . . . . . . . . 9
Basic Operations . . . . . . . . . . . . . . . . . . . . . . . . . . . . . . . . . . . . . . . . . . . . . . . . . . . . . . . . . . . .10
Turn power on/off . . . . . . . . . . . . . . . . . . . . . . . . . . . . . . . . . . . . . . . . . . . . . . . . . . . . . . . .10
Set temperature . . . . . . . . . . . . . . . . . . . . . . . . . . . . . . . . . . . . . . . . . . . . . . . . . . . . . . . . . .10
Set shaking without heat . . . . . . . . . . . . . . . . . . . . . . . . . . . . . . . . . . . . . . . . . . . . . . . . . . . 10
Set shaking speed . . . . . . . . . . . . . . . . . . . . . . . . . . . . . . . . . . . . . . . . . . . . . . . . . . . . . . . . 10
Heat without shaking . . . . . . . . . . . . . . . . . . . . . . . . . . . . . . . . . . . . . . . . . . . . . . . . . . . . . .11
Set the timer . . . . . . . . . . . . . . . . . . . . . . . . . . . . . . . . . . . . . . . . . . . . . . . . . . . . . . . . . . . . 11
Continual use without timer. . . . . . . . . . . . . . . . . . . . . . . . . . . . . . . . . . . . . . . . . . . . . . . . . 11
Start operation . . . . . . . . . . . . . . . . . . . . . . . . . . . . . . . . . . . . . . . . . . . . . . . . . . . . . . . . . . . 11
End operation . . . . . . . . . . . . . . . . . . . . . . . . . . . . . . . . . . . . . . . . . . . . . . . . . . . . . . . . . . . 12
Opening lid during operation . . . . . . . . . . . . . . . . . . . . . . . . . . . . . . . . . . . . . . . . . . . . . . . .12
Changing Parameters during Operation . . . . . . . . . . . . . . . . . . . . . . . . . . . . . . . . . . . . . . . . . .12
Change temperature parameter during operation . . . . . . . . . . . . . . . . . . . . . . . . . . . . . . . .12
Change shaking speed parameter during operation . . . . . . . . . . . . . . . . . . . . . . . . . . . . . . 12
4. Troubleshooting . . . . . . . . . . . . . . . . . . . . . . . . . . . . . . . . . . . . . . . . . . . . . . . . . . . . . . . . . . . . 13
Measuring Temperature . . . . . . . . . . . . . . . . . . . . . . . . . . . . . . . . . . . . . . . . . . . . . . . . . . . . . .13
Error Display . . . . . . . . . . . . . . . . . . . . . . . . . . . . . . . . . . . . . . . . . . . . . . . . . . . . . . . . . . . . . . . 13
Description of Errors . . . . . . . . . . . . . . . . . . . . . . . . . . . . . . . . . . . . . . . . . . . . . . . . . . . . . . . . . 14
5. Temperature Calibration . . . . . . . . . . . . . . . . . . . . . . . . . . . . . . . . . . . . . . . . . . . . . . . . . . . . .15
Procedure for Temperature Calibration . . . . . . . . . . . . . . . . . . . . . . . . . . . . . . . . . . . . . . . . . . . 16
6. Maintenance and Cleaning Instructions . . . . . . . . . . . . . . . . . . . . . . . . . . . . . . . . . . . . . . . . .17
Cleaning the Incubation Chamber . . . . . . . . . . . . . . . . . . . . . . . . . . . . . . . . . . . . . . . . . . . . . .17
Cleaning the Acrylic Lid . . . . . . . . . . . . . . . . . . . . . . . . . . . . . . . . . . . . . . . . . . . . . . . . . . . . . .18
Cleaning don’ts . . . . . . . . . . . . . . . . . . . . . . . . . . . . . . . . . . . . . . . . . . . . . . . . . . . . . . . . . .18
7. Attachment Positioning on Shaking Platform . . . . . . . . . . . . . . . . . . . . . . . . . . . . . . . . . . . . 19
Benchtop Shaking Incubator Instruction Manual | ii
Page 4

1 Introduction
The Benchtop Shaking Incubator is a combination shaker and temperature-controlled
chamber instrument. This instrument is ideal for applications that require shaking agitation
and controlled temperatures, such as microbial culture work in life science, microbiology,
and medical laboratories. With its small footprint this Benchtop Shaking Incubator takes
up minimal space and is suitable for laboratories that require its use both routinely and
occasionally.
1 | Benchtop Shaking Incubator Instruction Manual
Page 5

Key Features
•
Up to 4 L media capacity in a small footprint
•
Wide range of incubator chamber temperatures (5°C above room temperature to 70°C) and
environmental temperatures (4 to 65°C), allowing instrument to be used in coldrooms
•
Digital readout of all parameters — temperature, shaker speed, and time
•
Temperature in instrument chamber precisely maintained to within 0.5°C of set temperature
•
Lid interlock sensor that automatically stops the shaker when the lid is opened
Specifi cations
The Benchtop Shaking Incubator casing of is made of steel plate, varnished with a
polyurethane lacquer. The temperature chamber lid is made of acrylic that is resistant to
temperatures up to 90°C. Other specifi cations for the Benchtop Shaking Incubator are
shown in Table 1.
Table 1. Benchtop Shaking Incubator Specifi cations.
Description Specifi cation
Power supply
Heater power
Fan power
Shaking motor power
Fuse
Environment temperature
Relative humidity
Speed regulation
Shaking orbit
Temperature operating range
Temperature sensor
Temperature accuracy
Temperature stability
Timer
Capacity
Dimensions W x D x H
Weight
Overvoltage category
230 V ± 10%, 50/60 Hz; 115 V ± 10%, 50/60 Hz
700 W
17 W
35 W
2 x 5 A, 250 V; 2 x 10 A, 115 V
4–65°C
Up to 85%, noncondensing
Digital, load independent, 20–300 RPM in 1 RPM increments
19 mm
5°C above room temperature to 70°C
PT100
±0.5°C
±0.5°C
1 min–99 hours, timer HOLD function
16 x 125 ml, 9 x 250 ml, 5 x 500 ml, 4 x 1,000 ml
370 x 530 x 400 mm
21 kg
Installation category I
Benchtop Shaking Incubator Instruction Manual | 2
Page 6

General Safety Recommendations
•
Read this instruction manual thoroughly before any installation. Improper installation and use
may result in injury and/or damage to the instrument
•
Disconnect the device from main power supply before cleaning. Failure to do so may result
in damage to the instrument and/or injury, including electrocution
•
Do not use the instrument near any water sources. Take care that water does not get
into the instrument especially during cleaning. Failure to do so may result in damage to the
instrument and/or injury, including electrocution
•
Use the Benchtop Shaking Incubator only as described in this instruction manual. If the
instrument is used in a manner not specifi ed by the instruction manual, the safety features of
the instrument may be compromised and the warranty will be void
Warning! Do not place fl ammable or explosive materials inside the Benchtop Shaking
Incubator.
Startup Checklist
•
Read instruction manual for Benchtop Shaking Incubator
•
Unpack and install instrument, lid, and platform as specifi ed in following sections
•
Install Benchtop Shaking Incubator attachments (for example, fl ask clamps or petri dish shelf)
to platform. See Section 7 for further instruction
•
Close lid and turn instrument on
•
Set parameters and test instrument before adding samples. Set new parameter values if
necessary
3 | Benchtop Shaking Incubator Instruction Manual
Page 7

2 Instrument Installation
Instrument Components
• Benchtop Shaking Incubator basic unit
• Benchtop Shaking Incubator lid
• Benchtop Shaking Incubator lid guides (2) and attachment knobs (2)
• Benchtop Shaking Incubator platform
• Spare screws for platform accessories
• Power cord(s)
• Instruction manual
Unpacking the Instrument
1. Unpack the Benchtop Shaking Incubator carefully. Open the box and lift the instrument,
together with the foam shock absorbers, out of the box. Remove the shock absorbers
and store all packaging materials for future use.
2. Examine the instrument carefully for any damage. Ensure that all parts of the instrument
listed above are included with the product. If any item is missing or damaged, contact
your local Bio-Rad offi ce.
3. Check the information on the instrument label on the rear of the machine for the model
type and serial number.
4. Check that the power cord has a prong confi guration that is compatible with the local
standard.
Benchtop Shaking Incubator Instruction Manual | 4
Page 8

Instrument Placement
When selecting a location for the Benchtop Shaking Incubator, consider the following:
• The instrument should be placed on a smooth, stable, and horizontal surface
• This instrument is heavy, do not store or operate it at the edge of a surface
• The instrument must be in an upright position during operation
• Ensure that there is suffi cient clearance along the back of the instrument for air circulation
• Ensure that there is suffi cient clearance around and above the instrument to allow for easy
access to the instrument and opening of the lid
• Avoid locations that are subject to temperature and humidity changes, such as areas that
are under direct sunlight or near instruments that produce heat and/or steam
• Avoid locations that are subject to vibrations
Warning! Do not store or operate this instrument near a sink or water source as
contact with water could cause electrical shock.
Warning! Do not use this instrument near fl ammable or explosive materials.
Note: Place the instrument so that the power cord is readily accessible and can be pulled
out of the electrical outlet easily.
Connecting Power
1. Plug the supplied power cord into the back of the instrument.
2. Plug the power cord into the appropriate grounded electrical outlet.
Warning! Do not store or operate this instrument near a sink or water source as
contact with water could cause electrical shock.
Warning! The outlet voltage must match the voltage listed on the instrument label.
Failure to supply appropriate power may damage the instrument and void the
warranty.
5 | Benchtop Shaking Incubator Instruction Manual
Page 9

Installing the Platform
1. Locate the bag of screws included with the Benchtop Shaking Incubator. These are spare
screws for use with the fl ask clamp accessories. Keep them in a safe place if not using
immediately.
2. Mount the Benchtop Shaking Incubator platform to the four rubber mounting points of the
Benchtop Shaking Incubator.
Warning! Improper installation of the Benchtop Shaking Incubator platform can result
in injury and damage to the instrument.
Installing Accessories
Flask clamps
1. Each plastic fl ask clamp comes with a small bag of screws and washers. Additionally, a bag
of spare screws is provided with the Benchtop Shaking Incubator. These can be used to
attach accessories such as fl ask clamps onto the platform.
2. You will need a crosshead (Phillips-type) screwdriver. To secure a plastic clamp for a 1,000,
500, or 250 ml fl ask, use two of the three holes available at each position and screw the
clamp tightly to the platform. Only one hole is necessary for securing the clamp for a 125 ml
fl ask. See section 7 on Attachment Positions for suggestions on placement of plastic fl ask
clamps.
Benchtop Shaking Incubator Instruction Manual | 6
Page 10

Petri dish shelf
1. Arrange the petri dish shelf so that the edges of the shelf face upward, creating a barrier to
prevent plates or dishes from sliding off.
2. The petri dish shelf has two metal extensions that fi t into the back wall of the Benchtop
Shaking Incubator. Open the lid of the Benchtop Shaking Incubator and install the petri dish
shelf. The shelf should now be parallel to the surface upon which the instrument is placed.
Note that when using the petri dish shelf and shaker function simultaneously, 1,000 and 500 ml
fl asks can be used in the front positions but only 250 and 125 ml fl asks can be positioned in
the middle and rear positions of the shaking incubator platform.
Warning! Improper installation of the Benchtop Shaking Incubator accessories can
result in injury and damage to the instrument.
7 | Benchtop Shaking Incubator Instruction Manual
Page 11

Attaching Lid
1.
Locate the supplied lid guides and knobs (two of each) for the Benchtop Shaking
Incubator lid.
2. Insert the lid guide into the holes on the lid. Be sure to insert the lid guide from the inside
out so the fl ange lies fl ush to the holes on the inside of the lid.
3. Line up the the hole of the lid and lid guide with the housing on the Benchtop Shaking
Incubator and tighten the knobs into the housing from the outside in.
4. Make sure the knobs are tight enough to secure the lid but not so tight as to strip the
threads of the housing.
Warning! Improper installation of the Benchtop Shaking Incubator lid can result in
injury and damage to the instrument.
Benchtop Shaking Incubator Instruction Manual | 8
Page 12

3 Operating the Benchtop
Shaking Incubator
Introduction
2
Shaking Incubator
Run
Temperature (°C)
1
POWER
Speed (RPM
Time (HR, MIN
37.0
4
3
)
250
)
8
9
5
1. POWER (I/O) switch — illuminates when set to ON (I) position.
2. Run signal light — illuminates green when the shaking incubator is running a program.
PUSH/TURN
6
START
STOP
7
10000070793
3.
Temperature indicator light — fl ashes yellow when the incubator temperature is being set.
4. Speed indicator light — illuminates yellow when the shaker speed is selected for
display and fl ashes when shaker speed is being set.
5. Time indicator light — illuminates yellow when the shaking incubator timer is selected
for display and fl ashes when time is being set.
6. Setting dial (PUSH/TURN) — enables user to set temperature, speed, and time. Push
and hold the setting dial to enter the set mode (fl ashing indicator lights), then toggle
between temperature, speed, and time settings by pressing the dial. Rotate clockwise
or counterclockwise to change temperature, speed, and time. To exit set mode, press
Start/Stop or wait 8 seconds until the indicator light stops fl ashing.
7. START/STOP button — starts and stops shaking incubator operations.
8. Temperature display — indicates temperature setting in °C.
9. Speed/Time display — indicates speed in RPM and time setting in hours and minutes.
9 | Benchtop Shaking Incubator Instruction Manual
Page 13

Basic Operations
Turn power on/off
1. Press POWER switch to the ON (I) position. Shaking incubator automatically detects
power supply frequency and displays F50 or F60 on the lower display, depending on the
power cord used. The shaking incubator then recalls the last saved parameters.
Shaking Incubator
Set temperature
1. Press the setting dial until the Temperature indicator light fl ashes.
2. Rotate the setting dial clockwise to increase or counterclockwise to decrease temperature
to desired setting. The temperature is displayed in Celsius with a minimum of 0.0°C and
maximum of 70.0°C.
Warning! When operating at temperatures above 60°C, do not touch the platform; it
can be very hot and result in bodily injury, including burns.
POWER
Temperature (°C)
Speed (RPM
Time (HR, MIN
Run
88.8
START
)
F60
)
PUSH/TURN
STOP
10000070793
3. Press Start/Stop to accept the temperature setting and exit the setting mode, or wait
8 seconds. The Temperature indicator light will stop fl ashing.
Run
)
)
37.0
99.0
PUSH/TURN
START
STOP
10000070793
Shaking Incubator
POWER
Temperature (°C)
Speed (RPM
Time (HR, MIN
Set shaking without heat
1. To use the shaking platform function without temperature regulation, set the temperature to
OFF on the display. Do this by setting the temperature below 0.0°C or above 70.0°C.
Set shaking speed
1. Press and hold setting dial until the Temperature indicator light fl ashes. Press the setting
dial to toggle through setting options until the Speed indicator light fl ashes.
2. Rotate the setting dial clockwise to increase or counterclockwise to decrease shaker speed
to desired setting. The shaker speed is displayed in RPM with a minimum of 20 RPM and a
maximum of 300 RPM.
Benchtop Shaking Incubator Instruction Manual | 10
Page 14

3.
Press Start/Stop to accept the shaker speed setting and exit set mode, or wait
8 seconds. The Speed indicator light will stop fl ashing.
Run
)
)
37.0
100
PUSH/TURN
START
STOP
10000070793
Shaking Incubator
POWER
Temperature (°C)
Speed (RPM
Time (HR, MIN
Heat without shaking
1. To use the incubator without shaking, set the speed to OFF on the display. Do this by
setting the shaker speed under 20 RPM or above 300 RPM.
Set the timer
1. Press and hold the setting dial until the Temperature light indicator fl ashes. Press the
setting dial to toggle through setting options until the Time indicator light fl ashes.
2.
Rotate the setting dial clockwise to increase or counterclockwise to decrease time to
desired setting. The time setting displays in hours and minutes (hours.minutes) with a
minimum of 1 minute and a maximum of 99 hours. For example, a timer display of 70.3 is
70 hours and 30 minutes and a timer display of 1.55 is 1 hour and 55 minutes.
3. Press Start/Stop to accept the timer setting and exit setting mode, or wait 8 seconds. The
Time indicator light will stop fl ashing.
Run
)
)
37.0
99.0
PUSH/TURN
START
STOP
10000070793
Shaking Incubator
POWER
Temperature (°C)
Speed (RPM
Time (HR, MIN
Continual use without timer
1. To use the shaking incubator continuously with no end time, set the time to HLd on the
display. Do this by setting the timer to less than 1 minute (0.01) or more than 99 hours
(99.0).
Start operation
1. Press Start/Stop once to exit the setting mode. You are now in operation mode. The only
signal light illuminated will be that of the last changed parameter.
2. Press Start/Stop to start the shaking incubator program. The Run indicator light will
illuminate. The shaking incubator timer will count down from the set time.
3. View the timer and shaker speed values by pressing the setting dial. These two values are
shown alternately on the bottom display (Speed/Time).
11 | Benchtop Shaking Incubator Instruction Manual
Page 15

End operation
1. When the set time elapses or Start/Stop is pressed, an End message appears on the
display and the Run indicator light turns off.
2. When the shaking incubator completely stops, it defaults to the last used values for
temperature, speed, and time parameters.
Opening lid during operation
1.
Lifting the lid during operation will engage the auto shut-off function.
2.
When the lid is lifted during operation, the shaking incubator will immediately stop heating
and the platform will slow to a stop. The temperature display will read Opn and the Speed/
Time display will read LId. When the lid is closed again, the shaking incubator resumes
operation.
3. If there is loss of power during operation, the shaking incubator will restart and resume
function automatically when power returns. The display will fl ash to indicate that there was a
disruption in power. The fl ashing can be turned off by pressing the setting dial.
Changing Parameters during Operation
Note: The time parameter cannot be changed during operation.
Change temperature parameter during operation
1. To change the temperature during operation, press and hold the setting dial until the
Temperature indicator light fl ashes.
2. Rotate the setting dial clockwise to increase or counterclockwise to decrease temperature
to desired setting.
3. Press Start/Stop once to accept the new temperature setting. The shaking incubator will
resume operation at the new setting.
Change shaking speed parameter during operation
1. To change the shaking speed during operation, press and hold the setting dial until the
Temperature indicator light fl ashes. Press the setting dial to toggle through setting options
until the Speed indicator light fl ashes.
2. Rotate the setting dial clockwise to increase or counterclockwise to decrease shaking
speed to desired setting.
3. Press Start/Stop once to accept the new shaking speed setting. The shaking incubator will
resume operation at the new setting.
Benchtop Shaking Incubator Instruction Manual | 12
Page 16

4 Troubleshooting
Measuring Temperature
Use a reliable external thermometer to verify that the internal temperature of the unit has
reached the set temperature. The external thermometer can be placed anywhere that is
stable and will not obstruct the platform during shaking.
The unit’s temperature sensor is located in the back wall at the upper right of the chamber.
Placing the external thermometer near, but not touching, this temperature sensor will best
represent the unit’s temperature readout. The thermometer could also be placed on the
surface beneath the shaking platform, representing the lower portion of the internal area
of the unit.
Error Display
The Benchtop Shaking Incubator automatically monitors the instrument’s function to ensure
safe and reliable operation. If an error message appears, stop operation and call Bio-Rad
Laboratories Technical Support.
Sample of error display:
Shaking Incubator
POWER
13 | Benchtop Shaking Incubator Instruction Manual
Temperature (°C)
Speed (RPM
Time (HR, MIN
Run
START
)
)
PUSH/TURN
STOP
10000070793
Page 17

Description of Errors
E11: An error in the motor regulation (PWM regulator, pulse generator, motor) has been
detected. Shaking incubator will automatically stop.
E12: The motor did not reach set speed in 30 seconds. Shaking incubator will automatically
stop.
E13: The set speed oscillated by more than 100 RPM in 2 seconds. Shaking incubator will
automatically stop.
E21: The heater temperature sensor has malfunctioned. Shaking incubator will automatically
stop.
E22: The temperature sensor measures 5°C warmer than the temperature set point. Shaking
incubator will automatically stop.
E23: Set temperature was not reached in 2 hours. Shaking incubator will automatically stop.
Benchtop Shaking Incubator Instruction Manual | 14
Page 18

5 Temperature Calibration
The Benchtop Shaking Incubator has a temperature readjustment function that can be used
to calibrate the chamber temperature in the event that the displayed temperature no longer
matches the sample temperature. Please note that proper temperature readjustment will
require a calibrated digital thermometer with precision to at least 0.1°C.
15 | Benchtop Shaking Incubator Instruction Manual
Page 19

Procedure for Temperature Calibration
1. Set the Benchtop Shaking Incubator to the desired calibration temperature and a speed of
0 RPM, and then press Start/Stop to begin heating.
2. Place a liquid sample in the middle of the incubator platform. Allow at least 2 hours for the
unit and the sample to reach the set temperature.
3. After at least 2 hours, take a temperature measurement of the liquid sample with the
calibrated digital thermometer. The difference between the thermometer reading and the
temperature displayed on the Benchtop Shaking Incubator will be the calibration value.
Example 1. If the temperature on the thermometer is 37.9°C and the temperature on the
shaking incubator display is 37°C, the calibration value is 0.9 (37.9 – 37 = 0.9).
Example 2. If the temperature on the thermometer is 36.2°C and the temperature on the
shaking incubator display is 37°C, the calibration value is –0.8 (36.2 – 37 = –0.8).
4. Press Start/Stop to end the run. Press and hold the setting dial for more than 5 seconds.
The temperature indicator light will fl ash, the top display will show 0.0, and the lower display
will show COr.
5. Set the calibration value by rotating the setting dial clockwise or counterclockwise. Pay
attention to the sign of the calibration value (plus or minus).
6. Press Start/Stop to fi nish the temperature calibration
Benchtop Shaking Incubator Instruction Manual | 16
Page 20

6 Maintenance and Cleaning
Instructions
Cleaning the Incubation Chamber
The fl oor of the incubation chamber (painted steel) should be maintained regularly. Any spills
inside the chamber should be cleaned immediately. Use only mild cleaning solutions with
neutral pH. Using strong or abrasive cleaners will damage the instrument.
The stainless steel platform can be removed, cleaned, and decontaminated by autoclaving at
120°C.
17 | Benchtop Shaking Incubator Instruction Manual
Page 21

Cleaning the Acrylic Lid
Acrylic is easily scratched. To clean, use gentle nonabrasive liquid detergent and a soft cloth.
For best results, use 2% aqueous solution of gentle liquid cleaners such as dish detergent.
Wipe the lid surface with a damp soft cloth. Dust and dirt can be removed with a dry soft cloth.
Cleaning don’ts
• Do not use cleaners that could damage the lid surface
• Do not use acetone, benzene, paint thinner, carbon tetrachloride, or other corrosive liquids
because they can damage the acrylic lid
• Do not use detergents containing ketones, esters, or aromatics
• Do not use cleaners with solid and abrasive particles
• Do not use polishes
• Do not use hard sponges
• Do not use detergents with high levels of alcohol
Warning! When operating at temperatures above 60°C, allow the unit to cool down
prior to cleaning the instrument. At these high temperatures, do not touch the
platform; it can be very hot and result in bodily injury, including burns.
Warning! Unplug power cord before cleaning the Benchtop Shaking Incubator.
Failure to do so may result in damage to the instrument and personal injury, including
electrocution.
Benchtop Shaking Incubator Instruction Manual | 18
Page 22

7 Attachment Positioning on
Shaking Platform
Various confi gurations of attachments can be mounted on the shaking platform. Use the
following diagrams as guidelines for positioning different fl ask clamps and accessories.
Shaking platform with threaded holes shown:
19 | Benchtop Shaking Incubator Instruction Manual
Page 23
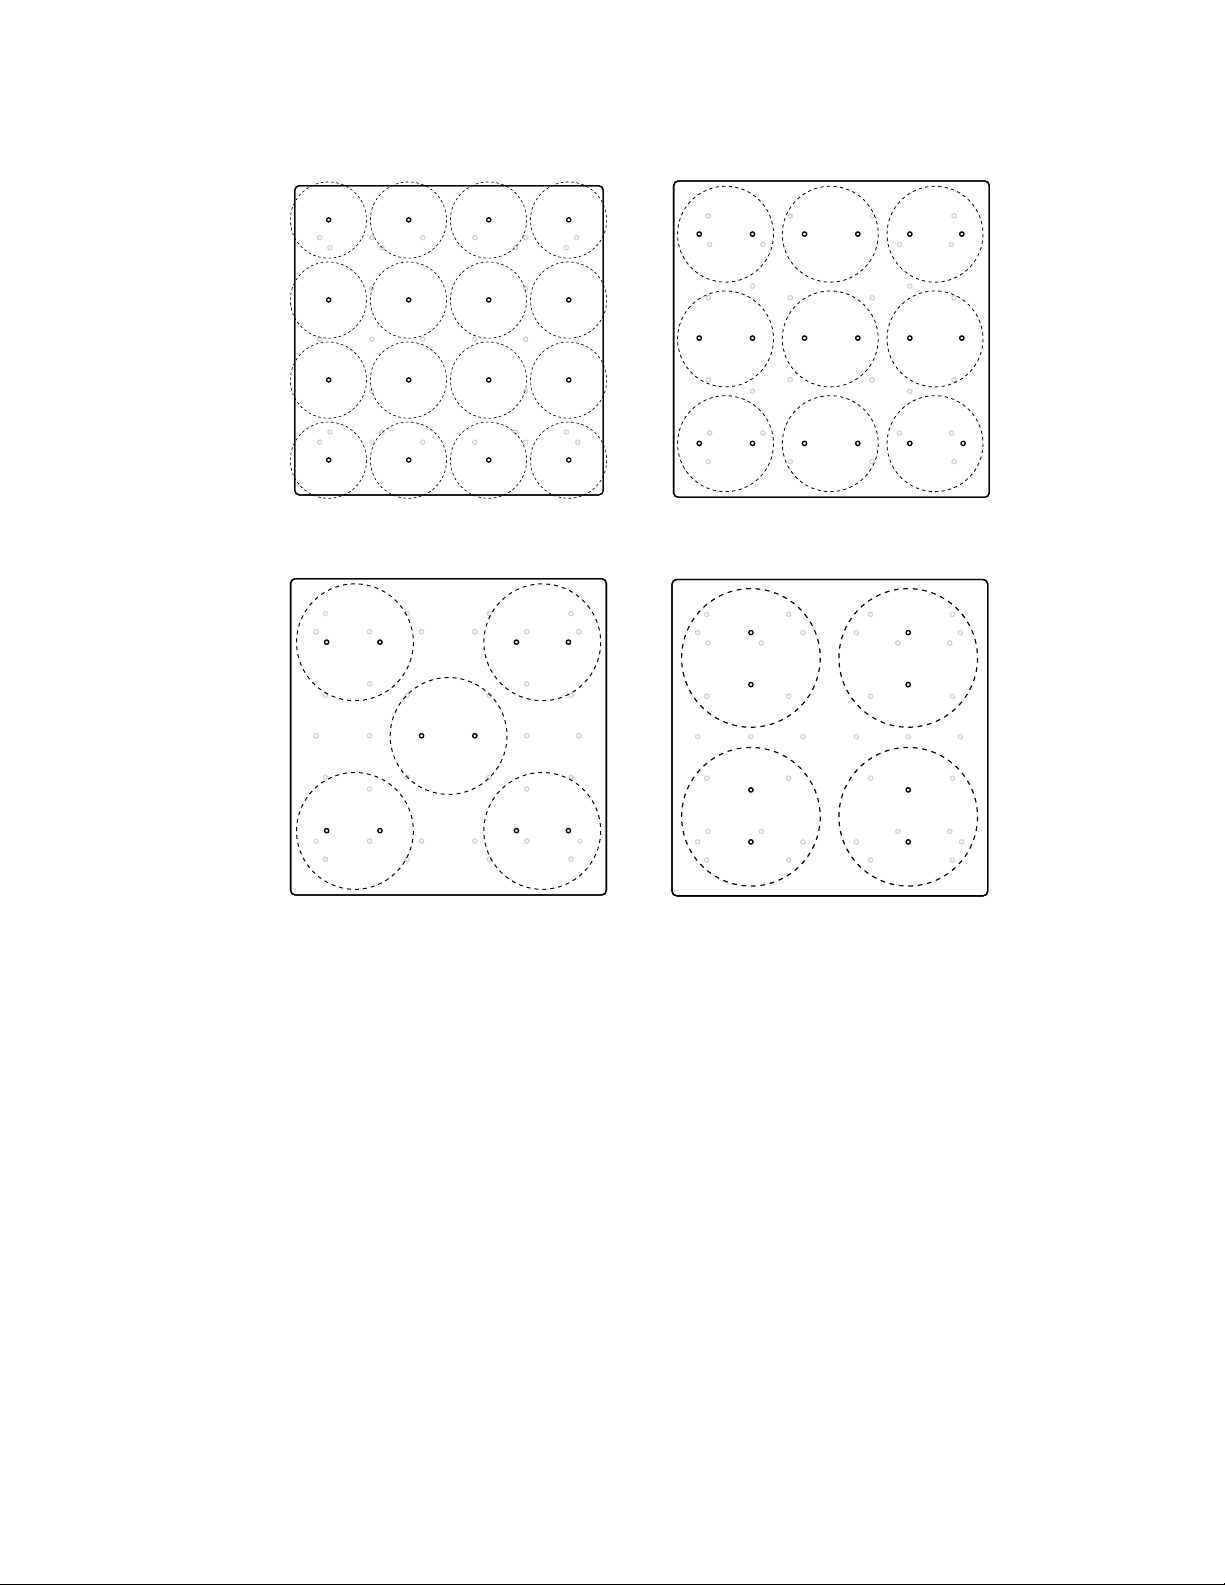
125 ml attachment guide: 250 ml attachment guide:
500 ml attachment guide: 1,000 ml attachment guide:
Benchtop Shaking Incubator Instruction Manual | 20
Page 24

Bio-Rad
Laboratories, Inc.
Life Science
Group
10000070759 Ver B US/EG
Web site bio-rad.com USA 1 800 424 6723 Australia 61 2 9914 2800 Austria 43 1 877 89 01 177 Belgium 32 (0)3 710 53 00 Brazil 55 11 3065 7550
Canada 1 905 364 3435 China 86 21 6169 8500 Czech Republic 420 241 430 532 Denmark 45 44 52 10 00 Finland 358 09 804 22 00
France 33 01 47 95 69 65 Germany 4
Israel 972 0 3 963 6 050 Italy 39 02 216091 Japan 81 3 6361 7000 Kore a 82 2 3 473 446 0 Mexico 52 555 488 7670 The Netherlands 31 (0) 318 540 666
New Zealand 64 9 415 2280 Norway 47 23 38 41 30 Poland 48 22 331 99 99 Portugal 351 21 472 7700 Russia 7 495 721 14 04
Singapore 65 6415 3188 South Africa 27 (0) 861 246 723 Spain 34 91 590 5200 Sweden 46 08 555 12700 Switzerland 41 026 674 55 05
Tai wa n 886 2 2578 7189 Thailand 66 2 651 8311 United Arab Emirates 971 4 818730 0 United Kingdom 44 020 8328 2000
9 89 31 884 0 Hong Kong 852 2789 3300 Hungary 36 1 459 6100 India 91 124 4029300
0617 Sig 1216
 Loading...