

Binatone WR1505N3 Quick Installation Manual

Quick Installation Guide
WR1505N3
150Mbps Wireless N Router
7109504945 REV1.0.2
1
Chapter 1. Connecting the Router
Before installing the router, you should have connected your PC to the Internet
through your broadband service successfully. If there are any problems, please
contact with your ISP. After that, please install the router according to the following
steps. Don't forget to pull out the power plug and keep your hands dry.
a. Power off your PC(s), Cable/DSL modem, and the router.
b. Locate an optimum location for the router. The best place is usually near the
center of the area in which your PC(s) will wirelessly connect.
c. Adjust the direction of the antenna. Normally, upright is a good direction.
d. Connect the power adapter to the power socket on the router, and the other
end into an electrical outlet. The router will start to work automatically.
After finishing the steps above, please choose the operation mode you need and
carry out the corresponding steps. There are three operation modes supported by
this router: Standard Wireless Router, Repeater and WISP Client Router.
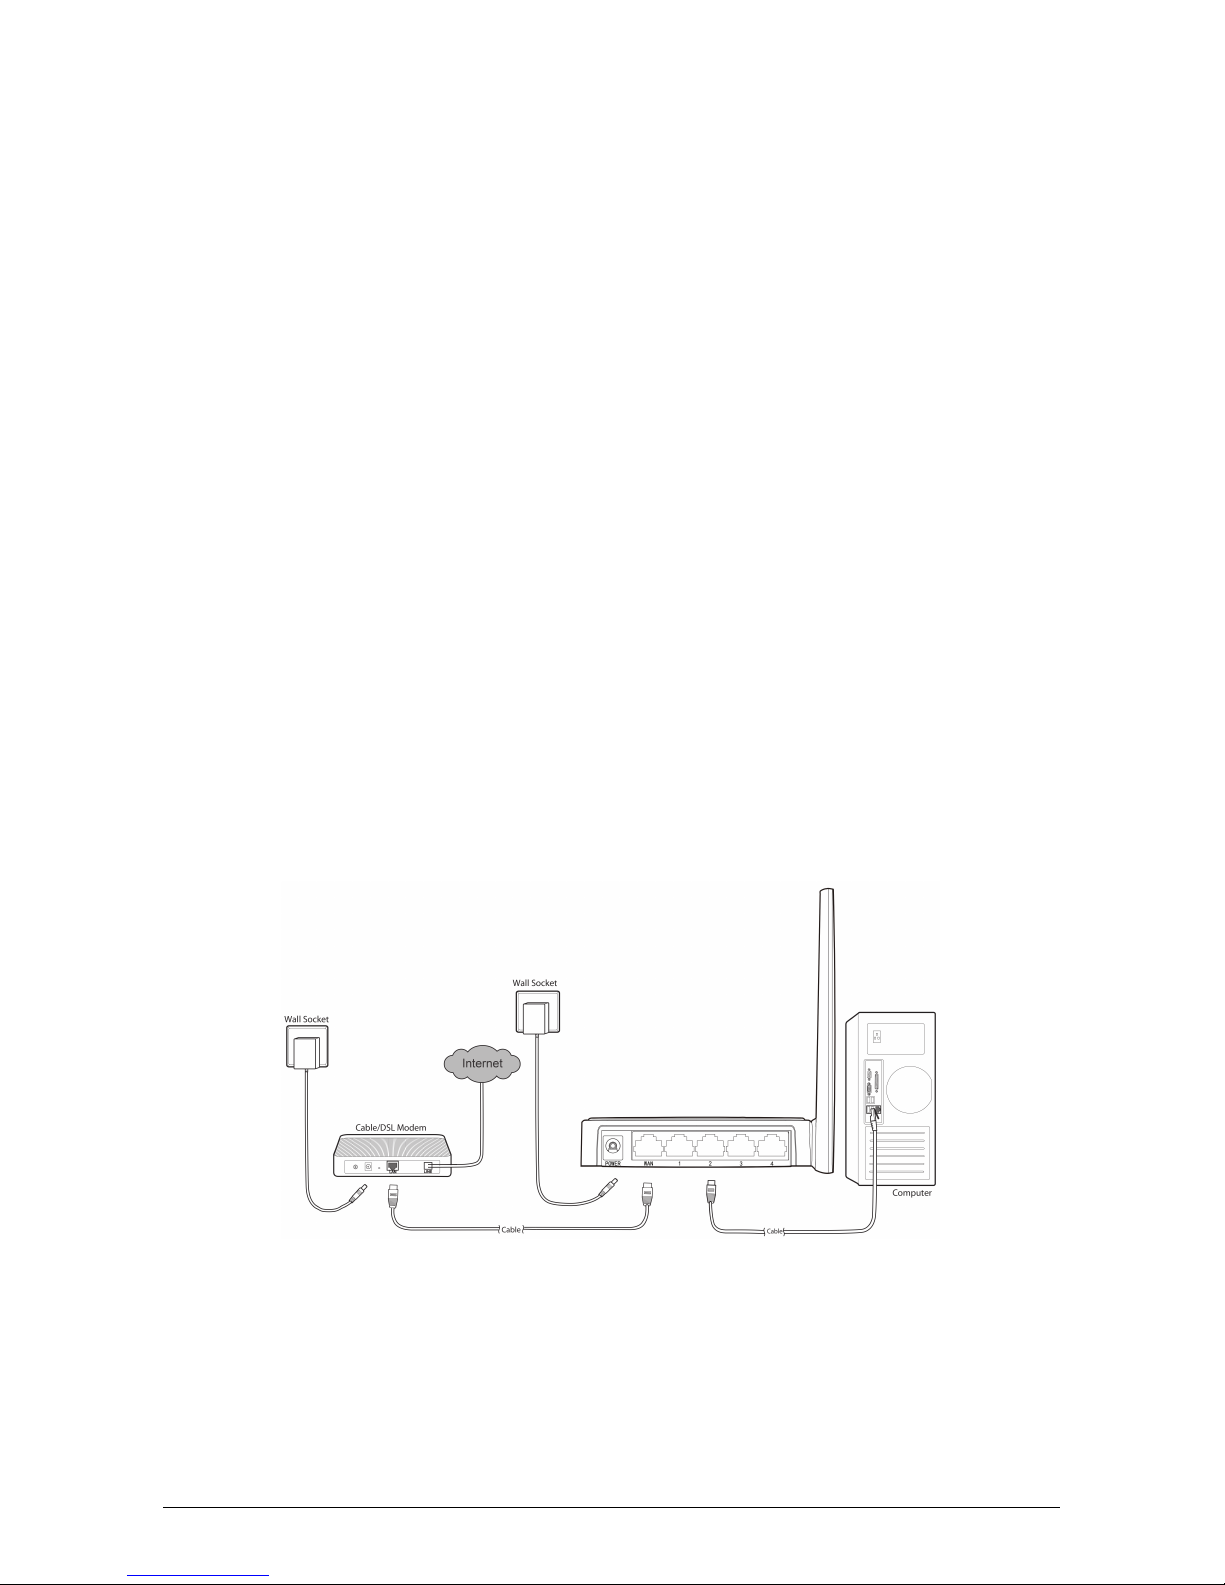
1.1 Standard Wireless Router Mode
The default mode of the router is Wireless Router. On this mode, it can be
connected to Cable/DSL Modem or directly connected to a wired network with an
Ethernet cable. Computers can connect to the device by both wired way through
the wired port LAN and wireless way.
a. Connect the PC(s) to the LAN Ports on the router.
b. Connect the DSL/Cable Modem to the WAN port on the router.
c. Power on your PC(s) and Cable/DSL modem.
2
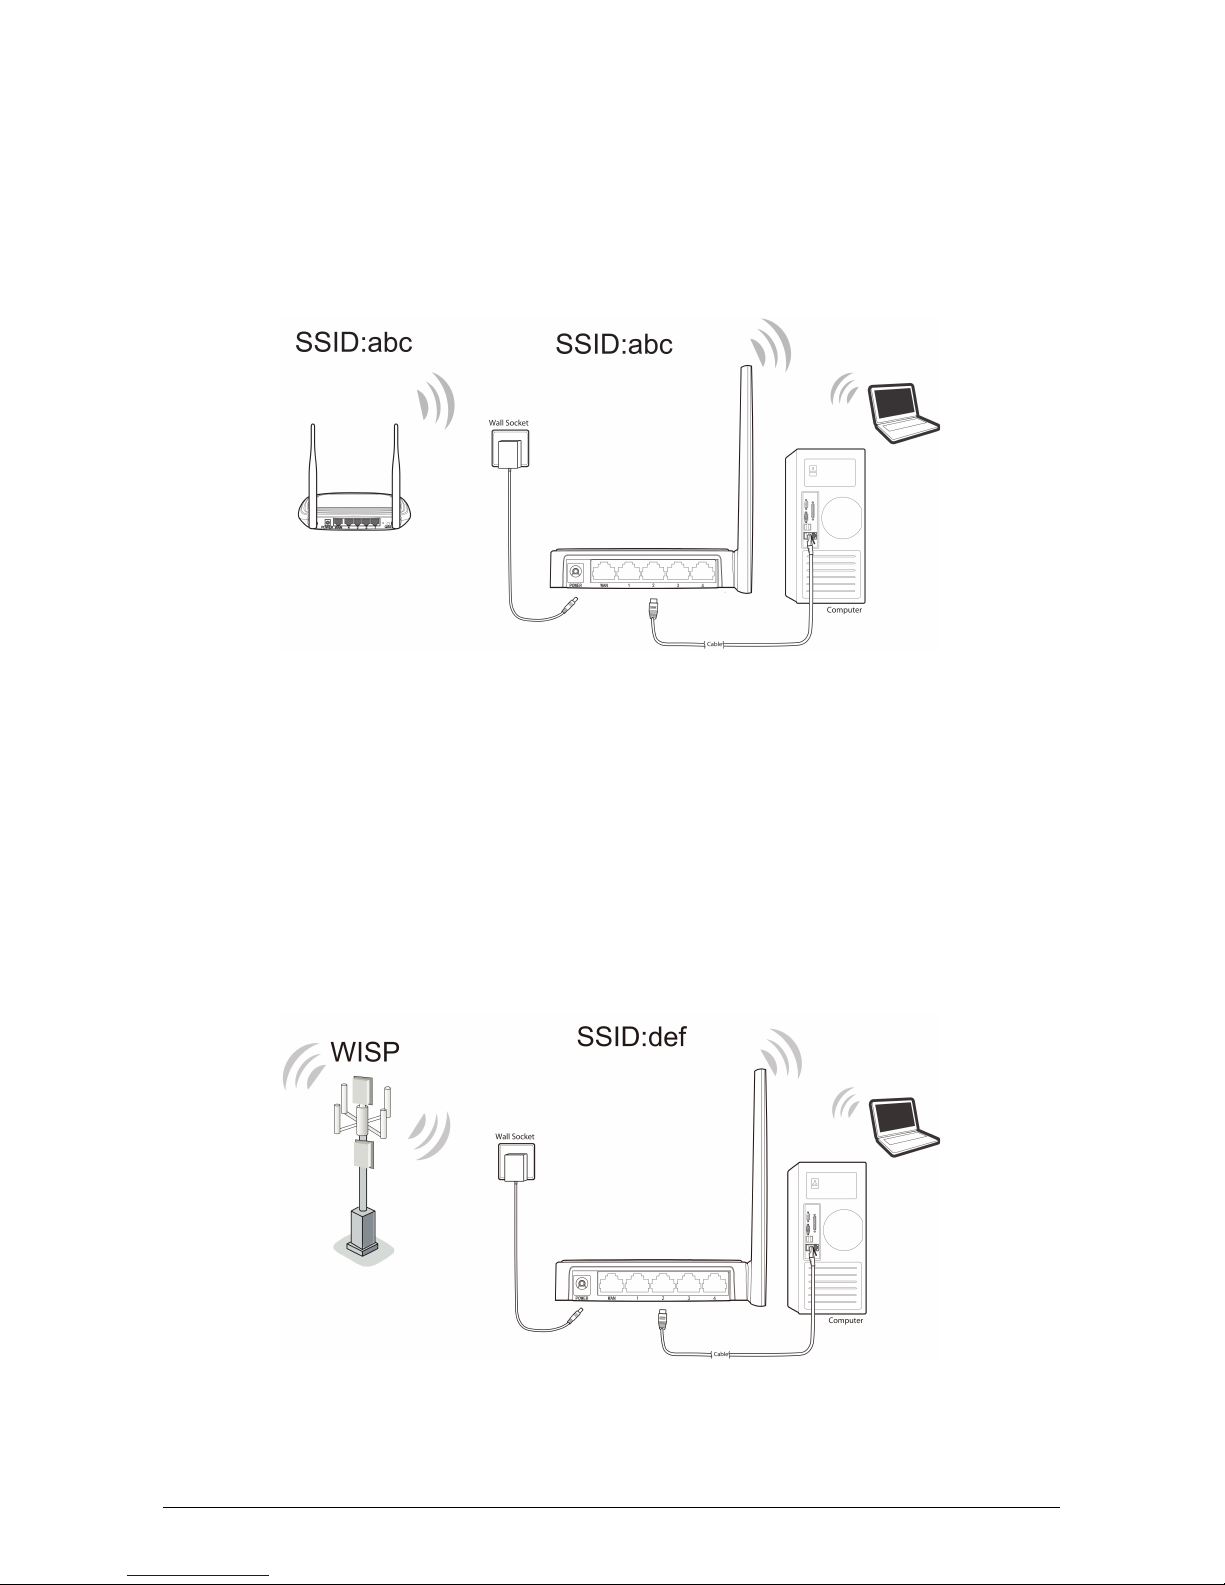
1.2 Repeater Mode
The router is used to extend the range of wireless signal of the existing AP or
wireless router.
On this mode, computer can connect to the device by either wired or wireless way.
The SSID of the router should be the same as that of the device you repeat.
a. Connect the PC(s) to the LAN Ports on the router.
b. Power on the PC(s) or notebook(s).
1.3 WISP Client Router
In WISP mode, the router enables multiple users to share Internet connection from
WISP.
On this mode, the LAN port devices share the same IP from WISP through
Wireless port. While connecting to WISP, the Wireless port works as a WAN port
at WISP Client Router mode.
a. Connect the PC(s) to the LAN Ports on the router.
b. Power on the PC(s) or notebook(s).
3
Chapter 2. Login to the Router
To login to the router, you should set up the TCP/IP Protocol in Obtain an IP
address automatically mode on your PC(s). For the detailed instructions, please
refer to Appendix B in the User Guide on the Resource CD.
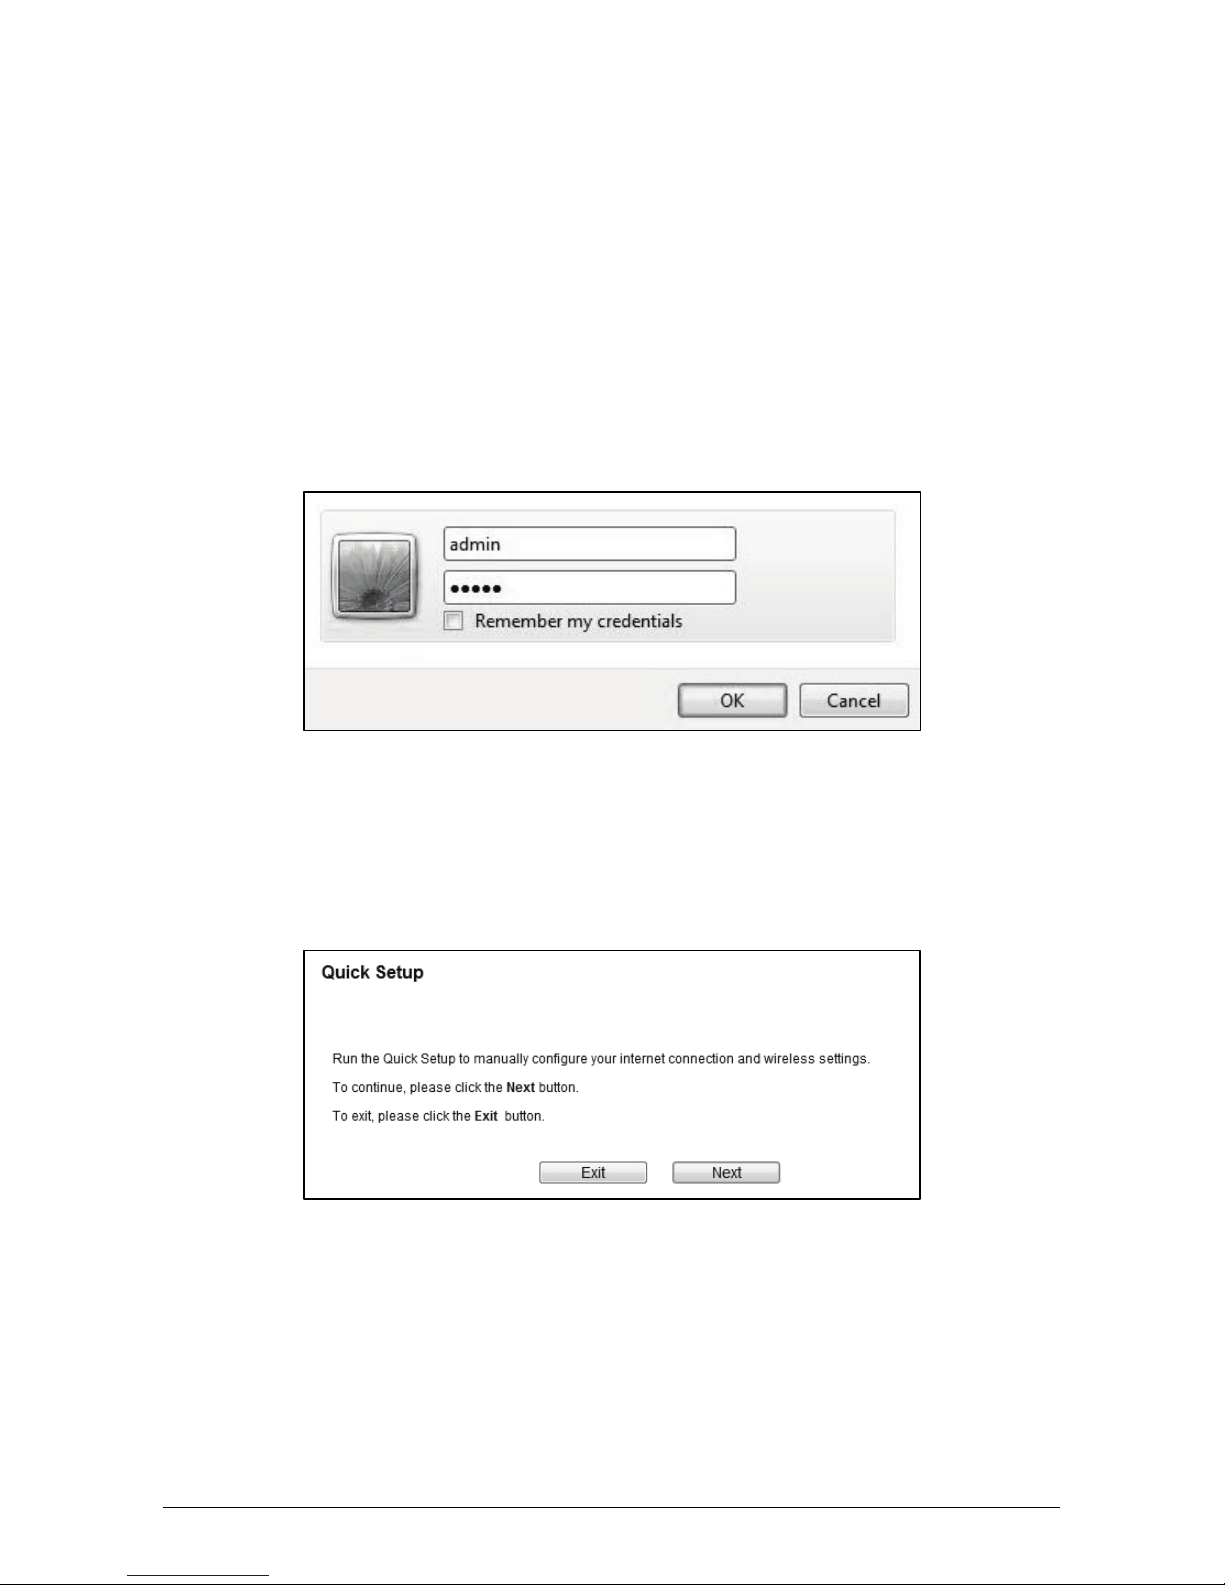
a. To access the configuration utility, open a web-browser and type in the default
address http://192.168.0.1 in the address field of the browser.
b. After a moment, a login window will appear. Enter admin for the User Name
and Password, both in lower case letters. Then click OK or press Enter.
Chapter 3. Connecting to the Internet
a. After successful login, you can configure the router using the web browser.
Please click the Quick Setup link on the left of the main menu and the Quick
Setup screen will appear. Click Next to continue.
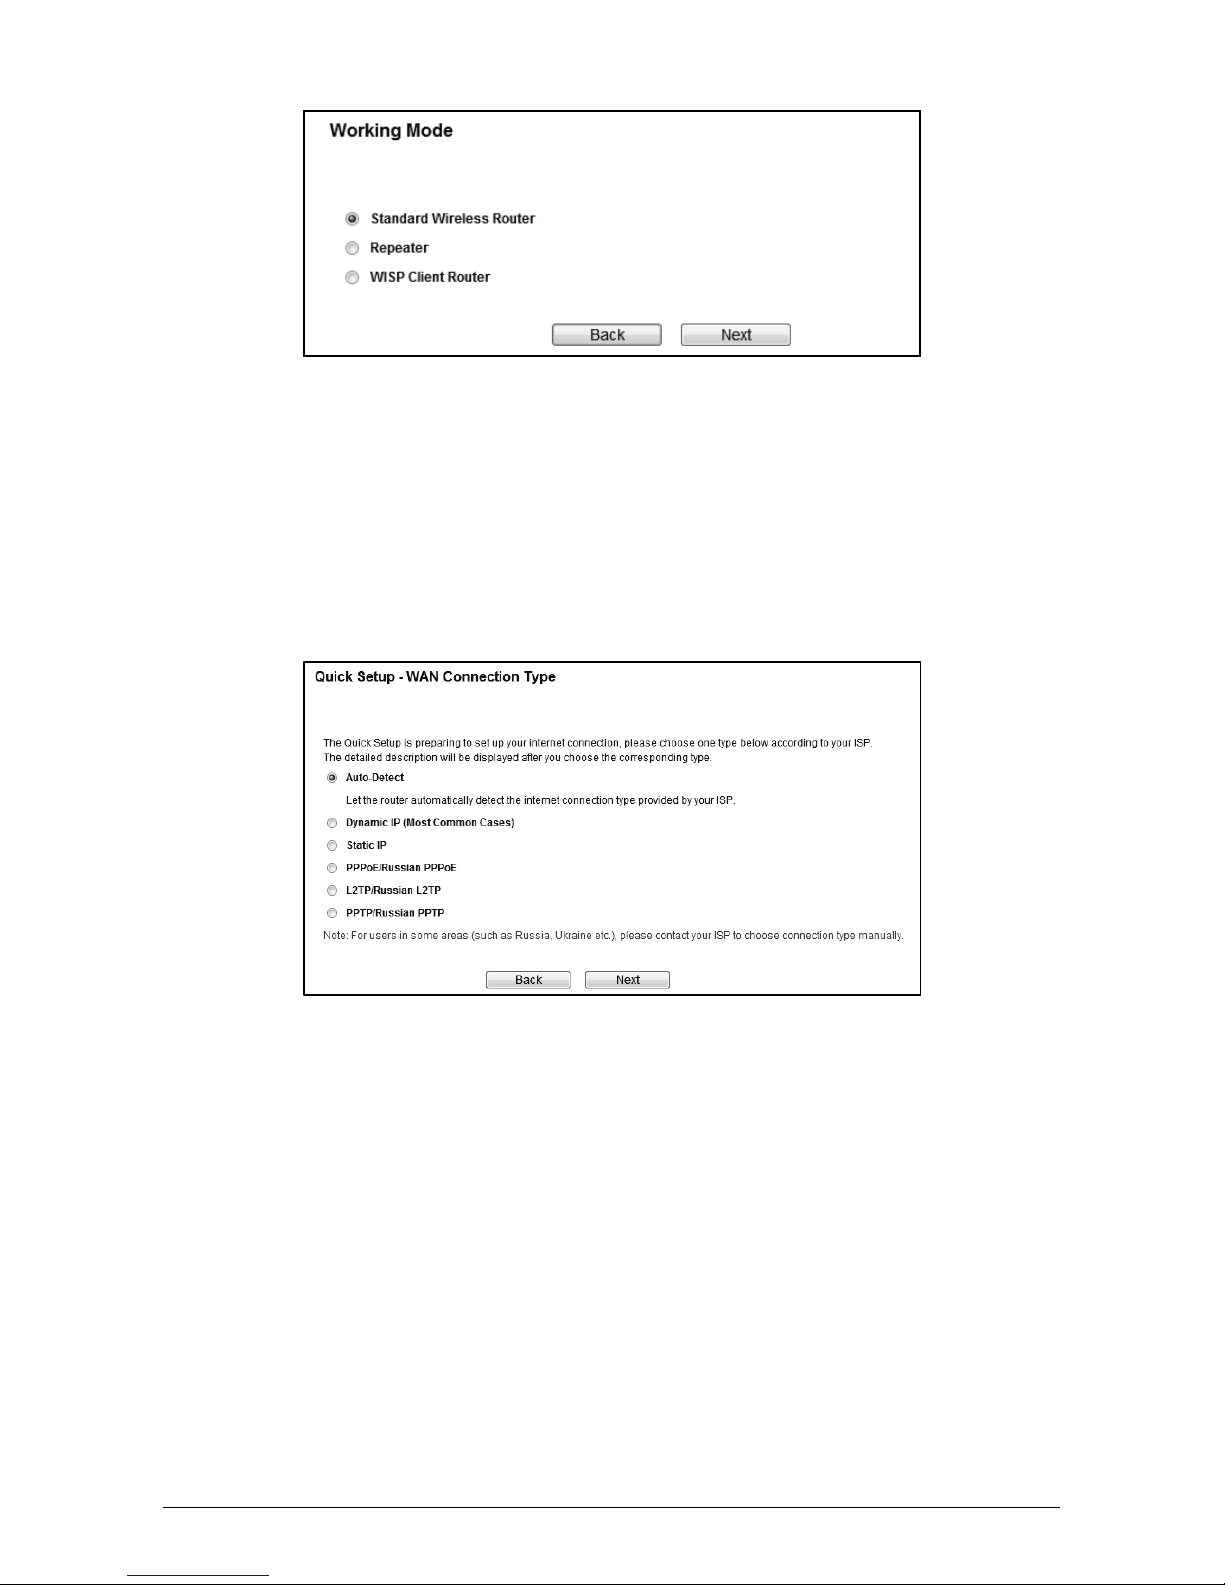
b. The Working Mode screen will appear as shown below. Select the Working
Mode Type according to your needs. Click Next. You can configure your
device quickly by the following steps in different modes.
4
3.1
Standard Wireless Router
When you choose Standard Wireless Router on Working Mode page, take the
following steps:
a. The Router provides Auto-Detect function and supports five popular ways to
access the Internet: Dynamic IP, Static IP, PPPoE/Russian PPPoE,
L2TP/Russian and PPTP/Russian PPTP. Choose your WAN connection type
and click Next.
I If you select Auto-Detect, the Router will automatically detect the
connection type your ISP provides. The appropriate configuration page
will be displayed when an active Internet service is successfully detected
by the Router.
II If Dynamic IP is selected, the router will automatically obtain IP parameter
from your ISP. In most cases, there is no need to clone the MAC address.
You can select No, I do NOT need to clone MAC address and then click
Next. If it is necessary in your case, please select Yes, I need to clone
MAC address and then click Next.
 Loading...