

Page 1

Peak
Version 5.2
Software User’s Guide
TM
Page 2

INSTALL LICENSE AGREEMENT
This legal document is an agreement between you, the end user (“YOU” or
“LICENSEE”), and Berkley Integrated Audio Software, Inc. (“BIAS, Inc.”). BY
CLICKING “INSTALL” ON THE FOLLOWING DIALOG, YOU ARE AGREEING TO
BECOME BOUND BY THE TERMS OF THIS AGREEMENT, WHICH INCLUDES
THE SOFTWARE LICENSE AND THE SOFTWARE DISCLAIMER OF WARRANTY
(collectively the “Agreement”). CLICK “QUIT” ON THE FOLLOWING DIALOG IF
YOU DO NOT ACCEPT THE TERMS OF THIS AGREEMENT. THIS AGREEMENT
CONSTITUTES THE COMPLETE AGREEMENT BETWEEN YOU AND BIAS, INC.
IF YOU DO NOT AGREE TO THE TERMS OF THIS AGREEMENT, DO NOT USE
OR REGISTER THE SOFTWARE AND PROMPTLY RETURN THE SOFT WARE AND
THE OTHER MATERIALS (INCLUDING WRITTEN MATERIALS, BINDERS OR
OTHER CONTAINERS) THAT ARE PART OF THIS PRODUCT TO THE PLACE
WHERE YOU OBTAINED THEM FOR A FULL REFUND. YOUR USE OF THIS
SOFTWARE SHALL CONSTITUTE ACCEPTANCE OF THIS AGREEMENT, AND
ONCE YOU HAVE REGISTERED THE SOFT WARE YOU MAY NOT RETURN IT.
1. BIAS SOFTWARE LICENSE
BIAS offers two distinct license options – SINGLE USER and MULTI-USER
SINGLE SITE. If you have purchased a single user license, the license
terms in section 1a apply to you. If you have purchased a multi-user
single site license (e.g. 5 user lab pack), the license terms in section 1b
apply to you.
1a. GRANT OF LICENSE (SINGLE USER). In consideration of payment of the
single user license fee, which is part of the price you paid for this
product, BIAS, as Licensor, grants to you, LICENSEE, a nonexclusive
license to use and display this copy of a BIAS software program (the
“SOFTWARE”) and accompanying user documentation
(“DOCUMENTATION”). LICENSEE may install and authorize the
SOFTWARE on one COMPUTER, provided that (a) the COMPUTER is
owned by (or leased to) and under exclusive control of the Licensee; (b)
the SOFTWARE shall NOT be used simultaneously on more than one
COMPUTER at a time, and (c) any COMPUTER(S) with BIAS Software
installed shall not be sold, rented, leased, loaned or otherwise be
removed from the LICENSEE’s possession without first removing and
deauthorizing the Software, except as provided in Paragraph 6 (below)
pertaining to “TRANSFER RESTRICTIONS.” BIAS reserves all rights not
expressly granted to LICENSEE.
1b. GRANT OF LICENSE (MULTI-USER SINGLE SITE LICENSE). In
consideration of payment of the multi-user single site license fee, which
is part of the price you paid for this product, BIAS, as Licensor, grants to
you, LICENSEE, a nonexclusive license to use and display this copy of the
Software and Documentation. LICENSEE may install and authorize the
SOFTWARE on a number of COMPUTERS equal to or less than the
number of licenses purchased (e.g. a 5 User Lab Pack allows up to 5 BIAS
SOFTWARE licenses at a single SITE to be simultaneously installed,
authorized, and used on up to 5 COMPUTERS at said SITE), provided
that (a) each COMPUTER is owned by (or leased to) and under exclusive
control of the Licensee; (b) the SOFTWARE shall NOT be used
simultaneously on more COMPUTERS at a time than the number of
licenses purchased as part of the multi-user single site license, and (c)
any COMPUTER(S) with BIAS Software installed shall not be sold, rented,
leased, loaned or otherwise be removed from the LICENSEE’s
possession without first removing and deauthorizing the Software,
except as provided in Paragraph 6 (below) pertaining to “TRANSFER
RESTRICTIONS.” BIAS reserves all rights not expressly granted to
LICENSEE.
2. SOFTWARE AUTHORIZATION. You must register and AUTHORIZE this
SOFTWARE either online (via the included BIAS Authorization Manager
software) or by phone (1-800-775-2427 +1-707-782-1866). Once the
SOFTWARE is registered and AUTHORIZED, it may not be returned.
3. OWNERSHIP OF SOFTWARE AND DOCUMENTATION. As LICENSEE,
you own the media on which the SOFT WARE and DOCUMENTATION are
originally or subsequently recorded or fixed, but BIAS retains title and
ownership of the SOFT WARE and DOCUMENTATION and all subsequent
copies of the SOFT WARE and DOCUMENTATION, regardless of the form
or media on which the original and other copies may exist. This License
is not a sale of the original SOFTWARE or any copy or sale of the original
DOCUMENTATION.
4. COPY RESTRICTIONS. This SOFT WARE and the DOCUMENTATION are
copyrighted. Unauthorized copying of the SOFTWARE, including
SOFTWARE that has been modified, merged, or included with other
software, or of the DOCUMENTATION is expressly forbidden. You may
be held legally responsible for any copyright infringement that is caused
or encouraged by your failure to abide by the terms of this License.
Subject to these restrictions, and if the SOFT WARE is not copy-protected,
you may make one (1) copy of the SOFTWARE solely for backup
purposes. You must reproduce and include the copyright notice on the
backup copy.
5. USE RESTRICTIONS. As the LICENSEE, you may physically transfer the
SOFTWARE from one computer to another provided that the
SOFTWARE is used on only one computer at a time if you have
purchased a single user license or, if you have purchased a multi-user
single site license, on up to the number of computers for which you have
purchased a license at one time. You may not electronically transfer the
SOFT WARE from one computer to another over a network. You may not
distribute copies of the SOFTWARE or the DOCUMENTATION to others.
You may not modify, adapt, translate, reverse engineer, decompile,
disassemble, or create derivative works based on the SOFTWARE. You
may not modify, adapt, translate, or create derivative works based on the
DOCUMENTATION without the prior written consent of BIAS.
6. TRANSFER RESTRICTIONS. This SOFTWARE is licensed only to you,
LICENSEE, and may not be assigned or otherwise transferred to anyone,
whether voluntary or by operation of law, without the prior written
consent of BIAS. Any authorized transferee of the SOFTWARE must
agree to be bound by the terms and conditions of this Agreement, or the
transfer shall be invalid. In no event may you transfer, assign, rent, lease,
sell, or otherwise dispose of the SOFTWARE on a temporary or
permanent basis except as expressly provided herein.
7. LICENSE TO U.S. GOVERNMENT. If LICENSEE is an agency or
instrumentality of the United States Government, the SOFT WARE and
DOCUMENTATION are “commercial computer software” and
“commercial computer software documentation”, and pursuant to FAR
12.212 or DFARS 227.7202, and their successors, as applicable, use,
reproduction and disclosure of the Software and Documentation are
governed by the terms of this Agreement.
8. TERMINATION. This License is effective until terminated. This License
will terminate automatically without notice from BIAS if you fail to
comply with any provision of this License. Upon termination you shall
destroy the DOCUMENTATION and all copies of the SOFTWARE,
including modified copies, if any.
9. UPDATE POLICY. BIAS may create, from time to time, updated versions
of the SOFTWARE. At its option, BIAS will make such updates available
to LICENSEE and transferees who have paid the update fee and returned
the registration card to BIAS.
10. BIAS PRODUCT SUPPORT.
Unlimited Complimentary Self Help Options
If you have questions about installing or using your BIAS products, please
check the manual or user guide first, and you will find answers to most
of your questions there. If you need further assistance, please check the
Peak 5 User’s Guideii
Page 3

support section of the BIAS web site, which contains answers to
frequently asked questions, troubleshooting tips, and more:
http://www.bias-inc.com/support/faq/
Limited Complimentary Technical Assistance
Ninety days of complimentary technical support assistance for up to
three incidents is available with the initial purchase of Type 1 BIAS
products (Peak Pro, Peak Pro XT, Master Perfection Suite, SoundSoap
Pro, Deck). Ninety days of complimentary technical support assistance
for a single incident is available with the initial purchase of Type 2 BIAS
products (Peak LE, Deck LE, SoundSoap 2). The support period begins
when the product is initially registered and authorized. Type 3 products
(OEM versions) are excluded.
An additional thirty days of complimentary technical support assistance
for a single incident, beginning on the expiration of the initial ninety days
of complimentary support described above, is available with the
purchase of paid upgrades to Type 1 and Type 2 BIAS products.
To receive e-mail or telephone technical support, you will need a valid
serial number and must be registered for a current BIAS product. Please
keep your original product serial number (located on your original
owner’s certificate) in a safe place as it will be required for support.
Customers who prefer support by email, please contact:
Customers who prefer support by telephone, (connect and toll charges
apply), please have your computer running and close by the phone and
call us at:
+1-707-782-1865
(9AM-5PM Monday-Friday PST – excluding BIAS holidays)
Fee-based Technical Support Options
Fee-based Support is available for those customers whose support period
has expired or for Type 3 (OEM version) customers. Please call:
+1-707-782-1865
(9AM-5PM Monday-Friday PST – excluding BIAS holidays)
For customers living outside of North America, please contact your local
BIAS distributor, or contact BIAS directly. A list of BIAS distributors may
be found at:
http://www.bias-inc.com/distributors.html
BIAS Support Policy and Hours
BIAS, Inc. support policy and hours are subject to change without notice.
Sales and Non-Technical Customer Service
For product information, sales, and other non-technical customer
service, please email or call:
[email protected]
US: 1-800-775-BIAS (2427)
International: +1-707-782-1866
(9AM-5PM Monday-Friday PST – excluding BIAS holidays)
No technical support is available at the numbers or email address above.
11. MISCELLANEOUS. This Agreement is governed by the law of the State of
California, without regard to conflicts of law principles.
DISCLAIMER OF WARRANTY AND LIMITED WARRANTY
THE SOFTWARE AND DOCUMENTATION (INCLUDING INSTRUCTIONS FOR
USE) ARE PROVIDED “AS IS” WITHOUT WARRANTIES OF ANY KIND. FURTHER,
BIAS DOES NOT WARRANT, GUARANTEE, OR MAKE ANY REPRESENTATIONS
REGARDING THE USE, OR THE RESULTS OF THE USE, OF THE SOFTWARE OR
DOCUMENTATION IN TERMS OF CORRECTNESS, ACCURACY, RELIABILITY,
CURRENTNESS, OR OTHERWISE. THE ENTIRE RISK AS TO THE RESULTS AND
PERFORMANCE OF THE SOFTWARE IS ASSUMED BY YOU, AND NOT BIAS OR
ITS DEALERS, DISTRIBUTORS, AGENTS, OR EMPLOYEES. YOU AGREE TO
ASSUME THE ENTIRE COST OF ALL NECESSARY SERVICING, REPAIR, OR
CORRECTION.
BIAS warrants to the original LICENSEE that the media upon which the
SOFTWARE is recorded and the BIAS Key (USB dongle), if applicable, are free
from defects in materials and workmanship under normal use and service for a
period of ninety (90) days from the date of delivery as evidenced by a copy of
your receipt. Further, BIAS hereby limits the duration of any implied
warranty(ies) on the media to the respective periods stated above. Some states
do not allow limitations on duration of an implied warranty, so the above
limitation may not apply to you.
BIAS’ entire liability and your exclusive remedy as to the media shall be, at BIAS’
option, either (a) return of the purchase price or (b) replacement of the media
that does not meet BIAS’ Limited Warranty and which is returned to BIAS with a
copy of the receipt. If failure of the media has resulted from accident, abuse, or
misapplication, BIAS shall have no responsibility to replace the media or refund
the purchase price. Any replacement media will be warranted for the remainder
of the original warranty period or thirty (30) days, whichever is longer.
THE ABOVE ARE THE ONLY WARRANTIES OF ANY KIND, EITHER EXPRESS OR
IMPLIED, INCLUDING BUT NOT LIMITED TO THE IMPLIED WARRANTIES OF
MERCHANTABILITY AND FITNESS FOR A PARTICULAR PURPOSE, THAT ARE
MADE BY BIAS CONCERNING THE BIAS PRODUCT. NO ORAL OR WRITTEN
INFORMATION OR ADVICE GIVEN BY BIAS, ITS DEALERS, DISTRIBUTORS,
AGENTS, OR EMPLOYEES SHALL CREATE A WARRANTY OR IN ANY WAY
INCREASE THE SCOPE OF THIS WARRANTY, AND YOU MAY NOT RELY ON ANY
SUCH INFORMATION OR ADVICE. THIS WARRANTY GIVES YOU SPECIFIC
LEGAL RIGHTS. YOU MAY HAVE OTHER RIGHTS WHICH VARY FROM STATE TO
STATE.
NEITHER BIAS NOR ANYONE ELSE WHO HAS BEEN INVOLVED IN THE
CREATION, PRODUCTION, OR DELIVERY OF THIS PRODUCT SHALL BE LIABLE
FOR ANY DIRECT, INDIRECT, CONSEQUENTIAL, OR INCIDENTAL DAMAGES
(INCLUDING DAMAGES FOR LOSS OF BUSINESS PROFITS, BUSINESS
INTERRUPTION, LOSS OF BUSINESS INFORMATION, AND THE LIKE). BECAUSE
SOME STATES DO NOT ALLOW THE EXCLUSION OR LIMITATION OF LIABILITY
FOR CONSEQUENTIAL OR INCIDENTAL DAMAGES, THE ABOVE LIMITATION
MAY NOT APPLY TO YOU.
This Disclaimer of Warranty and Limited Warranty is governed by the laws of the
State of California, without regard to conflicts of law principles.
Should you have any questions concerning this Agreement, or if you desire to
contact BIAS for any reason, please contact in writing:
BIAS Customer Sales and Service
140 Keller Street
Petaluma, CA 94952
USA
Copyright 1996–2006 BIAS, Inc.
License Agreement/Credits
iii
Page 4

Credits:
Peak 5 Software: Steve Berkley, Andrew Kimpton, Guillermo Garcia, David Ralley,
Wayne Jackson, Eric Eizenman.
Apple Events™, AppleTalk™, Audio Units™, GarageBand™, Final Cut Pro™,
iMovie™, iPod™, iTunes™, Logic™, Macintosh™, and OS X™ are registered
trademarks of Apple Computer, Inc.
Cubase™ and VST™are registered trademarks of Steinberg Media Technologies,
AG.
Pro Tools™ and Sound Designer II™ are registered trademarks of Digidesign,
Inc.
Digital Performer™ is a registered trademark of MOTU, Inc.
CDDB™ is a registered trademark of Gracenote, Inc.
FileMaker Pro™ is a registered trademark of FileMaker, Inc.
PS2™ is a registered trademark of Sony, Inc.
Xbox™ is a registered trademark of Microsoft, Inc.
Live™ is a registered trademark of Ableton, AG.
Jam™ is a registered trademark of Roxio, Inc.
SFX Machine LT™ is a registered trademark of The Sound Guy, Inc.
E-32™, E-64™, E-IV™, E-4000™, and E-5000™ are registered trademarks of Emu Systems, Inc.
A3000™, A4000™, and A5000™ are registered trademarks of Yamaha, Inc.
SP™ and SX™ are registered trademarks of Peavey, Inc.
K2000™, K2500™, and K2600™ are registered trademarks of Kurzweil, Inc.
User’s Guide:
Zac Wheatcroft, Bruce Bennett, Steve Berkley
Special Thanks to:
Christine Berkley, Jason Davies, Paul Knowles, Dan Spirlock, Gabe Khofri, Ben
Ventura, Lisa Stefan, Victor Cebreros, Megan Peterschmidt, Cory Stück, Kristen
Jacobs, Ben Hester, Kelly Evans, Larry Nilsen, Michael Van Landingham, Andrew
Stone, Brent Hurtig, Seamus Walsh, Andy Marcus, Ian & Christina Nyquist, Steve
Cerilli, Ernest Cholakis, Bil Bryant, Howard Frederics, CKSDE, Michael Anse,
Michael Barrett, Marvin Bass, Chris Borgia, Daniel Brennan, Sean Charles, Donnie
Christian, Barry Diament, Jeff Dinces, Dr. Fred Bashour, Jason Fernandez, Scott
Frankfurt, Chris Griffin, Barry Higgins, Gary Hobish, James L. Jackson, Julian
Kwasneski, Drew Lavyne, Jeremy Lee, George Leger III, Ray Legnini, Ken Loge,
Elvio Magliocca, Darin Marshall, Peter McConnell, Arnaud Melese, Jim Miller,
Heather Perkins, Paul Pierron, Marc Poirier, Fernando Rodriguez, Marc
Rosenberg, Brad Sarno, Jeremy Scidmore, John O. Senior, Luke Slater, William
Storkson, Craig Sylvern, Rudy Trubitt, James Wadell, Brandon Ware, Jim
Wintermyre, J. Mark Andrus, Michael Barrett, Robbie Berman, Bruce Bennett, R ay
Brunelle, BT, Will Carpmill, Chris Clanin, Luke DeLalio, Dennie Edwards, Tom
Erbe, Terje Finstad, Daniel Fisher, Kelly Fitz, Mikail Grahm, Brian Hamilton, Tom
Hays, Morris Hayes, Matt Isaacson, Carson Kendall, peer landra, Igor Len, Randy
M., Jose Ignacio Martin, Christophe Masson, Riccardo Mazza, Ron Macleod, David
Mash, Peter McCabe, David McIntyre, Melvin & Milo Mole, Jeff Moore, Itai Neoran,
NIN, Drayson Nowlan, Martin O'Donnell, Larry Oppenheimer, Dan Phillips, Scott
Plunkett, Gene Porfido, Les Quindipan, Ralph, Bob Rice, Brad Sarno, Arne
Schulze, Seva, Eli Shauriki, Ronen Shloush, Craig Snoke, Alex Stahl, M. Stevens,
Morten Stjernholm, Mark Tinley, David Torn, Rudy Trubitt, Tsvika, Earl Vickers,
Charles Wiltgen, Michael Winter, and Tsuyoshi Yasukawa.
Peak 5 User’s Guideiv
Page 5

BIAS Product Support:
Unlimited Complimentary Self Help
Options
If you have questions about installing or using your BIAS
products, please check the manual or user guide first,
you will find answers to most of your questions there. If
you need further assistance, please check:
http://www.bias-inc.com/support.html
for frequently asked questions, an extensive database of
related articles, troubleshooting tips, and more.
Limited Complimentary Technical
Assistance
Ninety days of technical support assistance for up to
three incidents is available with the initial purchase of
Type 1 BIAS products (Peak Pro, Peak Pro XT, Master
Perfection Suite, Deck, SoundSoap Pro). Ninety days of
technical support assistance for a single incident is
available with the initial purchase of Type 2 BIAS
products (Peak LE, Deck LE, SuperFreq, SoundSoap 2).
Type 3 products (OEM versions) are excluded. Thirty
days of technical support assistance for a single incident
is available with the purchase of paid upgrades to Type
1 and Type 2 BIAS products. The support period begins
when the product authorization code (PAC) is initially
issued following the product registration. To receive email or telephone technical support, you will need a
valid serial number and must be registered for a current
BIAS product. Please keep your original product serial
number and PAC in a safe place as it will be required for
support. For customers preferring e-mail assistance,
please use the email form available on our web site at:
http://www.bias-inc.com/support.html
Or, email:
For customers preferring telephone assistance, (connect
and toll charges apply), please have your computer
running and close by the phone and call us at:
+1-707-782-1865
9AM-5PM Monday-Friday PST – excluding BIAS holidays
Fee-based Technical Support Options
Fee-based Support is available for those customers
whose support period has expired or for Type 3 (OEM
version) customers. Please call:
+1-707-782-1865
9AM-5PM Monday-Friday PST – excluding BIAS holidays
For customers living outside of North America, please
contact your local BIAS distributor, or contact BIAS
directly. A list of BIAS distributors may be found at:
http://www.bias-inc.com/distributors.html
BIAS Support Policy and Hours
BIAS, Inc. support policy and hours are subject to change
without notice.
Product Support Options
v
Page 6

Sales and Non-Technical Customer Service
For product information, sales, and other non-technical
customer service, please email or call:
[email protected]
US: 1-800-775-BIAS (2427)
International: +1-707-782-1866
9AM-5PM Monday-Friday PST – excluding BIAS holidays
No technical support is available at the numbers or email
address above.
Peak 5 User’s Guidevi
Page 7

vii
Table of Contents
Table of Contents
Chapter 1 - Introducing Peak
Welcome!......................................................................................................................................................................................................19
Who is Peak Designed For?............................................................................................................................................................20
What’s New in Peak 5.0/5.2?..................................................................................................................................................................20
Minimum System Requirements........................................................................................................................................................21
Maximizing Peak’s Performance.................................................................................................................................................................21
About Your User’s Guide...........................................................................................................................................................................21
About Peak LE..............................................................................................................................................................................................22
Getting Help with Peak...............................................................................................................................................................................23
Conclusion..................................................................................................................................................................................................23
Chapter 2 - Installing, Registering, & Activating Peak
Installing Peak.............................................................................................................................................................................................27
Registration & Authorization......................................................................................................................................................................28
Deauthorizing a Computer..........................................................................................................................................................................30
Conclusion..................................................................................................................................................................................................30
Chapter 3 - Peak Basics
Introduction........................................................................................................................................................................................33
A Brief Explanation of Digital Audio..........................................................................................................................................................33
Sampling & Sample Rate........................................................................................................................................................................33
Bit Resolution..........................................................................................................................................................................................33
About Disk-Based Recording & Editing.....................................................................................................................................................34
Nonlinear Versus Linear Recording......................................................................................................................................................34
Nondestructive Editing..........................................................................................................................................................................34
Hard Disk Storage Requirements..........................................................................................................................................................34
Hard Disk Maintainance........................................................................................................................................................................34
Creating a New Peak Document........................................................................................................................................................35
Opening Existing Audio Documents..........................................................................................................................................................35
Opening WAVE Files................................................................................................................................................................................35
Opening Compressed Audio Documents.............................................................................................................................................35
Recently Opened Documents...............................................................................................................................................................36
Opening Dual Mono Files..........................................................................................................................................................................36
Dragging & Dropping Folders, Disks, & CD Audio Tracks.....................................................................................................................37
Recovering Damaged Audio Files..........................................................................................................................................................37
Saving & Closing Documents......................................................................................................................................................................38
Using the Save As & Save A Copy As Commands..................................................................................................................................39
Using POW-r™ Dithering.......................................................................................................................................................................39
Saving Compressed Audio Documents.................................................................................................................................................39
Closing Audio Documents......................................................................................................................................................................40
Peak Windows & Palettes.............................................................................................................................................................................40
Peak Audio Document Window..............................................................................................................................................................40
Transport Window...................................................................................................................................................................................43
Page 8

Peak 5 User’s Guideviii
Contents Window....................................................................................................................................................................................43
Setting Preferences......................................................................................................................................................................................44
Setting Peak’s Playback Parameters.......................................................................................................................................................44
Dynamic Scrub Time..............................................................................................................................................................................45
Scroll During Playback............................................................................................................................................................................45
Move Waveform During Playback..........................................................................................................................................................45
Show Marker Times................................................................................................................................................................................46
Auditioning..............................................................................................................................................................................................46
Blending..................................................................................................................................................................................................46
Auto-Import Dual Mono.........................................................................................................................................................................47
Choosing Colors for the Audio Document Window............................................................................................................................47
Choosing a Time Format........................................................................................................................................................................47
Audio File Meter, Tempo & Timestamp Settings..................................................................................................................................48
Choosing A Scratch Disk.........................................................................................................................................................................48
Keyboard Shortcuts................................................................................................................................................................................49
The Toolbar...................................................................................................................................................................................................50
Quitting Peak................................................................................................................................................................................................51
Conclusion...................................................................................................................................................................................................51
Chapter 4 - Playback & Recording
Introduction.........................................................................................................................................................................55
Core Audio...................................................................................................................................................................................................55
Configuring Peak for Playback.....................................................................................................................................................................56
Playback Options....................................................................................................................................................................................57
Core Audio Settings Dialog....................................................................................................................................................................58
Configuring Peak for Virtual Instrument Playback................................................................................................................................59
Playing Audio with Peak..............................................................................................................................................................................60
The Transport Controls..........................................................................................................................................................................60
Triggering Playback of Multiple Audio Documents..............................................................................................................................60
Playing Virtual Instruments....................................................................................................................................................................61
Configuring Peak for Recording..................................................................................................................................................................61
Recording Options..................................................................................................................................................................................62
Record Settings.......................................................................................................................................................................................62
Multi-Document Recordings (Long Recordings).......................................................................................................................................64
Recording Audio...........................................................................................................................................................................................64
The Record Dialog..................................................................................................................................................................................65
Configuring Peak to Record Through Effects Plug-Ins..........................................................................................................................65
Recording.....................................................................................................................................................................................................66
Recording into a QuickTime Movie.......................................................................................................................................................67
Importing a Track from an Audio CD..........................................................................................................................................................67
Making Audio Connections.........................................................................................................................................................................68
Using the Macintosh’s Built-In Inputs & Outputs.................................................................................................................................68
Third-Party Audio Interfaces...................................................................................................................................................................70
Conclusion...................................................................................................................................................................................................71
Chapter 5 - Editing
Introduction.................................................................................................................................................................................................75
Editing Audio with Peak...............................................................................................................................................................................75
Interactive Editing...................................................................................................................................................................................75
Page 9

Table of Contents
ix
Nondestructive Editing...........................................................................................................................................................................75
Unlimited Undo & Redo.........................................................................................................................................................................75
The Audio Document Window...................................................................................................................................................................76
An Audio Waveform................................................................................................................................................................................76
A Selection...............................................................................................................................................................................................76
A Marker...................................................................................................................................................................................................78
A Loop.....................................................................................................................................................................................................78
Audio Between Adjacent Markers..........................................................................................................................................................78
Audio Info Area.......................................................................................................................................................................................78
Audio Info Dialog....................................................................................................................................................................................79
Selecting Audio.............................................................................................................................................................................................79
Markers & Selections as Navigational Aids.............................................................................................................................................80
Auditioning Audio........................................................................................................................................................................................80
Scrubbing.....................................................................................................................................................................................................80
Dynamic Scrubbing................................................................................................................................................................................80
Jog Scrubbing..........................................................................................................................................................................................81
Tape-Style Scrubbing..............................................................................................................................................................................82
Using Unlimited Undo & Redo....................................................................................................................................................................82
Essential Editing Functions..........................................................................................................................................................................84
Scratch Disks...........................................................................................................................................................................................84
Clearing the Clipboard to Reclaim Disk Space.....................................................................................................................................84
Cutting Audio..........................................................................................................................................................................................84
Deleting Audio........................................................................................................................................................................................85
Copying Audio.........................................................................................................................................................................................85
Pasting Audio...........................................................................................................................................................................................85
Replacing Audio......................................................................................................................................................................................86
Inserting Audio........................................................................................................................................................................................86
Duplicating Audio...................................................................................................................................................................................86
Cropping a Selection..............................................................................................................................................................................87
New Document from Selection..............................................................................................................................................................87
Silencing a Selection...............................................................................................................................................................................88
Inserting Silence into a Document.......................................................................................................................................................88
Repairing Clicks & Pops.....................................................................................................................................................................88
Show Edits..................................................................................................................................................................................................90
Using Crossfades & Blending to Smooth Edits........................................................................................................................................90
Creating Fade Ins & Fade Outs..................................................................................................................................................................92
Editing a Fade In/Fade Out Envelope..................................................................................................................................................92
Creating & Using Markers..........................................................................................................................................................................94
Creating Markers...................................................................................................................................................................................94
Delete Markers......................................................................................................................................................................................96
Regions.......................................................................................................................................................................................................98
Creating Loops...........................................................................................................................................................................................99
Turn Loop Flag On/Off on Save.................................................................................................................................................................101
Crossfading Loops......................................................................................................................................................................................101
The Crossfade Loop Dialog..................................................................................................................................................................101
Crossfade Variations..............................................................................................................................................................................101
Using Loop Surfer.......................................................................................................................................................................................103
Making Loops into Regions..................................................................................................................................................................105
Using the Guess Tempo & Threshold Commands to Find Tempo..........................................................................................................106
Using Loop Tuner.......................................................................................................................................................................................106
Exporting Regions..............................................................................................................
........................................................................107
Editing QuickTime SoundTracks in Peak..................................................................................................................................................109
Conclusion.................................................................................................................................................................................................109
Page 10

Peak 5 User’s Guidex
Chapter 6 - Playlists & CD Burning
Introduction...............................................................................................................................................................................................113
Basic Playlist Concepts...............................................................................................................................................................................116
Creating a Playlist..................................................................................................................................................................................116
Adding Regions to a Playlist..................................................................................................................................................................116
Selecting Playlist Events.......................................................................................................................................................................116
About the Move Event & Trim Event Cursor Modes...........................................................................................................................117
Deleting Playlist Events........................................................................................................................................................................117
Using Undo & Redo..............................................................................................................................................................................118
Creating Transitions between Playlist Events......................................................................................................................................118
Auditioning Transitions.........................................................................................................................................................................118
Burning an Audio CD............................................................................................................................................................................119
Saving a Playlist......................................................................................................................................................................................119
Detailed Overview of Controls, Modes & Tools.......................................................................................................................................119
Miscellaneous Controls.............................................................................................................................................................................120
Saving, Closing & Opening Playlists....................................................................................................................................................120
Adding Regions to a Playlist..................................................................................................................................................................120
Undoing & Redoing..............................................................................................................................................................................123
Indexes..................................................................................................................................................................................................123
Control Area...............................................................................................................................................................................................123
Playlist Function Buttons......................................................................................................................................................................123
Counter Display....................................................................................................................................................................................127
Transport Controls................................................................................................................................................................................127
Crossfade Audition Controls................................................................................................................................................................128
Slip & Shuffle Mode Controls..............................................................................................................................................................130
Nudge Controls.....................................................................................................................................................................................131
Mode Checkboxes & Behaviors...........................................................................................................................................................137
Adding Disc-Specific CD-TEXT Metadata............................................................................................................................................139
Waveform View Area..................................................................................................................................................................................140
View Controls........................................................................................................................................................................................140
Waveform Display Area.........................................................................................................................................................................142
Cursor Modes & Tools...........................................................................................................................................................................145
High-Precision Editing Mode...............................................................................................................................................................147
Selecting Playlist Events.......................................................................................................................................................................147
Deleting Playlist Events.........................................................................................................................................................................148
Creating Transitions between Playlist Events......................................................................................................................................148
Setting Track Start Offsets....................................................................................................................................................................152
List View Area.............................................................................................................................................................................................153
List View Columns, Controls, & Data Fields........................................................................................................................................153
Changing the Order of Columns..........................................................................................................................................................159
Selecting Playlist Events........................................................................................................................................................................159
Deleting Playlist Events.........................................................................................................................................................................159
Changing the Names of Playlist Events................................................................................................................................................160
Changing the Order of Playlist Events..................................................................................................................................................160
Creating Transitions between Playlist Events......................................................................................................................................161
Editing Crossfades.................................................................................................................................................................................162
Setting Track Start Offsets.....................................................................................................................................................................164
Adding Metadata to Discs & Tracks......................................................................................................................................................165
Applying Effects Plug-Ins to Playlist Events..........................................................................................................................................167
Output Options..........................................................................................................................................................................................170
Burning Audio CDs....................................................................................................................................................................................170
CD Burning Options.............................................................................................................
................................................................170
Page 11

Table of Contents
xi
Burning from a Playlist.........................................................................................................................................................................171
Burning from an Audio Document......................................................................................................................................................171
Burning from a Jam Image File.............................................................................................................................................................171
Creating a New Document from a Playlist................................................................................................................................................172
Exporting a DDP Fileset.............................................................................................................................................................................172
Exporting a Jam Image File........................................................................................................................................................................173
Exporting as Text........................................................................................................................................................................................174
Conclusion.................................................................................................................................................................................................174
Chapter 7 - DSP
Introduction...............................................................................................................................................................................................177
Processing Audio with Peak’s DSP Tools...................................................................................................................................................177
Peak’s Audio Processing Tools...................................................................................................................................................................177
Add.........................................................................................................................................................................................................178
Amplitude Fit........................................................................................................................................................................................178
Auto-Define Tracks................................................................................................................................................................................179
Bit Usage................................................................................................................................................................................................182
Change Duration...................................................................................................................................................................................182
Change Gain..........................................................................................................................................................................................182
Change Pitch.........................................................................................................................................................................................184
Convert Sample Rate............................................................................................................................................................................185
Convolve................................................................................................................................................................................................186
Crossfade Loop.....................................................................................................................................................................................186
Envelope from Audio............................................................................................................................................................................188
Fade In & Fade Out...............................................................................................................................................................................189
Find Peak...............................................................................................................................................................................................189
Gain Envelope.......................................................................................................................................................................................189
Harmonic Rotate...................................................................................................................................................................................190
ImpulseVerb...........................................................................................................................................................................................190
Invert......................................................................................................................................................................................................192
Loop Tuner.............................................................................................................................................................................................192
Mono to Stereo & Stereo to Mono.......................................................................................................................................................192
Mix..........................................................................................................................................................................................................193
Modulate................................................................................................................................................................................................194
Normalize..............................................................................................................................................................................................194
Normalize (RMS)...................................................................................................................................................................................195
Panner....................................................................................................................................................................................................196
Phase Vocoder.......................................................................................................................................................................................196
Rappify...................................................................................................................................................................................................197
Repair Click...........................................................................................................................................................................................197
Repair Clicks..........................................................................................................................................................................................198
Remove DC Offset.................................................................................................................................................................................199
Reverse Boomerang..............................................................................................................................................................................200
Reverse..................................................................................................................................................................................................200
Strip Silence...........................................................................................................................................................................................200
Swap Channels......................................................................................................................................................................................202
Threshold..............................................................................................................................................................................................202
Conclusion.................................................................................................................................................................................................204
Page 12

Peak 5 User’s Guidexii
Chapter 8 - Plug-Ins
Introduction...............................................................................................................................................................................................207
Plug-Ins Included with Peak 5...................................................................................................................................................................207
Installing Plug-Ins.......................................................................................................................................................................................209
Audio Units Plug-Ins..............................................................................................................................................................................209
BIAS Plug-Ins.........................................................................................................................................................................................209
VST Plug-Ins..........................................................................................................................................................................................209
Organizing Plug-Ins with Folders..............................................................................................................................................................210
Using Effects Plug-Ins.................................................................................................................................................................................210
Inserts....................................................................................................................................................................................................210
Vbox.......................................................................................................................................................................................................210
The Vbox Matrix.........................................................................................................................................................................................212
Box Controls..........................................................................................................................................................................................212
Editing Effect Plug-In Parameters.........................................................................................................................................................214
Moving Plug-Ins.....................................................................................................................................................................................214
Changing Input Routing.......................................................................................................................................................................215
Creating Serial Plug-Ins Chains.............................................................................................................................................................215
Creating Parallel Plug-Ins Chains..........................................................................................................................................................215
Master Wet/Dry Controls......................................................................................................................................................................215
Master Input/Output Levels.................................................................................................................................................................215
Loading & Restoring Vbox Presets.......................................................................................................................................................216
A/B Comparisons..................................................................................................................................................................................216
Vbox Preferences..................................................................................................................................................................................216
Recording Through Effect Plug-Ins...........................................................................................................................................................216
Plug-Ins Envelope......................................................................................................................................................................................217
Plug-In Latency Compensation.................................................................................................................................................................217
Using Effect Plug-Ins with the Batch Processor........................................................................................................................................218
Using Virtual Instrument Plug-Ins.............................................................................................................................................................219
Configuring Peak for Virtual Instrument Playback..............................................................................................................................219
Loading Virtual Instruments on Inserts...............................................................................................................................................220
Playing Virtual Instruments.......................................................................................................................................................................220
Recording Virtual Instruments..................................................................................................................................................................220
Deactivating Virtual Instruments..............................................................................................................................................................221
Playing Virtual Instruments Alongside Audio Documents.......................................................................................................................221
Conclusion.................................................................................................................................................................................................222
Chapter 9 - Batch File Processor & Apple Events
Introduction...............................................................................................................................................................................................225
Batch File Processor...................................................................................................................................................................................225
Input Area..............................................................................................................................................................................................226
Process Area..........................................................................................................................................................................................226
Save Changes Area................................................................................................................................................................................227
Errors & Cancelling Batch Processes...................................................................................................................................................228
Peak’s Audio Librarian Tools......................................................................................................................................................................229
Apple Events Support...........................................................................................................................................................................229
“Savvy” Core Suite of Apple Events......................................................................................................................................................229
Peak Events............................................................................................................................................................................................229
Example Scripts.....................................................................................................................................................................................230
Conclusion.................................................................................................................................................................................................230
Page 13

Table of Contents
xiii
Chapter 10 - Samplers
Introduction...............................................................................................................................................................................................233
Working with SMDI Samplers....................................................................................................................................................................233
SMDI Samplers......................................................................................................................................................................................233
SMDI Samper Error Messages & Troubleshooting..............................................................................................................................235
A Note about the Yamaha A3000...............................................................................................................................................................236
The Sampler Preferences Dialog...............................................................................................................................................................236
Conclusion.................................................................................................................................................................................................236
Chapter 11 - Peak Menus
Introduction...............................................................................................................................................................................................239
Peak Pro Menu............................................................................................................................................................................................239
About Peak.............................................................................................................................................................................................239
Help.......................................................................................................................................................................................................239
Preferences............................................................................................................................................................................................239
Hide Peak...............................................................................................................................................................................................243
Hide Others...........................................................................................................................................................................................243
Quit Peak...............................................................................................................................................................................................243
File Menu....................................................................................................................................................................................................243
New........................................................................................................................................................................................................243
Open......................................................................................................................................................................................................244
Close......................................................................................................................................................................................................244
Close All.................................................................................................................................................................................................244
Save........................................................................................................................................................................................................244
Save As...................................................................................................................................................................................................245
Save a Copy As.......................................................................................................................................................................................245
Import CD Track....................................................................................................................................................................................245
Import Dual Mono................................................................................................................................................................................246
Recover Audio File................................................................................................................................................................................246
Export Dual Mono.................................................................................................................................................................................246
Export Regions......................................................................................................................................................................................246
Export as Text........................................................................................................................................................................................247
Batch Processor.....................................................................................................................................................................................247
Burn Audio CD......................................................................................................................................................................................247
Recently Opened Documents..............................................................................................................................................................247
Edit Menu...................................................................................................................................................................................................248
Undo......................................................................................................................................................................................................248
Redo.......................................................................................................................................................................................................248
Edits.......................................................................................................................................................................................................248
Cut.........................................................................................................................................................................................................248
Copy.......................................................................................................................................................................................................249
Paste.......................................................................................................................................................................................................249
Replace..................................................................................................................................................................................................249
Duplicate...............................................................................................................................................................................................249
Insert......................................................................................................................................................................................................249
Insert Silence.........................................................................................................................................................................................249
Silence...................................................................................................................................................................................................249
Delete....................................................................................................................................................................................................250
Delete Except Audio.............................................................................................................................................................................250
Crop.......................................................................................................................................................................................................250
Page 14

Peak 5 User’s Guidexiv
Clear Clipboard.....................................................................................................................................................................................250
Select All................................................................................................................................................................................................250
Insertion Point at Selection Start/End..................................................................................................................................................250
Set Selection..........................................................................................................................................................................................250
Select Loop............................................................................................................................................................................................250
Previous Selection/Next Selection.......................................................................................................................................................250
Action Menu...............................................................................................................................................................................................250
Zoom Out..............................................................................................................................................................................................251
Zoom In.................................................................................................................................................................................................251
Increase Vertical Zoom.........................................................................................................................................................................251
Decrease Vertical Zoom........................................................................................................................................................................251
Fit Selection...........................................................................................................................................................................................251
Zoom Out All the Way...........................................................................................................................................................................251
Zoom at Sample Level...........................................................................................................................................................................251
Zoom at Sample Level (End)................................................................................................................................................................251
Snap To..................................................................................................................................................................................................252
Snap Start & End...................................................................................................................................................................................252
Snap Start..............................................................................................................................................................................................252
Snap End...............................................................................................................................................................................................252
Loop this Selection...............................................................................................................................................................................252
Nudge Loop Backward.........................................................................................................................................................................252
Nudge Loop Forward............................................................................................................................................................................252
New Marker............................................................................................................................................................................................252
Markers from Tempo.............................................................................................................................................................................253
New Region...........................................................................................................................................................................................253
New Region Split...................................................................................................................................................................................253
Capture Region to Playlist.....................................................................................................................................................................253
Markers to Regions................................................................................................................................................................................253
Nudge....................................................................................................................................................................................................254
Go To......................................................................................................................................................................................................254
Loop Surfer............................................................................................................................................................................................254
Guess Tempo........................................................................................................................................................................................255
Audio Menu................................................................................................................................................................................................255
Stop/Rewind..........................................................................................................................................................................................255
Play/Pause..............................................................................................................................................................................................255
Play Selection........................................................................................................................................................................................255
Play with Auditioning............................................................................................................................................................................255
Stop & Extend Selection.......................................................................................................................................................................255
Fast-Forward..........................................................................................................................................................................................256
Record....................................................................................................................................................................................................256
Record Settings.....................................................................................................................................................................................256
Hardware Options.................................................................................................................................................................................258
Hardware Settings.................................................................................................................................................................................258
Meters....................................................................................................................................................................................................258
DSP Menu...................................................................................................................................................................................................258
Add.........................................................................................................................................................................................................258
Amplitude Fit.........................................................................................................................................................................................259
Auto-Define Tracks................................................................................................................................................................................259
Bit Usage................................................................................................................................................................................................260
Change Duration...................................................................................................................................................................................261
Change Gain....................................................................................................................
......................................................................261
Change Pitch.........................................................................................................................................................................................261
Convert Sample Rate............................................................................................................................................................................262
Page 15

Table of Contents
xv
Convolve................................................................................................................................................................................................262
Crossfade Loop.....................................................................................................................................................................................262
Envelope from Audio............................................................................................................................................................................262
Fade In & Fade Out...............................................................................................................................................................................263
Find Peak...............................................................................................................................................................................................263
Gain Envelope.......................................................................................................................................................................................263
Harmonic Rotate...................................................................................................................................................................................263
ImpulseVerb...........................................................................................................................................................................................264
Invert......................................................................................................................................................................................................264
Loop Tuner............................................................................................................................................................................................264
Mono to Stereo & Stereo to Mono.......................................................................................................................................................265
Mix..........................................................................................................................................................................................................265
Modulate................................................................................................................................................................................................265
Normalize..............................................................................................................................................................................................266
Normalize (RMS)...................................................................................................................................................................................266
Panner....................................................................................................................................................................................................266
Phase Vocoder.......................................................................................................................................................................................267
Rappify...................................................................................................................................................................................................267
Repair Click...........................................................................................................................................................................................267
Repair Clicks..........................................................................................................................................................................................267
Remove DC Offset.................................................................................................................................................................................269
Reverse Boomerang..............................................................................................................................................................................269
Reverse..................................................................................................................................................................................................269
Strip Silence...........................................................................................................................................................................................269
Swap Channels......................................................................................................................................................................................269
Threshold..............................................................................................................................................................................................270
Sampler Menu............................................................................................................................................................................................270
Send to Sampler....................................................................................................................................................................................270
Revert from Sampler.............................................................................................................................................................................270
Send All to Sampler...............................................................................................................................................................................270
Revert All from Sampler........................................................................................................................................................................270
E-mu, Ensoniq, ASR-X, Kurzweil, Peavey, Yamaha Sampler...............................................................................................................271
Plug-Ins Menu............................................................................................................................................................................................271
Vbox.......................................................................................................................................................................................................271
Inserts....................................................................................................................................................................................................271
Bounce...................................................................................................................................................................................................272
Options Menu............................................................................................................................................................................................272
Time Units.............................................................................................................................................................................................272
Sample Units.........................................................................................................................................................................................272
Use Loop in Playback............................................................................................................................................................................272
Scroll During Play..................................................................................................................................................................................273
Move Waveform During Playback........................................................................................................................................................273
Compute Max File dB...........................................................................................................................................................................273
Show Edits.............................................................................................................................................................................................273
Show Marker Times..............................................................................................................................................................................273
Show Overview......................................................................................................................................................................................273
Show Cursor Info..................................................................................................................................................................................273
Auto-Import Dual Mono.......................................................................................................................................................................273
Auto-Adjust Bounce for Latency...........................................................................................................................................................274
Audio Info..............................................................................................................................................................................................274
Dynamic Scrub Time.............................................................................................................
...............................................................274
Auto Snap..............................................................................................................................................................................................275
Keyboard MIDI Input............................................................................................................................................................................275
Page 16

Peak 5 User’s Guidexvi
Movie.....................................................................................................................................................................................................275
“Open” Dialog After Launch.................................................................................................................................................................275
Window Menu............................................................................................................................................................................................275
Transport...............................................................................................................................................................................................275
Toolbar...................................................................................................................................................................................................276
Contents................................................................................................................................................................................................276
Movie.....................................................................................................................................................................................................276
MIDI.......................................................................................................................................................................................................276
Playlist....................................................................................................................................................................................................276
Tiling Windows......................................................................................................................................................................................276
Stacking Windows.................................................................................................................................................................................276
Hide All Audio Document Windows....................................................................................................................................................276
Toggle Contents Drawer.......................................................................................................................................................................277
Links Menu.................................................................................................................................................................................................277
Appendix 1 – Keyboard Shortcuts
Keyboard Shortcuts...................................................................................................................................................................................279
Appendix 2 – Peak Actions
Peak Actions...............................................................................................................................................................................................285
Appendix 3 – Troubleshooting
Troubleshooting – Before Calling for Help..............................................................................................................................................289
Appendix 4 – Recording & Playback with Mac OS X Audio HAL & FireWire DV
Recording & Playback with Mac OS X Audio HAL & FireWire DV............................................................................................................295
Glossary
Glossary......................................................................................................................................................................................................301
Index
Index...........................................................................................................................................................................................................309
Page 17

Chapter 1
Introducing Peak
Page 18

Peak 5 User’s Guide18
Page 19

Chapter 1: Introducing Peak
Welcome!
BIAS Peak™ is an advanced audio application that
provides superior tools for recording, editing, and
processing digital audio on the Macintosh computer.
Peak was specifically designed to meet the needs and
demands of audio professionals. By combining highquality direct-from-disk digital audio editing features
with lightning fast destructive & nondestructive editing
environments, Peak provides unsurpassed audio editing
power, and makes a superb addition to multitrack audio
application programs, such as BIAS Deck™, Cubase™,
Digital Performer™, Live™, Logic™, Pro Tools™, and
practically any other application that deals with digital
audio. Peak offers advanced sampler support, and works
directly with many popular MIDI sampling keyboards
and rackmount samplers. Peak is also the perfect audio
complement to digital video editing programs, such as
iMovie™ and Final Cut Pro™.
Peak Features:
• Direct-to-disk recording and playback at all sample
rates supported by the sound hardware on your
Macintosh, or supported through third-party audio
hardware
• User-configured waveform display
• Support for commonly used audio document
formats, including AIFF, Sound Designer II™,
WAVE, QuickTime™, Raw, System 7 Sound, Sonic
AIFF, Paris™, Jam Image, AU, MP3, and MP4(AAC)
formats
• Non-destructive file-based editing with unlimited
undo and redo
• Professional editing abilities, including user-definable
fade curves, silence, and complete support for
cut/copy/paste with multiple undo and redo
• By using an application that supports Apple Events, such
as FileMaker Pro™, you can catalog your Peak sound
files and audition them from within the application
• Support for third-party digital audio hardware,
such as M-Audio™ or Mark of the Unicorn™ digital
audio interfaces, through Core Audio.
• Support for 8-, 16-, 24-, and 32-bit audio files
• Support for third-party VST™ & Audio Units effects
and instrument plug-ins, allowing you to add
advanced signal processing features to Peak. Plugins from companies such as BIAS, Cycling `74™,
Steinberg™, Waves™, and Apple™ can be used
with Peak for digital filtering, noise reduction,
reverb, equalization, and other effects in real time
• The ability to create 100% Red Book compliant
(with CD-TEXT, ISRC codes, and PQ subcodes)
audio CDs directly from a Peak Playlist or audio
document
• Sophisticated Tools for looping, including Loop
Surfer™, Loop Tuner™, and Guess Tempo™
• Sampler Support
• Advanced Playlist editing and mastering options
• Automated batch file processing
• Customizable Toolbar and Keyboard Shortcuts
• QuickTime Movie window with scrubbing
Chapter 1: Introducing Peak
19
1
Page 20

Who Is Peak Designed For?
Peak is designed for a wide variety of users, ranging from
composers and multimedia producers to sound
designers, mastering engineers, video editors, and remix
editors. Peak’s comprehensive recording, editing,
mastering, looping, and processing capabilities make it a
powerhouse tool for virtually any aspect of digital audio
production. If you are interested in sound and possess
imagination and creativity, Peak is for you.
What’s New in Peak 5.0/5.2?
Version 5.2 of Peak software offers the following updates
and enhancements:
• Universal application supports both Intel and
PowerPC-based Macs
• Updated authorization system allows Peak to be
authorized by serial number or USB key
Features new as of version 5.0 include:
• Completely redesigned Playlist with unlimited
undo/redo
• International Standard Recording Code (ISRC)
support
• PQ subcode support
• CD-TEXT support
• DDP File Export*
• POW-r™ Dither in Playlist
• Advanced Change Pitch algorithm
• Advanced Change Duration algorithm
• Advanced Sample Rate Conversion algorithm
• VBox 2.0 effects routing interface – now supports
Audio Units plug-ins, and VST/Audio Units
instruments
• MIDI support (for virtual instruments)
• Freq-4 v. 2.0 EQ Plug-In
• Automatic plug-in latency compensation
• Adjust Parameters while recording through plugins
• Support for Unicode & long file names (longer
than 32 characters)
• More accurate waveform display
• Auto-Define Tracks DSP tool
• Strip Silence DSP tool
• Envelope from Audio DSP tool
• RMS Normalize DSP tool
• New Region Split
• High Resolution Tape-Style Scrubbing
• Snap To options: CD Frames, Sony PS2™ &
Microsoft XBox™ loop boundaries, and custom
units
• Recover Audio File
• Preserve File Attributes in Batch Processor
• Multi-Document Recording (Long Recordings)
• Edit History in File Drawer
• HD Time Units (59.97 & 60 fps)
• Save Loop Flags in On/Off position
• Automatic Window Tiling
• New ImpulseVerb User Interface
• New Toolbar icons
• Support for Mac OS X v. 10.4 “Tiger”
Peak 5 User’s Guide20
Page 21

Minimum System Requirements
To use Peak you will need:
• G4, G5, or Intel-based Mac (>500MHz processor
recommended)
• Macintosh OS 10.3.9 minimum (10.4 recommended, Intel-based Macs, and burning CD-TEXT
require 10.4)
• Minimum 1024 x 768 screen resolution
• 256 MB RAM (512 MB or more recommended)
• 330 MB available free disk space
• 18 ms hard drive (average seek time) or faster
• QuickTime 6.0 or later
• Support for third-party audio hardware may
require compatible Core Audio drivers
For the most up-to-date information, please visit:
http://www.bias-inc.com/products/peak/
Mac OS X v. 10.4 “Tiger” and a compatible CD
burner are required for burning CD-TEXT and
subcode metadata from a Peak Playlist document.
Maximizing Peak’s Performance
The following tips are optional, and will help you get the
best performance out of Peak and your Macintosh, but
they are not required.
To maximize Peak performance:
• Set your monitor to no more than thousands of
colors (the lowest setting that displays properly is
recommended for older Macintosh computers).
• Turn File Sharing off, unless you need it.
• Disconnect your Macintosh from any networks and
turn off AppleTalk, unless you need to be on a
network.
• Optimize your hard drive. (See Chapter 3 to learn
about proper hard disk maintenance.)
• Use a separate (i.e., a drive that is not also hosting
the operating system or Peak application) fast hard
drive as a scratch disk/record disk – BIAS
recommends at least a 7200 RPM rotational speed,
8 MB cache or higher, 18ms access time or better,
and a fast data transfer connection, such as SCSI,
FireWire 400/800, ATA, etc.
About Your User’s Guide
Peak is designed to be simple and intuitive. Your User’s
Guide is designed to help you set up and use Peak for
digital recording and editing as quickly and easily as
possible.
This User’s Guide assumes that you are familiar with
standard Macintosh operating techniques, including:
• Setting up, starting, and using your Macintosh
• Choosing commands from menus
• Clicking, double-clicking, selecting, Shift-selecting,
dragging with the mouse, and other common
operations
• Opening, copying, saving and deleting files
• Opening, closing, scrolling, moving, re-sizing, and
selecting Macintosh windows
If you don’t know how to perform these tasks, please
refer to your Macintosh User’s Guide and spend a little
time learning about your Macintosh before going any
further. This will make using Peak much easier and more
enjoyable.
The Chapters in your Peak User’s Guide are arranged in
Chapter 1: Introducing Peak
21
1
Page 22

the order in which you would typically perform tasks
when embarking on an audio project:
• Chapter 1 introduces you to Peak and explains
some of the requirements for using it
• Chapter 2 explains how to install Peak and configure
your Macintosh for recording and playback
• Chapter 3 introduces you to some basic concepts
of digital audio and disk-based recording, as well as
basic Peak operations
• Chapter 4 explains how to configure, record to,
and playback audio from hard disk in Peak using
Core Audio. It also explains how to import audio
from compatible CD-ROM drives
• Chapter 5 introduces you to the concepts and
techniques of nondestructive editing with Peak
• Chapter 6 explains how to create regions and
sequence their playback using Playlists, as well as
how to burn audio CDs export a variety of common
file formats
• Chapter 7 explains how to use Peak’s native DSP
tools
• Chapter 8 explains how to use Audio Units & VST
plug-ins, and how to use Vbox to enhance Peak’s
audio production capabilities
• Chapter 9 explains how to use Peak’s Batch File
Processor as well as how to use Apple Events for
file management
• Chapter 10 explains how to import samples
directly from compatible samplers (to edit or
process the audio using all of Peak’s functions) and
send the modified sample back to the sampler
• Chapter 11 describes each of the commands found
in Peak’s menus
• Appendix 1 lists the default Keyboard Shortcuts for Peak
• Appendix 2 provides a troubleshooting guide for
commonly encountered problems
• A Glossary and Index complete your Peak User’s Guide
Look for important tips and notes whenever you
see this exclamation mark.
About Peak LE
Peak LE is a limited-feature edition of “Peak Pro”, and not
all features are available. Peak LE has a streamlined
feature set and includes the essential tools required for
music production, basic CD mastering, and editing the
audio content in files commonly used in non-linear video
editing systems.
If you are using the limited edition (LE edition) of Peak,
not all features will be available. Specifically, the
following features are not available in Peak LE:
• Add
• Advanced Playlist functions – Peak LE features a
basic Playlist
• Amplitude Fit
• Bit Depth and Sample rate limited to 24-bit/96kHz
• Bit Usage
• Convolve
• Crossfade Loop
• Customizable Keyboard Shortcuts
• Customizable Toolbar
• Dither
• Envelope from Audio
• Find Peak
• Harmonic Rotate
• Import Dual Mono
• ImpulseVerb
• Includes a 2-band edition of the Freq EQ plug-in
Peak 5 User’s Guide22
Page 23
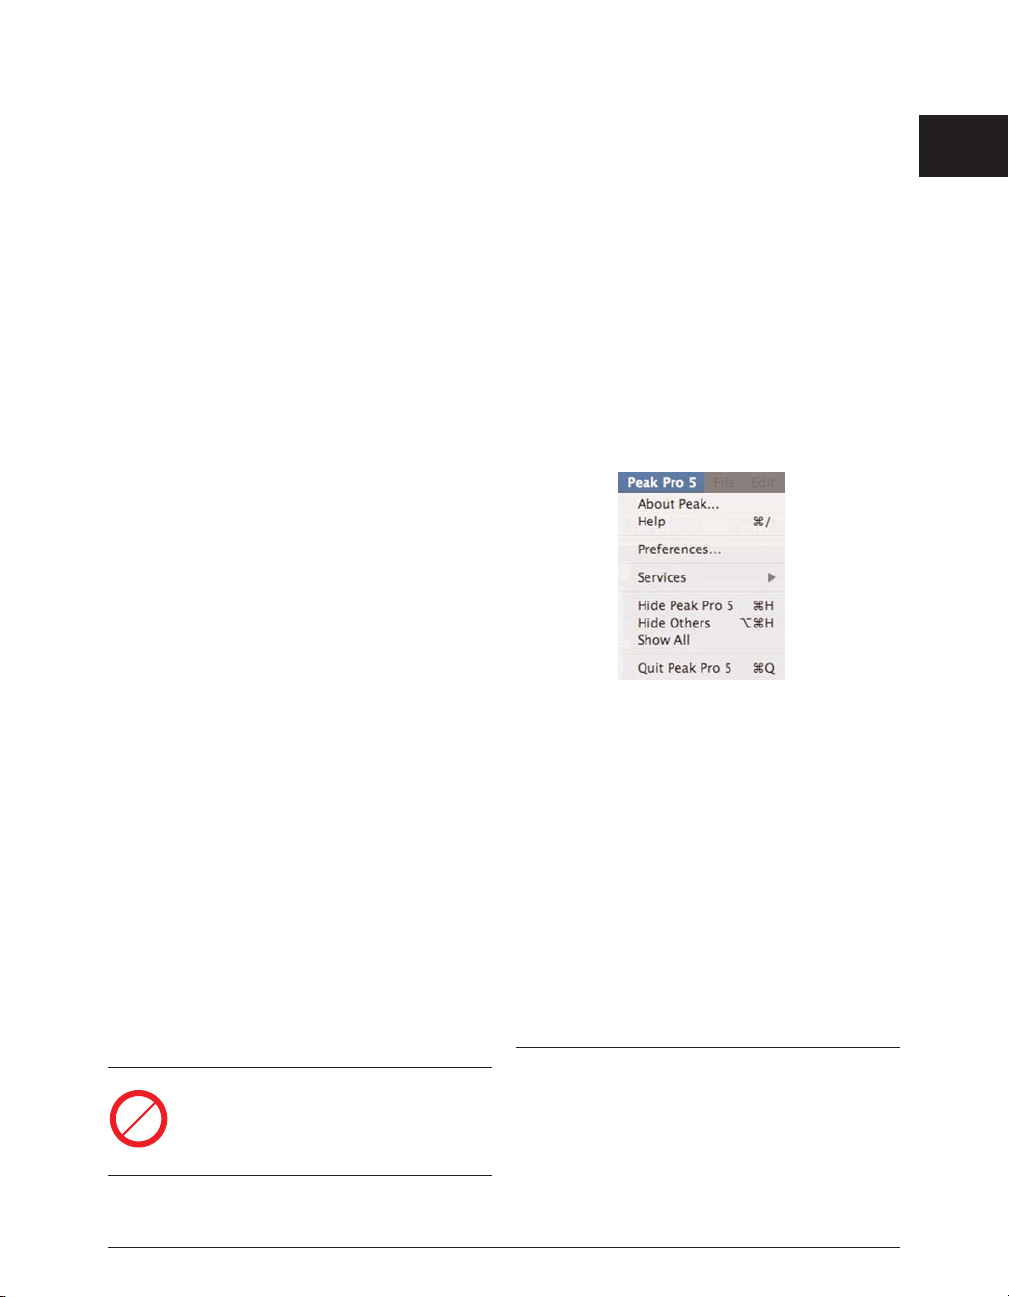
• Limited to using one effect/virtual instrument plugin at a time
• Loop Surfer and Loop Tuner
• Meters Dialog
• Modulate
• Mono To Stereo
• Panner
• POW-r™ Dithering
• Phase Vocoder
• Rappify
• Recording Input Levels
• Recording Notepad
• Remove DC Offset
• Repair Click
• Repair Clicks
• RMS Normalize
• Sampler Support
• Specialized Apple Events for Playback from a
database such as FileMaker Pro
• Stereo To Mono
• Strip Silence
• Swap Channels
• Threshold
• Vbox is not included
Features that are not supported in Peak LE will
show this icon in the manual. Features
unavailable in Peak LE will appear greyed out in
their menus.
Getting Help with Peak
Peak provides a variety of helpful resources when you
run into questions. The first type is Toolbar Help, which
shows you the function of each icon in the Toolbar or
Transport. If you hold the mouse cursor over a
Toolbar/Transport icon for 2 seconds, the Toolbar Help
for that icon’s function will appear.
The next type of help is available under the Peak menu.
Choosing Help will open the .pdf format Peak User’s
Guide, which was installed along with Peak.
You may also use the Links menu to access additional
documentation, tutorials, and technical support online,
via the BIAS website.
BIAS recommends using these resources before
contacting Technical Support. The answers to most
common technical questions can be found online. Best
of all, using online help resources is free, easy, and
available 24 hours a day, 7 days a week, 365 days a year.
If you do need to contact Technical Support, please see
the BIAS Technical Support Policy on page 5 of this user’s
guide.
Conclusion
Now that you know a little about Peak, proceed to the
next chapter to learn how to install your software and get
started using it.
Chapter 1: Introducing Peak
23
1
LE
Page 24

Peak 5 User’s Guide24
Page 25

Chapter 2
Installing, Registering, & Authorizing Peak
Page 26

Peak 5 User’s Guide26
Page 27

Chapter 2: Installing, Registering, & Authorizing Peak
Installing Peak
Peak’s auto-installer software makes installation very easy.
The steps below will guide you through the process.
Your complete Peak system consists of:
• CD-ROM installer
• Serial number
• Authorization File
Before you install Peak, please check the
Minimum System Requirements on Page 21.
To Install Peak:
1. If you are using any virus protection software, turn it off
or temporarily remove it, and restart your Macintosh.
2. Insert the Peak installer CD-ROM into your CD-ROM
drive – when its icon appears on your computer’s
desktop, double-click the Install Peak icon.
3. When prompted about the Installer package
running a program to determine if it can be
installed, click the Continue button.
4. When the Installer dialog appears, click the
Continue button.
5. Read the Software License Agreement – then click
the Continue button to proceed.
6. Click the Agree button if you agree to the terms of
the Software License Agreement.
7. Select the hard drive/volume on which you wish to
install Peak, and click the Continue button.
8. Click the Install/Upgrade button (depending on the
configuration of your user account, you may need to
enter your account password. If prompted for your
password, enter it and click the OK button. If you do
not know your account password, please contact
your system administrator for assistance).
9. When the installation is complete, a message will appear
indicating that the installation was successful. Click the
Close button to quit the Installer. (Don’t forget to turn
back on any virus-protection software that you may be
using the next time you restart the computer).
What Peak Installs:
• Peak Application
• Plug-Ins
• Peak Impulses
• Peak Envelopes
• Documentation
If you would like to register and authorize Peak at this point,
launch the Peak application (which is installed into your
Applications folder by default), and have your Owner’s
Certificate handy, and follow the directions in the next
section.
If you upgraded from an earlier version of Peak
which used a BIAS USB Key for authorization, and
prefer to continue using the key for authorization –
simply plug in the key and Peak will work with it.
Chapter 2: Installing, Registering, and Authorizing Peak
27
2
Page 28

Registration & Authorization
Peak must be authorized to work on your computer. You must
register Peak with BIAS in order to authorize it. BIAS offers a
variety of methods to authorize your computer – though
registering and authorizing via the internet with the computer
on which Peak will be run is by far the fastest and easiest
method. This and alternate methods are outlined below.
Serial Number-Based Authorization System
Peak’s standard authorization system consists of the
following components:
• BIAS Authorization Manager – A simple application
for managing BIAS software licenses.
• Serial Number – Located on Owner’s Certificate.
• Registration Account – Your registration and
authorization information on the BIAS Server.
• Authorization Request File – A file transferred from
your computer to the BIAS server, which adds the
computer you are authorizing to your BIAS
Registration Account.
• Authorization File – A file transferred from the BIAS
server to your computer, which authorizes it to run Peak.
Optional BIAS USB Key-based Authorization
Users who prefer the BIAS USB key-based authorization
system to the standard serial number authorization
system may purchase a key separately, or use an existing,
authorized USB key from a previous version of Peak.
Multi-user or site-license keys are also available, and may be
more convenient than using serial numbers in academic
“lab”, or corporate settings. For more information on
purchasing BIAS USB keys, please contact BIAS Sales, at:
US Toll-Free: 1-800-775-2427
International: +1-707-782-1866
Email: [email protected]
You must register with BIAS in order to authorize
your computer – Peak will not launch unless your
computer is authorized to run it.
The registration/authorization process provides the
following services:
• Registers your software with BIAS - making you
eligible for technical support and product updates.
• Authorizes your computer so it can run Peak. You
may authorize up to two computers for use with
Peak – for example, a studio or office computer,
and a laptop for home or mobile use.
Keep in mind that for each license of Peak – the
software may only be used by one user, on one
computer system at a time. If you have used both
of your authorizations, and need to authorize a
new computer, you will need to first de-authorize
one of the authorized computers before you are
issued a new authorization for the new computer.
To Register & Authorize a Computer to Run Peak:
1. Launch Peak – the first time it is launched on an
unauthorized computer, you will be prompted to
use it in trial mode, or to authorize it – click the
Authorize button.
2. When the BIAS Authorization Manager appears,
select BIAS Peak Pro 5.x in the “Please Choose a
Product” section – then enter your Peak serial
number and email address in the appropriate
fields, and click the Authorize button.
Peak 5 User’s Guide28
Your serial number appears on the Owner’s Certificate, included in the
Peak Pro package, or on the electronic receipt from a downloadable
purchase (not shown here).
Page 29

If you use more than one email address, be sure to
make a note of which one you registered with –
this will make managing your BIAS Registration
Account faster and simpler in the future.
3a. If you have previously registered another BIAS
product, using the same email address, Peak will be
authorized automatically – please continue to step 4.
3b. If the BIAS Registration system does not recognize
your email address (i.e., if this is the first BIAS product
you are registering, or if you enter a different email
address than with previously registered BIAS
products) – a dialog will appear, prompting you to
enter your registration information. Enter your
registration information, and click the Submit button
– a dialog will appear indicating that you have been
successfully registered – please continue to step 4.
4. A dialog will appear indicating successful authorization –
click the OK button, and then click the Done button to
exit the Authorization Manager, and begin using Peak.
Alternate Methods of Registration/Authorization
If the computer on which you plan to use Peak cannot be
temporarily connected to the Internet, even for this onetime authorization process, there are a number of other
ways to register and authorize Peak.
Authorizing Peak with an existing BIAS USB Key (Dongle)
If you have upgraded from an earlier version of Peak,
which used a BIAS USB Key for copy protection, and
prefer to continue using key-based authorization –
simply plug in the key and your computer will be
authorized with the existing Peak authorization on it.
If you choose this method of authorization, be
aware that you will need to have your BIAS Key
with you, and plugged into your computer when
you wish to use Peak!
Registering & authorizing Peak using another
computer with internet access
To use this method of registration/authorization, you will
need to run the BIAS Authorization Manager application
from your installer CD-ROM – or copy the BIAS
Authorization Manager application from your installer CDROM to the internet-equipped computer’s hard drive.
To Register & Authorize using Another Computer with
Internet Access:
1. Launch Peak on the computer where Peak will be used
(i.e., the computer without internet access) – the first
time an unauthorized copy is launched, the Welcome
to Peak dialog appears, click the Authorize button.
2. In the BIAS Authorization Manager dialog, select BIAS
Peak Pro 5.x in the “Please Choose a Product” section
– then enter your Peak serial number and email
address – your Peak serial number is printed on the
Owner’s Certificate included in the Peak package (see
picture on previous page).
3. Click the Alternate Authorization button – the
Alternate Authorization dialog appears.
4. In the Alternate Authorization dialog, click the
Generate Authorization Request button – the
Serial Number/Email Address dialog appears.
5. Confirm that the email address and serial number
are correct, and click the OK button to save an
Authorization Request File to your hard drive.
6. Transfer the Authorization Request File to another
computer that has Internet access (via a LAN, by
burning it to CD, copying to a floppy diskette, flash
drive, external hard drive, iPod, digital camera, etc.)
7. Launch the BIAS Authorization Manager
application on your internet-equipped computer.
8. In the “Please Choose a Product” section, choose
BIAS Peak Pro 5.x.
9. Click the Alternate Authorization button in the
BIAS Authorization Manager application..
10. Go directly to step 3 in the Alternate Authorization
dialog – click the Open Authorization Request button.
11. In the Open dialog that appears, locate and select
Chapter 2: Installing, Registering, and Authorizing Peak
29
2
Page 30

the Authorization Request File, then click the Open
button – this will transmit the Authorization
Request File to the BIAS Server.
12a. If you have previously registered another BIAS
product, using the same email address, the BIAS
server will transmit an Authorization File back to
your internet-equipped computer – click the Save
button to save this to the internet-equipped
computer’s hard drive. Please proceed to step 13.
12b. If the BIAS Registration system does not recognize
your email address (i.e., if this is the first BIAS
product you are registering, or if you enter a different
email address than with previously registered BIAS
products) – a dialog will appear, prompting you to
enter your registration information.
12c. Enter your registration information, and click the
Submit button, then click the OK button when the
successful registration dialog appears.
12d. You will be prompted to open the Authorization
Request File a second time – locate it, and then click
the Open button – The BIAS server will transmit an
Authorization File back to your internet-equipped
computer – click the Save button to save this to the
internet-equipped computer’s hard drive.
13. Click OK to exit the Authorization Successful
dialog, then click the Done button in the Alternate
Authorization dialog, and again in the BIAS
Authorization Manager.
14. Transfer the Authorization File (the file is called “BIAS
Peak Pro 5.x”) from the internet-equipped computer
back to the host computer where Peak will be used
(via a LAN, by burning it to CD, etc.).
15. Go directly to step 4 in the Alternate Authorization
dialog – click the Open Authorization File button.
16. In the Open dialog that appears, locate and select
the Authorization File, then click the Open button.
17. Click OK in the Authorization Complete dialog, and
Done in the Authorization Manager.
To Register & authorize Peak with no internet connection
If you do not have temporary Internet access on any
computer, or need help with any part of the
registration/authorization process, please contact BIAS at:
US Toll-Free: 1-800-775-2427
International: +1-707-782-1866
Deauthorizing a Computer
If you need to de-authorize a particular computer that
will no longer be used to run Peak, you can do so by
following the steps below.
The computer running Peak must be connected to
the internet in order to deauthorize it.
To De-Authorize a Computer:
1. Launch Peak – and choose Authorization Manager from
the Peak menu (or launch the BIAS Authorization
Manager application from your installer CD-ROM).
2. In the BIAS Authorization Manager, select the
product you wish to de-authorize – the serial
number and email address used to authorize that
product will be automatically recalled and will appear
in the Serial Number and Email Address fields.
3. Click the Deauthorize button.
4. Click the Deauthorize button to confirm the
deauthorization process – the Deauthorization
Successful dialog appears.
5. Click the OK button – then click the Done button
in the BIAS Authorization Manager.
Conclusion
Now that you have installed, registered, and authorized
Peak, please proceed to the next chapter to learn several
basic concepts and functions essential to using Peak.
Peak 5 User’s Guide30
Page 31

Chapter 3
Peak Basics
Page 32

Peak 5 User’s Guide32
Page 33

Chapter 3: Peak Basics
Introduction
This chapter explains several key Peak concepts and
functions, including how to open, close, and save audio
documents.
A Brief Explanation of Digital Audio
If you are new to digital hard-disk-based recording, you
may wish to acquaint yourself with a few of the principles
behind digital audio before you dive into using Peak
software. This section explains a few key concepts that
will give you a good general understanding of how Peak
does what it does.
What we hear as sound is actually a pattern of pressure
waves that move through the air. The frequency of these
waves determines the pitch of the sound – how low or
high it sounds. Sound frequency is measured in cycles
per second, or Hertz (Hz). The range of human hearing
is generally considered to be from about 20 Hz at the low
end to 20 kHz at the high end. In practice, however,
most adults hear only as high as 12 kHz to 18 kHz,
especially those of us who may have spent more time
than we should have with headphones or at loud rock
concerts.
Sampling and Sample Rate
Your Peak software-equipped Macintosh computer
stores audio digitally. This means that analog electrical
signals from microphones or other sources are
converted into numbers by a circuit called an analogto-digital converter and stored on hard disk. The
analog-to-digital (A/D) converter uses a technique
called digital sampling to convert analog electrical
signals into numbers. Digital sampling is the sonic
equivalent of taking a snapshot. By taking thousands
of little digital samples per second and storing them to
a hard drive, an A/D converter can capture an accurate
sample-by-sample representation of a sound, much like
a movie is a frame-by-frame representation of a moving
image. The number of samples taken of the audio in a
second is called the sample rate. The sample rate
determines the recording’s upper frequency response.
A higher sample rate delivers higher frequency
response. As a rule of thumb, a digital recording’s
upper frequency response is roughly half of its sample
rate (known as the Nyquist frequency). The audio on
compact discs, for example, is recorded at 44,100
samples each second, or 44.1 kHz. This sample rate is
the standard for professional-quality digital audio, and
provides an upper-end frequency response of
approximately half the sample rate (known as the
Nyquist frequency): 22.5 kHz, somewhat higher than
most people’s hearing range.
Bit Resolution
Another factor that affects the quality of the audio is
the resolution of each sample. The greater the
resolution, the better the quality. To use an analogy
from the film world, just as image resolution and
quality increase with film size (8 millimeter film is
much lower in image quality than 70 millimeter film)
greater bit resolution (8-bit, 16-bit, 24-bit, and 32-bit)
results in better fidelity digital audio. Audio CDs have
a resolution of 16-bits.
Chapter 3: Peak Basics
33
3
Page 34

In practice, the bit resolution determines the
recording’s dynamic range-that is, how many distinct
steps you have to describe a sound’s level, from quiet
to loud. For instance, an 8-bit recording has 256 (28)
levels available, which is the equivalent of 48 decibels
(dB) of dynamic range. On the other hand, a 16-bit
recording has 65,536 (216) levels available, equivalent
to 96 dB dynamic range. (The rule of thumb for
determining the dynamic range in decibels is to take
the bit rate and multiply it by 6.)
About Disk-Based Recording and
Editing
If you are new to hard-disk-based recording, you will
be impressed by the power and control that Peak
software provides for recording and editing digital
audio. You will encounter several new concepts and
techniques for using a disk-based system such as
Peak. Perhaps the most important among these is the
concept of nondestructive manipulation of audio.
Nonlinear Versus Linear Recording
Nondestructive audio manipulation is possible
thanks to the nature of Peak’s recording medium: a
hard disk instead of a roll of analog tape. Unlike
analog tape, which is a linear recording medium,
hard disks provide a nonlinear, or random-access
medium. This is because audio is stored on hard
disk as digital information which the hard disk can
access immediately or randomly (hence the term
“random-access”), simply by moving its read/write
head to the appropriate location and reading the
appropriate data. This allows you to perform such
miraculous feats as cutting and pasting “pieces of
sound” and rearranging material long after it has
been recorded.
Nondestructive Editing
Perhaps most impressive is the fact that with diskbased audio production you need not actually modify
the original source material in any way to accomplish
these feats. In most cases, by cutting and pasting you
are in reality only asking the hard disk to access
portions of the audio file in a slightly different order.
Since Peak doesn’t normally cut up, move around, or
delete the actual recording on the hard drive, it’s said
to be a nondestructive editing system. Peak does not
rewrite the file until you choose to save your edits.
Other manipulations, such as playing audio material
backwards, can be accomplished by reading the data
in reverse order. The power and flexibility of diskbased audio production software such as Peak far
surpasses the capabilities of traditional analog audio
production tools.
Hard Disk Storage Requirements
The actual recording of audio to hard disk requires a
significant amount of storage. This is directly affected
by the sample rate and bit resolution at which you
record: the higher the fidelity, the greater the
requirements for storage. As a guideline, 16-bit, 44.1
kHz audio requires roughly 5 megabytes of storage
per minute of mono recording. Stereo 16-bit, 44.1
kHz audio requires roughly 10 megabytes per minute.
Stereo 24-bit, 44.1 kHz audio requires roughly 15
megabytes per minute.
Hard Disk Maintenance
Because audio recording and playback is a hard diskintensive task, it is important that your hard drive be in
good operating condition. In the computer world, this
means keeping it from becoming fragmented by using
hard drive maintenance software. Fragmentation
occurs as your hard drive begins to run out of
contiguous (uninterrupted) space where it can write
files. If the data that makes up a file is stored at a single
location on your drive, it is much easier and faster for
your drive to find the data and read it. However, as
Peak 5 User’s Guide34
Page 35
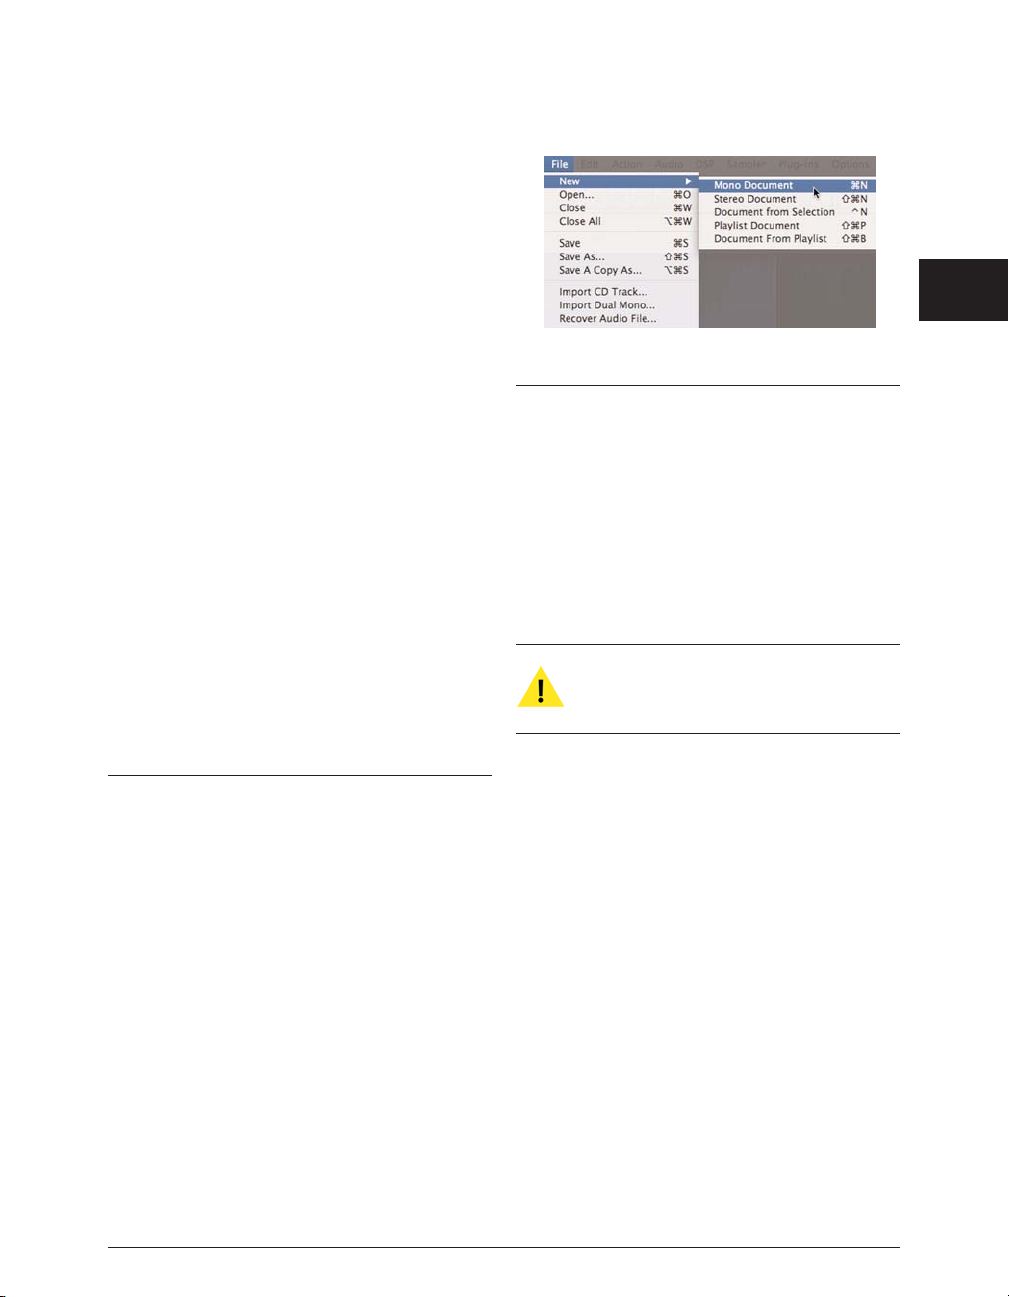
contiguous space runs out, the drive may not be able
to write the entire file in one location and instead must
fragment the file by writing pieces of it at various
locations in whatever smaller open areas it can find.
This requires that the drive search near and far to read
the pieces of the file. Too much fragmentation can lead
to errors in recording and playback as the hard drive
struggles to keep up with the demands of your audio
application. In general, you should keep your hard
disk below 10% fragmentation. Most hard drive
maintenance software packages let you monitor the
degree of fragmentation on your drive and defragment
it by rewriting files into contiguous blocks of data. In
addition to defragmenting your drive regularly, you
should also back up your files and reformat your drive
on a regular basis to keep your system in top operating
condition. By doing this, you will ensure maximum
performance from your Macintosh and Peak software,
and keep your studio running smoothly. Now that you
understand some of the basic principles behind digital
audio and disk-based recording, take a few moments to
learn some of the basic operations of Peak. These are
covered in the sections that follow.
Creating a New Peak Document
Peak will allow you to create an empty audio file of
zero duration by choosing a new mono or stereo
document. However, you would typically record a
new audio file in Peak or open an existing audio file
into Peak for editing. Peak allows you to have
multiple audio documents open at the same time.
To create a new audio document:
Choose New (-N) from the File menu or Toolbar.
This command provides a hierarchical menu, which
allows you to choose either a mono or stereo format
for the new document.
Opening Existing Audio Documents
Peak allows you to open audio files created in a
variety of common audio formats including AIFF,
Sound Designer II, WAVE, QuickTime, Raw, System 7
Sound, Sonic AIFF, Paris, Jam Image, AU, MP3, and
AAC/MP4.
Peak will not allow you to open and edit protected
AAC/MP4 files, such as music purchased from the
iTunes Music Store.
Opening WAVE files
The Macintosh recognizes files using a “type” and
“creator”. WAVE files are recognized by some audio
applications with a type “.WAV”, while others
recognize only “WAVE” as the type. Peak, along with
Apple’s QuickTime software and most other
multimedia applications, recognize WAVE files of the
type “WAVE”, but not of type “.WAV”. You can use
ResEdit or other third-party applications to ensure
your WAVE files have the correct type prior to opening
them with Peak.
Opening Compressed Audio Documents
AIFF/AIFC and QuickTime files with compression
such as MACE 3:1, MACE 6:1, IMA 4:1, QDesign, or
Alaw are compatible with Peak.
Chapter 3: Peak Basics
35
3
Creating a new mono audio document
Page 36
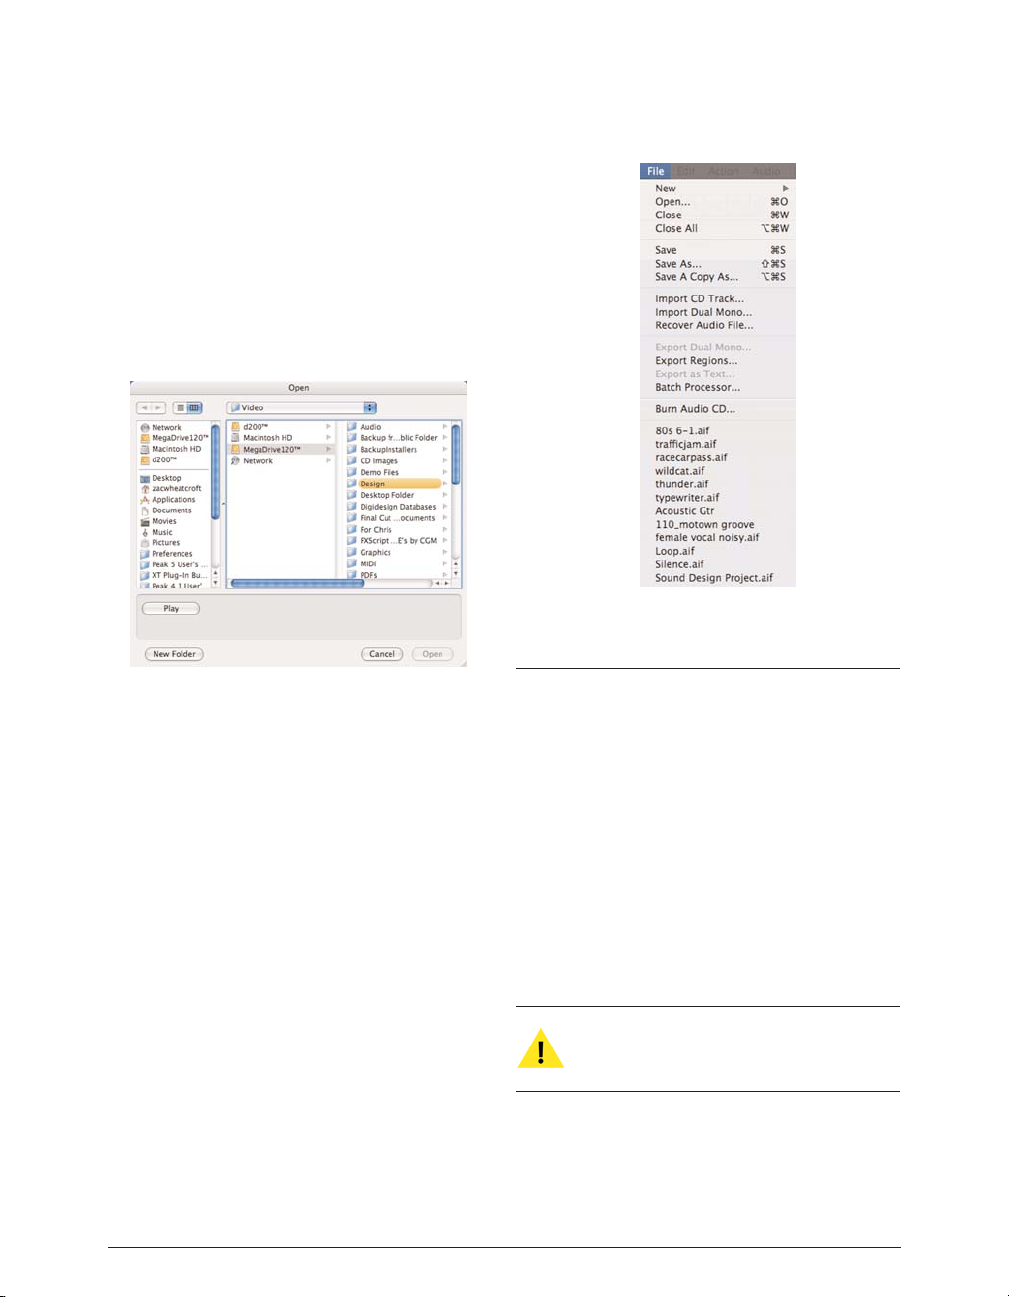
To open an audio file:
1. Choose Open (-O) from the File menu.
2. In the dialog that appears, locate the file that
you wish to open. From this dialog, you can
open AIFF, Sound Designer II, WAVE,
QuickTime, Raw, System 7 Sound, Sonic AIFF,
Paris, Jam Image, AU, and MP3 formatted audio
files.
3. When you find the file you wish to open, click the
Open button and Peak will open the audio file into
a new audio window, displaying an overview of the
entire sound. Shift-click or -click to open
multiple files.
Recently Opened Documents
Peak automatically remembers up to the last eight
audio documents that you have opened and keeps a
list of these at the bottom of the File dialog. This
allows you to easily select a document’s name and
reopen it without having to search on your hard drive.
Peak can find and open a document even if you have
changed its location on your hard drive. If you
change the name of the file, the next time you open
Peak, it will automatically update the name in its
internal list.
Opening “Dual Mono” Files
Certain audio applications, such as BIAS Deck, do not
directly support stereo interleaved files, and instead use
“dual mono” files, which comprise the right and left
channels of stereo material. Peak allows you to open such
dual mono files, and in the process creates a new interleaved
stereo audio document. Because Peak actually writes a new
stereo audio file to disk, this conversion process requires
hard disk space equivalent to the two original mono files.
Please note that the Import Dual Mono command
requires that both files be mono files and have the
same sample rate.
To open a dual mono file:
1. Choose Import Dual Mono from the File menu.
2. In the dialog that appears, locate the desired files.
Peak 5 User’s Guide36
The Open dialog
Recently opened documents are displayed in the lower portion of the
File menu
Page 37
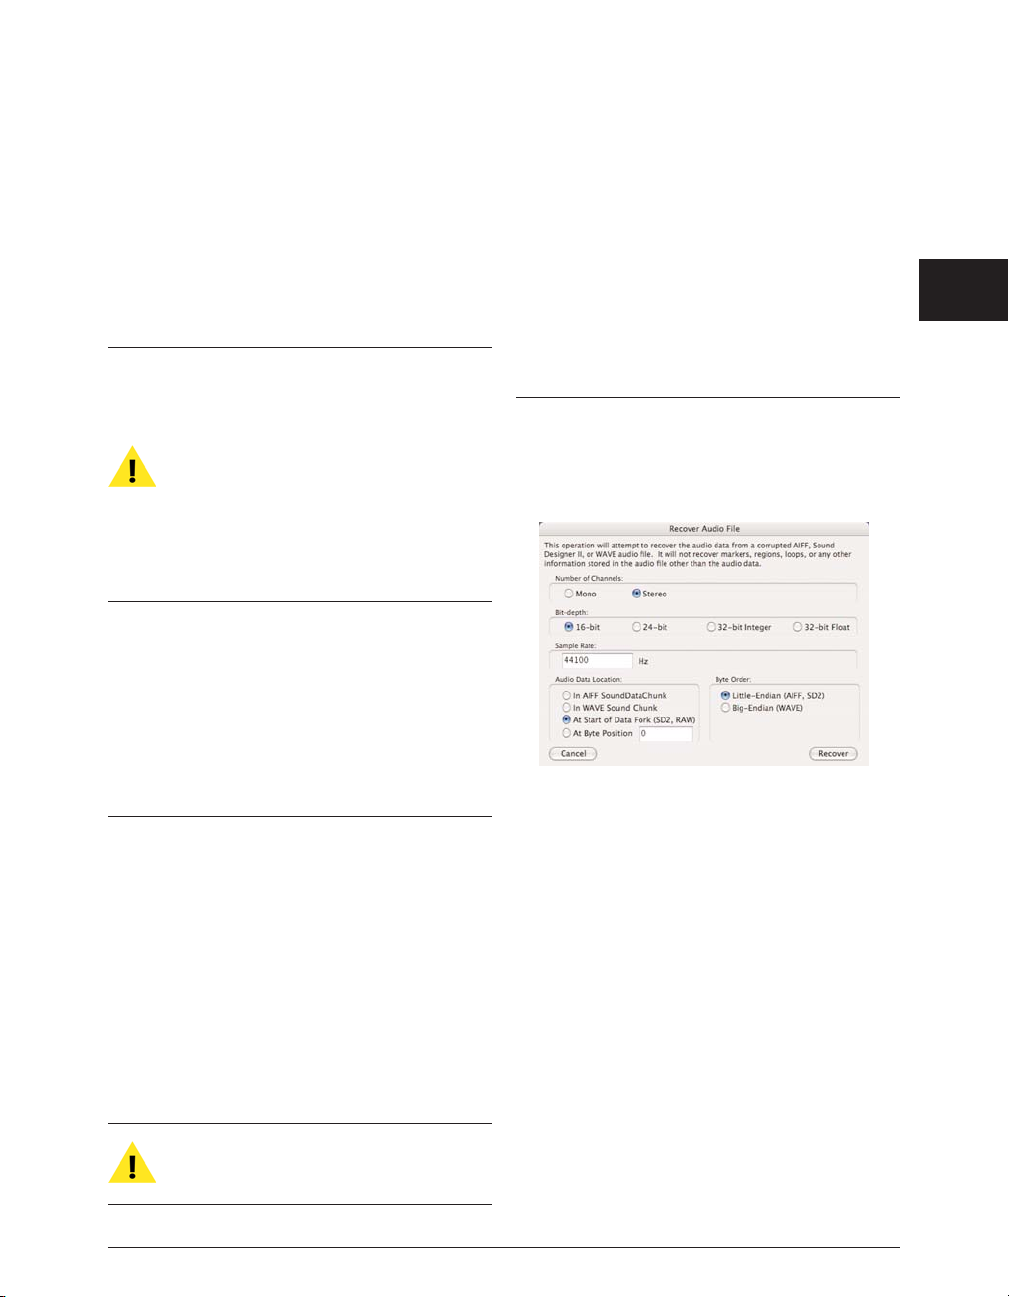
3. Select either half of the dual mono file and click
Open. Peak imports the first file and then prompts
you for the second.
4. Select the second audio file and click Open. When
Peak has finished creating the new stereo audio
document you can begin editing.
For simpler importing of Dual Mono files, turn on
the Auto Import Dual Mono feature in the Optinos
menu. With this feature activated, you can
automatically import dual mono files by choosing
Open from the File menu and selecting one of the
dual mono file’s channels. Peak will then create a
new stereo document containing both channels.
Please note that these dual mono files must have
exactly the same file name with the suffix “.L” for
the left channel and “.R” for the right channel.
Peak also allows you to export your stereo audio documents
in Dual Mono format, which means that it’s easy to import
dual mono tracks from BIAS Deck into Peak, edit and
process them within Peak, and then export them as Dual
Mono files to be reincorporated into your Deck sessions.
Dragging and Dropping Folders,
Disks, and CD Audio Tracks
In addition to opening individual documents by dragging and
dropping them onto the Peak application’s icon, you can drag
and drop entire folders or disks onto the Peak application’s
icon. The contents of the disk or folder(s) will be scanned for
audio documents that Peak can open, such as AIFF, Sound
Designer II, WAVE, QuickTime, MP3, and so on.
This feature is particularly useful when used with
Peak’s Batch File Processor.
Peak allows you to drag a CD audio track directly onto
the Peak icon or open the track directly from the Open
command under the File menu or Toolbar. When you
import a CD track using one of these two methods, the
entire track will be imported. If you do not want to
import an entire audio track, you can still use the Import
CD track command under the File menu (covered in
Chapter 4).
Recovering Damaged Audio Files
Peak 5 includes a new tool called Recover Audio File,
which allows you to open a damaged file, and attempt to
recover the audio data contained in it. This tool extracts
audio data only, and ignores all other information
contained in the file’s header, such as information about
loop points, regular markers, region markers, etc. When
audio data is successfully recovered, it is placed into a
new audio document and must be saved.
There are a few pieces of information that Peak requires, in
order to attempt file recovery – these include the number of
channels, the file’s bit depth and sample rate, the audio data
location, and the byte order. With these few bits of
information (and depending on the degree of damage),
Peak may be able to recover many otherwise unusable audio
files. To attempt to recover a file, you must supply correct
Chapter 3: Peak Basics
37
3
The Recover Audio File dialog
Page 38

information about the format the file was originally recorded
in, otherwise, you may end up with white noise, or a file that
plays at the wrong speed, etc.
When the Recover Audio File encounters corrupt sectors
with media, file, or I/O errors, it will attempt to continue
recovering whatever audio data is available, and will write
the sections containing errors as silence in the new audio
file that is created.
Saving and Closing Documents
It is good practice to save regularly throughout a project
to avoid losing valuable work in the event of a power
failure or other unfortunate occurrence. The Save
command saves the changes you have made to your
audio document by writing it to your hard disk.
The Save command cannot be undone. If you want to be
able to continue to undo your edits, use the Save a Copy As
command under the file menu. Peak allows you to save your
audio documents in a variety of common audio file formats,
each of which is described below. Be aware that different
formats allow different information to be stored with the file.
Peak preserves this information unless you save the file into
a different file format. Saving a file in a format different from
its original format may, however, cause some information
stored in the file to be discarded.
New in version 5 is support for Unicode
characters. This allows non-English characters to
be used when saving files, and also allows the use
of “long” filenames (longer than 32 characters).
Peak supports the following audio file formats:
• AIFF:
This is Apple’s Audio Interchange File Format.
It is also Peak’s default file format and is supported
by many Macintosh software applications.
• Sound Designer II: This is Digidesign’s audio file
format for its digital audio products. Use this
format if you wish to use an audio document in a
Digidesign audio application.
• WAVE/.WAV: This is Microsoft’s Windows Audio File
Format. It is supported by many Windows software
applications and some Macintosh applications.
The WAVE format is best if you plan to use an audio
document in an application that supports or
requires WAVE format files.
• QuickTime: This is Apple’s audio file format for
QuickTime-based multimedia. It is supported by
all Macintosh software applications that support
QuickTime. The QuickTime format is best if you
plan to use an audio document in multimedia
applications that support QuickTime, such as
Macromedia Director™. QuickTime includes
formats such as AAC/mp4.
• Raw: This is the header-less raw file format that
may be useful for some game platforms.
• System 7 Sounds: This is the Apple audio file format
used for Macintosh Operating System Sounds.
• Jam Image file: This is the Jam audio image file
format. Jam audio image files may be created in
Peak and used in Roxio Jam for burning audio CDs.
• Sonic AIFF: The file format used by Sonic Solutions
audio workstations.
• .paf: This is the file format used by E-mu’s Paris
audio system. Note this file format favors mono
and dual mono files.
•.au:This file format is commonly used on the
World Wide Web and in Java audio applets – it is
supported by many platforms and programs.
•MP3: This saves your document in MP3 format.
Encoding as mp3 format requires that the LAME
encoder be installed. For more information on
downloading and installing this encoder, please
see Appendix 3, which contains step-by-step
directions for using the LAME encoder.
Peak 5 User’s Guide38
Page 39
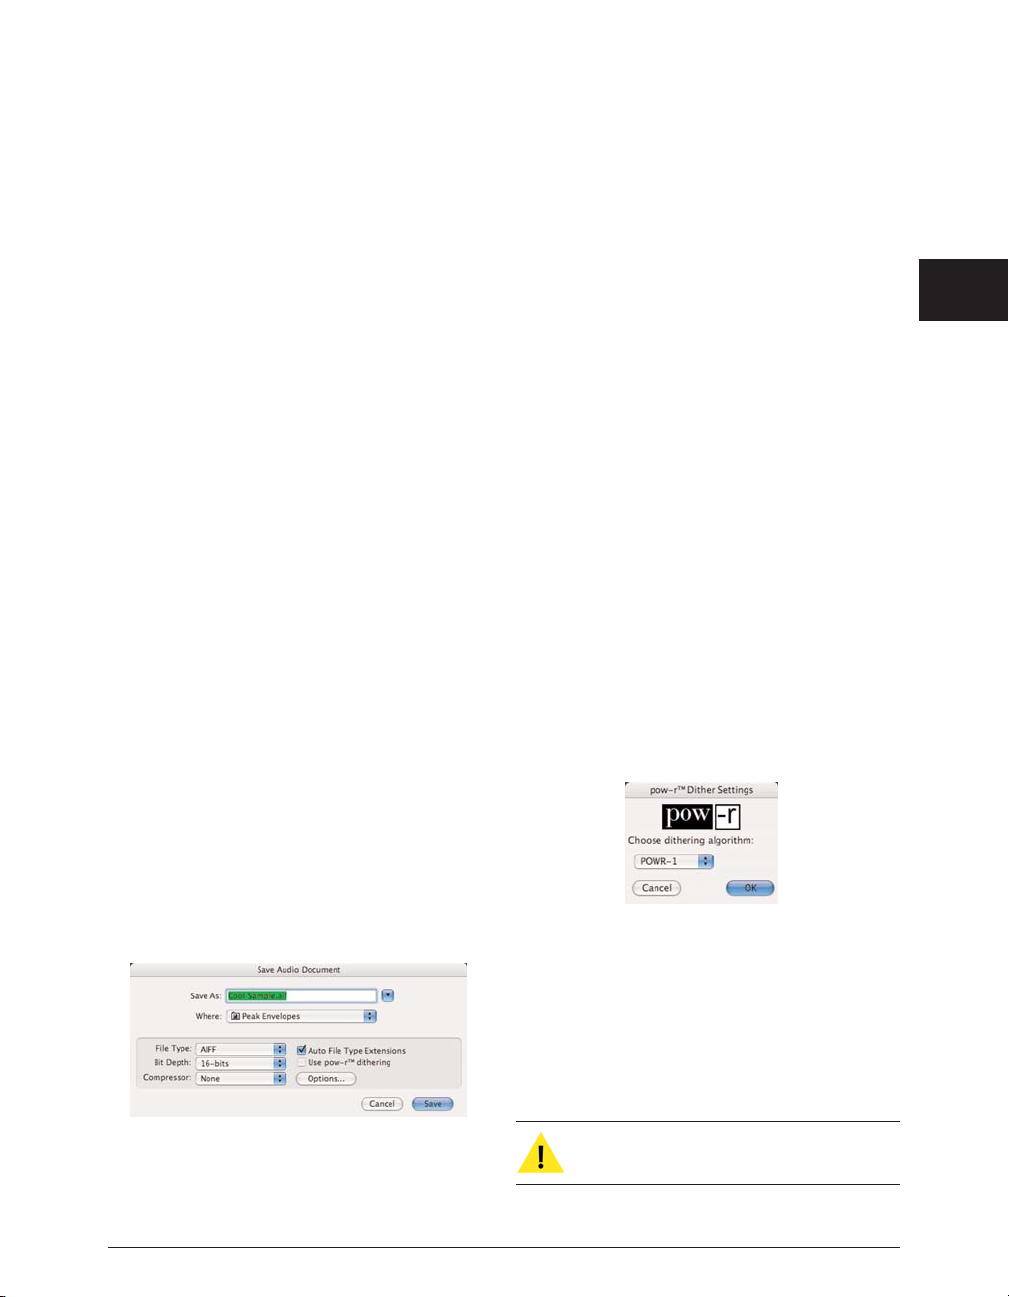
To save a Peak document:
1. Choose Save from the File menu or press -S on
your keyboard.
2. Select a file format from the pop-up File Type
menu. AIFF is Peak’s default audio file format.
3. Enter a name for the new audio document, select
where you want to save the new file, and then click
Save.
Using the Save As and Save A Copy As
Commands
The Save As command allows you to save a copy of
the current document under a different name, or in a
different location on your hard disk. Since the Save
As command closes the current document and lets
you keep working on the renamed copy, it is useful
for saving successive stages of a project. This allows
you to save each major step under a different name.
Later you can retrace your steps should you want to
go back to an earlier version. The Save A Copy As
command will save a copy of the file you are working
on, but it will keep the copy you are working on open.
This allows you to continue working on your audio
and still be able to undo any edits you executed prior
to using the Save A Copy As command.
To save an audio document under another name:
1. Choose Save As (-Shift-S) or Save A Copy As (-
Option-S) from the File menu. The Save dialog
appears:
2. Select the desired file format from the File Type
pop-up menu. AIFF is Peak’s default audio file
format.
3. If you wish to save the audio document to a
different bit depth resolution, click the bit
depth pop-up. It is strongly recommended that
you enable the POW-r™ dithering option if you
are saving to a lower bit depth (e.g., 24-bit to 16bit).
4. Enter a name for the new audio document, select
where you want to save the new file, and click Save.
Using POW-r Dithering
If you are saving to a lower bit depth (e.g., 24-bit to
16-bit), it is strongly recommended that you enable
the POW-r dithering option. Choose the POW-r
Dither Settings from the Preferences dialog to adjust
the settings for POW-r dither. For mono files, or
stereo files with a narrow stereo field (e.g.,
recordings of solo instruments), use POW-r 1; for
more stereophonically complex material, use POW-r
2; for full-spectrum audio with a wide stereo field,
use POW-r 3.
Saving Compressed Audio Documents
AIFF/AIFC and QuickTime files with compression such as
MACE 3:1, MACE 6:1, IMA 4:1, QDesign, or Alaw are
compatible with Peak.
You can only Save with file compression using
AIFF or QuickTime file formats.
Chapter 3: Peak Basics
39
3
The Save dialog
The POW-r™ Dither Settings dialog
Page 40

Audio compression should be the last step in
mastering your audio documents. Decompressing
and re-compressing audio documents will
degrade their sound quality each time they are recompressed, so it is best not to save with
compression until all editing and mastering has
been completed.
To save an audio document with compression:
1. Choose Save As ( -Shift-S) from the File menu.
The Save As dialog appears.
2. Choose the audio compressor you wish to use
from the Compressor pop-up menu. Some
compression formats only work with 8-bit or 16bit data, so the compression options may be
grayed out, depending on your setting in the bit
depth pop-up menu. Some of the types of
available audio file compression include: MACE
3:1, MACE 6:1, QDesign Music, ALaw 2:1, 32-bit
Floating Point, 64-bit Floating Point, IMA 4:1, 24bit integer, 32-bit integer, 16-bit Little Endian,
and 16-bit Big Endian.
3. Click the Options button to adjust the settings
for the specified compression format, and then
click OK.
4. Type the name of the new audio document,
select the folder you wish to save the audio
document, and click Save.
Closing Audio Documents
To close a file in Peak, choose Close from the File
menu (-W ). If you have made any changes to your
document since the last time you saved, Peak will ask
you if you want to save them. If you do, choose Yes;
if you do not, choose No. If you change your mind
and wish to continue your session, choose Cancel. To
close all files currently open in Peak, choose Close All
from the File menu (-Option-W ).
Peak Windows and Palettes
There are several windows and palettes when you
open Peak that either appear by default or are
available to you under Peak’s Windows menu.
Windows that appear in Peak by default include an
audio document window for each audio file you have
open. Windows and palettes that you can turn on or
off include the Transport, the Toolbar, the Contents
Window, and the Movie Window. This section will
cover the basic function of these Peak Windows and
Palettes.
Peak Audio Document Window
Peak Audio Document windows contain a Waveform
Display, an Audio File Info Bar, a Max Level Indicator
in the lower left corner, and an expandable contents
drawer which contains information about markers,
regions, and loops. The Waveform Display is a
graphic representation of the audio file, the Audio
File Info Bar shows the sample rate, bit resolution,
file format and file size of the audio file, and the Max
Level Indicator shows the highest amplitude level in
the audio file. On top of the Audio Document
window is the File Overview, if it is enabled under
the Peak Options menu. The contents drawer is
similar to the Contents Window, but offers a
convenient way to view regular, region, and loop
markers on a document-by-document basis, as well
as a complete edit history for that document. The
Audio Window is described in more detail in Chapter
5.
Peak’s audio document window also contains several
different tool icons representing different cursor
modes. The default cursor is a standard Arrow
Cursor. You can also use the cursor palette to select
a Hand Cursor for scrolling a Pencil Tool for drawing
directly on the waveform at the sample level, and a
Magnifying Glass Tool for zooming the waveform
view in and out. The ESC key on your computer
keyboard will toggle through the four cursor modes.
Peak 5 User’s Guide40
Page 41
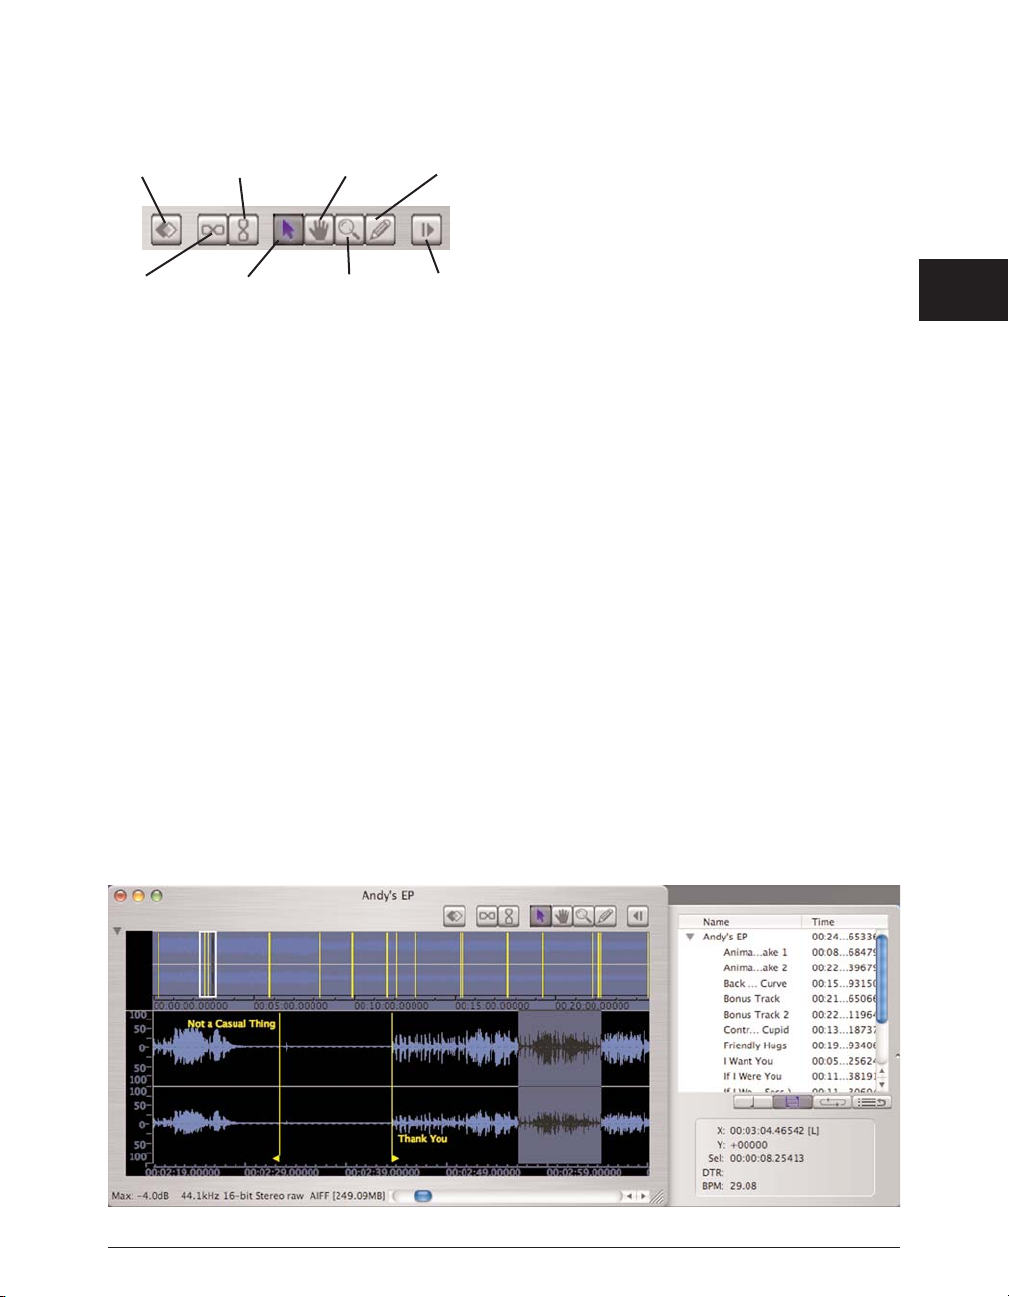
To access any of these cursors or functions, just click
on the corresponding icon. To change the cursor
tool, click on a new icon. The various cursors and
editing modes are discussed briefly below, and in
greater detail in Chapter 5: Editing.
Blending On/Off Button
When Blending is turned on, Peak creates very short
crossfades between sections of audio that are cut,
pasted, copied, or inserted. Blending helps to avoid
clicks and pops that can occur when cutting an audio
waveform at a non-zero crossing, or when combining
material with significantly different amplitude. The
left-most button toggles Blending on and off, and
the Caps Lock key on your keyboard may also be
used to toggle it on and off. More information on
using Blending is available in Chapter 5: Editing.
Horizontal Lock Button
The Horizontal Lock button allows both the Begin &
End markers in a loop or region to be moved
simultaneously. This feature is very useful in
situations where the duration of a selection needs to
be maintained, but the selection needs to be made in
a different part of an audio document. The secondfrom-left button toggles Horizontal Lock on and off.
Vertical Lock Button
The Vertical Lock button allows back-to-back Region
markers sharing the same space between samples to
be moved simultaneously. This is very useful when
cutting a long DJ mix or live recording into “tracks” –
when you need to adjust where a track break will
occur, without introducing any gaps between the two
regions.
Arrow Cursor Tool
The Cursor Tool is the default tool. It is the standard
“arrow” tool that lets you click and select on-screen
items.
Chapter 3: Peak Basics
41
3
Blending On/Off
Horizontal Lock
Vertical Lock
Arrow Cursor
Hand Cursor
Magnifying Glass Tool
Pencil Tool
Toggle Drawer
The Audio Document window, with the Contents Drawer open
Page 42
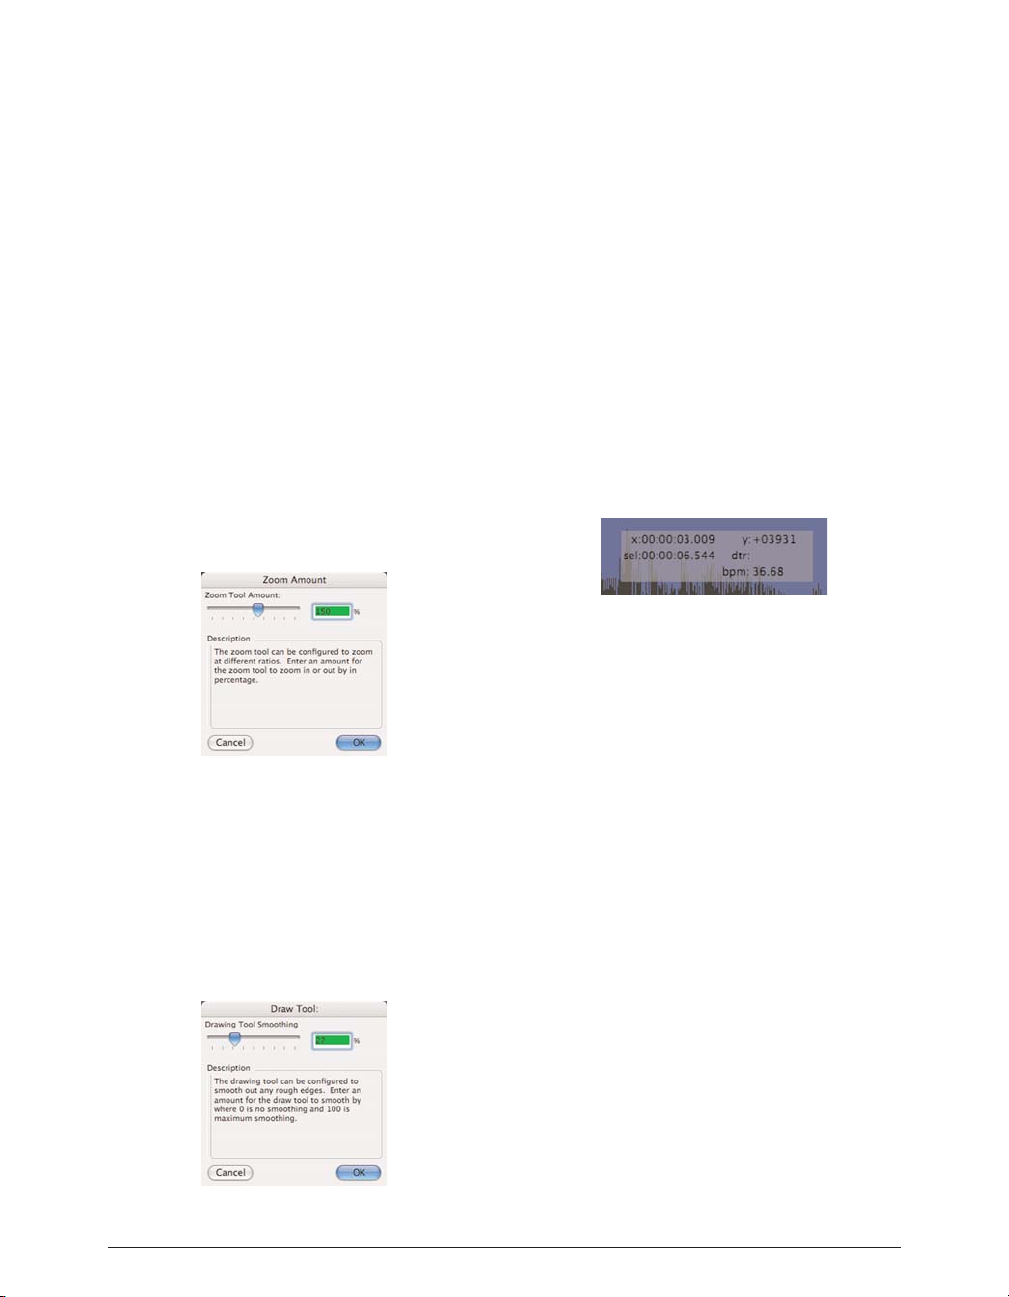
Hand Tool
The Hand Tool lets you scroll a waveform in its window.
Magnifying Glass (“Zoom Tool”)
To use the Magnifying Glass tool, simply click on the tool
in the audio document window, then move the cursor
over the waveform. A “plus” (+) sign will appear inside
the Magnifying Glass. Click on the waveform to zoom in;
each click of the mouse will zoom in farther. To zoom
out, option-click on the waveform. A “minus” (-) sign will
appear in the Magnifying Glass, and you can click on the
waveform to zoom out. Double-clicking on the
Magnifying Glass will open the Zoom Amount dialog
where you can specify the Zoom Amount.
Pencil Tool
The Pencil Tool lets you draw directly on the waveform at
the sample level. This is very useful for drawing out
clicks in the waveform. Double-click on the Pencil Tool
icon for the Drawing Tool Smoothing Settings.
Cursor and Selection Information
The lower section of the audio document window’s
Contents Drawer displays the X (time) and Y (amplitude)
coordinates of the cursor point, Sel: the duration of any
currently selected audio), DTR (Distance to Reference
Marker), and BPM: the tempo in beats per minute. You
can type a value in for the X, Sel, and BPM parameters.
The same information can also be displayed by toggling
the transparent cursor overlay to the “on” position,
which appears next to the mouse cursor, and moves
along with the mouse cursor. Transparent cursor
information can be turned on and off under Peak’s
Options menu (-Shift-T).
The time format displayed in these fields depends on
which time format (Samples, Min:Sec:ms, SMPTE, or
Bars|Beats) you have chosen with the Time Units
command under the Options menu.
Here is how to read the cursor and selection information
that appears in the Cursor Location display.
Y = the current cursor position along the
vertical scale (amplitude), or start point of a
selection
X = the current cursor position
[L] = the cursor is positioned over the left channel
[R] = the cursor is positioned over the right
channel
DTR = distance to the nearest reference marker
Sel = the duration of the current selection
+/- = indicates positive or negative phase
BPM = beats per minute
Peak 5 User’s Guide42
The Zoom Amount dialog
The Draw Tool dialog
The cursor overlay follows the mouse cursor as it moves, and displays
various types of information directly over the waveform
Page 43
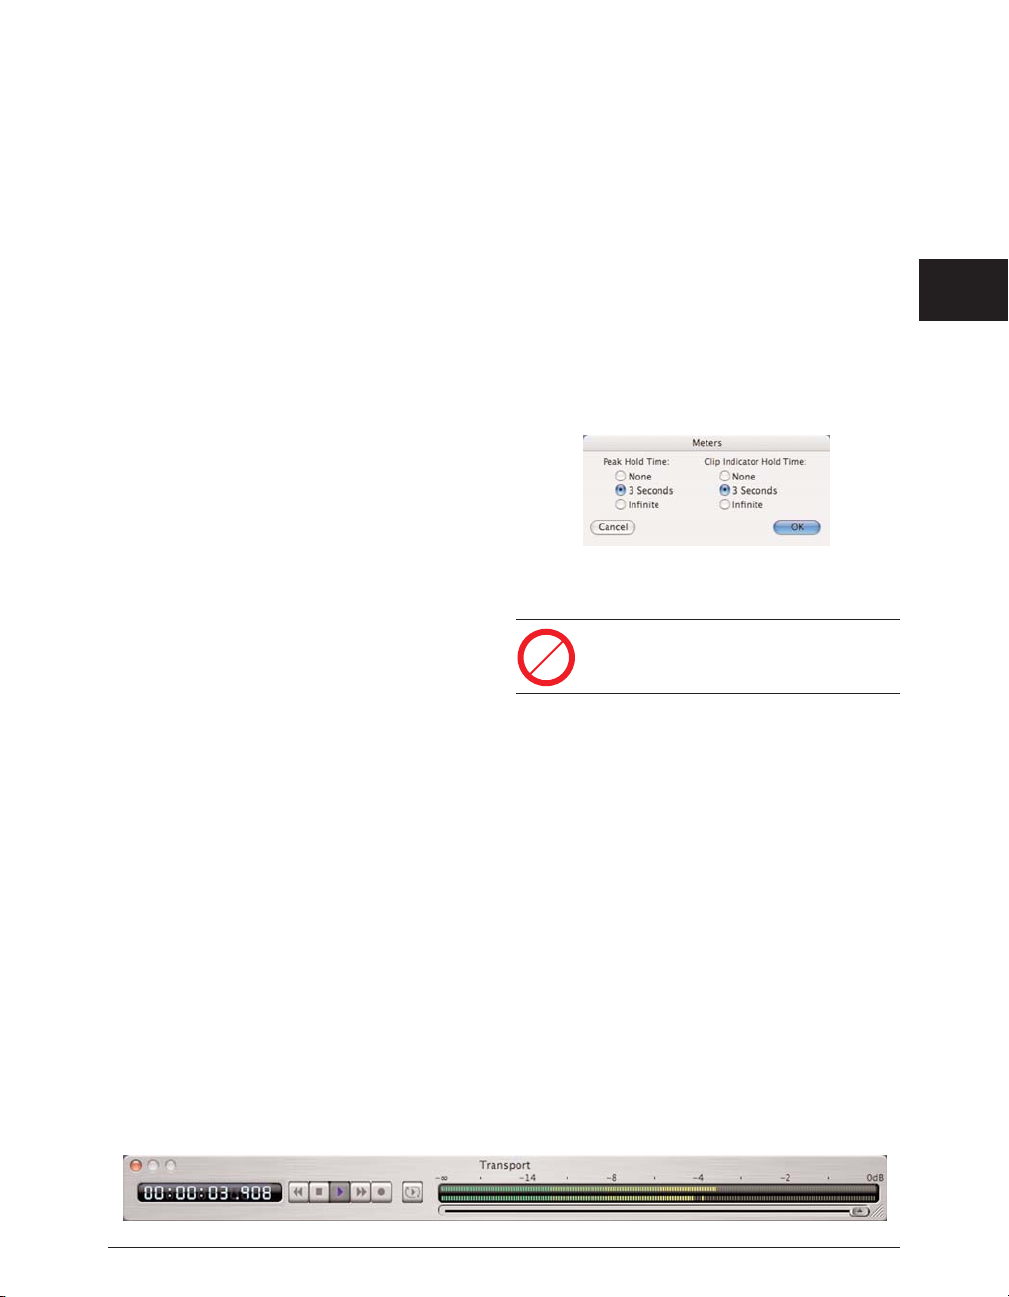
Transport Window
The Transport window is a floating, re-sizable window. It
contains four main components: a time display showing
elapsed time, the Transport controls (Return to Zero,
Stop, Play, Go to End, Record, and Loop during
playback), audio level meters with clip/peak indicators,
and a master fader for playback volume control.
Time Display
Peak’s Time Display serves a number of functions. While
audio is playing, the Time Display shows the elapsed
time in the selected time units format, and tracks the
“playback head”, or cursor. When audio playback is
stopped the Time Display shows the current cursor
location within the audio waveform. Clicking the Time
Display opens Peak’s Go To Time dialog, and allows you
to enter a time value – the insertion point cursor jumps
to this time location in the audio document.
This display will also show the time remaining while
performing Open, Save, DSP processing, or CD-burning
actions.
Meters
Peak’s meters are much like the VU or LED meters on a
mixing board or tape recorder. They are bar graph
meters that show the relative volume or loudness of the
audio as it plays. They are also designed to show peak
volume and whether the signal has “clipped,” or
distorted.
The Meters dialog
You can configure the Meters display by choosing Meters
from the Audio menu, or by clicking the appropriate
button in the Toolbar. Using the Meters dialog, you can
select the Peak Hold time and Clip Indicator Hold Time.
The Peak Hold indicators appear as yellow bars at the far
right of each of the bar graphs as audio plays, and
selecting a hold time causes the indicator to pause for
easy reading of the peak value during playback. The Clip
Indicators appear as red bars at the far right of each of
the bar graphs as audio plays, and are triggered when
audio distorts, or “clips”, and selecting a hold time causes
the indicator to pause for easy reading of any clipping or
distortion that occurs during playback. Setting the Peak
Hold and Clip Indicator Hold Times to None turns these
features off.
The Meters dialog is not available in Peak LE.
Progress Bar
The Meters display changes to a progress bar during
audio processing, and while saving or opening audio
files.
Master Fader
The Master Fader is located just below the level meters,
and is used to control the level of audio documents
being played back in Peak.
Contents Window
Peak has a floating Contents Window that will display all
regular, Region, and Loop markers contained in any open
Chapter 3: Peak Basics
43
3
The Transport contains the Time Display, Transport Controls, VU Meters, and Master Fader
The Meters dialog
LE
Page 44
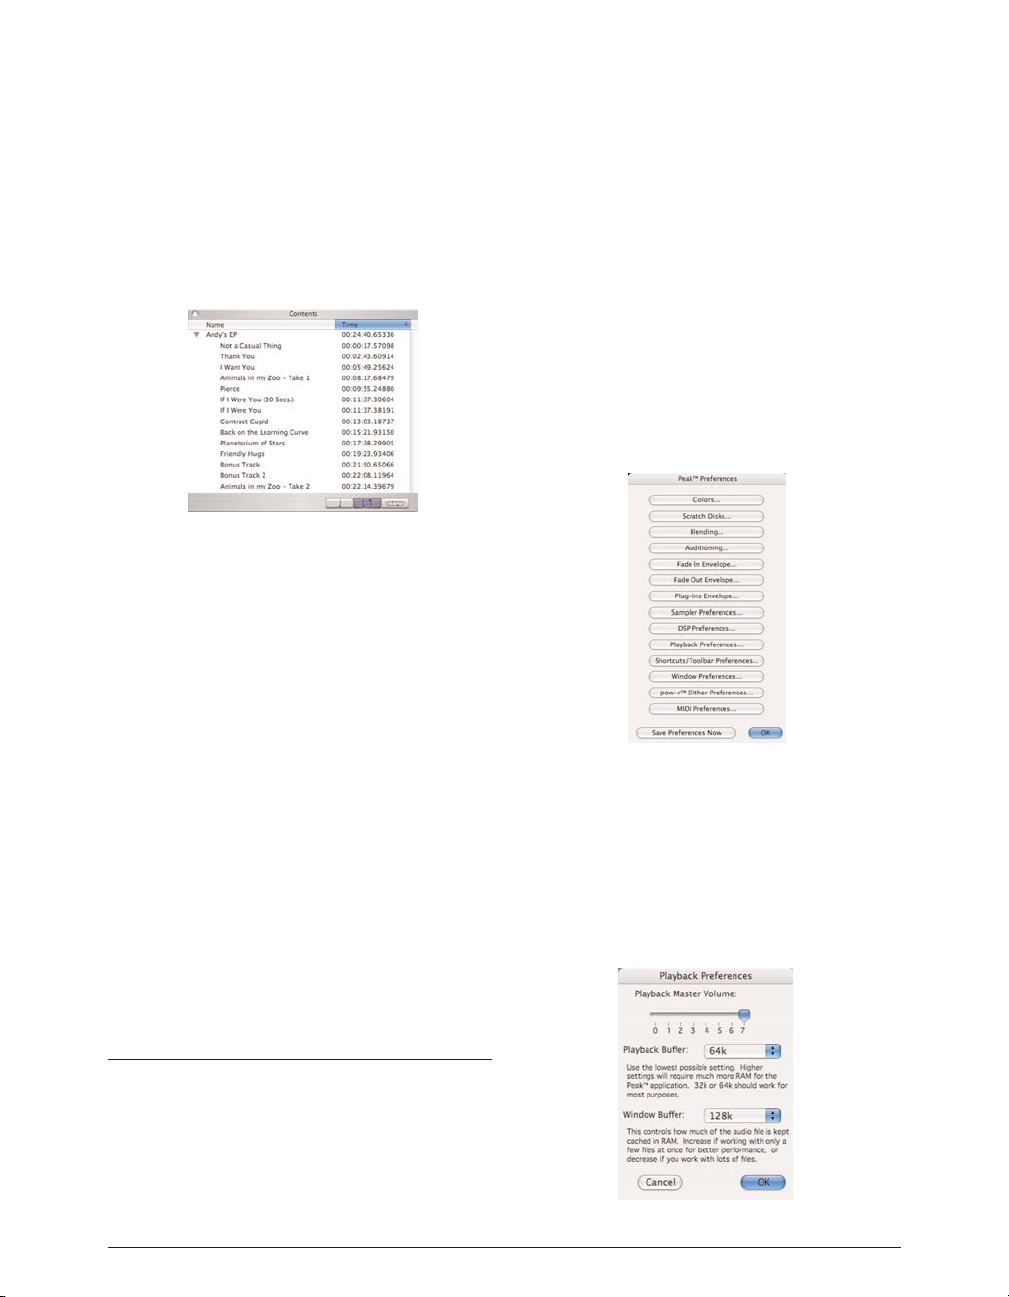
audio documents. There are three buttons at the bottom
of the palette that allow you to select which items to
view-from left to right: the Region Button, the Marker
Button and the Loop Button. Option-double-clicking on
any item in the Contents window will bring up the Edit
Region or Edit Marker dialog.
To resize the Contents Window:
• Click and drag on the lower right hand corner of
the Contents window to resize the Contents
Window.
To resize columns in the Contents Window:
• Click and drag to the right of the column’s title bar
that you want to resize. For example, to make the
Name column wider, click and drag the line
between Name and Time to the right.
To sort columns in the Contents Window:
• Click the title of the column by which you want to
sort. For example, to sort by Time, click on Time.
To change the sort order in the Contents Window:
• Click the sort order button in the column title to
change the sort order.
Setting Preferences
You can customize a number of Peak’s parameters so you
can work with the program in a way that best suits you.
Most of these parameters are found in the Preferences
dialog and Options menu. These include the controls for
playing back audio documents, the selection of the icons
in the Toolbar, and the colors that you want for the audio
document window. Once you have set these preferences
as you like, they will stay that way until you decide to
change them again. This section explains how to set
several of these parameters. For any menu items not
covered here, please refer to Chapter 11: Peak Menus.
There you will find explanations of each command in the
Preferences dialog and other Peak menus. Items from
the Preferences dialog and Options menu are also
covered throughout this manual where their discussion
is relevant.
Setting Peak’s Playback Parameters
Peak’s Playback Preferences dialog allows you to control
the master output volume, hard disk playback buffer
size, and window buffer size.
Peak 5 User’s Guide44
The Contents Window
The Preferences dialog
The Playback Preferences dialog
Page 45

Playback Master Volume
Peak provides a master volume control for audio
playback. In the Playback Preferences dialog, set Peak’s
output volume to the level that you desire by adjusting
the slider or entering a number value from 0 (silent) to 7
(loudest). If you are controlling your playback volume
with the volume control of your playback system, you’ll
probably want to leave the output level set to 7.
Playback Buffer
Peak allows you to control the amount of RAM the
program uses when playing back audio documents.
In general, lower is better. A playback buffer setting
of 32 - 64k is a good place to start. If you are
experiencing clicks in your playback, working with
fragmented files, using processor-intensive real-time
DSP, or are using a slow hard drive, you may need a
larger playback buffer setting.
Window Buffer
Peak also allows you to control the amount of RAM the
program uses to cache audio data and the size of each
processing chunk. Use larger values if you are working
with a few large files, and smaller values if you are
working with many smaller files.
Dynamic Scrub Time
Peak provides a unique audio auditioning technique
called dynamic scrubbing. This feature is very useful
for precisely pinpointing and selecting a desired
location in an audio document. Dynamic scrubbing
allows you to drag the mouse forward or backward
over a waveform while Peak plays a short loop
(between 10 and 600 milliseconds) at the scrub
location. When you have found the location you are
looking for, let go of the mouse and the insertion
point will be exactly where you want it to be. Peak
allows you to choose the length of this playback loop
with the Dynamic Scrub Time command in the
Options menu. You can also select Tape-Style
Scrubbing in this dialog. For a full description of
scrubbing audio in Peak, please see Chapter 5.
To select a loop duration for dynamic scrubbing:
1. Choose Dynamic Scrub Time from the Options
menu, and choose a duration from the hierarchical
submenu. Typically, a value of between 40 to 80
milliseconds works well.
2. You can also select Tape-Style Scrubbing by selecting it
in this submenu. To deselect Tape-Style Scrubbing,
just click any duration value in the submenu.
Scroll During Playback
With the Scroll During Playback command enabled, Peak
will “scroll” through the audio document as playback
progresses. This allows you to visually follow the
progress of audio playback. A check next to this menu
item indicates that it is enabled.
To enable Scroll During Playback:
1. Select Scroll During Play from the Options menu.
A check next to this item indicates it is enabled.
2. To disable Scroll During Playback, simply re-select
Scroll During Play from the Options menu. The
absence of a check next to this item indicates it is
disabled.
Move Waveform During Playback
With the Move Waveform During Play command enabled,
Peak will move the waveform under the cursor as
playback progresses, so that the playhead cursor is
always in the middle of the waveform display. A check
next to this menu item indicates that it is enabled.
To enable Move Waveform During Playback:
1. Select Move Waveform During Play from the
Options menu. A check next to this item indicates
it is enabled.
Chapter 3: Peak Basics
45
3
Page 46

2. To disable Move Waveform During Playback, simply
re-select Move Waveform During Play from the
Options menu.
Show Marker Times
With the Show Marker Times command enabled, all Peak
markers will show a time value as well as the marker
name.
To enable Show Marker Times:
1. Select Show Marker Times from the Options menu.
A check next to this item indicates it is enabled.
2. To disable Show Marker Times, simply deselect
Show Marker Times from the Options menu. The
absence of a check next to this item indicates it is
disabled.
Auditioning
Peak’s Auditioning command allows you to audition a
selection along with a specific amount of audio
preceding or following it. The Auditioning dialog allows
you to select a desired amount of pre-roll or post-roll
when you play the selection. To play a selection with the
selected amount of pre- and postroll, press ControlSpacebar.
To configure Auditioning:
1. Select Auditioning from the Preferences dialog –
The Auditioning Preferences dialog appears.
2. Enter the desired amount of Pre-roll and Post-roll,
and click OK.
Blending
Blending is an automatic crossfade function with a usereditable envelope. Peak can apply blending to areas of
an audio document when they are modified by cutting,
deleting, or other editing processes in order to smooth
abrupt transitions between waveform amplitudes. It can
be very useful for creating a smooth transition between
edits that would otherwise sound too abrupt. If you have
cut, pasted, or inserted audio into a document, you may
wish to enable blending to smooth things out a bit. It
can be toggled on or off by clicking the Blending button
in the Audio Document Window, or by using the caps
lock key on your keyboard.
To configure Blending:
1. Select Blending from the Preferences dialog. Enter
the Duration over which you wish Blending to
occur into the dialog box.
2. To edit the Blending Envelope, click on the Edit
Blending Envelope button. Click OK to exit the
dialog and click Save Preferences Now to save the
change.
For detailed instructions on how to use blending or how
to edit the blending crossfade envelope, see Chapter 5:
Editing.
Auto-Import Dual Mono
Certain audio applications, such as BIAS Deck and
Digidesign’s Pro Tools, do not directly support
interleaved stereo files, and instead use “dual mono”
files-a pair of files, one for the left channel and one for
the right channel. These files have typically been
exported with the suffix “.L” for the left channel, and the
suffix “.R” for the right channel. Auto-Import Dual Mono,
when selected, will allow you to select just one channel
of the dual mono file in the Open dialog. Peak will
automatically “grab” the other half of the file, and convert
both files into a single stereo Peak document.
Peak 5 User’s Guide46
The Auditioning dialog
Page 47
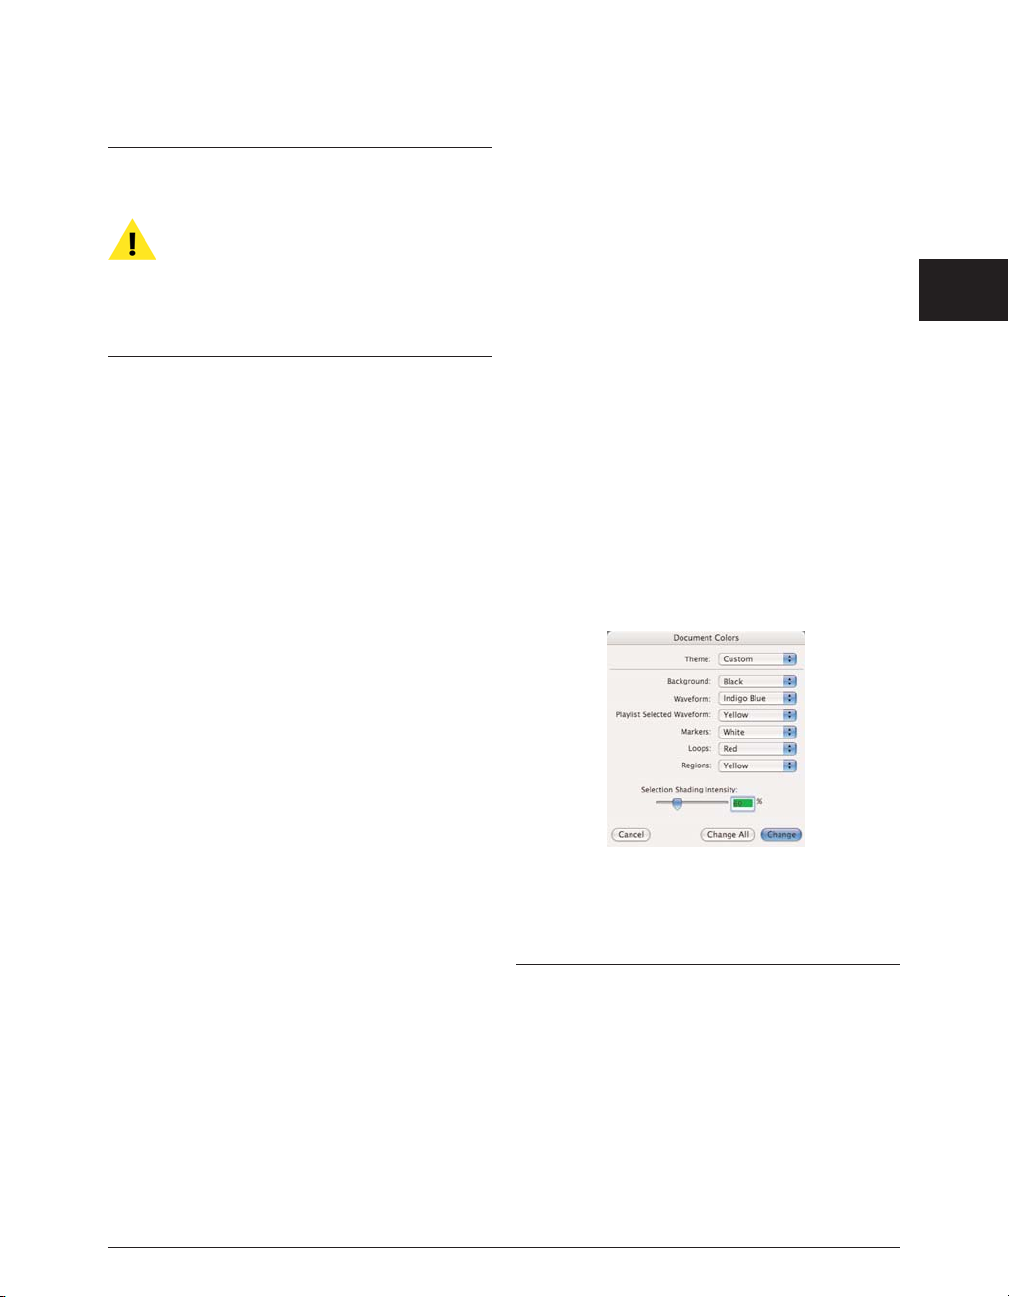
Please note that the Import Dual Mono command
requires that both files be mono files, have the
same sample rate and bit depth, and the must
have the exact same name followed by the suffixes
“.L” and “.R”. If you are using file type extensions
(.aif, .wav, etc) the format must be
“Filename.Side.Extension”. For example –
“Song1.L.aif ” and ”Song1.R.aif ”.
To enable Auto-Import Dual Mono:
1. Select Auto-Import Dual Mono from the Options
menu. A check next to this item indicates it is
enabled.
2. To disable Auto-Import Dual Mono, simply reselect
Auto-Import Dual Mono from the Options menu.
The absence of a check next to this item indicates
it is disabled.
Choosing Colors for the Audio Document Window
Peak allows you to customize the colors used to
display the elements in audio documents. You can
use this dialog to set the background color,
waveform color, and colors for markers and loops.
You can select either a preset color combination,
or individual colors for each element in the audio
document window, as well as picking your own
custom colors from a color palette. Changes made
using the Colors dialog affect both the current
audio document’s colors, and any subsequent new
audio document’s colors.
To customize the colors of the waveform display:
1. Choose Colors from the Preferences dialog.
2. To select a preset color combination, click the
Theme pop-up menu and choose the preset that
you desire.
3. Alternatively, to select individual colors for each
element in the audio document window, choose
Custom from the Theme pop-up menu and then
select the desired colors from the Background,
Waveform, Markers, Loops, and Regions pop-up
menus.
4. If you wish, you can use this dialog to further
customize any element in the audio
document window. Pick an element to
customize, choose Custom from the Theme
pop-up menu, and select User Color. A
standard Macintosh color palette will appear.
Use this wheel to select any color you wish.
Click OK to return to the Colors dialog.
5. To close this dialog, click Change (to change one
color) or Change All (to change the colors for all
open audio documents). The audio document
window is now set to the colors and look you’ve
selected.
Choosing a Time Format
The Time Units command allows you to choose a time
format for the audio timeline in Peak’s audio document
window. You can choose Samples, Seconds, SMPTE frames,
and Bars|Beats. The format you choose will depend on the
Chapter 3: Peak Basics
47
3
The Colors dialog
Page 48
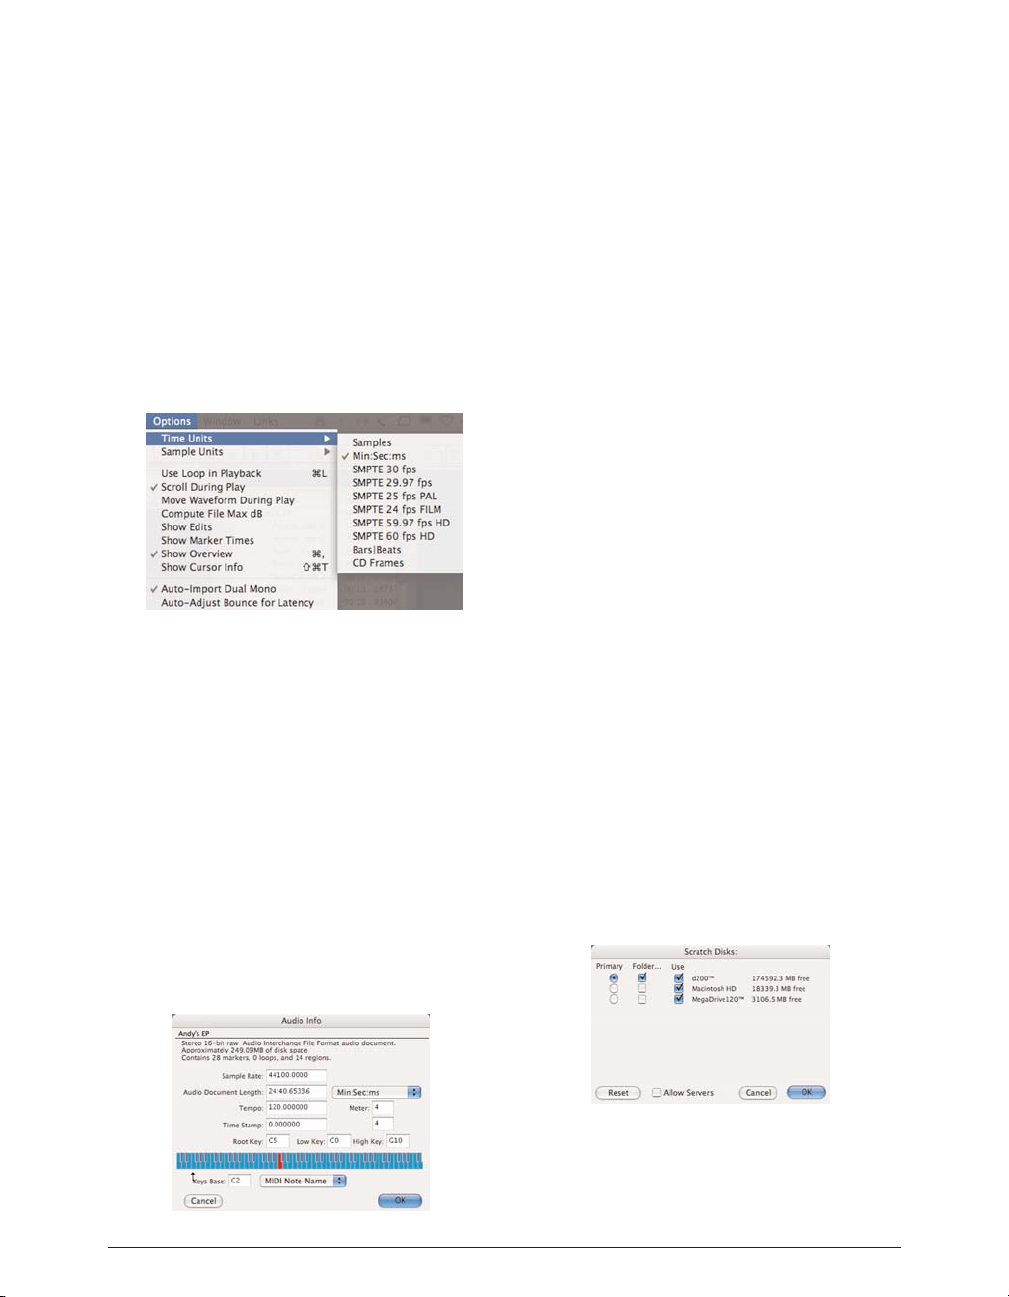
nature of the project that you are working on.
To choose Peak’s time format:
1. Choose Time Units from the Options menu.
2. From the submenu, choose the time format that
you desire: Samples, Min:Sec:ms, SMPTE frames,
Bars|Beats, or CD Frames. The timeline in Peak’s
audio document window and Transport switches to
the format that you choose.
Audio File Meter, Tempo, and Timestamp
Settings
If your audio document is using bars|beats as its units,
you will want to tell Peak what the tempo of the audio
document is. Use the Audio Info command from the
Options menu-or enter the BPM in the Cursor palette-to
set the tempo of the audio document. You can also enter
the meter of an audio document using the Audio Info
dialog. The numerator represents the number of beats
per measure, and the denominator represents the value
of a beat, where 4=quarter note, 8=eighth note,
16=sixteenth note, and so forth.
You may also enter a timestamp for the audio document in
seconds. If the audio document has a timestamp, then the
displayed time in an audio document will be offset from this
time rather than starting at zero. For example, if the
timestamp for an audio document is four seconds, then the
first sample in the audio document will appear in the audio
document with a time of 4 seconds instead of zero seconds.
Choosing a Scratch Disk
Because audio data can be very large, Peak utilizes a portion
of your hard disk’s free space to hold audio data that has
been cut or copied, as well as for temporary or scratch files
for undo purposes. If your hard disk is short on space, you
may not be able to cut, copy, or modify large selections. If
you have more than one hard drive attached to your
Macintosh, the Scratch Disks section in the Preferences
dialog allows you to choose the hard drives (or “scratch
disks”) that you wish to use for these temporary files. Peak
allows you to select which disk you want to have as your
default, or “Primary” disk for this purpose-usually you would
select the disk that has the most free space. If you are
connected to a file server, you can utilize available storage on
the server by clicking the Allow Servers checkbox. Any
available servers will then appear in the Scratch Disks popup menu. This feature is recommended only if you have
access to a high speed Ethernet, or other fast server.
To choose a scratch disk for temporary files:
1. Choose Scratch Disks from the Preferences dialog.
The Scratch Disks dialog appears.
2. The Scratch Disks dialog will show all hard drives
currently connected to your Macintosh. Choose the
Peak 5 User’s Guide48
Choosing a time format with the Time Units command
Audio Document Info
The Scratch Disks dialog
Page 49
hard drive(s) that you wish Peak to use when it creates
temporary files by clicking the checkboxes next to the
drives in the list. To choose the Primary Disk, or the
default disk for temporary files, click on the Primary
button next to that disk. If you are connected to a file
server and would like to use storage available there as
well, enable the Allow Servers checkbox.
3. Click OK to close this dialog. Peak will use the disk
you have selected as your Primary scratch disk,
and, if it becomes full, will then use the other disks
you’ve chosen.
The hard drive with the original audio file must
have the equivalent amount of free space (i.e., a
60MB file would require that there be an
additional 60MB of free space on the hard drive
on which the file resides).
You must have write permissions for the selected
Scratch Folders and Disks or else Peak will report
an error. Contact your System Administrator if
you need assistance changing Directory or Disk
permissions.
Keyboard Shortcuts
Peak allows you to customize any Peak menu item with a
keyboard shortcut. To change your keyboard shortcuts,
go to the Preferences dialog and select the Shortcuts and
Toolbar item. Preferences are stored in a file called Peak
5.0 Shortcuts, located in:
Users/<YourUserAccount>/Library/Preferences/
Peak’s default Keyboard Shortcuts are listed in Appendix
1 at the end of this manual.
To add a new Keyboard Shortcut:
1. Choose Shortcuts & Toolbar in the Preferences
dialog.
2. Scroll through the list of menu items, or, with the
list box selected, simply type in the first few letters
of the menu item you wish to assign. Then click on
the name of the Peak menu item you wish to assign
a new keyboard shortcut.
3. Use the Shortcut Key box to enter the letter you
wish to use for a shortcut. You may select the
Command, Option, Shift or Control keys as
additional modifiers by clicking on the checkboxes
in this dialog.
4. Close the Shortcuts/Toolbar Preferences dialog.
To remove a Keyboard Shortcut:
1. Choose Keyboard Shortcuts in the Preferences
dialog.
2. Scroll through the list of menu items, and click on
the name of the Peak menu item for which you
wish to remove a keyboard shortcut.
3. Click on the Clear button.
4. Close the Shortcuts/Toolbar Preferences dialog.
User-defined Keyboard Shortcuts and Toolbar
customization are not supported in Peak LE.
Making a Keyboard Shortcuts “Cue Card”
It’s easy to make a “cue card” that you can keep on your
desk with all the Peak shortcuts you’ve assigned. Using
the supplied FileMaker Pro template, you can import all
of your shortcuts from a text file describing each
keyboard shortcut generated from Peak.
To Create A Custom “Cue Card” of your Keyboard
Shortcuts:
1. Choose Shortcuts/Toolbar Preferences in the
Preferences dialog.
2. Click on the Save As Text button.
3. Enter the name of the keyboard shortcuts text file
Chapter 3: Peak Basics
49
3
LE
Page 50

you wish to save, and choose the disk and folder
you wish to save into. Click Save.
4. Switch to the Finder and Launch FileMaker Pro.
5. Choose Open from the File menu in FileMaker Pro.
6. Open the supplied “Peak Shortcuts Template”
FileMaker Pro template.
7. Choose Import Records from the File menu in
FileMaker Pro.
8. In the pop-up menu at the bottom of the Open
dialog in FileMaker Pro, choose Tab-Delimited.
9. Find the shortcuts text document you saved in step
3 and click Open.
10. FileMaker Pro will add the records to the database.
11. Use the Print option in FileMaker Pro’s File menu
to print out your keyboard shortcuts. You can also
sort the imported keyboard shortcut commands by
description or shortcut. Consult your FileMaker
Pro User’s Guide for more information on
importing records, sorting records, and printing.
FileMaker Pro is not included with Peak.
The Toolbar
Peak allows you to select almost any Peak command for
the Toolbar. The Shortcuts & Toolbar menu allows you
to group together the functions you use most often, so
that you can simply click a button instead of going to the
menus. For example, if you frequently use Normalize
and Pitch Change, you can choose to have the icons for
these functions in the Toolbar, so that all you have to do
to use one of them is to make an audio selection and
click a button. The Toolbar is an easy way to make your
work in Peak faster and more efficient, allowing you to
customize the program to suit the way you work.
To add or subtract items from the Toolbar, use the
Shortcuts & Toolbar item in the Preferences dialog.
Toolbar selections are stored in a preference file called
“Peak 5.0 Shortcuts” located in:
Users/UserName/Library/Preferences/.
You can reshape and resize the Toolbar by clicking on
the lower right corner of the Toolbar window and
dragging to the desired shape and size. The Toolbar
can be arranged horizontally, vertically, or as a
“cluster” of buttons. Icons in the Toolbar can be sized
anywhere between 16 x 16 pixels to 64 x 64 pixels.
To add a new icon to the Toolbar:
1. Choose Shortcuts/Toolbar Preferences from the
Preferences dialog.
2. Scroll through the list of menu items, and click on
the name of the Peak menu item you wish to have
appear in the Toolbar.
3. Click on the “Place In Toolbar” checkbox to select
the icon to add to the Toolbar. If there is no icon,
the menu item cannot be placed in the Toolbar.
4. Close the Shortcuts/Toolbar Preferences dialog.
To remove an icon from the Toolbar:
1. Choose Shortcuts/Toolbar Preferences from the
Preferences dialog.
2. Scroll through the list of menu items, and click on
the name of the Peak menu item you wish to
remove from the Toolbar.
3. Click on the checkbox to uncheck the item you
wish to remove.
Peak 5 User’s Guide50
The Toolbar’s buttons, size, and horizontal/vertical orientation are all user-configurable
Page 51

4. Close the Shortcuts/Toolbar Preferences dialog.
Customizable Toolbar is not supported in Peak LE
To resize icons in the Toolbar:
1. Choose Shortcuts/Toolbar Preferences from the
Preferences dialog.
2. Move the Toolbar Icon Size slider to the left for
smaller icons, or to the right for larger icons.
3. Close the Shortcuts/Toolbar Preferences dialog.
Quitting Peak
When you have finished a project or wish to end an
editing session, the Quit command allows you to quit
Peak and return to the Finder. If you haven’t saved
changes, Peak will warn you before allowing you to quit.
To quit Peak:
• Choose Quit from the Peak menu (-Q).
If you have made any changes to your document since
the last time you saved, Peak will ask you if you want to
save them. If you do, choose Yes; if you don’t, choose
No. If you change your mind and wish to continue your
session, choose Cancel.
If you wish to close all currently open windows
without saving, hold down the Option key and
click Don’t Save.
Conclusion
You now know how to create, open, import audio files,
export, close, and save Peak documents. You also know
how to set the preferences for operating Peak. The next
chapter explains how to use your Peak software to record
audio to disk.
Chapter 3: Peak Basics
51
3
LE
Page 52

Peak 5 User’s Guide52
Page 53

Chapter 4
Playback & Recording
Page 54

Peak 5 User’s Guide54
Page 55

Chapter 4:
Playback and Recording
Introduction
In this chapter you’ll learn how to play and record audio
with Peak. Peak allows playback of many digital audio file
formats, and can record any audio source that’s
connected to your Macintosh. Playback and recording
may be performed using either the built-in audio
hardware in your Macintosh, or with a wide variety of
third-party audio hardware interfaces (USB, FireWire,
PCI, PCMCIA, etc).
Peak may also be used as a host for playing and recording
virtual instrument plug-ins, recording soundtracks for
QuickTime movies, and importing tracks from audio
CDs.
Core Audio
Peak supports Apple’s Core Audio when using the Mac’s
built-in audio hardware, as well as with third-party
interfaces, such as those made by Digidesign™,
Edirol™, M-Audio™, MOTU™, PreSonus™, Tascam™,
and many others.
A list of many compatible audio hardware interfaces is
available on the BIAS website:
http://www.bias-inc.com/support/hardware/
Please note that this list reflects interfaces that
have been tested with Peak, and is updated
regularly. If an interface is not listed here, it does
not mean that it is not compatible with Peak. The
general rule for hardware compatibility is, if a
compatible Core Audio driver is provided by the
hardware’s manufacturer, or Mac OS X natively
supports the hardware device – Peak is
compatible with it.
For Peak to work properly with third-party audio hardware
devices, they must either be natively supported by Mac OS X –
or, you will need to install a compatible Core Audio driver
provided by the audio hardware manufacturer. Be sure to
consult the audio hardware manufacturer’s instructions when
installing & configuring your audio interface.
Using Core Audio is highly recommended! Using the
Sound Manager (i.e., Mac OS X HAL or FireWire DV)
settings is uncommon and is not addressed in this
chapter. The only reason to record or play back audio
using Sound Manager (Mac OS X HAL or FireWire DV ) is
because you are using a third-party audio hardware
interface or other device (such as a DV camera) as an
input or output device – that is not compatible with Core
Audio. For more information on recording and
playback using Sound Manager (Mac OS X HAL or
FireWire DV) audio, please see Appendix 4.
Chapter 4: Playback & Recording
55
4
Page 56
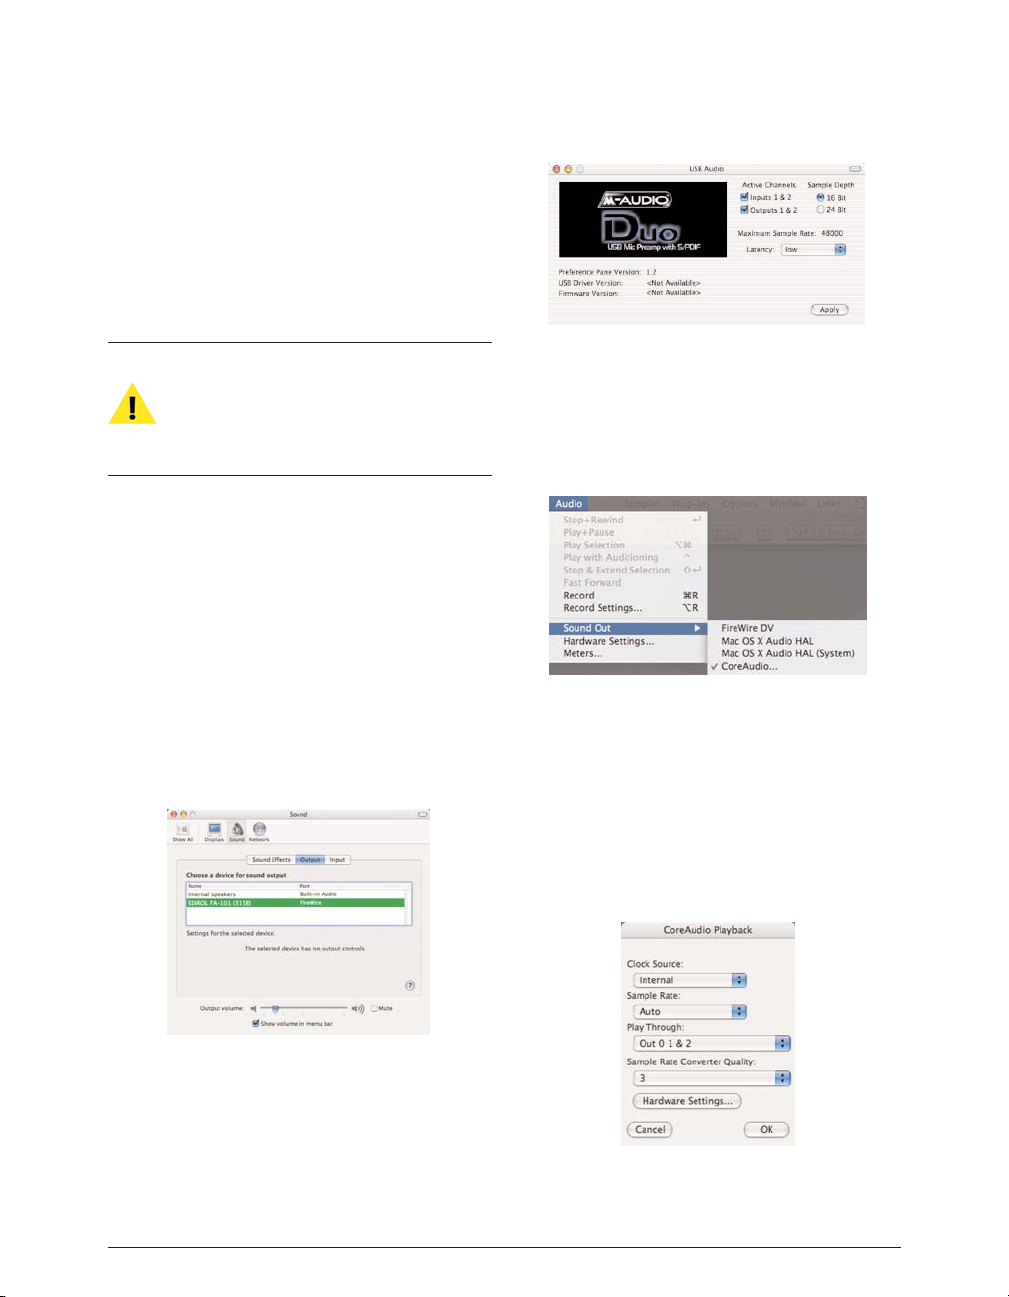
Configuring Peak for Playback
Whether you are using the built-in audio hardware in
your Macintosh, or a third-party interface, there are some
basic configuration steps you must perform before
playing back audio.
When launching Peak for the first time, a dialog
appears asking whether you would like to
configure your Audio/MIDI preferences. To
quickly set up your audio hardware for the first
time, click Yes.
To Configure Peak for Audio Playback:
1. If applicable, install/connect your third-party audio
interface and its software according to the
manufacturer’s instructions.
2. Reboot your Macintosh.
3. Launch the System Preferences, and choose
Sound.
4. Select your third-party audio interface for Output.
5. Configure the audio interface’s own utility software
or control panel (if one is included with your
interface).
6. Launch Peak.
7. From the Audio menu, select Sound Out>Core
Audio.
8. Select the Clock Source, Sample Rate, Play
Through, and Sample Rate Converter Quality
settings from the pop-up menus in the Core Audio
Playback dialog. Click OK, or for further options,
click the Hardware Settings button.
Peak 5 User’s Guide56
The Output section of the Sound Preferences
The Sound Out submenu under the Audio menu
Hardware Settings: M-Audio Delta Control Panel
Core Audio Playback dialog
Page 57
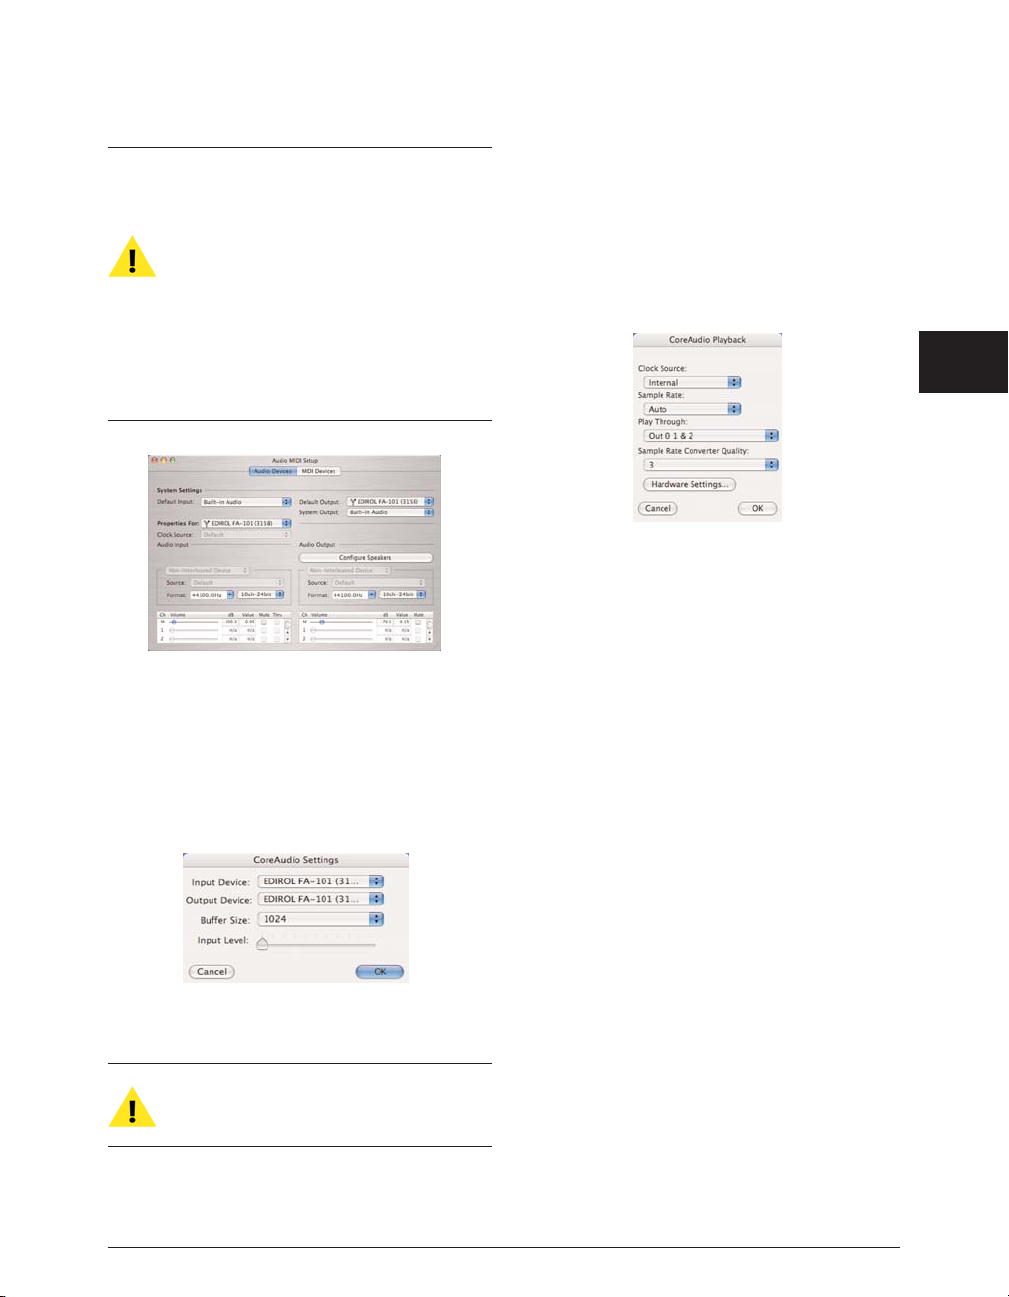
Most audio interfaces can be adequately
configured using the Apple Sound Preferences.
Some more advanced audio interfaces may
require additional configuration. In this case the
Apple Audio MIDI Setup Utility may be used to
configure your audio hardware. The Audio MIDI
Setup Utility is installed in the following directory,
located in:
/Macintosh HD/Applications/Utilities/
9. Select the Input Device, Output Device, Buffer
Size, and Input Level. Click OK to close the Core
Audio Settings dialog, and click OK again to close
the Core Audio Playback dialog.
Not all hardware devices allow control over the
input level from within the Core Audio Settings
dialog.
Peak is now configured for playback with Core Audio.
Playback Options
Various playback configurations are available within
the Core Audio Settings dialog. Depending on the
audio hardware you are using, you may need to
configure these items with specific settings.
Clock Source Pop-Up Menu
This menu lets you choose the clock source for digital
sync.
Sample Rate Pop-Up Menu
This menu allows you to choose the sample rate for
playback. The default sample rate setting is “Auto”.
Unless you specifically need to use another setting,
this is best left set to “Auto”.
Play Through Pop-Up Menu
This menu lets you choose the channels on your
audio interface that you wish audio to play out of. For
example, if you are using a hardware interface with
multiple outputs, you can select the appropriate
outputs to route audio output through to your
monitors/headphones.
Chapter 4: Playback & Recording
57
4
The Audio MIDI Setup Utility
Core Audio Settings
Core Audio Playback dialog
Page 58
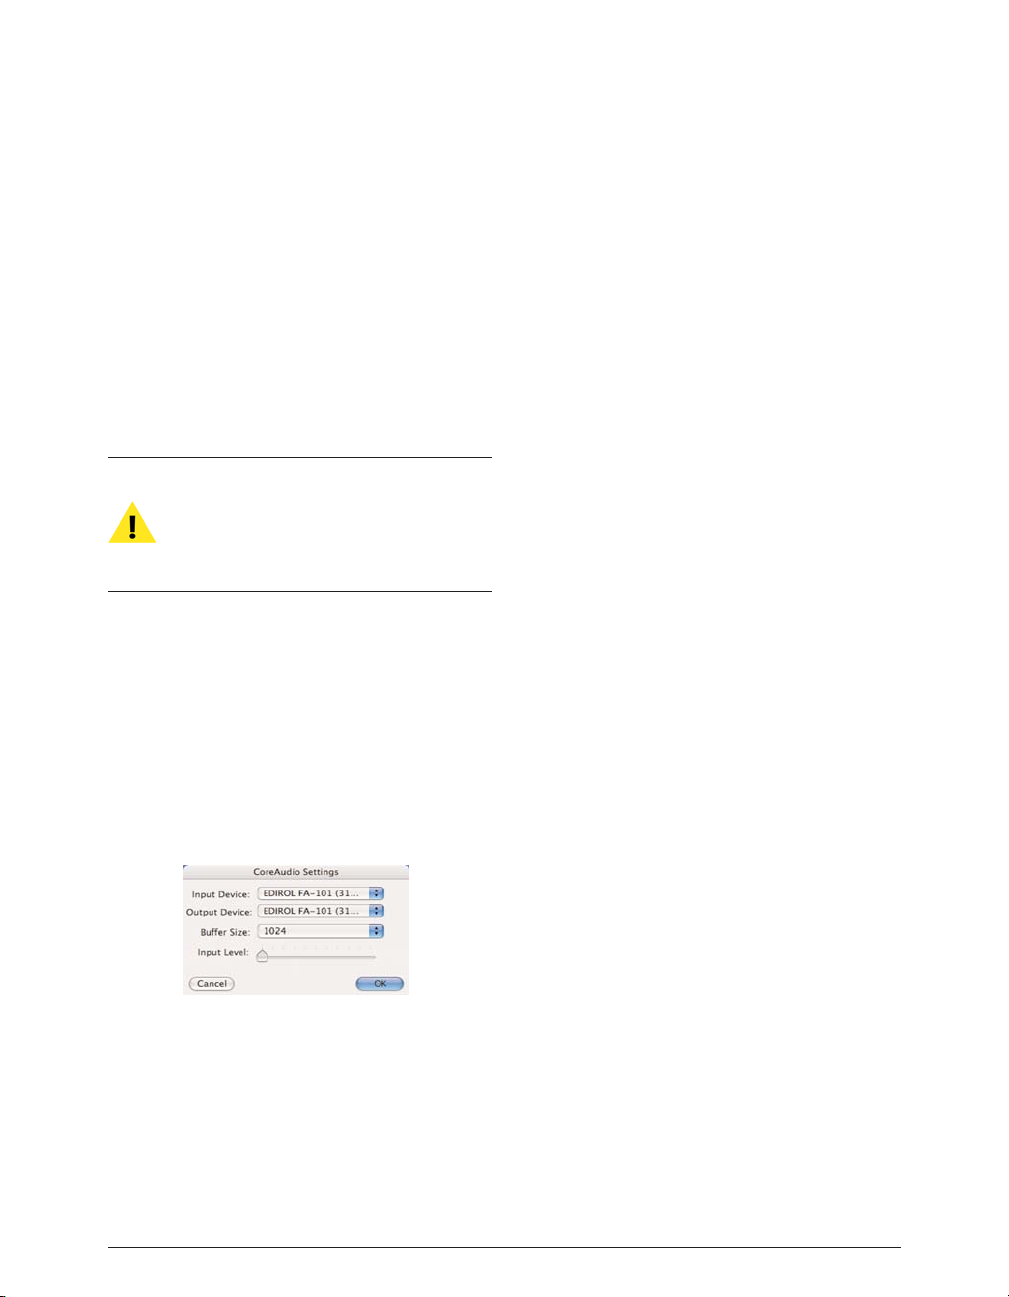
Sample Rate Converter Quality Pop-Up Menu
Peak features on-the-fly sample rate conversion, used
when playing back audio files with a sample rate not
natively supported by the audio hardware being used. A
setting of 1 gives the lowest quality sample rate
conversion, and uses the least amount of CPU resources.
A setting of 5 gives the highest quality, and uses more
CPU power. Depending on your Macintosh system’s
speed, you may need to experiment with this setting for
the best performance.
Be aware that the setting used for Sample Rate
Converter quality also affects the quality of TapeStyle Scrubbing. BIAS recommends using the
highest setting possible that your computer system
is capable of.
Core Audio Settings Dialog
Additional Core Audio options are available in the Core
Audio Settings dialog, which may be accessed by
choosing Hardware Settings from the Audio menu, or by
clicking the Hardware Settings button in the Core Audio
Playback dialog. These options include the following:
Input Device pop-up menu
This pop-up menu allows you to choose the desired
audio hardware device to use for input, when more than
one is available.
Output Device pop-up menu
This pop-up menu allows you to choose the desired
audio hardware device to use for output, when more
than one is available.
Buffer Size pop-up menu
This menu controls the buffer size used, and is directly
related to the amount of latency that is encountered. It
is recommended that you use the lowest possible setting
that your computer is capable of. The easiest way to
determine the lowest setting your computer is capable of
is by doing test recordings – if you notice distortion, or
dropouts in the recorded audio, you will need to use a
higher setting. If you do need to raise this setting, it’s
best to do it by one setting at a time, for example, if your
system cannot handle using a 512k buffer size, raise it to
1024k and try again.
If your computer requires a relatively high buffer size for
smooth recording, and you need to monitor your audio
source, it is recommended that you set up your
equipment to allow direct monitoring from a mixer, or
from an audio interface that features direct monitoring.
Direct monitoring will eliminate the problem of latency,
in which you hear what is being recorded after a slight
delay, which is directly proportional to the buffer size
setting being used.
If you are playing virtual instruments and notice a
significant delay from the time you play a note, and the
time you hear it, you may want to experiment with lower
buffer sizes, to reduce the latency to the lowest possible
level that still provides smooth audio playback.
Input Level slider
The Input Level slider allows you to configure the input level
prior to making a recording. This slider, and the input level
slider in the System’s Sound Preference pane serve the same
Peak 5 User’s Guide58
Core Audio Settings
Page 59
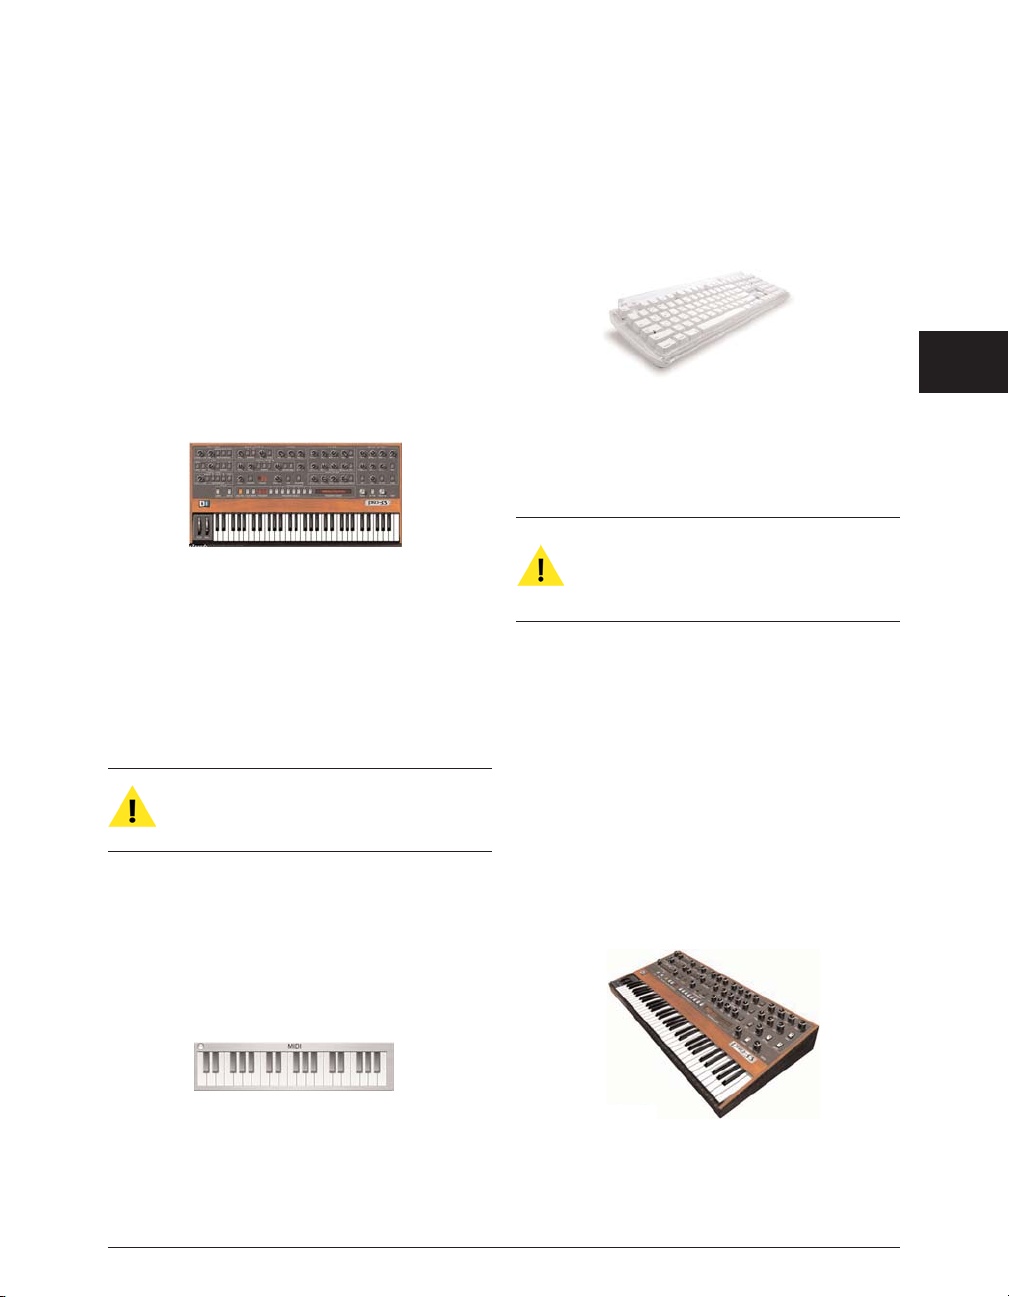
purpose – adjusting it in Peak will affect the setting in the
Sound Preference pane, and vice-versa. This slider is not
compatible with all audio devices. If you are using an audio
hardware device that is not compatible with the Input Level
slider, it is normal for it to appear greyed out.
Configuring Peak for Virtual Instrument Playback
Peak supports VST and Audio Units format virtual
instruments.
Virtual instruments may be played by clicking keys in
Peak’s MIDI keyboard window, or by enabling keyboard
MIDI control (uses your computer’s keyboard as a MIDI
input), or by using an external MIDI keyboard.
Note that when a virtual instrument is active,
audio documents will not play back unless the
instrument is bypassed.
To Configure Peak for Virtual Instrument Playback with
Peak’s MIDI Keyboard Window:
• From the Window menu, select MIDI – Peak’s
MIDI Keyboard window appears.
Active virtual instruments now receive input when keys
in Peak’s MIDI Keyboard are clicked.
To Configure Peak for Virtual Instrument Playback with
your Computer’s keyboard:
• From the Option menu, select Keyboard MIDI
Input.
Active virtual instruments now receive input when keys
on your computer’s keyboard are pressed.
Note that when Keyboard MIDI Input is active, that
keyboard autolocate functions are temporarily
disabled. To access these functions, disable
Keyboard MIDI Input.
To Configure Peak for Virtual Instrument Playback using
an External MIDI Controller:
1. Connect a MIDI interface to your Macintosh and
follow its installation/setup instructions. After you
have configured your MIDI interface, launch Peak.
2. Open Peak’s Preference Panel>MIDI Preferences.
3. Select the desired MIDI device and click OK – then
click the Save button to exit Peak’s Preference
panel.
Active virtual instruments now receive input when keys
on your MIDI controller are pressed.
Chapter 4: Playback & Recording
59
4
An example of a virtual instrument that can be played and recorded
using Peak
Page 60
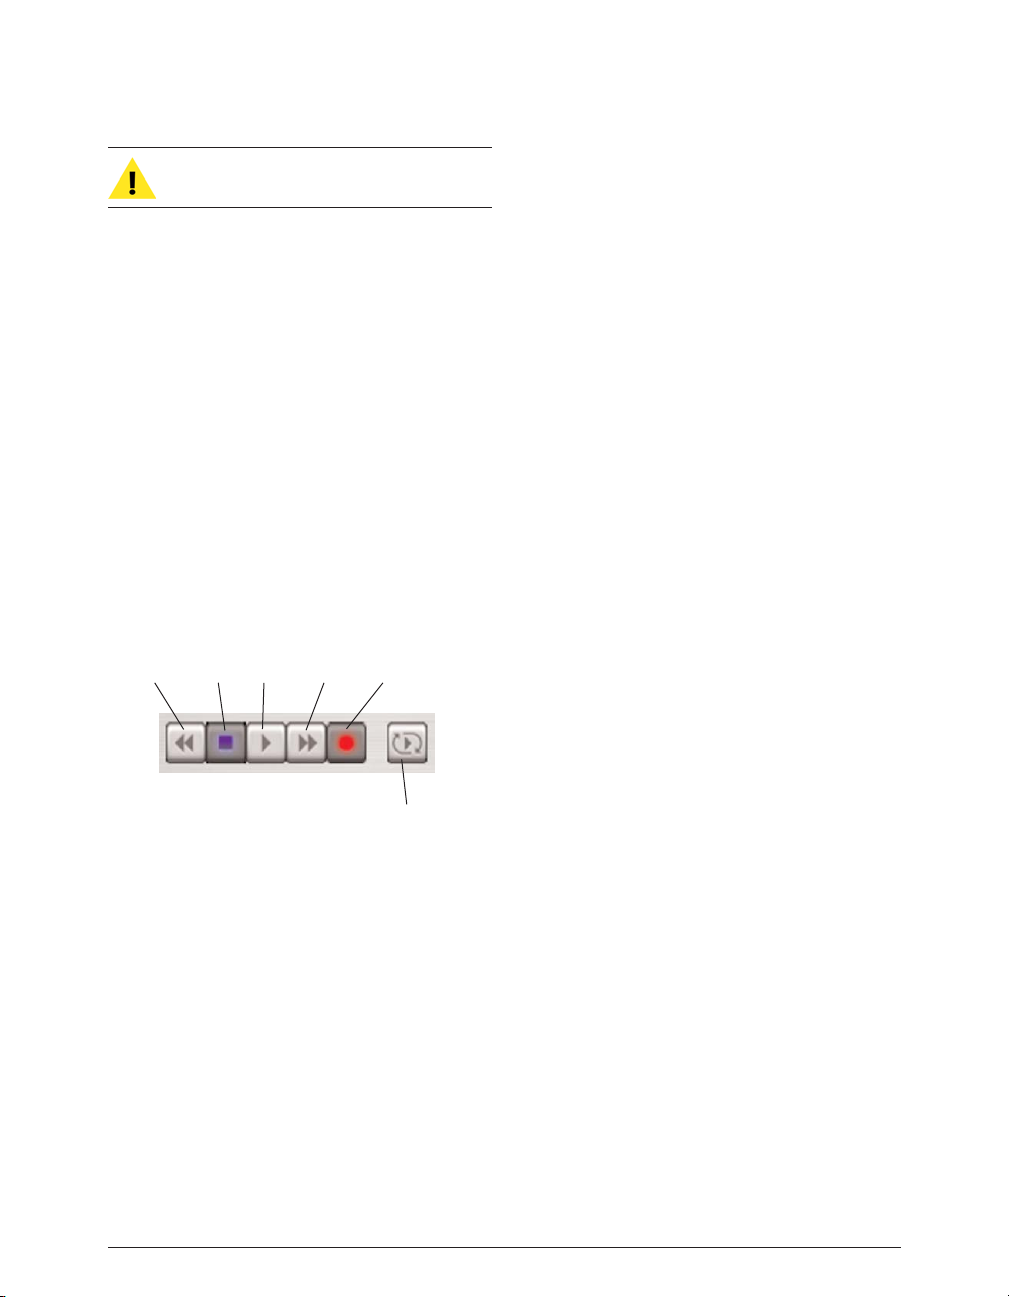
More information on using virtual instruments is
available in Chapter 8: Plug-Ins.
Playing Audio with Peak
Once you have finished the configuration steps in the
previous section, you’re ready to start playing back audio
files. The next section will familiarize you with the
various controls and methods used to control file
playback.
The Transport Controls
The Transport Controls that appear in the Transport window
are useful tools for initiating both playback and recording.
They function much like the controls on a tape recorder. As
they appear below, from left to right, they are Return to
Zero, Stop, Play, Go to End, and Record.
To start playback from the beginning of a document:
• Press the Spacebar, or click the Play button in the
Transport. Playback begins from the beginning of
the document.
• To stop playback, press the Spacebar again or click
the Stop button in the Transport.
To “rewind” playback to the beginning of a document:
• Click the Stop button twice, or click the Return to
Zero button in the Transport. You can also press
the Return key if playback has been stopped.
To start playback from a specific point in a document:
• Click the cursor at the desired location in the audio
document and press the Spacebar on your
computer keyboard. Playback begins from the
cursor location and continues to the end of the
document.
or:
• Double-click the mouse at the desired location in
the audio document. Playback begins from the
location that you double-clicked and continues to
the end of the document.
or:
• Click anywhere in the Audio Waveform Overview to
begin playback from that point.
• To stop playback, press the Spacebar.
Triggering Playback of Multiple Audio Documents
As explained earlier, Peak allows you to have multiple audio
documents open at the same time. Peak assigns each of
these documents a number based on the order in which it
was opened. Peak provides you with a convenient way of
triggering playback of any open audio document by pressing
a number key on your computer keyboard. This can be a
very useful feature for applications such as “live” sound
effects playback, since you can open multiple audio
documents and play them from your Macintosh keyboard.
To trigger sequential playback of multiple audio
documents:
1. Open several audio documents, taking note of the
number that Peak assigns them in the Window
menu. (This is based on the order in which the
documents were opened.)
Peak 5 User’s Guide60
The Transport Controls
Return to Zero Stop Play Go to End
Use Loop in Playback
Record
Page 61
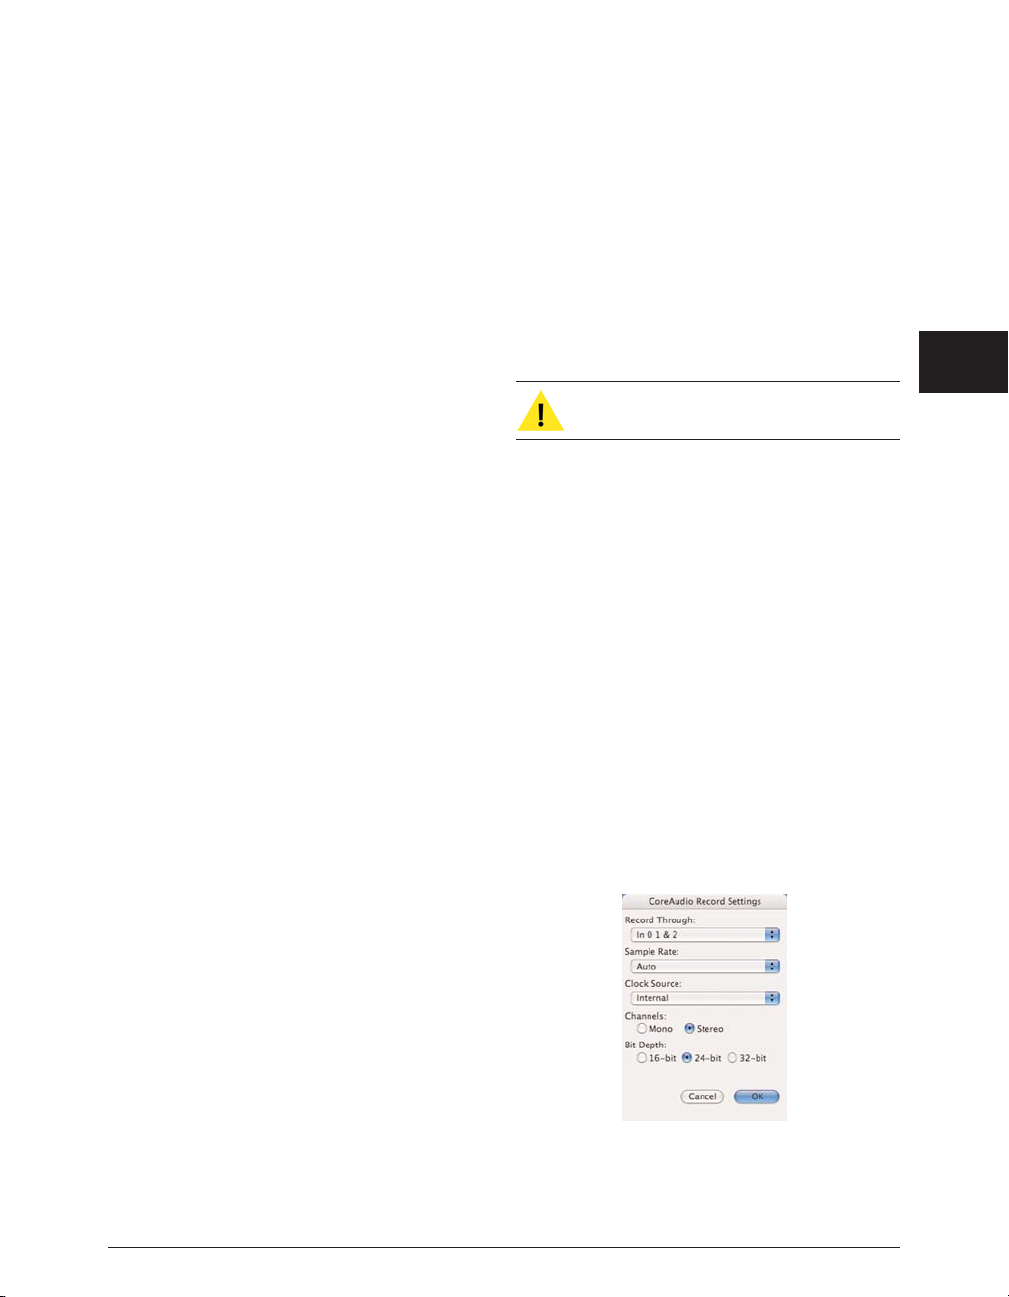
2. Press the number which corresponds to the
document(s) you wish to play. (Note: the numeric
keypad will not work for this function, you must use the
numbers at the top of the keyboard). You don’t need
to wait until a document has finished playing to press
the next number: typing a numerical sequence on your
keyboard will “queue up” all of the corresponding files.
They will then play in the order you choose.
3. If you wish to stop playback and jump to the next
document in line, press the Return key. Peak initiates
playback of the next document in sequence.
Playing Virtual Instruments
Peak supports VST and Audio Units format virtual
instruments. Virtual instrument support in Peak offers a
simple method for recording performances – and greatly
expands the scope of Peak’s sound design possibilities.
To configure Peak to play virtual instruments, please see
the section on Configuring Peak for Virtual Instrument
Playback, earlier in this chapter.
To Play a Virtual Instrument with Peak’s MIDI Keyboard
Window:
1. From the Window menu, select MIDI – Peak’s
MIDI Keyboard window appears.
2. Open a virtual instrument.
3. Click a key in the MIDI Keyboard window to play a note.
To Play a Virtual Instrument with your Computer’s
keyboard:
1. From the Option menu, select Keyboard MIDI Input.
2. Open a virtual instrument.
3. Press a key on your computer keyboard to play a note.
To Play a Virtual Instrument Playback using an External
MIDI Keyboard:
1. Open the desired instrument (assuming you have
already configured your MIDI equipment as
described in the previous section).
2. Play a note on the MIDI keyboard.
More information on using virtual instruments is
available in Chapter 8: Plug-Ins.
Configuring Peak for Recording
To record in Peak via Core Audio, you will first need to have
configured Peak for playback with Core Audio. Once Peak is
configured for playback, you can open the Record Settings
dialog and configure Peak for recording with Core Audio.
The Record Settings dialog can be accessed from under the
Audio menu (Option-R) as well as from the Toolbar.
To Configure Peak for Recording:
1. From the Audio menu, choose Record Settings.
2. Click the Device and Sample Format button – the
Core Audio Record Settings dialog appears.
3. Select the input source to Record Through, the
Sample Rate, Clock Source, Channels (Mono or
Chapter 4: Playback & Recording
61
4
Record Settings dialog
Page 62
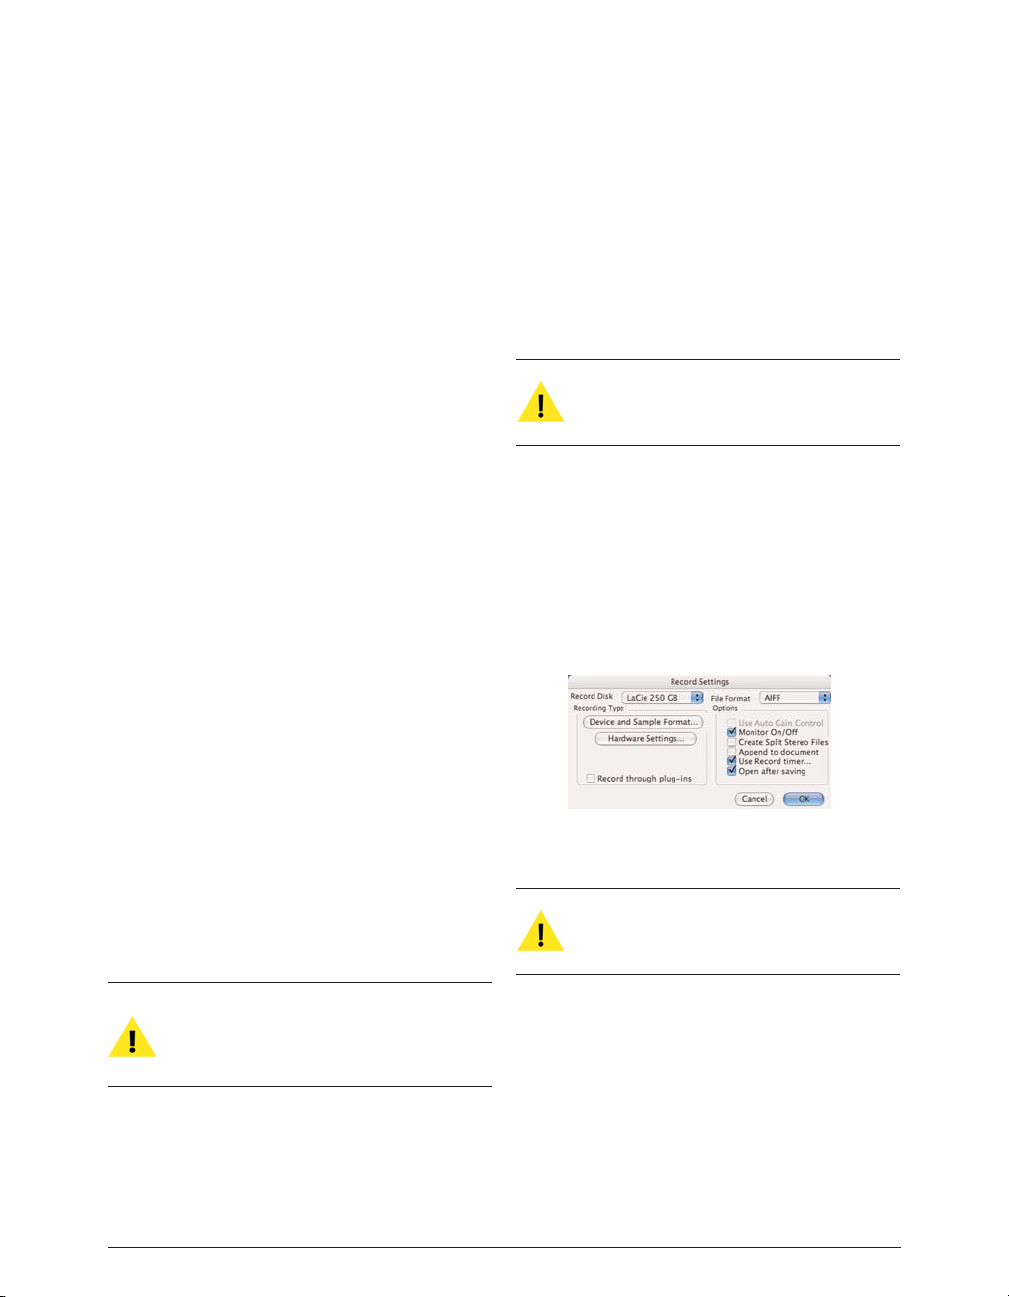
Stereo), and Bit Depth.
4. Click OK.
Peak is now configured for recording with Core Audio.
Recording Options
Various recording configurations are available within the
Core Audio Record Settings dialog. Depending on the
audio hardware you are using, you may need to
configure these items with specific settings.
Record Through Pop-Up Menu
This menu allows you to choose which inputs on your audio
interface (the “source”) you wish to record through. For
example, if you are using an audio interface with multiple
inputs, you can designate the appropriate inputs.
Sample Rate Pop-Up Menu
The Sample Rate pop-up menu allows you to select the
sample rate at which you wish to record. Some sample rates
may not be available depending on the limitations of the
audio card and its Core Audio driver. Please note that if you
are recording from a digital source you will want to record at
the same sample rate as your digital source. For more
information on sample rates, see the Glossary.
The “Auto” setting in the Sample Rate pop-up menu
will record at whatever sample rate the device is
currently set to. To record at a specific sample rate,
it is best to choose the specific rate in this menu.
Channels Radio Buttons
These radio buttons allow you to specify whether to
record in mono or stereo format.
Bit Depth Radio Buttons
These radio buttons allow you to specify the desired bit
depth for a recording. Please note that you will be
limited to recording at bit depths that are supported by
your audio hardware and its Core Audio driver. For more
information on bit depths, see the Glossary.
Be sure to set the Clock Source to digital in the
Core Audio dialog if you plan to record via Core
Audio from a digital source.
Record Settings
When you select Record Settings from the Audio menu
(Option-R) or Toolbar, the Record Settings dialog
appears. This dialog is used to configure your settings
for recording with Peak.
Please note that the settings you choose here are
independent of any previously set within the Mac
OS Sound Preference pane.
You will notice several pop-up menus, buttons, and
checkboxes in the Record Settings dialog. These allow
you to select which hard drive to record to, what file
format you’d like to record in, as well as a number of
other options (described below). You may also wish to
record through plug-ins. The next few paragraphs
describe how to set all of these parameters using the
Record Settings dialog.
Peak 5 User’s Guide62
Core Audio Record Settings dialog
Page 63

Record Disk Pop-Up Menu
The Record Disk pop-up menu allows you to choose
which hard drive you would like to record to. If you
have more than one hard drive connected to your
Macintosh, use this pop-up to select your record
drive. (This option will default to the largest drive
currently available to your Macintosh unless you
select otherwise.)
Peak requires that you save the audio file to the
same drive on which it was recorded.
File Format Pop-Up Menu
The File Format pop-up menu allows you to select the
file format for the audio being recorded. You may
choose from AIFF or Sound Designer II. If you need
the newly recorded audio file to be in a different
format, you can always use the Save As function to
save it as another format once recording is complete.
If you do not select a file format for recording, Peak
will default to AIFF.
Auto Gain Control Checkbox
The Auto Gain Control checkbox allows you to
enable/disable the Automatic Gain Control feature
used by the Sound Manager system with some
Macintosh microphone inputs. If the recording
device you are using supports this feature, and you
wish to use Auto Gain Control, check the Auto Gain
Control checkbox. It is normal for this checkbox to
be greyed out (unavailable) when using Core Audio.
Setup information for using the Sound Manager
system is available in Appendix 4 of this user’s
guide.
Monitor Checkbox
The Monitor checkbox allows you to monitor the audio
throughput while you are recording.
Split Stereo Files Checkbox
The Split Stereo Files checkbox allows you to record the
incoming stereo audio as dual mono files rather than a
single stereo file. Dual mono files are used in programs
like Pro Tools, or BIAS Deck, so this option is useful if
you need to record dual mono files (i.e., split stereo).
Append to Document Checkbox
The Append to document checkbox allows you to record
into an existing audio document. To record new audio
into an existing document, place the insertion point in
the existing audio document at the point where you want
to insert the new audio. If the insertion point is at the
beginning of the file, the newly recorded audio will be
inserted at the beginning of the file. If the insertion
point is at the end of the file, the newly recorded audio
will be appended to the end of the existing file. If the
insertion point is somewhere in the middle of the file,
the newly recorded audio will be inserted at that point.
If you make a selection of audio, the Append to
document feature will allow you to replace the current
audio with newly recorded audio from the beginning of
the selection through the end of the document or
wherever you stop the recording.
Record Timer Checkbox
The Record timer checkbox allows you to designate a
specific duration for recording. Peak will stop recording
after this set time and then open the Save dialog in order
for you to save your recording. Checking the Record
timer checkbox will bring up the Recording Time dialog.
In the Recording Time dialog, designate the duration for
recording in seconds and click OK. For example, to
record for ten minutes, enter “600” in the Seconds field.
Chapter 4: Playback & Recording
63
4
Page 64

Open After Saving Checkbox
The Open after saving checkbox determines whether the
audio document is opened in Peak after it is recorded.
Device and Sample Format Button
Clicking the Device and Sample Format button will open
the Core Audio Record Settings dialog, where you can
specify various recording options.
Hardware Settings Button
Clicking the Hardware Settings button in the Record
Settings dialog brings up the Core Audio Settings dialog,
where you can specify which hardware device to use
(when multiple devices are connected to your
computer), the buffer size, and the input level (if the
device supports adjustable input level).
Multi-Document Recordings (Long
Recordings)
If you plan to make long recordings with Peak, be aware
that each individual audio document that Peak creates
has a maximum file size of just under 2 gigabytes (1.99 to
be precise). If a recording exceeds this length/file size,
Peak automatically creates a new document and
continues recording seamlessly. When a multi-
document recording is finished, Peak will present
multiple Save dialogs (one for each 2 GB file, or fraction
thereof ), so each document may be saved separately.
The maximum recording length will vary depending on
the number of channels used, as well as bit depth and
sample rate. The maximum amount of disk space that
can be used in multi-document recording is 10 GB,
spread across five individual audio documents. This
amounts to approximately 16.5 hours of continuous
recording at CD quality settings (Stereo/16-Bit/44.1kHz).
The recording settings you choose will affect how long a
recording you can make.
For example, if you were to record 10 hours of audio at 16Bit/44.1kHz, you would be using approximately 600 MB of
disk space per hour. At this rate, after about 3.3 hours of
recording, you would have used about 2 GB of disk space.
When this 2 GB limit is reached, Peak would continue
recording, but now into a new document – the first
document is stored as a temporary file on the hard disk.
After another 3.3 hours, another 2 GB file is created, and
Peak continues recording into a third file. When we reach
9.9 hours, Peak begins recording into a fourth document –
this one being the remainder, or .1 hours (6 minutes). When
we stop Peak at the 10 hour mark, four consecutive Save
dialogs would be presented, allowing the four pieces of this
long recording to be saved. It’s a good idea to develop a
naming convention to address multi-document recordings,
such as naming your files “Part 1/4”, “Part 2/4”, “Part 3/4”,
“Part 4/4”, or something similar, that identifies each file as
part of the whole recording.
When editing files created during multi-document
recording, each one appears in Peak as a separate audio
document.
Recording Audio
Once you have finished the configuration steps in the
previous section, you’re ready to start recording audio.
This section will familiarize you with the various controls
and methods used to control file playback.
Peak 5 User’s Guide64
The Recording Time dialog
Page 65
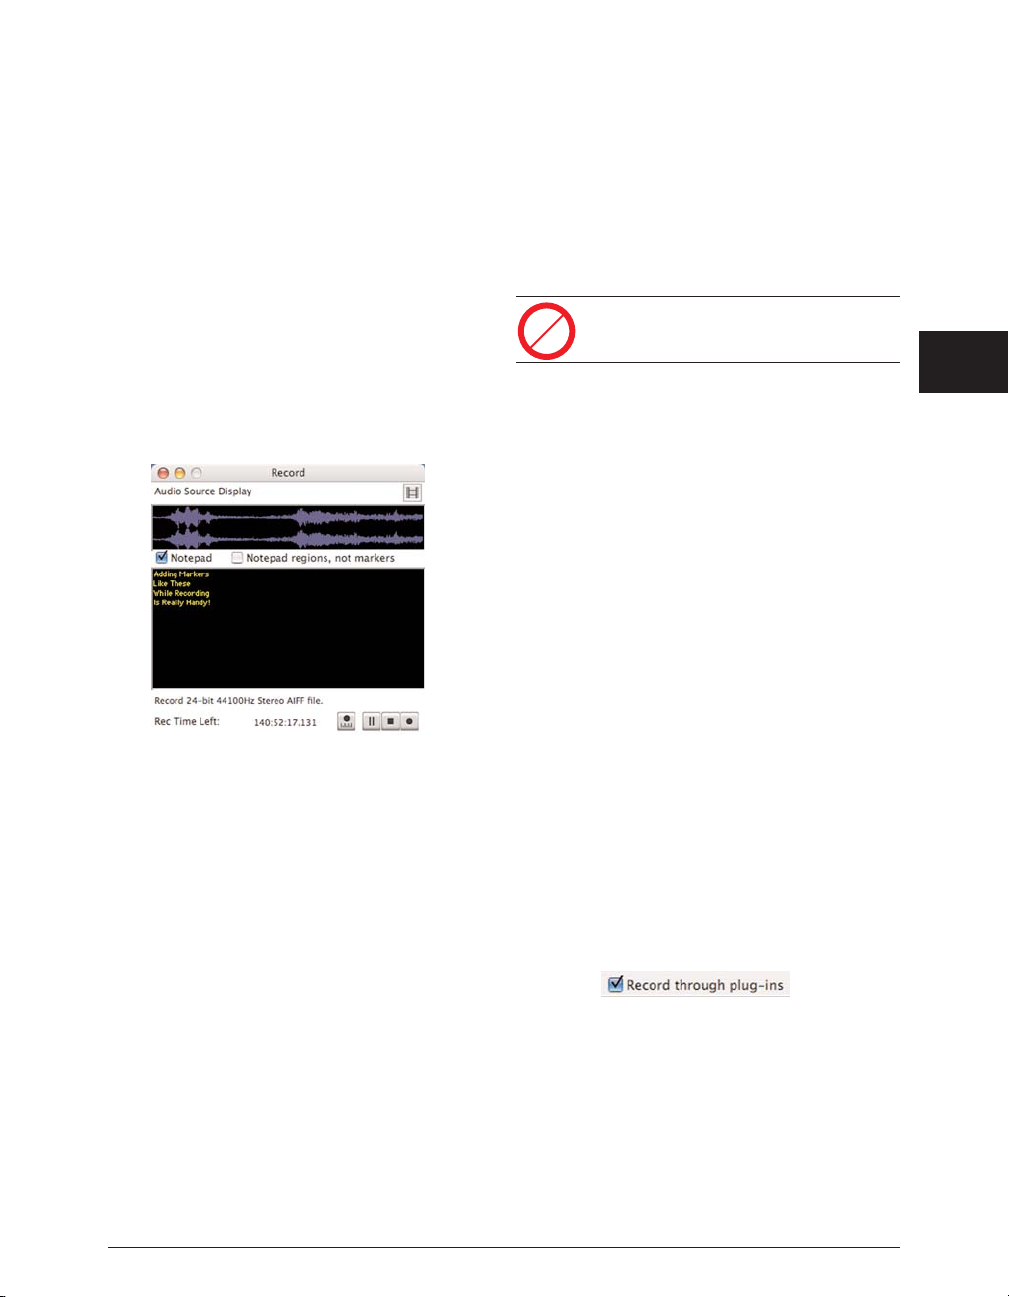
The Record Dialog
When you select Record from the Audio menu (-
R), Transport, or Toolbar, the Record dialog appears.
There are transport buttons along the bottom to
Start, Pause and Stop the recording, an Audio Source
display that shows you the waveform as it is being
recorded, and a Notepad window. There are also text
displays showing you the sample rate, bit depth, and
number of channels you selected in the Record
Settings dialog, as well as the amount of time you
have left to record on the selected Record Disk.
The Notepad feature in the Record dialog allows you
to type in text descriptions, transcribe a recording, or
type in comments called Notepad Cues at specific
points during the recording of an audio document.
The Notepad feature is available from the Record
dialog and may be used once a recording starts.
If you enable the Notepad checkbox, you can create
markers while recording. Each time you press the
Return key, a new Notepad Cue (marker) is
generated for the current recording time. You may
then begin typing text to describe the audio
recording at that time (i.e., naming the marker).
When you hear the next significant event in the
recording, press the Return key to create another
cue, and so forth.
When you are finished recording, Peak will create
markers in the audio document that correspond to each
Notepad Cue you have entered. If you also enable the
Notepad Regions, Not Markers checkbox, Peak will create
regions during recording.
Notepad Cues are not available in Peak LE.
Configuring Peak to Record Through Effect & Instrument Plug-Ins
If you have plug-ins installed, you can record through
them in real-time when using Core Audio. This is useful
if you want to use a noise reduction, equalizing, or
dynamics plug-in during recording. While recording
through plug-ins, you are free to adjust plug-in
parameters – however, be aware that you will be making
permanent changes to the material that is recorded, and
will not be able to undo these adjustments.
To configure Peak to record through Effects Plug-Ins:
1. From the Plug-Ins menu, open and configure the
plug-in(s) you wish to record through.
2. Select Record Settings from the Audio menu. The
Record Settings dialog will appear.
3. Check the Record Through Plug-Ins checkbox and
click OK.
4. Select Record from the Audio menu (-R) or
Toolbar. You are now ready to record audio
through the plug-in(s).
5. Be sure to disable the active effects plug-in(s) after you
have made the recording. (If effects plug-ins are active
when playing audio back, the signal passes through the
Chapter 4: Playback & Recording
65
4
The Record dialog
LE
Page 66
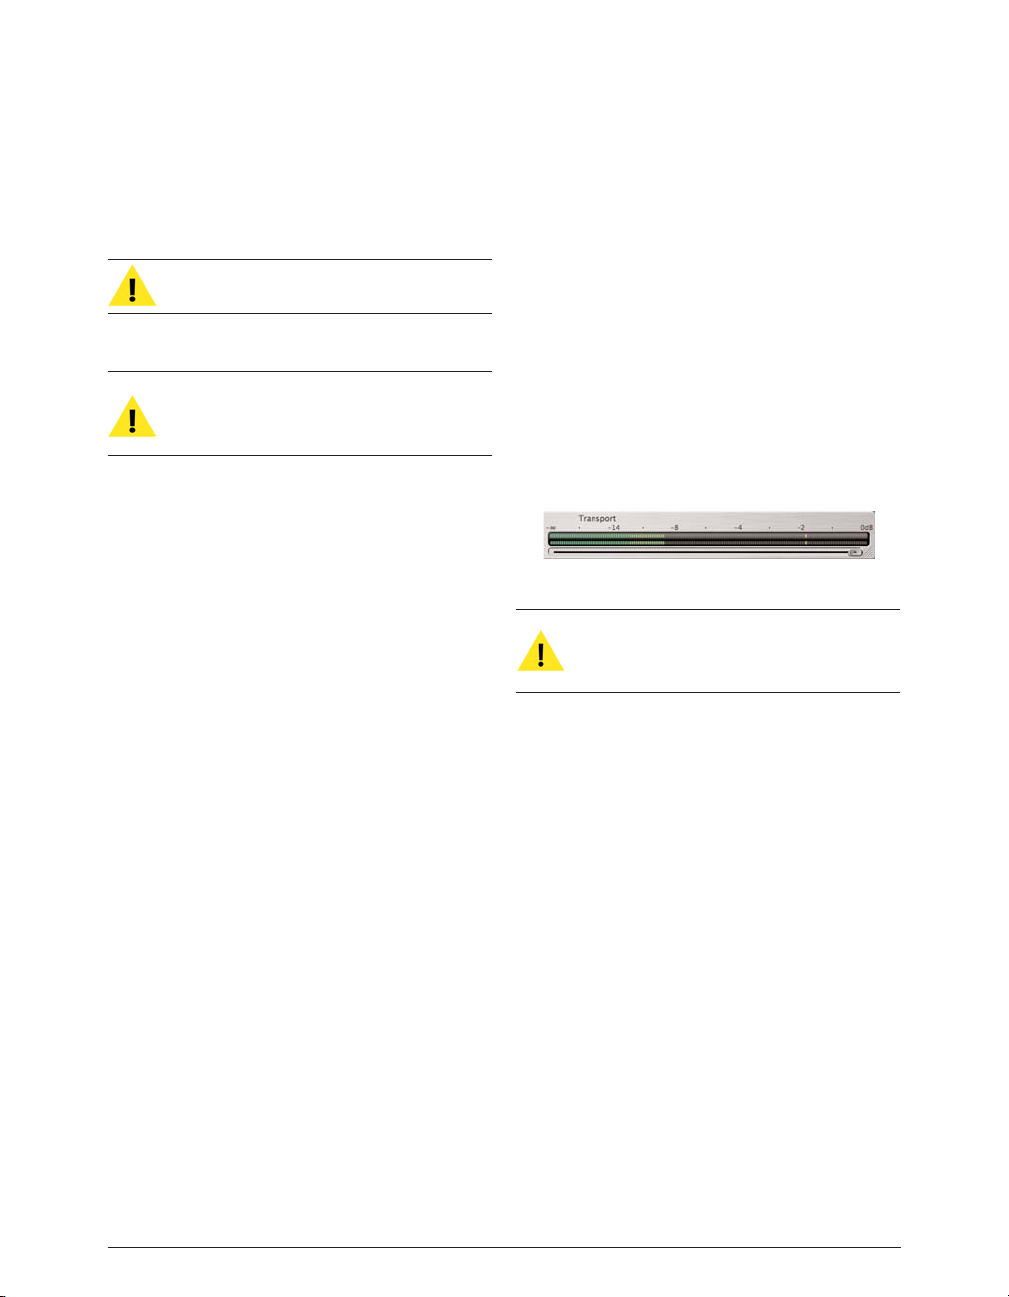
plug-in, and will double the effect of the plug-in on the
signal, and will not give an accurate representation of the
material being played back).
Peak can only record through plug-ins when using
Core Audio.
You may want to monitor your recording. To do
this, open the Record Settings dialog and check the
Monitor On/Off checkbox.
Recording
Once you have configured Peak for recording, you may
use the following directions to record audio from any
source connected to your Macintosh.
To start recording:
1. Turn down the volume of your instrument or audio
source.
2. Connect the instrument or audio source to the
audio input jack on the rear of your Macintosh. If
you are using third-party audio hardware device,
use the connectors on this device; many audio
devices have an external interface box which
contains the input and output connectors, if this is
the case, use these.
3. Choose Record Settings from the Audio menu
(Option-R) or Toolbar, and configure the settings as
described in the previous section. If you wish to
listen to the audio being recorded, make sure that
you have checked the Monitor On/Off checkbox in
the Record Settings.
4. Select Record from the Audio menu (-R) or the
Record button in the Transport. The Record dialog
will open.
5. Play your instrument or audio source. You should
see the signal levels register on Peak’s Audio
Meters in the Transport window.
6. Adjust the output of your audio source so that its
signal registers relatively high on the meters but
never hits top (indicated by the red Clip
Indicators.). Remember to always leave 6 dB or so
of headroom on the meters so that you don’t clip.
Use the yellow and orange meter lights and red
Clip indicators to help you make this adjustment.
If the recording level “clips” (exceeds 0 dB, causing
digital distortion), you can reset the clip
indicators by clicking them with your mouse.
7. Click the Record button in the Record dialog. You
are now recording to disk. You should see the
audio waveform begin to scroll in the Audio Source
Display window.
8. To stop recording, click the Stop button. To pause,
click the Pause button.
9. Once you have stopped recording, the Save dialog
appears and prompts you to name the audio
document. You must save the audio document to
the same hard drive you selected in the Record
Settings dialog. Enter a name and click Save. Peak
automatically saves the document in the audio file
format you selected in the Record Settings dialog.
If you wish to later save the document in a different
audio file format, use the Save As command.
Peak 5 User’s Guide66
Page 67
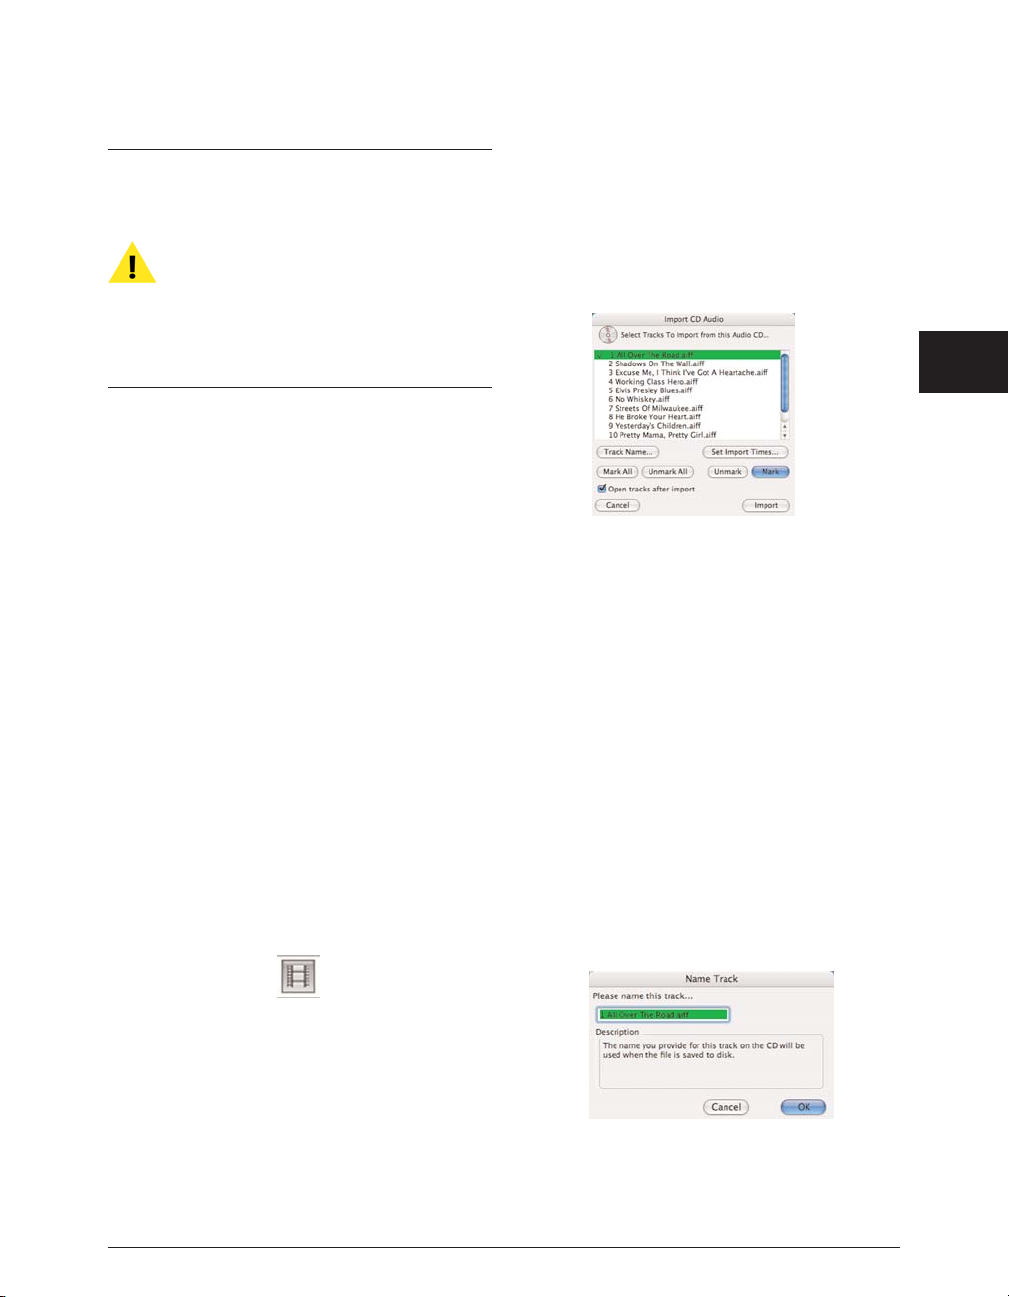
When recording through an effects plug-in, be
aware that you will not be able to undo this effect.
If you are not satisfied with the recording, you will
have to re-record. If you are unsure about
recording through a plug-in, you may wish to
record a dry signal, and apply the effect after you
have saved the recording. This way, you can
experiment with effect settings and commit to
them only when you are satisfied.
Recording into a QuickTime movie
Peak can record audio into a silent QuickTime movie.
This is a useful feature for adding a soundtrack or
voiceover to a QuickTime movie.
To Record into a QuickTime Movie:
1. Create a new stereo or mono document (from the
File menu>New)
2. Open the movie
3. Open the Record Settings dialog, and check the
Append to Document checkbox
4. Choose Record from the Audio menu (-R), or
click the Record button in the Toolbar.
5. Click the Movie icon in the Record dialog.
6. Click the Record button in the Record dialog.
7. When finished recording, click the Stop button in
the Record dialog.
8. Save the recording.
9. Choose Save As... and select QuickTime as the file format
Importing a Track from an Audio CD
If your Macintosh computer is equipped with a
compatible CD-ROM drive, you can use Peak to import
audio directly from an audio CD.
To import tracks from an audio CD:
1. Insert an audio CD in your CD-ROM drive.
2. Choose Import CD Track from the File menu or
click the Import CD Track button in the Toolbar.
3. In the dialog that appears, select the CD track that
you wish to import and click Mark. You may mark
multiple tracks for import. If you wish to import all
of the tracks on the CD, click on the Mark All
button.
4. To name a selected CD track, click the Track Name
button.
Chapter 4: Playback & Recording
67
4
Clicking the Movie icon in the Record dialog causes a QuickTime
movie to play along while recording.
Import CD Audio dialog
Name Track dialog
Page 68
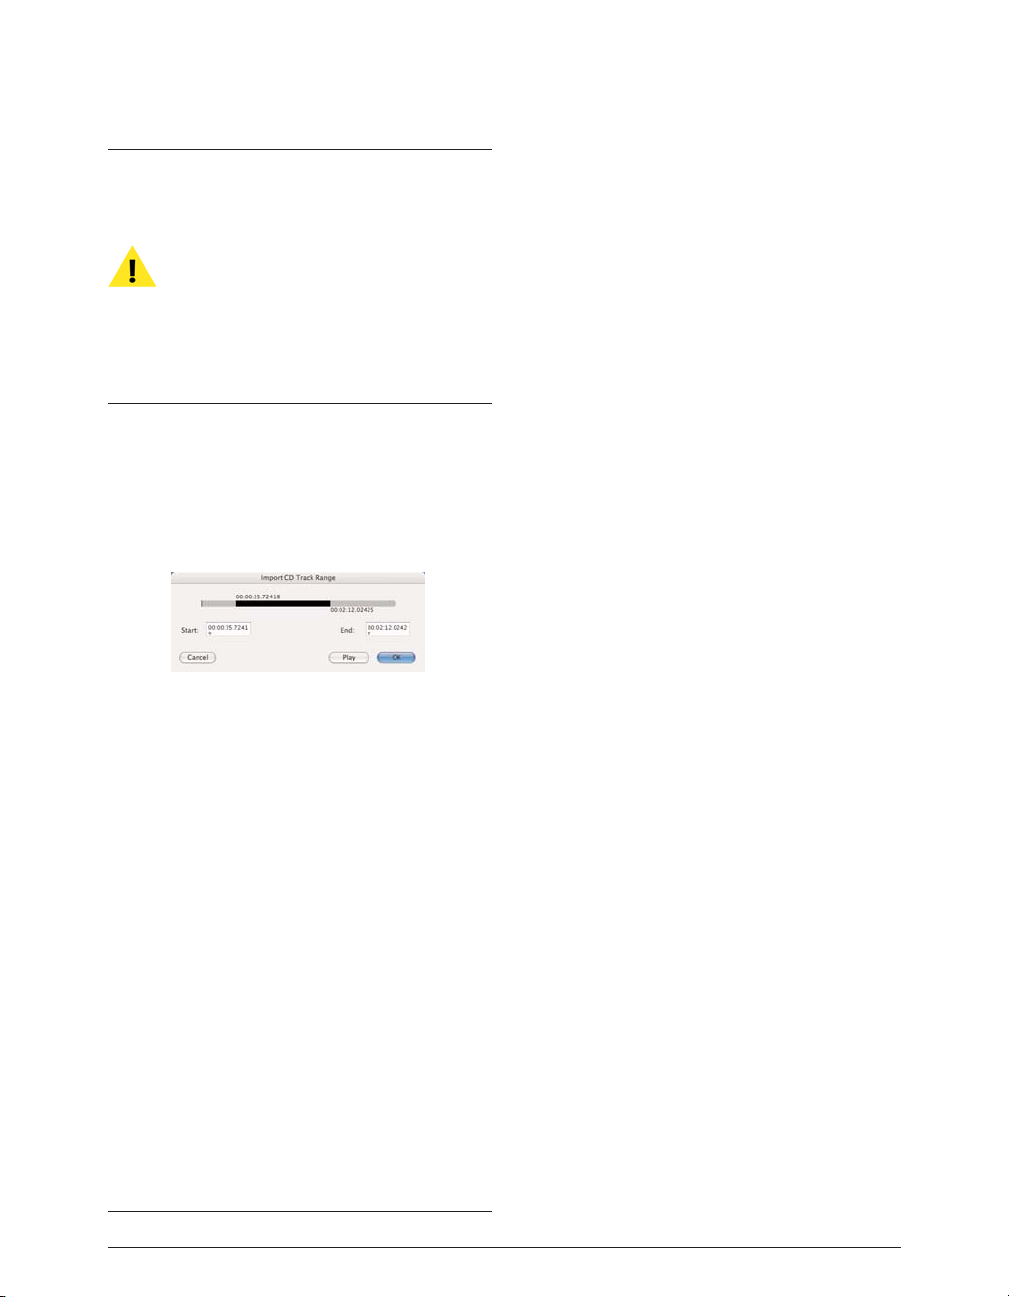
If you have iTunes™ installed, and your computer is
connected to the internet – iTunes will automatically
launch (unless it has been disabled in the Mac OS
CD/DVD Preference pane) when an audio CD is inserted
into the computer’s CD-ROM drive. iTunes default
behavior is to automatically get the track names from
the CDDB™ online CD database. Once a CD’s tracks
are labeled, that information is available to any
application that imports a track, including Peak. This is
a convenient way to automatically name a CD’s tracks.
5. To select only a portion of the track, click on Set Import
Times button or double-click on the track in the list. The
CD Import Track Range dialog will appear.
6. By adjusting the Start and End time controls in this
dialog you can import the entire CD track, or a just
specific portion of the track. You may also click
directly on the timeline to adjust start and end
points. Click Play to audition the CD track (or
selected portion of the CD track). Click OK when
you are happy with the selection.
7. Check the Open tracks after importing checkbox if you
want the CD track(s) you are importing to open in Peak.
8. Click the Import button in the The Import CD Audio
dialog to import the selected tracks and the Save
dialog appears. Use the pop-up menu at the top of
the dialog to navigate to the volume where you wish
to save the audio file. Click Save to save the file to disk.
Peak will save the file(s) in the AIFF audio format.
Making Audio Connections
While it is possible to listen to audio playback in Peak
using a Macintosh’s built-in speaker or headphones,
most people will prefer to listen through a better quality
external speaker system.
It is very easy to set up audio connections between
your Macintosh and a mixer or speaker system. Your
exact setup will differ slightly depending on whether
you are using the built-in sound input and output
connectors on your Macintosh, or those of a thirdparty audio interface.
Using the Macintosh’s Built-In Inputs and
Outputs
To use your Macintosh’s built-in audio inputs and
outputs for recording and playback, do the
following:
1. Turn down the volume on your playback system.
Peak can be used with a variety of playback
systems, including:
• Headphones
• A stereo receiver or amplifier and speakers
• A mixer, amplifier, and a pair of speakers
• A mixer and a pair of amplified (self-powered)
speakers
• A pair of amplified (self-powered) speakers,
smaller versions of which are often called
“multimedia” speakers.
2. Connect your audio source output to the
Macintosh’s audio input connector. Your audio
source can be one of a variety of devices, such as:
• A cassette or DAT deck output
Peak 5 User’s Guide68
The Import CD Track Range dialog
Page 69
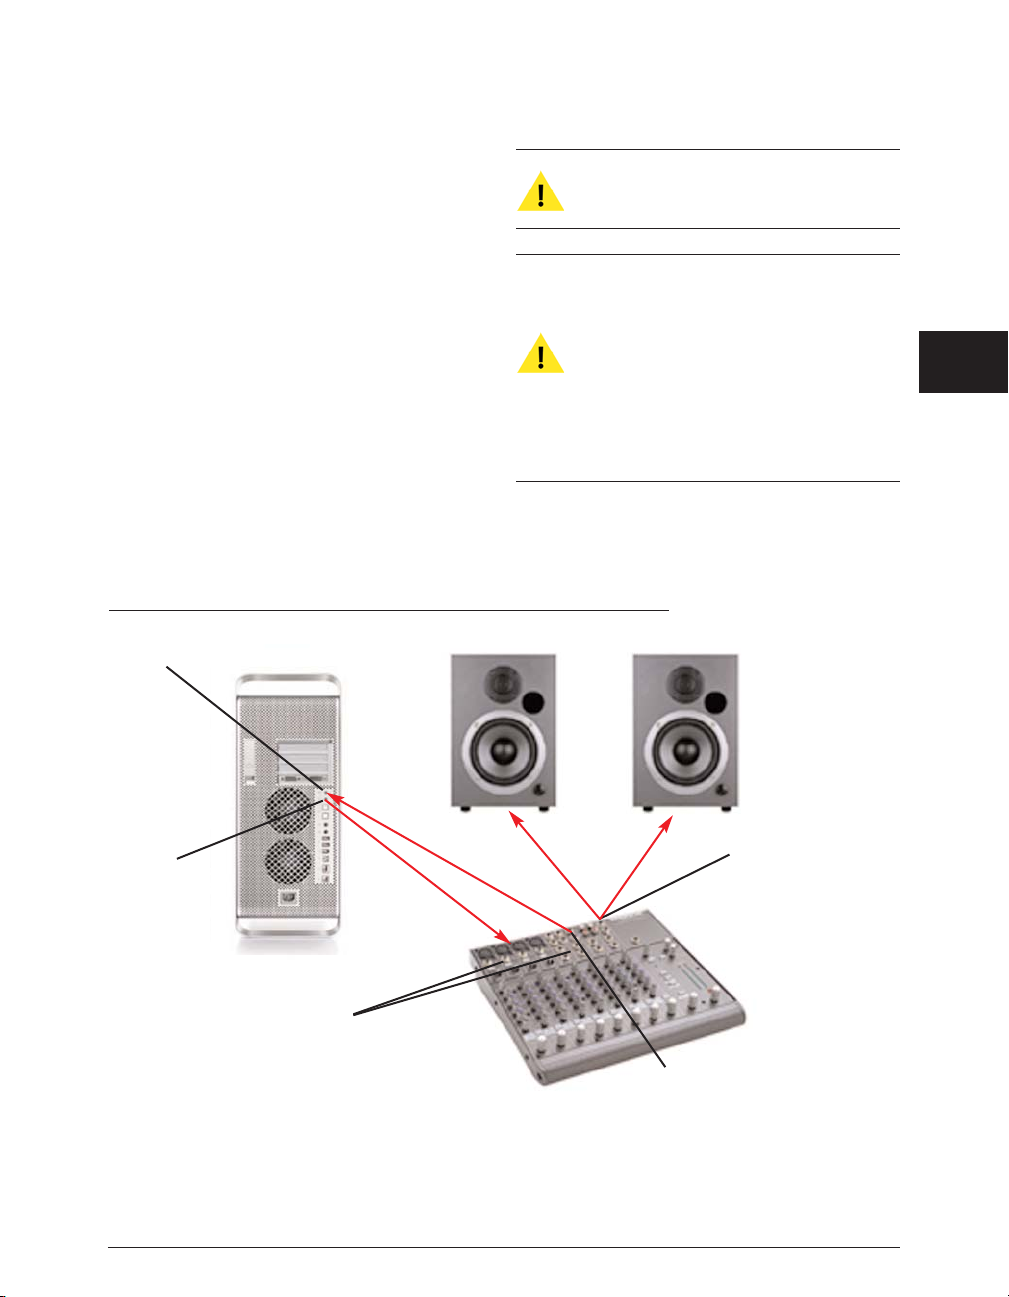
• A mixer output
• A stereo receiver line output (such as “tape
deck record” output)
• An instrument line output (such as the output
of a synthesizer or guitar preamp)
The Mac’s audio input and output jacks are standard
stereo mini-plug (1/8-inch) connector. Most mixer,
receiver, and amplified speaker inputs are equipped with
XLR, 1/4-inch, RCA, or mini-plug jacks. To make the
proper connection, you may need to use an adapter.
Some Macintosh models may not have a built-in
sound input – in which case you will have to use
a third-party audio interface for sound input.
For advanced users: Certain professional mixing
consoles, DAT decks, or other audio sources may
have a nominal output level of +4 dBu, whereas
the Macintosh expects to see a nominal -10 dBV
level. Be aware that you may need to adjust your
mixer’s output levels accordingly to prevent
overloading the Macintosh’s input; or alternately,
you may need to use a “+4 to -10” line-matching
transformer.
Chapter 4: Playback & Recording
69
4
Audio Input
Receives input
from any linelevel audio
source (mixer,
amplifier, etc.)
Connects to Mac
with 1/8” stereo
mini-plug
Audio Output
Sends line-level
audio signal out
of Mac to
headphones,
mixer, amplifier,
or self-powered
speakers.
Connects to Mac
with 1/8” stereo
mini-plug
Macintosh CPU
Mixer Auxilliary Outputs
Sends audio output to Mac’s audio input.
When recording an audio signal through a mixer, the Aux
Outputs allow the computer to record the signal, while the mixer’s
Main Outputs send the signal to the speakers/headphones, so
you can monitor what you are recording.
Speakers
Monitor audio signals
coming from Mac, or any
other audio sources
routed through the mixer
– also allows monitoring
audio signals being
recorded into the Mac.
Mixer Main Outputs
Sends audio out to amplifier,
or self-powered speakers.
Common types of output
connections include 1/4”,
XLR, or RCA – refer to your
mixer’s documentation to see
which you should use.
Mixer Inputs
Receive audio input from Mac’s
audio outputs.
Common types of input connections
include 1/4”, XLR, or RCA – refer to
your mixer’s documentation to see
which you should use.
Common connections when using the Mac’s built-in sound*
*Diagram shows connections via a mixer, which is not required – if connecting directly to speakers, use their volume control, or the volume control on your Macintosh
Page 70
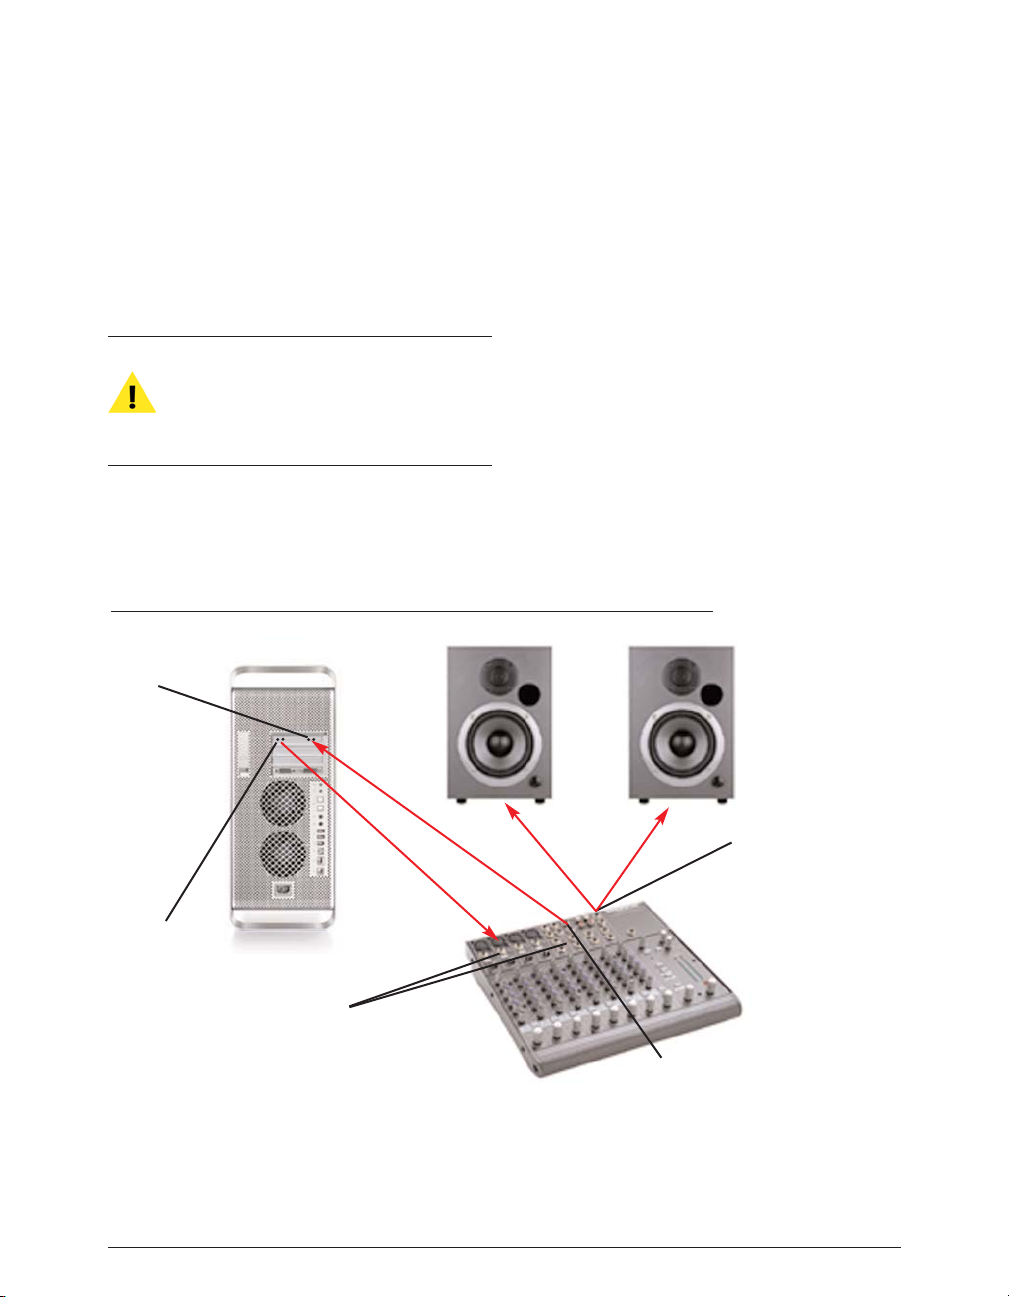
3. Connect your Mac’s audio output to your playback
system’s input.
4. Connect your playback system’s output (typically
an auxiliary or bus send) to your Mac’s audio input.
Be very careful to avoid feedback loops (the audio signal
feeds back into itself ) when recording. Feedback can
damage both your equipment and your hearing. The
Monitor option in the Record Settings dialog should be
disabled if monitoring a recording will cause feedback.
5. Raise the volume on your mixer or playback
system. Your system should now be properly
configured and ready for recording and playback.
Third-Party Audio Interfaces
If you have a Core Audio-compatible PCI, PCMCIA (CardBus),
USB, or FireWire audio interface installed in your computer and
wish to use its inputs and outputs, do the following:
1. Turn down the volume on your mixer or playback
system.
2. Make sure that you have installed the third-party
Peak 5 User’s Guide70
Common connections with a third-party audio hardware device*
Audio Input
Receives input from
any line-level or miclevel audio source
(connections will vary
with different devices)
Typically connects to
Mac with RCA, 1/4”,
or XLR cables
Audio Output
Sends audio signal
out of Mac to
headphones, mixer,
amplifier, or selfpowered speakers.
Typically connects to
Mac with RCA, 1/4”,
or XLR cables
Mixer Auxilliary Outputs
Sends audio output to audio hardware’s input.
When recording an audio signal through a mixer, the Aux
Outputs allow the computer to record the signal, while the mixer’s
Main Outputs send the signal to the speakers/headphones, so
you can monitor what you are recording.
Speakers
Monitor audio signals coming
from Mac, or any other audio
sources routed through the
mixer – also allows monitoring
audio signals being recorded
into the Mac.
Mixer Main Outputs
Sends audio out to amplifier, or
self-powered speakers.
Common types of output
connections include 1/4”, XLR,
or RCA – refer to your mixer’s
documentation to see which you
should use.
Mixer Inputs
Receive audio input from audio
hardware’s outputs.
Common types of input connections
include 1/4”, XLR, or RCA – refer to
your mixer’s documentation to see
which you should use.
*Diagram uses a PCI audio card as an example – other devices, such as USB or FireWire interfaces connect to the computer differently (ie: USB/FireWire
cable), but generally have the same types of inputs & outputs, and can be connected to mixers and other audio equipment in a similar manner
Macintosh CPU
Page 71

audio interface according to the manufacturer’s
instructions.
3. Install the Core Audio drivers (if required) for your audio
interface according to the manufacturer’s instructions.
4. Connect your source’s outputs to the inputs of
your audio interface.
5. Connect the outputs of your audio interface to the
inputs of your mixer or playback systems
6. Raise the volume on your mixer or playback
system. Your system should now be properly
configured and ready for recording and playback.
A typical mixer/computer configuration is to have the
computer outputs go to channel inputs on your mixer
and to have the auxiliary or bus sends from the mixer go
to the inputs of the computer. Instruments you want to
record may be plugged into other channel inputs on the
mixer and routed out the auxiliary or bus sends on the
mixer to be recorded by the computer. The mixer’s main
outputs go to the amplifier/speakers.
Conclusion
You have now learned about how to configure Peak for
recording and playback with Core Audio, and how to
connect various types of audio equipment to your
computer. You’ve also learned how to record and play
back audio documents, and how to record through plugins, play & record virtual instruments, record into
QuickTime movies, and to import audio CD tracks.
Now that you’re familiar with setting up your equipment
to get audio into and out of Peak, continue along to the
next chapter, where you will learn how to edit audio with
Peak’s powerful set of digital editing tools.
Chapter 4: Playback & Recording
71
4
Page 72

Peak 5 User’s Guide72
Page 73

Chapter 5
Editing
Page 74

Peak 5 User’s Guide74
Page 75

Chapter 5: Editing
Introduction
This chapter introduces you to the concept of digital
audio editing. You will learn how to edit digital audio
with Peak’s many powerful editing tools.
Editing Audio with Peak
Peak provides you with a powerful interactive,
nondestructive environment for editing and
manipulating audio. In this environment, not only are
virtually all editing actions completely “undo-able” and
“redo-able,” but they can be performed interactively
while audio playback is engaged.
Interactive Editing
Interactive editing means that you can cut, paste, loop,
and process audio with many of Peak’s DSP functions
and plug-ins, even while playing back the very audio that
you are editing. For example, you can start playback, cut
a selection of audio and paste or insert it later in the
document, and when Peak reaches the location of the
inserted audio, it will play it as if it were there all along.
This revolutionary capability makes Peak a supremely fast
and flexible audio production tool that makes
conventional recording and editing methods, such as
analog tape and a razor blade, seem primitive and archaic
by comparison.
Nondestructive Editing
Peak’s nondestructive editing capabilities mean
that the edits you perform to an audio document
do not permanently change the original source
recording until you finally save the document.
Thus, you can cut, copy, paste, fade in and out of,
and otherwise completely change a recording, and
still be able to return back to square one – the
original untouched state of the recording – up
until the time that you save the document to disk.
At that time, all edits are permanently written into
the document.
Unlimited Undo and Redo
As an editing session progresses, Peak maintains an
internal list of the edits that you perform. Changes
that you make to an audio document are not
permanently applied to the file until you ultimately
save it. This is what gives Peak its unprecedented
unlimited undo and redo capability. Through the
use of the Macintosh’s standard Undo and Redo
commands, you can undo or redo your actions
sequentially, or by using the Edits command, using
a “playlist-style” editing event list. This is a very
exciting technology that allows you to maintain
complete creative freedom of choice – right up
until the last moment before you save your project
to disk.
Chapter 5: Editing
75
5
Page 76

The Audio Document Window
The heart of Peak’s powerful editing capabilities is the
audio document window. The audio document window
provides you with a “window into sound,” allowing you
to make good use of both your eyes and ears to perform
extremely precise editing tasks. The audio document
window gives you a time-domain representation of
sound, that is, you see the amplitude of the sound over
time.
An Audio Waveform
If you have never seen sound displayed in a visual format
before, it may not be immediately obvious how to “read” an
audio waveform. It is actually quite easy to navigate through
a recording with a waveform as your road map. The peaks
in the waveform are areas of high amplitude (loud spots).
The valleys in the waveform are areas of low amplitude
(quiet spots). If the audio material is music with a
pronounced, regular beat, it is generally very easy to pick out
where the beats are simply by looking for peaks. Using this
information, and the guidelines given shortly in the “A
Selection” section, you will be able to successfully locate and
select a desired portion of the audio document and perform
the edits that you wish. The cursor marks the current
location, and also serves as an insertion point.
Peak 5’s improved waveform display gives an even
more accurate representation of the digital audio
signal than in previous versions, and provides
more information about positive and negative
phase.
Vertical Scaling
Peak allows you to control the vertical magnification of
audio waveforms. This feature is useful if you are editing
and viewing a document with very quiet audio material.
To increase the vertical scaling magnification:
• Hold the Control key down and press the Up
Arrow key.
To decrease the vertical scaling magnification:
• Hold the Control key down and press the Down Arrow key.
Audio Waveform Overview
Peak provides an Overview display of the entire audio
waveform along the top of the screen under the menu bar.
This provides you with a convenient visual reference of the
overall document when you are editing only a portion in the
audio document window. The highlighted area in the
Overview display shows the area of the audio waveform
currently visible in the audio document window. If desired,
you can hide the Overview display to allow the audio
document window to occupy more of the computer screen.
To show/hide the Audio Waveform Overview:
• Select Show Overview in the Options menu (-,)
– a check next to this item indicates it is enabled,
and the absence of a check means it is disabled (or
click the disclosure triangle in the upper left corner
of the audio document window).
A Selection
A selection is just what it sounds like: a portion of audio that
you have selected by clicking and dragging with the mouse.
You must select audio in order to perform an editing action
on it. To make good selections for editing, the best rule of
Peak 5 User’s Guide76
An audio waveform
Page 77
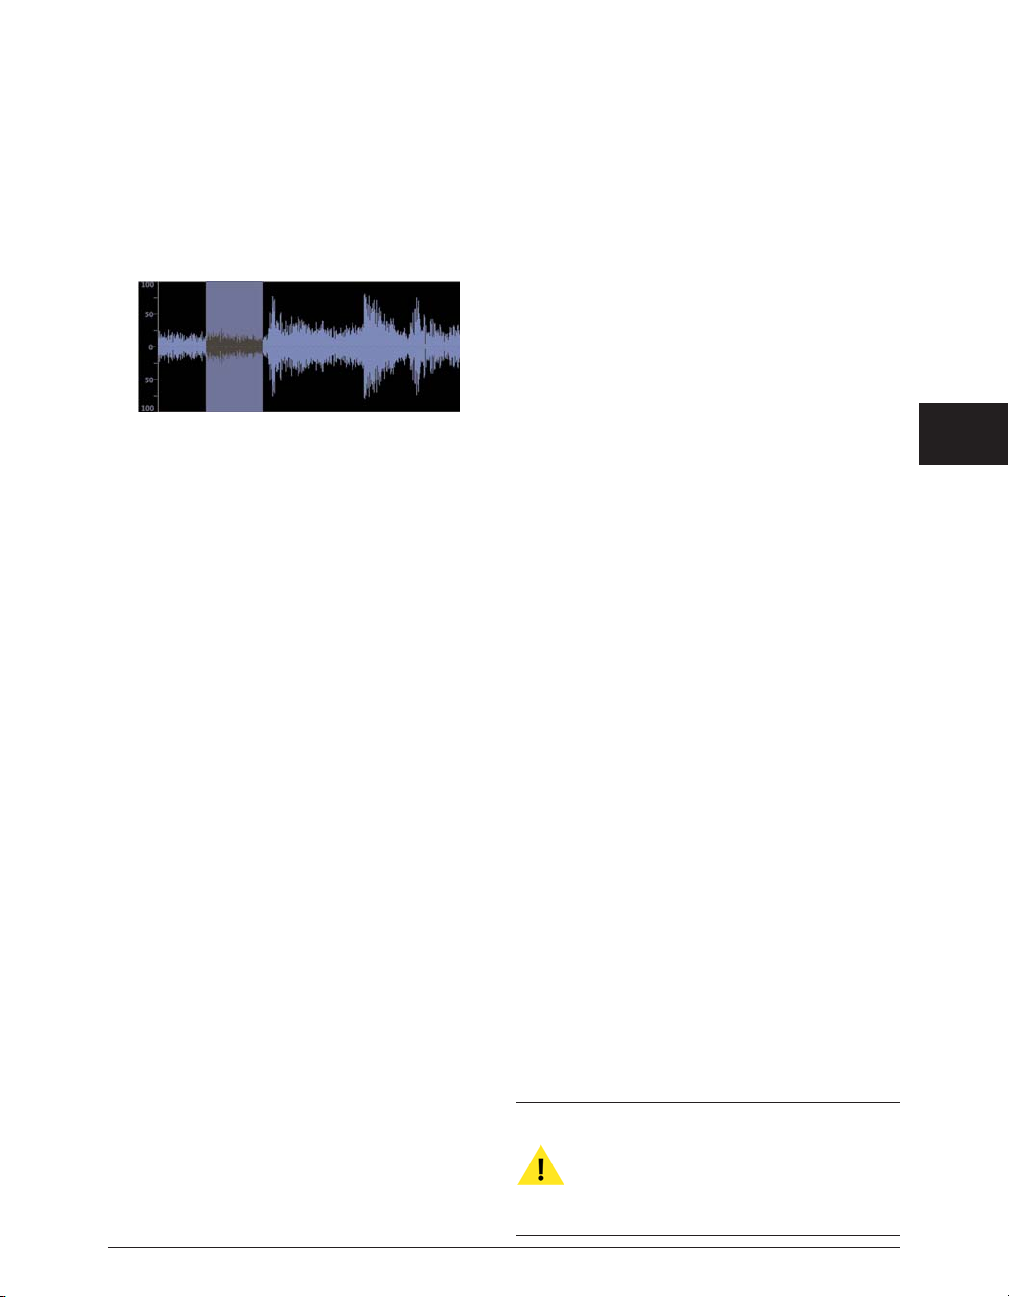
thumb is to begin a selection just before a peak in the
waveform and end it just after a peak in the waveform. In
other words, try to make selections start and end in areas of
low amplitude (“valleys” in the waveform).
It is also important, when possible, to begin and end a selection
at a point where the waveform meets the zero crossing line
(the center line through the waveform). This helps you avoid
creating pops and clicks if you later cut or paste the audio,
because the point at which the waveform meets the zero
crossing is a point of no amplitude in the sound wave. Pops
and click generally only occur if you make a careless selection
and begin or end on a portion of the sound wave where the
amplitude is high (where the waveform is high above, or far
below the center point). Enable Auto-Snap in the Options
menu, and select Snap To>Zero Crossings from the Action
menu to have Peak nudge your selection to the nearest zero
crossings automatically.
In addition to snapping to zero crossings in the audio
waveform, Peak features a number of other Snap To
options. These options allow a selection to be “snapped”
to a preset number of samples, or to a custom selection
length. Other Snap To boundaries include:
• Bars/Beats
• CD Frames (588 samples or multiple thereof)
• Sony PS2 Loop Boundaries (28 samples or multiple
thereof )
• Microsoft Xbox Loop Boundaries (64 samples or
multiple thereof )
• Custom Units (user-definable number of samples)
The Snap To units you choose will depend on the type of
editing work you will be doing. Most users will probably use
Zero Crossings or Bars/Beats for most musical applications.
Multimedia and video game sound designers will especially
appreciate these new options when producing audio for a
particular delivery platform. For example, when creating
audio loops and sound effects for a Playstation 2 video game,
audio edits need to be made at increments of 28 samples in
order to loop/play back smoothly in the PS2’s audio engine.
By choosing the Snap To PS2 loop boundary setting, any edits
that are made will automatically be made in units that will
translate smoothly to the PS2’s playback system.
Once markers are placed in the waveform, they may
need to be moved. By holding down the Shift key while
dragging the markers the selected Snap To behavior will
be applied, and the markers may be shifted slightly so as
to conform to the selected Snap To format.
The Zoom In function helps you make very precise
selections by letting you zoom in to a higher
magnification and select exactly the portion of the
waveform you desire. Also, once you have made a
selection, you can adjust the beginning or the end of the
current selection by holding down the Shift key and
clicking with the mouse. Your selection will be
shortened or lengthened accordingly.
Channel Independent Processing
To select only the Left channel, move the cursor over it and
above the left channel’s waveform. The cursor will show a
small “L” at the insertion point. To select only the Right
channel, move the cursor over it and below the left channel’s
waveform. The cursor will show a small “R” at the insertion
point. You can process one channel of an audio document
using most of Peak’s native DSP or third-party plug-ins.
Peak allows you to select and process the left and
right channels of a stereo file independently, but
you cannot edit (i.e., Cut, Paste, Delete, etc.) the
left and right channels of a stereo file
independently.
Chapter 5: Editing
77
5
A waveform with selected audio
Page 78
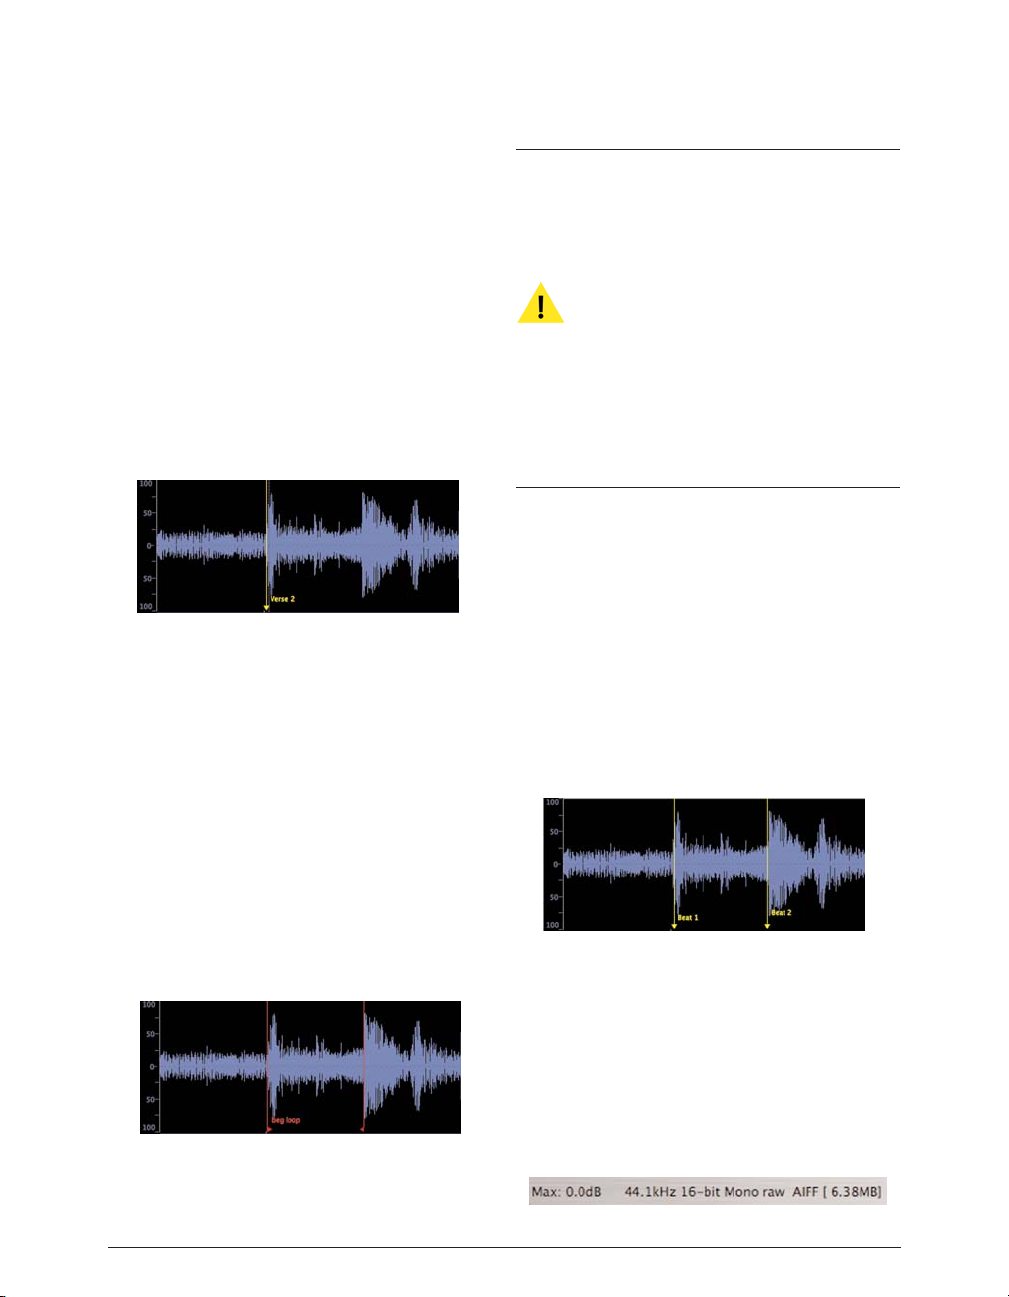
A Marker
A marker can be placed in a document to identify a
point of importance. A marker appears as a line
with a solid triangular base. Peak allows you to
place markers into a document in order to mark a
given location or Region in a document for later
selection, navigation, or editing. Markers can be
moved, named and renamed, “anchored” to a
particular location on a waveform, and given other
attributes. The use of markers is covered in
greater detail later in this chapter.
A Loop
A loop refers to a section of audio that is bounded
on either side by loop markers. In the illustration
above, the area that falls between the loop markers
“beg loop” and “end loop” is looped. Loops are
used to sustain or repeat a section of audio. They
can be used for material that you intend to transfer
to a sampler, or simply for playback within Peak
itself. Peak allows you to create one loop per audio
file.
Although Peak allows only one loop per audio
document, there is a quick and easy way to mark
multiple desired sections for looping. With the loop
markers in the desired location, choose Select Loop
from the Edit menu, then, choose New Region from
the Action menu
– a Region is created that is the
same length as the loop. Using this technique allows
you to create as many Regions as desired within a
single audio document. To loop any of these Regions,
simply
-click between a Region’s markers to select
the Region (or press the Tab key until the desired
Region is selected), and then choose Loop this
Selection (
-Shift-“-“)from the Action menu.
Audio Between Adjacent Markers
Audio between adjacent markers refers to a section of
audio that is bounded by markers. In the illustration
above, the area that falls between the Beat 1 and Beat 2
markers is audio between markers. (Note: A selection of
audio between markers is different than an audio Region.
Regions are described later in this chapter, as well as in
Chapter 6, Playlists and Audio CD Burning.)
Audio Info Area
In the lower left corner of each Peak Audio Document is
the Audio Info Area. The Info Area shows the maximum
amplitude, sample rate, bit resolution, file format, and
file size of the audio file.
Peak 5 User’s Guide78
A waveform with a Marker (named “Verse2”)
A waveform with a Loop
A waveform with 2 adjacent markers (named “Beat #1 and Beat #2)
Audio Info Area
Page 79
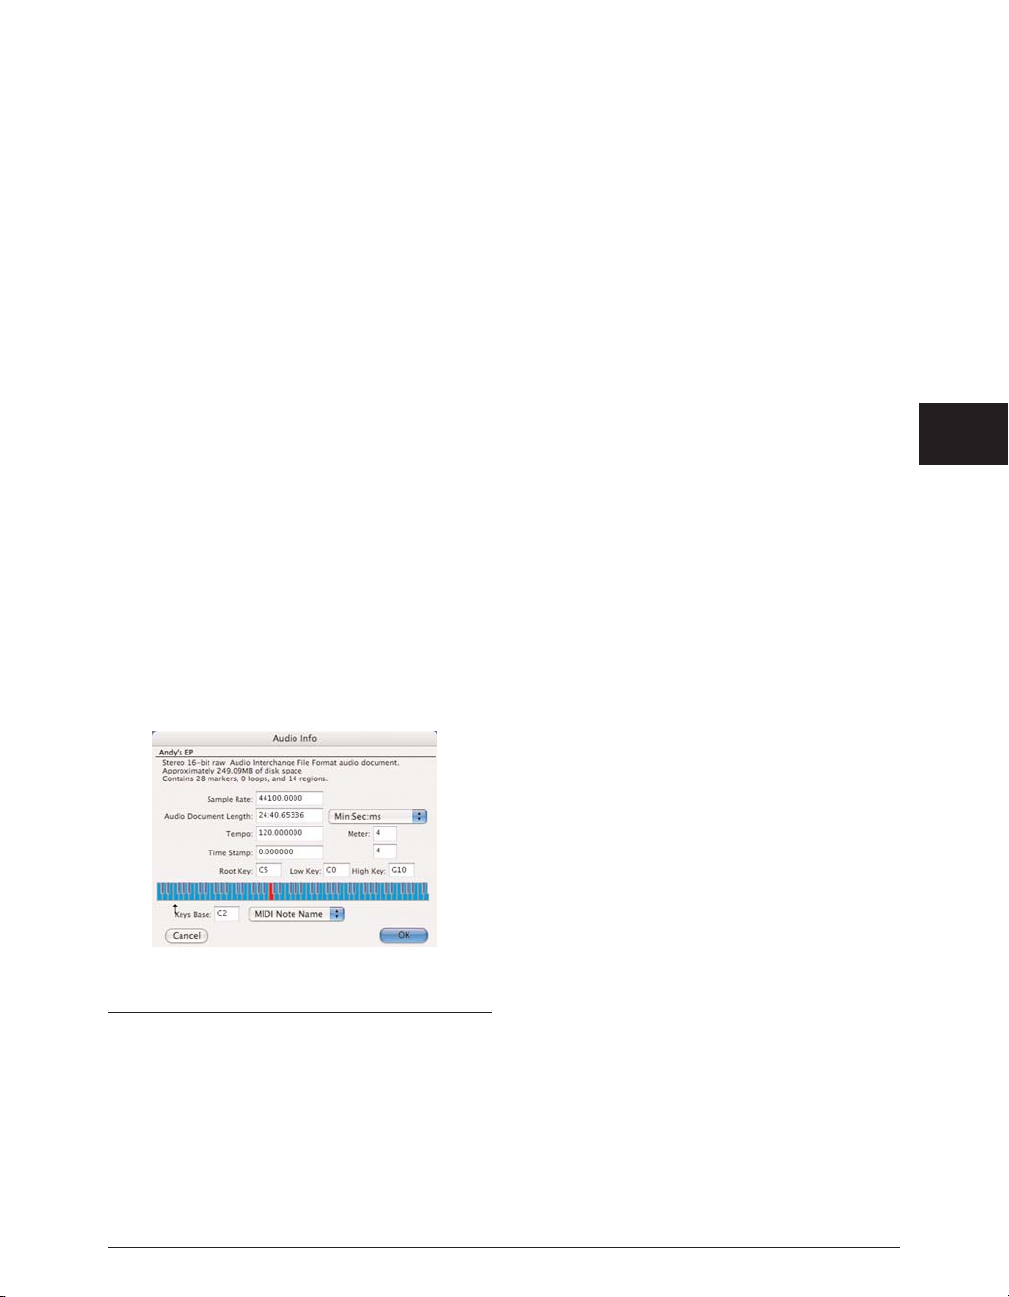
Clicking on the Max dB section of the Audio Info Area
will open the Change Gain dialog, so that you can change
the gain for the entire audio file, or the current selection.
For more information on the Change Gain DSP function,
please refer to Chapter 7: DSP. Clicking on any other
portion of the Audio Info Area will open the Audio Info
dialog.
Audio Info dialog
Selecting Audio Info from the Options menu (-I) – or
clicking on the Audio Info area – opens the Audio Info
dialog. The Audio Info dialog allows you to change the
sample rate, duration, root key (for use in a sample
playback instrument), and high and low key range. Note
that by changing the sample rate, the pitch and duration
of the audio will be affected. (To change the sample rate
of an audio document without changing the pitch, use
the Convert Sample Rate command from the DSP menu,
or click on the appropriate Toolbar icon.) The Audio Info
dialog is described in more detail later in this chapter, as
well as in Chapter 11: Menus.
Selecting Audio
In order to perform any type of editing action on an
audio document, first you must select the portion of the
document that you wish to modify. Peak has several
techniques for making and modifying selections.
To make a selection with the mouse:
• Click the cursor at the desired start location in the
audio document and drag to select the desired
range.
To extend or shorten a selection:
1. Make a selection with the mouse as explained
above.
2. Hold down the Shift key and click on the end of the
selection that you wish to modify.
3. Drag the mouse to extend or shorten the selection.
When you are satisfied with the length of the
selection, release the mouse.
To select audio between two markers:
1. Hold down the Command key () and click
anywhere in between two markers. (Markers are
explained in detail in the next section.) Peak selects
the audio between the markers.
2. If there are additional markers in the document
and you wish to extend the selection to encompass
other portions of audio that fall between the
markers, hold down the Shift key and the
Command key, and click between another two
markers. The selection will extend from the
originally selected audio to the audio that you just
added.
3. Repeat as desired to navigate to and select
additional audio between markers.
To select audio between two markers with the Tab key:
1. Create markers at several locations in the
document with one of the techniques explained in
the next section.
2. Press the Tab key on your computer keyboard.
Chapter 5: Editing
79
5
Audio Info dialog
Page 80
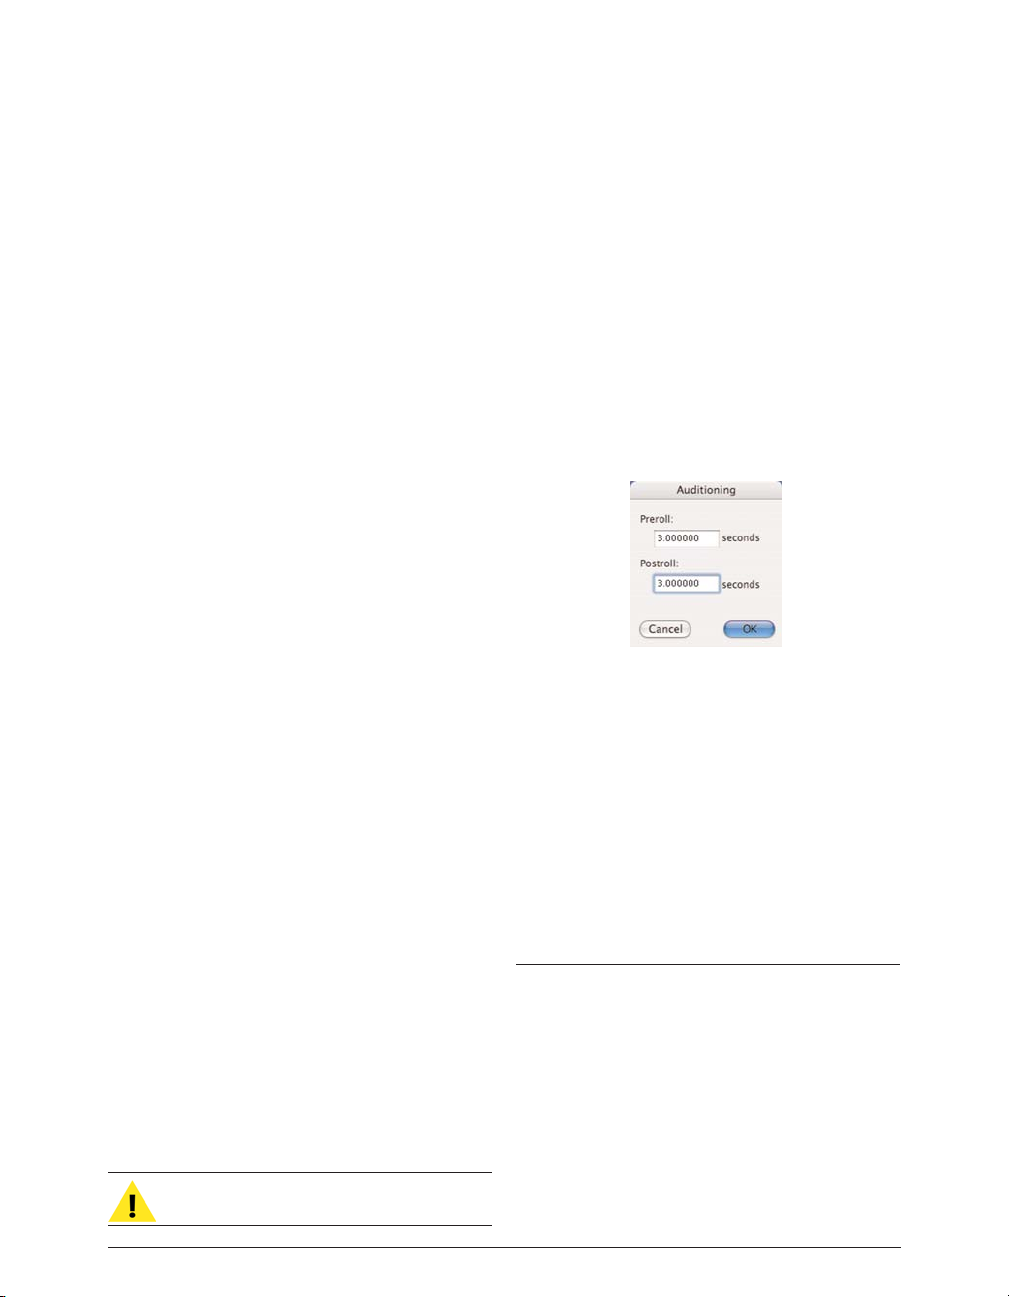
Peak selects the portion of the waveform that lies
between the first two markers in the document.
3. Press the Tab key again to select the portion of audio
between the next two markers. (If you hold down the
Shift key while tabbing the selection through the audio
file, you can append each successive space between
markers to the current selection.)
4. Repeat as desired to navigate to and select
additional audio.
To select all audio in a document:
• Choose Select All from the Edit menu or press -
A on your Macintosh keyboard.
Markers & Selections as Navigational Aids
The presence of Regions, loops, or markers – and selected
portions of the waveform can be very helpful in navigating
through an audio document.
When markers are present, the Tab key on your keyboard may
be used to select the audio between markers. Pressing the Tab
key again selects the next space between markers – when Peak
reaches the end of the document, it will “wrap” back to the
beginning. Using the Option & Tab keys together will select the
spaces between markers in the opposite direction.
This keyboard shortcut makes it very easy to navigate to specific
areas, for example: Imagine you are working with a recording of
an LP, and have placed a marker in the space between each song
(the silent area). To quickly navigate to the beginning of song 5,
simply press the Tab key five times, and then press the up arrow
key on your keyboard – this would select the space between
markers that bound the fifth song, and the up arrow key would
locate Peak’s cursor to the beginning of the selection.
Many other useful tips can be found in Appendix
2: Peak Actions.
Auditioning Audio
It is often useful to audition a selection along with just a bit of
audio preceding or following it – without actually including this
material in the selection itself. Peak’s Auditioning command
allows you to do this by specifying a desired amount of pre-roll
or post-roll when you play the selection.
To audition audio with pre-roll or post-roll:
1. Choose Auditioning from the Preferences panel –
the Auditioning Preferences dialog appears.
2. Enter the desired amount of pre-roll and post-roll
and click OK.
3. Click the cursor in the audio document and drag to
select the desired range.
4. Press -Spacebar – Peak plays the selection,
adding the specified amount of pre- and post-roll.
Scrubbing
Peak offers a number of ways to scrub audio, these are
described below.
Dynamic Scrubbing
Peak provides a unique audio auditioning technique
Peak 5 User’s Guide80
The Auditioning Preferences Dialog
Page 81

called dynamic scrubbing. This feature is very useful for
precisely pinpointing and selecting a desired location in
an audio document. Dynamic scrubbing allows you to
drag the mouse forward or backward over a waveform
while Peak plays a short loop (between 10 and 600
milliseconds) at the scrub location. When you have
found the location you are looking for, you can
commence editing. Peak allows you to choose the
length of this playback loop with the Dynamic Scrub
Time command in the Options menu. Peak provides two
types of dynamic scrubbing: dynamic shuttle scrubbing
and dynamic jog scrubbing. Both are described below.
To select a loop duration for dynamic scrubbing:
• Choose Dynamic Scrub Time from the Options
menu, and choose a duration from the hierarchical
submenu. Typically, values between 40 and 80
milliseconds work well.
To use dynamic “Shuttle-type” scrubbing:
1. Hold down the Control key and click and drag the
mouse across a portion of the waveform in an
audio document window. As you drag the mouse,
Peak plays a short loop of the audio at the insertion
point. You can control the tempo and direction
(forward or backward) of playback by dragging the
mouse slower or faster, forwards, or backwards.
2. Release the mouse button to stop scrubbing. The
insertion point will be exactly where you left off
scrubbing.
3. To make a selection starting at the current scrub
point, stop scrubbing, hold down the Shift key, and
click the mouse to extend the selection from the
insertion point to the desired end location.
Jog Scrubbing
Peak provides a variation of the dynamic scrubbing
feature, which is similar to a technique known in
recording studios as jog scrubbing. With this technique,
Peak actually engages playback and moves through the
file at its normal pace, but allows you to control the
playback point by dragging the mouse. You can control
the direction (forward or backward) of playback by
dragging the mouse forwards or backwards. This
scrubbing mode affords a greater degree of control when
you are “zoomed out” in the audio document window.
To use dynamic “jog” scrubbing:
1. Hold down the Control key and Option key and
drag the mouse across a portion of the waveform
in an audio document window. As you drag the
mouse, Peak engages playback while it loops a
short portion of the audio at the insertion point.
Dragging the cursor farther away from the current
insertion point increases the velocity of scrubbing.
2. Release the mouse button to stop scrubbing. The
insertion point will be exactly where you left off scrubbing.
3. To make a selection starting at the current scrub
point, stop scrubbing, hold down the Shift key, and
click the mouse to extend the selection from the
insertion point to the desired end location.
Since jog scrubbing mode is engaged by pressing the
Option key in combination with the Control key, it is
possible to toggle back and forth between jog and shuttle
modes simply by pressing or releasing the Option key.
Chapter 5: Editing
81
5
Setting the Dynamic Scrub feature’s loop time
Page 82

Tape-Style Scrubbing
In addition to dynamic scrubbing feature, Peak provides
high resolution tape-style scrubbing. To enable tapestyle scrubbing, set the Dynamic Scrub Time under the
Options menu to Tape-Style.
To start tape-style scrubbing:
• Hold down the Control key on your keyboard, and
then click and drag the mouse at the location in the
waveform where you wish to begin scrubbing.
To deactivate tape-style scrubbing:
•Release the mouse and Control key.
To control “tape” speed in tape-style scrubbing:
1. As you drag the mouse towards the right,
scrubbing speed will increase.
2. As you drag the mouse toward the left, scrubbing
will slow down.
3. If you drag the mouse to the left of the point where
you started scrubbing, the scrub direction will
change from forward playback to backwards
playback.
The top of the playhead cursor will display the scrubbing
speed, which can vary from +/- 2.25 times the original
speed.
Using Unlimited Undo and Redo
Peak maintains an internal list of the edits that you perform
during the course of an editing session. These changes are
not permanently applied to the file until you save it. This
gives Peak unlimited undo and redo capability. Through the
use of the Macintosh’s standard Undo (-Z) and Redo
(-Y ) commands, you can undo and redo your actions
sequentially; or by using the Edits command, using a
“playlist-style” editing event list. This powerful capability
allows you to maintain complete creative freedom of choice
– right up until the last moment before you save your
project to disk. The only limitation in using Redo is that if
you insert a new action when a redo action is available, you
will no longer be able to redo. Remember, as soon as you
perform an editing action other than Undo in Peak, Redo is
no longer available.
To undo an action:
1. Perform an edit (such as cutting audio or moving a
marker).
2. Choose Undo from the Edit menu (-Z) or
Toolbar. The action is undone.
3. You can continue undoing actions until you return
to the original state of the audio document (the
state at which it was last saved). When there are no
actions left to undo, the Undo menu item will
appear grayed out.
To redo an action:
1. If you wish to redo the action that was undone,
choose Redo from the Edit menu (-Y ) or
Toolbar. The action is redone.
2. You can continue redoing actions until none are
left to redo. When there are no actions left to redo,
the Redo menu item will appear grayed out.
Using the Edits Command to Undo a Series of Actions
Peak’s Edits command provides you with a second
unique and powerful method of undoing virtually
Peak 5 User’s Guide82
Page 83
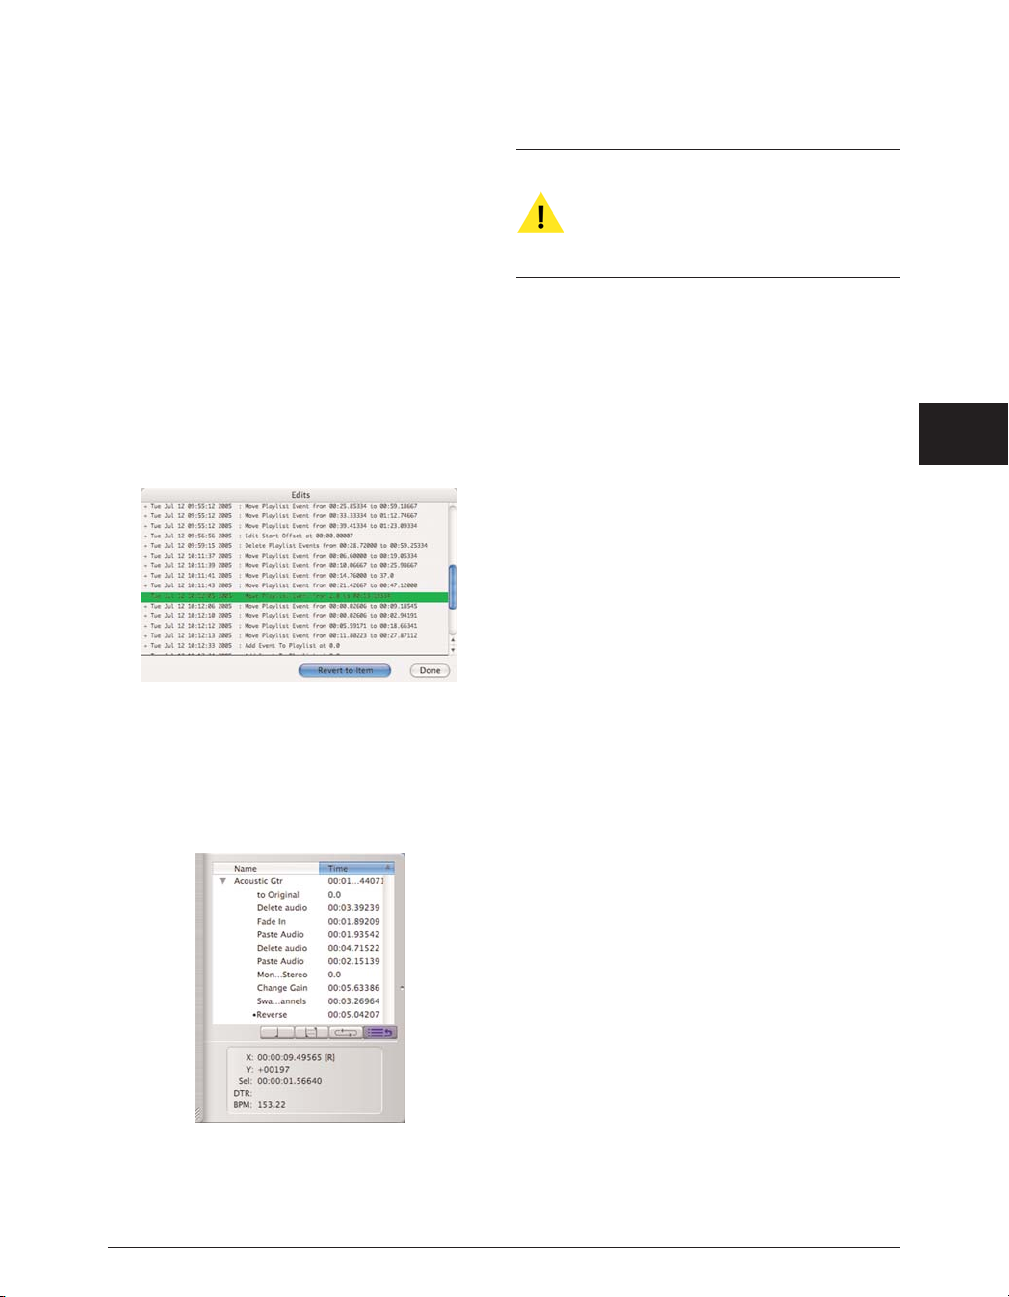
any number of editing actions performed on an
audio document since you last saved it. You can
think of the Edits command as an “event-based”
listing of all your editing actions since you last
saved. Using this list, you can navigate back in
time to the point at which you performed a
particular edit, and if you wish, undo it. Once you
have returned to an earlier state in the project, you
are free to start editing from that point on.
The Edit history list is available in two locations –
one is in the Edits dialog, located under the Edit
menu.
The other location where the Edit history may be
accessed is in the Audio Document Window’s
Contents Drawer.
Be aware that if you do go back to a past
action and perform a different action at that
state in the project, any edits that originally
occurred after will be gone, and you won’t be
able to redo them.
To use the Edits dialog to return to or undo an action:
1. Perform several edits. (Don’t use the Save
command or you won’t be able to undo any edits
that occurred before you saved.)
2. Choose Edits from the Edit menu. A dialog
appears listing the edits you have
performed since you last saved the
document.
3. In the list, double-click on the description of the
action you wish to return to (or select an action
and click the Revert to Item button). Peak returns
the document to the state it was in at the time of
that edit.
4. When you have finished, click Done.
To use the Edits list in the Contents Drawer to return to or
undo an action:
1. Perform several edits. (Don’t use the Save
command or you won’t be able to undo any edits
that occurred before you saved.)
2. From the Window menu, choose Toggle
Contents Drawer ( -F), and click the Show
History button in the lower right portion of
the drawer – a list of edits you have
performed since you last saved the document
appears.
3. In the list, double-click on the description of the
action you wish to return to. Peak returns the
Chapter 5: Editing
83
5
The Edits dialog
The Edits history in the Contents Drawer
Page 84
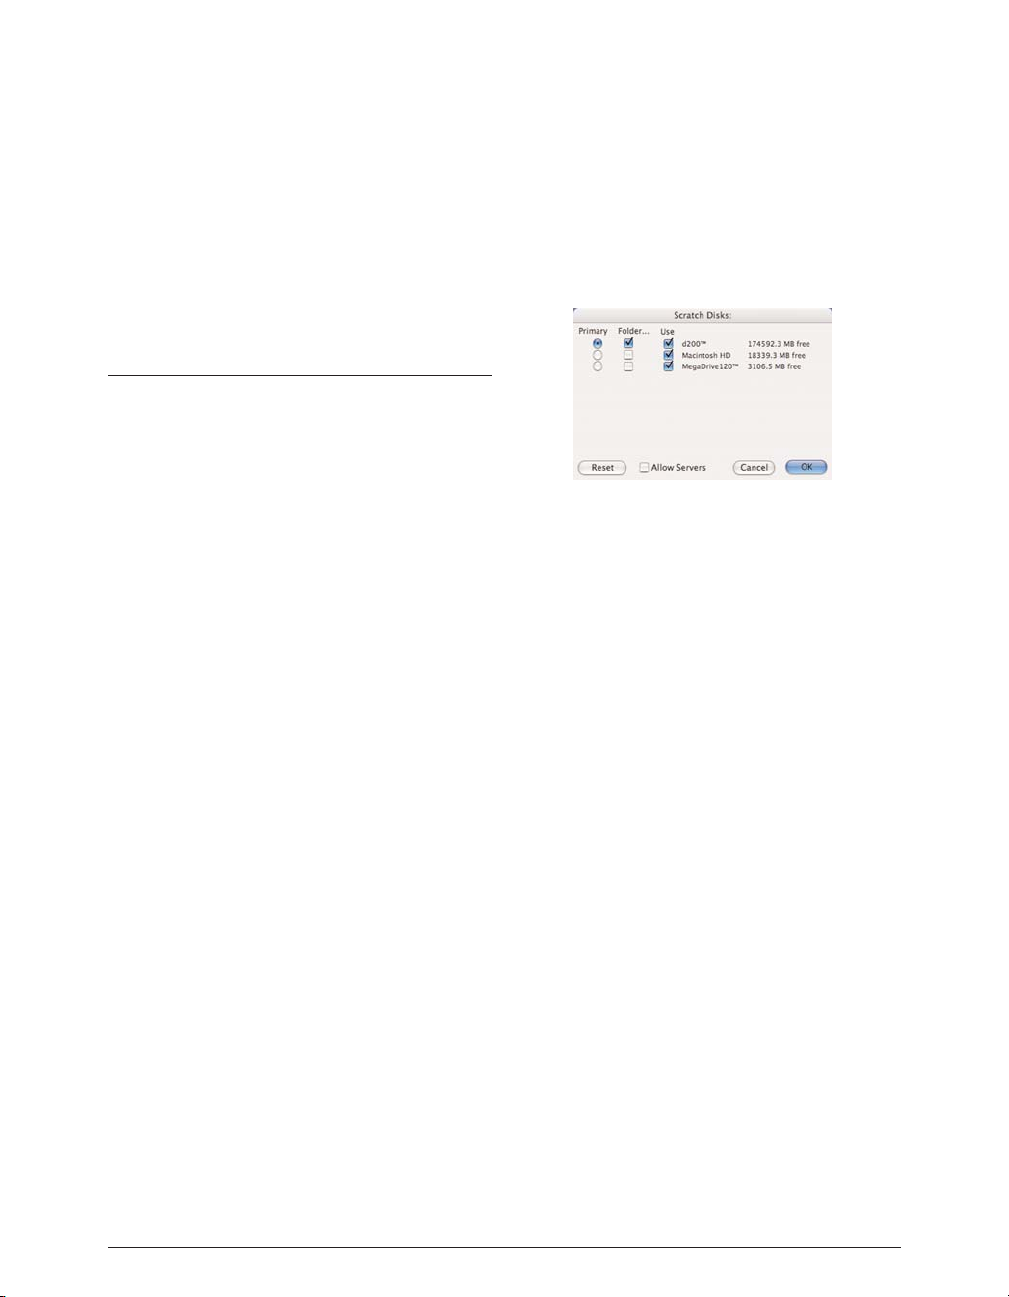
document to the state it was in at the time of that
edit.
4. When you have finished, click Done.
Essential Editing Functions
Peak supports all of the Macintosh’s essential
editing functions such as cut, copy, and paste and
provides several more specifically designed for
audio editing. This section explains how to use
each of these functions.
Because Peak allows you to have multiple audio
documents open at the same time, it is possible to
conveniently cut, copy, paste, and insert audio between
documents. This makes combining material from several
audio documents very fast and easy.
Scratch Disks
Because audio data can be very large, Peak utilizes a
portion of your hard disk’s free space to hold audio data
that has been cut or copied, as well as for temporary or
“scratch” files for undo purposes. If you have more than
one hard drive attached to your Macintosh, the Scratch
Disks section of the Preferences panel allows you to
choose the hard drives (or “scratch disks”) that you wish
to use for these temporary files. Peak allows you to
select which disk you want to have as your default, or
“Primary” disk for this purpose – ideally you would
select the disk that has the most free space. If you are
connected to a file server, you can utilize available
storage on the server by clicking the Allow Servers
checkbox (that is if you have a very fast server
connection). Any available servers will then appear in
the Scratch Disks pop-up menu. This is recommended
only if you have access to a high-speed ethernet, or other
fast server.
Clearing the Clipboard to Reclaim Disk Space
If you no longer need the clipboard contents, you can
free up the disk space occupied by the clipboard by
choosing the Clear Clipboard command from the Edit
menu.
Cutting Audio
The Cut command (-X) allows you to cut a selected range out
of an audio document. Audio that occurs after the cut slides
over to fill in the gap. By cutting and pasting “pieces” of audio,
you can freely rearrange material in an audio document. This
can be a powerful tool for creating audio remixes for musicoriented applications, as well as an indispensable tool for general
sound design tasks. When you cut a selection, the Macintosh
holds the cut audio data in its internal memory (the Clipboard)
in case you wish to paste it elsewhere. Because all real-time
editing you do with Peak is nondestructive, the audio isn’t
actually removed from the original audio document until you
finally save the file to disk with the Save command. At that time,
all edits are saved and any changes that you have made are
permanently saved to the audio document.
Peak 5 User’s Guide84
The Scratch Disks dialog
Page 85

To cut a selection:
1. Click the cursor at the desired location in the audio
document and drag to select the desired range.
2. Choose Cut from the Edit menu (-X) or Toolbar.
3. The selected range is removed from the audio
document(s) and held on the Clipboard. Audio
occurring after the cut slides over to fill in the gap.
Deleting Audio
If you wish to remove a section of audio from an audio
document without using the Cut command, you can use
the Delete key, or the Delete button on the Toolbar. As
with the Cut command and other editing functions, the
audio isn’t actually removed from the original audio
document until you save the file to disk.
To delete a selection:
1. Click the cursor at the desired location in the audio
document and drag to select the desired range.
2. Press the Delete key, or click the Delete button on
the Toolbar.
3. The selection is removed from the audio
document. Audio occurring after the deleted
section slides over to fill in the gap.
Copying Audio
The Copy command ( -C) copies the current
selection to the Macintosh’s Clipboard (or internal
memory buffer) so that you can paste it, insert it,
or use it with optional “Clipboard-based”
processing such as Add, Convolve, Mix, Modulate,
and ImpulseVerb. As with the Cut command,
copying and pasting “pieces” of audio, allows you
to freely rearrange material in a document. This
can be a powerful tool for creating audio remixes
for music-oriented applications, and is an
indispensable tool for sound design.
To copy a selection:
1. Click the cursor at the desired location in the audio
document and drag to select the desired range.
2. Choose Copy from the Edit menu (-C) or
Toolbar.
3. The selection is copied to the Clipboard.
At this point, you can use the Paste, Insert, or Duplicate
commands to place the copied audio into an audio
document. Each of these commands is explained below.
Pasting Audio
The Paste command ( -V ) allows you to paste the
contents of the Clipboard into a location that you
choose by placing an insertion point. Pasting
audio deletes any selected audio and inserts the
clipboard audio at the insertion point. Blending
can be used with the Paste command if you have
made a selection – the pasted audio will be
crossfaded with the audio on either side of the
selection according to the Blending Envelope and
Blending Envelope Duration settings.
By cutting and pasting pieces of audio, you can
freely rearrange material in an audio document. In
musical applications, this gives you the freedom to
entirely “rewrite” compositions by changing the
order of things, repeating desired sections, and so
on. In sound design applications, this gives you
the power to “compose” with sound by creating
audio collages.
Chapter 5: Editing
85
5
Page 86

To paste audio into an audio document:
1. Click the cursor at the point where you wish to
paste the audio data in an audio document or make
a selection of audio you want to delete and replace
with the contents of the clipboard.
2. Choose Paste from the Edit menu (-V ) or
Toolbar.
The Clipboard contents are pasted into the audio
document(s), beginning immediately after the insertion
point. Any selected audio at the location of the paste is
overwritten when the pasted data is inserted into the
audio document.
Replacing Audio
The Replace command allows you to paste audio data
over existing audio – to paste audio into an audio
document without pushing all data to the right of the
insertion point farther to the right (later in time) to
accommodate the newly pasted audio. The Replace
command is useful for “laying over” a portion of audio
while maintaining the timing of the original document.
To replace audio into an audio document:
1. Click the cursor at the point where you wish to
replace the audio data in an audio document.
2. Choose Replace from the Edit menu or Toolbar. All
data to the right of the replaced audio maintains
their time position.
Inserting Audio
The Insert command (-D) allows you to paste audio
data into an audio document without overwriting any
existing data at the insertion point. When you paste data
with the Insert command, all data to the right of the
insertion point or selection start is pushed farther to the
right (later in time) to accommodate the newly pasted
audio. The Insert command is one of Peak’s most useful
tools for restructuring the contents of an audio
document. It is particularly good for “composing on the
fly” since it allows you to cut and insert pieces of audio –
musical phrases, riffs, or simply textural sounds – to
create a composition or soundscape.
To insert audio into an audio document:
1. Click the cursor at the point where you wish to
insert the audio data in an audio document.
2. Choose Insert from the Edit menu (-D) or
Toolbar. All data to the right of the insertion point
is pushed farther to the right (later in time) to
accommodate the newly pasted range.
Duplicating Audio
The Duplicate command has a number of different
behaviors, depending on whether you are working in an
audio document or in a Playlist. The behavior in Playlists
is covered in Chapter 6: Playlists – this section covers the
behaviors of the Duplicate command in audio
documents.
If no selection is made when this command is invoked,
the Duplicate command allows you to paste multiple
copies of audio data into an audio document without
overwriting any existing data at the insertion point.
When you paste data with the Duplicate command, all
data to the right of the insertion point or selection start
is pushed farther to the right (later in time) to
accommodate the newly pasted audio. The Duplicate
command allows you to specify how many times you
would like to Duplicate the audio data contained in the
clipboard. The Duplicate command is very useful for
creating longer audio documents that need to repeat a
Peak 5 User’s Guide86
Page 87

certain piece of audio, such as creating a 4 bar drum loop
out of a 1 bar drum loop.
To Duplicate audio:
1. Select a range of audio, and choose Copy from the
Edit Menu (-C).
2. Click the cursor at the point you wish to insert
duplicate copies of the audio selected in step 1.
3. Choose Duplicate from the Edit menu.
4. Use the Duplicate slider to indicate how many
copies should be inserted, or type in the number of
desired copies.
5. Click the OK button. All data to the right of the
insertion point is pushed farther to the right (later
in time) to accommodate the newly pasted range.
If there is a selection in the waveform when the
Duplicate command is invoked, then Peak automatically
fills the selection with the Clipboard contents. Peak
determines how many times the Clipboard contents
must be duplicated in order to fill the selection. If the
selection is not evenly divisible by the duration of the
Clipboard contents, Peak includes a fraction of the
Clipboard contents to make the duplication completely
sample accurate to the original selection.
To Duplicate audio to fit a Selection:
1. Select a range of audio, and choose Copy from the
Edit Menu (-C).
2. Select a range of audio that will be the “target”, and
will be filled with the Clipboard contents.
3. Choose Duplicate from the Edit menu – Peak fills
the selection with as many copies of the Clipboard
contents as possible, and fraction of Clipboard
contents if there is not enough space left in the
selection for another duplicate of the full Clipboard
contents.
Cropping a Selection
The Crop command (-`) allows you to make a
selection in an audio document and quickly remove all
other audio from the audio document except the
selection. The Crop command is a particularly useful
tool for editing material to be used as samples or sound
effects, since it allows you to isolate and save just the
desired portion of a recording.
To crop a selection:
1. Click the cursor at the desired location in the audio
document and drag to select the desired range.
2. Choose Crop from the Edit menu (-`). All audio
but the selection is removed from the audio
document.
New Document from Selection
The New Document from Selection command will
automatically create a new Audio Document containing
the selected audio from the source document.
To create a new document from a selection:
1. Make a selection in any open audio document that
you want to have as its own document.
2. Choose Document from Selection from the New
submenu under the File menu (Control-N).
3. A new audio document will be created with the
selected audio.
Chapter 5: Editing
87
5
Page 88

Silencing a Selection
The Silence command (-E) replaces the selected
portion of an audio document’s waveform with silence.
This feature is very useful for silencing nonessential
portions of a recording that contain an unusual amount
of noise. This can be used very successfully with spoken
material such as dialog or narration to remove noise
between words or during pauses in speech. It can also
be used to remove pops or clicks that occur in such
material.
To silence a selection:
1. Click the cursor at the desired location in the audio
document and drag to select the desired range.
2. Choose Silence from the Edit menu (-E) – the
selected audio is replaced with silence.
Inserting Silence into a Document
The Insert Silence command allows you to insert a
specific amount of silence into an audio document
at the current insertion point. This feature is very
useful for inserting pauses of a desired duration
into a recording, and can be particularly useful in
adjusting the timing or rhythm of spoken material
such as dialog or narration. When you choose this
command, Peak will prompt you to enter the
amount of silence you wish to insert. You can
enter this value in samples, milliseconds, or
seconds. All audio occurring after the insertion
point is moved later in time by the amount of the
silence that you insert.
To insert silence of a specific duration into a document:
1. Click the cursor at the desired location in the audio
document.
2. Choose Insert Silence from the Edit menu.
3. In the dialog that appears, enter the amount of
silence that you wish to insert into the audio
document – Peak inserts the specified amount of
silence into the document.
Repairing Clicks & Pops
Clicks & pops are common artifacts in digital audio
– they occur in various ways, such as: performing
cut/copy/paste-type edits at non-zero crossings in
the audio waveform, recording vinyl records, faulty
recording equipment or cables, digital sync
problems, etc. There are two main categories of
clicks that Peak’s tools can repair.
When editing audio with Peak, it is unlikely
that you will introduce new clicks and pops
because of its Auto Snap (to Zero) option.
When Auto Snap (to Zero) is turned on
(which it is by default), any selections made
are automatically snapped to the closest zero
crossing in the waveform, where the audio is
at zero amplitude. This ensures that you do
not inadvertently introduce a click or pop
when performing cut/copy/paste type edits.
Analog clicks – such as those found in digital
recordings of vinyl records – are caused by
scratches or other surface imperfections on a
record. This type of click usually appears in the
audio waveform as an abrupt, jagged anomaly.
Peak 5 User’s Guide88
The Insert Silence dialog
Page 89
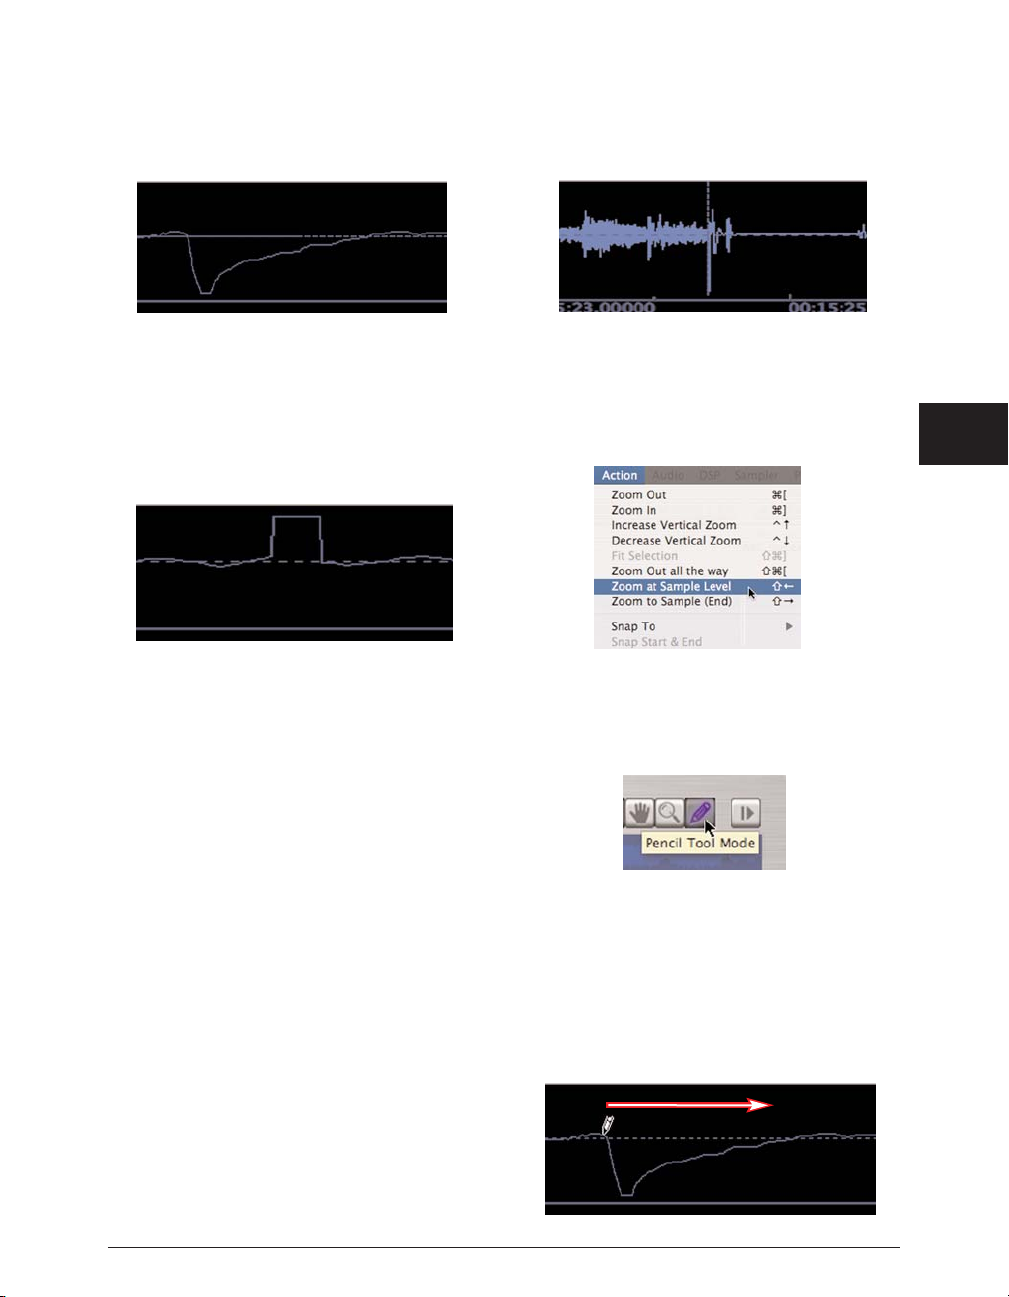
Digital clicks are generally caused by digital sync
problems with audio hardware interfaces, bad digital
cables, or recording with improper buffer settings. This
type of click generally has a square shape to it.
Peak’s Pencil Tool can repair either type, though in
the case of digital clicks you may want to use the
Repair Click and Repair Clicks DSP tools, which are
specifically designed for this purpose (more
information on Repair Click and Repair Clicks is
available in Chapter 7: DSP).
In either case, to use the Pencil Tool, you must be
zoomed in to sample level (sample level being the
first zoom level at which you can see individual
audio samples) or beyond. Additional information
on settings for the Pencil Tool is available in
Chapter 3: Peak Basics.
To repair a click with the Pencil Tool:
1. Locate a click in the audio waveform – it will
appear as an abrupt “spike”.
2. Place the insertion point/cursor directly over the
click.
3. From the Action menu, select Zoom to Sample
Level – you should now be able to see the
individual samples that make up the click.
4. In the tool area of the audio document window,
select the Pencil Tool.
5. Click into the waveform, and “draw” across the
anomaly, trying to approximate the shape of the
waveform on either side of the click. When you
have repaired the click, don’t forget to switch back
to the Arrow Cursor.
Chapter 5: Editing
89
5
Example of a digitized scratch on a vinyl record
Example of a digital click
Page 90
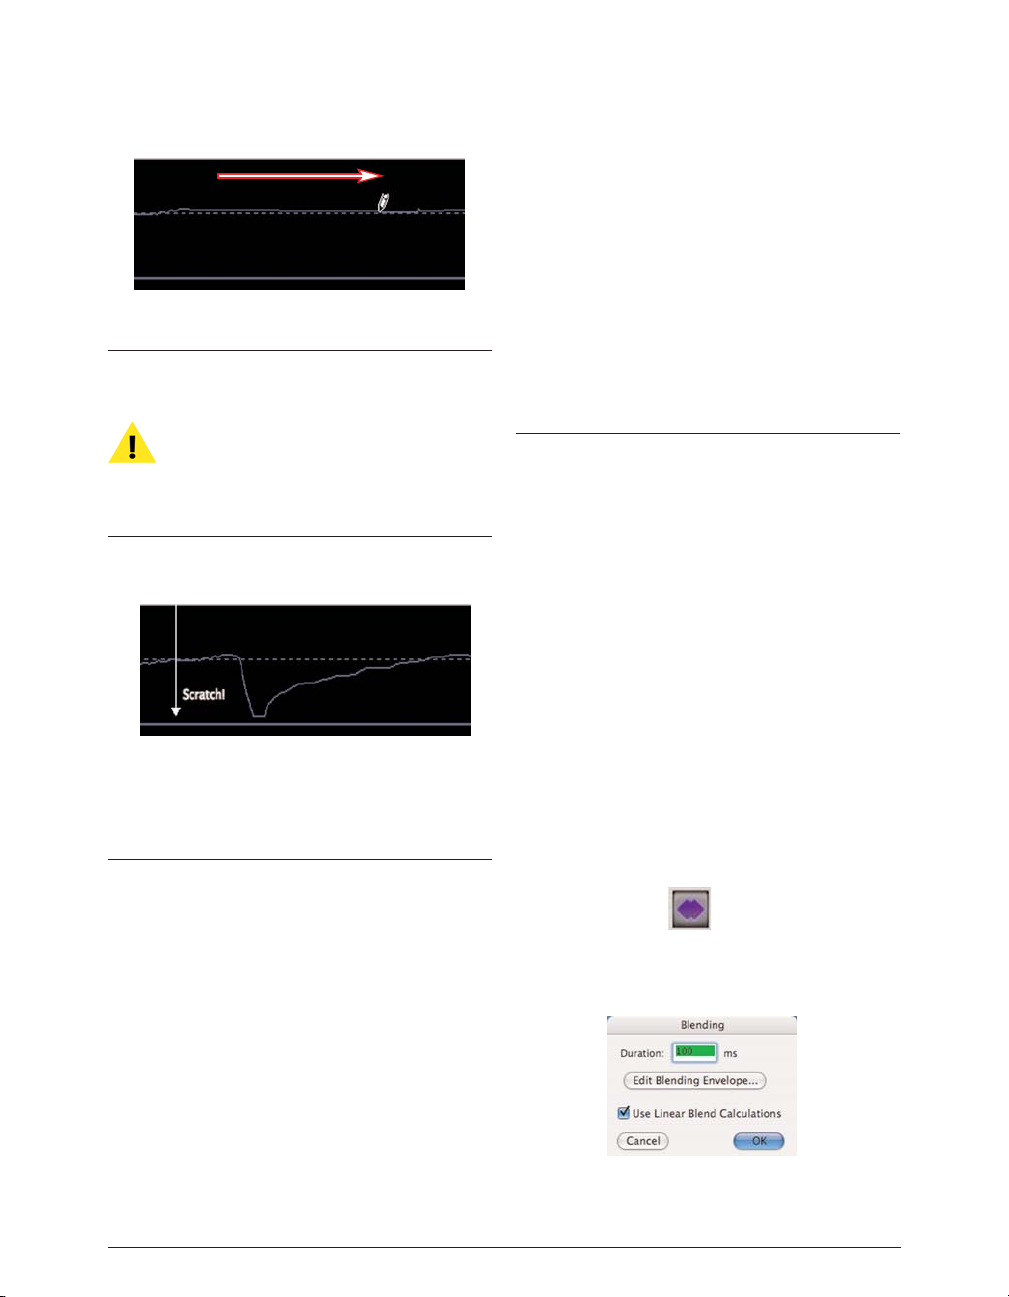
It is useful to place a marker over a click, and
then zoom in to repair it using the Pencil Tool.
Markers are covered in detail later in this chapter.
When you are zoomed in to allow viewing the
waveform in detail, it is very easy to scroll past a
click
– having a marker in place makes it easy to
locate the click, should you lose your place.
Show Edits
When you enable the Show Edits command, Peak
indicates areas of an audio document that you have
edited by enclosing these areas with hatched lines.
This provides you with a convenient visual
reference to portions of the document that have
been affected by your editing actions. Once you
save a document, the edits are saved, and these
indicators will no longer appear.
To Enable Show Edits:
• Choose Show Edits from the Options menu. A
check next to this item indicates it is enabled.
To Disable Show Edits:
• Choose Show Edits again from the Options menu.
The absence of a check next to this item indicates
it disabled.
Using Crossfades and Blending to
Smooth Edits
Blending is an automatic crossfade function with a usereditable envelope. Peak can apply blending to areas of an
audio document where they are modified by cutting,
deleting, pasting, or other editing processes in order to
smooth abrupt transitions between waveform amplitudes. It
can be very useful for creating a smooth transition between
edits that would otherwise sound too abrupt. If you are
going to edit (i.e., Cut, Paste, Delete, etc.) a document, you
may wish to enable blending to smooth things out a bit. You
can toggle blending on or off by clicking the Blend
enable/disable button in the audio document window, or by
pressing the Caps Lock key on your keyboard.
Peak 5 User’s Guide90
Adding a marker near the click when zoomed out can make it easier
to find when you zoom in for a closer look
The Blending Enable/Disable button in the audio document window
The Blending dialog
Page 91
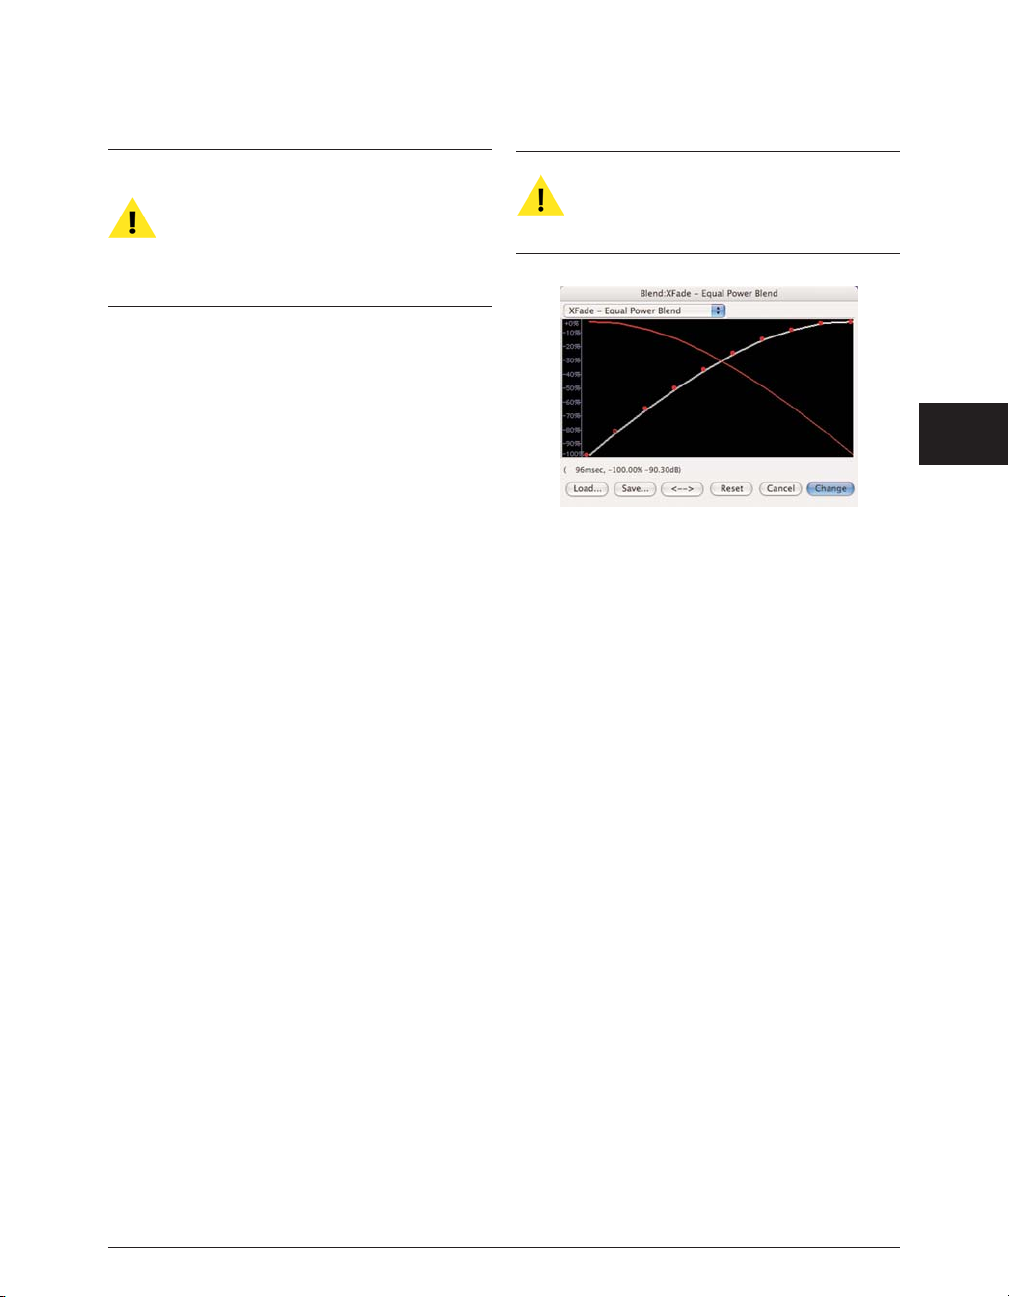
Be aware that Blending can interfere with certain
DSP processes available under Peak’s DSP menu,
such as Fade In/Out and Normalize. You will
typically only want to enable Blending only when
you intend to make an edit in which Blending
may be desirable.
To enable blending:
• Click the blending button in the audio document
window, or press the Caps Lock key on your
keyboard. The blending button will light up in blue
when blending is turned on.
To disable blending:
• Click the blending button in the audio document
window, or press the Caps Lock key on your
keyboard. The blending button will not be
illuminated when blending is turned off.
To set blending parameters:
1. Choose Blending in Peak’s Preferences panel.
2. Enter a value in milliseconds in the Duration field.
Peak will apply a crossfade of this duration across
the edit.
3. If you wish to edit the shape of the crossfade that
the blending function applies, click the Edit
Blending Envelope.
4. Peak’s Crossfades are calculated logarithmically to
preserve volume levels for crossfaded material. If
you want Peak to calculate the Blending Crossfade
linearly, check the Linear Blend Calculations
checkbox.
5. Click OK when you have finished.
To quickly access the Blending Envelope editor,
press the Option key while clicking the Blending
button in the tool area at the upper right of an
audio document window.
To select and edit the blending envelope:
1. Choose Blending in Peak’s Preference panel and
click the Edit Blending Envelope button. The
Blending Envelope Editor appears. The envelope
shape shown here represents the shape of the
crossfade. Peak also comes with several commonly
used preset envelopes that appear in the pop-up at
the top of all of Peak’s Envelope Editing windows
(see also Editing a Fade In/Out Envelope). These
are stored in the Peak Envelopes folder in the
Preferences folder of your home directory.
2. Click anywhere on the line and a new moveable
“breakpoint” will appear.
3. Drag the breakpoint to the desired location.
4. Continue creating and dragging breakpoints until
you have created the envelope that you desire. If
you wish to delete a breakpoint, click on it with the
cursor and press the Delete key on your computer
keyboard.
5. If you wish to reverse the shape of the envelope
you have created, click the “<->” button. This
creates a mirror image of the envelope.
Chapter 5: Editing
91
5
The Blending Envelope Editor
Page 92

6. If you would like to save your custom envelope for
later use, click on the Save button before exiting
the envelope editor.
If you save your custom blending envelope into:
/MacintoshHD/Users/<YourUserAccount>
/Library/Preferences/Peak Envelopes/
it will automatically appear in the Envelope popup menu it the Blending Envelope editor.
7. When you are satisfied with your new envelope
shape, click Change to confirm your edits and close
the envelope editor. Peak will use this envelope
until you change it again.
Note that the Blending Envelope will only be
applied to an edit if it is configured prior to
making the edit.
If Linear Blend Calculations is checked in the
Blending dialog, the Equal Power X-fade envelope
is very effective for a smooth crossfade that will
not result in a dip in the energy of the audio data.
Creating Fade Ins and Fade Outs
Peak allows you to create fade ins or fade outs at any
point in an audio document. Fade ins/outs can be very
useful for smoothly fading in or out of an audio
document, or for fading out of one type of audio material
into another. Very short fade ins can also be useful for
smoothing or removing clicks and pops in a recording.
Peak allows you to control the exact “shape” of the fade
in/out by providing you with preset envelope shapes as
well as very precise user-definable envelope controls for
the fade. Peak also comes with several commonly used
preset envelopes that appear in the pop-up at the top of
the Envelope Editing windows. These are stored in the
Peak Envelopes folder in your Peak folder.
To create a Fade In:
1. Click the cursor at the desired location in the audio
document and drag to select the range you desire.
The Fade In will be applied to the audio within this
selection.
2. Choose Fade In from the DSP menu, or click the
Fade In button in the Toolbar. Peak applies the
Fade In to the selection you have made in the
audio document.
3. To hear the completed Fade In, press -Spacebar.
You will hear the selected audio complete with
your Fade In.
To create a Fade Out:
1. Click the cursor at the desired location in the audio
document and drag to select the range you desire.
The Fade Out will be applied to the selected audio.
2. Choose Fade Out from the DSP menu, or click the
Fade Out button in the Toolbar. Peak applies the
Fade Out to the selection you have made in the
audio document.
3. To hear the Fade Out, press -Spacebar. You will
hear the selected audio complete with your Fade
Out.
Editing a Fade In/Fade Out Envelope
Peak allows you to control the exact shape of Fade
Ins/Outs by providing you with controls for editing the
Fade In/Out envelope. These are found in the Fade In
Peak 5 User’s Guide92
Page 93
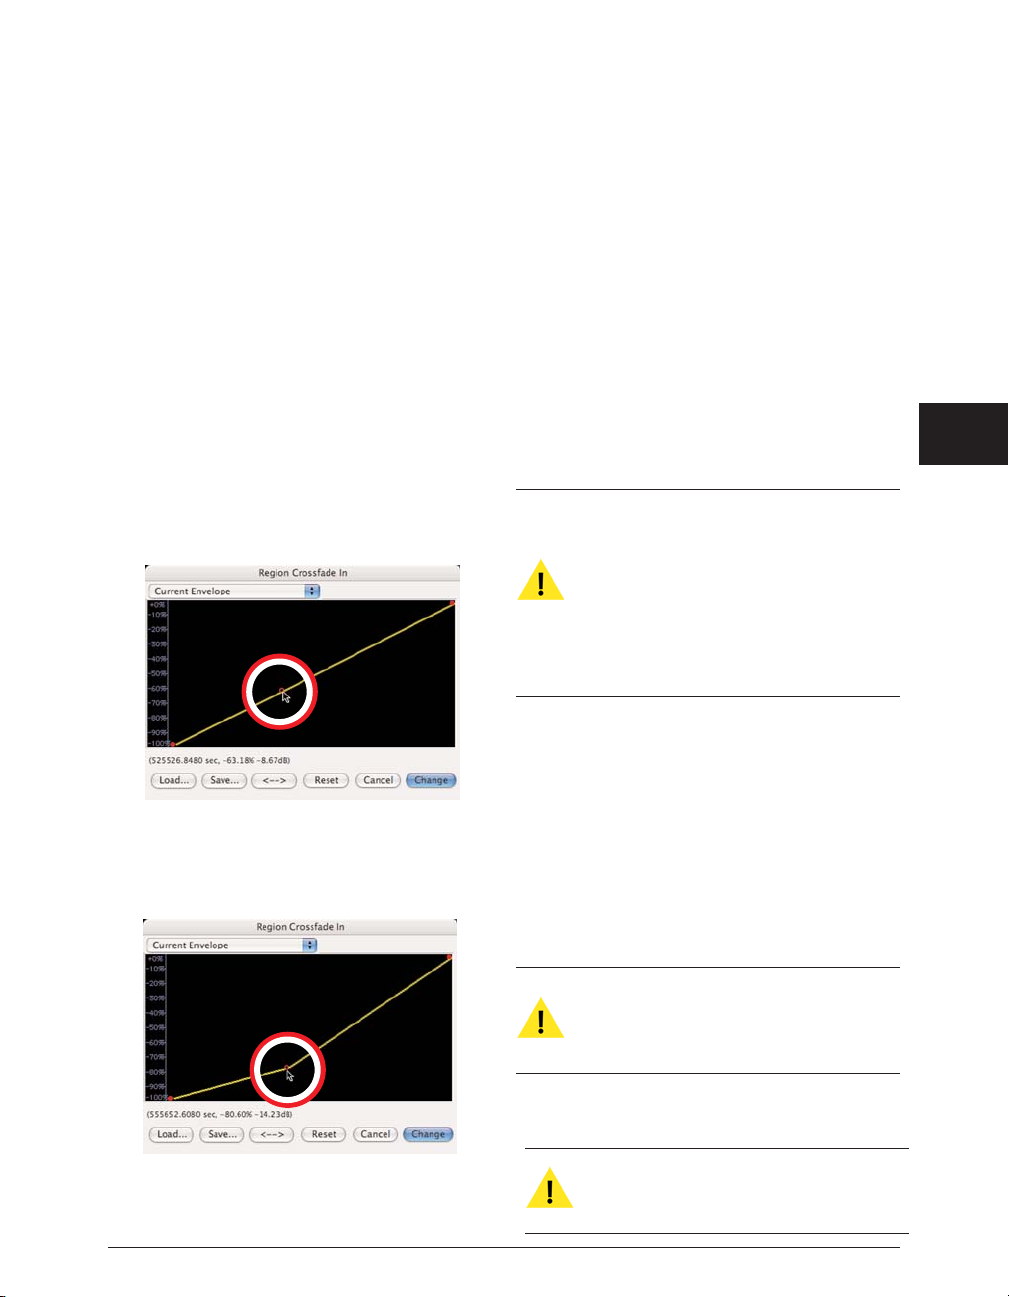
Envelope and Fade Out Envelope sections in the
Preferences panel.
To edit and save a Fade In/Fade Out envelope:
1. Choose Fade In Envelope (or Fade Out Envelope)
from the Preferences panel. The Fade Envelope
Editor appears. The envelope shape shown here
represents the shape of the fade, and overlays the
selected audio to show where the curve is
graphically applied to the waveform representation
of the audio.
2. Click anywhere on the line and a new moveable
“breakpoint” will appear.
3. Drag the breakpoint to the desired location on the
envelope’s curve.
4. Continue creating and dragging breakpoints until
you have created the fade envelope that you
desire. If you wish to delete a breakpoint, click on
it with the cursor and press the Delete key on your
computer keyboard.
5. If you wish to reverse the shape of the envelope
you have created, click the “<->” button. This
creates a mirror image of the envelope.
6. If you would like to save your custom envelope for
later use, click on the Save button before exiting
the envelope editor.
If you save your custom Fade In/Out envelope
into:
/MacintoshHD/Users/<YourAccount>/Library/
Preferences/Peak Envelopes/
it will automatically appear in the Envelope popup menu it the Fade In/Out Envelope editor.
7. When you are satisfied with your new envelope
shape, click Change to confirm your edits and close
the envelope editor. Peak will use this envelope
every time you apply a Fade In (or Fade Out) until
you change it again.
To quickly access the Fade Envelope editor, press
the Option key while clicking the Fade In/Out
buttons in the toolbar, or while picking these
commands from the DSP menu.
Note that the Fade In/Fade Out Envelope will only
be applied to a selection if it is configured prior to
applying the Fade In/Fade Out DSP function.
Chapter 5: Editing
93
5
The Fade Envelope Editor (a Fade In is shown)
Page 94
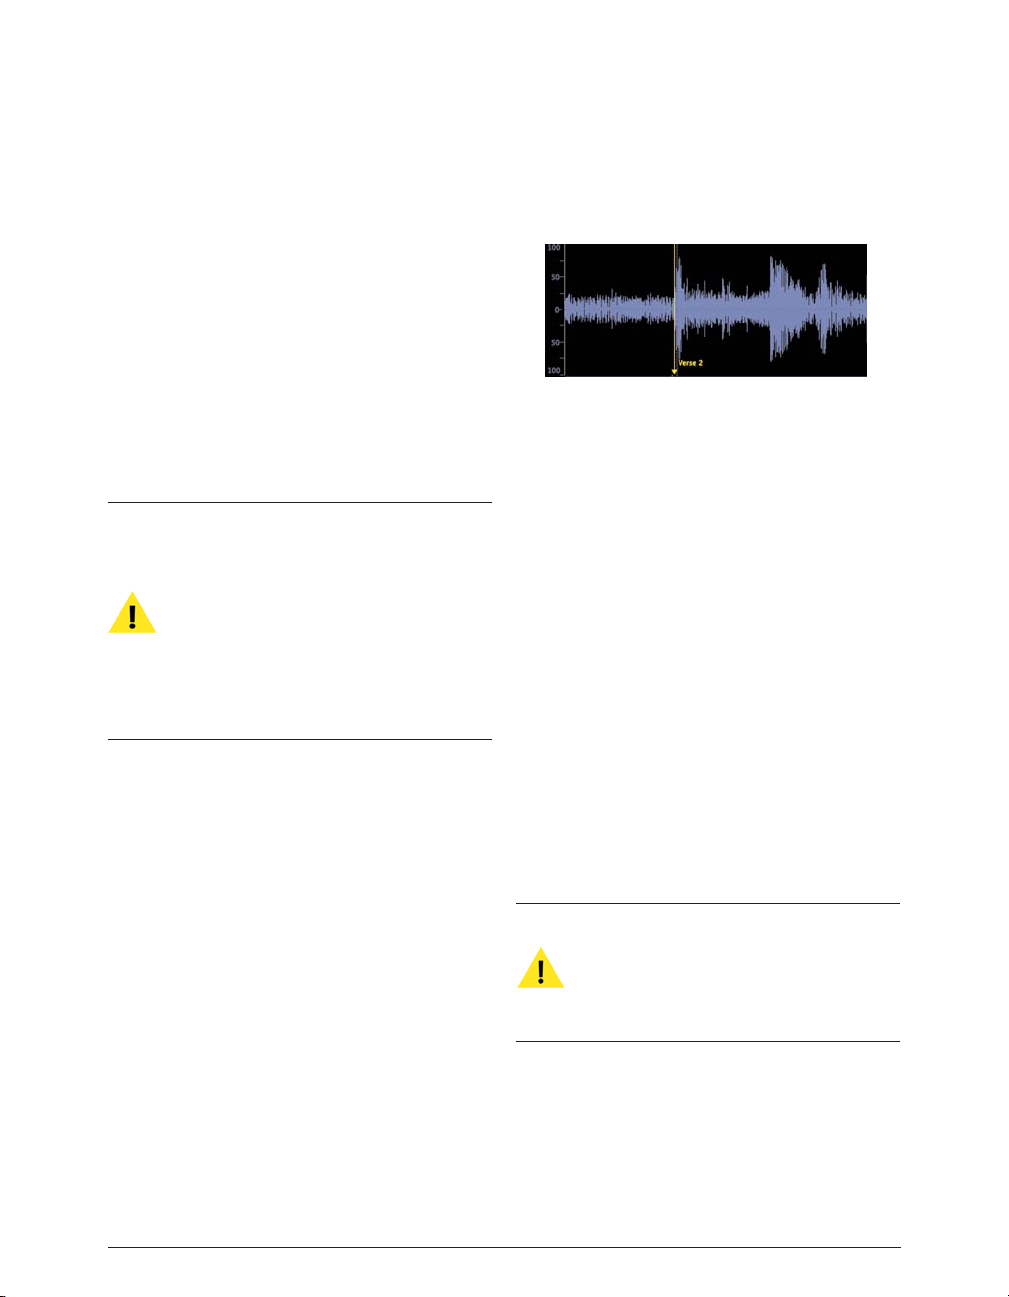
To load a Fade In/Fade Out envelope:
1. Choose Fade In Envelope (or Fade Out Envelope)
from the Preferences panel. The envelope editor
appears.
2. Click the Load button.
3. In the dialog that appears, locate and select the
fade envelope that you desire, and click Open.
4. Click Change to confirm this new envelope and
close the envelope editor. Peak will use this
envelope until you change it again.
The steps above for loading a custom
envelope apply only if you have saved a
custom envelope outside of the Peak
Envelopes folder, for example, if you have
saved custom envelopes with a project that
will be transferred to another Peak user.
Otherwise, you may simply choose the desired
envelope from the Envelope pop-up menu in
the Fade In/Out Envelope editor dialog.
Creating and Using Markers
Peak has a very powerful set of features to control
the placement and modification of markers.
Markers are locations in an audio document that
you define as important. By marking specific
locations in a recording, you can navigate easily to
a location for selection, editing or playback
purposes.
Markers can also be made into loops. Loops are
used to sustain or repeat a section of audio. They
can be used for material that you intend to transfer
to a sampler, or simply for playback within Peak
itself. Peak allows you to create one loop per audio
file. Loops are covered in detail later in this
chapter.
Creating Markers
The next few pages describe in detail the various ways to
create markers – by dropping them “on the fly” during
playback, inserting them during recording with Notepad
Cues, defining them with the mouse when playback is
stopped, creating markers using the Threshold DSP
command, or using the Markers from Tempo command
to insert multiple markers at regular intervals. Of the
various ways to create markers, the mouse method is
perhaps the more precise. However, since it is possible
to fine tune the location of a marker at any time by
dragging it, (or by using the Edit Marker dialog,
explained later) all methods work equally well – the
method you choose to insert markers will depend largely
on the task at hand.
Remember that if Auto Snap is enabled the
insertion point will snap to the nearest selected
Snap To unit. This will cause your marker to be
placed at the nearest Snap To unit when you use
the mouse to create or place a marker.
Once you have created a marker, you can assign or edit
the marker’s attributes in the Edit Marker dialog.
Double-click the triangular base of the marker to open
the Edit Marker dialog.
Peak 5 User’s Guide94
A marker in the Waveform Display
Page 95
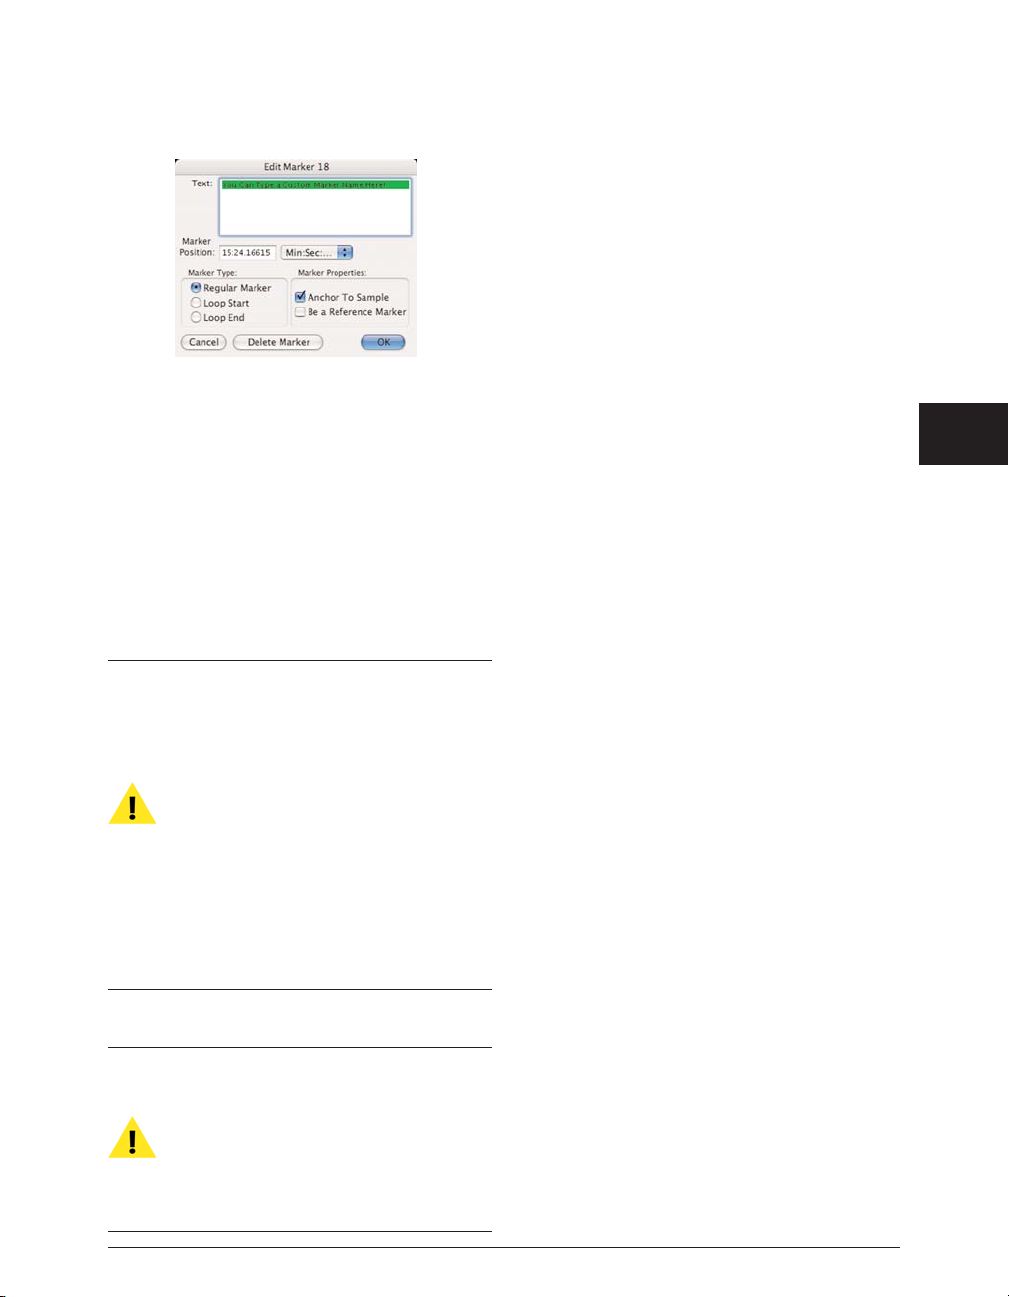
Text
You may wish to give markers meaningful names (up to 256
characters long) based on their locations in an audio document.
Peak gives markers default numeric names based on the name
of the audio document and the order in which the marker was
defined. To name or rename a marker, simply type the new
name in to the Text field of the Edit Marker dialog.
You can easily find any marker, Region, or loop
that you have named by simply typing the first few
letters of its name. For example, if you want to
locate a marker called “Solo,” just type the letters
“s”-“o”-“l”, and Peak will automatically scroll to
the marker called “Solo.” If you hit Enter or Return
after typing the characters, Peak will also
automatically place the insertion point at that
marker. If more than one marker matches the
letters you type in, Peak will locate the first marker
with that name. (Note that numerical marker
name entries will only work from the keypad, not
the numbers keys along the top of your keyboard.)
If you re-name the first marker in a document to
“1”
– then all subsequent markers will be
automatically named “2”, “3”, “4”, and so on. You
can then quickly locate to the desired marker by
typing its number on the numeric keypad (the
numbers at the top of the keyboard serve another
purpose) and pressing Enter.
Marker Position
The Marker Position field allows you to move a
marker to a specific time location in an audio
document by entering the desired value. The popup menu to the right of this field allows you to
choose a time format (samples,
Minutes:Seconds:Miliseconds, etc.) for the value
that you enter in the Marker Position field.
Marker, Loop Start, and Loop End
These three radio-style buttons allow you to define
whether the marker is a regular marker or a loop marker.
If you choose to designate the marker as loop marker,
you can define it as either the loop start or the loop end
by clicking on the corresponding radio button.
Anchor To Sample Checkbox
When you insert or delete audio that is near a marker,
you may want the marker to move with that particular
location on the waveform. This will compensate for the
insertion or deletion, so that the marker remains with
the particular portion of audio you want it to be
associated with. By enabling the Anchor feature for a
marker, you can assure that Peak will “tie” the marker to
a location on a waveform, causing it to stay with that
location even when audio is inserted or deleted into the
document. By default, Peak enables this feature for
markers, loops and Regions.
Be a Reference Marker Checkbox
By defining a marker as a reference marker, you can use the
marker as a reference when you make selections or move other
markers. Selecting or dragging the marker will then
automatically display the distance to the closest reference
marker in whatever time format (Samples or Seconds) is
currently selected in the Peak application. This may be useful,
for instance, if you know that you want a particular sound event
(such as a car door slam) to happen a certain number of seconds
before or after another sound event (such as a tire squeal).
Chapter 5: Editing
95
5
The Edit Marker dialog
Page 96

Deleting Markers
The Delete Marker button allows you to remove the
currently selected marker from an audio document.
The following section explains how to create markers
and define their attributes.
To create a marker when playback is stopped:
1. Click the mouse at the desired location in the
audio document – a dotted vertical line appears,
indicating the insertion point.
2. Press -M on your computer keyboard or choose
New Marker from the Action menu or Toolbar –
Peak places a marker at that location.
To create a marker during playback:
1. Begin playback of an audio document.
Pressing the Return key first, and then typing
the marker’s name ensures that markers are
placed accurately
was made when typing in the marker’s name,
it might take longer than anticipated to enter
the corrected name, and the marker would
be placed later in time. By pressing the
Return key first, and then typing the name,
you can be sure that the marker is placed in
the correct location.
To create a marker using dynamic scrubbing:
– for instance, if an error
1. Hold down the Control key (or Control-Option for
jog-type scrubbing) and drag the mouse across the
desired location to scrub playback.
2. At the desired point during playback, release the
mouse to stop scrubbing.
2. At the desired point during playback, press -M
on your computer keyboard. Peak will drop a
marker at that location.
3. Repeat as desired as playback continues. Each
marker will appear at the appropriate location in
the audio document window.
To create a marker during recording:
1. Open the Record dialog.
2. Check the Notepad checkbox.
3. Begin recording.
4. Press the Return key to place a marker – then type
a name for the marker. To place another marker,
press the Return key and type a name for the
second marker, and so on.
Peak 5 User’s Guide96
3. Press -M on your computer keyboard. Peak will
drop a marker at that location.
To name a marker or set other marker attributes:
1. Double-click on the triangular base of the marker
that you wish to edit. The Edit Marker dialog
appears.
2. Enter a name for the marker.
3. Change other attributes of the marker as desired.
For an explanation of each of these attributes, refer
to the beginning of this section.
4. When you have finished, click OK to close the Edit
Marker dialog – the marker now has the attributes
you selected.
or:
• You may also open the audio document’s Contents
Page 97

Drawer and click the desired marker’s name – it
will become editable text and can be re-named.
When you press the Return key, the marker’s name
is updated.
To move a marker to a new location:
1. Click on the triangular base of the marker and drag
it to the desired location.
2. To make a marker’s position snap to a zerocrossing (the point at which a waveform crosses
the center phase line) as you drag it, hold down
the Shift key while you drag.
To move a marker to a new location numerically:
1. Double-click on the triangular base of the marker.
The Edit Marker dialog appears.
2. Choose the desired time units (Samples, Seconds,
or Milliseconds) from the time format pop-up
menu.
3. In the Position field, enter the precise time location
that you wish to move the marker to.
4. Click OK to close this dialog – Peak moves the
marker to the location you entered in the dialog.
or:
• You may also open the audio document’s Contents
Drawer and click the desired marker’s duration – it
will become editable text and a new value can be
entered. Once the duration is altered and the
Return key is pressed, the marker will snap to the
new location.
To nudge a marker or a selection of markers to a new
location:
1. Make a selection that includes the marker (or
markers) that you wish to nudge.
2. Choose Nudge Markers from the Action menu or
Toolbar – the Nudge Markers dialog appears.
3. In the “Nudge Markers By” field, enter the number
of seconds (positive or negative) by which you
wish to nudge the marker.
4. Click OK to close this dialog – Peak nudges the
marker by the value you entered in the dialog.
To delete a marker:
1. Double-click the triangular base of the marker –
the Edit Marker dialog appears.
2. Click the Delete button – the marker is deleted
from the audio document.
3. Click OK to close the Edit Marker dialog.
To delete markers in a Selection:
1. Make a selection in the audio document that
contains the markers you want to delete.
2. Choose Delete All Except Audio (Option-Delete)
from the Action menu and all markers, Regions,
and loops in the selection will be deleted.
To Copy/Paste only Markers:
1. Select the desired range of audio, which contains
the markers you wish to copy.
2. From the Edit menu, choose Copy (-C).
Chapter 5: Editing
97
5
The Nudge Markers dialog
Page 98
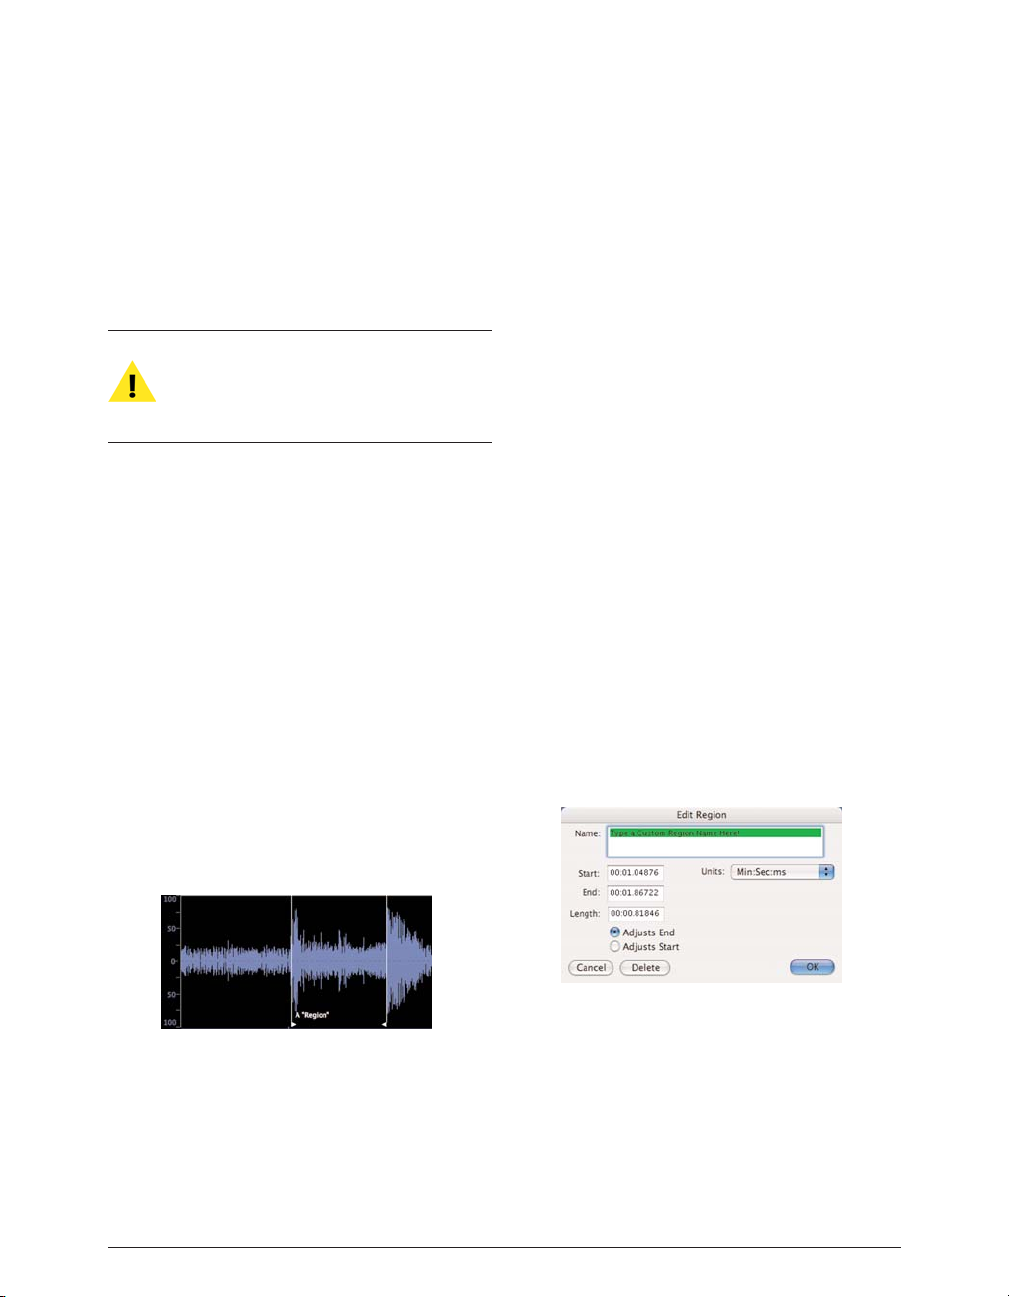
3. Select a different range of audio (in the same
document or in a different document).
4. Hold down the Option key, and choose Paste from
the Edit menu – just the markers are pasted over
the current selection.
To paste just the markers, you must hold down the
Option key and choose Paste from the Edit menu –
using the
-V keyboard command will paste the
audio on the Clipboard, as well as the markers.
Regions
Regions are portions of an audio document defined by
Region Markers using the New Region command from
the Action menu (-Shift-R) or Toolbar. Regions
present in currently open audio documents will be listed
in the Contents window.
Regions can be saved only into AIFF, Sound Designer II, and
WAVE files. However, Peak will also read Regions stored from
other programs in Sound Designer II files. The method Peak
uses to store Regions in AIFF files is specific to Peak and is
not necessarily supported by other software applications. If
you are using Regions with other programs, you will want to
store your files as Sound Designer II or WAVE files.
To define a new Region:
1. Make a selection in an opened audio document.
2. Choose New Region from the Action menu (-
Shift-R) or Toolbar.
3. Type the name of the Region and click OK. The
new Region will appear in the audio document.
To modify the length of the Region by changing the start or end:
• Drag the start or end marker of the Region in the
audio document window.
To move a Region without changing its length:
• Hold down the Option key and drag either the start
or end marker of the Region.
or:
• Click the Horizontal Lock button in the tool area of
the audio document window, and then drag either
the start or end marker of the Region.
To edit a Region’s start, end, or length manually:
1. Double-click on either the start or end marker of
the Region in the audio document window. The
Edit Region dialog will appear.
2. Enter new values for Start, End, or Length times,
then click OK.
To change the name of a Region:
1. Double-click on either the start or end marker of
the Region in the audio document window. The
Edit Region dialog will appear.
2. Type the new name of the Region into the dialog
Peak 5 User’s Guide98
An audio Region (named “A Region”)
The Edit Region dialog
Page 99

and click OK.
or:
• You may also open the audio document’s drawer
and click the desired marker’s name – it will
become editable text and can be re-named. When
you press the Return key, the marker’s name is
updated.
To locate a Region:
• Double-click the Region’s name in the Contents
Window or in the audio document window’s
Contents Drawer. The Region will automatically
snap into view, with the Region selected.
or:
• Type the first few letters of the Region’s name,
and the Region will snap into view automatically.
Please note that if multiple Regions share similar
names, such as “TheIntro” and “TheEnd”, you
would need to type at least one character
beyond “t-h-e-” for Peak to be able to distinguish
between these similar names. If you plan on
using this technique to locate to Regions, it is
recommended that you not use spaces in the
Regions’ names, as when you attempt to locate
to them, pressing the Space Bar on your
keyboard will initiate playback.
To split a Region:
1. Place insertion point cursor at the the desired
location.
2. Choose New Region Split (Ctrl-Shift--R) from the
Action menu. The cursor’s position determines
the split point. Any part of the document before
the split point becomes one Region, and any part
after the split point becomes another Region.
To Copy/Paste only Regions:
1. Select the desired range of audio, which contains
the Region markers you wish to copy.
2. From the Edit menu, choose Copy (-C).
3. Select a different range of audio (in the same
document or in a different document).
4. Hold down the Option key, and choose Paste from
the Edit menu – just the Region markers are pasted
over the current selection.
To paste just the Region markers, you must hold
down the Option key and choose Paste from the
Edit menu – using the
-V keyboard command
will paste the audio on the Clipboard, as well as
the Region markers.
Creating Loops
If you’re editing music or other rhythmically-based
material, it is generally a good idea to test a
selection to make sure it contains an even number
of beats before you cut, copy, or paste it. A good
way to do this is to loop the selection and listen to
the loop as it plays. As described in the next
section, Peak includes Loop Surfer, which can
automate the process of finding a rhythmically
“correct” length of audio to loop, assuming you
know the tempo and the number of beats you wish
to loop. You can also use the Loop Tuner, found in
the DSP menu, to adjust the loop start and end
points. The Loop Tuner is also described in the
next section.
Loops are useful in material that you plan to transfer to a
sampler. Loop markers created with Peak are recognized
by samplers as sustain loops. Peak allows you to create
one loop per audio document.
Chapter 5: Editing
99
5
Page 100

When using a single loop per audio document,
there is a quick and easy way to mark multiple
desired sections for looping. With the loop
markers in the desired location, choose Select
Loop from the Edit menu, then, choose New Region
from the Action menu
– a Region is created that is
the same length as the loop. Using this technique
allows you to create as many Regions as desired
within a single audio document. To loop any of
these Regions, simply
-click between a Region’s
markers to select the Region (or press the Tab key
until the desired Region is selected), and then
choose Loop this Selection from the Action menu.
To play a loop in Peak, select Use Loop in Playback
command (-L) from the Options menu or click the
loop button in the Transport window, begin playback,
and when Peak reaches the loop, it will continue to
repeat until you stop playback. If Use Loop in Playback
is not enabled, Peak will simply play right through the
loop to the end of the audio document or selection.
To create a loop from a selection:
1. Click the cursor at the desired location in the audio
document and drag to select the range you want.
2. Choose Loop This Selection from the Action menu
(-Shift-”-”) or Toolbar. Your selection is now
looped. Loop markers appear at the beginning and
end of the loop.
3. To listen to the loop, choose the Use Loop in
Playback command (-L) from the Options menu
(a check next to this menu item indicates it is
enabled), or click the Loop button in the Transport
window, and start playback by pressing the
Spacebar on your keyboard.
4. You can interactively fine-tune a loop by dragging
the loop start or end markers while loop playback
is engaged. As you drag a loop marker to a new
location, Peak will adjust the playback loop to
reflect the changes you make. You can also use the
Loop Tuner to call up a dialog that allows you to
visually fine tune the loop, and even play the loop
while adjusting it to listen to the changes.
To change regular markers into loop markers:
1. Create markers in an audio document.
2. Double-click on the triangular base of the marker
that you wish to define as the loop start point. The
Edit Marker dialog appears.
3. Click the Loop Start button and click OK. The
marker becomes a Loop Start marker.
4. Double-click on the triangular base of the marker
that you wish to define as the loop end point. The
Edit Marker dialog appears.
5. Click the Loop End button and click OK. The
marker becomes a Loop End marker. You have
now defined a loop in your audio document.
To move a pair of loop markers together:
• Hold down the Option key and drag one of the
loop markers to the desired location. Both
markers move in tandem as you drag.
or:
• Click the Horizontal Lock button in the audio
document window, and drag the begin loop or end
loop marker – both markers move in tandem. Be
sure to turn off Horizontal Lock to move the loop
markers independently.
Peak 5 User’s Guide100
The Horizontal Lock button
 Loading...