

Page 1
Lift
Italiano, 6
English, 8
Deutsch, 10
Français, 12
Español, 14
Portoguês, 16
Nederlands, 18
Русский, 20
Dansk, 22
Suomi, 24
Svenska, 26
ЕллзнйкЬ, 28
Română, 30
Čeština, 32
Slovensky, 34
Istruzioni per l’uso
Instructions for use
Betriebsanleitung
Mode d’emploi
Instrucciones de uso
Instruções de uso
Gebruiksaanwijzingen
Руководство по эксплуатации
Brugsanvisning
Käyttöohjeet
Bruksanvisning
ПдзгЯет чсЮузт
Instrucţiuni de utilizare
Návod k použití
Návod na používanie
Page 2

2
Page 3
3
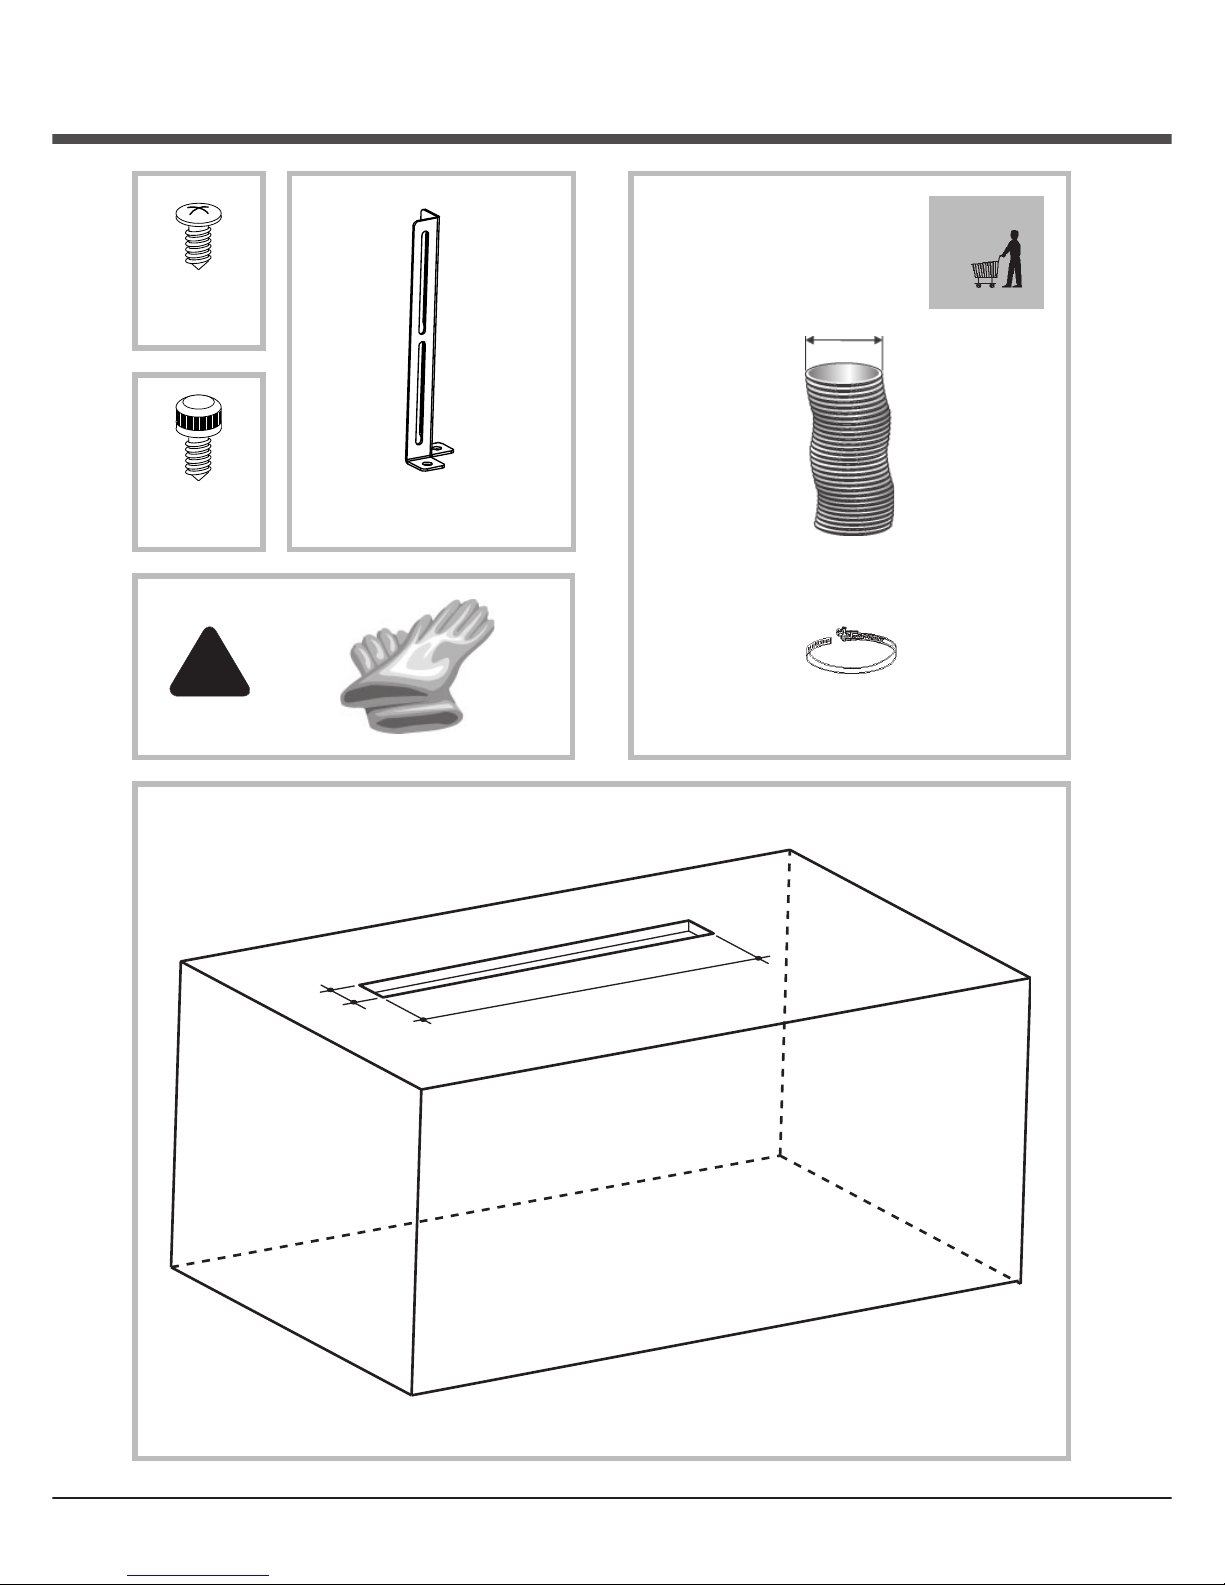
!
2x
1x
ø 15cm
8x
3.9x9.5mm
12x
4.2x15mm
4x
550 / 830
96
Page 4
4
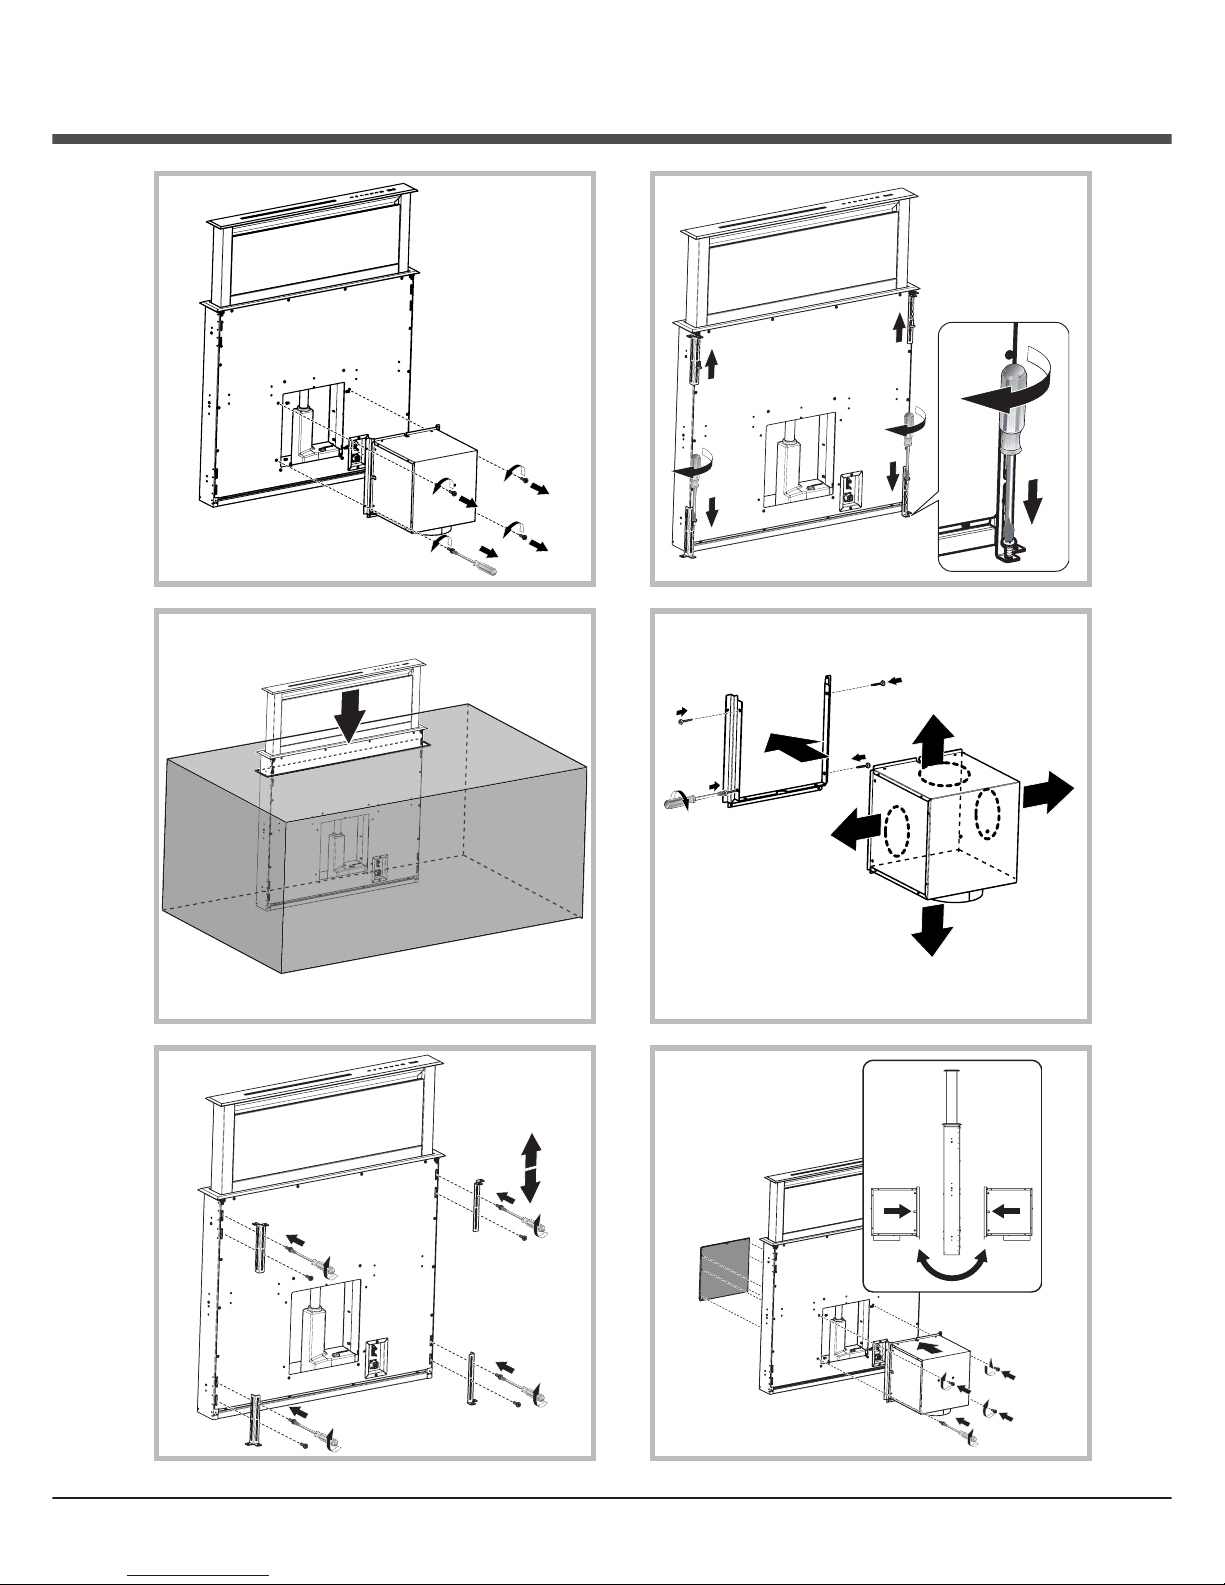
1
3
4
5
6
3.9 x 9.5 mm
4.2 x 15 mm
2
Page 5
5
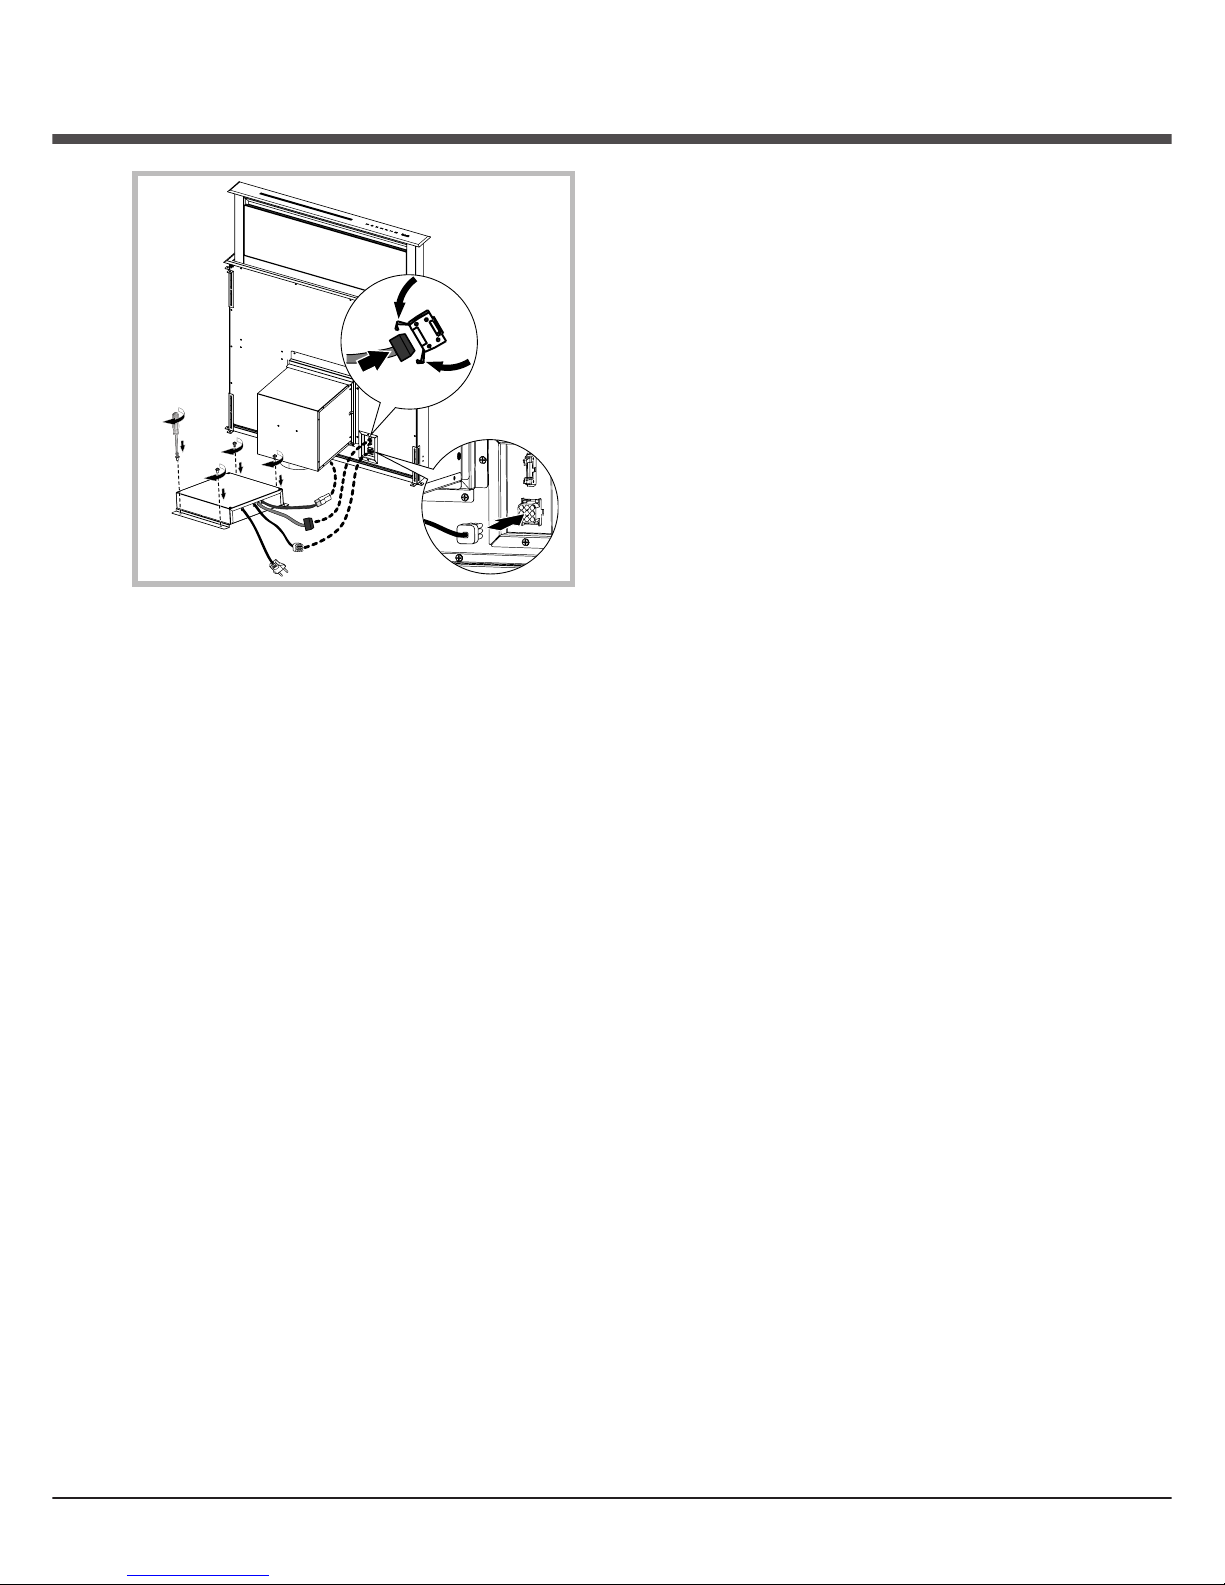
7
4.2 x 15 mm
Page 6
6
IT
! L’installazione va effettuata secondo queste istruzioni
e da personale professionalmente qualificato.
!
Utilizzare dei guanti nelle operazioni di installazione
e di manutenzione.
SCARICO DELL’ARIA
(Per le versioni aspiranti)
! Predisporre il foro ed il condotto di scarico dell’aria
(diametro 150mm).
! Usare un condotto lungo il minimo indispensabile.
! Usare un condotto con minor numero di curve possi-
bile (angolo massimo della curva: 90°).
! Evitare cambiamenti drastici di sezione del condotto.
! Usare un condotto con l’interno piu’ liscio possibile.
! Il materiale del condotto deve essere approvato
normativamente.
! Non collegare la cappa a condotti di scarico dei fumi
prodotti da combustione (caldaie, caminetti, stufe,
ecc).
! Per lo scarico dell'aria da evacuare rispettare le
prescrizioni delle autorità competenti.
Inoltre l'aria da scaricare non deve essere eliminata
attraverso una cavità del muro a meno che tale cavità
non sia destinata a questo scopo.
! Attrezzare il locale con delle prese d’aria per evitare
che la cappa crei una pressione negativa nella stanza
(che non deve superare i 0,04 mbar); infatti se la
cappa è usata contemporaneamente ad apparecchi
non elettrici (stufe a gas, ad olio, a carbone, ecc) ci
puo’ essere il risucchio dei gas di scarico della fonte
di calore.
FILTRANTE O ASPIRANTE ?
La cappa puo’ essere in versione aspirante o in versione
filtrante.
Decidere sin dall’inizio il tipo di installazione.
Per una maggiore efficienza, consigliamo di installare la
cappa in versione aspirante (se possibile).
Versione aspirante
La cappa depura l’aria e la espelle all’esterno attraverso
un condotto di scarico (diametro 150 mm).
Versione filtrante
La cappa depura l’aria e la re-immette pulita nella
stanza.
COMANDI
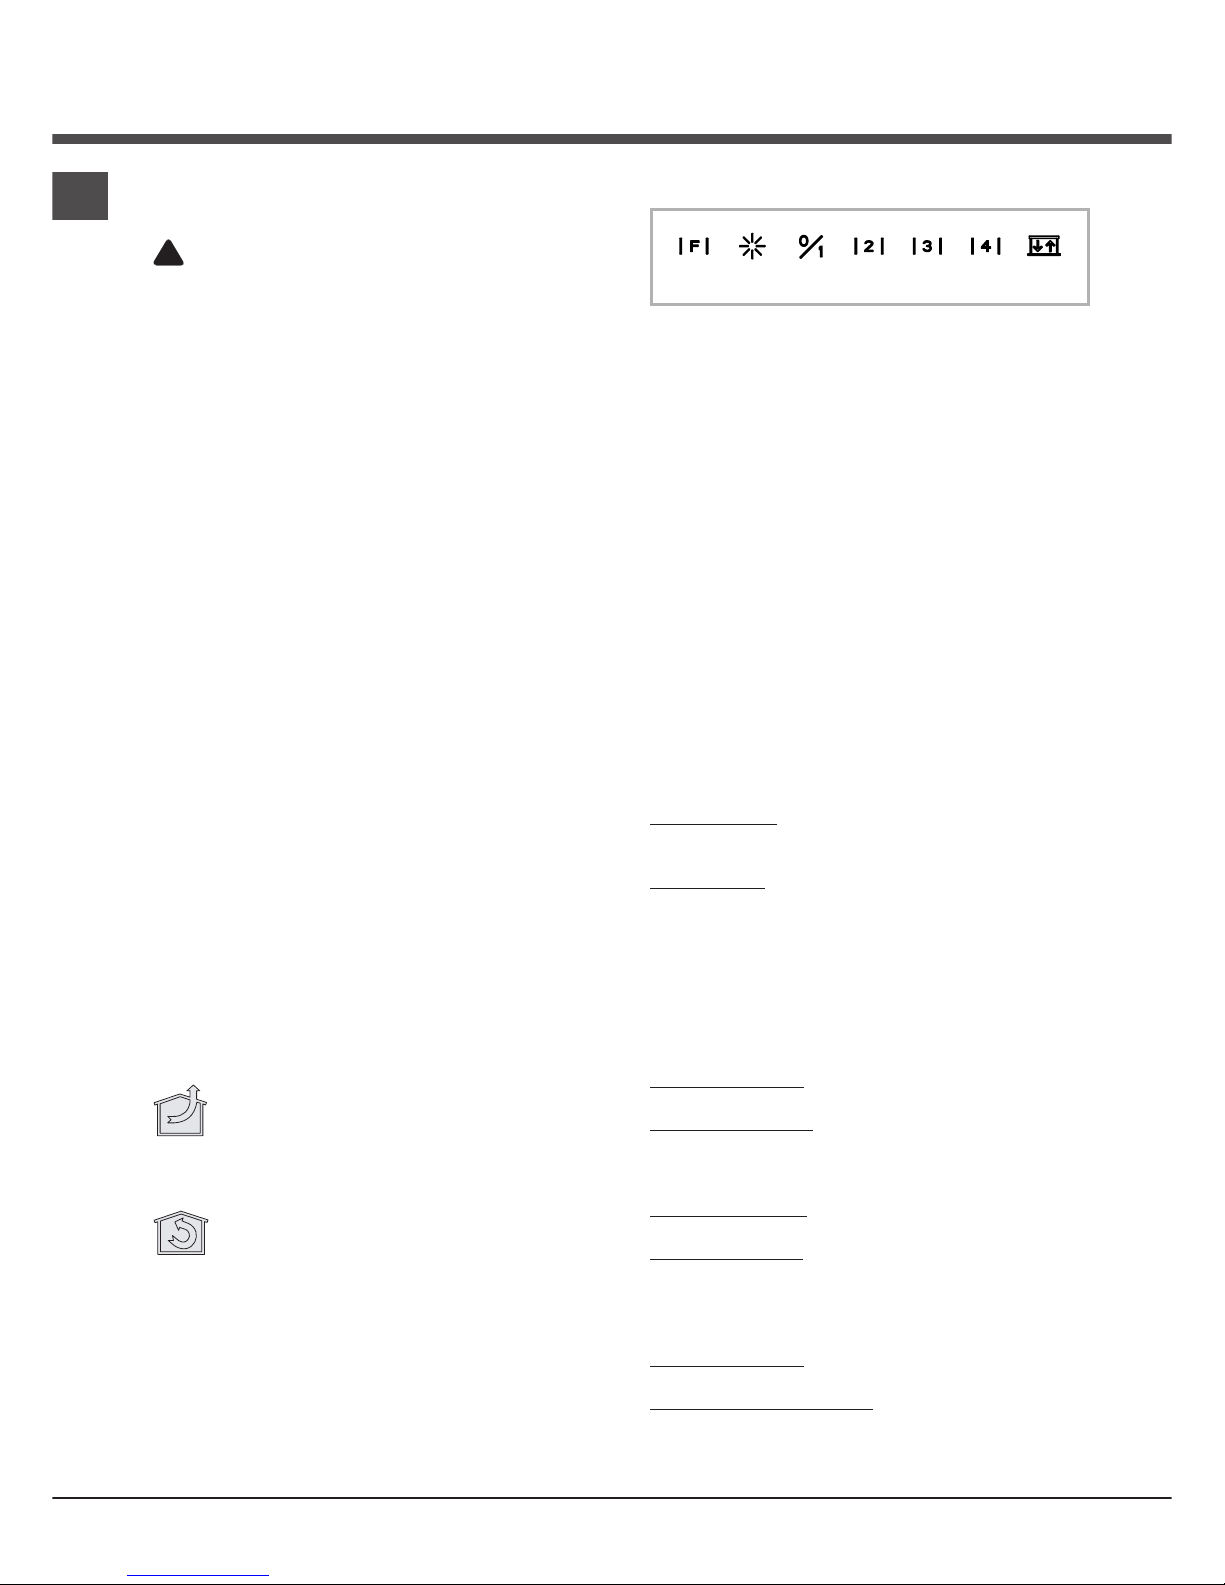
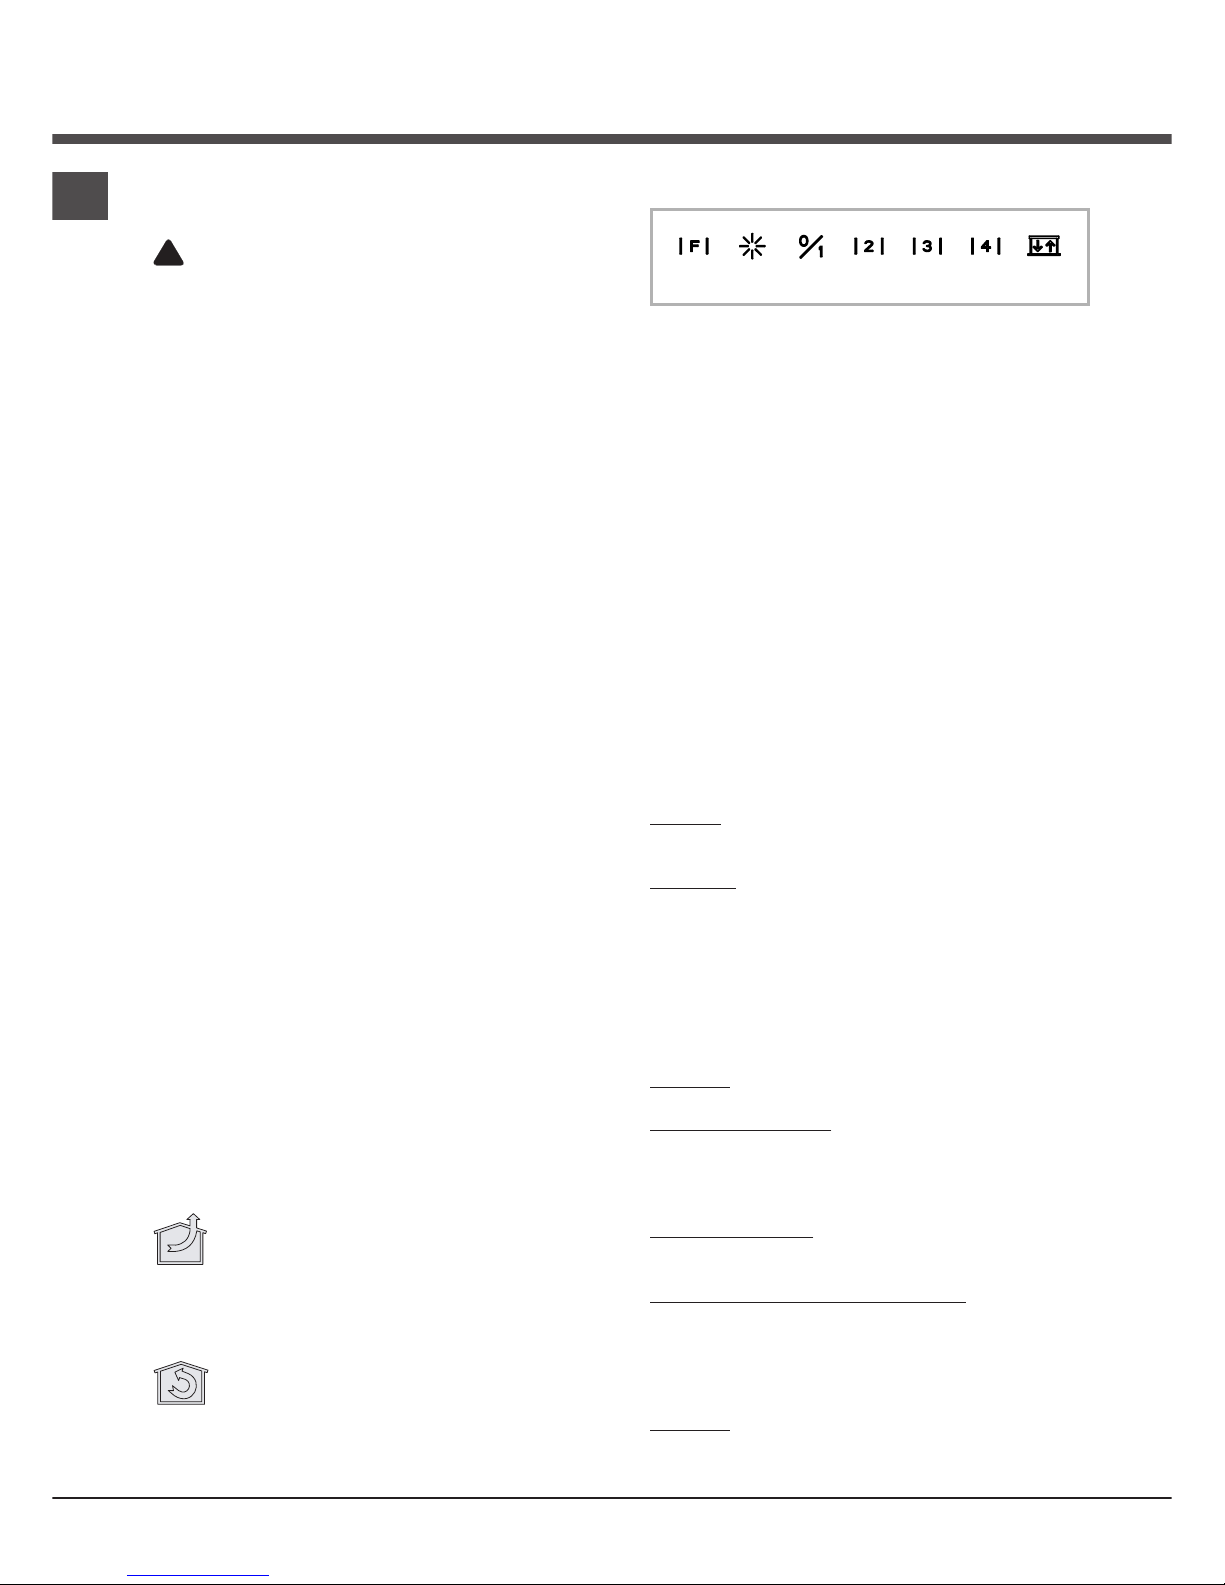
P1 P2 P3 P4 P5 P6 P7
P1: reset allarme filtri
P2: on/off led - con la pressione lunga del tasto è
possibile modificare l'intensità dei led High/Low)
Nota: L'accensione dei led è visualizzata da P2
solo con il pannello aspiratore completamente
aperto
P3: on/off motore - 1^vel
P4: 2^vel
P5: 3^vel
P6: 4^vel
P7: up/down pannello aspiratore (in fase di apertura è
possibile fermare il pannello all'altezza desiderata
con una seconda pressione del tasto)
Funzione Timer 5':
Con la pressione lunga (>2") dei tasti P3, P4, P5 o P6
si attiva la funzione Timer 5'. Trascorsi minuti il motore
si spegne e il carrello si chiude. Le luci passano dall'intensità High all'intensità Low. Quando la funzione è
attiva il led corrispondente alla velocità corrente del
motore lampeggia.
Visualizzazione allarme filtri:
Filtri antigrasso: Dopo 30h di funzionamento del motore, il led del tasto P1 si accende per 30'' ogni qualvolta
si spegne il motore.
Filtro carbone: Dopo 120h di funzionamento del motore, il led del tasto P1 lampeggia per 30'' ogni qualvolta
si spegne il motore.
MANUTENZIONE
! Prima di pulire o fare manutenzione togliere la
tensione.
Pulizia della cappa
QUANDO PULIRE: pulire almeno ogni 2 mesi per
evitare rischi di incendio.
PULIZIA ESTERNA: usare un panno inumidito con
acqua tiepida e detersivo neutro (per le cappe verniciate); usare prodotti specifici per cappe in acciao, rame o
ottone.
PULIZIA INTERNA: usare un panno (o un pennello)
imbevuto di alcool etilico denaturato.
COSA NON FARE: non usare prodotti abrasivi o
corrosivi (esempio spugne metalliche, spazzole troppo
dure, detergenti molto aggressivi, ecc.)
Pulizia dei filtri antigrasso
QUANDO PULIRE: pulire almeno ogni 2 mesi per
evitare rischi di incendio.
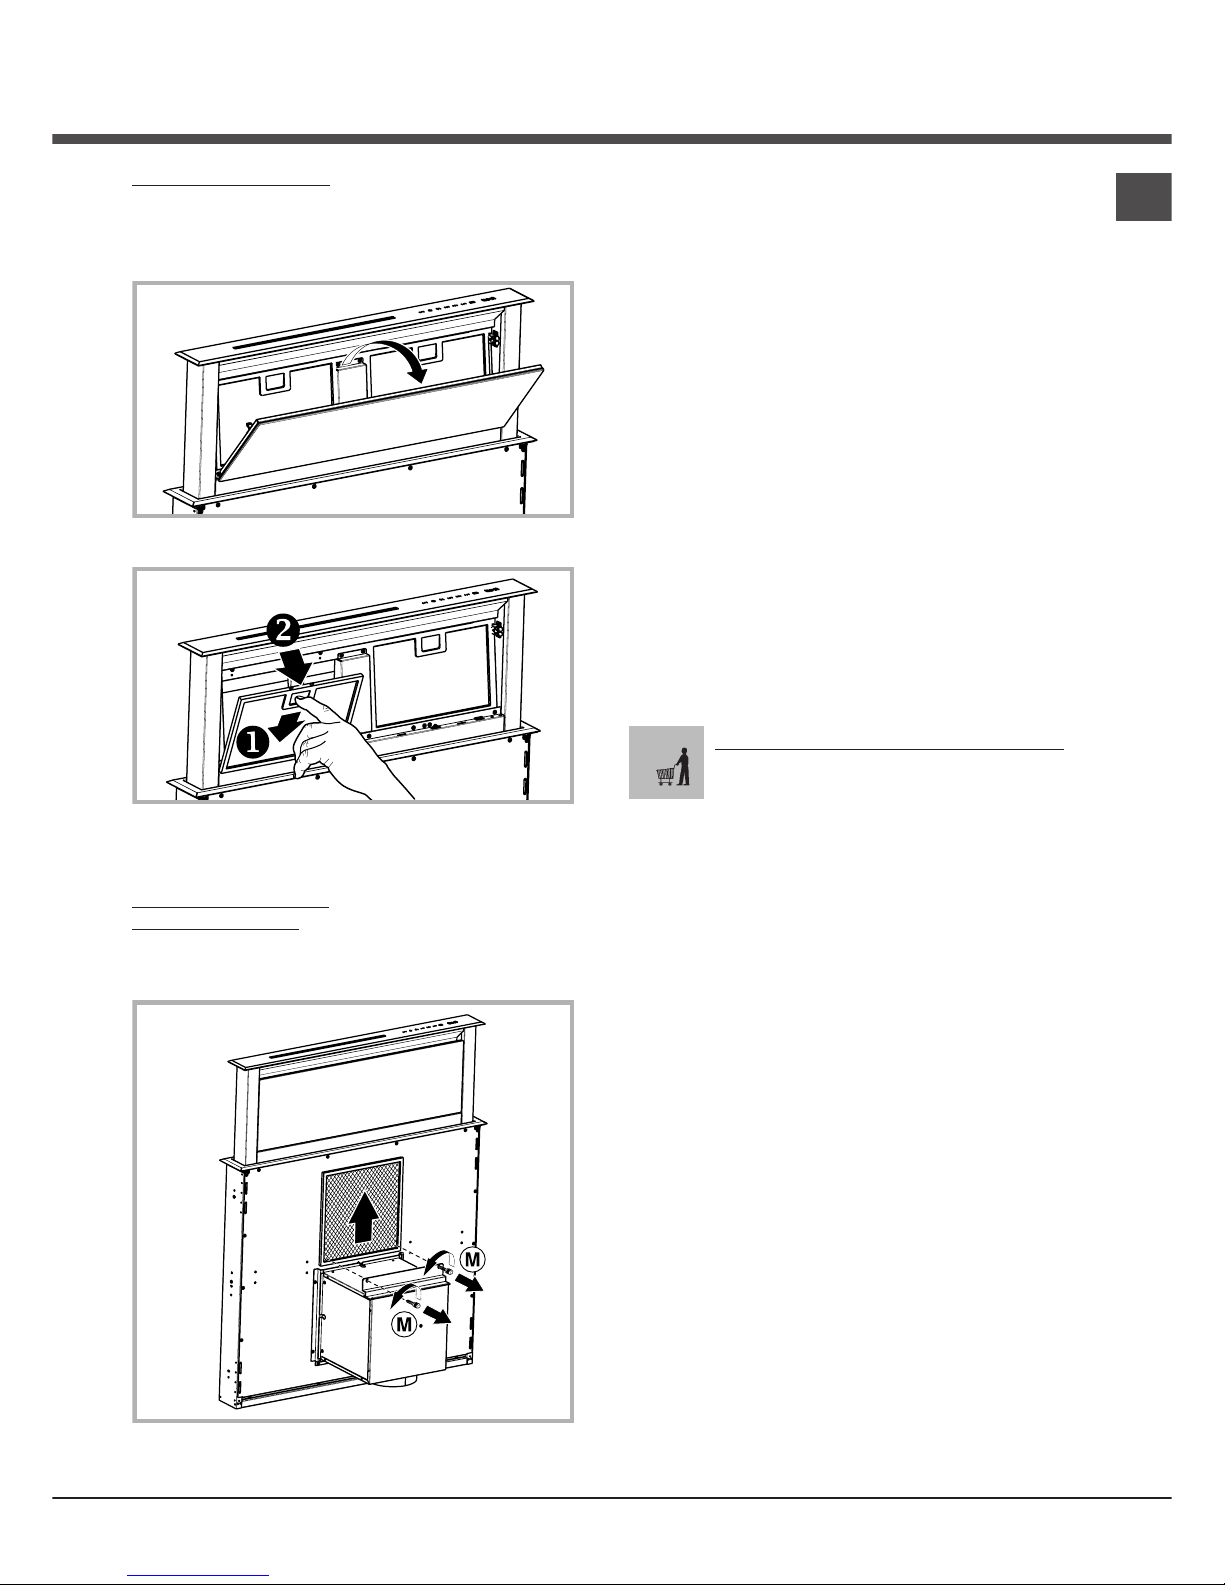
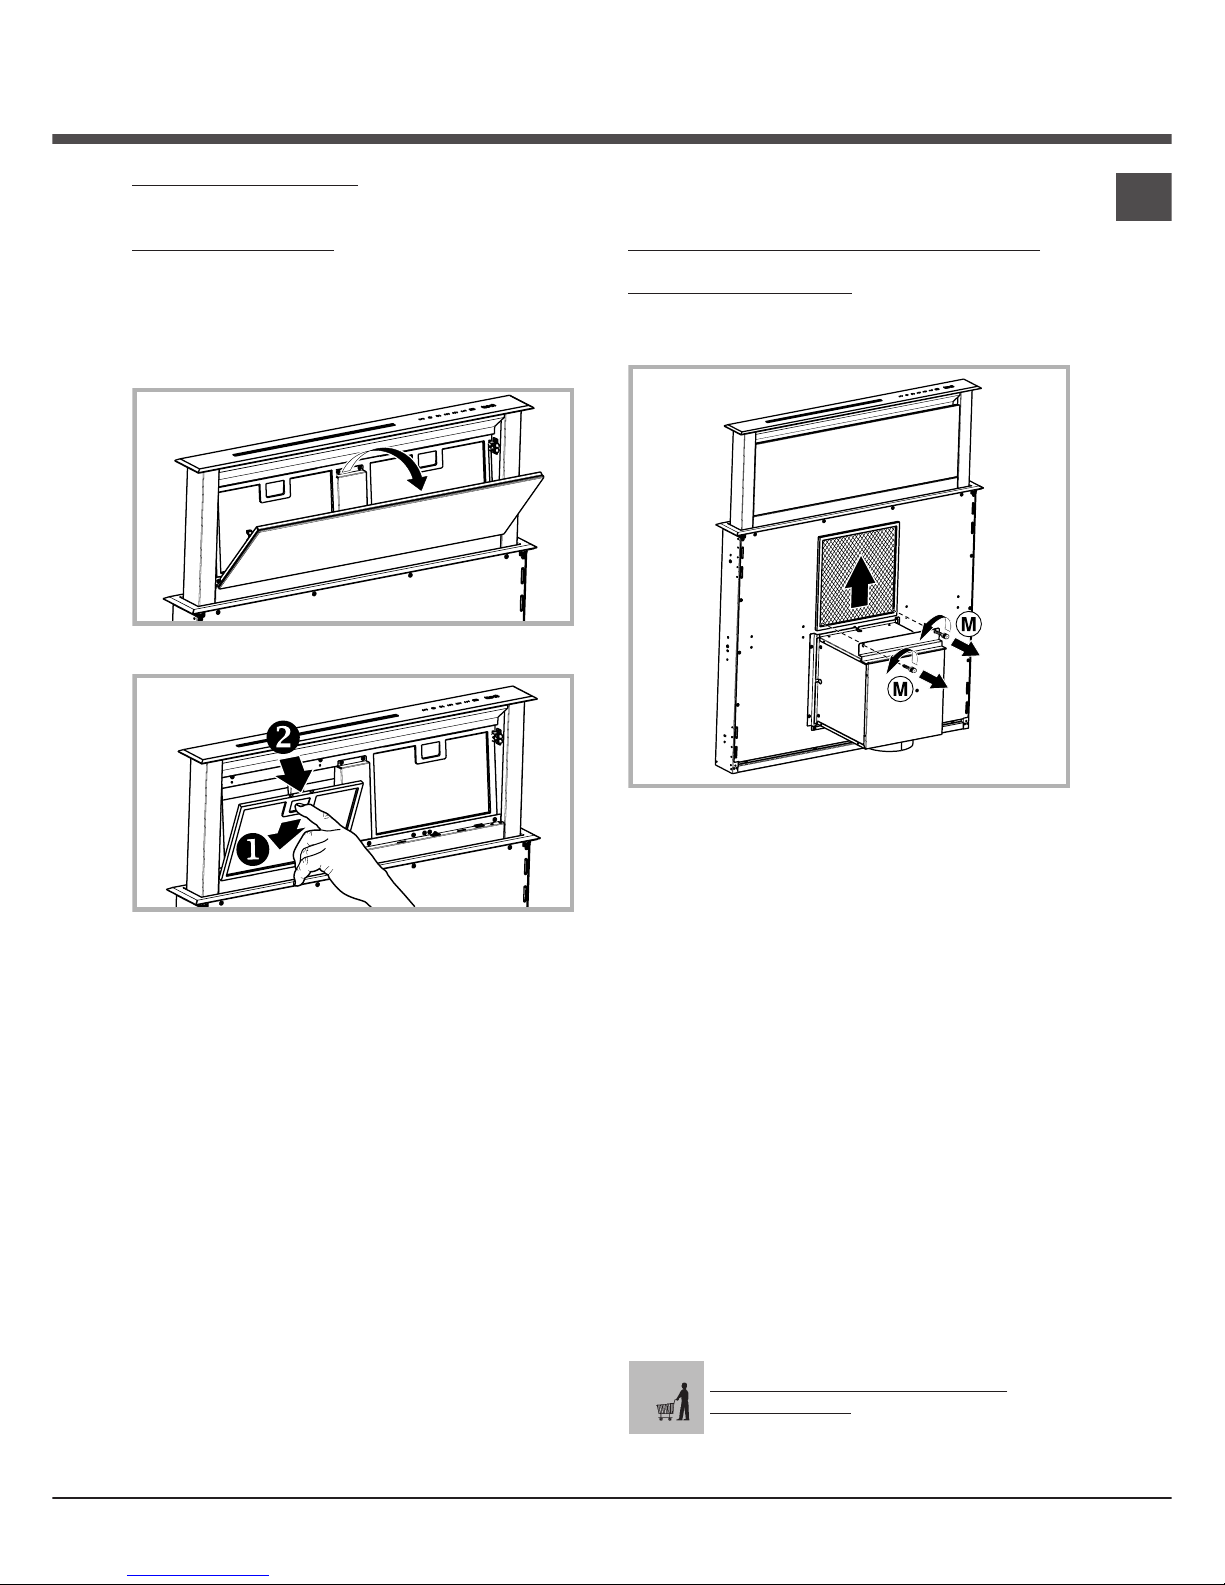
COME TOGLIERE I FILTRI: in corrispondenza della
maniglia spingere il fermo verso il retro e tirare il filtro
verso il basso.
Italiano
Page 7
7
COME PULIRE I FILTRI: lavare con detersivo neutro a
mano o in lavastoviglie. Nel caso di lavaggio in
lavastoglie, un eventuale scolorimento non compromette in nessun modo la funzionalità dei filtri.
Sostituzione del filtro carbone (P)
(Solo per la cappa filtrante)
QUANDO SOSTITUIRE: sostituire almeno ogni 6 mesi.
COME TOGLIERLO: rimuovere il filtro carbone togliendo prima i 2 fermafiltri “M”.
IT
ANOMALIE DI FUNZIONAMENTO
Se qualcosa non sembra funzionare, prima di chiamare
il Servizio Assistenza effettuare i seguenti semplici
controlli:
• Se la cappa non funziona:
Verificare che:
- non c’è interruzione di corrente.
- è stata selezionata una velocità.
• Se la cappa ha un rendimento scarso:
Verificare che:
- La velocità motore selezionata è sufficiente per la
quantità di fumo e di vapori liberata.
- La cucina è sufficientemente areata per permettere
una presa d’aria.
- Il filtro carbone non è consumato (cappa in versione
filtrante).
• Se la cappa si è spenta nel corso del normale funzionamento:
Verificare che:
- non c’è interruzione di corrente.
- il dispositivo di interruzione omnipolare non è scattato.
Componenti non in dotazione con il prodotto
Page 8
8
GB
English
! The appliance must be installed by a qualified person
in compliance with the instructions provided.
!
Wear gloves when carrying out installation and
maintenance operations.
AIR VENT
(for ducting versions)
! Prepare the hole and the air vent duct (150 mm
diameter).
! Use a duct of the minimum indispensible length.
! Use a duct with as few elbows as possible (maximum
elbow angle: 90°).
! Avoid drastic changes in the duct cross-section.
! Use a duct with an as smooth as possible inside.
! The duct must be made of certified material.
! Do not connect the hood to smoke exhaust ducts for
the products of combustion (boilers, fireplaces,
stoves, etc).
! For the air vents comply with the provisions laid down
by the competent authorities.
In addition, the air must not be evacuated through a
hole in the wall unless specifically intended for this
purpose.
! Fit air intakes in the room to prevent the hood from
creating a negative pressure in the room (which must
not exceed 0.04 mbar); if the hood is used at the
same time as non-electrical equipment (gas-, oil- and
charcoal-fired stoves, etc.) the exhaust gas may be
sucked in by the heat source.
FILTERING OR DUCTING VERSION ?
The hood may be in filtering or in ducting version.
Decide from the outset which type is to be installed.
For better efficiency, we recommend installing the hood
in the ducting version (if possible).
Ducting version
The hood purifies the air and evacuates it to the outside
through an exhaust duct (diameter 150 mm).
Filtering version
The hood purifies the air and recycles the clean air
back into the room.
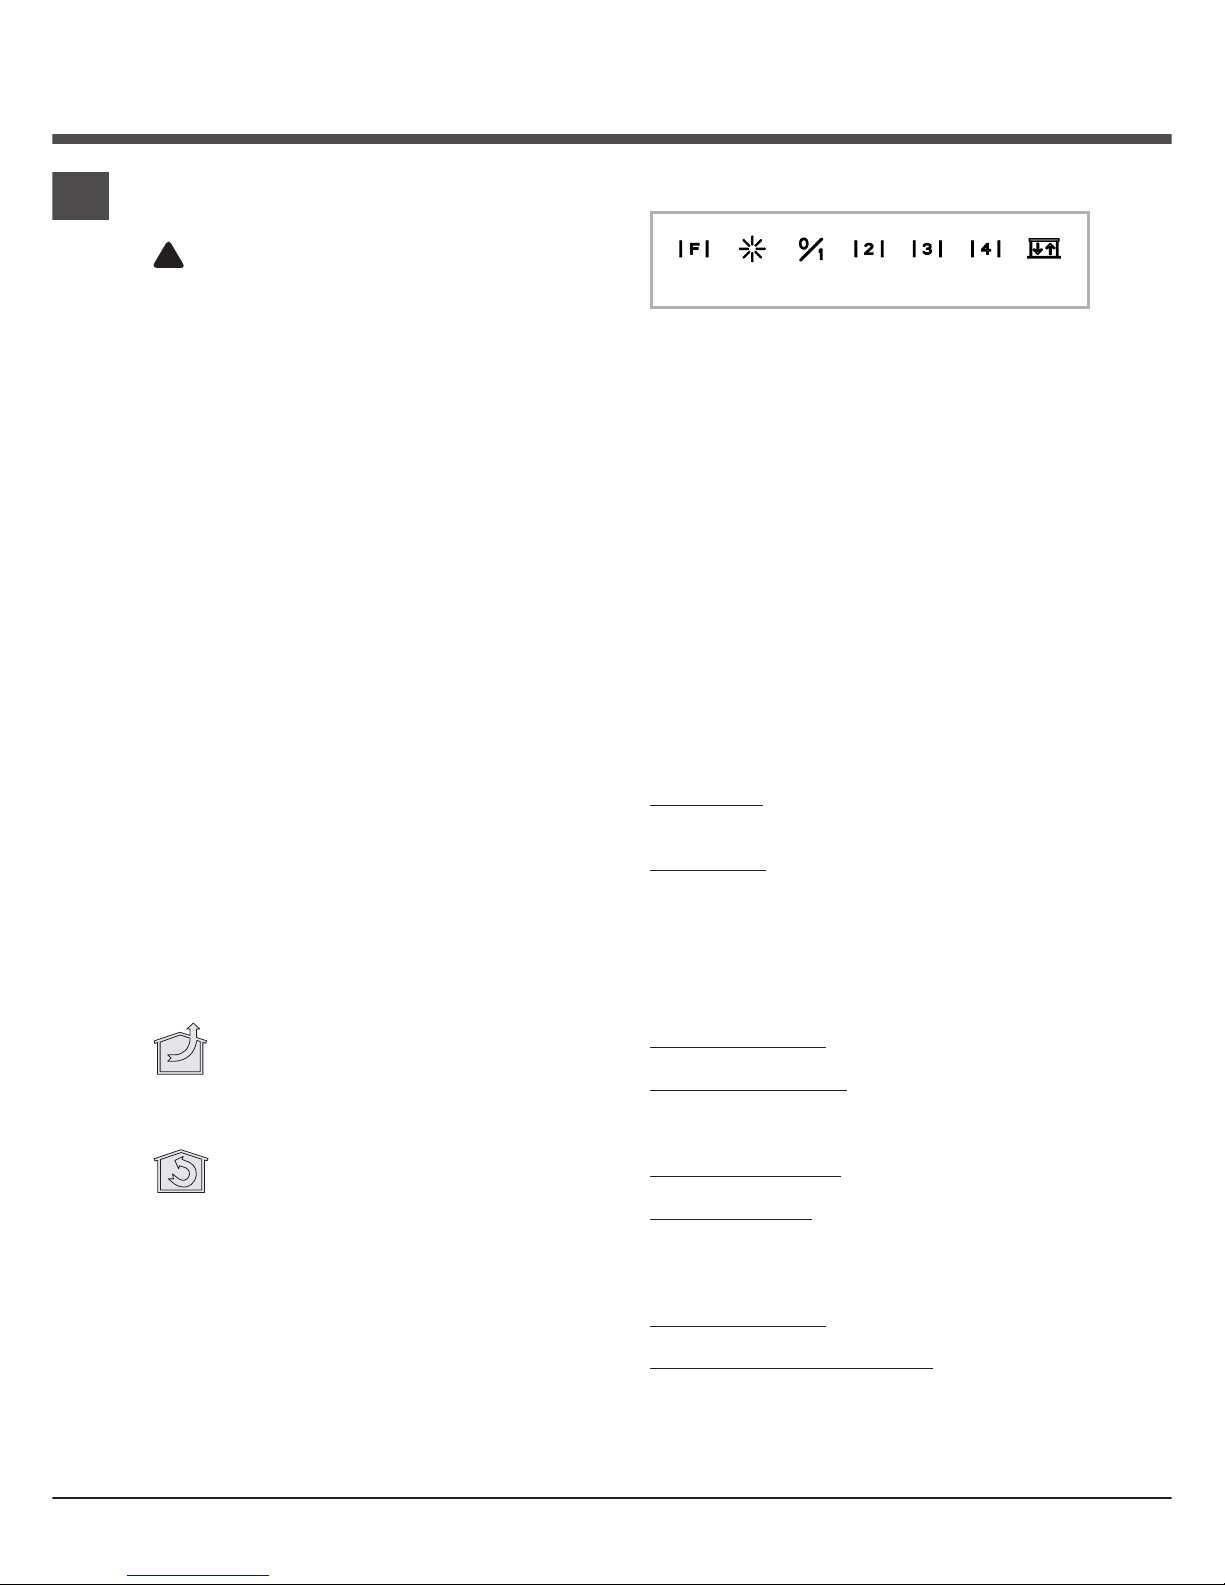
CONTROLS
P1 P2 P3 P4 P5 P6 P7
P1: Filter alarm reset
P2: LED on/off - holding the button down you can
change the LED intensity to High or Low
Note: LED activation is displayed by P2 only when
the lift panel is completely open.
P3: Motor on/off - 1st speed
P4: 2nd speed
P5: 3rd speed
P6: 4th speed
P7: Lift panel up/down (during opening the panel can
be stopped at the desired height by pressing the
button a second time).
5' Timer function:
Holding the buttons P3, P4, P5 or P6 pressed down
(>2") the 5' Timer function is activated. When the time
has run out, the motor turns off and the lift closes. The
LEDs change from High to Low intensity. When the
function is active, the LED corresponding to the current
motor speed blinks.
Filter alarm display:
Grease filters: After 30h of motor operation, the LED of
the P1 button comes on for 30'' every time the motor
turns off.
Charcoal filter: After 120h of motor operation, the LED
of the P1 button blinks for 30'' every time the motor
turns off.
MAINTENANCE
! Before cleaning or maintenance cut the power.
Cleaning the hood
WHEN TO CLEAN IT: clean it at least every 2 months
to prevent the risk of fire.
EXTERNAL CLEANING: use a cloth moistened in
lukewarm water and neutral detergent (for painted
hoods); use specific products for steel, copper or brass
hoods.
INTERNAL CLEANING: use a cloth (or brush) soaked
in denatured ethyl alcohol.
WHAT NOT TO DO: do not use abrasive or corrosive
products (e.g. metal sponges, brushes, too hard
brushes, very aggressive detergents, etc.)
Cleaning the grease filters
WHEN TO CLEAN IT: clean it at least every 2 months
to prevent the risk of fire.
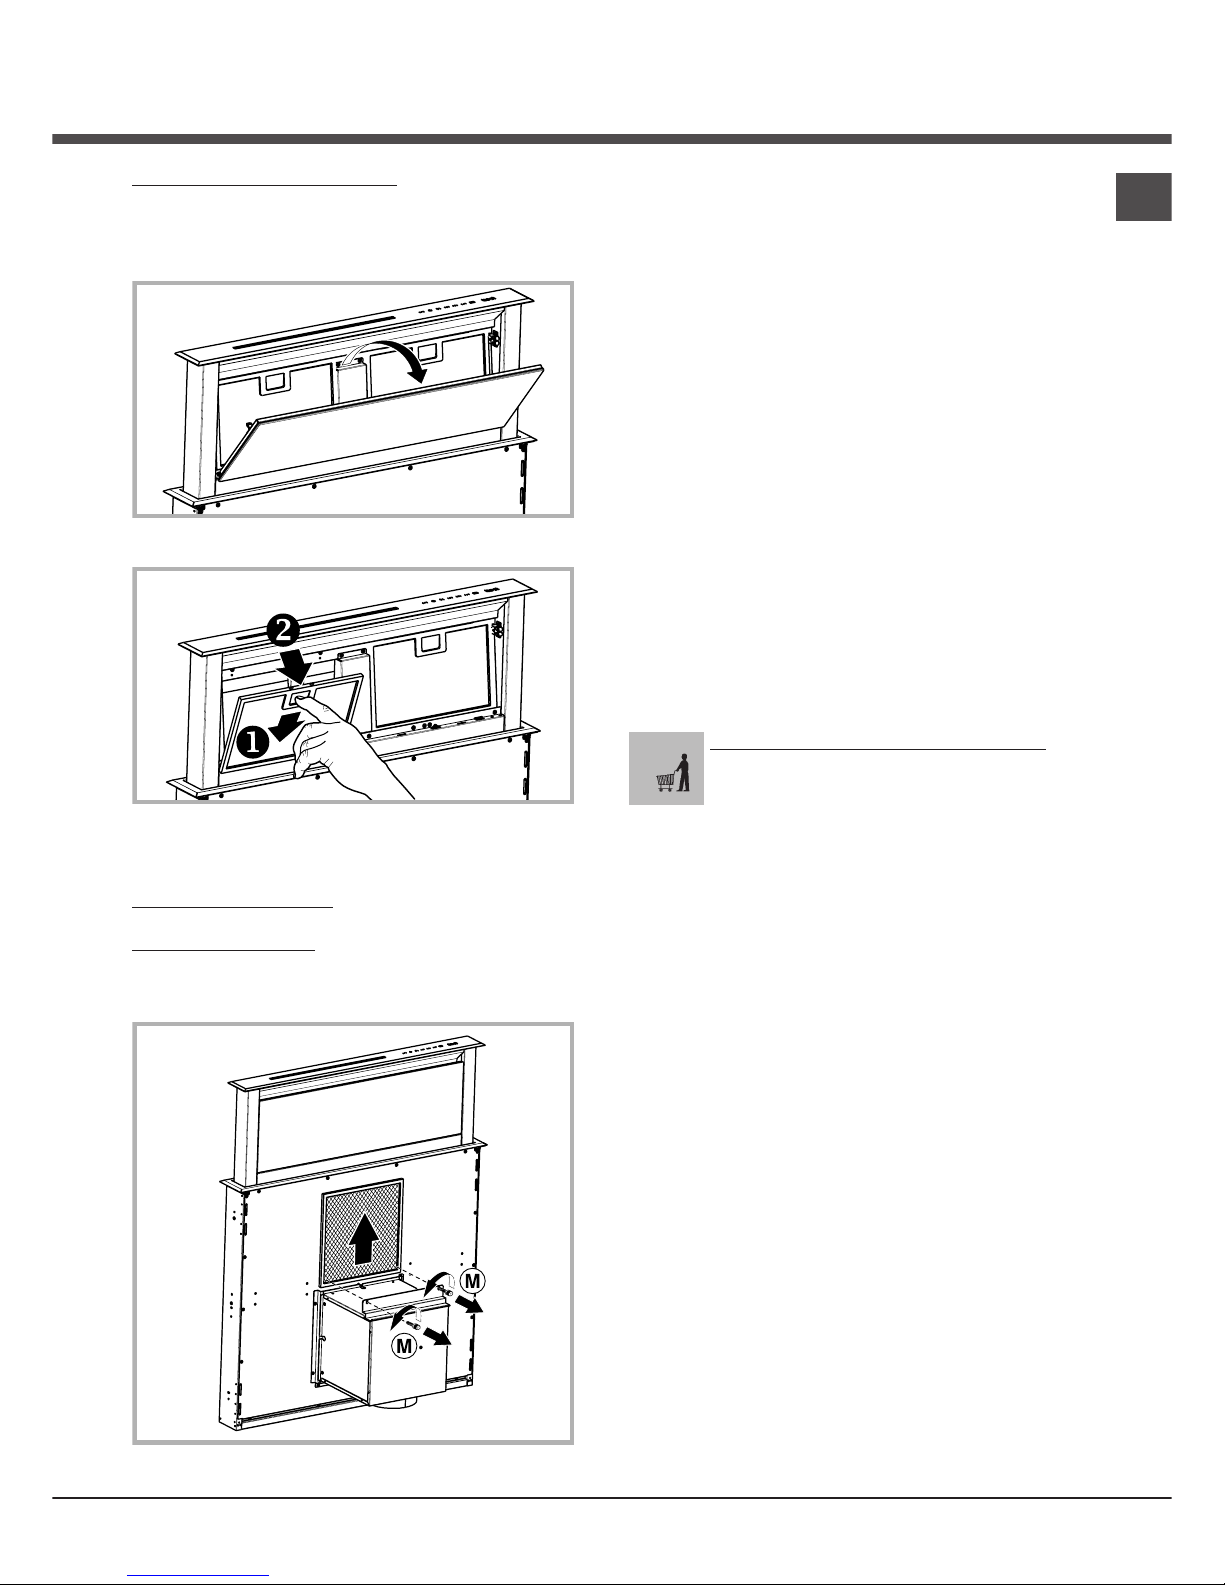
HOW TO REMOVE THE FILTERS: push the catch
near the handle towards the rear of the hood and pull
the filter downwards
Page 9
9
HOW TO CLEAN THE FILTERS: hand wash or in the
dishwasher using a neutral detergent. If washing in the
dishwasher, possible discoloration of the filters does not
in any way compromise their functioning.
Replacing the charcoal filter (P)
(for filtering version only)
WHEN TO REPLACE IT: replace it at least every 6
months.
HOW TO REMOVE IT: position the charcoal filter
inside the hood and fit the 2 filter clips (M).
GB
MALFUNCTIONS
If something appears not to be working properly, do the
following simple checks before calling Technical
Service:
• If the hood is not working:
Check that:
- The power has not been disconnected.
- A speed has been selected.
• If the hood performs inefficiently:
Check that:
- The motor speed selected is sufficient for the amount
of smoke and vapours released.
- The kitchen is sufficiently ventilated to allow air intake.
- The charcoal filter is not worn (hood in filtering
version).
• If the hood has turned off during normal functioning:
Check that:
- The power has not been disconnected.
- the omnipolar disconnection device has not tripped.
Components not provided with the product
Page 10
10
Deutsch
! Die Installation ist gemäß den vorliegenden
Anweisungen und von Fachpersonal durchzuführen.
!
Bei Installations- und Wartungsarbeiten
Handschuhe tragen.
ABLEITUNG DER ABLUFT
(Für die Abluftversionen)
! Die Abluftöffnung und -leitung (Durchmesser 150
mm) vorbereiten.
! Eine möglichst kurze Leitung verwenden.
! Eine Leitung mit einer möglichst geringen Anzahl von
Krümmungen verwenden (max. Winkel der
Krümmung: 90°).
! Starke Änderungen des Leitungsdurchmessers sind
zu vermeiden.
! Die Innenfläche der Leitung muss so glatt wie möglich
sein.
! Das Material der Leitung muss von den Normen
zugelassen sein.
! Die Dunstabzugshaube nicht an die Abzugsleitung
von Verbrennungsrückständen (von Heizungen,
Kaminen, Öfen usw.) anschließen.
! In Bezug auf den Abluftabzug müssen die
Vorschriften der zuständigen Behörden eingehalten
werden. Die Abluft darf außerdem nicht über einen
Hohlraum in der Mauer abgezogen werden, wenn
dieser nicht ausdrücklich zu diesem Zweck bestimmt
ist.
! Den Raum mit Lufteintrittsöffnungen versehen, um zu
vermeiden, dass die Dunstabzugshaube einen
Unterdruck im Raum aufbaut (der 0,04 mbar nicht
überschreiten darf); wird die Haube nämlich
gleichzeitig mit nicht elektrischen Geräten (Gasöfen,
Ölöfen, Kohleöfen usw.) benutzt, kann es zu einer
Ansaugung der Abgase aus der Wärmequelle
kommen.
UMLUFT- ODER ABLUFTVERSION?
Die Abzugshaube kann als Abluft- oder Umluftversion
installiert werden.
Entscheiden Sie vor der Installation, welche Version Sie
wünschen (Umluft- oder Abluftversion).
Zur Verbesserung der Effizienz raten wir, die Haube
(sofern möglich) als Abluftversion zu installieren.
Abluftversion
Die Dunstabzugshaube reinigt die Luft und gibt sie über
eine Abluftleitung nach außen ab (Durchmesser 150
mm).
Umluftversion
Die Dunstabzugshaube reinigt die Luft und leitet sie
sauber wieder in den Raum zurück.
BEDIENELEMENTE
P1 P2 P3 P4 P5 P6 P7
P1: Reset Filteralarm
P2: LED On/Off - durch langes Drücken der Taste
kann die Leuchtintensität der LEDs geändert
werden (High/Low)
Hinweis: P2 zeigt nur dann an, dass die LEDs
leuchten, wenn die Abzugsplatte ganz geöffnet ist
P3: Motor On/Off - 1. Geschw.
P4: 2. Geschw.
P5: 3. Geschw.
P6: 4. Geschw.
P7: Abzugsplatte Up/Down (beim Öffnen kann die
Platte durch ein zweites Drücken der Taste auf der
gewünschten Höhe angehalten werden)
Funktion Timer 5':
Durch langes Drücken (>2") der Tasten P3, P4, P5 oder
P6 wird die Funktion Timer 5' aktiviert. Nach Ablauf der
Minuten schaltet sich der Motor aus und der Wagen wird
geschlossen. Die Intensität der Beleuchtung wechselt
von High auf Low. Wenn die Funktion aktiv ist, blinkt die
LED der aktuellen Motorgeschwindigkeit.
Anzeige der Filteralarme:
Fettfilter: Nach 30 Betriebsstunden des Motors leuchtet
die LED der Taste P1 nach jedem Ausschalten des
Motors 30'' lang auf.
Kohlefilter: Nach 120 Betriebsstunden des Motors blinkt
die LED der Taste P1 nach jedem Ausschalten des
Motors 30'' lang.
WARTUNG
! Vor dem Reinigen oder Warten die Spannungszufuhr
ausschalten.
Reinigung der Abzugshaube
WIE OFT: Um ein Brandrisiko zu vermeiden, die Haube
mindestens alle 2 Monate reinigen.
AUSSENREINIGUNG: Für die äußere Reinigung (von
lackierten Geräten) ein mit lauwarmem Wasser und
neutralem Reiniger angefeuchtetes Tuch verwenden;
für Edelstahl-, Kupfer- oder Messinghauben
Spezialprodukte verwenden.
INNENREINIGUNG: Für die innere Reinigung des
Geräts einen mit denaturiertem Äthylalkohol getränkten
Lappen (oder Pinsel) verwenden.
WAS NICHT GETAN WERDEN DARF: Keine
scheuernden oder korrosiven Produkte (zum Beispiel
Metallschwämme, zu harte Bürsten, aggressive
Reinigungsmittel usw.) verwenden.
Reinigung der Fettfilter
WIE OFT: Um ein Brandrisiko zu vermeiden, die Haube
mindestens alle 2 Monate reinigen.
DE
Page 11
11
ENTFERNEN DER FILTER: Die Klammer im Bereich
des Griffs zurück drücken und dabei den Filter nach
unten ziehen.
REINIGEN DER FILTER: Die Filter mit einem neutralen
Reinigungsmittel mit der Hand oder in der
Geschirrspülmaschine waschen. Beim Waschen in der
Geschirrspülmaschine wird die Funktionstüchtigkeit der
Filter nicht beeinträchtigt, wenn diese evtl. etwas
ausbleichen.
Austausch des Kohlefilters (P)
(Nur bei Umlufthauben)
WIE OFT MUSS ER AUSGETAUSCHT WERDEN:
Mindestens alle 6 Monate.
WIE WIRD ER ENTFERNT: ausgestattet ist, den
Kohlefilter innen anbringen und die 2 Haltefilter (M)
einsetzen, um den Kohlefilter zu blockieren.
BETRIEBSSTÖRUNGEN
Wenn etwas nicht zu funktionieren scheint, folgende
Kontrollen durchführen, bevor der Kundendienst
gerufen wird:
• Wenn die Abzugshaube nicht funktioniert:
Prüfen, ob:
- ein Stromausfall vorliegt.
- eine Geschwindigkeit gewählt wurde.
• Wenn die Leistung der Abzugshaube mangelhaft ist:
Prüfen, ob:
- die gewählte Motorgeschwindigkeit für die
freigesetzte Menge an Rauch und Dämpfen
ausreicht.
- die Küche ausreichend belüftet ist, um eine
Luftansaugung zuzulassen.
- der Kohlefilter verbraucht ist (bei Umluftversion).
• Wenn sich die Haube im Laufe des normalen
Betriebs selbst ausgeschaltet hat.
Prüfen, ob:
- ein Stromausfall vorliegt.
- die allpolige Trennvorrichtung ausgelöst wurde.
Teile, die nicht zum Lieferumfang des
Produkts gehören
DE
Page 12

12
Français
! L’installation doit être effectuée par un professionnel
du secteur conformément aux instructions du fabricant.
!
Faire usage de gants lors des opérations
d'installation et d'entretien.
ÉVACUATION DE L'AIR
(pour les versions aspirantes)
! Réaliser le trou et installer la conduite d'évacuation de
l'air (diamètre 150 mm).
! Utiliser un tuyau de la longueur strictement
nécessaire.
! Les coudes du tuyau doivent être en nombre minime
(angle maxi du coude: 90°).
! Éviter les variations excessives de section du tuyau.
! Utiliser un tuyau le plus lisse possible sur sa partie
interne.
! Le matériau du tuyau doit être aux normes.
! Ne pas relier la hotte à des conduites d'évacuation de
fumées de combustion (chaudières, cheminées,
poêles, etc).
! Pour l'évacuation de l'air, respecter les consignes des
autorités compétentes en la matière. Par ailleurs, l'air
à évacuer doit être éliminé par une cavité dans le
mur, sauf si cette dernière n'est pas prévue à cet
effet.
! Équiper la pièce de prises d'air pour éviter que la
hotte ne crée une pression négative à l'intérieur de la
pièce (elle ne doit pas dépasser 0,04 mbar); en effet,
si la hotte est utilisée conjointement à des
appareillages autres qu'électriques (poêles à gaz, à
huile, à charbon, etc.), les gaz d'évacuation de la
source de chaleur peuvent être réaspirés.
FILTRANTE OU ASPIRANTE?
La hotte peut être installée en version aspirante ou en
version filtrante.
Le type d'installation doit être choisi d'emblée.
Pour une plus grande efficacité, il est recommandé,
dans la mesure du possible, d'installer la hotte en
version aspirante.
Version aspirante
La hotte filtre l'air et l'expulse à l'extérieur à travers le
tuyau d'évacuation (diamètre 150 mm).
Version filtrante
La hotte filtre l'air et l'expulse à l'intérieur de la pièce.
COMMANDES
P1 P2 P3 P4 P5 P6 P7
P1 : réinitialisation alarme des filtres
P2 : on/off diodes - par une pression longue sur la
touche, il est possible de modifier l'intensité des
diodes High/Low)
Note : L'éclairage des diodes est visualisé par P2
uniquement avec le panneau aspirateur
complètement ouvert
P3 : on/off moteur - 1ère vit.
P4 : 2
ème
vit.
P5 : 3
ème
vit.
P6 : 4
ème
vit.
P7 : up/down panneau aspirateur (lors de l'ouverture, il
est possible de fermer le panneau à la hauteur
voulue par une deuxième pression sur la touche)
Fonction Timer 5' :
Par une pression longue (>2") sur les touches P3, P4, P5
ou P6, on active la fonction Timer 5'. Une fois ce temps
écoulé, le moteur s'arrête et le chariot se ferme. Les
éclairages passent de l'intensité High à l'intensité Low.
Lorsque la fonction est activée la diode correspondant à
la vitesse en cours du moteur, clignote.
Affichage alarme des filtres :
Filtres à graisse : Après 30 h de fonctionnement du
moteur, la diode de la touche P1 s'allume pendant 30''
toutes les fois que le moteur s'arrête.
Filtre à charbon : Après 120 h de fonctionnement du
moteur, la diode de la touche P1 clignote pendant 30''
toutes les fois que le moteur s'arrête.
ENTRETIEN
! Avant de procéder au nettoyage ou à une opération
d'entretien, couper l'alimentation électrique.
Nettoyage de la hotte
QUAND NETTOYER LA HOTTE? la nettoyer au moins
une fois tous les 2 mois pour prévenir le risque
d'incendie.
NETTOYAGE EXTERNE: utiliser un chiffon humidifié à
l'eau tiède et un détergent neutre (pour les hottes
peintes); utiliser un produit spécial pour hottes en acier,
cuivre ou laiton.
NETTOYAGE INTERNE: utiliser un chiffon (ou un
pinceau) imbibé d'alcool éthylique dénaturé.
À ÉVITER: ne pas utiliser de produits abrasifs ou
corrosifs (par exemple éponges métalliques, brosses
trop dures, détergents très agressifs, etc.).
Nettoyage des filtres à graisse
QUAND NETTOYER LA HOTTE? la nettoyer au moins
une fois tous les 2 mois pour prévenir le risque
d'incendie.
FR
Page 13

13
DÉMONTAGE DES FILTRES: Pousser le blocage à
hauteur de la poignée, vers l'intérieur et tirer le filtre
vers le bas.
NETTOYAGE DES FILTRES: laver les filtres avec un
détergent neutre à la main ou au lave-vaisselle. En cas
de lavage au lave-vaisselle, une éventuelle décoloration
ne compromet en aucun cas l'efficacité des filtres.
Remplacement du filtre à charbon (P)
(uniquement pour la hotte filtrante)
QUAND CHANGER LE FILTRE? le changer au moins
tous les 6 mois.
DÉMONTAGE DU FILTRE: placer le filtre à charbon à
l’intérieur et mettre en place les 2 fixations (M) pour
bloquer le filtre à charbon.
ANOMALIES DE FONCTIONNEMENT
En cas d'anomalie de fonctionnement, avant de faire
appel au service d'assistance, effectuer les contrôles
suivants:
• Si la hotte ne fonctionne pas:
S'assurer:
- de l'absence de coupure de courant.
- qu'une vitesse a été sélectionnée.
• Si la hotte a un faible rendement:
S'assurer:
- que la vitesse du moteur sélectionnée est suffisante
pour la quantité de fumée et de vapeurs libérées.
- que la cuisine est insuffisamment aérée pour assurer
une prise d'air.
- que le filtre à charbon n'est pas usé (hotte en version
filtrante).
• Si la hotte s'éteint durant son fonctionnement normal:
S'assurer:
- de l'absence de coupure de courant.
- que le dispositif d'interruption omnipolaire ne s'est pas
déclenché.
Éléments non fournis avec la hotte
FR
Page 14

14
Español
!
Utilice guantes durante las operaciones de
instalación y mantenimiento.
EXTRACCIÓN DE AIRE
(Para las versiones aspiradoras)
! Prepare el agujero y el conducto de extracción de
aire (diámetro 150 mm).
! Utilice un conducto cuya longitud sea la mínima
indispensable.
! Utilice un conducto con el menor número posible de
curvas (ángulo máximo de la curva: 90°).
! Evite los cambios drásticos en la sección del
conducto
! Utilice un conducto cuyo interior sea lo más liso
posible.
! El material del conducto debe estar aprobado de
conformidad con las normativas.
! No conecte la campana a conductos de extracción de
humos producidos por combustión (calderas,
chimeneas, estufas, etc.).
! Para la extracción del aire a evacuar hay que
respetar las prescripciones de las autoridades
competentes. Además, el aire extraído no debe
eliminarse a través de un agujero en la pared, a
menos que el mismo esté específicamente destinado
a dicho propósito.
! Instale tomas de aire en el local para evitar que la
campana cree una presión negativa en la habitación
(dicha presión no debe superar los 0,04 mbar); de
hecho, si la campana se utiliza al mismo tiempo que
otros equipos no eléctricos (estufas de gas, aceite,
carbón, etc.), podría producirse la succión de los
gases de escape de la fuente de calor.
¿FILTRANTE O ASPIRADORA?
La campana puede instalarse en versión aspiradora o
filtrante. Decida desde el principio el tipo de
instalación). Para mejorar las prestaciones,
aconsejamos instalar la campana en la versión
aspiradora (si es posible).
Versión aspiradora
La campana depura el aire y lo expulsa hacia fuera a
través de un conducto de extracción (diámetro 150
mm).
Versión filtrante
La campana depura el aire y vuelve a introducir el aire
limpio en la habitación.
MANDOS
P1 P2 P3 P4 P5 P6 P7
P1: reinicio de la alarma de filtros
P2: encendido/apagado led: con una pulsación larga
de la tecla se puede modificar la intensidad alta/
baja de los led
Nota: El encendido de los led se visualiza en P2
sólo con el panel aspirador totalmente abierto
P3: encendido/apagado motor - 1ª vel.
P4: 2ª vel.
P5: 3ª vel.
P6: 4ª vel.
P7: subida/bajada del panel aspirador (en la fase de
apertura se puede detener el panel a la altura
deseada con una segunda pulsación de la tecla)
Función de temporizador de 5'
Con una pulsación larga (>2") de las teclas P3, P4, P5
o P6 se activa la función Temporizador de 5'.
Transcurridos los minutos el motor se apaga y el carro
se cierra. Las luces pasan de la intensidad Alta a la
Baja. Cuando la función está activa el led
correspondiente a la velocidad actual del motor
destella.
Visualización de alarma de filtros:
Filtros antigrasa: Después de 30 h de funcionamiento
del motor, el led de la tecla P1 se enciende durante 30''
cada vez que se apaga el motor.
Filtro de carbón: Después de 120 h de funcionamiento
del motor, el led de la tecla P1 destella durante 30''
cada vez que se apaga el motor.
MANTENIMIENTO
! Desconecte la tensión antes de efectuar operaciones
de limpieza o mantenimiento.
Limpieza de la campana
CUÁNDO LIMPIAR: limpie por lo menos cada 2 meses
para evitar los riesgos de incendio.
LIMPIEZA EXTERNA: utilice un paño humedecido con
agua tibia y detergente neutro (para las campanas
pintadas); utilice productos específicos para campanas
de acero, cobre o latón.
LIMPIEZA INTERNA: utilice un paño (o un pincel)
humedecido con alcohol etílico desnaturalizado.
LO QUE NO DEBE HACER: no utilice productos
abrasivos o corrosivos (por ejemplo, esponjas de
metal, cepillos demasiado duros, detergentes muy
agresivos, etc.
Limpieza de los filtros antigrasa
CUÁNDO LIMPIAR: limpie por lo menos cada 2 meses
para evitar los riesgos de incendio.
ES
Page 15

15
CÓMO QUITAR LOS FILTROS: en correspondencia
con el tirador, tire del retén hacia la parte posterior de
la campana y tire del filtro hacia abajo.
CÓMO LIMPIAR LOS FILTROS: lave con detergente
neutro a mano o en una lavavajillas. En caso de lavado
en lavavajillas, la eventual decoloración de los filtros no
afectara de ningún modo su funcionamiento.
Sustitución del filtro de carbón (P)
(Sólo para la campana filtrante)
CUÁNDO SUSTITUIR: sustituya por lo menos cada 6
meses.
CÓMO QUITARLO: coloque el filtro de carbón en el
interior e introduzca los 2 retenes del filtro (M) para
bloquear el filtro de carbón.
ANOMALÍAS DE FUNCIONAMIENTO
Si alguna pieza parece no funcionar, realice los
siguientes controles antes de llamar al Servicio de
Asistencia:
• Si la campana no funciona:
Compruebe que:
- no haya interrupciones de corriente.
- se haya seleccionado una velocidad.
• Si la campana presenta un rendimiento escaso:
Compruebe que:
- La velocidad del motor seleccionada es suficiente
para la cantidad de humo y vapores emitida.
- La cocina está suficientemente ventilada para
permitir una toma de aire.
- el filtro de carbón no está gastado (campana en
versión filtrante).
• Si la campana se ha apagado durante el
funcionamiento normal:
Compruebe que:
- no haya interrupciones de corriente.
- el dispositivo de interrupción omnipolar no se ha
disparado.
Componentes no suministrados con el
producto
ES
Page 16

16
Portoguês
! A instalação deve ser realizada segundo estas
instruções e por pessoal profissional qualificado.
!
Utilizar luvas nas operações de instalação e
manutenção.
SAÍDA DO AR
(Para as versões aspirantes)
! Preparar o furo e a conduta para exaustão do ar
(diâmetro 150mm).
! Utilizar uma conduta com o comprimento mínimo
indispensável.
! - Utilizar uma conduta com o menor número possível
de curvas (ângulo máximo da curva: 90ºC 90°).
! Evitar alterações drásticas da secção do tubo
(diâmetro .
! Usar uma conduta com o interior mais liso possível.
! O material da conduta deve ser aprovado em
conformidade com a lei.
! Não ligar o exaustor a condutas para exaustão dos
fumos produzidos através da combustão (caldeiras,
lareiras, aquecedores, etc).
! Para a evacuação do ar respeitar as disposições
estabelecidos pelas autoridades competentes. Além
disso, o ar a evacuar não deve ser eliminado através
de um abertura na parede a não ser que seja
destinado expressamente a esse fim.
! Equipar o local com tomadas de ar para evitar que o
exaustor crie uma pressão negativa no local (que não
deve superar 0,04 mbar); Se o exaustor for utilizado
simultaneamente com aparelhos não eléctricos
(aquecedores a gás, a óleo, a carvão, etc) é possível
que haja sucção dos gases de combustão da fonte
de calor.
FILTRANTE OU ASPIRANTE ?
O exaustor pode ser na versão filtrante ou na versão
aspirante. Decidir desde o início o tipo de instalação.
Para uma maior eficiência, aconselhamos a instalação
do exaustor na versão aspirante (se possível).
Versão aspirante
O exaustor limpa o ar e expulsa-o para o exterior
através de uma condutas de exaustão (diâmetro 150
mm).
Versão filtrante
O exaustor limpa o ar que volta a entrar limpo no local.
COMANDOS
P1 P2 P3 P4 P5 P6 P7
P1: reiniciar alarme filtros
P2: on/off led - pressionando mais tempo o botão é
possível modificar a intensidade dos leds High/Low)
Nota: O acender dos leds é visualizado através de
P2 mas com o painel de aspiração completamente
aberto
P3: on/off motor - 1^vel
P4: 2^vel
P5: 3^vel
P6: 4^vel
P7: up/down painel de aspiração (na fase de abertura
é possível bloquear o painel à altura desejada com
uma segunda pressão do botão)
Função timer 5':
Com pressão longa (>2") dos botões P3, P4, P5 ou P6
activa-se a função Timer 5'. Passados 5 minutos o
motor desliga e o vai-vém fecha. As luzes passam da
intensidade High para a intensidade Low. Quando a
função esta activa o led correspondente à velocidade
em curso do motor pisca.
Visualização alarme filtros:
Filtros anti-gordura: Após 30h de funcionamento do
motor, cada vez que se desliga o motor liga o led L2
(vermelho fixo) durante 30''.
Filtro de carvão: Após 120h de funcionamento do
motor, cada vez que se desliga o motor o led do botão
P1 pisca durante 30''.
MANUTENÇÃO
! Ates de limpar ou efectuar a manutenção desligar a
tensáo.
Limpeza do exaustor
QUANDO EFECTUAR A LIMPEZA: limpar pelo menos
cada 2 meses para evitar riscos de incêndio.
LIMPEZA EXTERNA: usar um pano humedecido
previamente numa solução de água morna e detergente neutro (para exaustores pintados); Utilizar produtos
específicos para exaustores em aço, cobre ou latão.
LIMPEZA INTERNA: usar um pano (ou um pincel)
embebido em álcool etílico desnaturado.
O QUE NÃO FAZER: não utilizar produtos abrasivos
ou corrosivos (tais como esponjas metálicas, escovas
demasiado duras, detergentes muito agressivos, etc.)
Limpeza dos filtros antigordura
QUANDO EFECTUAR A LIMPEZA: limpar pelo menos
cada 2 meses para evitar riscos de incêndio.
COMO REMOVER OS FILTROS: Na correspondência
da pega, empurrar o bloqueador para o interior e puxar
o filtro para baixo;
PT
Page 17

17
COMO LIMPAR OS FILTROS: lavar com detergente
neutro à mão ou na maquina de lavar loiça. Caso a
lavagem seja efectuada na máquina de lavar loiça,
uma eventual perda de cor não compromete de forma
alguma o funcionamento dos filtros.
Substituição do filtro de carvão (P)
(Somente para o exaustor filtrante)
QUANDO SUBSTITUIR: Substituir pelo menos cada 6
meses.
COMO RETIRAR: posicionar o filtro ao carvão dentro e
introduzir 2 retentores de filtros (M) para bloquear o
filtro ao carvão.
ANOMALIAS DE FUNCIONAMENTO
Se algo parece não funcionar, antes de contactar o
Serviço de Assistência efectuar seguintes controlos
simples:
• Se o exaustor não funcionar:
Verificar que:
- não há interrupção de corrente.
- foi seleccionada uma velocidade.
• Se o exaustor tiver uma performance fraca:
Verificar que:
- A velocidade do motor seleccionada é suficiente para
a quantidade de fumo e vapores libertada.
- O fogão é suficientemente arejado para permitir uma
tomada de ar.
- O filtro de carvão não está gasto (exaustor em versão
filtrante).
• Se o exaustor desligar durante o funcionamento
normal:
Verificar que:
- não há interrupção de corrente.
- o dispositivo de corte omnipolar não disparou.
Componentes não fornecidas com o produto
PT
Page 18

18
Nederlands
! De installatie moet worden uitgevoerd door een
bevoegde installateur en volgens de instructies van de
fabrikant.
!
Gebruik altijd handschoenen tijdens alle installatie-
en onderhoudswerkzaamheden.
LUCHTAFVOER
(Voor afvoer afzuigkappen)
! Opening en afvoerbuis (doorsnede 150mm)
voorbereiden.
! De lengte van het afvoerkanaal moet zo kort mogelijk
zijn.
! Gebruik zo min mogelijk bochten (maximaal
toegestane hoek: 90°).
! Vermijd grote verschillen in doorsnede.
! Gebruik een buis met een zo glad mogelijke
binnenkant.
! Het gebruikte materiaal moet volgens norm zijn.
! De afvoer van de afzuigkap mag niet op het
rookgasafvoerkanaal (van CV-ketel, schorsteen of
kachel) worden aangesloten.
! Neem de lokale geldende voorschriften voor
luchtafvoer in acht. Bovendien mag de af te voeren
lucht niet geëlimineerd worden via een gat in de
muur, tenzij dit gat uitdrukkelijk voor dit doel bestemd
is. Verder mag de lucht niet door een wandholte
worden afgevoerd mits deze niet hiervoor ontworpen
of bestemd is.
! De installatieruimte moet van ventilatieopeningen
worden voorzien om negatieve druk te voorkomen
(mag niet boven 0,04 mbar); Als de afzuigkap
tegelijkertijd met andere elektrische toestellen (gasof olie- of koolgestookte ketels enz.) wordt gebruikt,
ontstaat er kans dat de rookgassen door de
warmtebron worden teruggezogen.
AFVOER OF RECIRCULATIE?
De afzuigkap is beschikbaar in verschillende afvoer of
recirculatie uitvoeringen. Beslis op voorhand welke
installatie u verkiest (afvoer of recirculatie). Voor een
grotere doeltreffendheid, is het raadzaam de
aanzuigende kap te installeren (indien mogelijk). Voor
het beste rendement, is het raadzaam (indien mogelijk)
een afvoer afzuigkap te installeren.
Afvoer afzuigkap:
De kap filtert de afgezogen lucht en voert die af door
een afvoerbuis (doorsnede 150 mm).
Recirculatie afzuigkap:
De kap filtert en recirculeert de gezuiverde lucht in de
binnenruimte.
BEDIENINGSELEMENTEN
P1 P2 P3 P4 P5 P6 P7
P1: reset filteralarm
P2: aan/uit-led - door lang op de toets te drukken is het
mogelijk om de intensiteit van de leds te
veranderen Hoog/Laag)
Opmerking: het branden van de leds wordt door
P2 alleen weergegeven als het afzuigpaneel
helemaal geopend is
P3: aan/uit motor - 1e snelh.
P4: 2e snelh.
P5: 3e snelh.
P6: 4e snelh.
P7: afzuigpaneel omhoog/omlaag (tijdens het openen
kan het paneel op de gewenste hoogte worden
gestopt door een tweede keer op de toets te
drukken)
Functie Timer 5':
Door lang (>2") op de toetsen P3, P4, P5 of P6 te
drukken, wordt de functie Timer 5' geactiveerd. Nadat de
minuten verstreken zijn gaat de motor uit en sluit de slede.
De lichten gaan van de intensiteit Hoog over naar de
intensiteit Laag. Wanneer de functie actief is, knippert de
led die correspondeert met de actuele motorsnelheid.
Weergave filteralarm:
Vetfilters: na 30 bedrijfsuren van de motor gaat de led
van de toets P1 30'' branden, telkens wanneer de
motor uitgeschakeld wordt.
Koolstoffilter: na 120 bedrijfsuren van de motor knippert
de led van de toets P1 30'', telkens wanneer de motor
uitgeschakeld wordt.
ONDERHOUD.
! Stroomvoorziening uitschakelen alvorens de
afzuigkap te reinigen of onderhouden
Reiniging van de afzuigkap
WANNEER: minstens 1 keer in de 2 maanden reinigen
om brandgevaar te vermijden.
REINIGING VAN DE BUITENKANT: maak gelakte
oppervlakken schoon m.b.v. een zachte doek, bevochtigd
met lauw water en neutraal reinigingsmiddel; Gebruik
specifieke reinigingsmiddelen bestemd voor RVS, koper of
messing.
REINIGING VAN DE BINNENKANT: gebruik een doek/
kwast gedrenkt in gedenatureerde ethylalcohol.
WAARSCHUWING: Gebruik geen schuur- of bijtende
middelen (zoals metaalspons, te harde borstel of
agressieve schoonmaakmiddel enz.)
Reiniging van de vetfilters
WANNEER: minstens 1 keer in de 2 maanden reinigen
om brandgevaar te vermijden.
NL
Page 19

19
AFNEMEN VAN DE FILTERS: ter hoogte van de
handgreep, de grendel naar achteren duwen en de filter
naar beneden trekken.
REINIGING VAN DE FILTERS: Was de filters met de
hand of in de vaatwasser met een neutraal reinigingsmiddel.
De vaatwasser kan de kleur van de filters iets doen vervagen;
dit heeft echter geen invloed op de goede werking van de
filters.
Vervanging van de koolstoffilter (P)
(Alleen voor recirculatie)
WANNEER: minstens 1 keer in de 6 maanden.
AFNEMEN VAN DE FILTER: de koolfilter binnen
positioneren en de 2 stopfilters (M) aanbrengen om de
koolfilter te blokeren.
STORINGEN
Bij een storing van de afzuigkap, voer de volgende
controles uit alvorens de Technische Dienst te
raadplegen:
• Als de afzuigkap niet functioneert:
Controleer of: Controleer dat:
- er geen stroomonderbreking is.
- er een snelheid is geselecteerd.
• Bij een laag rendement van de afzuigkap:
Controleer of: Controleer dat:
- de ingestelde snelheid volstaat voor de afgegeven
hoeveelheid rook en dampen.
- de keuken is voldoende geventileerd voor een
correcte luchttoevoer.
- de koolstoffilter niet is verzadigd (i.g.v. recirculatie).
• het uitvallen van de afzuigkap tijdens de normale
werking heeft plaatsgevonden.
Controleer of: Controleer dat:
- er geen stroomonderbreking is.
- de omnipolaire schakelaar niet is opgetreden.
Niet meegeleverde onderdelen
NL
Page 20

20
РУССКИЙ
! Монтаж производится в соответствии с
настоящими инструкциями профессионально
квалифицированными специалистами.
!
Использовать перчатки во время установки и
техобслуживания.
ОТВОД ВОЗДУХА
(Для всасывающих моделей)
! Предусмотреть отверстие и трубу для отвода
воздуха (диаметр 150 мм).
! Использовать трубу минимально возможной
длины.
! Использовать трубу с наименьшим возможным
числом изгибов (максимальный угол изгиба: 90°).
! Избегать резких изменений диаметра сечения
трубы.
! По возможности спользовать трубу с гладкой
внутренней поверхностью.
! Труба должна быть сделана из материала,
соответствующего стандартам.
! Не подсоединять вытяжку к трубам отвода дыма,
образованного в результате сжигания
(водонагреватели, камины, печки и т. д.).
! При отводе вытягиваемого воздуха необходимо
соблюдать требования компетентных органов.
Кроме того, воздух не должен выводиться через
какое-либо стенное отверстие, если только оно не
предусмотрено для данной цели.
! Оборудовать помещение вентиляционными
отверстиями во избежание создания вытяжкой
отрицательного давления в помещении (не
должно превышать 0,04 бар); если вытяжка
используется одновременно с неэлектронными
приборами (газовые, масляные, угольные печи и
т. д.) возможно обратное всасывание газа,
отведенного от источника тепла.
ФИЛЬТРУЮЩАЯ ИЛИ ВСАСЫВАЮЩАЯ?
Вытяжка может быть фильтрующего или
всасывающего типа. Необходимо с самого начала
выбрать тип вытяжки для установки.
Для максимальной производительности советуем
установить всасывающий тип вытяжки (по
возможности).
Всасывающий тип
Вытяжка очищает воздух и выбрасывает его наружу
через вытяжную трубу (диаметр 150 мм).
Фильтрующий тип
Вытяжка очищает воздух и возвращает очищенный
воздух в помещение.
ОРГАНЫ УПРАВЛЕНИЯ
P1 P2 P3 P4 P5 P6 P7
P1: сброс сигнала тревоги фильтров
P2: вкл./выкл. светоиндикаторы – нажать и
удерживать кнопку для изменения
интенсивности свечения светоиндикаторов:
высокая/низкая)
Примечание: Р2 указывает на то, что
светодиоды включены, только при полностью
открытой вытяжной панели
Р3: вкл./выкл. двигателя – 1-ая скор.
Р4: 2-ая скор.
Р5: 3-я скор.
Р6: 4-ая скор.
Р7: вытяжная панель вверх/вниз (во время
открывания можно остановить панель на
нужной высоте повторным нажатием кнопки)
Функция «Таймер 5 мин.»
При нажатии и удерживании (>2 сек.) кнопок Р3, Р4, Р5
или Р6 включается функция «Таймер 5 мин.». По
истечении этого времени двигатель выключается и
устройство всасывания закрывается. Интенсивность
подсветки изменяется с высокой на низкую. При
включенной функции мигает светоиндикатор,
соответствующий текущей скорости.
Отображение сигнала тревоги фильтров
Жироулавливающие фильтры: после 30 ч. работы
двигателя каждый раз при его выключении включается
на 30 сек. светоиндикатор кнопки P1.
Угольный фильтр: после 120 ч. работы двигателя
каждый раз при его выключении светоиндикатор кнопки
P1 мигает в течение 30 сек.
ТЕХНИЧЕСКОЕ ОБСЛУЖИВАНИЕ
! Перед чисткой или проведением технического
обслуживания отключить напряжение.
Чистка вытяжки
КОГДА ПРОИЗВОДИТЬ ЧИСТКУ: чистить не реже,
чем раз в 2 месяца, чтобы избежать риска
возгорания.
НАРУЖНАЯ ЧИСТКА: использовать тряпку,
смоченную в теплой воде с нейтральным моющим
средством (для окрашенных вытяжек);
использовать специальные средства для вытяжек
из стали, меди или латуни.
ВНУТРЕННЯЯ ЧИСТКА: использовать тряпку (или
кисточку), смоченную в денатурированном этиловом
спирте.
ЧТО НЕЛЬЗЯ ДЕЛАТЬ: не использовать
абразивные или коррозийные средства (например,
металлические губки, слишком жесткие щетки,
очень агрессивные моющие средства, и т. д.).
RS
Page 21

21
Чистка жироулавливающих фильтров
КОГДА ПРОИЗВОДИТЬ ЧИСТКУ: чистить не реже,
чем раз в 2 месяца, чтобы избежать риска
возгорания.
КАК ВЫНУТЬ ФИЛЬТРЫ: в месте расположения
ручки протолкнуть стопор по направлению к задней
части вытяжки и потянуть фильтр вверх.
КАК ЧИСТИТЬ ФИЛЬТРЫ: мыть нейтральным
моющим средством вручную или в посудомоечной
машине. В случае использования посудомоечной
машины возможно обесцвечивание фильтров,
которое не влияет на их функциональность.
Замена угольного фильтра (Р) (Только для
фильтрующей вытяжки)
КОГДА ПРОИЗВОДИТЬ ЗАМЕНУ:
заменять фильтра как минимум каждые 6 месяцев.
КАК ВЫНУТЬ ФИЛЬТР: то установите угольный фильтр
внутрь и вставьте 2 креплени фильтра (М), чтобы
закрепить его.
НЕИСПРАВНОСТИ В РАБОТЕ
Если какая-либо из функций вытяжки не работает,
прежде чем обратиться в службу технической
поддержки, выполнить следующие простые
действия по проверке прибора:
• Если вытяжка не работает, убедиться в том, что:
- нет перебоя электропитания;
- выбрана скорость.
• Если вытяжка работает не на полную мощность:
убедиться в том, что:
- Выбранная скорость двигателя достаточна для
выбрасываемого количества дыма и пара.
- Кухня достаточно проветривается для создания
тяги.
- Угольный фильтр не изношен (для вытяжки
фильтрующего типа).
• Если вытяжка выключилась во время работы:
убедиться в том, что:
- нет перебоя электропитания;
- многополюсный выключатель не сработал.
Компоненты, не входящие в комплект
RS
Page 22

22
! Installationen skal udføres i overensstemmelse med
instruktionerne og af en kvalificeret tekniker.
!
Anvend handsker ved montering og
vedligeholdelse.
UDLUFTNING AF LUFTEN
(til modellerne med udluftning)
! Lav et hul til udluftningsrøret (diameter 150mm).
! Anvend ikke et længere udluftningsrør end det er
strengt nødvendigt.
! Anvend et udluftningsrør med så få bøjninger som
muligt (bøjningernes må maksimalt være på 90°).
! Undgå bratte ændringer af udluftningsrørets
diameter.
! Anvend et udluftningsrør med en indvendig overflade,
der er så glat som muligt.
! Udluftningsrøret skal være fremstillet i et af materiale,
der er godkendt af gældende lovgivning på området.
! Tilslut ikke emhætten til udluftningsrør til røg der
stammer fra forbrænding (fyr, brændeovne,
komfurer, osv.).
! Udluftningen af luften skal overholde de af
myndighederne fastlagte krav.
Derudover må luften ikke udluftes gennem et hulrum i
muren, med mindre dette hulrum er bestemt indrettet
til formålet.
! Sørg for at lokalet har tilstrækkelig ventilation, for at
undgå at emhætten skaber undertryk i lokalet (der
ikke må overstige 0,04 mbar). Hvis emhætten
anvendes samtidig med ikke-elektriske apparater,
(gas-, olie-, eller kulfyrede komfurer, osv.) kan der
forekomme en indsugning af udstødningsgasserne fra
varmekilden.
MED FILTER ELLER UDSUGNING ?
Emhætten kan fås i to versioner, med filter eller med
udsugning. Typen af emhætte skal besluttes før den
monteres.
Få at opnå størst mulig effektivitet anbefales versionen
med udsugning (hvis det er muligt).
Version med udsugning
Emhætten renser luften og suger den udenfor gennem
udsugningsrøret (diameter 150 mm).
Version med filter
Emhætten renser luften og blæser den rensende luft
tilbage i lokalet.
BETJENING
P1 P2 P3 P4 P5 P6 P7
P1: Nulstil filteralarmer.
P2: Diode tændt/slukket - med et langt tryk på
knappen kan man ændre intensiteten af dioderne
High/Low.
Bemærk: Tændingen af dioderne bliver kun vist på
P2 når udsugningspanelet helt åbent.
P3: Tænd/slut motor 1. hastighed.
P4: 2. hastighed.
P5: 3. hastighed.
P6: 4. hastighed.
P7: Op/ned for udsugningspanelet (under åbningen er
det muligt at stoppe panelet i den ønskede højde,
ved igen at trykke på knappen).
Funktionen timer 5 min.:
Funktionen Timer 5 min. aktiveres med et langt tryk (>2
sek.) på knapperne P3, P4, P5 eller P6. Når minutterne
er gået slukker motoren, og udtræksdelen lukker.
Lysenes intensitet går fra High til Low. Når funktionen
er aktiv, blinker dioden, der svarer til motorens aktuelle
hastighed.
Visning af filteralarmer:
Fedtfilter: Efter at motoren har været i drift i 30 timer,
tænder dioden i knap P1 i 30 sekunder, hver gang man
slukker motoren.
Kulfilter: Efter at motoren har været i drift i 120 timer,
blinker dioden i knap P1 i 30 sekunder, hver gang man
slukker motoren.
VEDLIGEHOLDELSE
! Sørg for at tage slukke for emhætten før den
rengøres eller vedligeholdes.
Rengøring af emhætten
HVORNÅR SKAL DEN RENGØRES: rengør mindst
hver anden måned for at undgå brandfare.
UDVENDIG RENGØRING: anvend en fugtig klud
opvredet i lunkent vand med et neutralt rengøringsmiddel
(til lakerede emhætter). Anvend specialprodukter til
emhætter i stål, kobber eller messing.
INDVENDIG RENGØRING: anvend en klud (eller en
pensel) dyppet i husholdningssprit.
GØR IKKE FØLGENDE: anvend ikke slibende eller
ætsende produkter (f.eks. ståluldsklude, for hårde
børster, meget aggressive rengøringsmidler, osv.).
Rengøring af fedtfiltret
HVORNÅR SKAL DET RENGØRES: rengør mindst
hver anden måned for at undgå brandfare.
SÅDAN TAGES FILTRENE UD: tryk
fastgøringsmekanismen der sidder ud for håndtaget
bagud, og træk samtidig filteret nedad.
Dansk
DK
Page 23

23
SÅDAN RENGØRES FILTRENE: vask med et neutralt
rengøringsmiddel i hånden eller i opvaskemaskine. En
eventuel affarvning af filtrene hvis de vaskes i
opvaskemaskinen, påvirker ikke på nogen måde deres
funktion.
Udskiftning af kulfiltret (P)
(Kun for emhætten med filter)
HVORNÅR SKAL DET UDSKIFTES: udskift mindst
hver 6. måned.
SÅDAN TAGES FILTRET AF: placeres kulfilteret inde i
emhætten, og de 2 filterholdere (M) indsættes for at
blokere kulfilteret.
DRIFTSFEJL
Hvis det virker, som om emhætten ikke fungerer, skal
de følgende simple eftersyn udføres, før der ringes til
kundeservice:
• Hvis emhætten ikke virker:
Kontrollér at:
- der ikke er strømafbrydelse.
- der er blevet valgt en hastighed.
• Hvis emhætten har en dårlig ydelse:
Kontrollér at:
- Den valgte hastighed er tilstrækkelig til den afgivne
mængde røg og damp.
- Køkkenet er tilstrækkeligt ventileret til at der kan ske
en korrekt luftudsugning.
- Kulfiltret ikke er opbrugt (emhætteversionen med
filter).
• Hvis emhætten slukker under normal drift:
Kontrollér at:
- der ikke er strømafbrydelse.
- fejlstrømsanlægget ikke er slået fra.
Komponenter der ikke leveres sammen med
produktet.
DK
Page 24

24
FI
! Asennus tulee suorittaa näiden ohjeiden mukaisesti
pätevän henkilöstön avulla.
!
Käytä suojakäsineitä asennus- ja huoltotöiden
aikana.
ILMANPOISTO
(Imuversiot)
! Valmistele aukko ja ilmanpoistoputki (halkaisija 150
mm).
! Käytä mahdollisimman lyhyttä putkea.
! Käytä mahdollisimman suoraa putkea (mutkan
maksimikulma: 90°).
! Vältä leikkaamasta putkea.
! Käytä putkea, jonka sisäpinta on mahdollisimman
tasainen.
! Putken valmistusmateriaalin on oltava normien
mukainen.
! Älä liitä liesituulettimeen poistoputkea, jotka on
tarkoitettu palamisesta aiheutuvan savun poistoon
(lämmittimet, takat, uunit jne.).
! Ilmanpoistossa on noudatettava toimivaltaisten
viranomaisten määräyksiä. Ilmaa ei saa poistaa
seinässä sijaitsevan kanavan kautta, ellei kyseinen
kanava ole tarkoitettu nimenomaan siihen
tarkoitukseen.
! Varusta tila ilma-aukoilla, ettei liesituuletin luo
huoneeseen negatiivista painetta (joka ei saa ylittää
0,04 mbaria). Jos liesituuletinta käytetään
väliaikaisesti muissa kuin sähkölaitteissa (kaasu-, öljyja hiililämmittimet jne.), saattaa se aiheuttaa
poistokaasun kierron lämmönlähteestä.
SUODATIN- VAI IMUVERSIO?
Liesituuletin on saatavilla sekä suodatin- että
imuversiona. Päätä heti alussa, kumman version haluat
asentaa.
Tehon maksimoimiseksi suosittelemme asentamaan
imuversion (jos se on mahdollista).
Imuversio
Liesituuletin puhdistaa ilman ja ohjaa sen poistoletkun
(halkaisija 150 mm) kautta ulos.
Suodatinversio
Liesituuletin puhdistaa ilman ja puhaltaa puhtaan ilman
takaisin huoneeseen.
OHJAIMET
P1 P2 P3 P4 P5 P6 P7
P1: suodattimien hälytyksen resetointi
P2: virran merkkivalo - merkkivalojen voimakkuutta
(High/Low) voidaan säätää painamalla painiketta
pitkään
Huomaa: P2 näyttää syttyneet merkkivalot vain
imulaitteen paneelin ollessa täysin auki.
P3: moottori päällä/pois päältä - 1. nopeus
P4: 2. nopeus
P5: 3. nopeus
P6: 4. nopeus
P7: imulaitteen paneeli ylös/alas (avausvaiheen aikana
paneeli voidaan pysäyttää halutulle tasolle
painamalla painiketta uudelleen)
Ajastintoiminto 5':
Ajastintoiminto Timer 5' aktivoidaan painamalla
painikkeita P3, P4, P5 tai P6 pitkään (>2 min). Kun
minuutit ovat kuluneet, moottori sammuu ja
kuljetusvaunu sulkeutuu. Merkkivalojen korkea (High)
voimakkuus muuttuu alhaiseksi (Low). Kun toiminto on
päällä, vastaava moottorinopeuden merkkivalo vilkkuu.
Suodattimien hälytyksen näyttö:
Rasvanpoistosuodattimet: 30 tunnin moottorin käynnin
jälkeen P1-painikkeen merkkivalo syttyy 30 minuutin
ajaksi aina moottorin sammutuksen yhteydessä.
Hiilisuodatin: 120 tunnin moottorin käynnin jälkeen P1painikkeen merkkivalo syttyy 30 minuutin ajaksi aina
moottorin sammutuksen yhteydessä.
HUOLTO
! Ennen puhdistus- tai huoltotöitä poista jännite.
Liesituulettimen puhdistus
KOSKA PUHDISTAA: puhdista vähintään kahden
kuukauden välein tulipalovaaran ehkäisemiseksi.
ULKO-OSAN PUHDISTUS: käytä haalealla vedellä ja
miedolla pesuaineella (maalatut liesituulettimet)
kostutettua rättiä. Teräs-, kupari- ja
messinkiliesituuletinten puhdistamiseen käytä niille
tarkoitettuja erikoistuotteita.
SISÄ-OSAN PUHDISTUS: käytä denaturoidulla
etyylialkoholilla kostutettua rättiä (tai sivellintä).
ÄLÄ: käytä hankaavia ja syövyttäviä tuotteita
(esimerkiksi metallisieniä, kovia harjoja, voimakkaita
pesuaineita jne.)
Rasvasuodatinten puhdistus
KOSKA PUHDISTAA: puhdista vähintään kahden
kuukauden välein tulipalovaaran ehkäisemiseksi.
IRROTA SUODATTIMET SEURAAVASTI: paina
salpaa kahvansuuntaisesti taaksepäin ja vedä suodatin
pois alakautta.
Suomi
Page 25

25
SUODATINTEN PUHDISTUS: puhdista käsin tai
astianpesukoneessa miedolla pesuaineella. Jos peset
suodattimen astianpesukoneessa, se saattaa haalistua,
mikä ei mitenkään vaikuta sen toimintaan.
Hiilisuodattimen (P) vaihtaminen
(Vain suodatinversiot)
KOSKA VAIHTAA: vähintään kuuden kuukauden
välein.
IRROTTAMINEN: poista suodattimen 2 pidikettä (M) ja
irrota hiilisuodatin.
TOIMINTAVIAT
Jos liesituuletin ei tunnu toimivan, tarkista seuraavat
seikat ennen kuin soitat huoltopalveluun:
• Jos liesituuletin ei toimi:
Tarkista, että:
- sähkönsyöttö ei ole katkennut.
- jokin nopeus on valittuna.
• Jos liesituuletin vetää huonosti:
Tarkista, että:
- valittu moottorin nopeus on riittävä tilassa olevan
savun ja höyryn imemiseen.
- keittiön ilmankierto on riittävä, jotta liesituuletin saa
tarpeeksi ilmaa.
- hiilisuodatin ei ole kulunut (suodatinversio).
• Jos liesituuletin sammuu normaalin käytön aikana:
Tarkista, että:
- sähkönsyöttö ei ole katkennut.
- että moninapainen katkaisinlaite ei ole lauennut.
Varusteet, jotka eivät tule tuotteen mukana
FI
Page 26

26
! Installationen ska ske enligt dessa anvisningar och av
behörig personal.
!
Använd handskar vid åtgärder för installation och
underhåll.
LUFTUTLOPP
(För de insugande versionerna)
! Förbered hålet och ledningen för ett luftutlopp
(diameter 150mm).
! Använd en ledning som är så kort som möjligt.
! Använd en ledning som har så få böjningar som
möjligt (maximal vinkel på böjningen: 90°).
! Undvik drastiska förändringar vad det gäller skärning
av ledningen.
! Använd en ledning som är så slät som möjligt
invändigt.
! Det material som ledningen är gjord av måste vara
godkänt och följa de gällande normerna.
! Koppla inte spiskåpan till utloppsledningar som
används för att leda bort rök som genereras vid
förbränning (värmepannor, öppen spis, kaminer, etc.).
! För utsläpp av den luft som ska föras ut följ de
behöriga myndigheternas föreskrifter.
Därtill får luften som ska föras ut inte ledas ut genom
ett hål i väggen ifall hålet i fråga inte är avsett just för
detta ändamål.
! Utrusta lokalen med luftintag för att undvika att
spiskåpan skapar ett negativt tryck i rummet (som
inte får överstiga 0,04 mbar). Ifall spiskåpan används
samtidigt med andra apparater som inte är elektriska
(gasdrivna, oljedrivna eller koleldade kaminer och så
vidare) kan det skapas ett baksug av de avgaser som
släpps ut från värmekällan.
FILTRERANDE ELLER INSUGANDE ?
Spiskåpan finns tillgänglig i insugande version eller i
filtrerande version. Bestäm er redan från början för
installationstypen.
För att öka effektiviteten rekommenderar vi er att
installera spiskåpan i den insugande versionen (om
detta är möjligt).
Insugande version
Spiskåpan renar luften och släpper sedan ut den
utomhus med hjälp av en utloppsledning (diameter 150
mm).
Filtrerande version
Spiskåpan renar luften och släpper återigen ut den rena
luften i rummet.
KOMMANDON
P1 P2 P3 P4 P5 P6 P7
P1: reset alarm filter
P2: on/off led - genom att trycka in knappen länge är
det möjligt att ändra intensiteten hos lysdioderna
Hög/Låg)
Anmärkning: När lysdioderna tänds visas detta på
P2, men endast när sugapparaten är helt öppen
P3: on/off motor - 1:a hast
P4: 2:a hast
P5: 3:e hast
P6: 4:e hast
P7: upp/ned sugapparat (under öppningsfasen kan
man stanna upp apparaten vid önskad höjd genom
att trycka in knappen en gång till)
Funktion Timer 5:
Genom att trycka in knapparna P3, P4, P5 eller P6
länge (>2 min) aktiveras funktionen Timer 5. Efter 5
minuter stängs motorn av och vagnen stängs.
Lamporna går från intensiteten Hög till intensiteten Låg.
När funktionen är aktiv blinkar lysdioden som är
kopplad till motorns nuvarande hastighet.
Visning alarm filter:
Fettfilter: Efter 30 timmars motordrift tänds led-lampa
P1 under 30 minuter varje gång som motorn stängs av.
Kolfilter: Efter 120 timmars motordrift blinkar led-lampa
P1 under 30 minuter varje gång som motorn stängs av.
UNDERHÅLL
! Ta bort spänningen innan du ska göra rent eller utföra
underhållsåtgärder.
Rengöring av spiskåpan
NÄR SKA DEN GÖRAS REN: rengör åtminstone en
gång varannan månad för att undvika brandrisk.
UTVÄNDIG RENGÖRING: använd en trasa som har
fuktats med ljummet vatten och milt rengöringsmedel
(för lackerade spiskåpor); använd specifika produkter
som är till för spiskåpor i stål, koppar eller mässing.
INVÄNDIG RENGÖRING: använd en trasa (eller en
pensel) som har dränkts med t-sprit.
VAD MAN INTE SKA GÖRA: använd inte etsande eller
frätande produkter (t.ex. metallsvampar, för hårda
borstar, väldigt aggressiva rengöringsmedel, etc.)
Rengöring av fettfilter
NÄR SKA DE RENGÖRAS: rengör åtminstone en
gång varannan månad för att undvika brandrisk.
HUR KAN MAN TA BORT FILTREN: tryck spärren
bakåt i anslutning till handtaget och dra filtret nedåt.
HUR SKA MAN RENGÖRA FILTREN: tvätta för hand
eller i diskmaskin med milt rengöringsmedel. Vid tvätt i
diskmaskin kan en eventuell blekning ske som inte
påverkar filtrens funktion på något sätt.
Svenska
SV
Page 27

27
Byte av kolfiltret (P)
(Endast för filtrerande spiskåpa)
NÄR SKA DEN BYTAS UT: byt ut åtminstone en gång i
halvåret.
FÖR ATT TA BORT DEN: placerar du kolfiltret inuti
panelen och fäster det med 2 filterhållare (M).
SV
DRIFTFEL
Om det verkar som att någonting inte fungerar utför
följande enkla kontroller innan du ringer vår Kundtjänst:
• Om spiskåpan inte fungerar:
Kontrollera att:
- det inte är strömavbrott.
- en hastighet har valts.
• Om spiskåpan har låg kapacitet:
Kontrollera att:
- Den hastighet som har valts för motorn är tillräcklig
för den mängd rök och ånga som släpps ut.
- Köket är tillräckligt ventilerat för att tillåta luftintag.
- Kolfiltret inte är utslitet (spiskåpa i filtrerande version).
• Om spiskåpan har stängts av under normal drift:
Kontrollera att:
- det inte är strömavbrott.
- den allpoliga brytaren inte är utlöst.
Komponenter som inte tillhör produktens
standardutrustning.
Page 28

28
! З егкбфЬуфбуз дйенесгеЯфбй уэмцщнб ме фйт пдзгЯет
бхфЭт кбй брь рспущрйкь ербггелмбфйкЬ ейдйкехмЭнп.
!
ЧсзуймпрпйеЯфе гЬнфйб уфйт есгбуЯет
егкбфЬуфбузт кбй ухнфЮсзузт.
ЕККЕНЩУЗ ФПХ БЕСБ
(Гйб фйт екдьуейт брпссьцзузт)
! РспефпймЬуфе фзн прЮ кбй фпн бгщгь еккЭнщузт фпх
бЭсб (дйЬмефспт 150mm).
! ЧсзуймпрпйЮуфе Энбн бгщгь фпх елЬчйуфпх
бнбгкбЯпх мЮкпхт.
! ЧсзуймпрпйЮуфе Энбн бгщгь ме фпн елЬчйуфп дхнбфь
бсйимь гщнйюн (мЭгйуфз гщнЯб фзт кбмрэлзт: 90°).
! Брпцеэгефе дсбуфйкЭт бллбгЭт дйбфпмЮт фпх
бгщгпэ.
! ЧсзуймпрпйЮуфе Энбн бгщгь ме фп еущфесйкь кбфЬ
фп дхнбфьн рйп леЯп.
! Фп хлйкь фпх бгщгпэ рсЭрей нб еЯнбй егкексймЭнп щт
рспт фйт рспдйбгсбцЭт.
! Мз ухндЭефе фпн брпсспцзфЮсб уе бгщгпэт
еккЭнщузт фщн кбрнюн, рспъьнфщн кбэузт
(лЭвзфет, фжЬкйб, иесмЬуфсет, клр.).
! Гйб фзн еккЭнщуз фпх бЭсб рспт брпмЬксхнуз нб
фзсеЯфе фйт хрпдеЯоейт фщн бсмьдйщн бсчюн.
Бкьмз, п рспт еккЭнщуз бЭсбт ден рсЭрей нб
брпвЬллефбй мЭущ мйбт кпйльфзфбт фпх фпЯчпх екфьт
кй бн бхфЮ з кпйльфзфб рсппсЯжефбй гйб фп укпрь
бхфь.
! ЕопрлЯуфе фп чюсп ме хрпдпчЭт бЭсб гйб нб мз
дзмйпхсгЮуей п брпсспцзфЮсбт мйб бснзфйкЮ рЯеуз
уфп дщмЬфйп (рпх ден рсЭрей нб оереснЬей фб 0,04
mbar). РсЬгмбфй, бн п брпсспцзфЮсбт
чсзуймпрпйзиеЯ фбхфьчспнб ме ухукехЭт мз
злекфсйкЭт (иесмЬуфсет бесЯпх, лбдйпэ, Ьнисбкб,
клр.) мрпсеЯ нб бнбсспцзипэн кбхубЭсйб брь фзн
рзгЮ иесмьфзфбт.
ЦЙЛФСБСЙУМБФПУ ¹ БРПССПЦЗУЗУ;
П брпсспцзфЮсбт мрпсеЯ нб еЯнбй фэрпх
брпссьцзузт Ю фэрпх цйлфсбсЯумбфпт. БрпцбуЯуфе
ео бсчЮт фпн фэрп егкбфЬуфбузт. Гйб кблэфесз
брьдпуз, рспфеЯнпхме фзн егкбфЬуфбуз фпх
брпсспцзфЮсб уе Экдпуз брпссьцзузт (бн еЯнбй
дхнбфьн).
¸кдпуз брпссьцзузт
П брпсспцзфЮсбт кбибсЯжей фпн бЭсб кбй фпн
брпвЬллей рспт фб Эощ мЭущ еньт бгщгпэ еккЭнщузт
(дйбмЭфспх 150 mm).
¸кдпуз цйлфсбсЯумбфпт
П брпсспцзфЮсбт кбибсЯжей фпн бЭсб кбй фпн
ербнейуЬгей кбибсь уфп дщмЬфйп.
ЧЕЙСЙУФЗСЙБ
P1 P2 P3 P4 P5 P6 P7
P1: reset ухнбгесмпэ цЯлфсщн
P2: on/off led – рбфюнфбт рбсбфефбмЭнб фп кпхмрЯ
мрпсеЯфе нб фспрпрпйЮуефе фзн Энфбуз фпх led
High/Low)
УзмеЯщуз: фп Ьнбммб фщн led брейкпнЯжефбй брь
фп P2 мьнп ме фп рЬнел брпсспцзфЮсб фелеЯщт
бнпйчфь
P3: on/off кйнзфЮсб – 1
ç
ôá÷.
P4: 2
ç
ôá÷.
P5: 3
ç
ôá÷.
P6: 4
ç
ôá÷.
P7: up/down рЬнел брпсспцзфЮсб (уе цЬуз
бнпЯгмбфпт мрпсеЯфе нб уфбмбфЮуефе фп рЬнел
уфп ерйихмзфь эшпт рбфюнфбт деэфесз цпсЬ фп
кпхмрЯ)
ЛейфпхсгЯб Timer 5’:
Рбфюнфбт рбсбфефбмЭнб (>2") фб кпхмрйЬ P3, P4, P5
Ю P6 енесгпрпйеЯфбй з лейфпхсгЯб Timer 5’. Ме фзн
рбсЭлехуз фщн лерфюн п кйнзфЮсбт увЮней кбй фп
фсьлеъ клеЯней. Фб цюфб реснЬне брь фзн Энфбуз High
уфзн Энфбуз Low. ¼фбн з лейфпхсгЯб еЯнбй енесгЮla фп
led рпх бнфйуфпйчеЯ уфзн фсЭчпхуб фбчэфзфб фпх
кйнзфЮсб бнбвпувЮней.
Брейкьнйуз ухнбгесмюн цЯлфсщн:
ЦЯлфсб ухгксЬфзузт лЯрпхт: мефЬ брь 30h
лейфпхсгЯбт фпх кйнзфЮсб, фп led фпх кпхмрйпэ P1
бнЬвей гйб 30’’ кЬие цпсЬ рпх увЮней п кйнзфЮсбт.
ЦЯлфсп Ьнисбкб: мефЬ брь 120h лейфпхсгЯбт фпх
кйнзфЮсб, фп led фпх кпхмрйпэ P1 бнбвпувЮней гйб 30’’
кЬие цпсЬ рпх увЮней п кйнзфЮсбт.
УХНФЗСЗУЗ
! Рсйн кбибсЯуефе Ю кЬнефе ухнфЮсзуз дйбкьшфе фп
злекфсйкь.
Кбибсйьфзфб фпх брпсспцзфЮсб
РПФЕ КБИБСЙЖЕФБЙ: фпн кбибсЯжефе фпхлЬчйуфпн
кЬие 2 мЮнет гйб нб брпупвзипэн кЯндхнпй рхскбгйЬт.
ЕОЩФЕСЙКПУ КБИБСЙУМПУ: чсзуймпрпйЮуфе Энб
рбнЯ всегмЭнп ме члйбсь несь кбй пхдЭфесп
брпссхрбнфйкь (гйб фпхт веснйкщмЭнпхт
брпсспцзфЮсет). ЧсзуймпрпйЮуфе рспъьнфб ейдйкЬ гйб
брпсспцзфЮсет брь бфуЬлй, чблкь Ю мрспэнфжп.
ЕУЩФЕСЙКПУ КБИБСЙУМПУ: чсзуймпрпйЮуфе Энб
рбнЯ (Ю Энб рйнЭлп) емрпфйумЭнп уе бйихлйкЮ блкпьлз
мефпхуйщмЭнз.
ФЙ ДЕН РСЕРЕЙ НБ КБНЕФЕ: мз чсзуймпрпйЮуефе
рспъьнфб дйбвсщфйкЬ Ю брпохуфйкЬ (гйб рбсЬдейгмб
мефбллйкЬ уцпхггбсЬкйб, впэсфует рплэ уклзсЭт,
брпссхрбнфйкЬ рплэ вЯбйб, клр.)
ЕллзнйкЬ
GR
Page 29

29
Кбибсйумьт фщн цЯлфсщн ухгксЬфзузт лЯрпхт
РПФЕ КБИБСЙЖЕФБЙ: фп кбибсЯжефе фпхлЬчйуфпн кЬие
2 мЮнет гйб нб брпупвзипэн кЯндхнпй рхскбгйЬт.
РЩУ БЦБЙСПХНФБЙ ФБ ЦЙЛФСБ: брЭнбнфй брь фз
лбвЮ урсюофе фп уфпр рспт фб рЯущ кбй фсбвЮофе фп
цЯлфсп рспт фб кЬфщ.
РЩУ КБИБСЙЖПНФБЙ ФБ ЦЙЛФСБ: рлэнефе ме
пхдЭфесп брпссхрбнфйкь уфп чЭсй Ю уе рлхнфЮсйп
рйЬфщн. Уфзн ресЯрфщуз рлэузт уе рлхнфЮсйп
рйЬфщн, Энбт ендечьменпт брпчсщмбфйумьт ден
дйбкхвеэей ме кбнЭнб фсьрп фз лейфпхсгйкьфзфб фщн
цЯлфсщн.
БнфйкбфЬуфбуз фпх цЯлфспх Ьнисбкб (P)
(Мьнп гйб фпн брпсспцзфЮсб цйлфсбсЯумбфпт)
РПФЕ БНФЙКБИЙУФБФБЙ: бнфйкбиЯуфбфбй фпхлЬчйуфпн
кЬие 6 мЮнет.
РЩУ ФП БЦБЙСЕЙФЕ: фпрпиефЮуфе фп цЯлфсп Ьнисбкб
уфп еущфесйкь кбй ейуЬгефе фб 2 уфпр цЯлфсщн (M) гйб
нб мрлпкЬсефе фп цЯлфсп Ьнисбкб.
GR
БНЩМБЛЙЕУ ЛЕЙФПХСГЙБУ
Бн кЬфй ден лейфпхсгЮуей, рсйн кблЭуефе фзн ХрзсеуЯб
ФечнйкЮт ХрпуфЮсйозт дйенесгЮуфе фпхт бкьлпхипхт
брлпэт елЭгчпхт:
• Бн п брпсспцзфЮсбт ден лейфпхсгеЯ:
ВевбйщиеЯфе бн:
- хрЬсчей дйбкпрЮ злекфсйкпэ.
- Эчей ерйлегеЯ мйб фбчэфзфб.
• Бн п брпсспцзфЮсбт Эчей мейщмЭнз брьдпуз:
ВевбйщиеЯфе бн:
- З фбчэфзфб кйнзфЮсб ербскеЯ гйб фзн рпуьфзфб
кбрнпэ кбй бфмюн рпх елехиесюнефбй.
- З кпхжЯнб бесЯжефбй ербскют гйб нб ерйфсЭрей мйб
хрпдпчЮ бЭсб.
- Фп цЯлфсп Ьнисбкб Эчей еобнфлзиеЯ (брпсспцзфЮсбт
уе Экдпуз цйлфсбсЯумбфпт).
• Бн п брпсспцзфЮсбт Эувзуе уфз дйЬскейб фзт
кбнпнйкЮт лейфпхсгЯбт:
ВевбйщиеЯфе бн:
- хрЬсчей дйбкпрЮ злекфсйкпэ.
- з рплхрплйкЮ дйЬфбоз дйбкпрЮт Эчей енесгпрпйзиеЯ.
ЕобсфЮмбфб рпх ден рбсЭчпнфбй ме фп
рспъьн
Page 30

30
RO
! Instalarea se va face conform prezentelor instrucţiuni,
numai de persoane calificate.
!
Utilizaţi mănuşi pe parcursul operaţiunilor de
instalare şi întreţinere.
EVACUAREA AERULUI
(Pentru versiunile cu aspirare)
! Pregătiţi orificiul şi conducta de evacuare a aerului
(diametrul 150mm).
! Utilizaţi o conductă cu lungimea minimă necesară.
! Utilizaţi o conductă cu cât mai puţine coturi posibile
(unghi maxim al cotului: 90°).
! Evitaţi schimbarea drastică a secţiunii conductei.
! Utilizaţi o conductă cu interiorul cât mai neted posibil.
! Materialul conductei trebuie să fie aprobat
corespunzător.
! Nu legaţi hota la conductele de evacuare a fumului
produs în urma combustiei (centrale, cămine, sobe
etc).
! Pentru evacuarea aerului respectaţi indicaţiile stabilite
de autorităţile competente.
De asemenea, aerul nu trebuie evacuat printr-un
orificiu al peretelui decât dacă acesta a fost construit
special în acest scop.
! Dotaţi spaţiul cu prize de aer pentru a evita ca hota
să creeze o presiune negativă în cameră (care nu
trebuie să depăşească 0,04 mbari); de fapt, dacă
hota se utilizează concomitent cu alte aparate care
nu sunt electrice (sobe cu gaz, ulei sau cărbune etc.)
pot apărea vârtejuri de gaze degajate de sursa de
căldură.
FILTRANTĂ SAU ASPIRANTĂ ?
Hota poate fi utilizată atât în versiune filtrantă cât şi în
versiune aspirantă. Decideţi de la început versiunea de
instalare.
Pentru o mai bună eficienţă, vă recomandăm să
instalaţi hota în versiunea aspirantă (dacă este posibil).
Versiune aspirantă
Hota filtrează aerul şi-l împinge în exterior printr-o
conductă de evacuare (diametrul 150 mm).
Versiune filtrantă
Hota filtrează aerul şi-l reintroduce curat în cameră.
COMENZI
P1 P2 P3 P4 P5 P6 P7
P1: reset alarma filtre
P2: on/off led - cu apasare prelungita a butonului se
poate modifica intensitatea ledurilor High/Low)
Nota: Aprinderea ledurilor este visualizata de catre
P2 doar daca panoul de aspirare este complet
deschis
P3: on/off motor - 1^vel
P4: 2^vel
P5: 3^vel
P6: 4^vel
P7: up/down panoul de aspirare (este posibila
închiderea panoului în faza de deschidere la
înaltimea dorita apâsând pentru a doua oara
butonul)
Functia Timer 5':
Prin apasare prelungita (>2") a butoanelor P3, P4, P5 o
P6 se activeaza functia Timer 5'. Dupa scurgerea
minutelor indicate motorul se stinge iar panoul se
închide. Luminile trec de la intensitatea High la cea
Low. Când functia este activata, ledul care corespunde
vitezei curente a motorului pâlpâie.
Vizualizare alarma filtre:
Filtre antigrasime: Dupa 30h de functionare a motorului,
ledul butonului P1 se aprinde timp de 30'' de fiecare
data când motorul se stinge.
Filtrul de carbon: Dupa 120h de functionare a motorului,
ledul butonului P1 pâlpâie timp de 30'' de fiecare data
când motorul se stinge.
ÎNTREŢINERE
! Înainte de a curăţa sau efectua întreţinerea decuplaţi
tensiunea.
Curăţarea hotei
CÂND TREBUIE CURĂŢATĂ: curăţaţi cel puţin o dată
la 2 luni pentru a evita riscul de incendiu.
CURĂŢARE EXTERNĂ: utilizaţi o lavetă umezită în
apă călduţă şi detergent neutru (pentru hote vopsite);
utilizaţi produse speciale pentru hotele din oţel, aramă
sau cupru.
CURĂŢARE INTERNĂ: utilizaţi o lavetă (sau o cârpă)
îmbibată cu alcool etilic diluat.
CE NU TREBUIE FĂCUT: nu utilizaţi produse abrazive
sau corozive (de exemplu bureţi metalici, perii foarte
dure, detergenţi foarte agresivi etc.)
Curăţarea filtrelor anti-grăsime
CÂND TREBUIE CURĂŢATE: curăţaţi cel puţin o dată
la 2 luni pentru a evita riscul de incendiu.
Română
Page 31

31
CUM SE SCOT FILTRELE: cu mânerul corespunzător
împingeţi dispozitivul de prindere în spate şi trageţi filtrul
în jos.
CUM SE CURĂŢĂ FILTRELE: spălaţi-le cu un
detergent neutru, manual sau cu maşina de spălat
vase. În cazul în care le spălaţi cu maşina de spălat
vase, dacă se decolorează nu înseamnă că este
afectată şi funcţionarea acestora.
Înlocuire filtru carbon (P)
(Doar pentru hote filtrante)
CÂND TREBUIE ÎNLOCUIT: cel puţin o dată la 6 luni.
CUM SE SCOATE: fixa˛i filtrul cu c„rbune Ón interiorçi
monta˛i cele 2 capace de fixare a filtrelor (M), pentru a
bloca astfel filtrul.
ANOMALII DE FUNCŢIONARE
Dacă vi se pare că ceva nu funcţionează, înainte de a
contacta Serviciul Asistenţă, efectuaţi următoarele
verificări simple:
• Dacă hota nu funcţionează:
Verificaţi dacă:
- nu este întrerupt curentul.
- a fost selectată o viteză.
• Dacă hota are un randament scăzut:
Verificaţi dacă:
- Viteza motorului selectată este suficientă pentru
cantitatea de fum şi abur eliminată.
- Bucătăria este aerisită suficient pentru a crea o priză
de aer.
- Filtrul carbon nu este consumat (hotă în versiunea
filtrantă).
• Dacă hota s-a oprit pe parcursul funcţionării normale:
Verificaţi dacă:
- nu este întrerupt curentul.
- întreruptorul bimetal nu s-a cuplat.
Componente care nu se află în dotarea
produsului
RO
Page 32

32
CZ
! Instalace musí být provedena podle uvedených
pokynů odborně kvalifikovaným personálem.
!
Při provádění operací instalace a údržby
používejte rukavice.
ODTAH VZDUCHU
(pro sací verze)
! Připravte otvor a trubici odtahu vzduchu (průměr 150
mm).
! Použijte trubici o nejkratší možné délce.
! Používejte trubici s co nejmenším počtem ohybů
(maximální úhel ohybu: 90°).
! Vyhněte se výrazným změnám části trubice.
! Používejte trubici s co nejhladším vnitřním povrchem.
! Materiál, ze kterého je trubka vyrobena, musí
odpovídat platným normám.
! Nezapojujte digestoř na trubky odtahu spalin (kotle,
krby, kamna, atd.).
! Pro výfuk vypouštěného vzduchu dodržujte předpisy
kompetentních úřadů.
Dále vypouštěný vzduch nesmí být veden otvorem ve
zdi, ledaže by tento otvor byl určen k tomuto účelu.
! Vybavte prostor sacími hrdly, abyste zabránili tomu,
že digestoř vytvoří negativní tlak v místnosti (nesmí
překročit 0,04 mBar), pokud by totiž byl kryt současně
používán také jiným než elektrickým zařízením
(plynová kamna, olejová kamna, kamna na uhlí, atd.),
mohlo by vzniknout sání odpadních plynů ze zdroje
tepla.
FILTRUJÍCÍ NEBO SACÍ?
Digestoř může být buď ve verzi sací nebo filtrující. Typ
si zvolte ještě před instalací.
Doporučujeme instalovat digestoř sací verze (pokud je
to možné), protože má vyšší účinnost.
Sací verze
Digestoř čistí vzduch a odvádí ven výfukovou trubkou
(průměr 150 mm).
Filtrační verze
Digestoř čistí vzduch a vrací jej čistý zpět do místnosti.
PŘÍKAZY
P1 P2 P3 P4 P5 P6 P7
P1: vynulování alarmu filtru
P2: on/off led - dlouhým stiskem tlacítka je možné
menit intenzitu kontrolek led High/Low)
Poznámka: Rozsvícení kontrolek led se zobrazí na
P2 pouze se zcela otevreným panelem odsavace.
P3: on/off Motoru 1. rychlost
P4: 2. rychlost
P5: 3. rychlost
P6: 4. rychlost
P7: up/down panelu odsavace (ve fázi otevrení je
možné druhým stiskem tlacítka zastavit panel v
požadované poloze)
Funkce Timer 5':
Dlouhým stiskem (>2") tlacítek P3, P4, P5 a P6 je
aktivována funkce Timer 5'. Po uplynutí minut se motor
vypne a digestor se zavre. Svetla prechází z intenzity
svitu High na intenzitu Low. Když je funkce aktivní,
kontrolka led odpovídající aktuální rychlosti motoru
bliká.
Zobrazení alarmu filtru:
Tukové filtry: Po 30h fungování motoru se kontrolka led
tlacítka P1 rozsvítí na dobu 30'' pokaždé, když se
motor vypne.
Uhlíkový filtr: Po 120 h fungování motoru kontrolka led
tlacítka P1 bliká na dobu 30'' pokaždé, když se motor
vypne.
ÚDRŽBA
! Před čištěním nebo prováděním údržby odpojte od
zdroje napětí.
Čištění digestoŕe
KDY ČISTIT: Čistit alespoň každé 2 měsíce, abyste
zabránili riziku vzniku požáru.
VNĚJŠÍ ČIŠTĚNÍ: Používejte navlhčený hadřík s
vlažnou vodou a neutrální čisticí prostředek (pro
lakované digestoře), na digestoře z oceli, mědi nebo
mosazi používejte speciální přípravky.
VNITŘNÍ ČIŠTĚNÍ: Používejte hadřík (nebo štětec)
namočený v denaturovaném lihu.
CO NEDĚLAT: Nepoužívejte brusné materiály nebo
materiály způsobující korozi (například kovové
houbičky, příliš tvrdé kartáče, příliš agresivní čisticí
prostředky atd.).
Čištění tukových filtrů
KDY ČISTIT: Čistit alespoň každé 2 měsíce, abyste
zabránili riziku vzniku požáru.
JAK VYJMOUT FILTRY: Stlačte zarážku v místě
držadla směrem dozadu a vytáhněte filtr směrem dolů.
Čeština
Page 33

33
JAK ČISTIT FILTRY: Omýt ručně neutrálním čisticím
prostředkem nebo v myčce. V případě mytí v myčce
případné odbarvení v žádném případě neohrozí
funkčnost filtrů.
Výměna uhlíkového filtru (P)
(pouze pro filtrující digestoř)
KDY VYMĚNIT. Vyměnit alespoň každých 6 měsíců.
JAK JEJ ODEJMOUT: vyjměte drátěné příchytky M z
krycí mřížky digestoře, tím filtr uvolníte.
CZ
ABNORMÁLNÍ FUNKCE
Pokud by se zdálo, že něco nefunguje, pak před
přivoláním servisní služby proveďte následující snadné
kontroly:
• Pokud digestoř nefunguje:
Ověřte, zda:
- nedošlo k přerušení přívodu proudu,
- byla vybrána rychlost.
• Pokud má digestoř nízký výkon:
Ověřte, zda:
- Vybraná rychlost motoru je dostačující pro množství
unikajícího kouře a par.
- Kuchyň je dostatečně větrána, aby umožnila přívod
vzduchu.
- Uhlíkový filtr není opotřebovaný (digestoř filtrující
verze).
• Pokud se digestoř vypnula v průběhu normálního
chodu:
Ověřte, zda:
- nedošlo k přerušení přívodu proudu.
- nebyl aktivován vícepólový vypínač
Součástky, které nejsou dodávány
s výrobkem.
Page 34

34
SK
! Napravo sme v skladu s temi navodili namestiti samo
usposobljeno osebje.
!
Pri vykonávaní inštalácie a údržby používajte
rukavice.
ODVOD VZDUCHU
(Pri verziách s odvodom vzduchu)
! Pripravte otvor a rúrku na odvod vzduchu (priemer
150mm).
! Použite rúrku s minimálnou použiteľnou dĺžkou.
! Použite rúrku s čo najmenším počtom ohybov
(maximálny uhol ohybu: 90°).
! Vyhýbajte sa prudkým zmenám plochy odvodnej
rúrky.
! Použite rúrku s čo najhladšími vnútorným povrchom.
! Materiál odvodnej rúrky musí spĺňať požiadavky
platných noriem.
! Nezapájajte odsávač pár ku odvodom a komínom,
ktoré odvádzajú dymy spaľovania (kotol, kozub,
sporáky a pod.).
! Odvádzaný vzduch musí spĺňať podmienky predpisov
príslušných zodpovedných orgánov.
Okrem toho sa odvádzaný vzduch nesmie odvádzať
otvorom v múre, ak tento otvor nie je určený iba na
tento účel.
! V miestnosti zabezpečte otvory na prívod vzduchu,
aby sa predišlo tomu, že sa činnosťou odsávača pár
vytvorí v miestnosti negatívny tlak (ktorý nesmie
prekročiť 0,04 mbar); teda, ak sa odsávač pár
používa súčasne so spotrebičmi, ktoré na svoju
prevádzku využívajú iný ako elektrický zdroj energie
(plynové sporáky, olejové piecky, sporák na uhlie a
pod.), môže dôjsť k javu, kedy tepelný zdroj vysaje
spaliny.
S FILTROVANÍM ALEBO S ODVODOM
VZDUCHU?
Odsávač pár môže byť vo verzii s odsávaním alebo s
filtrovaním vzduchu. Hneď na začiatku sa rozhodnite o
druhu inštalácie.
Na zabezpečenie čo najvyššej účinnosti odporúčame
nainštalovať odsávač pár vo verzii s odsávaním
vzduchu (ak je to možné).
Verzia s odsávaním vzduchu
Odsávač pár čistí vzduch a odvádza ho von cez
odvodnú rúrku (priemer 150 mm).
Verzia s filtrovaním vzduchu
Odsávač pár čistí vzduch a čistý ho opäť vháňa do
miestnosti.
OVLÁDAČE
P1 P2 P3 P4 P5 P6 P7
P1: reset alarmu filtrov
P2: zapnutá/vypnutá kontrolka - dlhým stlacením
tlacidla je možné menit intenzitu kontrolky High/
Low)
Poznámka: Zapnutie kontrolky je zobrazené P2,
iba ak je panel nasávania úplne otvorený
P3: zapnutý/vypnutý motor - 1^rýchl.
P4: 2^rýchl.
P5: 3^rýchl.
P6: 4^rýchl.
P7: hore/dole panel nasávania (vo fáze otváranie je
možné zastavit panel v žiadanej výške podla
stlacenia tlacidla)
Funkcia Timer 5':
Dlhým stlacením (>2") tlacidiel P3, P4, P5 a P6 sa
aktivuje funkcia Timer 5'. Po prejdení týchto minút sa
motor vypne a vozidlo sa uzavrie. Svetlá prejdú z
intenzity High do intenzity Low. Ked je funkcia aktívna,
príslušná kontrolka bliká podla aktuálnej rýchlosti
motora.
Zobrazenie alarmov filtrov:
Odmastovacie filtre: Po 30-tich hodinách fungovania
motora sa kontrolka tlacidla P1 rozsvieti na 30 sekúnd
vždy, ked vypnete motor.
Uhlíkový filter: Po 120-tich hodinách fungovania motora
zacne kontrolka tlacidla P1 blikat po dobu 30-tich
sekúnd vždy, ked vypnete motor.
ÚDRŽBA
! Pred čistením alebo vykonávaním údržby odpojte
spotrebič od elektrického napájania.
Čistenie odsávača pár
KEDY ČISTIŤ: aby sa predišlo riziku požiaru, čistite
odsávač aspoň každé 2 mesiace.
ČISTENIE POVRCHU: používajte utierku navlhčenú vo
vlažnej vode s neutrálnym čistiacim prostriedkom (pre
lakované odsávače pár); používajte špecifické
prípravky na antikorové, medené alebo mosadzné
odsávače pár.
ČISTENIE VNÚTRA: používajte utierku (alebo štetec)
namočenú v denaturovanom liehu.
ČO NESMIETE ROBIŤ: nepoužívajte abrazívne alebo
korozívne prostriedky a prípravky (napríklad kovové
drôtenky, veľmi tvrdé kefky, veľmi agresívne čistiace
prípravky a pod.)
Čistenie filtrov na zachytávanie tukov
KEDY ČISTIŤ: aby sa predišlo riziku požiaru, čistite
odsávač aspoň každé 2 mesiace.
Slovensky
Page 35

35
AKO VYBRAŤ FILTRE: treba zatlačiť dozadu úchytku
nachádzajúcu sa vedľa rukoväte a potiahnuť filter
smerom dolu.
AKO ČISTIŤ FILTRE: umyte ich neutrálnym čistiacim
prostriedkom ručne alebo v umývačke riadu. V prípade
umývania v umývačke riadu môže dôjsť k zmene farby
filtrov, čo však v žiadnom prípade neovplyvní ich
účinnosť.
Výmena uhlíkového filtra (P)
(Iba v prípade odsávačov s filtrovaním vzduchu)
KEDY VYMENIŤ: vymieňať aspoň každých 6
mesiacov.
AKO HO VYBRAŤ: umiestnite uhlíkový filter do vnútra
a zaistite ho prostredníctvom dvoch upevňovačov (M).
CHYBY PRI PREVÁDZKE
Ak sa vám zdá, že niečo nefunguje správne, predtým,
ako zavoláte prevádzku Servisu, vykonajte nasledujúce
jednoduché kontroly:
• Ak odsávač pár nefunguje:
Skontrolujte, či:
- nedošlo k prerušeniu dodávky elektriny.
- bola nastavená nejaká rýchlosť.
• Ak je výkonnosť odsávača pár slabá:
Skontrolujte, či:
- Nastavená rýchlosť motora stačí na odsávanie
uvoľneného množstva dymu a pár z prípravy jedál.
- V kuchyni je dostatočné vetranie, ktoré zabezpečí
dostatočný prívod vzduchu.
- Nie je opotrebovaný uhlíkový filter (v prípade
odsávača pár s filtrovaním vzduchu).
• Ak sa odsávač pár počas bežnej činnosti vypne:
Skontrolujte, či:
- nedošlo k prerušeniu dodávky elektriny.
- nezasiahol dvojpólový bezpečnostný spínač.
Diely, ktoré sa nedodávajú spolu s výrobkom
SK
Page 36

04308190 - LIFT
 Loading...