

Page 1

1Table of contents
Safety precautions ............................ 6
Phone overview ................................. 9
Standby display icons ......................12
Getting started ................................ 13
Removing the back cover ...............13
Inserting the SIM card ....................13
Inserting the battery ........................14
microSD card ...................................14
Inserting the microSD card ...........14
Removing the microSD card .........15
Installing the back cover .................15
Charging the battery .......................16
Switching phone on/off ..................16
Switching phone on ........................16
Entering PIN ...................................16
First time startup ............................16
Standby screen ................................17
Signal strength ................................17
Offline mode ...................................17
Emergency Call (SOS) ....................17
Switching phone off ....................... 17
General instructions ....................... 18
Connectivity .....................................18
DRM ..................................................18
Menu control ...................................18
Navigating the menus ....................18
Menu speed dialling ....................... 19
Tabs .................................................19
Standard functions ..........................19
Options menu .................................19
Mark mode ......................................20
Fast list search .................................20
PIN codes ........................................ 21
PIN control ......................................21
Change PIN ..................................... 21
Change PIN2 ................................... 21
Change phone code ........................ 22
Text input ........................................ 22
Changing input methods ............... 22
Text input without T9 .................... 22
Text input with T9 .......................... 23
T9 word suggestions ...................... 23
Adding a new word to the T9
dictionary ........................................23
Correcting a word .......................... 23
Special characters ........................... 24
Text edit menu ................................ 24
Text templates ................................. 24
Creating text templates .................. 24
Inserting text templates .................25
Calling .............................................25
Making a video call ......................... 25
Video call options ...........................25
Dialling with number keys ............ 26
Ending a call .................................... 26
Setting earpiece volume ................. 26
Dialling previous numbers ............ 26
Listening to voicemail .................... 26
Accepting a call ............................... 26
Rejecting a call ................................ 27
Handsfree talking ........................... 27
Swapping between 2 calls .............. 27
Establish a second connection ...... 27
Swapping calls ................................27
Incoming calls during a call .......... 27
Ending calls ....................................28
Conference ...................................... 28
Ending a conference .......................28
Private call ......................................28
Page 2

Table of contents2
Call options ......................................29
Full/split screen ..............................30
Contacts .......................................... 30
Accessing Contacts .........................30
All contacts .......................................31
Adding a new contact ..................... 31
Groups ..............................................32
Adding a new group ....................... 32
Adding members ............................32
Viewing members in a group ........ 32
Editing a group ...............................32
SIM contacts ....................................32
Adding a new SIM contact .............32
Moving a SIM contact to phone .... 33
Filter ..................................................33
Options menu for Contacts ...........33
Fast contact search ..........................35
Dialling a contact ............................35
Voice-activated dialling ..................35
Recording a voice tag ..................... 35
Using Voice-activated dialling ...... 35
Call records ..................................... 36
Redial number .................................36
Duration/charges .............................36
Charge settings ...............................36
Entertainment ................................ 37
Media player ....................................37
Music ...............................................37
Pictures ............................................38
Videos ..............................................38
Bookmarks ......................................38
Camera ..............................................38
Starting the camera ........................38
Displayed information ................... 38
Taking pictures/videos .................. 39
Reviewing pictures/videos ............. 39
Save pictures/videos .......................39
Return to view finder ..................... 39
Delete pictures/videos .................... 40
Camera options .............................. 40
Picture settings/Video settings ..... 40
FM radio .......................................... 41
Setting preset stations ....................42
Create message ................................ 42
SMS/MMS ....................................... 42
Writing/sending an SMS ...............42
Writing/sending an MMS .............. 43
SMS/MMS options ......................... 44
E-mail ............................................... 44
Writing/sending e-mails ................44
E-mail options ................................ 45
Inbox ...............................................45
Inbox structure ............................... 46
Reading SMS, MMS, CB ................ 46
Reading E-mail ............................... 46
WAP push ....................................... 47
Message lists .................................... 48
Drafts ................................................ 48
Outbox ............................................. 48
Sent ................................................... 48
Message settings .............................. 48
SMS settings .................................... 48
SMS profiles ....................................48
Auto header ....................................49
Auto signature ................................ 49
Save sent items ............................... 49
Auto delete SMS .............................49
Emoticons .......................................49
Page 3

3Table of contents
Text size ...........................................49
MMS settings ...................................49
MMS profiles ..................................49
Home retrieval/Roaming retrieval 49
Req. read report ..............................50
Req. deliv report .............................50
Delivery time ...................................50
Validity period ................................50
Hide number ...................................50
Anon. messages ..............................50
Allow read report ............................50
Allow deliv report ...........................50
Creation mode ................................50
Auto signature ................................50
Save sent items ................................50
Allow adverts ..................................50
Emoticons .......................................51
Text size ...........................................51
Max msg size ...................................51
E-mail settings .................................51
Activating an account ....................51
Deleting an account ........................51
Editing an account ..........................51
CB settings ........................................51
Receive broadcasts ......................... 51
Cell info display ..............................52
Topic list ..........................................52
Voicemail .........................................52
Voicemail settings ..........................52
Listening to voicemails ..................52
Internet ........................................... 52
Home Page .......................................52
Enter URL ........................................52
Bookmarks .......................................53
History ..............................................53
Settings ............................................. 53
Multimedia ..................................... 53
Look and feel .................................. 53
Security ........................................... 53
Certificates ......................................53
WAP push ....................................... 53
Browser profiles .............................53
Navigation in the browser ............. 54
Ending a connection ...................... 54
Download ........................................ 54
Java Application Manager ............. 54
Games ..............................................55
GPS ..................................................55
Organiser ........................................56
Calendar ........................................... 56
Daily view ....................................... 56
Weekly view .................................... 57
Monthly view .................................. 57
Calendar Settings ........................... 57
New event/Edit event .....................57
Information on the alarm ..............58
Voice memo .................................... 58
New recording ................................58
Playback ..........................................58
Set as call ringtone .........................58
Time zones ...................................... 58
Synchronisation .............................. 59
Remote sync ................................... 59
Active profile ..................................59
Sync mode ....................................... 59
Apps to synchronise ....................... 59
Sync log ........................................... 59
Extras ..............................................60
SIM toolkit (optional) .................... 60
Page 4

Table of contents4
My menu ..........................................60
Using My menu ..............................60
Change My menu ...........................60
Alarm clock ......................................60
Set alarm .........................................60
Apply Alarm to every day ..............60
End alarm ........................................ 61
Calculator .........................................61
Unit converter ..................................61
Converting the units/currency ......61
Currency settings ............................62
Sound recorder ................................62
Stopwatch .........................................62
My stuff ........................................... 62
Folder structure ...............................62
License manager .............................64
Using the phone as card reader ...... 64
Settings ........................................... 65
Profiles ..............................................65
Ringtones ..........................................65
Themes ..............................................65
Display ..............................................65
Wallpaper ........................................65
Logo .................................................65
Animation mode ............................65
Screensaver .....................................66
Greeting message ............................66
Backlight time .................................66
Brightness .......................................66
Power save ......................................66
Vibration ..........................................66
Connectivity .....................................66
Bluetooth® technology ................... 66
Data counter ...................................68
Connect profiles ............................. 68
Internet profiles .............................. 68
Linger time ..................................... 68
Shortcuts .......................................... 69
Setting a function shortcut ............69
Setting a speed-dial key ................. 69
Start function/call number using
shortcuts ......................................... 69
Call setup ......................................... 69
Hide ID ............................................ 69
Call waiting ..................................... 69
Diverts ............................................. 70
Any key answer ..............................70
Auto redial ...................................... 70
Video calls ....................................... 70
Display call timer ........................... 71
Phone ............................................... 71
Language .........................................71
Default input method ....................71
Key tones .........................................71
Info tones ........................................ 71
File system ......................................71
Phone identity ................................ 71
Master reset .................................... 72
Clock ................................................ 72
Time/Date ....................................... 72
Time zone .......................................72
Time format ....................................72
Date format .....................................72
Show clock ......................................72
Auto time ........................................ 72
Security ............................................ 72
Auto key lock .................................. 72
Only protect. SIM ........................... 73
PIN codes ........................................ 73
Page 5

This SIM only ..................................73
Barrings ...........................................73
License manager .............................73
Download prompt ..........................73
Network ............................................73
Network info ...................................73
Choose network ..............................74
Auto network ..................................74
GPRS auto attach ............................74
Preferred network ..........................74
Mode selection ................................74
Fast search .......................................74
Accessories .......................................74
Car kit ..............................................74
Headset ............................................74
Charge via USB ...............................75
Mass storage ...................................75
GPS settings .....................................75
Questions & Answers .................... 76
Care and maintenance .................... 79
Product data ................................... 80
SAR ................................................. 81
License Agreement ........................ 82
Menu tree ........................................ 85
5Table of contents
Page 6
Safety precautions6
Safety precautions
Information for parents
Please read the operating instructions and safety precautions carefully before use.
Explain the content to your children and the hazards associated w ith using the phone.
Remember to comply with
legal requirements and local
restrictions when using the
phone. For example, in
aeroplanes, petrol stations,
hospitals or while driving.
Mobile phones can interfere
with the functioning of medical
devices such as hearing aids
or pacemakers. Keep at least
20cm/9 inches between phone
and pacemaker. When using
the mobile phone hold it to the
ear which is furthest away from
the pacemaker. For more
information consult your
doctor.
Always keep the phone and
accessories out of reach of
small children.
Small parts such as the SIM
card, dust cap, lens ring and
lens cap as well as the microSD
card can be dismantled and
swallowed by small children.
Do not place the phone near to
electromagnetic data carriers
such as credit cards and floppy
disks. Information stored on
them could be lost.
Do not look directly into the
LED (e.g. flash LED) with
optical magn ifiers because of
radiation.
This product complies with
IEC/EN 60825-1 “Safety of
Laser Products” for LED Class
1M products; such products
are safe under reasonably
foreseeable operating
conditions.
Permanent hearing loss may
occur if you use ear- or
headphones at high
volume.You can adapt over
time to a higher volume, whi ch
may sound normal but can be
damaging to your hearing. Set
your volume to a safe level. If
you experience discomfort or
buzzing in your ears, reduce
the volume or discontinue use
of your ear- or headphones.
Ringtones, info tones and
handsfree talking are
reproduced through the
loudspeaker. Do not hold the
phone to the ear when it rings
or when you have switched on
the handsfree function.
Otherwise you risk serious
permanent damage to your
hearing.
Page 7
7Safety precautions
The mains volta ge (V)
specified on the power supply
unit must not be exceeded.
Otherwise the charging device
may be damaged.
The power supply must be
plugged into an easily
accessible AC mains power
socket when charging the
battery. The only way to turn
off the charging device after
charging the battery is to
unplug it.
You may only open the phone
to replace the battery, SIM and
microSD card. You must not
open the battery under any
circumstances. All other
changes to this device are
strictly prohibited and will
invalidate the guarantee.
The phone may cause
interference in the vicinity of
TV sets, radios and PCs.
Use only original accessories.
This will avoid potential risks
to health or property and
ensu re compliance wi th all
relevant regulations.
Dispose of unwanted batteries
and phones as permitted by the
laws in your countries.
• Only use original batteries
and charging devices.
Otherwise you risk serious
damage to health and
property. The battery could
explode, for instance.
• All batteries can cause
property damage, injury or
burns if a conductive
material such as jewel ry, keys
or beaded chains touch
exposed terminals. The
material may complete an
electrical circuit and become
quite hot. Exercise care in
handling any charged
battery, particularly when
placing it inside your po cket,
purse or other container with
metal objects.
• Do not dispose of batteries in
fire as they may explode.
• Do not charge the original liion batteries in the
environment with its
temperature below 0 ° C (+32
°F) a s it may c ause los s of
charged battery capacity.
Improper use will invalidate the
guarantee! These safety instructions also
apply to original accessories.
As mobile devices offer a range of
functions, they can be used in positions
other than the head, such as on the body.
In this case, a separation distance of
1.5 cm is required.
Page 8

Safety precautions8
Bluetooth®
Your phone has a Bluetooth® interface. This
makes it possible to establish a wireless
connection with your phone and a headset,
a car kit or other Bluetooth-enabled devices.
This phone is also qualified by BQB SIG; the
QD ID is B012807.
In order to establish a secure link between
the devices and to prevent a third party
from having access to your phone, you
should observe the following points:
• The initial connection between two
devices, what is called "pairing", should
take place in familiar surroundings.
• Both devices must be able to identify
themselves one time by using a
password/PIN. To ensure sufficient
security, you should choose a 16-digit
number combination for a password that
would be difficult to guess (if a PIN has
not been assigned).
• An automatic connection acceptance
("connection without confirmation")
should only be used in exceptional cases.
• In general, only trustworthy devices
shou ld be lin ked in or der to minimise
security risks.
• You should restrict the "visibility" of your
phone if possible. This will make it much
more difficult for unknown devices to
establish a connection with your phone.
To do this, in the Bluetooth menu, set the
option Bluetooth visibility from On to Off
(page 67).
• The name of your phone is transmitted in
a Bluetooth connection. The factory
default is "M7". The first time Bluetooth
function is activated, or later in the
Bluetooth menu, you can change this
name (page 67).
•If Bluetooth technology is not needed, this
function should be deactivated.
•Before using Bluetooth accessories, or a
mobile phone inside a vehicle, check the
vehicle user guide for any limitations on
the use of these products.
Page 9
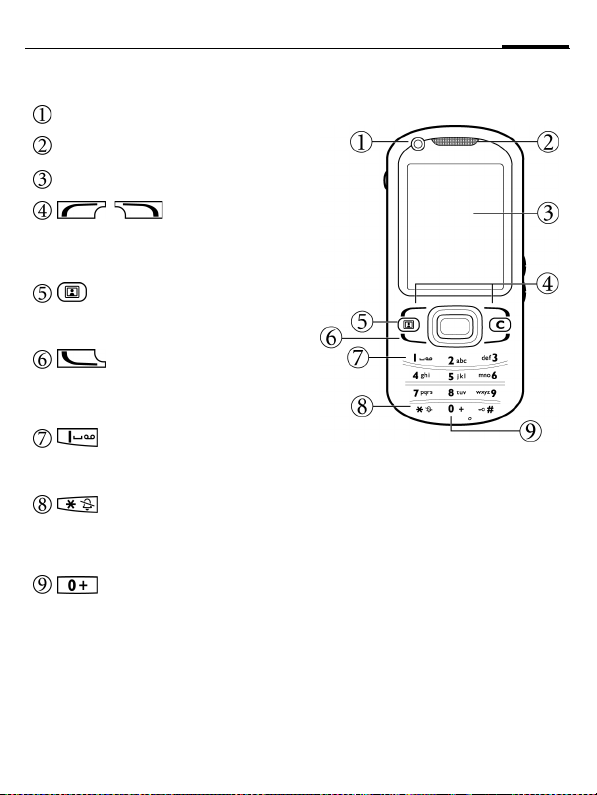
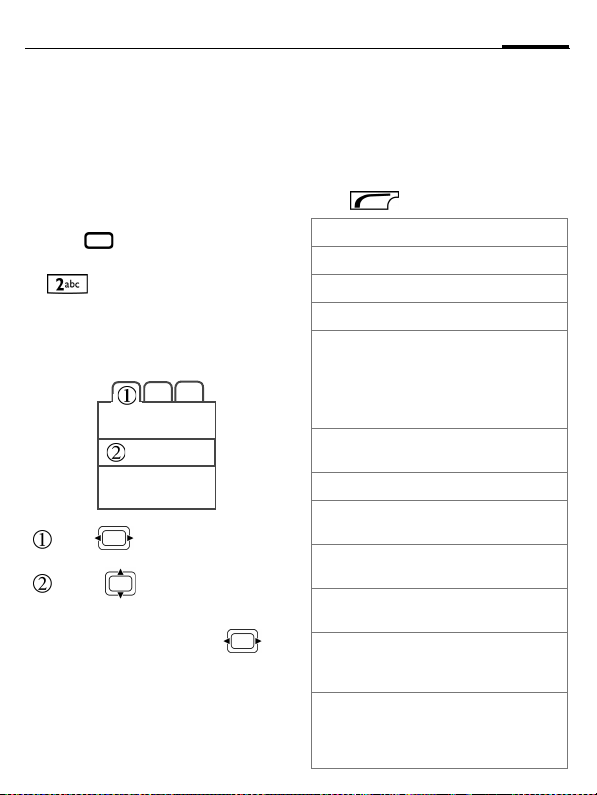
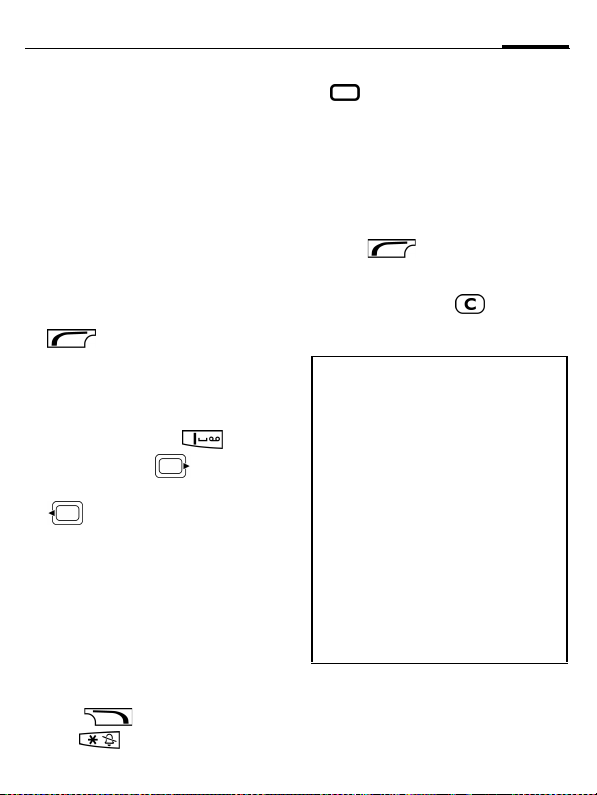
Phone overview
Internal Camera
Speaker
Main display
/ Soft keys
The current function s of these keys are
shown in the bottom line of the displ ay
(see Shortcuts, page 69).
Video call key
Press to activate video call mode /
make a video call.
Call key
• Press to send or answer calls.
• In standby screen: press to open call
records.
Voicemail key
In standby screen: press and hold to
dial your voicemail number.
Asterisk key
• Press to enter an asterisk "*".
• Press and hold to activate/deactivate
the Silent mode.
key
While dialling a number, press and
hold to make an in ternational call
(enter "+").
9Phone overview
Page 10
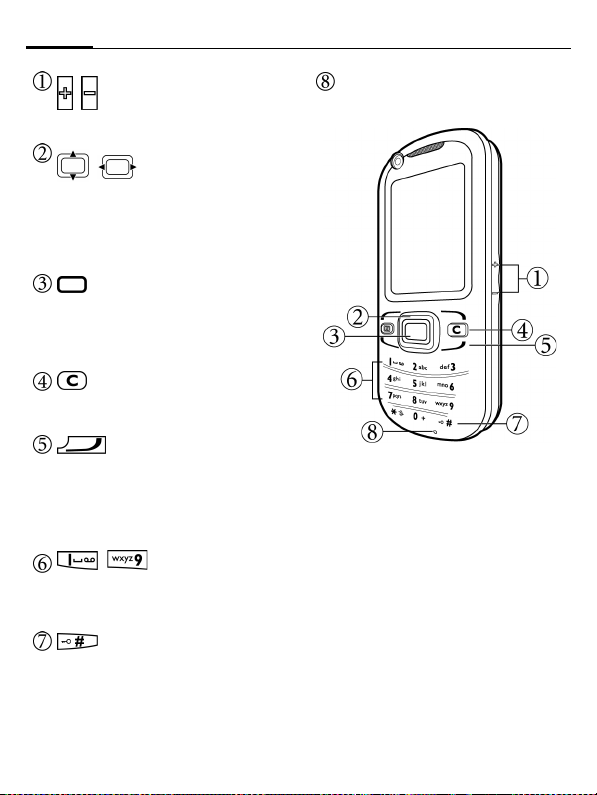
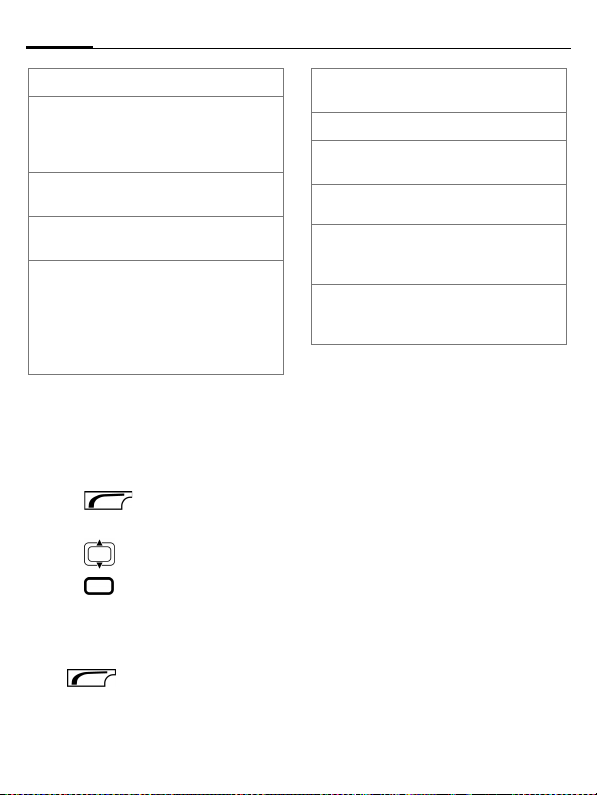
Phone overview10
/
Volume keys
Press to adjust volume.
/ Navigation key
• In standby screen: press to start
shortcut functions (see Shortcuts,
page 69).
• In lists, messages and menus: scroll
up, down, left and right.
OK key
• In standby screen: press to open the
main menu.
• In lists and menus: start a function /
confirm selection.
key
• Press to delete entered text.
• Press and hold to delete text quickly.
Power on/off/End key
• Press and hold to turn the phone
on/off.
• Press to end a call.
• Press to reject an incoming call.
• Press to cancel dialling.
- Number keys
• Press to enter numbers.
• Press and hold to start a shortcut
function/speed-dial a number.
Pound key
• Press to enter "#".
• Press and hold to activate/deactivate
keypad lock.
• While dialling a number, press and
hold to add a wildcard "?" to the
number (see also page 31).
Microphone
Page 11
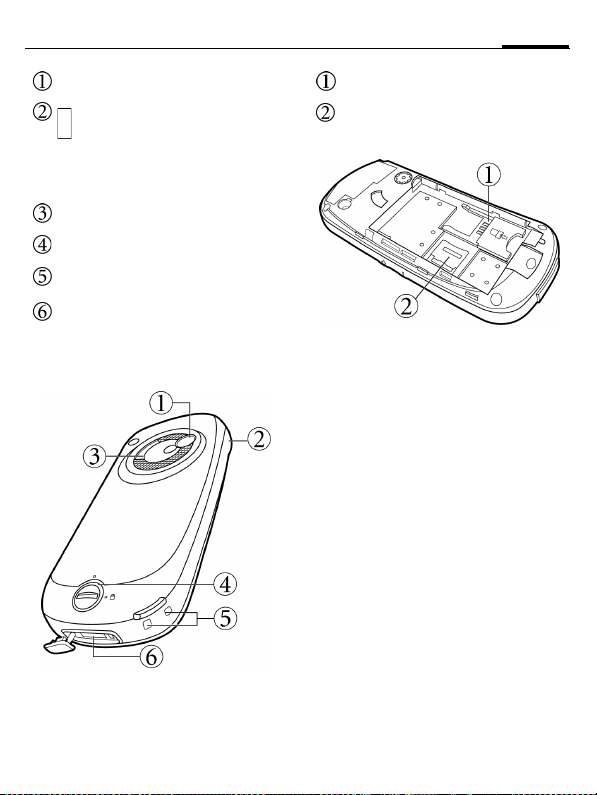
11Phone overview
External Camera
Hot key
Press to activate the designated
function. Function assigned to the key
may vary by region/network operator.
Speaker
Battery knob
Strap hole
Connection socket
For charger, headset, USB data cable,
etc.
SIM card holder
microSD card holder
Page 12
Phone overview12
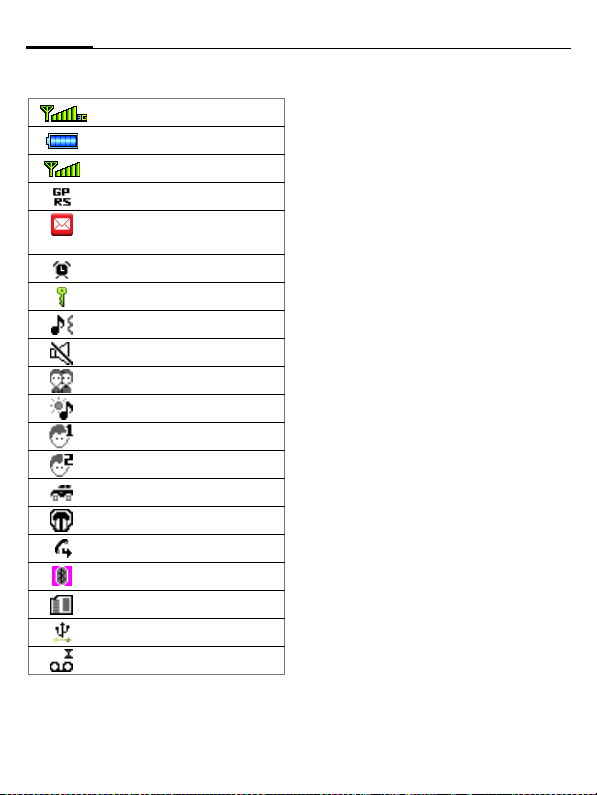
Standby display icons
3G signal strength
Battery charge level, e.g. 100%
GSM signal strength
GPRS is activated
New SMS/MMS/E-mail
messages
Alarm set
Keypad locked
General profile active
Silent profile active
Meeting profile active
Outdoor profile active
User profile 1 active
User profile 2 active
Car kit profile active
Headset profile active
Divert
Bluetooth technology active
microSD card loaded
USB data cable connected
Voice mail received
Page 13
13Getting started
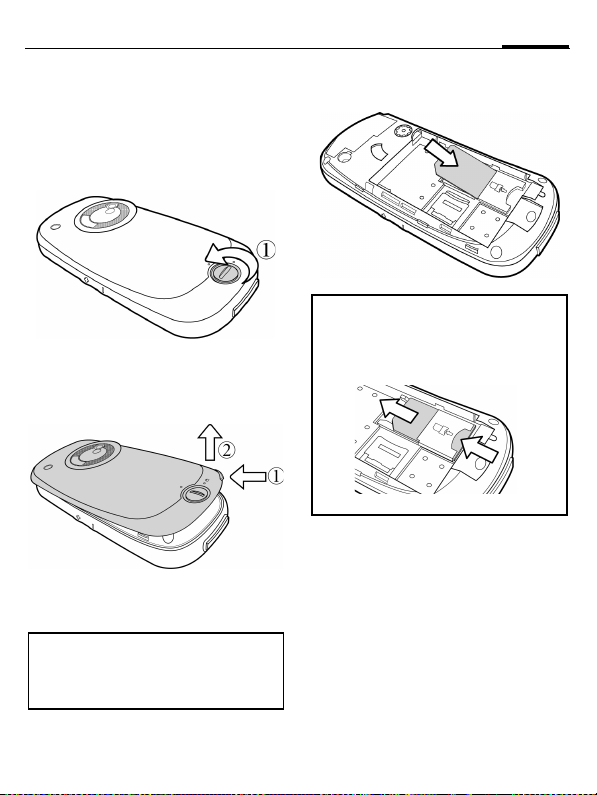
Getting started
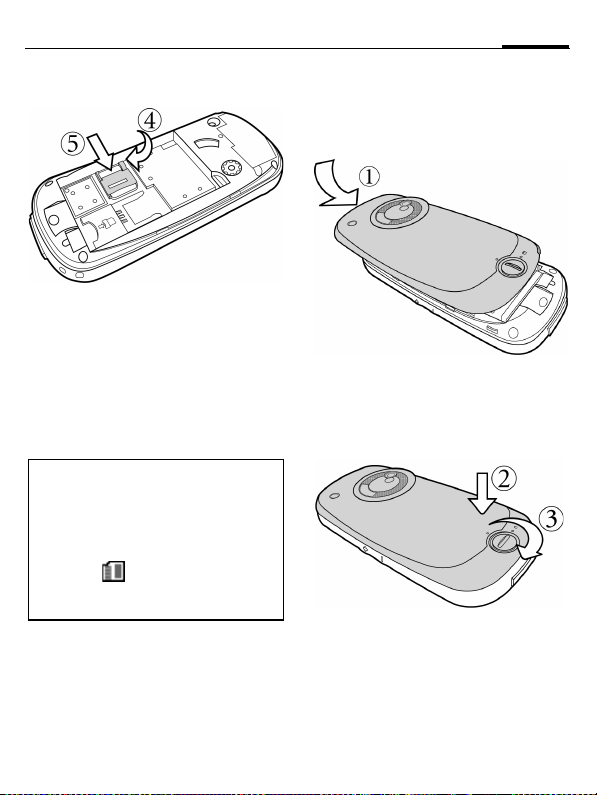
Removing the back cover
1. Turn the battery knob 90 degrees in
the anticlockwise direction.
2. Find the tab near the strap hole and
lift the cover off t he phone from there
as illustrated.
Inserting the SIM card
A SIM card can be easil y damaged if its
metal contacts become scratched.
Therefore, take sp ecial care when holding
or inserting it.
Slide the entire SIM card into the SIM
card holder, with the metal contacts of
the SIM card facing downward and the
cut corner at the top left as illustrated.
To remove the SIM card, you must first
remove the battery to unlock the SIM
card holder.
Push the end of the SIM card to release it.
Page 14
Getting started14
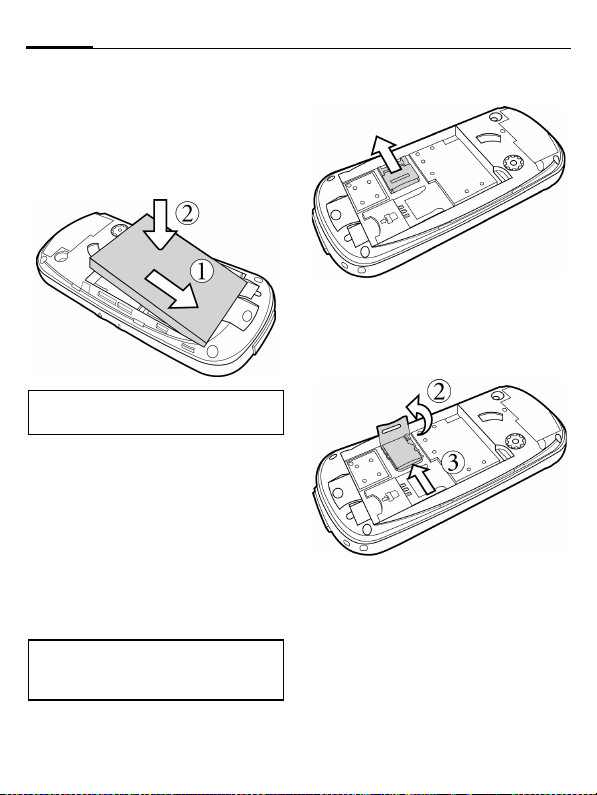
Inserting the battery
1. Insert the tabs on the bottom edge of
the battery into the slots at the
bottom of the battery bay.
2. Press the upper edge of the battery
down so that it locks in place.
Switch off your phone before removing
the battery.
microSD card
The microSD card gives your phone a
very large memory capacity. This allows
you to save picture/video files, sound
recordings, and any other files.
You can access the list of folders and
files in the My stuff menu (page 62).
Inserting the microSD card
To insert the microSD card, you must
first remove the back cover and the
battery.
1. Slide the microSD card holder
backward to release it.
2. Lift the microSD card holder up.
3. Insert the microSD card into the card
holder. Ensure that the card’s metal
contacts face the phone.
4. Swing the card holder downward.
Page 15
15Getting started
5. Slide the card holder forward to lock
it.
Removing the microSD card
1. Slide the microSD card holder
backward to release it, and lift it up.
2. Remove the microSD card.
3. Swing th e card holder downward and
slide the card holder forward to lock
it.
• Your phone can support a microSD
card with capacity up to 2GB.
• Your phone does not support a
microSD card in FAT32 or NTFS
format.
•The icon is shown on the display
of your phone when the microSD card
is loaded.
Installing the back cover
1. Insert the tabs on the inside top edge
of the back cover into the slots on the
top edge of the phone.
2. Press the cover down onto the b ack of
the phone to lock it in place.
3. Turn the battery knob 90 degrees in
the clockwise direction.
Page 16
Getting started16
Charging the battery
The battery is not fully charged when
first unpacked.
1. Swing the cover of the connection
socket out.
2. Plug the charger connector into the
connection socket on the bottom
edge of your phone. Note that the
connector is inserted with the UP
sign facing upward.
3. Plug the charger into a power outlet
and charge for at least 2 hours (the
battery is 90% charged in 2 hours).
4. Once the phone is fully charged,
remove the charger from both the
power outlet and the phone.
Alternatively, you can charge the phone
using the USB data cable. However, if
the battery is fully discharged, use only
the charger for effective charging.
• Do not remove the battery while
charging.
• When the battery is discharged, the
charging may not start immediately
when you plug in th e connector. Wait 2
to 5 minutes for the phone to begin
charging.
• Charging is only possible within a
temperature range of 0 °C (+32 °F) to
+45 °C (+113 °F).
• Do not charge the original li-ion
batteries in the environment with its
temperature below 0 °C (+32 °F) as it
may cause loss of charged battery
capacity.
An alert sound warns you when the
battery is low.
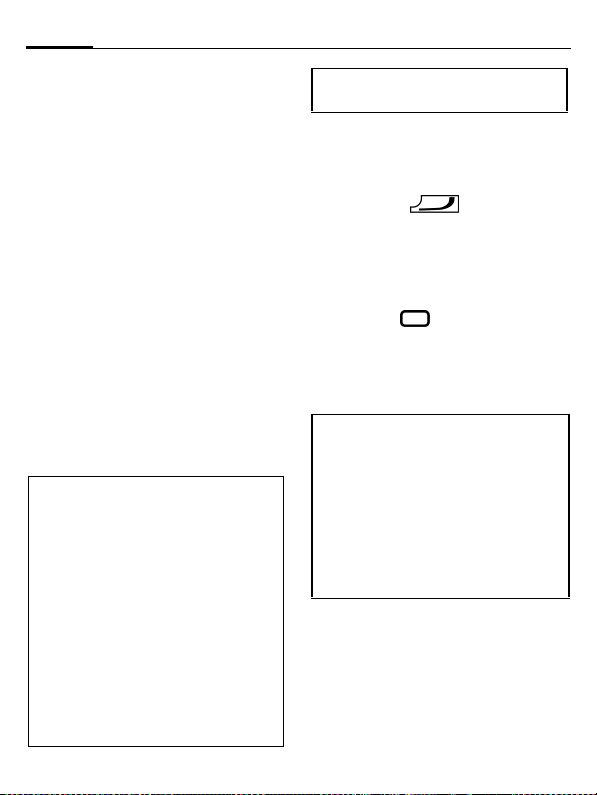
Switching phone on/off
Switching phone on
Press and hold to switch the
phone on. The phone will display a
greeting message (page 66).
Entering PIN
Enter your PIN using number keys and
confirm with .
When the PIN code entered has been
accepted, the phone will automatically
search for the designated network. This
search process may take a few seconds.
• The SIM card can be protected with a 4
to 8-digit PIN.
• If you enter the PIN incorrectly three
times in a row, the SIM card will be
locked. You must now enter the PUK
(Personal Unblocking Key) for that SIM
card in order to unlock it. Please contact
your service provider to obtain a PUK.
• To activate/deactivate/change PIN, see
page 21.
First time startup
After you have powered on the phone
for the first time, or if you have reinstalled a battery removed for a long
period of time and then power on the
phone, you will be guided by Startup
assistant to set the time information.
Page 17
17Getting started
Follow the on-screen instructions to
complete the initial setup.
Standby screen
The phone is in standby screen and is
ready for use when the name of the
service provider is displayed on the
standby screen.
Press to return to standby
screen from any situation.
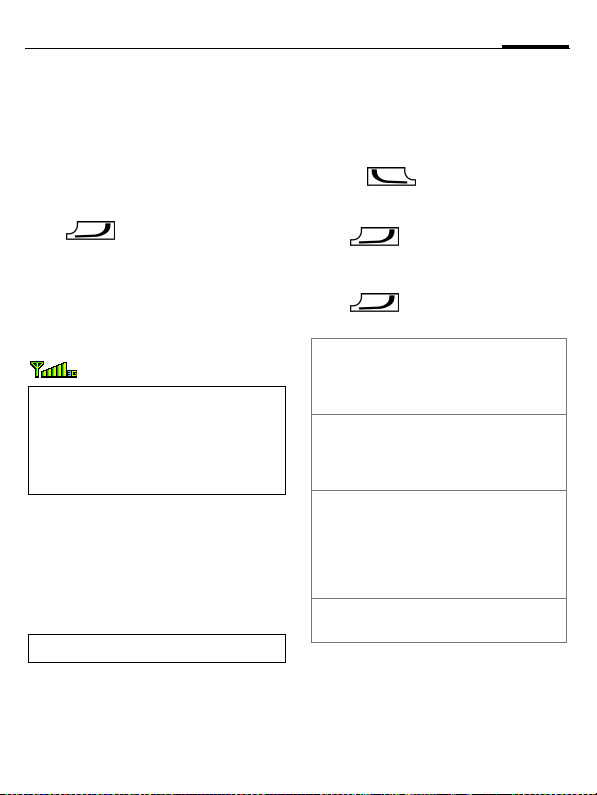
Signal strength
The signal strength is indicated in the
top left corner of the display. More bars
indicate a stronger signal.
Strong signal.
If the phone is not able to detect the
designated network, or links to a network
that you are not authorised to use, the
signal strength meter will show no bars.
You m ay only b e able to make eme rgency
calls.
Offline mode
You can operate many phone functions
in offline mode but you are not
connected to any network (you are not
available for incoming calls and you
cannot initiate a call).
To switch offline mode on/off, see below.
inserted, as long as you are within range
of a network of the type supported by
your phone.
1. Enter 112 (the international
emergency number).
2. Press .
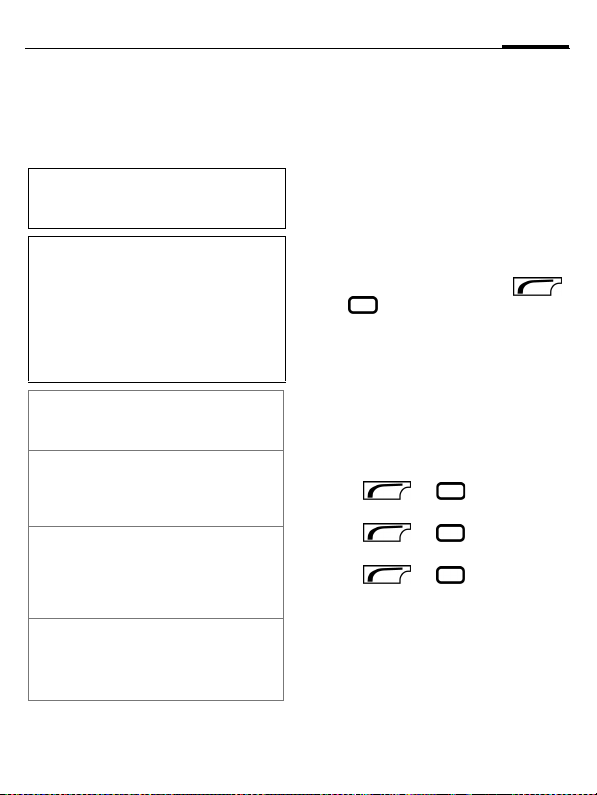
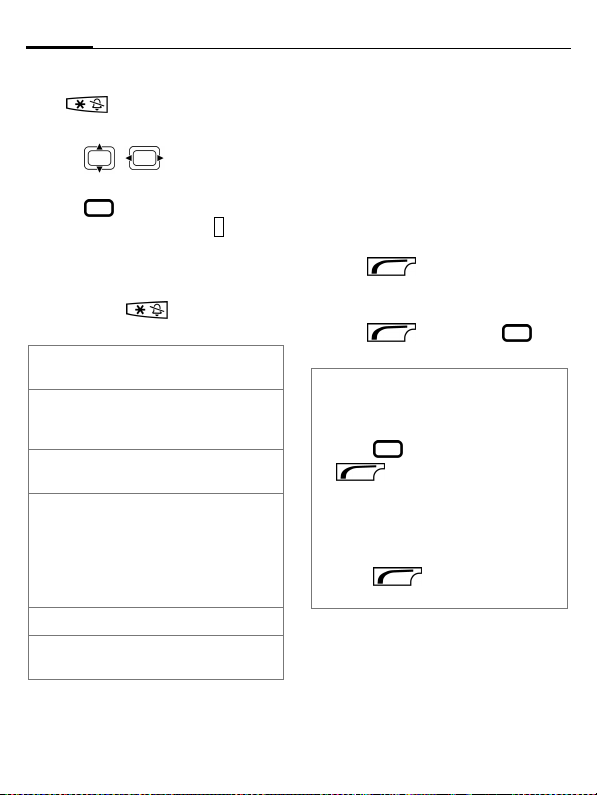
Switching phone off
Press and hold to switch the
phone off.
Or
Press briefly and select one of
the Off options.
Switch off
Offline
mode/Online
mode
Phone &
alarms off
Snoozed
alarm off
Switch phone off. Phone
switches on
automatically if al arm or
calendar event occurs.
Phone is not switched off
but is not connected to
any network (see Offline
mode, page 17).
Phone will not power on
when an alarm or
calendar event occurs
while off. This mode is
useful e.g. in hospitals or
on an airplane.
Switch the snoozed
alarm off.
Emergency Call (SOS)
You can make an emergency call even if
your phone is locked or cannot access
your network, or if there is no SIM card
Page 18
General instructions18
General instructions
Connectivity
Your phone supports different methods
for transmitting data in the mobile
network:
• The fastest method is UMTS
(Universal Mobile
Telecommunications System). If you
use UMTS, you can make highquality video calls. You can be
connected to the Internet
permanently. Some service providers
do not support this service.
• GPRS (General Packet Radi o Service)
is another method for transmitting
data in the mobile network. With
GPRS you can be connected to the
Internet permanently as well, if the
network has sufficient capacity.
• GSM (Global System for Mobile
Communications) is a fully digital
standard for mobile networks mainly
used for voice calls and text messages
(SMS).
Depending on the surrounding network
and your provider, different methods
are used automatically. Depending on
your provider you may set which
method to use.
content transmissions for playback in
computers, portable devices and
network devices, while protecting them
from unauthorised use.
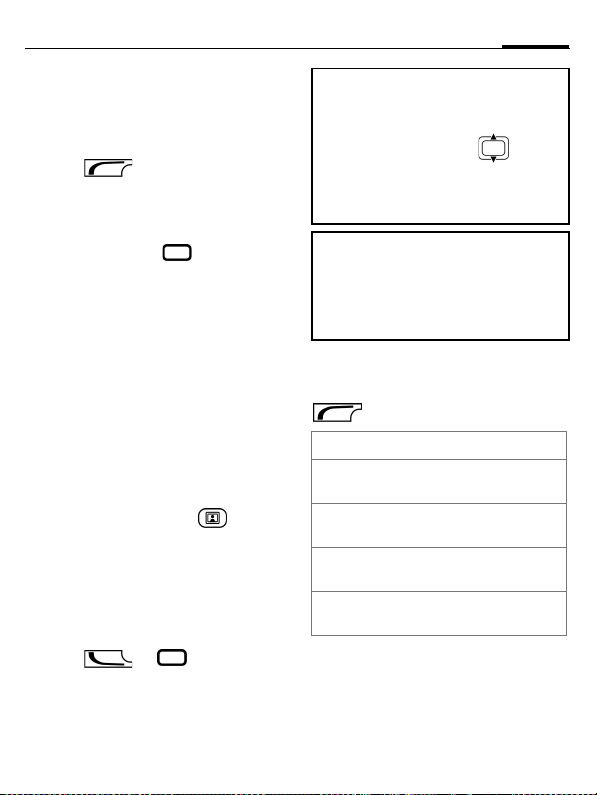
Menu control
Navigating the menus
The phone features various functions
and settings organised in menus and
submenus.
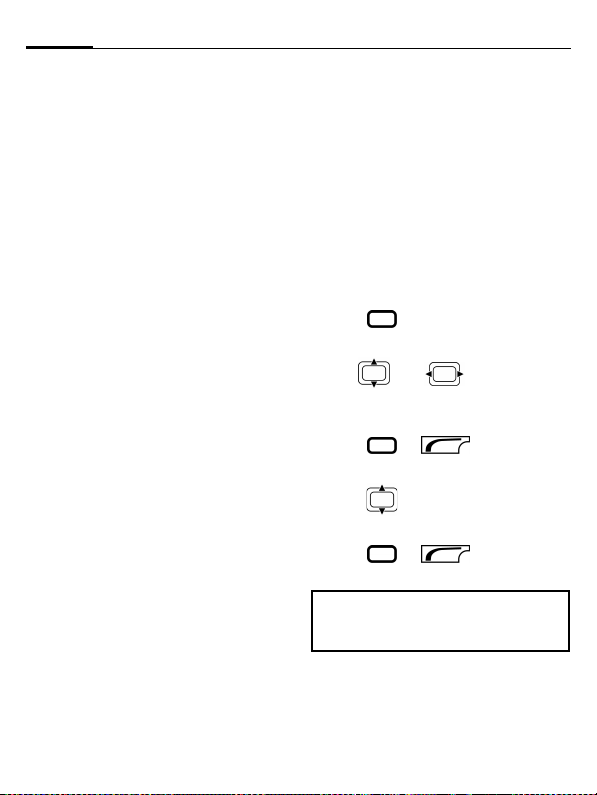
To select a function from menus:
1. Press in standby screen to open
the main menu.
2. Use and to scroll up,
down, right or left through the main
menu. For example, scroll to Settings.
3. Press or (Select) to
enter the Settings menu.
4. Press to scroll to a submenu, for
example Ringtones.
5. Press or (Select) to
enter the Ringtones menu.
In this user manual, the steps needed to
reach a menu are shown in a condensed
form, for example: Settings > Ringtones.
DRM
This phone features Digital Rights
Management (DRM) technology. DRM
allows copyright-protected audio/visual
Page 19
19General instructions
Menu speed dialling
All menu functions are numbered
internally according to the position of
the menu icon/option on the display. A
function may be selected directly by
entering these numbers in sequence.
E.g., select Settings > Ringtones from
standby screen:
1. Press .
2. Scroll to Settings and then press
.
Tabs
Tabs allow fast access to information
and applications.
Press to switch between tabs.
• Press to leave the current
input field/entry and switch to the
next input field/entry.
• While editing a tab, press to
navigate within the input field.
Standard functions
Options menu
The list below contains standard
functions offered across various options
menus.
Press (Options).
<New entry>
Save
Change
View
Details
Delete/
Delete all
Exit
Edit
Text input
meth.
Text edit
menu
Sort by
Set as
Create new entry.
Store entry.
Open options list.
Display entry.
• Display additional
information about the
selected entry.
• Display properties of the
file.
Delete entry/delete all
entries after confirmation.
Exit application.
Open entry to edit/open
input field to edit.
Open input method menu
(page 22).
Open text edit menu
(page 24).
Select sort criterion (e.g.
alphabetical, type, status,
sender, date/time).
e.g. set picture as
wallpaper, logo,
screensaver, melodies as
ringtones.
Page 20
General instructions20
Rename
Send
Create
message
Reply/
Reply to all
Capacity/
Memory
status
Rename selected entry.
Select transmission type
(e.g. MMS , SMS, e-mail or
Bluetooth technology) and
send file.
Select transmission type
and create message.
The sender becomes the
recipient.
Display memory status for
phone, SIM card or the
microSD card.
If memory is insufficient,
start Memory assistant
(page 71).
Mark mode
In some applications (e.g. Contacts/ My
Stuff) one or more entries in a list can be
highlighted to carry out a function
jointly.
1. Press (Options)
Mark
.
2. Press : select entry/entries.
3. Press : Mark/unmark entry.
Mark options
Depending on the actual situation,
different functions will be offered.
Press (Options)
and select
.
Mark/
Unmark
Mark all
Unmark all
Delete
marked
Send
marked
Retrieve
marked
Mark/unmark selected
entry.
Mark all entries.
Unmark all marked
entries.
Delete all marked entries.
Send marked entries
messages (e.g. e-mails
from draft folder).
Retrieve marked e-mails
(if only header is
retrieved).
Fast list search
Pressing number keys while you are in
alphabetically ordered lists
(e.g. Contacts) opens a fast search
window.
Enter text to jump quickly to the entry
that corresponds most closely with the
entered text.
Page 21
21PIN codes
PIN codes
Settings > Security > PIN codes
The phone and SIM card are protected
against misuse by several security codes.
Keep these confidential numbers in a safe
place where you can access them again if
required.
• If you enter the PIN incorrectly three
times in a row, the SIM card will be
locked. You have to enter the PUK for
that SIM card in order to unlock it.
Please contact your network operator to
obtain a PUK.
• If the PUK has been lost, please contact
your network operator.
PIN (Personal Identification
PIN2 This is needed to set the
PUK
PUK2
Phone
code
Number) Protects your SIM
card from unauthoris ed use.
charge detail display and to
access additional functions
on special SIM cards.
(Personal Unblocking Key)
Used to unlock SIM cards
after the wrong PIN has been
entered incorrectly three
consecutive times.
Protects your phone from
unauthorised use .
Must be entered at the first
security setting.
PIN control
The PIN is the password provided by
your network operator and is usually
requested each time the phone is
switched on. You can deactivate this
feature but you risk unauthorised use of
your SIM card. Som e network operators
do not permit deactivating the control.
Activating/deactivating PIN status
1. Select PIN control.
2. Enter PIN and confirm with
or .
Change PIN
Settings > Security > PIN codes >
Change PIN
You can change the PIN to any 4 to 8digit number you find easier to
remember.
1. Enter current PIN code and confirm
with or .
2. Enter new PIN code and confirm
with or .
3. Re-enter new PIN code and confirm
with or .
Change PIN2
(Display only if PIN2 is available).
Proceed as with Change PIN.
Page 22
Text input22
Change phone code
You define the phone code
(4 to 8-digits) when you activate a
phone-code protected function for the
first time. It is then valid for all phonecode protected functions.
To change phone code proceed as with
Change PIN.
Following the third unsuccessful
attempt, access to the phone code and
the functions that use it is denied.
Contact the Service Centre.
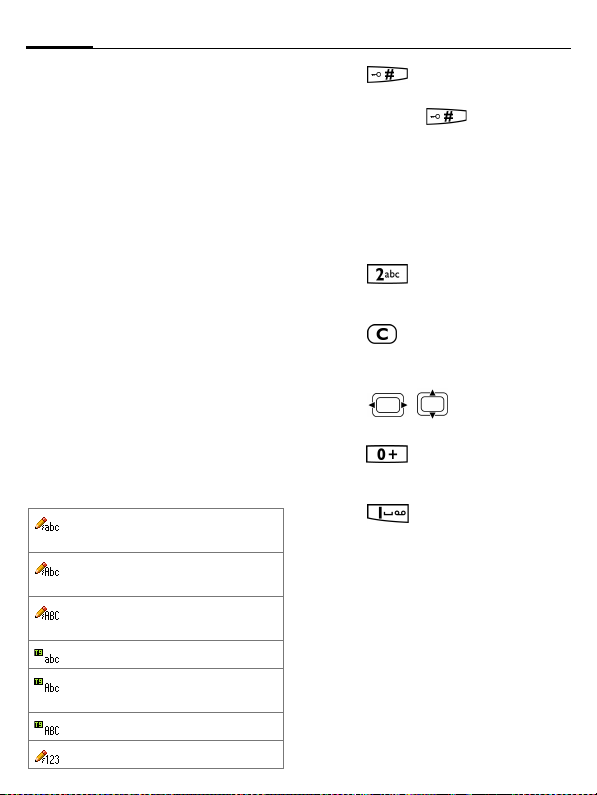
Text input
Changing input methods
When an editing screen is displayed, the
current text input method is indicated
in the upper right corner of the display.
The phone has the following input
methods:
Lowercase text input without
T9.
Text input without T9 with the
first letter capitalized.
Uppercase text input without
T9.
Lowercase text input with T9.
Text input with T9 with the first
letter capitalized.
Uppercase text input with T9.
Numeric input.
•Press
input methods.
•Press and hold : Input method
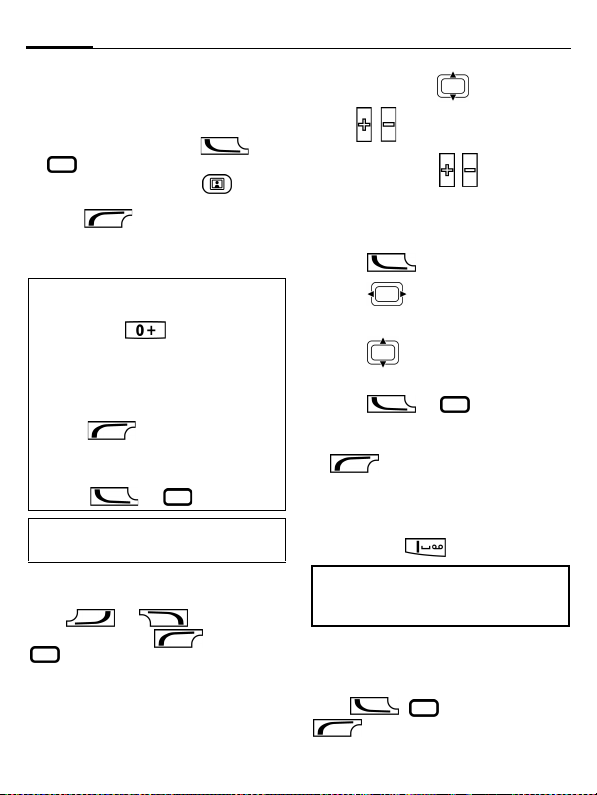
menu is displayed.
briefly: Swap between
Text input without T9
• Press a number key repeatedly until
the required letter appears. After a
brief interval the cursor will advance.
Example:
Press once briefly to write the
letter a, twice to write b etc. Press and
hold to write the number.
• Press briefly to delete the letter
left of the cursor or marked text.
Press and hold to delete text quickly.
• Press / to move the
cursor.
• Press once/repeatedly: . , ? ! ’ "
0 + - ( ) @ / : _
Press and hold: insert 0.
• Press : insert space.
Press twice: insert a line feed
Press three times/press and hold:
insert 1.
Page 23
23Text input
Text input with T9
T9 word suggestions
T9 predicts the most probable word
from a sequence of keys you press.
1. Simply press the keys once where the
relevant letter is located.
2. If several options are found in the
dictionary for a key sequence
(a word), the most probable is
displayed first.
3. If the first highlighted word is not the
one you want, press
(<< T9 <<). The displayed
word is replaced with a different
word. If this word is also incorrect,
press repeatedly until the correct
word is displayed.
4. To end a word, press to insert
a blank, or press to move the
cursor to the right of the word. Press
to move the cur sor to the left of
the word.
Adding a new word to the T9 dictionary
If a desired word is not in the list of word
suggestions (as a dotted line e.g.
indicates), the word is not yet included
in the T9 dictionary. You can add the
word to the dictionary.
1. Press (Spell), or press and
hold to se lect Text edit menu >
Spell word.
---
2. Enter the word and confirm with
.
The next time you enter the same
word, it is in the list of suggestions.
Correcting a word
1. Move left or right, word by word,
until the required word is
highlighted.
2. Press (<< T9 <<) to scroll
through the T9 word suggestions
again.
Alternatively, pr ess to delete the
character to the left of cursor and
displays a new possible word.
T9® Text Input is licensed under one or more of
the following: U.S. Pat. Nos. 5,187,480,
5,818,437, 5,945,928, 5,953,541, 6,011,554,
6,286,064, 6,307,548, 6,307,549, and 6,636,162,
6,646,573, 6,970,599; Australia Pat. Nos. 727539,
746674, 747901; Austria Pat. Nos. AT225534,
AT221222; Brazil P.I. No. 9609807-4; Canada
Pat. Nos. 1,331,057, 2,227,904, 2,278,549,
2,302,595; Japan Pat. Nos. 3532780, 3492981;
United Kingdom Pat. No. 2238414B; Hong Kong
Standard Pat. No. HK1010924; Republic of Singapore Pat. Nos. 51383, 66959, 71976; European
Pat. Nos. 0 842 463 (96927260.8), 1 010 057
(98903671.0), 1 018 069 (98950708.2); Republic
of Korea Pat. Nos. KR201211B1, KR226206B1,
402252; People’s Republic of China Pat. No.
ZL96196739.0; Mexico Pat. Nos. 208141,
216023, 218409; Russian Federation Pat. Nos.
2206118, 2214620, 2221268; and additional patents are pending worldwide.
Page 24
Text input24
Special characters
Press briefly: special characters
are shown.
• Press / to navigate to
characters.
• Press to insert the selected
character or a line feed if is
selected.
Text edit menu
Press and hold : Open Text edit
menu.
Insert
symbol
Mark/
Unmark
Copy/Paste
Input
language
Only if T9 is activated
Spell word
Insert a special character
or a line feed.
You can mark/unmark
text in order to copy and
paste it to a different place.
Copy/paste highlighted
text to a different place.
Select the language in
which you want to
compose your message.
If you select Automatic,
the Input language is based
on the display language.
Open the spell box and add
new words to dictionary.
Text templates
Text templates are short excerpts of
texts that you can insert in your
messages (SMS, MMS).
Creating text templates
Messages > Templates > Text
The list of existing templates is
displayed.
1. Press (Options) to select New
template.
2. Write text.
3. Press (Options) or to
select Save.
• To create a new SMS directly from the
Templates menu:
1. Scroll to a text template.
2. Press or press
(Options) and select New
message.
• To set a template as header/signature
for new messages:
1. Scroll to a text template.
2. Press (Options) and select
Set as header/signature.
Page 25
25Calling
Inserting text templates
Messages > Create message >
SMS/MMS
1. Write a message.
2. Press (Options) to select
Insert text.
3. Select Template.
4. Select a text template from the list
and confirm with . The text
template is inserted in the message.
Calling
With your phone you can make voice
calls as well as video calls. However, it is
not possible to make a voice call and a
video call at the same time.
Making a video call
To initiate a video call (in standby
screen):
1. Press the video call key .
2. The phone switches to video call
mode. A preview is displayed. You
can enter a number (see Dialling
with number keys) or enter a
number from Contacts via the
Options menu.
3. Press or to make the
call.
• Yo u can als o select a number from call
records to make a video call (see
Dialling previous numbers, page 26).
•During a video call, press to zoom
in/out.
• For options available during a video
call, see page 29.
The called party as well as the network
hav e to be cap able of ha ndli ng vi deo c alls.
If you are calling a number that does not
meet these requirements you will be
offered the option of making a voice call
instead.
Video call options
In video call mode press
(Options).
Video call
Save
Contacts
View
insert
pause
Call the entered number.
Save the entered number to
a new or existing contact.
Enter a number from the
contact list.
View the entered number’s
contact information, if any.
Insert "P" for extension
dialling.
Page 26
Calling26
Dialling with number keys
1. Enter a phone number in standby
screen.
2. Make a voice call: Press or
.
Make a video call: Press
Or
Press (Options) and select
Video call.
3. The displayed number is dialled.
Entering international dialling
codes:
Press and hold until "+" is
displayed. Then enter country and area
codes.
Dialling with number extension:
1. Enter the number.
2. Press (Options) and select
Insert 2-s pause to insert "P".
3. Enter the extension number.
4. Press or (voice call).
You can also use the Contacts list to dial
a number (page 35).
Ending a call
Press or (End call).
You can then press (Save) or
to save the number to a new or
existing contact.
Setting earpiece volume
(Only possible during a call)
• Voice call: Press or the volume
key / to adjust the volume.
• Video call: Press
volume.
/ to adjust the
Dialling previous numbers
1. Press to open call records.
2. Press to scroll to the preferred
tab: All/Dialled/Missed/Received
calls.
3. Press to pick out a number
from the list.
4. Press or to call the
number.
To make a video call, press
(Options) and select Video
call.
Listening to voicemail
Press and hold .
If the voicemail number is not stored on
your SIM card, you will be asked to set the
number.
Accepting a call
Voice call
Press , or
(Answer) to accept a call.
Page 27

27Calling
Video call
If the incoming call is a video call and
Show my image is deactivated (default,
page 70) Do you want to show your vi deo
image? is displayed. You have the
following options:
• Press (Yes): Your video is
shown to the caller.
• Press (No): The video mute
image is shown to the caller
(page 71).
•If Any key answer is activated
(page 70), you can accept the call by
pressing any key.
• To avoid the disturbance caused by a
ringing phone, you can press and hold
to switch Silent mode on/off.
Warning!
Please make sure you have accepted the
call before holding the phone to your ear.
This will avoid damage to your hearing
from loud ringtones.
Rejecting a call
Press or (Reject).
Handsfree talking
You can put the phone aside during a
call and hear the caller via the
loudspeaker.
Press to switch to
Speaker/Handset to activate/deactivate
handsfree talking.
Warning!
Always switch off "handsfree talking"
before holding the phone to your ear!
Otherwise you will damage your hearing!
Additional information
During a video call, the Speaker
(loudspeaker) is activated by default.
Swapping between 2 calls
(Network support dependent and not
available during video calls)
Establish a second connection
1. Press and select Hold call. The
active call is put on hold.
2. Dial a n ew number and press
or .
Alternatively, dial the new number and
press or . The active call is
put on hold.
Swapping calls
When the new connection is established
you can swap between calls:
Press .
Or
Press and select Swap.
Incoming calls during a call
You will hear a special tone during the
call (page 69). You have the following
options:
Page 28
Calling28
Accepting the waiting call in addition
to the first call
Press , or
(Swap)to accept the waiting
call. The current call is put on hold.
To swap between t he two calls wh en two
connections are established, press
.
Or
Press and select Swap.
Rejecting the waiting call
Press (Reject).
Accepting the waiting call, ending the
current call
1. Press to end the current call.
2. Press , or
(Answer) to accept the new
call.
Ending calls
Press or (End call) to
end the active call.
Or
Press and select Drop to select the
call to end.
If Return to held call? displays, you have
the following options:
• Press (Yes): Accept the held
call.
• Press (No): End the held call.
Conference
(Network support dependent and not
available during video calls)
Call up multiple parties one by one and
link them together in a multiparty call.
Once a call has already been established:
1. Press and select Hold call. The
active call is put on hold.
2. Dial a n ew number and press
or .
Alternatively, dial the new number
and press or . The active
call is put on hold.
3. When the second call is established,
Press and select Conference.
The held call is joined.
Ending a conference
Ending all calls
Press .
All calls in the multiparty conversation
are ended.
Ending one call
Press and select Drop to select the
call to end.
Private call
You can remove a party from a
conference and make a private call to
that party while the conference is put on
hold.
Press and select Private. Then
select the entry for the private call.
Page 29

29Calling
Swapping between the private call and
conference
Press and select Swap.
When a private call is finished
• Press : End the private call
and return to the conference.
• Press and select Conference.
The private call is joined to the
conference again.
Call options
The following functions are only
available during a call.
Press .
Mute call/
Mute sound
Hands free
Upgrade to
video/
Switch to voice
Add to
Contacts
Main menu
The person on the other
end of the line cannot
hear you (muting). In
video calls your vi deo is
still shown on the other
end of the line.
Call via the
loudspeaker.
Change the current
voice call to a video call
or vi ce versa . The
current call is ended
and a new connection
with the same partner is
established.
Save the number To a
new contact/To
exist.(existing) contact
Open the main menu.
Not available during video calls:
Hold call
Swap
Conference
Drop
Private
DTMF
Only during video calls:
Mute video
Pause
outg./Pause
inc.
Switch camera
Full/split
screen
Hold current call.
Swap between calls.
(see page 28)
End a call in a
conference.
Make private call in a
conference.
Enter tone sequences
(numbers) for remote
inquiries to an
answering machine.
The incoming video is
muted and the video
mute image is sent (see
page 71).
Pause the incoming
video (of the other
party) or outgoing
video (yours). The
menu entry changes to
Resume inc./ Resume
outg.
Determines whether
your own video is
captured by internal
camera or external
camera.
Select the video
presentation on your
display. See details
below.
Page 30

Contacts30
Frame rate
White balance
Flicker
adjustment
Send picture/
Send video
Adjust how many
frames per second the
camera will capture.
Adjust the sensitivity to
light.
Adjust the sensitivity to
indoor lightening
flicker rate.
Select a picture/video
from the My stuff menu
and show it to the
person on the other end
of the line.
Full/split screen
Select the video presentation on your
display. You have the following options:
Splitscr. - me sm.
The video of the other party as well as
your own video are displayed. The video
of the other party is shown in full screen
mode and your video is shown in an
additional small frame.
Them fullscreen
The video of the other party is shown in
full screen mode. Your own video is not
displayed.
Splitscr. - me lg.
The video of the other party as well as
your own video are displayed. Your
video is shown in full screen mode and
the video of the other party is shown in
an additional small frame.
Me fullscreen
Your video is sho wn in full screen mode.
The video of the other party is not
displayed.
Contacts
You can store contacts with a variety of
phone and fax numbers as well as
additional address details.
The contacts may contain the following
types of entries:
• Contacts saved on the phone (see All
contacts).
• SIM contacts saved on the SIM card
(page 32).
• Groups: contact categories (e. g.
shared ringtone). A contact can
belong only to one group (page 32).
• Distribution lists: shortcuts for
communication with more than one
contact (e.g. sending SMS). Contacts
may belong to several distribution
lists (page 33).
Accessing Contacts
In standby screen, press and select
Contacts.
For fast access, contacts are organised
on 4 tabs. Press to switch
between tabs.
Page 31

31Contacts
All contacts
Groups
SIM
contacts
Filter:
All contacts (including
SIM contacts) and
distribution lists.
All groups.
Contacts saved on the
SIM card.
Apply different filter criteria
to all contacts.
All contacts
All contacts (including SIM contacts)
are displayed in alphabetical order.
Distribution lists are displayed
additionally.
Adding a new contact
Opening a contact entry
•In the All contacts tab: select New
entry.
• In standby screen:
1. Enter a number.
2. Press (Options) and select
Save.
3. Select To new contact.
4. Select a phone type.
Filling contact information
The input fields are organised on 4 tabs:
General info, Private, Business,
Personal. Press (Options) and
select Switch tab... to swap between
them.
Assigning media files
In some input fields (ringtone, picture)
you can assign ringtones and pictures.
Press to select a media field (e.g.
picture) and confirm with .
Depending on the media type you can
either record a new media file via
camera or sound recorder or select a file
from the corresponding My stuff folder
(page 62).
Saving a contact
1. Press (Options) and select
Save contact.
2. Press to confirm save
notification.
For additional options for editing a
contact, press (Options).
Adding numbers with wildcards
Digits may be replaced by a "?"
(wildcard) when numbers are ent ered in
contacts:
Press (Options) and select Insert
wildcard.
Or
Press and hold to insert "?".
These wildcards must be replaced with
numbers before dialling (e.g., with the
extension numbers in a phone system).
Page 32

Contacts32
Calling a number containing a
wildcard "?"
1. Select the number from contacts.
2. Press .
3. Enter numbers to replace "?".
4. Press or . Number is
dialled.
Groups
Groups are collections of contacts that
can be used to categorise contacts. A
group can have the same incoming call
alert.
SIM contacts cannot belong to a group,
you have to copy them to the phone
contacts first.
The following groups have already been
created and can be renamed but not
deleted: Family, Friends, Office, VIP.
Adding a new group
You can add personal groups.
1. Select New group and enter the name
of a new group.
2. Press (Options) and select
Save.
Adding members
2. Press (Options) and select
Add new member. A list of all contacts
that are not already in the group is
displayed.
3. Select new members and confirm
with .
4. Press (Add) to confirm
selection.
Viewing members in a group
Select a group and press .
Editing a group
1. Press (Options) and select
Edit.
2. Rename the group and attach an
audio ringtone and a picture.
SIM contacts
Contacts saved on SIM card are
managed on this tab. SIM contacts
contain less information than contacts
saved on the phone.
Adding a new SIM contact
1. Select New entry and fill in the fields.
2. Press (Options) and select
Save contact.
1. Press to select a group. The
number of entries is displayed in the
second line when highlighted.
Page 33
33Contacts
Moving a SIM contact to phone
3. Press to select a SIM contact.
4. Press (Options) and select
Edit.
5. Press (Options) and select
Add more fields. The SIM contact is
converted to a regular contact saved
on phone memory.
.
You cannot convert protected SIM
contacts.
Filter
Depending on the selected filter,
contacts and distribution lists can be
listed on the filter tab.
Press (Options) and select Filter.
The following filter criteria are
available:
Press to select criterion and
confirm with .
A list is displayed with contacts that
contain the chosen feature, e.g. all
contacts including a birthday entry.
Options menu for Contacts
Depending on the current situation,
different functions will be offered. These
functions can be applied to the entry
currently selected as well as to multiple
selected entries.
Press (Options).
Distribution lists
New distr.
list
Add to distr.
list
Add new
member
Groups
New group
Add to group
SIM contacts
Add more
fields
Special
numbers
Enter name.
You can rename the
distribution list and
attach a ringtone and a
picture using the Edit
option.
Add contact/distribution
list/group to a new or
existing distribution list.
If SIM contact selected,
confirm to move contact
to phone memory.
Open contact list. Select
contacts and add them to
the selected distribution
list.
Enter name.
Add contact(s) to new or
existing group. If SIM
contact selected, confirm
to move contact to phone
memory.
Convert SIM contact to a
regular contact saved on
phone memory. (not for
protected SIM contacts).
Your provider may
supply you with special
numbers. Select classes
you want to show/hide
(Network support
dependent).
Page 34

Contacts34
Business card
Create biz
card
Create a business card,
which is a contact
containing your own
contact information.
The business card is
displayed outside the sort
order at the top of the
contact list. You cannot
add the business card to a
distribution list or group.
Set as biz
card
Selected contact is set as
business card. If a
business card already
exists, it is converted to a
regular contact. SIM
contacts cannot be set as
business cards.
Undo biz
card
Convert selected business
card to a regular contact.
Media field selected
Play
ringtone/
video/View
picture
Replace
ringtone/
video/picture
Remove
ringtone/
video/picture
Start playback of current
ringtone/video/ View
picture.
Select new
ringtone/video/picture.
Confirm to delete current
ringtone/video/picture
from contacts.
General options
Open web
site
If contact information
contains URL, start the
browser and load URL.
Send contact
Set as vid.
allow'd/
Undo
vid.allow'd
Save options
Save
location
Contacts are
sent/received as a vCard
via Bluetooth technology,
MMS, or e-mail.
Set a number as default
for video call dialling.
When you select Video
call to call contact, this
number will be dialled as
default.
(Not available for SIM
contacts.)
Depending on save
location, select
Copy/Move to SIM: Only
SIM information is saved
while copying/moving
contact from phone to
SIM.
Copy/Move to phone.
Protected SIM contacts,
special numbers and the
business card cannot be
copied or moved to
another save location.
Select SIM card/Phone
memory as default save
location.
Page 35

35Contacts
Duplicate
Find
Synchronise
For standard functions see page 19.
Add new contact with
duplicate information.
• Contacts se arch: Enter
text/number and
confirm with .
• Filter contac ts: Display
contacts and
distribution lists
according to the
selected filter.
Initiate synchronisation
of contacts.
Fast contact search
In the contact list, pres sing number keys
opens a fast search window.
Enter text to jump quickly to the entry
that corresponds most closely with the
entered text.
Dialling a contact
1. Scroll to a contact in Contacts list.
2. Press : Make a voice call to
the displayed (default) number.
Press the video call key : Make a
video call to the video enabled
number.
If several numbers are stored under the
contact, you can press to view all
numbers and select one to call.
Voice-activated dialling
You can dial numbers from the contacts
by speaking the name. SIM contacts,
distribution lists and groups cannot
have a voice tag.
You can associate one voice tag to each
number of a contact.
Recording a voice tag
Record the voice tag in a quiet
environment.
1. Open the All contacts tab.
2. Select a contact.
3. Press (Options) and select
Edit.
4. Select a number input field.
5. Press (Options) and select
Record voice tag.
6. Press (Start) to start
recording.
7. Speak the name. Repeat the name
after playback.
Using Voice-activated dialling
In standby screen press and hold .
Speak the name after the signal tone.
Page 36
Call records36
Call records
(Network support dependent)
In standby screen press and select
Call records.
Or
Press .
The different call information is listed
on 5 tabs:
All calls, Dialled calls, Missed calls,
Received calls and Duration/charges.
A caller’s name is displayed if it is stored
as a contact.
Press (Options) for options for
call records.
Redial number
1. Select a records tab (e.g. Missed
calls).
2. Select entry.
3. Press or : make a voice
call to the number
Press the video call key : make a
video call.
Duration/charges
(Network support dependent)
You can display the call duration and
the currency and rate of a call. You can
set the currency and rate for charge
display.
These call types are displayed: Last
call/Outgoing calls/Incoming calls
For the selected call type the following
information is displayed: the date/time
and the duration and charges. For all
incoming and all outgoing calls the
number of recorded calls is displayed,
too.
If the display of costs is disabled or the
currency is not entered, cost information
is not displayed.
Reset all incoming/outgoing calls lists
Press (Reset) to reset the
current list.
Charge settings
Select Settings.
Currency
(PIN2 protected)
1. Enter currency code
(up to 3 characters).
2. Press (Options) and
select Save.
Personal Rate
(PIN2 protected)
1. Enter per minute rate.
2. Press (Save).
To enter "." press .
Display costs
Activate/deactivate cost display.
Page 37

37Entertainment
Account limit info
(PIN2 protected)
The account limit is not supported by
all SIM cards. If your S IM card d oes not
support the account limit, an according
notification is displayed.
• Account limit
Activate/deactivate account limit.
• Enter max. units
Enter maximum units for the
account.
• Reset remaining
Confirm notification to reset account
limit.
Entertainment
Media player
Entertainment > Media player
The media player functions are
accessible via 4 tabs: Music, Pictures,
Videos and Bookmarks.
• Press to select tab.
• Press for more options when
a file is selected in a tab. Depending
on the file type, different options will
be offered.
The media player contains files stored
on the phone memory as well as on the
microSD card.
• You cannot pause an audio/video live
stream.
• Incoming calls, alarms and events stop
streaming.
• Your phone does not support playback
of a flas h file taking more tha n 1MB of
your phone memory; you will be
prompted by the warning of Low
Memory, and the playback will be
stopped to protect your phone.
Music
The music tab includes MP3 and AAC
files. For fast acce ss, the tracks are sorted
by the following categories:
Playback/Pause.
Press: skip to previous/next
track.
Press and hold: Rewind/fast
forward within the current
track.
End playback.
Create new playlist
1. Select Playlists.
2. Select <New playlist>.
3. Enter the playlist name.
4. Press (Options) and select
Save.
You can add/remove files and change
the order within the playlist via the
options menu (see My stuff, page 62).
Page 38

Entertainment38
Pictures
All files are listed with file name and
size.
Display picture
Select the desired picture and press
to display it.
The following functions can be applied
to a displayed picture:
Switch to full screen mode
and normal view.
Skip to previous/next
picture.
Videos
Select the desired video and press
to start playback.
The media player offers the following
functions for video playback:
Playback/Pause.
Press and hold: Rew ind/Fast
forward.
Switch full screen mode and
normal view.
Set the volume.
/
Bookmarks
Play music/video directly from
bookmarks.
The Bookmarks tab shows a listing of all
streaming content links. Each URL
must correspond to a single online
audio/video file. These bookmarks are
not listed as browser bookmarks.
Select the desired bookmark and press
to start playback of music/video
directly from the bookmark (live
stream).
Camera
Entertainment > Camera
You can view photos/videos recorded
with the integrated camera
immediately:
• Send picture/video via MMS, e-mail
or Bluetooth technology.
• Save pictures/videos on the phone or
on the microSD card.
Starting the camera
Picture mode
In standby screen press and select
Entertainment > Camera > Picture mode.
Video mode
In standby screen press and select
Entertainment > Camera > Video mode.
Displayed information
Current picture/video settings
The following symbols are displayed:
Current brightness setting.
Current zoom level.
Self timer (when activated).
Page 39

39Entertainment
Active self timer is indicated only in
picture mode.
Remaining memory
The following memory information is
displayed:
• Memory location: Pictures/videos
can be saved either on the phone
or on the microSD card . To
change save location see page 40.
• Remaining memory: Picture
count/available record time on the
current memory location. The
remaining memory depends mainly
on the selected resolution and the
motif.
Taking pictures/videos
Settings prior to taking
pictures/recording videos
• Press : Decrease/increase
brightness.
• Press : Zoom in/out.
For further settings see options menu.
Taking pictures
1. Start the camera in picture mode.
2. Press .
To take a self-portrait, press
(Options) and select Switch
camera, and use the internal camera lens
as view finder.
Recording videos
You can record up to 5 minutes.
1. Start the camera in video mode.
2. Press : Start recording.
3. Press or
(Pause/Resume): Control
recording.
4. Press (Stop): End recording.
Reviewing pictures/videos
Start video playback
Press (Options) and select Play
video.
• Press : Playback/pause.
• Press and hold : Rewind/Fast
forward.
•Press the volume key / : Control
volume during playback.
• Press (Stop): Stop playback.
Save pictures/videos
Press to confirm save notification.
The picture/video is displayed.
The picture/video is saved with a name
in Entertainment > Media Player >
Pictures/Videos (page 37) or in
My stuff > Pictures/Videos (page 62).
Return to view finder
Press : Open view finder to take
another picture/record another video.
Page 40
Entertainment40
Delete pictures/videos
Press (Discard): Delete
picture/video and open view finder.
Camera options
The following functions are available,
depending on the current situation.
Press (Options).
New picture/
New video
Play video
View
pictures/
View videos
Picture
mode/
Video mode
Switch
camera
Message
mode
Open view finder to take
another picture/record
another video.
Play recorded video.
Open corresponding
Media player tab to view
pictures/videos (page 62).
Switch between picture
and video mode.
Switch between the
external/internal camera.
Message mode is
optimised for sending
video via MMS/Bluetooth
technology.
•record time: 30 seconds.
• Low resolution.
Message mode is
activated automatically if
video mode is started
from MMS application.
Self timer
Audio record
Picture settings/ Video settings
For standard functions see page 19.
Picture is taken approx.
10 seconds after
triggering. For the last 3
seconds, you will hear a
signal tone each second.
Turn microphone on/off
for video mode.
Open settings (see below).
Picture settings/Video settings
Resolution front
Set the quality of the picture/video
captured by the internal camera,
regardless of the preview image
resolution.
Resolution back
Set the quality of the picture/video
captured by the external camera,
regardless of the preview image
resolution.
Default name
Enter default file name.
Save location
Select default save location: Phone
memory/microSD card.
Frame rate (only for video settings)
Set how many frames per second the
video should capture: Low/High.
Page 41

41Entertainment
White balance
Select: Auto/Indoor/Outdoor.
Flicker adjustment
Adjust the sensibility to indoor
lightening flicker rates: Off/50 Hz/60 Hz.
FM radio
Extras > FM radio
• You need to connect an FM stereo
headset to the phone in order to receive
FM radio signals.
• For accessories compatible with your
phone, contact your local BenQ office to
inquire about availabiliti es and detailed
information.
1. Connect the FM stereo headset to
activate FM radio.
2. To locate a station:
• Press : increase/decrease
frequency by 0.1 MHz.
• Press and hold : scan for the
next/previous available station
rapidly.
• Press a number key: switch to the
preset station assigned to that key
(page 42).
Minimize
Preset
stations
Add to
presets
Speakerphone
Auto store
Mono
mode
RDS AF
Exit
Close the program while
keep receiving FM radio
signals in the background.
Display a list of preset
stations.
Add new stations to the
presets list.
Toggle speakerphone
on/off.
Dete ct and sa ve 10 of t he
available stations that have
the strongest radio signals.
Toggle mono mode on/off.
The phone searches for and
switches to the new
frequency assigned for one
channel automatically when
you travel across different
regions, in which
distinguished frequencie s
are assigned for the same
channel.
Exit applica tion.
3. Press / to adjust volume.
Press (Options) to open the
options menu.
Page 42
Create message42
Setting preset stations
1. Scan for a station.
2. Press (Options) and select
Add to presets.
3. Scroll to a number and confirm with
(Select).
Or
1. Scan for a station.
2. Press and hold a number key to
assign the key to the station.
Create message
You can create SMS and MMS messages
and e-mails.
Messages > Create message
SMS/MMS
About SMS
You can transmit and receive long
messages on your phone.
The phone will automatically convert
long SMS messages that you send to
MMS after your confirmation. Long
SMS messages you send are
automatically divided into concatenated
SMS messages.
phone or to an e-mail address. All
elements of an MMS message are
merged into a "slide show".
Ask your service provider whether this
service is available. You may need to
register for this service separately.
Writing/sending an SMS
Messages > Create message > SMS
1. Enter text/add items (see SMS
options).
2. Press and select Add recipient.
3. Select a contact from Contacts list
(From Contacts) or enter a number
manually.
4. Press or press and
select Send.
The follow ing is displayed in the top
display line: text entry mode, number of
segments needed to send the current
message and number of remaining
characters.
SMS options
Depending on the current situation,
different functions will be offered.
Press (Options).
About MMS
The Multimedia Message Service
(MMS) enables you to send texts,
pictures/videos and sounds in a
combined message to another mobile
Page 43

43Create message
Add item
Send options
Further functions, see page 44.
Picture/Video/
Sound/Flash: Sele ct file
from the corresponding
My stuff folder (page 62)
If you try to add items
that cannot be sent via
SMS, the message is
converted to MMS after
confirmation.
Set Status report/
Validity period/
SMS type/Send with
(Message centre number)
for current SMS.
(page 48).
Writing/sending an MMS
Messages > Create message > MMS
1. Enter text/add items (see MMS
options).
2. Press and select Add recipient.
3. Select a contact from Contacts list
(From Contacts) or enter a number/email address manually.
4. Press or press and
select Send.
The following is displayed in the top
display line: text entry mode, number of
remaining characters and size of the
message.
MMS options
Depending on the current situation,
different functions will be offered.
Press (Options).
Add item
Add subject
Preview MMS
Send options
Further functions, see below.
• Picture/Video/Sound:
Select any file from the
corresponding My
stuff folder (page 62)
and add to a new slide.
• Flash: Select a flash
file from the
corresponding My
stuff folder (page 62)
and add as an
attachment (You
cannot attach more
than one flash per
MMS).
• Text: Enter text to a
new slide.
• Contact: Select a
contact and add as
vCard. (You cannot
attach more than one
vCard per MMS).
Enter subject.
Start preview mode
(see below).
Set Read report,
Delivery report, Validity
period, Priority and
Delivery time for
current MMS (see also
MMS settings, page 49).
Page 44

Create message44
Preview MMS
If you start Preview MMS you can change
the presentation of the message.
Press (Options) for more
options.
SMS/MMS options
Depending on the current situation,
different functions will be offered for
both SMS and MMS.
Press (Options).
Add recipient
Create item
Insert text
• From Cont acts: Select
a contact from
Contacts list.
• Enter number/Enter
email addrs: Specify
the number/email
address of the
recipient.
• Take picture/Record
video: Take a
photo/record a video
(page 39) to add to the
message.
• Record sound: Make
a sound recording
(page 58) to add to the
message.
• Template (pa ge 24).
• Contact details: open
contact and select
contact information.
Save as
Remove
picture/ video/
sound/flash/
contact/text/
recipient
For standard functions see page 19.
• Draft: Save message in
draft folder.
• Template: Save
message as text/MMS
template.
Remove picture/ video/
sound/flash/contact/text
/recipient from message.
Your phone has an e-mail program
(client). You can use it to create and
receive e-mails. To create new e-mails
you have to configure at least one e-mail
account (page 51).
Writing/sending e-mails
Messages > Create message > E-mail
1. Enter text/add items (see E-mail
options).
2. Press (Options) and select
Add recipient (see E-mail options).
3. Select a contact from Contacts list
(From Contacts) or enter e-mail
address (Enter e-mail addr.) manually.
4. Press or press and
select Send.
Page 45
45Inbox
E-mail options
Depending on the current situation,
different functions will be offered.
Press (Options).
Add recipient
Edit recipient
Attach item
Add Cc
Add Bcc
Remove item/
recipient
Save as draft
• From Contacts: Select
a contact from
Contacts list.
• Enter e-mail addr.:
Enter e-mail address
manually. T9 is not
available.
Edit entered address.
• From My stuff: Select
any file from the My
stuff folder.
• From Contacts: Select
contact and add as
vCard.
Add contact(s) of copy
recipient(s).
Add contact(s) of copy
recipient(s). Bcc
recipients are not visible
for other recipients.
Remove highlighted
attachment/recipient.
Save e-mail in draft
folder.
Add signature
Send options
For standard functions see page 19.
Add signature at the
current cursor position.
Set Req. deliv. receipt:,
Request read receipt:,
Priority: for current
e-mail (see E-mail
settings, page 51).
Inbox
Messages > Inbox
The inbox contains all MMS, SMS,
CB (Cell Broadcast), e-mail and WAP
push messages received on the phone.
When new messages are received, a
notification is displayed.
SMS
If a new SMS is received, a notification is
displayed. New messages are saved in
the Inbox automatically.
Press (View) or to
read new message.
MMS
An MMS is received in two steps: First
the MMS notification, then the MMS.
If a new MMS message is available for
downloading, the MMS notification is
displayed including number/contact
and subject of the MMS. You can
download the MMS immediately or
later.
Page 46
Inbox46
You can change MMS settings to
download new MMS immediately
without request.
Cell Broadcast Service
Some service providers offer Cell
Broadcast Services (CB), supplying you
with messages on the activated topics.
When the function is activated, CB
messages are received automatically.
Depending on the current setting, CB
messages are displayed in standby
screen or stored in Inbox.
E-mail
E-mails are not received automatically.
Before an e-mail can be read, it must be
retrieved from the server (page 46).
WAP push
WAP push messages are provided by
special service centres. Depending on
the current setting (page 53), WAP push
messages are received/rejected
automatically or you are prompted to
accept/reject when WAP push is
received.
Inbox structure
For fast access, the inbox is organised on
three tabs:
• MMS, SMS, CB
•E-mail
• WAP push messages
Make a call to the sender: Select SMS,
MMS or e- mail and pres s (vo ice
call)/ (video call).
Reading SMS, MMS, CB
All new messages are listed in
chronological order.
Select a message and press .
Numbers, e-mail addresses, vCards and
other saveable objects are highlighted
automatically.
Use these keys while reading a message.
/ Set volume.
Only MMS:
Navigate within a slide.
Switch to next/previous
slide.
Play media file.
For options available while reading a
message, press (Options).
Depending on the current situation,
different functions will be offered.
Reading E-mail
If more than one account is configured,
the list of accounts is displayed.
Before an e-mail can be read, it must be
retrieved from the server.
Page 47
47Inbox
The listed files and the options menu
vary depending on the receive server
type of the selected account.
POP3 account
The Inbox on the phone contains all the
e-mails that are in the Inbox on the
POP3 server.
You can configure whether or not an
e-mail is deleted on the server when
deleted on the phone.
If you configure so, the e-mails which
are deleted on the phone will not be
deleted on the server until next e-mail
retrieving.
IMAP4 account
The Inbox lists e-mails as well as
subscribed folders (e. g. mailboxes). You
can subscribe to various folders on the
IMAP4 server. E-mails are retrieved
only from the subscribed folders.
If you delete e-mails on the phone, they
will be deleted on the server after next
e-mail retrieving.
For options available while reading an email, press (Options).
Depending on the current situation,
different functions will be offered.
For details on E-mail settings, see
page 51.
You can set the max. size of downloaded
e-mails (page 51).
Retrieve e-mail
Depending on the download mode,
either entire e-mails or only the headers
are retrieved, or you may be asked
whether the entire e-mail or only the
header should be downloaded. The
number of retrieved e-mails is
displayed.
IMAP4 accounts: only e-mails in the
subscribed folders are retrieved.
Subscr. to folders
(only IMAP4 accounts)
You have to subscribe to folders on the
receive server in order to retrieve e-mail
from these folders.
All subscribed and un subscribed folders
on the receive serve r are listed. Only two
levels of folders are supported.
1. Press to select folder(s) and
confirm with to subscribe /
unsubscribe to folders.
2. Press (Options) and select
Subscr. to marked.
WAP push
The following messages are displayed:
• Service Indication (SI)
•Service Loading (SL)
• Audio, video, image, text
Service Indication message
An SI push me ssage gives you the option
of connecting directly to a particular
URL via the phone's browser.
Page 48

Message lists48
Service Loading message
Depending on your setting (page 53),
accepting an SL push message will start
the browser to download Web content
(e.g. images, applications) to the phone.
Message with audio/video/image
content
The message can contain attached files.
You can view/play and save the attached
content.
Message lists
Messages are displayed the same as in
the Inbox. The most recently
edited/sent message is displayed at the
top of the list.
Drafts
Messages > Drafts
The list is organised on two tabs:
SMS/MMS and E-mail.
You can save a message as a draft while
creating it.
Outbox
Messages > Outbox
The list contains all messages you failed
to send and is organised on two tabs:
SMS/MMS and E-mail.
Sent
Messages > Sent
The list contai ns all sent messages and is
organised on two tabs: SMS/MMS and
E-mail.
Message settings
Configure SMS, MMS, e-mails, cell
broadcast (CB) and voice mail.
SMS settings
Messages > Msg settings > SMS
SMS profiles
The SMS parameters are configured in
up to 10 different profiles.
The first 5 profiles are saved on the SIM
card, the last 5 profiles are saved on the
phone memory. When replacing the SIM
card, the profiles saved on the phone are
not changed.
Setting default profile
If profile is already configured: Select
profile and press to set profile as
default.
Edit profile
1. Select profile.
2. Press (Options) and select
Edit.
Reset profile
Press (Options) and select Reset
profile.
If your provider has locked a predefined
profile, it cannot be reset.
Page 49
49Message settings
Auto header
If the function is activated the Header
template (page 24) is automatically
inserted at the start of any created SMS.
Auto signature
If the function i s activated, the Signature
template (page 24) is automatically
inserted at the end of any created SMS.
Save sent items
If the function is activated, all sent SMS
messages are saved automatically in the
Sent folder.
Auto delete SMS
If the function is activated, the oldest
SMS message in the Inbox will be
deleted upon arrival of a new SMS
message.
Emoticons
Emoticons are little symbols (Smilies)
expressing your feelings. If the function
is activated, emoticons are
automatically displayed as little
pictures.
Text size
You can set the displayed size of the text
in the SMS Viewer.
MMS settings
Messages > Msg settings > MMS
MMS profiles
The MMS parameters are configured in
up to 5 different profiles. You will
receive the necessary data from your
service provider.
Setting default profile
If profile is already configured: Select
profile and press to set profile as
default.
Edit profile
1. Select profile.
2. Press (Options) and select
Edit.
Reset profile
Press (Options) and select Reset
profile.
If your provider has locked a predefined
profile, it cannot be reset.
Home retrieval/Roaming retrieval
Configure when new MMS messages are
to be downloaded from the message
server for Home and Roaming retrieval.
Automatic
Always ask
Messages are
automatically downloaded
as soon as an MMS
notification is received.
When an MMS
notification is received,
you are asked whether to
download it o r not.
Page 50

Message settings50
Restricted
When an MMS
notification is received,
only the notification is
displayed.
Req. read report
If the function is activated, request the
recipient to send back read report.
Req. deliv report
If the function is activated, request the
recipient to send back delivery report.
Delivery time
Select how long an MMS message
should be held on the server before
sending it to the recipient.
Validity period
If an MMS message could not be
delivered during this period, it is deleted
from the server automatically.
Hide number
The recipient will not see your phone
number.
Anon. messages
If set to Reject, anonymous MMS
messages are rejected automatically.
Allow read report
(Network support dependent.)
If the function is activated, allow the
server to send read reports to the sender.
If set to Yes confirm the charge
notification.
Allow deliv report
If the function is activated, allow the
server to send delivery reports to the
sender.
If set to Yes confirm the charge
notification.
Creation mode
You can restrict the content that can be
added to an MMS.
The following settings are possible:
Free
Warning
Restricted
You can add any content to
the MMS.
You are warned when
attempting to add content
to an MMS that cannot be
sent.
If you attempt to add
content that is not
compliant an error
message is displayed.
Auto signature
See SMS settings page 49.
Save sent items
See SMS settings page 49.
Allow adverts
If the function is deactivated, MMSbased advertisements are automatically
rejected.
Page 51

51Message settings
Emoticons
See SMS settings page 49.
Text size
See SMS settings page 49.
Max msg size
The size restriction affects downloaded
and created MMS messages.
E-mail settings
Before using e-mail service you must set
the server access and your e-mail
parameters. You may receive the
necessary data from the service
provider.
The e-mail paramete rs are configured in
up to 5 different accounts. One account
might be predefined by your service
provider. You cannot edit predefined
accounts.
Messages > Msg settings > E-mail.
Activating an account
If an account is already configured:
Select the account and press to
activate.
Deleting an account
Press (Options) and select
Delete.
All e-mails in the Inbox, the Drafts and
the Sent folders and all attachments
belonging to the deleted account are
deleted.
Editing an account
Edit the account according to the
information from your provider.
Press (Options) and select Edit.
User info
Setup your e-mail address (for example,
name@domain.abc) and login
information for the e-mail server.
Connection info
You can configure accounts with two
different receive server types: POP3 and
IMAP4. The configured accounts may
have different server types.
Msg preferences
Setup how messages are displayed, how
they are retrieved and sent, and the
notification of delivery report.
Add signature
Select No e-mail/New e-mail/All e-mails.
Create signature
Enter signature and confirm with .
CB settings
Messages > Msg settings >
Cell broadcast
Receive broadcasts
Activate and deactivate the CB service.
If the CB service is activated, the
standby time for the phone will be
reduced.
Page 52

Internet52
Cell info display
Select whether or not the local cell
information should be displayed in
standby screen.
Topic list
You can configure the types of
br oadc ast m ess ages you w ant to rece ive.
The list of configured topics
is displayed. You can add/remove
topics. Press (Options) for more
options.
Voicemail
(Network support dependent.)
Most service providers supply you with
a mailbox in which a caller can leave a
voice mail for you.
If the voice mail service is not part of
your service provider's standard
package, you will need to register for it,
and possibly set the voice mail
manually. The following sequence may
vary from service provider to service
provider.
Voicemail settings
Messages > Msg settings > Voicemail
Voicemail no.:
Enter your voicemail number.
Notification
Activate and deactivate display of a
message notifying of new voice mail
entries.
Listening to voicemails
In standby screen press and hold
.
Or
Messages > Voicemail.
Internet
Get the latest information from the
Internet that is specifically adapted to
the display options of your phone. In
addition, you can download games and
applications to your phone. Internet
access may require registration with the
service provider.
The browser is activated with the preset
option as soon as you call up the
function. Browser settings may be
specified/pre-assigned by the service
provider.
Home Page
Start the browser and display the
predefined Home Page.
Enter URL
Internet > Enter URL
1. Enter URL.
2. Press or press (Options)
and select Go to start the browser and
display the entered Internet site.
Changing the prefix
1. Press (Options) and select
Prefix.
Page 53
53Internet
2. Select a prefix or select Custom and
enter prefix.
Bookmarks
Internet > Bookmarks
Display the list of bookmarks stored in
the phone.
Select the bookmark and confirm with
to call up URL.
History
Internet > History
Display the list of most recently visited
Internet domains and pages.
1. Press : select the history entry.
2. Press : call up the URL.
Settings
Internet > Settings
Multimedia
Choose whether or not to show/play
images/sounds or download objects
embedded on the Internet pages.
Look and feel
Setup the font s ize (Font size), the way to
navigate within the I nternet page (Scroll
step), and the maximum wait-time for
the web response (Connection timeout).
Security
Secure
prompt
ID cache
Cookies
Link referral
Press (Options) and select Save.
Display a security request
when leaving a page with
secure connection to enter
a page that is non-secure.
Set whether or not the
browser should store your
user ID and password.
Enable/Disable cookies.
Allow/Do not allow the
current page to see
previous URL.
Certificates
Display the list of stored certificates.
Current
Display the current certificate
information.
Certificates list
Press to display the selected
certificate information.
WAP push
You can accept or reject SL (Service
Loading) push messages from trusted
and untrusted sources.
Press (Options) and select Save.
Browser profiles
You can choose one of 5 browser
profiles.
The current browser profile is marked.
Page 54
Download54
Activate profile
Press to select a profile and
confirm with .
Edit profile
Press (Options) and select Edit.
Profile
Name
Internet
profile/
Connection
profile
Start page
Press (Options) and select Save.
Reset profile
Press (Options) and select Reset
profile.
The browser profile is reset to an
unconfigured state. If your provider has
locked a predefined profile, it cannot be
reset.
Enter profile name.
Select profile (page 68).
Set current URL as
startpage for the profile.
Navigation in the browser
Select a link.
(Back) Press to go back a page.
•One input field/link
forward/back.
• Scroll one line.
Tab through active
content (links on page).
Ending a connection
Press and then (Yes) to
end the connection and close the browser.
Your Internet browser is under license of:
Download
Downloads are offered on the Internet.
Once downloaded, the content is
available to you on the phone.
You cannot download more than one
content at the same time.
• When the download is completed, you
can either continue browsing or open
the downloaded con tent and use it (e. g.
set picture as wallpaper, play
sound/video). However, when
Animation mode is set on, some of the
display settings, e.g. Wallpaper or Logo,
will be deactivated.
• Downloaded content is listed in the
corresponding folder in My stuff
(page 62). You can select to save
downloaded Java applications in the
Appl. (applications) or Games folder.
Java Application Manager
Accessible via My Stuff > Appls./Games.
Java Application Manager (JAM)
displays the list of Java
applications/games/MIDlet suites
Page 55

55Games
currently available on the phone and
helps manage those applications.
Press to select the desired
application.
Depending on the application selected,
different options are available.
Press (Options).
Additional information
You can use th e browser to download
applications (e.g. ringtones, games, pictures,
animations) from the Internet.
BenQ excludes all warranty and liability
cl ai ms i n r es pec t o f o r in co nn ec tio n w ith an y
applications subsequently installed by the
customer and any software not included in
the origin al delivery packag e. This also
applies to functions enabled subsequently at
the customer's instigation. The purchaser
bears sole risk for the loss of, damage to, and
any defects arising in, this device or the
applications and for any direct damage o r
consequential damage o f whatever nature
resulting from the use of this application. For
technical reasons, such applications and
subsequent enabling of certain functions are
lost in the event of the device being
replaced/re -supplied and may be l ost if it is
repaired. In such cases, the buyer is required
to download or enable the application again.
BenQ offers no warr anty or guarantee nor
does it accept any liability for the customer's
ability to d ownload or enable ap plications
again or to do so free of charge.
Games
Games
Games are offered on the Internet. You
can download games to the phone. Once
downloaded, these are available to you
via the phone.
Some games are already pre-installed on
your phone.
GPS
GPS
The Global Positioning System (GPS)
lets you find your position, which is
crucial for navigation. With the
embedded GPS receiver, your phone is
able to show its position by measuring
the distance between itself and at least 3
GPS satellites.
Once your are provided with a real-time
GPS map displaying where you are
located, you can assign a destination
and plan the route on th e download GPS
map.
You need to become a registered 3G
service user to receive the GPS map and
you may be able to subscribe to more
GPS-related services provided by your
network operator. Services may include
displaying traffic information,
entertainments, friends in your
neighbourhood or more. Contact your
network operator for the availability of
GPS-related services and detailed
information.
Page 56

Organiser56
• The download GPS map and the
displayed language ma y vary depending
on your currently located country or
region.
• The current date and time are
automatically updated based on the
GPS map you are using.
•If you are provided with GPS car
navigation and driving w ith it, you may
be distracted by checking the route on
your pho ne. It is reco mmended to h ave
the company ch ecking the GPS map for
you.
While using GPS service, it takes a while
receiving data from the satellites and
calculating the distance. The time to
connect to GPS satellites and the
position accuracy depend mainly on the
weather condition and satellite
coverage, which may be degraded by
buildings and architecture in your
surrounding area.
To shorten the connection time and
improve position accuracy, your
network operator may use AGPS servers
to better receive GPS data through the
base stations. To setup AGPS servers,
contact your network operator for
settings in detail (GPS settings, page 75).
Organiser
Calendar
Organiser > Calendar
You can enter events in the calendar.
The time and date must be set for the
calendar to work correctly.
AM/PM or 24h display depends on your
clock settings (page 72).
The calendar offers you 3 views: daily,
weekly and monthly. When you switch
the view, the current hour/day/week is
marked.
Press (Options) and select
Daily/Weekly/ Monthly to switch to
different views, or for more options.
Daily view
Display events of the current day. You
can scroll from 12 AM to 11 PM. A
vertical line indicates the event
duration.
One day forward/back.
One hour forward/back.
Edit/New event (page 57).
A contact’s birthday is displayed with
subject "Birthday" in a single hour slot at
the day start time (page 57). If a birthday
event is highlighted, press to open
the contact.
To set a contact’s birthday, see page 31
Page 57

57Organiser
Weekly view
Events are shown as vertical bars of
different colours on the horizontal hour
division. The first 2 upcoming or
current events for the current day are
displayed below the calendar.
One day forward/back or
one week forward/back if
Monday or Sunday is
highlighted.
Forward/back two hours
through the day.
Display daily view for
highlighted day.
Monthly view
Week numbers are displayed in the first
column. The first 2 upcoming or current
events for the current day are displayed
below the calendar.
One day forward/back
or one month forward/ back
if first or last day is
highlighted.
One row up/down
or one month forward/
back if first or last row is
highlighted.
Display daily view for
highlighted day.
Calendar Settings
Press (Options) and select
Settings.
Default repeat
Set the default repeat time frame for
newly created events.
Default alarm mode
Set the default alarm time span for
newly created events.
To set the ringtone see page 65.
Day start time
Set the start time displayed on the first
line in the daily/weekly view.
Week start day
Set the start day displayed in the
weekly/monthly view.
New event/Edit event
Events are displayed in all calendar
views. Overlapping events are displayed
in parallel as different vertical bars.
Press (Options) and select New
event/Edit event.
Press (Options) and select Save
to save the event.
Page 58

Organiser58
• If you edit a repeating event, select
whether you want to save changes to the
highlighted event or to all occurrences
and confirm with .
• If the time format 12-hour is activated
(page 72) press / to
switch between am/pm for start and
end time.
Information on the alarm
When the set date and time of the event
are reached an audio and a visual alarm
occur.
When the alarm occurs, follow the onscreen commands and press
corresponding keys. Or press to
launch the calendar and display the
event.
An alarm sounds even when the phone
is switched off (except the phone is
switched off in alarms off mode, page 17).
Voice memo
Organiser > Voice memo
Use the function to record short memos.
New recording
1. Select Record new. Select a save
location for recording.
2. Press or (Record): Start
recording.
3. Press : Pause/record.
4. Press (Done): End recording.
The recording is saved in the Sounds
folder in My Stuff (page 62).
An incom ing call ends recordi ng. The
record is saved automatically.
Playback
1. Select recording.
2. Press : Playback/pause.
3. Press (Stop): Stop playback.
4. To adjust volume press / .
Set as call ringtone
1. Select recording.
2. Press (Options) and select
Set as.
3. Confirm with (Yes).
Time zones
Organiser > Time zones
The world clock shows the current
system time, the time zone (colour
vertical bar on the map), the time zone
name and the time in the selected city.
The time zone display can be changed:
1. Press : Select the time zone in
the world map.
2. Press : Select a city in the
selected time zone.
3. : Set time zone to the selected
city.
Page 59

59Organiser
If you changed the time zone:
• The alarm clock is not affected .
• Calendar events are updated to the
current time zone.
Synchronisation
Organiser > Synchronisation
You can use this function remotely to
access externally filed data (addresses,
calendar) and synchronise these with
the data on your phone. The data can,
for example, be saved on a company
computer.
Remote sync
You can configure up to 5 profiles
for remote synchronisation. Before
you start the synchronisation,
check Active profile, Sync mode and
Apps to synchronise (see below).
Initiate the synchronisation. The
computer is selected and
synchronisation started. When
completed, the actions which have been
performed are displayed.
If you accept/establish a call during
synchronisation, the synchronisation
might be stopped depending on your
network.
Active profile
Select profile you want to use for
synchronisation and press .
Edit profile
Press (Options) and select Edit.
For details on settings, please contact
your service provider.
Restore defaults
Press (Options) and select
Restore defaults.
Sync mode
Data to sync Select whether All data
Sync direction Select the direction in
or only Modified data is
to be trans ferred during
synchronisation.
which synchronisation
is to occur.
Two-way: Data is
transferred in both
directions between the
phone and the server.
Mob.overwrit.: phone
transfers data to the
server.
Serv.overwrit.: server
transfers data to the
phone.
Apps to synchronise
1. Press to check/unchec k the data
type to sync: Contacts, Calendar.
2. Press (Done) to confirm.
Sync log
Display a summary of the latest
synchronisation. The log indicates
whether the synchronisation attempt
Page 60
Extras60
was successful, e .g. date, time and details
about the synchronised application.
Extras
SIM toolkit (optional)
(Network support dependent)
Extras> SIM toolkit
Your service provider may offer special
applications such as mobile banking,
share prices, etc. via the SIM card.
For further information, please contact
your service provider.
My menu
Extras > My menu
Create your own menu with frequently
used functions, phone numbers from
the contact list or applications.
Using My menu
Select an entry and press to
activate the function.
Or
If the selected entry is a phone number,
Press to call it.
Change My menu
You can replace each entry with another
entry from the selection list.
1. Select an entry.
2. Press (Change) to open the
function list.
3. Select a function to assign to the entr y
and press or (Select) to
save the entry.
If None is selected, the assignment is
cleared from the list.
If Assign speed dial is selected, the
Contacts list is opened. Select a
contact’s phone number.
Alarm clock
Extras > Alarm clock
The alarm clock can be set for each day
of the week separately.
Set alarm
1. Select a day of the week and press
.
2. Enter time.
3. Press or (Save) to
activate alarm.
If the time format 12-hour is activated
(page 72) press / to switch
between am/pm.
is displayed in standby screen when
alarm is turned on.
Apply Alarm to every day
Apply the highlighted alarm time to
every day of the week.
Press (Options) and select Apply
to every day.
Page 61
61Extras
End alarm
The alarm will ring at the set time, even
when the ringtone or the phone is
switched off (except the phone is
switched off in alarms off mode,
page 17).
If the phone is swi tched on by the alarm,
it won’t switch off again if you end the
alarm.
To end the alarm, press
(Options) and select Turn off.
Reset alarm
Press (Snooze): Stop the alarm
tone, and reset it for 10 minutes.
The original time of the alarm is not
changed.
End alarm
Press (Off): End alarm.
The alarm remains active and will occur
at the same time in one week.
Calculator
Extras > Calculator
The calculator can be used in a basic
version and with an advanced range of
functions.
• Number keys: Enter digit(s).
•
•: Select function.
The result is calculated and displayed
immediately.
/
: Navigate to functions.
Press (Options) to switch
between Basic Mode and Extended
Mode to get different functions.
Unit converter
Extras > Unit converter
You can convert various amounts into
other units.
Converting the units/currency
1. Press to select the desired
measure type: length, temperature,
currency, etc.
2. Press to switch to the input
field.
3. Enter the quantity to be converted.
4. Press to switch to the selection
field.
Page 62

My stuff62
5. Press to select the source unit/
currency.
6. Press to select the target unit/
currency. The result is displayed
below.
Currency settings
When you call up the function, you
must enter both source and target
currencies as well as their exchange rate.
1. Enter source currency in the input
field.
2. Press (Save) and select Save.
3. Scroll to the target currency field.
4. Press (Options) and select
Add currency.
5. Enter target currency and exchange
rate.
6. Press (Save) and select Save.
Sound recorder
Extras > Sound recorder
Same function as Organiser > Voice
memo (page 58).
Stopwatch
Extras > Stopwatch
Use the stopwat ch to measure time or to
save intermediate times.
• Press : Start/Stop/Restart.
•Press (Lap): Save lap time. A
lap is counted as the time between
subsequent key presses.
•Press (Reset): Reset time to
zero when the stopwatch stops.
My stuff
Select My stuff.
You can use My stuff to organise your
files in folders.
If the microSD card is inserted,
folders/files stored on it are organised
on a separate tab. Files are managed the
same way as files saved on the phone.
Select tab (phone
memory/microSD card).
List of folders/files is
displayed.
Select folder/file or link and
confirm with .
Depending on your selection, the file
and respective application are opened,
or download is started.
Remember that pictures, sounds or
applications may be protected
(DRM, page 18).
Folder structure
Files are organised in folders.
Predefined folders have already been
created for different data types and
cannot be changed.
Page 63

63My stuff
The content of the fixed folders is
filtered. The folders contain special
media types. Files that do not fit in
another folder are listed in Misc.
You can add personal folders on the top
level as well as subfolders. Personal
folders are displayed behind the default
folders.
Personal folders on the top level can
contain mixed media types. You can
delete personal folders.
Within fixed folders you can add
personal subfolders, which are
restricted to the media type of the fixed
folder.
To organise folders, press
(Options).
Folder Content Formats (e.g.)
Sounds
Pictures
MP3 tracks,
ringtones,
recordings.
mp3, aac+
m3u, mid,
amr, wav
Pictures. bmp, jpg, jpeg,
png, gif
Videos
Themes
Videos. 3gp, H263,
Load theme
MPEG4
*
(packed)
Theme
configuration
(unpacked).
Select theme
to activate it.
Appls.
Launch Java
Application
Manager and
*
display list of
saved
applications.
Games
Launch Java
Application
Manager and
jar, jad
display list of
saved games.
Misc.
Files of media
types that are
e.g. html, wml
not included
in other
folders, e. g.
text modules,
Internet
pages. If you
try to open a
file of
unknown
type an error
message is
displayed.
Flashs
Flash files. swf, svg
Press (Options) for options for
organising folders.
• Depending on your provider the
structure, content and functionality
may differ.
• Your phone does not support playback
of a flas h file taking more tha n 1MB of
your phone memory; you will be
prompted by the warning of Low
Memory, and the playback will be
stopped to protect your phone.
Page 64
Using the phone as card reader64
License manager
Display alphabetical list of all rights
associated with file s stored on the phone
or the microSD card.
Scroll to a desired file, press
(Options) and select License
manager.
If the selected file has no license:
1. Press (Yes) to start License
manager anyway.
2. Select license.
Press (Options).
View license
Renew license
License
search
Go to content /
Downld
content
Delete license
Display license details.
Open browser to URL of
license server. Purchase
new rights.
Enter rights name to
search for license.
Go to associated content
file for specified license
in according folder.
If chosen content is not
found on the phone or
the microSD card, you
have to download
content first. Load URL
of content server.
Remove license from
phone. Confirm
notification.
Using the phone as card reader
Only available with the microSD card
inserted.
You can use your phone as a card reader
to transfer files between the computer
and the microSD card.
System requirements:
Windows 2000/XP.
1. Connect the phone to a computer via
the USB data cable.
2. When asked to activate mass storage
device, press or (Yes) to
establish connection.
3. On the computer, double-click on the
My Computer icon to open the My
Computer panel, where a removable
disk icon representing the storage
capacity of the microSD card is
displayed.
You can now use the phone as a card
reader by copying/pasting/deleting
files between the computer and
microSD card.
When copying a file from your
computer to the microSD card, you
must place the file in the folder
intended for the type of file.
For example, an MP3 file must be
placed in the Sounds folder in order to
be successfully used in the phone.
Page 65
65Settings
Settings
Profiles
Settings > Profiles
Several settings can be stored in a phone
profile, for example to adapt the phone
to the surrounding level of noise.
6 standard profiles are provided with
default settings. You can set and rename
2 personal profiles (User profile 1 and
User profile 2).
To activate the selected profile, press
.
To edit a default profile or create a new
personal file, press (Options)
and select Change settings.
Headset
The special profile Headset is
automatically set when an original
headset is attached.
Ringtones
Settings > Ringtones
In Volume, set the tones on the phone to
suit your requirements. The volume
setting controls the volume of the
ringtone as well as the general volume
level of beeps and tones played by
different applications. The volume
setting does not affect the media player.
In other options, set the melodies and
tones for different functions separately.
Themes
Settings > Themes
Load a completely new user interface in
your phone. With the press of a key,
various functions are re-organised
based on a theme, e.g.
• switch on/off melody and animation.
• wallpaper.
In addition to the automatic exchange
of theme parameters (e.g. switch on/off
melody), you will have to manually set
parameters such as Logo, Screensaver.
When you select a theme all the
components of the theme apply to the
phone, e.g. ringtones, wallpaper. The
existing settings might be overwritten.
Display
Settings > Display
Wallpaper
Background image used on either
display in standby screen. You can set a
wallpaper for each display separately.
Logo
Graphic to be displayed instead of the
provider logo.
Animation mode
A default Flash file to replace the
wallpaper.
Page 66
Settings66
When Animation mode is set on, some of
the display settings, e.g. Wallpaper or
Logo, will be deactivated.
Screensaver
The screensaver is displayed when a
specified time period has elapsed. An
incoming call or pressing any key will
end the function.
• Press to scroll to different fields.
• Press to scroll to optio ns in a field.
• Press (Options) and select
(Save) to save the screensaver.
Warning!
When the screensaver is manually set,
talk/standby time is reduced dramatically.
Greeting message
Set a message to be displayed when the
phone is switched on.
Backlight time
Set the backlight duration for the
display.
Brightness
Press / to set the brightness
level for the display.
Decreasing the brightness of the display
extends the operatin g time of your phone.
Power save
Activate/deactivate power save mode.
The standby time before the display
goes into power save mode is fixed.
Vibration
Settings > Vibration
To avoid the disturbance caused by
a ringing phone, you can activate the
silent alert function as an alternative.
The silent alert can also be activated in
addition to the ringtone (e.g. in noisy
environments).
Connectivity
Settings > Connectivity
Bluetooth® technology
Bluetooth technology is a short-range
radio connection by means of which a
headset or car kit or such can be
connected without the need for wires.
Using the Send function in the options
menu for the applicatio n concerned you
can also use this route to send data.
To establish a Bluetooth connection
between your phone and other
Bluetooth devices you must activate the
function.
The Bluetooth® word mark and logos are
owned by the Bluetooth SIG, Inc. and any
use of such marks by BenQ Co rporation is
under license. Other trademarks and
trade names are those of their respective
owners.
Page 67
67Settings
Bluetooth technology active
Activate/deactivate Bluetooth technology
Bluetooth technology reduces the
phone’s standby time if it is activated.
is displayed when Bluetoot h
technology is activated.
File location
Select where the files are to be stored
after being transferred via Bluetooth
technology.
Search
Search for specific categories of devices
or for all Bluetooth devices.
Found devices are displayed in a list (for
list options see below).
If Audio is selected Headsets, Car kit and
audio or video devices are listed.
Known devices
Display the list of known devices (max.
10 devices).
Last connected
Display the list of last 10 connected
devices, including those that are
currently connected.
Bluetooth name
Display device address. Enter the device
name that is shown to other BT devices
when they request this (see Bluetooth
visibility).
If no name is entered, the device address
is shown to other BT users (the device
address cannot be changed).
Bluetooth visibility
The device address/name is shown or
not to other BT devices if they request
this in order to receive or send data.
On/Off
Auto
Activate/deactivate visibility.
Set visibility for 5 minutes,
then visibility is disabled
automatically.
Bluetooth device options
Depending on the current list (Search,
Known devices or Last connected),
different functions will be offered.
1. P ress to s elec t a dev ice f rom lis t.
2. Press (Options).
Page 68

Settings68
Trust/
Do not trust
Connect/
Disconnect
View details
Add to known
list
New search
Trust: Enter your
password both on the
phone and on the device
to trust the device, so
that Bluetooth
connection can be
established.
If you are pairing with
an audio device, enter
the password
predefined for the
device.
Do not trust: Remove
trust option of device.
Trusted devices are
added to the known list
automatically and do
not require the
password to connect.
Establish/end Bluetooth
connection to a known
audio device. Only one
audio device may be
connected at a time.
Display the device
details: Name:, Device
type:, Address: and/or
Service: (not available
if no Service Class of th e
device can be searched).
Add the device to the
known list.
Start a new search.
Data counter
Display the data transfer information.
Connect profiles
(Network support dependent)
Depending on your provider up to
25 profiles may be preset containing a
collection of settings utilised by
applications.
Press (Options) and select Edit
to edit the selected profile. For more
information on settings, please contact
your service provider.
Your provider will supply you with your
login and password.
Internet profiles
(Network support dependent)
Depending on your provider up to
25 profiles are preset containing a
collection of settings utilised by
applications, such as Internet (WAP
browser) and MMS.
Press (Options) and select Edit
to edit the selected profile. For more
information on settings, please contact
your service provider.
Your provider will supply you with your
login and password.
Linger time
(Network support dependent)
Depending on your provider you may
be able to specify the linger time which
will apply to all applications.
Page 69

69Settings
Shortcuts
Settings > Shortcuts
You can assign one important
number/function to each soft key, the
navigation key (up, down, left, right)
and the number keys 2 to 9. These keys
can then be used as shortcuts to start
functions/dial numbers (speed-dial
numbers).
Setting a function shortcut
1. Select the desired key and confirm
with .
2. Select shortcut function and confirm
.
Setting a speed-dial key
To assign a number to a key select Speed
dial and then select the desired contact.
is predefined as the speed dial
key for the voicemail number. You
cannot change its function.
If no function is assigned, you can set a
function if you
• press and hold the number key in
standby screen and confirm request.
• press the soft key and navigation key
briefly.
Start function/call number using shortcuts
• Press the corresponding soft key and
navigation key briefly to start the
function.
•Press and hold a corresponding
number key to start the function/dial
number.
The service provider may have already
assigned functions to a softkey (e.g access
to "SIM services" or direct call-up of the
Internet portal). It may not be possible to
modify this key assignment.
The left soft key may sometimes be
replaced automatically by View to access
a new message for example.
Call setup
Settings > Call setup
Hide ID
(Network support dependent)
When you make a call, your nu mber can
be shown on the display of the called
party or suppressed.
The setting applies to voice and video
calls.
Call waiting
(Network support dependent)
If you are registered for this service, set
call waiting.
Page 70

Settings70
You will hear the call waiting tone
during a call when there is another call
waiting.
Diverts
(Network support dependent)
You can specify the conditions
under which the call types should be
diverted to your mailbox or other
numbers.
Divert voice calls/video calls
1. Select call type.
2. Press (Options) and select
Set.
3. Enter the number to divert to. Or
Press (Options) and select
Contact to choose a contact’s
number.
Divert all calls/data/fax/messages
1. Select Set.
2. Enter the number to divert to. Or
Press (Options) and select
Contact to choose a contact’s
number.
Note that the divert is stored in the
network and not in the phone (e.g., when
the SIM card is changed).
All calls
All calls are diverted ( is displayed
when activated).
All conditional
A call is diverted in the following
situations: Not reachable, No reply, Busy.
Not reachable
A call is diverted if the phone is switched
off or is out of range.
No reply
A call is diverted if you don’t answer it.
Busy
A call is diverted if another call is in
progress.
Fax
Fax calls are diverted to a number with a
fax connection.
Data/Messages
Data calls are diverted to a number with
a PC connection.
Any key answer
Incoming calls can be accepted by
pressing any key (except for ).
Auto redial
If a call you make is not answered, the
phone will automatically redial that call.
Video calls
Specify the additional settings for video
calls.
Show my video
If the function is activated, your video
image is always transmitted to the caller
during a video call.
If the function is deactivated, you can
choose whether or not to send the video
Page 71

71Settings
image when you receive an incoming
video call.
Select image
If you do not want to transmit your
video image to the caller (Show my
image is deactivated), you can select a
video mute picture that is shown
instead.
1. Press (Change) to change
setting.
2. Select a picture from My stuff
(page 62) folder and confirm with
(Select).
Display call timer
Display the call timer during a
voice/video call.
Phone
Settings > Phone.
Language
Set the language of the display text.
Display language
Show the currently set display language.
When Automatic is set, the language of
your home service provider is used.
Input language
Select a language for text entry.
Languages with T9 support are marked
with the T9 symbol. When Automatic is
set, the input language is based on the
display language.
If a language that y ou do not understand
happens to be set , the phone can be reset
to the language of your home service
provider with the following input (in
standby screen): * # 0 0 0 0 # or
.
Default input method
Set T9 (intelligent text entry) or the
multi-tap (ABC) as default text entry
method for most of the text entry items.
Key tones
Set the tone that i s played when pressing
keys.
Info tones
Activate/deactivate the service and
alarm tones.
File system
Format card
Format the microSD card and delete all
saved data.
Memory assistant
Works the same way as My stuff
(page 62), listing all saved folders and
files in phone memory and on microSD
card.
Phone identity
Switch between tabs to display the
phone identity number (IMEI), the
software configuration or start a Device
check.
Page 72

Settings72
The IMEI number may be useful for
customer service.
Device check
A self-test as well as individual tests are
offered. If you select Self test, all
individual tests are carried out.
To start the Phone identity feature in
standby screen, press * # 0 6 #.
Master reset
Reset the phone to default values
(factory setting). This does not affect the
SIM card or the network settings.
To reset the phone in standby screen
press * # 9 9 9 9 #.
Clock
Settings > Clock
Time/Date
Enter time (hours/ minutes) or date
(month/day/year) and confirm with
.
If Auto time is activated (page 72), the
network time is displayed.
If the 12-hour time format is activated in
Time format, press / to
switch between am/pm.
Time zone
The same function as Organiser > Time
zones (page 58).
Time format
Set the 24-hour/12-hour format for time
used in various applications.
Date format
Set the display format for date.
Show clock
Set the time and date display in standby
screen.
Auto time
If you activate auto time, the time zone
is switched automatically to local time
by the network.
Security
Settings > Security
Auto key lock
If activated, the keypad is locked
automatically if no key has been pressed
for two minutes in standby screen. This
prevents the phone from being used
accidentally. However, you can still be
called and you can still make an
emergency call.
The keypad can be directly locked and
unlocked in standby screen by pressing
.
Page 73

73Settings
Only protect. SIM
(PIN2 or phone code protected)
Dialling options are restricted to the
SIM protected numbers in the contacts.
PIN codes
See page 21.
This SIM only
(PIN2 or phone code protected)
The phone can be linked to a SIM card
when the phone code is entered. Unless
the phone code is known the phone will
not operate with a different SIM card.
If the phone i s to be used with a different
SIM card, enter the phone code when
requested.
Barrings
(Network support dependent)
Barring restricts the use of your
SIM card (not supported by all service
providers). You need a 4-digit network
password for network barring. Your
service provider will supply you with
this password. You may need to register
separately for each barring.
All outgoing
All outgoing calls except emergency
numbers are barred.
Outg. internat.
(International outgoing)
Only national calls can be made.
Outg. int. x home
(International outgoing without home
country)
International calls are not permitted.
However you can make calls to your
home country when abroad.
All incoming
The phone is barred for all incoming
calls.
When roaming
You do not receive calls when you are
outside your home network.
Network password
Change the network barring password
obtained from the service provider.
Clear all
All barrings are deleted.
License manager
Start the License manager to view/edit
license information of all saved files.
Download prompt
Enable or disable a content download
notification.
Network
Settings > Network
Network info
Retrieve information about the network
operator currently set.
Page 74

Settings74
Choose network
Start network search. This is useful if
you are not in your home network or
want to register in a different network.
The list of networks currently available
is displayed.
Auto network
If you activate this function, the phone
searches automatically for the available
network. Otherwise you can select a
different network manually from the
network list.
GPRS auto attach
Select to allow the phone to search for
GPRS signal automatically while it is in
2G mode.
Preferred network
Display a list of preferred networks.
Customise the list by changing entries.
Mode selection
(Network support dependent)
Make sure that your service provider
supports the selected network mode.
Fast search
If you activate this function, network
reconnection is speeded up (standby
time is reduced).
Accessories
Settings > Accessories
Car kit
The Car kit profile is activated
automatically as soon as the phone is
connected to the car kit.
Edit profile
To edit the Car kit profile see Profiles,
page 65.
Auto answer
Voice and video calls are accepted
automatically after a few seconds.
Key assignments
(only for Car kit)
You can assign new functions to keys on
the car kit.
Headset
If an original headset is used, the
Headset profile is automatically
activated when the headset is plugged
in.
Edit profile
To edit Headset profile see Profiles,
page 65.
Auto answer
Voice and video calls are accepted
automatically after a few seconds.
Page 75

Charge via USB
The phone is charged via USB when
connected to a computer via USB data
cable.
Mass storage
See Using the phone as card reader
(page 64).
GPS settings
You can choose to edit settings of one of
the 25 AGPS servers to better receive
GPS data. For details on the AGPS
server settings, contact your network
operator.
75Settings
Page 76
Questions & Answers76
Questions & Answers
If you encounter problems while using the phone, or if it performs erratically, you can
consult the information in the chart below. If your particular problem cannot be resolved
using the information in the chart, contact the dealer where you purchased the phone.
Problem Possible causes Possible solution
Poor reception The network signal is too weak
Echo or noise Poor network trunk quality on
Battery will not
charge.
at your current location, for
example, in a basement or near
a tall building, beca use wireless
transmissions can not
effectivel y reach it.
The network is busy at the
current time (for example,
during peak times, there may be
too much network traffic to
handle additional calls).
You are too far away from a base
station for you r service
provider.
the part of your service
provider.
Poor local te lephone line
quality.
The battery or battery charger is
damaged.
The phone's temperature is
below 0 °C (+32 °F) or higher
than +45 °C (+113 °F).
Poor contact between the
battery and charger.
Move to a location where the network signal can be
properly received.
Avoid using the phone at such times, or try again
after waiting a short time.
You can request a service area map from your
service provider.
Press
switched to a better-quality network trunk or
phone line.
Press and dial again. You may be
switched to a better-quality network trunk or
phone line.
Contact the dealer.
Adjust the battery charging environment to avoid
extremes of temperature.
Check all connectors to make sure all connections
have been properly made.
and dial again. You may be
Page 77

Problem Possible causes Possible solution
Shortened standby
time
You cannot switch
your phone on.
SIM card error SIM card malfunction or
Unable to conn ect to
the network.
You cannot answer
incoming c alls.
The standby time is related to
your service provider system
configuration. The same phone
used with different service
providers’ systems will not
provide exactly the same length
of standby time.
The battery is depleted. In hightemperature environments,
battery l ife will be shorten ed.
If you are not able to connect to
the network, the phone will
continue to se nd out signals as i t
attempts to locate a base station.
Doing so consumes battery
power and will consequently
shorten sta ndby time.
Battery power has been
depleted.
damage.
SIM card inserted improperly. Insert the SIM card properly.
Debris on the SIM card
contacts.
SIM card inv alid. Contact you r service provider.
You are not within the
network's service area.
Poor signal. Move to an open space, or if you are inside a
You have activated call barrings. Go to
If you are located in an area where signalling is
weak, temporarily switch off the phone.
Use a new battery.
Change you r location to one where the network is
accessible , or temporarily tu rn off your phone.
Recharge the phone's battery.
Take the SIM card to your service provider for
testing.
Use a soft, dry clo th to clean the SIM card contacts.
Check the service area with your service provider.
building, move closer to a window.
Settings > Security > Barrings > All
, and then sele ct Clear all.
calls
77Questions & Answers
Page 78

Questions & Answers78
Problem Possible causes Possible solution
You cannot make
outgoing calls.
PIN Code is blocked. You have entered an incorrect
Unable to add
contacts to the
Phone.
Unable to selec t
certain features.
You have activated call barrings. Go to Settings > Security > Barrings > All
Charge limit reached. Reset limit with PIN2.
PIN code three consecutive
times.
Memory for contacts is already
full.
Your service provider does not
support these features, or you
have not applied for services
that provide these features.
, and then sele ct Clear all.
calls
Contact your service provider. If the service
provider provides the SIM card's PUK code, use
the PUK code to un lock the SIM card.
Delete unnecessary contact information from the
Phone.
Contact you r service provider .
Page 79

Care and maintenance
Your phone has been designed and
manufactured to the highest of standards
and should be treated with great care. The
suggestions below will help you to enjoy
your phone for many years.
• Protect your phone from moisture and
humidity. Precipitation, humidity and
liquids contain minerals that will corrode
electronic circuits. Should your phone
become wet, disconnect it immediately
from the power supply to avoid electric
shock. Do not place your phone (even to
dry it) on/in a source of heat such as a
microwave oven, oven or radiator. The
phone may become overheated and
possibly explode.
• Do not use or store the phone in dusty,
dirty areas. Its moving parts may be
damaged and the casing may become
deformed and discoloured.
• Do not store your phone in hot
environments (e.g. vehicle instrument
panel in the summer). H igh temperatures
can shorten the life of electronic devices,
damage batteries and warp or melt
certain plastics.
• Do not store your phone in cold
environments. When the phone warms
up again (to its normal ambient
temperature), moisture can form inside
the phone, which may damage electronic
circuit boards.
• Do not drop, knock or shake your phon e.
Rough handling can damage internal
circuit boards.
• Do not use harsh chemicals, cleaning
solvents, or strong detergents to clean the
phone.
The suggestions given above apply equally
to your phone, battery, charger and all
accessories. If any of these parts is not
working properly, obtain fast and reliable
help at our service centres.
Battery quality statement
The capacity of your mobile phone battery
wi ll red uce e ach t ime it is ch arged /emp tied .
Storage at too high o r low temperatures will
also result in a gradual capacity loss. As a
result the operating time of your mobile
phone may be considerably reduced, even
after a full recharge of the battery.
Regardless of this, the battery has been
designed and manufactured so that it can be
recharged and used for six months after the
purchase of you mobile phone. After six
months, if the battery is clearly suffering
from loss of performance, we recommend
that you replace it. Please buy only original
batteries.
Display quality statement
For technological reasons, a few small dots
with differe nt colours ma y appear in the
display in exceptional cases.
Just remember that the appearance of
brighter or darker dots generally does not
mean that a fault has occurred.
79Care and maintenance
Page 80

Product data80
Product data
Declaration of conformity
Hereby, BenQ Corporation, declares that
this M7 is in compliance with the ess ential
requirements and other relevant provisions
of Directive 1999/5/EC. The relevant
declaration of conformity (DoC) has been
signed.
Please call the company hotline if you
require a copy of the original, or visit:
www.BenQ-eu.com/support
Lost phone
If y ou lo se yo ur ph one or SIM c ard c onta ct
your service provider immediately to
prevent misuse.
Disclaimer
BenQ Corporation makes no warranty or
representation, either expressed or implied,
with respect to the quality, accuracy or
fitness for any particular purpose of this
document. The information in this
document is correct at the time of printing
and subject to change without notice.
Page 81

SAR
81SAR
European Union (R&TTE) and
international (ICNIRP)
INFORMATION ON RF EXPOSURE /
SPECIFIC ABSORPTION RATE (SAR)
THIS MODEL MEETS INTERNATIONAL
GUIDELINES FOR EXPOSURE TO RADIO
WAVES
Your mobile device is a radio transmitter
and receiver. It i s designed not to exceed the
limits for exposure to radio waves
recommended by international guidelines.
These guidelines were developed by the
independent scientific organization
ICNIRP and include safety m argins
designed to assure the protection of all
persons, regardless of age and health.
The guidelines use a unit of measurement
known as the Specific Absorption Rate, or
SAR. The SAR limit for mobile devices is
2 W/kg and was adopted into the European
Standard EN 50360 and into other national
standards. The CE mark demonstrates that
the EU requirements are met.
The highest SAR value for this device when
tested at the ear was 0.823 W/kg
mobile devices offer a range of functions,
they can be used in positions other than the
head, such as on the body. In this case, a
separation distance of 1.5 cm is required.
As SAR is measured utilizing the device's
highest transmitting power, the actual SAR
of this device while operating is typically
below that indicated above. This is due to
automatic changes to the power level of the
1
. As
device to ensure it only uses the minimum
level required to reach the network.
The World Health Organization has stated
that present sc ientific information does n ot
indicate the need for any special
precautions for the use of mobile devices.
They note that if you nevertheless want to
reduce your exposure then you can d o so by
limiting the length of calls or using a
'hands-free' device to keep the mobile
phone away from the head and body.
Additional Information can be f ound on the
website of the World Health Organization
(www.who.int/emf).
1 The tests are carried out in accordance with
international guidelines for testing.
Page 82

License Agreement 82
License Agreement
This License Agreement ("Agreement") is between You and BenQ Corporation ("BenQ").
The Agreement authorizes You to use the Licensed Software, specified in Clause 1 below,
which may be included in your phone, stored
on a CD-ROM, sent to You by electronic mail
or over the air, downloaded from BenQ Web
pages or servers or from other sources under
the terms and conditions set forth below.
Read this Agreement carefully before using
you r ph one. By u sing you r pho ne or ins tall ing ,
copying, and/or using the Licensed Software,
You acknowledge that You have read and understood the Agreement and agree to be bound
by all of the terms and conditions stated below.
You further agree that if BenQ or any licensor
of B enQ ("L icensor ") is re quire d to eng age in
any proceeding, legal or otherwise, to enforce
their rights under this Agreement, BenQ
and/or its Licensor shall be entitled to recover
from You, in addition to any other sums due,
reasonable attorney's fees, costs and disbursements. If You do not agree to all of the terms
and conditions of this Agreement, do not install or use the Licensed Software. This Agreement governs any Updates, releases, revisions,
or enhancements to the Licensed Software.
1. LIC ENSED S OFTWAR E. As us ed in th is
Agreement, the term "Licensed Software"
means collectively: all the software in Your
phone, all of the contents of the disk(s), C DROM(s), electronic mail and its file attachments, or other media with which this Agreement is prov ided and includes a ny related
BenQ or third party software and upgrades,
modified versions, updates, additions and
cop ies of th e Licen sed Sof tware, if any, distri buted over the air, downloa ded from BenQ Web
pages or servers or from other sources.
2. COPYRIGHT. The Licensed Software and
all related rights, without limitation including
proprietary rights therein, are owned by BenQ,
its Licensors or affiliates and are protected by
international treaty provisions and all applicable national laws. This Agreement does not
convey to You no r allow You to acquire any t itle or ownership interest in the Licensed Software or ri ghts therein. The st ructure,
organization, data and code of the Licensed
Software are the valuable trade secrets and
confidential information of BenQ, its Licensors or affiliates. You must reproduce and include the copyright notices with any permitted
copies You make of the Licensed Software.
3. LICENSE AND USE. BenQ grants to You
a non-exclusive, non-transferable end user
right to install the Licensed Software or use the
Licensed Software installed on the phone. The
Licensed Software is licensed with the phone
as a single in tegrated product a nd may be used
with the phone only as set forth in these licensing terms.
4. LIMITATIONS ON LICENSE. You may
not copy, d istribute, or make derivative works
of the Licensed Software except as follows:
• You may make o ne copy of the Licensed
Software, excluding the documentation, as
an archival backup copy of the original. Any
other copies You make of the Licensed Software are in violation of this Agreement.
• You may not use, modify, or transfer the
right to use the Licensed Software other than
together with the accompanying hardware
or copy the Licensed Software except as expressly provided in this Agreement.
• You may not sublicense, rent or lease the Licensed Software.
• You may not reverse engineer, decompile,
modify, or disassemble those Licensed Software prog rams except and on ly to the extent
that such activity is expressly permitted by
applicable law notwithstanding this limitation.
Parts of the Licensed Software may be supplied
by third parties and may be subject to separate
Page 83

83License Agreement
license terms. Such terms are set out within the
documentation.
5. MISUSE OF THE LICENSED SOFTWARE OR DATA GENERATED BY THE LICENSED SOFTWARE IS STRICTLY
PROHIBITED BY BENQ , MAY VIOLATE U.S.
AND OTHER LAWS AND MAY SUBJECT
YOU TO SUBSTANTIAL LIA BILITY. You are
solely responsible for any misuse of the Licensed Software under this Agreement and for
any liability or damage related in any way to
your use of the Licensed Software in violation
of this Ag reement. You are a lso responsible for
using the Licensed Software in accor dance
with the limitations of this Agreement.
6. TERMINATION. This Agreement is effective from the first date You install, copy or
otherwise use the Licensed Software. You may
terminate this license at any time by deleting
or destroying the Lice nsed Software, all back
up copies a nd all related ma terials provided to
You by BenQ. Your license rights terminate
automatically and immediately without notice
if You fail to comply with any provision of this
Agreement. The rights and obligations under
sections 2, 5, 6, 7, 9, 12 and 13 of this Agreement shall s urvive the termination of this
Agreement.
7. YOU ACKNOWLEDGE THE LI CENSED
SOFTWARE IS PROVIDED "AS IS" AND NEITHER BENQ NOR ANY OF I TS LICENSORS
MAKE ANY REPRESENTATIONS OR WARRANTIES, EXPRESS OR IMPLIED, INCLUDING BUT NOT LIMITED TO THE
WARRANTIES OF MERCHANTABIL ITY OR
FITNESS FOR A PARTICULAR PURPOSE OR
THAT THE LICENSED SOFTWARE WILL
NOT INFRINGE ANY THIRD PARTY PATENTS, COPYRIGHTS, TRADEMARKS OR
OTHER RIGHTS. THERE IS NO WARRANTY
BY BENQ OR ITS LICENSORS OR BY ANY
OTHER PARTY THAT THE FUNCTIONS
CONTAINED IN THE LICENSED SOFTWARE WILL MEET YOUR REQUIREMENTS
OR THAT THE OPERATION OF THE LI-
CENSED SOFTWARE WILL BE UN INTERRUPTED OR ERROR-FREE AND BENQ AND
ITS LICENSORS HERE BY DISCLAIM ANY
AND ALL LIABILITY ON ACCOUNT THEREOF. NO ORAL OR WRITTEN INFORMATION
OR ADVICE GIVEN BY A BENQ REPRESENTATIVE SHALL CREATE A WARRANTY
OR IN ANY WAY AFFECT THIS DISCLAIMER. YOU ASSUME AL L RESPONSIBILITY TO
ACHIEVE YOUR INTENDED RESULTS AND
FOR THE INSTALLATION, USE, AND RESULTS OBTAINED FROM IT.
8. NO OTHER OBLIGATIONS. This Agree-
ment creates no obligations on the part of
BenQ other than as specifically set forth herein.
9. LIMITATION OF LIABILITY. IN NO
EVENT SHALL BENQ, ITS EMPLOYEES, LICENSORS, AFFILIATES OR AGENTS BE LIABLE FOR ANY DIRECT DAMAGES, LOST
PROFITS, DATA OR BUSINESS, OR COSTS
OF PROCUREMENT OF SUBSTITUTE
GOODS OR SERVICES, PROPERTY DAMAGE, INTERRUPTION OF BUSIN ESS OR FOR
ANY SPECIAL, INDIRECT, INCIDENTAL,
EXEMPLARY, ECONOMIC, PUNITIVE OR
CONSEQUENTIAL DAMAGES, HOWEVER
CAUSED, AND WHETHER ARISING UNDER
CONTRACT, TORT, NEGLIGENCE, OR OTHER THEORY OF LIABILITY, OR ARISING
OUT OF THE USE OF OR INABILITY TO USE
THE LICENSED SOFTWARE, EVEN IF BENQ
IS ADVISED OF THE POSS IBILITY OF SUCH
DAMAGES. THE LIMITATION OF LIABILITY SHALL NOT APPLY IF AND TO THE EXTENT BENQ´s LIABILITY IS MANDATORY
UNDER THE APPLICABLE LAW E.G. ACCORDING TO PRODUCT LIABILITY LAW
OR IN THE EVENT OF INTENTIONAL MISCONDUCT, PERSONAL INJURY OR DEATH.
10. TECHNICAL SUPPORT. BenQ and its Li-
censors have no obligation to furnish You with
technical support unless separately agreed in
writing between You and BenQ or the applicable Licensor.
Page 84

License Agreement 84
BenQ and where applicable its Licensors in the
Licensed Software shall be free to use any feedback received from You resulting from you r
access to and use of the Licensed Software for
any purpose including (without limitation) the
manufacture, marketing and maintenance or
support of products and services.
11. EXPORT CONTROL. The Licensed Software may include technical data and crypto graphic software and is subject to European
Union and U.S. export controls and may be
sub ject to i mport o r expor t cont rols in o ther
countries. You agree to strictly comply with all
applicable import and export laws and regulations. Specifically, You agree, to the extent required by U.S. Export Administration
Regulations, that You shall not disclose or otherwise export or re-export the Licensed Software or any part thereof delivered under this
Agreement to (a) Cuba, Iran, Iraq, Libya,
North Korea, Sudan, Syria or any other country (including a national or resident of such
country) to which the U.S. has restricted or
prohibited the export of goods or services.
12. APPLICABLE LAW AND FORUM. The
laws of Taiwan govern this Agreement. No
choice of law rules of any jurisdiction will apply. The courts in Taipei, Taiwan shall settle
any disputes arising out of or relating to this
Agreement provided you are a merchant.
13. MISCELLANEOUS. This Agreement represents the entire agreement between You and
BenQ relating to the Licensed Software and (i)
supersedes all prior or contemporaneous oral
or written communications, proposals, and
representations with respect to its subject matter; and (ii) prevails over any conflicting or additional terms of any acknowledgement or
similar communication between the parties
during the term of this License. Notwithstanding the foregoing, some products of BenQ may
require You to agree to additional terms
through an on-line "click-wrap" license, and
such terms shall supplement this Agreement.
If any provision of this Agreement is held
invalid, all other provisions shall remain valid
unless such validity would frustrate the purpose of this Agreement, and this Agreement
shall be enforced to the full extent allowable
under applicable law. No modification to this
Agreement is binding, unless in writing and
signed by a duly authorized representative of
each party. This Agreement shall be binding
on and shall inure to the benefit of the heirs,
successors, and assigns of the parties hereto.
The failure of either party to enforce any right
resulting from the breach of any provision of
this Agreement by the other party will not be
deemed a waiver of any right related to a subsequent breach of such provision or any other
right hereunder. Notwithstanding anything to
the contrary in this Agreement, BenQ and/or
its licensors may enforce its rights, including
but not limited to copyright, trademark or
trade names, in accordance with the rules of
law in each country.
Page 85
Menu tree
Contacts
Call records
Internet
>
Home Page
Enter URL
Bookmarks
History
Settings
85Menu tree
Entertainment
Messages
Organiser
Games
GPS
Video Call
>
Media player
Camera
FM radio
>
Create message
Inbox
Drafts
Outbox
Sent
Voicemail
Templates
Msg settings
>
Calendar
Voice memo
Time zones
Synchronisation
Page 86

Menu tree86
Extras
My stuff
Settings
>
STK Toolkit
My menu
Alarm clock
Calculator
Unit converter
Sound recorder
Stopwatch
>
Profiles
Ringtones
Themes
Display
Vibration
Connectivity
Shortcuts
Call setup
Phone
Clock
Security
Network
Accessories
GPS settings
4J.04Y01.001
 Loading...