

Page 1
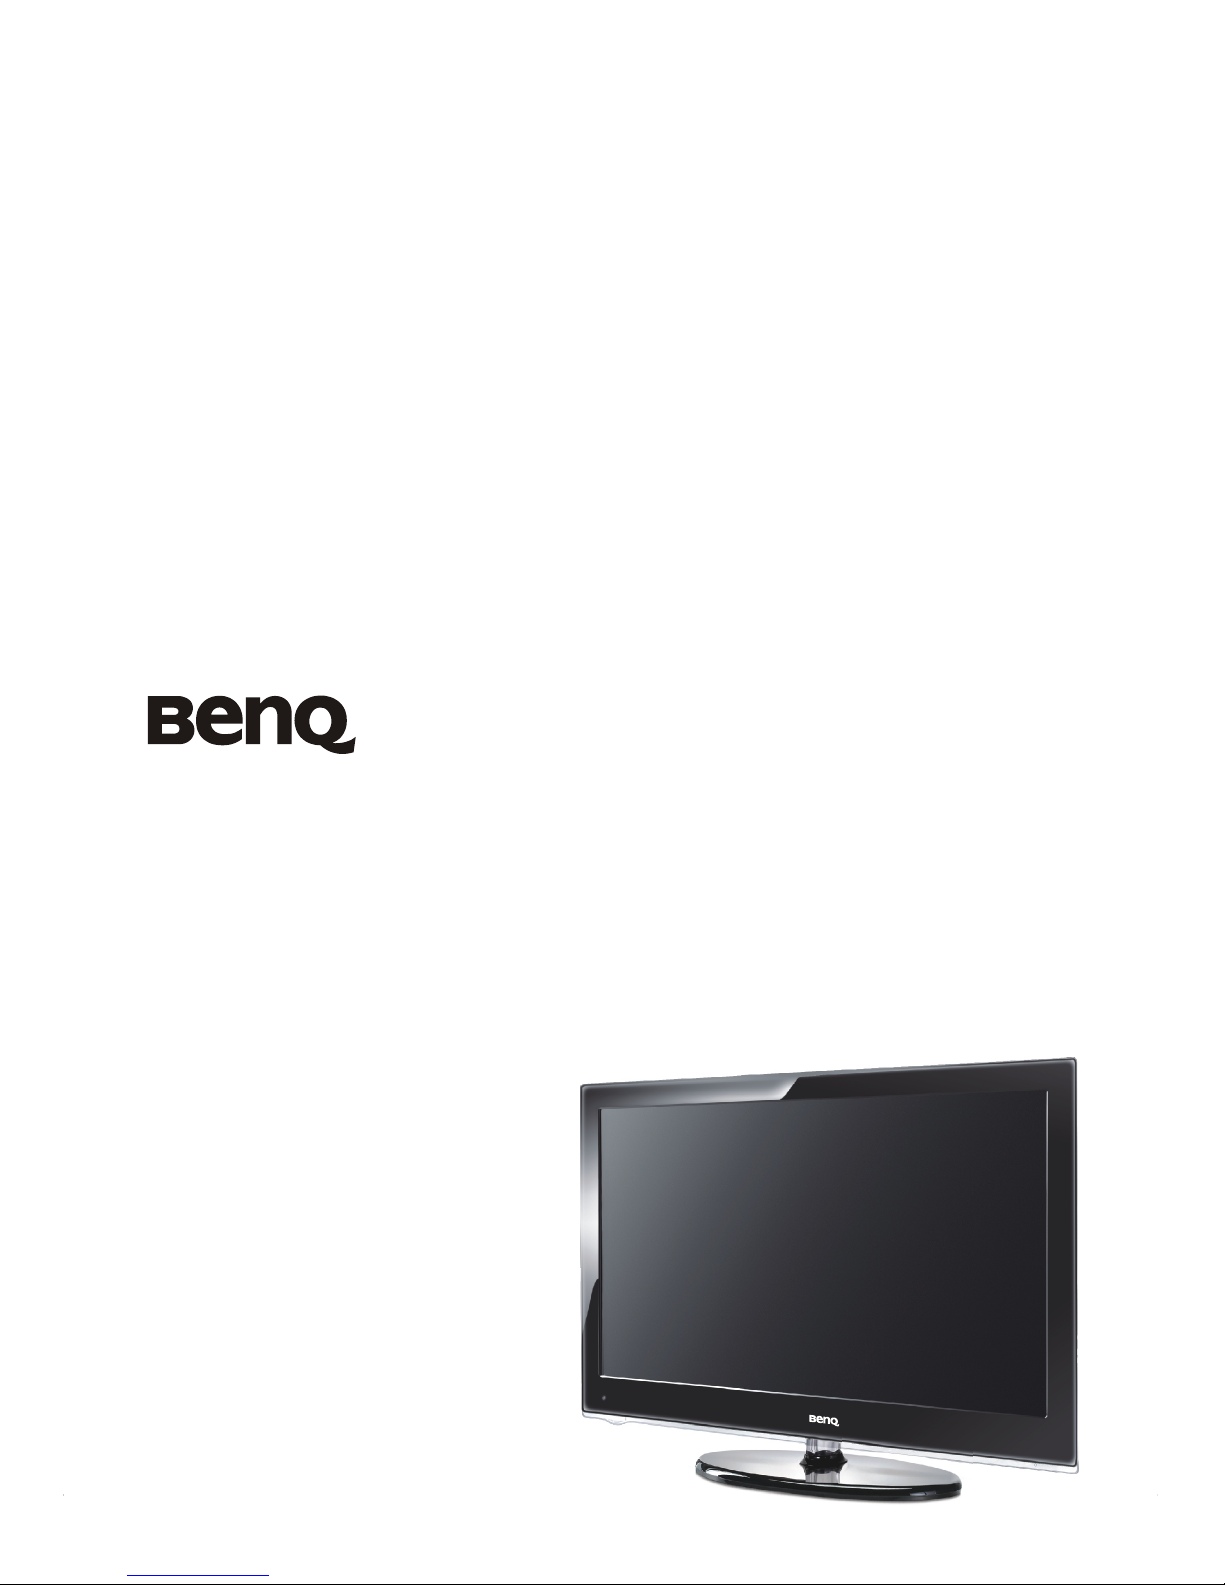
L23 series LED TV
User s Manual
,
Page 2
Disclaimer
Copyright
BenQ eco FACTS
Safety, W arning, and Notice 2
Care and cleaning in formation 3
Safety notice for batteries 4
Safety notice for remote control 4
HDMI Digital Port Connection 6
Earphone Socket
S-VIDEO nput onnection 7
Wall Mounting subassembly
1
1
1
Technical Specifications 5
Interface Specification 5
The Technical Specifications for Final Product 5
Listing 5
Installation & Connection 6
Antenna Connection 6
Power Connection 6
Computer Connection 6
AV1/AV2 Video Signal Connection 7
SPDIF-OUT 7
7
IC
AV-Out Connection 7
YPbPr/YCbCr Input Connection 7
Base installation 7
installation 7
Panel Control Keys 8
Remote Control 8
Basic Operation Instruction 9
Power On 9
Stand by 9
Signal Source Selection 9
Menu Operation Instruction 10
PICTURE 10
SOUND 11
OSD 11
TV 12
Hotel Function (Optional)13
USB Signal Source Operation 13
Simple Troubleshooting 16
Table of Contents
Page 3

1
Disclaimer
Copyright
BenQ ecoFACTS
BenQ Corporation makes no representations or warranties, either expressed or implied, with respect
to the contents of this document. BenQ Corporation reserves the right to revise this publication and
to make changes from time to time in the contents thereof without obligation to notify any person of
suchrevision or changes.
Copyright 2011 BenQ Corporation. All rights reserved. No part of this publication may be reproduced,
transmitted, transcribed, stored in a retrieval system or translated into any language or computer
language, in any form or by any means, electronic, mechanical, magnetic, optical, chemical, manual or
otherwise, without the prior written permission of BenQ Corporation.
This user manual aims to provide the most updated and accurate information to customers, and thus all contents
may be modified from time to time without prior notice. Please visit http://www.benq.com for the latest version of
this manual.
BenQ has been dedicated to the design and development of greener product as part of its aspiration
to realize the ideal of the "Bringing Enjoyment 'N Quality to Life"corporate vision with the ultimate
goal to achieve a low-carbon society. Besides meeting international regulatory requirement and
standards pertaining to environmental management, BenQ has spared no efforts in pushing our
initiatives further to incorporate life cycle design in the aspects of material selection, manufacturing,
packaging, transportation, using and disposal of the products. BenQ ecoFACTS label lists key ecofriendly design highlights of each product, hoping to ensure that consumers make informed green
choices at purchase. Check out BenQ s CSR Website at http://csr.BenQ.com/ for more details on
BenQ s environmental commitments and achievements.
Page 4
2
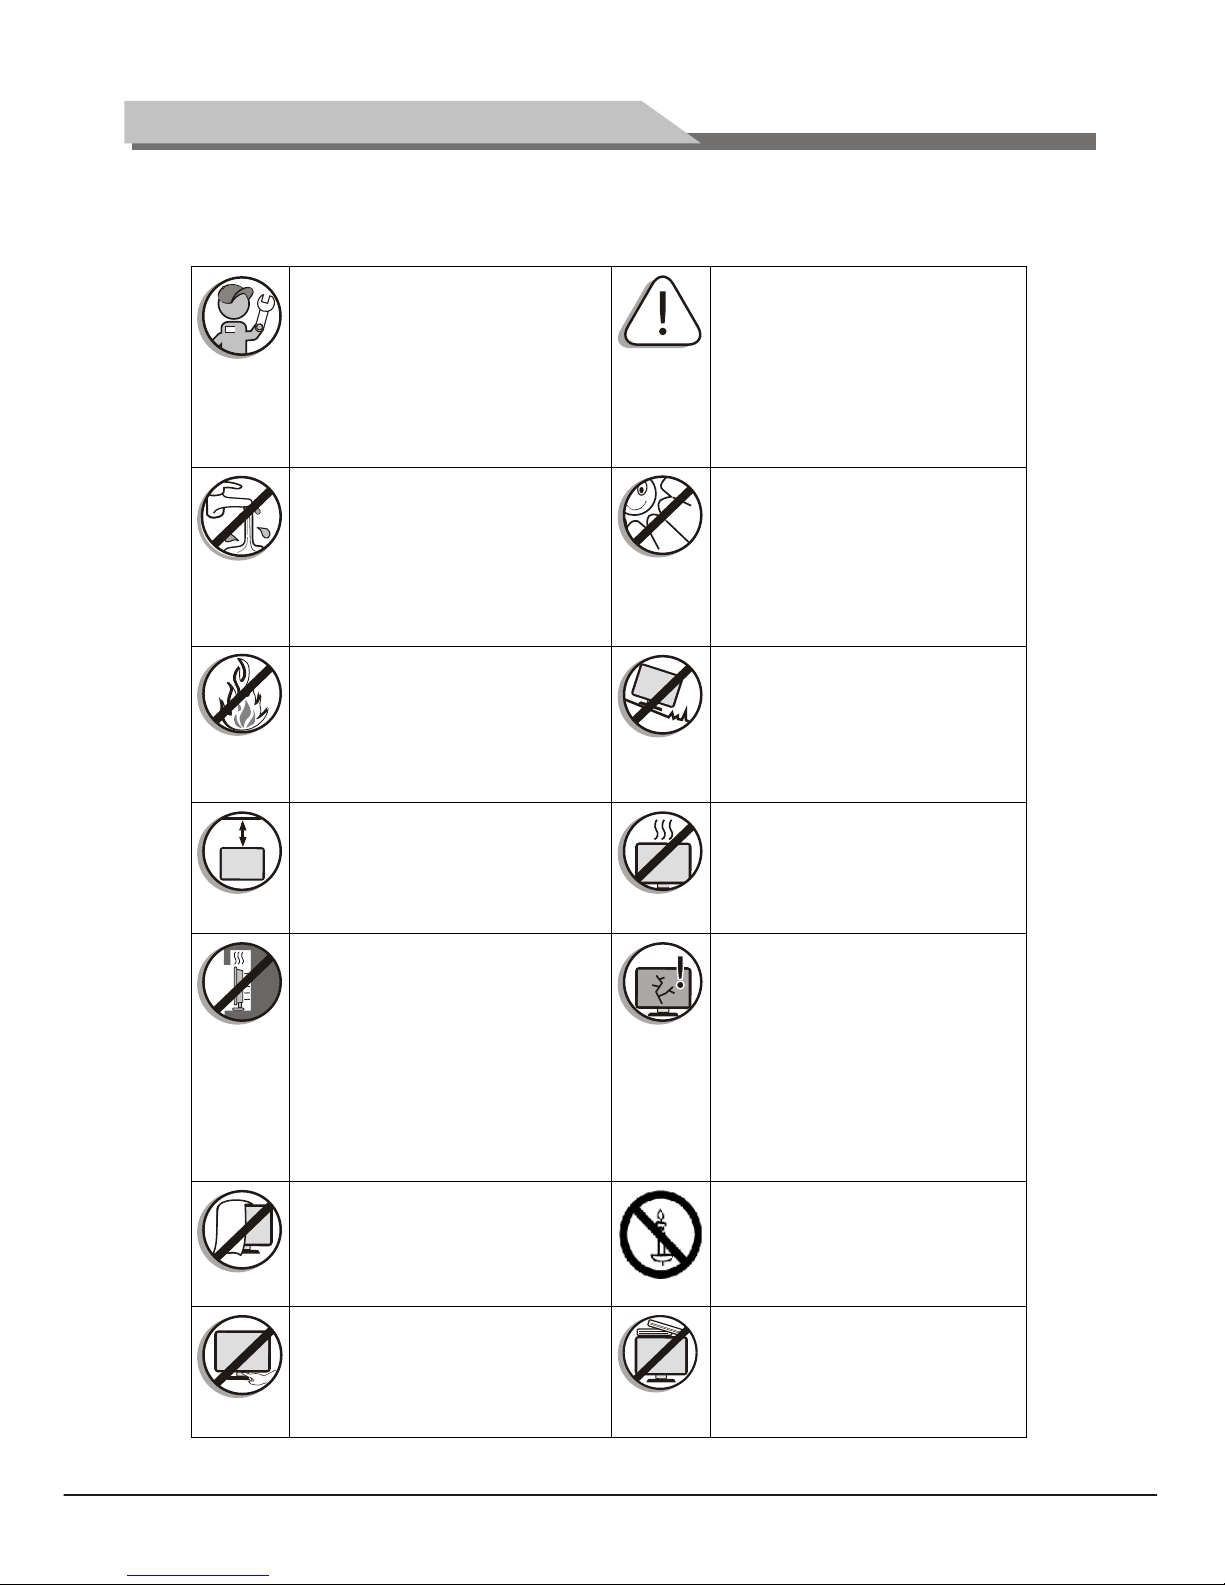
Safety, Warning, and Notice
To prevent potential dangers and prolong the service life of the TV, please observe the following points
when installing, operating, and cleaning the TV.
For wall mounting, have a qualified and
experienced technician mount it safely.
Use only a recommended wall bracket
(optional accessory) for this TV and
ensure that the bracket is securely screw
fixed to the wall structure, and not just
the wall render, lining or cladding.
Do not place the TV near water, like a
spa or pool, or in a position which will
allow the splashing or spraying of water
onto the display.
Do not place the TV near or above sources
of heat, such as radiators, heaters, fuel
stoves and other heat-generating items
(including audio amplifiers).
Observe all warnings and cautions as
labeled on the TV.
Do not place the TV in direct sun or spot
lighting will shine onto the TV.
Do not place the TV on an uneven, sloping
or unstable surface (such as a trolley)
where it may fall and cause damage to
itself or others.
For wall mounting, allow appropriate
space on top for attaching the TV to the
wall bracket.
Do not place the TV in an enclosed place
without allowing for ventilation.
If recessed into a wall opening, you must
leave appropriate free space both top
and bottom for mounting and removing
the TV.
All Liquid Crystal Display (LED) screens
have a very thin protective layer of glass
which is liable to marking or scratching,
and cracking if struck or pressured. The
liquid crystal substrate is also liable to
damage under excessive force or extreme
temperatures. Please handle with care.
Do not cover or block the vents and
openings while the TV is switched on.
To prevent the spread of fire, keep candles
or other open flames away from the TV at
all times.
Do not insert your fingers or any foreign
objects into the hinge and its surrounding
area to avoid possible injury to you or
damage to the TV.
Do not apply excessive force or place
heavy stuff on the TV to avoid possible
damage.
Page 5
Only use the power cord supplied with the TV. Never use a power cord which appears damaged or
frayed, or change the plug type on the power cord.
Use only a properly grounded plug and receptacle. -- An improper ground may cause electric shock or
equipment damage (Class l Equipment only).
Be aware of the total loading when using extension cords or multiple outlet power boards.
This TV has no power switch. When installing the TV, incorporate a readily accessible disconnect device
in the fixed wiring, or connect the power cord to socket-outlet which must be provided near the TV and
easily accessible. If a fault should occur during operation of the unit, operate the disconnect device to
switch the power supply off, or disconnect the power cord.
This TV has been engineered and manufactured with the highest priority on safety, however, IMPROPER
HANDLING OR USE CAN RESULT IN POTENTIAL ELECTRICAL SHOCK OR FIRE HAZARD. Please
handle this TV with care. If damaged, turn off the power and unplug the power cord from the TV.
Transport the TV to your nearest BenQ authorized service center for repair.
There are no user serviceable parts in this TV. Never unscrew or remove any covers. There are
dangerous voltages inside. Turn off the power and unplug the power cord before moving the TV.
*
*
*
*
*
*
*
*
*
*
*
*
*
*
*
*
This TV has been engineered and manufactured with the highest priority on safety, however,
IMPROPER HANDLING OR USE CAN RESULT IN POTENTIAL ELECTRICAL SHOCK OR FIRE
HAZARD. Please handle this TV with care. If damaged, turn off the power and unplug the power cord
from the TV. Transport the TV to your nearest BenQ authorized service center for repair.
There are no user serviceable parts in this TV. Never unscrew or remove any covers. There are
dangerous voltages inside. Turn off the power and unplug the power cord before moving the TV.
!!
Safety, Warning, and Notice
Care and cleaning information
Always turn off and disconnect the TV from the mains power before cleaning.
Do not use cream, liquid, aerosol or spray cleaners. Use only a slightly damp well wrung-out (drip-free)
and lint-free, clean soft cloth and lightly wipe the TV.
If necessary, use a pH-neutral liquid dish-washing detergent diluted with water on a separate clean lintfree cloth to remove oil or grease marks. Wipe over again with a clean dry lint-free cloth to remove any
smear marks.
When cleaning the TV (including the frame around the screen), please use a proper cleaning tool
harmless to the materials used by the TV in order to avoid possible scratches or damages.
Under close examination and in certain circumstances, you may notice that a few non-active pixels
appear on the screen as a fixed point of color. Please note that this does not affect the performance of
your product as it is usually not visible at normal viewing distances.
If the TV is not going to be used for an extended period of time (like when you are going away for
holidays), it should be switched off and unplugged from the wall outlet. You should also consider removing
the batteries from the remote control (as they may leak).
The TV is not suitable for installation on certain transportation vehicles (such as cars, yachts, and so on)
to avoid possible damage to the TV because of vibration.
LED (Liquid Crystal Display) screens, like plasma (PDP) and conventional CRT (Cathode Ray Tube)
screens, are also susceptible to "screen burn-in" or"image retention" which can be found on the screen
as visible fixedlines and shades and cannot be removed. To avoid such permanent damage to the screen,
please take the following preventive measures when using your TV:
3
Page 6
4
Care and cleaning information
Safety notice for batteries
Safety notice for remote control
(1) Avoid displaying still images (like On-Screen Display menus, TV station logos, fixed/inactive text or
icons) for more than two hours.
(2) Change the aspect ratio from time to time. Fill the entire screen with the image and eliminate the
black bars whenever possible. Avoid displaying images in 4:3 aspect ratio over a long period of time,
otherwise there may be visible burn marks on the screen as two vertical lines.
(3) Turn on the ECO Mode function when displaying PC input image.
(4) This TV is designed for home use only. Do not use it as a commercial display in public areas.Please note
that the product warranty does not cover any screen damages that result from the failure to take the
measures above.
Please note that the product warranty does not cover any screen damages that result from the failure to
take the measures above.
Many of the electronic components used by the TV contain high tension coils, and thus inductance occur when circuits pass
through these components. This inductance is a normal physical phenomenon, which can be found in many electronic devices in daily
life such as computers and fluorescent lights. Therefore, there is no concern or worry about the use and safety of this TV.
The use of the wrong type of batteries may cause chemical leaks or explosion. Please note the following:
Always ensure that the batteries are inserted with the positive and negative terminals in the correct
direction as shown in the battery compartment.
Different types of batteries have different characteristics. Do not mix different types.
Do not mix old and new batteries. Mixing old and new batteries will shorten battery life or cause
chemical leaks from the old batteries.
When batteries fail to function, replace them immediately.
Chemicals which leak from batteries may cause skin irritation. If any chemical matter seeps out of the
batteries, wipe it up immediately using a dry cloth, and replace the batteries as soon as possible.
Due to varying storage conditions, the battery life for the batteries included with your TV may be
shortened. Replace them within 3 months or as soon as you can after initial use.
*
*
*
*
*
*
*
*
*
*
*
If the TV comes with a remote control, please note the following:
Do not put the remote control in the direct heat, humidity and avoid fire.
Do not drop the remote control.
Do not expose the remote control to water or moisture. Failure to do so could result in malfunction.
Confirm there is no object between the remote control and the remote control sensor of the TV.
If the remote control will not be used for an extended period, remove the batteries.
Page 7

Technical Specifications
5
Interface Specification:
VGA
HDMI
CVBS Input/Output
S-VIDEO Input
YCbCr/Ypbpr
Audio Input/Output
TV(RF)
Earphone
Interface Specification
DB-15, 75 0.5~0.7Vp-p H/V:TTL Level (Support mode refer to VGA Input Mode )
Video signal: 1080p, 1080i, 720p, 576p, 576i, 480p, 480i
Audio: LPCM
48KHz, 44.1KHz, 32KHz, 24Bit, 20Bit, 16Bit
75 1Vp-p (PAL/NTSC/SECAM)
Y: 75 1Vp-p; C: 75 0.286Vp-p
Y: 75 1Vp-p; Cb/Cr: 75 0.7Vp-p
Signal mode: 1080p, 1080i, 720p, 576p, 576i, 480p, 480i
20K , 0.5Vp-p
75 Imbalance
16~300 100mW+100mW
The Technical Specifications for Final Product
Panel size
Max. Resolution
Best resolution
Pixel pitch
Active area
Color
Unpacking Dimension(LHW)
Packing Dimension(LHW)
Net weight
Gross weight
23"
1920 1080
1920 1080@60Hz
mm
630 465 mm
4Kg
5Kg
0.2655mm 0.2655mm
509.76mm 286.74mm
568 418 36
100
16.7M
Power adapter: Volume:
TV receive system: PAL+NTSC/PAL+SECAM
100-240VAC 60/50Hz 3W+3W
Working Environment: Atmosphere pressure: 86kPa 104kPa Temperature: 5 40 Humidity: 10% 85%
Storage Environment: Atmosphere pressure: 86kPa 104kPa Temperature: -20 55 Humidity: 5% 95%
VGA input mode
Power LED indicator
Off
On
Mode
On
Standby
Power consumption
23"
40W
1W
Note: This specification is subject to change without notices. If there are differences between
manual and realoperation, please do according to real operation.
Please make sure that all of the following items are complete
LED TV (Include base) User manual Remote control
If any of above listed items is missing, please contact your dealer or our service department.
Listing
Page 8

AV machine
CVBS, DVD Player or other
machine with CVBS/S-Video.
G
B
R
W
R
CVBS, DVD Player or other
machine with YPbPr/YCbCr.
W
R
Y
W
R
Y
Installation & Connection
6
Antenna Connection
To power socket AC 100V-240V, 60/50Hz
Audio/Video machine
with HDMI interfaces
USB interface
Earphone Socket
CVBS, DVD Player or other
machine with CVBS/S-Video.
Digital audio output
It is better to use outdoor antenna or CATV cable if you want to watch the colorful and hi-definition
pictures. Note: Please turn off TV power before the outdoor antenna is connected to the TV signal input port.
Outdoor antenna can't be located near the high-voltage wires. Please pull out the plug of outdoor antenna to
avoid thunder shock in thunder weather.
W
R
Y
G Green (Y)
B Blue (Pb/Cb)
W White(AUDIO-L )
R Red (AUDIO-R, Pr/Cr)
Y Yellow (VIDEO)
I
AC 100V-240V, 60/50Hz).
Please connect one end of VGA cord with
the output port of the computer (available for both desktop
or laptop computer), and another end of VGA cord with the
input port of the VGA on its rear cover.
Connect external HDMI high signal source to HDMI digital
input port of this machine through HDMI digital connector
cable; push "SOURCE" button to select HDMI signal source.
nsert the power plug into the socket of the electrical source
(
Notes:
1. When connecting the power cord, be sure to turn off the machine
and other equipment's power.
2. If a long time at leisure, please disconnect it from power supply.
3. This TV must be connected to a three pin socket outlet for safety.
Power Connection
Computer Connection
HDMI Digital Port Connection
Page 9

7
Installation & Connection
Through composite cable, connect AV equipment VIDEO output termination to this machine VIDEO input,
and AV equipment AUDIO output termination to this machine AUDIO input, respectively; Press "SOURCE"
key to select "AV1" or "AV2" signal source.
Digital audio output, connect an external amplifier with optical audio decoding device.
AV1/AV2 Video Signal Connection
SPDIF-OUT
Please adjust the volume
to a suitable size, to avoid sounds excessive to affect the hearing.)
gna
If you need watch image of DV and connect your TV game machine, you can connect audio or
video output end of DV and game machine to the monitor.
Base equipment act as the picture. Equip the base
with the machine according to arrow point, and lock
the bolt tightly.
Installation for VESA Wall Mounting
1. Take off the base
2. Fasten the wall mounting board. ( The height can be confirmed by the user)
3. Fasten the wall mounting stand at the position of VESA on the rear cover with bolts.
4. Spin M4 bolts into the left-right nuts on the wall mounting stand. 3-4 mm of depth from bolts washer
to stand is recommended.
5. Hang the machine onto the slot of the wall mounting board. Then lock the two bolts on the sides.
Note: Installation method is different because of Hanging arm hardware's .
The TV speakers will be shut off when earphone is inserted into this socket.(
Through S-VIDEO/AUDIO cables to connect external AUDIO/VIDEO equipment to the
machine's AUDIO/VIDEO input port, and press "SOURCE" key to select "S-VIDEO" si l source
If the signal source is DVD, Digital wired receiver or equipments with the YPbPr/YCbCr output,
recommends you to connect YPbPr or YCbCr output with the TV YPbPr/YCbCr input. In order to obtains
the better picture quality, at the same time, please connect its audio output with TV audio input as shown
in the following chart. If you choose the YPbPr/YCbCr signal, please set signal source selection under
YPbPr pattern.
subassembly
structure
Must install the wall pendant on firm wall surface, please do not install this machine on ceiling or
vehicles.
Earphone Socket
S-VIDEO Input Connection
AV-OUT Connection
YPbPr/YCbCr Input Connection
Base installation
Wall Mounting subassembly installation
Wall Mounting Stand
Wall Mounting Board
Page 10

8
Position of Control Keys
Remote Control
PLAY
PAUSE
STOP ROTATE
PREV. NEXT REV.
F WD.
INFO 16:9
COLOR
PN
AUDIO
Power
Numerical key
Smart sound
Volume
Info
Time
Color
Color system
Return
Zoom
Source
Channel
Menu
Cursor Key
OK
Smart image
Program list
Mute
Key
POWER
MUTE
Numerical key
F1
Program list
SMART S
SMART P
Cursor key
VOL+/VOLMENU
SOURCE
CH+/CHINFO
Time ( )
Return ( )
16:9
Color
P/N
AUDIO(optional)
OK
PLAY ( )
PAUSE ( )
STOP ( )
ROTATE ( )
PREV. ( )
NEXT ( )
REV. ( )
FW D. ( )
Function
Turn on or standby
Eliminate sound
Number input button
Freeze picture
Look through program list
Intelligent sound mode selection
Intelligent image mode selection
Up or Down cursor button: function select;
Left or right cursor button: analog add or reduce
Sound volume add or reduce button
Press this button to display menu
Press this button to display signal source selection menu
Select channel Number
System information display switch
Timer setting button, press this key can set time of turning down
Press this button to return to last watching channel
Switch aspect ratio
Color temperature mode selection button
Color system mode selection button
Select NICAM mode
Confirm operation
Invalid
Invalid
Remote Control Key Instruction
For USB operation
NICAM(optional)
4
6
7
5
8
3
1
2 3
1. Remote Receiving Sensor.
2. Power Indicator.
3. Power switch.
4. SOURCE: Press this key to enter the menu of signal source and choose signal source.
5. CH+/CH-: Press these two keys to choose channel, and adjust the options you need under OSD
operation.
6. VOL+/VOL-: Press these two keys to add or reduce volume, and adjust the analog value under OSD
operation.
7. MENU: Press this key to enter main menu.
8. Power on/Standby .
Note: There are some apparent differences between modes, please according to practicality.
Page 11

Remote Control
9
Telecontrol battery installation method
Take off the cover of battery box, fix two AAA batteries with 1.5 volt, and conform with the polarity of
remote control battery box.
Note: Appearance of the remote control may be different from this picture, please according to practicality.
Precautions for use of remote control
1. When using remote control you should point it to the remote-control inductive window. The goods
between remote control and inductive window may hinder normal operation.
2. Do not cause the remote control to receive fierce vibration. In addition, do not set or place the remote
control under direct sunlight, for the thermal energy will cause the distortion of remote control.
3. When remote-control inductive window of main machine is under direct sunlight or intense illumination,
the remote control may malfunction, by now, please change the angle of illumination or this machine, or
approach the inductive window to operate the remote control.
4. When the battery voltage is insufficiency it influences the remote control distance, you should replace
with new battery; when not to use the remote control for long or the battery is exhausted, please take
out the battery, in order to avoid bringing the battery leakage to corrode the remote control and thus
cause it out of commission.
5. Do not use different batteries. The mix use of new and old batteries is not allowed, you should use
battery pair.
6. Do not throw battery into fire, charge or disassembly, especially do not charge, assemble and
disassemble, heat or burn to the used battery. Please observe the related environmental protection
stipulation on wasted battery.
Basic Operation Instruction
Plug power cord into the electrical socket and press '' '' key on the control panel, then press '' ''
key on the remote control to turn on the TV.
Press ''Power''key on the remote control. TV will be in standby.
Special Attention:
1.TV will automatically turn to standby if there is no signal input for 5 minutes when TV turns on.
2.T rn to standby when the
Press ''SOURCE'' key either on the remote control or on the control panel, then
menu of signal source will be displayed on the screen. Then press ''Up/Down''
key on remote control or "CH+/CH-" key on the control panel to choose the
signal source. Press ''OK'' key on the remote control or ''MENU" key on the
control panel and TV will switch the current signal source to the signal source
you choose.
set
V set will automatically tu preset time of turning off reaches.
Signal Source Selection
Standby
Power On
Input Source
TV
AV1
AV2
S-VIDEO
YPbPr
PC
HDMI
USB
Page 12

Press ''MENU'' key on the remote control or on the control panel.
The TV will display the main menu.
1. Press ''Left/Right'' key on the remote control or ''VOL+/VOL-''
key on the control panel to select the adjustment
sort menu, which includes 4 sorts:
2. Press ''Down''key on the remote control or ''CH-'' on the
control panel to enter the adjustment sort menu.
3. Press ''Up/Down'' key on the remote control or ''CH+/CH-''
on the control panel to select what is needed to adjust in
sort menu.
4. Press ''Left/Right'' key on the remote control or ''VOL+/VOL-''on the control panel to adjust the value
or setting.
5. Press ''Menu'' key to exit the main menu when the TV displays the Main Menu; Press ''Menu'' key to
return to previous menu when the TV displays the submenu; Press ''SOURCE'' key to display the signal
source menu or exit signal source menu.
6. During the operation, the selections which can not be adjusted at current mode will be hidden
automatically and the color of the selections will be changed into gray.
7. Menu Operation Instruction in this manual is explained according to TV mode. The operations in other
modes are similar to the one in TV mode. Users can take it as reference.
Select to enter the PICTURE submenu. Press "Up/Down" key on the remote control or "CH+/CH-"
key on the control panel to choose what you need. Press the "Left/Right" key on the remote control or
the "VOL+/VOL-" key on the control panel to adjust analog value or state (see below table).
Special Attention
1. The Hue function is available only for NTSC system.
PICTURE, SOUND,
OSD, TV.
2. The value adjusted by user, such as Contrast, Brightness, Hue, Saturation, and Sharpness will be saved
automatically by the machine as User mode.
Remote Control Shortcut Keys
SMART P: Press SMART P key on the remote control. You can switch the function among the "Standard",
"Soft", "User", "Bright" four modes .
16:9: Press 16:9 key on the remote control, you can switch the mode among the "Full, "4:3","Subtitle",
"Film"four modes.
Adjust Select Menu:Exit
Full
Standard
48
48
50
55
50
Picture Mode
Contrast
Brightness
Saturation
Sharpness
Aspect Ratio
Color Temp.
Noise Reduction
Hue
Soft
Off
Basic Operation Instruction
Picture Mode
Contrast
Brightness
Saturation
Hue
Sharpness
Select picture mode
Adjust the contrast of whole
picture
Adjust brightness and blackness
of whole picture
Adjust the saturation of whole
picture
Adjust the hue of whole picture
Adjust the sharpness of whole
picture
"Standard", "Soft", "User," "Bright" four modes.
Increasing analog value increases Contrast;
Decreasing analog value decreases Contrast(0-100).
Increasing analog value increases brightness;
Decreasing analog value decreases brightness(0-100).
Increasing analog value increases color;
Decreasing analog value decreases color (0-100).
Increasing analog value increases green;
Decreasing analog value increases purple(0-100).
Increasing analog value increases definition;
Decreasing analog value decreases definition (0-100).
Option
Function Description
PICTURE
Menu Operation Instruction
10
Page 13

Aspect Ratio
Color Temp
Noise Reduction
Select picture scale
Select color temperature mode
of the picture
Select model of 3D NR
"Full, "4:3", "Subtitle","Film" four modes
There are three Color Temperature modes, "Standard",
"Warm", "Cool ".
"Middle", "High", "Off", "Low".
Option
Function
Description
Basic Operation Instruction
Select to enter the SOUND submenu. Press "Up/Down" key on the remote controlor the key "CH+/
CH-" on the control panel to choose what you need. Press the"Left/
Right" key on the remote control or the "VOL+/VOL-" key on the
control panel to adjust analog value or state (see belowtable).
Special Attention
1. Normally, 0 value of adjustment is recommended;
2. The treble or bass analog value which is adjusted by the
users will be saved as the User mode by the machine
Remote Control Shortcut Keys
SMART S: Press SMART S key on the remote control. You
can switch the function among the
MUTE: Open or close sound. VOL+/VOL-: Add or reduce volume.
"Standard", "Music",
"Movie", "User" four modes.
Adjust Select Menu:Exit
50
50
0
Standard
Sound Mode
Treble
Bass
Balance
Auto Volume
Off
Sound Mode
Treble
Bass
Balance
Auto Volume
Adjust audio effect mode
Adjust treble value
Adjust bass value
Adjust balance of left or right sound
Select Auto Volume
"Standard", "Music", Movie", "User" four modes.
Increasing analog value increases treble;
Decreasing analog value decreases treble (0-100).
Increasing analog value increases bass;
Decreasing analog value decreases bass (0-100).
Increasing analog value decreasing left volume;
Decreasing analog value decreases right volume(L50-R50).
"On/Off", two states.
Option
Function Description
Select to enter the OSD submenu. Press "Up/Down"key on
the remote control or "CH+/CH-"key on the control panel to
choose what you need. Press the "Left/Right" key on the remote
control or the"VOL+/VOL-" key on the control panel to adjust
analog value or state (see below table).
Adjust Select Menu:Exit
English
60 Second
0
On
Off
OSD Language
OSD Duration
OSD Transparency
Blue Screen
Sleep Time
Recall
OSD Language
OSD Duration
OSD Transparency
Blue Screen
Sleep Time
Recall
S
Adjust duration of OSD menu
Adjust halftone of OSD menu
Set sleep time of the machine
Resume to setting of factory
elect language for OSD display
Open or close blue screen
There are many languages to select
Increasing analog value, extend duration time of OSD menu;
(15, 30, 45, 60). Unit: second
Increasing analog value increases halftone;
Decreasing analog value decreases halftone(0-100).
"On/Off", two states.
"Off, 15M, 30M, 45M, 60M,90M, 120M, 240M", unit: minute.
Reset all values to setting of factory.
Option
Function Description
SOUND
OSD
11
Page 14

TVSelect to enter the submenu. Press "Up/Down" key on the remote control or "CH+/CH-" key on
the control panel to choose what you need. Press the "Left/Right"
key on the remote control or the "VOL+/VOL-" key on the
control panel to adjust analog value or state (see below table).
Auto Search
TV
Auto Search
Manual Search
TV
Manual
Search
Select to enter the submenu of . Then press ''Up/Down'' key on the
remote control or ''CH+/CH-'' on the control panel to select '' ''.
The machine perform search after pressing ''Right '' key on the remote control
or ''VOL+'' on the control panel. (In the process of searching the channel
automatically, press the key of ''MENU'' on the remote control, a of
). All of the TV programs will be saved automatically.
Select to enter the submenu of . Then press ''Up/Down'' key on
the remote control or ''CH+/CH-''on the control panel to select ''
''. Then press the key of ''Right'' on the remote control to enter submenu of Press
''Left/Right'' key on the remote control to select channel No.. Press ''Up/Down'' key on the remote control
to select '' '', press ''Left/Right'' key on the remote control again, the machine begin searching to
ward low frequency or high frequency. (In the process of searching the channel automatically, press the
key of '' MENU'' on the remote control to stop searching).
dialogue
"Do you want to exit searching?" display on the screen. Press "Left" cursor
key to confirm and exit. Press "Right" cursor key to cancel operation and
continue auto search
Manual Search.
SEARCH
Fine Tune
Select to enter the submenu of TV. Then press ''Up/Down'' key on
theremote control or ''CH+/CH-'' on the control panel to select ''Fine
Tune''. Press ''Left/Right'' key on the remote control to adjust from low
frequency or high frequency.
Channel Edit
Select to enter the submenu of TV. Then press ''Up/Down'' key on
the remote control or ''CH+/CH-'' on the control panel to select
''Channel Edit''. Press ''Right'' key on the remote control to enter
submenu of ''Channel Edit''
Adjust Select Menu:Exit
PAL
DK
On
45.30 M Hz
Color System
Sound System
Skip
Auto Search
Manual Search
Fine Tune
Channel Edit
0 %... 50.25 MHz V HF-L
Found : 0 Progtranme
Menu:Exit
Auto Search
Menu:Exit
Manual Search
CH: 1
Search
Frequency 45.25 MH z
Basic Operation Instruction
Option
Function Description
Color System
Sound System
Skip
Auto Search
Manual Search
Fine Tune
Channel Edit
Select color system
Select sound system
Select skip or not
Select auto search
Select manul search
Select channel edit
Select fine tune
Manual Search
Fine Tune
Channel Edit
""
"I, DK, M, BG" four modes.
"Off/On" two states.
""
""
""
""
PAL, NTSC, AUTO three modes.
Please refer to Auto Search
Please refer to
Please refer to
Please refer to
1 CH
2 CH
3 CH
4 CH
5 CH
6 CH
7 CH
8 CH
9 CH
1:Delete
Channel Edit
2:Move 3:Skip
OK:Enter Menu:Exit
TV
12
Page 15

HOTEL MODE
CH LOCK
MAX VOL
AUTO SET
PICTURE MODE
POWER VOL
POWER SOURCE
CH NUMBER
KEY LOCK
LOCK CH NUM
LOCK
CLONE
ON
OFF
100
ON
STANDARD
30
TV
1
OFF
1
OFF
Basic Operation Instruction
Please insert USB memory card into USB interface of TV, press "source" key on the remote control or
control panel to select USB signal source, press "OK" key to enter.
Note:
USB function support file format with video file/sound file/graphic file/text file. For some nonstandard USB
storage devices, may appear condition of unable recognize, please replace the standard USB storage device.
Streaming media system to play a file for each format has certain limitations, if more than the system limit,
then play will be wrong
USB Signal Source Operation
13
Hotel Function(Optional)
Delete: Press ''Up/Down'' key on the remote control to select channel which you wish delete. Press "1"
key on the remote control, press "MENU" key to return .
Move: After select channel, press "2" key on the remote control, then press ''Up/Down'' key on the remote
control to select position where you wish place, then press "MENU" key on the remote control to return.
Skip: Press ''Up/Down'' key on the remote control to select channel, press ''3'' key on the remote control
to open or close "Skip".
Select Channels with "CH+/CH-" Key
Press ''Channel'' key on the remote control or CH+/ CH-" key on the control panel to select the channels.
Select channels with the Return key you can go to the last channel when pressing the Return key. For
example, if the last channel is 10 and the current channel is 20, you will go to channel 10 when pressing the
Return key. You can switch the two favourite channels as you like.
Select Channels with Numeric Keys
1. Operations to select channels with 1 digit :
Press the number keys on the remote control to select TV channel directly.
2. Operations to select channels with 2 digits :
Press the number keys with 2 digits on the remote control to select TV channels.
3. Operations to select channels with 3 digits :
Press the number keys with 3 digits on the remote control to select
TV channels.
""Press MENU key on the remote control to display the main TV
menu, and then press "4578" on the remote control to display the
hotel function menu. Press "Up/Down" key to enter into the menu
and select the item which you need to adjust, and then press "Left/
Right" key to adjust the value or state.
Note: With the mode of AV, S-VIDEO, YPbPr, PC, HDMI, all functions and adjustments are similar
with TV. User can check it at convenience. HDMI connector can realize DVI connector function
with external HDMI/DVI commutator.
Page 16

USB 2.0
PHOTO MUSIC MOVIE TEXT
C:\PICTURE
1 / 11
Return Up Folder 10.jpg 11.jpg
13.jpg12.jpg
16.jpg 17.jpg
14.jpg 15.jpg
18.jpg 19.jpg
Press "Left/Right" key on the remote control to select
the document sort menu, which includes 4 sort:
PHOTO, MUSIC, MOVIE, TEXT.
Remote Control Shortcut Keys
The last two row keys on the remote control are used
for USB operation.
PHOTO
Select to enter the PHOTO submenu. Select your
mobile U disk or hard disk, and press "OK" key on the
remote control to read your photo documents.
Select to return previous menu. Press cursor key on
the remote control to select photo and press "OK" key
(After the photo was selected, the file lower right
corner shows a red hook. you can choose photos to
join playlist.). Press "PLAY" key on the remote control
to play. when you choose nothing, t
Basic Function
"INFO" key on the remote control, a toolbar will display under the screen
(Press "Down" key on the remote control to hide toolbar).
he machine will join
all the photos in the file in playlist automatically.
When photos are playing, press
Basic Operation Instruction
"Left/Right" key on the remote control to select this function,
"OK" key to play or pause .
Prev.: "Left/Right" key on the remote control to select this function, "OK"
key to read previous photo.
Next: "Left/Right" key on the remote control to select this function, "OK"
key to read next photo.
Stop: "Left/Right" key on the remote control to select this function, "OK"
key to stop playing and return to previous menu.
Repeat: "Left/Right" key on the remote control to select this function,
"OK" key to select repeat One or repeat all or not repeat.
Music: "Left/Right" key on the remote control to select this function, "OK"
key to play background music.(Musics and photos need to place in the identical folder,
or you may select some music in music file first.)
Playlist: "Left/Right" key on the remote control to select this function, "OK"
key to show playlist.
Info. : "Left/Right" key on the remote control to select this function, "OK"
key to show the information of photo. Including resolution, size and so on.
Play/Pause: Press press
Press press
Press press
Press press
Press press
Press press
Press press
Press press
14
Do not pull up USB storage devices when system playing, this may result in system or equipment problems
The system supports USB1.1 and USB2.0 connector, the standard transport protocol such as U disk and
removable hard disk storage devices.
Page 17

MUSIC
The operations are similar to the "PHOTO".Please refer to "PHOTO" options.
Basic Function
Other functions are similar to the "PHOTO", Please refer to "PHOTO" options.
The operations are similar to the "PHOTO".Please refer to "PHOTO" options.
Basic Function
MOVIE
FB: "Left/Right" key on the remote control to select this function, "OK" key
to fast back. Press "PLAY"key to play normally.
FF: "Left/Right" key on the remote control to select this function, "OK" key
to fast forward. Press "PLAY"key to play normally.
Select time: "Left/Right" key on the remote control to select this function,
"OK" key to select the time to play .
Press press
Press press
Press press
Set A: "Left/Right" key on the remote control to select this function, "OK"
key to set A and B, the film will circulating play in the time of A to B.
SF: "Left/Right" key on the remote control to select this function, "OK" key
to slow down play speed. Press "PLAY"key to play normally.
Step: "Left/Right" key on the remote control to select this function, "OK" key
to play one step by step. Press "PLAY"key to play normally.
Zoom in: "Left/Right" key on the remote control to select this function, "OK"
key to enlarge picture. (If the document is larger than 1920 1080, this function is
unsupported.)
Zoom out: "Left/Right" key on the remote control to select this function,
"OK" key to reduce picture.(This function does not support more than 1920 1080
HDvideo.)
"Left/Right" key on the remote control to select this function,
"OK" key to select proportion among Auto/4:3/Full.(This function does not support
more than 1920 1080 HD video.)
Press press
Press press
Press press
Press press
Press press
Press pressProportion:
TEXT
The most operations and functions are the similar to "PHOTO". Please refer to "PHOTO" options.
Basic Operation Instruction
Clockwise: "Left/Right" key on the remote control to select this function,
"OK" key to clockwise rotation photo.
Counter-clockwise: "Left/Right" key on the remote control to select this function,
"OK" key to counter-clockwise rotation photo.
Press press
Press
press
15
Page 18

Symptom
Factor
Solution
Snowflake speckle and
sound noise.
1.Antenna cable connector is loose,
cable is damaged.
2.Channel setting is incorrect.
3.Antenna cable type is not matching.
4.Direction or position of antenna
cable is incorrect.
5.Signal is weak.
1.Check the antenna cable connector plug whether or
not loose, cable whether or not perfect.
2.Refer to channel setting method, resetting again.
3.Check antenna cable type(VHF/UHF)
4.Adjust direction or position of antenna cable .
5.Attempt to use signal amplifier.
TV image is better, but has
noise.
TV system setting is incorrect. Enter to "TV" menu, reset sound system again .
No image. No sound.
Power plug is loose, power
cord don't connect well.
1.Check power cord whether or not connect well.
2.Check if " " on the panel is on.
TV image have stripe.
Signal is exposed to disturb,
such as car, neon light, electric
blower etc.
TV image have shadow.
1.TV signal is reflected by valley
or building.
2.Toward direction of antenna
cable is incorrect.
1.Use high directional antenna cable. Use Fine
Tune of "TV".
2.Adjust toward direction of antenna cable.
No color.
1.Color saturation is too low.
2.Color system is incorrect .
1.Enter "PICTURE" to add up color saturation.
2.Enter "TV" to change color system.
TV no sound.
1.Volume setting is too low.
2.Sound is muted.
3.Sound system is incorrect.
1.Adjust volume to proper value.
2.Press "MUTE" button on remote control to
eliminate mute.
3.Enter "TV" to change sound system.
CAUTION: Don't let your machine display the same picture for a long time, please set up a screen protection
procedure. If a high contrast picture remains for along time, this picture will bring a 'leave shadow' in screen. Usually
the 'leave shadow' will disappear gradually when you turn off the machine power. However, this trouble can't be
repaired, Which isn't in range of warranty.
Electrical release at turning off.
It is normal.
Noise Signals at turning off.
Remote control distance is
short, lose control.
1.Remove objects, avoiding cover the receive
window of remote control.
2.Change battery.
Computer display faintly.
1.Adjustment is incorrect.
2.Display mode is incorrect.
1.Use auto-adjustment function.
2.Use commend mode.
Computer display image
excursion, not full screen,
over screen.
1.Adjustment is incorrect.
2.Display mode is incorrect.
1.Use auto-adjustment function.
2.Enter "GEOMETRY" to adjust horizontal or
vertical position.
3.Use recommended mode.
Computer no display,and
prompt no signal input,red
indicator LED twinkling.
Signal cable is loose or fall off.
Check signal cable whether or not loose, fall off,
reconnect well again.
Don't use electric blower around machine, adjust
antenna cable direction to reduce disturb.
Can not operate this
machine.
Exterior influence, for example
lightning, static electricity and so
on, which are possibly to disturb
the normal operation of this
machine.
Press " " button to turn off electrical source,
then press " " button to turn on the TV again
after 1-2 minutes.
1.Receive window of remote
continue was covered by
objects.
2.The battery energy of remote
control is to low.
Simple Troubleshooting
16
Page 19

Part No: 4J.V2L01.001
C
 Loading...