

08 25390 00 © 9. 2003
d
STOVES LIMITED
STONEY LANE, PRESCOT, MERSEYSIDE, L35 2XW
Format Freestanding
Dual Fuel Double Oven & Grill
INSTALLATION AND USER INSTRUCTIONS
Model: D854
You must read these instructions prior to using the
appliance and retain them for future reference.
User’s Section . . . . . . . . . . . . . . . . . . . . . . . . . . . . . . . . . . . . . 2 - 26
Introduction . . . . . . . . . . . . . . . . . . . . . . . . . . . . . . . . . . . . . . . . . . . . . . . . . 2
Be Safe - Not Sorry. . . . . . . . . . . . . . . . . . . . . . . . . . . . . . . . . . . . . . . . . . . . 4
Using the Hob . . . . . . . . . . . . . . . . . . . . . . . . . . . . . . . . . . . . . . . . . . . . . . . 5
Using the Grill . . . . . . . . . . . . . . . . . . . . . . . . . . . . . . . . . . . . . . . . . . . . . . . 7
Using the Top Oven . . . . . . . . . . . . . . . . . . . . . . . . . . . . . . . . . . . . . . . . . . . 9
Top oven baking guide . . . . . . . . . . . . . . . . . . . . . . . . . . . . . . . . . . . . . . . . 10
Main oven conversion guide . . . . . . . . . . . . . . . . . . . . . . . . . . . . . . . . . . . . 11
Using the Main Oven . . . . . . . . . . . . . . . . . . . . . . . . . . . . . . . . . . . . . . . . . 12
Main oven baking guide . . . . . . . . . . . . . . . . . . . . . . . . . . . . . . . . . . . . . . . 15
Cooling and defrosting in the main oven. . . . . . . . . . . . . . . . . . . . . . . . . . . . 16
Slow cooking . . . . . . . . . . . . . . . . . . . . . . . . . . . . . . . . . . . . . . . . . . . . . . . 16
Using the ovens . . . . . . . . . . . . . . . . . . . . . . . . . . . . . . . . . . . . . . . . . . . . . 17
Roasting guide . . . . . . . . . . . . . . . . . . . . . . . . . . . . . . . . . . . . . . . . . . . . . . 18
Traditional fruit cakes . . . . . . . . . . . . . . . . . . . . . . . . . . . . . . . . . . . . . . . . . 19
Roasting turkey. . . . . . . . . . . . . . . . . . . . . . . . . . . . . . . . . . . . . . . . . . . . . . 19
Automatic cooking . . . . . . . . . . . . . . . . . . . . . . . . . . . . . . . . . . . . . . . . . . . 20
Programmer / Clock . . . . . . . . . . . . . . . . . . . . . . . . . . . . . . . . . . . . . . . . . . 22
Cleaning . . . . . . . . . . . . . . . . . . . . . . . . . . . . . . . . . . . . . . . . . . . . . . . . . . 26
Installation Instructions . . . . . . . . . . . . . . . . . . . . . . . . . . . . . 28 - 32
Technical Data . . . . . . . . . . . . . . . . . . . . . . . . . . . . . . . . . . . . . . . 33
Belling Customer Care. . . . . . . . . . . . . . . . . . . . . . . . . . . . . . . . . . 34
1
Please keep this handbook for future reference, or for anyone else
who may use the appliance.
CONTENTS
In case of difficulty within the UK and Northern Ireland, please call
BELLING Customer Care Centre Helpline on
0151 432 7999
When you dial this number you will hear a recorded message and be given a
number of options. This indicates that your call has been accepted and is being
held in a queue. Calls are answered in strict rotation as our Customer Care
Representatives become available.
Opening Hours for Customer Care Centre
Monday to Friday 8am - 8pm
Saturday 8.30am - 6pm
Sunday 10am - 4pm
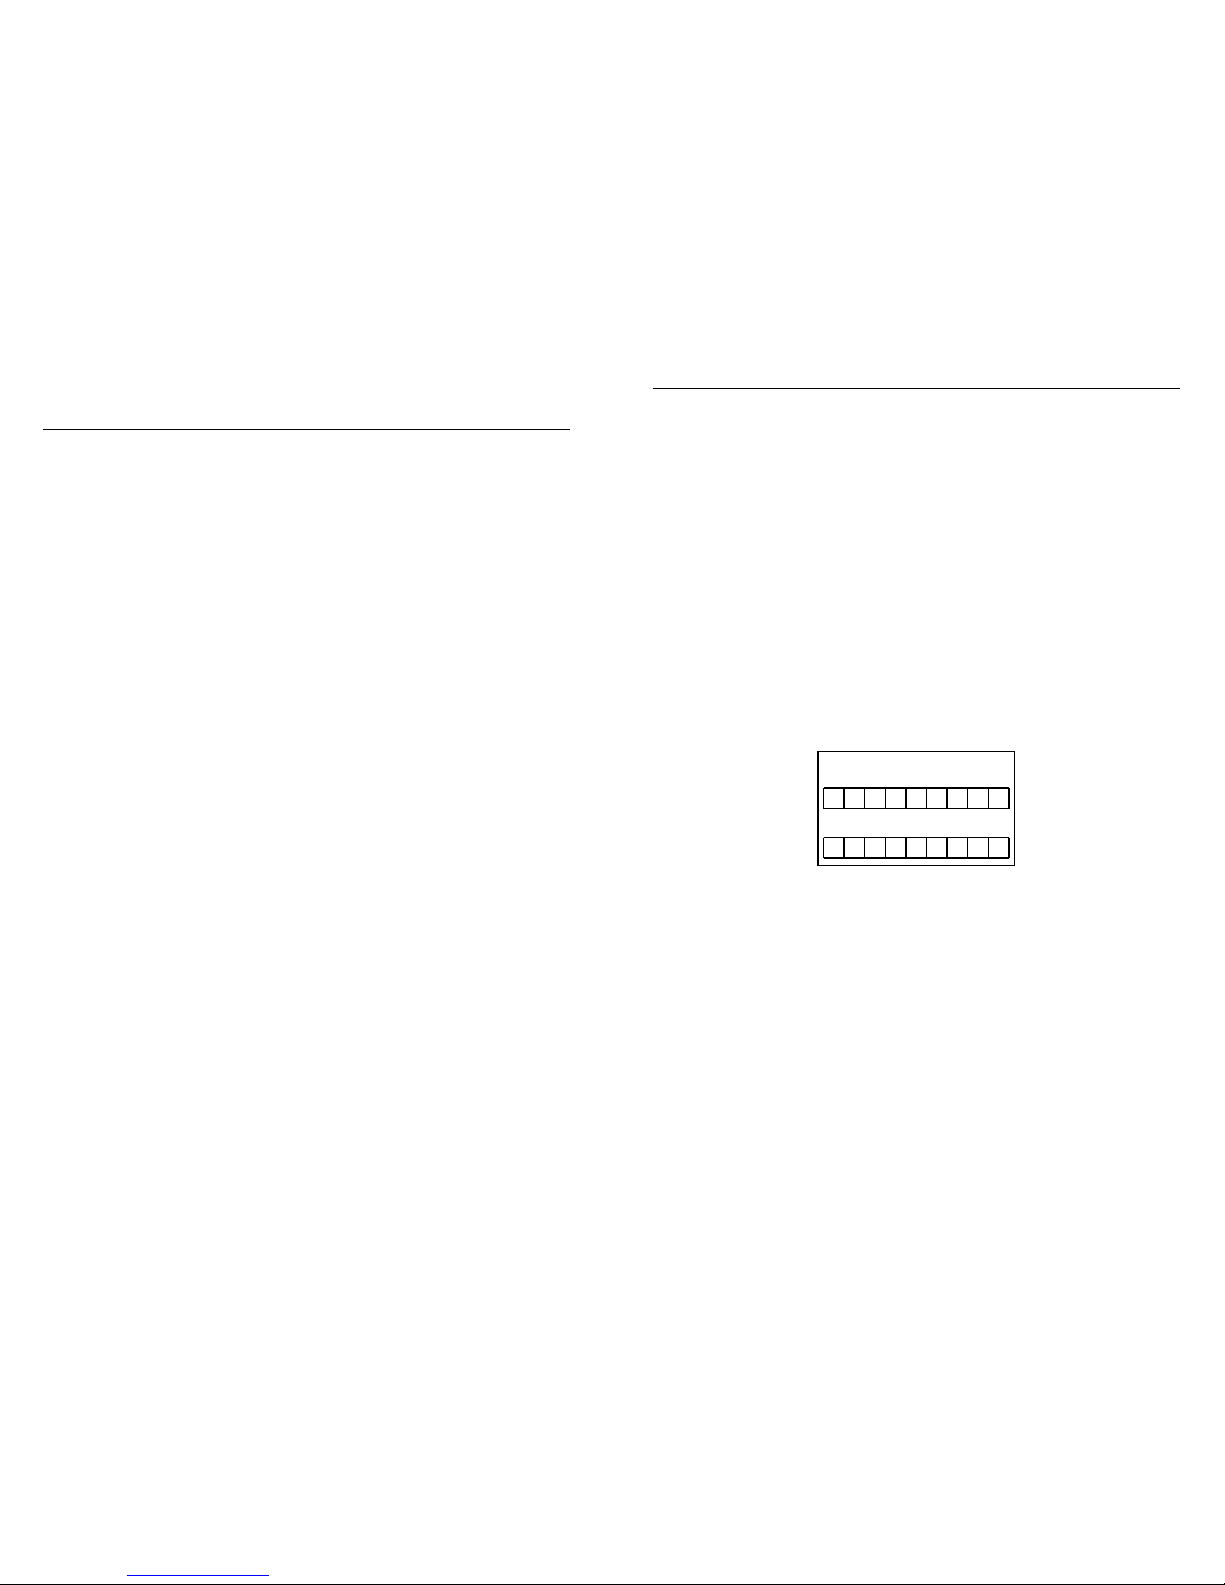
Enter appliance numbers here for future reference:
Please ensure you have the above details (Model No and Serial No) to hand
when calling Belling Customer Care. They are essential to booking your call.
Outside the UK and Northern Ireland, refer to your local supplier.
Model No
Serial No
34
BELLING CUSTOMER CARE

Data badge
On the bottom of the front frame behind
the oven door.
Type of gas
This cooker must only be used with Natural
Gas only, as specified on the appliance
data badge.
Gas category
Natural Gas - I
2H
Pressure setting
G20 Natural Gas @ 20 mbar
Pressure test point
Use the oven injector
Aeration - Fixed
Electrical supply
220 - 240V ~ 50Hz
Spark generator: Mains operated 6 outlet
controlled by a single rocker switch at the
LHS of the facia to individual electrodes. 2
outlets shorted to earth.
Warning: This cooker must be earthed.
Hob - Burners have burner heads and
caps which are removable for cleaning.
Concealed electrodes to each burner.
Countries of destination
GB - Great Britain, IE - Ireland
33
Fuel Burner / Element Nominal Injector
Rate Qn Size
Natural Hob - LHF 1.0kW 77
Gas Hob - LHR & RHR 2.0kW 104
Hob - RHF 3.0kW 130
Total heat input 8.0kW -
Electric Oven 2300W -
Single grill 1655W Dual grill 2575W
Stir fan 30W Cooling fan 10W Oven light 25W -
Maximum load 4940W
TECHNICAL DATA
Thank you for choosing a British
built appliance by Belling.
We hope that the following information
will help you to familiarise yourself
with the features of the appliance, and
to use it successfully and safely.
Our policy is one of constant development
& improvement. Strict accuracy of
illustrations and specifications is not
guaranteed. Modification to design
and materials may be necessary
subsequent to publication.
This appliance must be installed in
accordance with the regulations in
force, and only in a well ventilated
space. Read the instructions before
installing or using this appliance.
Your new appliance is designed to be
installed flush to base units.
Your 1st Year Guarantee
To fulfil the conditions of your guarantee,
this appliance must be correctly
installed and operated, in accordance
with these instructions, and only be
used for normal domestic purposes.
Please note that the guarantee, and
Service availability, only apply to the
UK and Republic of Ireland.
Before using the appliance for
the first time, remove any protective
polythene film and wash the oven
shelves in hot soapy water, to remove
their protective coating of oil. Even so,
when you first turn on the oven or grill
you may notice a smell and some smoke.
Gas & Electrical connection
Please refer to installation instructions
for the Gas & Electrical Safety Regulations
and the Ventilation Requirements.
In your own interest, and that of safety,
it is the law that all gas appliances be
installed by competent persons, who will
ensure that the installation is in accordance
with “The Gas Safety (Installation & Use)
Regulations 1994”, & the “The Gas Safety
(Installation & Use) (Amendment)
Regulations 1996”. Failure to comply
with these Regulations is a criminal offence.
Corgi registered installers undertake to
work to satisfactory standards.
Disconnection of gas and electric
appliances should always be carried
out by competent persons.
Warning: This appliance must be
earthed.
To replace an oven light bulb
Caution: Switch off the electricity
supply to the cooker at the socket, to
avoid the risk of electric shock.
Wait until the oven is cool, then
remove the shelves.
The oven light is at the rear of the oven
cavity.
Remove the loose oven back - unscrew
the 4 securing screws (one at each corner).
Please note that the oven light bulb is not
covered by the guarantee. Replacement
bulbs can be ordered from your local
supplier, or bought from a hardware store.
2
INTRODUCTION

-Unscrew the lens cover (turn anticlockwise). Unscrew the bulb and replace.
Replace lens cover.
Replace oven back.
Environmental Protection
Stoves Limited is committed to protecting
the environment and operates an
Environmental Management System
which complies with BS EN ISO
14001:1996.
Disposal of packaging
• All our packaging materials are
recyclable and environmentally
friendly.
• Please help us to protect our
environment by disposing of all
packaging in an environmentally
friendly manner.
• Please contact your local authority
for the nearest recycling centre.
Caution: Packaging materials can
pose a risk of suffocation - keep away
from children.
Ventilation
The use of a gas cooking appliance
results in the production of heat and
moisture in the room in which it is
installed. Ensure that the kitchen is well
ventilated: keep natural ventilation
holes open or install a mechanical
ventilation device (mechanical extractor
hood). Prolonged intensive use of the
appliance may call for additional
ventilation, for example, opening of a
window, or more effective ventilation,
for example increasing the level of
mechanical ventilation where present.
Stability bracket
If the cooker is to be fitted with a
flexible inlet connection, a stability
bracket should also be fitted to engage
in the back of the cooker. Make sure
this is re-engaged whenever you move
the cooker for cleaning.
If the ignition fails:
• Check there is a spark when the
ignition button is depressed. If
there is no spark, check that the
electricity supply is switched on at
the cooker control box.
• Check that the gas supply is
switched on.
Moving the cooker
Do not attempt to move the cooker by
pulling on the doors or handles. Open
the door and grasp the frame of the
cooker, taking care that the door does
not shut on your fingers.
Take care to avoid damage to soft or
uneven floor coverings when moving
the appliance. Some cushioned vinyl
floor coverings may not be designed
to withstand sliding appliances without
marking or damage.
3
INTRODUCTION
32
Connect to the gas supply
The inlet to the cooker is
1
⁄2” BSP
internal situated at the rear right corner.
Fit the bayonet connection. This should
be located so as to ensure that the
flexible connector hose does not kink.
Use a 900-1125mm length of flexible
connector.
Ensure that all pipe work is of the correct
rating for both size and temperature.
Flexible connections should comply
with BS 669. Parts of the appliance
likely to come into contact with a
flexible connector have a temperature
rise of less than 70˚C.
After installation, make sure all
connections are gas sound.
Commissioning
Burner aeration
All burners have fixed aeration and no
adjustment is possible.
Pressure setting
G20 Natural Gas @ 20 mbar
Pressure test point
Use the oven injector
Hob - Turn the control knob to the
FULL
ON
position, wait a second before
pressing the ignition switch or holding
a lighted match or taper to the burner.
Before leaving the installation
1. Place all the loose parts of the
cooker into position.
2. Show the customer how to operate
the cooker and give them this
handbook. Thank you.
INSTALLATION INSTRUCTIONS
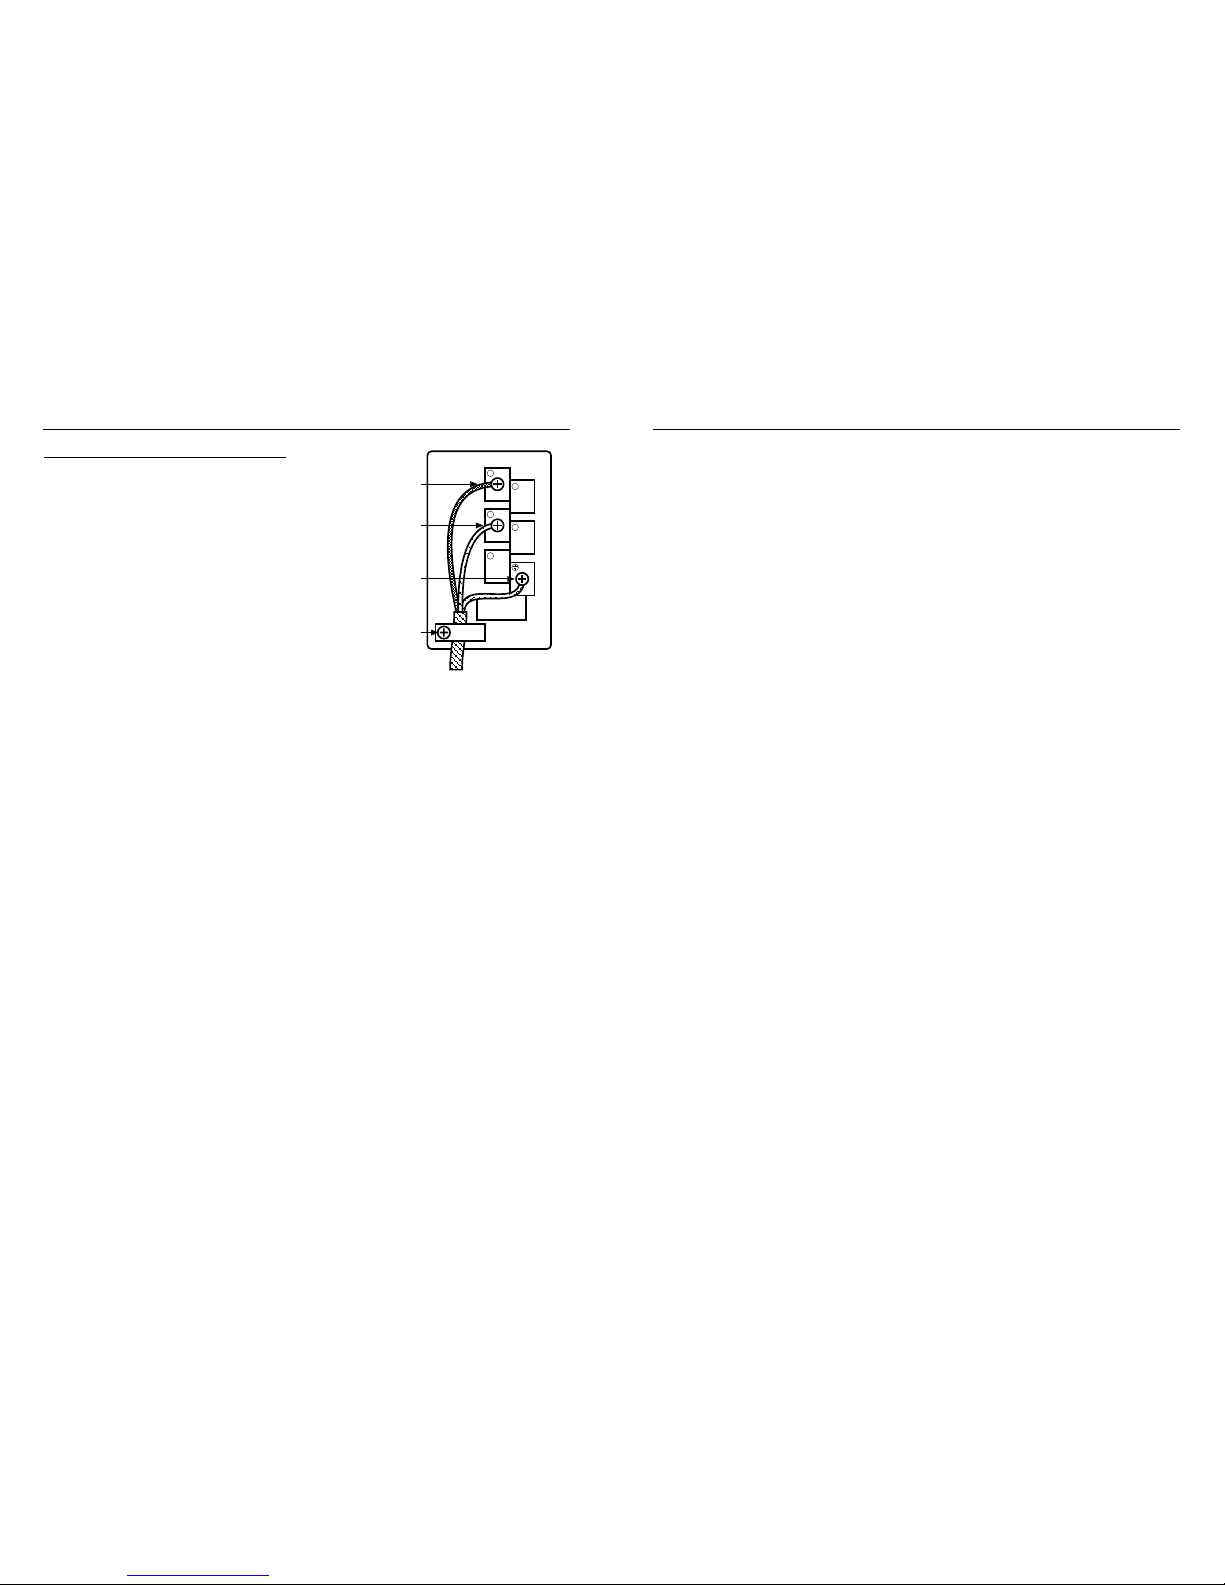
Connect to the electricity supply
Warning: This appliance must be
earthed.
The appliance must be installed by a
competent electrician using a double
pole control unit of 30 ampere minimum
capacity with 3mm minimum contact
separation at all poles.
We recommend that the appliance is
connected by a qualified electrician
who is a member of the N.I.C.E.I.C.
and who will comply with the I.E.E.
and local regulation.
1. Access to the mains terminal is
gained by opening the terminal
block cover at the rear of the
appliance (use a small flat-bladed
screwdriver).
2. Connection should be made with
6mm
2
twin and earth cable.
3. First strip the wires, then push the
cable through the cable clamp in
the terminal block cover.
4. Connect the cable to the terminal
block and tighten the cable clamp
screw (see diagram).
5. Close the terminal box, ensuring
that the cover is engaged on the
locking tabs.
31
INSTALLATION INSTRUCTIONS
1
2
3
4
5
Cable
clamp
Earth
(Green / Yellow
or sleeving)
Live
(Red or Brown)
Neutral
(Black or Blue)
When you are cooking, keep
children away from the vicinity
of the appliance.
This product is designed as a domestic
cooking appliance for the preparation
and cooking of domestic food
products, and should not be used for
any other purpose.
• Remove all packaging, protective
films and oils from the appliance
before using for the first time.
• Make sure you read and
understand the instructions before
using the appliance.
• Keep electrical leads short so they
do not drape over the appliance
or the edge of the worktop.
• Keep all flammable materials (such
as curtains, furnishings & clothing)
away from the appliance.
• Parts of the appliance may be hot
during or immediately after use.
Care should be taken to avoid
touching heating elements inside
the oven. Allow sufficient time for
the appliance to cool after
switching off.
• Never use the appliance for
heating a room.
• Do not drape tea towels over the
flue vents or doors, as this creates
a fire hazard.
• When opening the appliance
door, take care to avoid skin
contact with any steam which may
escape from the cooking.
• Do not use aluminium foil to cover
the grill pan, or put items wrapped
in foil under the grill as this creates
a fire hazard. The high reflectivity
can also damage the element.
• Do not use the oven with the door
inner glass panel removed (glass
oven doors only).
• Use oven gloves when removing
hot food / dishes from the oven or
grill. The oven / grill and utensils
will be very hot when in use.
• Do not use foil on oven shelves, or
allow it to block the oven flue, as
this creates a fire hazard, and
prevents heat circulation.
• When cooking heavy items - eg;
turkeys - do not pull the oven shelf
out with the item still on the shelf.
• Switch off the electricity supply
before replacing the oven light bulb,
to avoid the risk of electric shock.
Warning: This appliance must be
earthed.
When you have finished
cooking check that all controls
are in the off position.
4
BE SAFE - NOT SORRY
Ignition
Push in and turn the selected control
knob anticlockwise to the ‘full on’ position
and press the ignition switch (if fitted),
or hold a lighted match or taper to the
burner, until the burner lights. Turn the
control knob to the required setting.
Adjust the burner flame so that it does
not extend over the pan base.
To turn off, push in the control knob
and turn clockwise until the dot on the
control knob is below the dot on the
facia panel.
To simmer
The simmer position is marked by the
small flame symbol.
Once lit turn the selected control knob
anticlockwise
past the large flame
symbol (FULL ON) to the small flame symbol.
You may hear a slight popping noise
when the hob burners are operating
and this is quite normal, but if anything
about the cooker appears unusual,
such as change in flame appearance,
or the operation of controls - seek
expert advice.
Pans
For optimum safety and performance, we
recommend the use of flat bottomed pans
with a base diameter of minimum 100mm
(4”) and maximum 250mm (10”).
Do not use traditional style double
pans (excluding steamer pans), rim
based pans, old misshapen pans or
any pan which is unstable when
placed on a flat surface.
Position pans over the centre of the
burners, resting on the pan supports.
If positioned off centre, smaller pans
may be unstable.
When cooking with fat or oil, never
leave unattended.
Turn pan handles to a safe position,
so they are out of reach of children,
not overhanging the appliance, and
cannot be caught accidentally.
Commercial simmering aids should
not be used as they create excessive
temperatures that can damage the
surface and may cause a hazard.
Pan supports
Always make sure the pan supports
are replaced correctly, and located in
the hob spillage well.
5
USING THE HOB
30
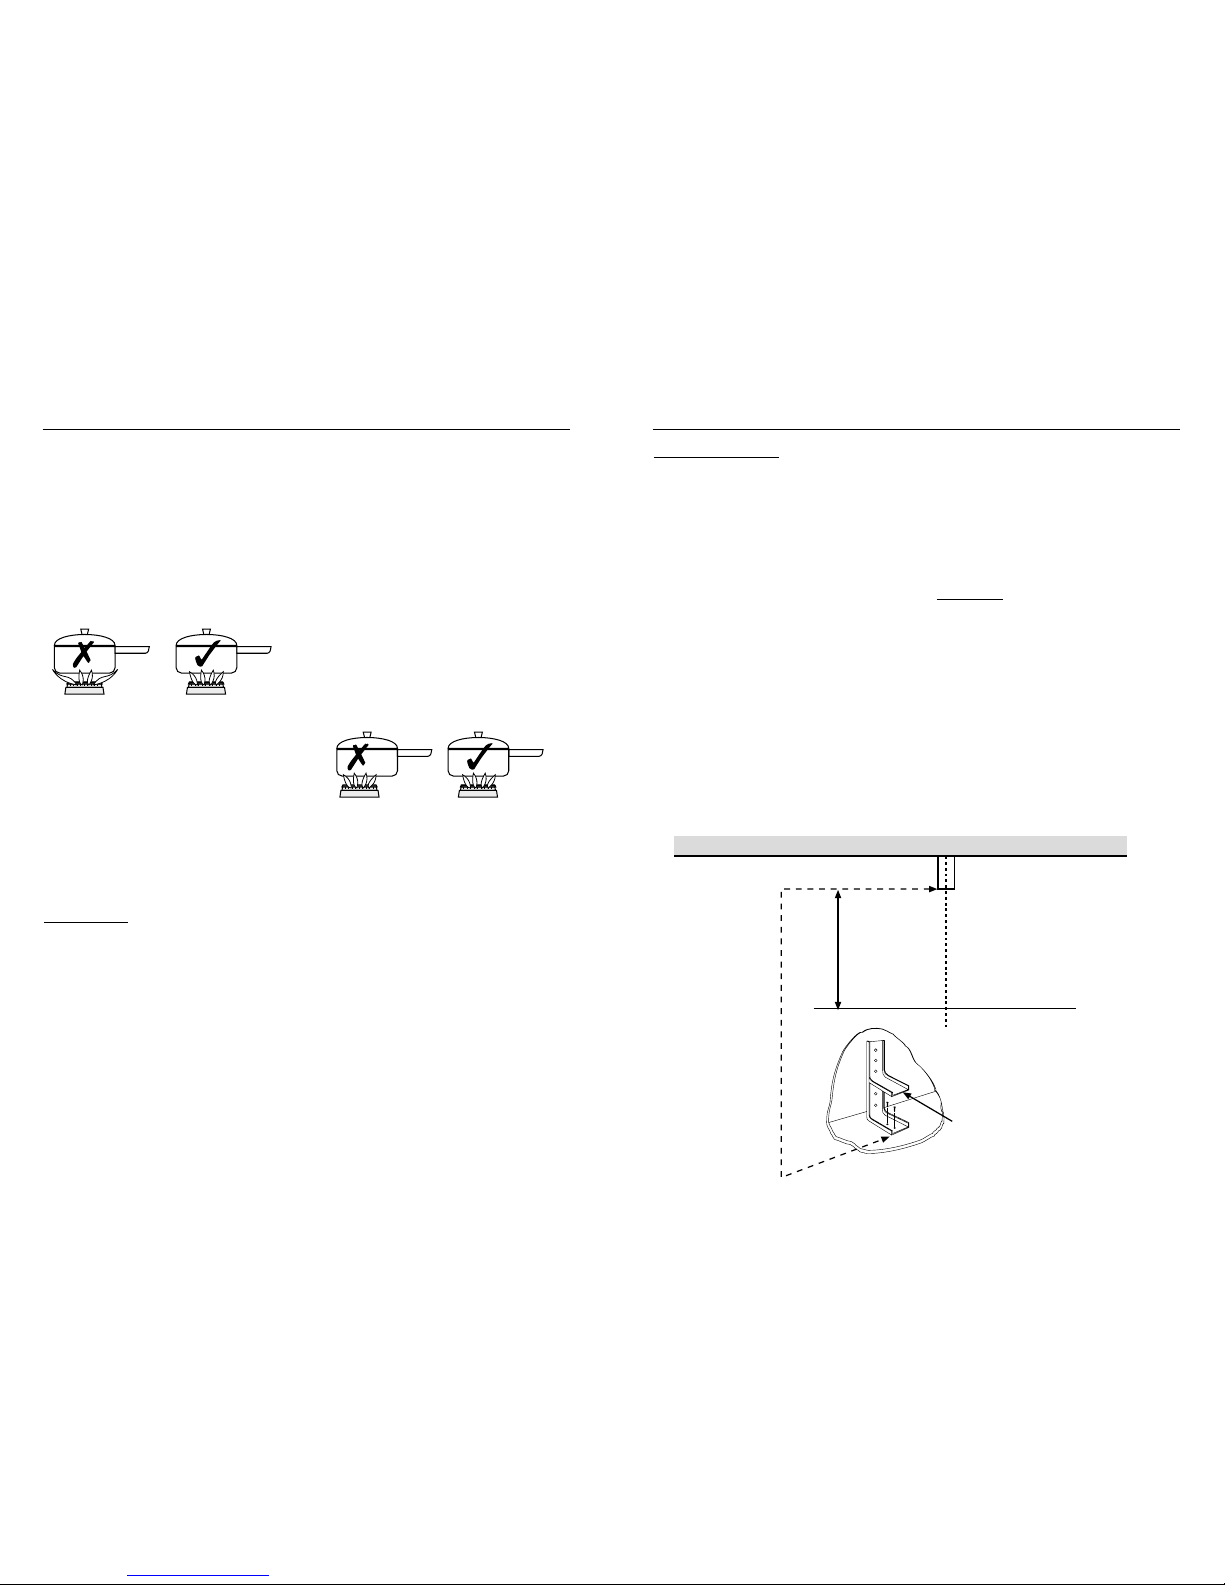
Stability bracket
If the cooker is fitted with a flexible
connection, a stability bracket should
be fitted to engage in the back of the
cooker. A stability bracket can be
bought from your local supplier.
A stability bracket can be fitted as
follows:
1. Place the cooker in position and
draw a
PENCIL LINE
level with the
front edge.
2. Mark the centre of the cooker to
give the
CENTRE LINE for the bracket.
3. Remove the cooker and mark off
450mm from the
PENCIL LINE to
locate the front edge of the lower
bracket.
4. Fix the bracket to the floor.
Measure from
FLOOR LEVEL to
ENGAGEMENT EDGE
in the back of
the cooker and add 3mm.
5. Assemble the underside of the top
part of the bracket to this height.
Levelling
Place a spirit level on a baking sheet
onto an oven shelf.
The cooker is fitted with levelling feet
at the front and rear.
Stability bracket
1 Pencil line
on floor
2 Centre
line
3
450
mm
Front edge for
lower bracket
4
5 Underside of top bracket
slots into engagement
edge in back of cooker.
Rear wall
INSTALLATION INSTRUCTIONS
 Loading...