

Page 1

COLOUR TELEVISIONS
42WP300PS
Operating Instructions
Page 2

List of contents
This User’s Manual provides you assistance during the installation and use of the plasma screen. Detailed
descriptions and drawings as well as the user-friendly on-screen illustrations in the user’s manual makes
installation and use easier even for the new users. The contents of this User’s Manual may be altered
without prior notification due to technical improvements. Always make sure that you use the latest version
of this user’s manual.
Important Considerations to Follow: .....................4-5
Safety Warnings...........................................................6
Product Description: ...................................................7
Special Features:.........................................................8
Getting started...........................................................................9
Connecting the mains lead......................................................10
Speaker and stand installation............................................11-12
Opening the plasma screen, batteries, operation modes........13
Control Unit..............................................................................14
Remote Control..........................................................15
Initial power on and settings performance...............................16
Setting up the television ..........................................................17
Automatic search.....................................................................17
Manual search....................................................................18-19
Program arrangement .............................................................20
TV settings: ................................................................21
Sound Menu ............................................................................21
Sound features ........................................................................21
Picture menu ...........................................................................22
Features menu ...................................................................23-24
Teletext features:..................................................25-26
External equipment connections:.......................27-32
Fault analysis and recovery: ...............................33-34
Technical specifications table:.................................35
Transmitter information.............................................36
Guarantee....................................................................37
Service.........................................................................38
-3-
Page 3

Important Considerations to
Follow:
• General references
Please read the general considerations on safety
and user’s manual in detail before connecting the
plasma screen. Only by this way you can use all the
functions safely and securely.
Keep the user’s manual as close to the device as
possible to search for information. Follow the
instructions on the device and in the user’s manual.
Never let the children use display electrical devices
unattended.
• Use
The plasma TV you have purchased has the highest
quality standards possible in this business line. This
plasma TV contains a display comprising of pixels.
A pixel comprises of three elements (red, green and
blue). Despite the fact that the highest quality check
practices have been used during the manufacture of
screens, some pixels or pixel elements may have
small defects. These faults may occur as continuously
lighted pixels, unlighted pixels or unbalanced pixels
(flashing).
Therefore, these faults are not covered by guarantee.
This is applicable so long as the total of all the faulty
pixels or pixel elements do not exceed the 0.01% of
the total number. The brightness and contrast of
plasma screen decreases in time. Plasma screens
are phosphorus based and in some operating
conditions “Burning” effect may occur. This is actually
the natural deterioration of phosphorus material. This
is a common occurrence in plasma technology.
The operating conditions mentioned above are:
- displaying static images for long durations
- displaying the same background continuously
- using a format other than full screen (e.g. 4:3) for
long durations.
When burning occurs, it is usually not correctable.
Please follow the below listed recommendations to
avoid or decrease burning effect:
- For the first 100 hours of use, please use the
animated pictures or constantly moving still pictures
in full screen mode (slide show).
- Please use your plasma TV in full screen mode
(16:9)
- In case the plasma screen is used as a PC monitor,
please use animated pictures.
Always turn the screen off when not in use.
- Reduce contrast and brightness as far as possible.
- If possible, display the images with maximum
color profundity and scale.
Certain situations may cause a buzzing sound in
the electronics of the screen. This usually results
from the fact that the grounded cables of the
main electric supply are different. A method to
solve this problem is inserting a filter between the
aerial cable and input. These filters are available
at all specialist commercial stores.
• Environmental Conditions
Never use the plasma screen in the environmental
conditions different from the technical data.
Different conditions endangers the device and
may cause fire or fault.
Protect the plasma screen from humidity. This
refers to high moisture, closeness to water, water
drops and water splashes as well as rain. Do not
put any container full of water (e.g. a vase) on the
device.
Protect the device from heat. Keep away from
flames, heating devices, ovens or continuous
direct sunlight.
Protect the screen against heat accumulation. Do
not cover the ventilation holes. In horizontal
position, keep min.10 cm above and below
ventilation holes to furniture and ceiling and 4 cm
from the sides and the back. Do not cover the
TV with cloth. The screen has been designed to
be mounted to a wall.
• Mains connection
This product is Class I and must be connected to
a mains socket with a protective earth. The mains
input and the mains switch are located on the rear
input panel, see page 14. for safe disconnection
of the TV from the manis voltage, the mains switch
is to be turned of and the mains plug is to be
removed from the mains socket. Never use a
damaged mains cable.
-4-
Page 4

• Signal Inputs
Always switch off the plasma screen and signal
supply before establishing any connections
between two devices.
• Disorders
In case there is any damage in the mains lead or
the device, remove the power lead from the socket
immediately. Under no circumstances do you
dismantle and/or repair the device by yourself.
Instead, contact our Service Support Line or
another professional workshop.
• Batteries
When swallowed, the batteries pose fatal danger.
Therefore, you should keep the batteries away
from the reach of little children. If a battery is
swallowed, immediately seek medical assistance.
Immediately remove the used up batteries from
the remote control since they may leak and
consequently cause damage.
The batteries supplied with the device should not
be recharged or utilized in any other way, be
damaged, thrown into fire or short circuited.
DISCONNECT THE TV COMPLETELY, SHUT OFF
THE NETWORK OUTLET AND REMOVE THE
MAINS LEAD.
Used up batteries should not be disposed of with the
normal household waste. Batteries should be
disposed of in waste collection points designed for
this purpose.
• Cleaning and Maintenance
Switch off the device before cleaning and remove
the mains lead from the socket. Wait for a few
minutes for the capacitors in the device to
discharge. Use a soft damp cloth for cleaning.
You should avoid chemical solutions and cleaning
agents, since they will damage the surfaces.
• The plasma screen creates internal high voltage
for gas discharge. Power off during installation,
maintenance and repair and disconnect the power
cable from the socket. Wait for a few minutes for
the capacitors in the device to discharge.
• In case foreign substances such as water, fluids,
metal fragments, etc. enters into the device,
immediately disconnect the mains lead. Never
attempt to touch anything in the device with any
object. There is the danger of electric shock or
accident.
• If an odd smell is emitted or abnormal noises are
heard from the device, immediately disconnect
the mains lead. If no image is displayed in the
screen after switching on or during use, do the
same. In such a case, never attempt to continue
operating the screen.
• In cases of long periods where the TV is not used,
or during thunderstorms, disconnect the mains
lead from the socket and remove the aerial
connection.
• Never connect or disconnect the mains lead with
wet hands. Never switch on the mains switch
with wet hands.
• Only use the supplied mains lead. Protect it against
any damages and do not make any modifications
on it. Never use a damaged mains lead.
• The plasma screen has a glass surface. In case
the device is exposed to overload (e.g. shake,
vibration, twist or heat shock), the glass surface
may get broken. Do not expose the glass surface
to any pressure or shake. In case the glass gets
broken, disconnect the mains lead and do not
touch the glass with naked hands.
• When switched to stand-by mode, the plasma
screen remains connected to the mains.
To cut the connection completely, you should
switch the mains switch off, or pull out the mains
lead from the socket.
• For ergonomic reasons, it is recommended that
you avoid using red or blue fonts or symbols on
dark backgrounds. Such an image may cause
illegibility due to low contrast and tires the eyes
early. Therefore, use high contrast images like
black font on white background.
• Pay attention to loudspeaker output technical data
during the connection of external speakers. Ensure
that the loudspeakers are of the correct
specification to prevent damage to them or to the
internal amplifier.
• Now, the unnecessary packs and packaging
sources are recyclable and must always be
recycled.
• Place the cardboard vertically, bottom side on a
firm ground. You may recognize the upper part
from the direction of the arrows on the longitudinal
side.
• Plasma screen may only be mounted on the
vertical (upright) walls. Make sure that the screen
is switched off and the mains lead and signal
cable have been disconencted from their sockets.
The background should be firm and of a structure
to carry the load. If you have any doubt, contact
your authorized sales or service department.
-5-
Page 5
Safety Warnings!
Your and other people’s safety is important. Therefore, please read the Safety Instructions, before
using this TV.
Safety Instructions
Please read these safety instructions before using your TV for the first time.
!
• Position your TV to prevent the sunlight from directly reflecting on the screen. Excessive light
results in loss of colour.
• Place the electric supply or other cables so that they are not stepped on or get caught by the
objects placed near them.
• Do not place objects full of liquids like vase or pot near the TV.
• Do not expose the TV to liquids drops or splashes.
• Do not place open fire sources on the TV set like lighted candles.
• Make sure that naked flame sources like candles are not placed on the device.
• Keep away your TV from heat radiating sources such as stove, radiator, furnace, etc.
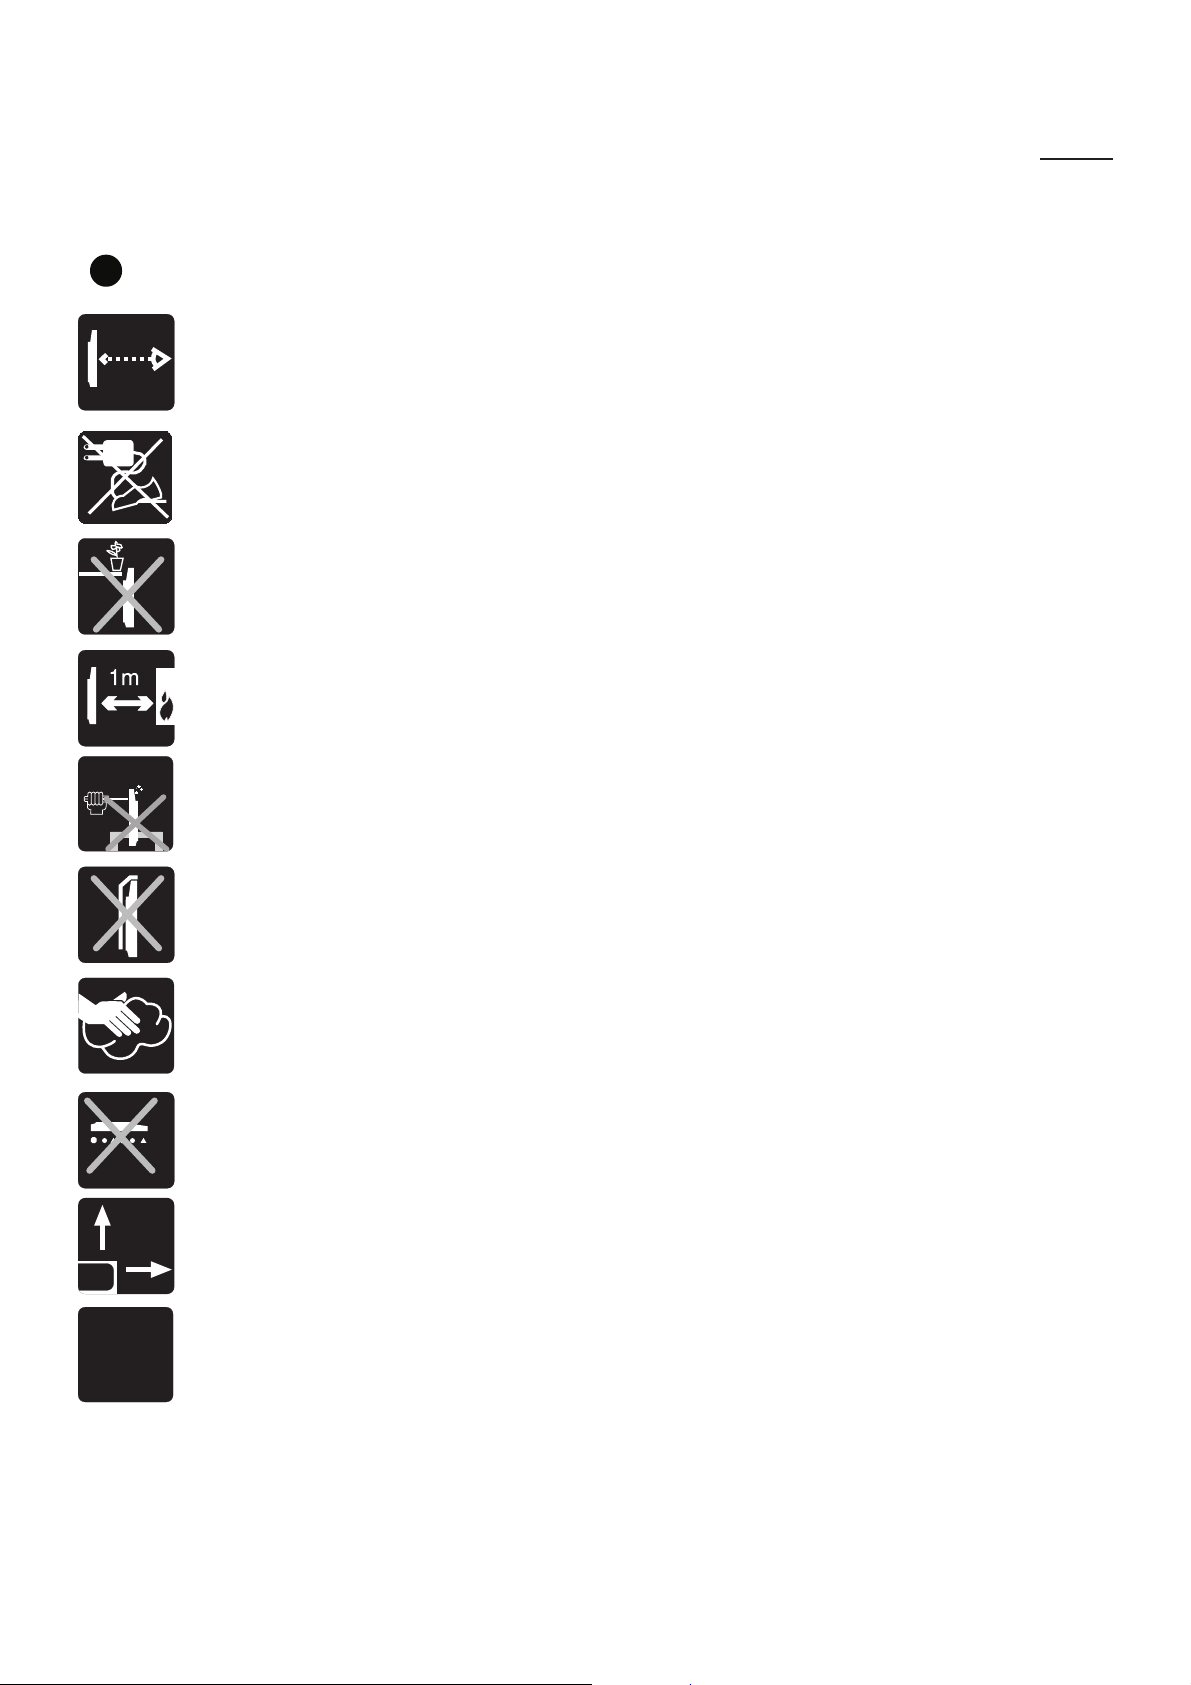
10
cm
230
• Do not push, hit or screw into the screen of your product.
• The heat generated in the device goes out from the ventilation holes, so do not cover the
receiver with veils, thick fabric, etc., since they may prevent air circulation. Do not place your
TV on a carpet or a soft ground.
• Never let the children insert foreign substances in the open sections or slots of your TV.
• Clean the TV screen with a slightly damp cloth or chamois. Never use corrosive cleaning
agents like liquid or aerosol cleaners.
• Disconnect mains lead of the TV from its plug when cleaning.
• Never put pressure on the screen when cleaning.
• Never position your screen on hard or uneven objects. Your plasma TV might be damaged.
• If you wish to place the TV on a shelf or a wall unit, leave minimum 10 cm of clearance from
the top, sides and back of the TV.
• Your TV has been designed to operate in 230 AC; 50Hz voltages. Do not connect your TV
to a power supply other than the operating voltage stated.
• If you are not going to use your TV for a while, please pull the mains lead
V
from the mains socket.
50Hz
-6-
Page 6

Product Description
High technology signal processing, 106 cm flat
16:9 plasma screen, user friendly, interactive remote
control together with an attractive case with a less
modular depth represents the new generation product
design.
Use of the best generation of plasma screens,
computer images and presentations as well as high
contrast warrants perfect video images. A variety of
interconnection alternatives makes integration to
existing and new visual systems easier.
• Screen: flat – large – thin (Standard definition)
The new plasma screen offers a resolution of
852x480 pixels on the 920 mm x 512 mm screen
surface. 16.7 millions of colours with 256 RGB
gradations offers limitless colour viewing. Enjoy
the video and data images on the 106 cm screen
and admire the depth of only 129 mm.
• Silent
A new type of cooling systems enables the plasma
screen to operate without disturbing fan noise.
The plasma screen which is as silent as a standard
TV provides a new standard for living room and
conference room. Approximately 15 dB A of noise
level, which is the result of the plasma technology,
represents the peak of technology at the moment.
• All in one box
The screen, power supply and image and sound
signal processing are supplied in one single box.
This makes mounting onto a wall easier. When
it is mounted on the wall like a painting, all its
signal inputs and outputs are easily accessible.
Both loudspeakers offer well balanced listening
pleasure.
• Video / Computer VGA / Music
Large connection capacity PAL/NTSC/SECAM
offers video standards (CVBS, RGB and Y/C),
multi-standard TV radio (99 TV channels with auto
and manual programming), VGA/SVGA and it
even contains a 16:9 VGA format with a resolution
of 848x480 pixels.
• User Interface
IR remote control and On-Screen Controller (OSD)
makes operation quite easy. OSD offers structured
menus for the selection of signal sources, image
and sound.
• Digital signal processing
The plasma screen is equipped with the latest
signal processing standard with 8 bit technology.
It contains features such as active algorithm to
offer 4:3 video and data images while the image
is frozen on 16:9 screen.
• Under any conditions
The new glass panel has been exposed to thin
abrasion on the front side to maintain high contrast
rate and superior legibility even in poor illumination
conditions.
• Installation: Easy and quick
Various attachment devices are available to your
for installation. No matter whether the TV is
attached to the wall, or a table.
• Advantages of digital technique
Digital graphics cards offer superior imaging
performances. The plasma screen offers an image
performance close to the original with its DVI
connection and remains compatible with the
previous analogue graphics cards.
• Digital noise silencing
You may activate noise silencing adaptable to
movement by means of OSD and set the quality
of image materials properly. Automatic noise
silencing reduction makes it possible to regenerate
the fast moving image components in an inartificial
way.
• Full and stable color offer
Superior color offer with exquisite details supports
the possibility to adjust gamma. By means of
OSD’s, you can adjust the most suitable gamma,
colour warmth, contrast and brightness for all
entries.
-7-
Page 7

Television
Thank you for purchasing this television which has been designed to keep you satisfied for a long
time.
You may already have knowledge about how to use a television; but still spare some time to read
the below instructions.
These instructions have been prepared to gain you knowledge about many new features of this
television and enable you to benefit from your purchase in the best way possible.
Special Features
• 42” PDP VGA Panel
• Available for Cable Broadcasts
• 2x10 W Stereo sound (for models with external loudspeaker )
• 2000 pages of teletext
• PIP (Picture in Picture)
• Picture Formats; 4:3, 14:9, 16:9 automatic, letterbox, subtitle, panorama
• Zoom feature
• Wide angle of vision
• Scart, AV connection
• S-VHS and PHONO connection
• DVI connection
• PC connection
• Low energy consumption
• AVL
• ATS
• Programmable power off via sleep timer
• Graphic Equalizer
• The feature of sharpness in colour transitions (CTI)
• Sharpness feature and picture feature (LTI) in the black-white transitions
• A clear Picture made by means of the Digital Comb Filter
• On screen viewing of all settings, program numbers and all the processes
• Manual Fine Tuning
• 100 Program memory
• Infrared Remote Control equipped all the functions
• Child Lock
• Feature of viewing the NTSC broadcast to be entered via Scart
• Easy performance of the processes via the advanced menu system.
• Ability to choose 24 different menu languages. (O.S.D. only)
• HDMI feature
• YPBPBR component input
-8-
Page 8

Getting Started
Your plasma screen was tested and packed before
delivery. It is ready to for use after it has been
unpacked. After unpacking the screen, please check
for possible damages and completeness of the
delivery. In case there is a damage, the supplier may
only meet your demands after you inform them about
the situation before the first installation.
Attention: Always remove the screen from its
package with the help of a second person. Trying
to remove the screen from its package by yourself
is hazardous to your health.
Note: Scart, DVI, VGA and PHONO cables are not
supplied.
The contents of the cardboard box are:
1. plasma screen
2. Remote Control
3. Batteries
4. Mains lead
5. User’s Manual
6. Guarantee Certificate
7. Quick set up guide
8. Table stand
9. Speakers
Inserting the Connection Line
When connecting or inserting the mains lead and
video cable (e.g. SCART, Y/C…) the following points
should be taken into consideration:
• Please align the connection lines. Note that signal
lines are not placed directly on the surface of the
screen.
• For high image quality, use only covered high
quality signal cable. To connect video signal, high
quality 75
signal low-quality signal cable may cause
distortions and shadows on the displayed picture
as well as exceeding the permissible EMC level.
For perfect and safe operation of the device,
mechanical interlocks for single plug and outlet
sockets are necessary.
• You should also avoid placing signal sources such
as computer or video recording device in front of
the screen.
Please place these signal sources next to or
behind the screen.
coaxial cable should be used. A
If there is any missing component in the package,
please call the Service Support Line. The missing
part will be sent to you free of charge. Please keep
this user’s manual near the installation site to have
continuous assistance.
Installation site
A proper installation site must be in compliance with
the below criteria:
• Light reflections Avoid installing opposite of
windows or other light sources.
• Accessibility to mains input The mains input
and mains switch should be easily access›ble at
all times.
• Ventilation Keep minimum 10 cm clearance from
above and below the ventilation holes to the
furniture and the ceiling.
• Environment Temperature Safe operation should
be between 5ºC and 35ºC.
Starting
There are some procedures you should carry out
before turning on your plasma TV.
1. The connection of signal sources: TELEVISION,
VIDEO, COMPUTER
2. Sound playback connection
3. Insert the batteries in the remote control
4. Connect the mains lead
5. Turn the plasma screen on
• Always turn your plasma television off before
connecting any signal source to it.
The Connection of Signal Sources:
Connect the cables of your signal sources to the
input panel of your plasma screen.
You need an aerial cable for the built-in TV Tuner,
and a suitable PHONO cable for external audio
sources.
Sound Connection (playback)
Your plasma screen has various sound outputs on
the input panel for sound playback. It is possible to
connect your music set or Dolby Surround System
as well as external loudspeakers to your internal
amplifier.
• Turn your plasma screen off before connecting
external loudspeakers. Take into consideration
the technical data of loudspeakers’ output and
make sure that the size of the loudspeakers is
sufficient.
• Before establishing a connection between you
music set or Dolby Surround system and your
plasma screen, always turn the device off.
-9-
Page 9
Important Information
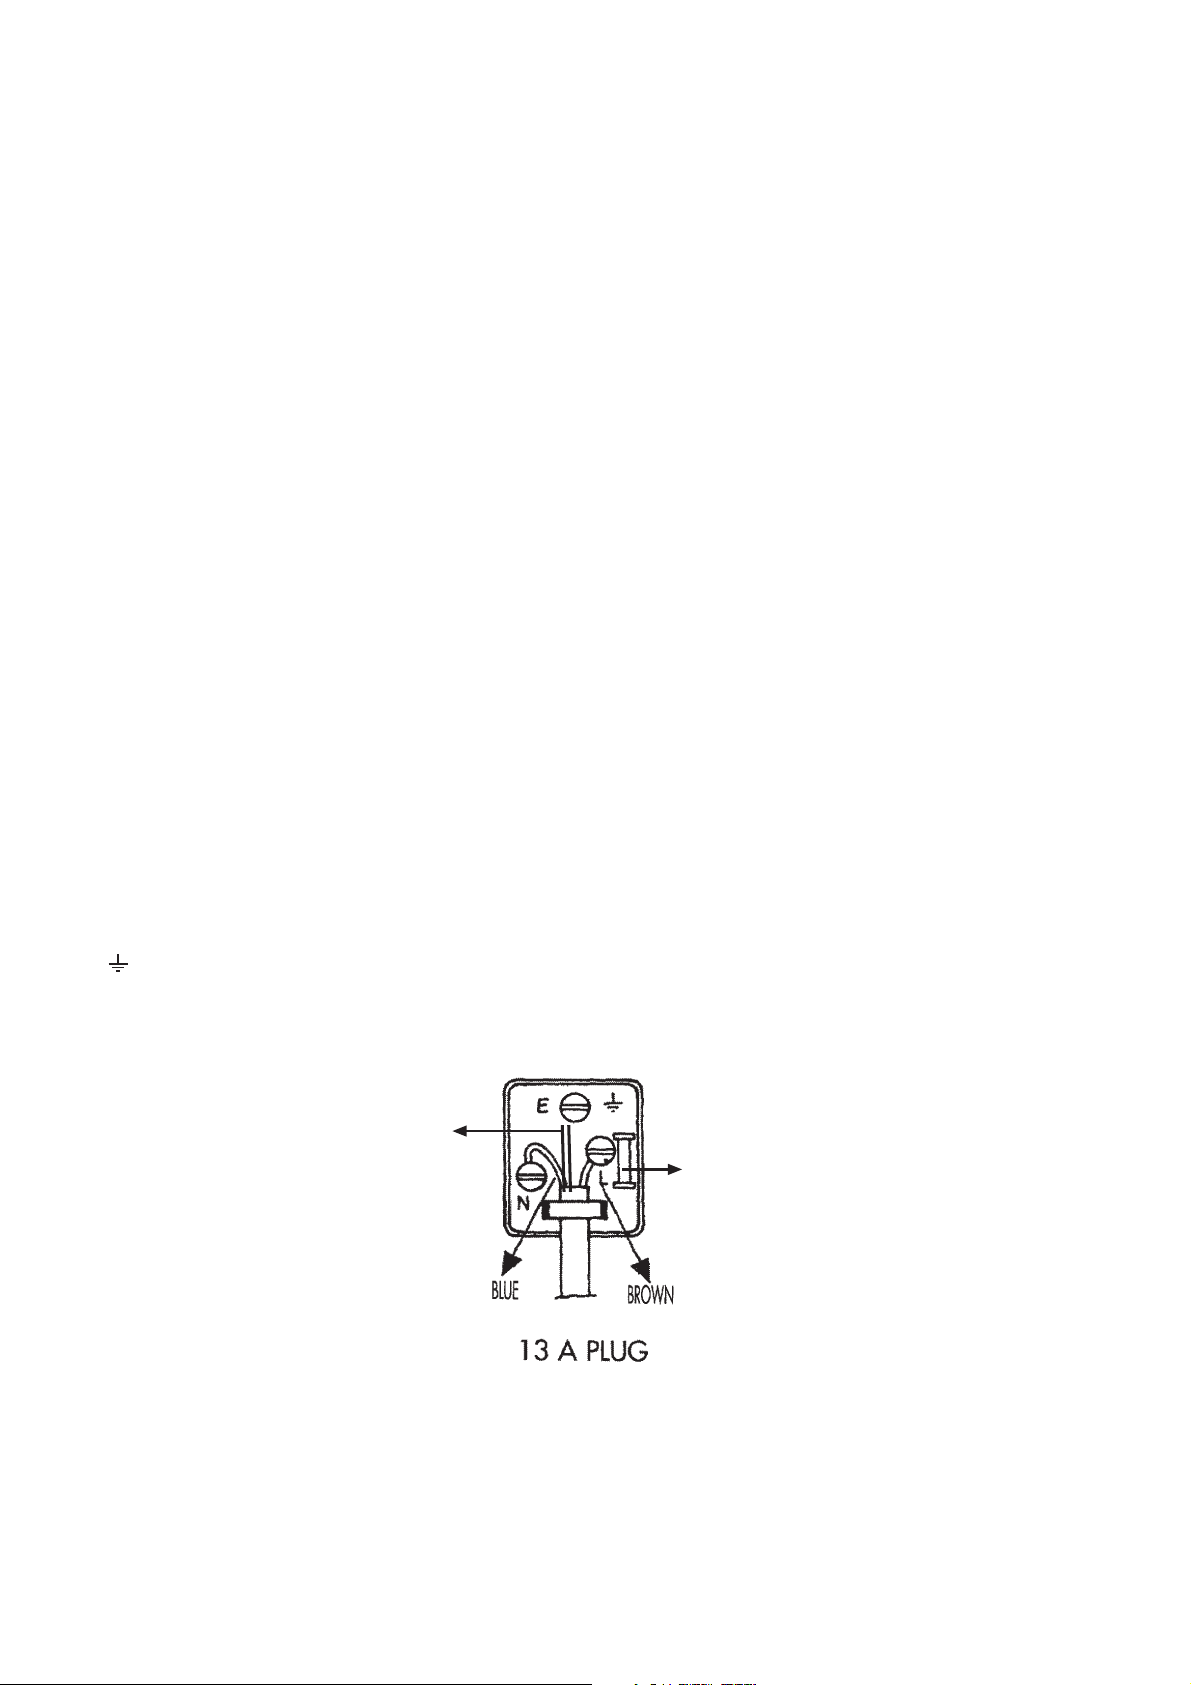
Connection of Mains Cable
Always use the mains cable supplied. First of all insert the mains cable into the input panel of the CTV,
and only thereafter in to mains supply socket.
ELECTRICAL CONNECTIONS
For your own safety read the following instructions carefully before attempting to connect this unit to the
mains supply.
For your convenience a mains lead and plug with a fuse has been supplied. For your safety please
observe the following information.
The moulded plug incorporates a 5A fuse. Should the fuse need to be replaced an ASTA approved
BS 1362 fuse of the same rating must be used. Do not forget to refit the fuse cover. In the event of losing
the fuse cover the plug must not be used until a replacement fuse cover which must be the same colour
as that visible on the pin face of the plug has been fitted. Fuse covers are available from any good
electrical store.
If the fitted moulded plug is not suitable for your socket, then the plug should be cut off and an
appropriate plug fitted.
IMPORTANT! FITTING A DIFFERENT PLUG.
If the mains plug is cut off from the mains cable rewire the replacement plug in accordance with these
instructions.
IMPORTANT
The wires in this mains lead are coloured in accordance with the following code:
Blue - Neutral
Brown - Live
Yellow
Green-Earth
As the colours in the mains lead may not correspond with the coloured markings identifying the
terminals in your plug proceed as follows:
The wire coloured BLUE must be connected to the terminal marked with the letter N or coloured
BLACK.
The wire coloured BROWN must be connected to the terminal marked with the letter L or coloured
RED.
The wire coloured green or GREEN/YELLOW must be connected to the terminal marked with letter E
.
or
The television receiver must be protected by a 5A fuse if a fused plug is fitted. For any other plug fit
a 5A fuse at the distribution board.
GREEN
GREEN/YELLOW
5 A FUSE
Caution: - Under no circumstances should the discarded plug be inserted into a mains socket. To prevent
shock hazard carefully dispose of the discarded plug into your dustbin, do not leave the plug lying around
where children might see it.
-10-
Page 10
Stand Installation
Note: See Separate stand
package for full assembly
instructions.
-11-
Securing
screws
Page 11
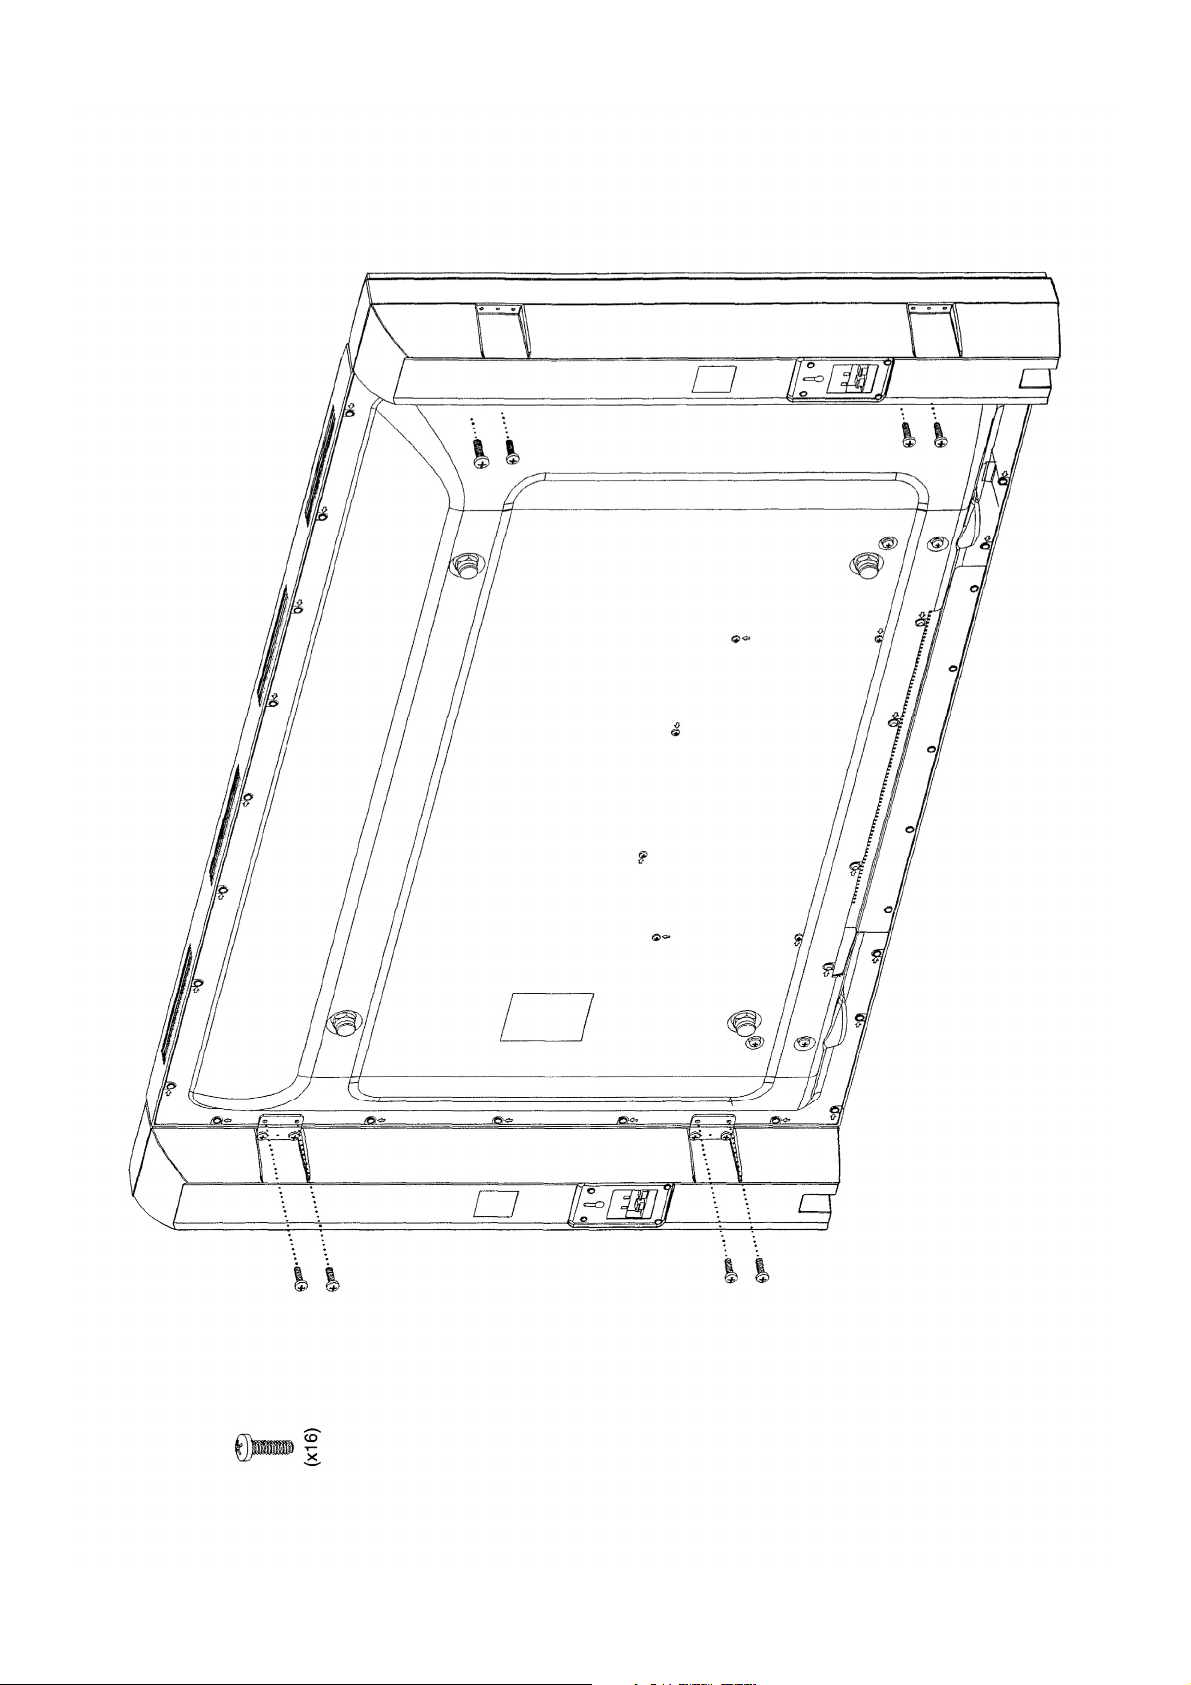
Speaker Installation
Fix 2 brackets to each side
off the Tv.
Fix the speakers to the
brackets.
For full instructions see
separate speaker package.
-12-
Page 12
Turning the Plasma Screen on
You may control your plasma screen with remote
control only when the device is in stand-by mode.
Switch the mains switch on. The standby indicator
turns red.
• Press a digit key or Program
Up/Program Down key or the
PR+/PR+ or MENU key on the front
7
PR-
PR+
panel of the television to turn the
television on. Stand-by indicator turns
to green. The picture is displayed on
the screen after a few seconds. To
switch the television to stand-by mode,
push the Stand-by button. Stand-by
indicator turns to red.
Operation Modes
ATTENTION
Note that at the beginning of use, the operation mode
should be in full screen format setting especially in
the first 100-150 operation hour (see: Displaying of
the sub-menu, Picture Format). This prevents
differences of brightness on picture areas.
Also, to prevent permanent shadows on the displayed
picture, avoid displaying any still images in the first
operation hours (computer mode, teletext pages,
Photo CD images, etc.). If the plasma television is
to be used as computer monitor, it is recommended
that you use a screen saver.
• The Plasma screen is always connected to the
mains supply in stand-by mode. To cut the
connection completely, you should switch the
mains switch off and disconnect the mains lead
from the mains socket.
• The screen has an electric adaptor and it may be
operated with a supply voltage of 230V AC and
50Hz.
Note 1: If there is no broadcast signal, your television
will switch to stand-by mode in five minutes.
Note 2: If your remote control has a fault or its
batteries have been used up, there are “MENU”
“SOURCE”, “
buttons to operate the TV.
Batteries
To reveal the battery compartment, remove the back
cover and make sure that you have inserted the
batteries correctly.
The batteries suitable for this remote control are UM4, IEC R03 or AAA 1.5V.
Do not mix a used, old battery with a new battery or
do not use mixed battery types.
The performance of the remote control will deteriorate
from a distance farther than 8 metres or out of an
angle of 30 degrees.
PROG ”, “ VOL ” front panel
Computer mode
For the best image, we recommend 848 x 480, 640
x 480 or 720 x 400 pixel resolution. 848x480 pixel
resolution corresponds to the screen matrix and offers
the best image. You can obtain the driver for this
resolution from the Internet pages of well-known
graphic card producers. Unlike the applications in
CRT monitors, for a vibration free presentation on
flat screens, it is not necessary to select high image
reconditioning. 60Hz of reconditioning is
recommended.
Video recorder mode
If your recorder offers Y/C (S-Video) format playback,
it is recommended to use Y/C (S-Video) inputs to
improve image quality. DVD player mode
For the best use, it is recommended to use RGB
operation mode connectable to SCART 1 input. In
case your player does not offer this operation mode,
please use the Y/C (S Video) signal mode.
Image adherence
The manufacturer would like to state that during
watching frozen pictures (e.g. computer playback)
for long durations, the image remains still visible in
full mask for a few minutes when a different source
is played afterwards. This is known as “image
adherence”. Please note this is normal operation and
not a fault.
Video cable
To connect video signal, high quality 75 Ω coaxial
cable should be used. A low-quality signal cable
may cause distortions and shadows on the displayed
picture as well as exceeding the permissible EMC
level. For perfect and safe operation of the device,
mechanical interlocks for single plug and outlet
sockets are necessary.
-13-
Page 13

PANEL CONNECTIONS
12
5
14 15
AV-2
AV-1
4
ANT-IN
6
PROGMENUSOURCE VOL
1. Remote control receiver
2. Standby mode indicator
3. Mains power on/off button
4. Scart 1
5. Scart 2
6. Aerial input
7. Video input PHONO connector
8. Sound input PHONO connector
(Left/L)
9. Sound input PHONO connector
(Right/R)
10. Video output PHONO connector
Video
L
S-VHS
AV-3 AV-Out YPbPr
13
252423222120
Y
Audio In
Pb
L
R
Video
7
8
L
9
AV-3
11. Sound output (Left/L)
12. Sound output (Right/R)
13. S-VHS connector
14. Loudspeaker output (Right/R)
15. Loudspeaker output (Left/L)
16. PC-DVI sound input
17. VGA (PC connection input)
18. DVI-D Input
19. Power Input
20. Source selection
21. Menu Button
22. Program down button
Speaker Out
DVI-D
HDMI
18
10
11
12
26
Video
L
AV out
PC-IN
17
27
Pb
28
29
23. Program up button
24. Volume turn-down button
25. Volume turn-up button
26. HDMI Input
27. Component video input (Y)
28. Component video input (Pb)
29. Component video input (Pr)
30. Component sound input (L)
31. Component sound input (R)
PC-DVI
Audio In
Audio In
19
L
30
R
31
16
Y
YPbPr
3
Please note
• Do not use the Video PHONO and S-Video connections at the same time; otherwise they will
affect each other’s image.
• RGB inputs from Scart will give you a better image quality.
-14-
Page 14

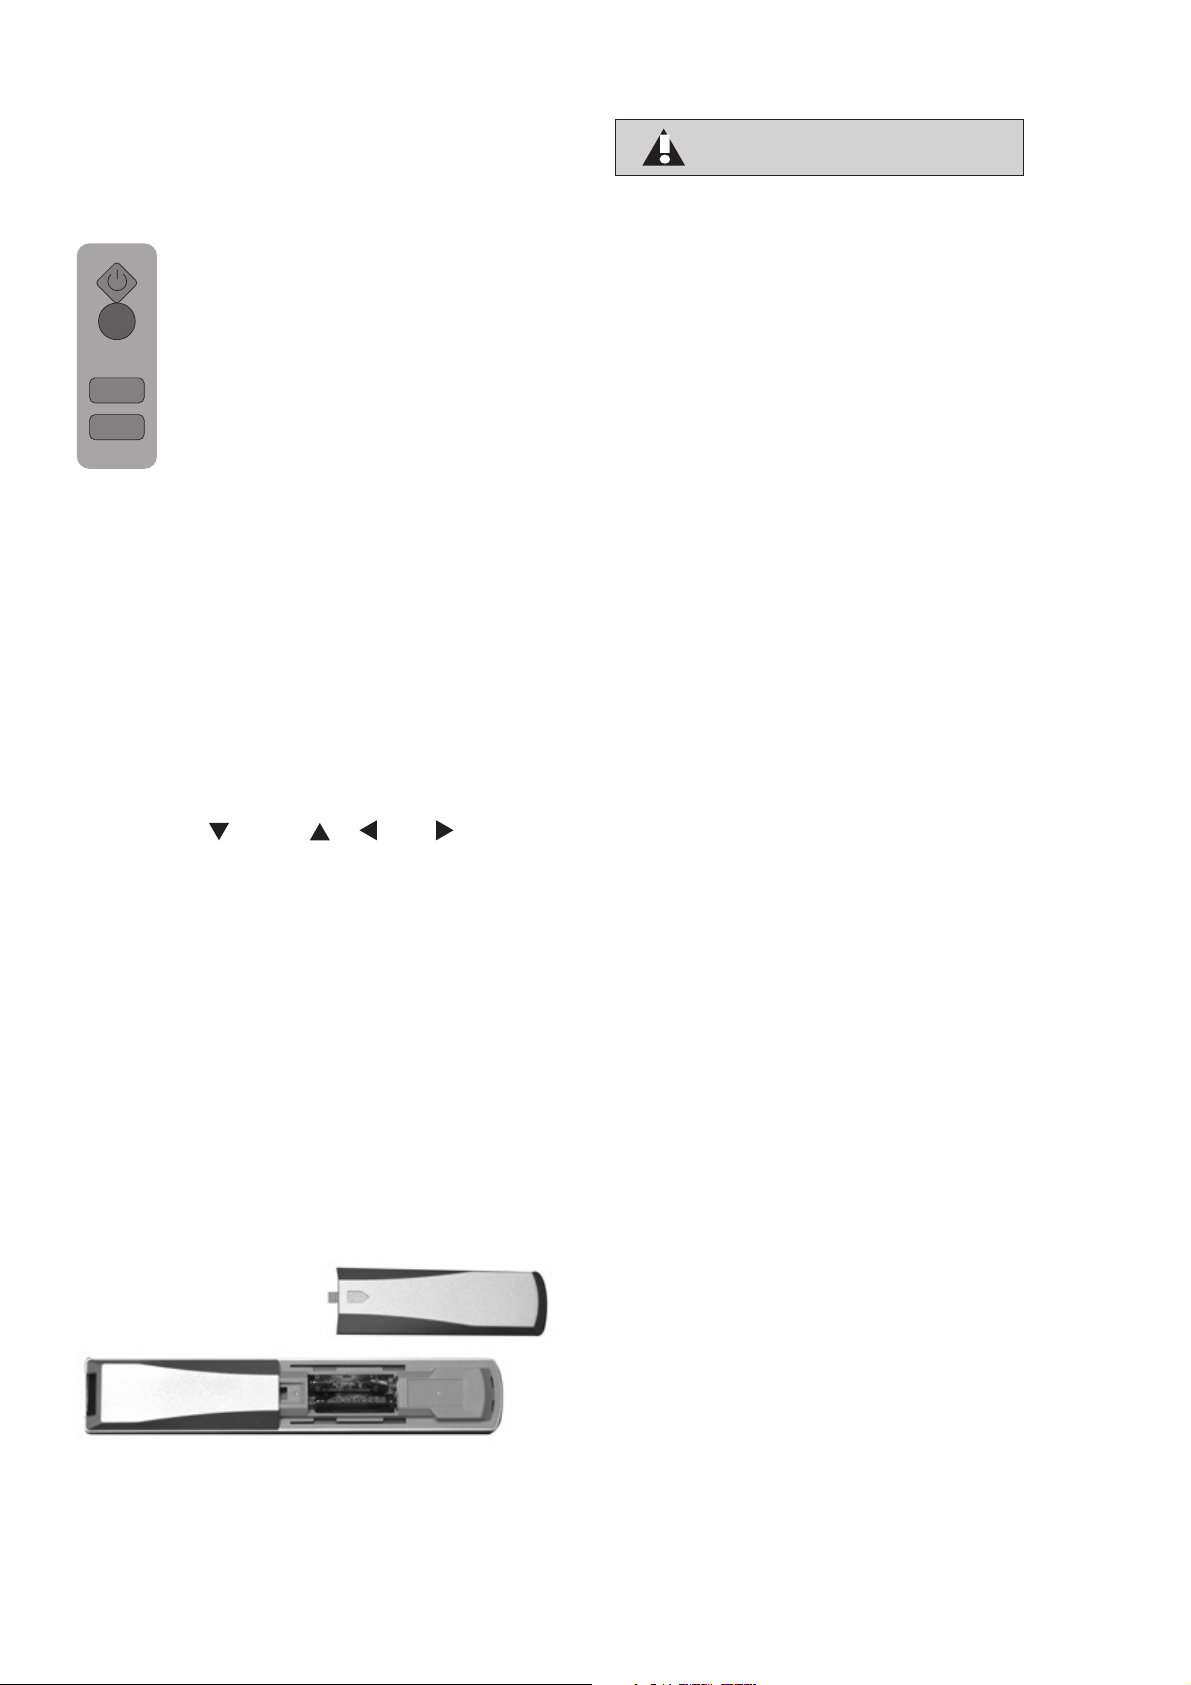
Remote control
1
2
3
16
18
4
5
6
7
8
9
10
11
12
13
14
15
17
19
20
21
22
PIP SEL.
AV
123
456
789
ZOOM
PR- PR+
VOL-
i
PIP POS.
PC
0
OK/
FREEZE
?
TEXT/
MIX
PAT
PIP SIZE
TV
SWAP
VOL+
MENU
23
24
25
26
27
28
29
30
31
32
33
34
35
36
1. Picture Format choice ( )
2. Temporary sound mute (
)
3. Equalizer selection ( )
4. PIP Position selection
5. PIPI/PAP On-Off
6. AV modes selection menu
7. Numeric buttons
8. ZOOM mode selection
9. Program down (
10. Up button (
11. Volume down (
12. Left button (
13. Confirmation and temporary picture freeze (
14. Info/Text page (
15. Down (
) (Menu)
PR-
) (Menu)
VOL-
)
) (Menu)
)
)
OK/
FREEZE
)
16. Text Question/Answer button (Revealing Image) (
17. Red teletext (
18. Teletext page enlarge (Double) (
19. Blue Teletext (
20. Teletext / Mix selection (
21. UPDATE (
22. Yellow teletext (
)
)
)
)
)
)
23. Stand-by On/Off ( )
24. Picture mode selection button ( )
25. PAT (Picture and Teletext) Mode
26. PIP size selection
27. PC mode access
28. TV mode access
29. SWAP (
30. Program Up (
31. Volume Up (
32. Right movement (
)
)
)
)
33. MENU
34. Text Stop (Hold) (
35. Green teletext (
36. Sub page (SUB PAGE) (
)
)
)
)
-15-
Page 15

Performing the initial power-on settings
TV controls:
Temporary On-Off (STAND-BY)
When the TV is switched on, by pressing
the standby button the TV will GO TO
standby mode. The standby indicator
will turn red. To turn the TV back on
PR+
PR-
press the standby button or any numeric
button or (
)/( ) buttons.
Caution!
If you are not going to use your television for a
long period of time, make sure to switch it off
from the main power button.
When you first turn on your television, select the
language and the country you wish from the
displayed menu via the buttons (
then press the button (
) in the auto-program
tab. The automatic channel search will start via
the ATS system and the program table will be
displayed on the screen following the search. If
you would like to exit such menus without any
operation, press the button (
/ ) and ( / ),
).
Temporary sound mute (MUTE)
To mute the sound, press the ( ) button.
The (
) on screen display will appear.
Press the mute button again, th sound
will return. During mute, When you press
( ) button the volume will decrease but will
the
not exit mute. If you press the
( ) button the
volume will increase and automatically exit mute.
Previous Program Selection Button
(Swap)
To return to the previous programme
press the (
to go back to the programme last
viewed.
PR 01
) button. Press it once more
PR 11
PR 01
Program selection
You may enter whichever program number you
would like by pressing the buttons (
located on your television and your remote
control. To select programs higher than
PR+
PR-
9, you may use the Numerical buttons.
You may enter the number of the
program you want to select with
numerical buttons. For example, to
switch to the program number 12, press
the buttons number 1 and 2 found on
your remote control.
TRT-1
01
02
TRT-1
TRT-1
03
TRT-1
04
SHOW
05
06
07
08
skip
move delete
09
10
11
12
13
14
15
16
17
18
19
20
21
22
23
24
name
)/( )
-16-
Page 16

External Connection
There are 2 scart connections on your television.
When you press the AV button, the source table
will be displayed.
Source
TV
AV1
AV2
AV3
SVHS
PC
DVI
HDMI
YPBPR
1. AV1 when scart input is used
(RGB support)
2. When the AV2 scart input is used
3. When the AV3 PHONO input is used
4. When the SVHS S-Video input is used
5. The PC mode is switched to
6. The DVI mode is switched to
7. The HDMI is switched to
8. The YPBPBR is switched to
To select your desired source, use the
buttons
( )/( ) and press the button
( ).
(You can return to TV mode by pressing
() button again.
Control Menu
(Press ( ) button. The Menu including
all the setting menus will be visualized
on the screen. You may select any menu
by pressing Up/Down ( )/( ) buttons,
enter the menu by right/left
( )/( ) buttons and
switch between the menu subtitles.
Tuning and storing the programs on
your television
Automatic tuning and storing in the
memory the TV channels via ATS
The ATS (Automatic tuning system) on your TV
enables the automatic finding and sorting of
channels. Sorting is done according to the
selected channels which broadcast teletex and
channel names; followed by all channels with
teletext without channel names and then by
channels without teletext.
(Press
settings menu by pressing the right
movement
access this menu by pressing the Blue
button
( )/( ) button, the ATS menu will
appear on the screen. In the country
line select the country the broadcast of
which you want to watch with priority
by pushing the Right/Left movement
button
Press the (¡) and select the Autoprogram
title or press
buttons. The prompt menu before the
Automatic Setup will be shown on the
screen. When you press the “Green”
button
press, the Channels will be scanned automatically
and the channels in which broadcast has been
found will start to be saved in the memory as of
the first program. At the same moment, the Autoprogram prompt menu will be displayed and the
mark indicating the position in which the
Automatic Setting function is found will appear.
To stop the process at any given time, please
press the
( ) button.
The Program table will appear on the screen
after the automatic search is over.
You can assign any channel to any program
number you would like from among program
numbers that have been stored in the memory
as described in the part Program Table.
To abort the Program table, press the button
( ).
( ) button. Move onto the
( ) button. You may directly
( ). When you press Up/Down
( )/( ) in the Country line.
( ) or Right/Left ( )/( )
( ) to start the Auto-program
You can either tune the programs
automatically or manually store them in
your television.
Note:
If your television does not receive any
broadcast for a period of 5 minutes, it
automatically switches to the stand-by
position. The countdown for the last 5
minutes OSD is displayed on the screen.
-17-
ATS
country
autoprogram
MENU :Cancel TV :Exit
SETUP
ats
installation
program table
MENU :Cancel TV :Exit
United Kingdon
Page 17

Manual tuning and storing of the
television channels:
If you already know the Channel number:
(Press ( ) button. Move onto the settings
menu by pressing the right movement
button. You may directly access this menu
by pressing the Blue button
When you select the installation tab by
pressing the buttons ( )/( ) and press
the button
seen on the screen. Select the program
in which you would like to perform an
Installation using the right-left direction
( )/( ) or numerical buttons. Select the
system in which you would like to make
the search from among the system tabs.
Enter the System tab by pressing the
movement button
here to the band tab via the downward
movement button
left movement buttons
remote control, select the “S” for cable
channels and “C” for broadcasts received
via the aerial.
( ), a setup menu will be
( ) below. Move from
( ). Pressing the right-
( ).
( )/( ) on your
Select the Channel tab pressing the upward
movement button
keys or using the right-left movement keys
( )/( ), type in the channel number. If the
broadcast viewed on the screen is of your desired
quality, select firstly the initial storing tab via the
downward movement
memory the process you have made.
Then press the
briefly appear on the screen. The broadcast will
be stored in the memory under the program
number you have selected. The program will be
stored with its number. You can tune and store
the other channels in the memory in the same
way. In the event that you wish to exit the
installation menu for any reason, simply press
( ) button.
the
( ) and using the numerical
( ) button to store in the
( ) button, the text 'stored' will
-18-
Page 18

If you do not know the channel number:
Fine Tuning
(Press ( ) button. Move onto the settings
menu by pressing the right movement
( ) button. You may directly access this
menu by pressing the Blue button
( ).
When you select the installation tab by
pressing the buttons
the button
( ), a setup menu will be
( )/( ) and press
visualized on the screen. Select the
program in which you would like to perform
an Installation using the right-left direction
buttons
( )/( ) or numerical buttons.
Select the system in which you would like
to make the search from among the
system tabs. Enter the System tab by
pressing the down button
( ) below.
Here, your television can be set to a single
system and you can also select from
among more than one systems via the
( )/( ) buttons. (option) Move from here to the
band tab via the downward movement button
( ).
Pressing the right-left movement buttons ( )/( )
on your remote control, select the “S” for cable
channels and “C” for broadcasts received via the
aerial. Select the search tab via the downward
movement button ( ), scan the channels in
ascending order with the Right direction button
( )
and in descending order with the left direction button
( ). If the channel that has been found is of your
desired quality, then select the storing tab.
If the current channel requires Fine Tuning,
then select the fine tuning tab by using
the downward movement button
( ) in
the Installation menu. Using the right-left
movement
( )/( ) buttons on your remote
control you will have the ability to get the
exact quality of tuning required. Under
normal circumstances, you will not feel
the need to use the Fine Tuning function.
The AFC values of your television will
automatically adjust and lock themselves
to the channel. However, you might need
it in case the television transmitters do
not operate according to the standards.
To store in the memory the settings you have made,
select the Store option and press the button
Program no
System
Channel
Band
Search
Fine tuning
Store
MENU :Cancel TV :Exit
INSTALLATION
0
B/G
23
17
S
( ).
Afterwards, store it in the memory by pressing the
button
( ). Repeat the same procedure also for
the other channels by selecting the program number
of your choice from among the program no. tab.
If there is need to perform Manual Fine Tuning on
the current channel or to name the current channel,
refer to the related parts.
-19-
Page 19

Program Table
(Press ( ) button. Move onto the settings
menu by pressing the right movement
button. You may directly access this menu
by pressing the Blue button
( ). When
you select the program table tab by
pressing the upwards/downwards direction
buttons
( )/( ) and press the button
( ), the program table will be seen on
the screen.
Switching the locations of the program
channels that have already been stored:
Select the program you would like to
relocate by pressing the upwardsdownwards
buttons
( )/( ) or Right-left direction
( )/( ). Press the “GREEN” ( )
button. The selected program number and
name will be in the color green.
Select the program you would like to
relocate by pressing the upwardsdownwards
( )/( ) or Right-left direction
buttons ( )/( ). Finish the relocation
process by pressing the “GREEN”
( )
button. The channel in the first program
number you selected has been moved to
your second selected program number
and the channels between both program
numbers have been shifted to the initially
selected program number.
Deleting a program that has been stored:
Select the program you would like to delete
by pressing the upwards-downwards
( )/( ) or Right-left direction buttons
( )/( ). Press the “blue” ( ) colored
button. The confirmation menu will appear
on the screen. You may perform the
deletion process by pressing the “Green”
button
process by pressing the “Red” button
Once you pres the “Green” button
the selected program has been deleted
and all the following channels have been
transferred to the previous program
number.
( ) or you may abort the deletion
( ).
( ),
Hiding a program that has been skipped:
In the event that you do not wish to come
across certain programs while navigating
through the channels using the
( )/( ) buttons, then you can use
that function. Select the program you
would like to skip by pressing the
upwards-downwards ( )/( ) or Right-
left direction buttons
“Red” button
( ). The letter “S” will
( )/( ).Press the
appear on the right side of the name
information in the program to be skipped.
You have the option of applying this
method on more than one program
channel.
In order to see the program numbers
that are to be skipped, write down the
channel numbers via numeric buttons
directly. To cancel the program skipping
process, press once again the “Red”
( ) button. The letter “S” in red which is displayed
on the right side of the program information will
disappear and the skipping process will be
cancelled.
To name the programs
The channels names might be automatically
displayed on the programs in the table via ATS,
yet the channel number might also be displayed
instead of the channel name.
You can assign your program or
programs of choice the names that have
a maximum of five characters.
the program you would like to name by
pressing the upwards-downwards
( )/( ) or Right-left direction buttons
( )/( ). Press the “Yellow” ( ) button.
The number, sound type and name
information of the channel for which you
would like to specify name information
will appear on the screen. Using the updown button
the number or sign that you want. For
the second character, press the Right-
left button
number or sign you would like again by
the Up-down
entering all the characters, store the
name you have written in the memory
by pressing the button
( )/( ) you can choose
( )/( ) and select the letter,
( )/( ) buttons. After
( ).
TRT-1
01
02
TRT-1
TRT-1
03
TRT-1
04
SHOW
05
06
07
08
skip
move delete
09
10
11
12
13
14
15
16
17
18
19
20
21
22
23
24
name
-20-
Page 20

The settings of your new television:
Setting up the Sound Menu (Red button)
You may perform the sound setting using the VOLUME + buttons on your television or the
( ), ( ) buttons on your remote control.
You can perform the other sound settings by
entering the Sound menu. For this purpose,
press the
Select the sound menu tab
( ) button on your remote control.
( ) using the direction
button. (You may have direct access to this menu
by pressing the Red button) You may select any
title on which you want to operate.
SOUND
volume
0
balance
sound type
0
effect
avl
equalizer
MENU :Cancel TV :Exit
Mono
Spatial
Off
Effect: If you want to add depth to the sound of
the program you watch, select Spatial with the
( )
button.
AVL: Television transmitters have different sound
levels. This can be noticed from the different volume
levels that can be heard while switching from one
program to another. Using the right/left movement
( )/( ) buttons switch to Open. The AVL (Automatic
Volume Limiting) function maintains the same
sound level as you switch from program to program.
Select the option Off to cancel it.
Balance: To adjust the sound balance between
the right and left speakers to the desired level,
select the balance tab by using the downward
movement
desired level by using the buttons
( ) button. Adjust this option to your
( )/( ).
Sound type: The program you watch might be
stereo or in two different languages. Using the
right/left keys
( )/( ) in this menu you can select
Mono/Stereo or Dual-I/Dual-II language.
Equalizer: Selecting the Equalizer tab, press the
( ) or right direction ( )button. The equalizer
setting function will be displayed. Using the Right/left
( )/( ) buttons, you may select any of the options
increasing the sound effect of the program you
are watching depending on the specifications of
that program. The options are Music, Sports, Movie,
Speech and User. Music, Sports, Movie and Speech
are previously programmed and unchangeable
options. User is the option which you may fully
adjust. To adjust the User alternative, press
( )
button; you may adjust the levels of frequency via
( ) and ( ) buttons. You may select the 120Hz,
200Hz, 500Hz, 1.2KHz, 4KHz, 7.5KHz ve 12KHz
frequency bands via
( ) and ( ) button. Press the
() button to store the adjusted levels and exit the
user option.
You may exit the equalizer menu by pressing again
( ) button.
the
Note: You can choose the equalizer options directly
using the
can exit the Equalizer display by pressing the
( ) button on your remote control. You
( )
button at any given time.
-21-
Page 21

Picture Set up:
MENU :Cancel TV :Exit
PICTURE
brightness
contrast
color
sharpness
hue
noise reduction
picture smart
picture format
Wide Screen Display
The TV can be watched in different formats
according to the broadcast made. Pressing (
58
80
50
66
50
Off
User
Auto
button, select the features Letterbox, Subtitle,
Automatic,16:9, 14:9 and 4:3.
Please Note: When the MENU button is pressed,
the image size will change as the menu is displayed
on the screen. This prevents the menus from
exceeding the edges of the visible parts of the
screen.
)
MENU
Enter the Picture menu by pressing the button
() on your remote control. You may directly
access the Picture menu by pressing the
Green button
( ).
Y o u m a y directly access this menu
by pressing the Green colored button ( ).
Using the upwards/downwards direction
buttons
( )/( ), you can select whichever
setting title you would like and adjust their
levels with the Right/left direction
( )/( )
buttons.
The picture brightness, contrast, color and
sharpness levels can all be adjusted according
to your desire. The changes you make in the
picture settings will be automatically stored
in the memory without any further processes
necessary.
Noise reduction: Using this feature, you may reduce
the interference and noise formed in the picture using
the options Off, Soft, sharp and sharpest.
Smart picture: You can select one of the
options previously saved in the memory and
unchangeable by moving on this option and
using the Right/Left movement
( )/( )
buttons. Soft, Natural and Rich are default
settings. The user values are the values which
you stored in the memory.
Furthermore, you can select one of the unchangeable
settings previously saved in the memory without entering
the Picture menu by using the “
” button on your
remote control.
Picture Format: You can switch the broadcast picture
you watch in this option in a format of your
choice. These are the formats Automatic,
16:9, Subtitle, Letterbox, 4:3 Panorama and
14:9. You can perform the same process via
the format selection button “
” found on your
remote control without entering the picture
menu. In that case, the mark 16:9 or 4:3
appears on the bottom left corner of the screen.
Color tone: When NTSC video is entered via Scart,
you may make the Colour Shade setting. The colour
shade option is not seen in the menu when you have
not entered such type of a video. When a NTSC video
is connected via the Scart, this option becomes active
and it is viewed in the menu.
14:9
This is the movie format.
Letterbox
While watching a ‘’Letter box
formatted’’ film / video cassette, this
setting will eliminate or minimize
the black stripes on the background
by zooming in the picture and
without diffusing it.
Subtitle
If the subtitles are transmitted in
the ‘’letterbox formatted’’ broadcast,
then this setting will push the picture
upwards in order to ensure the
entire written text to be visualized.
Automatic
Some movie channels might
broadcast in the 16:9 format. If you
would like to see this format
automatically, then select
AUTOMATIC. In that case, the
mark AUTO 16:9 appears on your
screen.
16:9
Please use this setting for watching
the broadcasts in wide screen DVD,
wide screen picture video cassette
or 16:9 format. Since various screen
formats such as 16:9, 14:9, 20:9
etc. are used, black stripes might
be formed on the lower and upper
parts of the screen.
4:3
Use this setting to watch the
broadcasts in the 4:3 format.
Panorama
This setting stretches the corners
of the picture to the side on
condition that the picture on the
screen remains still.
Note: In 1080i mode, when subtitle or letterbox option is
selected, the video may be distorted or video artifacts
may be visible. Other then 1080i mode, this limitation
does not exist. In 1080i mode, turn off or deselect the
“subtitle” and “letterbox” options to avoid this
Since the use of certain functions in order to change the
picture sizes for collective display or commercial purposes
(modifying the height and width etc.) will be deemed an
infringement of the picture copyrights, penal procedure can
be carried out as required by the relevant laws.
-22-
Page 22

Features
FEATURE
child lock
vcr mode
menu language
MENU
menu background
MENU :Cancel TV :Exit
Press the ( ) button on your remote
pip
AV2 output
AV output
sleep timer
control. Select the features menu
tab using the direction button
You may directly access this menu by
pressing the Yellow button
select from among the titles in this menu
for which you would like to perform a
process using the Upwards/Downwards
direction
( )/( ) buttons.
Child lock : If you turn this feature On, your
television will not be turned on from the Stand-by
position via the function keys on the television and
these keys will not be operated while it is on.
Language: Selecting the language line,
OK/
FREEZE
press the
( ) or right direction ( ) button.
Language menus will appear on the
screen. Select the language you would
like to use by pressing the upwards-
downwards
( )/( ) or Right-left direction
buttons ( )/( ). Press the ( ) button
again. All the setting displays of your
television will be shown in the language
that you selected.
Menu background: Using this option, you can
adjust the background for the menus and other
osd's shown on the screen as being Transparent
or Opaque.
AV2 output: You may select the image and sound
output source for the devices you will connect to
the Scart 2 socket. When you select TV, the image
and sound we watch in the program will be
transmitted.
Off
On
opaque
TV
TV
0
( ).
( ). You can
Sleep timer control:
Your television is equipped with the
functionality for automatically turning off at
the end of a time period you are to select
between 15 minutes and 120 minutes. To
ensure that your television turn of at the
end of your desired time period, select the
sleep timer control tab. Select the time
period of your choice via the right
( ) keys.
left
( ) and
When there are 30 seconds till the end of the
specified period, the countdown for turning off will
be displayed on the screen and your television will
automatically switch to the stand-by mode. To
cancel the automatic power-off process, switch the
sleep timer control option to “0”.
VCR mode: Using this option, you can prevent
the disruptions in the picture which stem form the
recording or magnetic cassette while watching a
picture with the video device. For this purpose,
simply turn on the VCR mode option On.
FEATURE
child lock
vcr mode
menu language
menu background
MENU :Cancel TV :Exit
pip
AV2 output
AV output
sleep timer
Off
On
opaque
TV
TV
0
Note: This option will be active only for the AV
inputs. This option will not be displayed in the
Features menu in Programs or PC mode. This
option is automatically activated in the program no
“0”. You may store the antenna output channel of
the video device in No. “0” and watch this broadcast
preventing the image distortions resulting from the
recording or magnetic cassette.
ZOOM :
ZOOM
To activate this option, press the button
( ) on your remote control while watching
a program picture. In that case, the Zoom
sub-menu appears on the right side of
the screen. The image is enlarged and
reduced step by step in 19 steps in total
by using Up/Down
( )/( ) buttons.
During the zooming process, the image
is zoomed in, in a centre-focused way.
To move up/down
( )/( ) or right/left
( )/( ) on the picture in this position,
press the
( ) button on your remote
control. Then, press the key for the
direction in which you would like to move.
To exit the Zoom menu for any reason,
OK/
FREEZE
MENU
simply press the
process is active in 16:9, 14:9, 4:3,
Subtitle, Letterbox formats.
( ) button. Zooming
Note: The Zoom mode does not function
when there is a PIP picture on the screen.
-23-
Page 23

Temporary Freezing (Freeze): You may freeze
the program picture you are watching. For
OK/
FREEZE
this, press the
control when there is no menu on the
( ) button on the remote
screen The program picture will be paused
until the same key is pressed for the
second time.
Note: The Freeze feature does not function when
there is a PIP picture on the screen.
Using the PIP (Picture in Picture) Feature:
( ) button on your remote
PIP SEL.
Press the
control. The PIP window selection menu
appears on the screen.
PIP Dimension:
With this option, you may zoom in and
PIP SIZE
zoom out the PIP window size. For this
purpose, you may set the PIP size by
pressing the
( ) button while there is a
PIP picture on the screen.
PAT Mode:
While watching a broadcast on your television, you
can enter the PAT (Picture and teletext) mode
pressing the
( ) button on your remote control.
Thanks to this feature, you can also follow
the teletext broadcast if there is also a
PAT
teletext broadcast in the program that is
being watched. To abort this mode, press
again the
( ) button found on your remote
control.
Selecting either the picture-in-picture (PIP) or
picture-and-picture (PAP) option, press the button
( ). According to the selected option, a window
will be opened inside the main picture and a subscreen will be displayed. If you select the full screen
mode, the PIP disappears.
In the event that you wish to exit PIP mode for any
reason, simply press the ( ) key found on your
remote control.
Note:
1) By turning on the PIP picture from the program
you are watching or the AV mode, you can change
the other programs from the main picture.
2) You can turn on the PIP from the PC or DVI
mode.
3) The same AV input cannot be watched on the
PIP and the main picture.
PIP Position:
With this option, you can change the
PIP POS.
position in which the PIP window is shown
on the screen. For this, press the
( )
button when there is PIP picture on the
screen and view the PIP position selection
menu on the screen.
Here, press the ( ) button and set the PIP window
position; then select full screen with
( ) button on
your remote control and exit this menu.
-24-
Page 24

TTV/Text Mix
Teletext
Teletext is an information system that displays text
on your TV screen. Using the teletext control buttons
you can view pages of informaiton that are listed
in the teletext index.
Please Note: No on screen display is available in
text mode. The contrast, brightness and colour
cannot be changed but the volume control
adjustment is available.
To enter text mode
In a channel that does not have the
TEXT/
teletext broadcast, please press the button of a
program that has teletext broadcast. To switch
back to the television broadcast, press the same
button.
Once you have switched to the teletext broadcast,
the index page will initially be shown (Page 100).
In this page, the titles of the topics in that teletext
broadcast and the initial page numbers do appear.
Teletext feature, if you press the
MIX
button, the message “NO TELETEXT
AVAILABLE” will appear on the screen.
In order to switch your television to the
( )
By pressing this button, you can watch
TEXT/
MIX
the teletext information and the TV
broadcast on top of one another and
together. In this way, the channel’s teletext
information service can be viewed while
TEXT/
MIX
the channel’s regular broadcast is carried
on. Press TEXT/MIX button to open the
teletext screen. When you press the same
button, the teletext page will appear with
TV broadcast. Press the same button
once more to return to TV broadcast.
Double height text
Using this button, you can watch the top
half of the teletext page in the enlarged
format. To view the lower half of the page
also enlarged, press the same button
once more; when you press
( ) button again, the
page will be restored to its normal size.
Page selection
To be able to view the page you would like on the
screen, type in the number of that page using the
numerical keys. You can see the number you have
entered on the left side of the upper title tab.
When you would like to skip the pages
one by one, you can go to the next page
pressing the
0
page pressing the
9
To return to the Index page, press the
button
i
( ) key and to the previous
( ) key.
( ).
-25-
Page 25

Stop Button (HOLD)
Question - answer button (REVEAL)
Some information is laid out by the
broadcasting agency in multiple pages
and it is broadcast in the automatic cycle
mode. For example, on a text of four
pages, the pages are indicated with the
figures 01, 02, 03 and 04 on the bottom of the
page. To view one of these pages longer, press
the (
) button. When you press the same button
again, the cycle continues.
Sub page button (SUB)
If any agency that performs teletext
broadcasting broadcasts the sub pages
of any teletext page, the page numbers
starting with 01 appear on the bottom
5
of the screen. (Using the
you can switch to the sub pages. In that
case, the tab 'sub page’ is Shown inside
"red -" and "green +" frames. You can
select the sub pages pressing the "RED"
and "GREEN" buttons. You can abort
the same page by pressing the same
button again.
( ) button,
Sometimes, a teletext page contains a
hidden answer such as a game or a
?
riddle. To disclose the hidden answer,
?
press the button
.
Clock
(The Clock function of the ( ) button;
when you would like to find out the time
while watching any television channels,
press the button
( ). In that case, a
clock will appear on the up right corner of the
screen. You can erase the time information off
the screen by pressing the same button.
Fastext
The colored buttons on the remote control device
are for the fastext feature.
When you select any page, the titles on various
subjects might be shown on the screen in four
different colors or inside colored frames (red,
green, yellow and blue).
By pressing one of the coloured buttons on the
remote control, you can access the subject of
your choice without waiting.
Note: The fastext feature is not available for all
the teletexts broadcasts. It is determined by the
broadcasting agency whether it is to be broadcast
or not.
-26-
Page 26

External equipment connection
AV inputs:
Press the (
Source menu, from which you may select the
input mode will appear on the screen.
TV: While in the AV modes, move onto this option
and press the
mode.
AV1: To watch the picture of the device connected
to the Scart1, move onto this option and press
the button
RGB output, youwill be able to watch it.
AV2: To watch the picture of the broadcast device
connected to the Scart2, move onto this option
and press the button
has an RGB output, youwill be able to watch it.
S-VHS: To watch the picture of the device
connected using the S:Video input, move onto
this option and press the button
AV3: To watch the picture of the device connected
using the PHONO input, move onto this option
and press the button
PC: To be able to watch the monitor image in
the PC mode, move onto this option and press
( ) button.
the
DVI: To be able to watch the image in the DVI
mode, move onto this option and press the
button.
HDMI: To be able to watch the image when a
connection is made via the HDMI socket, this
option must be selected.
YPBPBR (Component Input): To be able to
watch the image when a connection is made via
the this socket, this option must be selected.
) button on the remote control. The
( ) button for switching to the TV
( ).If the connected device has an
( ). If the connected device
( ).
( ).
( )
Connecting a Video Recorder
from the SCART socket
Before making the connections, make sure first
that your television and the video recorder are
turned off.
Connect one end of the Scart socket cable (not
supplied with the television) to the suitable
connection terminal of the video recorder and
the other end to the Scart connection point behind
your television.
Turn on your television and video recorder.
By pressing the (
remote control, select the input AV1 or
AV2 to which you connected your device.
AV
Note:
To connect a RGB-supported external
device to your television, it is necessary that you
use a RGB supported Scart cable. If your external
device is supported in that case, you can set the
output as RGB.
Via the PHONO or S-Video socket
Before making the connections, make sure first
that your television and the video recorder are
turned off.
Connect one end of the Scart socket cable (not
supplied with the television) to the suitable
connection terminal of the video recorder device
and the other end to the Scart connection point
behind your television.
Turn on your television and video recorder device.
If the sound is mono, use the Left Audio (L) input
and select MONO from the sound settings menu.
) button on your
If you would like to use your VCR by connecting
it to your television at the modulator outlet with
an aerial cable, select the program ‘0’ which is
set for this type of connection.
-27-
Page 27

Speaker Out
PC-DVI
Audio In
PC-IN
From aerial input
1. Connect the RF out socket of the video to the aerial input located
behind the television.
2. Connect the connection cable to the RF socket of the video.
3. Store the video channel in the memory under any program.
4. Press stored video program number.
5. Press the PLAY key of the video.
6. You may connect the aerial cable to the aerial input of your video.
In that case, it is necessary for your video to be turned on so that
you can watch your TV.
Y
Video
Audio In
Pb
L
L
ANT-IN
DVI-D
HDMI
R
S-VHS
AV-3 AV-Out YPbPr
Sound Input (L)
Video Input
Sound Input (R)
Note: If you would like to use your video with the RF socket, select the
program 0.
Via the PHONO or S-Video socket
You can also connect your device to your television via the S-Video
socket. To do this;
Connect the S-Video cable to the S-Video socket and the audio cables
to the audio sockets.
AV-2
AV-1
Insert the 21 pin
SCART socket in the 21
pin SCART socket on
the TV.
ANT-IN
Antenna
S-VHS
Video
L
AV-3 AV-Out YPbPr
Y
Audio In
Pb
L
DVI-D
R
Speaker Out
PC-DVI
PC-IN
HDMI
Audio In
Speaker Out
Audio In
Y
Video
PC-DVI
Audio In
PC-IN
HDMI
DVI-D
L
R
Pb
Sound Input (R)
AV-3 AV-Out YPbPr
L
S-VHS
S-VHS
Sound Input (L)
ANT-IN
-28-
Page 28

Speaker Out
PC-DVI
PC-IN
Audio In
HDMI
DVI-D
Connecting the DVD Player
Via the SCART socket
Make sure that both the TV and the
DVD player are turned off.
Insert one end of the SCART cable
(not supplied) in the back of the DVD
player and the other end in the
SCART socket in the back of the TV.
Turn the DVD player and the TV on.
Via PHONO cable
Make sure that both the TV and the DVD
player are turned off.
Insert one end of the PHONO cable in the
video and sound sockets at the back of the
DVD player and the other end in the video
and sound socket of the TV.
Via the PHONO cable or S-Video
socket
You may also connect via the S-Video socket
on the TV.
Audio In
Y
Video
Speaker Out
L
R
Insert the S-Video plug in the S-Video socket
and the sound cables in the sound sockets.
Pb
L
ANT-IN
PC-DVI
Audio In
PC-IN
S-VHS
AV-3 AV-Out YPbPr
Sound Input (L)
Video Input
Sound Input (R)
AV-2
AV-1
Insert the 21 pin
SCART socket in the 21
pin SCART socket on
the TV.
ANT-IN
S-VHS
Video
L
AV-3 AV-Out YPbPr
Y
Audio In
Pb
L
DVI-D
R
Speaker Out
PC-DVI
PC-IN
HDMI
Audio In
Y
Video
Audio In
Pb
L
L
ANT-IN
DVI-D
HDMI
S-VHS
R
Sound Input (R)
AV-3 AV-Out YPbPr
S-VHS
Sound Input (L)
-29-
Page 29

Connecting a decoder
Via the SCART socket
Make sure that both the TV and the decoder are
turned off.
Insert one end of the SCART cable (not supplied)
in the back of the decoder and the other end in
the SCART socket in the back of the TV. Turn
the decoder and the TV on.
Press the (
control to select SCART1.
Via PHONO cable
Make sure that both the TV and the decoder are
turned off.
Note: For decoder connection via PHONO, the
Decoder device should have an internal adjuster.
) button on the remote
Insert one end of the PHONO cable in the video
and sound sockets at the back of the decoder
and the other end in the video and sound socket
of the TV.
DVI-D connection
Your television has a DVI-D socket. You may
connect devices with DVI output such as
computers with a proper cable. You may also
listen sound from the connected device.
Computer or DVI are connected to the PCDVI/AUDIO IN (computer-DVI/Sound input) input
on the back of your television with a cable.
AV Sockets
Using a proper AV cable, you may connect any
suitable devices to Phono inputs by means of the
Phono Video and Sound Inputs at the back of your
TV. Any program displayed on the main screen or
AV input, except S-VHS, computer or DVI (optional),
are available on Phono Video/Sound outputs as
image/sound signals.
The Scart socket at the back of your TV set
always give the program signals selected from
the set Adjuster.
Speaker Out
Audio In
Y
Video
PC-DVI
Audio In
PC-IN
HDMI
DVI-D
L
R
Pb
Sound Input (R)
AV-3 AV-Out YPbPr
L
S-VHS
Sound Input (L)
AV-2
AV-1
ANT-IN
S-VHS
Video
L
AV-3 AV-Out YPbPr
Y
Audio In
Pb
L
DVI-D
R
Speaker Out
PC-DVI
PC-IN
HDMI
Audio In
ANT-IN
Video Input
Insert the 21 pin
SCART socket in the 21
pin SCART socket on
the TV.
-30-
Page 30

INPUT
Your 42” 16:9 PDP-television equipment has VGA inputs, it may also be used as a PC monitor
(Plug&Play).
Connecting the Computer:
Connect your PC to the PC-IN (computer input)
at the back of your television via an appropriate
cable (not supplied with your television).
You may also connect the sound output of your
PC to the PC-DVI/AUDIO IN input at the back
of the television via a proper cable and listen to
sound.
Switching to PC mode
Press the (
) button on your remote control to
switch from PDP-Television to monitor (PC)
mode. To return to television mode from PC
mode, use the
( ) button on your remote control.
PC Input Settings
In PC mode you can make adjustments to the
picture, these include H Position, V Position,
Phase and Auto position. Press the (
) button
to display picture menu as shown below.
PHASE: You may set the colour and shape by
using right/left
( )/( ) buttons.
Image Format: You may select one of the
Automatic, 4:3, 16:9, Subtitle, Letterbox,
Panorama formats as PC view image.
You may select using the format button on your
remote control without entering the picture menu.
Automatic Configuration: The most proper
geometric setting according to the access mode
is configured via this function. Select
AUTOMATIC CONFIGURATION for this
application and press the
( ) button. You may
use the PIP feature in PC mode as described
in the previous sections.
You may adjust the sound of the device you have
connected to the Sound Input at the back of the
television by using
( ), ( ) or ( ) buttons.
PICTURE
brightness
sharpness
noise reduction
picture smart
MENU :Cancel TV :Exit
Press the right
picture format
( ) cursor button to enter the
picture menu. Repeatedly press the down
contrast
color
hue
58
80
50
66
50
Off
User
Auto
( )
curson button until the PC picture menu shown
below appears.
PICTURE
H. Position
V Position
Auto Position
MENU :Cancel TV :Exit
Phase
58
80
50
Transition to the DVI mode
Connect your computer or digital video device
via its socket and a proper cable (not supplied
with the television) to the DVI input on the back
of your television. You may also connect the
sound output of your PC or sound device to the
PC-DVI/AUDIO IN input at the back of the
television via a proper cable and listen to sounds.
Please note: To watch images in DVI mode,
your PC should have a graphic card with DVI
output.
The settings in DVI mode are the same as the
PC mode. However, automatic configuration
will not function in this mode.
You can now make the required adjustmonts. To
exit PC menu press the ( ) button.
H. Position: Horizontal position setting
V. Position: Vertical position setting
-31-
Page 31

Behind the television
Digital satellite receiver
Aerial
output
Aerial
input
TV
Scart socket
Video
Scart socket
Video recorder
Aerial
output
Aerial
input
Connecting the television to a camera
AV1
Video Input
Sound Input (L)
Sound Input (R)
Scart
socket
Speaker Out
Audio In
Y
Video
Aerial
socket
PC-DVI
Audio In
PC-IN
HDMI
DVI-D
L
R
Pb
Sound Input (R)
AV-3 AV-Out YPbPr
L
Sound Input (L)
S-VHS
Video Input
Connecting TV games and PC
AV1
Video Input
Sound Input (L)
Sound Input (R)
Speaker Out
Audio In
Y
Video
PC-DVI
Audio In
PC-IN
HDMI
DVI-D
L
R
Pb
Sound Input (R)
AV-3 AV-Out YPbPr
L
AERIAL
Sound Input (L)
S-VHS
Video Input
AERIAL
-32-
Page 32

Fault Analysis and Recovery
FAULT
Complete screen fault although the mains lead is connected
and the display is turned on with the mains switch and
the remote control.
FAULT
Dark screen
FAULT
No colour or excessive colour
FAULT
No/Bad vertical and/or horizontal synchronization
FAULT
The remote control does not function.
POSSIBLE CAUSE
• Power supply interrupted.
• Faulty fuse
• Faulty mains lead
POSSIBLE RECOVERY PROCEDURE
• CALL the service support line.
POSSIBLE CAUSE
• Contrast setting too low.
• No input signal
POSSIBLE RECOVERY PROCEDURE
• Adjust brightness and/or contrast correctly.
• Connect the cable correctly and check the video source.
POSSIBLE CAUSE
• No signal from the PC for missing colour
• Bad signal connection
POSSIBLE RECOVERY PROCEDURE
• Check the PC/video source
• Connect the cable properly
POSSIBLE CAUSE
• Bad connection of the synchronization lines
• Bad signal connection
POSSIBLE RECOVERY PROCEDURE
• Screw the plugs and sockets in use correctly
• Check the separate video connection lines
POSSIBLE CAUSE
• Empty batteries
• There is an obstruction between the remote control and
the sensor.
• Remote control is out of operation range.
POSSIBLE RECOVERY PROCEDURE
• Insert new batteries.
• Remove the obstruction between the remote control and
the sensor.
• Operate the remote control in the given range.
FAULT
Displayed image too dark.
FAULT
No signal on the screen.
FAULT
Single letters are not displayed (In PC Mode)
FAULT
Horizontal lines in TV or Video signals.
Repairs
POSSIBLE CAUSE
• Image screen quality not set properly
POSSIBLE RECOVERY PROCEDURE
• Correct the image brightness and contrast.
POSSIBLE CAUSE
• You have selected the wrong input channel.
• The screen cannot be operated with the given signals.
POSSIBLE RECOVERY PROCEDURE
• Switch to the proper input.
• Adjust the signal to the proper format.
POSSIBLE CAUSE
• Switch to the proper input.
• Adjust the signal to the proper format.
POSSIBLE RECOVERY PROCEDURE
• Adjust the proper phase position.
• Check the image size setting.
• Carry out automatic adjustment.
POSSIBLE CAUSE
• The signal source is in front of the screen.
• Video cable protection is insufficient.
POSSIBLE RECOVERY PROCEDURE
• Always place the signal sources next to or behind the
screen.
• Use only high quality signal cable with higher screen
damping.
Do not attempt to repair the plasma TV yourself! This would
invalidate the warranty and put your personel safety in danger.
The dismantling of protective coverings is reserved solely for
persons trained for this purpose.
WARNING
-33-
Page 33

In the unlikely event of a failure with your plasma
TV please prov›de the information below to your
service provider.
1. Description of the Fault
Describe the exact symptoms in detail as much
as possible. If the fault occurs from time to time,
please include this in your description.
2. Invoicing
Please inform about the invoice type you want;
merely, specify if you want an estimation before
undertaking any financial responsibility before
your device is repaired. In case no detail is
specified for this purpose, the repairs will be
performed according to the standard procedures.
Cleaning the Screen and Its Case
The dust accumulated on the screen can affect
image quality and should be cleaned from time
to time.
ATTENTION
Remove the mains lead before cleaning.
Cleaning of the plasma screen may be divided
into different areas.
1. Screen Surface
Wet the cloth with a glass cleaner not harmful
to the environment (do not dip into water). It
contains active substance (up to 98%) surfactant
materials soluble in water. Glass cleaner cleans
fingerprints, grease, dust and nicotine
accumulation away. To prevent scratches, clean
the screen in circular movements. Dry the screen
with a second clean cloth.
2. Surface of the Case
It is recommended to clean the dust and filth
from the case with a feather dust cleaner
beforehand. Feather dust cleaner should be
made of non-conductive material such a plastic
or wood. Wet the cloth with a glass cleaner not
harmful to environment and/or antistatic plastic
cleaner (do not dip into the water). It cleans the
surface and also protect against electrostatic
charge, which is one of the main reasons of dust
accumulation on the screen. Pursuant to the EU
recommendations, this cleaner contains surface
active material less than 5%, alcohol and little
amount of smell. Pursuant to GelStoffV
(regulations of dangerous substances), these
cleaning agents are named as flammable
material; however, according to VbF (regulations
of flammable fluids), they are not flammable.
-34-
Page 34

Technical specifications Table
Panel
size/type
Sound Output
Power (10% THD)
Power
Consumption
Stand-by Power
Consumption
42” 16:9
Plazma Display Panel
2x10 W
275 W
2,5 W
General technical specifications
Power Supply-AC:...............................................................230 V 50 Hz
Number of the preset programs: ........................................100
RF Antenna input: ...............................................................75 Ohms (coaxial)
Loudspeaker impedance: ...................................................4 ohm
Sound Systems:.................................................................Mono/Stereo/NICAM
Batteries: ............................................................................2xUM-4, IEC R03 or AAA 1.5
Receiving channels: ..........................................................VHF (Band I Channels 2-4)
.............................................................................................VHF (Band II Channels 5-12)
.............................................................................................UHF (Channels 21-S41)
Received broadcasting systems: .......................................Pal BG
Pal SECAM BG
Pal SECAM BG DK/DK’
Pal SECAM BG LL'
Pal I
Note: Your television has been manufactured in accordance with your country by selecting from
among the above mentioned broadcasting systems and this system cannot be changed by the user
except the case described below: In countries where BG/DK and BG/LL’ broadcasts are done (BG
or DK / BG and LL’). For further information, see the settings part about your television.
WARNING:
This is a A class product. This product may cause radio interference in the house environment; in such a case, the
user may have to take the necessary measures.
Environmental note
This product has been made from high-quality parts and materials which can be re-used and
recycled.
Therefore, do not throw the product away with normal household waste at the end of its life. Take
it to a collection point for devices. This is indicated by this symbol on the product, in the operating
manual and on the packaging.
Please find out about collection points operated by your local authority.
Help protect the environment by recycling used products.
-35-
Page 35

MAIN UK TRANSMITTER STATIONS
UHF CHANNELS STATIONS CT D
Regional Main Stations BBCI BBC2 ITV CH4 CH5 Map Bluebell Hill 40 46 43 65 29
North West Crystal Palace 26 33 23 30 37 28
Caldbeck 30 34 28 32 56 12 Dover 50 56 66 53 30
Winter Hill 55 62 59 65 48 15 Heathfield 49 52 64 67 31
Douglas (‹OM) 68 66 48 56 56 45 Oxford 57 63 60 53 49 27
North East
Belmont 22 28 25 32 56 17 Sandy Heath 31 27 24 21 39 25
Emley Moor 44 51 47 41 37 16 Sudbury 51 44 41 47 35 26
North East Tacolneston 62 55 59 65 52 24
Bilsdale West Moor 33 26 29 23 35 14 Scotland
Chatton 39 45 49 42 11 Angus 57 63 60 53 37 6
Pontop Pike 58 64 61 54 56/68 13 Black Hill 40 46 43 50 37 8
Midlands (West) Craigkelly 31 27 24 21 48 7
Ridge Hill 22 28 25 32 35 23 Darvel 33 26 23 29 35 9
Sutton Coldfield 46 40 43 50 37 22 Durris 22 28 25 32 67 5
The Wreckin 26 33 23 29 25 20 Eitshal (Lewis) 33 26 23 29 49
Midlands (East) Keeylang Hill 40 46 43 50 1
Waltham 58 64 61 54 35 21 Knock More 33 26 23 29 4
South West Rosemarkie 39 45 49 42 3
Beacon Hill 57 63 60 53 37 Rumster Forest 31 27 24 21 2
Caradon Hill 22 28 25 32 38 Selkirk 55 62 59 65 52 10
Huntshaw Cross 55 62 59 65 67 40 Wales
Redruth 51 44 41 47 37 39 Blaenplwyf 31 27 24 21 56 44
Stockland Hill 33 26 23 29 36 Carmel 57 63 60 53 42
Channel Islands LIanddona 57 63 60 53 19
Fremont Point 51 44 41 47 Moel-y-Parc 52 45 49 42 18
West Presely 46 40 43 50 37 43
Mendip 58 64 61 54 37 35 Wenvoe 44 51 41 47 41
South N.IRELAND
Hannington 39 45 42 66 35 34 Brougher Mountain 22 28 25 32 37 47
Midhurst 61 55 58 68 32 Divis 31 27 24 21 31 46
Rowbridge 31 24 27 21 33 Limavady 55 62 59 65 48
BBCI BBC2 ITV CH4 CH5 Map
-36-
Page 36

-37-
Page 37

-38-
Page 38

AJD.801
 Loading...