

Page 1
MANUALE D’USO E MANUTENZIONE
INSTRUCTION BOOK
MANUEL D’UTILISATION
MANUAL DE USO Y MANTENIMIENTO
BEDIENUNGS - UND WARTUNGSHANDBUCH
660 HY WS
• Motofalciatrice idrostatica
• Hydrostatic motor mower
• Motofaucheuse hydrostatique
• Motosegadora hidrostática
• Hydrostatischer Motormäher
Codice
Code
Codigo
Kodezahl
Edizione
Edition
Edición
Ausgabe
90103121
02.2016
MADE IN ITALY
Page 2

Page 3
MANUALE D’USO E MANUTENZIONE
INSTRUCTION BOOK
MANUEL D’UTILISATION
MANUAL DE USO Y MANTENIMIENTO
BEDIENUNGS - UND WARTUNGSHANDBUCH
660 HY WS
• Motofalciatrice idrostatica
• Hydrostatic motor mower
• Motofaucheuse hydrostatique
• Motosegadora hidrostática
• Hydrostatischer Motormäher
Codice
Code
Codigo
Kodezahl
Edizione
Edition
Edición
Ausgabe
90103121
02.2016
MADE IN ITALY
Page 4

REGISTRAZIONE DATI MACCHINA
A
Il manuale rappresenta la macchina (senza attrezzo) indicata in copertina. Al fine di facilitare la ricerca di ricambi e di altre informazioni della
macchina acquistata è necessario registrare alcuni dati. Si prega di
scrivere quanto richiesto nei riquadri a fianco:
A) Modello di macchina
B) Numero di serie della macchina
IT
C) Numero di serie del motore
D) Nome del rivenditore dove è stata acquistata
E) Indirizzo del rivenditore
F) Numero di telefono del rivenditore
G) Data di acquisto della macchina
RECORDING DATA MACHINE
The manual represent the machine (without implement) indicated on
the front cover. To facilitate the search of the spare parts and maintain
information of the bought machine, is necessary to record some data.
Please write the requested data inside the squares to side:
A) Model of machine
B) Serial number of the machine
EN
C) Serial number of the engine
D) Name of the dealer where bought the machine
E) Address of the dealer
F) Phone number of the dealer
G) Date of the bought machine
ENREGISTREMENT DES DONNEES DE LA MACHINE
Le manuel représente la machine (sans outil) figurant sur la couverture. Afin de faciliter la recherche des pièces de rechange et d’autres
informations concernant la machine achetée, il faut enregistrer certaines données. Veuillez écrire ce qui est demandé dans les cases sur le
côté:
A) Modèle de la machine
FR
B) Numéro de série de la machine
C) Numéro de série du moteur
D) Nom du revendeur où la machine a été achetée
E) Adresse du revendeur
F) Numéro de téléphone du revendeur
G) Date d’achat de la machine
..................................................................................
..................................................................................
B
..................................................................................
..................................................................................
C
..................................................................................
..................................................................................
D
..................................................................................
..................................................................................
REGISTRO DATOS MÁQUINA
El manual representa la máquina (sin herramienta) indicada en la cubierta. Para facilitar la búsqueda de recambios y de mayor información
sobre la máquina adquirida, es necesario registrar algunos datos. Se
ruega escriban todo lo solicitado en los recuadros de al lado:
A) Modelo de máquina
B) Número de serie de la máquina
ES
C) Número de serie del motor
D) Nombre del vendedor autorizado donde se adquirió
E) Dirección del vendedor autorizado
F) Número de teléfono del vendedor
G) Fecha de compra de la máquina
REGISTRIERUNG DER GERÄTEDATEN
Das Handbuch stellt die auf der Titelseite abgebildete Maschine (ohne
Anbaugerät) dar. Um die Suche nach Ersatzteilen und anderen Informationen der Maschine, die Sie kaufen Sie einige Daten aufzeichnen
müssen zu erleichtern. Bitte schreiben Sie, was in den Kisten auf der
rechten benötigt:
A) Gerätemodell
B) Gerätenummer
DE
C) Seriennummer des Motors
D) Name des Händlers, bei dem das Gerät gekauft wurde
E) Anschrift des Händlers
F) Telefonnummer des Händlers
G) Kaufdatum des Geräts
E
..................................................................................
..................................................................................
F
..................................................................................
..................................................................................
G
..................................................................................
..................................................................................
2
Page 5

INDICE
Copertina fronte-manuale
• Marchio e modello macchina rappresentato
• Codice ed edizione manuale d'uso
Registrazione dati macchina
Indice
0. Introduzione
1. Simbologia e avvertenze per la sicurezza
1.1 Simbologia
1.2 Avvertenze
2. Identificazione e adesive
2.1 Targhetta di identificazione
2.2 Adesive macchina
Pag. 2
" 3
" 8
" 10
" 10
" 14
" 21
" 21
" 22
2.2.1 Legenda adesive macchina
2.3 Mantenimento delle adesive
3. Caratteristiche tecniche
3.1 Motore
3.2 Frizione PowerSafe®
3.3 Dispositivo di sterzo
3.4 Trasmissione idrostatica
3.5 Cambio
3.6 Manubrio
3.7 Inversore di marcia
3.8 Presa di forza (PTO)
3.9 Dispositivi di sicurezza
3.10 Pneumatici
3.11 Bilanciamento della macchina
Pag. 23
" 24
" 24
" 25
" 25
" 26
" 26
" 26
" 28
" 28
" 28
" 28
" 29
" 29
IT
INDEX
Front-cover user manual
• Mark and models of machine represented
• Code and edition of the user manual
Recording data machine
Index
0. Introduction
1. Safety symbols and warnings
1.1 Symbols
1.2 Warnings
2. Identification and stickers
2.1 Identification plate
2.2 Labels of the machine
INDEX
Couverture frontale du manuel
• Marque et modèles des machines représentées
• Code et édition du manuel d'utilisation
Enregistrement des données de la machine
Index
0. Introduction
1. Symboles et avertissement pour la sécurité
1.1 Symboles
1.2 Avertissement
2. Identification et adhésifs
2.1 Plaque d'identification
2.2 Adhésifs de la machine
Page 2
" 3
" 8
" 10
" 10
" 14
" 21
" 21
" 22
Page 2
" 3
" 8
" 10
" 10
" 14
" 21
" 21
" 22
2.2.1 Labels map
2.3 Preservation of the labels
3. Technical features
3.1 Engine
3.2 PowerSafe® clutch
3.3 Steering device
3.4 Hydrostatic transmission
3.5 Gearbox
3.6 Handlebar
3.7 Reverser device
3.8 Power take off (PTO)
3.9 Safety devices
3.10 Tires
3.11 Balancing of the machine
2.2.1 Légende des adhésifs
2.3 Maintenance des adhésifs
3. Caractéristiques techniques
3.1 Moteur
3.2 Embrayage PowerSafe®
3.3 Dispositif de direction
3.4 Transmission hydrostatique
3.5 Boîte de vitesses
3.6 Guidon
3.7 Inverseur de boîte de vitesse
3.8 Prise de force (PTO)
3.9 Dispositifs de sécurité
3.10 Pneus
3.11 Equilibrage de la machine
Page 23
" 24
" 24
" 25
" 25
" 26
" 26
" 26
" 28
" 28
" 28
" 28
" 29
" 29
Page 23
" 24
" 24
" 25
" 25
" 26
" 26
" 26
" 28
" 28
" 28
" 28
" 29
" 29
EN
FR
INDICE
Cubierta fronte-manual
• Marca y modelos máquinas representadas
• Código y edición manual de uso
Registro datos máquina
Indice
0. Introducción
1. Simbología y advertencias para la seguridad
1.1 Simbología
1.2 Advertencias
2. Identificación y adhesivos
2.1 Placa de identificación
2.2 Adhesivos máquina
INHALT
Titelseite der Betriebsanleitung
• Marke und Modell der dargestellten Geräte
• Codenummer und Ausgabe der Anleitung
Registrierung der Gerätedaten
Inhalt
0. Einführung
1. Symbolik und Sicherheitshinweise
1.1 Symbolik
1.2 Hinweise
2. Identifizierung und Aufkleber
2.1 Typenschild
2.2 Geräteaufkleber
Pag. 2
" 3
" 8
" 10
" 10
" 14
" 21
" 21
" 22
Seite 2
" 3
" 8
" 10
" 10
" 14
" 21
" 21
" 22
2.2.1 Leyenda de adhesivos
2.3 Mantenimiento de los adhesivos
3. Caracteristicas tecnicas
3.1 Motor
3.2 Embrague PowerSafe®
3.3 Dispositivo de dirección
3.4 Transmisión hidrostática
3.5 Cambio
3.6 Manillar
3.7 Inversor de marcha
3.8 Toma de fuerza (PTO)
3.9 Dispositivos de seguridad
3.10 Neumáticos
3.11 Equilibrado de la máquina
2.2.1 Erklärung der Aufkleber
2.3 Erhaltung der Aufkleber
3. Technische Eigenshaften
3.1 Motor
3.2 PowerSafe® Kupplung
3.3 Lenkvorrichtung
3.4 Hydrostatisches Getriebe
3.5 Getriebe
3.6 Lenker
3.7 Wendegetriebe
3.8 Zapfwelle (PTO)
3.9 Sicherheitsvorrichtungen
3.10 Bereifung
3.11 Schwerpunktlage des Gerätes
3
Pag. 23
" 24
" 24
" 25
" 25
" 26
" 26
" 26
" 28
" 28
" 28
" 28
" 29
" 29
Seite 23
" 24
" 24
" 25
" 25
" 26
" 26
" 26
" 28
" 28
" 28
" 28
" 29
" 29
ES
DE
Page 6

3.12 Raggio di sterzata "zero" (0)
3.13 Dimensioni e masse massime
4. Preparazione della macchina
4.1 Apertura della scatola di cartone
4.2 Verifiche preliminari
4.3 Assemblaggio della macchina
5. Identificazione comandi e dispositivi
5.1 Legenda identificazione comandi
IT
5.2 Comandi e dispositivi
6. Istruzioni d’uso
6.1 Formazione operatore
6.2 Controlli prima di avviare il motore
6.3 Regolazioni macchina / motore
7. Avviamento e verifica della macchina
Pag. 29
" 29
" 33
" 33
" 33
" 34
" 37
" 37
" 39
" 41
" 41
" 42
" 44
" 45
7.1 Messa in moto
7.2 Verifica di funzionamento
8. Applicazione attrezzi
9. Informazioni utili
9.1 Uso della macchina
9.2 Uso della macchina su terreno in pendenza
9.3 Trasmissione idrostatica / cambio
9.4 Frizione PowerSafe®
9.5 Freni-Frizioni di sterzo idraulici (di lavoro /
servizio)
9.6 Freno di stazionamento idraulico
9.7 Verifiche livelli olio
9.8 Ingrassaggio
9.9 Attrezzi ed accessori applicabili
Pag. 45
" 46
" 48
" 50
" 50
" 51
" 52
" 52
" 53
" 53
" 53
" 53
" 54
3.12 Steering radius "zero" (0)
3.13 Dimensions and maximum masses
4. Setting up of the machine
4.1 Opening the carton box
4.2 Preliminary checks
4.3 Assembling the machine
5. Identifying controls and devices
5.1 Controls identification key
EN
5.2 Controls and devices
6. Instructions for use
6.1 Operator training
6.2 Checks before switch on the engine
6.3 Adjustment machine / engine
7. Avviamento e verifica della macchina
3.12 Rayon de braquage "zéro" (0)
3.13 Dimensions et masses maximales
4. Mise en fonction
4.1 Ouverture du carton
4.2 Contrôles préliminaires
4.3 Assemblage de la machine
5. Identification commandes et dispositifs
5.1 Légende identification des commandes
FR
5.2 Commandes et dispositifs
6. Instructions d'utilisation
6.1 Formation de l'opérateur
6.2 Contrôles avant de faire démarrer le moteur
6.3 Réglages machine / moteur
7. Démarrage et vérification de la machine
Page 29
" 29
" 33
" 33
" 33
" 34
" 37
" 37
" 39
" 41
" 41
" 42
" 44
" 45
Page 29
" 29
" 33
" 33
" 33
" 34
" 37
" 37
" 39
" 41
" 41
" 42
" 44
" 45
7.1 Starting up
7.2 Functional test
8. Connecting the implements
9. Useful information
9.1 Using the machine
9.2 Using the machine on slops
9.3 Hydrostatic transmission / gearbox
9.4 PowerSafe® clutch
9.5 Hydraulic steering brakes – clutches (work /
service)
9.6 Hydraulic stationery brake
9.7 Checking the oil levels
9.8 Greasing
9.9 Applicable tools and accessories
7.1 Mise en marche
7.2 Vérification du fonctionnement
8. Application des outils
9. Informations utiles
9.1 Utilisation de la machine
9.2 Utilisation de la machine sur terrain en pente
9.3 Transmission hydrostatique / boîte de vitesses
9.4 Embrayage PowerSafe®
9.5 Freins / Embrayages de direction hydrauliques
(de travail / service)
9.6 Frein de stationnement hydraulique
9.7 Vérifications des niveaux d'huile
9.8 Graissage
9.9 Equipements et accessoires applicables
Page 45
" 46
" 48
" 50
" 50
" 51
" 52
" 52
" 53
" 53
" 53
" 53
" 54
Page 45
" 46
" 48
" 50
" 50
" 51
" 52
" 52
" 53
" 53
" 53
" 53
" 54
3.12 Radio de giro "cero" (0)
3.13 Dimensiones y pesos máximos
4. Puesta en funcionamiento
4.1 Apertura de la caja de cartón
4.2 Controles previos
4.3 Ensamblado de la máquina
5. Identificación mandos y dispositivos
5.1 Leyenda identificación mandos
ES
5.2 Mandos y dispositivos
6. Instrucciones de uso
6.1 Formación operador
6.2 Controles antes de poner en marcha el motor
6.3 Regulaciónes máquina / motores
7. Puesta en marcha y comprobación de la máquina
3.12 Wendekreis "null" (0)
3.13 Höchstabmessungen und Höchstgewicht
4. Inbetriebnahme
4.1 Öffnen des Verpackungskartons
4.2 Kontrollen im Vorfeld
4.3 Gerät montieren
5. Beschreibung Steuerungen und Vorrichtungen
5.1 Zeichenerklärung Steuerungen
DE
5.2 Steuerungen und Einrichtungen
6. Gebrauchsanweisung
6.1 Einweisung der Bedienperson
6.2 Vor Einschaltung des Maschine prüfen
6.3 Motor / Maschine Verstellung
7. Gerät Einschalten und Prüfen
Pag. 29
" 29
" 33
" 33
" 33
" 34
" 37
" 37
" 39
" 41
" 41
" 42
" 44
" 45
Seite 29
" 29
" 33
" 33
" 33
" 34
" 37
" 37
" 39
" 41
" 41
" 42
" 44
" 45
7.1 Puesta en marcha
7.2 Comprobación de funcionamiento
8. Aplicación de los aperos
9. Información util
9.1 Uso de la máquina
9.2 Uso de la máquina sobra un terreno en pendiente
9.3 Transmisión hidrostática / cambio
9.4 Embrague PowerSafe®
9.5 Frenos / Embragues de dirección hydráulicos
(de trabajo / servicio)
9.6 Freno de estacionamiento hidráulico
9.7 Control de los niveles de aceite
9.8 Engrasado
9.9 Equipos y accesorios aplicables
7.1 Inbetriebsetzung
7.2 Betriebsprüfung
8. Anwendung des Zubehör
9. Nützliche Hinweise
9.1 Gebrauch der Maschine
9.2 Gebrauch der Maschine auf Hängen
9.3 Hydrostatgetriebe / Getriebe
9.4 PowerSafe® Kupplung
9.5 Bremsen - hydraulische Lenkerkupplungen
(Betrieb / Service)
9.6 Hydraulische Standbremse
9.7 Ölstand prüfen
9.8 Schmieren
9.9 Anwendbare Geräte und Zubehöre
4
Pag. 45
" 46
" 48
" 50
" 50
" 51
" 52
" 52
" 53
" 53
" 53
" 53
" 54
Seite 45
" 46
" 48
" 50
" 50
" 51
" 52
" 52
" 53
" 53
" 53
" 53
" 54
Page 7

9.9.1 Attrezzi
9.9.2 Ruote pneumatiche
9.9.3 Ruote "Superbite" (anti-deriva)
9.9.4 Ruote metalliche artigliate
9.9.5 Gemellaggio ruote
9.9.6 Protezioni per mozzi ruote
9.9.7 Attacco rapido attrezzi
9.9.8 Rullo per Blade Runner
9.9.9 Zavorre bilanciamento attrezzi
9.9.10 Protezione anteriore barra
9.9.11 Protezioni laterali per barra Semi Fitta
9.9.12 Presa di forza unificata D=35 mm (1"3/8)
9.9.13 Prolunga attrezzi cm 8
10. Fine lavoro
Pag. 54
" 56
" 56
" 57
" 57
" 57
" 58
" 59
" 59
" 59
" 60
" 60
" 60
" 63
11. Pulizia
11.1 Pulizia motore e filtro aria
11.2 Pulizia delle attrezzature
12. Inattività prolungata
13. Movimentazione e trasporto
14. Manutenzione e lubrificazione
14.1 Motore
14.1.1 Filtro aria a bagno d’olio
14.1.2 Filtro aria a secco
14.2 Frizione
14.3 Trasmissione idrostatica (gruppo Kanzaki)
14.4 Scatola cambio / frizioni di sterzo
14.5 Sostituzione filtro e olio cambio
14.6 Schemi idraulici
Pag. 63
" 63
" 64
" 64
" 65
" 66
" 67
" 67
" 67
" 68
" 68
" 70
" 72
" 74
IT
9.9.1 Implements
9.9.2 Pneumatic wheels
9.9.3 Wheels "Superbite" (anti-drift)
9.9.4 Back-clawed metal wheels
9.9.5 Wheels twinning
9.9.6 Wheels hub protection
9.9.7 Quick hitch implements
9.9.8 Roller for Blade Runner
9.9.9 Ballasts for equipment
9.9.10 Outter bar front protections
9.9.11 SF (Fingers) bar side protections
9.9.12 Standard Power Take Off D=35 mm
(1"3/8)
9.9.13 Equipment extension cm 8
10. End of the job
9.9.1 Outils
9.9.2 Roues pneumatiques
9.9.3 Roues "Superbite" (antidérive)
9.9.4 Roues métalliques dentées
9.9.5 Jumelage roues
9.9.6 Protections pour moyeux roues
9.9.7 Attache rapide outils
9.9.8 Rouleau pour Blade Runner
9.9.9 Contrepoids pour équilibrer les outils
9.9.10 Protection antérieure pour barre
9.9.11 Protections latérales pour barre SF (à
dents semi-serrés)
9.9.12 Prise de force unifiée D=35 mm (1"3/8)
9.9.13 Rallonge outils cm 8
10. Fin du travail
Page 54
" 56
" 56
" 57
" 57
" 57
" 58
" 59
" 59
" 59
" 60
" 60
" 60
" 63
Page 54
" 56
" 56
" 57
" 57
" 57
" 58
" 59
" 59
" 59
" 60
" 60
" 60
" 63
11. Cleaning
11.1 Cleaning engine and air filter
11.2 Cleaning of the implements
12. Prolonged inactivity
13. Movement and transport
14. Maintenance and lubrication
14.1 Engine
14.1.1 Oil-bath air filter
14.1.2 Dry air filter
14.2 Clutch
14.3 Hydrostatic transmission (Kanzaki group)
14.4 Gearbox / steering clutches
14.5 Changing filter and gearbox oil
14.6 Hydraulic diagrams
11. Nettoyage
11.1 Nettoyage moteur et filtre à air
11.2 Nettoyage des équipements
12. Inactivité prolongée
13. Déplacement et transport
14. Entretien et lubrification
14.1 Moteur
14.1.1 Filtre à air à bain d'huile
14.1.2 Filtre à air à sec
14.2 Embrayage
14.3 Transmission hydrostatique (groupe Kanzaki)
14.4 Boîte de vitesses / Embrayages de direction
14.5 Remplacement du filtre et de l'huile de la
boîte de vitesses
14.6 Schéma hydraulique
Page 63
" 63
" 64
" 64
" 65
" 66
" 67
" 67
" 67
" 68
" 68
" 70
" 72
" 74
Page 63
" 63
" 64
" 64
" 65
" 66
" 67
" 67
" 67
" 68
" 68
" 70
" 72
" 74
EN
FR
9.9.1 Aperos
9.9.2 Ruedas neumaticas
9.9.3 Ruedas "Superbite" (antideriva)
9.9.4 Ruedas metálicas con garra
9.9.5 Ruedas gemelas
9.9.6 Protecciones para bujes ruedas
9.9.7 Enganche rapido aperos
9.9.8 Rodillo para Blade Runner
9.9.9 Lastres para equilibrar los aperos
9.9.10 Protección anterior para barra
9.9.11 Protecciones laterales para barra SF (con
dientes semi-juntos)
9.9.12 Toma de fuerza unificada D 35mm (1"3/8)
9.9.13 Alargador elementos 8 cm
10. Fin del trabajo
9.9.1 Zubehör
9.9.2 Pneumatische Räder
9.9.3 "Superbite" Räder (Antidriften)
9.9.4 Stachelwalzen-Räder
9.9.5 Zwillingsbereifung
9.9.6 Abdeckungen für Radnaben
9.9.7 Schnellanschluß für Arbeitsgeräte
9.9.8 Rölle für Blade Runner
9.9.9 Zusatzgewichte Gewichtsausgleich der
Anbaugeräte
9.9.10 Frontschutz für Mähbalken
9.9.11 Seitenschutz für SF Mähbalken
9.9.12 Zapfwelle D=35 mm (1" 3/8)
9.9.13 Verlängerung Anbaugeräte 8 cm
10. Arbeitsende
Pag. 54
" 56
" 56
" 57
" 57
" 57
" 58
" 59
" 59
" 59
" 60
" 60
" 60
" 63
Seite 54
" 56
" 56
" 57
" 57
" 57
" 58
" 59
" 59
" 59
" 60
" 60
" 60
" 63
11. Limpieza
11.1 Limpieza del motor y filtro aire
11.2 Limpieza de los equipos
12. Inactividad prolongada
13. Manejo y transporte
14. Mantenimiento y lubricación
14.1 Motor
14.1.1 Filtro de aire en baño de aceite
14.1.2 Filtro de aire a seco
14.2 Embrague
14.3 Transmisión hidrostática (grupo Kanzaki)
14.4 Caja de cambios / Embrague de dirección
14.5 Sustitución del filtro del aceite en la caja de
cambios
14.6 Esquemas hidraulicos
11. Reinigung
11.1 Motor und Luftfilter reinigen
11.2 Geräte reinigen
12. Längerer Gerätestillstand
13. Verfahren und Transport
14. Wartung und Schmierarbeiten
14.1 Motor
14.1.1 Lüftfilter im Ölbad
14.1.2 Trocken Lüftfilter
14.2 Kupplung
14.3 Hydrostatgetriebe (Kanzaki-Einheit)
14.4 Getriebegehäuse / Lenkerkupplung
14.5 Filter und Getriebeöl ersetzen
14.6 Hydraulische Schema
5
Pag. 63
" 63
" 64
" 64
" 65
" 66
" 67
" 67
" 67
" 68
" 68
" 70
" 72
" 74
Seite 63
" 63
" 64
" 64
" 65
" 66
" 67
" 67
" 67
" 68
" 68
" 70
" 72
" 74
ES
DE
Page 8

14.6.1 Trasmissione idrostatica
14.6.2 Legenda
14.6.3 Schema frizione PowerSafe® e frizioni di
sterzo
14.6.4 Legenda frizione PowerSafe® e di sterzo
14.7 Impianto elettrico
14.7.1 Schema elettrico
14.7.2 Legenda
IT
15. Inconvenienti, cause e rimedi
16. Come registrare la frizione PowerSafe®
17. Tutela dell’acquirente
17.1 Dichiarazioni di Consegna, Garanzia, CE
17.2 Vibrazioni e rumore
18. Assistenza
Pag. 74
" 74
" 75
" 75
" 76
" 76
" 76
" 78
" 83
" 85
" 85
" 86
" 87
19. Garanzia
20. Materiale di consumo
21. Ricambi, come ordinare
Copertina di fondo
• Costruttore e logo del gruppo
• Indirizzo del costruttore
• Telefono, fax, e-mail, indirizzo URL
Pag. 88
" 88
" 89
14.6.1 Hydrostatic transmission
14.6.2 Key
14.6.3 PowerSafe® and steering wheel diagram
14.6.4 PowerSafe® and steering wheel key
14.7 Electrical diagram
14.7.1 Diagram
14.7.2 Electric system key
15. Trouble shooting
EN
16. How to adjust the PowerSafe® clutch
17. Consumer protection
17.1 Delivery declarations / warranty and EC
17.2 Vibrations and noise
18. After sale service
14.6.1 Transmission hydrostatique
14.6.2 Légende
14.6.3 Schéma embrayage PowerSafe® et embrayages de direction
14.6.4 Légende embrayage PowerSafe® et de
di-rection
14.7 Installation électrique
14.7.1 Schéma électrique
FR
14.7.2 Légende
15. Inconvénients, causes et solutions
16. Comment régler l'embrayage PowerSafe®
17. Protection de l'Acheteur
17.1 Déclarations de livraison / garantie et CE
17.2 Vibrations et bruit
18. Assistance
Page 74
" 74
" 75
" 75
" 76
" 76
" 76
" 78
" 83
" 85
" 85
" 86
" 87
Page 74
" 74
" 75
" 75
" 76
" 76
" 76
" 78
" 83
" 85
" 85
" 86
" 87
19. Warranty
20. Consumables
21. Spare parts, how to order
Rear cover of manual
• Manufacturer and logo of the group
• Manufacturer's address
• Phone no., fax no., e-mail, URL address
19. Garantie
20. Matériel de consommation
21. Pièces de rechange, comment commander
Couverture arrière du manuel
• Constructeur et lieu du groupe
• Adresse du Constructeur
• Téléphone, fa, e-mail et adresse URL
Page 88
" 88
" 89
Page 88
" 88
" 89
14.6.1 Transmisión hídrostatica
14.6.2 Legenda
14.6.3 Esquema embrague PowerSafe® y
embra-gues de gíro
14.6.4 Leyenda embrague PowerSafe® y de
gíro
14.7 Instalación eléctrica
14.7.1 Esquema eléctrico
ES
14.7.2 Leyenda
15. Problemas, causas y remedios
16. Como registrar el embrague PowerSafe®
17. Tutela del comprador
17.1 Declaraciones de entrega / garantía y CE
17.2 Vibracciónes y ruido
18. Asistencia
14.6.1 Hydrostatischenantrieb
14.6.2 Key
14.6.3 Kupplungsplan PowerSafe® und Lenkerkupplung
14.6.4 Zeichenerklärung PowerSafe®- und
Lenkerkupplung
14.7 Elektrische Anlage
14.7.1 Elektrische Schema
DE
14.7.2 Beschriftung
15. Störungen, Ursache und Abhilfe
16. PowerSafe® Kupplung einstellen
17. Käuferschutz
17.1 Lieferungs-/Garantieerklärung und CE-Deklaration
17.2 Schwingung und Geräusch
18. Kundendienst
Pag. 74
" 74
" 75
" 75
" 76
" 76
" 76
" 78
" 83
" 85
" 85
" 86
" 87
Seite 74
" 74
" 75
" 75
" 76
" 76
" 76
" 78
" 83
" 85
" 85
" 86
" 87
19. Garantía
20. Material de consumo
21. Recambios, cómo pedir
Cubierta parte trasera del manual
• Fabricante y logotipo del grupo
• Dirección Fabricante
• Teléfono, fax, correo electrónico y dirección URL
19. Garantía
20. Verschleissmaterial
21. Ersatzteile, Bestellung
Rückseite der Betriebsanleitung
• Hersteller und Firmenlogo der Gruppe
• Herstelleranschrift
• Telefon- und Faxnummer, E-mail- Adresse und
URL
6
Pag. 88
" 88
" 89
Seite 88
" 88
" 89
Page 9

PAGINA LASCIATA INTENZIONALMENTE BIANCA
INTENTIONALLY BLANK PAGE
PAGE LAISSÉE EN BLANC INTENTIONNELLEMENT
PÁGINA DEJADA EN BLANCO INTENCIONADAMENTE
ABSICHTLICH FREI GELASSENE SEITE
7
Page 10

0. INTRODUZIONE
Gentile cliente,
ci complimentiamo per la scelta effettuata che, dal momento dell’acquisto e per la vita della macchina, le garantirà
l’assistenza post-vendita e la collaborazione che da sempre contraddistinguono il nostro marchio.
Questa pubblicazione l’aiuterà a conoscere meglio la mac-
IT
china e se verrà utilizzata seguendo queste istruzioni le
durerà molti anni e le sarà di prezioso aiuto per svolgere i
lavori di manutenzione e taglio dell’erba. Le raccomandiamo pertanto di leggere attentamente queste pagine e di
seguirne sempre i consigli.
La motofalciatrice 660 HY WS è dotata di dispositivi di si-
curezza conformi alle Direttive Europee vigenti, di trasmissione idrostatica con 2 gamme di velocità, di 1 frizione centrale e 2 frizioni di sterzo a bagno olio a comando idraulico
con freno automatico di stazionamento, PTO con freno automatico incorporato e attacco rapido.
La motofalciatrice 660 HY WS è adatta per l’applicazione
di attrezzature frontali come barra falciante, lama da neve,
spazzatrice, tosaerba, trincia erba ecc.
0. INTRODUCTION
Dear Customer,
thank you for your preference. Upon purchasing this product, after-sales assistance is guaranteed for the life span
of the machine as well as the collaboration that has always
distinguished our brand.
This publication will help you to get to know the machine
EN
better. If you follow these instructions the machine will last
for many years. This publication will prove invaluable when
carrying out maintenance work and cutting grass. It is therefore recommended that you read these pages carefully
and always follow the advice given.
0. INTRODUCTION
Cher client,
nous vous félicitons pour le choix effectué qui, dès l’achat
et pour la durée de vie de la machine, vous garantira l’assistance après-vente et la collaboration qui, depuis toujours, caractérisent notre marque.
Cette publication vous aidera à mieux connaître la machine et si elle sera utilisée selon ces instructions durera plu-
FR
sieurs années et vous sera une aide précieuse pour effectuer les travaux d’entretien ou du coupe de l’herbe.Nous
vous recommandons par conséquent de lire attentivement
ces pages et de toujours suivre les conseils donnés.
The 660 HY WS motor mower is equipped with safety devices in agreement with last European Directive, with hydrostatic transmission and 2 ranges of speed, with 1 engine
clutch and 2 steering clutches all in oil bath with hydraulic
control and automatic parking brake, with automatic inner
brake on PTO and quick hitch.
The 660 HY WS motor mower was developed to mount
front implements as cutter-bar, snow-blade, sweeper, lawn
mower, grass flail etc.
La motofaucheuse 660 HY WS est équipée de dispositifs
de sécurité conformes aux directives européennes en vigueur, d’une transmission hydrostatique avec 2 gammes
de vitesse, de 1 débrayage central et de 2 embrayages de
direction à bain d’huile à commande hydraulique avec frein
automatique de stationnement, PTO avec frein automatique incorporé et attelage rapide.
La motofaucheuse 660 HY WS est adaptée à l’utilisation
d’équipements frontaux tels que barres faucheuses, lames
à neige, balayeuses, tondeuses, hache-herbe, etc…
0. INTRODUCCIÓN
Estimado cliente,
le agradecemos que haya escogido nuestro producto y le
comunicamos que, a partir del momento de la compra y
mientras dure la máquina, tendrá garantizada la asistencia
posventa y la colaboración que desde siempre ha caracterizado nuestra marca. Esta publicación le ayudará a conocer mejor la máquina y, si la utiliza siguiendo estas instruc-
ES
ciones, durará muchos años. Además, este manual será
una valiosa ayuda para realizar sus operaciones de mantenimiento y de corte de la hierba. Le recomendamos que
lea atentamente estas páginas y que siga siempre los
consejos que incluye.
0. EINFÜHRUNG
Verehrter Kunde,
wir beglückwünschen Sie zu Ihrer Wahl, denn durch den
Kauf sichern Sie sich für die ganze Lebenszeit des Gerätes unseren After-Sales-Service und unsere Unterstützung
zu, die unser Haus seit jeher auszeichnen. Diese Anleitung
wird Ihnen helfen, Ihr Gerät besser kennen zu lernen;
wenn Sie ihr Gerät entsprechend vorliegenden Anweisun-
DE
gen verwenden, werden Sie viele Jahre Freude daran haben; außerdem ist die Anleitung eine wertvolle Hilfe bei der
Durchführung von Wartungs- und Mäharbeiten. Lesen Sie
diese Seiten aufmerksam und beachten Sie stets alle darin
enthaltenen Ratschläge.
La motosegadora 660 HY WS está dotada de dispositivos
de seguridad conformes a las Directivas Europeas vigentes, de transmisión hidrtostática con 2 gamas de velocidad, de 1 embrague central y de 2 embragues de dirección
de baño de aceite de mando hidráulico con freno automático de estacionamiento, PTO con freno automatico incorporado y empalme rápido.
La motosegadora 660 HY WS es apta para colocar equipos delanteros como barra de corte, cuchilla de nieve, recogida de basuras, segadora, trinchadora de hierba, etc.
Der Motormäher 660 HY WS verfügt über den europäischen Vorschriften entsprechenden Sicherheitsvorrichtungen, sowie über hydrostatisches Getriebe mit 2 Geschwindigkeitsbereichen, 1 Hauptkupplung und 2 Lenkerkupplungen im Ölbad und hydraulischer Steuerung mit automatischer Standbremse, Zapfwelle mit eingebauter automatischer Bremse sowie Schnellanschluss.
Am Motormäher 660 HY WS lassen sich frontseitige Anbaugeräte anbringen wie zum Beispiel Mähbalken,Schneefräsen, Kehrvorrichtungen, Mähwerke, Mulcher usw.
8
Page 11

Il manuale contiene le istruzioni per l’uso e la manutenzione delle macchine modello 660 HY WS ed è parte integrante della macchina.
Si raccomanda ai venditori di macchine nuove e / o di seconda mano di prendere atto che il manuale dovrà sempre essere fornito con la macchina.
Eventuale copia dovrà essere richiesta al servizio tecnico
del Costruttore, il codice è 90103121.
Se il manuale ha contenuti poco chiari, siete pregati di contattare il Costruttore; telefono, fax, e-mail sono indicati sulla copertina di fondo.
Le macchine comprese in questo manuale
sono costruite in accordo con la
Direttiva CE vigente e sue modificazioni.
Il presente manuale è conforme alla norma ISO 3600.
IT
The manual contains the instructions for the use and maintenance of the machines model 660 HY WS, it is an integral
part of the machine.
It is recommended that dealers of new and / or secondhand machines to take note that the manual should always
be provided with the machine.
Any copy must be requested to the technical service of the
Manufacturer, the code is 90103121.
If the manual has unclear content, please contact the technical service of the Manufacturer; phone no., fax no., email are indicated on the rear cover.
Le manuel contient les instructions pour l’utilisation et l’entretien des machines modèle 660 HY WS et il est partie intégrante de la machine.
On recommande aux vendeurs de machines neuves et /
ou d’occasion de prendre note que le manuel devra toujours être livré avec la machine.
Toute copie éventuelle devra être demandée au service technique du Constructeur, le code est 90103121.
Si le manuel devait contenir des explications peu claires,
veuillez contacter le Constructeur, dont le téléphone, fax,
e-mail sont indiqués sur la couverture du fond.
The machines covered in this manual were
manufactured in accordance with the European
Directive in force and its modifications.
This manual is compliant with ISO 3600.
Les machines contenues dans ce manuel
sont construites en accord avec la Directive
CE en vigueur et ses modifications.
Ce manuel est en conformité avec la norme ISO 3600.
EN
FR
El manual contiene las instrucciones para el uso y mantenimiento de las máquinas modelo 660 HY WS y es una
parte inseparable de la máquina.
Se recomienda a los vendedores de máquinas nuevas y /
o de segunda mano que entreguen siempre un manual
con la máquina.
Se podrán solicitar más copias al servicio técnico del fabricante, el código es 90103121.
Si los contenidos del manual están poco claros, les rogamos que se pongan en contacto con el fabricante; en la
contracubierta están indicados el teléfono, fax y correo
electrónico.
Die vorliegende Betriebsanleitung enthält Gebrauchs- und
Wartungsanweisungen der Geräte Modell 660 HY WS und
ist wesentlicher Bestandteil des Lieferumfangs. Wir erinnern alle Verkäufer von alten und / oder gebrauchten Geräten daran, dass die Betriebsanleitung stets zusammen
mit dem Gerät ausgehändigt werden muss.
Mögliche Kopien können beim technischen Kundendienst
des Herstellers angefordert werden, die Bestellnummer ist
90103121.
Falls die Anleitung stellenweise nicht klar genug sein sollte, setzen Sie sich bitte mit dem Hersteller in Verbindung;
Telefon- und Faxnummer sowie E-Mail-Adresse entnehmen Sie bitte der Rückseite der vorliegenden Anleitung.
Las máquinas incluidas en este manual
están construidas de acuerdo con la
Directiva CE vigente y sus modificaciones.
Este manual está en conformidad con
la norma ISO 3600.
Die Geräte, auf die sich diese Bedienungsanleitung
bezieht, wurden nach der geltenden CE-Richtlinie
und späteren Änderungen gebaut.
Dieses Handbuch ist in Übereinstimmung
mit ISO 3600.
ES
DE
9
Page 12
1. SIMBOLOGIA E AVVERTENZE PER L
A
A
SICUREZZA
In questo manuale e sulla macchina (fig.2/3) sono presenti
simboli con avvertenze per la sicurezza e l’uso della macchina.
IT
1.1 Simbologia
SIMBOLO DI PERICOLO
Indica importanti messaggi di sicurezza. Quando vedete questo simbolo, fate attenzione al
rischio di lesioni; leggete attentamente il messaggio che segue e informate gli altri operatori.
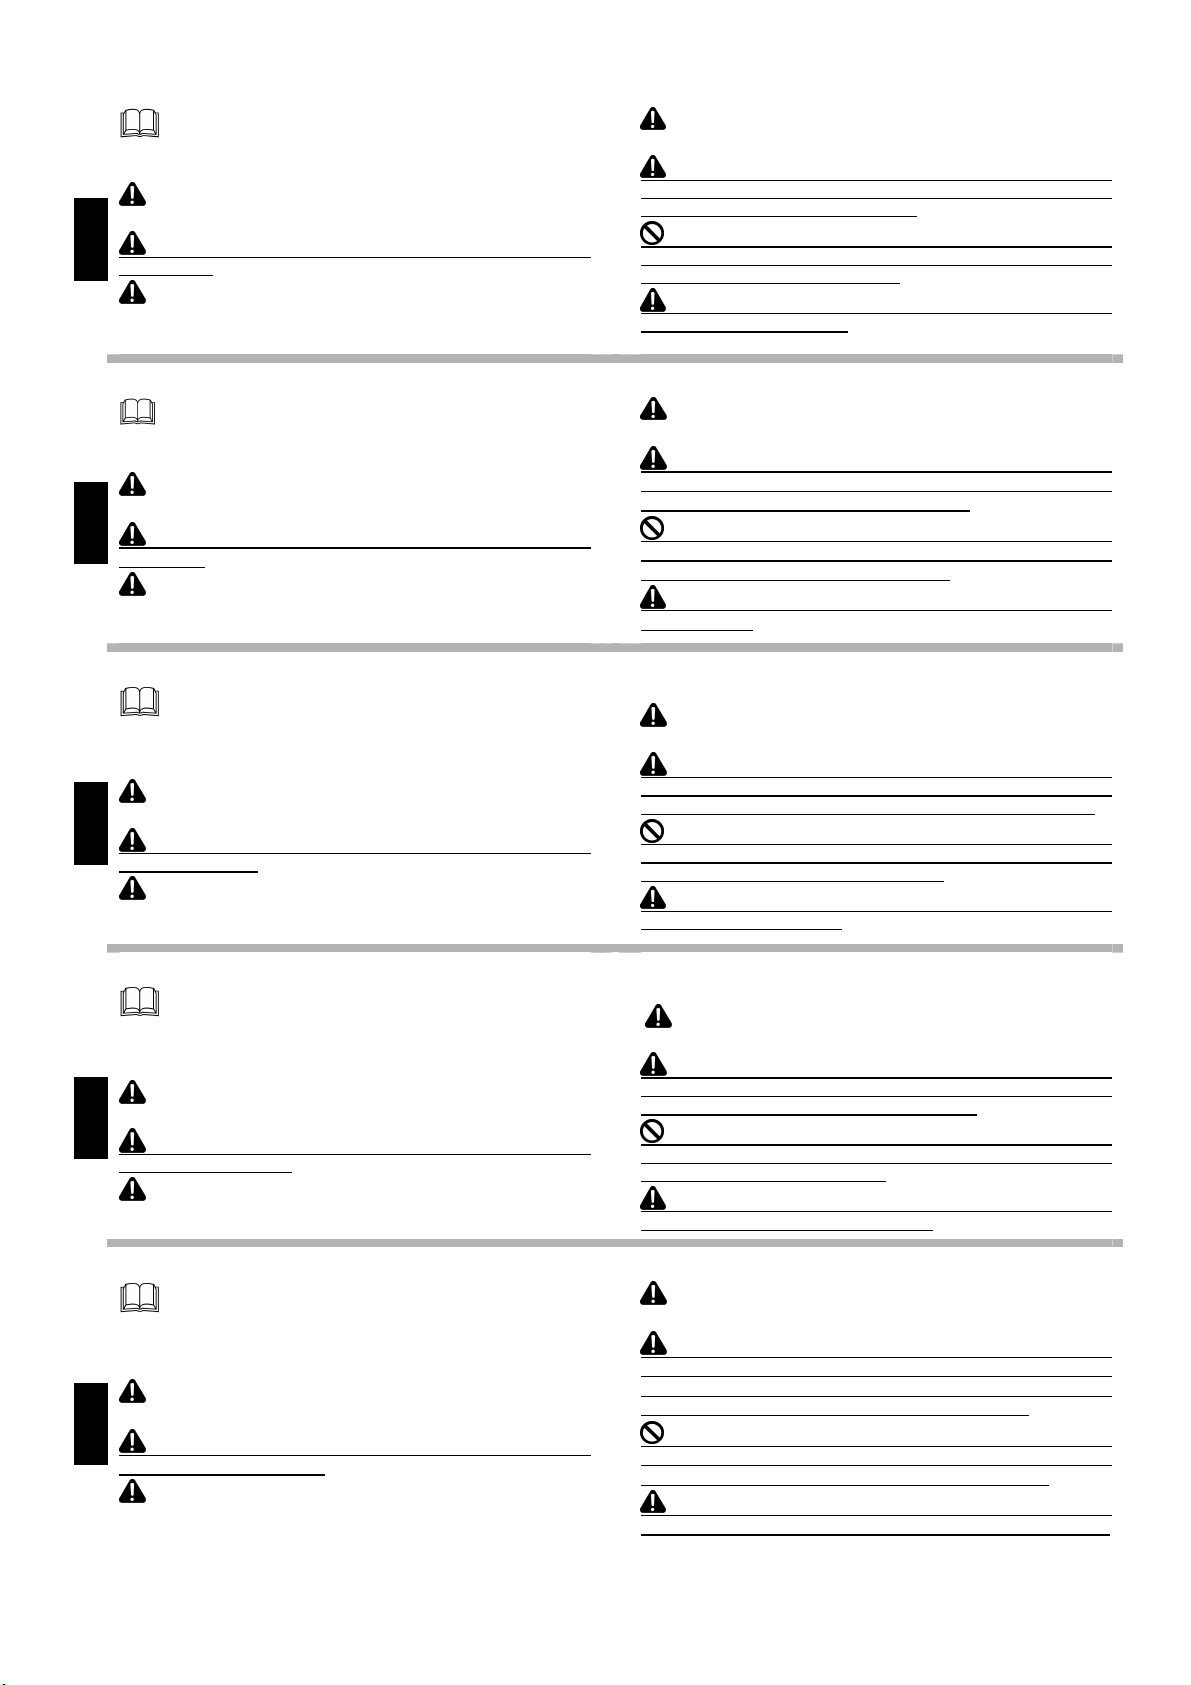
MANUALE APERTO
Significa che dovete leggere attentamente il
manuale di uso e manutenzione.
1. SAFETY SYMBOLS AND WARNINGS
In this manual and on the machine (fig.2/3) there are symbols with warnings pertaining to the safety and use of the
machine.
EN
1. SYMBOLES ET AVERTISSEMENTS POUR LA
SECURITE
A l’intérieur de ce manuel et sur la machine (fig.2/3), vous
trouverez des symboles avec des avertissements pour la
sécurité et l’utilisation de la machine.
FR
1. SIMBOLOGÍA Y ADVERTENCIAS PARA L
SEGURIDAD
Dentro de este manual y en la máquina (fig.2/3) existen
símbolos con advertencias para la seguridad y el uso de la
máquina.
ES
1.1 Symbols
1.1 Symboles
1.1 Simbología
SAFETY ALERT SYMBOL
This indicates important safety messages.
When you see this symbol, be alert to the possibility of injury, carefully read the message
that follows, and inform other operators.
MANUAL OPEN
This means that you must carefully read the
user and maintenance manual.
SYMBOLE DE DANGER
Il indique d’importants messages de sécurité.
Lorsque vous voyez ce symbole, faire attention
au risque de blessures, lire soigneusement le
message qui suit et informer les autres opérateurs.
MANUEL OUVERT
Signifie que vous devez lire avec attention le
manuel d’utilisation et entretien.
SÍMBOLO DE PELIGRO
Indica importantes mensajes de seguridad.
Cuando vean este símbolo presten mucha
atención ya que indica riesgo de lesiones.
Lean atentamente el mensaje que se indica e
informe a los demás operadores.
MANUAL ABIERTO
Significa que hay que leer atentamente el manual de uso y mantenimiento.
1. SYMBOLIK UND SICHERHEITSHINWEISE
In der vorliegenden Bedienungsanleitung und am Gerät
(Abb.2/3) sind Symbole angebracht, die auf Sicherheit und
Gebrauch des Gerätes hinweisen.
DE
10
1.1 Symbolik
GEFAHRENSYMBOL
Dieses verweist auf wichtige Sicherheitshinweise. Wenn Sie dieses Symbol sehen, achten
Sie bitte auf Verletzungsgefahr; lesen Sie den
folgenden Hinweis aufmerksam und informieren Sie alle weiteren Mitarbeiter.
OFFENES BUCH
Dieses Symbol weist auf ein aufmerksames
Lesen der Bedienungsanleitung hin.
Page 13
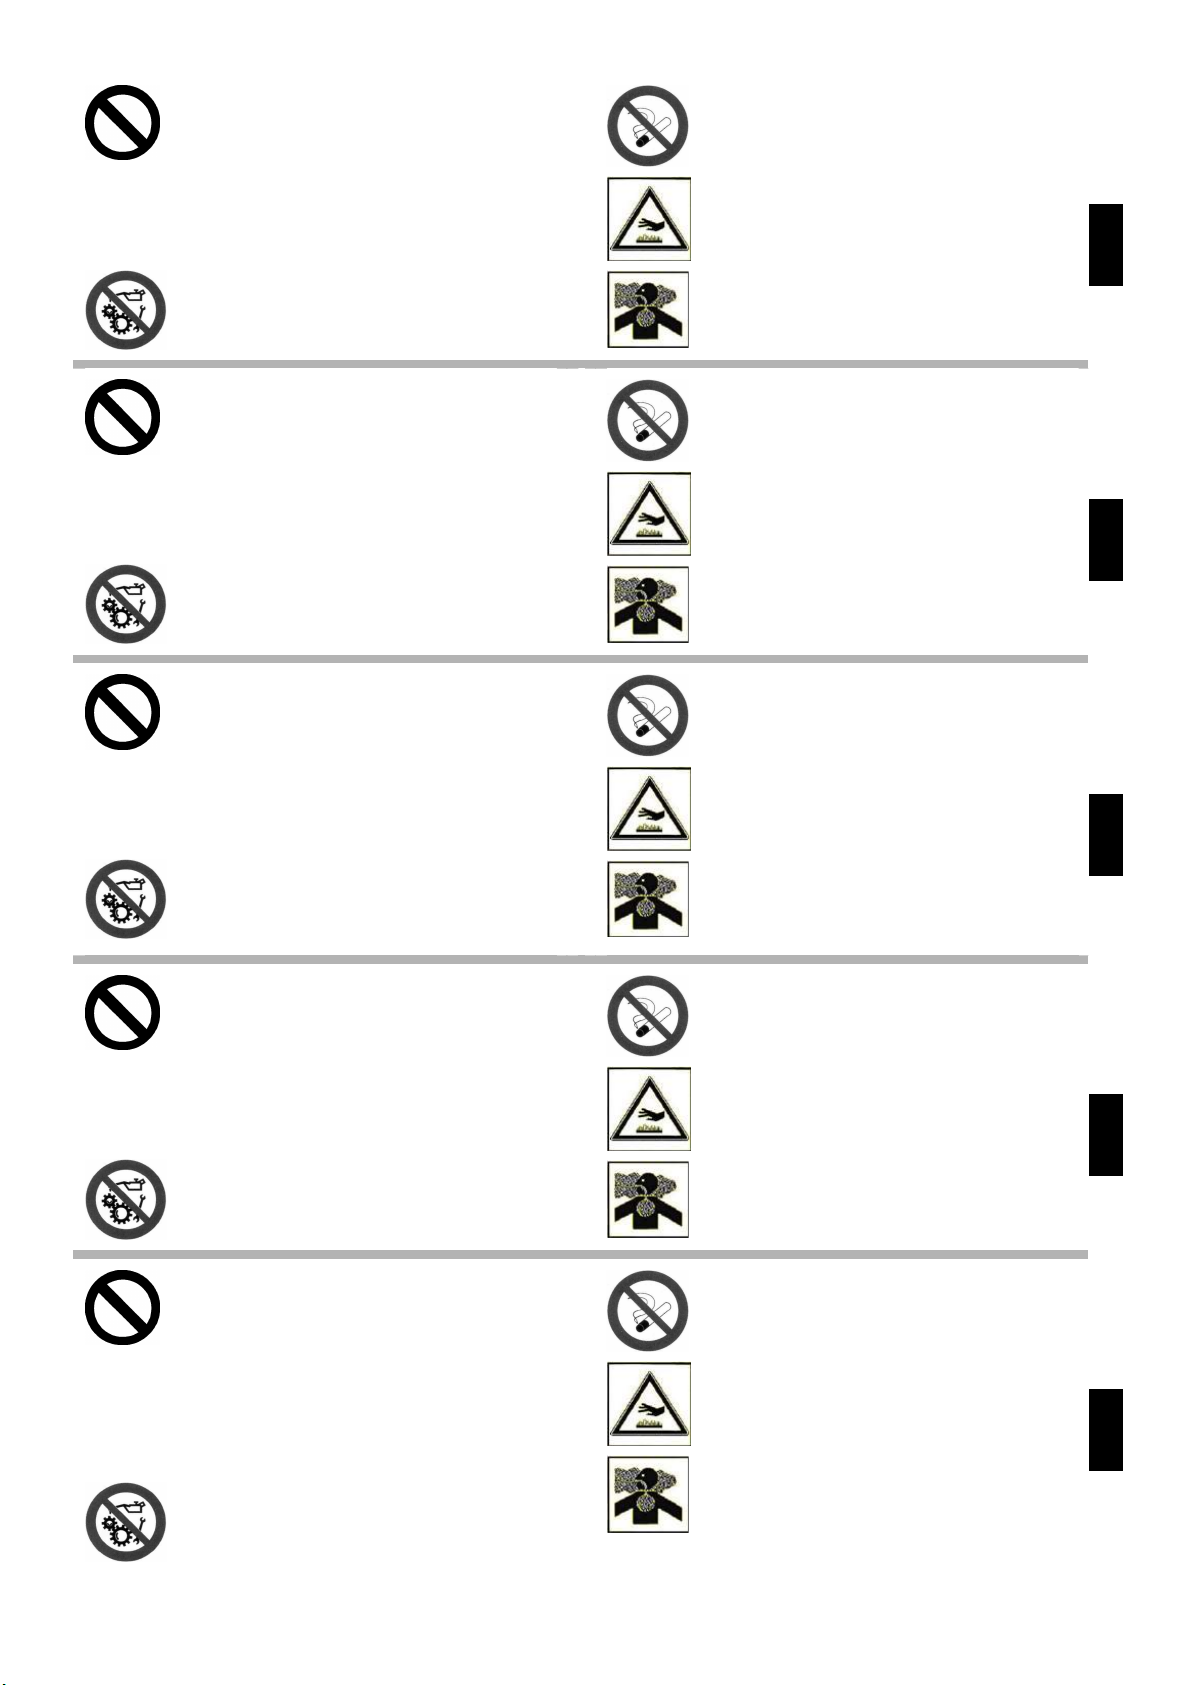
DIVIETO, NON FARE ! - Significa che non dovete assolutamente fare le operazioni riportate
sotto questo simbolo, potrebbero comportare
un pericolo mortale.
IMPORTANTE - Dovete porre particolare attenzione all’informazione che segue.
NOTA - Serve per richiamare l’attenzione su
informazioni supplementari date su uno specifico argomento.
Non riparare o lubrificare la macchina con organi in movimento o motore acceso.
Vietato fumare, accendere fiammiferi o fiamme, lasciare fiamme libere o creare scintille.
Prestate particolare attenzione a non entrare in
contatto con parti surriscaldate del motore.
I gas di scarico possono causare malanni o
morte. Se è necessario mettere in moto il motore in uno spazio chiuso, usare una prolunga
tubo di scarico per far uscire il fumo. Lavorare
in una zona ben ventilata.
IT
NO! DO NOT DO! - this means that you must
absolutely not carry out the operations stated
below this symbol. It could involve a lethal hazard.
IMPORTANT - You must pay particular attention to the next information.
NOTE - Used to draw attention to additional
information given on a specific topic.
Do not repair or lubricate the machine when
the parts are moving or the engine is on.
INTERDICTION, NE PAS FAIRE ! - signifie
que vous ne devez absolument pas faire les
opérations indiquées par ce symbole, il pourrait comporter un risque mortel.
IMPORTANT - Vous devez faire particulièrement attention à l’information qui suit.
NOTE - Utilisé pour attirer l'attention sur des
informations complémentaires données sur un
sujet précis.
Ne pas réparer ou lubrifier la machine avec des
organes en mouvement ou le moteur allumé.
Do not smoke. Do not light matches or flames.
Do not leave naked flames around or make
sparks.
Take special care not to touch hot parts of the
engine.
Engine exhaust fumes can cause sickness or
death. If it is necessary to run an engine in an
enclosed area, use an exhaust pipe extension
to remove the fumes. Always try to work in a
well ventilated area.
Interdiction de fumer, d’allumer des allumettes
ou flammes, de laisser des flammes libres ou
de créer des étincelles.
Veiller tout particulièrement à ne pas toucher
des éléments surchauffés du moteur.
L’exhalation des gaz d’échappement peut être
cause d’intoxication ou de mort. S’il est nécessaire d’allumer le moteur à l’intérieur, appliquer
au tuyau extensible pour permettre la sortie
des gaz. Il est toujours mieux de travailler en
plein air.
EN
FR
PROHIBICIÓN ¡NO HACERLO! - significa que
no se deben de ninguna manera realizar las
operaciones indicadas bajo este símbolo, podría conllevar peligro de muerte.
IMPORTANTE - Tienen que prestar especial
atención a la información que se indica.
NOTA - Sirve para llamar la atención sobre la
información suplementaria dada sobre un tema específico.
No reparar ni lubricar la máquina con órganos
en movimiento o con el motor encendido.
VERBOT! - Dieses Symbol bedeutet, dass Sie
die unter diesem Symbol beschriebenen Vorgänge auf keinen Fall durchführen dürfen, da
Lebensgefahr droht.
WICHTIG - Bitte achten Sie besonders auf die
nachfolgende Information.
HINWEIS Hiermit wird die Aufmerksamkeit des
Lesers auf besondere, zusätzliche Informationen über ein spezifisches Thema gelenkt.
Bei laufenden Bewegungsmechanismen bzw.
laufendem Motor dürfen weder Instandsetzungsnoch Schmierarbeiten vorgenommen
werden.
Prohibido fumar, encender cerillas o llamas,
dejar llamas libres u ocasionar chispas.
No tocar partes recalentadas del motor.
Os gases de escape podem causar danos ou
morte. Caso seja ncessário fazer com que o
motor funcione num espaço fechado, utilize
uma extensão para o tubo de escape que os
fumos sejam espulso para o exterior. Trabalhe
numa área bem ventilada.
Feuer, offenes Licht und Rauchen verboten.
Achtung - keine heißen Motorteile berühren!
Auspuffgase können Übelkeit oder Tod verursachen. Wenn es notwendig ist, einen Motor in
einem geschlossenen Raum laufen zu lassen,
benützen Sie eine Verlängerung, um das Auspuffgas abzuleiten. Versuchen Sie immer in
einem gut belüfteten Raum zu arbeiten.
ES
DE
11
Page 14
IT
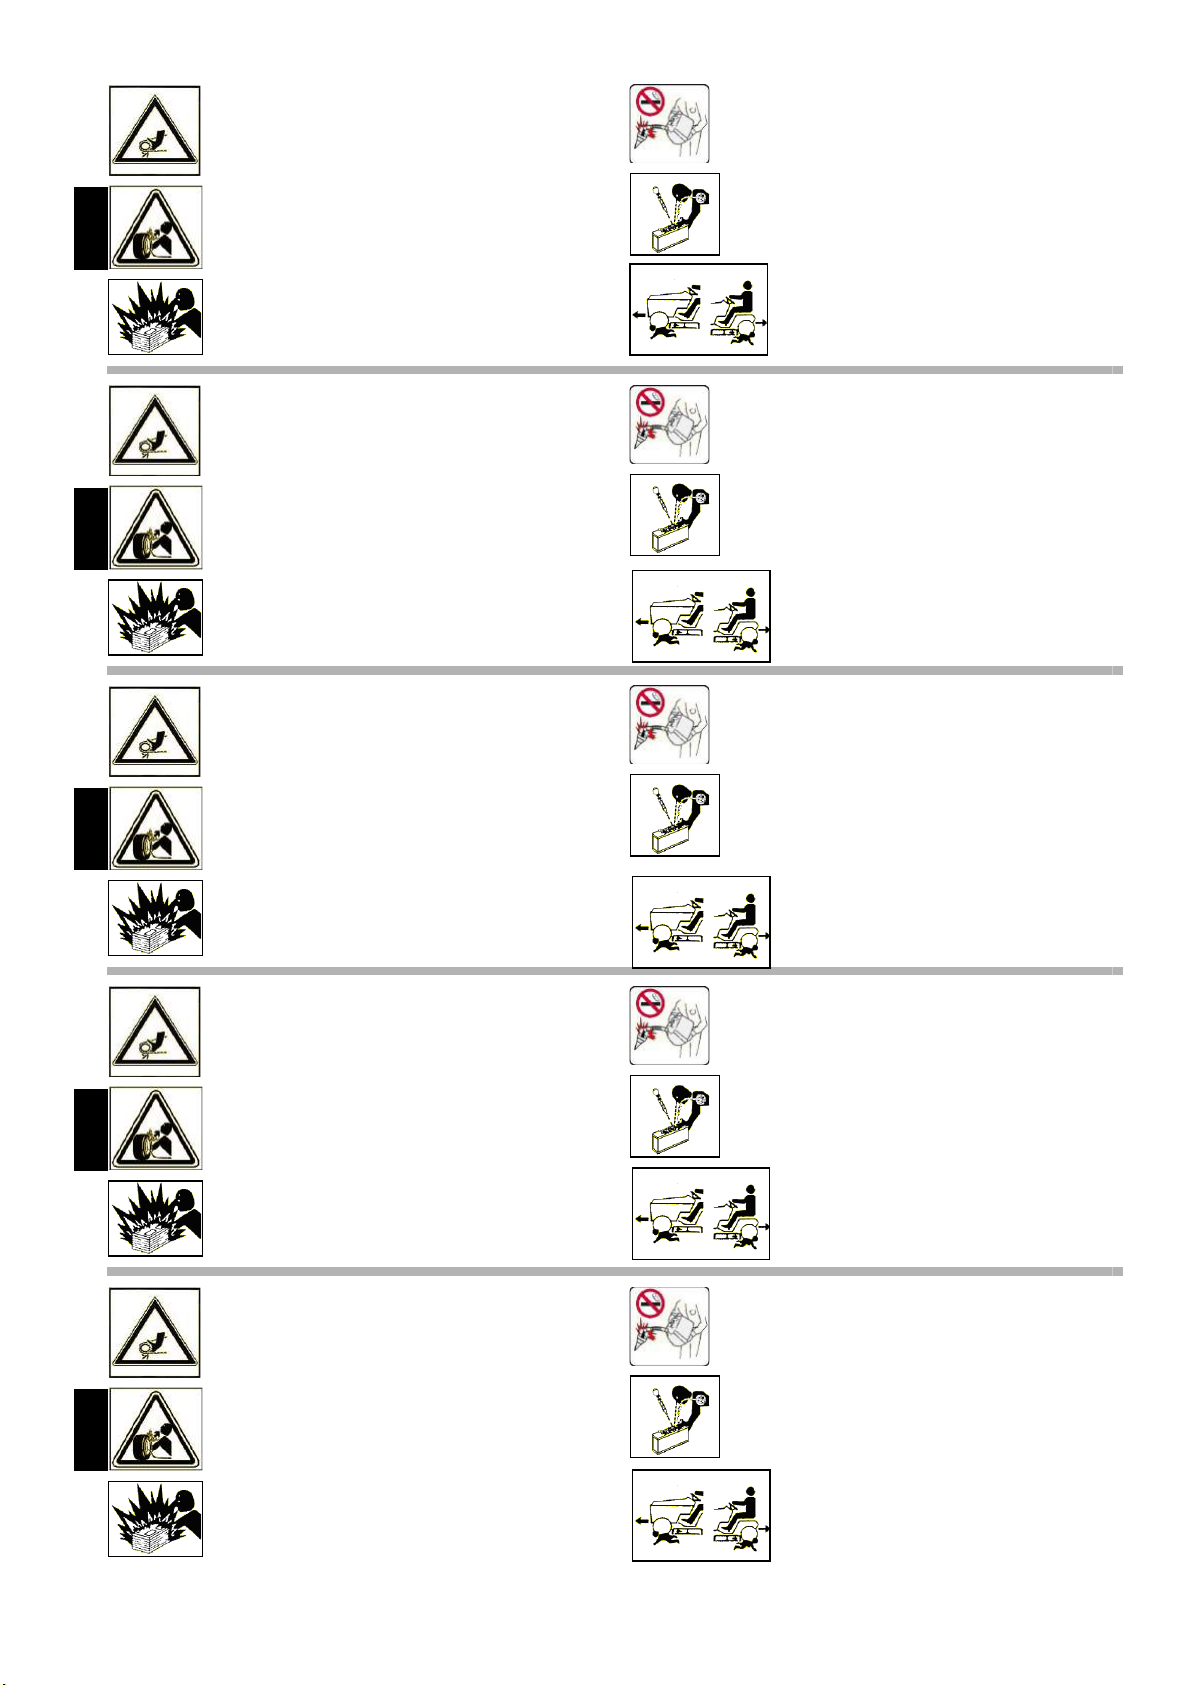
Attenzione! Non toccare mai pulegge o cinghie
in movimento, creano gravi danni alla persona.
Non fare manutenzione col motore in moto.
La separazione fra pneumatico e cerchione, causata dall’esplosione del pneumatico, può provocare serie ferite o addirittura la morte.
Per prevenire l’esplosione della batteria, tenete
scintille, fiammiferi accesi e fiamme lontani dalla
stessa. Il gas della batteria può esplodere.
Maneggiare il carburante con cura, è altamente
infiammabile; non fate rifornimento mentre fumate, o vicino a fiamme o scintille, o quando il motore è acceso.
L’acido solforico della batteria è velenoso. È in
grado di causare bruciature alla pelle, bucare vestiti e causare cecità se arriva negli occhi.
Lame e attrezzi in movimento sono pericolosi. Proteggete i bambini e prevenite gli incidenti.
EN
FR
Caution! Never touch moving pulleys or belts.
They can be very dangerous. Never do maintenance with engine running.
A burst which separates the tyre from the rim
parts can cause serious injury or death.
Prevent battery explosions: keep sparks, lighted
matches and open flames away from the top of
the battery. Battery gas can explode.
Attention! Ne jamais toucher ni poulies ni courroies en mouvement, elles peuvent provoquer
des accidents aux personnes. Ne pas faire l’entretien quand le moteur est en marche.
La séparation entre le pneu et la jante, provoquée par l’explosion d’une roue peut causer des
dommages, blessures ou la mort.
Prevenir l’explosion de la batterie: tenir les éticelles, les alumettes et le feu loin de la batterie.
Le gaz de la batterie peut exploser.
Handle fuel with care, it is highly flammable: do
not refuel machine while smoking, when machine
is near an open flame or sparks, or when the
engine is running. Stop the engine.
Sulfuric acid in battery electrolyte is poisonous. It
is strong enough to burn skin, eat holes in clothing and cause blindness if it gets in contact with
the eyes.
Rotating blades and moving implements are
dangerous. Protect children and prevent accidents.
Manier avec soin le carburant car c’est très inflammable. Ne pas remplir le réservoir si vous
êtes en train de fumer ou pendant que la machine
est près du feu ou d’étincelles ou encore pendant
que la machine travaille. Arrêter le moteur.
L’acide sulfurique de la batterie est toxique. Il
peut causer des brûlures à la peau, endommager les vêtements et peut aussi causer cécité.
Les lames et les outils en rotation sont dangereuses. Proteger les enfants et prévenir
les accidents.
ES
DE
¡Atención! No tocar jamás poleas o correas en
movimiento, porque pueden crear graves daños a
la persona. No efectuar el mantenimiento con el
motor en marcha.
La separación entre el neumático y la llanta producida por la explosión del neumático puede provocar graves herida e incluso la muerte.
Para prevenir la explosión de la batería, mantener chispas, cerillas encendidas y llamas lejos
de la misma. El gas de la batería puede explotar.
Vorsicht! Nie laufende Riemenscheiben oder
Treibriemen anfassen, da es gefährlich ist. Nie
bei laufendem Motor Instandhaltung machen.
Die Trennung der Räder von den Felgen durch
Explosion kann schwere Verletzungen oder den
Tod verursachen.
Vorbeugung der Batterie-Explosion.
Entfernen Sie Funken, Zündhölzer und Flammen
von der Batterie. Das Batteriegas kann explodieren.
12
Manejar el combustible con cuidado porque es
sumamente inflamable; no repostar mientras se
fuma o cerca de llamas o chispas, o cuando el
motor está encendido.
El ácido sulfúreo de la batería es venenoso, puede provocar quemaduras en la piel, agujear la
ropa y provocar ceguez si llega a los ojos.
Las cuchillas y las hierramientas en movimiento son peligrosas, proteger a los niños
y prevenir los accidentes.
Treibstoff vorsichtig handhaben, da er sehr entzündbar ist: beim Tanken nicht rauchen. Nicht
tanken, wenn die Maschine in der Nähe von
Flammen oder Funken ist oder wenn der Motor
läuft. Immer den Motor abschalten.
Säure der Batterie ist giftig. Sie kann die Haut
verbrennen, Löcher in die Kleidung machen und
Blindheit verursachen.
Arbeitende Zubehör und Messer sind gefährlich, Kinder schützen und Unfälle vorbeugen.
Page 15
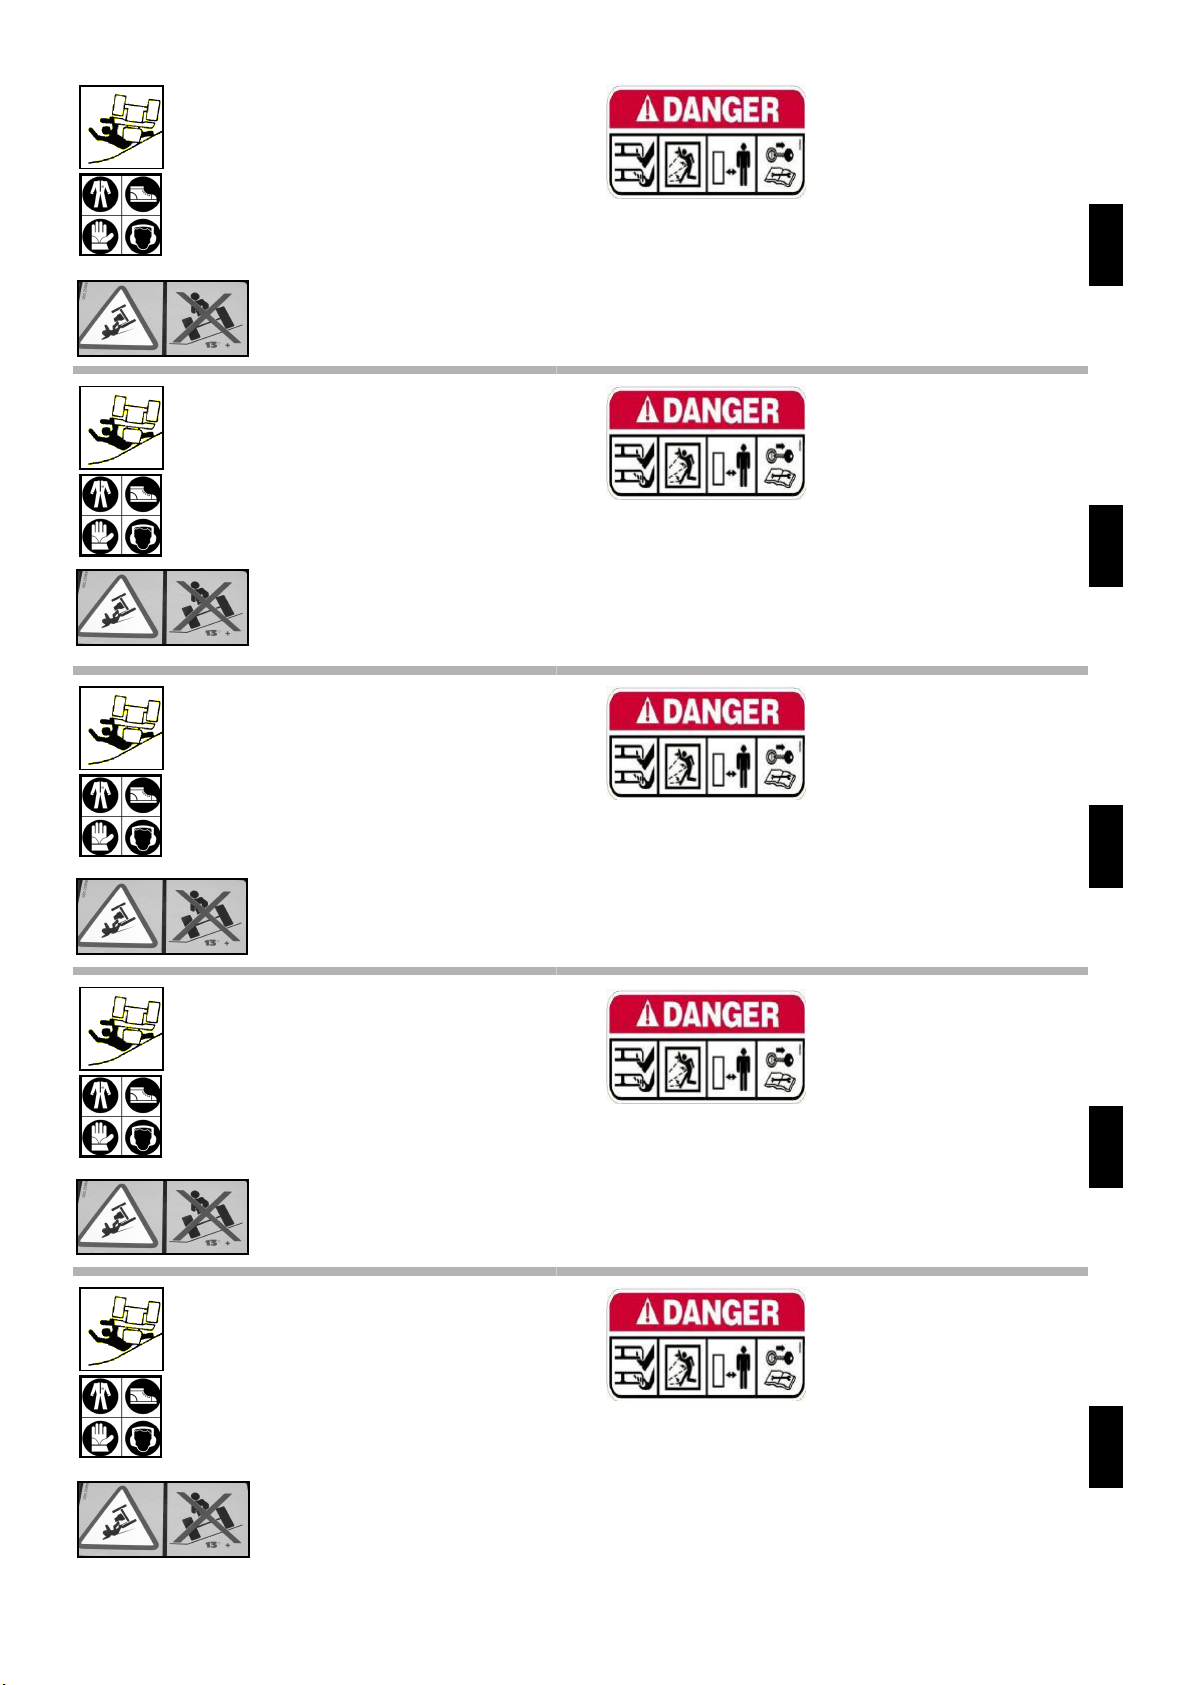
Evitate le scivolate. Non guidate dove la macchina potrebbe scivolare o inclinarsi. Attenzione a
buche o ad oggetti nascosti.
Prima di utilizzare la macchina, è obbligatorio
indossare gli appositi dispositivi di sicurezza individuali: protezione del corpo, guanti di protezione,
calzature di sicurezza, protezioni acustiche.
PERICOLO! Ribaltamento della macchina. Non usare questa macchina su
pendenze superiori a 30° (58%).
ATTENZIONE!
possono essere lanciati dalle lame o dai corpi rotanti risultando molto pericolosi, tenere lontano le persone. Togliere la
chiave e leggere le istruzioni prima di effettuare qualsiasi operazione di manutenzione e riparazione.
ORGANO TAGLIENTE.
Tenere lontano mani e piedi.
Non lavorare con persone vicine
alla macchina, corpi estranei
IT
Avoid tipping. Do not drive where machine could
slip or tip. Stay alert for holes and other hidden
objects.
Before using the machine, it is mandatory to put
on the appropriate individual safety devices: body
protection, protection gloves, security shoes, ear
protection.
Eviter les pentes. Ne pas conduire la machine où
elle pourrait glisser ou se renverser. Faire attention aux trous ou à tout autre obstacle caché.
Avant d’utiliser la machine, il est obligatoire de
mettre les dispositifs individuels de sécurité appropriés: protection du corps, gants de protection,
chaussures de sécurité, protection de l’ouïe.
DANGER! Machine rollover: don't use
this machine on slopes greater than
30° (58%).
DANGER! Renversement de la machine. Ne pas utiliser cette machine sur
des pentes supérieures à 30° (58%).
WARNING!
be ejected by blades or rotating parts, generating a danger.
Keep people away. Remove the key and read the instruction
manual before attempting to carry out any maintenance or repairs to the machine.
étrangers peuvent être centrifugés par les lames ou parties en
rotation, et devenir très dangereux. Les personnes doivent se
trouver à une certaine distance. Enlever la clé et lire les instructions avant toute opération de maintenance et de réparation.
SHARP PARTS.
Keep hands and feet away.
Do not operate with people near
the machine, foreign bodies may
ATTENTION!
ORGANE TRANCHANT.
Eloigner les mains et les pieds.
Ne pas travailler avec personnes près de la machine, corps
EN
FR
Evitar patinazos. No conducir donde la máquina
pueda patinar o inclinarse. Cuidado con los baches o con objetos escondidos.
Antes de utilizar la máquina es obligatorio ponerse los dispositivos individuales de seguridad
apropriados: protección del cuerpo, guantes de
protección, calzado de seguridad, protección del
oído.
Nicht dort fahren,wo die Maschine rutschen könnte. Vorsicht bei Löchern oder versteckten Gegenständen.
Vor dem Gebrauch der Maschine ist es vorgeschrieben, die geeignete persönlichen Schutzkleidung anzuziehen: Körperschutz, Schutzhandschuhe, Sicherheitsschuhe, Gehörschutz.
¡PELIGRO! Volcado de la máquina.
No utilizar esta máquina en pendientes superiores a 30° (58%).
GEFAHR! Umstürzen der Maschine.
Die Maschine nicht an Hängen mit
einer Neigung über 30° (58 %) einsetzen.
nas cerca de la máquina, objetos extraños que pudieran salir
despedidos de las cuchillas o de los cuerpos giratorios, ya que
resultarían muy peligrosos. Mantener alejado de las personas.
Quitar la llave y leer las instrucciones antes de efectuar cualquier operación de manteni-miento o reparación.
körper können von den Messern oder von den Drehkörpern
weggeschleudert und damit sehr gefährlich werden; Personen
fern halten. Vor jedem Wartungs- bzw. Reparatureingriff den
Startschlüssel abziehen und die Gebrauchsanleitung durchlesen.
¡PELIGRO!
ÓRGANO CORTANTE.
Mantener alejados los pies y las
manos.
No se puede trabajar con perso-
ACHTUNG!
SCHARFE KLINGEN.
Hände und Füße fernhalten.
Beitreiben Sie das Gerät nicht in
der Nähe von Personen; Fremd-
ES
DE
13
Page 16
1.2 Avvertenze
Leggere attentamente il manuale d’uso prima di avviare il
motore. Le seguenti avvertenze sono importanti per l’incolumità
dell’operatore e di eventuali osservatori o animali domestici.
Prudenza e buon senso sono i fattori principali nella preven-
zione degli infortuni.
IT
Non usare la macchina su pendenze superiori a 30° (58% di
inclinazione).
Attenzione! La macchina va utilizzata solo per lo scopo per
cui è stata progettata, evitare di trasportare persone, di modificarla
o manometterla, evitare di fare gare di qualsiasi tipo o di usarla
come traino ecc.
Prestare particolare attenzione alle avvertenze e alle adesive
di sicurezza poste sulla macchina.
Attenzione, pericolo! La batteria contiene acido solforico: è
mortale se ingerito! Può causare cecità se viene a contatto con gli
occhi, bruciare la pelle e bucare vestiti.
Pericolo! Tenete la batteria lontana da scintille, fiammiferi o
sigarette accese, fiamme libere, il gas della batteria è altamente
pericoloso e mortale, può esplodere.
Attenzione, pericolo! L’esplosione di un pneumatico può pro-
vocare serie ferite o la morte.
1.2 Warnings
Read the user manual carefully before starting up the engine. The following warnings are important for the safety of the
operator and any onlookers or pets.
Caution and common sense are the main factors in ac-
cident prevention.
EN
Do not use the machine on slopes exceeding 30° (58% of
inclination).
se for which it was designed. Do not transport persons. Do not
make changes to it or tamper with it. Do not race with it at all
1.2 Avertissements
rage du moteur. Les avertissements suivants sont importants pour
la sécurité de l’opérateur et de éventuels observateurs ou animaux domestiques.
prévention des accidents.
FR
(58% d’inclinaison).
but pour lequel elle a été conçue, d'éviter le transport de person-
Warning! The machine should only be used for the purpo-
Lire avec attention le manuel d’utilisation avant le démar-
Prudence et bon sens sont les facteurs essentiels pour la
Ne pas utiliser la machine sur des pentes supérieures à 30°
Attention, la machine doit être utilisée uniquement dans le
or use it as a trailer, etc.
Pay particular attention to the warnings and safety stickers
on the machine.
Caution! Danger! The battery contains sulphuric acid. Fa-
tal if ingested! It can cause blindness if it gets into contact with
eyes. Burns the skin and dissolves clothing.
Danger! Keep the battery away from sparks, matches, li-
ghted cigarettes and naked flames. The battery gas is extremely dangerous and lethal. Can explode.
Caution! Danger! An exploded tyre can cause serious in-
juries or death.
nes, de le modifier ou altérer, éviter de faire n'importe quel type de
course ou de l'utiliser comme remorquage, etc.
Accorder une attention particulière aux avertissements et aux
adhésifs de sécurité placés sur la machine.
Attention, danger, la batterie contient de l’acide sulfurique,
c’est mortel si c’est ingéré! Cela peut rendre aveugle s’il est mis
en contact avec les yeux, brûler la peau et trouer les vêtements.
Danger, tenir la batterie loin des étincelles, allumettes ou ciga-
rettes allumées, flammes libres, le gaz de la batterie est extrêmement dangereux et mortel, il peut exploser.
Attention, danger, l’explosion d’un pneu peut provoquer des
blessures graves ou la mort.
1.2 Advertencias
Leer atentamente el manual de uso antes de poner en marcha el motor. Las siguientes advertencias son importantes para la
integridad física del operador y de las personas que estuvieran
observando o de los animales domésticos.
La prudencia y el sentido común son los factores principales
en la prevención de accidentes
ES
No se debe usar la máquina en pendientes superiores a los
30° (58% de inclinación)
Atención, la máquina sólo debe utilizarse para el fin para el
que fue diseñado, evitar el transporte de personas, modificar o
1.2 Hinweise
Die Bedienungsanleitung vor Anlassen des Motors aufmerksam lesen. Nachfolgende Hinweise sind für die Sicherheit
des Bedienpersonals und möglicher Beobachter oder Haustiere wichtig.
Vorsicht und gesunder Menschenverstand sind wesent-
liche Hauptaspekte bei der Unfallverhütung.
DE
Das Gerät nicht auf Hängen mit mehr als 30° Gefälle
(58% Neigung) verwenden.
Achtung! Die Maschine darf lediglich zu dem Zweck ver-
wendet werden, für den sie entwickelt wurde; es dürfen keine
Personen transportiert werden. Die Maschine weder abändern
noch manipulieren und keine Rennen veranstalten bzw. die
manosear, evitar hacer cualquier tipo de competición o para utilizarlo como el remolque, etc.
Prestar especial atención a las advertencias y a los adhesivos de seguridad situados su la máquina.
¡Atención, peligro! La batería contiene ácido sulfúrico: si se
ingiere resulta mortal! Puede causar ceguera si entra en contacto
con los ojos, quemar la piel y agujerear la ropa.
Peligro, mantener la batería lejos de las chispas, cerillas o
cigarrillos encendidos; el gas de la batería es extremadamente
peligroso y mortal, puede explotar.
¡Atención, peligro! La explosión de un neumático puede pro-
vocar graves heridas o incluso la muerte.
Maschine nicht als Zugfahrzeug verwenden usw.
Bitte beachten Sie insbesondere die Hinweise und Auf-
kleber am Maschine.
Achtung, Gefahr! Die Batterie enthält Schwefelsäure;
diese ist bei Einnahme lebensgefährlich und kann außerdem
bei Kontakt mit den Augen zu Blindheit führen bzw. Brandverletzungen verursachen und Löcher in Kleider ätzen.
Gefahr: Die Batterie fern von Funken, Zündhölzern oder
angezündeten Zigaretten sowie freien Flammen halten. Das
Batteriegas ist lebensgefährlich und kann explodieren.
Achtung, Gefahr: Die Explosion eines Reifens kann
schwere Verletzungen verursachen und lebensgefährlich sein.
14
Page 17
Pericolo! Il carburante è altamente infiammabile: non fare ri-
fornimento con il motore in moto, spegnete il motore, lasciare raffreddare la marmitta, non fare rifornimento mentre state fumando
o siete vicini a fiamme libere o scintille, maneggiare e conservare
il carburante con cura.
Pericolo! Non toccare mai pulegge e cinghie in movimento,
possono creare gravi infortuni alle persone.
Pericolo! Non fare manutenzione con il motore in moto, spe-
gnere il motore e rimuovere la chiave.
Dopo il primo avviamento si raccomanda di familiarizzare con
i comandi e con la macchina.
Prima di iniziare il lavoro, imparare a spegnere il motore in
modo sicuro e rapido.
Pericolo! Il movimento della lama e delle forche è molto peri-
coloso, non mettere mai mani e / o piedi vicino alla lama o sulle
forche.
Prima di far lavorare altre persone con la vostra macchina
occorre metterle al corrente delle norme di sicurezza, far leggere
loro il manuale d’uso e insegnare loro come si usa.
Prima di accendere la macchina verificare che non ci siano
persone intorno; specialmente bambini.
Prima di partire con la macchina in marcia indietro controllare
che non ci siano persone od ostacoli.
IT
Danger! The fuel is highly inflammable. Do not refuel when
the engine is on. Turn off the engine. Let the muffler cool down.
Do not refuel while smoking or in the vicinity of naked flames or
sparks. Handle and store the fuel with care.
Danger! Never touch moving pulleys and belts. Can cause
serious accidents to people.
Danger! Do not carry out maintenance with the engine on.
Turn off the engine and remove the key.
Following the initial start-up, it is recommended that you
familiarize yourself with the controls and the machine.
Danger, le carburant est hautement inflammable, ne remplis-
sez pas le réservoir avec le moteur en marche, éteignez le moteur, laissez refroidir le tuyau d’échappement, ne faites pas le
plein alors que vous fumez ou que vous êtes prêt des flammes
libres ou étincelles, utiliser et conserver le carburant avec soin.
Danger, ne jamais toucher les poulies et courroies en mouve-
ment, elles peuvent provoquer de graves accidents aux personnes.
Danger, ne faire aucun entretien avec le moteur allumé, étein-
dre le moteur et enlever la clef.
Après le premier démarrage, on recommande de se familia-
riser avec les commandes et avec la machine.
Avant de commencer le travail, apprendre à éteindre le mo-
Prior to starting work, learn how to turn off the machine safely
and quickly.
Danger! The movement of blade and fork is very dangerous.
Never put your hands and / or feet near the blade the forks.
Before letting other people use your machine, you must inform
them about the safety standards. Make them read the user manual and teach them how to use the machine.
Before turning on the machine, check that there is nobody in
the vicinity, especially children.
Before reversing the machine, check for people or obstacles.
teur de manière sûre et rapide.
Danger, le mouvement de la lame et de les fourches est très
dangereuse, ne jamais mettre les mains et/ou les pieds près la
lame ou le fourches.
Avant de faire travailler d’autres personnes avec votre machine, il faut les mettre au courant des normes de sécurité, leur
faire lire le manuel d’utilisation et leur apprendre comment l’utiliser.
Avant de mettre en marche la machine, vérifier qu’il n’y ait
personne dans les alentours, spécialement des enfants.
Avant de partir avec la machine en marche arrière, contrôler
derrière qu’il n’y ait personne ou aucun obstacle.
EN
FR
Peligro, el combustible es altamente inflamable, no repostar
con el motor en movimiento, apagar el motor, dejar que se enfríe
la marmita, no repostar mientras se está fu-mando o se está cerca
de llamas libres o chispas, manejar y conservar con sumo cuidado
el combustible.
Peligro, no tocar nunca poleas o correas en movimiento,
pueden producir graves accidentes en personas.
Peligro, no realizar el mantenimiento con el motor en movi-
miento, apagar el motor y quitar la llave.
Tras la primera puesta en marcha se recomienda familia-
rizarse con los mandos y con la máquina.
Antes de empezar el trabajo aprender a apagar el motor de
Gefahr: Der Kraftstoff ist hochbrennbar. Bei laufendem Motor
nie Kraftstoff auffüllen. Den Motor ausschalten, den Auspuff abkühlen lassen; keinen Kraftstoff auffüllen, wenn Sie rauchen oder
sich in unmittelbarer Nähe von freien Flammen oder Funken
befinden; den Kraftstoff stets vorsichtig handhaben.
Gefahr: Laufende Riemenscheiben und Riemen nicht anfas-
sen, dies könnte schwere Verletzungen verursachen.
Gefahr: Keine Wartungsarbeiten bei laufendem Motor durch-
führen; den Motor abschalten und den Zündschlüssel ziehen.
Machen Sie sich nach Erstinbetriebnahme mit den Steuerun-
gen und dem Gerät vertraut.
Lernen Sie vor Arbeitsbeginn, wie der Motor sicher und
forma segura y rápida.
Peligro, el movimiento de la cuchilla y de la tenedor es muy
peligrosa, no poner nunca las manos y/o pies pròximo de la cucilla
y/o de la tenedor.
Antes de que otras personas empiecen a trabajar con la maquinaria, hay que comunicarles las normas de seguridad, hacer
que lean el manual de uso y enseñarles cómo se usa.
Antes de encender la máquina, hay que comprobar que no
haya personas alrededor; especialmente que no haya niños.
Antes de arrancar la máquina en marcha atrás, controlar que
no haya personas u obstáculos.
schnell abgestellt wird.
Gefahr! Die Bewegung der Messer und Gabeln ist sehr ge-
fährlich, Hände bzw. Füße fern vom Messer oder von den Gabeln
halten.
Bevor andere Personen mit Ihrem Gerät arbeiten, sind diese
über sämtliche Sicherheitsnormen zu informieren; jeder, der am
Gerät arbeitet, muss die Bedienungsanleitung gelesen haben.
Personen in den Gebrauch einweisen.
Vor Geräteeinschaltung ist sicherzustellen, dass sich keine
Personen, vor allem keine Kinder, in Gerätenähe aufhalten.
Bevor rückwärts gefahren wird, ist sicherzustellen, dass weder
Personen noch Hindernisse im Weg stehen.
ES
DE
15
Page 18
Pericolo, non portare passeggeri sulla macchina.
Pericolo, non usare la macchina quando si è affaticati, non
bere alcolici.
Controllare il terreno prima di procedere al taglio, che non vi
siano sassi, bastoni o corpi estranei, che potrebbero essere presi
da lama o parti rotanti e diventare molto pericolosi.
Pericolo, non lavorare su pendenze eccessive dove la mac-
IT
china potrebbe scivolare o ribaltarsi.
Prima di iniziare il lavoro, indossare indumenti appropriati,
guanti, scarpe, occhiali, cuffie ecc.
Prima di scendere dalla macchina, spegnere il motore, disin-
serire la PTO, rimuovere la chiave d’avviamento e abbassare l’apparato di lavoro nella posizione più bassa.
Su strade sconnesse viaggiare a bassa velocità.
Sulle pendenze, in discesa moderare la velocità.
Pericolo, non far lavorare persone troppo giovani; vietato l'uso
ai minori di 18 anni e ai non esperti.
Pericolo, non fare retromarcia col motore accelerato.
Con motore a massimo regime è pericoloso sterzare brusca-
mente.
Pericolo, non azionare la leva di avanzamento o retromarcia
bruscamente.
Danger! Do not carry passengers on the machine.
Danger! Do not use the machine when tired. Do not drink al-
cohol.
Check the ground before to cut. Check for stones, sticks or
foreign bodies, which could be catch from blade or rotating parts
and became very dangerous.
Danger! Do not work on overly sloping ground where the ma-
EN
chine could slide or tip over.
Before commencing work, wear appropriate work clothing,
gloves, protective footwear and glasses.
Before getting down from the machine, turn off the engine,
Danger, ne porter aucun passager sur la machine.
Danger, ne pas utiliser la machine lorsqu’on est fatigué, ne
pas boire de boissons alcoolisées.
Vérifier le terrain avant de commencer le coupe, qu’il n’y ait
aucun caillou, bâton ou corps étranger qui pourraient être prise de
la lame ou corps tournant et devenir très dangereux.
Danger, ne pas travailler sur des pentes trop raides où la ma-
FR
chine pourrait glisser ou se renverser.
Avant de commencer le travail, porter des vêtements de travail appropriés, des gants, des grosses chaussures, des lunettes.
Avant de descendre de la machine, éteindre le moteur, débrancher le PTO, enlever la clef de démarrage et abaisser le outil
disable the PTO, remove the ignition key and lower the implement
to the lowest position.
Travel slowly on bumpy roads.
Slow down on downhill slopes.
Danger! Must not be used by people who are too young. Must
not be used by minors under the age of 18 years and by nonexperts.
Danger! Do not reverse with accelerated engine.
When engine is at full power, it is dangerous to turn suddenly.
Danger! Do not make sudden movement with the forwards or
backwards lever.
de travail dans la position la plus basse.
Sur routes en mauvais état, voyager à petite vitesse.
Sur les pentes, modérer la vitesse en descente.
Danger, ne pas faire travailler des personnes trop jeunes; in-
terdire l’utilisation aux mineurs de 18 ans et aux personnes sans
expérience.
Danger, ne pas faire marche arrière avec le moteur en accélé-
ration.
Avec le moteur à plein régime, il est dangereux braquer bru-
squement.
Danger, ne pas actionner la levier de marche après ou de
marche arrière brusquement.
Peligro, no llevar pasajeros en la máquina.
Peligro, no usar la máquina cuando se está cansado, no to-
mar bebidas alcohólicas.
Controlar el terreno antes de realizar el segado, que no haya
piedras, palos o cuerpos extraños ya que podrían ser arrojados
por la cuchilla o parte móvil por lo que es muy peligroso.
Peligro, no trabajar en pendientes excesivas donde la máqui-
ES
na podría deslizar o volcar.
Antes de empezar a trabajar, llevar puestas prendas apropiadas para el trabajo, guantes, botas, gafas.
Antes de bajarse de la maquinqriq, apagar el motor, desconectar la PTO, quitar la llave de encendido y bajar el aparado de
Gefahr: Keine Personen mitfahren lassen.
Gefahr: Das Gerät bei Ermüdung und nach Alkoholkonsum
nicht benutzen.
Die Bodenbeschaffenheit vor dem Schnitt prüfen und sicherstellen, dass das Gelände frei von Steinen, Stöcken oder Fremdkörpern, die von den Messern oder Drehkörpern weggeschleudert
und damit sehr gefährlich werden könnten.
Gefahr: Keine Böden mit starkem Gefälle, wo das Gerät
DE
wegrutschen oder sich überschlagen könnte, bearbeiten.
Vor Arbeitsbeginn hat der Fahrer geeignete Arbeitskleidung
und Arbeitsschuhe zu tragen, sowie Schutzhandschuhe und Augenschutz zu benutzen.
Vor dem Absteigen vom Gerät den Motor abschalten, die
trabajo hasta la posición más baja.
En carreteras con baches, viajar a baja velocidad.
En las pendientes, en bajada, moderar la velocidad.
Peligro, no dejar que trabajen personas demasiado jóvenes;
prohibir el uso a menores de 18 años y a los que no son expertos.
Peligro, no dar marcha atrás con el motor acelerado.
Con el motor en máximo régimen es peligroso dar vuelta re-
pentinamente.
Peligro, no accionar la palanca de avance o marcha atrás
bruscamente.
Zapfwelle ausstecken, den Zündschlüssel ziehen und das Arbeitsgerät in die unterste Stellung herabfahren.
Auf ungeteerten Wegen langsam fahren.
Auf Hängen bei Abwärtsfahrt die Geschwindigkeit reduzieren.
Gefahr: Nicht mit zu jungen Personen arbeiten; das Gerät darf
weder von Jugendlichen unter 18 Jahren noch von unerfahrenen
Personen gefahren werden.
Gefahr: Bei beschleunigtem Motor nicht Rückwärtsfahren.
Bei hochtourigem Motor sind brüske Lenkmanöver gefährlich.
Gefahr: Das Hebel für die Vorwärts- bzw. Rückwärtsfahrt
nicht abrupt bedienen.
16
Page 19
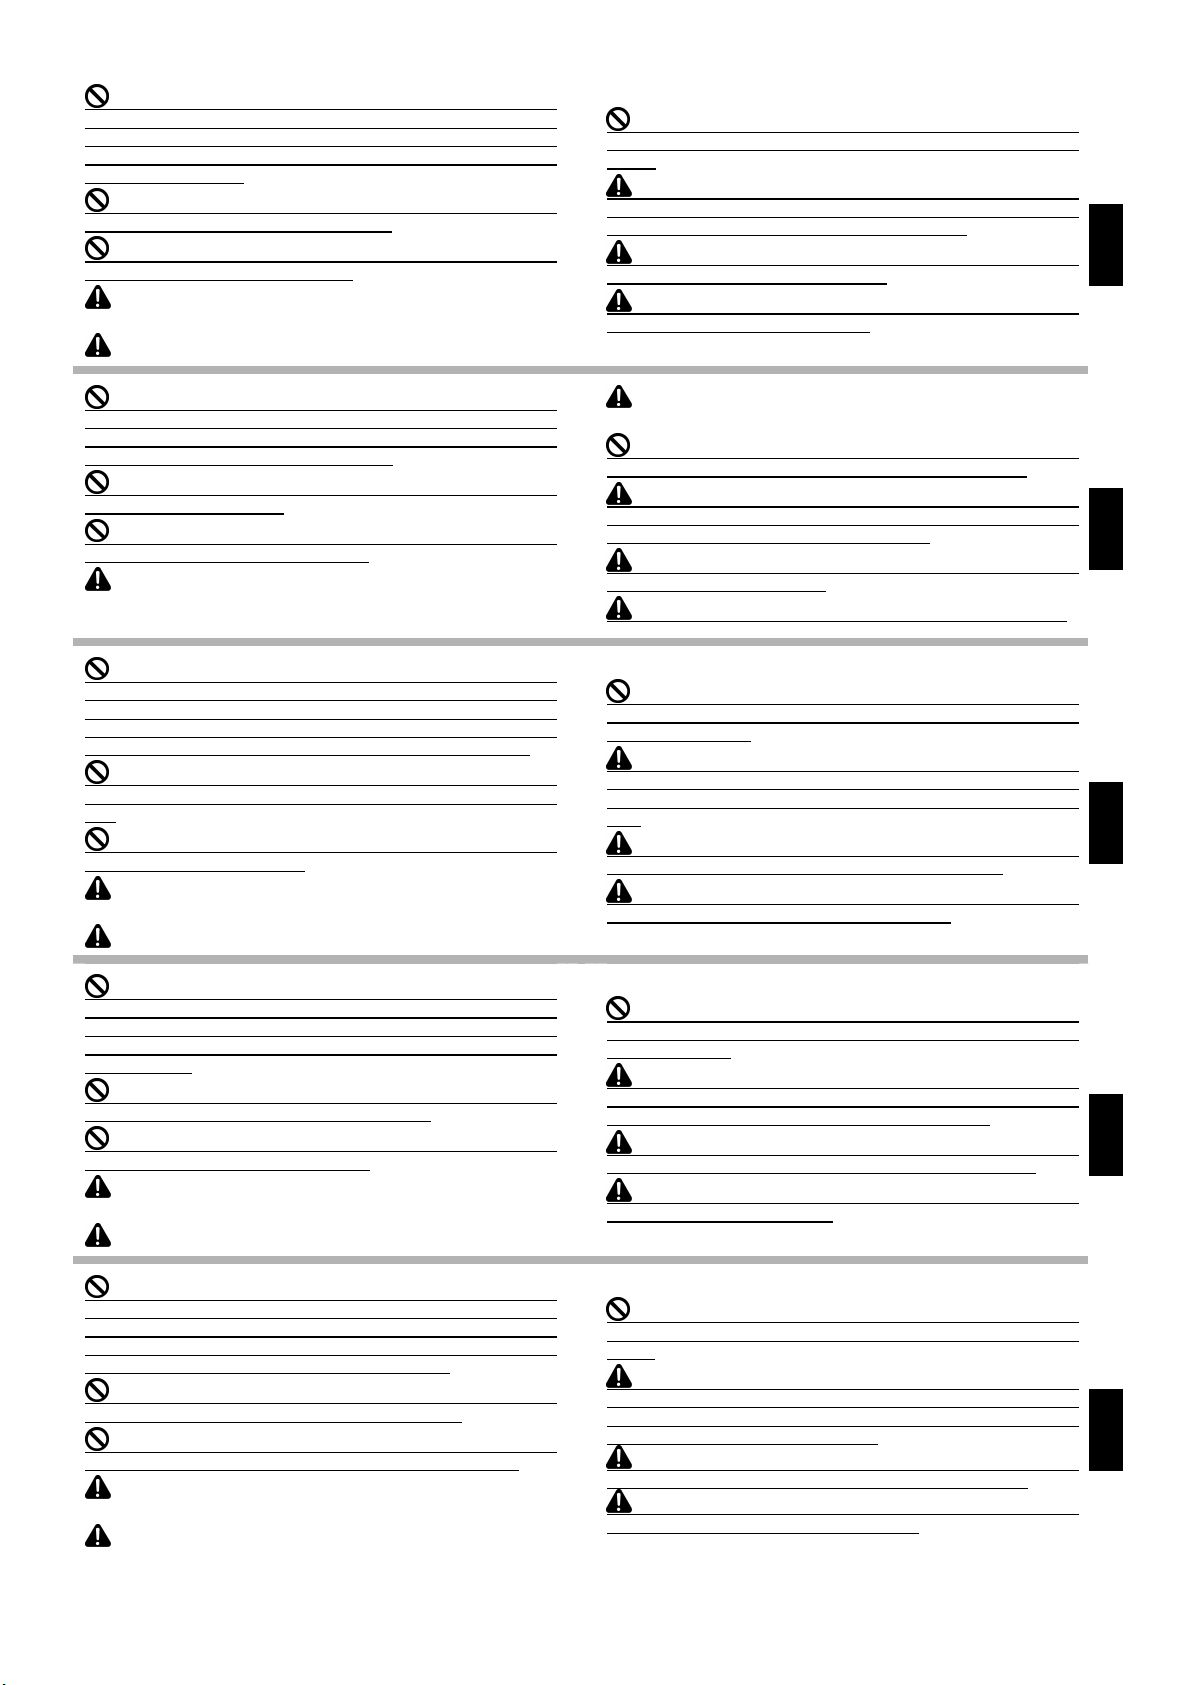
Per evitare il pericolo di esalazioni velenose, non adoperare il
motore acceso in locali chiusi.
Prima di avviare il motore, riempire il serbatoio di carburante.
Fare rifornimento di combustibile solo all’aperto, spegnere sempre
il motore, stare lontano da scintille o fiamme, non fumare! Non rimuovere il tappo serbatoio carburante quando il motore è caldo.
Richiudere in modo sicuro il tappo del serbatoio e dei contenitori di
carburante.
Evitare fuoriuscite di combustibile; dopo aver riempito il serba-
toio, asciugare ogni residuo di carburante sulla macchina prima di
avviare il motore.
Pericolo, non operare con la macchina vicino a fossati o ban-
chine che possano cedere sotto il peso della macchina, specialmente quando la superficie è friabile o bagnata.
In discesa curvare sempre lentamente.
Pericolo, non manomettere o disattivare i dispositivi di si-
curezza.
Pericolo, non lavorare con persone vicine alla macchina, cor-
pi estranei possono essere lanciati dalle lame o da corpi rotanti
risultando molto pericolose.
Quando non usate la macchina, togliete le chiavi dal quadro e
riporle in luogo inaccessibile ai bambini.
IT
To avoid the danger of toxic exhausts, do not use the engine
indoors when turned on.
Fill the fuel tank before starting up the engine. Only refuel
outdoors. Always turn off the engine. Stay away from sparks or
flames. Do not smoke. Do not remove the fuel tank cap when the
engine is hot. Safely close the tank cap and the fuel containers.
Avoid fuel leaks. After having filled the tank dry all fuel residues on the machine before starting the engine.
Danger! Do not use the machine near ditches or piers that
Pour éviter le danger d’inhalations toxiques, ne pas utiliser la
machine avec le moteur allumé dans des locaux fermés.
Avant de mettre en marche le moteur, remplir le réservoir de
carburant. Faire le plein de combustible seulement à l’extérieur,
éteindre toujours le moteur, se tenir loin des étincelles ou des
flammes, ne pas fumer! Ne pas enlever le bouchon du réservoir
carburant lorsque le moteur est encore chaud. Refermer de façon
sûre le bouchon du réservoir et des récipients de carburant.
Eviter que le combustible déborde, après avoir rempli le réservoir essuyer tout résidu de carburant sur la machine avant de démarrer.
Danger, ne pas utiliser la machine près de fossés ou d’acco-
may give way under the weight of the machine, especially when
the surface is friable or wet.
Always take downhill bends slowly.
Danger! Do not tamper with or disable the safety devices.
Danger! Do not work with persons near the machine, foreign
objects they may be launched by the blades or rotating parts,
making it very dangerous.
When the machine is not in use, remove the keys from the
panel and store them in a place inaccessible to children.
tements qui puissent céder sous le poids de la machine spécialement quand la surface est friable ou mouillée.
En descente braquer toujours lentement.
Danger, ne pas endommager ou désactiver les dispositifs
de sécurité.
Danger, Ne travaille pas avec des personnes proches de la
machine, des corps étrangers peuvent être projetés par la lame ou
part en rotation qui le rend très dangereux.
Quand vous n’utilisez pas la machine, enlevez les clefs du ta-
bleau de bord et les poser dans un lieu inaccessible aux enfants.
EN
FR
Para evitar el peligro de exhalaciones venenosas, no se debe
tener el motor encendido en locales cerrados.
Antes de poner el motor en marcha, llenar el depósito de
combustible. Repostar combustible solo al aire libre, apagar siempre el motor, permanecer lejos de chispas o llamas, ¡no fumar! No
se puede quitar el tapón del depósito de combustible cuando el
motor está caliente. Cerrar de forma segura el tapón del depósito
y de los recipientes del combustible.
Evitar fugas de combustible, una vez que se haya llenado el
depósito hay que secar todos los residuos de combustible que
haya en la máquina antes de poner en marcha el motor.
Peligro, no trabajar con la máquina cerca de fosos o arce-
Damit eine Einatmung von Giftgasen vermieden wird, darf der
Motor nicht in geschlossenen Räumen betrieben werden.
Vor Inbetriebnahme des Motors ist der Kraftstofftank zu befüllen. Der Kraftstoff darf nur im Freien aufgefüllt werden; dazu stets
den Motor abstellen und sich fern von Funken oder Flammen halten; nicht rauchen! Bei warmem Motor den Dankdeckel nicht entfernen. Tankdeckel und Kraftstoffkanister nach dem Befüllen wieder fest verschließen.
Vermeiden Sie jeglichen zusätzlichen Kraftstoffaustritt.
Trocknen Sie Kraftstoffreste am Gerät ab, nachdem sie den Tank
befüllt haben und bevor Sie den Motor anlassen.
Gefahr: Das Gerät nicht in der Nähe von Gräben oder Böden
nes que puedan ceder con el peso de la máquina, especialmente
si la superficie es friable o está mojada.
Cuando se circule cuesta abajo, tomar siempre las curvas len-
tamente.
Peligro, no manipular o desactivar los dispositivos de se-
guridad.
Peligro, no trabajar con gente cercana al maquinaria, los
cueros extraños pueden ser arrojados por la cuchilla o parte móvil
por lo que es muy peligroso.
Cuando no se use la máquina, hay que quitar las llaves del
cuadro de mandos y colocarlas en un lugar inaccesible para niños.
betreiben, die unter dem Gerätegewicht nachgeben könnten; dies
gilt vor allem bei bröckeligem oder nassem Boden.
Bitte fahren Sie bei Gefälle Kurven nur sehr langsam.
Gefahr: Sicherheitseinrichtungen weder manipulie-ren
noch deaktivieren.
Gefahr: Betreiben Sie das Gerät nicht in der Nähe von Perso-
nen; Fremdkörper können von den Messern oder von den Drehkörpern weggeschleudert und damit sehr gefährlich werden.
Bei Nichtverwendung des Gerätes stets den Schlüssel aus
dem Zündblock ziehen und an einem für Kinder nicht zugänglichen Ort aufbewahren.
ES
DE
17
Page 20
Pericolo, non fare nessun tipo di regolazione o pulizia con il
motore in moto.
Pericolo, non far controllare la macchina da altri mentre siete
seduti alla guida col motore in moto.
L’utilizzatore è sempre responsabile dei danni arrecati a terzi.
Ogni utilizzo improprio comporta il decadimento della garanzia
IT
ed il declino di ogni responsabilità del costruttore.
Sezioni lama rotte e denti deformati o danneggiati devono es-
sere sempre sostituiti, mai riparati.
Usare sempre ricambi ed accessori originali.
Danger! Do not carry out any type of adjustments or cleaning
when the engine is in operation.
Danger! Do not have the machine checked by other people
while seated at the steering wheel with the engine in operation.
The user is always responsible for damage caused to third
parties.
EN
All improper use will cause the warranty to expire and the ma-
nufacturer shall not be held liable.
Broken blades and deformed teeth must always be replaced,
never repaired.
Always use original spare parts and accessories.
Danger, ne faire aucun genre de réglage ou nettoyage avec le
moteur en marche.
Danger, ne pas faire contrôler la machine par d’autres person-
nes alors que vous êtes assis au volant avec moteur en marche.
L’utilisateur est toujours responsable des dégâts provoqués à
des tiers.
Toute utilisation inappropriée comporte l’annulation de la ga-
FR
rantie et le déclin de toute responsabilité de la part du constructeur.
Sections lame brisée et déformée ou dents endommagées
doit toujours être remplacé, et non réparé.
Utiliser toujours pièces de rechange et accessoires originaux.
Lavorare solo con la luce del sole o con buona luce artificiale.
Pericolo, non fermarsi su pendenze o quando si lavora in sa-
lita o in discesa.
Se dovete svuotare il serbatoio carburante, eseguite l'opera-
zione all’aperto.
ATTENZIONE: per ridurre il pericolo di incendio mantenere il
motore, la marmitta, il collettore di scarico, la batteria, la zona serbatoio e conduttura carburante liberi da erba, foglie, polvere, ecc..
Pericolo, non depositare la macchina dentro edifici dove i
vapori del carburante possono arrivare a fiamme, scintille o con fili
elettrici scoperti.
Only work in daylight or in good artificial light.
Danger! Do not stop on slopes or when working uphill or
downhill.
If you have to empty the fuel tank, do the operation out-doors.
CAUTION! To lower the risk of fire, keep the engine, muffler,
exhaust manifolds, battery, tank area and fuel pipes free from
grass, leaves, dust, etc..
Danger! Do not store the machine in buildings where fuel fu-
mes could come into contact with flames, sparks and unsheathed
electrical wires.
Travailler seulement avec la lumière du soleil ou une bonne
lumière artificielle.
Danger, ne pas s’arrêter sur des pentes ou lorsque l’on tra-
vaille en montée ou en descente.
Si vous devez vider le réservoir carburant, exécuter la opéra-
tion à l’extérieur.
ATTENTION: pour diminuer tout risque d’incendie, le moteur,
le tuyau d’échappement, les collecteurs de décharge, la batterie,
la zone réservoir et conduite carburant doivent être exemptes
d’herbe, feuilles, poussière, etc.
Danger, ne pas laisser la machine dans des locaux où les
vapeurs du carburant peuvent arriver jusqu’à des flammes, étincelles ou être en contact avec des fils électriques découverts.
Peligro, no se puede realizar ningún tipo de regulación o
limpieza con el motor en movimiento.
Peligro, no se debe dejar que otros controlen la máquina
mientras haya alguien sentado al volante con el motor encendido.
El usuario siempre es el responsable de los daños que se
ocasionen a terceros.
Cada uso indebido conlleva la anulación de la garantía y el
ES
declive de toda la responsabilidad del fabricante.
Secciones cuchilla roto y deformado o dientes dañados siem-
pre debe ser reemplazado, no se repara.
Usar siempre recambios y accesorios originales.
Gefahr: Bei laufendem Motor keine Einstellung oder Reini-
gung vornehmen.
Gefahr: Das Gerät nicht von anderen Personen überprüfen
lassen, während Sie bei laufendem Motor auf dem Fahrersitz sitzen.
Der Betreiber ist stets für Schäden, die er Drittpersonen zu-
fügt, verantwortlich.
Jeder unsachgemäße Gebrauch führt zur sofortigen Ungültig-
keit der Garantie und enthebt den Hersteller von jeder Haftung.
DE
Abgebrochene Messerbereiche oder verformte bzw. beschä-
digte Zähne sind stets auszuwechseln und dürfen nicht repariert
werden.
Es müssen ausschließlich Originalersatzteile und Originalzubehöre verwendet werden.
Trabajar solo con la luz natural o con una buena luz artificial.
Peligro, no se puede detener el vehículo en terrenos en pen-
diente o cuando se está trabajando cuesta arriba o cuesta abajo.
Si hay que vaciar el depósito del combustible, las operaciones
deben realizarse al aire libre.
ATENCIÓN: para reducir el peligro de incendio mantener el
motor, la marmita, los colectores de escape, la batería, la zona del
depósito y los conductos del combustible libres de hierba, hojas,
polvo, etc.
Peligro, no colocar la máquina dentro de edificios donde los
vapores del combustible puedan llegar a llamas, chispas o con
cables eléctricos descubiertos.
Ausschließlich bei Sonnenlicht oder guter künstlicher Beleuch-
tung arbeiten.
Gefahr: Es darf nicht auf Hängen oder dann gehalten werden,
wenn man bergauf oder bergab arbeitet.
Falls der Kraftstofftank geleert werden muss, ist dies im Fre-
ien durchzuführen.
Achtung: Zur Reduzierung von Brandgefahr sind der Motor-
raum, der Auspuff, die Abgaskollektoren, die Batterie, der Tankbereich und die Kraftstoffleitungen frei von Gras, Blättern, Staub
usw. zu halten.
Gefahr: Das Gerät nicht in Gebäuden abstellen, wo die Kraft-
stoffdämpfe Flammen, Funken oder freie Stromdrähte erreichen
könnten.
18
Page 21
Sostituire sempre le marmitte usurate o danneggiate.
Conservare il carburante in contenitori appositi, mai conser-
varlo in contenitori per alimenti.
Fare molta attenzione alle persone ed ai passanti occasionali
quando si lavora vicino ad una strada.
Pericolo, non lavorare mai con persone intorno alla macchina,
tenere sempre a distanza di sicurezza.
Pericolo, non manomettere le regolazioni del motore, in modo
particolare il numero massimo di giri.
Se si urta un corpo estraneo disinnestare la PTO, fermare il
motore, togliere la chiave di avviamento e ispezionare la macchina, se la macchina vibra portarla al Centro Assistenza per farla
controllare.
Far raffreddare il motore e la marmitta prima di ricoverare la
macchina in locali chiusi.
IT
Always replace the worn or damaged mufflers.
Keep the fuel in designated containers. Never keep the fuel in
food-grade containers.
Pay particular attention to persons and occasional passers-by
when working near roads.
Danger! Never work with persons around the machine. Al-
ways maintain a safety distance.
Danger! Do not tamper with the engine settings, especially the
maximum number of revolutions.
Remplacer toujours le tuyau d’échappement usé ou endom-
magé.
Conserver le carburant dans des récipients appropriés, ne
jamais le conserver dans des récipients pour aliments.
Faire très attention aux personnes et aux passants occa-
sionnels lorsque l’on travaille près d’une route.
Danger, ne jamais travailler avec des personnes autour de la
machine, les tenir toujours à une distance de sécurité.
Danger, ne pas altérer les réglages du moteur, en particulier
le nombre maximum de tours.
If you hit a foreign body, disengage the PTO, stop the engine,
remove the ignition key and inspect the machine. If the machine
vibrates, take it to the Service Centre to have it checked.
Let the engine and muffler cool down before moving the machine indoors.
Si on heurte contre un corps étranger, déconnecter la PDF,
arrêter le moteur, enlever la clef de démarrage et inspecter la
machine, si la machine vibre, la porter au Centre d’Assistance afin
de la faire contrôler.
Laisser refroidir le moteur et le tuyau d’échappement avant de
ranger la machine dans des locaux fermés.
EN
FR
Sustituir siempre las marmitas desgastadas o dañadas.
Conservar el combustible en recipientes adecuados, no con-
servarlo nunca en recipientes para alimentos.
Tener mucho cuidado con la gente y los que pasen ocasio-
nalmente por el lugar cuando se trabaja cerca de una carretera.
Peligro, no trabajar nunca con personas alrededor de la má-
quina, mantener siempre la distancia de seguridad.
Peligro, no manipular las regulaciones del motor, especial-
mente el número máximo de revoluciones.
Verschlissene oder beschädigte Auspuffe müssen stets er-
setzt werden.
Den Kraftstoff in geeigneten Kanistern aufbewahren; auf kei-
nen Fall dürfen hierzu Lebensmittelbehälter verwendet werden.
Besonders auf Personen und gelegentliche Passanten achten
wenn in Straßennähe gearbeitet wird.
Gefahr: Es darf nie mit dem Gerät gearbeitet werden, wenn
sich Personen im Geräteumfeld befinden; stets einen Sicherheitsabstand einhalten.
Gefahr: Die Motoreinstellungen dürfen nicht abgeändert wer-
den; dies gilt insbesondere für die Höchstdrehzahl.
Si se golpea un cuerpo extraño, desacoplar las TDF, detener
el motor, quitar la llave de arranque e inspeccionar la maquinqria;
si la máquina vibra llevarla al Centro de Asistencia para controlarla.
Dejar enfriar el motor y la marmita antes de depositar la
máquina en locales cerrados.
Schlägt das Gerät gegen einen Fremdkörper, sind die Zapfwelle auszustecken; den Motor abstellen, den Zündschlüssel ziehen und den Maschine überprüfen; vibriert das Gerät, ist es zur
Prüfung zum Kundendienst zu bringen.
Den Motor und den Auspuff abkühlen lassen, bevor das Gerät
in einen geschlossenen Raum gefahren wird.
19
ES
DE
Page 22

PAGINA LASCIATA INTENZIONALMENTE BIANCA
THIS PAGE IS ON PURPOSE WHITE
CETTE PAGE EST DÉLIBÉRÉMENT BLANCHE
ESTA PÁGINA ES ESPECIFICAMENTE BLANCA
DIESE SEITE ABSICHTLICH WEIß IST
20
Page 23

2. IDENTIFICAZIONE E ADESIVE
Su ogni macchina viene applicata una targhetta adesiva di
identificazione del prodotto, in accordo con la Direttiva
Macchine CE (fig.2/1 e 2/3), e viene stampigliata come da
fig.2/2.
2.1 Targhetta di identificazione - Identification plate Plaque d’identification - Placa de identificación Typenschild
1 3 2 4
BCS S.p.A. Viale Mazzini 161
20081 Abbiategrasso (MI)
ITALIA
Des. Type
IT
2. IDENTIFICATION AND STICKERS
An identification label is applied to every machine in agreement with the EC Directive Machine (fig.2/1 and 2/3) and is
punched as by fig.2/2.
2. IDENTIFICATION ET ADHESIFS
Sur chaque machine est appliquée une plaquette adhésive d’identification du produit, conformément à la Directive
CE relative aux machines (fig.2/1 et 2/3) et elle est estampillée comme indiqué dans la fig.2/2.
Power kW Mass kg
Year Id. SN
fig.2/1
5 7 8 6
Zeichenerklärung - Leyenda - Légende - Key - Legenda:
1. marchio
brand
marque
marca
Brandmal
3. modello
model
modèle
modelo
Modell
5. potenza del motore
engine power
puissance du moteur
potencia del motor
Motorleistung
2. costruttore
manufacturer
constructeur
constructor
Hersteller
4. motore
motor
moteur
motor
Motor
6. peso
weight
poids
peso
Gewicht
EN
FR
2. IDENTIFICACIÓN Y ADHESIVOS
En cada máquina se coloca una placa de identificación del
producto con la Directiva Máquinas CE (fig.2/1 y 2/3) y se
marca como indica la fig.2/2.
2. IDENTIFIZIERUNG UND AUFKLEBER
An jedem Gerät wird ein Aufkleber angebracht, der das
Produkt in Übereinstimmung mit der EG-Maschinenrichtlinie (Abb.2/1 und 2/3) identifiziert und ist entsprechend
Abb.2/2 abgestempelt.
7. numero di identificazione dell'anno di produzione
identification number of production year
numéro d'idéntif. de l'année de production
numero de identificación de l'año de producción
Identifizierungsnummer der Produktionsjahr
8. n. di serie
serial number
numéro de série
numero de matricúla
Serienzahl
ES
DE
fig.2/2
21
Page 24
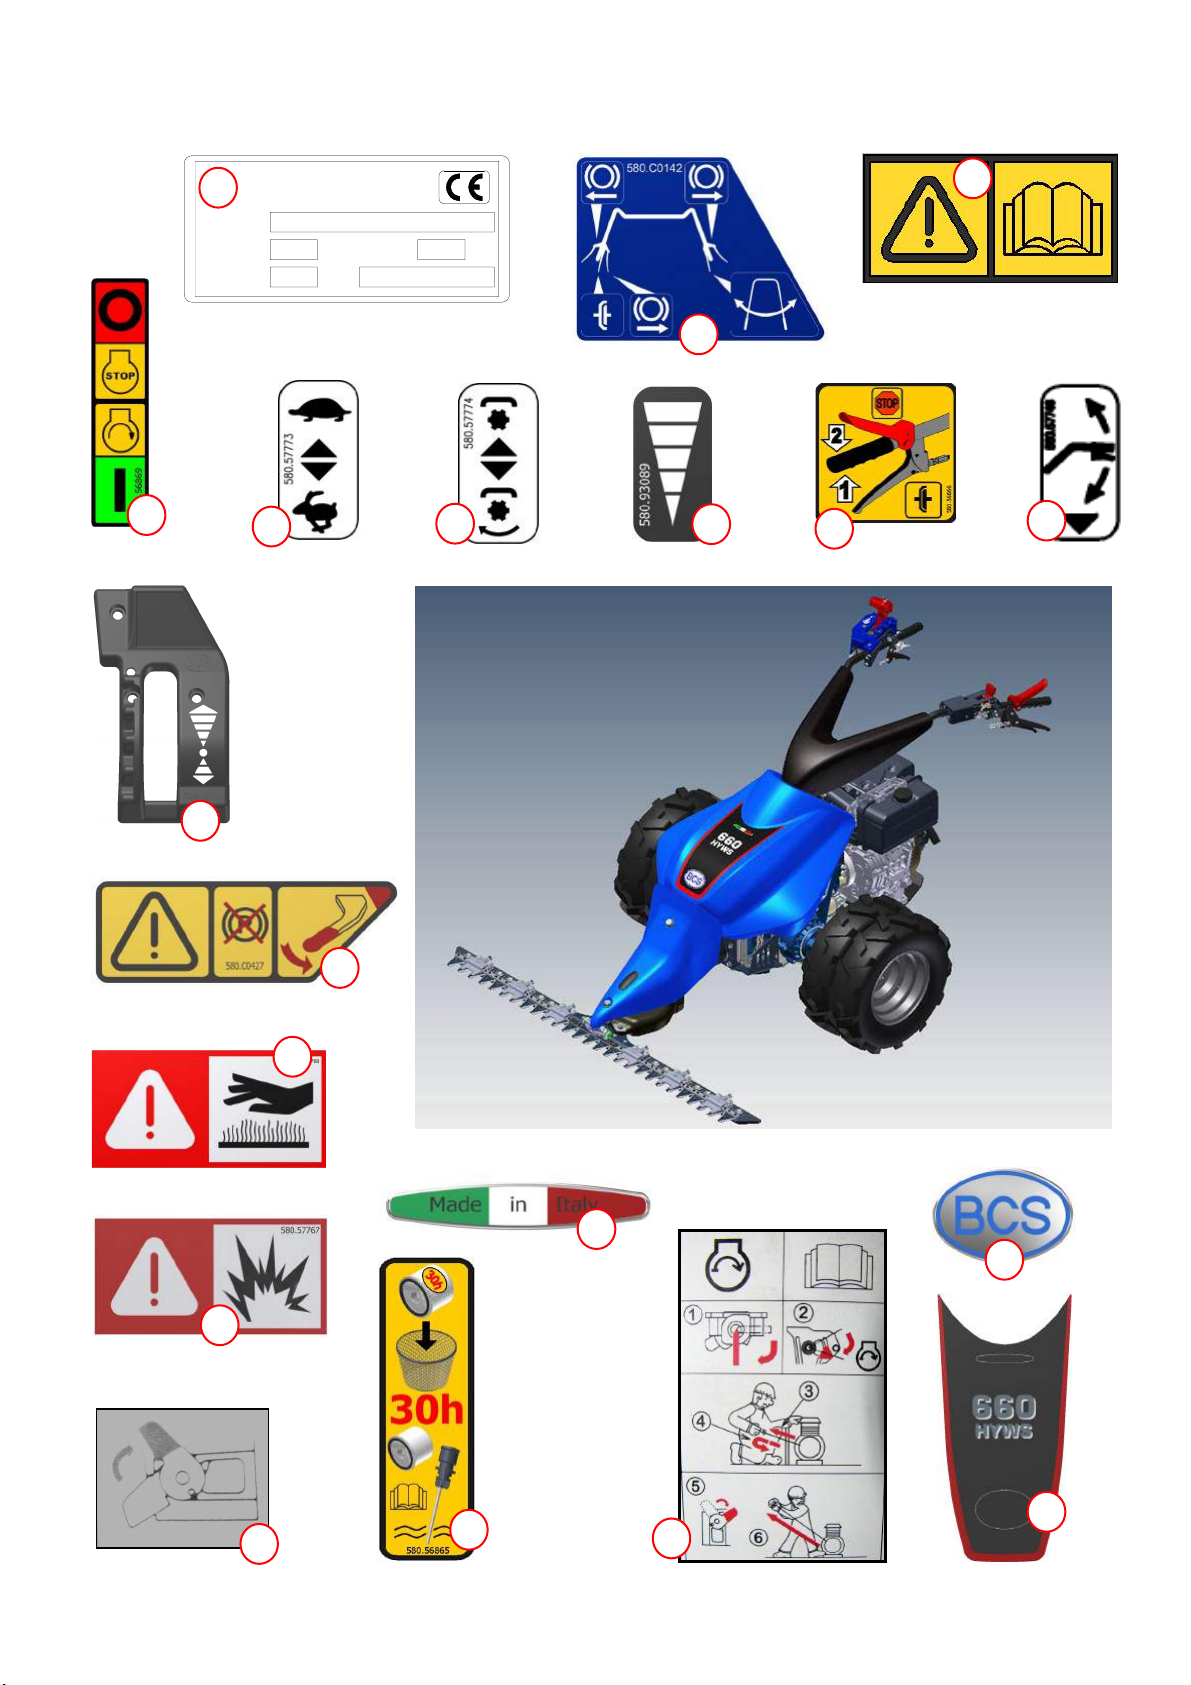
2.2 Adesive macchina – Labels of the machine – Adhésifs de la machine – Adhesivos máquina – Geräteaufkleber
4
1
Des. Type
Power kW Mass kg
Year Id. SN
10
BCS S.p.A. Viale Mazzini 161
20081 Abbiategrasso (MI)
ITALIA
5
11
12
6
17
2
7
8
3
9
18
13
15
14
16
19
22
fig.2/3
Page 25

2.2.1 Legenda adesive
1
Adesiva CE
2
Adesiva comandi
3
Leggere il Manuale d’uso
4
Motore acceso / spento
5
Marcia lenta / veloce
6
Inserimento PTO
7
Comando acceleratore
8
Operazioni PowerSafe®
9
Alzare / abbassare il manubrio
2.2.1 Labels map
1
EC label
2
Controls label
3
Read the user manual
4
Engine ON / OFF
5
Slow / fast speed
6
PTO engaging
7
Throttle control
8
PowerSafe® operation
9
Rise / lower the handlebar
2.2.1 Légende des adhésifs
10
Indicazione avanti / indietro
11
Sblocco freno di parcheggio
12
Superfici molto calde
13
Pericolo di scoppio
14
Adesiva manutenzione filtro
15
Adesiva decompressore motore
16
Operazioni avviamento motore
17
Adesiva Made in Italy
18
Ovale BCS
10
Forward / reverse indicator
11
Unlock the parking brake
12
Hot surfaces
13
Risk of explosion
14
Filter maintenance label
15
Decompressor label
16
Switch on operation engine
17
Made in Italy label
18
BCS label
19
Adesiva 660 HY WS
19
660 HY WS label
IT
EN
1
Adhésif CE
2
Adhésif commandes
3
Lire le Manuel d’utilisation
4
Moteur allumé / éteint
5
Vitesse lente / rapide
6
Insertion PTO
7
Commande accélérateur
8
Opérations PowerSafe®
9
Lever / baisser le guidon
2.2.1 Leyenda de adhesivos
1
Adhesivo CE
2
Adhesivo mandos
3
Leer el manual de uso
4
Motor encendido / apagado
5
Marcha lenta / rápida
6
Acoplamiento PTO
7
Mando acelerador
8
Operaciones PowerSafe®
9
Subir / Bajar el manillar
2.2.1 Erklärung der Aufkleber
10
Indication avant / arrière
11
Déblocage frein de stationnement
12
Surfaces très chaudes
13
Danger d’explosion
14
Adhésif entretien filtre
15
Adhésif décompression moteur
16
Opération démarrage moteur
17
Adhésif Made in Italy
18
Ovale BCS
10
Indicaciones adelante / atrás
11
Desbloqueo freno de stacionamiento
12
Superficies muy calientes
13
Peligro de explosión
14
Adhesivo mantenimiento filtro
15
Adhesivo descompresor motor
16
Operaciones arranque motor
17
Adhesivo Made in Italy
18
Oval BCS
19
Adhésif 660 HY WS
19
Adhesivo 660 HY WS
FR
ES
1
EG-Aufkleber
2
Aufkleber Steuerungen
3
Bedienungsanleitung lesen
4
Motor an / aus
5
Langsamer / schneller Gang
6
Schaltung Zapfwelle
7
Gashebel
8
PowerSafe® Vorgänge
9
Lenker anheben / absenken
10
Markierung vor / zurück
11
Freischaltung Standbremse
12
Sehr heiße Oberfläche
13
Explosionsgefahr
14
Aufkleber Filterwartung
15
Aufkleber Motor-Dekompression
16
Vorgänge Motor anlassen
17
Aufkleber Made in Italy
18
BCS Oval
23
19
Aufkleber 660 HY WS
DE
Page 26

2.3 Mantenimento delle adesive
IMPORTANTE! Le adesive vanno mantenute pulite da polvere
e fango, devono essere sempre ben visibili e leggibili, occorre
sostituirle se mancanti o illeggibili.
Nel caso vengano sostituiti componenti della macchina che in
origine erano dotati di adesive riguardanti la sicurezza occorre
assolutamente riportare il componente nelle sue condizioni originali completo di nuove adesive.
IT
Le adesive sono disponibili sugli esplosi ricambi specifici di
ogni modello di macchina. Nuove adesive possono essere richieste al Costruttore tramite il vostro rivenditore; in questo caso è necessario il codice parte che, di norma, è presente anche sull’adesiva.
3. CARATTERISTICHE TECNICHE
La 660.HY.WS è stata studiata per essere utilizzata in luoghi particolarmente difficili, sulle pendenze ed in montagna. E’ dotata di trasmissione idrostatica con 2 gamme di
velocità, con frizione PowerSafe® centrale e 2 freni / frizioni di sterzo idrauliche sull’asse ruote, comandate con 2
leve indipendenti, montate alle estremità del manubrio, la
leva di sterzata destra è replicata anche a sinistra del
manubrio per agevolare l’uso della macchina.
Questo particolare schema permette di manovrare con
estrema facilità in spazi ristretti o su pendenze e di avere
sempre il controllo della macchina.
2.3 Preservation of the labels
IMPORTANT! The labels must be kept clean from dust and
mud, must always be clearly visible and legible, must be replaced if missing or illegible.
In the case be replaced a machine components that were originally equipped with label on safety, need absolutely to return
the component to its original condition complete with new labels.
EN
The labels are available on the exploded parts specific to each
machine model. New labels may be obtained from the Manufacturer through your dealer; in this case you need the code
part, which is nor-mally also printed on the label.
2.3 Maintenance des adhésifs
IMPORTANT! Les adhésifs doivent rester propres sans pous-
sière et sans boue, ils doivent toujours être bien visibles et lisibles, il faut les remplacer s’ils manquent ou s’ils sont illisibles.
Si des composants de la machine devaient être remplacés,
qui à l’origine sont munis d’adhésifs concernant la sécurité, il
faut absolument remettre le composant dans ses conditions
initiales, y compris les nouveaux adhésifs.
Les adhésifs sont disponibles sur les pièces de rechange dé-
FR
taillées spécifiques de chaque modèle de machine. De nouveaux adhésifs peuvent être demandés au Constructeur par
l’intermédiaire de votre revendeur; dans ce cas, il est nécessaire de fournir la partie du code qui se trouve normalement
sur l’adhésif même.
3. TECHNICAL FEATURES
The 660 HY WS is designed to be used on difficult fields,
on the slopes and mountains. It is equipped with hydrostatic transmission with 2 ranges of speed, with PowerSafe® clutch and 2 hydraulic steering brake / clutch on
wheel axle controlled by 2 independent levers mounted at
the ends of the handlebars, the right steering lever is
replicated at left of the handlebar to facilitate the use of the
machine.
This particular scheme allows you to move easily in tight
spaces or on slopes and always have the control of the
machine.
3. CARACTERISTIQUES TECHNIQUES
La 660 HY WS a été étudiée pour être utilisée dans des
lieux particulièrement difficiles, sur des pentes et en montagne. Elle est équipée d’une transmission hydrostatique
avec 2 gammes de vitesse, avec embrayage PowerSafe®
central et deux freins / embrayages de direction hydrauliques sur l’axe des roues, commandés par deux leviers indépendants, installés à l’extrémité du guidon, le levier de
braquage est reproduit également à gauche du guidon
pour faciliter l’utilisation de la machine.
Ce schéma particulier permet de manœuvrer avec une
extrême facilité dans des endroits étroits ou sur des pentes
et d’avoir toujours le contrôle de la machine.
2.3 Mantenimiento de los adhesivos
¡IMPORTANTE! Los adhesivos deben mantenerse sin polvo
ni lodo, tienen que verse y leerse fácilmente y, cuando se caigan o se lean mal, tienen que sustituirse.
En caso de que se sustituyan componentes de la máquina
que originalmente estaban dotados de adhesivos relacionados
con la seguridad, hay que volver a colocar obligatoriamente el
componente tal como era originalmente, con sus adhesivos
nuevos.
ES
Los adhesivos pueden verse en los diseños detallados de los
recambios específicos de cada modelo de máquina. Se pueden pedir nuevos diseños al fabricante a través del Vendedor
autorizado y en este caso será necesario dar el código de la
pieza que normalmente existe también en el adhesivo.
2.3 Erhaltung der Aufkleber
WICHTIG! Die Aufkleber müssen sauber und staub- sowie
schmutzfrei gehalten werden, müssen stets gut sichtbar und
gut leserlich sein und sind bei Abnutzung oder Fehlen zu
ersetzen.
Falls Bauteile des Gerätes ersetzt werden, auf denen sich ursprünglich Aufkleber befanden, sind am ersetzten Bauteil unbedingt alle betreffenden Aufkleber neu anzubringen.
DE
Die Aufkleber sind in den Explosionszeichnungen des Ersatzteilkatalogs spezifisch für jedes Gerätemodell abgebildet.
Neue Aufkleber können über den Händler beim Hersteller bezogen werden. In diesem Fall muss die Teilnummer angegeben werden, die normalerweise auch auf dem Aufkleber steht.
3. CARACTERISTICAS TECNICAS
La 660.HY.WS está concebida para utilizarse en lugares
especialmente difíciles, en pendiente y en la montaña.Está
dotada de transmisión hidrostática con 2 gamas de velocidad, con embrague PowerSafe® central y 2 frenos / embragues de dirección hidráulicos en el eje de ruedas, controladas por 2 palancas independientes, montadas en los
extremos del manillar. La palanca de giro derecho existe
igual también a la izquierda para facilitar el uso de la máquina.
Este esquema específico permite maniobrar con gran facilidad en espacios restringidos o en pendientes y tener
siempre bajo control la máquina.
3. TECHNISCHE EIGENSHAFTEN
Der 660.HY.WS wurde für einen Einsatz in besonders
schwierigen Arbeitsumgebungen, auf Hängen und in den
Bergen entwickelt. Er verfügt über ein hydrostatisches Getriebe mit 2 Geschwindigkeitsbereichen, PowerSafe®-Kupplung und 2 Bremsen / hydraulischen Lenkerkupplungen
an der Radachse sowie Steuerung durch 2 unabhängige
an den Lenkerenden angebrachte Hebel; zur leichteren
Bedienung des Gerätes ist der Lenkerhebel rechts wie
links baugleich angeordnet. Durch dieses besondere Schema ist das Gerät in engen Bereichen bzw. auf Hängen extrem leicht manövrierbar und stellt zugleich eine fortwährende Gerätekontrolle sicher.
24
Page 27

Il manubrio è montato su antivibranti, regolabile in altezza
e lateralmente. E’ progettata per l’uso di attrezzi frontali come barre falcianti, tosaerba, lame da neve, trincia erba (fig.
3/1, 3/2, 3/3, 3/4, 3/5) ecc.
3.1 Motore
Per tipo di motore, potenza giri/min vedi tab. 3 pag. 32.
3.2 Frizione PowerSafe®
Idraulica, a comando meccanico, pressione di funzionamento = 7,5 bar; per la regolazione vedi pag. 83-84.
IT
fig.3/1
The handlebar is mounted on vibration dampers adjustable
in height and on two sides. It was developed using front
implements as cutter bars, lawn mowers, snow blades,
sweepers, grass flails (fig. 3/1, 3/2, 3/3, 3/4, 3/5) etc.
3.1 Engine
For the engine type, power r.p.m., see table 3 page 32.
3.2 PowerSafe® Clutch
Hydraulic, mechanically-controlled, service pressure = 7,5
bar; for the adjustment see page 83-84.
EN
fig.3/2
fig.3/3
Le guidon est installé sur des anti-vibrants, réglables en
hauteur et latéralement. Elle a été conçue pour l’utilisation
d’équipement frontaux tels que barres faucheuses, lames
à neige, hache-herbe, (fig.3/1, 3/2, 3/3, 3/4, 3/5), etc.
3.1 Moteur
Pour type de moteur, puissance tours / minutes voir tab.3
page 32.
3.2 Embrayage PowerSafe®
Hydraulique, à commande mécanique, pression de fonctionnement = 7,5 bar, pour le réglage voir page 83-84.
El manillar está montado sobre antivibrantes, regulables
en altura y también lateralmente. Está proyectada para
usar equipos delanteros como barras de corte, segadoras,
cuchillas de nieve, trinchadoras de hierba (fig.3/1, 3/2, 3/3,
3/4, 3/5) etc.
3.1 Motor
Para el tipo de motor, potencia rpm véase tab.3 pág.32.
3.2 Embrague PowerSafe®
Hidráulico, de mando mecánico, presión de funcionamiento
= 7,5 bar, para la regulación véase la regulación de la pág.
83-84.
FR
ES
fig.3/4
fig.3/5
Der Lenker ist auf höhen- und seitlich verstellbaren Schwingungsdämpfern angeordnet. Das Gerät wurde für den
Einsatz mit frontseitigem Anbaugerät wie zum Beispiel
Mähbalken, Mähwerken, Schneefräsen, Mulcher usw. vorgesehen (Abb. 3/1, 3/2, 3/3, 3/4, 3/5).
3.1 Motor
Für Hinweise zu Motortyp, Leistung, U/min siehe Tab.3
Seite 32.
3.2 PowerSafe® Kupplung
Hydraulisch, mit mechanischer Steuerung, Betriebsdruck
7,5 bar, für Hinweise zur Einstellung siehe Seite 83-84.
DE
25
Page 28

3.3 Dispositivo di sterzo
Freno / frizione a dischi multipli in bagno olio a comando
idraulico con leve indipendenti, con freno idraulico a chiusura anticipata, leva di sterzata destra replicata a sinistra
per un totale controllo della macchina su lavori in pendenza, comandi con recupero automatico del gioco.
3.4 Trasmissione idrostatica
Gruppo idrostatico compatto Kanzaki tipo KHS-13 JH con
IT
pompa 13 cm³, facilmente smontabile, circuito di alta pressione separato, con radiatore per raffreddamento olio e
ventola di raffreddamento del gruppo idrostatico, pompa di
carico, circuito idraulico in comune con la frizione Power
Safe®, per le caratteristiche vedi fig.3/6 pag. 27.
3.5 Cambio
Ad ingranaggi, con 2 gamme di velocità per lavoro e trasferimento, senza folle, con inversione idrostatica. Per le velocità di avanzamento vedere tab.4 pag.32. Posizione di folle
per la manovra a spinta protetto da azionamenti accidentali, e freno automatico di stazionamento (auto-hold).
3.3 Steering device
Brake / Clutch Multiple discs in oil bath with hydraulic control on independent levers, with hydraulic brake to early
closure for a total control of the machine on slopes, controls with automatic recover of the play.
3.4 Hydrostatic transmission
EN
Type KHS-13 JH Kanzaki hydrostatic compact group, with
pump of 13 cm³, easily separable, high pressure separate
circuit, with oil cooling radiator and cooling fan for the hydrostatic unit, with charging pump, hydraulic circuit in common with the PowerSafe® clutch, for the features see
3.3 Dispositif de direction
Frein / Embrayage multidisques bain d’huile à commande
hydraulique avec levier indépendant, avec frein hydraulique à fermeture antivol, levier de braquage droit reproduit
à gauche pour un contrôle total de la machine lors de
travaux en pente, commandes avec récupération automatique du jeu.
3.4 Transmission hydrostatique
FR
Groupe hydrostatique compact Kanzaki type KHS-13 JH
avec pompe 13 cm³, facilement démontable, circuit à haute pression séparée, avec radiateur pour le refroidissement
de l’huile et ventilateur de refroidissement du groupe hydrostatique, pompe de chargement, circuit hydraulique en
fig.3/6 page 27.
3.5 Gearbox
Gear, with 2 ranges of speed for work and transfer, without
neutral position, with hydrostatic inversion. For the forward
speeds see table 4 page 32. Neutral position to move pushing the machine protected from accidental operation,
and automatic parking brake (auto-hold).
commun avec l’embrayage PowerSafe®, pour les caractéristiques, voir fig.3/6 page 27.
3.5 Boîte de vitesses
A engrenage, avec 2 gammes de vitesse pour le travail et
le transfert, sans point mort, avec inversion hydrostatique.
Pour les vitesses d’avancement voir tab.4 page 32. Position de point mort pour la manœuvre à lancement sécurisé
lors d’utilisations accidentelles et frein automatique de stationnement (auto-hold).
3.3 Dispositivo de dirección
Freno / embrague de discos múltiples en baño de aceite
de mando hidráulico con palancas independientes, con freno hidráulico de cierre anticipado, palanca de giro derecho
existe igual también a la izquierda para tener un control
total de la máquina en trabajos en pendiente, mandos con
recuperación automática de la holgura
3.4 Transmisión hidrostática
ES
Grupo hidrostático compacto Kanzaki tipo KHS-13 JH con
bomba de 13 cm³, que se desmonta fácilmente, circuito de
alta presión separado. con radiador para refrigeración de
aceite y ventilador de refrigeración del grupo hidrostático,
bomba de carga, circuito hidráulico en común con el
3.3 Lenkvorrichtung
Bremse / Ölbad-Lamellenkupplung mit hydraulischer Steuerung mit unabhängigen Schalthebeln, mit hydraulischer
Bremse mit vorgeschalteter Schließfunktion, zur leichteren
Bedienung des Gerätes an Hängen Lenkerhebel rechts
wie links baugleich angeordnet, Steuerung mit automatischem Spielrückzug.
3.4 Hydrostatisches Getriebe
DE
Kompakter hydrostatischer Antrieb Kanzaki Typ KHS-13
JH mit 13 cm³ Pumpe; leicht demontierbar, separater
Hochdruckkreislauf mit Ölkühler und Kühllüftung des hydrostatischen Antriebs, Füllpumpe, hydraulischer Kreislauf
gemeinsam mit der PowerSafe®-Kupplung, für weitere
embrague PowerSafe®, para las características véase fig.
3/6 pág.27.
3.5 Cambio
Con engranajes, con 2 gamas de velocidad para trabajo y
desplazamiento, sin punto muerto, con inversión hidrostática. Para las velocidades de avance, véase la tabla 4 pág.
32. Posición de punto muerto para la maniobra de empuje
protegida frente a accionamientos accidentales y freno automático de estacionamiento (auto-hold).
Merkmale siehe Abb. 3/6 Seite 27.
3.5 Getriebe
Mit Zahnrädern, mit 2 Geschwindigkeitsbereichen für Arbeit und Fahrt, ohne Leerlauf, mit hydrostatischer Wendefunktion. Die Vorwärtsfahrtgeschwindigkeiten können Tab.
4 Seite 32 entnommen werden. Neutralstellung für Anschubmanöver vor versehentlichen Einschaltungen geschützt und automatische Standbremse (auto-hold).
26
Page 29

f
Kanzaki KHS - 13JH
Caratteristiche gruppo idrostatico
Features hydrostatic group
Caractéristiques du groupe hydrostatique
Características del grupo hidrostático
Merkmale hydrostatischer Antrieb
Kanzaki KHS – 13JH
Cilindrata
IT
Displacement Flow
EN
FR
Cylindrée
Portata
Débit
Giri gruppo idrostatico a 3600/1’ motore
Rpm hydrostatic group at 3600 rpm engine Variable pressure
Tours groupe hydrostatique à 3600/1’
moteur
ig. 3/6
Pressione variabile
Pression variable
Pompa di carico
Loading pump
Pompe de
chargement
ES
DE
Cilindrada
Hubraum
13 cm³
Alcance
Durchfluss Dreh. Hydrostatische Antrieb 3600/1’ Motor Verstellbarer Druck Füllpumpe
39 lt / min.
Giros grupo hidrostático a 3600/1’ motor
3000 giri / min.
Presión variable Bomba de carga
69 – 174 bar
5 bar
27
Page 30

3.6 Manubrio
Regolabile in altezza e lateralmente in più posizioni. Montato su ammortizzatori, con comandi a leva e cavi che agiscono sui relativi distributori idraulici, compresa la leva di
sicurezza. Comando di sterzata a destra replicato sulla
stegola di sinistra.
3.7 Inversore di marcia
Azionando verso l’operatore la leva di avanzamento rossa
IT
posta sulla destra della stegola inverte automaticamente il
senso di marcia in entrambe le gamme.
3.8 Presa di forza (PTO)
Con attacco rapido di serie, a 3 denti con innesto frontale
3.6 Handlebar
Adjustable in height and sideways in multiple positions.
Mounted on shock absorbers, with control levers and cables acting on its hydraulic valves, including the safety lever. Right command steering replicated to the left of the
handlebar.
3.7 Reverser device
By moving toward the operator the red lever of the move-
EN
ment sited on the right side of the handlebar, we automatically invert the driving direction of both ranges.
3.8 Power Take Off (PTO)
With standard quick hitch, three teeth with facilitate front
facilitato; rotazione destra indipendente dal cambio; vincolata alla velocità del motore (vedi tab.4). Per schema e
flangiatura vedi fig.3/7, 3/8 e 3/9 pag.30.
3.9 Dispositivi di sicurezza
• Frizione PowerSafe®, abbandonando la leva rossa a sinistra la macchina si fermerà all’istante ma Il motore rimane acceso.
• Freno automatico meccanico, di stazionamento (autohold) funzionante anche a motore spento.
• Blocco di sicurezza sulla leva del folle per la manovra a
spinta, per evitare accidentali azionamenti.
coupling; right rotation, independent from the gear; bound
by the speed of the engine (see table 4). About schema
and flange see fig.3/7, 3/8 and 3/9 page 30.
3.9 Safety devices
• PowerSafe® clutch, leaving the red lever to the left the
machine will stop immediately with the engine running.
• Mechanical automatic parking brake, (auto-hold), functioning also with engine stop.
• Safety lock on the neutral lever for pushing movement,
to avoid involuntary movement operations.
3.6 Guidon
Réglable en hauteur et latéralement dans plusieurs positions. Monté sur des amortisseurs, avec commandes à levier et câbles qui agissent sur les respectifs distributeurs
hydrauliques, y compris le levier de sécurité. Commande
de braquage à droite reproduit sur la poignée gauche.
3.7 Inverseur de boîte de vitesse
En actionnant en direction de l’opérateur le levier d’avan-
FR
cement rouge placée sur la droite de la poignée, on invertit
automatiquement le sens de la vitesse dans les 2 gammes
3.8 Prise de force (PTO)
Avec attelage rapide de série, à 3 dents avec enclenche-
3.6 Manillar
Regulable en altura y lateralmente, en varias posiciones.
Montado sobre amortiguadores, con mando de palanca y
cables que actúan sobre los correspondientes distribuidores hidráulicos, incluida la palanca de seguridad. Mando
de giro a derecha y también idéntico en la estava para la
izquierda.
3.7 Inversor de marcha
ES
Accionando hacia el operador la palanca de avance roja
situada a la derecha de la esteva invierte automáticamente
el sentido de marcha en ambas gamas.
3.8 Toma de fuerza (PTO)
Con empalme rápido de serie, de 3 dientes, con conexión
ment frontal facilité; rotation droite indépendante de la boîte de vitesses liée à la vitesse du moteur (voir tab.4). Pour
schéma et bridage voir fig.3/7, 3/8 et 3/9 page 30.
3.9 Dispositifs de sécurité
• Embrayage PowerSafe®, en abandonnant le levier rouge
à gauche, la machine s’arrêtera immédiatement, mais le
moteur restera allumé.
• Frein automatique mécanique, de stationnement (autohold) fonctionnant également avec le moteur éteint.
• Bloc de sécurité sur le levier du point mort pour la manœuvre à lancement, pour éviter des manipulations accidentelles.
frontal facilitada; rotación derecha independiente del cambio, vinculada a la velocidad del motor (véase tab.4). Para
esquemas y refuerzo véanse las figs.3/7, 3/8 y 3/9 pág.30.
3.9 Dispositivos de seguridad
• Embrague PowerSafe®, abandonando la palanca roja de
la izquierda, la máquina se detendrá instantáneamente
pero el moto quedará encendido.
• Freno automático mecánico, de estacionamiento (autohold) que funciona también con el motor apagado
• Bloqueo de seguridad en la palanca del punto muerto
para la maniobra de empuje, para evitar accionamientos
accidentales.
3.6 Lenker
In mehreren Stellungen höhenverstellbar und seitlich verstellbar. Er ist an Dämpfern mit Hebel- und Seilschaltung
angebracht, die die entsprechenden hydraulischen Zusatzsteuergeräte ansteuern, einschließlich Sicherheitshebel.
Lenksteuerung rechts wie an der linken Sterz baugleich
angeordnet.
3.7 Wendegetriebe
DE
Wird der rote rechts von der Sterz angeordnete Hebel für
die Vorwärtsfahrt zum Bediener hin gezogen, erfolgt automatisch eine Umkehr der Fahrtrichtung in beiden Bereichen.
3.8 Zapfwelle (PTO)
Mit serienmäßigem Schnellanschluss, mit 3 Zähnen mit er-
leichterter frontseitigen Schaltung; vom Getriebe unabhängige Rechtsdrehung; gebunden an die Motorgeschwindigkeit (siehe Tab.4). Für Schema und Flanschung siehe Abb.
3/7, 3/8 und 3/9 Seite 30.
3.9 Sicherheitsvorrichtungen
• PowerSafe®-Kupplung; wird der rote Schalthebel links
losgelassen, hält das Gerät augenblicklich an, aber der
Motor läuft weiter.
• Automatische, mechanische Standbremse (auto-hold),
funktioniert auch bei ausgeschaltetem Motor.
• Sicherheitssperre am Hebel der Neutralstellung für Abschubmanöver, um versehentliche Einschaltungen zu ver-
28
meiden.
Page 31

• Chiusura anticipata del freno di sterzo rispetto l’apertura
della frizione per evitare di perdere il controllo della macchina durante il lavoro su terreni in pendenza.
3.10 Pneumatici
Per adeguare le macchine alla necessità di lavoro dei vari
attrezzi e delle varie colture, è possibile variare la carreggiata ed i tipi di ruote: vedi tabella 2 pag.32.
3.11 Bilanciamento della macchina
Il bilanciamento macchina / attrezzo è importante per l’uso
ottimale della stessa in tutte le condizioni di lavoro.
Per ottenere questo, è importante aggiungere eventuali
pesi alle diverse attrezzature, vedere sezione 9.9.8.
3.12 Raggio di sterzata “zero” (0)
Il raggio di sterzata “zero”, permette di utilizzare la macchina in qualsiasi condizione di terreno ed in presenza di
ostacoli o piante.
3.13 Dimensioni e masse massime
Vedere tabella 1 pag.31.
IT
• Early closing of the steering brake, than the opening of
the clutch to avoid to lose the control of the machine during
the work on slope fields.
3.10 Tires
It is possible to change the track and the types of the
wheels to adapt the machine to the required jobs with different implements and cultures, see table 2 page 32.
3.11 Balancing of the machine
The balancing of machine / implement is important to use
the equipment at the better in all working conditions.
• Fermeture anticipée du frein de direction par rapport à
l’ouverture de l’embrayage pour éviter de perdre le contrôle de la machine durant le travail sur des terrains en pente.
3.10 Pneus
Pour adapter les machines au besoin du travail des différents équipements et des différentes cultures, il est possible de changer l’ornière et les types de roues: voir tableau
2 page 32.
3.11 Equilibrage de la machine
L’équilibrage machine / équipement est important pour
l’utilisation utilisation optimale de la machine durant toutes
les conditions de travail.
To achieve this, it is important to add some weight to the
different equipment, see section 9.9.8.
3.12 Steering radius, “zero” (0)
The zero turning radius allow to use the machine in every
condition of fields and in presence of obstacles or trees.
3.13 Dimensions and maximum masses
See table 1 page 31.
Pour obtenir ce résultat, il est important d’ajouter d’éventuels poids aux différents équipements, voir section 9.9.8.
3.12 Rayon de braquage “zéro” (0)
Le rayon de braquage “zéro” permet d’utiliser la machine
dans n’importe quelle condition du terrain et en présence
d’obstacles ou de plantes.
3.13 Dimensions et masses maximales
Voir tableau 1 page 31.
EN
FR
• Cierre anticipado del freno de dirección respecto a la
apertura del embrague para evitar perder el control de la
máquina durante el trabajo en terrenos en pendiente.
3.10 Neumáticos
Para adaptar las máquinas a la necesidad de trabajo de
los diferentes equipos y de los diferentes cultivos, se puede variar el ancho de vía y los tipos de ruedas: véase la
tabla 2 pág.32.
3.11 Equilibrado de la máquina
El equilibrado de la máquina / equipo es importante para el
uso óptimo de la misma en todas las condiciones de trabajo.
• Zeitlich vorgezogenes Zufahren der Lenkbremse gegen-
über dem Öffnen der Kupplung, um einen Verlust der Kontrolle über das Gerät während der Arbeit auf Hängen zu
vermeiden.
3.10 Bereifung
Zur Anpassung der Geräte an die Arbeitsbedürfnisse der
verschiedenen Anbaugeräte und Anbauarten lässt sich die
Spurweite und der Reifentyp wählen: siehe Tabelle 2 Seite
32.
3.11 Schwerpunktlage des Gerätes
Die Schwerpunktlage der Maschine / des Anbaugerätes ist
zur optimalen Verwendung in allen Arbeitsbedingungen
Para obtener esto, es importante añadir los pesos que fueran necesarios a los diferentes equipos, véase la sección
9.9.8.
3.12 Radio de giro “cero” (0)
El radio de giro “cero”, permite utilizar la máquina en cualquier condición del terreno y en presencia de obstáculos o
plantas.
3.13 Dimensiones y pesos máximos
Véase la tabla 1 pág.31.
sehr wichtig. Hierzu müssen den verschiedenen Anbaugeräten möglicherweise Gewichte hinzugefügt werden, siehe
Abschnitt 9.9.8.
3.12 Wendekreis “null” (0)
Der Wendekreis “null” gewährleistet eine Verwendung des
Gerätes bei beliebiger Bodenbeschaffenheit und auch bei
Vorhandensein von Hindernissen bzw. Pflanzen.
3.13 Höchstabmessungen und Höchstgewicht
Siehe Tabelle 1 Seite 31.
ES
DE
29
Page 32

A
± ²
C
R
fig.3/8
fig.3/7
ROTAZIONE: DESTRA - ROTATION: RIGHT - ROTATION: DROITE - ROTACIÓN: DERECHA - DREHUNG: RECHT
GIRI DELLA PRESA DI FORZA - PTO's RPM - TOURS DE LA PRISE DE FORCE - GIROS DE LA TOMA DE FUERZA
DREHUNGEN DER ZAPFWELLE: 990 @ 3600/1'
fig.3/9
D
30
Page 33

TABELLA 1 – TABLE 1 –TABLEAU 1 –TABLA 1 –TAFEL 1
Dimensioni e masse massime - Dimensions and maximum weights - Dimensions et poids maximum - Dimensiones y
pesos máximos - Höchstabmessungen und Gewichte
IT - Pneumatici
EN - Tyres
FR - Pneus
ES - Neumáticos
DE - Reifen
5.0-10 1300 990 630 900 550 96 181 196
5.0-10 (Twin) 1300 990 630 1180 600 96 199 214
5.0-10 (+ Super Bite) 1300 990 630 1170 600 96 200 215
23x8.50-12 Tractor 1300 1020 630 1020 600 96 186 201
21x11.00-8 Terra Tyre 1300 990 630 1180 600 96 183 198
20x8-10 Garden 1300 990 630 1010 700 96 183 198
20x8-10 Tractor 1300 990 630 1010 700 96 183 198
IT - M1 = massa massima con motori a benzina
EN - M1 = maximum weight with petrol motors
FR - M1 = poids maximum avec moteur à essence
ES - M1 = peso máximo con motores de gasolina
DE - M1 = Höchstgewicht bei Benzinmotoren
A (mm) B (mm) C (mm) D (mm) E (mm) F (mm)
M2 = massa massima con motori diesel
M2 = maximum weight with diesel motors
M2 = poids maximum avec moteur diesel
M2 = peso máximo con motores diesel
M2 = Höchstgewicht bei Dieselmotoren
M (kg)
1 2
31
Page 34

A
A
L max (A)
L max (A+B)
TABELLA 2 – TABLE 2 – TABLEAU 2 – TABLA 2 – TAFEL 2
B
B
Superbite
L max
900 (A)
1170 (A+B)
1180 (A+A) 5.0 – 10 (Twin)
1010 (A) 20x8.00 – 10 (Tractor)
1010 (A) 20x8.00 – 10 (Garden)
1180 (A)
1020 (A) 23x8.50 – 12 Tr
1080 (C) D 500 x L 290 (taloned)
1240 (C) D 525 x L 370 (taloned)
Type of Tyre / Wheels
5.0 – 10
5.0 – 10 (+Superbite)
21x11.00 – 8
(Terra Tyre)
D L bar D L D L
512 140 1.2 500 135 / /
512 140 1.2 / / / /
526 196 1.2 / / / /
495 196 1.2 / / / /
518 280 0.5 / / / /
574 200 1.2 / / / /
/ / / / / 500 290
/ / / / / 525 370
TABELLA 3 – TABLE 3 – TABLEAU 3 – TABLA 3 – TAFEL 3
giri/min.
MOTORE – ENGINE
MOTEUR – MOTOR
MOTOR
Yanmar L100AE 406 7,4 / 10,1 3600 X Std cone kg/h 1,960
Honda GX390 (Alps) 389 8,7 / 11,9 3600 X mm 25,4 kg/h 2,550
B&S Vanguard 480 11,9 / 16 3600 X mm 25,4 kg/h 3,625
cm³ kW / HP
rpm
tour/min.
rpm
U/min.
Benzina
Gasoline
Essence
Gasolina
Benzin
Diesel
Albero motore
Engine shaft
Arbre moteur
Eje motor
Kurbelwelle
Consumo
Consumption
Consommation
Consumo
Konsum
TABELLA 4 – TABLE 4 – TABLEAU 4 – TABLA 4 – TAFEL 4
La velocità con motore a 3600 giri/min è variabile da 0 al massimo della velocità indicata.
The speed of the engine at 3600 rpm varies between 0 and the maximum speed indicated.
La vitesse avec le moteur à 3600 tours/minute est variable de 0 au maximum de la vitesse indiquée.
La velocidad con el motor a 3600 r.p.m. es variable desde 0 hasta el máximo de la velocidad indicada.
Die Geschwindigkeit bei laufendem Motor bei 3600 Dreh./min. liegt zwischen 0 und der angegebenen Höchstgeschwindigkeit.
RUOTE – WHEELS – ROUES
RUEDAS – RÄDER
5.0 – 10
Tractor
20x8.00 – 10
Garden
20x8.00 – 10
Tractor
21x11.00 – 8
Terra Tyre
23x8.50 – 12
Tractor
1av 2av 1rm 2rm 3600 min 3000 min 990 min
km/h
mph
km/h
mph
km/h
mph
km/h
mph
km/h
mph
0 – 4,76
0 – 2,95
0 – 4,55
0 – 2,83
0 – 5,10
0 – 3,17
0 – 4,50
0 – 2,79
0 – 5,01
0 – 3,11
0 – 7,00
0 – 4,35
0 – 6,69
0 – 4,15
0 – 7,51
0 – 4,66
0 – 6,62
0 – 4,11
0 – 7,37
0 – 4,58
0 – 4,34
0 – 2,69
0 – 4,15
0 – 2,58
0 – 4,66
0 – 2,89
0 – 4,10
0 – 2,55
0 – 4,57
0 – 2,84
0 – 6,39
0 – 3,97
0 – 6,10
0 – 3,79
0 – 6,85
0 – 4,25
0 – 6,04
0 – 3,75
0 – 6,72
0 – 4,17
giri/min motore, engine rpm,
motor, Dreh./min des Motors
tours/min du moteur, giros/min del
giri/min pompa idrostatica, hydro-
pump rpm, tours/min. de la pompe
des hydrostatische Pumpe
bomba hídrostatica, Dreh./min
hydrosta-tique, giros/min. de la
32
Giri presa di forza, PTO rpm,
TdF Dreh./min. des Zapfwelle
Tours/min. de la PdF, Giros/min.
Page 35

A
1 2
3
6
4
fig.4/1
IT
- 1 Protezione stegola - 2 Protezione piantone - 3 Protezioni mozzi ruote (solo 5.0-10) - 4 Bussola attacco rapido - 5 Manuale e dotazione motore - 6 Manuale e dotazione macchina
EN
- 1 Handlebar protection - 2 Column protection - 3 Hub
wheels protections (5.0-10 only) - 4 Female quick coupling - 5
Engine manual and appended parts - 6 Machine user manual
and appended parts
FR
- 1 Protection poignée - 2 Protection colonne - 3 Protec-
tions pôles des roues (seulement 5.0-10) - 4 Douille attache
rapide - 5 Manuel et outillage moteur - 6 Manuel et outillage
machine
ES
- 1 Protección esteva - 2 Protección pivote - 3 Protección
bujes ruedas (solo 5.0-10) - 4 Buje enganche rápido - 5 Manual y dotación del motor - 6 Manual y dotación máquina
DE
- 1 Sterzschutz - 2 Lenksäulenschutz - 3 Radnabenschutz
(nur 5.0-10) - 4 Buchse Schnellanschluss - 5 Bedienungsanleitung und Motorzubehör - 6 Bedienungsanleitung und Gerätezubehör
4. PREPARAZIONE DELLA MACCHIN
4.1 Apertura della scatola di cartone
La macchina è consegnata in scatola di cartone spostabile
tramite muletto. Aprire la scatola e togliere gli accessori
(fig.4/1), tagliare la scatola in cartone sui 4 spigoli e liberare la macchina.
4.2 Verifiche preliminari
La macchina è senza attrezzi, occorre controllare l'integrità
della macchina e accertare che non abbia subito danni durante il trasporto. Verificare come da elenco a lato, che gli
accessori siano tutti presenti quindi procedere al montaggio come da sezione 4.3.
4. SETTING UP OF THE MACHINE
4.1 Opening the carton box
The machine is delivered in a carton box displaceable with
forklift. Open the carton box and remove the accessories
(fig. 4/1), then cut the carton box on the 4 corners and free
the machine.
4.2 Preliminary checks
The machine is without tools, you need to check the integrity of the machine and make sure that no damages have
occurred during transport. Check as by the list on the side
that all the accessories are inside, then proceed to reassemble as per section 4.3.
4. MISE EN FONCTION
4.1 Ouverture du carton
La machine est livrée dans un carton qui peut être déplacé
au moyen d’un chariot élévateur. Ouvrir le carton et enlever les accessoires (fig.4/1), couper la boîte en carton sur
les 4 bords et libérer la machine.
4.2 Contrôles préliminaires
La machine est sans équipements, il faut contrôler l’intégralité de la machine et s’assurer que elle n’ait subi aucun
dommage durant le transport. Vérifier selon la liste qui se
trouve sur le côté que les accessoires soient présents, puis
procéder au montage comme indiqué dans la section 4.3.
4. PUESTA EN FUNCIONAMIENTO
4.1 Apertura de la caja de cartón
La máquina se entrega en la caja de cartón y puede desplazarse mediante carretilla elevadora. Abrir la caja y sacar los accesorios (fig.4/1), cortar por las 4 esquinas de la
caja de cartón y sacar la máquina.
4.2 Controles previos
La máquina està sin aperos, hay que controlar el estado
de la máquina y comprobar que no haya sufrido daños durante el transporte. Comprobar en el listado que acompaña
que estén presentes todos los accesorios, hay que realizar
el montaje tal y como se indica en la sección 4.3.
IT
EN
FR
ES
4. INBETRIEBNAHME
4.1 Öffnen des Verpackungskartons
Das Gerät wird in einer Kartonkiste angeliefert, die sich mit
einem Gabelstapler verfahren lässt. Den Karton öffnen und
die Zubehöre entfernen (Abb.4/1), den Karton an den 4 Ecken
aufschneiden, um das Gerät herausnehmen zu können.
4.2 Kontrollen im Vorfeld
Am Gerät ist kein Zubehör angebracht, nach Anlieferung ist
es auf Unversehrtheit zu prüfen und sicherzustellen, dass es
keine Transportschäden aufweist. Außerdem entsprechend
nebenstehender Liste prüfen, dass alle Zubehörteile vorhanden sind und daraufhin entsprechend Abschnitt 4.3 mit der
Montage beginnen.
DE
33
Page 36

4.3 Assemblaggio della macchina
A
• Leggere attentamente il presente manuale ed i manuali
di uso e manutenzione del motore e dell’attrezzo da applicare alla macchina.
• Aprire i sacchetti della dotazione (5 e 6 fig.4/1) ed inizia-
re il montaggio, vedi fig.4/7.
• Montaggio ruote: sono fornite separatamente, fare at-
IT
tenzione che la freccia determinata dal disegno del battistrada (A fig.4/3) degli pneumatici sia rivolta verso gli attrezzi, serrare forte i bulloni. Gonfiare gli pneumatici a 1,2
bar, vedere tabella 2 pag.32.
4.3 Assembling the machine
• Read with attention this manual and also the user ma-
nual of the engine and of the implement to fit on the machine.
• Open the plastic bag included (5 and 6 fig.4/1) and start
to mount the machine, see fig.4/7.
• Mounting the wheels: they are supplied separately, pay
attention that the arrow of the tread (A fig.4/3) is toward the
EN
implements, tighten well the bolt. Inflate the tires to 1,2 bar,
see table 2 page 32.
4.3 Assemblage de la machine
• Lire attentivement le présent manuel et les manuels de
utilisation et d’entretien du moteur et de l’équipement à appliquer sur la machine.
• Ouvrir les sachets de la dotation (5 et 6 fig.4/1) et com-
mencer le montage, voir fig. 4/7.
• Montage des roues: elles sont fournies séparément,
FR
assurez-vous que la flèche déterminée par le dessin de la
bande de roulement (A fig.4/3) des pneus soit tournée en
direction des équipements, serrer bien fort les boulons.
Gonfler les pneus à 1,2 bar, voir tableau 2 page 32.
A
fig.4/3
B
4.3 Ensamblado de la máquina
• Leer atentamente este manual y el manual de uso y man-
tenimiento del motor y de los dispositivos que se vayan a
colocar en la máquina
• Abrir las bolsas que se entregan en la dotación inicial (5
y 6 fig.4/1) y comenzar el montaje, véase fig.4/7.
• Montaje ruedas: se entregan por separado, atención a
ES
que la flecha que determina el dibujo de la banda de rodadura (A fig.4/3) de los neumáticos esté dirigida hacia los
dispositivos, apretar fuerte los pernos. Inflar los neumáticos a 1,2 bar, véase la tabla 2 pág.32.
4.3 Gerät montieren
•
• Die vorliegende Anleitung und die Bedienungs- und War-
••
tungsanleitung des Motors und des an der Maschine anzubringenden Werkzeugs aufmerksam lesen.
•
• Die Kunststoffverpackungen des Lieferumfangs (5 und 6
••
Abb.4/1) öffnen und mit der Montage beginnen, siehe Abb.
4/7.
•
• Räder montieren: Diese werden separat geliefert; bitte
••
DE
achten Sie darauf, dass der Pfeil, den das (A Abb.4/3) Reifenprofil bildet, zum Anbaugerät zeigt; die Bolzenmuttern
fest an ziehen. Den Reifen Luft anlegen; der Reifendruck
muss 1,2 bar betragen, siehe Tabelle 2 Seite 32.
fig.4/4
IT - Rondelle elastiche, osservare il corretto montaggio
EN - Elastic washers, watch the right assembling
FR - Rondelles élastiques, observer le montage correct.
ES - Arandelas elásticas, realizar el montaje de forma correcta.
DE - Spannscheibe, bitte die ordnungsgemäße Montage
beachten.
no sì / yes
fig.4/7
34
Page 37

• Sostituire il tappo in plastica trasparente con il tappo
di livello olio in dotazione (B fig.4/4).
• Applicare l’attrezzo desiderato (montato in precedenza)
all’attacco rapido PTO della macchina e bloccarlo ruotando
in senso orario il pomolo rosso (R fig.3/8).
• Controllare che tutte le viti ed i dadi siano ben serrati in
particolare quelli che fissano l’attrezzo alla macchina (D
fig.3/8).
• Verificare il livello olio cambio tramite l’asta (C fig.14/24).
Se necessario aggiungere olio BCS Powerlube H3 SAE
15W-40 (ACEA A3-08/B3-08, API SL/CF, API EC I, VW
500/505.00).
• Verificare il livello olio del motore e dell’attrezzo. Nel ca-
so occorra ripristinare olio, per quantità e tipo, fare riferimento ai relativi capitoli di manutenzione del motore e
dell’attrezzo.
ATTENZIONE: se il motore ha il filtro aria a bagno d’olio,
immettere olio nella quantità indicata sul manuale del motore.
Utilizzare olio BCS Powerlube H3 SAE 15W-40 (ACEA
A3-08/B3-08, API SL/CF, API EC I, VW 500/ 505.00).
IMPORTANTE! Controllare che non vi siano perdite di olio
o viti lente, in particolare le viti di fissaggio delle ruote.
IT
• Change the plastic cap with the oil dipstick (B fig.4/4)
included.
• Fit the desired implement (pre-mounted) to the quick
hitch of the PTO of the machine and lock it turning clockwise the red knob (R fig.3/8).
• Check that all the screws and nuts are well tightened,
particularly the nuts fixing the implement to the machine (D
fig.3/8).
• Verify the transmission oil level using the dipstick (C fig.
14/24). If necessary add BCS oil Powerlube H3 SAE 15W40 (ACEA A3-08/B3-08, API SL/CF, API EC I, VW 500/
505.00).
• Remplacer le bouchon en plastique transparent avec
le bouchon du niveau huile en dotation (B fig.4/4).
• Appliquer l’équipement souhaité (monté précédemment)
à l’attelage rapide PTO de la machine et le bloquer en
tournant dans le sens horaire la poignée rouge (R fig.3/8).
• Contrôler que toutes les vis et les écrous soient bien
serrés, en particulier ceux qui fixent l’équipement à la machine (D fig.3/8).
• Vérifier le niveau changement d’huile au moyen de la
sonde (C fig.14/24). Si nécessaire ajouter de l’huile BCS
Powerlube H3 SAE 15W-40 (ACEA A3-08/B3-08, API
SL/CF, API EC I, VW 500/505.00).
• Verify the oil level of the engine and of the implement. If
necessary to restore, for quantity and type, refers to the
section of specific user manual of the engine and of the
implement.
ATTENTION: if the engine has the oil bath air filter, add oil
in the quantity indicated on the engine manual.
Use BCS oil Powerlube H3 SAE 15W-40 (ACEA A308/B3-08, API SL/CF, API EC I, VW 500/505.00).
IMPORTANT! Check that there are no oil leaks or loose
screws, especially the fixing screws of the wheels.
• Vérifier le niveau huile du moteur et de l’équipement.Dans
le cas où il soit nécessaire d’ajouter de l’huile, en quantité et
en type, se référer aux respectifs chapitres d’entretien du
moteur et de l’équipement.
ATTENTION: si le moteur a le filtre à air bain d’huile, mettre de l’huile selon la quantité indiqué dans le manuel du
moteur.
Utiliser de l’huile BCS Powerlube H3 SAE 15W-40 (ACEA
A3-08/B3-08, API SL/CF, API EC I, VW 500/505.00).
IMPORTANT! Contrôler qu’il n’y ait pas de pertes d’huile
ou de vis desserrées, en particulier les vis de fixage des
roues.
EN
FR
• Sustituir el tapón de plástico transparente por el ta-
pón del nivel de aceite que ese entrega en la dotación inicial (B fig.4/4).
• Colocar el dispositivo deseado (montado previamente)
al empalme rápido PTO de la máquina y bloquearlo girando en sentido horario con la rueda roja (R fig.3/8).
• Controlar que todos los tornillos y las tuercas estén bien
apretados sobre todo los que sujetan el dispositivo a la
máquina (D fig.3/8).
• Comprobar el nivel del cambio de aceite mediante la
varilla (C fig.14/24). Si es necesario, añadir aceite BCS
Powerlube H3 SAE 15W-40 (ACEA A3-08/B3-08, API
SL/CF, API EC I, VW 500/505.00).
•
• Den durchsichtigen Kunststoffdeckel durch den mit-
••
gelieferten Öldeckel (B Abb. 4/4) ersetzen.
•
• Das gewünschte Anbaugerät (zuvor montiert) am Zapfwel-
••
len-Schnellanschluss des Gerätes anbringen und durch
Drehen des roten Schraubknopfes (R Abb.3/8) im Uhrzeigersinn sichern.
•
• Prüfen, dass alle Schrauben und Muttern fest angezo-
••
gen sind; insbesondere die, mit denen das Anbaugerät am
Gerät fixiert ist (D Abb. 3/8).
•
• Den Ölstand im Getriebe am Prüfstab (C Abb.14/24)
••
überprüfen. Ggf. Öl BCS Powerlube H3 SAE 15W-40
(ACEA A3-08/B3-08, API SL/CF, API EC I, VW 500/
505.00) auffüllen.
• Comprobar el nivel de aceite del motor y del dispositivo.
En caso de que hubiera que añadir aceite, para ver la
cantidad y el tipo, remitirse a los capítulos correspondientes de mantenimiento del motor y del dispositivo.
ATENCIÓN: si el motor tiene filtro de aire de baño de aceite, introducir aceite en la cantidad indicada en el manual
del motor.
Utilizar aceite BCS Powerlube H3 SAE 15W-40 (ACEA
A3-08/B3-08, API SL/CF, API EC I, VW 500/505.00).
¡IMPORTANTE! Controlar que no haya pérdidas de aceite
o tornillos flojos, sobre todo, los tornillos de sujeción de las
ruedas.
•
• Den Ölstand des Motors und des Anbaugerätes über-
••
prüfen. Falls der Ölstand wiederhergestellt werden muss,
sind die Angaben hinsichtlich Menge und Öltyp in den
Wartungsabschnitten der Anleitungen des Motors und des
Anbaugerätes zu beachten.
ACHTUNG: Verfügt der Motor über Luftfilter im Ölbad, ist
Öl nach der in der Motoranleitung angegebenen Menge
aufzufüllen. Öl der Sorte BCS Powerlube H3 SAE 15W-40
(ACEA A3-08/B3-08, API SL/CF, API EC I, VW 500/
505.00) verwenden.
WICHTIG! Prüfen, dass kein Ölleck besteht oder Schrau-
ben gelockert sind, dies gilt insbesondere für die Klemmschrauben der Räder.
ES
DE
35
Page 38

PAGINA LASCIATA INTENZIONALMENTE BIANCA
THIS PAGE IS ON PURPOSE WHITE
CETTE PAGE EST DÉLIBÉRÉMENT BLANCHE
ESTA PÁGINA ES ESPECIFICAMENTE BLANCA
DIESE SEITE ABSICHTLICH WEIß IST
36
Page 39

5. IDENTIFICAZIONE COMANDI E DISPOSITIVI
V
5.1 Legenda identificazione comandi (fig.5/1a - 5/1b)
1 Leva selezione gamme lenta / veloce 10 Leva di sterzo sinistra
2 Leva inserimento Presa di Forza (PTO) 11 Leva di sterzo destra
3 Leva regolazione altezza manubrio 12 Leva regolazione laterale manubrio
4 Leva sblocco freno di stazionamento 13 Leva comando idrostatica
5 Leva acceleratore 14 Asta introduzione e verifica livello olio trasmissione
6 Leva stop motore 15 Supporto e filtro olio trasmissione
7 16 Attacco rapido PTO
Leva STOP rossa (se rilasciata arresta ogni movimento della macchina)
8 Leva frizione PowerSafe®
9 Leva di sterzata destra (replicata a sinistra)
17 Radiatore olio
IT
5. IDENTIFYING CONTROLS AND DEVICES
5.1 Controls identification key (fig.5/1a - 5/1b)
1 Low / fast selecting lever 10 Left steering lever
2 PTO engagement lever 11 Right steering lever
3 Handlebar height adjustment lever 12 Handlebar lateral adjusting lever
4 Parking brake lock lever 13 Hydrostatic transmission control lever
5 Throttle lever 14 Dipstick transmission oil level and filling
6 Engine stop lever 15 Support and filter oil transmission
7 16 PTO quick hitch
Red stop lever (if released switch off every movement
of the machine)
5. IDENTIFICATION COMMANDES ET DISPOSITIFS
5.1 Légende identification des commandes (fig.5/1a -
5/1b)
1 Levier sélection gammes lente / rapide 11 Levier de direction droit
2 Levier embrayage Prise de Force (PTO) 12 Levier réglage latéral du guidon
3 Levier réglage hauteur du mancheron 13 Levier commande hydrostatique
4 Levier de déblocage du frein de stationnement 14
5 Levier d'accélération
6 Levier d'arrêt moteur 15 Support et filtre de l’huile de transmission
7 16 Attache rapide PTO
Levier STOP rouge (en relâchant ce levier, la machine
s'arrête complètement)
8 PowerSafe® clutch lever
9 Right steering lever (repeated to the right)
17 Oil radiator
8 Levier embrayage PowerSafe®
9 Levier de braquage droit (reproduit à gauche)
10 Levier de direction gauche
Sonde pour le remplissage et le contrôle du niveau de
l’huile de transmission
17 Radiateur à huile
EN
FR
5. IDENTIFICACIÓN MANDOS Y DISPOSITIVOS
5.1 Leyenda identificación mandos (fig.5/1a - 5/1b)
1 Palanca selección gamas lenta / rápida 10 Palanca de giro izquierda
2 Palanca acople Toma de Fuerza (PTO) 11 Palanca de giro derecha
3 Palanca regulación altura manillar 12 Palanca regulación lateral manillar
4 Palanca desbloqueo freno de estacionamiento 13 Palanca mando hidrostática
5 Palanca acelerador 14
6 Palanca arresto motor
7 15 Soporte y filtro de aceite de transmisión
Palanca STOP roja (si se suelta, detiene cualquier
movimiento de la máquina)
5. BESCHREIBUNG DER STEUERUNGEN UND
ORRICHTUNGEN
5.1 Zeichenerklärung Steuerungen (Abb.5/1a - 5/1b)
1 Schalthebel Gänge langsam / schnell 10 Lenkhebel links
2 Schalthebel der Zapfwelle (PTO) 11 Lenkhebel rechts
3 Hebel zur Einstellung der Lenkhöhe 12 Seitlicher Stellhebel Lenker
4 Freischalthebel Standbremse 13 Hydrostatischer Schalthebel
5 Gashebel 14 Prüfstab Ölstand im Getriebe
6 Schalthebel Motor-Stop 15 Halterung und Filter Getriebeöl
7 16 PTO Schnellanschluss
STOP-Schalthebel rot (wird dieser losgelassen, hält
jede Bewegung der Maschine an)
8 Palanca embrague PowerSafe®
9 Palanca de giro derecha (idéntica en la izquierda)
Varilla introducción y control del nivel de aceite de
transmisión
16 Enganche rápido PTO
17 Radiator aceite
8
Kupplungshebel PowerSafe®
9 Lenkungshebel rechts (links baugleich)
17 Ölkühler
ES
DE
37
Page 40

18 Tappo serbatoio carburante
19 Supporto aste di comando
20 Dispositivo avviamento auto avvolgente
21 Piastre di bilanciamento 31 Carburatore, vite scarico (benzina)
22 Tappo introduzione e controllo olio motore 32 Decompressore accensione diesel
IT
23 Tappo scarico olio motore 33 Tappo magnetico
24 Interruttore elettrico motore (benzina) 34 Gruppo frizione PowerSafe®
25 Filtro aria a secco del motore 35 Gruppo idrostatico
26 Rubinetto carburante 36 Frizioni di sterzo idrauliche
27 Ventola raffreddamento trasmissione idrostatica
Freno automatico trasmissione idrostatica
28
Pomolo attacco rapido PTO
29
Candela (benzina)
30
37 Leva comando acceleratore
18 Fuel tank cap
19 Support control rod
20 Recoil start device
21 Balancing plates 31 Decompressor starting diesel engine
22 Dipstick engine oil level and filling 32 Magnetic cap
EN
23 Engine oil drain plug 33 PowerSafe® unit clutch
24 Engine electric switch (gasoline) 34 Hydrostatic group
25 Engine dry air filter 35 Hydraulic steering clutches
26 Fuel tap 36 Quick coupling PTO knob
27 Hydro-transmission cooling fan
18 Bouchon du réservoir carburant
19 Support axe de commande
20 Dispositif de démarrage enrouleur automatique
21 Plaque d’équilibrage 31 Carburateur, vis de chargement (essence)
22 32 Décompresseur allumage diesel
FR
Bouchon pour le remplissage et le contrôle de l’huile
moteur
23 Bouchon décharge de l'huile du moteur 34 Groupe embrayage PowerSafe®
24 Interrupteur électrique moteur (essence) 35 Groupe hydrostatique
25 Filtre à air sèche du moteur 36 Embrayage de direction hydraulique
26 Robinet du carburant 37 Levier d’accélérateur
27
Ventilateur de refroidissement de la transmission
hydrostatique
Quick coupling PTO knob
28
Plug (gasoline)
29
Carburetor and drain screw (gasoline)
30
37 Throttle control lever
Frein automatique de la transmission hydrostatique
28
Bouton attache rapide PTO
29
Bougie (essence)
30
33 Bouchon magnétique
18 Tapón del déposito de combustible
19 Soporte varilla de mando
20 Dispositivo arranque autobobinado
21 Placas de equilibrado 31 Carburador, tornillo escape (gasolina)
22 Tapón de introducción y control aceite motor 32 Descompresor encendido diesel
ES
23 Tapón de descargo de aceite motor 33 Tapón magnético
24 Interruptor eléctrico motor (gasolina) 34 Grupo embrague PowerSafe®
25 Filtro del aire a seco del motor 35 Grupo hídrostatico
26 Grifo carburante 36 Embragues de giro hidráulicos
27 Ventilador refrigeración transmisión hidrostática
Freno automático transmisión hidrostática
28
Pomo enganche rápido PTO
29
Bujía (gasolina)
30
37 Palanca de control del acelerador
18 Pfropfen von Treibstofftank
19 Halterung Steuerhebel
20 Selbstaufwickelnde Startvorrichtung
21 Ausgleichsplatten 31 Vergaser, Ablassschraube (Benzin)
22 Einfüll- und Prüfdeckel Motoröl 32 Dekompressor Diesel-Einschaltung
DE
23 Motoröl Auspuffpfropfen 33 Magnetdeckel
24 Elektrischer Motorschalter (Benzin) 34 Kupplungsgruppe PowerSafe®
25 Motor trocken Lüftfilter 35 Hydrostatischegruppe
26 Kraftstoffhahn 36 Hydraulische Lenkerkupplung
27 Kühllüfter Hydrostatgetriebe
Automatische Bremse Hydrostatgetriebe
28
Knopf Schnellanschluss PTO
29
Kerze (Benzin)
30
37 Gashebel
38
Page 41

5.2 Comandi e dispositivi – Controls and devices – Commandes et dispositifs – Mandos y dispositivos – Steuerungen
und Einrichtungen
28
27 14
29
6
1
3
7
13
2
32
4
21
14
16
10
8
9
5
12
20
23
11
19
39
33
22
34
35
fig.5/1a
Page 42

18
26
15
17
20
40
4
37
25
25
HY WS ER
13
24
HY WS
37
30
36
31
fig.5/1b
Page 43

6. ISTRUZIONI D'USO
6.1 Formazione Operatore
Attenzione! La macchina è stata progettata per l’uso
di attrezzi applicati frontalmente come Barre falcianti,
Spazzaneve, Spazzatrici, Tosaerba, Trinciaerba ecc.
E’ assolutamente vietato l’uso per scopi diversi (trasporto
persone, traino, gare di qualsiasi tipo, circolazione su strade pubbliche ecc.); non deve essere modificata o manomessa.
Attenzione! Non mettere mani o piedi in prossimità
delle zone di lavoro, su parti in movimento o in rotazione.
Attenzione! Lavorando sulle pendenze non stac-
care mai il blocco per la spinta manuale.
Attenzione! Prima di usare la macchina è assoluta-
mente necessario familiarizzare con i comandi, imparare a
spegnere il motore in modo sicuro e rapido; leggere le
avvertenze di sicurezza.
Attenzione! Non permettere l’uso della macchina a mi-
nori di età o a persone non esperte; non trasportare passeggeri; non operare vicino a fossati o banchine che possano cedere col peso della macchina.
IT
6. INSTRUCTIONS FOR USE
6.1 Operator training
Caution! The machine has been designed for the use
of front implements like Cutterbar, Snowblades, Sweepers,
Lawn mower, Flail mower etc.
It is absolutely forbidden to use it for different purposes
(passenger transport, towing, any kind of racing, run on public roads, etc.), Should not be modified or tampered with.
Caution! Do not put hands or feet near the work zones
or moving or rotating parts.
6. INSTRUCTIONS D’UTILISATION
6.1 Formation de l’opérateur
Attention! La machine a été conçue pour l’utilisation
d'outils fixés frontalement comme barres faucheuses,
chasses-neige, balayeuses, tondeuses, broyeur etc.
Il est absolument interdit de l’utiliser dans des buts différents (transport de personnes, attelage, compétitions de
tout genre, circulation sur routes publiques, etc.), elle ne
doit être ni modifiée, ni falsifiée.
Attention! Ne pas mettre les mains ou les pieds à pro-
ximité de la zone de travail, sur des parties en mouvement
ou en rotation.
Caution! Working on slopes never detach the lo-
cking brake for the manually pushing.
Caution! Before using the machine need absolutely to
familiarize with the controls, learn to switch off the engine
in safe and quikly way, read the safety instructions.
Caution! Do not allow the use of the machine to mi-
nors, to non-experts, do not carry passengers, do not operate near channels or docks that can collapse under the
weight of the machine.
Attention! En travaillant en pente, ne jamais dé-
brancher le bloc pour la poussée manuelle.
Attention! Avant d’utiliser la machine il est absolument
nécessaire de se familiariser avec les commandes, d’apprendre à éteindre le moteur de manière sûre et rapide, de
lire l’avertissement de sécurité.
Attention! Interdire l’utilisation de la machine aux mi-
neurs, à des personnes non qualifiées, ne pas transporter
des passagers, ne pas travailler près de fossés ou accotements qui pourraient céder sous le poids de la machine.
EN
FR
6. INSTRUCCIONES DE USO
6.1 Formación Operador
¡Atención! La máquina se ha proyectado para usar
aperos qui sean aplicados frontalmente como barras de
siega, quitanieves, barredoras, cortacéspedes, trinchadoras de hierba ecc. Está completamente prohibido usarla
para otros fines (transporte de personas, arrastre, competiciones de cualquier tipo, circulación en carreteras públicas, etc.), por tanto, no debe modificarse ni manipularse.
¡Atención! No se pueden poner los pies ni las manos
cerca de las zonas de trabajo, en piezas en movimiento o
en rotación.
6. GEBRAUCHSANWEISUNG
6.1 Einweisung der Bedienperson
Achtung! Das Gerät wurde für den Einsatz von front-
seitigen Anbaugeräten wie Mähbalken, Schneefräsen, Kehrvorrichtungen, Mähwerke, Mulcher usw. entwickelt. Der Einsatz für andere Zwecke ist strengstens verboten (Transport von Personen, als Zugfahrzeug, für Rennen beliebiger
Art, Straßenverkehr usw). Die Maschine weder abändern
noch manipulieren.
Achtung! Weder Hände noch Füße nähe die Bewe-
gungs- bzw. Rotationsmechanismen legen.
Achtung! Bei der Arbeit an Hängen darf die Sperre
¡Atención! Cuando se esté trabajando en pendiente
no se debe soltar nunca el bloqueo del empuje manual.
¡Atención! Antes de utilizar la máquina es estricta-
mente necesario familiarizarse con los mandos, aprender
a apagar el motor de manera rápida y segura y leer las
advertencias de seguridad.
¡Atención! No se debe permitir el uso de la máquina a
los menores de edad ni a personas que no sean expertas.
No se deben transportar pasajeros, trabajar cerca de fosos
o arcenes ya que pueden ceder con el peso de la máquina.
für den manuellen Schub nicht entfernt werden.
Achtung! Vor Gebrauch der Maschine ist es unbedingt
notwendig, dass sich die Bedienperson mit den Steuerungen vertraut gemacht hat, gelernt hat, den Motor schnell
und sicher abzuschalten und die Sicherheitshinweise gelesen und verstanden hat.
Jugendlichen unter Jahren darf und unerfahren Perso-
nen der Gebrauch der Maschine nicht gestattet werden; es
dürfen keine Personen transportiert und es darf auch nicht
in der Nähe von Gräben oder Erdwällen gearbeitet werden,
da diese unter dem Gewicht der Maschine nachgeben
könnten.
ES
DE
41
Page 44

r
Attenzione! In presenza di bambini nascondere la
chiave di accensione.
Attenzione! per l’uso della macchina è obbligatorio uti-
lizzare adeguati mezzi di protezione individuali (DPI), scarpe antinfortunistiche, cuffie, occhiali, guanti da lavoro, ecc.
Non fare interventi di pulizia o manutenzione alla macchina
o alle varie attrezzature senza osservare le avvertenze di
IT
sicurezza contenute in questo manuale e nel manuale specifico di ogni attrezzatura. Prima di avviare la macchina è
necessario conoscere i dispositivi le protezioni di sicurezza
ed i comandi.
6.2 Controlli prima di avviare il motore
• controllare che le griglie di aspirazione per il raffreddamento del motore siano pulite;
• che l'olio del motore sia a livello (22 fig. 5/1a);
• che l’olio del cambio sia a livello (14 fig. 5/1a);
• che la leva inserimento PTO (3 fig. 5/1a) sia in posizione
di folle;
• che il filtro aria (25 fig. 5/1b) sia pulito, in caso contrario
occorre pulirlo;
• che l’attrezzatura montata sia pulita e libera da impedimenti o protezioni delle lame e che la lama sia affilata;
Caution! Hide the ignition key in presence of children.
Caution! For the use of the machine is required to use
appropriate personal protection equipment (PPE), safety
shoes, ear protection, goggles, gloves, etc..
Do not do any cleaning or maintenance to the machine or
parts of the implement without observing the safety instructions contained in this manual and in the specific manual to
EN
each implement. Before you switch on the machine you
must know the devices the safety features and controls.
Attention! En présence d’enfants, cacher les clefs de
démarrage.
Attention! Pour l’utilisation de la machine, il est obliga-
toire d’utiliser des moyens appropriés de protection individuels (DPI), des grosses chaussures, un casque, des lunettes, des gants de travail, etc.
Ne pas faire d’interventions de nettoyage ou d’entretien à
la machine ou aux différents équipements sans accorder
FR
une attention particulière aux avertissements de sécurité
contenu dans ce manuel ou dans le manuel spécifique de
chaque équipement. Avant d’allumer la machine, il faut
connaître les dispositifs et les protections de sécurité et les
commandes.
6.2 Checks before switch on the engine
• check if the air intake grills for cooling the engine are
clean;
• if the engine oil is at level (22 fig. 5/1a);
• if the gear oil is at level (14 fig. 5/1a);
• if the lever to engage the PTO (3 fig. 5/1a) is in neutral
position;
• that the air filter (25 fig. 5/1b) is clean, otherwise you
have to clean it;
• that the equipment installed is clean and free from obstructions or blade guards and the blade is sharp;
6.2 Contrôles avant de faire démarrer le moteu
• contrôler que les grilles d’aspiration pour le refroidissement du moteur soient propres;
• que l’huile du moteur soit à niveau (22 fig. 5/1a);
• que l’huile de la boîte de vitesses soit à niveau (14 fig.
5/1a);
• que le levier d’insertion PTO (3 fig.5/1a) soit en position
de point mort
• que le filtre à air (25 fig. 5/1b) soit propre, le cas contraire
il faut le nettoyer;
• que l’équipement monté soit propre et libre de tout obstacle ou de protections des lames et que la lame soit affûtée;
¡Atención! En caso de que haya niños, esconder la
llave de encendido.
¡Atención! para el uso de la máquina es obligatorio
utilizar medios de protección individual adecuados (DPI),
calzado de seguridad adecuado, auriculares, gafas, guantes de trabajo, etc.
No se deben realizar intervenciones de limpieza o mante-
ES
nimiento en la máquina o en los diferentes equipos sin
cumplir las advertencias de seguridad que contiene este
manual y el manual específico de cada equipo. Antes de
poner la máquina en marcha es necesario conocer los dispositivos y las protecciones de seguridad, además de los
mandos.
Achtung! Bei Anwesenheit von Kindern den Zünd-
schlüssel verstecken.
Achtung! Für den Gebrauch der Maschine ist geeigne-
te Personenschutzausrüstung (PSA) zu verwenden, d.h.
Arbeitsschuhe, Gehörschutz, Schutzbrille, Arbeitshandschuhe usw.
Es dürfen keine Reinigungs- oder Wartungs- arbeiten an
der Maschine ausgeführt werden, wenn die in der vorlie-
DE
genden Bedienungsanleitung enthaltenen Sicherheitsanweisen nicht beachtet wurden. Vor Einschaltung der Maschine muss die Bedienperson mit den verschiedenen Sicherheitseinrichtungen und Steuerungen vertraut sein.
6.2 Controles antes de poner en marcha el motor
• controlar que las rejillas de aspiración para el enfriamiento del motor estén limpias;
• que el aceite del motor tenga el nivel correcto (22 fig.
5/1a);
• que el aceite del cambio tenga el nivel correcto (14 fig.
5/1a);
• que la palanca inclusión PTO (3 fig.5/1a) esté en posi-
ción de punto muerto;
• que el filtro de aire (25 fig. 5/1b) esté limpio, en caso con-
trario hay que limpiarlo;
• que el equipo montado esté limpio y libre de impedimentos o protecciones de las cuchillas y que el filo esté afilado;
6.2 Vor Einschaltung des Maschine prüfen
• Prüfen dass die Ansauggitter für die Motorkühlung sauber sind;
• dass der Stand des Motoröls ordnungsgemäß ist (22
Abb.5/1a);
• dass das Öl im Getriebe den richtigen Stand aufweist (14
Abb.5/1a);
• dass der Schalthebel der Zapfwelle (3 Abb.5/1a) in Neu-
tralstellung steht;
• dass der Luftfilter (25 Abb.5/1b) sauber ist; Filter andern-
falls reinigen;
• dass das angebrachte Anbaugerät sauber ist, keine Hindernisse aufweist, die Abdeckungen der Messer entfernt
wurden und das Messer scharf ist.
42
Page 45

• che la regolazione del manubrio sia adeguata, regolarla
agendo sulla leva (3 fig.5/1a) e spostarlo lateralmente nella
posizione desiderata, se necessario, tramite la leva (12 fig.
5/1a);
• che nel serbatoio ci sia carburante sufficiente;
IMPORTANTE! Utilizzare carburante pulito, fresco e conservato in contenitori adeguati; in caso contrario l’iniettore,
la pompa o il carburatore e la candela potrebbero subire
danni.
• togliere il tappo (18 fig.5/1b) e riempire il serbatoio di
carburante servendosi di un imbuto con filtro molto fine.
• evitare l’uso di carburante contaminato, vecchio o mal
conservato, il costruttore ed il rivenditore non si assumono
responsabilità sui danni subiti dal motore a causa della
scarsa qualità e la cattiva conservazione del carburante da
parte del proprietario della macchina.
IMPORTANTE! per i motori diesel, ogni 30 / 40 giorni av-
viare il motore per tenere in esercizio l’iniettore e la pompa
ed evitare che si blocchino, lasciarlo girare per alcuni minuti.
IT
• that the handlebar adjustment is appropriate, adjust by
mean of the lever (3 fig.5/1a) and moving to the side in
desired position if necessary, by mean of the lever (12 fig.
5/1a);
• that there is sufficient fuel in the tank;
IMPORTANT! Use clean fuel, fresh and stored in appropriate containers, at the contrary the injector or the fuel
pump, or the carburetor, or the plug could be damaged.
• que le réglage du guidon soit adéquat, le régler en agissant sur le levier (3 fig.5/1a) et le déplacer latéralement
dans la position souhaitée, si nécessaire, au moyen du
levier (12 fig.5/1a);
• qu’il y ait suffisamment de carburant dans le réservoir;
IMPORTANT! Il faut utiliser du carburant propre, fraîche et
conservée dans des récipients adéquats, sinon l'injecteur,
la pompe, ou le carburateur et la bougie pourraient subir
des dommages.
• remove the cap (18 fig.5/1b) and fill the fuel tank using a
funnel with a fine filter;
• avoid the use of contaminated fuel, old or poorly preserved, the manufacturer and retailer assume no responsibilities on damage to unit due to poor quality and poor preservation of the fuel by the owner of the machine;
IMPORTANT! For diesel engines, every 30 / 40 days starting the engine to keep in operation the injector and the
pump and prevent it from sticking and let it run few minutes.
• lever le bouchon (18 fig.5/1b) et remplir le réservoir de
carburant en se servant d’un entonnoir avec un filtre très
fin;
• éviter l’utilisation de carburant contaminé, vieux ou mal
conservé, le constructeur et le revendeur décline toute responsabilité en cas de dommages au moteur à cause de la
mauvaise qualité et conservation du carburant de la part
du propriétaire de la machine;
IMPORTANT! Pour les moteurs diesel, chaque les 30 / 40
jours, mettre en marche le moteur pour garder en fonction
l’injecteur et la pompe et éviter ainsi qu’ils se bloquent.
EN
FR
• que la regulación del manillar sea adecuada, regularlo
con la palanca (3 fig.5/1a) y desplazarlo lateralmente hasta
la posición deseada, si es necesario, mediante la palanca
(12 fig.5/1a);
• que en el depósito haya combustible suficiente;
¡IMPORTANTE! hay que utilizar combustible limpio, fresco
y conservado en contenedores adecuados, en caso contrario, el injector, la bomba o el carburador y la bujía podrían sufrir daños.
• dass die Lenkereinstellung angemessen ist; hierzu den
Hebel (3 Abb.5/1a) verwenden und seitlich in die gewünschte Stellung fahren, ggf. auch am Hebel (12 Abb.
5/1a);
• dass im Tank genügend Kraftstoff ist.
WICHTIG! Es muss sauberer, frischer und in geeigneten
Behältern gelagerter Kraftstoff verwendet werden; andernfalls besteht die Gefahr, dass Einspritzventil, Pumpe oder
Vergaser und Kerze beschädigt werden.
• quitar el tapón (18 fig.5/1b) y llenar el depósito de car-
burante sirviéndose de un embudo con un filtro muy fino;
• evitar el uso de combustible contaminado, viejo o mal
conservado, el fabricante y el vendedor no se asumen ninguna responsabilidad por los daños sufridos por el motor
debido a la baja calidad o a la mala conservación del combustible por parte del propietario de la máquina;
¡IMPORTANTE! Para los motores diesel, cada 30/40 días
hay que poner en marcha el motor para que el inyector y la
bomba estén funcionando y evitar que se bloqueen.
• den Tankdeckel (18 Abb.5/1b) entfernen und den Kraft-
stofftank unter Verwendung eines Trichters mit Feinfilter befüllen;
• kein verseuchtes, altes oder schlecht verwahrtes Brennstoff verwenden; Hersteller und Händler übernehmen für
die Qualität und Aufbewahrung des Brennstoff seitens des
Gerätebesitzers keinerlei Haftung.
WICHTIG! Bei Dieselmotoren den Motor alle 30 / 40 Tage
anlassen und ein paar Minuten laufen lassen, damit das
Einspritzventil und die Pumpe betrieben werden und vermieden wird, dass sich diese festsetzen.
43
ES
DE
Page 46

6.3 Regolazioni macchina / motore
La macchina è consegnata con le regolazioni di fabbrica,
tuttavia se necessario effettuare qualche registrazione, agire
sui registri indicati di seguito o sul manubrio:
1 - Regolazione cavi comando frizione PowerSafe® (fig.6/1)
2 - Regolazione cavi comando freni / frizione WS (fig.6/1,
6/2)
IT
3 - Regolazione cavo comando gas (fig.6/3)
4 - Regolazione cavo manopola avanti – retro (fig.6/4)
5 - Regolazione del cavo stop motore (fig.6/3)
6 - Regolazione giri motore (fig.6/3) (vedere manuale speci-
fico del motore)
1
2
6.3 Adjustment machine / engine
The machine is delivered with the right adjustment, anyway,
if necessary to make adjustment, act on the adjusting screws
below or on the handlebar:
1 - PowerSafe® clutch cable adjustment (fig.6/1)
2 - WS brakes / clutches cable adjustment (fig.6/1, 6/2)
3 - Throttle cable adjustment (fig.6/3)
4 - Forward - reverse knob cable adjustment (fig.6/4)
EN
5 - Engine-stop cable adjustment (fig.6/3)
6 - Engine RPM adjustment (fig.6/3) (see specific manual of
the engine)
6.3 Réglages machine / moteur
La machine est livrée avec les réglages d’usine, néanmoins
si nécessaire effectuer quelques enregistrements, agir sur
les registres indiqués ci-dessous ou sur le guidon:
1 - Réglage câbles de commande embrayage PowerSafe®
(fig.6/1)
2 - Réglage câbles de commande frein / embrayage WS (fig.
6/1, 6/2)
FR
3 - Réglage câble de commande gaz (fig.6/3)
4 - Réglage câble poignée avant - arrière (fig.6/4)
5 - Réglage du câble arrêt moteur (fig.6/3)
6 - Réglage tours moteur (fig.6/3) (voir manuel spécifique du
moteur)
6.3 Regulaciónes máquina / motores
La máquina se entrega regulada en fábrica, pero aún así es
necesario efectuar algunos ajustes, como los registros indicados a continuación o en el manillar:
1 - Regulación cables mando embrague PowerSafe® (fig.6/1)
2 - Regulación cables mando frenos / embrague WS (fig.6/1,
6/2)
3 - Regulación cable mando gas (fig.6/3)
ES
4 - Regulación cable mando adelante – atrás (fig.6/4)
5 - Regulación del cable parada motor (fig.6/3)
6 - Regulación revoluciones motor (fig.6/3) (véase manual
específico del motor)
fig.6/1
fig.6/2
fig.6/3
2
3
6
5
6.3 Motor / Maschine Verstellung
Das Gerät wurde vor Anlieferung werkseitig eingestellt; sollten dennoch Nachjustierungen erforderlich sein, sind die
nachstehend aufgelisteten Regler zu justieren, bzw. Einstellungen am Lenker vorzunehmen:
1 - Einstellung Kupplungsschaltseile PowerSafe® (Abb.6/1)
2 - Einstellung Schaltseile Bremse / Kupplung WS (Abb.6/1
6/2)
DE
3 - Einstellung Gasschaltseil (Abb.6/3)
4 - Einstellung Seil Schaltknopf vorwärts/rückwärts (Abb.6/4)
5 - Einstellung des Motor-Stoppseils (Abb.6/3)
6 - Einstellung der Motorendrehzahl (Abb.6/3) (siehe spezi-
fische Motoranleitung)
4
fig.6/4
44
Page 47

A
A
G
H
fig.7/1
fig.7/2
M
N
L
fig.7/3
N
7. AVVIAMENTO E VERIFICA DELLA MACCHIN
7.1 Messa in moto
IMPORTANTE! Prima della messa in moto leggere le verifiche pre-
liminari (sez. 4.2) e l’assemblaggio della macchina (sez. 4.3), leggere anche le sezioni 5. e 6.
• Verificare che la leva stop G e l’interruttore stop H (fig.7/1) siano
in posizione acceso ( I )
• Accelerare leggermente con la leva L (fig.7/2)
• Chiudere la leva dell’aria M e aprire il rubinetto del carburante N
(fig.7/3).
• Tendere la corda di avviamento sino ad ottenere la compres-
sione del motore (1 fig.7/4)
7. STARTING UP OF THE MACHINE
7.1 Starting up
IMPORTANT! Before start-up read the preliminary checks (section
4.2) and the assembling of the machine (section 4.3), read also the
sections 5. and 6.
• Check that the stop lever G and the stop switch H (fig.7/1) are in
switch on position ( I )
• Accelerate lightly with the lever L (fig.7/2)
• Choke the air lever M and open the fuel tap N (fig.7/3)
• Tension the recoil rope until to obtain the compression of the
engine (1 fig.7/4).
7. DEMARRAGE ET VERIFICATION DE LA MACHINE
7.1 Mise en marche
IMPORTANT! Avant la mise en marche lire les vérifications pré-
liminaires (section 4.2) et l’assemblage de la machine (section 4.3),
lire également les sections 5. et 6.
• Vérifier que le levier d’arrêt G et l’interrupteur d’arrêt H (fig. 7/1)
soient en position allumée ( I )
• Accélérer légèrement avec le levier L (fig.7/2)
• Fermer le levier de l’air M et ouvrir le robinet du carburant N
(fig.7/3).
• Tendre la corde de démarrage jusqu’à obtenir la compression du
moteur (1 fig.7/4).
7. PUESTA EN MARCHA Y COMPROBACIÓN DE LA
MÁQUIN
7.1 Puesta en marcha
¡IMPORTANTE! Antes de la puesta en marcha hay que leer los
controles previos (sección 4.2) y el ensamblado de la máquina
(sección 4.3), leer también las secciones 5. y 6.
• Controlar que la palanca stop G y el interruptor stop H (fig. 7/1)
estén en posición de encendido ( I )
• Acelerar suavemente con la palanca L (fig.7/2)
• Cerrar la palanca del aire M y abrir la llave del carburante N
(fig.7/3).
• Tensar la cuerda de arranque hasta obtener la compresión del
motor (1 fig.7/4)
7. GERÄT EINSCHALTEN UND PRÜFEN
7.1 Inbetriebsetzung
WICHTIG! Vor Inbetriebsetzung die Hinweise zu den durchzufüh-
renden Kontrollen im Vorfeld (Abschnitt 4.2) und zur Montage des
Gerätes (Abschnitt 4.3) lesen; auch die Abschnitte 5 und 6 beachten.
• Prüfen, dass der Stopphebel G und der Stoppschalter H (Abb.
7/1) in Stellung ( I ) stehen.
• Leicht am Hebel L (Abb.7/2) beschleunigen.
• Den Lufthebel M schließen und den Kraftstoffhahn N (Abb.7/3)
aufdrehen.
• Das Startseil soweit ziehen, bis eine Kompression des Motors (1
Abb.7/4) erzeugt wird.
IT
EN
FR
ES
DE
45
Page 48

• Ritornare a riavvolgere la corda dell’autoavvolgente (2 fig.7/4)
3
A
• Armare la leva del decompressore (3 fig.7/4, per diesel)
• Tirare energicamente la corda di avviamento (4 fig.7/4), lasciar
girare il motore acceso per qualche minuto.
7.2 Verifica di funzionamento
• Dopo averla messa in moto come da 7.1, fare le verifiche di fun-
zionamento di leve e comandi riportati ai punti 5.1 e 5.2 che tutti
IT
funzionino regolarmente.
• Se avete applicato un attrezzo leggere prima il relativo manuale di
uso e fare riferimento alla sez. 8, poi procedere come segue:
- Aprire (freccia 1) la leva sblocco freno S (fig. 7/5 - 7/6);
- Tramite l’asta A, portare la leva R (freccia 2) nel settore 3
• Back to rewind the rope of the recoil starter (2 fig.7/4)
• Actuate the decompression lever (3 fig.7/4, for diesel)
• Firmly pull the recoil rope (4 fig.7/4), leave the engine running
few minutes.
7.2 Functional test
• After the start up as 7.1, do the checks operation of the levers
and controls as by sections 5.1 and 5.2, all are to functioning re-
EN
gularly.
• If have applied an implement read before the relating user manual
and refer to the section 8, then proceed as follow:
- Open (arrow 1) the brake unlock lever S (fig. 7/5 - 7/6);
- By mean of the rod A, move the lever R (arrow 2) on sector 3
• Retourner à enrouler à nouveau la corde de l’enrouleur (2 fig.7/4)
• Se munir du levier de décompresseur (3 fig.7/4, pour diesel)
• Tirer énergiquement la corde de démarrage (4 fig.7/4), laisser
tourner le moteur allumé pendant quelques minutes.
7.2 Vérification du fonctionnement
• Après l’avoir mise en marche selon fig.7.1 faire les vérifications
de fonctionnement des leviers et des commandes indiqués aux
points 5.1 et 5.2 qu’ils fonctionnent tous régulièrement.
FR
• Si vous avez appliqué un équipement, lire précédemment le relatif
manuel d’utilisation et se référer à la section 8, puis procéder comme ci-dessous:
- Ouvrir (flèche 1) le levier déblocage frein S (fig.7/5 - 7/6);
- Au moyen de l’axe A, porter le levier R (flèche 2) dans le secteur
• Volver a enrollar la cuerda del autobobinado (2 fig.7/4)
• Activar la palanca del descompresor (3 fig.7/4, para diesel)
• Tirar enérgicamente la cuerda de arranque (4 fig.7/4), dejar girar
el motor encendido durante unos minutos.
7.2 Comprobación de funcionamiento
• Tras haberla puesto en marcha como se indica en la fig.7.1 rea-
lizar los controles de funcionamiento de palancas y mandos indicados en los puntos 5.1 y 5.2 para ver que todos funcionan correcta-
ES
mente.
• Si se ha colocado un dispositivo, leer antes el manual correspondiente y consultar la sección 8. A continuación, realizar lo siguiente:
- Abrir (flecha 1) la palanca desbloqueo freno S (fig. 7/5 - 7/6)
- Mediante la varilla A, poner la palanca R (flecha 2) en el sector 3
2
fig.7/4
fig.7/5
B
1
4
2
3
4
R
S
S
A
• Das Seil durch den Selbstaufwickler zurücklaufen und auf-
wickeln lassen (2 Abb.7/4).
• Den Hebel des Dekompressors scharf schalten (3 Abb.7/4, für
Diesel).
• Das Startseil (4 Abb.7/4) kräftig ziehen, den laufenden Motor ein
paar Minuten laufen lassen.
7.2 Betriebsprüfung
• Nach Inbetriebsetzung entsprechend 7.1 sind die unter Punkt
5.1 und 5.2 genannten Hebel und Steuerungen auf ihre Funktion-
DE
stüchtigkeit zu prüfen.
• Wurde ein Anbaugerät angebracht, ist zunächst die entsprechende Betriebs- und Gebrauchsanleitung zu lesen und Abschnitt 8
zu beachten; dann wie folgt beschrieben vorgehen:
- Den Freischalthebel der Bremse S (Abb.7/5 -7/6) öffnen (Pfeil 1);
- Am Stab A, den Hebel R (Pfeil 2) in den Bereich 3 bringen (Fahr-
fig.7/6
46
Page 49

fig.7/7
fig.7/8
F
fig.7/9a
fig.7/9b
(posizione di marcia / blocco attivo);
IMPORTANTE Il settore 4 (fig.7/5) è la posizione di sblocco freno
(vedi adesiva fig.7/7) per muovere la macchina a spinta con motore spento.
• Tirare (freccia 1) la leva frizione F (fig.7/8).
• Abbassare (freccia 2) la leva PowerSafe® rossa P.
P
T
HY WS
T
HY WS / ER
• Selezionare la gamma lenta o veloce con l’asta A (fig.7/6).
• Azionare lentamente la leva rossa T (fig.7/9) e verificare che la
macchina risponda ai comandi.
• Tramite la frizione inserire la PTO con l’asta di comando B (fig.
7/6) e controllare che l’attrezzo applicato giri regolarmente.
• Dopo la verifica spegnere il motore portando la leva stop (G
fig.7/10) in posizione (0).
(gear position / lock activated);
IMPORTANT The sector 4 (fig.7/5) is brake unlock position (see
label in fig.7/7) to move pushing the machine with engine switch
off.
• Pull (arrow 1) the clutch lever F (fig.7/8)
• Lower (arrow 2) the PowerSafe® red lever P.
• Select the low or fast range with the control rod A (fig.7/6).
• Operate slowly the red lever T (fig.7/9) and verify if the machine
moves to the controls.
• By mean of the clutch insert the PTO with the control rod B (fig.
7/6) and verify if the applied implement turns regularly.
• After the verify, switch off the engine by moving the stop lever
(G fig.7/10) in position (0).
3 (position de marche / bloc actif);
IMPORTANT le secteur 4 (fig.7/5) est la position de déblocage du
frein (voir adhésif fig.7/7) pour déplacer la machine à poussée
lorsque le moteur est éteint.
• Tirer (flèche 1) le levier d'embrayage F (fig.7/8).
• Abaisser (flèche 2) le levier PowerSafe® rouge P.
• Sélectionner la gamme lente ou rapide avec l’axe A (fig.7/6).
• Actionner lentement le levier rouge T (fig.7/9) et vérifier que la
machine réponde aux commandes.
• Au moyen de l'embrayage, introduire la PTO avec l’axe de commande B (fig.7/6) et contrôler que l'équipement appliqué tourne
régulièrement.
• Après le contrôle, éteindre le moteur en portant le levier arrêt (G
fig.7/10) en position (0).
(posición de marcha / bloqueo activo);
IMPORTANTE El sector 4 (fig.7/5) es la posición de desbloqueo
freno (véase pegatina fig.7/7) para mover la máquina empujándola con el motor apagado.
• Tirar (flecha 1) de la palanca embrague F (fig.7/8).
• Bajar (flecha 2) la palanca PowerSafe® roja P.
• Seleccionar la gama lenta o rápida con la varilla A (fig.7/6).
• Accionar lentamente la palanca roja T (fig.7/9) y comprobar que
la máquina responde a los mandos.
• Con el embrague, acoplar la PTO con la varilla de mando B (fig.
7/6) y controlar que el equipo aplicado gire con normalidad.
• Tras el control, apagar el motor poniendo la palanca stop (G
fig.7/10) en la posición (0).
IT
EN
FR
ES
fig.7/10
G
position / Sperre aktiv);
WICHTIG: Der Sektor 4 (Abb.7/5) ist die Freischaltposition der
Bremse (siehe Aufkleber Abb.7/7), um die Maschine bei ausgeschaltetem Motor verfahren zu können.
• Den Kupplungshebel F ziehen (Pfeil 1) (Abb.7/8).
• Den roten PowerSafe® Hebel P (Pfeil 2) absenken.
• Am Hebel A (Abb.7/6) den langsamen oder schnellen Gang wählen.
• Den roten Hebel T (Abb.7/9) langsam bewegen und sicherstel-
len, dass das Gerät auf die Steuerungen reagiert.
• Mit der Kupplung die Zapfwelle mit dem Schalthebel B (Abb.7/6)
einlegen und prüfen, dass das angebrachte Anbaugerät ordnungsgemäß läuft.
• Nach erfolgter Prüfung den Motor abschalten; hierzu den Stopphebel (G Abb.7/10) in Stellung (0) bringen.
47
DE
Page 50

8. APPLICAZIONE ATTREZZI
Applicare le varie attrezzature alla macchina a seconda del lavoro che intendete svolgere; sono disponibili attrezzi come la barra falciante, la lama
da neve, la spazzatrice, il tosaerba, il trinciaerba, ecc.; per l’applicazione
procedere come segue:
1) seguire il manuale d’uso specifico di ogni attrezzo e montare gli accessori necessari all’uso;
IT
2) montare una bussola attacco rapido C (fig.8/7) sull’attrezzo, serrare forte
i dadi D;
3) girare la manopola rossa R in senso antiorario per aprire l’attacco rapido;
8. CONNECTING THE IMPLEMENTS
Apply the implement on the machine in function of the work you must do,
there are implements like cutter bar, snow blade, sweeper, lawn mower,
flail mower etc., to apply proceed as indicated:
1) follow the proper manual of every implement and fit the necessary accessories to the use;
2) mount a quick hitch female C (fig.8/7) on the implement and tighten well
the nuts D;
EN
3) turn the red knob R in counter-clockwise way to open the quick hitch;
fig.8/1
fig.8/2
8. APPLICATION DES OUTILS
Appliquer les différents équipements à la machine selon le travail qu’il sera
nécessaire d’effectuer; sont disponibles des équipements tels que la barre
faucheuse, la lame à neige, la balayeuse, la tondeuse, le hache-herbe,
etc.; pour l’application procéder comme suit:
1) le manuel d’utilisation spécifique de chaque équipement et monter les
accessoires nécessaires à l’utilisation;
FR
2) monter une boussole d’attelage rapide C (fig.8/7) sur l’équipement,
serrer fort les écrous D;
3) tourner la poignée rouge R dans le sens antihoraire pour ouvrir l’attelage
rapide;
8. APLICACIÓN DE LOS APEROS
Aplicar los diferentes dispositivos en la máquina según el trabajo que se
pretenda desarrollar. Hay algunos dispositivos disponibles como la barra
segadora, la cuchilla de nieve, recogida de basuras, la segadora, la trinchadora de hierba, etc.; para la colocación, realizar lo siguiente:
1) seguir el manual de uso específico de cada dispositivo y montar los accesorios necesarios para el uso;
ES
2) montar un buje de empalme rápido C (fig.8/7) en el dispositivo, apretar
fuerte las tuercas D;
3) girar el mando rojo R en sentido antihorario para abrir el empalme
rápido;
fig.8/3
8. ANBAUGERÄTE ANBRINGEN
Je nach der Arbeit, die durchgeführt werden soll, sind die verschiedenen
Anbaugeräte an der Maschine anzubringen; es sind verschiedene Anbaugeräte erhältlich, wie Mähbalken, Schneefräsen, Kehrvorrichtungen, Mähwerke, Mulcher usw.; zur Montage wie folgt beschrieben vorgehen:
1) Jeweils die Anweisung des betreffenden Anbaugerätes beachten und
die erforderlichen Zubehörteile anbringen.
DE
2) Eine Schnellanschlussbuchse C (Abb.8/7) am Anbaugerät anbringen,
die Muttern D fest anziehen.
3) Den roten Drehknopf R im Gegenuhrzeigersinn drehen, um den Schnellanschluss zu öffnen.
48
fig.8/4
fig.8/5
Page 51

fig.8/7
A
fig.8/8
4) Calzare l’attrezzo al codolo attacco rapido della macchina (A fig.8/7), ag-
± ²
ganciare l’attacco rapido poi girare la manopola R in senso orario;
5) Assicurarsi che il perno di aggancio dell’attacco rapido sia agganciato
correttamente e che macchina e attrezzo siano solidali (fig.8/8)
6) Controllare che tutte le viti ed i dadi siano ben serrati, ingrassare dove
necessario se già non fatto in precedenza, usare grasso Agip Grease 30.
7) Verificare che il bilanciamento tra macchina e attrezzo sia buono, un
buon bilanciamento agevola le operazioni di lavoro e movimento della macchina, se necessario aggiungere specifici pesi o prolunghe PTO.
8) Verificare le varie regolazioni previste sul manuale specifico di ogni attrezzo, in particolare le regolazioni sulla barra falciante, regolazioni di altezza di taglio ecc.
4) Fit the cutterbar to the male quick hitch of the machine (A fig.8/7), lock
the quick hitch turning the red knob R in clockwise direction;
5) Check if the hooking pin of the quick hitch is locked correctly and the
machine is well connected with the cutter bar (fig.8/8);
6) Check if all the screws and nuts are well tighten, greasing where necessary if not already done, use Agip Grease 30;
7) Check if the balancing between machine and implement is well done, a
good balancing makes easier the operations of work and movement of the
machine, if necessary add weights or PTO spacers;
8) Check the different adjustments on the proper manual of every implement,
in particular way the adjustment on the cutter bar, height adjustment etc.
4) Mettre l’outil à la queue de l’attelage rapide de la machine (A fig.8/7),
accrocher l’attelage rapide, puis tourner la poignée R dans le sens horaire.
5) S’assurer que l’axe d’accrochage de l’attelage rapide soit accroché
correctement et que la machine et l’équipement soient solidaires (fig.8/8).
6) Contrôler que toutes les vis et les écrous soient bien serrés, graisser où
c’est nécessaire si cela n’a pas déjà été fait précédemment, utiliser de la
graisse Agip Grease 30.
7) Vérifier que l’équilibrage entre la machine et l’équipement soit bon, un
bon équilibrage facilite les opérations de travail et déplacement de la machine, si nécessaire ajouter des poids spécifiques ou des rallonges PTO.
8) Vérifier les différents réglages prévus sur le manuel spécifique de chaque équipement, en particulier les réglages sur la barre faucheuse, réglages de la hauteur de coupe, etc…
IT
EN
FR
4) Encajar el dispositivo al manguetón de empalme rápido de la máquina (A
fig.8/7), enganchar el empalme rápido y girar el mando R en sentido horario.
5) Asegurarse de que el perno de enganche del empalme rápido esté enganchado correctamente y que la máquina y dispositivo estén unidos firmemente (fig.8/8)
6) Controlar que todos los tornillos y tuercas estén bien apretados, engrasar donde sea necesario si no se ha hecho previamente, usar grasa Agip
Grease 30.
7) Comprobar que el equilibrado entre máquina y dispositivo sea bueno, un
buen equilibrado facilita las operaciones de trabajo y movimiento de la
máquina, si es necesario añadir pesos específicos o alargadores de PTO.
8) Comprobar las diferentes regulaciones previstas en el manual específico
de cada dispositivo, sobre todo las regulaciones de la barra segadora, regulaciones de la altura de corte, etc.
4) Das Anbaugerät auf den Schaft des Maschinenschnellanschlusses (A
Abb.8/7) stecken, den Schnellanschluss einstecken und den Drehknopf R
im Uhrzeigersinn drehen.
5) Sicherstellen, dass der Einspannbolzen des Schnellanschlusses ordnungsgemäß eingespannt ist und Maschine und Anbaugerät fest verbunden sind (Abb.8/8).
6) Prüfen, dass alle Schrauben und Muttern fest angezogen sind. Ggf. fetten, falls vorher nicht gefettet wurde; dazu Fett der Sorte Agip Grease 30
verwenden.
7) Die Schwerpunktlage von Maschine und Anbaugerät prüfen. Ein ordnungsgemäßer Gewichtsausgleich erleichtert den Betrieb und das Fahren
der Maschine. Falls nötig, müssen spezifische Gewichte oder Zapfwellenverlängerungen hinzugefügt werden.
8) Die jeweiligen Einstellungen für jedes Anbaugerät in den entsprechenden Anleitungen prüfen; dies gilt insbesondere für die Einstellungen am
Mähbalken, Einstellung der Mähhöhe usw.
ES
DE
49
Page 52

9. INFORMAZIONI UTILI
9.1 Uso della macchina
IMPORTANTE:
• Controllare il terreno prima di procedere nel lavoro, che
non vi siano sassi, bastoni, tubi da irrigazione o corpi
estranei.
IT
• Durante il lavoro regolare la velocità in funzione della
quantità di prodotto da raccogliere o da tagliare.
• Prestare attenzione quando si incontrano zone di prodotto allettato, se necessario rallentare o avanzare nel
senso meglio indicato per agevolare la raccolta.
• Innestare la PTO qualche metro prima di entrare nella
zona di lavoro.
Attenzione! Durante il RODAGGIO controllare l’olio
giornalmente; sostituire l'olio motore dopo le prime 30 ore
di funzionamento. Attenersi comunque al programma di
manutenzione consegnato con la macchina.
• Se il motore tende a spegnersi, è bene ridurre la velocità
di avanzamento in quanto la quantità lavorata potrebbe
essere eccessiva; se il problema persiste, è necessario far
controllare il motore e/o l’attrezzo.
• Durante il lavoro fare molta attenzione in corrispondenza
9. USEFUL INFORMATION
9.1 Using the machine
IMPORTANT:
• Inspect the field before work that there are no stones,
sticks, pipes for irrigation or foreign objects.
• When working adjust the speed according to the quantity
of product to be collected or to be cut.
EN
• Be careful when you meet areas of bedridden product, if
necessary decelerate or move forward in the best suited
way, to facilitate harvesting.
9. INFORMATIONS UTILES
9.1 Utilisation de la machine
IMPORTANT:
• Contrôler le terrain avant de commencer le travail, afin
qu’il n’y ait pas de cailloux, bâtons, tubes d’irrigation ou
corps étrangers.
• Durant le travail, régler la vitesse par rapport à la quantité
FR
du produit à ramasser ou à couper.
• Faire attention lorsqu’on croise des zones de produit renversé, si nécessaire ralentir ou avancer dans le sens le
plus favorable pour faciliter la récolte.
• Engage the PTO few feet before entering the work area.
Caution! During the RUNNING check the oil daily,
change the engine oil after the first 30 hours of operation.
Follow however to the maintenance program delivered with
the machine.
• If the engine tends to stop, you should reduce the
forward speed because the worked quantity could be too
much, if the problem persists, is necessary to check the
engine and/or the implement.
• During the work be careful near the trees and bushes
• Enclencher la PTO quelques mètres avant d’entrer dans
la zone de travail.
Attention! Durant le RODAGE, contrôler tous les
jours l’huile, remplacer l’huile moteur après les 30 premières heures de fonctionnement. Se conformer toutefois au
programme d’entretien livré avec la machine.
• Si le moteur a tendance à s’éteindre, il est bon de réduire
la vitesse d’avancement, car la quantité travaillée pourrait
être excessive; si le problème persiste, vous devez vérifier
le moteur et/ou l’équipement.
• Pendant le travail, faire très attention près des arbres,
9. INFORMACIÓN UTIL
9.1 Uso de la máquina
IMPORTANTE:
• Controlar el terreno antes de empezar a trabajar, que no
haya piedras, palos, tubos de sistemas de riego o cuerpos
extraños.
• Durante el trabajo, regular la velocidad en función de la
ES
cantidad de producto que haya que recolectar o cortar.
• Prestar atención cuando se encuentren zonas de producto sesgado. Si es necesario, disminuir la marcha o
avanzar en el sentido más indicado para la recolección.
9. NÜTZLICHE HINWEISE
9.1 Gebrauch der Maschine
WICHTIG:
• Vor Arbeitsbeginn die Bodenbeschaffenheit überprüfen und
sicherstellen, dass das Gelände fei von Steinen, Stöcken,
Bewässerungsrohren oder sonstigen Fremdkörpern ist.
• Die Geschwindigkeit während des Maschinengebrauchs
DE
nach der aufzusammelnden bzw. zu mähenden Produktmenge justieren.
• Bei Bereichen mit stark liegendem Gras ist vorsichtig
vorzugehen, ggf. langsamer fahren bzw. so fahren, dass
sich das Produkt leichter aufsammeln lässt.
• Acoplar la PTO cualquier metros antes de entrar en la
zona de trabajo.
¡Atención! Durante el RODAJE controlar el aceite
diariamente; sustituir el aceite motor tras las primeras 30
horas de funcionamiento. Atenerse en cualquier caso al
programa de mantenimiento entregado con la máquina.
• Si el motor tiende a apagarse, es conveniente reducir la
velocidad de avance ya que la cantidad procesada podría
ser excesiva. Si el problema persiste, es necesario que se
controle el motor y/o el dispositivo.
• Durante el trabajo, prestar mucha atención cerca los
• Die Zapfwelle ein paar Meter vor Einfahren in den Ar-
beitsbereich einlegen.
Achtung! Beim EINFAHREN ist täglich das Öl zu
prüfen; das Motoröl nach den ersten 30 Betriebsstunden
wechseln. In jedem Fall hat sich der Betreiber an das mit
der Maschine ausgehändigte Wartungsprogramm zu halten.
• Neigt der Motor dazu, auszugehen, sollte die Fahrgeschwindigkeit reduziert werden, da die bearbeitete Menge
möglicherweise zu groß ist; besteht die Störung weiterhin,
muss der Motor bzw. das Anbaugerät überprüft werden.
• Bei Bäumen, Büschen und in der Nähe von Randsteinen
50
Page 53

di alberi, cespugli e in prossimità di cordoli che potrebbero
danneggiare le attrezzature in particolare le lame e le trasmissioni. Terminato il lavoro, spegnere il motore, accertarsi che la macchina sia frenata.
9.2 Uso della macchina su terreno in pendenza
Attenzione! non usare questa macchina su pendenze superiori a 30 gradi (58%); se le ruote tendono a
slittare, correggere l’avanzamento utilizzando le leve di
sterzo 9, 10, 11 (fig.5/1a).
• I terreni in pendenza devono essere percorsi possibilmente nel senso trasversale, mai in salita e discesa, pre-
stando molta attenzione nei cambi di direzione e che le
ruote a monte non incontrino ostacoli (sassi, rami, radici,
ecc.) che potrebbero causare la perdita di controllo della
macchina.
• Valutare le varie situazioni e prestare attenzione in presenza di terreno umido ed erba bagnata poiché la
macchina potrebbe scivolare.
• In discesa partire a bassa velocità, evitare di passare sopra erba secca o tagliata poiché le ruote perdono aderenza. Per aumentare l’aderenza è possibile gemellare le
ruote 5.0-10 o abbinarle alle ruote Superbite (vedere sezioni 9.9.2 e 9.9.3).
IT
and near of curbs that could damage the implements, particularly blades and the transmissions. After finishing the
work, switch off the engine, check if the machine is locked.
9.2 Using the machine on slops
Caution! Do not use this machine on slopes more
than 30 degrees (58%); if the wheels tend to slip, correct the forward using the steering levers 9. 10, 11 (fig.
5/1a).
• The sloping field should be covered possibly moving
crosswise, never up and down, be careful to change direc-
de buissons ou de bordures basses qui pourraient abîmer
les outils, en particulier les lames et les transmissions. À la
fin du travail, éteindre le moteur et s'assurer que la machine soit freinée.
9.2 Utilisation de la machine sur terrain en pente
Attention! Ne pas utiliser cette machine sur des
pentes supérieures à 30 degrés (58%); si les roues ont
tendance à glisser, corriger l’avancement en utilisant
les leviers de direction 9, 10, 11 (fig.5/1a).
• Les terrains en pente doivent être parcourus si possible
dans le sens transversal, jamais en montée et descente
tion and that the wheels do not hit obstacles (stones,
branches, roots, etc.) that could cause loss of control of the
machine.
• Evaluate the different situations and pay attention in the
presence of moist soil and wet grass because the machine
could slip.
• To descent use a slow speed and avoid to pass above
dry or cut grass because the wheels lose adherence. Is
possible to twin the 5.0-10 wheels to increase the adherence or match them with Superbite wheels (see section
9.9.2 and 9.9.3).
en faisant très attention aux changements de direction, les
roues en amont ne doivent pas rencontrer d’obstacles
(cailloux, branches, racines, etc.) qui pourraient provoquer
la perte de contrôle de la machine.
• Evaluer les différentes situations et faire très attention
lors de terrains humides et herbe mouillée, car la machine
pourrait glisser.
• En descente, partir à petite vitesse et éviter de piétiner
l'herbe sèche ou coupée, car les roues perdent de leur
adhérence. Pour augmenter l’adhérence c'est possible faire le jumelage avec les roues 5.0-10 ou les unie avec les
roues Superbite (voir les sections 9.9.2 et 9.9.3).
EN
FR
árboles, las matas y los bordillos bajos que podrían dañar
los aperos, in particular las cuchillas y las transmisiones.
Una vez acabado el trabajo, apagar el motor y asegurarse
que la máquina está frenada.
9.2 Uso de la máquina sobra un terreno en pendiente
¡Atención! no se puede usar esta máquina en
pendientes de más de 30 grados (58%); si las ruedas
tienden a deslizar, corregir el avance utilizando las palancas de dirección 9, 10, 11 (fig.5/1a).
• Los terrenos con pendiente tienen que recorrerse a ser
posible en el sentido transversal, nunca en ascenso / de-
besonders vorsichtig vorgehen, da diese die Anbaugeräte
und insbesondere die Messer und die Getriebe beschädigen könnten. Den Motor nach erfolgter Arbeit abschalten,
sicherstellen, dass die Maschine gebremst ist.
9.2 Gebrauch der Maschine auf Hängen
Achtung! Dieses Gerät nicht auf Hängen mit mehr
als 30 Grad Gefälle (58%) verwenden. Falls die Räder
dazu neigen, abzurutschen, ist der Vorschub unter Verwendung der Lenkhebel 9, 10, 11 (Abb.5/1a) zu berichtigen.
• Bei Erdreichen mit Gefälle sollte nach Möglichkeit in
Hang-/Talrichtung gearbeitet werden; besondere Vorsicht
scenso prestando mucha atención en los cambios de dirección, que las ruedas que están delante no encuentren
obstáculos (piedras, ramas, raíces, etc.) que pudieran causar la pérdida de control de la máquina.
• Estudiar las diferentes situaciones y prestar atención en
caso de terrenos húmedos de hierba mojada ya que la
máquina podría resbalar.
• En bajada, empezar a baja velocidad y evitar pisar la
hierba seca o cortada porque las ruedas perderían adherencia. Para aumentar la adherencia es posible hermanar
las ruedas 5.0-10 o unirlas a las ruedas Superbite (veer las
secciones 9.9.2 y 9.9.3).
ist beim Richtungswechseln geboten, damit die Räder
nicht gegen Hindernisse (Steine, Äste, Wurzeln usw.) stoen, da man in einem solchen Fall die Kontrolle über das
Gerät verlieren könnte.
• Die verschiedenen Situationen abwägen und besonders
vorsichtig bei feuchtem oder nassem Boden arbeiten, da
das Gerät rutschen könnte.
• Bei Talfahrt ist bei niedriger Geschwindigkeit anzufangen; es sollte vermieden werden, über trockenes oder gemähtes Gras zu fahren, da dadurch das Haftvermögen der
Räder beeinträchtigt wird. Das Haftvermögen lässt sich
durch Abpassen der Räder 5.0-10 bzw. Kombination mit
den Rädern Superbite erhöhen (siehe Abschnitte 9.9.2 und
9.9.3).
51
ES
DE
Page 54

• Durante il lavoro in pendenza, nel caso di azionamento
della frizione, un freno automatico blocca la macchina in
qualsiasi condizione di fermo lavoro, anche a motore
spento.
Attenzione! Non staccare il freno automatico 4
(fig. 5/1a e 5/1b) in pendenza. Per il cambio marcia da
1a a 2a e viceversa tenere la leva comando idrostatica
IT
13 (fig. 5/1a) al minimo di velocità, non mettere in folle.
9.3 Trasmissione idrostatica / cambio
La trasmissione è composta da un gruppo idrostatico e ingranaggi in bagno olio con 2 gamme di velocità di avanza-
• Working on slopes, in case of use of the clutch an automatic brake will lock the machine in every condition of stationery work, also with engine off.
Caution! Don’t unlock the automatic brake 4 (fig.
5/1a and 5/1b) on the slope. Changing the speed from
1st a 2nd and vice-versa, hold hydro-control lever 13
(fig.5/1a) at the minimum speed, never put into neutral.
EN
9.3 Hydrostatic transmission / Gearbox
The Transmission is composed by a hydrostatic unit and
gears in oil bath with 2 ranges of speed forward and rever-
mento e di retromarcia. Le 2 velocità sono regolabili (vedere tabella 4, pag.32), in lavoro utilizzare la gamma lenta.
E’ presente una posizione di folle per muovere la macchina
a spinta con blocco di sicurezza per evitare azionamenti
accidentali. Comprende anche un freno di stazionamento
(auto-hold) che tiene bloccata la macchina anche a motore
spento.
9.4 Frizione PowerSafe®
Idraulica a dischi multipli con pompa integrata e valvola di
massima pressione, con leva di sicurezza che mette in folle la trasmissione e la PTO ma il motore rimane acceso.
se. The 2 speeds are adjustable (see table 4, page 32), on
working use the low range. There is a neutral position to
move pushing the machine with safety lock to avoid accidental engagement. Include a stationery brake (auto-hold)
that locks the machine also with engine off.
9.4 PowerSafe® clutch
Hydraulic with multiple discs with integrated pump and maximum pressure valve, with safety lever putting in neutral
position gears and PTO but with the engine running.
• Durant le travail en pente, dans le cas d’une utilisation de
l’embrayage, un frein automatique bloque la machine dans
n’importe quelle condition d’arrêt de travail, même si le
moteur est éteint.
Attention! Ne pas supprimer le frein automatique
4 (fig. 5/1a et 5/1b) en pente. Pour le changement de
vitesses de la 1a à la 2a et vice versa maintenir le levier
FR
commande hydrostatique 13 (fig. 5/1a) au minimum de
la vitesse, ne pas mettre le point mort.
9.3 Transmission hydrostatique / boîte de vitesses
La transmission est composée d’un groupe hydrostatique
et d’engrenages à bain d’huile avec 2 gammes de vitesse
• Cuando se trabaje en pendiente, en caso de que se accione el embrague, un freno automático bloqueará la máquina en cualquier condición de parada de trabajo, incluso
con el motor detenido.
¡Atención! No soltar el freno automático 4 (fig.
5/1a y 5/1b) estando en pendiente. Para el cambio de
marcha de 1a a 2a y viceversa mantener la palanca de
ES
mando hidrostática 13 (fig. 5/1a) al mínimo de velocidad, no poner en punto muerto.
9.3 Transmisión hidrostática / cambio
La transmisión está compuesta por un grupo hidrostático y
engranajes en baño de aceite con 2 gamas de velocidad
d’avancement et de marche-arrière. Les 2 vitesses sont
réglables (voir tableau 4, page 32), durant le travail utiliser
la gamme lente. Il y a une position de point mort pour
bouger la machine à poussée avec bloc de sécurité pour
éviter des avancements accidentels. Elle comprend également un frein de stationnement (auto-hold) qui maintient
bloqué la machine même si le moteur est éteint.
9.4 Embrayage PowerSafe®
Hydraulique à disques multiples avec pompe intégrée et
soupape de pression maximum, avec levier de sécurité qui
met au point mort la transmission et la PTO, mais le moteur reste allumé.
de avance y marcha atrás. Las 2 velocidades se pueden
regular (véase tabla 4, pág.32), durante el trabajo utilizar
la gama lenta. Existe una posición de punto muerto para
mover la máquina empujándola, con bloqueo de seguridad, para evitar accionamientos accidentales. Incluye también un freno de estacionamiento (auto-hold) que mantiene bloqueada la máquina incluso con el motor apagado.
9.4 Embrague PowerSafe®
Hidráulico de discos múltiples con bomba integrada y válvula de máxima presión, con palanca de seguridad que
pone en punto muerto la transmisión y la PTO pero manteniendo encendido el motor.
• Bei der Arbeit auf Hängen blockiert eine automatische
Bremse bei Betätigung der Kupplung die Maschine in jeder
beliebigen Betriebsstillstandstellung, auch bei abgeschaltetem Motor.
Achtung! Die automatische Bremse 4 (Abb.5/1a
und 5/1b) auf Hängen nicht lösen. Für den Gangwechsel vom 1. in den 2. Gang und umgekehrt, den hydrostatischen Schalthebel 13 (Abb.5/1a) auf der tiefsten
DE
Geschwindigkeit lassen, nicht in die Neutralstellung legen.
9.3 Hydrostatgetriebe / Getriebe
Das Getriebe besteht aus einer Hydrostateinheit und Zahnrädern im Ölbad mit 2 Geschwindigkeiten für vorwärts und
rückwärts. Die 2 Geschwindigkeiten sind einstellbar (siehe
Tabelle 4, Seite 32); während der Arbeit den langsamen
Gang verwenden. Es ist eine Neutralstellung vorgesehen,
um die Maschine von Hand verschieben zu können; die
Sicherheitssperre verhindert ein versehentliches Einschalten. Es ist auch eine Standbremse vorgesehen (auto-hold),
die für den Stand des Gerätes bei abgeschaltetem Motor
sorgt.
9.4 PowerSafe® Kupplung
Dies ist eine hydraulische Lamellenkupplung mit integrierter
Pumpe und Druckbegrenzungsventil, sowie Sicherheitshebel, der den Antrieb und die Zapfwelle in Neutralstellung
versetzt, wobei der Motor jedoch eingeschaltet bleibt.
52
Page 55

9.5 Freni - Frizioni di sterzo idraulici (di lavoro / servizio)
La macchina è dotata di 2 freni / frizioni di sterzo integrate,
a dischi multipli, con recupero automatico del gioco, indipendenti su ogni ruota. Comandate tramite leve dal manubrio con doppio comando di sterzata destro.
9.6 Freno di stazionamento meccanico
Automatico (auto-hold), che blocca la macchina in qualsiasi condizione di inclinazione, anche a motore spento, 28
(fig.5/1a).
9.7 Verifica livelli olio
Verificare giornalmente i livelli olio motore e cambio e se ci
sono perdite di olio, per la sostituzione vedere sezione 14.
Pulire giornalmente il filtro aria.
9.8 Ingrassaggio
Macchina e attrezzi sono dotati di vari punti di ingrassaggio
identificabili tramite manuale specifico. Una corretta lubrificazione giornaliera e generale allunga la vita della macchina, pertanto si raccomanda di eseguire scrupolosamente l’ingrassaggio dei vari punti indicati sui relativi manuali d’uso.
IT
9.5 Hydraulic steering Brakes - Clutches (work / service)
The machine has 2 steering brakes/clutches integrated,
with multiple discs, with automatic adjustment of the play,
independent for every wheel. Controlled by mean of lever
from the handlebar, with double lever for right steering.
9.6 Mechanic stationery brake
Automatic (auto-hold), that locks the machine in every condition of inclination, also with engine off, 28 (fig.5/1a).
9.7 Checking the oil levels
Daily verify the engine and gearbox oil levels and if there
9.5 Freins - Embrayages de direction hydrauliques (de
travail / service)
La machine est munie de 2 freins / embrayages de direction intégrés, à disques multiples, avec récupération automatique du jeu, indépendants sur chaque roue. Commandés au moyen d’un levier à partir du guidon avec double
commande de braquage droit.
9.6 Frein de stationnement mécanique
Automatique (auto-hold), qui bloque la machine dans n’importe quelle condition d’inclinaison, même si le moteur est
éteint 28 (fig.5/1a).
9.7 Vérifications des niveaux d’huile
Vérifier quotidiennement les niveaux d’huile moteur et
are leakage, see the section 14 to change the oil.
Daily clean the air filter.
9.8 Greasing
Machine and implements are equipped of some greasing
point identified by mean of the specific user manual. A
daily and proper general lubrication, extends the life of the
machine, so it is strongly recommended to carefully grease
the points outlined on their user manuals.
boîte de vitesses et s’il ya des pertes d’huile, pour le remplacement voir section 14.
Nettoyer quotidiennement le filtre à air.
9.8 Graissage
La machine et les équipements sont munis de différents
points de graissage identifiables au moyen du manuel
spécifique. Une correcte lubrification journalière et générale prolonge la vie de la machine, par conséquent nous
recommandons d’exécuter scrupuleusement le graissage
des différents points indiqués sur les relatifs manuels d’utilisation.
EN
FR
9.5 Frenos - Embragues de dirección hidráulicos (de
trabajo / servicio)
La máquina está dotada de 2 frenos / embragues de dirección integrados, de discos múltiples, con recuperación automática de la holgura, independientes en cada rueda.
Controladas mediante palancas por el manillar con doble
mando derecho de dirección.
9.6 Freno de estacionamiento mecanico
Automático (auto-hold), que bloquea la máquina en cualquier condición de inclinación, incluso con el motor apagado, 28 (fig.5/1a).
9.7 Control de los niveles de aceite
Controlar diariamente los niveles de aceite motor y cambio
9.5 Bremsen - hydraulische Lenkerkupplungen (Betrieb / Service)
Das Gerät verfügt über zwei integrierte an jedem Rad unabhängige Bremsen / Lenker-Lamellenkupplungen, mit automatischem Spielausgleich. Diese werden anhand der
Hebel am Lenker mit doppelter Lenkschaltung rechts betrieben.
9.6 Mecanische Standbremse
Diese ist automatisch (auto-hold) und blockiert das Gerät
bei jedem Steigungsgrad, auch bei ausgeschaltetem Motor, 28 (Abb. 5/1a).
9.7 Ölstand prüfen
Den Ölstand im Motor und im Getriebe täglich prüfen und
y, también, que haya pérdidas de aceite; para la sustitución véase la sección 14.
Limpiar diariamente el filtro de aire.
9.8 Engrasado
Máquina y herramientas dotadas de varios puntos de engrasado que pueden identificarse con un manual específico. Una correcta lubricación diaria y general prolonga la
vida de la máquina por lo que se recomienda seguir estrictamente el engrasado en varios de los puntos indicados en
los correspondientes manuales de uso.
sicherstellen, dass keine Lecks bestehen; Hinweise zum
Ölwechsel entnehmen Sie bitte dem Abschnitt 14.
Den Luftfilter täglich reinigen.
9.8 Schmieren
An der Maschine und den Anbaugeräten sind zahlreiche
Schmierpunkte vorgesehen; diese sind in der entsprechenden Anleitung gekennzeichnet. Eine ordnungsgemäße tägliche und allgemeine Schmierung verlängert die Lebenszeit der Maschine; folglich sind alle in den entsprechenden
Anleitungen gekennzeichneten Schmierstellen sorgfältig zu
schmieren.
53
ES
DE
Page 56

9.9 Attrezzi ed accessori applicabili (fig. da 9/25 a 9/60)
Alla macchina sono applicabili attrezzi come barre falcianti,
spazzaneve, tosaerba, trinciaerba ecc. e accessori come
protezioni laterali barra, protezione anteriore barra, presa
di forza unificata, distanziali per ruote, ruote di varie tipologie ecc.
In accordo con le Direttive Europee vigenti, è vie-
IT
tato applicare attrezzi e / o accessori per il trasporto
dell'operatore o di altre persone. Tutte le attrezzature
originali sono costruite in accordo con la Direttiva
Macchine Europea vigente.
9.9.1 Attrezzi
BARRA FALCIANTE
1,15 m a 1,80 m (fig.9/25)
TRINCIAERBA
75 cm e 90 cm (fig.9/26)
SPAZZATRICE
100 cm (fig.9/27)
LAMA DA NEVE
100 cm (fig.9/34)
TOSAERBA 100 cm (fig.9/35)
TRINCIA HEAVY DUTY
cm 80 (fig.9/36)
Vedere manuale specifico
Vedere manuale specifico
Vedere manuale specifico
Vedere manuale specifico
Vedere manuale specifico
Vedere manuale specifico
9.9 Applicable tools and accessories (fig. 9/25 to 9/60)
To the machine are applying tools as cutter bar, snow blade, lawn mower, flail mower, etc. and accessories as side
protection bar, front protection bar, unified PTO, wheels
spacers, different type of wheels etc.
In agreement with the current European Directives, is forbidden apply implements and / or accesso-
EN
ries for the transport of the operator or other persons.
All the original implements are manufactured in agreement with the current European Directives.
9.9 Equipements et accessoires applicables (fig. de
9/25 à 9/60)
A la machine sont applicables des équipements, tels que
les barres faucheuses, les lames à neige, les tondeuses,
les hache-herbe, etc…et des accessoires tels que les protections latérales barre, la protection antérieure barre, la
prise de force unifiée, l’entretoise pour roues, les roues de
différentes typologie, etc…
FR
En accord avec les Directives européennes en vigueur, il est interdit d’appliquer des équipements et/ou
des accessoires pour le transport de l’opérateur ou de
autres personnes. Tous les équipements originaux sont
fabriqués en accord avec la Directive Européenne Machines en vigueur.
9.9.1 Implements
CUTTER BAR
1,15 m to 1,80 m (fig.9/25)
FLAIL MOWER
75 cm and 90 cm (fig.9/26)
SWEEPER 100 cm (fig.9/27)
SNOW BLADE
100 cm (fig.9/34)
LAWN MOWER
100 cm (fig.9/35)
HARVESTER HEAVY DUTY
cm 80 (fig.9/36)
9.9.1 Outils
BARRE DE COUPE
1,15 m à 1,80 m (fig.9/25)
BROYEUR
75 cm et 90 cm (fig.9/26)
BALAYEUSE
100 cm (fig.9/27)
LAME À NEIGE
100 cm (fig.9/34)
TONDEUSE 100 cm (fig.9/35)
BROYEUR HEAVY DUTY
cm 80 (fig.9/36)
See related manual
See related manual
See related manual
See related manual
See related manual
See related manual
Voir manuel spécifique
Voir manuel spécifique
Voir manuel spécifique
Voir manuel spécifique
Voir manuel spécifique
Voir manuel spécifique
9.9 Equipos y accesorios aplicables (fig. de 9/25 a 9/60)
En la máquina pueden aplicarse equipos como barras de
corte, quitanieves, segadoras, trinchadoras, etc. y accesorios como protecciones laterales de la barra, protección
delantera de la barra, toma de fuerza unificada, distanciadores para ruedas, ruedas de varios tipos, etc.
En virtud con las Directivas Europeas vigentes,
está prohibido colocar equipos y/o accesorios para el
ES
transporte del operador o de otras personas. Todos los
equipos originales están construidos de conformidad
con la Directiva Máquinas Europea vigente.
9.9 Anwendbare Geräte und Zubehöre (Abb. von 9/25
bis 9/60)
An der Maschine können Anbaugeräte wie Mähbalken,
Schneefräsen, Mähwerke, Mulcher usw. sowie Zubehöre
wie seitliche Mähbalkenabsicherungen, vordere Balkenabdeckungen, vereinheitlichte Zapfwellen, Distanzbuchen für
Räder, verschiedenartige Räder usw. angebracht werden.
In Übereinstimmung mit den geltenden Europäischen Vorschriften ist es verboten, Geräte bzw. Zube-
DE
hörteile für den Transport der Bedienperson oder anderer Personen anzubringen. Alle Originalvorrichtungen
wurden nach der geltenden Europäischen Maschinenrichtlinie angefertigt.
9.9.1 Aperos
BARRA DE SIEGA
1,15 m a 1,80 m (fig.9/25)
TRINCHADORA DE HIERBA
75 cm et 90 cm (fig.9/26)
BARREDORA 100 cm (fig.9/27)
CUCHILLA DA NEVE
100 cm (fig.9/34)
CORTACÉSPEDES
100 cm (fig.9/35)
TRINCHADORA HEAVY DUTY
cm 80 (fig.9/36)
9.9.1 Zubehör
MÄHBALKEN
1,15 m bis 1,80 m (Abb.9/25)
FUTTERSCHNEIDEMASCHINE
75 cm und 90 cm (Abb.9/26)
KEHRGERÄT 100 cm
(Abb.9/27)
SCHNEEFRÄSE
100 cm (Abb.9/34)
RASENMÄHER 100 cm
(Abb.9/35)
MULCHER HEAVY DUTY
cm 80 (Abb.9/36)
54
Veer manual especifico
Veer manual especifico
Veer manual especifico
Veer manual especifico
Veer manual especifico
Veer manual especifico
Siehe bezügliches Handbuch
Siehe bezügliches Handbuch
Siehe bezügliches Handbuch
Siehe bezügliches Handbuch
Siehe bezügliches Handbuch
Siehe bezügliches Handbuch
Page 57

fig.9/25 fig.9/26
fig.9/27 fig.9/28
fig.9/29 fig.9/30
55
Page 58

9.9.2 Ruote pneumatiche
Sono particolarmente indicate per impieghi agricoli, da manutenzione e
giardinaggio; con battistrada artigliato o garden, consentono una buona
aderenza della macchina a terra sia sui terreni duri che soffici.
Le ruote 5.0-10 e le 23x8.50-12 (fig.9/39 e 9/40) hanno il cerchio a carreggiata variabile, è possibile variare la carreggiata invertendo il montaggio
delle ruote stesse. Le ruote 5.0-10 sono gemellabili oppure abbinabili a
IT
ruote metalliche Superbite. Le ruote 21x11.00-8, 20x8.00-10 artigliate e
garden hanno carreggiata fissa (vedere tabella 2 pag. 32).
9.9.3 Ruote "Superbite" (anti-deriva)
Accoppiabili agli pneumatici 5.0-10 (B), queste ruote sono particolarmente
indicate per falciare su terreni in pendenza.
9.9.2 Pneumatic wheels
They are particularly suitable for agricultural, maintenance and garden
uses, with clawed or garden tread always provides good adherence of the
machine to the ground, either on hard or soft grounds.
The wheels 5.0-10 and 23x8.50-12 (fig. 9/39 and 9/40) have the rim with
adjustable track, it is possible to change the track inverting the assembly
of the same wheels. The wheels 5.0-10 can be assembled in couple or
with Superbite metallic wheels. The wheels 21x11.00-8, 20x8.00-10 cla-
EN
wed and garden have fixed track (see table 2 page 32).
9.9.3 Wheels "Superbite" (anti-drift)
Mounted to the tire 5.0-10 (B), these wheels are particularly recommended
to mow on sloping ground.
9.9.2 Roues pneumatiques
Elles sont particulièrement indiquées pour les usage agricoles, maintenance et jardinage; avec profil dentelé ou garden elles permettent une
bonne adhérence de la machine au terrain, qu'il s'agisse de terrains durs
ou meubles.
Les roues 5.0-10 et 23x8.50-12 (fig.9/39 et 9/40) ont la jante à chaussée
variable, il est possible de changer la chaussée en invertissant le montage
des roues. Les roues 5.0-10 sont jumelables ou associables avec roues
FR
métalliques Superbite. Les roues 21x11.00-8, 20x8.00-10 avec profil dentelé ou garden sont à chaussée fixe (voir la table 2 page 32).
9.9.3 Roues "Superbite" (antidérive)
Accouplables à les pneus 5.0-10 (B) ces roues sont particulièrement indiquées pour faucher sur terrains en pente.
fig.9/39
9.9.2 Ruedas neumaticas
Son particularmente indicadas para maquinaria agricola, mantenimiento y
jardinería; con el perfil garrudo o garden ofrece una buena adherencia de
la máquina al suelo, ya sea sobre terrenos duros o blandos.
Las ruedas 5.0-10 y 23x8.50-12 (fig. 3/39 y 9/40) tienen la llanta con paso
variable, es posible variarel paso invertiendo el montaje de las mismas
ruedas. Las ruedas 5.0-10 sean gemelables o bien combinables a ruedas
de jaula Superbite. Las ruedas 21x11.00-8, 20x8.00-10 con el perfil gar-
ES
rudo o garden tienen la llanta con paso fijo (veer tabla 2 pag.32).
9.9.3 Ruedas "Superbite" (antideriva)
Acoplables a los neumaticos 5.0-10 (B) estas ruedas son particularmente
indicadas para falcar sobre terrenos en pendencia.
9.9.2 Pneumatische Räder
Diese eignen sich besonders für den landwirtschaftlichen Einsatz, Instandhaltungsarbeiten und Gartenarbeit; als Stollenräder oder Garden, gewähr-
leisten sie ein besonders gutes Haftvermögen der Maschine, sowohl auf
harten als auch auf weichen Böden.
Die 5.0-10 und 23x8.50-12 Räder (Abb. 9/39 und 9/40) haben Felgen mit
veränderbarer Spurweite, d.h. die Spurweite lässt sich durch Montage der
Räder verstellen. Die 5.0-10 Räder sind bereits anpassbar bzw. mit Su-
DE
perbite Metallrädern kombinierbar. Die Stollenräder 21x11.00-8, 20x8.00-
10 und Garden haben eine feste Spurweite (siehe Tabelle 2 Seite 32).
9.9.3 "Superbite" Räder (Antidriften)
Diese Räder sind mit den Reifen 5.0-10 (B) kombinierbar und eignen sich
besonders zu Mäharbeiten an Hängen.
56
fig.9/40
Page 59

A
fig.9/41
fig.9/42
C
B
Accoppiate alle ruote pneumatiche incrementano sia la trazione che la stabilità laterale della macchina. L’accoppiamento è ottenuto per mezzo delle
piastre C (fig.9/42).
9.9.4 Ruote metalliche artigliate - Le ruote R (fig.9/41) sono di 2 misure,
R
B
3x300 e 3x400, sono ideali per il lavoro in montagna e su forti pendenze.
Oltre ad avere la massima trazione con le speciali punte, rendono anche
maneggevoli e sicure le operazioni di svolta su forte pendenza.
9.9.5 Gemellaggio ruote - Le ruote 5.0-10 sono gemellabili interponendo
le piastre B (fig.9/45) fra una ruota e l’altra.
9.9.6 Protezioni per mozzi ruote (solo 5.0-10) - Le protezioni D (fig.9/46)
servono per evitare l’avvolgimento di erba sugli assi ruote ed evitare che
questa vada a contatto dei paraoli. Si montano interposti tra le ruote E ed i
mozzi porta ruote F con la campana rivolta verso la ruota.
Coupling to pneumatic wheels they increase both the traction and lateral
stability of the machine. The coupling is obtained by mean of the plates C
(fig.9/42).
9.9.4. Back-clawed metal wheels - The wheels R (fig.9/41), which come in
2 sizes, 3x300 and 3x400, are ideal for work in the mountains or on steep
slopes. In addition to maximum traction with the special tips, they also make
operations carried out on steep slopes manageable and safe.
9.9.5 Wheels twinning - The wheels 5.0-10 are twinned installing the plates
B (fig.9/45) between the two wheels.
9.9.6 Wheels hub protection (5.0-10 only) - The protection D (fig.9/46) are
necessary to avoid the wrapping of grass on the wheel axles and avoid that
it comes in contact of the oil seals. Are mounted between the wheels E and
the wheel hubs F with the bell side toward to the wheel.
Unies aux roues pneumatiques elles augmentent soit la traction soit la stabilité latérale de la machine. L’accouplement est obtenu par les plaques C
(fig.9/42).
9.9.4 Roues métalliques dentées - Les roues R (fig.9/41) sont de 2 dimensions, 3x300 et 3x400, elles sont idéales pour travailler en montagne et sur
des pentes raides. En plus d'avoir une traction maximale, les pointes spéciales rendent encore plus faciles et sures les opérations effectuées sur des
pentes raides.
9.9.5 Jumelage roues - On peut jumeler les roues 5.0-10 en montant les
plaques B (fig.9/45) entre une roue et l’autre.
9.9.6 Protections pour moyeux roues (seulement 5.0-10) - Les protections D (fig.9/46) servent à éviter l’enroulement de l’herbe sur les axes des
roues et à éviter que celle-ci se trouve en contact avec les joints à lèvre. Elles se montent intercalées entre les roues E et les moyeux porte-roues F
avec la cloche tournée vers la roue.
IT
EN
FR
fig.9/45
5.0-10
fig.9/46
E
F
D
Acopiada a las ruedas neumáticas incrementan sea la tracción que la estabilidad lateral de la máquina. L’acoplamiento se obtiene con las planchas C
(fig.9/42).
9.9.4. Ruedas metálicas con garra - Las ruedas R (fig.9/41) son de 2 me-
didas, 3x300 y 3x400 y son ideales para el trabajo en montaña y en fuertes
pendientes. Además de tener la máxima tracción con las puntas especiales,
hacen también que las operaciones de giro en fuertes pendientes sean más
manejables y seguras.
9.9.5 Ruedas gemelas - Pueden duplicarse las ruedas 5.0-10 interpo-
niendo las planchas (fig.9/45) entre una rueda y la otra.
9.9.6 Protecciones para bujes ruedas (solo 5.0-10) - Las protecciones D
(fig.9/46) sirven para evitar que la hierba se enrolle en los ejes de las ruedas e impedir así que entre en contacto con los retenes de aceite. Se montan entre las ruedas E y los bujes portarruedas F con la campana mirando
hacia la rueda.
Kombiniert mit den pneumatischen Rädern erhöhen sie den Zug und die
seitliche Stabilität der Maschine. Die Kombinierung erfolgt anhand der Platten C (Abb.9/42).
9.9.4. Stachelwalzen-Räder - Die Räder R (Abb. 9/41) sind in zwei Größen
erhältlich, 3x300 und 3x400. Sie eignen sich ideal zur Arbeit an Hängen und
Gelände mit starkem Gefälle. Die Spezialspikes gewährleisten äußerste Zuverlässigkeit und bieten außerdem Halt und Sicherheit bei der Arbeit an
extrem steilen Hängen.
9.9.5 Zwillingsbereifung - Die Zwillingsbereifung der Räder 5.0-10 erfolgt
durch Platten B (Abb. 9/45) zwischen den Rädern.
9.9.6 Abdeckungen für Radnaben (nur 5.0-10) - Die Abdeckungen D
(Abb.9/46) verhindern, dass sich Gras um die Radachsen wickelt und mit
den Manschetten in Kontakt tritt. Sie werden zwischen die Räder E und die
Radnaben F mit zum Rad zeigender Glocke eingesetzt.
ES
DE
57
Page 60

A
9.9.7 Attacco rapido attrezzi
Serve per cambiare rapidamente gli attrezzi sulla macchina. E' composto da 2 parti: un codolo A, parte integrante della macchina, ed una
bussola B (fig.9/47).
Per montare l'attrezzo alla macchina basta inserire la bussola B nel
codolo A e si aggancia girando il pomolo rosso G (fig.9/47) in senso
IT
orario.
Per ogni attrezzo occorre una bussola B, esiste la bussola B con 2 o
3 bulloni. Mantenere la bussola B ed il codolo A lubrificati con grasso
per favorire il montaggio e lo smontaggio (fig.9/47).
9.9.7 Quick hitch implements
It allows to change rapidly the implements on the machine. It consists
of 2 parts: a sleeve A, integral part of the machine, and a shank B
(fig.9/47).
To mount the implement to the machine, just insert the shank B on
sleeve A and hook them turning the red knob G (fig.9/47) in clockwise
EN
direction.
For every implement a shank B is necessary. Exist a shank B with 2
or 3 bolts. Keep shank B and sleeve A always lubricated with grease
to make assembly and disassembly easier (fig.9/47).
± ²
G
B
fig.9/47
H
9.9.7 Attache rapide outils
Il sert à changer rapidement les outils de la machine. Il est composé
de 2 parties: une queue A, partie intégrant de la machine, et une
douille B (fig.9/47).
Pour monter l’outil à la machine, il suffit d'introduire la douille B dans
la queue A et de les accrocher en tournant le poignée rouge G (fig.
FR
9/47) dans le sens horaire.
Pour chaque outil il faut une douille B; la douille B existe avec 2 ou 3
boulons. Maintenir la douille B et la queue A bien lubrifiés avec de la
graisse pour faciliter le montage et le démontage (fig.9/47).
9.9.7 Enganche rapido aperos
Sirve para cambiar rápidamente los aperos en la máquina. Está formado por dos partes: un conducto A, parte integral de la máquina, y
un buje B (fig.9/47).
Para montar el apero en la máquina, es suficiente introducir el buje B
en el conducto A y engancharlos girando el pomo rojo G (fig.9/47) en
ES
sentido horario.
Para cada aperos es necesario un buje B; existe un buje B con 2 o 3
pernos. Mantener el buje B y el conducto A lubrificados con grasa
para facilitar el montaje el desmontaje (fig.9/47).
fig.9/48
fig.9/49
9.9.7 Schnellanschluß für Arbeitsgeräte
Er dient, um die Arbeitsgeräte der Maschine schnell zu wechseln. Es
besteht aus zwei Teilen: einem Schaft A und einer Buchse B (Abb.
9/47).
Zum Anbau des Gerätes an die Maschine ist lediglich die Buchse B in
der Schaft A zu stecken und wird durch drehen im Uhrzeigersinn des
DE
roten Schraubknopfes G (Abb.9/47) eingehakt.
Für jedes Anbaugerät wird eine Buchse B benötigt; mit 2 oder 3 Bolzens Buchse B vorhanden sein.
Buchse B und Schaft A mit Fett gut geschmiert halten, um die Montage und Demontage zu erleichtern (Abb.9/47).
58
A
fig.9/54
Page 61

9.9.8 Rullo per Blade Runner
Il rullo H (fig.9/48) serve per lavorare su terreni difficili, in
pendenze e con presenza di cespugli. Permette di lavorare
senza l’ausilio delle ruotine che possono essere alzate ed
escluse.
9.9.9 Zavorre bilanciamento attrezzi
Per bilanciare la macchina e utilizzarla al meglio con le
varie attrezzature sono disponibili diverse zavorre:
• zavorra per lama da neve “professional” (kg.9);
• zavorra per Blade Runner (kg.14);
• zavorra per barre falcianti, per trasmissione a bagno olio
standard e Duplex (kg.15); montabili anche in coppia su
gruppo lungo (fig.9/49).
9.9.10 Protezione anteriore per barra
É obbligatorio applicare la protezione anteriore A (fig.
9/54) ogni volta che si effettua un trasferimento o qualora
la barra rimanga esposta al pubblico o ferma in deposito.
IT
9.9.8 Roller for Blade Runner
The roller H (fig.9/48) needs to work on difficult ground, on
slopes and with bushes. It allows to work without the
wheels that they can be raised and excluded.
9.9.9 Ballasts for equipment
To balance the machine and using it at the best with different equipment, various types of ballast are available:
• ballast for “professional” snow blade (kg.9);
• ballast for Blade Runner (kg.14);
9.9.8 Rouleau pour Blade Runner
Le rouleau H (fig.9/48) sert à travailler sur des terrains
difficiles, en pente et en présence de buissons. Il permet
de travailler sans l’aide des petites roues qui peuvent être
soulevées ou exclues.
9.9.9 Contrepoids pour équilibrer les outils
Pour équilibrer la machine et utiliser-la aux mieux avec les
différents outils, sont disponibles différents contrepoids:
• contrepoids pour lame à neige “professional” (kg.9);
• contrepoids pour Blade Runner (kg.14);
• ballast for cutter bar, standard oil bath transmission and
Duplex (kg.15); also mounted in pairs on longer oil bath
transmission (fig.9/49).
9.9.10 Cutter bar front protections
It is recommended to apply the front protection A (fig.
9/54) each time a transfer is performed or whenever the
bar remains exposed or in the deposit.
• contrepoids pour barres de coupe, pour transmission à
bain d'huile standard et Duplex (kg.15), qui peuvent être
montées aussi accouplée sur groupe long (fig.9/49).
9.9.10 Protection antérieure pour barre
Il est obligatoire d'appliquer la protection antérieur A
(fig.9/54) chaque fois que l'on transfère ou lorsque la barre
reste exposée au public ou garée dans une remise.
EN
FR
9.9.8 Rodillo para Blade Runner
El rodillo H (fig.9/48) sirve para trabajar en terrenos difíciles, en pendiente y con presencia de matojos. Permite trabajar sin la ayuda de las ruedecillas, que pueden subirse y
también excluirse.
9.9.9 Lastres para equilibrar los aperos
Para equilibrar la máquina y utilizarla al meglio con los diferentes aperos sean disponibles diferentes lastres:
• lastre para cuchilla de nieve “professional” (kg.9);
• lastre para Blade Runner (kg.14);
9.9.8 Rolle für Blade Runner
Die Rolle H (Abb. 9/48) wird zur Bearbeitung von schwierigen Böden, auf Hängen bzw. bei Büschen verwendet. Bei
Verwendung der Rolle erübrigt sich der Einsatz der Stützrädern; diese können hochgefahren werden.
9.9.9 Zusatzgewichte Gewichtsausgleich der Anbaugeräte
Für den Gewichtsausgleich der Maschine und zur bestmöglichen Verwendung mit den verschiedenen Anbaugeräten
sind verschiedene Zusatzgewichte erhältlich:
• Zusatzgewicht für Schneefräse “professional” (9 Kg);
• Zusatzgewicht für Blade Runner (14 Kg);
• lastre para barra de siega, para transmision en baño de
aceite standard y Duplex (kg.15); se pueden montar también en pareja su grupo largo (fig.9/49).
9.9.10 Protección anterior para barra
Es obligatorio aplicar la protección anterior A (fig.
9/54) cada vez que Usted quiere efectuar un desplazamiento o si la barra está exhibida al público o parada en
deposito.
• Zusatzgewicht für Mähbalken, für Standard und Duplex
Ölbadantrieb (kg.15); auch paarweise an langen Einheiten
einsetzbar (Zusatzgewichte) (Abb. 9/49).
9.9.10 Frontschutz für Mähbalken
Es ist notwendig den Frontschutz anzuwenden in Fall
einer Übertragung und jedes Mal der Mähbalken belibt
ausgestellt oder im Lagerplatz (Abb.9/54).
59
ES
DE
Page 62

9.9.11 Protezioni laterali per barra SF (a denti semifitti)
(B fig.9/56)
Servono per impedire che la lama, uscendo nella sua corsa di lavoro dall’ingombro della barra, danneggi le piante
vicine o si danneggi urtando contro ostacoli o sassi.
Servono anche come protezioni antinfortunistiche.
IT
9.9.12 Presa di forza unificata D=35 mm (1" 3/8)
(fig.9/59)
Questa presa di forza, applicata sulla presa di forza standard, porta all'esterno un albero scanalato di Ø 35 mm e
dimensioni unificate 1" 3/8, come la PTO dei trattori, se-
condo le norme DIN 9611. A questo albero si possono collegare giunti cardanici, pulegge e attrezzi vari.
9.9.13 Prolunga attrezzi cm 8 (fig.9/60)
E’ un accessorio utile nei casi in cui sia necessario bilanciare il peso tra la macchina e l’attrezzo senza o con l’abbinamento di zavorre. La prolunga è da montare in particolare con l’uso delle barre falcianti in montagna o su pendenze dove la barra tende a sollevarsi facilmente da terra.
Vengono montate a seconda del peso del motore; si consiglia di montare al massimo 2 prolunghe abbinate.
9.9.11 SF (Fingers) bar side protections (B fig.9/56)
Their purpose to avoid that the blade, when it comes out
from the bar seat during its running, damages itself or the
near plants knocking against obstacles or stones.
They can also be used as accident prevent tools.
9.9.12 Standard Power Take Off D=35 mm (1" 3/8)
EN
(fig. 9/59)
This PTO fitted on the machine PTO, takes out a splined
shaft which as Ø = 35 mm and unified size 1" 3/8, like the
tractors PTO's, according to DIN standards 9611.
9.9.11 Protections latérales pour barre SF (à dents
semi-serrés) (B fig.9/56)
Leur but est d’éviter que la lame, en sortant du siège de la
barre pendant le travail endommage les plantes proches
ou s’endommage en heurtant des obstacles ou des pierres.
Ils sertent aussi pour protection anti-infortunistique.
FR
9.9.12 Prise de force unifiée D=35 mm (1" 3/8) (fig.9/59)
Cette prise de force, appliquée sur la prise de force standard, porte à l'extérieur un arbre cannelé de Ø 35 mm qui
a des dimensions unifiées 1" 3/8, comme la PTO des trac-
By this shaft you can drive pulleys, universal joints and
many other implements.
9.9.13 Equipment extension cm 8 (fig. 9/60)
Is a useful accessory when the weight needs to be balanced between the machine and the equipment with or without the combination of ballasts. The extension should be
assembled especially when moving bars are used on hills
or inclines, where the bar tends to lift up easily from the
ground. They are assembled according to the weight of the
motor. It is recommended that 2 combined extensions are
assembled.
teurs, selon les règles DIN 9611. A cet arbre on peut appliquer des joints de cardan, des poulies ou d'autres outils.
9.9.13 Rallonge outils cm 8 (fig.9/60)
Est un accessoire utile s’il faut équilibrer le poids entre la
machine et l’outil ou avec l’accouplement du contrepoids.
La rallonge doit être montée spécialement en utilisant les
barres de faucheuses en montagne ou en pente ou la
barre a tendance à se soulever facilement de terre. Elles
sont installées selon le poids du moteur; on conseille
d’installer au maximum 2 rallonges accouplées.
9.9.11 Protecciones laterales para barra SF (con dientes semi-juntos) (B fig.9/56)
Sirven para impedir que la cuchilla, usándose la barra normalmente, no dañe plantas vecinas o se rompa al topar
con obstáculos o piedras.
Ellas sirven como protección anti-infotunio, támbien.
ES
9.9.12 Toma de fuerza unificada D=35 mm (1" 3/8)
(fig.9/59)
Esta toma de fuerza, aplicada sobre la toma de fuerza
principal, lleva al exterior un eje estriado de Ø 35 mm y de
dimensiones unificadas 1" 3/8, como la PTO de los tracto-
9.9.11 Seitenschutz für SF Mähbalken (B Abb.9/56)
Vermeidet Beschädigungen am Blatt selbst, wenn es während des Arbeitslauf sich löst, sowie beim Anstoß an Hindernisse oder Steine.
Sie dienen als Schutz gegen Unfälle.
9.9.12 Zapfwelle D=35 mm (1" 3/8) (Abb.9/59)
DE
Diese Zapfwelle, welche auf die Standard-Zapfwelle montiert wird, hat außen eine gerillte Welle Ø35 mm die Standard Abmessungen 1" 3/8 wie die Zapfwelle der Einachser
gemäß DIN-Norm 9611 aufweist.
res, según las reglas DIN 9611. A este eje se pueden acoplar juntas cardánicas, poleas y aperos varios.
9.9.13 Alargador elementos 8 cm (fig.9/60)
Es un accesorio útil en los casos en los que es necesario
equilibrar el peso entre la máquina y el elemento, sin o con
lastres. El alargador debe montarse sobre todo cuando se
usan barras de corte en montaña o en pendientes donde
la barra tiende a levantarse fá-cilmente del suelo. Se
montan según el peso del motor; se aconseja montar un
máximo de 2 alargadores combinados.
Mit dieser Welle können Gelenkwelle, Riemenscheiben
und verschiedenes Zubehör verbunden werden.
9.9.13 Verlängerung Anbaugeräte 8 cm (Abb.9/60)
Das dann verwendet wird, wenn das Gewicht zwischen der
Maschine und dem Gerät mit oder ohne Zusatzgewichten
gleichmäßig verteilt werden soll. Die Verlängerung wird besonders bei Verwendung von Mähbalken in den Bergen
oder an Hängen angebracht, wo der Mähbalken dazu
neigt, sich leicht vom Boden abzuheben. Die Verlängerungen werden je nach dem Gewicht des Motors angebracht;
es sollten höchstens zwei gekoppelte Verlängerungen angebracht werden.
60
Page 63

fig.9/56
fig.9/59
fig.9/60
61
Page 64

PAGINA LASCIATA INTENZIONALMENTE BIANCA
THIS PAGE IS ON PURPOSE WHITE
CETTE PAGE EST DÉLIBÉRÉMENT BLANCHE
ESTA PÁGINA ES ESPECIFICAMENTE BLANCA
DIESE SEITE ABSICHTLICH WEIß IST
62
Page 65

10. FINE LAVORO 11. PULIZI
A
A
• Terminato il lavoro, azionare la leva frizione 8 (fig.5/1a) e
disinnestare la PTO tramite la leva 2 (fig.5/1a);
• Per fermarsi portare la leva 13 (fig.9/1a) in folle;
• Portare la leva acceleratore 5 (fig.9/1a) al minimo;
• Spegnere il motore tramite la leva 6 (fig.9/1a) ruotando la
leva in posizione di “O”;
• Prima di abbandonare la macchina accertarsi che sia
bloccata.
Per mantenere in efficienza la macchina ed il motore, consigliamo di effettuare giornalmente la pulizia e rimuovere
polvere, fango, foglie, erba secca o incrostata ecc.
11.1 Pulizia motore e filtro aria
IMPORTANTE! Per pulire il motore e il filtro aria a secco
usare esclusivamente aria compressa, non lavare mai il
motore con idropulitrice. Per il filtro aria a bagno olio
occorre lavare e pulire il contenitore dell’olio e ripristinare il
livello.
10. END OF THE JOB 11. CLEANING
• After work, move the clutch lever 8 (fig.9/1a) and disen-
gage the PTO using the lever 2 (fig.9/1a);
• To stop, move the lever 13 (fig.9/1a) to neutral;
• Move the throttle lever 5 (fig.9/1a) to the minimum;
• Stop the engine by means of the lever 6 (fig.9/1a) turning
the lever in position of “O”;
• Before to abandon the machine check if it is locked.
To keep the machine and the engine in good working order, it is recommended that cleaning is carried out daily
and remove dust, mud, leaves, dry or encrusted grass, etc.
11.1 Cleaning engine and air filter
IMPORTANT! To clean the engine and the dry air filter use
only compressed air, never wash the engine with a
hydro-cleaner. If the air filter is in oil bath it is necessary
to wash and clean the oil container and redo the level.
IT
EN
10. FIN DU TRAVAIL 11. NETTOYAGE
Pour maintenir toute l'efficacité de la machine et du mo-
• Une fois que le travail est terminé, actionner le levier de
embrayage 8 (fig.5/1a) et déconnecter la PTO par le levier
2 (fig.5/1a);
• Pour s'arrêter, détacher le levier 13 (fig.9/1a);
• Porter le levier accélérateur 5 (fig.9/1a) au minimum;
• Éteindre le moteur par le levier 6 (fig.9/1a) en tournant le
levier dans la position “O”;
• Avant de lâcher la machine, s'assurer qu'elle est bloquée.
teur, nous conseillons d'effectuer tous les jours le nettoyage et enlever la poudre, la boue, les feuilles, l'herbe sèche
ou incrustée, etc.
11.1 Nettoyage moteur et filtre à air
IMPORTANT! Pour nettoyer le moteur et le filtre a air à
sec utiliser exclusivement air comprimé, ne laver jamais
le moteur avec nettoyer haute pression. Pour le filtre air
à bain d'huile il faut laver et nettoyer le réservoir de l'huile
et rétablir le niveau.
10. FIN DEL TRABAJO 11. LIMPIEZ
Para mantener el buen funcionamiento de la máquina y del
• Una vez acabado el trabajo, accionar la palanca de embrague 8 (fig.5/1a) y desacoplar la PTO a través de la palanca 2 (fig.5/1a);
• Para detenerse, quitar la palanca 13 (fig.9/1a) en la posi-
ción neutra;
• Poner la palanca acelerador 5 (fig.9/1a) al mínimo;
• Apagar el motor a través de la palanca 6 (fig.9/1a) giran-
do la palanca en la posición “O”;
• Antes de abandonar la máquina asegurarse que está
bloqueada.
motor, aconsajamos efectuar diariamente la limpieza y eliminar el polvo, el barro, las hojas, la hierba seca o incrustada etc.
11.1 Limpieza del motor y filtro aire
¡IMPORTANTE! Para limpiar el motor y el filtro aire a seco
utilizar exclusivamente aire comprimido, no limpiar nunca
el motor con una hidropulidora. Para el filtro aire a baño
de aceite es necesario lavar y limpiar el recipiente del
aceite y restablecer el nivel.
FR
ES
10. ARBEITSENDE 11. REINIGUNG
• Nach Arbeitsabschluss den Kupplungshebel 8 (Abb.
5/1a) betätigen und die Zapfwelle am Hebel 2 (Abb.5/1a)
ausstecken;
• Den Hebel 13 (fig.9/1a) in Neutralstellung bringen, um
das Gerät anzuhalten;
• Den Beschleunigungshebel 5 (Abb.9/1a) in die unterste
Stellung bringen;
• Den Motor am Hebel 6 (Abb.9/1a) abschalten d.h. den
Hebel auf “O” stellen;
• Vor Verlassen der Maschine sicherstellen, dass sie blockiert wurde.
Zür Gewährleistung der hohen Leistungsfähigkeit von Geät und Motor sollten diese täglich gereinigt werden; dabei
sind Staub, Schmutz, Schlamm, Blätter und trockenes
bzw. verkrustetes Gras usw. zu entfernen.
11.1 Motor und Luftfilter reinigen
WICHTIG! Den Motor und den Luftfilter trocken reinigen,
d.h. ausschließlich Pressluft verwenden; den Motor nie
mit Hochdruckwasserstrahlmaschinen reinigen. Für
den Ölbad-Luftfilter muss der Ölbehälter gereinigt und der
Ölstand wiederhergestellt werden.
63
DE
Page 66

12. INATTIVITA' PROLUNGATA
11.2 Pulizia delle attrezzature
Pulire giornalmente le attrezzature utilizzate asportando
fango, erba secca, corde avvolte ecc., soffiando con aria
compressa e lubrificando come da manuale.
IT
• Riporre la macchina in un ambiente asciutto, al riparo
dalle intemperie e, possibilmente, ricoprirla con un telo; fare attenzione che motore e tubo di scarico siano freddi.
• Al massimo ogni 30 giorni avviare il motore.
• Se si prevede un prolungato periodo di inattività (superio-
re ad 1 mese), seguire le indicazioni contenute nel libretto
di istruzioni del motore; inoltre, lubrificare tutte le articolazioni.
• Per proteggere il motore in caso di inattività prolungata si
raccomanda di utilizzare l'additivo carburante acquistabile
11.2 Cleaning of the implements
Clean daily the implements used to work by removing mud,
dry grass, wrapped rope etc. and blowing it with compressed air and lubricated as by manual.
EN
11.2 Nettoyage des équipements
Nettoyer tous les jours les équipements utilisés et enlever
boue, herbe sec, cordes enroulée, etc., souffler avec de
l'air comprimée et lubrifier comme décrit dans le manuel.
FR
12. PROLONGED INACTIVITY
• Return the machine to a dry environment, sheltered
against bad weather and, if possible, cover it with a cloth;
make sure that the engine and discharge tube are cold.
• Switch on the engine every 30 days maximum.
• If a prolonged period of inactivity is expected (longer than
1 month), follow the instructions contained in the engine
instruction book. Grease all the joints.
• To protect the engine in case of prolonged inactivity, it is
recommended that fuel additive is used for engines, which
12. INACTIVITÉ PROLONGÉE
• Ranger la machine dans un environnement sec, à l'abri
des intempéries et, si possible, la couvrir d'une toile; faire
attention que le moteur et le tuyau d'échappement soient
froids.
• Au maximum chaque 30 jours, allumer le moteur.
• Si l'on prévoit une période d'inactivité prolongée (supé-
rieur à 1 mois), suivre les indications contenues dans le
manuel d'instructions du moteur; entre outre, lubrifier toutes les articulation.
• Pour protéger le moteur en cas d'inactivité prolongée, on
recommande d'utiliser l'additif conservateur du carburant
11.2 Limpieza de los equipos
Limpiar cada día los equipos utilizados, y eliminar barro,
hierba seca, cuerdas envueltas ecc., soplándo con aire
comprimido y lubrifiando como indicado en el manual.
ES
11.2 Geräte reinigen
Täglich die verwendeten Geräte reinigen; dabei Schlamm,
trockenes Gras, umwickelte Kordeln, usw. unter Verwendung von Pressluft entfernen und nach den Vorgaben in
der Bedienungsanleitung schmieren.
DE
12. INACTIVIDAD PROLONGADA
• Volver a poner la máquina en un ambiente seco, resguardado de la intemperie y, si es posible, recubrirla con
una lona; prestar atención que el motor y el tubo de escape sean fríos.
• Por lo maxímo cada 30 días poner en marcha el motor.
• Si se prevé un periodo de inactividad prolongado (más
de 1 mes), seguir las indicaciónes que contiene el libro de
instrucciónes del motor; además de lubrificar todas las articulaciones.
• Para proteger el motor en caso de inactividad prolongada
se recomienda utilizar el aditivo combustible para motores
12. LÄNGERER GËRATESTILLSTAND
• Das Gerät in einen trockenen, vor Witterung geschützten
Raum fahren und nach Möglichkeit mit einer Plane abdecken. Sicherstellen, dass Motor und Auspuffrohr abgekühlt
sind.
• Den Motor nach spätestens 30 Tagen anlassen.
• Bei voraussichtlich längerem Stillstand (über 1 Monat) ist
das am Minuspol angeschlossene Batteriekabel abzuklemmen; die in der Bedienungsanleitung des Motors enthaltenen Anweisungen beachten und außerdem alle Gelenke
schmieren.
• Zum Schutz des Motors bei längerem Stillstand sollte ein
64
Page 67

presso tutti i centri di assistenza autorizzati. Miscelare l'additivo al carburante nel serbatoio o nel contenitore del carburante, far girare il motore per qualche minuto. L’additivo
evita incollaggio della pompa e dell’iniettore, è un antiossidante, e conserva le caratteristiche originali del carburante
mantenendolo attivo a lungo. L’effetto protettivo e conservante dell’additivo può raggiungere anche i 24 mesi.
E’ indicato anche per i motori a benzina in quanto la conserva più a lungo e protegge il carburatore dalle incrostazioni.
13. MOVIMENTAZIONE E TRASPORTO
• Se occorre spostare la macchina a motore spento mettere in folle la leva freno 4 (fig.5/1a e 5/1b).
• Per caricarla su un camion o un rimorchio è necessario
caricarla sopra un bancale di legno e inserire la leva freno
di stazionamento 4 (fig.5/1a e 5/1b), legarla al bancale di
legno e sollevarla tramite un carrello elevatore.
• Dopo averla caricata, legarla al pianale del veicolo mediante funi, cavi o catene. Per il peso e le dimensioni della
macchina senza le attrezzature vedi sezione 3 Tabella 1.
IT
can be purchased from all authorized service centres.
Mix the additive to the fuel in the tank or in the container of
fuel and run the engine for a few minutes. The additive prevents sticking of the pump and the injector, is an antioxidant, and maintain the original features of the fuel keeping
it active for a long time. The protective and preserving effect of the additive may even reach 24 months.
Is also indicated for gasoline engines because preserves it
for long time and protects the carburetor from the fouling.
que l'on peut acheté dans tous les Centres d'Assistance
Autorisés. Mélanger l’additif au carburant dans le réservoir
ou dans le conteneur du carburant, faire tourner le moteur
pendant quelques minutes. L’additif évite le collage de la
pompe et de l’injecteur, c’est un antioxydant et il conserve
les caractéristiques originales du carburant en le conservant actif pendant longtemps. L’effet de protection et de
conservation de l’additif peut même atteindre jusqu’à 24
mois.
Il est indiqué aussi pour les moteurs à l'essence parce que
il conserve l'essence pendant longtemps et protége le carburateur des incrustations.
13. MOVEMENT AND TRANSPORT
• If you need to move the machine with the engine off, put
the brake lever 4 (fig.5/1a and 5/1b) in neutral.
• To charge it on a truck or trailer must charge it on a wooden pallet, enter the parking brake 4 (fig.5/1a and 5/1b),
bind it well to the pallet and rise it by means of a lifter.
• After you have loaded it, bind properly it to platform of the
vehicle by means of ropes, cables or chains. For weight
and dimensions of the machine without equipment see
section 3 Table 1.
13. DEPLACEMENT ET TRANSPORT
• S'il faut déplacer la machine avec le moteur éteint, mettre
au point mort le levier frein 4 (fig. 5/1a e 5/1b).
• Pour la charger sur un camion ou une remorque c'est
nécessaire de la monter sur une palette en bois et insérer
le levier du frein de stationnement 4 (fig.5/1a et 5/1b), la
lier à la palette en bois et la soulever par un chariot élévateur.
• Après avoir la charger, la lier au plateau de chargement
du véhicule par cordes, câbles ou châines. Pour le poids et
les dimensions de la machine sans les équipements, voir
section 3 table 1.
EN
FR
que puede comprarse en todos los centros de asistencia
autorizados.
Mezclar el aditivo con el carburante en el depósito o en el
recipiente del carburante. Hacer que el motor gire durante
unos minutos. El aditivo evita la obstrucción de la bomba y
del inyector, es un antioxidante y conserva las características originales del carburante manteniéndolo activo durante un largo periodo. El efecto protector y conservante
del aditivo puede alcanzar incluso los 24 meses.
Zusatzstoff für Kraftstoffe verwendet werden; dieser kann
bei jedem befugtem Kundenservice erworben werden.
Den Zusatzstoff mit dem Kraftstoff im Tank bzw. im Kraftstoffbehälter mischen und den Motor ein paar Minuten laufen lassen. Der Zusatzstoff verhindert das Verkrusten der
Pumpe und des Einspritzventils, ist ein Antioxidationsmittel
und sorgt dafür, dass der Kraftstoff seine Eigenschaften
auch mit der Zeit beibehält. Der Schutzeffekt und die konservierende Wirkung des Zusatzstoffes kann auch bis zu
24 Monaten reichen. Er eignet sich auch für Benzinmotoren, da er das Benzin länger haltbar macht und den Vergaser vor Verkrustungen schützt.
13. MANEJO Y TRANSPORTE
• Si hay que desplazar la máquina con el motor apagado
poner en punto muerto la palanca freno 4 (fig. 5/1a e 5/1b).
• Para cargarla en un camión o un remolque es necesario
cargarla sobra un bancal de madera y acoplar la palanca
freno de estacionamiento 4 (fig. 5/1a e 5/1b), y legarla al
bancal de madera y subirla con una carretilla elevadora.
• Tras haberla cargada, fijarla al vehículo con cuerdas, cables, o cadenas. Para el peso y las dmensiones de la máquina sin equipos, véase la sección 3 Tabla 1.
13. VERFAHREN UND TRANSPORT
• Falls die Maschine bei abgeschaltetem Motor verschoben werden soll, ist der Bremshebel 4 (Abb. 5/1a und 5/1b)
in Neutralstellung zu legen.
• Zum Verladen der Maschine auf einen Lastwagen oder
Anhänger muss sie auf eine Holzpalette gefahren werden;
die Standbremse 4 (Abb. 5/1a und 5/1b) anziehen, die Maschine an der Palette sichern und mit einem Hubwagen
anheben.
• Nachdem die Maschine verladen wurde, ist sie an der
Plattform des Fahrzeugs unter Verwendung von Seilen,
Tauen oder Ketten zu sichern. Angaben zu Gewicht und
Abmessungen der Maschine ohne Anbaugeräte können
dem Abschnitt 3 Tabelle 1 entnommen werden.
65
ES
DE
Page 68

14. MANUTENZIONE E LUBRIFICAZIONE
A
ATTENZIONE! Non riparare o lubrificare con organi in
movimento.
IT
Togliere la chiave e scollegare i cavi della batteria
prima di iniziare qualsiasi intervento di pulizia, manutenzione o riparazione. Indossare indumenti adeguati e
guanti da lavoro.
14. MAINTENANCE AND LUBRICATION
CAUTION! Do not repair or lubricate when the parts
are in movement.
EN
Remove the key and disconnect the battery cables
prior to commencing any cleaning, maintenance or repair operations. Wear suitable clothing and work gloves.
Non disperdere mai nell'ambiente oli esausti, combustibile e ogni altro prodotto incendiante o inquinante;
non fumare; non lasciare fiamme libere!
Un'efficiente manutenzione e una corretta lubrificazione contribuiscono a mantenere la macchina in perfetta
efficienza.
NOTA: per una cadenza di sostituzione degli oli motore e cambio, attenersi anche al manuale di manutenzione programmata.
Never disperse waste oil, fuel or any other incendiary
or polluting product into the environment. Do not smoke. Do not leave naked flames around.
Efficient maintenance and correct lubrication contribute towards keeping the machine in perfect working order.
NOTE: to replace the engine and transmission oils see
also the manual of the program maintenance.
14. ENTRETIEN ET LUBRIFICATION
ATTENTION! Ne pas réparer ou lubrifier si des orga-
nes sont en mouvement.
FR
Enlever la clef et déconnecter les câbles de la batterie
avant de commencer toute intervention de nettoyage,
entretien ou réparation. Porter des vêtements appropriés et des gants de travail.
14. MANTENIMIENTO Y LUBRICACIÓN
¡ATENCIÓN! No se puede reparar ni lubricar con los
órganos en movimiento.
ES
Quitar la llave y desconectar los cables de la batería
antes de que empiece cualquier intervención de limpieza, mantenimiento o reparación. Llevar puestas
prendas adecuadas y guantes de trabajo.
Ne jamais répandre dans l’environnement des huiles
usées, combustible ou tout autre produit inflammable
ou polluant, ne pas fumer, ne pas laisser des flammes
libres!
Un entretien efficace et une correcte lubrification contribuent à garder la machine en parfait état.
NOTE: pour une échéance de remplacement des huiles
moteur et boite de vitesses, se référer également au
manuel d’entretien programmé.
¡No desechar en el medio ambiente aceites usados,
combustible o cualquier otro producto inflamable o
contaminante! ¡No fumar ni dejar llamas libres!
Un mantenimiento eficiente y una correcta lubricación
contribuyen a mantener la máquina en perfecto funcionamiento.
NOTA: para los plazos de sustitución de los aceites
de motores y cambio, atenerse también al manual de
mantenimiento programado.
14. WARTUNG UND SCHMIERARBEITEN
ACHTUNG! Bei laufenden Bewegungsmechanismen
keine Schmier oder Instandsetzungsarbeiten vornehmen.
DE
Den Zündschlüssel ziehen und die Batterie ausstecken, bevor beliebige Reinigungs-, Wartungs- oder Instandsetzungsarbeiten durchgeführt werden. Geeignete Arbeitskleidung und Arbeitshandschuhe tragen.
ltöl, Brennstoffoder sonstige brennbare oder umweltschädliche Produkte dürfen nicht mit dem Hausmüll oder in der Kanalisation entsorgt werden, nicht
rauchen, keine freien Flammen brennen lassen!
Wirkungsvolle Instandhaltung und ordnungsgemäße
Schmierung tragen zur hohen Leistungsfähigkeit des
Gerätes bei.
HIWNEIS: Bitte halten Sie sich beim Ersatz von Motorund Getriebeöl auch an die Anleitung der vorgegeben
Wartungsintervalle.
66
Page 69

14.1 Motore
Per gli intervalli di manutenzione seguire le norme contenute nel libretto uso e manutenzione del motore. Di massima è opportuno controllare il livello dell’olio ogni 4 ore di
lavoro e sostituirlo annualmente o ogni 100 ore. Impiegare
sempre olio di buona qualità come indicato sul libretto uso
e manutenzione del motore. La fig.14/1 riporta il tappo di
scarico olio A e riempimento/livello B. Nel caso di motori a
benzina, se il motore non funziona in modo regolare occorre pulire la candela C (fig.14/3) ed il carburatore D (fig.
14/4).
14.1.1 Filtro aria a bagno d'olio
Se l'ambiente di lavoro è molto polveroso intensificare la
pulizia, lavare la matassa filtrante e ripristinare il livello
dell'olio ogni 8 ore, usare lo stesso olio del motore.
14.1.2 Filtro aria a secco (fig.14/2)
Per i motori che hanno il filtro aria con elemento filtrante di
carta occorre pulirlo con aria oppure sostituirlo se è molto
intasato o bucato o con superfici di tenuta rovinate.
Non utilizzare il motore se il filtro è in cattivo stato o se
mancante.
IT
14.1 Engine
For the maintenance intervals follow the instructions given
in the operating manual of engine. You should check the
oil level every 4 hours of work and replace it yearly or every 100 hours of work. Always use good quality oil as indicated on the engine user manual. In fig.14/1, the oil discharge cap A and filling/level cap B. If the engine don’t function
in regular way, in case of gasoline engines need to clean
the plug C (fig.14/3) and the carburettor D (fig.14/4).
14.1 Moteur
Pour les intervalles de lubrification, suivre les données
contenues dans ce livret du moteur. En principe il est utile
de contrôler le niveau de l’huile toutes les 4 heures de
travail et de le changer annuellement ou toutes les 100
heures. Employer toujours de l’huile pour moteur de bonne
qualité. La fig.14/1 montre le bouchon de vidange huile A
et de remplissage / niveau B. Dans le cas des moteurs à
essence, si le moteur ne fonctionne pas de manière régulière, il faut nettoyer la bougie C (fig.14/3) et le carburateur
D (fig.14/4).
14.1.1 Oil-bath air filter
If you work in dusty conditions intensifying cleaning, wash
the filtering hank and add oil every 8 hours, use the same
engine oil.
14.1.2 Dry air filter (fig.14/2)
For engines that have an air filter with paper filter component, these should be cleaned with air or replaced if very
clogged, punctured or if the sealing surface has become
damaged. Do not use the engine if the filter is in poor
condition or missing.
14.1.1 Filtre à air à bain d'huile
Si l'endroit est très poussiéreux intensifier le nettoyage,
laver l'écheveau filtrant et ramener l'huile au niveau requis
toutes les 8 heures. Utiliser la même huile que pour le moteur.
14.1.2 Filtre à air à sec (fig.14/2)
Pour les moteurs qui ont un filtre à air avec un élément de
filtre en papier, il faut le nettoyer avec de l’air ou le remplacer s’il est trop bouché, troué ou avec une surface abîmée.
Ne jamais utiliser le moteur sans le filtre ou avec le filtre en
mauvais état.
EN
FR
14.1 Motor
Para los intervalos de manutención seguir las normas contenidas en el librito de uso y manutención del motor. Es
oportuno controlar el nivel del aceite cada 4 horas de trabajo y sustituirlo una vez a l'año o cada 100 horas. Reponer siempre con aceite de buena calidad. La fig.14/1 ilustra
el tapón de vaciado de aceite A y relleno/nivel B. En el
caso de motores de gasolina, si el motor no funciona de
manera regular hay que limpiar la bujía C (fig.14/3) y el
carburador D (fig.14/4).
14.1 Motor
Die Schmierung muß in den im Motorhandbuch vorgeschriebenen Zeitabständen vorgenommen werden. Der Ölstand soll grundsätzlich alle 4 Arbeitsstunden kontrolliert
werden. Der Ölwechsel ist nach jährlich oder alle 100
Arbeitsstunden geprüft werden. Immer ein gutes Motorenöl
Ölsorte wie nach Anleitungen des Handbuchs des Motors.
In Abb.14/1 sind der Ölablassdeckel A und Füll-/ Standdeckel B gekennzeichnet. Bei Betriebsstörungen die Kerze
C (Abb.14/3) und den Vergaser D (Abb.14/4) bei Benzinmotoren reinigen.
14.1.1 Filtro de aire en baño de aceite
Si el ambiente de trabajo es polvoriento intensificar la limpieza, lavar la reja del filtro y restablecer el nivel del aceite
cada 8 horas. Usar el mismo aceite del motor.
14.1.2 Filtro de aire a seco (fig.14/2)
Para los motores que tienen el filtro de aire con elementos
filtrantes de papel, hay que hacer la limpieza con aire o
bien sustituirlo si está muy atascado, perforado o con superficies de estanqueidad estropeadas. No se debe utilizar
el motor sin el filtro ni tampoco si este está en mal estado.
14.1.1 Lüftfilter im Ölbad
Die Reinigung intensivieren in staubiger Umgebung den
filtrierenden Einsatz waschen und den Ölstand alle 8 Stunden kontrollieren. Mit der gleichen, für die Motorschmierung benutzen Ölsorte auffüllen.
14.1.2 Trocken Lüftfilter (fig.14/2)
Bei Motoren, die über Lüftfilter mit Filterpapier verfügen, ist
der Filter mit Lüft zu reinigen bzw. auszuwechseln, wenn
er sehr schmutzig oder durchlöchert ist bzw. wenn die
Oberfläche beschädigt ist. Den Motor nicht verwenden,
wenn der Filter defekt ist oder fehlt.
67
ES
DE
Page 70

14.2 Frizione (L fig.14/9)
La macchina è dotata di frizione idraulica PowerSafe®;
normalmente non necessita di manutenzioni o registrazioni
particolari, salvo sostituire olio e filtro come indicato alla
sezione 14.5. La fig.14/29 riporta lo schema idraulico di
funzionamento. Nel caso occorra una nuova registrazione,
fare riferimento a pag. 61.
IT
14.3 Trasmissione idrostatica (gruppo Kanzaki)
La trasmissione è dotata di gruppo idrostatico M (fig.14/8 e
14/9), smontabile senza aprire la scatola cambio, con filtro
di aspirazione (spin-on) (F fig.14/4) in comune con la frizio-
ne PowerSafe® L (14/9). Circuito di alta pressione separato.
• Pulire regolarmente i 3 tappi magnetici (B fig.14/9 e
14/25) ad ogni sostituzione di filtro.
• Tenere regolarmente pulito il radiatore (E fig.14/5) in ser-
pentina di acciaio.
• Pulire la ventola assiale centrifuga (G fig.14/7) per il raf-
freddamento del gruppo idrostatico, da residui di fango, erba secca ecc.
• Per la sostituzione di filtro e olio vedere sezione 14.5
• Il freno meccanico di stazionamento (auto-hold) 28 (fig. 5/1a
e 14/9) non necessita di particolare pulizia o regolazioni.
14.2 Clutch (L fig.14/9)
The machine is equipped with a PowerSafe® hydraulic
clutch, which normally does not require special maintenance or adjustment besides oil and filter replacement, as indicated on section 14.5. The fig.14/29 shows the hydraulic
operating diagram. If a new adjustment is required, please
refer to page 61.
14.3 Hydrostatic transmission (Kanzaki group)
EN
The transmission is equipped of hydrostatic group M (fig.
14/8 and 14/9), dismounting without open the gearbox,
with suction filter (spin-on) (F fig.14/4) shared with the
14.2 Embrayage (L fig.14/9)
La machine est munie d’un embrayage hydraulique Power
Safe®; normalement un entretien ou des réglages particuliers ne sont pas nécessaires, sauf au début, il serait préférable de remplacer l’huile et le filtre, comme indiqué à la
section 14.5. La fig.14/29 indique le schéma hydraulique
de bon fonctionnement. Si un nouveau réglage était nécessaire, se référer à la page 61.
FR
14.3 Transmission hydrostatique (groupe Kanzaki)
La transmission est munie d’un groupe hydrostatique M
(fig.14/8 et 14/9), démontable sans ouvrir la boîte de vitesses, avec filtre d’aspiration (spin-on) (F fig.14/4) en com-
PowerSafe® clutch L (fig.14/9). High pressure circuit sepa-
rated.
• Clean regularly the 3 magnetic caps (B fig.14/9 and
14/25) every change of the filter.
• Regularly keep clean the steel pipe of the cooling radiator
(E fig.14/5).
• Keep clean the centrifugal axial cooling fan (G fig.14/7) to
cool the hydrostatic group from residues of mad, dry grass
etc.
• To change filter and oil see section 14.5
• The mechanic parking brake (auto-hold) 28 (fig. 5/1a and
14/9) does not need particular cleaning or adjustment.
mun avec l’embrayage PowerSafe® L (fig.14/9). Circuit de
haute pression séparé.
• Nettoyer régulièrement les 3 bouchons magnétiques (B
fig.14/9 et 14/25) lors de chaque remplacement du filtre.
• Nettoyer régulièrement le radiateur (E fig.14/5) dans le
serpentin d'acier.
• Nettoyer la soupape axiale centrifuge (G fig.14/7) pour le
refroidissement du groupe hydrostatique, des résidus de
boue, d’herbe sèche, etc…
• Pour le remplacement du filtre et de l’huile voir sec.14.5.
• Le frein mécanique de stationnement (auto-hold) 28 (fig.
5/1a et fig.14/9) n’a pas besoin de nettoyage particulier ou
de réglages.
14.2 Embrague (L fig.14/9)
La máquina está dotada de embrague hidráulico Power
Safe®; normalmente no tiene necesidad de mantenimiento
o ajustes especiales, excepto sustituir el aceite y el filtro,
tal y como se indica en la sección 14.5. La fig.14/29 indica
el esquema hidráulico de funcionamiento. En caso de que
haya que hacer un nuevo ajuste, consultar la página 61.
14.3 Transmisión hidrostática (grupo Kanzaki)
ES
La transmisión está dotada de un grupo hidrostático M
(fig.14/8 y 14/9), desmontable, sin abrir la caja de cambios,
con filtro de aspiración (spin-on) (F fig.14/4) en común con
14.2 Kupplung (L Abb.14/9)
Die Maschine verfügt über eine hydraulische Kupplung Powersafe®. Normalerweise bedarf diese keiner besonderen
Wartung oder Einstellung, mit Ausnahme des Öl und Filter
entsprechend Angaben auf Teil 14.5 ersetzen. Die Abb.14/
29 zeigt den hydraulischen Betriebsplan. Falls eine neue
Einstellung erforderlich ist, die Seite 61 einsehen.
14.3 Hydrostatgetriebe (Kanzaki-Einheit)
DE
Der Antrieb verfügt über eine Hydrostateinheit M (Abb.14/8
und 14/9); diese lässt sich ohne Öffnen des Getriebegehäuses demontieren und hat mit der Kupplung Power-
Safe® L (Abb.14/9) einen gemeinsamen Absaugfilter
el embrague PowerSafe® L (fig.14/9). Circuito de alta presión separado.
• Limpiar regularmente los 3 tapones magnéticos (B fig.
14/9 y fig.14/25) cada vez que se sustituya el filtro.
• Mantener limpio con regularidad el radiador (E fig.14/5)
de serpentina de acero.
• Limpiar el ventilador axial centrífugo (G fig.14/7) para la
refrigeración del grupo hidrostático eliminando los residuos
de lodo, hierba seca, etc.
• Para sustituir el filtro y el aceite, véase la sección 14.5
• El freno mecanico de estacionamiento (auto-hold) 28 (fig.
5/1a y 14/9) no necesita especial limpieza o regulaciones.
(spin-on) (F Abb. 14/4). Separater Hochdruckkreislauf.
• Die 3 Magnetdeckel (B Abb.14/9 und 14/25) regelmäßig
bei jedem Filterersatz reinigen.
• Den Stahl-Rohrschlagenkühler (E Abb.14/5) regelmäßig
sauber halten.
• Den zur Kühlung der Hydrostateinheit verwendeten AxialRadiallüfter (G Abb.14/7) reinigen und Schlammreste, trockenes Gras usw. entfernen.
• Für Hinweise zum Ersatz von Filter und Öl siehe Abschnitt 14.5
• Die mechanische Standbremse (auto-hold) 28 (Abb.5/1a
und 14/9) bedarf keiner besonderen Reinigung oder Einstellung.
68
Page 71

B
C
A
fig.14/1
fig.14/4
E
fig.14/5
F
fig.14/2
fig. 14/6
G
D
fig.14/3
69
fig.14/7
Page 72

14.4 Scatola cambio / Frizioni di sterzo (fig.14/6 e 14/9)
• La macchina è dotata di gruppi freno-frizione di sterzo a
dischi multipli in bagno d’olio H, sono sull’asse ruote e integrate con la scatola cambio G, con recupero automatico
del gioco. Sono ad azionamento idraulico, lo stesso circuito che comanda la frizione PowerSafe® L, se sono neces-
IT
sarie regolazioni dei cavi vedere sezione 6.3.
• Il freno interno delle frizioni di sterzo H precede l’aper-
tura della corrispondente frizione per evitare slittamenti e
non perdere aderenza sulle pendenze.
14.4 Gearbox / Steering clutches (fig.14/6 and 14/9)
• The machine is equipped with brake-clutch steering
groups, with multiple discs in oil bath H, they are on the
wheel axle and integrated with the gearbox G, with automatic adjustment of the play. Hydraulically operated with
the same circuit that controls the PowerSafe® clutch L.
EN
See section 6.3 if adjustments are necessary.
• The internal brake of the steering clutches H operates
before the opening of the corresponding clutch to avoid
slipping and don’t lose traction on slopes.
• Per la sostituzione dell’olio vedere sezione 14.5
• Le 2 trasmissioni finali sono con riduttori in cascata a ba-
gno d’olio N (fig.14/9), lo stesso olio della scatola cambio.
• To change oil see section 14.5
• The 2 final drives are with waterfall gear-reducer in oil
bath N (fig.14/9), the same oil of the gearbox.
14.4 Boîte de vitesses / Embrayages de direction (fig.
14/6 et 14/9)
• La machine est munie de groupes frein-embrayage de direction à disques multiples à bain d’huile H, ils se trouvent
sur l’axe des roues et sont intégrés avec la boîte de vitesses G, avec récupération automatique du jeu
traînement hydraulique, le même circuit qui commande
FR
l’embrayage PowerSafe® L, si des réglages des câbles
sont nécessaires, voir la section 6.3.
• Le frein interne des embrayages de direction H précède
l’ouverture de l’embrayage correspondant pour éviter des
glissements et pour ne pas perdre l’adhérence en pente.
14.4 Caja de cambios / Embrague de dirección (fig.14/6
y 14/9)
• La máquina está dotada de grupos freno-embrague de
dirección de discos múltiples en baño de aceite H, están
en el eje de ruedas y están integrados con la caja de cambio G, con recuperación automática de la holgura
accionamiento hidráulico, el mismo circuito que controla el
ES
embrague PowerSafe® L. Si fueran necesarias regulaciones de los cables, véase la sección 6.3.
• El freno interior de los embragues de dirección H prece-
de a la apertura del embrague correspondiente para evitar
deslizamientos y no perder adherencia en las pendientes.
. Ils sont à en-
. Son de
• Pour le remplacement de l’huile voir section 14.5
• Les 2 transmissions finales sont avec réducteurs en ca-
scade à bain d’huile N (fig.14/9), la même huile que la boîte de vitesses.
• Para la sustitución del aceite véase la sección 14.5
• Las 2 transmisiones finales son de reductores en casca-
da de baño de aceite N (fig.14/9), el mismo aceite de la
caja de cambio.
14.4 Getriebegehäuse / Lenkerkupplung (Abb. 14/6 und
14/9)
• Das Gerät verfügt über eine Einheit aus Bremse/ LenkerLamellenkupplung im Ölbad H an der Radachse und sie ist
im Getriebegehäuse G mit automatischem Spielausgleich
integriert. Die Ansteuerung erfolgt ölhydraulisch und es
handelt sich um denselben Kreislauf, der auch die Power
Safe® Kupplung L ansteuert. Falls Einstellungen der Seile
DE
erforderlich sind, siehe Abschnitt 6.3.
• Die innere Bremse der Lenkerkupplungen H ist der Öff-
nung der entsprechenden Kupplung vorgeschaltet, damit
ein Schleifen vermieden und das Haftvermögen an Hängen nicht verloren wird.
• Für Hinweise zum Ölwechsel siehe Abschnitt 14.5
• Die 2 Abschlussantriebe verfügen über Reduktionsgetrie-
be im Ölbad N (Abb.14/9); dabei handelt es sich um dasselbe Öl des Getriebes.
70
Page 73

4
231
1
IT – Gruppo KANZAKI tipo KHS – 13JH
EN – KANZAKI group type KHS – 13JH
FR – Groupe KANZAKI type KHS – 13JH
ES – Grupo KANZAKI tipo KHS – 13JH
DE – KANZAKI-Gruppe Typ KHS – 13JH
L
G
fig. 14/8
M
28
B
N
B
H
fig.14/9
71
Page 74

14.5 Sostituzione filtro e olio cambio
Scaricare l’olio dalla scatola cambio tramite i 3 tappi di scarico olio (B fig.14/9 e 14/25).
PRIME 30 ORE - Dopo le prime 30 ore di lavoro sostituire
il filtro olio A (fig.14/23) e controllare il livello nella scatola
cambio utilizzando il tappo con asta C (fig.14/24) e verifi-
IT
cando che, a macchina orizzontale, l'olio arrivi tra le due
tacche 1 e 2 (fig.14/24). Se occorre, aggiungere olio multigrado per cambi idromeccanici tipo BCS Power Lube H3
SAE 15W-40 (ACEA A3-08/B3-08, API SL/CF, API EC I,
VW 500/505.00).
PER SOSTITUIRE IL FILTRO OLIO (A fig.14/23)
1. Rimuovere il filtro allentandolo con l’apposita chiave.
2. Stendere un velo di olio sulla guarnizione in gomma del
nuovo filtro.
3. Montare il nuovo filtro avvitandolo e stringendolo esclusivamente a mano.
OGNI SETTIMANA - Verificare che, a macchina orizzontale, l’olio arrivi tra le due tacche 1 e 2 del tappo con asta
C (fig.14/24).
14.5 Changing filter and gearbox oil
Discharge the oil of the gearbox from the 3 discharging oil
caps (B fig.14/9 and 14/25).
FIRST 30 HOURS - After the first 30 hours of work, replace the oil filter A (fig.14/23). Check the level on the gearbox using the dipstick (C fig.14/24) and checking that, with
the machine horizontal, the oil reaches in between the two
EN
notches 1 and 2 (fig.14/24). If necessary add multigrade
hydro-mechanical gear oil type BCS Power Lube H3 SAE
15W-40 (ACEA A3-08/B3-08, API SL/CF, API EC I, VW
500/505.00).
14.5 Remplacement du filtre et de l'huile de la boîte de
vitesses
Décharger l'huile de la boîte de vitesses par les 3 bouchons de décharge huile (B fig.14/9 et 14/25).
LES PREMIERES 30 HEURES - Après les premières 30
heures de travail, remplacer le filtre d’huile A (fig.14/23) et
contrôler le niveau dans la boîte de vitesses en utilisant le
bouchon avec tige (C fig.14/24) et en vérifiant que, lorsque
FR
la machine est horizontale, l’huile arrive entre les deux
encoches 1 et 2 (fig.14/24). S’il faut, ajouter de l’huile multidegré pour boîtes à vitesse hydromécanique BCS Power
Lube H3 SAE 15W-40 (ACEA A3-08/B3-08, API SL/CF,
API EC I, VW 500/505.00).
TO REPLACE THE OIL FILTER (A fig.14/23)
1. Remove the filter, unscrewing it with the correct span-
ner.
2. Smear a film of oil on the rubber gasket of the new filter.
3. Mount the new filter, screwing and tightening it only by
hand.
EVERY WEEK - With the machine on horizontal plane
check that the oil reaches between the two notches 1 and
2 of the dipstick C (fig.14/24).
POUR REMPLACER LE FILTRE À HUILE (A fig.14/23)
1. Enlever le filtre en le desserrant avec la clé adéquate.
2. Mettre une couche d’huile sur le joint en caoutchouc du
filtre neuf.
3. Monter le filtre neuf en le vissant et le serrer uniquement
à la main.
CHAQUE SEMAINE - La machine en position horizontale,
vérifier que l’huile arrive entre les deux encoches du bouchon avec la tige C (fig.14/24).
14.5 Sustitución del filtro y del aceite en la caja de
cambios
Descargar el aceite de la caja de cambios al tráves de los
3 tapones de descargo aceite (B fig.14/9 y 14/25).
PRIMERAS 30 HORAS - Trascurridas las primeras 30
horas de trabajo, sustituir el filtro de aceite A (fig.14/23) y
controlar el nivel de la caja de cambios utilizando el tapón
con varilla (C fig.14/24) y comprobando que, con la máqui-
ES
na horizontal, el aceite llegue a estar entre las dos muescas 1 y 2 (fig.14/24). Si es necesario, añadir aceite multigrado para cambios hidromecánicos BCS Power Lube H3
SAE 15W-40 (ACEA A3-08/B3-08, API SL/CF, API EC I,
VW 500/505.00).
14.5 Filter und Getriebeöl ersetzen
Das Öl aus dem Getriebe anhand der 3 Ölablassdeckel
ablassen (B Abb.14/9 und 14/25).
NACH DEN ERSTEN 30 STUNDEN - Nach den ersten 30
Betriebsstunden ist der Ölfilter A (Abb.14/23) auszuwechseln und den Ölstand im Getriebegehäuse prüfen; dazu
den Messstab (C Abb.14/24) verwenden und prüfen, dass
der Ölstand bei horizontal stehender Maschine zwischen
DE
den beiden Kerben 1 und 2 (Abb.14/24) steht. Bei Bedarf
Öl für hydromechanische Getriebe BCS Power Lube H3
SAE 15W-40 (ACEA A3-08/B3-08, API SL/CF, API EC I,
VW 500/505.00) auffüllen.
PARA SUSTITUIR EL FILTRO ACEITE (A fig.14/23)
1. Quitar el filtro aflojándolo con la llave correspondiente.
2. Extender una capa de aceite en la guarnición de goma
del nuevo filtro.
3. Montar el nuevo filtro tornillandolo y apretándolo exclusivamente a mano.
CADA SEMANA
Comprobar que, con la máquina horizontal, el aceite llegue
a las dos muescas del tapón con varilla C (fig.14/24).
DEN ÖLFILTER ERSETZEN (A Abb.14/23)
1. Die Filtersicherungsschraube unter Verwendung des
entsprechenden Schlüssels losschrauben und den Filter
herausnehmen.
2. Etwas Öl auf die Gummidichtung des neuen Filters auftragen.
3. Den neuen Filter einsetzen und ausschließlich von Hand
festschrauben.
WÖCHENTLICH - Bei waagerecht stehender Maschine
prüfen, dass der Ölstand zwischen den beiden Kerben des
Deckels mit dem Stab C (Abb.14/24) steht.
72
Page 75

A
A
C
fig.14/23
OGNI 100 ORE DI LAVORO O UNA VOLTA L’ANNO
• Sostituire l’olio: capacità litri 6,5 per la scatola cambio
comprensiva di trasmissione idrostatica, frizione Power
Safe® e frizioni di sterzo, usare olio multigrado BCS Po-
wer Lube H3 SAE 15W-40 (ACEA A3-08/B3-08, API SL/
CF, API EC I, VW 500/505.00).
• Sostituire il filtro olio A (fig. 14/23).
• Pulire i tappi magnetici B (fig. 14/9 e 14/25).
NOTA: fare sempre riferimento anche al Program-
ma di Manutenzione allegato al manuale.
EVERY 100 HOURS OF WORK, OR ONCE A YEAR
• Change the oil: 6,5 litres capacity for the gearbox with
hydrostatic transmission, PowerSafe® clutch and Steering
clutches, use oil multigrade BCS Power Lube H3 SAE
15W-40 (ACEA A3-08/B3-08, API SL/CF, API EC I, VW
500/505.00).
• Change the oil filter A (fig.14/23)
• Clean the magnetic cap B (fig.14/9 and 14/25).
NOTE: always refer to the enclosed Maintenance
Plan annexed to the manual.
IT
EN
C
1
2
fig.14/24
CHAQUE 100 HEURES DE TRAVAIL OU UNE FOIS PAR
AN
• Remplacer l’huile: contenance litres 6,5 pour la boîte de
vitesses qui comprende la transmission hydrostatique,
l'embrayage PowerSafe® et les embrayages de direction.
Employer huile multidegré BCS Power Lube H3 SAE
15W-40 (ACEA A3-08/B3-08, API SL/CF, API EC I, VW
500/505.00).
• Remplacer le filtre huile A (fig.14/23).
• Nettoyer les bouchons magnétiques B (fig.14/9 et 14/25)
NOTE: se référer toujours au Programme d’entre-
tien annexé.
CADA 100 HORAS DE TRABAJO O UNA VEZ AL AÑO
• Sustituir el aceite: capacidad litros 6,5 para la caja de
cambios que comprende la transmissión hídrostatica, el
embrague PowerSafe® y los embragues de gíro, usar
aceite multigrado BCS Power Lube H3 SAE 15W-40
(ACEA A3-08/B3-08, API SL/CF, API EC I, VW 500/
505.00).
• Sustituir el filtro aceite A (fig.14/23).
• Limpiar los tapones magnéticos B (fig.14/9 y 14/25).
NOTA: consultar siempre el Programa de Mante-
nimiento adjunto.
FR
ES
B
fig.14/25
LLE 100 BETRIEBSSTUNDEN ODER EINMAL IM
JAHR
• Das Öl wechseln: Fassungsvermögen 6,5 Liter. Für das
Getriebegehäuse mit Hydrostatgetriebe, für die PowerSa-
fe® Kupplung und die Lenkerkupplungen, BCS Mehrbereichsöl Power Lube H3 SAE 15W-40 (ACEA A3-08/B308, API SL/CF, API EC I, VW 500/505.00) verwenden.
• Den Ölfilter A (Abb. 14/23) ersetzen.
• Die Magnetdeckel B (Abb.14/9 und 14/25) reinigen.
HINWEIS: Stets das beiliegende Wartungspro-
gramm beachten.
73
DE
Page 76

14.6 Schemi idraulici - Hydraulic diagrams - Schéma hydraulique - Esquemas hídraulicos - Hydraulische schema
14.6.1 Trasmissione idrostatica - Hydrostatic transmission - Transmission hydrostatique - Transmisión hídrostatica Hydrostatischenantrieb
14.6.2 Legenda
1. Scatola cambio (serbatoio olio)
2. Tappo magnetico
3. Filtro spin on
4. Gruppo Kanzaki tipo KHS-13JH
5. Radiatore raffreddamento olio
6. Gruppo frizione idraulica Power-
Safe® (vedere 14.5.2)
14.6.2 Legenda
1. Caja de cambio (serbatoio aceite)
2. Tapón magnético
3. Filtro spin on
4. Grupo Kanzaki tipo KHS-13JH
5. Radiator refrigeración del aceite
6. Grupo embrague hídraulico Power
Safe® (veer 14.5.2)
IT
ES
14.6.2 Key
1. Gearbox (oil tank)
2. Magnetic cap
3. Spin on filter
4. Kanzaki group type KHS-13JH
5. Oil cooling radiator
6. PowerSafe® hydraulic clutch group
(see 14.5.2)
14.6.2 Key
1. Getriebegehäuse (Ölkessel)
2. Magnetdeckel
3. Spin on filter
4. Kanzaki-Gruppe Typ KHS-13JH
5. Ölkühler
6. Hydraulische Kupplungseinheit
PowerSafe® (Siehe 14.5.2)
EN
DE
FR
14.6.2 Légende
1. Boîte de vitesses (réservoir de
huile)
2. Bouchon magnétique
3. Filtre spin on
4. Kanzaki groupe type KHS-13JH
5. Radiateur refroidissement huile
6. Groupe embrayage hydraulique
PowerSafe® (voir 14.5.2)
74
Page 77

14.6.3 Schema frizione PowerSafe® e frizioni di sterzo - PowerSafe® and steering wheel diagram - Schéma embrayage
PowerSafe® et embrayages de direction - Esquema embrague PowerSafe® y embragues de gíro - Kupplungsplan
PowerSafe® und Lenkerkupplung
14.6.4 Legenda frizione PowerSafe® e
di sterzo (fig.14/31)
1. Distributore
2. Valvola di massima
3. Pompa
4. Filtro
5. Scatola cambio
6. Attuatore frizione PowerSafe®
7. Attuatori frizioni-freni
8. Comandi frizioni-freni
14.6.4 Leyenda embrague
PowerSafe® y de gíro (fig.14/31)
1. Distributor
2. Valvúla de maxima presión
3. Bomba
4. Filtro
5. Caja de cambio
6. Actuator embrague PowerSafe®
7. Actuatores embrague-frenos
8. Mandos embrague-frenos
IT
ES
14.6.4 PowerSafe® and steering
wheel key (fig.14/31)
1. Distributor
2. High pressure valve
3. Pump
4. Filter
5. Gearbox
6. PowerSafe® clutch actuator
7. Clutches-brakes actuator
8. Clutch-brake controls
14.6.4 Zeichenerklärung PowerSafe®und Lenkerkupplung (Abb.14/31)
1. Verteiler
2. Druckbegrenzungsventil
3. Pumpe
4. Filter
5. Getriebekasten
6. Aktuator PowerSafe®-kupplung
7. Aktuatoren Kupplungen-Bremsen
8. Comandi Kupplungen-Bremsen
EN
DE
FR
14.6.4 Légende embrayage
PowerSafe® et de direction
(fig.14/31)
1. Distributeur
2. Soupape de pression maximum
3. Pompe
4. Filtre
5. Boîte de vitesses
6. Actionneur embrayage PowerSafe®
7. Actionneurs embrayages-freins
8. Commandes embrayages-freins
75
Page 78

14.7 Impianto elettrico
14.7.1 Schema elettrico (fig.14/33)
La macchina non ha avviamento elettrico, lo schema elettrico è relativo esclusivamente al motore a benzina.
Il motore diesel non ha contatti elettrici o dispositivi.
IT
14.7.2 Legenda
M – Motore
B – Bobina elettronica
C – Interruttore stop motore (se presente)
D – Interruttore stop manubrio
14.7 Electrical system
14.7.1 Diagram (fig.14/33)
The machine is without electric start, the electric plan is exclusively for the gasoline engine. The diesel engine is without electric contact or devices.
14.7.2 Electric system key
EN
M – Engine
B – electronic coil
C – Engine switch stop (if there)
D – Handlebar switch stop
M
B
14.7 Installation électrique
14.7.1 Schéma électrique (fig.14/33)
La machine n'a pas de démarrage électrique, le schéma
électrique est exclusivement lié au moteur à essence. Le
moteur diesel ne possède pas de contacts électriques ou
de dispositifs.
14.7.2 Légende
FR
M – Moteur
B – Bobine électronique
C – Interrupteur d'arrêt moteur (s'il y en a un)
D – Interrupteur d'arrêt du guidon
14.7 Instalación eléctrica
14.7.1 Esquema eléctrico (fig.14/33)
La máquina no tiene encendido eléctrico, el esquema eléctrico se refiere exclusivamente al motor de gasolina.
El motor diesel no tiene contactos eléctricos o dispositivos.
ES
14.7.2 Leyenda
M – Motor
B – Bobina electrónica
C – Interruptor stop motor (si existe)
D – Interruptor stop manillar
14.7 Elektrische Anlage
14.7.1 Elektrische Schema (Abb.14/33)
Das Gerät wird nicht elektrisch angelassen, der Schaltplan
bezieht sich ausschließlich auf den Benzinmotor. Der Dieselmotor hat keine elektrischen Kontakte oder Vorrichtungen.
14.7.2 Beschriftung
DE
M – Motor
B – Elektronische Spule
C – Motorstoppschalter (sofern vorhanden)
D – Lenkerstoppschalter
C
D
fig.14/33
76
Page 79

PAGINA LASCIATA INTENZIONALMENTE BIANCA
THIS PAGE IS ON PURPOSE WHITE
CETTE PAGE EST DÉLIBÉRÉMENT BLANCHE
ESTA PÁGINA ES ESPECIFICAMENTE BLANCA
DIESE SEITE ABSICHTLICH WEIß IST
77
Page 80

15. INCONVENIENTI, CAUSE E RIMEDI
Tirando l’avviamento auto avvolgente il
IT
motore gira ma non si avvia
15. TROUBLESHOOTING
Pulling the recoil start the engine turns
but it does not switch on
EN
INCONVENIENTI CAUSE RIMEDI
Non arriva corrente Controllare il cavo della candela
Non arriva carburante
Uno o entrambi gli interruttori di stop
del motore sono in posizione OFF (O)
Motore freddo o candela difettosa o
sporca
PROBLEMS CAUSES SOLUTIONS
There is no AC current Check the connection cables
There is no the fuel flow
One or both engine stop switches are
in OFF (O) position
Cold engine or defected spark plug
Mancanza di carburante
Aprire il rubinetto del carburante
Portare gli interruttori in posizione
START ( I )
Chiudere l’aria e/o cambiare la candela
Lack of fuel
Open the fuel tap
Move the switches in START ( I ) position
Choke the air and / or change the spark
plug
15. INCONVENIENTS, CAUSES ET SOLUTIONS
En tirant sur le démarrage enroulement
automatique, le moteur tourne, mais ne
FR
démarre pas
15. PROBLEMAS, CAUSAS Y REMEDIOS
Tirando del arranque autobobinado el
motor gira pero no se pone en marcha
ES
INCONVENIENTS CAUSES SOLUTIONS
Le courant n’arrive pas Contrôler le câble de la bougie
Le carburant n’arrive pas
Un ou les deux interrupteurs du moteur
sont en position OFF (O)
Moteur froid ou bougie endommagée
ou sale
PROBLEMAS CAUSAS REMEDIOS
No llega la corriente Controlar el cable de la bujía
No llega el carburante
Uno o ambos interruptores de parada
del motor están en posición OFF (O)
Motor frío o bujía defectuosa o sucia Cerrar el aire y/o cambiar la bujía
Absence de carburant
Ouvrir le robinet du carburant
Porter les interrupteurs en position
START ( I )
Fermer l’air et / ou changer la bougie
Falta de carburante
Abrir la llave del carburante
Poner los interruptores en posición
START ( I )
15. STÖRUNGEN, URSACHE UND ABHILFE
Nach Ziehen der selbstaufwickelnden
Startvorrichtung dreht sich der Motor,
DE
läuft aber nicht an
STÖRUNGEN URSACHE ABHILFE
Kein Strom Das Kabel der Kerze überprüfen
Kein Kraftstoff
Einer oder beide Motor-Schalter stehen
auf OFF (O)
Motor kalt oder Kerze defekt bzw.
schmutzig
Kraftstoff fehlt
Kraftstoffhahn öffnen
Die Schalter auf START ( I ) stellen
Luftschaltung schließen bzw. Kerze
auswechseln
78
Page 81

INCONVENIENTI CAUSE RIMEDI
Avviamento difficoltoso o funzionamento
irregolare del motore
Il motore non gira in modo regolare
Depositi o impurità nel carburante
Candela sporca o difettosa Pulire o sostituire la candela
Carburatore sporco Pulire il carburatore
Pulire il filtro aria
Pulire il filtro carburante o Spurgare
l’iniettore o Pulire il carburatore
Svuotare il serbatoio ed impiegare
carburante pulito
Controllare ed eventualmente sostituire il
filtro carburante
IT
INCONVENIENTI CAUSE RIMEDI
Difficult to start or irregular runs of the engine
INCONVENIENTS CAUSES SOLUTIONS
Démarrage difficile ou fonctionnement irrégulier du moteur
Clean the air filter
The engine does not run regularly
Impurities in the fuel
Dirty or fouled spark plug
Dirty carburettor
Le moteur ne tourne pas de manière régulière
Dépôts ou impuretés dans le carburant
Bougie sale ou endommagée Nettoyer ou remplacer la bougie
Carburateur sale Nettoyer le carburateur
Clean the fuel filter or Drain the injector or
Clean the carburetor
Empty the tank and use clean fuel
Check and replace fuel filter
Clean or change the spark plug
Clean the carburettor
Nettoyer le filtre à air
Nettoyer le filtre carburant ou purger
l’injecteur ou nettoyer le carburateur
Vider le réservoir et utiliser carburant
fraîche
Contrôler et éventuellement remplacer le
filtre carburant
EN
FR
PROBLEMAS CAUSAS REMEDIOS
Puesta en marcha dificil o funcionamiento
irregular del motor
STÖRUNGEN URSACHE ABHILFE
Motor läuft nur schwer an bzw. läuft
unregelmäßig
Limpiar el filtro del aire
El motor no gira de forma normal
Depósito o impurezas en el
combustible
Bujía sucia o defectuosa Limpiar o sustituir la bujía
Carburador sucio Limpiar el carburador
Limpiar el filtro del carburante o purgar el
inyector o limpiar el carburador
Vaciar el depósito y emplear combustible
fresco
Controlar, y se fuera necesario, sustituir
el filtro combustible
Den Luftfilter reinigen
Der Motor läuft nicht gleichmäßig
Ablagerungen oder Verunreinigungen im Kraftstoff
Kerze schmutzig oder defekt Die Kerze reinigen oder auswechseln
Vergaser schmutzig Den Vergaser reinigen
Den Kraftstofffilter bzw. das Einspritzventil oder den Vergaser reinigen
Tank leeren und frisches Kraftstoff verwenden
Kraftstofffilter überprüfen und ggf. auswechseln
ES
DE
79
Page 82

Il motore si spegne d’improvviso
INCONVENIENTI CAUSE RIMEDI
IT
Il motore non parte
Azionando la leva di trasmissione la
macchina non si muove
Calo di rendimento del motore durante
il lavoro
Mancanza di carburante Fare il riempimento del serbatoio
Tappo serbatoio con foro sfiato otturato Pulire il foro di sfiato del tappo
Motore freddo Benzina, chiudere l’aria
Motore caldo Benzina, aprire l’aria
Motore freddo o caldo Diesel, azionare il decompressore
Leva sblocco freno di parcheggio in po-
sizione di folle
Velocità di avanzamento elevata Ridurre almeno di una marcia
Riportare la leva sblocco freno in posizione di marcia
Il motore si spegne d’improvviso
EN
Il motore non parte
Activating the transmission lever the
machine does not moves
Drop in engine performance at work Forward speed too high Reduce at least one gear
Le moteur s’éteint à l’improviste
FR
Le moteur ne part pas
En actionnant le levier de transmission,
la machine ne bouge pas
Baisse de rendement du moteur durant
le travail
PROBLEMS CAUSES SOLUTIONS
Lack of fuel flow Fill the tank
Breathing hole closed on tank cap
Cold engine Gasoline, choke the air
INCONVENIENTS CAUSES SOLUTIONS
Warm engine Gasoline, open the air
Cold or warm engine Diesel, actionning the decompressor
Parking unlock brake lever in neutral
position
Absence de carburant Faire le plein du réservoir
Bouchon réservoir avec trou d’évacua-
tion bouché
Moteur froid Essence, fermer l’air
Moteur chaud Essence, ouvrir l’air
Moteur froid ou chaud Diesel, actionner la décompression
Levier déblocage de stationnement en
position point mort
Vitesse d’avancement élevée par rap-
port à la récolte
Clean the breathing hole of the cap
Move the unlock brake lever in gear
position
Nettoyer le trou d’évacuation du bouchon
Reporter le levier déblocage frein en
position de marche
Diminuer au moins d’une vitesse
El motor se apaga de repente
PROBLEMAS CAUSAS REMEDIOS
ES
El motor no arranca
Accionando la palanca de transmisión
la máquina no se mueve
Bajada de rendimiento del motor durante el trabajo
Der Motor geht plötzlich aus
STÖRUNGEN URSACHE ABHILFE
DE
Der Motor läuft nicht an
Bei Aktivierung des Antriebshebel setzt
sich die Maschine nicht in Bewegung
Leistungsabfall des Motors während
des Mähvorgangs
Falta carburante Rellenar el depósito
Tapón depósito con orificio obstruido Limpiar el orificio de purga del tapón
Motor frío Gasolina, cerrar el aire
Motor caliente Gasolina, abrir el aire
Motor frío o caliente Diesel, accionar el descompresor
Palanca desbloqueo freno de estacio-
namiento en posición punto muerto
Velocidad de avance alta Reducir por lo menos una marcha
Kein Kraftstoff Den Behälter befüllen
Entlüftung im Kraftstoffdeckel verstopft Entlüftung im Deckel reinigen
Motor kalt Benzin, Luftschaltung schließen
Motor heiß Benzin, Luftschaltung öffnen
Motor kalt oder heiß Diesel, Dekompressor einschalten
Freischalthebel der Standbremse in
Neutralstellung
Hohe Vorwärtsfahrtgeschwindigkeit
Colocar la palanca de desbloqueo freno en posición de marcha
Freischalthebel in Betriebsstellung setzen
Mindestens einen Gang herunterschalten
80
Page 83

INCONVENIENTI CAUSE RIMEDI
La macchina tira a destra o a sinistra
Taglio irregolare in generale, con
qualsiasi attrezzatura da taglio per
erba
Vibrazioni durante il funzionamento
Pneumatici di diversa circonferenza o
sgonfi
Velocità di avanzamento elevata in
rapporto all’altezza di taglio e alle
condizioni del prato
Inefficienza delle lame Affilare o sostituire la lama o le sezioni lama
Lame rotte o piegate o usurate Sostituire le lame se danneggiate
Viti allentate in generale
Controllare la pressione dei pneumatici
Tagliare l’erba con il prato possibilmente
asciutto
Ridurre la velocità di avanzamento
Verificare e serrare le viti di fissaggio delle
lame e attacchi lame ecc.
IT
PROBLEMS CAUSES SOLUTIONS
The machine tends to go right or left
Uneven cut in general, with every
implement cutting grass
Vibration during the use
INCONVENIENTS CAUSES SOLUTIONS
La machine tire à droite ou à gauche
Coupe irrégulière en général, avec
quelques outil pour la coupe de l'herbe
Vibrations pendant le fonctionnement
Tire with different circumference or
deflated
Forward speed too high in relation to
the height of cut and the condition of
the lawn
Inefficiency of the blades
Broken blades or bent or worn out Replace the forks if damaged
Loosen screws in general
Pneus de circonférence différente ou
dégonflés
Vitesse d’avancement élevée par rapport à la hauteur de coupe et aux
conditions du pré
Inefficacité des lames
Lames cassées o pliées ou usées Remplacer les lames si endommagées
Vis desserreés en général
Check the tire pressure
Cut the grass when dry if possible
Reduce the forward speed
Sharpen or replace the blade or blade sections
Check and tighten the fixing screws of the
forks, chassis etc..
Contrôler la pression des pneus
Couper l’herbe avec le pré si possible sec
Diminuer la vitesse d’avancement
Affûter ou remplacer la lame ou les sections
de la lame
Vérifier et serrer les vis de fixation des lames et attaches lames etc.
EN
FR
INCONVENIENTS CAUSES SOLUTIONS
La máquina va hacia la derecha o la
izquierda
Coupe irrégulière en général, avec
quelques outil pour la coupe de l'herbe
Vibraciones durante el funcionamiento
STÖRUNGEN URSACHE ABHILFE
Das Gerät zieht nach links oder
rechts
Taglio irregolare in generale, con
qualsiasi attrezzatura da taglio per
erba
Vibrationen während des Betriebs
Neumáticos de circunferencia diferente o desinflados
Velocidad de avance alta en relación
con la altura del corte y cona las condicciónes de la pradera
Ineficiencia de las cuchillas
Cuchillas rotas o plegadas o desgastadas
Tornillos non apretados in general
Reifen haben unterschiedlichen Umfang bzw. sind nicht aufgepumpt
Höhe Fahrgeschwindigkeit im Verhältnis zur Grashöhe und zum Graszustand
Leistungsunfähigkeit der Messer
Messer beschädigt, verbogen oder
verschlissen
Fixierungen gelockert
Controlar la presión de los neumáticos
Cortar la hierba con la pradera posiblemente seca
Reducir la velocidad de avance
Afilar o sustituir las cuchillas o las secciones cuchillas
Sustituir las cuchillas dañadas
Comprobar y apretar los tornillos de sujéción cuchillas y ataques cuchillas etc.
Reifendruck prüfen
Nach Möglichkeit mähen, wenn das Gras
trocken ist
Geschwindigkeit reduzieren
Messer und Messerabschnitt schleifen oder
ersetzen
Beschädigte Messer auswechseln
Klemmschrauben der Messer und Messeranschlüsse überprüfen und anziehen usw.
ES
DE
81
Page 84

Rumore durante il funzionamento
INCONVENIENTI CAUSE RIMEDI
Lame o coltelli piegati a seguito di urti
con corpi estranei
Raddrizzare o sostituire lame o coltelli
danneggiati
A marcia inserita la trasmissione è
IT
mancante o non continua
Noise during the use
With gear engaged, the transmission is
EN
loosing or no continuing
PROBLEMS CAUSES SOLUTIONS
Bruit durant le fonctionnement
INCONVENIENTS CAUSES SOLUTIONS
Frizione PowerSafe® non funziona
Blades or knives bent as a result of
impacts with foreign objects
PowerSafe® clutch does not
functioning
Lames ou couteaux pliés à la suite de
chocs contre des corps étrangers
Regolare il gioco frizione o riparare /
sostituire la frizione
Straighten or replace damaged blades
or knives
Adjust the clutch play or repair / change
the clutch
Redresser ou remplacer lames ou
couteaux endommagés
Une fois la vitesse introduite, il n’y a
FR
pas de transmission ou elle n’est pas
continue
Ruido durante el funcionamiento
Con la marcha puesta, no hay
ES
transmisión o no es continua
PROBLEMAS CAUSAS REMEDIOS
Geräusch während des Betriebs
STÖRUNGEN URSACHE ABHILFE
Embrayage PowerSafe® ne fonctionne
pas
Cuchillas o cuchillos plegados tras un
golpe con cuerpos extraños
Embrague PowerSafe® no funciona
Messer oder Klingen nach Schlägen
gegen Fremdkörper verbogen
Régler le jeu embrayage ou réparer /
remplacer l’embrayage
Enderezar o sustituir las cuchillas o los
cuchillos dañados
Regular la holgura del embrague o
reparar / sustituir el embrague
Gerade biegen oder beschädigte Messer oder Klingen auswechseln
Bei eingelegtem Gang kein Antrieb
DE
bzw. ungleichförmig
PowerSafe® Kupplung funktioniert
nicht
82
Kupplungsspiel einstellen bzw.
Kupplung instand setzen / auswechseln
Page 85

A
A
F
16. COME REGISTRARE LAFRIZIONE PowerSafe®
La frizione PowerSafe® viene regolata in fase di montaggio e, salvo
smontaggi per riparazioni, di norma non richiede più alcuna registrazione. Tuttavia, nel caso fosse necessaria una nuova registrazione od
un controllo, procedere come segue:
1. verificare che il terminale ad occhiello più grande A (fig.16/70 - ter-
minale della leva frizione B fig.16/69) sia almeno 1 o 2 mm più lungo
del perno di aggancio dell'occhiello. Registrare la vite di registro C (fig.
16/71) per ottenere la misura voluta, quindi serrare la vite di registro;
2. agganciare l'occhiello grande A al perno (fig.16/72), calzare il seeger
di fermo D;
IT
B
fig.16/69
1 : 2 mm
fig.16/70
16. HOW TO ADJUST THE PowerSafe® CLUTCH
The PowerSafe® clutch is normally adjusted during assembly and
therefore requires no further adjustment, except in the event of repairs.
However, should a new adjustment or check be required, follow these
steps:
1. check that the largest eyelet terminal A (fig.16/70 - clutch lever ter-
minal B shown in fig.16/69) is at least 1 mm or 2 mm longer than the
eyelet's coupling pin. Adjust the adjusting screw C (fig.16/71) to obtain
the desired length, then tighten the adjusting screw;
2. hook the large eyelet A to the hinge (fig.16/72) and fit the snap ring
retainer D;
16. COMMENT REGLER L'EMBRAYAGE PowerSafe®
L’embrayage PowerSafe® est normalement réglé en phase de montage et, sauf démontage pour réparations, ne nécessite plus aucun réglage. Toutefois, si un nouveau réglage était nécessaire ou un contrôle, procéder comme suit:
1. vérifier que le terminal à œillet plus grand A (fig.16/70 - terminal du
levier de l’embrayage B fig.16/69) soit au moins 1 ou 2 mm plus long
que l’axe d’attache de l’œillet. Régler la vis de réglage C (fig.16/71)
pour obtenir la bonne dimension, donc serrer la vis de réglage;
2. attacher le grand œillet A à l’axe (fig.16/72), enfiler l’anneau seeger
d’arrêt D;
EN
FR
fig.16/71
D
fig.16/72
C
L
G
16. COMO REGISTRAR EL EMBRAGUE PowerSafe®
El embrague PowerSafe® normalmente se regula en la fase de montaje y, excepto en caso de desmontajes para reparaciones, no requiere
más registros. Sin embargo, en caso de que fuera necesario un nuevo
ajuste o un control, realizar lo siguiente:
1. comprobar que el terminal con ojal más grande (A fig.16/70 - termi-
nal de la palanca embrague B fig.16/69) sea por lo menos 1 o 2 mm
más largo que el perno de enganche del ojal. Ajustar el tornillo del
registro C (fig.16/71) para obtener la medida deseada; a continuación,
apretar el tornillo de ajuste;
2. enganchar el ojal grande A al perno (fig.16/72), montar el anillo de
retención D;
16. PowerSafe® KUPPLUNG EINSTELLEN
Die PowerSafe® Kupplung wird normalerweise bei der Montage eingestellt und sofern keine Demontagen zwecks Instandsetzung erfolgten, bedarf diese keiner weiteren Nachstellungen. Sollte eine Nachstellung oder Prüfung dennoch erforderlich sein, ist wie folgt beschrieben
vorzugehen:
1. Sicherstellen, dass der größere Seilschuh mit Öse (A Abb.16/70 -
Schuh des Kupplungsschalthebels B Abb. 16/69) um mindestens 1
oder 2 mm länger ist, als der Klemmbolzen der Öse. Die Stellschraube
C (Abb.16/71) auf das gewünschte Maß justieren. Die Stellschraube
daraufhin anziehen;
2. Die große Öse A am Bolzen (Abb.16/72) fixieren und den SeegerRing D aufstecken;
83
ES
DE
Page 86

3. verificare che il terminale ad occhiello più piccolo E (fig.16/73)
terminale leva stop rossa F (fig.16/69) sia almeno 1 o 2 mm più lungo
del perno di aggancio all'occhiello. Registrare la vite di registro G (fig.
16/71) per ottenere la misura voluta, quindi serrare la vite di registro;
4. agganciare l'occhiello piccolo E (fig.16/74), calzare il seeger di fermo
H.
A questo punto la registrazione è fatta in modo corretto.
ATTENZIONE: non tentare di smontare o serrare o smuovere le viti L
IT
(fig.16/72 e 16/74) senza la conoscenza del dispositivo PowerSafe®.
Per eventuali interventi occorre appoggiarsi ad un Centro di Assistenza
Autorizzato.
3. check that the smallest eyelet terminal E (fig. 16/73) terminal of red
stop lever F (fig. 16/69) is at least 1 mm or 2 mm longer than the
eyelet's coupling pin. Adjust the adjusting screw G (fig. 16/71) to obtain
the desired size, then tighten the adjusting screw;
4. hook the small eyelet E to the hinge (fig. 16/74) and fit the snap ring
retainer H.
EN
At this point the adjustment has been carried out correctly.
CAUTION: Do not attempt to remove, tighten or loosen the L screws
(fig. 16/72 and 16/74) without knowledge of the PowerSafe® device. In
the event that intervention is required, please contact an Authorized
Service Centre.
3. vérifier que le terminal à œillet plus petit E (fig.16/73) terminal du
levier stop rouge F (fig.16/69) soit au moins 1 à 2 mm plus long que
l’axe d’attache de l’œillet. Régler la vis de réglage G (fig.16/71) pour
obtenir la bonne dimension, donc serrer la vis de réglage;
4. attacher le petit œillet E à l’axe (fig.16/74), enfiler l’anneau seeger
d’arrêt H.
FR
A ce point, le réglage est effectué correctement.
ATTENTION: ne pas essayer de démonter, serrer ou bouger les vis L
(fig.16/72 et 16/74) sans avoir les connaissances nécessaires du dispositif PowerSafe®. Pour d’éventuelles interventions, il faut se adresser à un Centre d’Assistance Agrée.
1 : 2
E
fig.16/73
3. comprobar que el terminal con ojal más pequeño E (fig.16/73)
terminal de la palanca stop roja F (fig.16/69) sea por lo menos 1 o 2
mm más largo que el perno de enganche del ojal. Ajustar el tornillo de
registro G (fig.16/71) para obtener la medida deseada; a continuación,
apretar el tornillo de ajuste.
4. enganchar el ojal pequeño E al perno (fig.16/74), montar el anillo de
retención H.
De este modo el ajuste se ha realizado correctamente.
ES
ATENCIÓN: no se debe intentar desmontar ni apretar ni quitar los
tornillos L (fig.16/72 y 16/74) si no se conoce el dispositivo Power
Safe®. En caso de necesitar intervenir, hay dirigirse a un Centro de
Asistencia Autorizado.
3. Sicherstellen, dass der kleinere Seilschuh mit Öse E (Abb.16/73)
Schuh des roten Stopp-Schalthebels F (Abb.16/69) um mindestens 1
oder 2 mm länger ist, als der Klemmbolzen der Öse. Die Stellschraube
G (Abb.16/71) auf das gewünschte Maß justieren. Die Stellschraube
daraufhin anziehen.
4. Die kleine Öse E am Bolzen (Abb.16/74) fixieren und den SeegerRing H aufstecken.
Nun wurde eine ordnungsgemäße Einstellung vorgenommen.
DE
ACHTUNG: Nicht versuchen, die Schrauben L (Abb.16/72 und 16/74)
ohne bessere Kenntnis der PowerSafe® -Einrichtung auszubauen, Anzuziehen oder zu lockern. Bei ggf. erforderlichen Maßnahmen wenden
Sie sich bitte an einen technischen Kundendienst.
H
L
E
fig. 16/74
84
Page 87

17. TUTELA DELL'ACQUIRENTE
17.1 Dichiarazioni di consegna / garanzia e CE
Per tutelare l’Acquirente sulla qualità del prodotto acquistato, all’atto della vendita vengono rilasciati una Dichiarazione di Conformità CE ed una Dichiarazione di Consegna
con Certificato di Garanzia (rilasciata dal rivenditore); questi certificati sono da conservare insieme alla fattura di
acquisto o scontrino fiscale almeno nel periodo di validità
della garanzia.
La Dichiarazione di Consegna e Garanzia deve essere firmata dall’Acquirente dopo essere stato informato del funzionamento della macchina da parte del Rivenditore.
Il Certificato è presente sul sito del Costruttore, in area riservata al Rivenditore, che provvederà a compilare e fornire una copia al cliente, tenendo per sé la copia firmata.
La Dichiarazione di Conformità CE garantisce l’utente finale che la macchina è stata progettata e costruita al fine di
raggiungere i livelli di sicurezza previsti dalla Direttiva Macchine Europea e sue modificazioni.
17. CONSUMER PROTECTION
17.1 Delivery declarations / warranty and EC
To protect the Consumer in terms of the quality of the product purchased at the time of the sale, an EU Declaration
of Conformity and Declaration of Delivery are issued with a
Warranty Certificate (issued by the reseller). These certificates should be kept, as well as the invoice or receipt, for
as long as the warranty is valid at least.
The Declaration of Delivery and Warranty must be signed
by the Consumer after having the Reseller has informed
his/her about the functioning of the machine.
The Certificate is present on the premises of the Manufacturer, in an area reserved to the Reseller, which will fill
in and provide a copy to the customer, keeping the signed
copy for itself.
The EU Declaration of Conformity guarantees end users
that the machine has been designed and manufactured in
order to achieve the levels of safety set out by the European Machine Directive and its modifications.
IT
EN
17. PROTECTION DE L’ACHETEUR
17.1 Déclarations de livraison / garantie et CE
Pour protéger l’Acheteur sur la qualité du produit acheté au
moment de la vente, différents documents sont fournis tels
qu’une Déclaration de Conformité CE, un Déclaration de
Livraison avec Certificat de Garantie (remise par le revendeur), ces certificats doivent être conservés avec la facture
d’achat ou le ticket de caisse au moins durant la durée de
validité de la garantie.
La déclaration de Livraison et Garantie doit être signée par
l’Acheteur après avoir été informé du fonctionnement de la
machine de la part du Revendeur.
Le Certificat se trouve sur le site du Constructeur, dans
l’aire réservée au Revendeur, qui s’occupera de remplir et
procurer une copie au client, en gardant pour lui la copie
signée.
La Déclaration de Conformité CE garantit à l’Utilisateur final que la machine a été projeté et construite pour atteindre les niveaux de sécurité prévus par la Directive Machines Européenne et ses modifications.
17. TUTELA DEL COMPRADOR
17.1 Declaraciones de entrega / garantía y CE
Como garantía de calidad del producto adquirido, en el
momento de la venta se le entregan al comprador una Declaración de Conformidad CE, una Declaración de Entrega
con Certificado de Garantía (expedida por el vendedor),
estos certificados deben conservarse con la factura de
compra o el ticket durante, mínimo, todo el periodo de validez de la garantía.
La Declaración de Entrega y Garantía debe firmarla el
comprador después de que el vendedor le haya informado
del funcionamiento de la máquina.
El Certificado se encuentra en la página web del fabricante, en área reservada para el vendedor, que cumplimentará y entregará una copia al cliente, conservando una
copia para él.
La Declaración de Conformidad CE le garantiza al usuario
final que la máquina se ha proyectado y fabricado para
alcanzar los niveles de seguridad que prevé la Directiva
Máquinas Europea y sus modificaciones.
FR
ES
17. KÄUFERSCHUTZ
17.1 Lieferungs- / Garantieerklärung und CE-Deklaration
Zum Schutz des Käufers erhält dieser beim Kauf über die
Produktqualität CE-Konformitätserklärung und Lieferbescheinigung mit Garantieschein (vom Vertragshändler ausgestellt). Diese Bescheinigungen müssen mit der Rechnung bzw. mit dem Kassenbon zumindest während der
Garantielaufzeit aufbewahrt werden.
Die Lieferbescheinigung mit Garantieschein muss vom
Käufer unterzeichnet werden, nachdem dieser vom Vertragshändler über den Betrieb des Gerätes informiert wurde.
Die Bescheinigung ist auf der Webseite des Herstellers im
Login-Bereich der Vertragspartner aufrufbar; der Vertragshändler füllt das Formular aus, händigt dem Kunden eine
Kopie aus, und legt die vom Kunden unterzeichnete Bescheinigung zu seinen Akten.
Die CE-Konformitätserklärung bestätigt dem Kunden, dass
das Gerät mit dem Ziel entwickelt und gebaut wurde, das
von der europäischen Maschinenrichtlinie und späteren
Änderungen vorgesehene Maß an Sicherheit zu erfüllen.
85
DE
Page 88

17.2 Vibrazioni e rumore
MOTORI (A) MOTORI (B) MOTORI (C)
Valori (D)
(E) Modelli
710 / 730 / 740
728 / 738 / 739
IT
749 / 750
17.2 Vibrations and noise
A = MOTORS
B = GASOLINE
C = DIESEL
EN
D = VALUES
E = MODELS
LAeq
(1)
85,9 101,7 3,13 89,6 105,2 2,06
85,9 101,7 3,13 89,6 105,2 2,06
85,9 101,7 5,79 99,1 108,0 2,06
LwA
m/sec²
(2)
(3)
LAeq
(4)
LwA
(5)
m/sec²
(6)
(1) LAeq - PRESSIONE ACUSTICA: valori
espressi in dB(A) equivalenti - (2) LwA - POTENZA ACUSTICA: valori espressi in dB(A) (3) m/sec² - VIBRAZIONE: valore quadratico
medio ponderato alle stegole secondo UNI EN
709.
ATTENZIONE, PERICOLO: per l’utilizzo
di macchine che superano gli 80 dB(A) di
LAeq, l’operatore deve indossare adeguati
mezzi di protezione acustici (cuffie).
(1) LAeq - ACUSTIC PRESSURE: values
expressed in equivalent dB(A) - (2) LwA ACOUSTIC POWER: values expressed in
dB(A) - (3) m/sec² - VIBRATION: Average
square value calculated at handlebars according to UNI EN 709.
ATTENTION, DANGER: When using
machines emetting a LAeq higher than 80
dB(A), the user must wear fitted acoustic protection means (guard).
17.2 Vibrations et bruit
A = MOTEUR
B = ESSENCE
C = DIESEL
FR
D = MESURES
E = MODELES
17.2 Vibracciónes y ruido
A = MOTORES
B = GASOLINA
C = DIESEL
ES
D = VALORES
E = MODELES
(1) LAeq - PRESSION ACOUSTIQUE: valeurs
exprimées en dB (A) équivalent (2) LwA PUISSANCE ACOUSTIQUE: valeurs exprimées en dB(A) - (3) m/sec² - VIBRATION: valeur quadratique moyenne pondérée aux poignées suivant UNI EN 709.
ATTENTION, DANGER: Lors de l’utilisa-
tion de machines supérieures à 80 dB(A) de
LAeq l’opérateur doit porter un casque de protection acoustique.
(1) LAeq PRESION ACÚSTICA: valores
exprimidos en dB(A) equivalentes - (2) LwA
POTENCIA ACÚSTICA: valores exprimidos en
dB(A) - (3) m/sec² VIBRACIÓN: valor cuadrático medio ponderado a las estevas según UNI
EN 709.
ATENCIÓN, PELIGRO! Para utilizar má-
quinas que sobrepasan los 80 dB(A) de LAeq,
el utilizador debe llevar medios de protección
acústica adecuados (cofias).
17.2 Schwingung und Geräusch
A = MOTOREN
B = BENZIN
C = DIESEL
DE
D = WERTE
E = MODELLEN
86
(1) LAeq - ACUSTISCHES DRUCK: Werte
ausgedrückt in dB(A) Äquivalenten - (2) LwA
ACUSTISCHE LEISTUNG: Werte ausgedrückt
in dB(A) - (3) m/sec² SCHWINGUNG: Quadratwert berechnet auf die Sterzen nach UNI EN
709.
ACHTUNG, GEFAHR! Um Maschine, die
ein Wert höher als 80 dB(A) von LAeq haben,
zu benutzen, muß den Verbraucher geeignete
Mittel für akustische Schutz trägen (Kopfhörer).
Page 89

18. ASSISTENZA
Il Servizio Assistenza del Costruttore è sempre a disposizione per qualsiasi necessità di uso e / o riparazione della
macchina. Questo manuale fornisce le indicazioni per l’uso
e la manutenzione ordinaria.
Per una corretta gestione della macchina attenersi al Programma di manutenzione del Costruttore che a scadenze
programmate vi invita obbligatoriamente (almeno nel periodo di garanzia, pena il decadimento) a far controllare la
macchina ed a fare la manutenzione straordinaria presso
un Centro Assistenza autorizzato.
18. AFTER SALE SERVICE
The After Sales Service of the Manufacturer is always
available for any needs pertaining to the use and / or repair
of the machine. This manual provides instructions for the
routine maintenance and use.
For the correct management of the machine, comply with
the Manufacturer's Maintenance Plan, which, at planned
intervals, obligatorily requests (during the warranty period
at least, upon penalty of its expiring) that the machine is
checked and that extraordinary maintenance is carried out
by an authorized Service Centre.
Prima di riconoscere garanzia il Costruttore si riserva di
verificare se la manutenzione è stata eseguita come da
programma di manutenzione.
Before the warranty is recognized the Manufacturer reserves to verify if the maintenance is carried out as by maintenance programme planned.
IT
EN
18. ASSISTANCE
Le Service Assistance du Constructeur est toujours à disposition pour toute nécessité d’utilisation et / ou de réparation de la machine. Ce manuel fournit les indications
pour l’utilisation et l’entretien ordinaire.
Pour une bonne gestion de la machine se conformer au
Programme d’entretien du Constructeur qui à l’échéance
programmée vous invite obligatoirement (au moins durant
la durée de garantie sous peine d’annulation) à faire contrôler la machine et à faire l’entretien extraordinaire auprès
d’un Centre d’Assistance autorisé.
18. ASISTENCIA
El Servicio Asistencia del Fabricante está siempre a disposición para cualquier necesidad de uso y / o reparación de
la máquina. Este manual proporciona indicaciones para el
uso y mantenimiento ordinario.
Para una correcta gestión de la máquina atenerse al
Programa de mantenimiento del Fabricante que, con unos
plazos programados, indica que (por lo menos durante el
periodo de garantía, so pena de su anulación) es obligatorio controlar la máquina y hacer el mantenimiento extraordinario en un Centro de Asistencia autorizado.
Avant de reconnaître la garantie, le fabricant se réserve le
droit de vérifier si l'entretien a été effectué selon le programme d’entretien.
Antes de reconocer la garantía, el constructor se reserva
el derecho de controlar que el mantenimiento se haya realizado tal y como indica el programa de mantenimiento.
FR
ES
18. KUNDENDIENST
Der Kundendienst des Herstellers steht Ihnen bei Fragen
bezüglich Gebrauch und/oder Instandsetzung des Gerätes
stets gerne zur Verfügung. Die vorliegende Bedienungsanleitung gibt Ihnen Hinweise zum Gebrauch und zur regelmäßigen Wartung des Pflegetraktors.
Zur Gewährleistung einer ordnungsgemäßen Instandhaltung des Gerätes ist das vom Hersteller vorgegebene Wartungsprogramm einzuhalten; dieses verpflichtet den Käufer
(zumindest innerhalb der Garantielaufzeit, bei sonstigem
Garantieverlust) dazu, das Gerät in der Werkstatt eines
Vertragspartners überholen und außergewöhnliche Wartungsarbeiten ausschließlich dort durchführen zu lassen.
Vor Anerkennung einer Garantieleistung behält sich der
Hersteller das Recht vor, zu prüfen, ob die Wartungsarbeiten entsprechend Wartungsprogramm durchgeführt wurden.
87
DE
Page 90

19. GARANZIA 20. MATERIALE DI CONSUMO
La garanzia è in accordo alle normative comunitarie vigenti,
fornita nei modi e nei limiti indicati dal Costruttore. Per i paesi
extra europei vale il periodo di garanzia dei singoli paesi sempre con modalità e limiti indicati dal Costruttore.
IMPORTANTE! La garanzia non è riconosciuta per: trascuratezza della macchina, mancata manutenzione, uso di ricambi
IT
non originali, uso della macchina per qualsiasi scopo o lavoro
diversi da quanto riportato su questo manuale, manomissione
di qualsiasi componente della macchina, motore, impianto
elettrico e idraulico, e se riparata da personale non addestrato.
19. WARRANTY 20. CONSUMABLES
The warranty is in accordance with the EU legislation in force,
provided in the ways and within the limitations indicated by the
Manufacturer. For non-EU countries, the warranty period of
the individual countries applies, also according to the means
and limitations indicated by the Manufacturer.
IMPORTANT! The warranty does not apply to:
of the machine, lack of maintenance, repaired with use of no
EN
original parts, use of the machine for any purpose or work not
included in this manual, tampering of any part of the machine,
engine, electric and hydraulic system, and if repaired by untrained personnel.
carelessness
Il materiale di consumo è materiale considerato di normale
usura per l’uso specifico della macchina, normalmente questo
materiale non è soggetto a sostituzione in garanzia salvo in
caso di accertati difetti di produzione chiaramente identificabili.
I materiali di consumo sono: lame, cinghie, filtri aria motore,
filtri olio motore e trasmissione idraulica, cavi, fusibili impianto
elettrico, pneumatici, batterie, oli vari, forche, tiranti, slitte, lampadine, oli lubrificanti, carburante.
Consumables are the material regarded as experiencing normal wear for the specific use of the machine. Usually this material is not subject to replacement during the warranty, apart
from in the case of certified factory faults that are clearly identifiable.
The consumables are: blades, belts, engine air filters, engine
oil filters and hydraulic transmission, cables, fuses, wiring, tires, batteries, several oils, forks, rods, sleds, light bulbs, lubricants, fuel.
19. GARANTIE 20. MATERIEL DE CONSOMMATION
La garantie est en accord avec les normes communautaires
en vigueur, fournie de la manière et dans les limites indiquées
par le Constructeur. Pour les pays en dehors de l'Europe, la
période de garantie de chaque pays est valable toujours selon
les modalités et les limites spécifiées par le Constructeur.
IMPORTANT! La garantie ne s’applique pas en cas de
gence de la machine, absence d’entretien, utilisation de piè-
FR
ces de rechange non originales, utilisation de la machine dans
un but ou pour un travail différent que celui prévu par ce manuel, falsification de tout élément de la machine, moteur, installation électrique et hydraulique et si réparée par du personnel non qualifié.
19. GARANTÍA 20. MATERIAL DE CONSUMO
La garantía cumple las normativas comunitarias vigentes, dada en los modos y en los límites indicados por el Fabricante.
Para los países extraeuropeos es válido el periodo de garantía de cada país, siempre con las modalidades y límites indicados por el Fabricante.
¡IMPORTANTE! La garantía quedará anulada en caso de:
cuidar adecuadamente la máquina, no realizar el manteni-
ES
miento indicado, usar recambios que no sean originales, usar
la máquina para cualquier fin o trabajo diferente a lo establecido en este manual, manipular cualquier componente de la
máquina, motor, instalación eléctrica e hidráulica y en caso de
que personal sin formación reparara la máquina.
: négli-
no
Le matériel de consommation est un matériel considéré d’usure normale pour l’utilisation spécifique de la machine, normalement ce matériel n’est pas sujet à des remplacement sous
garantie sauf dans des cas de défauts établis de production
clairement identifiables.
Les matériaux de consommation sont : lames, courroies, filtres
à air moteur, filtres à huiles moteur et transmission hydraulique, câbles, fusibles installation électrique, pneus, batteries,
huiles diverses, fourches, tirants, patins, ampoules, huiles lubrifiantes, carburant.
El material de consumo es un material que se considera de
desgaste normal para el uso específico de la máquina, normalmente este material no está sujeto a cambios en garantía
excepto en caso de defectos de fábrica comprobados y claramente identificables.
Los materiales de consumo son: cuchillas, correas, filtro aire
motor, filtros aceite motor y transmisión hidráulica, cables, fusibles dispositivo eléctrico, neumáticos, baterías, aceites varios, horquillas, tirantes, guías de deslizamiento, bombillas,
aceites lubricantes y carburante.
19. GARANTIA 20. VERSCHLEISSMATERIAL
Die Garantie entspricht den geltenden Vorgaben der Europäische Gemeinschaft und wird in dem vom Hersteller vorgegebenen Rahmen geleistet. Bei außereuropäischen Staaten
gilt die jeweils bestehende Garantielaufzeit des entsprechenden Landes ebenfalls in dem vom Hersteller vorgegebenen
Rahmen.
WICHTIG! Es wird keine Garantieleistung entgegengebracht
DE
bei: Vernachlässigung des Gerätes, fehlender Wartung, Verwendung von Nichtoriginalersatzteilen, Verwendung des Gerätes für Zwecke oder Arbeiten die nicht den Angaben in der Betriebsanleitung entsprechen, unbefugten Eingriffe an beliebigen Gerätebauteilen bzw. Instandsetzung durch nicht fachlich
geschultes Personal.
Als Verschleißmaterial gilt solches Material, das aufgrund des
spezifischen Gerätegebrauchs einem normalen Verschleiß unterliegt. Normalerweise wird dieses Material nicht auf Garantie ersetzt, außer in Fällen, wo es sich um eindeutig erkennbare Fabrikationsfehler handelt.
Als Verschleißmaterial gelten: Messer, Riemen, Motor-Luftfilter, Ölfilter Motor und hydraulisches Getriebe, Kabel, Sicherungen der elektrischen Anlage, Reifen, Batterien, verschiedene Öle, Gabeln, Zugseile, Gleitteller, Lämpchen, Schmieröle, Kraftstoff.
88
Page 91

21. RICAMBI, COME ORDINARE
Si raccomanda di impiegare esclusivamente ricambi originali
che offrono sempre le massime caratteristiche di sicurezza e
intercambiabilità. Ogni richiesta deve essere corredata del numero di matricola della macchina e del numero di codice del
pezzo da sostituire.
Per i ricambi del motore, attenersi a quanto indicato nel libretto
specifico.
Si consiglia di indicare sempre il numero di matricola della
macchina e il codice del pezzo da sostituire e di rivolgersi ai
Centri vendita o assistenza autorizzati.
Il Costruttore è a disposizione per qualsiasi chiarimento si renda necessario.
Tutti gli ordini dei particolari di ricambio devono essere inoltrati
tramite Rivenditore, il Costruttore non può spedire nulla al dettaglio.
IT
21. SPARE PARTS, HOW TO ORDER
It is recommended that only original spare parts are used,
which always offer the maximum safety properties and are interchangeable. Every request must be provided with the machine serial number and the code number of the part to be replaced.
For engine spare part, comply with what is indicated in the
specific manual.
It is recommended that the machine serial number and the
code number of the part to be replaced are always indicated
and that you contact an authorized Help or Sales Centre.
21. PIECES DE RECHANGE, COMMENT COMMANDER
On recommande d’utiliser exclusivement des pièces de rechange originales qui offrent toujours les caractéristiques maximales de sécurité et d’interchangeabilité. Chaque demande
doit être accompagnée du numéro d’immatriculation de la
machine et du numéro de code de la pièce à remplacer.
Pour les pièces de rechange du moteur, suivre ce qui est
indiqué dans le livret spécifique.
On conseille de toujours indiquer le numéro de série et le code
de la pièce à remplacer et de s’adresser aux Centres de vente
ou assistance autorisés.
The Manufacturer is available for any further explanations that
may be needed.
All spare part orders must be sent via the Reseller. The Manufacturer cannot send anything by retail.
Le Constructeur est à disposition pour tout éclaircissement
nécessaire. Toutes les commandes des pièces de rechange
particulières doivent être envoyées via le Revendeur, le Constructeur ne peut rien envoyer en tant que vente au détail.
EN
FR
21. RECAMBIOS, CÓMO PEDIR
Se recomienda emplear exclusivamente recambios originales
que ofrezcan siempre las máximas características de seguridad y intercambiabilidad. Toda solicitud debe ir acompañada
del número de matrícula de máquina y del número de código
de la pieza que haya que sustituir.
Para los repuestos del motor, atenerse a lo indicado en el manual específico.
Se aconseja indicar siempre el número de matrícula y el código de la pieza que haya que sustituir y también les aconsejamos que se dirijan a los centros de venta o asistencia autorizados.
El fabricante está a disposición para cualquier aclaración que
sea necesaria.
Todos los pedidos de las piezas de recambio deben pasar a
través del vendedor, el fabricante no puede suministrar nada
al por menor.
21. ERSATZTEILE, BESTELLUNG
Es sollten ausschließlich Originalersatzteile verwendet werden, da diese stets höchste Sicherheitsmerkmale und Austauschbarkeit bieten.
Bei einer Anfrage sind die Gerätenummer und die Bestellnummer des auszuwechselnden Teils anzugeben.
Wir empfehlen stets die Gerätenummer und die Bestellnummer des auszuwechselnden Teils anzugeben und sich immer
an einen Vertragspartner zu wenden.
Der Hersteller steht bei Rückfragen gerne zur Verfügung.
Alle Ersatzteilaufträge müssen dem Hersteller durch einen
Vertragspartner zugestellt werden, der Hersteller kann keine
Teile direkt an den Endkunden versenden.
ES
DE
89
Page 92

Page 93

BCS S.p.A.
Viale Mazzini, 161 20081 Abbiategrasso (Milano) Italy
Tel.+39 02 94821 Fax +39 02 94960800 info@bcs-ferrari.it www.bcsagri.it
 Loading...