

Page 1
EP11 Single Infared Emitter Non-Visible
BASS
TREBLE
BALANCE
VOLUME
TAPE 1
MONITOR
TAPE 2
VCR
LD
AUX
CD
PHONES
EXTRA
SPEAKERS
AM
FM
MONO
SEARCH
TUNE
PRESET
FM
STEREO
CENTER
TUNE
MODE STORE
TUNE
VIDEO
TO REPEATER
RECEIVER
EP12 Dual Infared Emitter Non-Visible
PRODUCT INFORMATION AND INSTALLATION GUIDE
Description
1. Elegant, Compact Oval Shaped Transparent Housing
2. Infrared Circuitry Is Built Into The Transparent Housing
3. 10 Foot/3.0M Cable Terminated With A 3.5mm Plug
4. Integral Strain Relief Bushing Between Cable Diameter
5. Pressure Sensitive Adhesive Tape (PSA) For Easy Attachment On Any Hard, Clean and Dry
Surface
Diagram
INFRARED DIODE
INFRARED
TRANSPARENT
HOUSING
SELF-ADHESIVE
3.5MM MONO PLUG
-
+
EP11 EP12
IR Emitter Attached To The Shelf
SHELF
FM
CENTER
STEREO
TUNE
BALANCE
TREBLE
PHONES
EXTRA
SPEAKERS
BASS
TAPE 1
MONITOR
VIDEO
VCR
TAPE 2
SHELF
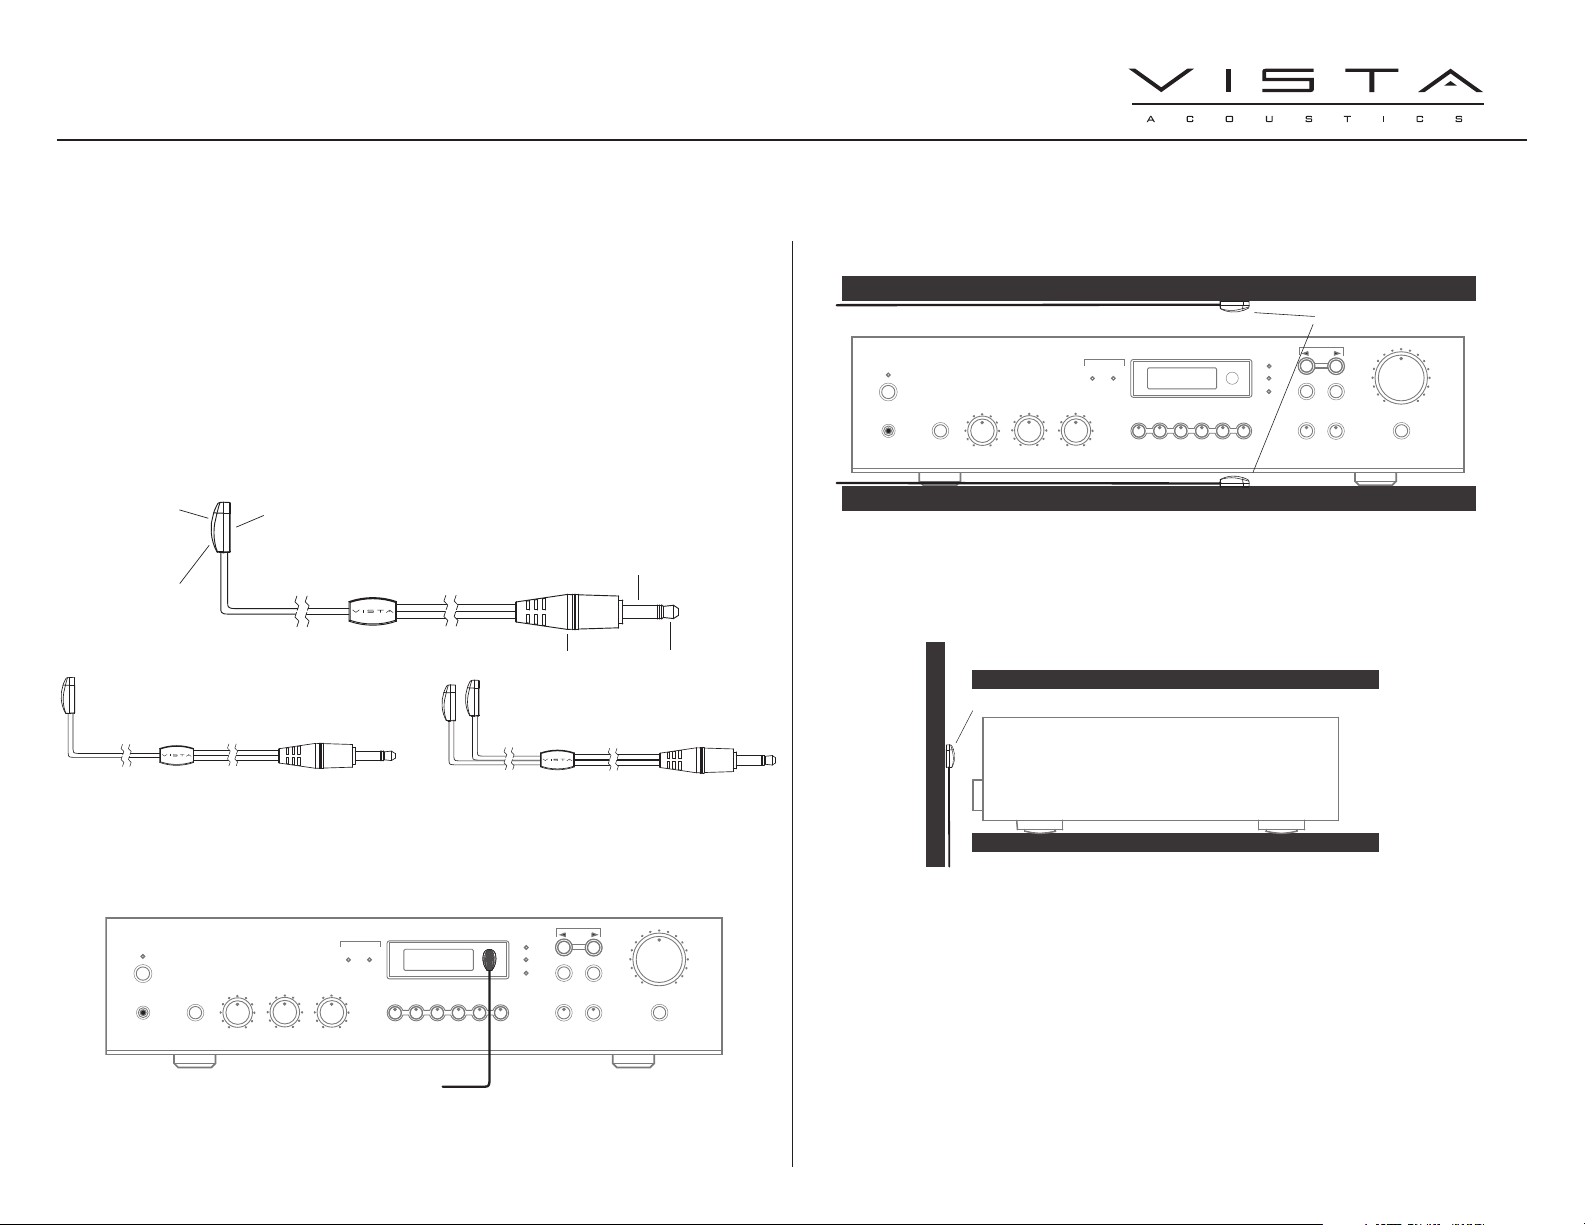
1. Attach IR emitter above or just below the IR window
2. Less reliable activation
Rack/Cabinet Door Installation
SHELF
EP11 OR EP12
RECEIVER SIDE VIEW
EP11 OR EP12
TUNE
SEARCH
TUNE
MODE STORE
PRESET
AUX
CD
LD
AM
VOLUME
FM
MONO
Installation
Standard Installation
1. IR emitter (flat side) attached directly to IR sensor window
2. More reliable activation
SHELF
1. IR emitter is attached to rack door, round shape side facing the IR window
2. Less reliable activation
Note:
1. Be sure the mounting surface is clean and dry to ensure proper attachment.
2. Do not connect the IR emitter directly to a power supply or battery. You must use a Vista
connecting block.
Trends Electronics International Inc. - 100 – 980 West 1st Street. North Vancouver, B.C. V7P 3N4
Phone: 1 (877) 946-9255 Fax: 1 (800) 618-7363 Email: orders@trendsinc.com
In North America contact:
 Loading...