Bazooka EL260, EI460, EL2100, EL2150 Installation Manual


Dear customer,
Congratulations on your purchase of a Bazooka EL high-performance amplifier. At Bazooka, we are fanatics about accurate music reproduction. Your selection of our products for your sound system indicates that quality sound is also important to you too. At SAS, we take great pride in manufacturing revolutionary audio products, and through the years of engineering expertise, hand craftsmanship and critical testing procedures, we have created the EL high-performance series of amplifiers. We hope that you will take as much pride in owning and using one of these highquality audio products as we do designing and manufacturing them.
When properly installed and operated, your Bazooka EL amplifier will give you years of clean uninterrupted sound reproduction. Therefore, we urge you to take a few minutes to carefully read through this manual. It will explain all of the features of your EL amplifier and help insure trouble free installation.
Sound can be deceiving. Over time your hearing comfort level adapts to higher volumes of sound. What may have sounded normal can actually be too loud and harmful to your hearing. Guard against this by setting your equipment at a safe level before your hearing adapts.
To establish a “safe level”,
 Start with your volume control at a low setting.
 Slowly increase the volume control until you can hear comfortably, clearly and without distortion.
 Once you have established a comfortable “sound level”, make a note of this position and do not go above this setting
Taking a minute to do this will help prevent your hearing from being damaged and allow you to enjoy listening to music throughout your lifetime.
1

Be sure to fuse the power wire within 12” of the car's battery. This will protect the car's battery in case of a short circuit between the power amplifier and battery. THIS IS A MUST, the amplifier's built-in fuse will only protect the power amplifier not the car's battery!
! " ## "
To ensure maximum power transfer and secure safe connections, it is recommended to use high grade barrier spades (for connection at amplifier) and terminal rings (for connection at battery).
$# # # #! # % ".
Exposed wires have a chance of being cut or damaged. It is best to run all wires through the vehicle under the carpet and/or side panels. This lends to a cleaner installation and less risk of damage.
" # # # #
Remember there are many electrical wires, gas lines, vacuum lines, brake lines as well as a gas tank in the automobile. Make sure you know where they are when mounting the amplifier to avoid puncturing lines, shorting wires or drilling holes in the gas tank.
# # " "
To avoid possibility of induced noise from the car's electrical system (i.e. popping noises or engine noise), run wires away from the car's electrical wiring.
& ' #! #! #
In order to reduce the chance of ground loops (i.e. engine noise), make the grounding wire as short as possible to reduce the wire's resistance. Also, when using multiple components, make sure all units are grounded at the same point.
% ! ! # ## # .
To avoid the possibility of power, signal or speaker shorts, be careful not to allow the amplifiers wires to come in contact with sharp edges. Use a grommet to protect the wire when running through the fire wall .
2

$(
$" #
This circuit protects the output of the amplifier against DC voltage. If for some reason DC voltage is detected at the output stage, the amplifier will shut down protecting the speakers from direct current.
" " #
The circuit protects the amplifier from damage due to a short found in the speakers or wiring. If one of the speakers or its wiring comes in contact with ground, the amplifier will shut down. To resume normal operation, correct the problem and turn the head unit off, then back on. The amplifier will reset and play again.
" #
To protect the amplifier circuitry against damage caused by prolonged exposure to high temperatures, a thermal protection circuit is activated if the amplifier reaches excessively high operating temperature. Once the thermal circuit is activated, the amplifier will shut down to cool off. The amplifier will automatically turn back on once it cools down to a safe operating temperature.
#! "
The diagnostic L.E.D. Illuminates green when the amplifier is on and receiving power.
& !
If so desired, the amplifier may be run in stereo and mono at the same time. For example, this feature would allow you to run a pair of mid and tweeters in stereo and a sub-woofer mono.
( ) # %
The “EL”amplifiers include a built-in variable **high and low pass crossovers. The crossover features a variable frequency selection (60Hz ~ 400Hz) for precise high or low pass filtering. **Except EL1500 which has a 40 ~ 120Hz low pass filter.
*
The “EL”amplifiers include a auxiliary output for a daisy chain connection of an EL Bazooka Amplified Bass Tube.
#! '$# ( "'
Heavy gauge bare wire distribution blocks are provided for maximum power and signal transfer with minimal resistance.
3

( (
For added low frequency performance the amplifiers are equipped with a variable 0~12 dB bass boost @ 45Hz.
+ # , +-.// # 0
One set of full range line outputs have been provided for convenient connection to additional amplifiers in the system.
#
This protects the amplifier against short circuits and excessive current.
#) #
Automatically turns amplifier on when connected to the head unit's remote output. The amplifier will turn on and off with the head unit to save current consumption. This control also operates the reset circuit for the amplifier's protection. It must be connected with the head unit in order to reset protection circuits.
!1 # # %
Allows you to fine-tune the level matching between your source and the power amplifier.
2 + % # , +34/5 64/5 +3-//$+3-./0
Allowing for integration with “Factory Sound Systems”.
3 & !
Stability to 2 ohm in stereo mode, 4 ohms bridged. The EL 1500 is stable to 2 ohms mono.
4

&7 +
Before you start the installation, it will be necessary to find a mounting location for the amplifier. Find a location in which the amplifier will receive adequate ventilation in order to dissipate the heat it develops during operation. Two popular mounting locations are in the trunk or under the seat.
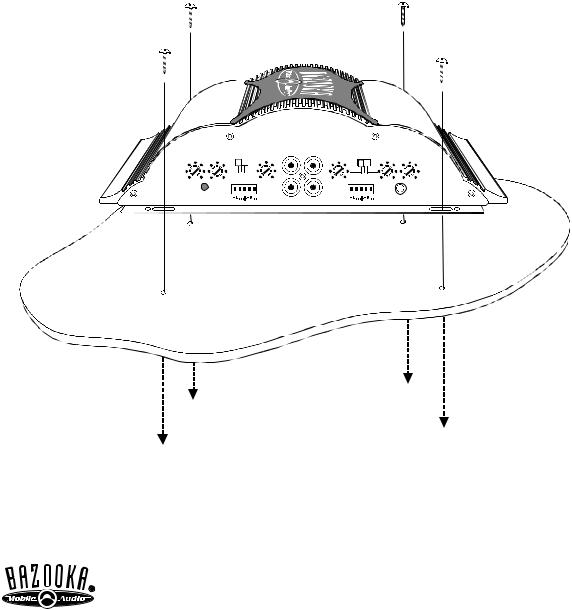
Select the location in which you wish to mount the amplifier. Use caution when mounting amplifier, there are many wires, gas lines, vacuum lines, brake lines as well as a gas tank in the automobile. Make sure you know where they are when mounting the amplifier to avoid puncturing lines, shorting wires or drilling holes in the gas tank. Once you are ready, use a pencil to mark the mounting holes in the bottom panel. After you have marked the locations of the holes move amplifier out of the way and drill small starter holes to make the tapping screws easier to install. Use provided screws to tighten down the amplifier.
BASS |
|
|
|
INPUT |
|
BASS |
|
|
|
|
|
||
BOOST |
X-OVER |
FILTER |
LEVEL |
LEVEL |
FILTER |
X-OVER BOOST |
|
||||||
|
|
|
CH1 |
CH3 |
|
|
|
|
LOW |
HI |
|
LOW |
HI |
|
|
FLAT |
|
|
FLAT |
|
0dB 12dB 60Hz 400Hz HI INPUT MIN MAX |
MIN MAX HI INPUT |
60Hz 400Hz 0dB 12dB |
||||
POWER |
|
CH2 |
CH4 |
|
REMOTE |
|
5
 Loading...