

Page 1

Pneumatic Gatefold Installation Instructions
For
Baum 2018, 2020 Pile & Continuous Feed Folder
models
This manual is a supplement to the operating manual. It is to be used for initial installation by a
Baum authorized field technician. For actual setup and operation of the gatefold, see the
operator’s manual.
© Baumfolder Corporation., Printed in USA TP10407
Page 2

Inspect shipment carefully for any damage immediately. If freight damage occurs, contact the
freight carrier immediately. Do not discard crating materials until installation is complete.
Make sure that all parts are shipped with the unit. A gatefold attachment includes:
1) Gatefold plate
1) Optical sheet sensor with cord
1) Encoder cable
1) Main control box
• Note that an air compressor is not supplied with the unit. It is recommended to use an air
supply with (90) PSI or (5) bar air pressure.
• Note that the airline fitting to connect to the customer air supply is not included due to the
variety of possibilities. Be sure to measure and procure the correct connection. Note that a
water trap is recommended to eliminate condensation from the air system.
• Note that the pneumatic gatefold does not require a stationary deflector above in the #2
foldplate position. Previous electronic gatefold designs required a stationary deflector for
mounting in the foldplate position above the gatefold plate when installed in the folder.
• The incoming electrical power for the gatefold control box is supplied using the X10
connector on the left-hand side of the main operator’s control box of the Baum folder. Later
models include this plug as standard equipment on the main box. Some early model Baum 20
series folders do not have this connection pre-wired. If your Baum 2018 or 2020 folder does
not have the X10 connector, contact the Baum parts department for the correct plugs and the
Baumfolder technical support department for wiring information for your folder.
• Note that these instructions are for the initial installation. The instructions for installation for
each use afterward are found in the operator’s manual. You must follow the set procedure for
installation for operation for successful results.
• The control box of the gatefold attachment can also be used for specified gluing operations
with addition of the proper gluing heads and modifications to the folder. Both inline and inplate gluing applications are adaptable. For more information on folding and gluing, refer or
request a copy of the Baum “Gluer Guide”. Baum offers complete segmented fold rollers and
grooved foldplates to meet these needs. Using genuine Baum parts is required to maintain the
factory parts warranty on new Baum installations. Use of other manufacturer’s parts will void
the factory warranty.
• The timed perforations function on the control is not applicable to the Baum 20 series
folders. This feature requires pre-slittershafts on the folder that are not available on the Baum
20 Series.
• Wiring information shown is applicable to Baum 20 series with DCT500 electrical design.
To connect to Baum 20 series folders previous to this design, contact the Baum technical
support department at 1-800-543-6107.
1) Mounting post with air regulator and
hoses attached
1) Mounting hardware for post
1) Operation manual
2
Page 3

1. Install mounting post to feeder
frame on the non-operator side of
the folder. Drill (2) ¼ inch or 6.5mm
diameter clearance holes in the
frame as shown. Use the hardware
kit supplied to mount the post to the
frame.
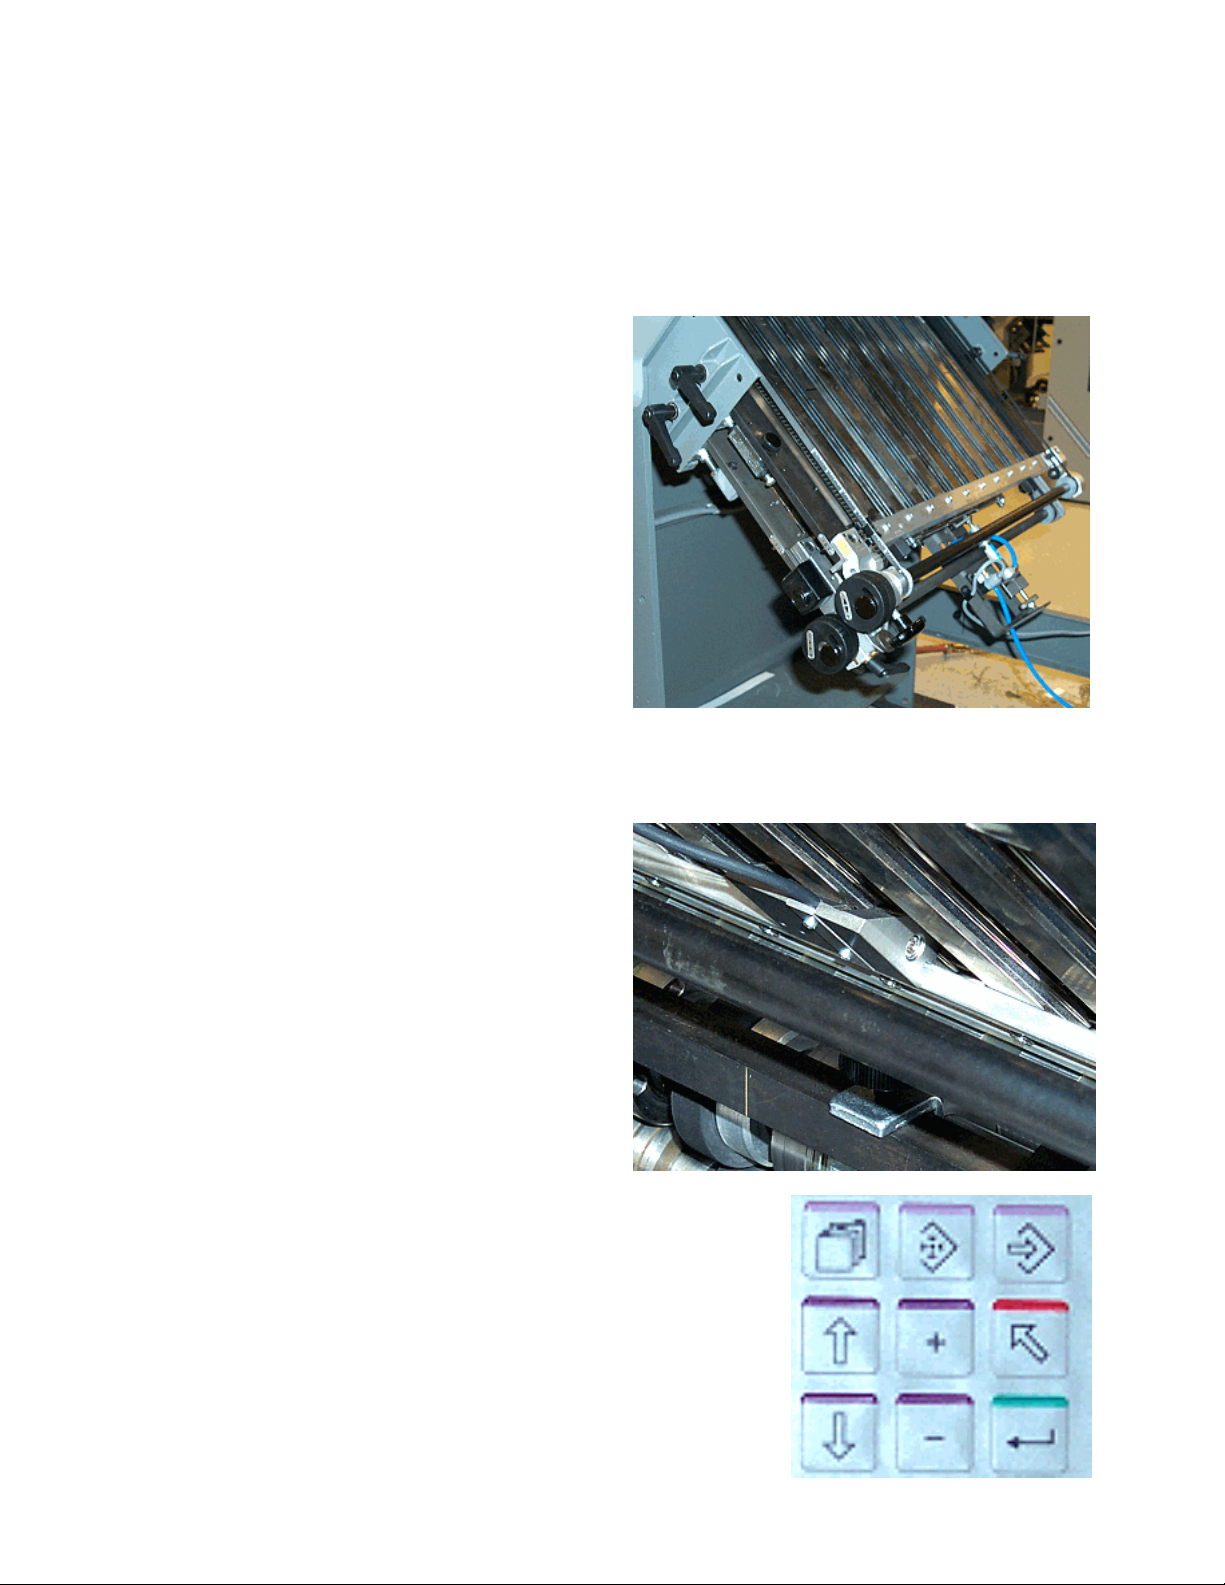
2. Place the control unit on top of
the mounting post. Install the power
cord. Connect the Optical sheet sensor
to Input 1. Connect the electrical cord
from the gatefold plate to Output 1.
Connect the encoder cable to the
Encoder connection. View shown is
from the backside.
3. Disconnect power from folder.
Wire the other end of the Encoder
cable to the main electrical box on the
folder. Insert encoder cable through
an opening available in the back of
the main control box of the folder.
Go to connector block 2X15. Connect
the gatefold encoder cable wire #1 to
pin #1 with the white wire.
Connect gatefold encoder cable wire
#2 to pin #2 with green #2 wire.
3
Page 4

4. Remove wire #13L1 from the side of Auxiliary
contact block K2. Move this wire up to the open side
of terminal 12L1 on the terminal strip TB-1.
5. Connect the blue air line hose to the air regulator at one end and to the gatefold plate at the
other end. The connections are brass quick connect couplings. It is best to do this without air
pressure in the line.
6. Connect the airline from the air
regulator to the incoming air supply.
Note that (90) PSI or (5) bar is
required for the correct operation.
4
Page 5

7. Install the gatefold foldplate in the #4 foldplate
position. Make sure that there is no interference.
Turn the handwheel on the folder to check. If there
is interference use Baum gage kit #261-998-BG01 from the Baum Parts Department to set
clearances by adjusting the plate stops correctly.
8. Connect the power cord for the gatefold control
box to electrical connection X10 on the left-hand
side of the main folder control box. If the X10
connector is not on the main box, order part
number 263-564-01-00 from the Baumfolder Parts
Department. Contact the Baum technical support
department for correct wiring information.
9. Fasten the optical sheet sensor to the underneath
side of the #3 foldplate on a rib. Locate the sensor
all of the way forward against the front lower
support rail. Tighten the setscrew in the side. You
can use the long-handled 4mm-ball driver that is
standard with the folder to adjust the setscrew.
10. Connect the air supply and set the pressure
regulator to (5) bar on the gauge. Pull up on the
adjustment knob to make adjustments.
5
Page 6

To set the control panel readout for proper machine size and
language, perform the following:
1. Press the main power button in the lower left-hand corner of the
gatefold control to turn power on.
2. Select channel #1 using the channel selection button.
• The message
(German) language.
• If the control is in English the readout will be
need to change the language to English, follow these steps.
2. Press the enter button in the data entry keys in the lower left-hand
corner. The word
Use the plus and minus buttons to set the width to 52cm if required.
3. Press the down arrow button located in the data panel in the lower
left-hand corner. The words
4. Press the down arrow button again and the words
“ 1 Falzlange L1” will appear if the readout is in Deutsche
“1 Foldlength L1”. If you
“Arbeitbreite 52” will appear.
“Diagnose” will appear.
“Sprache (lingua)” will appear.
5. Press the plus or minus button to select English.
6. Press the confirm button with the arrow going at an angle to secure the
setting. The words
selected.
“1 Folding Length L1” will appear if channel “1” is
6
Page 7

Setting up a Job to test.
It is important to set up a gatefold job
(1) step at a time. Work from the feeder
forward. Make your setup procedure the
same steps as the paper would travel
through the folder.
1. Always hand fold a sample as close
as possible to the final result that is
required. Mark the sample and place it where you can refer back to it. Note that
you must leave approximately 3mm or 1/8 inch gap between the (2) panels that
fold in toward each other. Use the conveniently located scale on the register
table to measure all dimensions. The “0” location of the scale is against the side
of the aluminum block where the scale starts.
2. After setting up the feeder and
register table, set up the fold head.
DO NOT INSTALL THE
GATEFOLD PLATE AT THIS
TIME. Begin by inserting sheets of
the stock to be folded into the
Baumsets as follows:
• Baumset #1 (1) Thickness
• Baumset #2 (1) Thickness
• Baumset #3 (1) Thickness
• Baumset #4 (2) Thicknesses
• Baumset #5 (4) Thicknesses (You will add more later to this one)
3. Set foldplate #1 to open folding position and set the length measured on the
first flap (L1). In the example of an 11 x 17 sheet, the first fold length will be 41/4 inches. Remove the #2 and #4 plates and leave these positions open so that
the paper can fall onto the floor. Turn the handwheel on the folder before
starting to insure that all foldplates are not rubbing. Feed test sheets at the speed
you expect to be folding and match the fold from the first panel to match the
sample. Make sure this fold is acceptable before proceeding.
7
Page 8
4. Reinstall foldplate #2 and have it set to deflect the paper. Leave #4 position
open without a foldplate. Set foldplate #3 open to folding to make the second
foldlength (L2). On an 11x17 sheet this length will be approximately 8-1/2
inches. Send test sheets and match against sample until fold is satisfactory.
5. Install the gatefold plate in the #4
position. Do not connect the power
supply to the gatefold. Pull the
movable sheet-tucking device down
away from the fold rollers to allow the
sheet to enter the plate in the
deactivated mode. Set the analog
readout device for fold depth to
approximately 105mm for an 11x17
gatefold. For other lengths, measure
the sample and set accordingly. Run
test sheets until the proper fold length
is achieved. The test sheets will exit
onto the delivery stacker with the last flap trailing the sheet. Pick up the sheet
and fold the flap in to test the length setting.
6. Install the Optical position sensor
under the #3 foldplate. This may
already be installed from previous
setup. Make sure that the sensor is
located down as far as it can be set
closest to the fold rollers.
7. Set up the Gatefold Control settings. You must set
the L1, L2 and the position sensor settings to run the
job.
8
Page 9

9
9
Page 10

10
Page 11

Send test samples and look for inside “dog ears” or damaged edges to the inside
edges. These are a signal that the timing needs to be adjusted. Do not adjust the
fold lengths. This is not the problem. If you follow the step by step procedures,
setting the timing is the only change required to complete the accuracy.
Box Folds:
You will now see a “double crease” or a box fold on one of the gates. To relieve
this, add the same amount of sheet thicknesses to each side Baumset for the #5 fold
roller. The more paper added to the Baumset, relaxes the tension and alleviates the
double crease. You will get a softer fold. To flatten the fold, add the Baum 8-page
right angle folder at the exit of the parallel folder. Set all foldplates on deflect
positions. Set all Baumsets in the 8-page folder to (4) thicknesses. This will flatten
the sheet if required.
11
Page 12

1-800 543-6107
Baumfolder Corporation
1660 Campbell Rd. Sidney, OH 45365
12
 Loading...