

Page 1
Baum 2015/2018/2020 Floor Model Folders
Job Setup
This sheet is only a guide to setup
and operation of the Baum
2015/2018/2020 Pile feed folders.
Jobs will vary and procedures will
need to be modified.
1. Hand fold a sample as close as possible of the
job to be run. Mark the sample so that it is not
lost during setup. Measure the overall length and
width of the sheet if you do not already know
them, using the scale located on the holddown in
the center of the register table.
2. Start with the feeder and move in progression
to the exit end of the last fold section to complete
the setup of the folder. There is no need to turn
the power on until the setup is complete.
3. Set the sideguide on the pile feeder to half of the
width of the sheet width using the scale on the
frame. Remove the LH sideguide for easy access
to load paper. See Fig. 1.
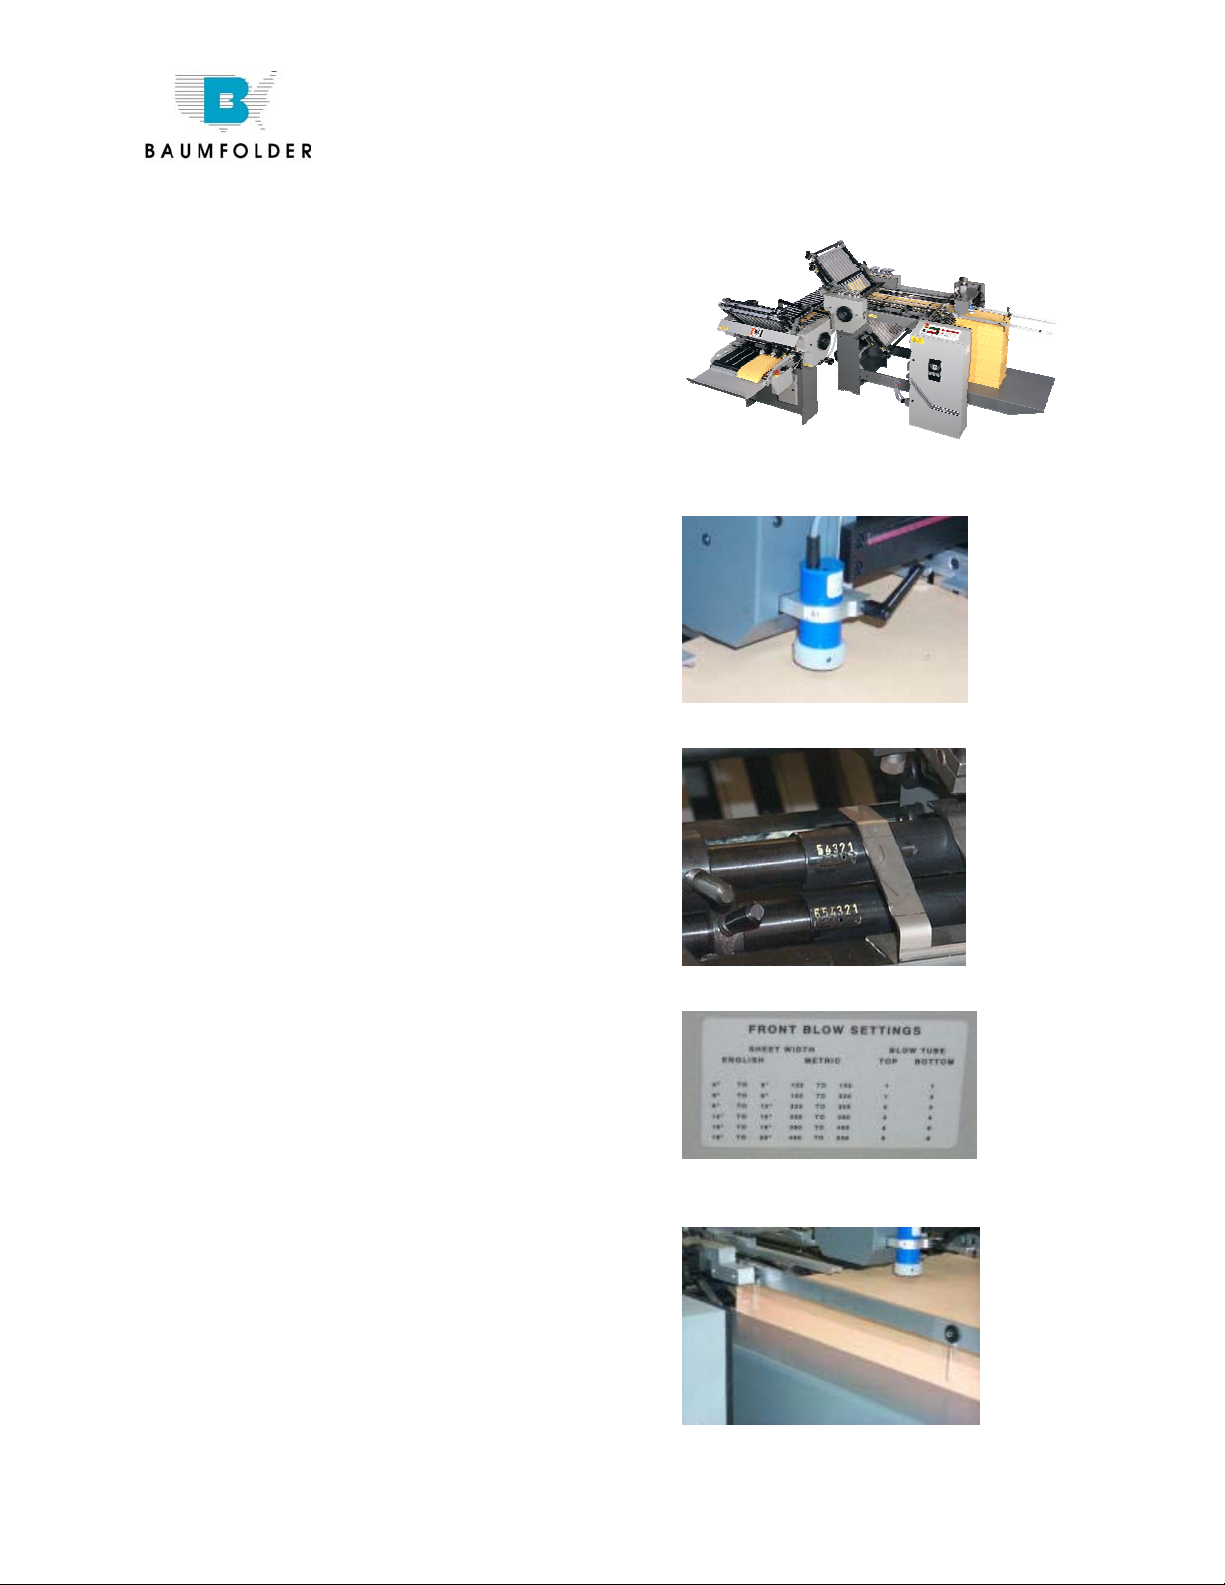
4. Set the double front blow bar to the proper air
settings referring to the chart on the side of the
control cabinet. See Figures 2 and 3.
5. Set the double sheet detector using (2)
thicknesses of the stock being fed and insert into
the lever and clip.
6. Load paper onto the pile feed platform. Be sure
to fan the paper before loading to add air in
between the sheets for easier feeding. Also note
that the loading of the paper must be positioned
to correspond to the folding imposition that you
want to achieve in the folding unit(s). You must
determine if you want the paper face up, or face
down, or head first, or tail first. Refer to your
hand folded sample to determine which
foldplates you will be using and the loading of
the paper.
7. Install LH see-thru sideguide and position
register guide approximately 1/16 to 1/8” away
from LH side of paper on pile feeder to insure
that paper can slide freely during feeding. See
figure 4.
8. Install the small metal clip that fastens to the
end of the register guide to keep an up-curl from
riding over the end of the register guide.
9. Check register marble configuration to make
sure that it matches the job that you are running.
At least (1) to (2) steel marbles are
recommended at the end of the register closest to
the pile feeder and (2) more at the end closest to
the fold rollers. The marble configuration in
between depends upon the weight of stock and
whether the feeding is landscape or portrait. To
Fig 1
Fig 2
Fig 3
Fig 4
Page 2
Baum 2015/2018/2020 Floor Model Folders
Job Setup
many steel marbles can drive the sheet too hard
and causing feeding problems.
10. Place register holddowns in proper locations
for the sheet width being fed. Note that for
11x17 sheets being fed in the 11 inch width,
place a register holddown between the LH seethru guide and the vacuum wheel to keep air
from cupping the sheet and causing stumbling.
Note that the register holddown with the scale is
always located in the center of the register in
front of the vacuum. Be careful when placing the
holddown on the right hand edge of the sheet to
angle the holddown slightly to prevent the right
hand edge from curling up inside and stumbling.
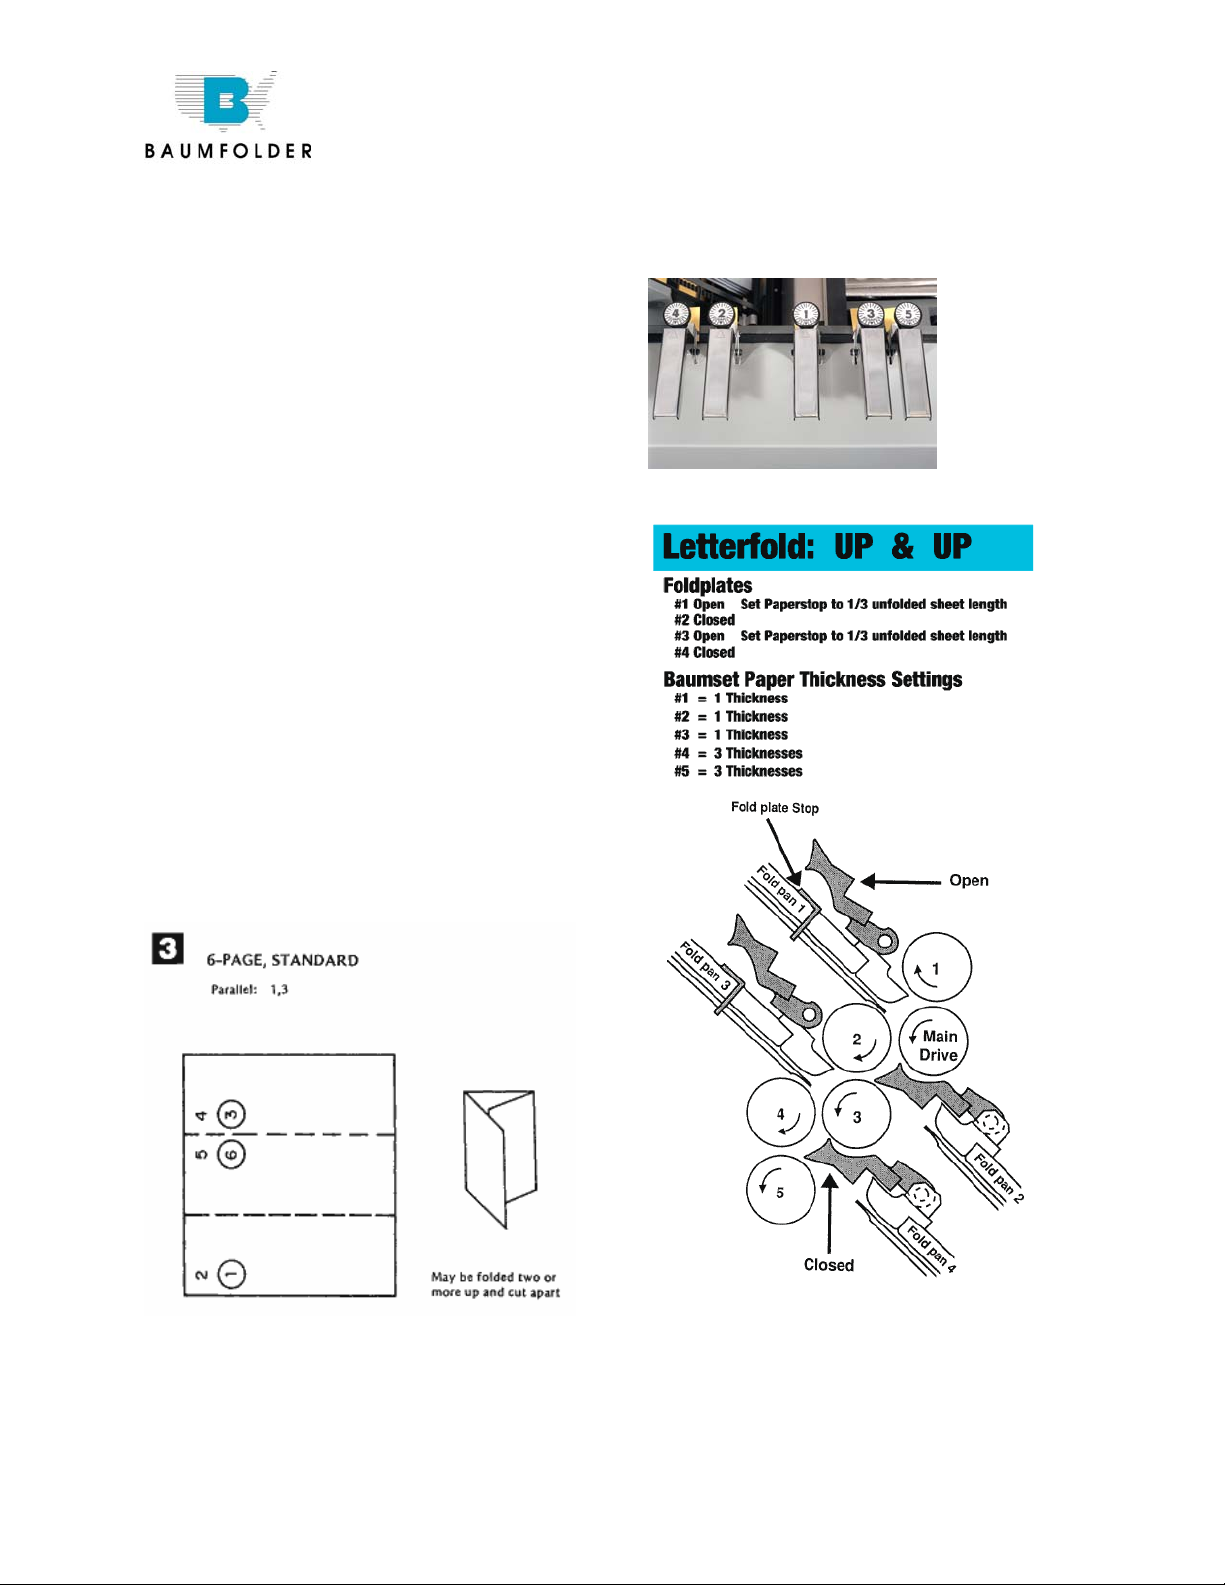
11. Set the Baumsets by inserting strips of paper of
the job that is being run. Only insert the
thickness that corresponds to the tailing or
minimum thickness that the roller must drive
without loosing control of the paper. You need to
refer to your hand-folded sample to follow the
paper path See fig 5. Refer also to the example
fold given in Fig. 6 that shows a cut-away
section of the folder and notes the proper
foldplate and Baumset settings for the imposition
shown.
Fig. 5
Page 3

Baum 2015/2018/2020 Floor Model Folders
12. Set the foldplates to the proper open and closed
positions by rotating the stop blocks and placing
the correct symbol for either open of closed to
the position closest to the fold rollers. Then set
the desired fold depths using the scale on the belt
and reading at the yellow mark on the indicator.
13. Setup the slittershafts using the proper
perforating scoring or slitting accessories. If just
a parallel folder is being used an perforating,
scoring or slitting is not required, pullout tires
must still remain on the slittershafts to properly
eject the sheets. Note that a good setup procedure
is to have all the setscrews facing outward at the
same clock position. This eliminates a lot of
handwheel turning to get to the setscrews during
job changes. See Fig. 7
14. Setup Delivery Stacker Wheels to the expected
position of the paper as it ejects the folder. The
independent speed control will need to be set
during the initial fold operation to insure proper
shingling. Note that the exit holddown straps
must also be installed to kick the sheet down
onto the delivery stacker.
Right angle Folding
When adding an 8-page or 16-page folder to a
parallel unit it is highly recommended that the stock
must be either perforated or scored as it exits the
previous fold unit. The perforating or scoring is to be
performed at the line of the fold that is to be folded in
the next fold section. This weakens the grain of the
stock so that a consistent, quality fold can be
achieved. Perforating is also needed to relieve air that
can become trapped in the folding process and create
wrinkles in the paper. The size of the perforator tooth
can make a difference in the amount of air that can
escape and remove the wrinkle problem. Failure to
score or perforate a sheet going into a right angle
folder will result in inconsistent fold quality.
Refer to your operator’s manual for scoring,
perforating and slitting information.
Marbleholder Setup
Note that marble placement can be critical on some
jobs and not on others. You may want to remove
some marbles that are in the end that accepts the
sheets at a right angle so that the sheets do not
bounce back when trying to get under the marbles. At
least (2) steel marbles are recommended at the end
closest to the fold rollers to maintain sheet control
against the guide.
Job Setup
Fig. 7 Perforating on 1-1/8” slittershaft
Scoring with 1-1/8” slittershafts
Scoring on a 7/8” slittershaft
Perforating on a 7/8” Slittershaft
Page 4

Baum 2015/2018/2020 Floor Model Folders
Job Setup
 Loading...