

Page 1
When folding right angle folds for book signatures it is
recommended to perforate the paper as it exits the
previous folding station. Perforating the paper creates
consistent, quality folds in the right angle folder.
Perforating creates a weakness or definition in the
paper that assists in folding multiple thicknesses or
against grains in the paper and more importantly
makes air passages in the paper to allow air to escape
during the folding process and eliminate wrinkles and
creases that occur from air pockets. When perforating
you must determine the next application in the
finishing process or the usage of the printed material
by the end recipient. If you are perforating signatures
for books that are to be gathered and stitched on a
saddlestitcher, you will want to use a course
perforating blade that has fewer number of teeth and
creates large slits for the air to escape. If you are
creating mailing pieces with coupons or reply sections
you will want to use a finer tooth perforator blade that
has several perforations per inch.
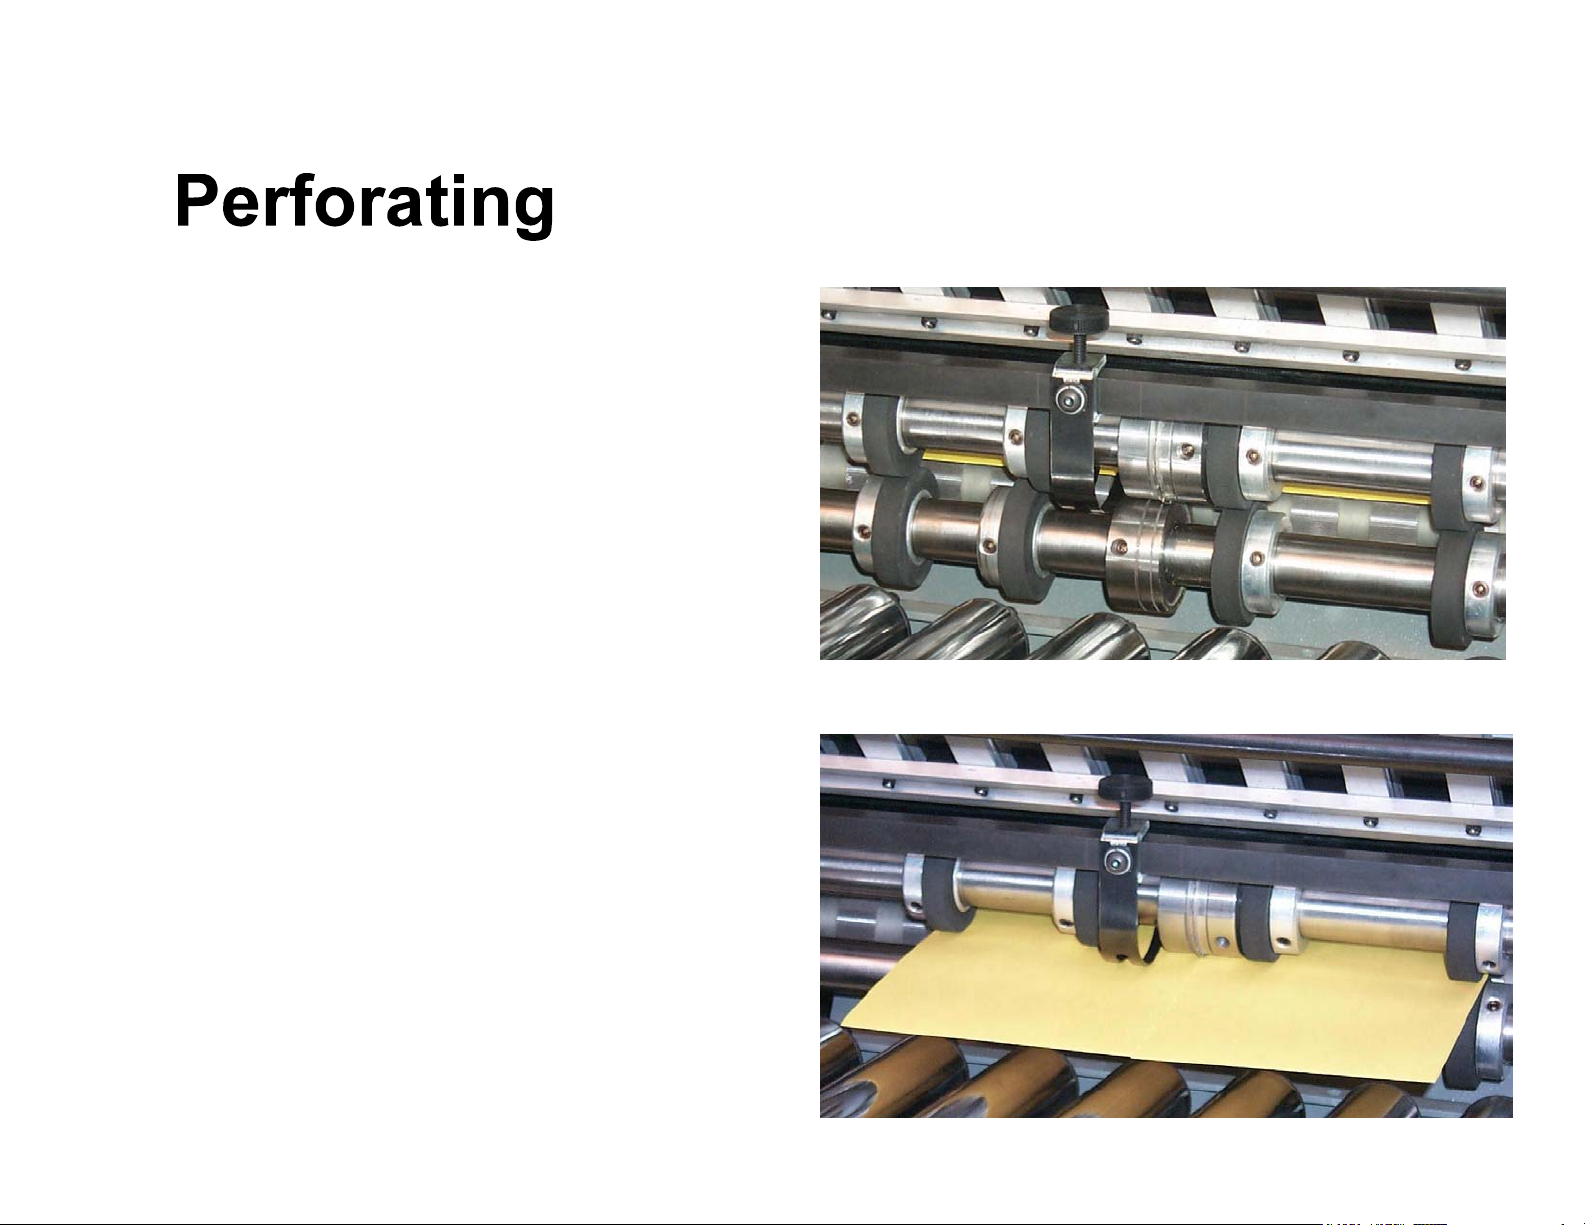
If you are folding 17x22” sheet in half in the first station
folder and then in half again in the right angle to make
standard 8-page signatures, you will need (1) line of
perforation on the slittershafts on the first station
folder. You will find (3) yellow scribe lines on the tie
bar at the exit of the first station folder. The yellow line
in the center is the approximate center of the folder
and the sheet and is where you can approximate the
location of the perforating accessories for this job.
Page 2
Perforating Continued:
To install the perforating accessories, first remove the
slittershaft housing on the non-operator side of the
folder. Loosen the holding knob and remove it from the
housing. Insert the holding knob into the tapped hole in
the side of the housing and screw it into the tapped
hole completely. Pull out on the holding knob and
remove the housing from the slittershafts. The
slittershafts stay in the folder. Use the 4mm hex allenkey ball driver to loosen the brass tip setscrews that
are holding existing accessories in place. Slide the
accessories that need removed off of the slittershafts.
Install the perforating blades onto the blade holder.
Note that there are multiple spacers of different
thicknesses on the blade holder. These are for
mounting multiple blades at incremental center
distances on the same blade holder. These are helpful
for perforations that are close together.
When installing the perforating blades onto the blade
holders, be sure to mount the blade holders so that the
rotation of the shaft will not loosen the locking nut.
Use the “Y” spanner wrench that is included with the
tools for the folder to loosen and tighten the blade
holder nut.
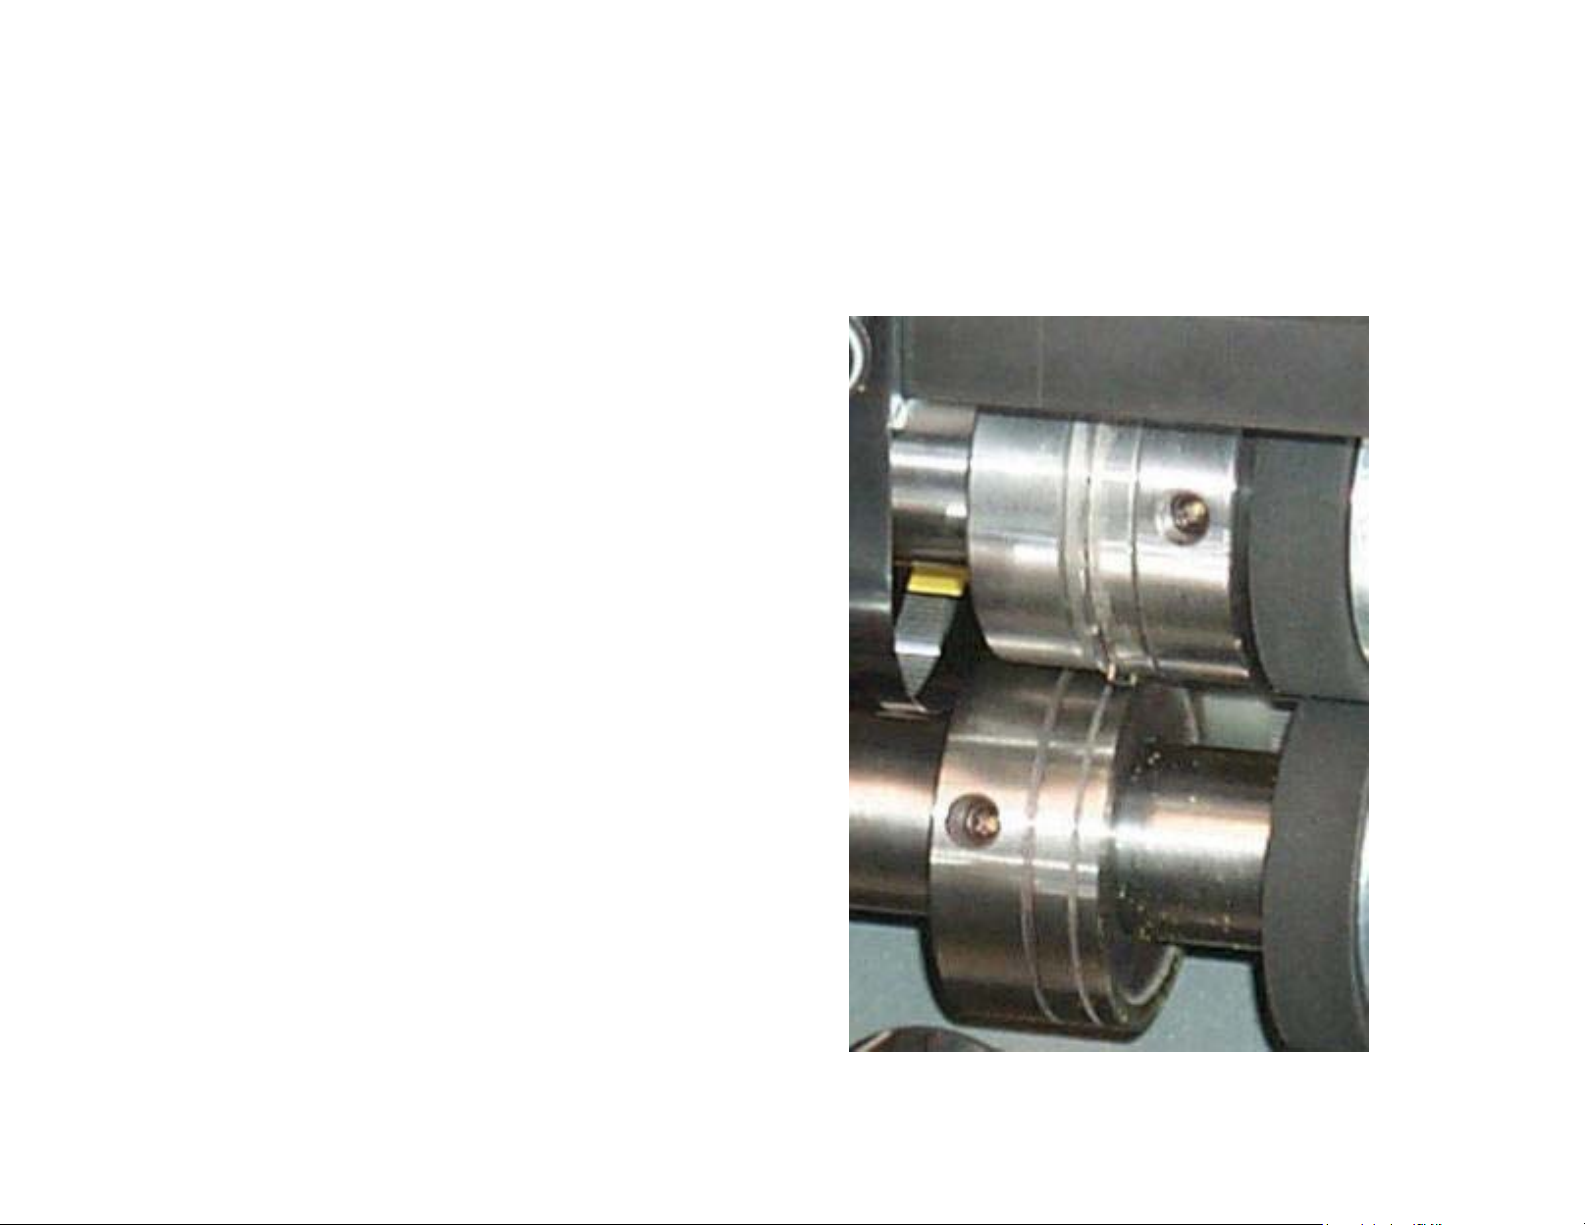
The perforating blade is to have the flat side running
against the sharp side of the female scoring collar and
the bevel side is to be pointing toward the next folder.
The (2) grooves in the collar are for scoring only. The
flat, sharp side of the collar acts as an anvil just like a
pair of scissors. If the perforating blade is not against
the anvil side the perforations will be ragged and of
poor quality.
Page 3

Perforating Continued:
Slide all accessories onto the slittershaft and leave all
items loose. Use the yellow scribe marks on the exit tie
bar to line up the perforating blades or pull up on the
#1 and #3 foldplates and roll a marked sheet of paper
through the folder and line up the perforating blades
with the marks on the lead edge of the paper and
place the pullout tires close to the perforating blades
and at the edges of the sheet. Reinstall the slittershaft
housing and tighten the holding knob back into the
upper position.
Line up all the accessories and rotate them so that all
of the setscrews are at the same position facing
outward and tighten the setscrews. This reduces setup
time for the next job having all of the setscrews at the
same position.
Mount the springsteel stripper assembly onto the exit
tiebar that has the yellow scribe marks as shown. The
stripper is to be mounted beside the perforating blade.
It does not straddle the blade. YOU MUST USE THE
STRIPPER TO PERFORATE!
Set the adjustable depth to the nominal center position
using the micrometer adjustment knobs at each end of
the slittershafts. The milled notch at the center of the
aluminum block is the nominal center adjustment.
To adjust the perforation position, you can use the
microadjustment knob on the register table. This is
only effective when one perforation is being adjusted.
It will not adjust multiple perforations.
 Loading...