

Page 1
BKcSuite
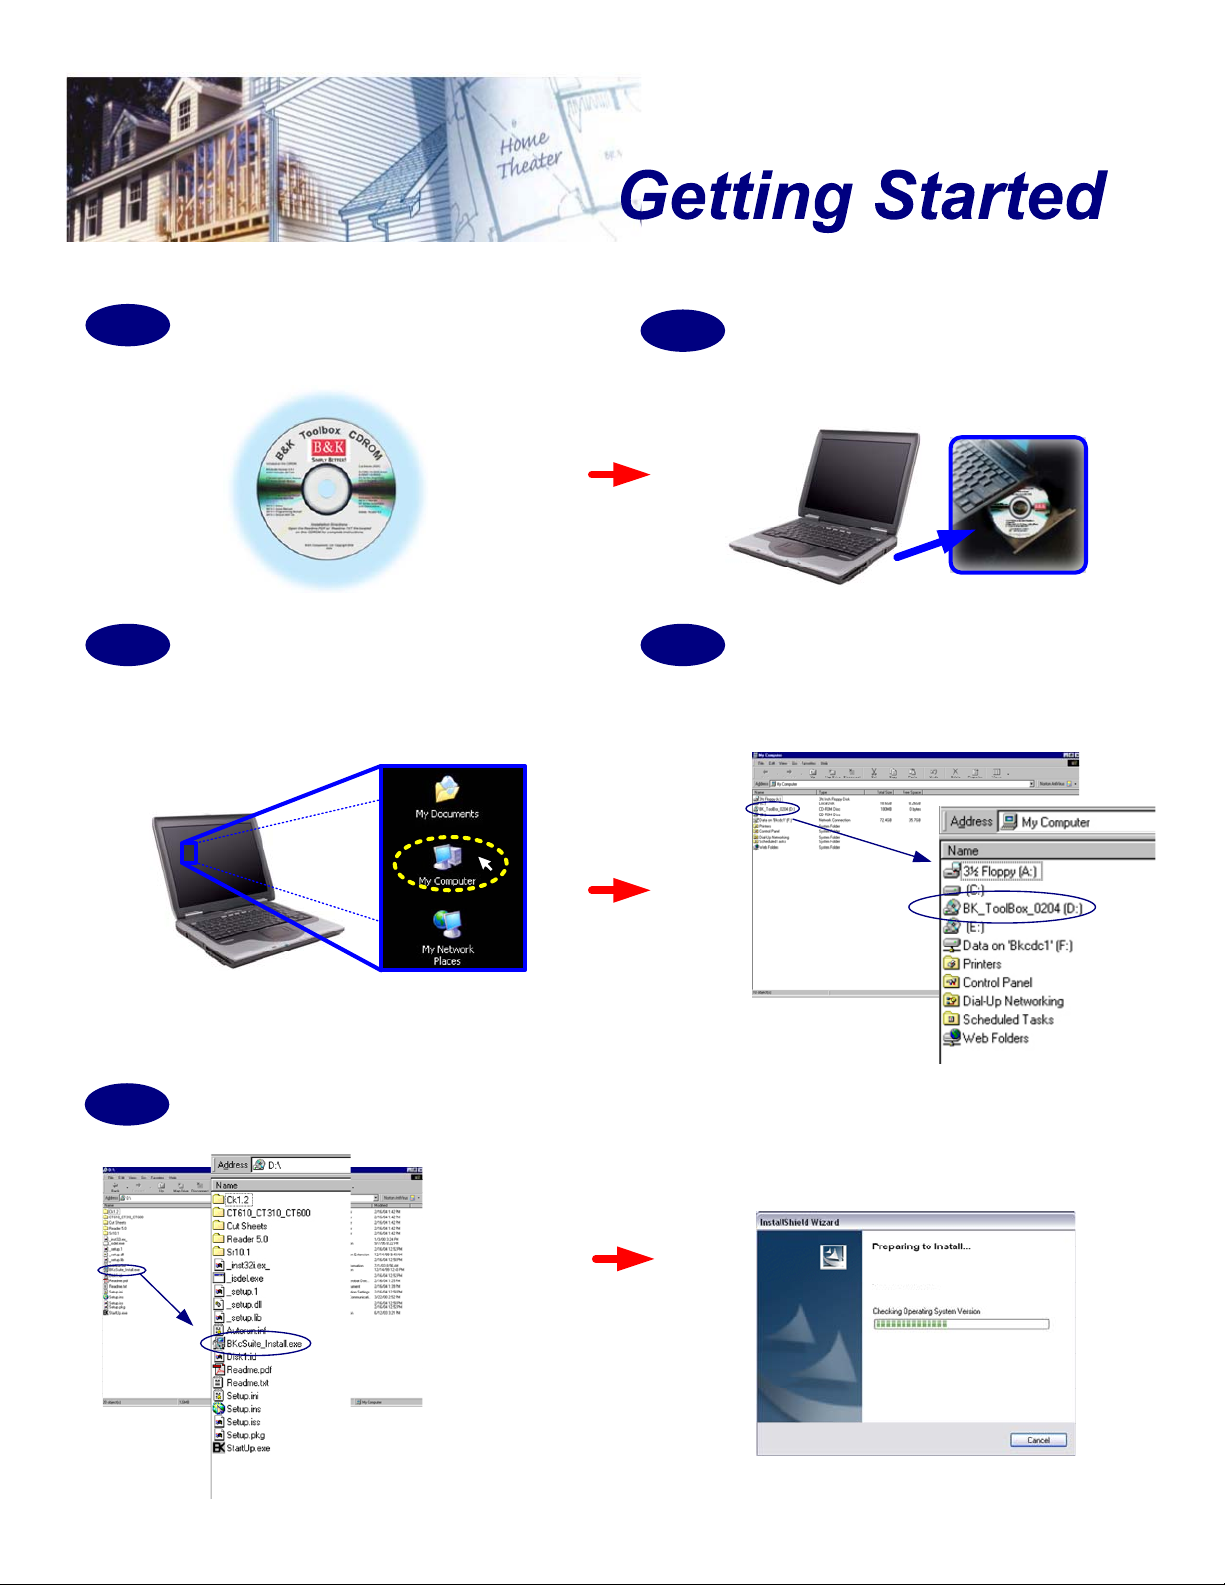
Installing the BKcSuite
Step 1
Remove the ToolBox CD-ROM from
Step 2
the packaging.
Step 3 Step 4
Locate and double click on the “My
Computer” icon on the Desktop or
Start Menu, depending on your
version of Windows.
Turn on the PC and put the CD-ROM
into the CD drive.
Locate and double click on the CDROM icon labeled
“BK_ToolBox_0204”.
Step 5
Locate and double click on “BKcSuite_Install.exe” and follow through the Installation Wizard.
Installation Wizard
SR10.1
BD040604
Page 2
BKcSuite
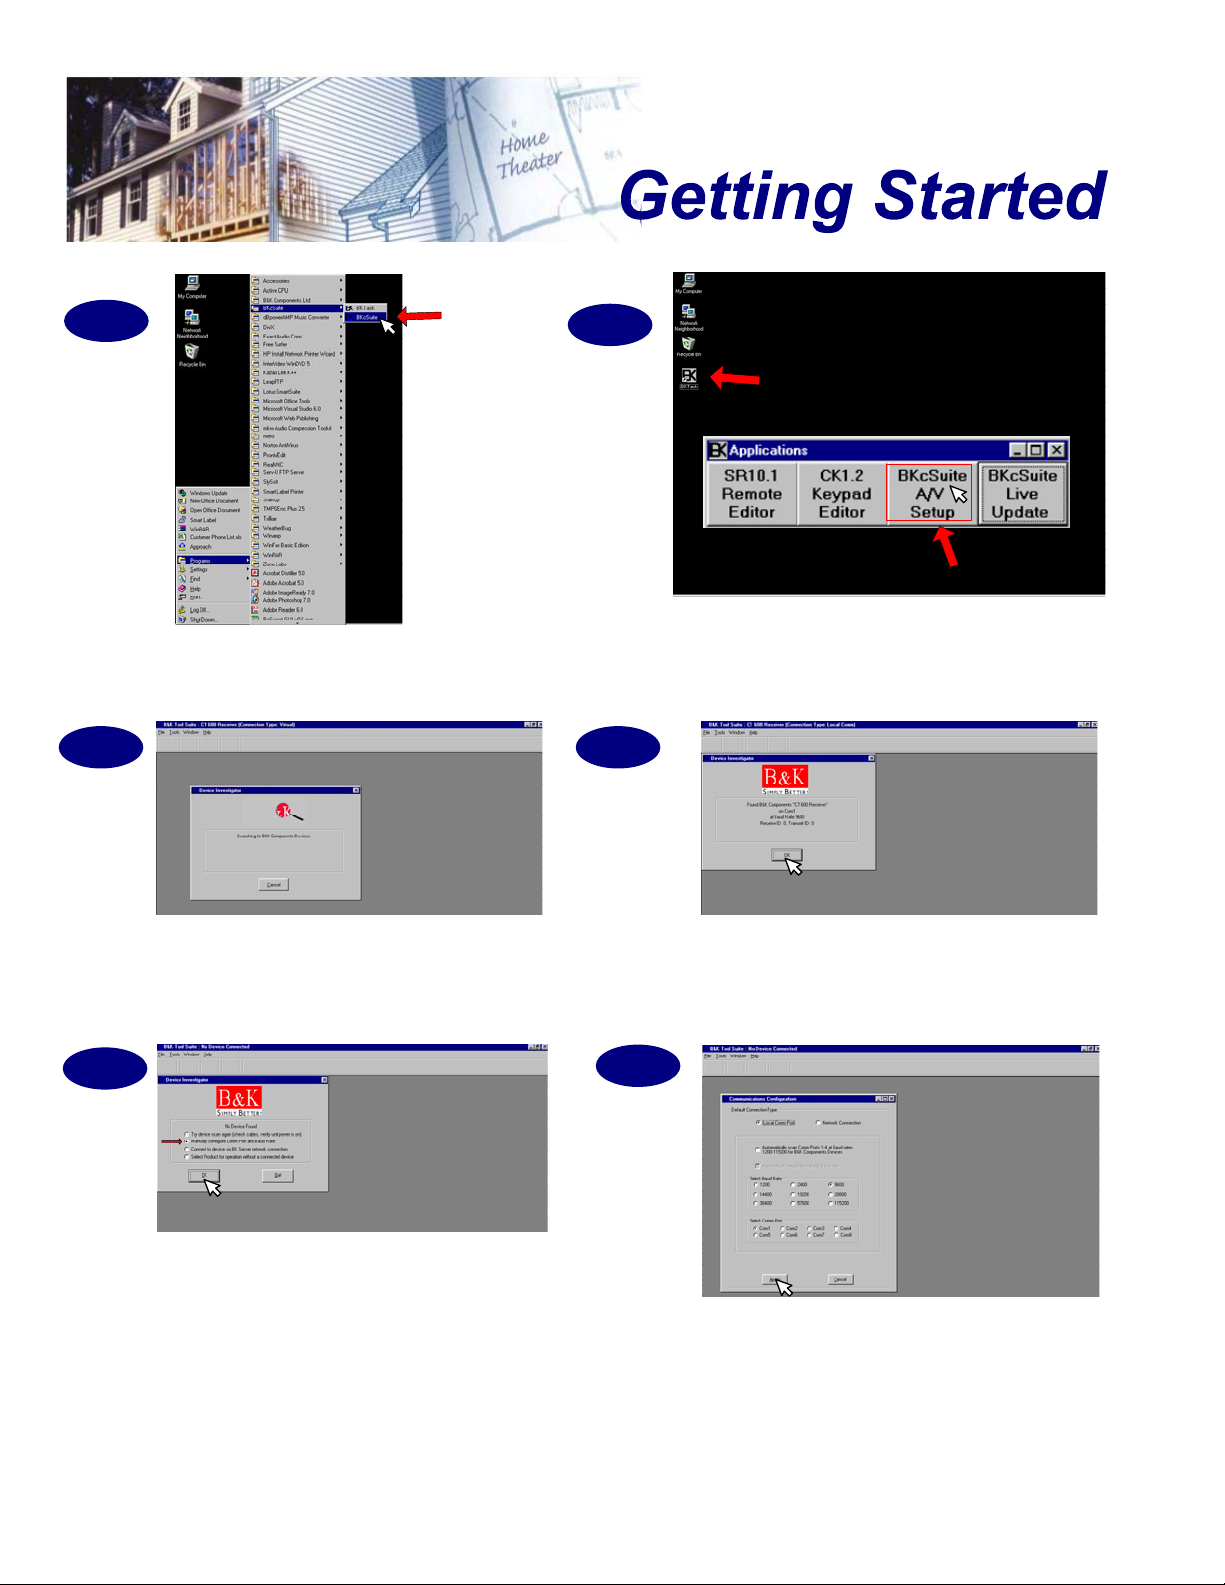
Running the BKcSuite
Step 1
Start BKcSuite by pointing to Start -> Programs ->
BKcSuite -> BKcSuite.
Step 2
Step 1a
Alternatively, you can double click the BK Task icon
on the Desktop, then select BKcSuite A/V Setup.
Step 2a
After starting the BKcSuite a window will open and
search for any attached B & K components.
Step 2b
If no device is found, the software will display a
prompt asking you to try again, manually
configure, connect via network, or select a
product without a connected device. Select
“manually configure” and click ok.
*Note* If after step 2c you proceed back to step 2a and still
have problems connecting, please visit our website @
www.bkcomp.com/FAQs.asp and view the help page entitled
“Why will my PC not communicate with the B & K product?”
You should see a window that states a device was
found and the software should begin to interrogate
the unit after a small time-out, or after clicking “ok”.
If so, go on to step 3, if not see step 2b.
Step 2c
Select “Local Comm Port” NOT “Network
Connection”, Baud Rate 9600, and the proper Comm
Port that corresponds with the port the B & K
component is physically attached to on the PC, then
click “Apply” and proceed back to step 2a. Also, see
the note at the bottom left of this page.
BD040604
Page 3

BKcSuite
Running the BKcSuite
Step 3
After interrogation of the unit is complete, you may
be presented with a warning. This simply suggests
that you choose “Select Product for operation
without a connected device” in step 2b.* You can
continue by clicking “OK”.
*Note* You can employ a virtual “safety net” by canceling the “Device Investigator” when it
pops up, and selecting “Select Product for operation without a connected device”. This will
allow you to set up all the features, save to a file then load that file when the unit is actually
connected. This is to help avoid “real-time” communication issues often encountered on
unstable or older, slower computers. See step #9 for more information.
Step 5
Step 4
CT Series Units
All Other Units
The BKcSuite will then leave you with a blank page
with a strip of icons at the top. These icons activate
the modules that the connected unit supports. Certain
B & K components will cause the strip of icons to vary
slightly.
Step 6
The “Basic Setup” icon (CT Series Only) allows you
to set up the absolute most basic features of a CT
receiver, useful if you are planning on installing and
running the unit right out of the box without any
advanced integration or programming.
BD040604
The “Edit Presets” icon (CT Series Only) allows
you to set up, program and save the internal
presets (100max.) in a CT receiver.
Page 4

BKcSuite
Running the BKcSuite
Step 7
The “Advanced Setup” icon allows you to set up all
the features of a B & K component, this is
recommended for advanced system designers and
programmers of the CT series receivers, and is
required to set up other B & K units via the BKcSuite
software.
Step 9
Step 8
The “RS-232 Macros” (CT Series Only) icon allows
you to set up RS-232 macros to be stored and
executed from within a CT receiver. This also allows
you to define various conditions that will trigger the
macros to execute.
Step 10
The “Select a ‘B & K Virtual Product’” icon opens a
window where you can select any supported B&K
components to setup and configure without actually
having the equipment attached to the PC.
The “Run the Device Investigator” icon, like in step 2
of “Running the BKcSuite”, triggers the BKcSuite
software to automatically begin searching for
attached B & K components to set up and configure.
BD040604
Page 5

BKcSuite
Running the BKcSuite
Step 11
The “View / Set Communication Properties” icon will
bring up a window where the Comm Port and Baud
Rate can be chosen manually if no device was
found in the automatic scan in step 2. *Note* the
“Network Connection“ is NOT currently supported.
Step 13
Step 12
The “Select a Server” icon is currently
UNSUPPORTED, and should be avoided so it
does not cause confusion.
Step 14
The “View B & K Documentation” or “User Guide”
icon will bring up a window where you can select
and view any of the INSTALLED .pdf
documentation. Important note : an installation of
Adobe
® Acrobat Reader™ is required to be on the
PC in order to be able to view documentation. Also,
you must have installed the .pdf documents from the
installation CD-ROM, or downloaded and installed
them from the internet. Get the free Acrobat Reader
from www.adobe.com.
B & K Components, Ltd. Copyrighted 2004
B & K Components, Ltd. warranty applies only to B& K Components, Ltd. products purchased from an Authorized B& K Dealer.
B & K Components, Ltd. offers support and service only to an Authorized B& K Components, Ltd. Service Provider
BD040604
The “View Information About this Connection” icon
will bring up a window where you can view
information about the BKcSuite version,
Communication Information, and Connected Device
Information. If you have technical questions, please
contact B & K Technical Support @ (800)543-5252.
Please be familiar with this screen, as the
Technical Support Agent will likely ask you for
information contained on it.
 Loading...