


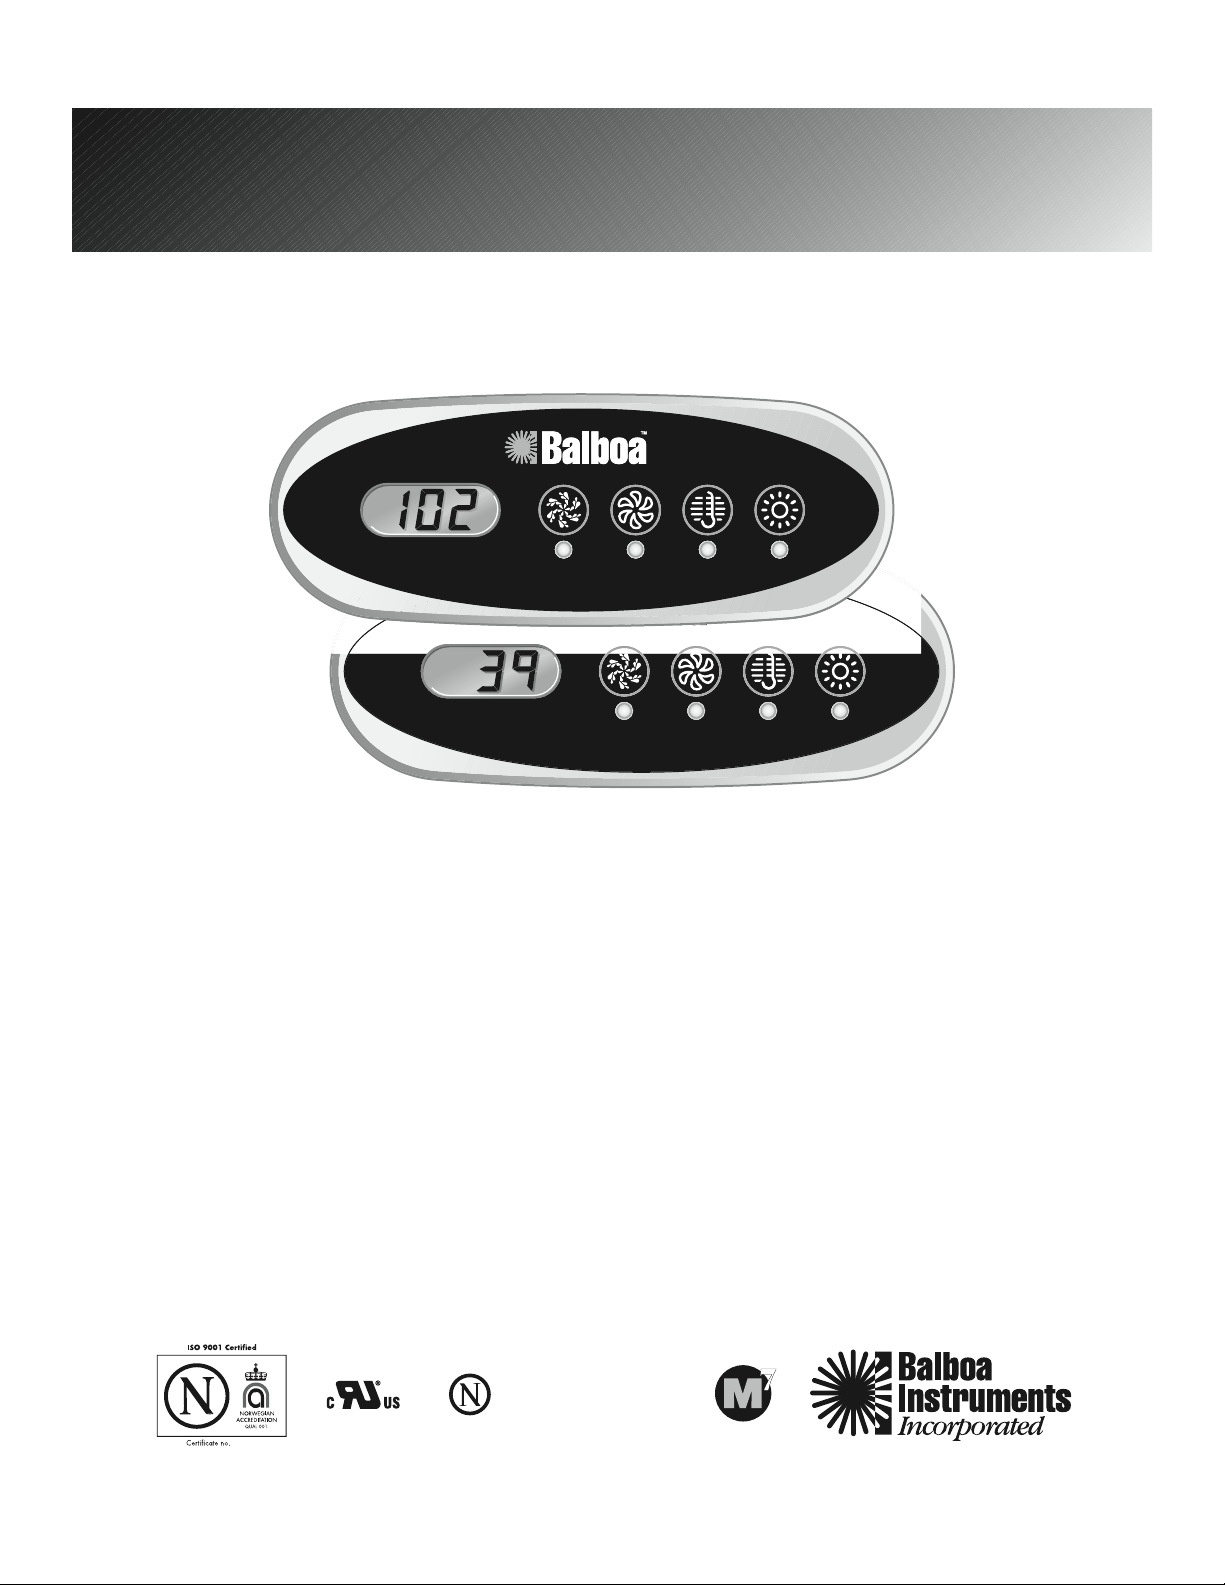
ML200
EL/GL Series - Mach 3
ML200 User Guide
Jets Aux LightTemp
Jets Aux LightTemp
Note regarding EL and GL systems: Mach 3 EL and GL systems function
identically, but conform to different International requirements. This
user guide will refer to EL systems for the sake of simplicity, but the
information given applies to both EL and GL products.
900854
YXcYfX$`ejkild\ekj%Zfd


EL/GL SERIES (Mach 3) CONTROL WITH ML200 PANEL
The ML200 panel can be used as a main panel
with the EL2000 and EL1000 systems, but only as a
remote/additional panel for the EL8000 and EL5000
systems. This user guide lists all features that are
available. Your spa may not respond as described in this
document as specific operation varies by system and
equipment used. If your spa is not fully equipped, the
panel buttons on your spa control may not be laid out
as shown. Functions not accessible by this panel may
be accessible by a larger panel such as the ML700 or
the ML900. One such example: This panel can be used
with EL2000 systems equipped with two pumps plus a
blower, but the blower cannot be controlled with this
panel unless the system does not have a pump 2. In
this case, the blower can be controlled with an optional
auxiliary panel.
Table of Contents
EL/GL SERIES (Mach 3) CONTROL ..... 1
Initial Start-up ..................... 1
Temp Set ........................ 2
Temp ........................... 2
Mode . ........................... 2
Standby Mode ..................... 2
Jets ............................. 2
Jets 2 ........................... 2
Blower .......................... 2
Circ Pump ........................ 2
Light ............................ 3
Ozone ........................... 3
Clean-up Cycle .................... 3
The pump responsible for heating and filtration (pump 1
low on non-circ systems, or the circ pump on circ
systems) will be referred to simply as the pump.
Timeouts refer to a preset length of time that a
function is programmed to operate before shutting off
automatically. Certain conditions (filters or freeze) can
cause a function to operate longer, while faults can
cause a function to operate for a shorter length of time.
The system keeps track of timeouts regardless of other
conditions occurring.
In multi-button sequences, if buttons are pressed too
quickly in sequence, they may not register.
Freeze Protection .................. 3
Locking Features ................... 3
Preset Filter Cycles ................. 3
Displaying Information About Your Spa . . 3
User Preferences ................... 4
Editing User Preferences ............. 4
Periodic Reminder Messages .......... 5
GFCI Protection .................... 5
GFCI Trip Test Procedure ............ 5
Diagnostic Messages .............. 6-7
Optional Auxiliary Panels ............ 8
Basic Installation Guidelines .......... 9
CSA Compliance . . . . . . . . . . . . . . . . . . . 9
Initial Start-up
When your spa is first actuated, it will go into Priming
mode (after displaying some configuration information).
Please see the M-7 Installation Instruction Manual for
complete instructions on Power-up and Pump Priming.
The Priming mode will last for up to 4 minutes and
then the spa will begin to heat and maintain the water
temperature in the Standard mode. You can exit Priming
mode early by pressing “Temp”.
Page 1

Temp Set (80°F - 104°F / 26.0°C - 40.0°C)
The last measured temperature is constantly displayed
on the LCD. Your spa’s set temperature range may
vary from range shown above depending on your
manufacturer’s settings.
Note that the last measured spa temperature displayed is
current only when the pump has been running for at least
1minute.
Temp
Press the “Temp” button once to display the set
temperature. To change the set temperature, press the
pad a second time before the LCD stops flashing. Each
press of the “Temp” button will continue to either raise
or lower the set temperature.
If the opposite direction is desired, release the pad and
let the display revert to the current water temperature.
Press the pad to display the set temperature, and again
to make the temperature change in the desired direction.
After three seconds, the LCD will automatically display
the last measured spa temperature.
will control the pump in Standby Mode (“Drain Mode”).
In this case, press any other button to exit. System will
revert to previous mode after 1 hour.
Jets
Press the “Jets” button once to turn pump 1 on or off,
and to shift between low and high speeds if equipped.
If left running, the pump will turn off after a timeout
period. The pump 1 low speed timeout on some systems
may be as long as 4 hours.
On non-circ systems, the low speed of pump 1 runs
when the blower or any other pump is on. It may also
activate for at least 1 minute every 30 minutes to detect
the spa temperature (polling) and then to heat to the
set temperature if needed, depending upon mode.
When the low speed turns on automatically, it cannot
be deactivated from the panel; however, the high speed
may be started.
Jets 2 (optional on some systems)
If your system has a second pump but your panel does
not have a “Jets 2” button, use the “Aux” button to
control pump 2.
Mode
A button combination is used to switch between
standard, economy, and sleep modes. Press “Temp”
followed by “Light” to enter mode programming, press
“Temp” to cycle through to desired mode (LCD flashes
until confirmed), then press “Light” to confirm selection.
Standard mode maintains the desired temperature.
Note that the last measured spa temperature displayed
is current only when the pump has been running for
at least 1 minute. “
momentarily when you switch into Standard Mode.
Economy mode heats the spa to the set temperature only
during filter cycles. “
temperature is not current and will alternate with the
temperature when the temperature is current.
Pressing “Jets” while in Economy mode puts the spa in
Standard-In-Economy mode, (“
same as Standard Mode, then reverts to Economy Mode
automatically after 1 hour. During this time,
“Temp” followed by “Light” will revert the mode to
Economy immediately.
Sleep mode heats the spa to within 20°F (11°C) of the set
temperature only during filter cycles. “
on the display until mode is changed.
” will appear on the display
” will appear solid when the
”) which operates the
pressing
” will appear
Standby Mode
Pressing “Temp” followed by “Aux” or “Jets 2” or
“Blower” will turn off all spa functions temporarily. This
is helpful when changing a filter. Pressing any button
exits Standby mode. On some systems the “Jets” button
Press the “Jets 2” button once to turn pump 2 on or
off, and to shift between low and high speeds if it is a
two-speed pump. If left running, the pump will turn off
after a timeout period.
Blower (optional on some systems)
If your system has a blower (and only one pump), but
your panel does not have a “Blower” button, use the
“Aux” button to control the blower.
1-speed operation: on/off;
2-speed operation: med/hi/off; or
3-speed operation: lo/med/hi/off.
If left on, the blower will automatically turn off after a
timeout period.
Circ Pump (optional)
If your system is equipped with a circ pump, it may be
configured to work in one of three different ways:
1) The circ pump operates continuously (24 hours) with
the exception of turning off for 30 minutes at a time
when the water temperature reaches 3°F (1.5°C) above
the set temperature (most likely to happen in very
hot climates).
2) The circ pump stays on continuously, regardless of
water temperature.
3) The circ pump will come on when the system is
checking temperature (polling), during filter cycles,
during freeze conditions, or when another pump is on.
Page 2
 Loading...