

Page 1
A11113300
SSA
UUsseerr M
Maannuuaall
VVeerrssiioonn 11..0
0
Please read this manual carefully before operating this set
Please remove batteries after use.
Page 1 of 12
Page 2

Contents
User Interface.........................................................................................................4
LCD Panel Display ................................................................................................5
Quick Start Instructions .......................................................................................6
Basic Operation......................................................................................................6
5.1 Power ON/OFF ....................................................................................................... 6
5.2 Channel Selection (1-8)........................................................................................... 6
5.3 CTCSS(Continue Tone Coded Squelch System)
Selection Mode....................................................................................................... 6
5.4 Press-to-Talk(PTT) Functions............................................................................... 7
5.5 Monitor Function.................................................................................................... 7
5.6 Volume Level Selection (1-8 level)......................................................................... 8
5.7 Calling Tone Selection............................................................................................ 8
5.8 Key Lock Function ................................................................................................. 8
VOX (Voice Activated Transmission) Setting ....................................................8
Auto-scan Operation .............................................................................................9
Battery Option .......................................................................................................9
Important Safety Information............................................................................10
Battery Installation..............................................................................................10
SPECIFICATIONS.............................................................................................11
Declaration of Conformity..................................................................................12
Page 2 of 12
Page 3
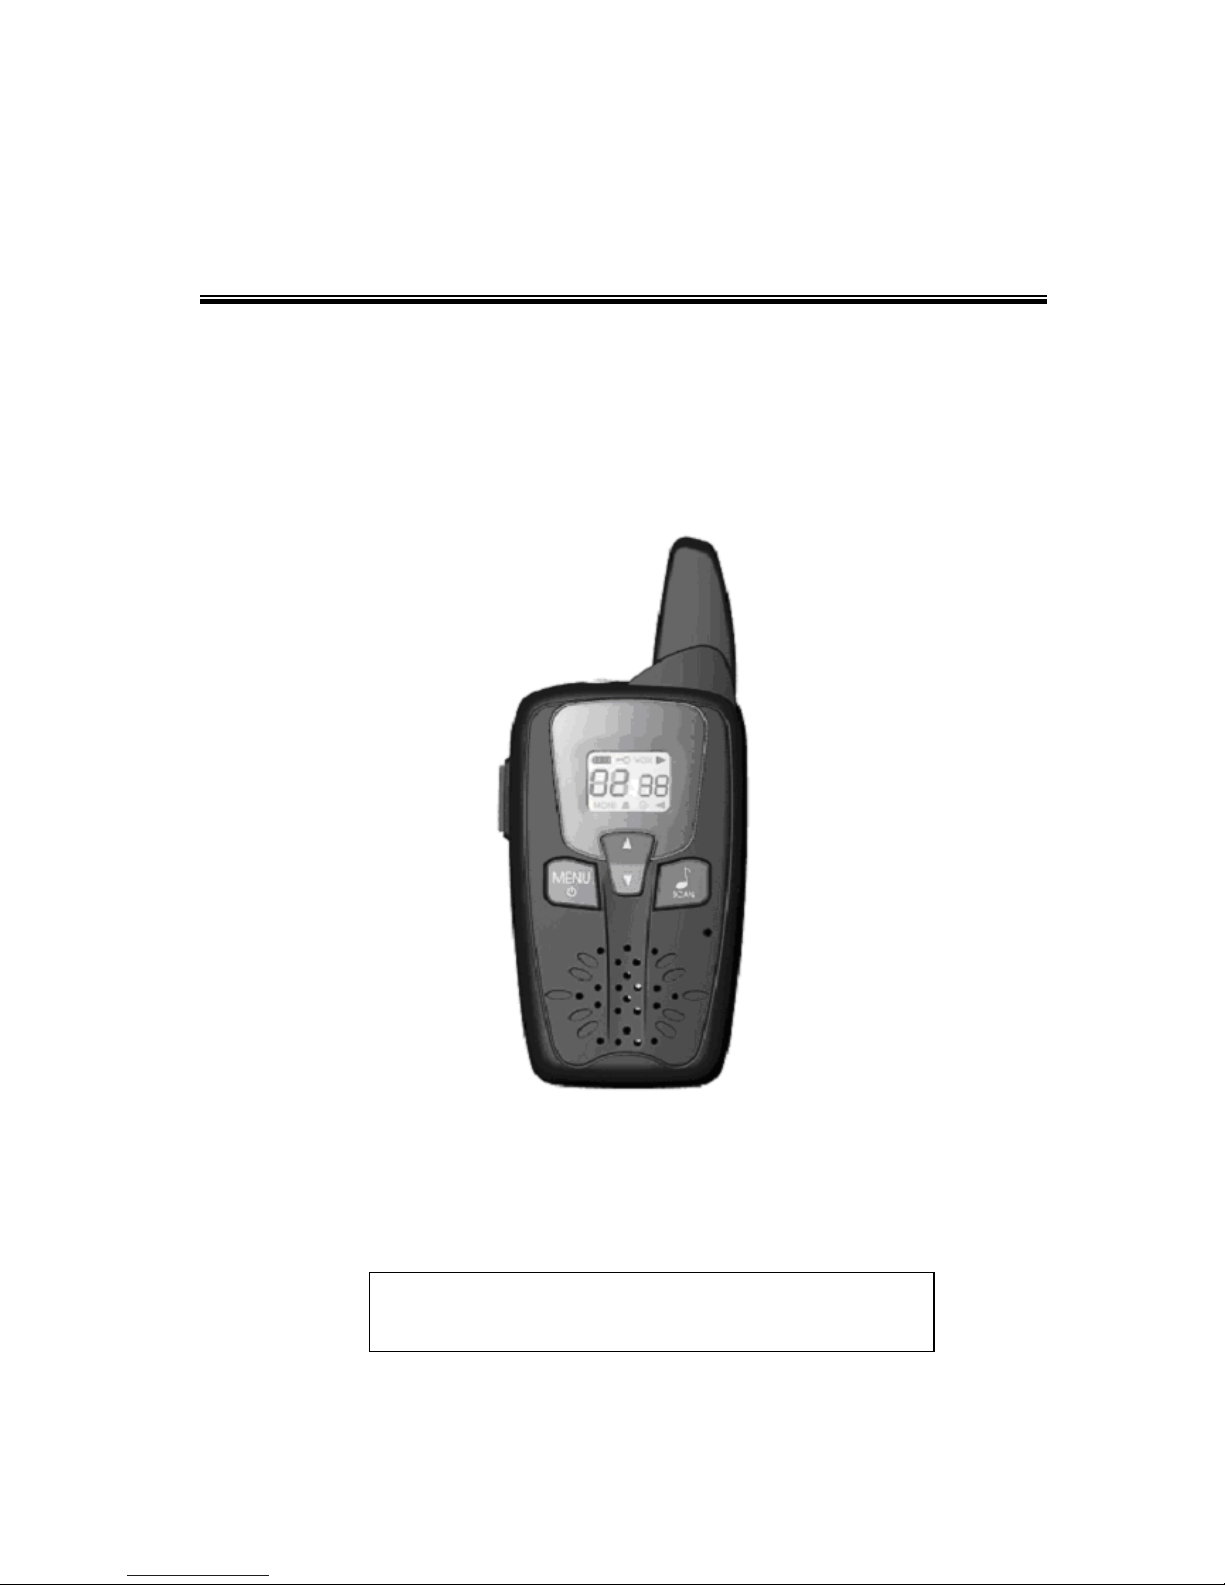
Introduction
The SA1130 series combines great look, super performance and advance
features that allows you stay connected while you’re on the go. Simply press and
hold the Press-to-Talk (PTT) button for instant communication to your group. It
features 38 privacy CTCSS codes for clear communication without interference.
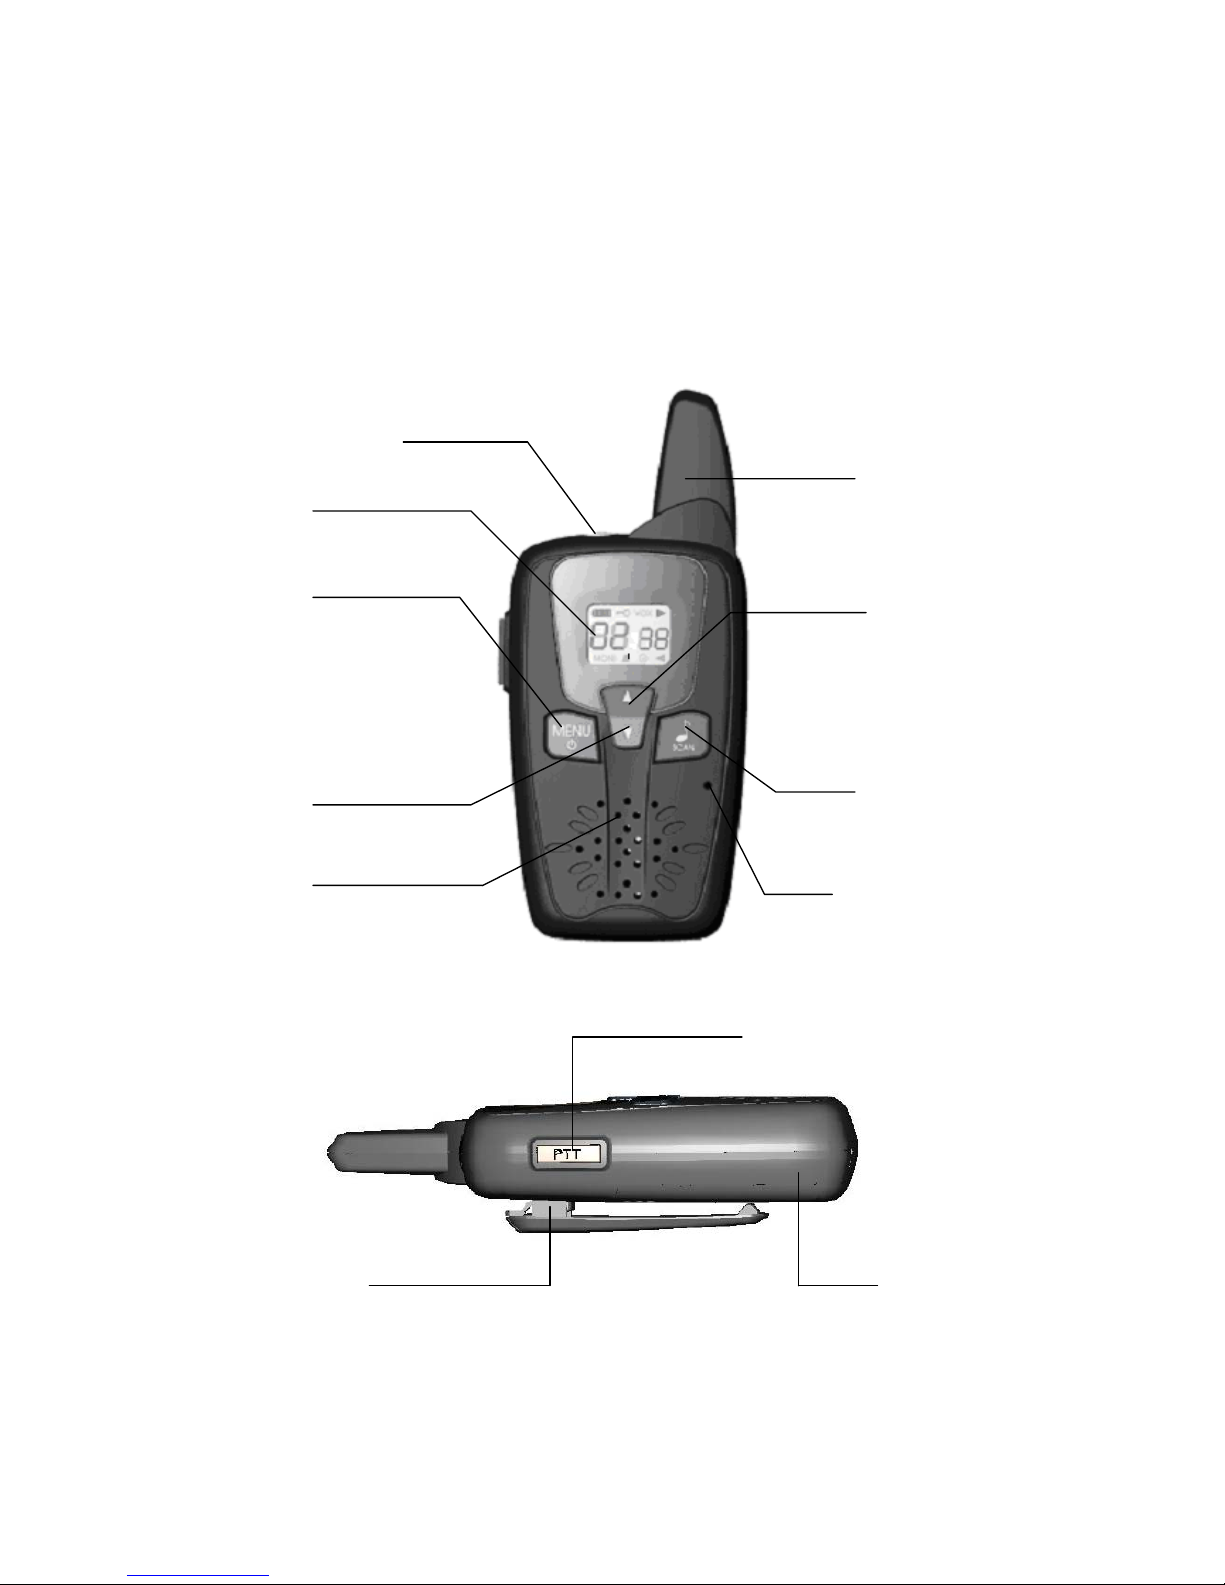
Microphone/
Headset Jack
LCD Panel
Antenna
MENU Key
Down Key
Speaker
PTT (Press-To-Talk) Key
Up Key
SCAN Key
Microphone
Belt Clip Battery Door
Page 3 of 12
Page 4

User Interface
2.1 Press-to-Talk (PTT) button
Press and hold while transmitting, release to listen.
2.2 MENU button
Press and hold (at least 2 seconds) to switch device ON/OFF.
Press briefly to enter menu mode.
2.3 SCAN button
Press briefly to make a call;
Press and hold (at least 2s) to scan channels;
Press and hold both scan and menu (at least 2s) to lock or unlock
The keypad.
2.4 UP/DOWN button (volume/channel selection)
select monitor function and set VOX level.
2.5 Microphone
Press to adjust volume level, change channels and sub-channels,
2.6 Loud Speaker
2.7 Belt Clip
2.8 Battery Compartment
2.9 Antenna
2.10 LCD Panel Display
Display the device’s status and MENU
Page 4 of 12
Page 5

LCD Panel Display
Keylock
Battery Indicator
Digit display for:
Channel
VOX Mode
TX
Digit display for:
CTCSS Code
& Volume
RX Monitor
Voice Activated Transmission (VOX) Menu
Appears when user activates hands free mode.
Battery Indicator
Display the remaining battery strength.
Transmission Indicator
Indicate device is in transmission mode
Receiving Indicator
Indicate device is in receiving mode
Key Lock Indicator
Appears when key lock is activated
Number Indicator
Display 2-digit for channel number, CTCSS Sub-channel number and volume
level
Monitor Indicator
Appears when Monitor function is activated
Page 5 of 12
Page 6

Quick Start Instructions
• Press and hold (at least 2 seconds) the
SA1130.
•
Press the
• Press the
the LCD screen.
•
Press the
•
Press the
on the LCD screen; press the
sub-channel.
•
Press and hold the
• Release the
Basic Operation
UP/DOWN
MENU
UP/DOWN
MENU
button once, and the current channel number flashes on
button for another time, the sub-channel number flashes
PTT
PTT
button to listen.
button to select volume level.
button to select the desired channel.
button to talk.
MENU
UP/DOWN
button to power on the
button to select the
In order to communicate with other SA1130 units, both parties must be on the same
channel. SA1130 has 8 channels indicated on the LCD Panel display. Before trying
to transmit on the selected channel, you should monitor the unit to check any
activity on the channel first.
5.1 Power ON/OFF
• Press the MENU button to switch the unit ON/OFF. When power is ON, all
LCD segments are switched on for 2 seconds and a beep tone is generated.
Previous settings (including channel and sub-channel numbers) are shown
on LCD.
5.2 Channel Selection (1-8)
• Press the MENU button briefly, and the current channel number flashes on
the LCD screen, then press UP/DOWN button to select the desired channel.
•
Press PTT button to confirm and return to NORMAL mode, or press MENU
button to confirm and enter the next mode item.
5.3 CTCSS(Continue Tone Coded Squelch System) Selection Mode
Page 6 of 12
Page 7

This feature allows usage of the sub-channels (00-38) within a main channel to
communicate with other party. It helps to avoid congestion on the main channel and
filters out unwanted noise and static.
• Press MENU button twice, then the CTCSS number is flashing.
• Press UP/DOWN button to select the CTCSS number (00-38), selecting
00 will ignore the CTCSS function.
•
Press
MENU
PTT
button to confirm and return to
button to confirm and enter the next mode item
NORMAL
mode, or press
.
NOTE: To communicate with other PMR units, they must be switched to the same
channel and CTCSS sub-code. To communicate with other PMR units that do not
have sub-codes, switch your unit to the same channel with the sub-code set to 00.
The CTCSS sub-codes can not prevent others from listening to your transmission.
This will only allow you to ignore all traffic on a given channel not using the same
sub-code.
5.4 Press-to-Talk(PTT) Functions
Receiving a call
•
Select the desired channel and CTCSS code;
• When a call is received, the RX Icon appears and you can listen to the
other party;
Transmitting a call
• Press and hold the PTT button to talk to the other party, and the TX
Icon
Note: When the other party has finished talking and you hear a “beep” sound, you
can start to talk.
Making a call
Press SCAN button briefly to make a call.
•
will display on LCD panel.
5.5 Monitor Function
This feature is used to check activity on the current frequency before transmitting.
It is useful when communicating with other parties with extreme range.
Page 7 of 12
Page 8

•
AT NORMAL mode, press the
monitor mode.
• Press
button to confirm and return to MONITOR mode. Any activity in current
channel will be monitored.
UP/DOWN
button to set Monitor function ON. Press
MENU
button four times then you enter
MENU
5.6 Volume Level Selection (1-8 level)
• With the keypad unlocked, both at NORMAL mode and receiving mode,
press UP/DOWN button to select the volume level.
5.7 Calling Tone Selection
There are six calling tones options.
•
Press MENU button five times, the “CL” appears and the current calling
tone setting (0-5) flashs.
• Press UP/DOWN button to select.
• Press PTT button to confirm.
5.8 Key Lock Function
or PTT
The lock function is to lock
happening to the unit settings.
To Lock/ Unlock the Keypad
•
Press and hold
seconds to lock the keypad, and the lock icon
MENU
the
SCAN
button will be locked;
• When the lock icon appears, press and hold
button simultaneously for at least 2 seconds to unlock the keypad, then the
lock icon
disappears on the LCD.
MENU
button and MENU button simultaneously for at least 2
button, and prevent accidental changes
appears on the LCD, then
SCAN
button and MENU
VOX (Voice Activated Transmission) Setting
This function enables you to have hands-free conversation. You do not have to
operate the
sensitivity to suit your environment of operation.
To Set the VOX Level
PTT
button each time when you want to talk. You can choose VOX
Page 8 of 12
Page 9

•
Press
UP/DOWN
0- Level is to disable the VOX function
1- Level is the least sensitive.
2- Level is the middle sensitive.
3- Level is the most sensitive.
button to set the VOX level from 0 to 3;
Voice Activation Accessory (optional)
•
Insert your microphone/headset into the SP Jack;
•
Press
vox level flashes;
• Press
sensitivity;
MENU
UP/DOWN
button three times, the
“VOX”
button to select VOX sensitivity among the 4 levels
icon appears and current
• Press PTT button to confirm the selected VOX setting;
Press MENU button to confirm and enter next item.
•
Auto-scan Operation
Scanning searches for signals automatically and makes it easier to locate new
stations for contacting or listening purposes. This feature allows you to monitor all
activated channels while scanning.
To Set Auto-scan function ON/OFF
•
At NORMAL mode, press and hold
mode;
• When in scan mode, the radio will scan each channel, and the display shows
scanning channel;
• After an activated channel is scanned, the scan stops to receive the signal;
• Press UP/DOWN button to continue to scan;
•
Press the SCAN button or PTT to stop the scanning.
Note: When you are setting the PMR, the option will be cancelled and return
to standby mode if you free handle for 3 seconds.
Battery Option
Your radio equipment is designed to operate both in four “AAA” type Ni-MH
rechargeable batteries (4.8V DC 550mAH) or Alkaline batteries (6 .0V DC). You
need to set the battery option according to which battery type you are using actually,
for your radio equipment can show the low battery level in time.
To choose Battery type
• Press MENU button six times, the “bA” appears and the current battery type
setting (0-1) flashs.
Page 9 of 12
SCAN
button for 2 seconds to enter scan
Page 10

•
Press UP/DOWN button to select.
• Press PTT button to confirm and return to standby mode.
0- Level is stand for Alkaline batteries (6.0V DC).
1- Level is stand for “AAA” type Ni-MH rechargeable batteries (4.8V DC
550mAH)
Important Safety Information
1. Radio
•
Do not shock or vibrate the radio to keep the best condition;
• Do not leave the radio under the direct ray of light (the sun) or high
humid area;
•
Never hold the antenna while transmitting, for better performance.
2. Battery
•
•
Charging time: 10-12 hours;
Do not overcharge the battery to conserve the battery lifetime,
and do not charge more than 20 hours;
•
Never charge Alkaline batteries for charging
•
Use only recommended desktop charger
3. Antenna
•
The antenna is a fixed type;
•
Keep the antenna 1 inch away from your head and body.
Battery Installation
Your radio equipment is designed to operate both in four “AAA” type
Ni-MH Rechargeable batteries (4.8V DC 550mAh) or Alkaline batteries
(6.0V DC).
! Caution
Never attempt to recharge Alkaline or Dry cell batteries. Only use
recommended rechargeable batteries.
Installation of the batteries
• Ensure that the radio equipment sets to power OFF
•
Release the belt clip by pulling the latch outwards and slip the clip
up
Page 10 of 12
Page 11

•
Slide the cover off the back of the unit
• Insert four “AAA” Ni-MH batteries or Alkaline batteries as refer to
the battery polarity indication
• Slip back the battery door and clip
SPECIFICATIONS
Frequency/
No.of Channel
Talk Range
Power Output
• 446 Mhz (Europe) - 8 Channel
446 Mhz (Singapore) - 5 Channel
•
• 477 Mhz (Malaysia/Australia) - 40 Channel
• 409 Mhz (China/Hong Kong) - 20 Channel
up to 4.5 km (3 miles) in open area
•
Useable Sensitivity > -120dBm
Modulation Distortion < 5% (1KHz 70%)
Maximum Deviation: +/- 2.5kHz
• 0.5 Watt
Power Source
Key Features
Display
Standby Time
• 4 x AAA, 6V DC Alkaline or
4 x AAA, 4,8V DC 550mAh, Ni-MH Rechargeable
•
CTCSS (38 sub-channel codes)
•
• VOX (Voice Activation)
• Speaker/Mic Jack (for Hands-free operation)
Automatic Background Noise Squelch Control
•
• Monitor Function
• Call Function
Auto Scan Function
•
• Auto Power Save Mode
• Key Lock Function
Power Level indicator (4 level)
•
• Volume Adjustment (8 level)
• Splash Proof (improved reliability for outdoor use)
Desktop Charger (Option)
•
Illuminated Green LCD backlight
•
• LC D Display Size (20mm x 15 mm)
• Consists of 9 Icons (Tx, Rx, Monitor, VOX, Tone,
CTCSS, Key Lock, Battery and Volume)
• 100 hours (for 550mAh battery)
Page 11 of 12
Page 12

Declaration of Conformity
In accordance to the following Applicable Directives:
Radio Equipment and Telecommunications Terminal Equipment
(R&TTE Directive): Directive 1999/5/EC
The SA1130 has been assessed (refer Attestation Number
R0403297-1/2/3/1S) against the following Applicable standards:
• ETSI EN 300 296-2 V1.1.1 (2001-03)
•
ETSI EN 301 489-5 V1.3.1 (2002-08)
EN60065: 2002
•
This declaration is the responsibility of the manufacturer/ importer
040-611523-101
Shiro Corporation Pte Ltd
31 Ubi Road 1, #07-00
Aztech Building Singapore 408694
Page 12 of 12
 Loading...