

Page 1

CyberLink
PowerCinema 5
User Guide
This version of CyberLink PowerCinema is created
for use as the TV software for Aztech PCTV3000.
Please contact CyberLink if you want to purchase
other software versions containing other features.
Page 2

Copyright and Disclaimer
All rights reserved. No part of this publication may be reproduced, stored in a
retrieval system, or transmitted in any form or by any means electronic, mechanical,
photocopying, recording, or otherwise without the prior written permission of
CyberLink Corporation.
To the extent allowed by law, CyberLink PowerCinema IS PROVIDED “AS IS”,
WITHOUT WARRANTY OF ANY KIND, EITHER EXPRESS OR IMPLIED,
INCLUDING WITHOUT LIMITATION ANY WARRANTY FOR
INFORMATION, SERVICES, OR PRODUCTS PROVIDED THROUGH OR IN
CONNECTION WITH CyberLink PowerCinema AND ANY IMPLIED
WARRANTIES OF MERCHANTABILITY, FITNESS FOR A PARTICULAR
PURPOSE, EXPECTATION OF PRIVACY, OR NON-INFRINGEMENT.
BY USING THIS SOFTWARE, YOU AGREE THAT CYBERLINK WILL NOT
BE LIABLE FOR ANY DIRECT, INDIRECT, OR CONSEQUENTIAL LOSS
ARISING FROM THE USE OF THIS SOFTWARE OR MATERIALS
CONTAINED EITHER IN THIS PACKAGE.
The terms and conditions here under shall be governed and construed in accordance
with the laws of Taiwan.
CyberLink PowerCinema is a registered trademark along with other company and
product names mentioned in this publication, used for identification purposes and
remain the exclusive property of their respective owners.
International Headquarters
Mailing Address CyberLink Corporation
15F, #100, Minchiuan Road, Shindian City
Taipei 231, Taiwan
Web Site www.cyberlink.com
Telephone 886-2-8667-1298
Fax 886-2-8667-1300
Copyright © 2006 CyberLink Corporation. All rights reserved.
Page 3

Contents
Overview ................................................................ 7
Setup Wizard ..........................................................................................8
Home Page ...........................................................................................15
Navigation Controls .........................................................................16
Browsing for Media Content ...........................................................16
Player Controls for Mouse Use .......................................................17
Settings .................................................................................................18
General Settings ...............................................................................18
Display Settings ...............................................................................19
Audio Settings .................................................................................21
TV ......................................................................... 23
Watching TV ........................................................................................24
Quick Menu .....................................................................................24
TV Menu Options ................................................................................26
Recorded TV ....................................................................................26
TV Recording Schedules ................................................................. 27
Program Guide .....................................................................................28
Searching for a TV Program ............................................................28
Extra TV Features ................................................................................29
Instant Replay ..................................................................................29
Twin TV (Optional) .........................................................................29
Triple TV (Optional) .......................................................................30
TeleText ...........................................................................................31
TV Settings ...........................................................................................32
Signal Settings .................................................................................32
3
Page 4

CyberLink PowerCinema
Manage Channels ............................................................................33
Recording Settings ...........................................................................34
Guide Settings ..................................................................................35
Videos ................................................................... 37
Watching Videos ..................................................................................38
Browsing for Videos ........................................................................38
Capturing Videos ............................................................................. 39
Video Settings ......................................................................................40
Music .................................................................... 41
Listening to Music ................................................................................42
Browsing for Music .........................................................................42
Watching Visualizations .................................................................. 43
Using Playlists .................................................................................43
Sync & Go ............................................................................................45
Music Settings ......................................................................................47
Pictures................................................................. 49
Viewing Pictures ..................................................................................50
Browsing for Pictures ......................................................................51
Editing Pictures .................................................................................... 52
Picture Settings .....................................................................................53
Technical Support ............................................... 55
Before Contacting Technical Support ..................................................56
Web Support .........................................................................................57
Telephone Support ...............................................................................58
4
Page 5

Contents
Index ..................................................................... 59
5
Page 6

CyberLink PowerCinema
6
Page 7

Chapter 1:
Overview
Welcome to CyberLink PowerCinema and the world of digital home entertainment!
CyberLink PowerCinema is an integrated multimedia player that brings you the
enjoyment of live TV, movies, music, up-to-date news information and much, much
more.
Before using CyberLink PowerCinema we recommend that you optimize your
computer for multimedia using the Setup Wizard.
Note:
• Ensure all the required hardware (i.e. tv turner card and radio card) has
been installed before launching CyberLink PowerCinema. For a hardware
compatibility list or tutorial for setting up a tv tuner card, refer to the
support section of our web site. http://www.cyberlink.com
• If you encounter any problems while setting up the hardware, please
contact the hardware vendor for assistance.
When you first launch CyberLink PowerCinema, you will be prompted to run the
setup wizard.
7
Page 8
CyberLink PowerCinema
Setup Wizard
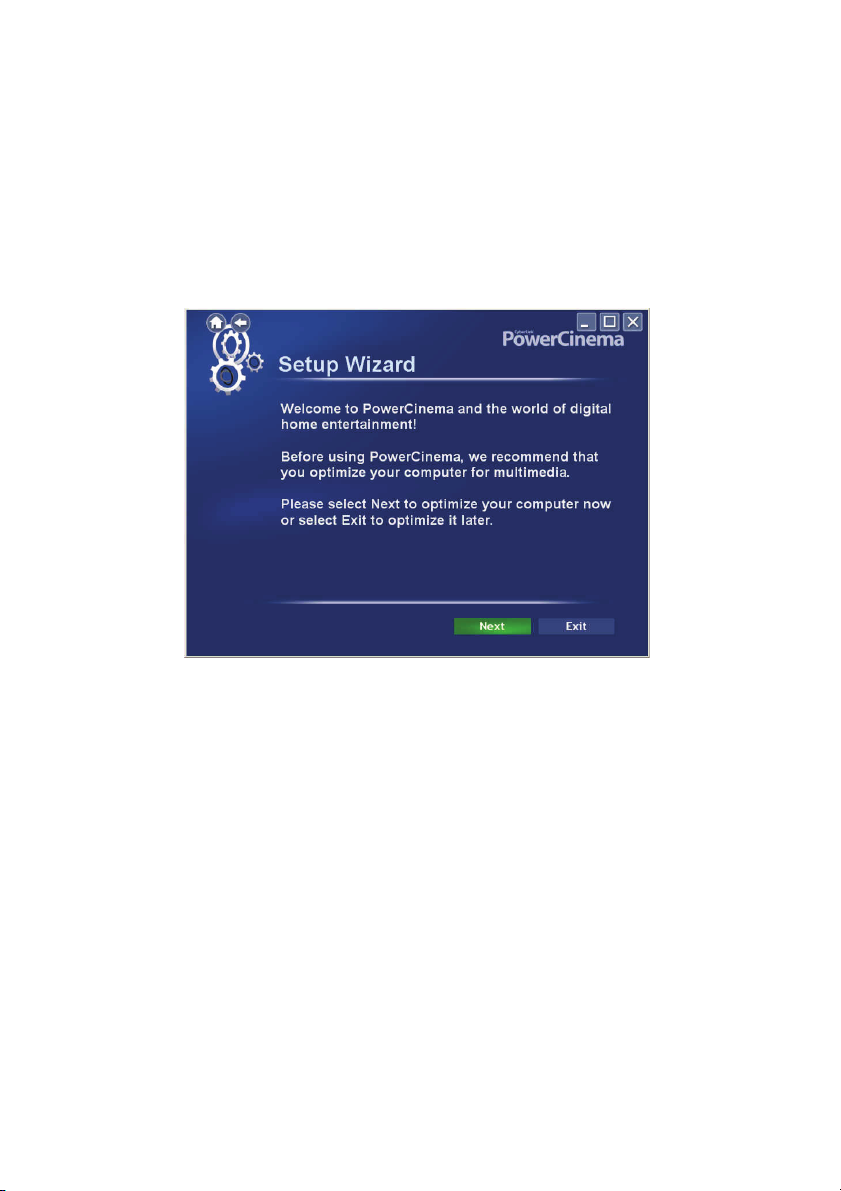
1. The Setup Wizard begins by displaying a welcome message. Select the
Next button to begin optimizing your computer for use with CyberLink
PowerCinema.
Note:
• You may exit the Setup Wizard at any time by selecting Exit. You will be
asked if you want to run the Setup Wizard the next time CyberLink
PowerCinema is launched. You may also run the Setup Wizard at any time
by accessing it on the Settings page.
• It is strongly recommended that you complete the Setup Wizard the first
time CyberLink PowerCinema is launched or when new hardware is
installed to ensure that all the hardware was installed correctly.
8
Page 9
Chapter 1: Overview
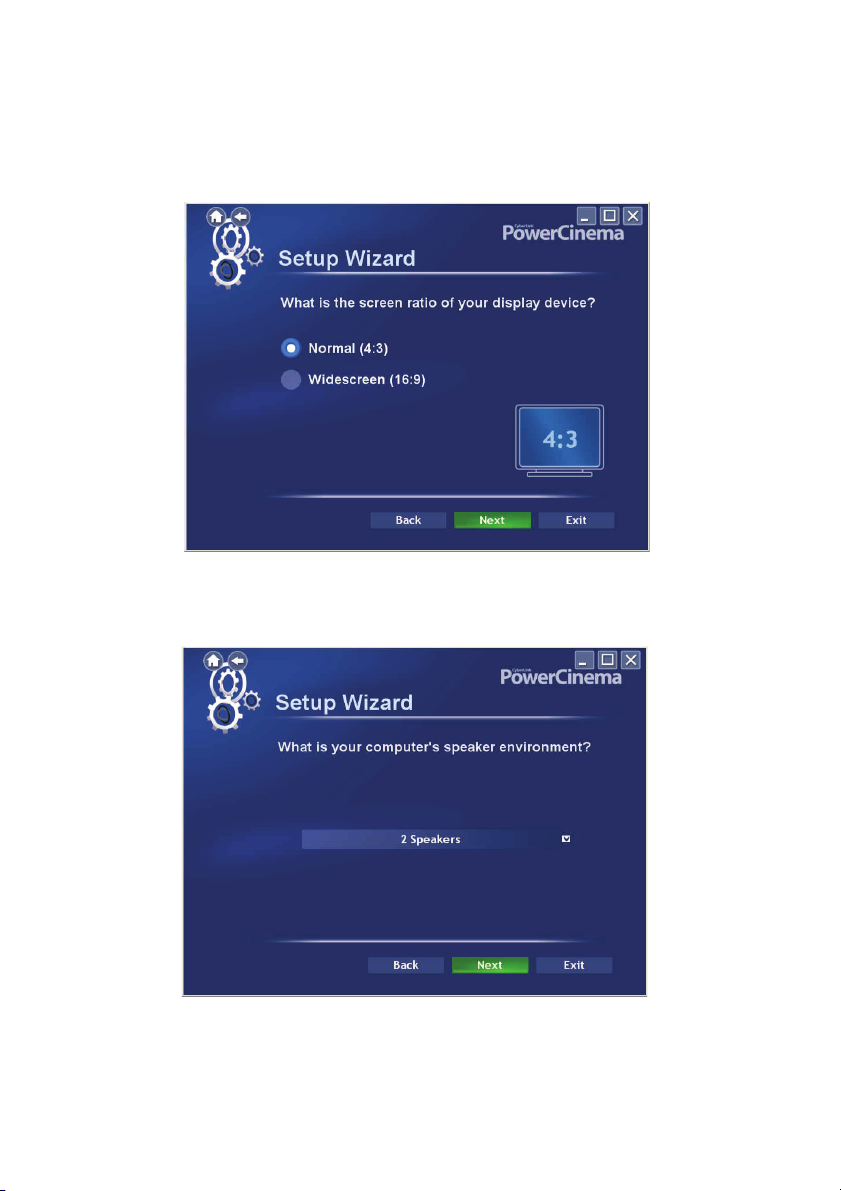
2. Select the screen ratio of your display device (either 4:3 or 16:9) and
then select Next.
3. The Setup Wizard will then ask you what the speaker environment of
your computer is. Select the option from the drop-down menu that best
describes your environment and then select Next.
9
Page 10
CyberLink PowerCinema
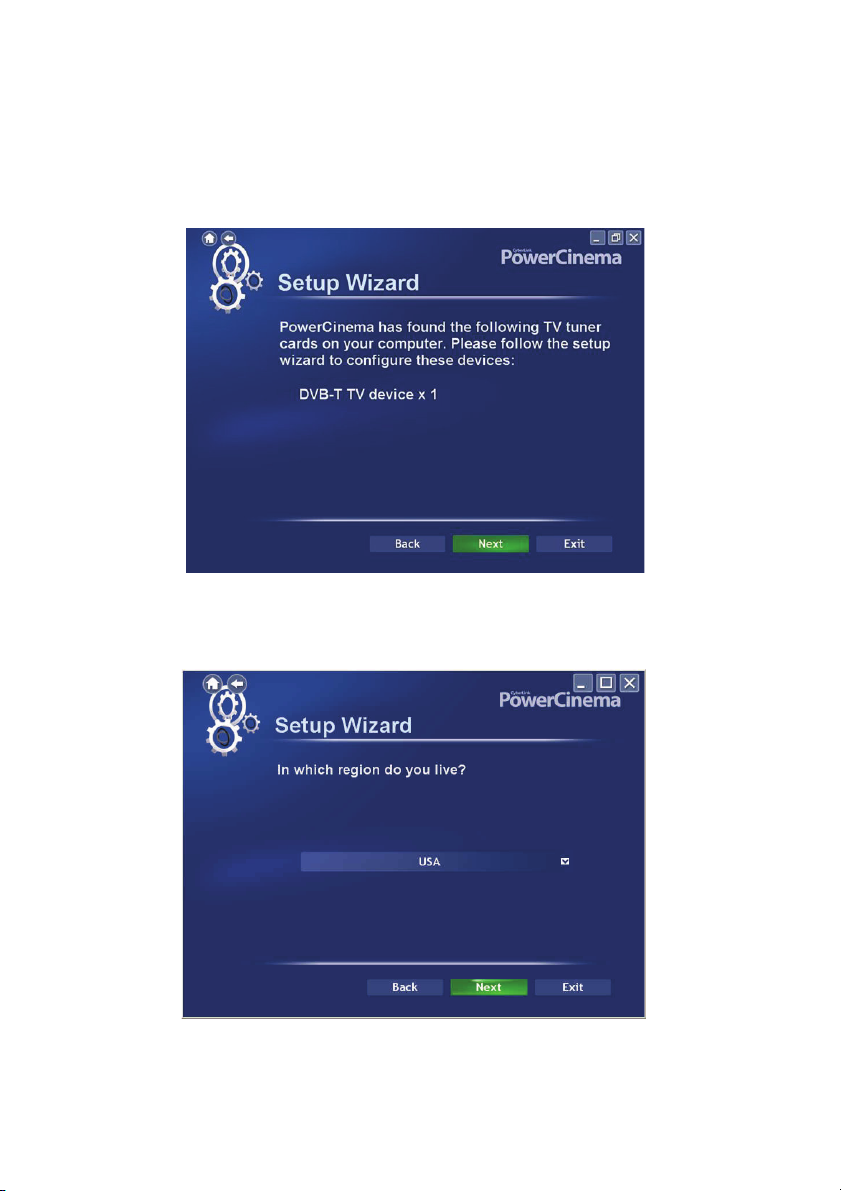
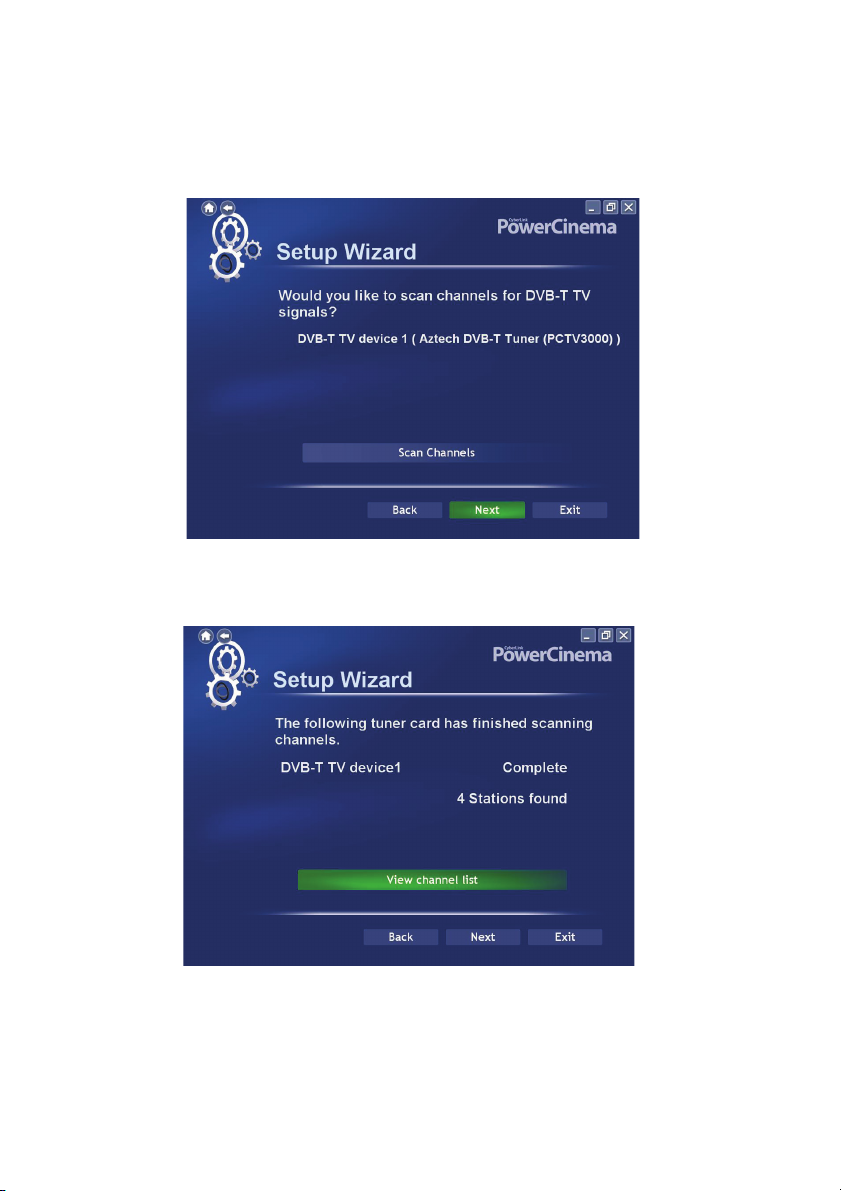
4. CyberLink PowerCinema will now help you configure your TV tuner
card, including scanning for available channels. Select Next to begin
configuring your TV tuner card.
5. To assist CyberLink PowerCinema to find all the available channels in
your area, select the region you live in from the drop-down menu and
then select Next.
10
Page 11
Chapter 1: Overview
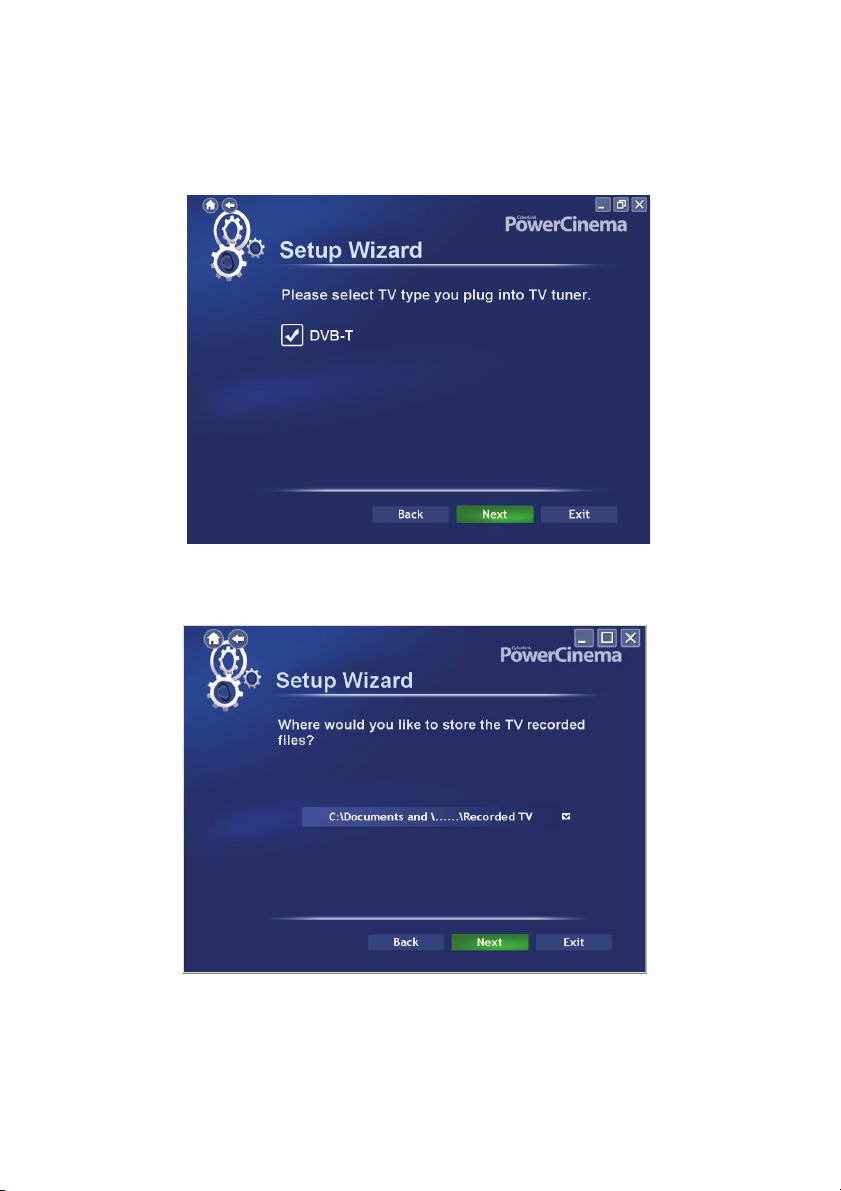
6. Select the type of TV tuner card that you have install in your computer
and then select Next to continue.
7. Choose where you would like to save your recorded TV files on your
computer. You may change this location later on the TV Settings page.
11
Page 12
CyberLink PowerCinema
8. To scan for available channels, select your tuner card from the dropdown menu and then select Next.
9. Once CyberLink PowerCinema has completed scanning for available
channels, select Next to display the scanning results.
12
You may select View channel list to view a list of the found channels.
Page 13
Chapter 1: Overview
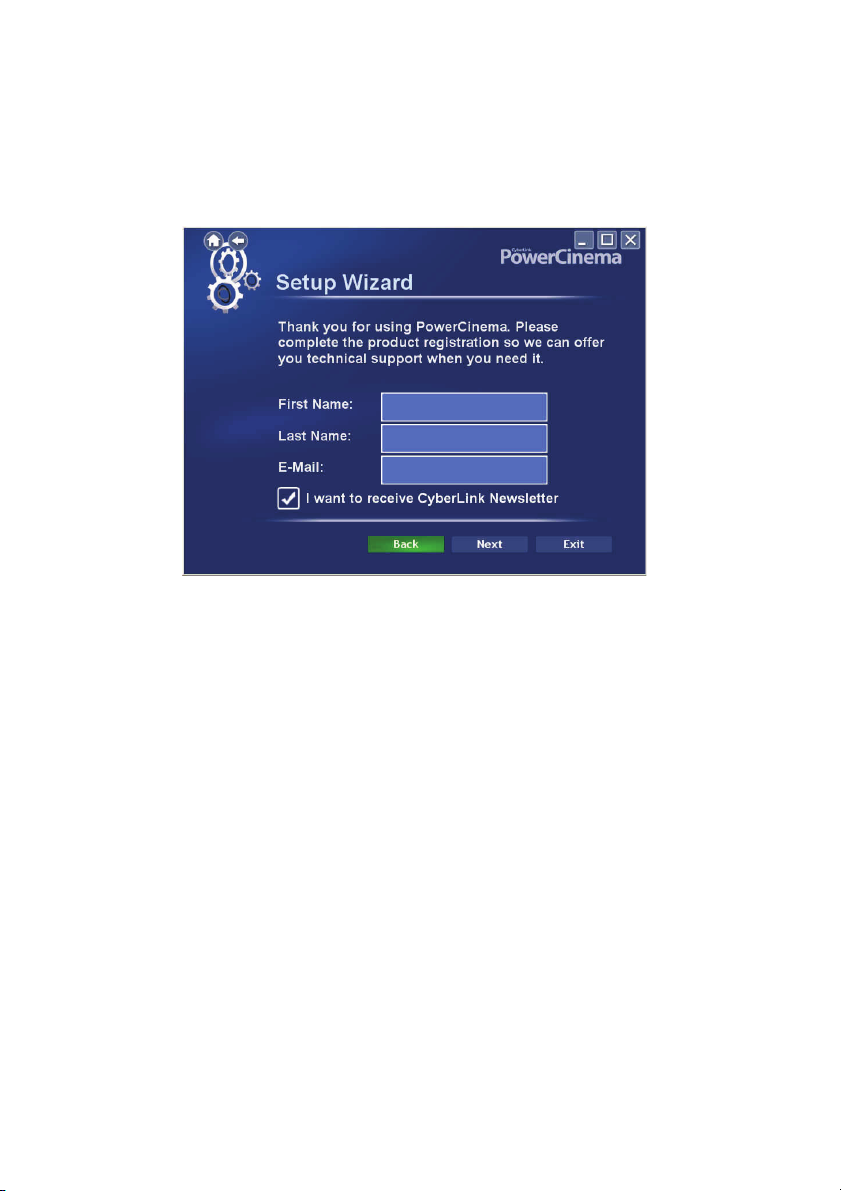
10. Select Next to display the Product Registration Page and enter in your
name and email address to register your copy of CyberLink
PowerCinema, so you can receive technical support.
Also choose whether you want to receive the CyberLink Newsletter
and then select Next.
13
Page 14
CyberLink PowerCinema
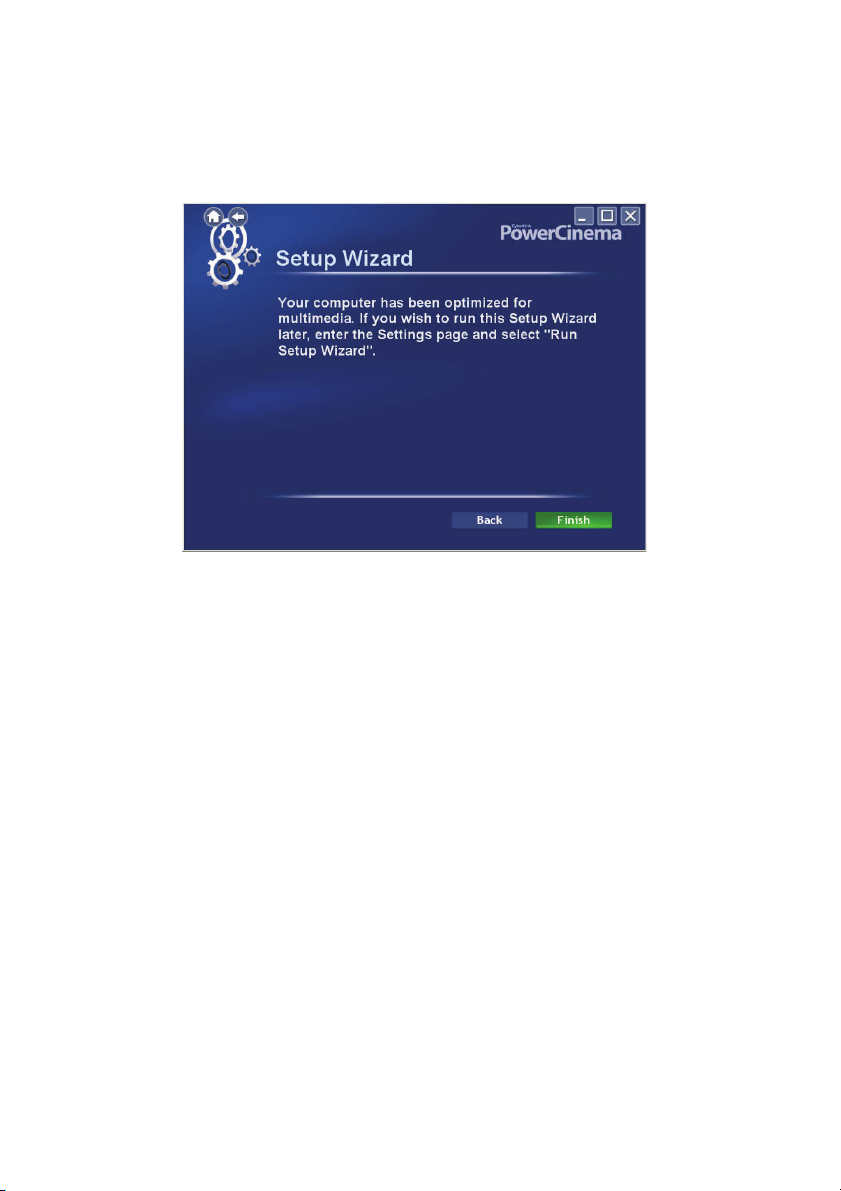
11. Congratulations! Your computer has now been optimized for
multimedia. Select Finish to begin using CyberLink PowerCinema.
14
Page 15

Chapter 1: Overview
Home Page
The Home page displays the available media types, which you can browse
through using a mouse's scroll wheel or the Left/Right arrows on the
keyboard. Select from one of the available features in CyberLink
PowerCinema to begin enjoying live TV, movies, music, up-to-date news
information and much, much more!
Note: Cyberlink PowerCinema's features and its user interface depends on its
version and add-on packs that are installed.
If your computer is connected to the Internet, CyberLink PowerCinema will
display the current weather conditions of your favorite city in the top right
corner. CyberLink PowerCinema will also periodically display product news
and information in the lower right corner. Selecting a product icon opens a
web page with more details and ordering information.
15
Page 16

CyberLink PowerCinema
Navigation Controls
The navigation bar across the top of the window contains a number of
buttons for navigating around CyberLink PowerCinema. Select the Home
icon to return to the Home page. Select the Back icon to return to
a previous page. The Minimize, Full Screen/Window, and Close buttons
have standard Windows behavior.
The Movies, Videos, Music, and TV functions continue to
play as you navigate around CyberLink PowerCinema,
allowing you to enjoy your media while performing other
tasks. To return to the media that is playing, select the Now
Playing pane in the bottom left corner.
Browsing for Media Content
Media pages have functions on the left and a content browsing area on the
right. Files are displayed as thumbnails (or icons) and organized in folders.
Select a folder to display its contents.
If the number of files and folders displayed exceeds one page in the content
browsing area, use the up/down buttons in the lower right corner to
scroll through the pages. You can also use the up/down arrows on the
keyboard to scroll up or down one row, or the Page Up/Page Down keys to
scroll up or down an entire page.
To go up one folder level, select the Up One Level icon .
16
Page 17

Chapter 1: Overview
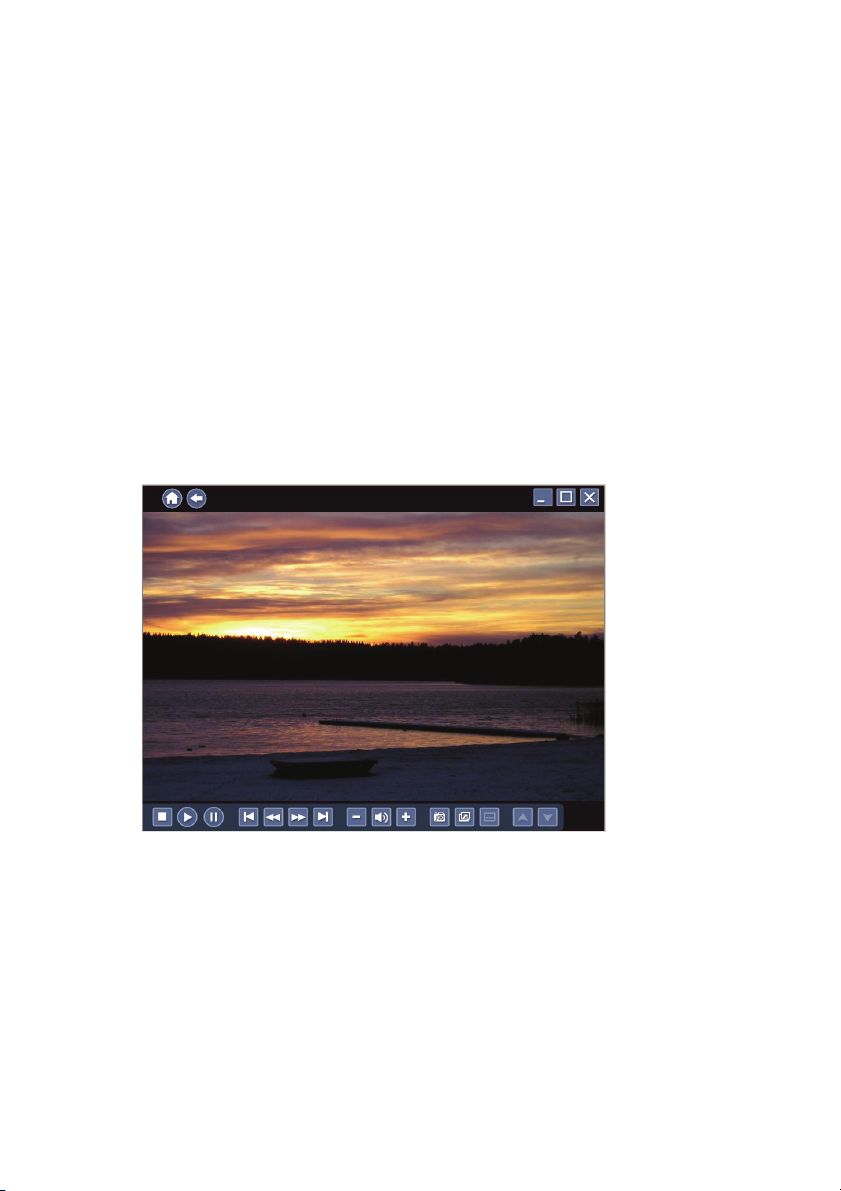
Player Controls for Mouse Use
To play a media file, select its thumbnail (or icon) in the content browsing
area. The player control panel appears whenever you move the mouse, then
automatically disappears several seconds after the mouse stops moving.
Standard playback buttons include Stop, Play/Pause, Previous, Rewind,
Fast Forward, and Next. Volume controls include Vo l um e Do w n, Mute/
Speaker On, and Vol u me Up. Other control buttons vary depending on the
type of media being played.
17
Page 18
CyberLink PowerCinema
Settings
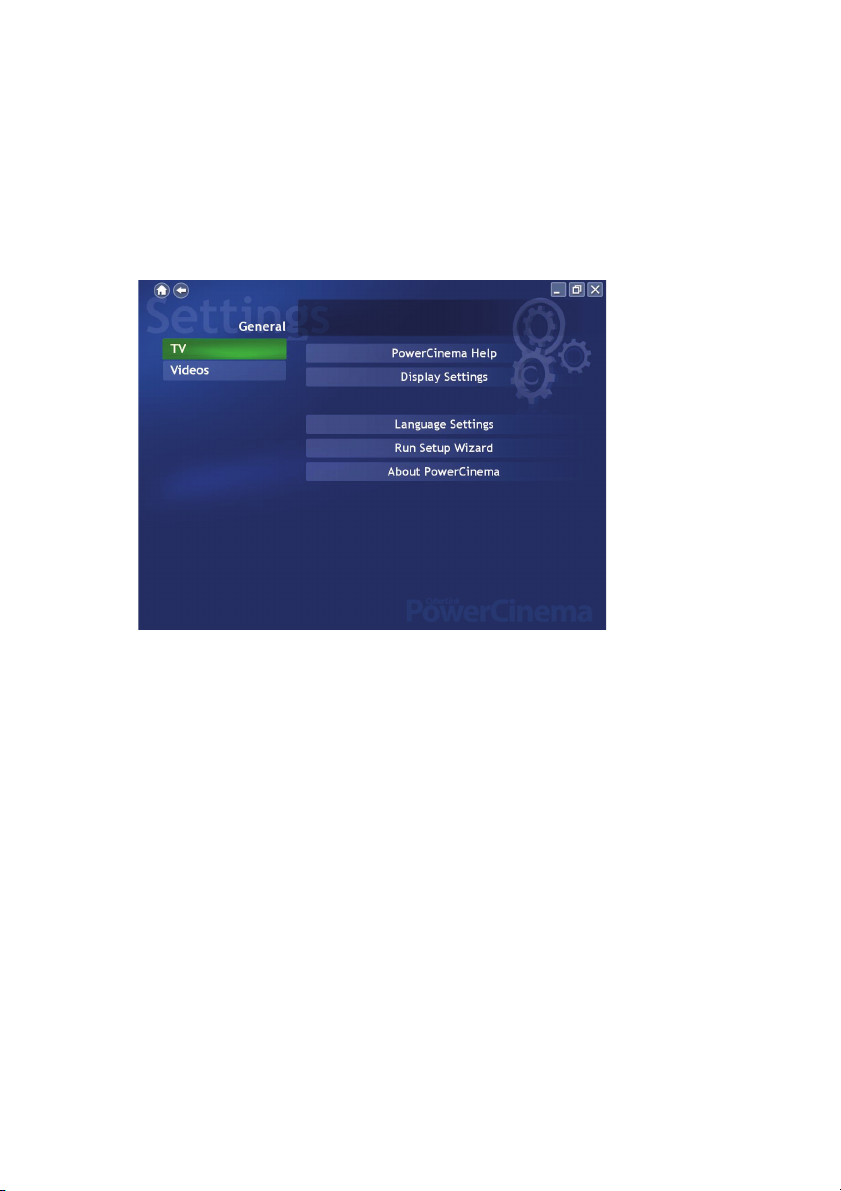
Selecting Settings on the Home page opens a page of options for
configuring CyberLink PowerCinema.
General Settings
PowerCinema Help opens this help system.
Display Settings opens a page with options for configuring your display
device. (See "Display Settings" on page 19.)
Audio Settings opens a page with options for configuring your computer's
audio. (See "Audio Settings" on page 21.)
Language Settings allows you to change the display language of CyberLink
PowerCinema. The language display will change dynamically, without you
having to restart the program.
Run Setup Wizard opens the wizard that appears the first time you run
CyberLink PowerCinema, allowing you to optimize your computer if you
did not do so after installation, or if you upgrade your computer. You can
18
Page 19
Chapter 1: Overview
also register your copy of CyberLink PowerCinema at the end of the Run
Setup Wizard..
About CyberLink PowerCinema opens a page with version and copyright
information, as well as your personal registration information.
Note: Other settings can be found in the function-specific help sections.
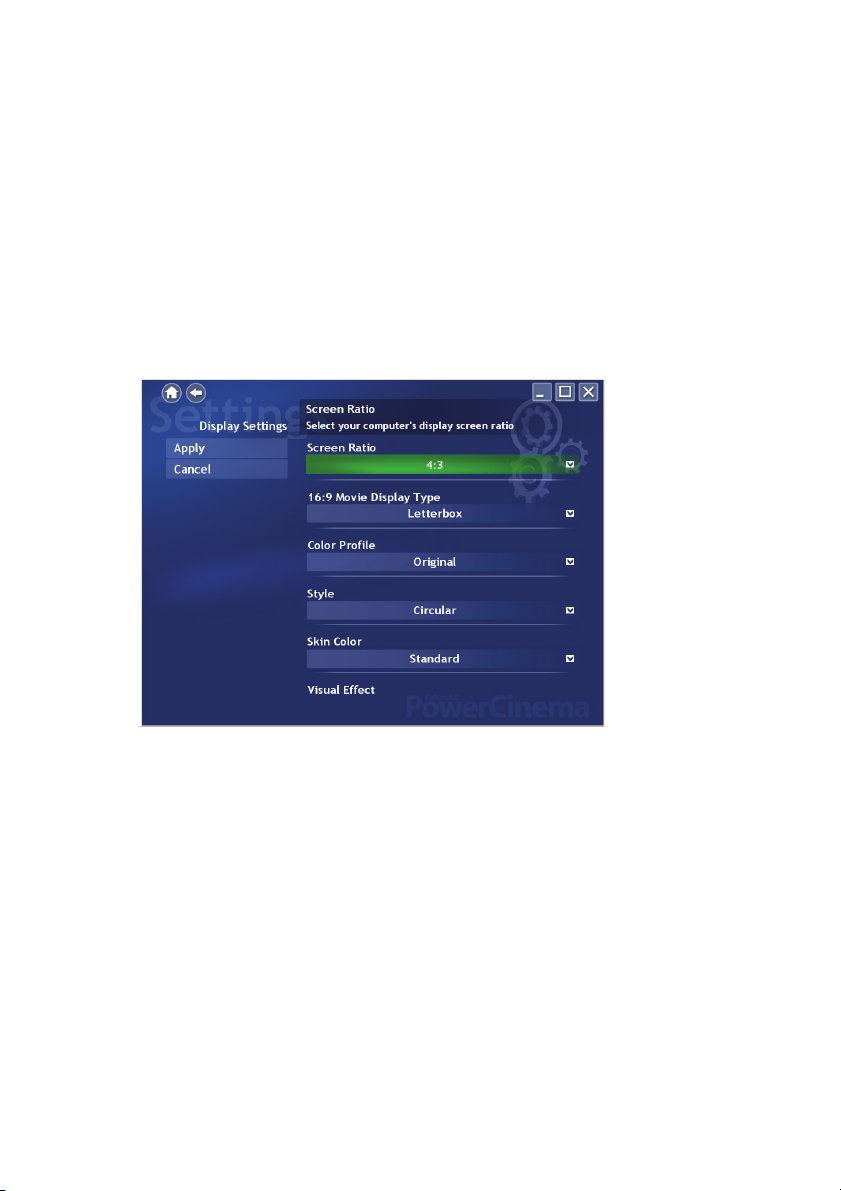
Display Settings
Use the Screen Ratio to indicate if you have a standard (4:3) or widescreen
(16:9) display.
16:9 (or 4:3) Movie Display Type determines how movies and videos are
converted to fit the screen when they do not match the screen ratio.
Letterbox keeps the video display undistorted and fills the extra space with
black bars. CLPV is a video stretching technology from CyberLink that
produces minimal distortion in the center of the picture. Pan & Scan
displays the central portion of DVD titles in widescreen ratio, and allows
you to drag the display area to view different portions of the video.
Color Profile allows you to change the overall color scheme of video
content during playback. Original uses the color scheme of the disc you are
19
Page 20

CyberLink PowerCinema
watching. Vivid, Bright, and Theater add enhanced color to the video
display. CLEV-2 is a video enhancement technology from CyberLink that
dynamically adjusts the brightness, contrast, and saturation if the movie you
are watching contains scenes that are overly dark or bright. Options other
than Original require more system resources to run.
Style allows you to select the menu style on the home page. Choose between
the standard menu and the circular menu. The Skin Color option allows you
to change the skin color of CyberLink PowerCinema. The Visual Effect
option lets you choose between 2D and 3D effects in CyberLink
PowerCinema. Select Good or Best for 3D effects, or Off for 2D effects.
Note: If your display card does not support 3D graphics, this option will not be
available. CyberLink PowerCinema automatically detects your display card
capability.
Load Default Settings returns the settings on this page to their original
values. If you modify any settings on this page, you must select Apply for
these changes to take effect.
20
Page 21

Chapter 1: Overview
Audio Settings
Set Speaker Environment to match the number of speakers you have.
Select SPDIF for digital audio output.
Output Mode determines the special processing used on the audio signal.
Experiment with the available settings to decide which you prefer.
Audio Channel Expander expands the range of sound of 4 or 6 speaker
output. CLMEI 2 is an audio channel expansion technology from
CyberLink that converts stereo audio sound and outputs it to multiple
channels. There are three variations: CLMEI 2 - Movie for watching
movies, CLMEI 2 - Music for regular music output, and CLMEI 2 -
Onstage for a more live sound.
Dynamic Range Compression offers options for different listening
environments. Normal Environment creates a standard virtual listening
environment. Quiet Environment emphasizes even the slightest sound
effect in a movie. Noisy Environment amplifies low range audio signals,
which is especially suitable for notebook computers.
Load Default Settings returns the settings on this page to their original
values. If you modify any settings on this page, you must select Apply for
these changes to take effect.
21
Page 22

CyberLink PowerCinema
22
Page 23
Chapter 2:
TV
CyberLink PowerCinema allows you to watch TV on your computer. You can
watch TV programs, schedule recordings and watch recorded TV shows. Select TV
on the Home page to open the main TV page.
23
Page 24
CyberLink PowerCinema
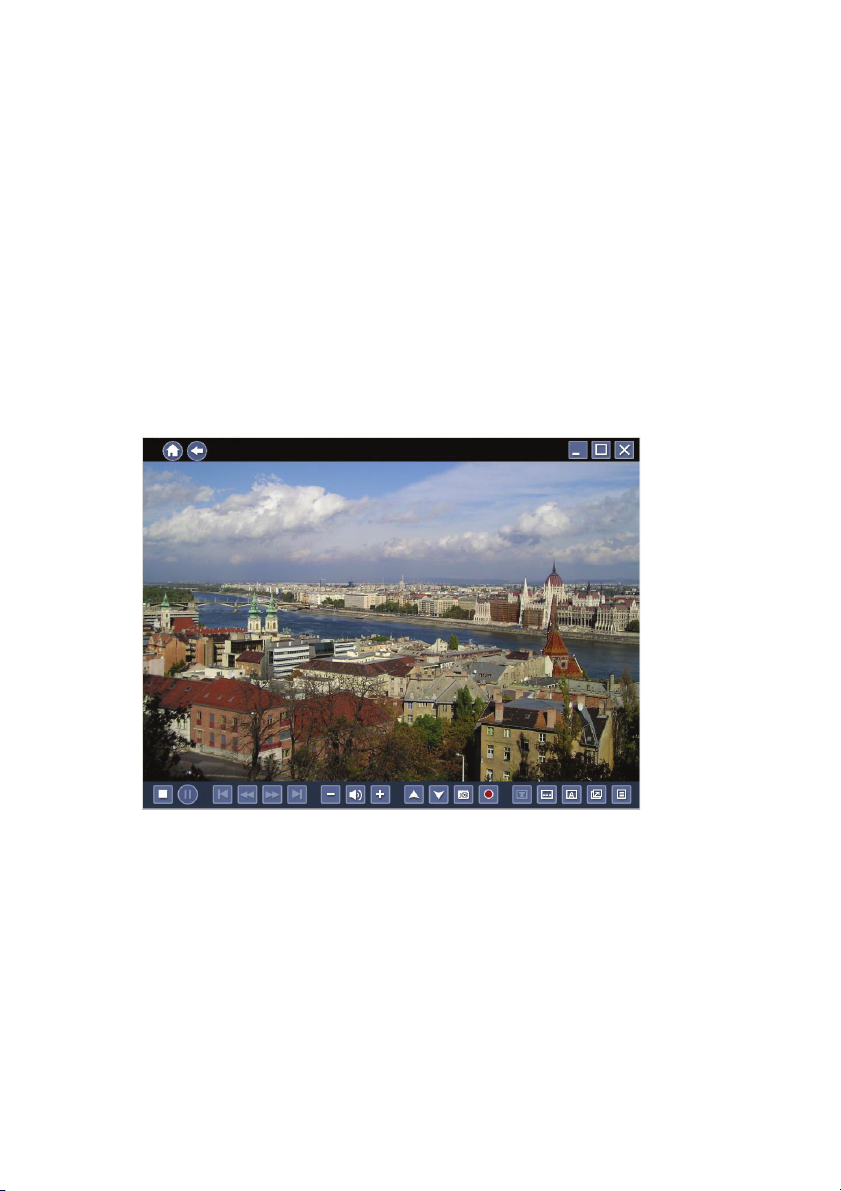
Watching TV
When you watch TV, the following additional buttons appear on the
playback controls for use with a mouse: Channel up (switches up one
channel), Channel down (switches down one channel), Snapshot
(takes a snapshot of the current frame of video), Record (records TV
content as a video file), Tel eTe xt (displays TeleText information),
Subtitle (displays broadcast subtitles when available), Audio (switch
between audio modes when available), Always on Top (TV window is
always on top of other programs on your computer) and Quick Menu
(provides quick access to the TV Menu and other settings).
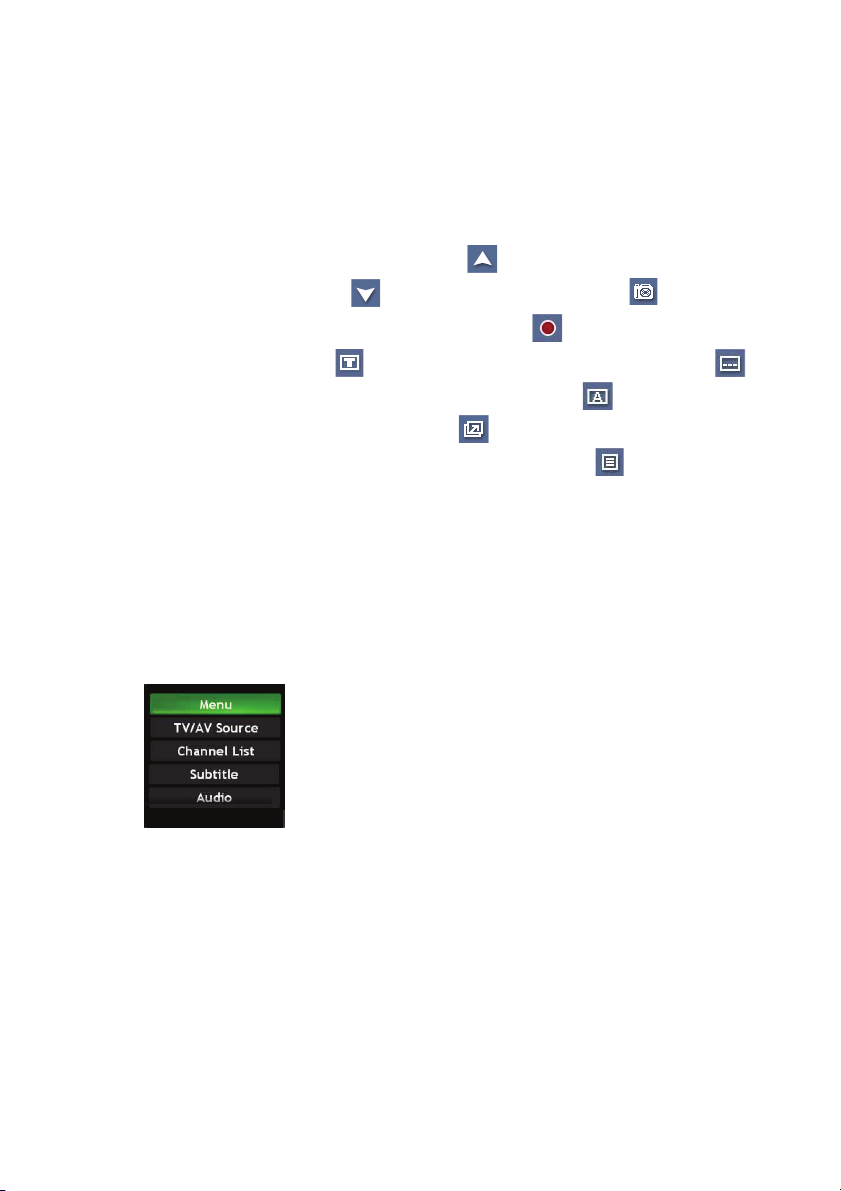
Quick Menu
The TV window automatically displays the current channel in full screen
mode. To display the TV menu options page, select the Quick Menu icon on
the Playback Controls panel and then select Menu.
Select TV/AV Source on the Quick Menu to change the source of your TV
broadcast.
Note: CyberLink PowerCinema supports multiple tuners, including Analog
(Composite, S-Video), DVB-S, DVB-T, ATSC.
Select Channel List to view the list of available channels you can choose to
watch. Select Subtitle to display broadcast subtitles. Select Audio to change
the TV audio mode.
24
Page 25

Chapter 2: TV
Note:
• The Subtitle and Audio features are only available through some
available digital TV programs.
• When available, Twin TV will also be available in the Quick Menu.
• When a DVB signal is detected, a Radio option will be available in
the Quick Menu listing any channels that consist of an audio signal
only.
25
Page 26

CyberLink PowerCinema
TV Menu Options
Recorded TV
Select Recorded TV on the TV Menu page to display the Recorded TV
page, which contains files recorded from a TV. Select what recorded TV files
are displayed using the View By… option. You can view files by file,
channel or category for files that were recorded with EPG data. CyberLink
PowerCinema automatically saves EPG program information when TV
programs are recorded, allowing you to view this information in the
Recorded TV folder.
To change the order in which the files are displayed, use the Sort By... option
to arrange by recorded date or program name. A thumbnail image shows the
first frame of the file. Select a recorded TV file to play it at full screen.
26
Page 27

TV Recording Schedules
Schedule displays all current recording schedules. To set a recording
schedule, select Schedule, New Schedule. (Make sure that TV is selected.)
In the page that opens, select the Channel you want to record, the Scheduling
Interval, and the recording date and times.
Chapter 2: TV
Select Apply to activate the recording schedule, or Cancel to quit without
accepting the schedule. Select an existing recording schedule to open it for
modification. Select Delete to remove a recording schedule you have
previously created.
27
Page 28

CyberLink PowerCinema
Program Guide
CyberLink PowerCinema allows you to use Electronic Program Guides
(EPG) to list available programs by channel and time and view detailed
program information.
Note:
• The Program Guide feature is only available in certain regions.
• You must first activate your EPG on the Guide Settings page.
Searching for a TV Program
You may search for a specific program using the Find Program option.
To search for a program:
1. Select Find Program, then Input a key word.
2. Type in a keyword and then select Enter. A list of programs containing
that keyword will be displayed.
28
Note: Use Recent key words to re-search for previously entered key words.
Page 29

Extra TV Features
CyberLink PowerCinema includes a number of extra features that cab enrich
your TV viewing experience.
Instant Replay
The CyberLink PowerCinema TV feature supports instant replay so you
won't miss any moments of your favorite TV programs. By default, the
instant replay function is disabled in CyberLink PowerCinema (See Enable
Time-Shifting in the Signal Settings page to enable it). To create an instant
replay, CyberLink PowerCinema records the TV broadcast as a file, creating
a slight lag between the broadcast and the TV content that you watch. Using
the TV control buttons you can pause live TV, or navigate forward and
backward to create an instant replay or to skip over commercials.
Twin TV (Optional)
Chapter 2: TV
Twin TV displays two TV channels on your TV, allowing you to watch two
TV programs at the same time.
Note: You must have a TV tuner card that supports multiple video inputs, two
TV tuner cards or a digital signal that supports Bouquet to use the Twin TV
feature.
Twin TV supports both analog and digital available video input. Users may
also use the same DTV source for Twin TV by using Bouquet.
Enabling Twin TV
To enable Twin TV mode:
1. Select Twin TV.
2. Select the Video Input source (or Bouquet if available) for the
secondary channel. The channel list will be displayed.
29
Page 30

CyberLink PowerCinema
3. Select a TV channel from the list.
The second TV channel will be displayed in a smaller display window on the
bottom left of your screen. If you change to full screen mode, the second TV
channel will be displayed in PiP mode on your screen.
If you are using a remote control, you may also change the position of your
PiP frame in full screen with the remote control.
Triple TV (Optional)
Triple TV displays three TV channels on your TV, allowing you to watch
three TV programs at the same time.
Note: You must have a TV tuner card that supports multiple video inputs, three
TV tuner cards or a digital signal that supports Bouquet to use the Triple TV
feature.
Triple TV supports both analog and digital available video input. Users may
also use the same DTV source for Triple TV by using Bouquet.
Enabling Triple TV
To enable Triple TV mode:
1. Select Triple TV.
2. Select the Video Input source (or Bouquet if available) for the third
channel. The channel list will be displayed.
3. Select a TV channel from the list.
The second and third TV channels will be displayed in smaller display
windows on the bottom left of your screen. If you change to full screen
mode, the second and third TV channels will be displayed in PiP mode on
your screen.
If you are using a remote control, you may also change the position of your
PiP frames in full screen with the remote control.
Note: You must first enable Twin TV before you can display the third Triple
TV window.
30
Page 31

TeleTex t
When you select the Tel eTe xt button, the TeleText page opens, displaying
listings with different kinds of information. To navigate within the TeleText
function, use the remote control buttons or the playback control buttons.
Select the Tel eTe xt button to scroll through the TeleText, transparent
(TeleText+TV), and Live TV pages. Press the Backspace button on the
keyboard or the BACK button on the remote to return to the main TV page.
When you use the TeleText function, the following special controls are
added to the pop-up control panel: Red (opens TeleText pages marked in
red), Green (opens TeleText pages marked in green), Blue (opens TeleText
pages marked in blue), Yellow (opens TeleText pages marked in yellow).
You can also use the corresponding buttons on the remote to perform the
same functions.
Previous Page (jumps back one page), Next Page (jumps forward one
page), Previous SubPage (jumps back one subpage), Next SubPage (jumps
forward one subpage), and Snapshot (captures the TeleText screen in the
format selected in TV settings).
Chapter 2: TV
31
Page 32
CyberLink PowerCinema
TV Settings
TV settings are organized into the following topics: Signal Settings, Manage
Channels, Recording Settings and Guide Settings.
Restore Default Settings returns all of the settings in CyberLink
PowerCinema to their original values.
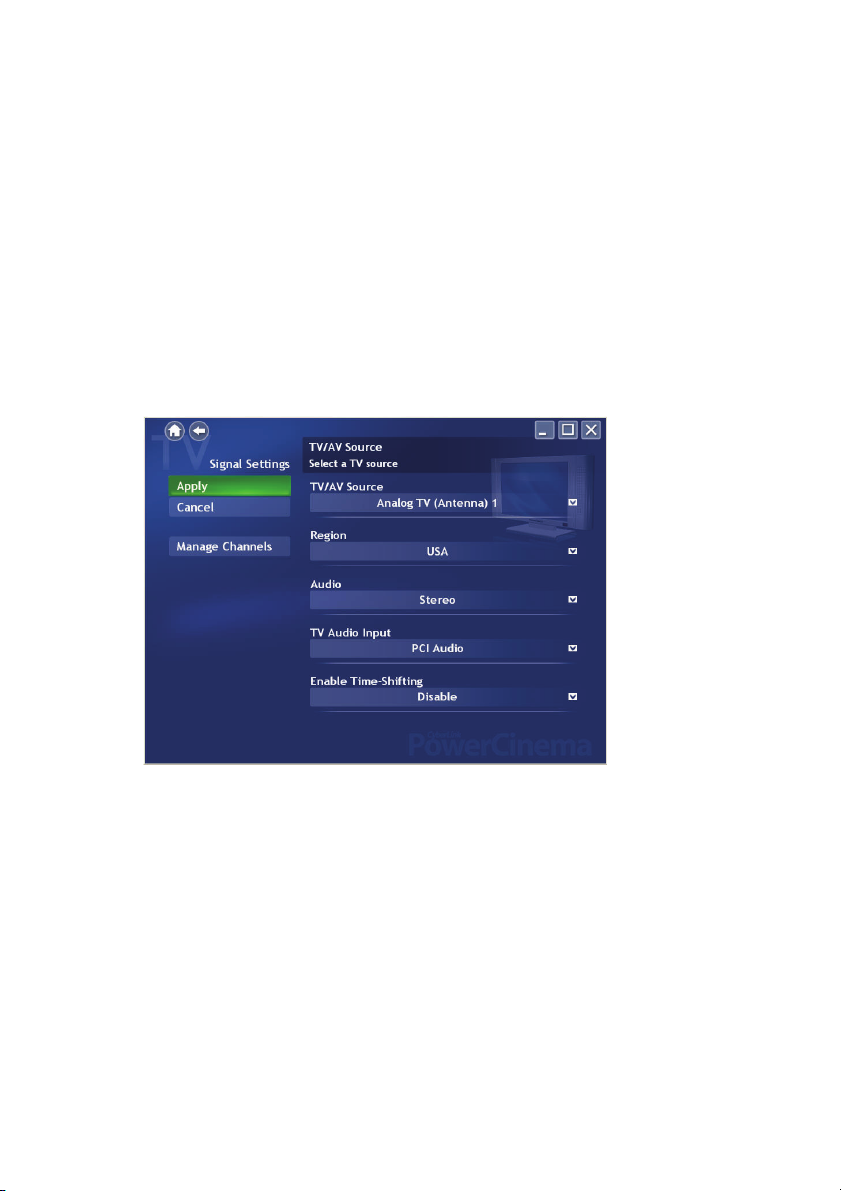
Signal Settings
In the TV/AV Source option, select if your TV receives signals from an
analog, digital or composite source.
The Region option allows you to select the country or region where your
cable provider is located.
Audio allows you to set your audio output. Options depend on your TV's
signal type, but may include Mono, Stereo, or SAP.
In the TV Audio Input option, select the source of your audio input.
32
Page 33

Set the Enable Time-Shifting option to Enable to watch instant replays. Set
the Auto Hide Twin TV In Full Screen option to Enable for the PiP
window to automatically hide when viewing a channel in full screen mode.
Manage Channels
To manage your TV channels, select Manage Channels. If no channel list
exists, select Scan Channels. Your computer will scan and list the available
TV channels. To disable a channel in the list, select it, then choose Deselect.
Disabled channels are not available for watching when you return to the TV
page.
To rename a channel in the list, select it, choose Rename, then enter the new
name. If you modify any settings on this page, you must select Apply for
these changes to take effect.
Chapter 2: TV
33
Page 34

CyberLink PowerCinema
Recording Settings
The Recording Quality option allows you to set the quality of video
recorded from TV. Selecting a higher quality results in a larger recorded file.
Recording Destination allows you to set the destination where files
recorded from TV are saved. To search for recorded files that contain EPG
data in the Recording Destination folder, select the Scan Folder button.
Note: It is recommended that you perform a folder scan if you changed the
Recording Destination folder to ensure the best results when viewing recorded
files by category.
Select Captured Teletext Format (Optional) allows you to select your
preferred format for Texttext captured using the Snapshot function.
Available formats include .bmp, .txt, .rtf and .html.
34
Page 35

Guide Settings
Select EPG Source to indicate if you want to use NexTView or the Internet
as your source of EPG (electronic program guide) information.
Note:
• The Program Guide feature is only available in certain regions.
• CyberLink PowerCinema supports multiple EPG preview with
different TV types.
CyberLink PowerCinema will guide you through the activation of your EPG.
Enter in your region specific information and then select your EPG provider
from the EPG Provider list.
Once you are finished, it may take time for your TV program data to be
downloaded. (Download time depends on the size of the data and the
bandwidth of your Internet connection).
Chapter 2: TV
35
Page 36

CyberLink PowerCinema
36
Page 37
Chapter 3:
Videos
CyberLink PowerCinema allows you to watch video files (in .dat, .mpg, .avi, .asf,
.mpeg, .div, .divx, .wm, .wmv, .vob, .dvr-ms, MPEG1 and MPEG2 formats) on your
computer. (You may need to install a special decoder to view .avi, .divx and .dvr-ms
files.) You may also watch a DVD image from your hard drive using CyberLink
PowerCinema. Select Videos on the Home page to open the Videos function.
37
Page 38
CyberLink PowerCinema
Watching Videos
Select a video file and select Play Video to play it. Use the playback controls
or the buttons on the remote to control playback. To return to the Videos
page, select Stop.
When you watch a video file, the following special control is added to the
pop-up control panel: Snapshot (takes a snapshot of the current frame
of video; this function requires a mouse to use).
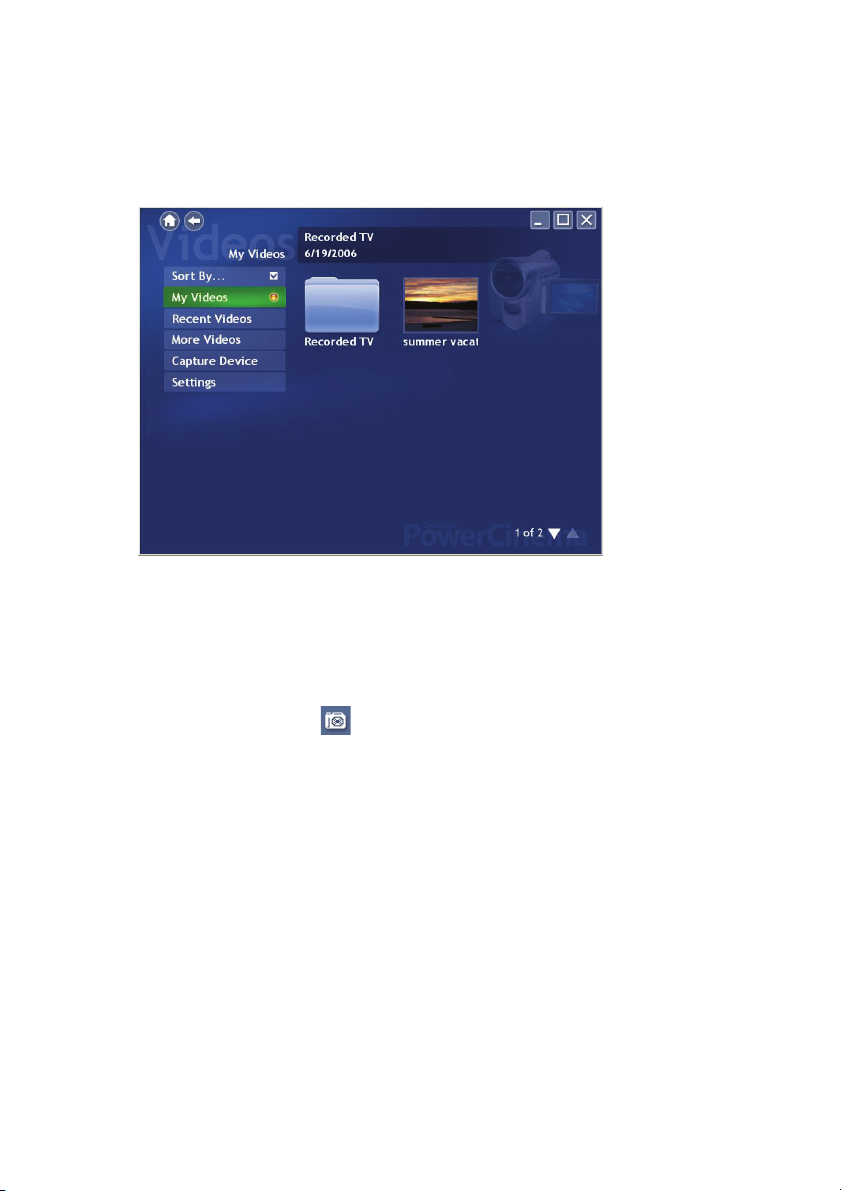
Browsing for Videos
To change the order in which items are displayed, use the Sort By... option.
Selecting a video file provides you with three options. Select Play Video to
play a video file at full screen. Use the pop-up control panel to control
playback. To return to the Videos page, select Stop. When selecting the file
you want to play, you can choose to Play the file or resume the video from
the point you previously stopped watching it. Select Delete to remove the
video file from the video folder.
38
Page 39

Chapter 3: Videos
To view videos in the My Videos folder on your computer, select My
Videos. To display videos that you have recently viewed, select Recent
Videos. To view videos that are located in other folders, select More Videos.
Browse through the drives and folders to locate the videos you want to
watch.
Capturing Videos
CyberLink PowerCinema lets you capture high-definition, digital and analog
video from external devices and create video files on your computer.
To capture video from an external device:
1. Select Capture Device.
2. Select the device where the external video is being inputted into your
computer. The video window will be displayed previewing the video
you want to capture.
3. Use the player controls on the bottom of the screen to record the video
as required. The recorded video will be saved to your default video
folder.
39
Page 40

CyberLink PowerCinema
Video Settings
The Default Video Folder option sets the folder that appears by default
when the Videos function is opened. To change folders, select the arrow next
to this option, then select a new folder.
Note: It is recommended that you set this option to either the folder you most
commonly use or to a top-level directory (such as your C: drive) to reduce the
number of folders you need to search through.
When the Play Video in Subfolders option is set to Yes , video files in all of
the subfolders contained in the selected directory are also played. When set
to No, only the video files in the selected directory are played.
The Recording Quality option allows you to set the quality of video
captured on your computer. Selecting a higher quality results in a larger
recorded file.
Load Default Settings returns the settings on this page to their original
values. If you modify any settings on this page, you must select Apply for
these changes to take effect.
40
Page 41
Chapter 4:
Music
For convenient access to your music collection, use CyberLink PowerCinema's
Music function. The Music function allows you to listen to music files (in .asf,
.mp3, .wav and .wma formats), rip Audio CDs, and even use playlists (in .asx,
.m3u, and .wmp formats) to listen to your favorite songs in any order you like.
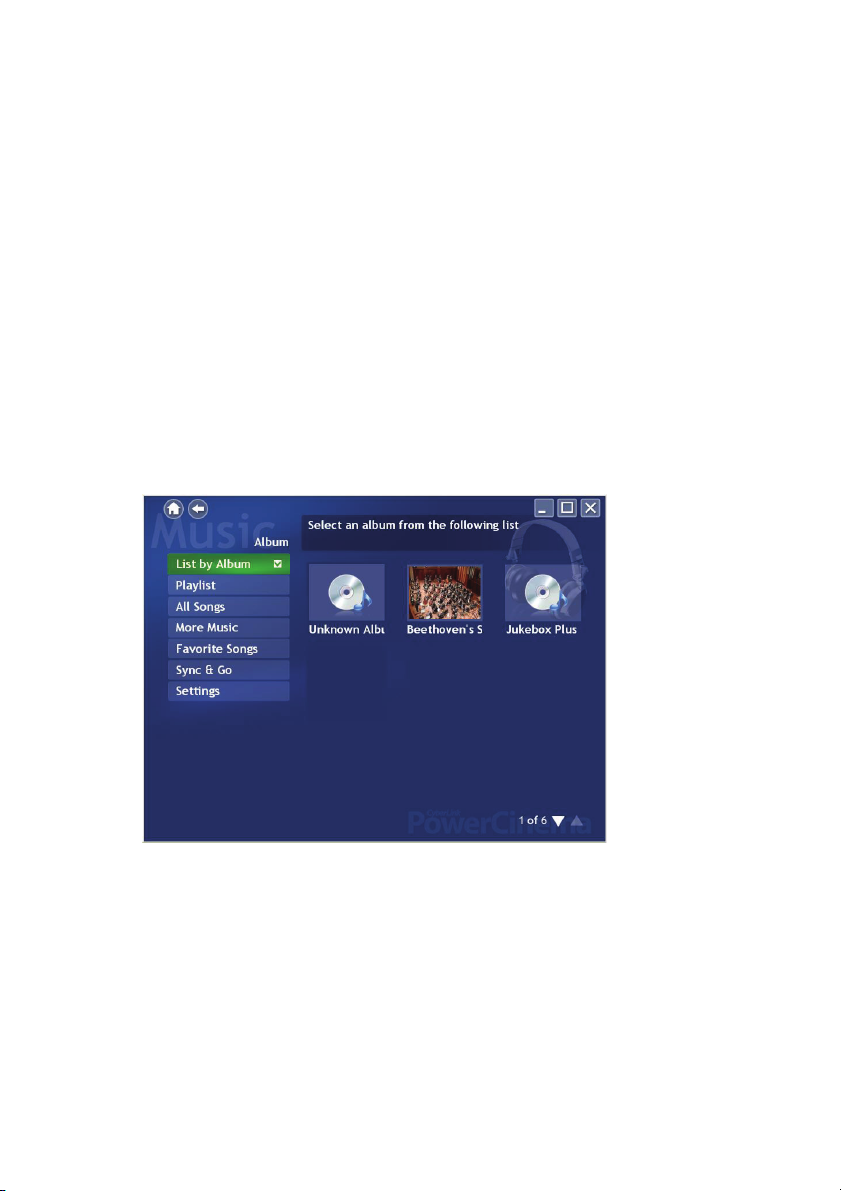
Select Music on the Home page to open the Music function.
You can list the music files by Album, Artist, Genre or Recent music. All Songs
sorts available music by song title.
41
Page 42

CyberLink PowerCinema
Listening to Music
Select a song in a list (or a track on a CD) to listen to that individual song.
Select Play to listen to a list of songs from the top. Select Shuffle to play
songs in random order. Select Repeat All to repeat a list of songs after the
entire list has played. Select Visualize to display a computer-generated
visualization while you listen to music. Select Favorite Songs to display a
list of your favourite songs. A song can be added to your favorites by
selecting the star next to the song in the playlist.
To display the most recent music that you have listened to, select Recent
Music. To sort music, select Album, Artist, Playlist, or Genre on the left
side of the music page. All Songs lists all available music by song title.
Browsing for Music
To listen to music that is located in other folders, select More Music.
Browse through the drives and folders to locate the music you want to listen
to.
42
Page 43

Chapter 4: Music
Watching Visualizations
Visualize allows you to watch computer-generated visualizations while you
listen to music. To exit the visualization press Esc or Backspace on the
keyboard.
Using Playlists
CyberLink PowerCinema lets you customize your songs into playlists. This
feature allows you to sequence songs from different sources into a single
playlist for your listening enjoyment. CyberLink PowerCinema also lets you
use the playlists you previously created in Windows Media Player. To view
the available playlists, select Playlist on the Music page.
Create a Playlist
To create a new playlist in CyberLink PowerCinema
1. Select All Songs on the Music main page and then begin selecting the
songs you want to include in your playlist by selecting the star beside
it.
43
Page 44

CyberLink PowerCinema
2. Select Favorite List to add the selected songs to your favorites, reorder
the songs as desired by using the arrows on the right, then select Save
to Playlist.
3. Select Create Playlist to create a new playlist. In the Playlist window,
enter a name for your playlist.
4. Select OK to save the new playlist.
Play a Playlist
To play a playlist, select Playlist on the main Music page, then select a
playlist from the list.
Edit a Playlist
To edit a playlist in CyberLink PowerCinema
1. Select Playlist and select Edit Playlist. Choose the playlist you want to
edit.
2. Uncheck the songs you want to remove from the playlist.
3. Select Apply to apply your changes.
Delete a Playlist
To delete a playlist in CyberLink PowerCinema
1. Select Playlist and select Remove Playlist.
2. Check the playlist you want to delete from CyberLink PowerCinema.
3. Select Apply to apply your changes.
44
Page 45

Sync & Go
Sync & Go lets you synchronize your music files in CyberLink
PowerCinema with a removable device.
Chapter 4: Music
When you connect a removable device to your computer, you will be asked
whether you want to synchronize your music files or browse the current files
on the removable device. You can also select Sync & Go on the Music page
to begin synchronizing your music if you already have a removable device
connected.
In the Sync Files window the amount of space available on your removable
device is displayed in the bottom left hand corner. Choose the type of files
you want to export and then select Sync to Device. Before proceeding, you
will be asked if you want to remove all files previously synchronized by
CyberLink PowerCinema.
CyberLink PowerCinema will proceed to export all the selected files to your
removable device. When complete, a message will be displayed. Select OK
to return to the Music page or Browse Files to view the music files on your
removable device.
45
Page 46

CyberLink PowerCinema
To listen to a music file on your removable device, choose the file and then
select Play.
46
Page 47

Chapter 4: Music
Music Settings
When the Play Music in Subfolders option is set to Yes, music files in all of
the subfolders contained in the selected directory are also played. When set
to No, only the music files in the selected directory are played.
Visualizations selects the computer generated visualizations that displays
while you listen to music.
The Ripping Quality option allows you to set the quality of music ripped
from an audio CD. Selecting a higher quality results in a larger music file.
Ripping Destination sets the folder where music files ripped from an Audio
CD are saved by default.
Note: It is recommended that you set this option to either the folder you most
commonly use or to a top-level directory (such as your C: drive) to reduce the
number of folders you need to search through.
Search for Music scans your computer for music files that can be played in
CyberLink PowerCinema.
47
Page 48

CyberLink PowerCinema
Load Default Settings returns the settings on this page to their original
values. If you modify any settings on this page, you must select Apply for
these changes to take effect.
48
Page 49
Chapter 5:
Pictures
CyberLink PowerCinema lets you view digital pictures (in BMP, JPEG, and PNG
formats), either individually or as a slide show. You can even edit pictures to make
them perfect for display. Select Pictures on the Home page to open the Pictures
function.
49
Page 50
CyberLink PowerCinema
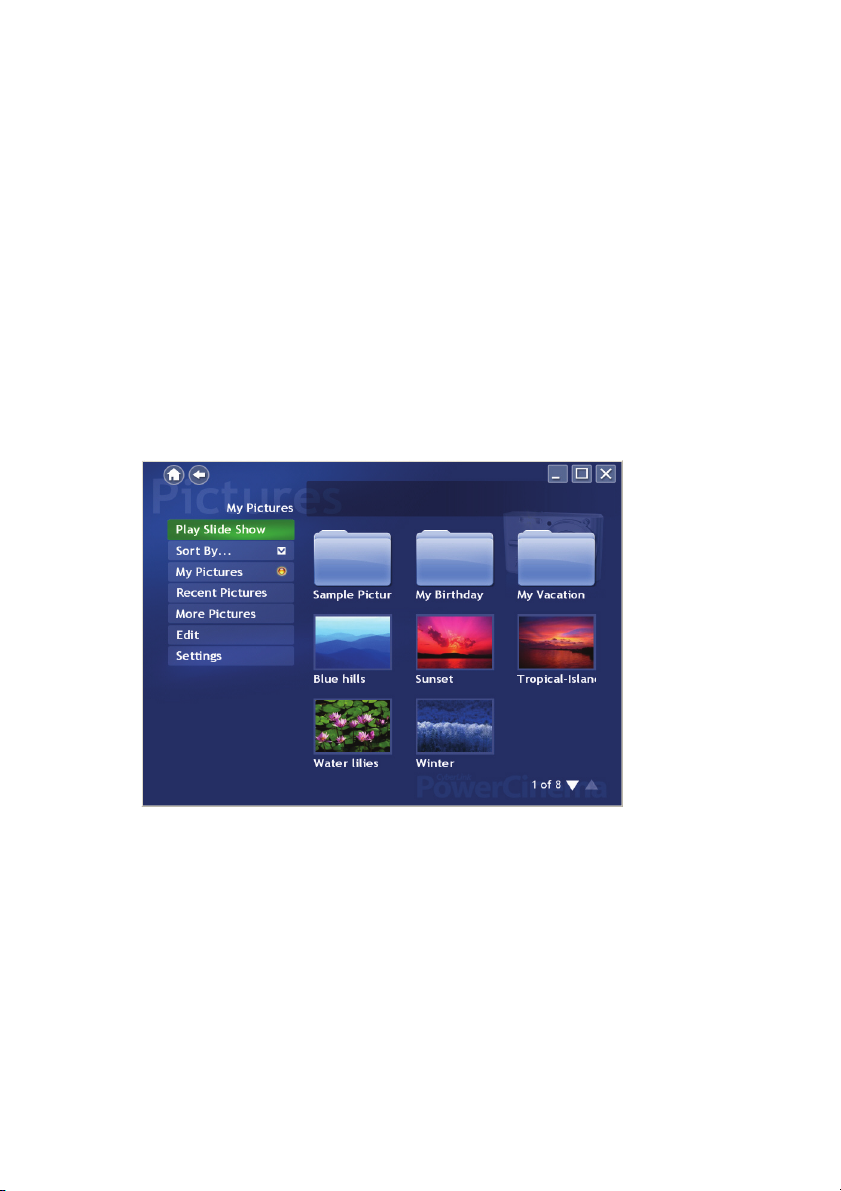
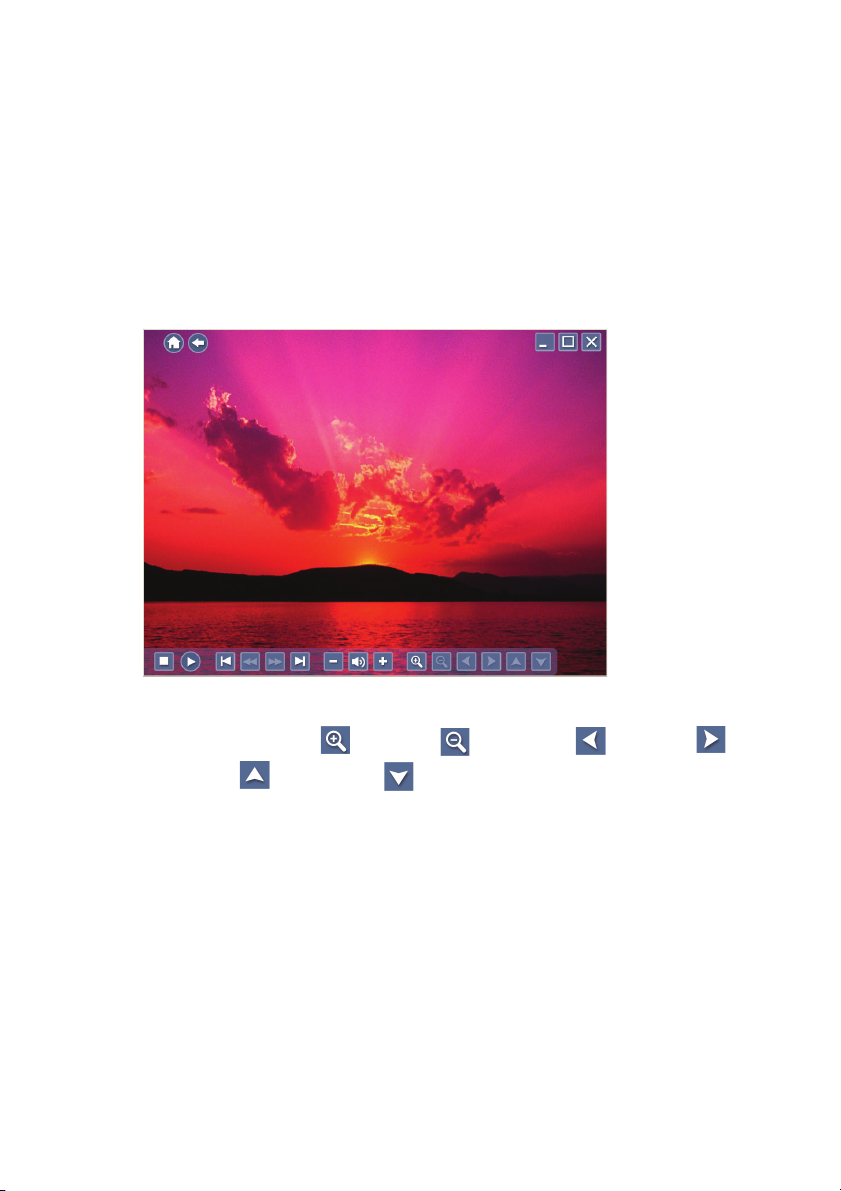
Viewing Pictures
To view pictures in a slide show, select the folder containing the pictures you
want to view, then select Play Slide Show. The slide show plays at full-
screen. Use the playback controls to control or quit the slide show. Selecting
an individual picture displays it at full-screen in a paused slide show.
When viewing still pictures, the following special controls are added to the
pop-up control panel: Zoom In, Zoom Out, Pan Left,
Pan Right, Pan Up, and Pan Down. (On the remote, use the CH/
PG Up and CH/PG Down buttons to zoom, and the left/right arrows to pan.)
50
Page 51

Chapter 5: Pictures
Browsing for Pictures
To change the order in which items are displayed, use the Sort By... option.
To view pictures in the My Pictures folder on your computer, select My
Pictures. To display pictures that you have viewed recently, select Recent
Pictures.
To view pictures that are located in other folders, select More Pictures.
Browse through the drives and folders to locate the pictures you want to
view.
51
Page 52
CyberLink PowerCinema
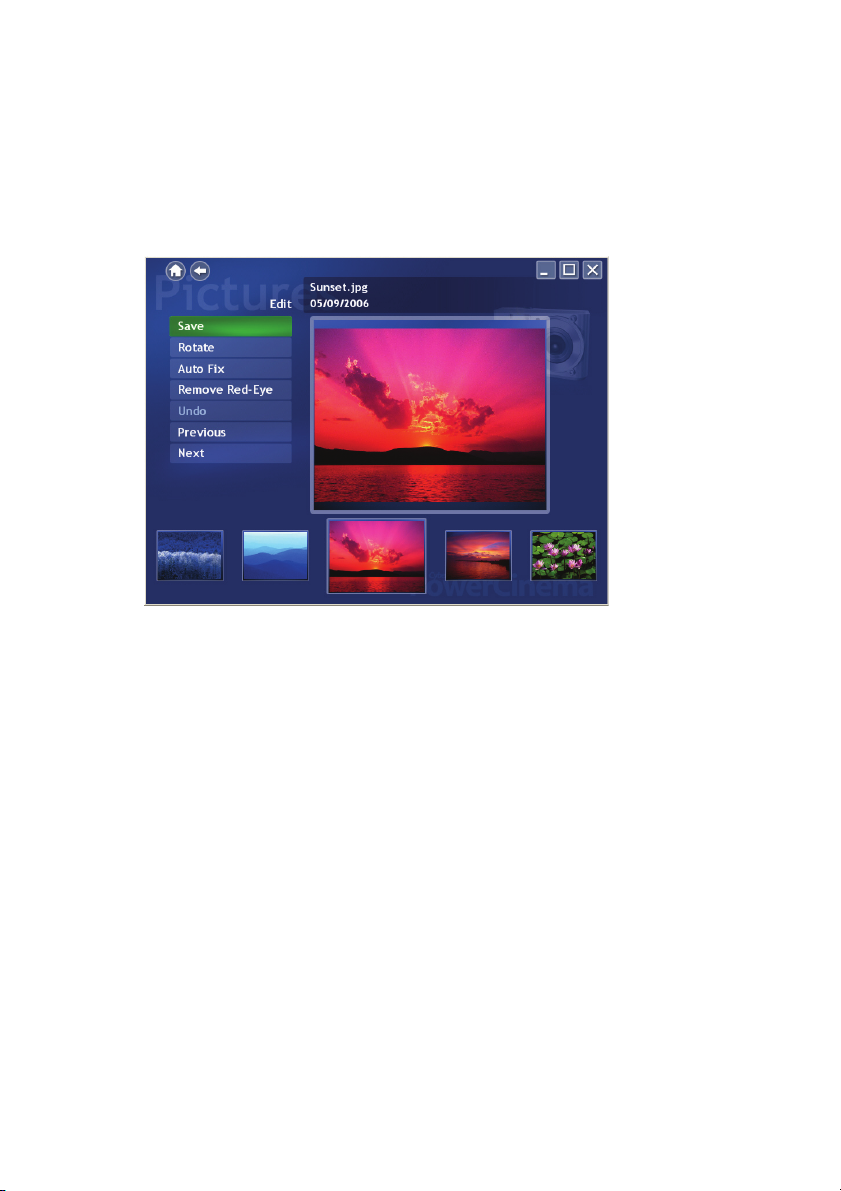
Editing Pictures
To edit a picture, select Edit, then select the picture you want to modify.
Note: To make modifications permanent, you must select Save.
Editing options may include the following:
• Rotate: rotates the picture ninety degrees to the right.
• Auto Fix: automatically balances the picture's color and brightness.
• Remove Red-Eye: removes the red-eye created in flash photography.
To undo a modification you have performed on a picture, select Undo. Select
Previous or Next to continue editing other pictures.
52
Page 53
Chapter 5: Pictures
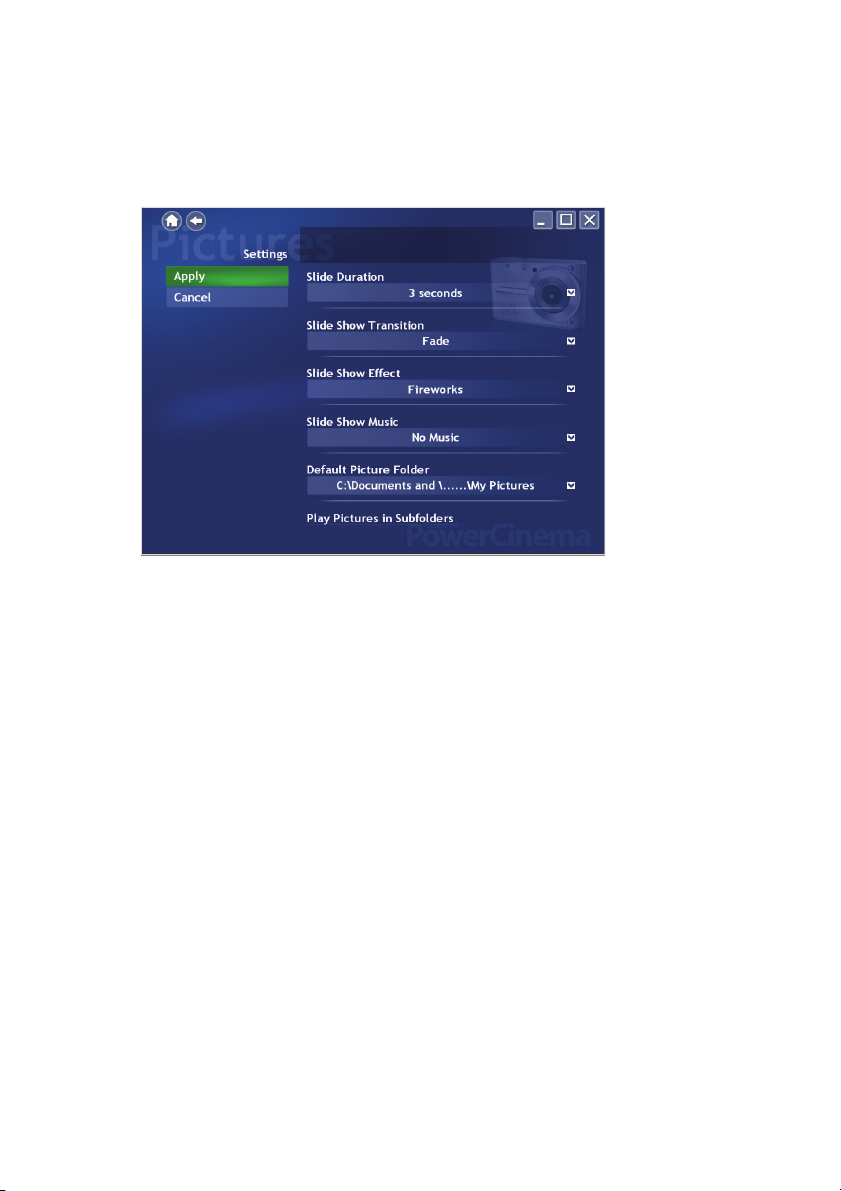
Picture Settings
Slide Duration determines how long each slide in a slide show is displayed
before automatically advancing.
Slide Show Transition sets the style of transition used between slides in a
slide show.
Slide Show Effect sets the type of effect used on your photos during the
slide show.
Slide Show Music allows you to select the drive and directory that contains
the background music for your slide show.
The Default Picture Folder option sets the folder that appears by default
when the Photos function is opened. To change folders, select the arrow next
to this option, then select a new folder.
Note: It is recommended that you set this option to either the folder you most
commonly use or to a top-level directory (such as your C: drive) to reduce the
number of folders you need to search through.
53
Page 54

CyberLink PowerCinema
When the Play Pictures in Subfolders option is set to Yes , images in all of
the subfolders contained in the slideshow directory are also displayed in the
slideshow. When set to No, the slideshow only plays the photos in the
directory you select.
Load Default Settings returns the settings on this page to their original
values. If you modify any settings on this page, you must select Apply for
these changes to take effect.
54
Page 55

Technical Support
This chapter contains technical support information. It includes all the information
to find the answers you need to assist you. You may also find answers quickly by
contacting your local distributor/dealer.
This chapter contains the following sections:
• "Before Contacting Technical Support" on page 56
• "Web Support" on page 57
• "Telephone Support" on page 58
55
Page 56

CyberLink PowerCinema
Before Contacting Technical Support
Please take advantage of one of CyberLink’s free technical support options:
• consult the User Guide or the online help installed with your
program.
• refer to the Frequently Asked Questions (FAQs) in the Support
section of the CyberLink Web site
The FAQs may have information and helpful hints that are more current than
the User Guide and online help. If the FAQs do not answer your questions,
you can submit a free e-mail request from the main FAQ page.
When calling for support, please have your computer and the following
information ready:
• registered CD-key (located on your CD case)
• the product name, version and build number, which generally can
be found by clicking on the product name image on the user
interface
• the version of Windows installed on your system
• hardware devices on your system (capture card, sound card, VGA
card) and their specifications
• the wording of any warning messages that were displayed (You
may want to write this down or take a screen capture)
• a detailed description of the problem and under what circumstances
it occurred
or http://www.cyberlink.com.
56
Page 57

Chapter 6: Technical Support
Web Support
Solutions to your problems are available 24 hours a day at no cost on the
CyberLink web sites:
Note: You must first register as a member before using CyberLink web
support.
Technical Inquiry Form
For your assistance, you may complete the Inquiry Form in the Support
section of the CyberLink web site.
http://www.cyberlink.com/english/cs/support/form/index.jsp
The more accurate and detailed the information you provide, the better we
can help to solve your problem.
General Support
Please visit the support section of the CyberLink web site to view all the
support options that are available to you.
http://support.cyberlink.com
In addition to frequently asked questions, the CyberLink web site also
provides troubleshooting techniques, the latest in product news and other
relevant information.
57
Page 58

CyberLink PowerCinema
Telephone Support
In order to provide the best solution to our end-users, Voice Support is now
part of the service we provide.
For only US$29.95, you will receive two months of Voice Support that
allows you the opportunity to call as often as necessary. The fee covers all
the CyberLink software you may own.
Note: This service is for North American users only.
See the voice Support section on the CyberLink Web site for more
information on Voice Support
or http://support.cyberlink.com.
58
Page 59

Index
A
About PowerCinema 19
Always on Top 24
Audio 24
Audio Input 32
Audio Settings 18, 21
Auto Fix 52
Auto Hide Twin TV In Full Screen 33
B
Blue button 31
Browsing
Media Content
Music 42
Pictures 51
Videos 38
16
Index
CLPV 19
Color Profile 19
D
Default Folder
Picture
53
Video 40
Deselect 33
Disable a channel 33
Display Settings 18
E
edit a picture 52
Electronic Program Guides (EPG) 28
Enable Time-Shifting 33
EPG
Provider
Source 35
35
F
Find Program 28
C
Capture Device 39
Capturing Videos 39
CLEV-2 20
G
General Settings 18
Green button 31
Guide Settings 35
59
Page 60

CyberLink PowerCinema
H
Home Page 15
I
Instant Replay 29
L
Language Settings 18
Letterbox 19
Listening to Music 42
M
Manage Channels 33
Menu 24
Mono 32
Movie Display Type 19
Music 41
Music Settings 47
N
Navigation Controls 16
Next SubPage 31
P
Pan
Down
50
Left 50
Right 50
Up 50
Pan & Scan 19
Picture Settings 53
Pictures 49
Play Music in Subfolders 47
Player Controls for Mouse Use 17
Playlist
Create
43
Delete 44
Edit 44
Play 44
PowerCinema Help 18
Previous SubPage 31
R
Recorded TV 26
Recording Destination 34
Recording Quality 34, 40
TV 34
Videos 40
Recording Schedules
TV
27
Recording Settings 34
Red button 31
Region 32
Remove Red-Eye 52
Rename a channel 33
Ripping
60
Page 61

Index
Audio CDs
Destination 47
Quality 47
Rotate 52
Run Setup Wizard 18
45
S
SAP 32
Scan Channels 33
Screen Ratio 19
Search for Music 47
Select Captured Teletext Format 34
Settings
Audio
21
General 18
Music 47
Pictures 53
TV 32
Video 40
Signal Settings 32
Skin Color 20
Slide Show
Duration
Effects 53
Music 53
Transition 53
Snapshot 24, 31
Stereo 32
Style 20
Subfolders
Play Pictures
Play Videos 40
Subtitle 24
Sync & Go 45
53
54
T
TeleText 24, 31
Time-Shifting
enable
33
Triple TV 30
TV 23
Recording Schedules 27
TV Settings 32
Twin TV 29
V
Video Settings 40
Videos 37
Viewing Pictures 50
Visual Effect 20
Visualizations 47
Visualize 43
W
Watching
TV
24
Videos 38
Visualizations 43
Y
Yellow button 31
61
Page 62

CyberLink PowerCinema
Z
Zoom
In
50
Out 50
62
 Loading...