

Page 1

Pref ace
About Axis
Preface
Thank you for purchasing the Axis NP S 530/532 N etwork Print Server.
Our goal in developing this product is to enable you to connect your
printers anywher e in your netwo rk , all ow ing a ll netw or k use rs a ccess to
shared printer resources.
Axis Communications, founded in 1984, is one of the world’s fastest
growing companies in the printer interface and network print server
mark et. Th e h ead q u ar ters are lo ca ted in Lund , Sw ed en , with su bsi d iar ies
in Boston , To kyo , a nd Hon g Kong.
Network CDROM Servers
Network Print
Servers
IBM Ma i n f r a me
and S/3x – AS/
400 Prin t er
Interfaces
Axis Co mmuni cati on s ha s a distr ibut o r net wo rk ope rat in g in more than
60 count ri es world-wide , ma rk e tin g thre e prod uc t lines:
CD-ROM servers provide a flexible and cost-efficient solution for sharing
CD-ROMs acr os s th e net work. The y a r e avai lable in Ethernet and Token
Ring ver s ions, with or without buil t in d rive opt ion.
T hes e intellige n t Ether net and Token Ri ng pr int s erv ers support a wide
range of LAN protocols. The Axis NPS 530, 532, 550, AXIS 150 and
152 are Ethernet print servers, and the Axis NPS 630, 632 and 650 are
Token Ring print servers.
These products include a wide range of plug-in interfaces and free
stan di ng pro d uc ts such as the Co bra+ and the AFP IPDS-to-PostScript
conve rter.
Axis NPS 530/532 U ser ’ s Manua l Version 2.0
Part No.:13588 October 1995
Copyright © Axis Communications AB
Axis NPS 530/532 User’s Manual 1
Page 2

Preface
About this manual
This manual will guide you through a simple step-by-step installation and
configura tion proc ed ur e. It is di vided into f o u r sections :
Introduction The NPS 530/532 print server, how it work s, where to use it, and its
main features.
Getting started How to connect your NPS 530/532 to your printer, and how to install it
in your network.
Setup How to s et up your NPS 530/532 for th e NetWare, Windows, O S/2,
Unix and Macintosh environments.
Advanced options An overview of unique NPS 530/532 functions that allows you to tailor
your printer resources for specific needs.
The manual applies to the NPS 530/532 with firmware release 5.00 and
sub seq u ent rel eas es un ti l oth er wise notifi ed . Please refer to th e Axis NPS
Print Ser ver Te c hnical R efere nc e fo r furth e r in form a t ion of func t ions a nd
parameters.
Every care has been taken in the preparation of this manual; if you detect
any inaccuracies or omissions, please inform us at the address on the back
cove r. Axis Com mun i cat i on s AB ca nn ot be he ld re spo nsi b le fo r any
techn ical or typo graphical er ro rs and reserves t he r igh t to mak e ch anges to
the produ c t and ma nua l s with ou t pri or notice.
2 Axis NPS 530/532 User’s Manual
Page 3

Emission notices
Preface
USA
Europe
This equipment generates, uses, and can radiate radio frequency energy and if not installed and used
in accordance with the instruction manual, may cause interference to radio communications. It has
been tested and found to comply with the limits for a Class A computing device pursuant to Subpart
B of Part 15 of FCC rules, which are designed to provide reasonable protection against such
interference when operated in a commercial environment. Operation of this equipment in a
residential area is likely to cause interference in which case the user at his own expense will be required
to take whatever measures may be required to correct the interference. Shielded cables should be used
with this unit to ensure compliance with the Class A limits.
This digital equipment fulfils the requirements for radiated emission according to limit B of
EN55022/1987, and the requirements for immunity according to EN50082-1/1992 residential,
commercial, and light industry. (Compliance is not valid for unshielded twisted-pair (UTP) cabling.)
Trademark acknowledgements
Unix, Novell, NetWare, Microsoft, Windows, LAN Server, LAN
Mana ger , IBM , OS/ 2, AI X , MV S, SunOS, Ultr ix, Hewlett-P ackard, and
Lexmark are registered trademarks of the respecti ve holde rs.
Axis NPS 530/532 User’s Manual 3
Page 4

Table of contents
Table of contents
1
Introduction 6
How It Wor ks 7
Where To Use it 7
Main Features 9
2
Getting started 10
Pr in te r Inst a lla ti on 12
Net wor k Inst a llation 13
3
Se tup for NetWare 14
Print Server Mode (Au tomatic) 17
Print Server Mode (Parameter Controlled) 18
Print S erver M ode (F ile Server C ont r olled) 20
Remote Printer Mode 24
Verif y t he Communi c ation 28
4
Se tup for Window s 29
Windows 3.1 30
Windows for Workgroups 31
Windows 95 33
Windows NT 35
Windows NT - LPD printing 37
5
Se tup for OS/2 38
Activate the NetB EUI Protocol 39
I ns ta ll the Axis P rint Utilit y for O S/2 39
Install the NPS 530/532 40
Create a Print Queue 41
Sharing Print Queues 42
Verif y t he Communi c ation 43
6
Setup for Unix systems 44
Prepare your system 45
4 Axis NPS 530/532 User’s Manual
Page 5

Table of contents
Set up your NPS 530/532 46
Set up and attach a prin t queue 50
Print methods 52
7
Se tup for Mac intosh 53
Choose a Printer 54
Verif y t he Communi c ation 55
8
Advanced Options 56
Logical Pr int er s 57
Cha ra c ter S et Conver sio n 59
Strin gs Befor e a n d After Print Jo bs 60
Strin g Su b stitution s 61
PostScript Function s 62
Hex Dump Mode 64
Te lnet L og in 65
Accou nti ng 66
Status L oggi ng 67
Lo ca l ly Ad minis tra ted Add r es s 68
SNMP 69
A
The parameter list 70
NetWare, Windows, OS/2 70
Unix (TCP/IP) 71
Apple Ether Talk 71
Fact or y Defau l t Settings 72
The Config File 73
B
Internal printouts 78
C
Protocol Support Upgrades 79
D
Techn ic al sp ec ifications 83
E
How to contact Axis 85
Axis NPS 530/532 User’s Manual 5
Page 6

Section 1: Introd uction
Section 1
Introduction
The Axis NPS 530 and 532 are plug-in network print servers for the
Ethernet environment. Th ere is no fu nctio nal d ifference b etwee n th e m ;
it’s onl y th e network conn ector that dif fer s.
The NPS 530/532 connects your printer directly to your Ethernet
network, no matter if you are using a PC or PS/ 2 system. The mu l t ip l e
protocol support makes it possible to print under NetWare and Microsoft
and IBM networks s imult aneously.
In addition, pr otocol upgrades for TCP/IP and Apple EtherTalk are
available as software keys from your dealer. Once upgraded, your NPS
530/532 supports printing from PC, PS/2, Macintosh and Unix systems
simu ltaneousl y and without user interven tion.
The NPS 530/532 plugs directly to the parallel port of any standard
printer. It combines a high degree of user-friendliness in both installation
procedures and print management with an equally high degree of
flexibility thanks to its powerful built-in functions.
The Axis NPS 530/532 Network Print Server
6 Axis NPS 530/532 User’s Manual
Page 7
How It Works
Section 1: Introduction
Ethernet network print data is transmitted as packets using a high-speed
protocol very different from the standards used by serial or parallel printers.
Each packet contains information about the sender, the receiver, how to
unpack the packet, and the data itself.
The NPS 530/532 acts as a node in the Ethernet network, with its own unique
address. It receives the packets addressed to it, unpacks them, and converts the
print data to a format suitable for standard printers.
The only difference between the NPS 530 and 532 is the physical network
attachment. The NPS 530 is attached by twisted-pair (10baseT) Ethernet
cabling, while the NPS 532 is attached by thin-wire (10base2).
It is physically attached to the network by Ethernet cabling. The print data is
sent to the printer using a high-speed parallel port.
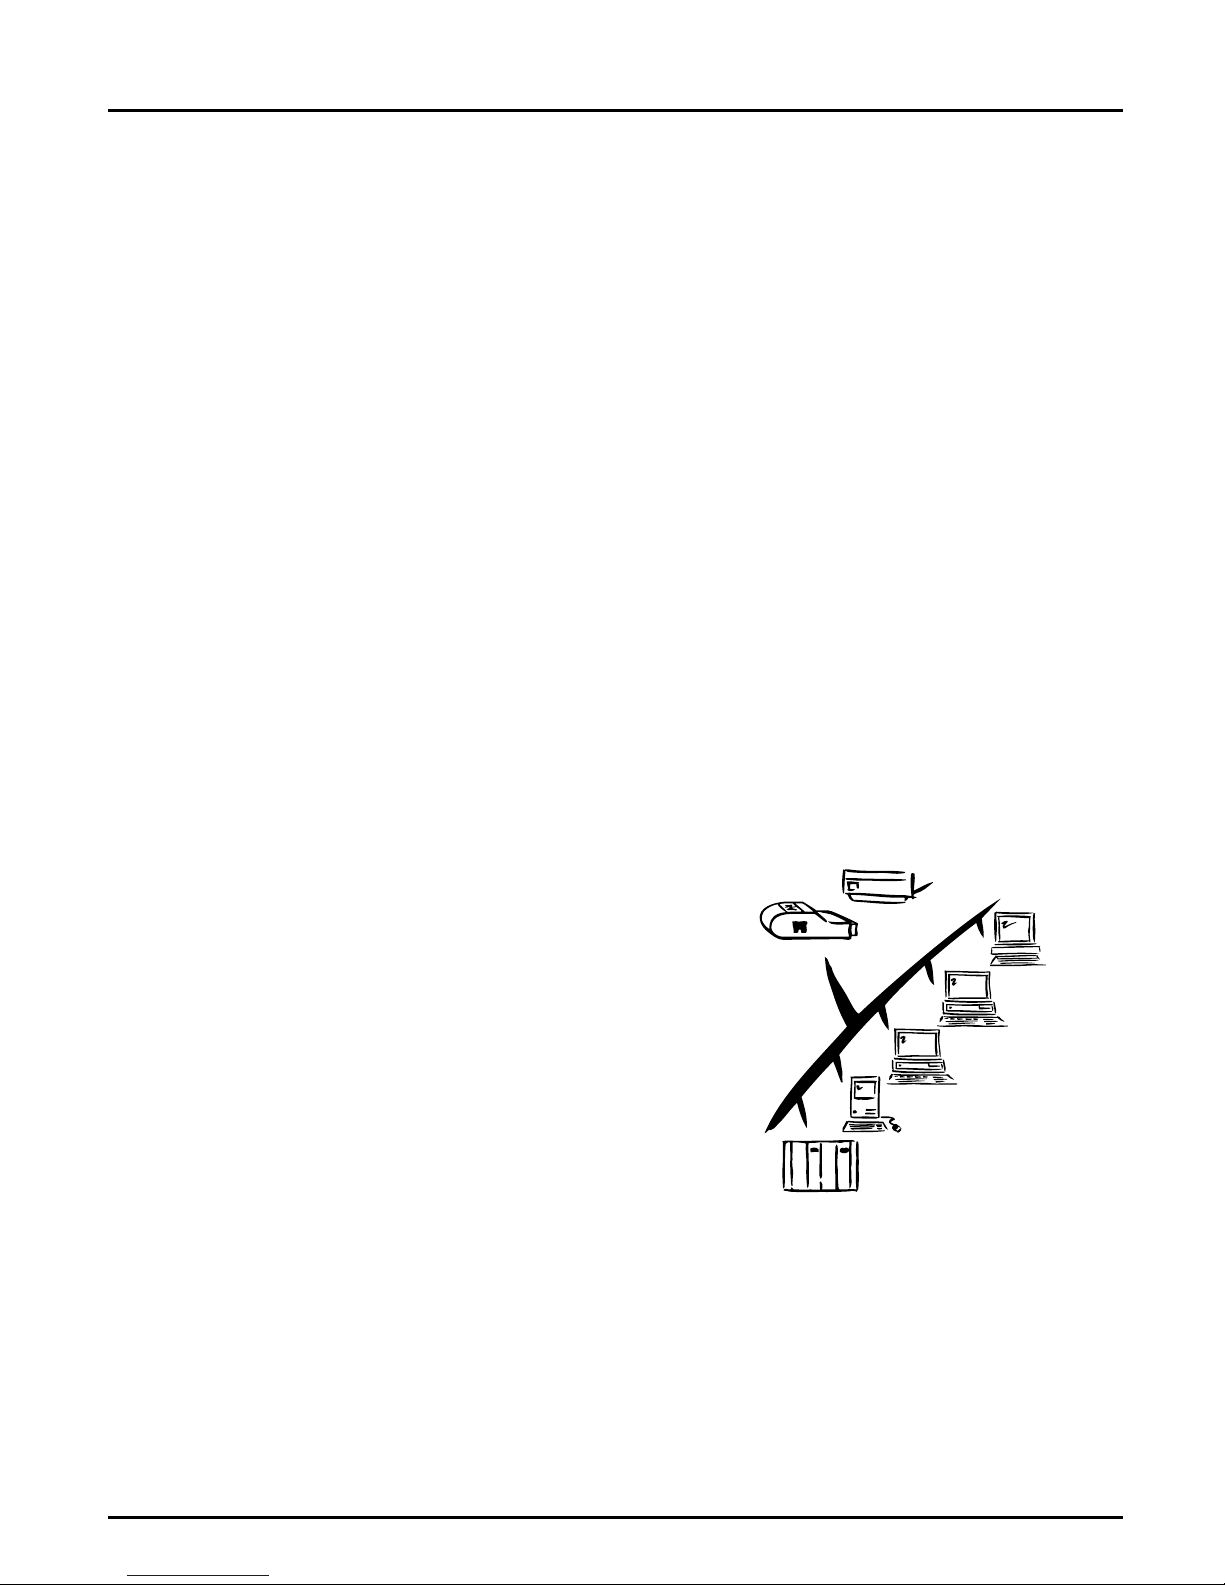
Where To Use it
The NPS 530/532 can communicate
with PC, PS/2, and optionally Unix
and Macintosh systems. It supports
two different network protocols:
NetWare and Microsoft and IBM
networks, and two additional protocols
as upgrade options: TCP/IP and Apple
EtherTalk. Since the NPS 530/532 can
handle these protocols
simultaneously, it’s the ideal printer
server solution for a mixed
environment.
NPS 530
Parallel
UNIX
Novell
PC
Macintosh
IBM
Axis NPS 530/532 User’s Manual 7
Page 8

Section 1: Introd uction
NetWare The NPS 530/532 has two different modes in the NetWare environment
Windows The NPS 530/532 is set up using the supp lied Axis Print Utility for
– Print Server Mode and Remote Printer Mode.
In Prin t Server Mode, the NPS 530/532 emulates a NetWare Print
Server. At power-on it will log in to each file server in the network to find
ou t which p r in t queu es are to be s erv ic ed. Up to 16 f ile s erv ers and u p to
96 pri nt queues are sup p or ted .
In Remote Printer Mode, the NPS 530/532 ap pears as a NetWare
Remote Printe r. At power -on it will log in and attach to up to eight
specified Ne tWa r e print server s .
Windows. You may prin t thro ug h a serv er (client-server), or directl y (peer-
to-peer). The supported platforms are Windows for Workgroups,
Windows 95 and Windows NT.
OS/2 The NPS 530/532 is integrated to the OS/2 Spooler using the supplied
Axis Print Utility for OS/2. Th e prin ters att ached to the NPS 530/532 will
appear as connected directly to the file server, and may be used by any PC
running LAN Server or LAN Manager on your network.
Unix systems The NPS 530/532 can operate as an integrated part of your system. The
printers con nected to the NPS 530/532 wil l appear as if they were
conn ec ted d irectly to the h os t printer spooler .
You have several protocols and print methods to choose from. The
method you should select depends on your requirement s, and what
system you are ru nn ing. Five print methods are supported in TCP/IP:
LPD, FTP, PROS A (named pipe) PROS B (filter) and Reverse Telnet.
Any host supporting the TCP/IP suite of protocols is sup ported by the
NPS 530/532.
Macintosh The NPS 530/532 will appear as a LaserWriter printer connected to your
Ap pleTalk network. Once selected from the C ho os er in th e Ap p le men u ,
it can be used as any other LaserWriter.
8 Axis NPS 530/532 User’s Manual
Page 9

Main Features
Reliability The Axis NPS 530/532 hardware provides high performance and
Flexibility It supports NetWare, Microsoft and IBM networks,and op tionally TCP/
Speed The sustained throughput exceeds 150 kbytes per second. High-speed
Section 1: Introduction
reliability combined with low power consumption. It is based on the Axis
ETRAX chip with an integrated 32 bit RISC CPU and Ethernet
controller.
IP and Apple EtherTalk simul t ane ously. F ive di ffe re n t print met hod s are
supported for Unix systems.
Centronics communication such as Hewlett-Packard Fast Mode is
supported.
Easy to Install Use PCONSOLE for NetWare Instal lat ion, Axis Print Ut ilit y for
Windows and OS/2, the supplied axinstall script for Unix systems, and
the Chooser for Macintosh.
Logic al P rin ters This u ni q ue Ax is concep t allows y ou to perform auto ASCII to PostScrip t
conversions, use different character sets, or select multiple bins and form
sizes on th e same printer.
Accou n t ing The accounting function lets you keep track of the last ten print jobs.
Security You may set up passwords for all users, restricting both log in and printer
access.
Axis NPS 530/532 User’s Manual 9
Page 10

Section 2: Getting started
Section 2
Getting started
Unpack and in s pect al l pa rt s for dam a ge. C ont act y ou r de ale r if
anyt hi ng is mi s si ng . All packin g mat e ri al s ar e rec ycla ble.
The standard
delivery
• NPS 530 Print Server; part no. 0039-1 or
NPS 532 Print Server; part no. 0039- 2
• NPS 530/532 User's Manu al; part no . 13588
• NPS 530/532 Quick Installation Guide; part no. 13593
• Warranty registration form; part no. 13510
• 3.5" di s k wi th NP S Installation Util ities for
NetWare, Windows and OS/2; part no. 13493
• Power Supply Europe (NPS 530 only ); part no. 13599 or
• Power Supply Europe (NPS 532 only ); part no. 13267 or
• Power Supply UK; part no. 13268 or
• Power Supply Australia; part no. 13269 or
• Power Supply USA; part no. 13270
Optional
accessories
10 Axis NPS 530/532 User’s Manual
• Self-adhesive Velcro ribbons; part no. 13282 and 13283
• BNC T-adapter (NPS 532 only); part no.12839
• Printer cable extension; part no. 13522
• NPS Print Server Technical Reference and
Adobe Acrobat Reader; see Ap pendix E.
Page 11

FRONT
BACK
TEST
POWER
PACKET
Section 2: Getting started
TEST Button
POWER Indicator
PACKET Indicator
Printer Connector
ETHERNET Connector
External Power
Supply Connector
FRONT
BACK
TEST
POWER
PACKET
ETHERNET
The NPS 530 si de panels
TEST Button
POWER Indicator
PACKET Indicator
Printer Connector
ETHERNET Connector
External Power
Supply Connector
Axis NPS 530/532 User’s Manual 11
ETHERNET
The NPS 530 si de panels
Page 12

Section 2: Getting started
Printer Installation
Before you begin:
Mak e sure th a t the exte rn al pow er supp ly is mark ed with the corre c t
mains voltage.
Attach the NPS 530/532 to your pri nter’s parallel port and make a tes t
printout:
1. Switch off the printer.
2. Attach the NPS 530/532 to the printer, either directl y to the parall el
printe r port, or usi ng th e op tio nal velcro ri bb ons an d pri nte r cable
extension.
3. Connect the external power supp ly. The PACKE Ti ndica tor will flash
during po wer-on and self-test. When the indicator stops flashing and
remains unlit, the NPS 530/532 is ready for use.
4. Switch on the printer.
5. Press and hold the test button until the PACKET indicator starts to
flash, the n re le as e the button to print a test p age.
The test page shows the sof tware revision and the basic setup of you r
NPS 530/532.
Note: The NPS 530/532 supports high-speed Centronics communication such
as He wl ett- Pa ckard Fas t Mode. Thi s function i s di s abled by def au lt, s in ce
some printers support standard Centronics only. To activate high-speed
Centronics, change the Output Menu parameter L1_CENTR to
HISPE ED as outl in ed in Ap p endix A.
12 Axis NPS 530/532 User’s Manual
Page 13

Network Installation
Section 2: Getting started
Before you begin:
Note: Each NPS print server is preconfigured with a unique Node Address
• M ake sure that your network is ready to accept a new node.
• Any network configuration should always involve the network
manager.
1. Record the serial number of your NPS 530/532. You will need this
numbe r for the setu p .
2. NPS 530 only: Connect your NPS 530 to the network using a
twisted-pair (10baseT) Ethernet cable.
3. NPS 532 only: Connect your NPS 532 to the network u s ing a thin-
wire (10base2) Ethernet cable.
(identic al to the serial number). You can change th is to a Locally
Administrated Address, see page 68.
The installation is now completed. Proceed with the setup sections for
NetWare, Windows, OS/2, Unix and/or Macintosh.
Axis NPS 530/532 User’s Manual 13
Page 14

Section 3: Setup for NetWare
Section 3
Setup for NetWare
The NPS 530/532 can run in either Print Server Mod e, Remote Printer
Mode or both si multan eou s ly . Th e b as ic configuration is done u si ng th e
PCONSOL E software suppl ied from Novell , and if you choose a setup
other than the automatic print server mode, also with AXCFG supplied
with the NPS 530/532.
The ov er vi ew on the fo ll owing page s exp lains the adva ntages and
limitations of each mode. Select the mode that best fits your needs, then
carry out the configuration as described later in this section.
Before you begin:
• Make sure that the NPS 530/532 is powered on and attached to the
net work.
•You will need root privileges on the system.
• Have the serial number found on the back of the NPS 530/532
available.
• A ny ne t work configura ti on s hould alw ays inv olve th e ne two rk
manager.
• If you use NetWare 4.0 or later, you must set up your file server for
bindery emulation by specifying the Bindery Context parameter. See
your Novell d oc u menta tion fo r de ta ils.
Befo r e configuri ng your NetWa r e s ystem, yo u m ay want to configure th e
NPS 530/532 (e.g. logical printer definitions). This is done using the
AXCFG software on th e disk supplied with th e NPS 530/532.
On the disk you will find a text file called read.me, cont a ining ins tall a tion
instructions for AXCFG in the Novell environment.
14 Axis NPS 530/532 User’s Manual
Page 15

Section 3: Setup for NetWare
Print Server Mode An NPS 530/532 in print server mode emulates a Novell print serv er (a
workstation running PSERVER). This is the recommended mode for
medium-s iz ed to large netw o rk s.
There a r e th re e di ff er ent ways to set up the print server mo d e, d ep en d ing
on how you want the NPS 530/532 to log in to the servers at power-up,
and how you want to manage printer and queue configurations:
Automatic Log-In The NPS 530/532 will autom atically detec t and log in to all NetWare
servers on the network at power-on. See page 17 for setup procedures.
Advantages Limitations
High performance (typically 150 kbytes/s).
Easy to set up – no NPS 530/532 configuration
required for automatic mode.
Requires a NetWare user licence for each
NPS 530/532.
The NPS 530/532 power-up takes a long
time on large networks
Parameter
Controlled Log-In
The NPS 530/532 will log in to only those NetWare servers specified by
the NPS 530/532 configuration. See page 18 for setup procedures.
Advantages Limitations
High performance (typically 150 kbytes/s).
Avoids the prolonged NPS power-up time
caused by the automatic file server login.
You can link a queue to a logical printer with-
out having t o use the !n queue name extension.
An unavailable file server will not affect the
access of the remaining sp ecified ser ver s.
Requires a NetWare user licence for each
NPS 530/532.
Requires configuration of the NPS 530/532.
Difficult to manage print queues on larger
networks.
Axis NPS 530/532 User’s Manual 15
Page 16

Section 3: Setup for NetWare
File Server
Controlled Log-In
Remote Printer
Mode
The NPS 530/532 will first log in to the Configuration File Server, a nd
then to any add itional NetWare servers found in the file server
conf igur ati on. See page 20 for setup proce dur es .
Advantages Limitations
High performance (typically 150 kbytes/s).
Avoids the prolonged NPS power-up time
caused by the automatic file server login.
Simplifies the queue and printer set-up and
maintenance, especially on larger networks.
You can link a queue to a logical printer with-
out having t o use the !n queue name extension.
Requires a NetWare user licence for each
NPS 530/532.
Requires configuration of the NPS 530/532.
If the configuration file server is unavailable,
then none of the queues will be serviced.
An NPS 530/532 in remote printer m ode em ulates a w or kstation ru nnin g
RPRINTER or NPRINTER (the Novell remote printer software). It is
attached to a NetWare print server, that is either located on the file server
(PSERVER.NLM), or a dedicated w orkstation running PSERVE R.EX E.
This mode is only recommended for small networks where the number of
NetWare user licences is a majo r iss u e.
The setup procedure involves adding a printer, linking the printer to one
or mo re print queues, and fi nally specifying whic h N etW are print servers
the NPS 530/532 shall attach to. The first two steps are carried out in
PCONSOL E, and the last step is done in AXCFG (suppli ed with the
NPS 530/532). See page 24 for setu p procedures.
Advantages Limitations
Allows up to 8 printers per NetWare user
licence.
Lower performance – 20 - 40 kbytes/s for
NLM, and 70 kbytes/s for EXE.
Requires configuration of the NPS 530/532.
High er networ k load.
16 Axis NPS 530/532 User’s Manual
Page 17

Section 3: Setup for NetWare
Print Server Mode (Automatic)
The setup procedure involves adding a print server and linking it to one
or more p ri nt queu es . Both s tep s are car ried out in PC ON SOLE.
Add a Print Server Follo w th es e step s to a d d a prin t server to your Net W are environmen t:
1. Lo g in t o a fil e se rve r fro m a clien t w orkstation.
2. Start PCO NSOLE.
3. NetWar e 4.xx o nly: Press <F4> to switch to Bind e r y M ode .
4. Select Pr in t Serv er Info rm at ion (3.xx) or Print Servers (4.xx).
5. Press <Insert> to add a new Print Server.
6. Enter the Print Server Name: AXIS< nnnnnn>
<
nnnnnn> are th e last six dig its of the NPS 530/532 serial number.
(see notes below)
7. Press Escape to return to the Main Menu.
Repea t this procedure for each fil e serve r using the NPS 530/532.
Notes: 1. If the serial num ber of your NPS 530/532 is 00408C110086
the default name is AXIS110086
. The serial number is found on the
label at the back of the NPS 530/532.
2. Y o u ma y cha nge the def ault name using AXCFG , th e Axi s Confi g ura tion Software. This must be done before running PCONSOLE.
3. The print server name is case insensitive in print server mode. Both
AXIS110086 and Axis110086 are valid default print server names.
, then
Axis NPS 530/532 User’s Manual 17
Page 18

Section 3: Setup for NetWare
Link a Print
Queue to the
Print Server
The next step is to link a print queue to the print server:
1. Start PCONSOLE according to steps 1-3 on the previous page.
2. Select Prin t Queue Informat io n (3.xx) or Print Queues (4.xx). If you
plan to use an exi s ting queue , then s ki p to step 5.
3. Press <Insert> to add a new queue.
4. Type a queue name, and press <Enter>.
5. S e lect t he queu e that y ou want the NPS 530/ 532 to serv ice. The
Print Queue Information menu appears.
6. S e lect Qu eue Servers (3.xx) or Print Servers (4.xx).
7. Press <Insert> to dis play the Queue Server Candida tes list.
8. Select AXI S <n nnnnn>.
9. Press <Escape> repeate dly to return to th e mai n menu.
Repeat this procedure for every queue you want the NPS 530/532 to
service. The NPS 530/532 supports up to 96 print queues, defined on up
to 16 file servers.
Print Server Mode (Parameter Controlled)
This is similar to the automatic print server mode, but the NPS 530/532
will not automatically log in to all file servers and scan for queues to
service. Instead, the file servers and print queues are specified by a set of
parameters in the NPS 530/532 configuration. This is the recommended
method for medium-sized networks.
NetWare
Configuration
The NetWare configuration is identical to the one d escribed for
autom atic print server mode. Fol low the instru ctions in “Add a Prin t
Server” (page 17) and “Link a Print Queue to the Print Server” (page 18) to
add a print server and assign queues to it.
18 Axis NPS 530/532 User’s Manual
Page 19
Section 3: Setup for NetWare
NPS 530/532
Configuration
Th e co nfig u rati on invo l ves spec ifying whic h N et W are file s e r vers and
print queues the NPS 530/532 shall attach to. This is done using
AXCFG, the Axis NPS configuration software on the disk supplied with
the NPS 530/532. Follow the instructions in the read.me file on the disk
to ins tall the soft war e, then proceed as foll ow s :
1. Start AXCFG, and select NetWare.
2. Selec t N o at t he ‘L oo k for old print se rve rs’ prom p t unless you are
configuring an NPS 530/532 with software revision prior to 4.20.
3. Choos e Sele ct A ll Net w ork s, then sel ec t your NP S 530/ 532.
4. Type root and pas s at the logi n prompt.
5. S e lect NETWARE MENU.
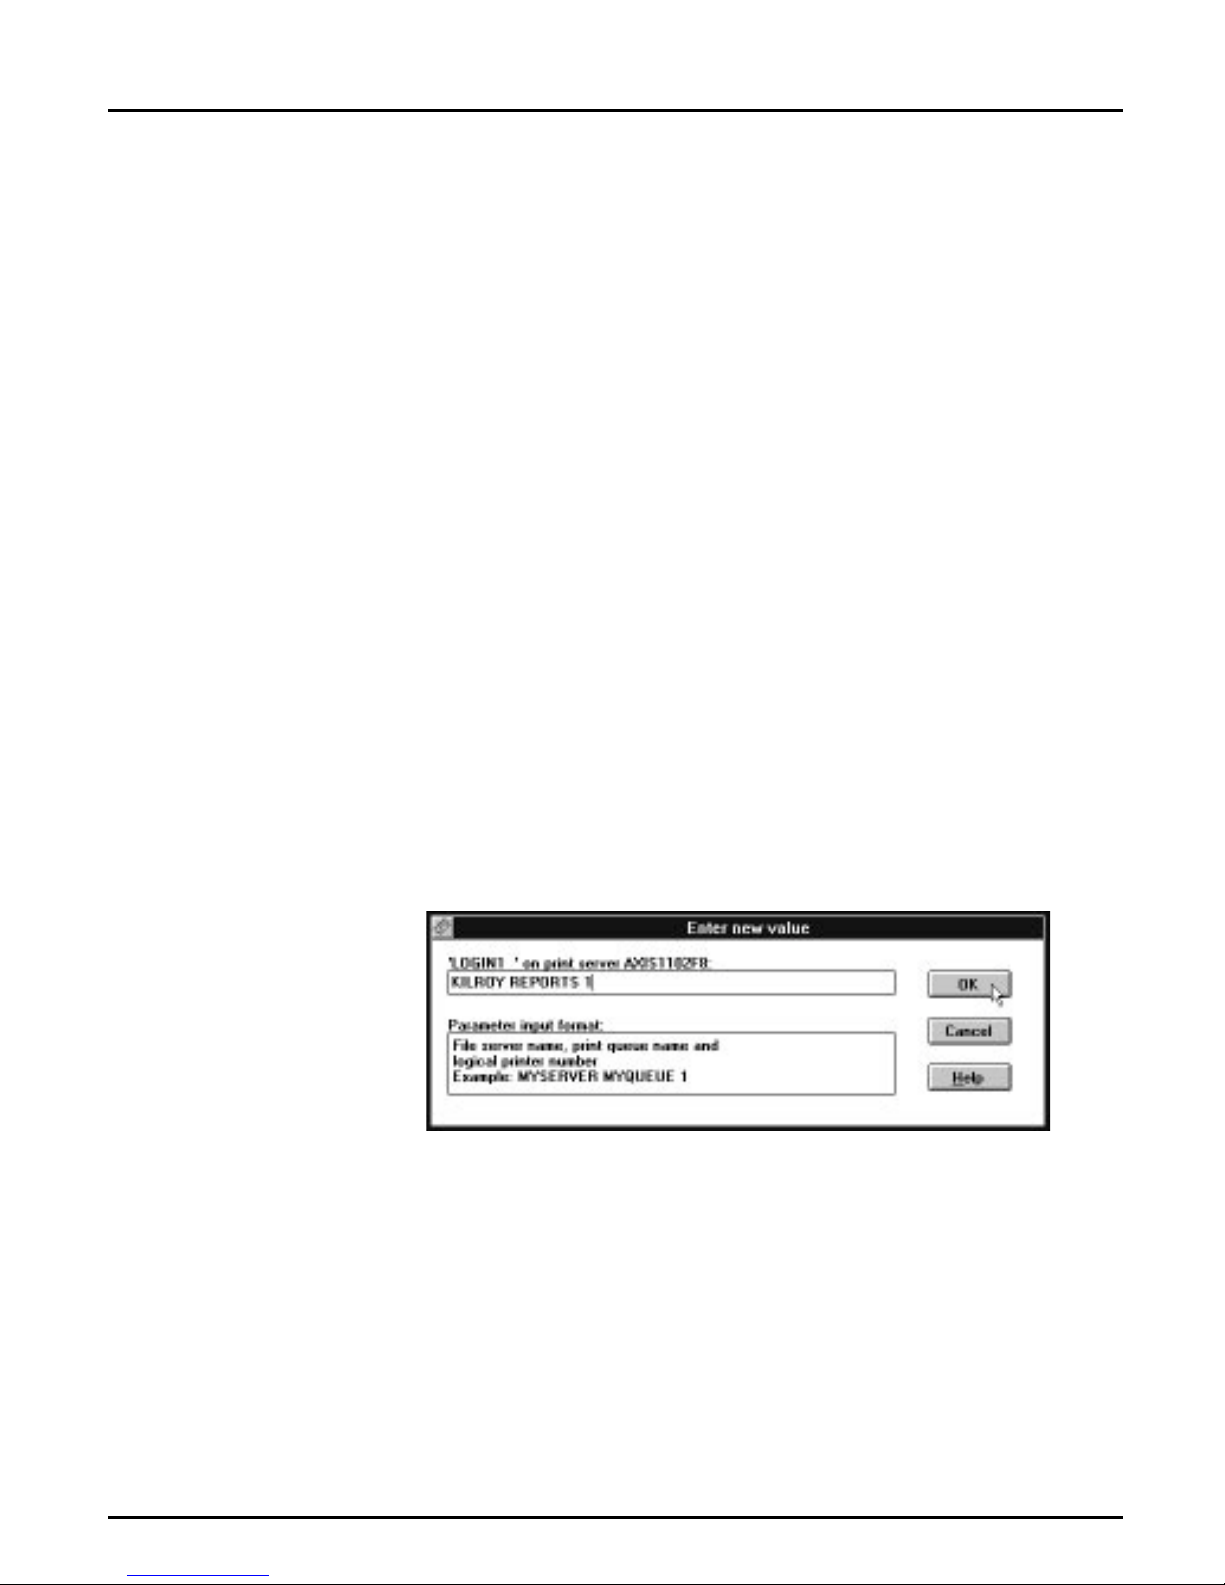
6. Select LOGIN1.
7. Type the name of the NetWare file server, the print queue, and the
logic a l p rinter nu mb e r. Us e th e file se rv er a n d p ri nt queue nam e from
the NetWare configuration above, and one of the logical printer numbers 1–8.
8. To specify more print qu eues, select L OGIN2 through LO GIN16 i n
consecutive order. Repeat step 7 for each print queue.
9. Select Save, t hen se le ct Cancel un til AX CF G closes down .
Axis NPS 530/532 User’s Manual 19
Page 20

Section 3: Setup for NetWare
Print Server Mode (File Server Controlled)
This method uses a NetWare file server (the Configuration File Server) to
hold the print queue information . The NPS 530/532 will not
automatically log in to all file servers and scan for queues to service.
Instead, the file ser vers and print queues are specified on the
configuration file server. This is the recommended method for large
ne tworks , s ince it si mplif ies the maint enance of a lar ge nu mber of pr int
queu es.
NetWare
Con figurat ion
The NetWare configuration is different from the automatic and
parameter controlled modes. Instead of setting up queues on several file
servers, all queu es a re set up and main tained on the configuration fil e
ser ver. The co nfigur a tion procedu re depe nd s on which NetWar e ver s ion
you ar e using.
20 Axis NPS 530/532 User’s Manual
Page 21

Section 3: Setup for NetWare
NetWare 3.xx: 1. Log in as supervisor to the NetWare server, and start PCONSOLE.
2. Select Change Current File Server, then select the fi l e se rver at w hich
you want to keep the queue and printer configurations. Make a not e
of the configuration file server name, you will need it during the NPS
530/532 configuration.
3. Select Print Serv er Info rm at io n, then ad d the new print ser ver
AXIS<nnnnnn>. See “Add a Print Server” (page 17) for details.
4. Select AXIS <nnnnnn>.
5. Select Print Ser v e r Configur ation, and then File Servers to be Serv-
iced.
6. Press <Insert> to see the list of Available File Servers. Add all file
servers you want the NPS 530/532 to log in to, then press <Esc> to ge t
back to the Print Server Information Menu.
7. Select Printer Configuration. A list of 16 prin ters ma rk e d Not
Installed appears. The printers numbered 1–8 correspond directly to
the NPS 530/532 logical printers PR1–PR8. The remaining eight
printers are not used by the NPS 530/532.
8. Select the second printer (number 1). Th e p r inter i s b y defaul t named
‘Printer 1’. The printer names are not used by the NPS 530/532.
9. Select Queues Serviced By Printer, th e n se le ct Printe r 1.
10.Press <Insert> to see the list of Available Qu eues, then select the
queues you want the printer to service. Repe at steps 9 – 10 if you
have installed more than one printer.
11.Exit PCONSOLE.
Axis NPS 530/532 User’s Manual 21
Page 22

Section 3: Setup for NetWare
NetWare 4.xx: 1. Log in as supervisor to the NetWare server, and start PCONSOLE.
2. Pr es s <F 4> to switc h to Bi nd e r y M od e .
3. Select Change Current NetWare Server, then select the file server at
which you want to keep the queue and printer configurations. Make
a note of th e confi g u rat ion fil e s erver name, you will need it d u ri ng the
NPS 530/532 configuration.
4. Select Pri nt Se r ver s, then add the new print server AXIS <nnnnnn>.
See “Add a Print Server” (page 17) for details.
5. Select AXIS <nnnnnn>.
6. Select S erv iced NetW are Servers .
7. Press <Insert> to see the list of Availa ble N e tW are Server s. Add all
file servers you want the NPS 530/532 to log in to, then press <Esc>
to get back to the Print Server Information menu.
8. Select Printers. An empty list of Defined Pr inter s appears. Printers are
numbered from 0 to 255 in the order that they are defined. The printers numbered 1–8 correspo nd directly to the NPS 530/532 logi cal
printers PR1–PR8. No other printer numbers are used by the NPS
530/532.
9. Press <Insert> to define printer number 0. Name it ‘DUMMY’,
‘UNUS ED ’ or si mi lar to indicate that this p ri nter is not used.
10.Press <Insert> to define printer number 1. Name it ‘PRINTER_1’
or whichever name you prefer. The printer names are not used by
t he NPS 530/ 532.
11.Select printer number 1. The printer is by default named ‘Printer 1’.
12.Select Print Queues Assigned and press <Insert> to see the list of
Available Print Queues .
13.Select the queues you want printer number 1 to service. Repeat steps
10 – 13 for each additional printer number you want to define.
14.Exit PCONSOLE.
22 Axis NPS 530/532 User’s Manual
Page 23
Section 3: Setup for NetWare
NPS 530/532
Configuration
The configurati on involves s p ecifying the configu ratio n f ile server. T his is
done using AXCFG, the Axis NPS installation software on the disk
supplied with the NPS 530/532. Follow the instructions in the read.me
file on the disk to in sta ll the software, then proceed as follows:
1. Start AXCFG, and select NetWare.
2. Selec t N o at t he ‘L oo k for old print se rve rs’ prom p t unless y ou are
configuring an NPS 530/532 with software revision prior to 4.20.
3. Choos e Sele ct A ll Net w ork s, then sel ec t your NP S 530/ 532.
4. Type root and pas s at the logi n prompt.
5. S e lect NETWARE MENU.
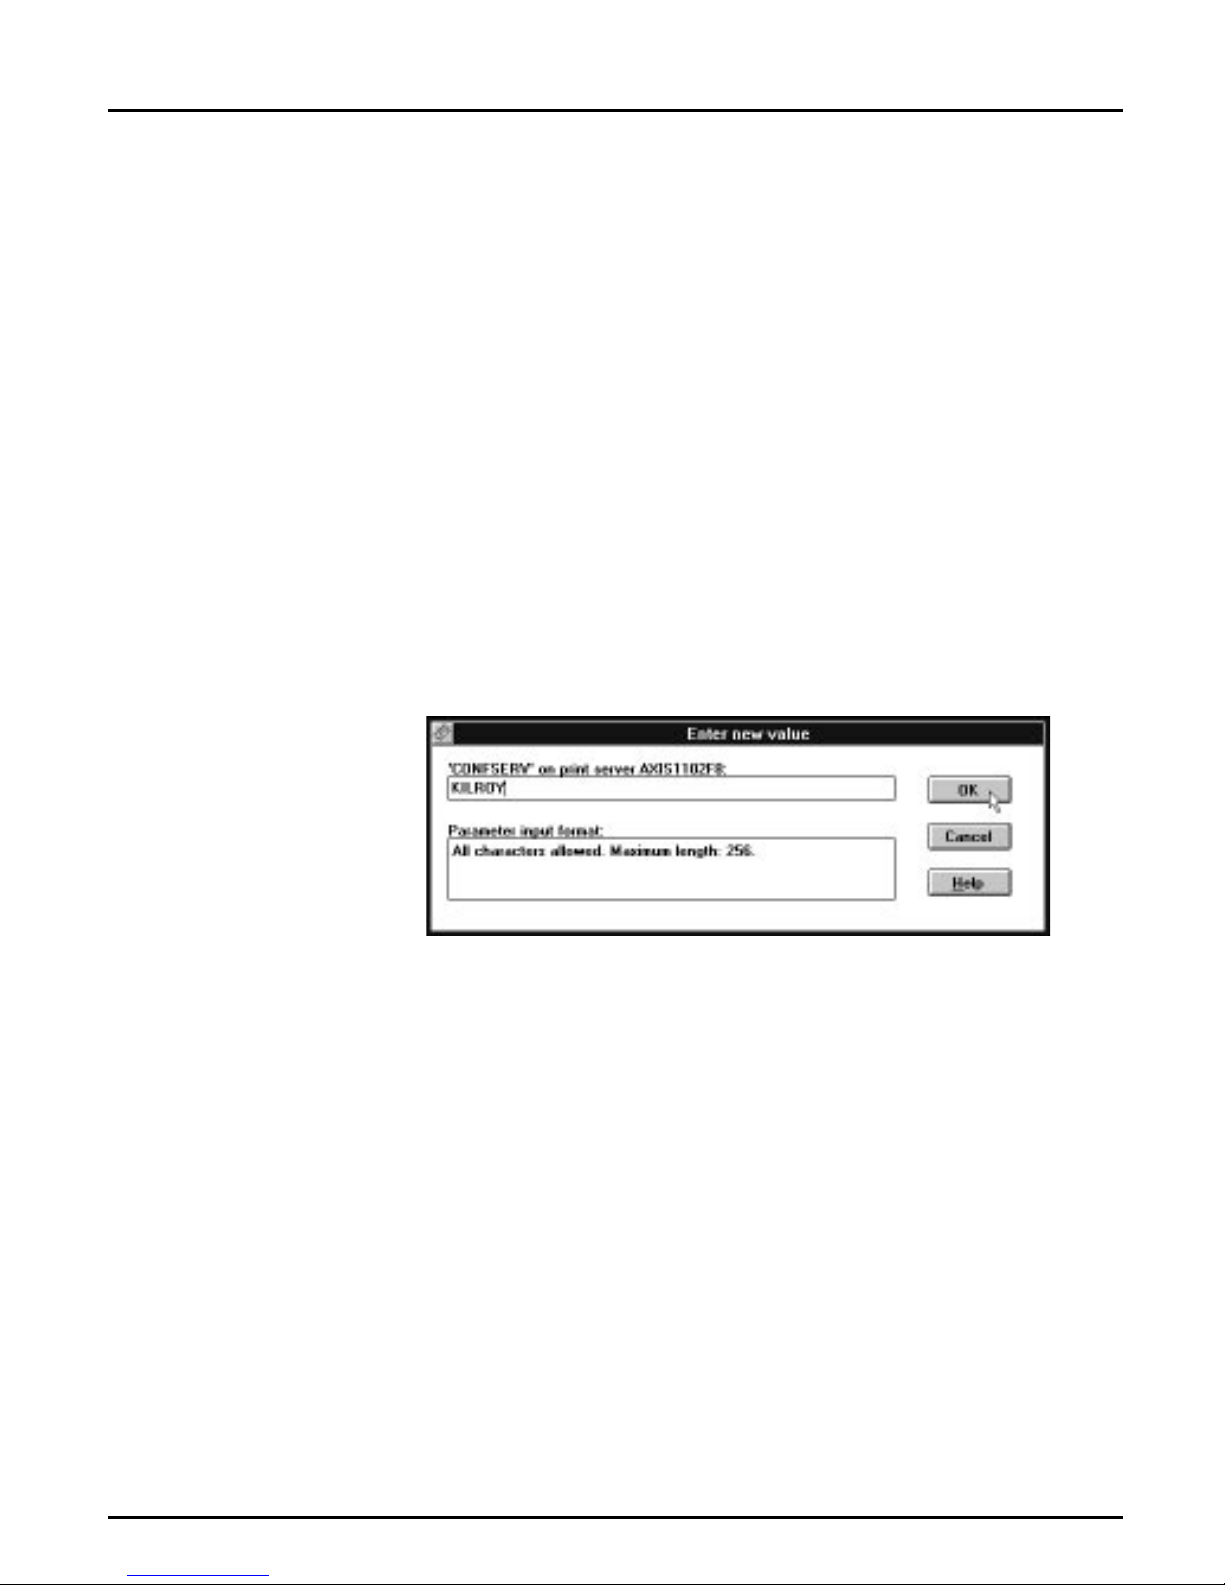
6. Select CONFSERV.
7. Type the name of the NetWare file server dedicated as the configuration file server, then select OK.
8. Select Save, then se le ct Cancel un til AX CFG clos es down .
Axis NPS 530/532 User’s Manual 23
Example: Use KILROY as configur ati on file server
Page 24

Section 3: Setup for NetWare
Remote Printer Mode
The configuration for remote printer mode comprises the following steps:
1. Add a Print Server
2. Create a Print Queue
3. Link a Remote Printer to the Print Queue
4. C o nfigur e the NP S 530/ 532
Add a Print Server The NetWare print server software is either installed on a file server
(PSERVER.NLM), or a dedicated workstation (PSERVER.EXE). If you
don’t already have a Novell print server instal le d, please refer to the
No vell d ocumenta tio n for ins talla tion proc ed u res .
Create a Print
Queue
Link a Remote
Printer to the
Pri nt Queue
Print queues ar e created in the same way as for print server mode. If you
do not need any new queues, skip to “Link a Remote Printer...” below.
1. L og in to a f ile ser ver fro m a cli e nt wor kstation.
2. Start PCONSOLE.
3. Select Print Queue Inf ormatio n (3.xx) or Print Queues (4.xx).
4. Press <Insert> to add a new queue.
5. Type a queue name, and press <Enter>. Select a print queue volume
(4.xx on l y ). Rep eat s tep s 4 – 5 for each queu e you wan t to cr eate.
6. Press <Esc> to retu rn to the Main Menu.
The procedures are slightly different depending on which NetWare
version you are using. In either case, begin with starting PCONSOLE
according to steps 1–3 in “Create a Print Queue” above if you have not
already done so.
24 Axis NPS 530/532 User’s Manual
Page 25

Section 3: Setup for NetWare
NetWare 3.xx: 1. Select Prin t Server I nfo rm atio n from the PCONSOLE Main Menu.
2. Select the NetWare Print Serv er to which you w ant to link your
NPS 530/532.
3. Select Pr int Ser ver Config ur ati on , and then Printer Configuration.
4. Select the first free s lot in the Conf igured Pr inters list.
5. Make a note of the NetWare print server name and the Printer
number; you will need it later during the configuration.
6. C han ge Nam e to AXIS<nnnnnn>!n
<
nnnnnn> are th e last six digits of the NP S 530/ 532 ser i al number .
(see notes below)
7. C hange Type to Remote Other/Unknown.
8. Pr ess <Esc>, and select Yes at the Save Changes prompt .
9. S e lect Queues Serviced by Printer in the Print Server Configuration
Menu.
10.Select AXIS<nnnnnn>!n in the Defined Printers list.
11.Press <Insert>, then select the queue you want to use from the Available Queues list. Repeat this s tep if you want more tha n one queu e.
12.Press <Esc> to g et back to the M ain Menu, then exit PCONSO LE.
Repeat this procedure for each file server and print server using the NPS
530/532.
Notes: 1. If the serial num ber of your NPS 530/532 is 00408C110086
the default name is AXIS110086
label at the back of the NPS 530/532.
2. Y o u ma y cha nge the def ault name using AXCFG , th e Axi s Confi g ura tion Software. This must be done before running PCONSOLE.
3. You may defin e up to eight remote printer s , each attached to its ow n
NPS 530/532 logical printer. Each remote printer must have a unique
name distinguished by the !n extension.
Axis NPS 530/532 User’s Manual 25
, then
. The serial number is found on the
Page 26

Section 3: Setup for NetWare
NetWare 4.xx: 1. Select Print S er ve rs from the PCONSOLE Main Menu.
2. Select the NetWare Print Serv er to which you w ant to link your
NPS 530/532.
3. Select Printers.
4. Press <Insert> to add a remote printer to th e Defined Printers list.
5. Type
<
AXIS<nnnnnn>!n
at t h e Printe r: prompt.
nnnnnn> are th e last six dig its of the NPS 530/532 serial number,
(see notes below)
and n is the logical printe r number 1–8.
6. Select AXIS<nnnnnn>!n.
Important: Always use printe r numbers 1 and higher; the NPS 530/
532 will not detect any remote printers with pr inter number 0.
7. Make a note of the NetWare print server name and the Printer
number; you will need it later during the configuration.
8. Select Printer type: , and change to
Other/Unknown
.
9. Select Print Queues Assigned, then press <Insert>
10.Press <Insert>, then select the queue you want to use from the Available Print Queues list. Repeat this step if you want more than one
queue.
11.Pr ess <F10> to sav e the chan ge s , then pr e ss <Esc >.
12.Press <Esc> to g et back to the M ain Menu, then exit PCONSO LE.
Repeat this procedure for each file server and print server using the NPS
530/532.
Notes: 1. If the serial num ber of your NPS 530/532 is 00408C110086
the default name is AXIS110086
label at the back of the NPS 530/532.
2. Y o u ma y cha nge the def ault name using AXCFG , th e Axi s Confi g ura tion Software. This must be done before running PCONSOLE.
3. You may defin e up to eight remote printer s , each attached to its ow n
NPS 530/532 logical printer. Each remote printer must have a unique
name distinguished by the !n extension.
26 Axis NPS 530/532 User’s Manual
, then
. The serial number is found on the
Page 27
Section 3: Setup for NetWare
Configure the
NPS 530/532
The configuration involves specifying which NetWare print servers and
printer numbers th e NPS 530/532 shall attach to. Th is is done using
AXCF G , th e Axis NPS insta ll a tion softw a r e on the dis k suppl ied w ith the
NPS 530/532. Fol low the instructions in the read.me file on the disk to
install the software, then proceed as follows:
1. Start AXCFG, and select NetWare.
2. Selec t N o at t he ‘L oo k for old print se rve rs’ prom p t .
3. Choose Sele ct All Networks, then sel ec t your NP S 530/ 532.
4. Type root and pas s at the logi n prompt.
5. S e lect NETWARE MENU.
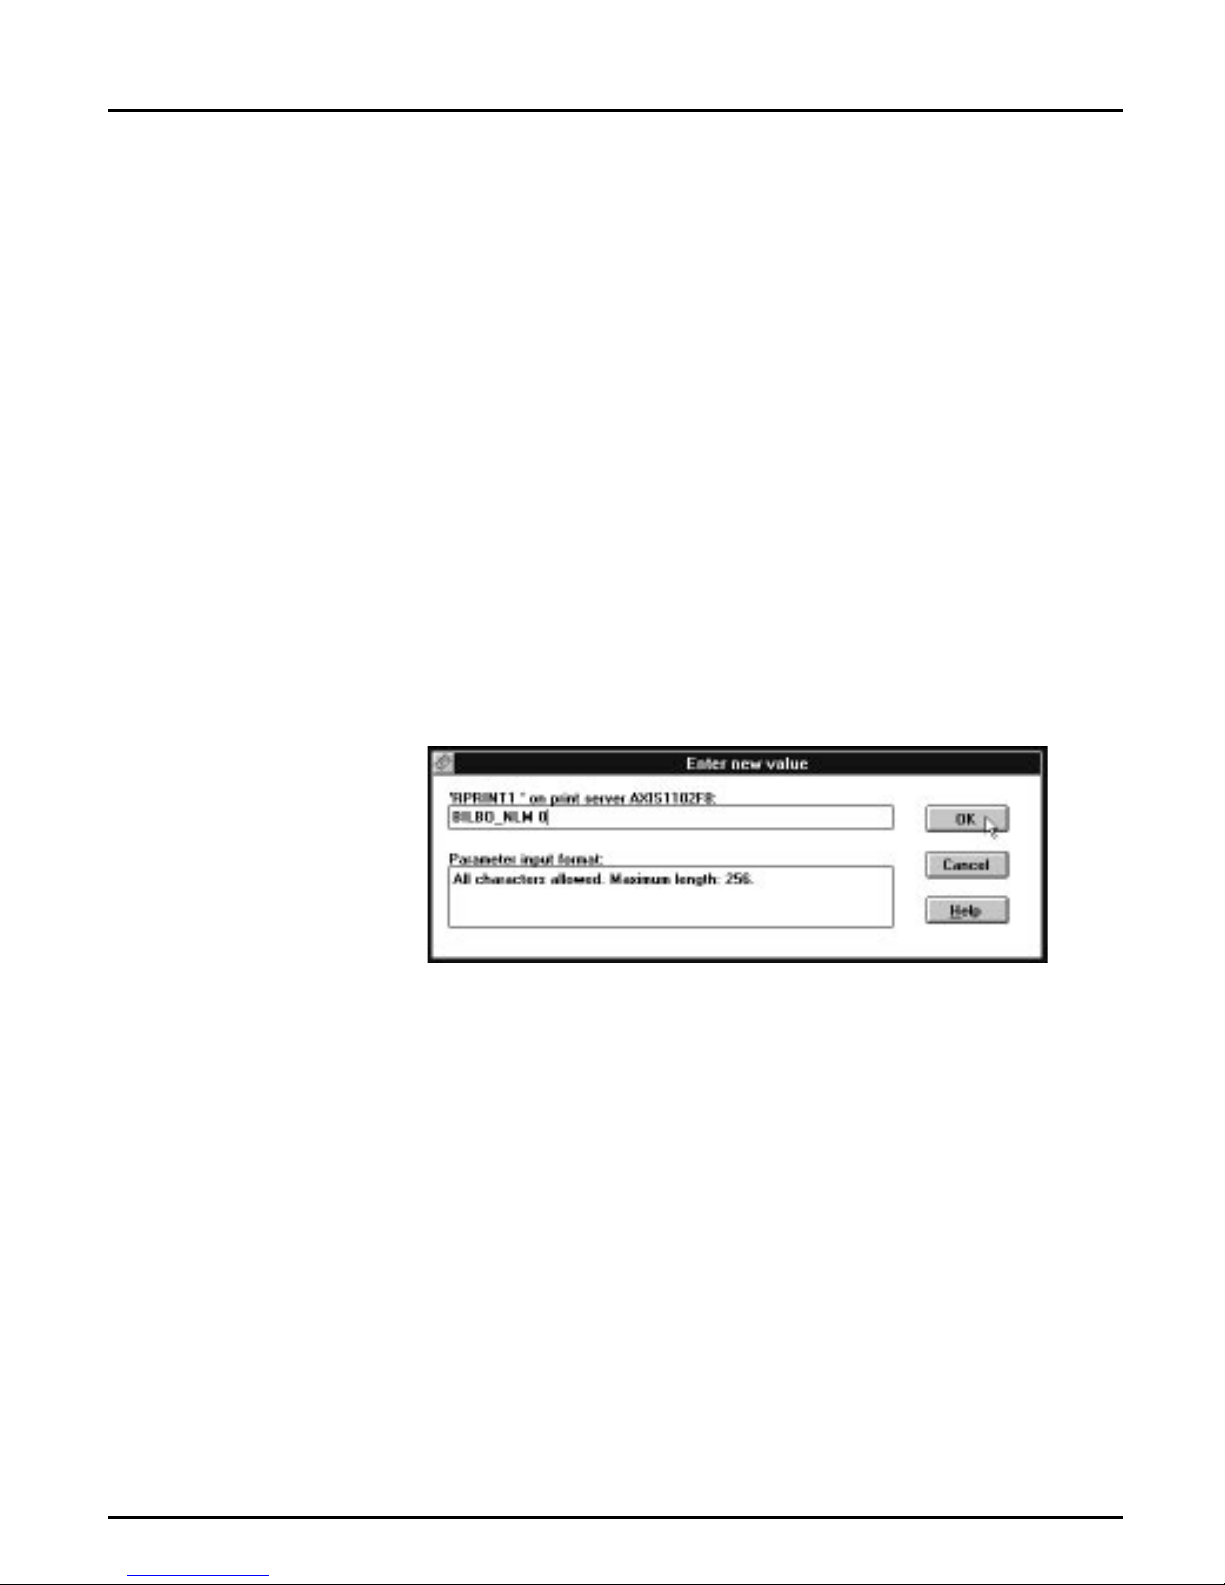
6. Select RP RI N T1.
7. Type the name of the NetWare print server and the printer number
(4.xx: Use printer numbers 1 and higher). Use the name and number
from the NetWare configuration earlier.
8. To specify more print servers, select RPRINT2 through RPRINT8
in consecutive order. Rep eat step 7 for each print server.
9. Select Save, t hen sel ec t Cancel un til AX CF G closes down .
Axis NPS 530/532 User’s Manual 27
Example: Use pri nter 0 at BI LBO_NLM as remo t e pri nt e r
Page 28

Section 3: Setup for NetWare
Verify the Communication
To verify communication by making a test printout, just send a job to
one of the print queues that NPS 530/532 will service. Use CAPTURE,
NPRINT, or PCONSOLE.
Example: Use CAPTURE from th e DO S com mand line when you are logg ed into
the net wor k, to print out th e a utoex ec.bat file from th e roo t of d r ive C:
CAPTURE /L=1 /Q=DESKTOP /NOTIFY /TI=30 /NT /FF /NB
COPY C:\AUTOEXEC.BAT LPT1:
The CAPTURE switches have the following meanings: /L=1 captur es the
printouts sent to th e PC LPT 1 port, /Q=DE S K T OP specifies the print
queue, /NOTIFY enables user messages, /TI=30 sets the time-out to 30
seconds, /NT specifie s no tab exp a ns ion, /FF end s th e printout wi th a
Form Feed, and /NB dis ables the banner pa ge.
28 Axis NPS 530/532 User’s Manual
Page 29

Section 4
Setup for Windows
This section describes how to set up your NPS 530/530 for the Microsoft
Windows environment. The following Windows platforms are
supported:
•Windows 3.1 (requires add-on network support)
• Wi ndows fo r Work g r oup s
•Windows 95
Section 4: Setup for Windows
Axis Print Utility
for Windows
•Windows NT
The setup is d one us ing Axis Print Utility for Windows. Insta l l the u tility if
you have n’t al rea d y do ne s o ( s e e t h e ins t r uc ti ons on the NPS 530/530
Setup disk lab e l) .
Axis P r int Uti lity is a dual p u r po s e ap p licat ion for networ k p rintin g in th e
Mic r osoft Wi nd ows envir o n ment. It’ s two p ur pose s are:
1. Install and maintain NPS 530/530 printer ports as Windows printer
ports.
Axis Print Utility automatically detects all NPS 530/530s on your netwo rk . Any nu mbe r of printers ma y be installed at any workst a t ion .
2. C apture and moni to r print jobs direc te d to NPS 530/530 ports.
Print jobs ar e di rected thro u gh a spool direct or y, either at you r lo cal
hard di sk (pee r-to-peer mo de ) or at th e fil e ser ver ( Client-S er ver
mode). NPS 530/530 printer ports can be monitored, and you get a
pop-u p notification message when your print job is finished.
For mo re inf ormation about Axis Pri nt Utility , s ee th e on- l ine help.
Axis NPS 530/532 User’s Manual 29
Page 30

Section 4: Setup for Windows
Requirem ents: 1. Micr os of t Ne twork must b e running when installing and using Axis
Print Utility.
2. Axis P r int Utility m u s t b e ru nni ng when ever yo u want to print to your
network printer.
Peer-to-peer vs.
Client-Server
printing
Windows 3.1
Axis Print Utili ty s u pports bot h peer - to- p eer and client-ser ver printing.
Peer-to-peer is the recommended print method for smaller networks. For
mor e inf or m ation on peer- to-peer and clie nt- server prin ting, see the Axis
Print Utility on-line help.
Windows 3.1 requires that network support such as LAN Server or LAN
Manager Workstation software is installed in order to print to a network
dev ice. If this is the case, proce ed as described un der Windows for
Wor k gr o ups below .
30 Axis NPS 530/532 User’s Manual
Page 31

Windows for Workgroups
Section 4: Setup for Windows
Setup for pee r-to -
peer printin g
Example:
Follow these steps to install your NPS 530/530 for peer-to-peer printing
at a Windows for Workgroups workstation:
1. Double-click the Axis Print Utility ico n .
2. In the Port me nu, click Add.
3. In the NPS Port list, select the NPS 530/530 port you want to install.
The port appears as <name>.LP1, where <name> is the NPS 530/530
print s erver name ( AX IS... is a bb re viated to AX .. .) .
AX110086.LP1
4. Accept or change the suggested Windows port name, and type any
comme nts in the Description field. Make a note of the Windows port
name (you will need it later), then click OK to install the Windows
port.
5. In the Port me nu, click Connect to bring up the Windows Printers
dialog.
6. Select a printer driv er from th e list of I n st al le d Printers (or click Add>>
to instal l a new driver), then click Connect...
7. Select th e Windows port from s tep 4 ( at the bo ttom of t h e Ports list ) ,
then click OK.
8. Click OK to close th e Connect dialog, and Close to close Printers.
The setup is now completed and you can immediately print through your
NPS 530/530.
Important: Axis Print Utility must be running when you print through
your NPS 530/530. We strongl y rec ommend t hat you copy th e Axis Pr int
Util ity icon into your Star tu p fol d er .
Axis NPS 530/532 User’s Manual 31
Page 32

Section 4: Setup for Windows
Client-Server
printing:
Server setup
Follow these steps to install your NPS 530/530 for client-server printing
at a Windows for Workgroups server:
1. Choose a workstation that you want to use as server for network pri nting. The server must be available at all times , and must have suff icient
ha rd dis k spa c e for spoolin g pr int j obs.
2. Make sur e th at the printer s haring optio n is enabled. (Ope n Network
Setup, cli ck S ha ring ..., check the ‘I want to be able to allow others to
pri nt to my print er (s) .’ box).
3. Install Axis Print Utility on the server.
4. Set up your N PS 530/530 as desc ribed on page 31.
5. Open Print Manager and select your printer.
6. In the Printer menu , sel ect Share Printer As...
7. Type a printer name in the Share as field (this is the printer name seen
by the clients, see Client setup below). Check the Re-s har e at Startu p
box, then click OK.
The ser ve r setu p is now comp l eted . Set up th e c li ents as describ ed belo w.
Client-Server
printing:
Client set up
Impor tan t : Bo th Axis P ri nt Utility an d Print Manager mus t b e running
when you print through your NPS 530/530. We strongly r ecommend
that you cop y th e Axi s Print Utility ico n into you r Sta rt up fo ld er .
Follow these steps to install your NPS 530/530 for client-server printing
at a Windows for Workgroups client:
1. In the Control Panel , sele ct Printer s.
2. Select a printer driv er from th e list of I n st al le d Printers (or click Add>>
to instal l a new driver), then click Connect...
3. Select Network...
4. In the Device Name lis t, sele c t a loca l p o rt (LPT1 - LPT3) t o redi rect
to your netw ork printe r.
5. In the Show Shared Printers on list, select the server from Server setup
above.
6. In the Shared Printers list, select the printer yo u wa nt to use .
7. Click OK, OK and Close, then ex it Control Panel.
The client setup is now completed and you can immediately print
through your NPS 530/530.
32 Axis NPS 530/532 User’s Manual
Page 33

Windows 95
Section 4: Setup for Windows
Setup for pee r-to -
peer printin g
Example:
Follow these steps to install your NPS 530/530 for peer-to-peer printing
at a Window s 95 workstation:
1. Double-click the Axis Print Utility ico n .
2. In the Port me nu, click Add.
3. In the NPS Port list, select the NPS 530/530 port you want to install.
The port appears as <name>.LP1, where <name> is the NPS 530/530
print s erver name ( AX IS... is a bb re viated to AX .. .) .
AX110086.LP1
4. Accept or change the suggested Windows port name, and type any
comme nts in the Description field. Make a note of the Windows port
name (you will need it later), then click OK to install the Windows
port.
5. In the Port me nu, click Connect to bring up the Printers folder.
6. Double-click the Add Printer icon. The Add Printer Wizard will gui de
you through the installation. Click Next to proc eed .
7. Choose Local Printer, then click Next.
8. Choose Manufacturer and Printer, t hen cl i ck Next.
9. Select th e Windows port from step 4, then click Next.
10.Accept or change the suggested Printer name, then cli ck Next.
11.C lick Finish to comp lete the instal lation.
The setup is now completed and you can immediately print through your
NPS 530/530.
Important: Axis Print Utility must be running when you print through
your NPS 530/530. We strongl y rec ommend t hat you copy th e Axis Pr int
Util ity icon into your Star tu p fol d er .
Axis NPS 530/532 User’s Manual 33
Page 34

Section 4: Setup for Windows
Client-Server
printing:
Server setup
Follow these steps to install your NPS 530/530 for client-server printing
at a Windows 95 server:
1. Choose a workstation that you want to use as server for network pri nting. The server must be available at all times , and must have suff icient
ha rd dis k spa c e for spoolin g pr int j obs.
2. Install Axis Print Utility on the server.
3. Set up your N PS 530/530 as desc ribed on page 33.
4. In the Printers fold er , cl ick the r igh t mo use button over your new
printer, then select Sharing...
5. Clic k the Share d As: radi o button, type a name in the Share Name:
field, then click OK.
The ser ve r setu p is now comp l eted . Set up th e c li ents as describ ed belo w.
Impor tan t : Bo th Axis P ri nt Utility an d Print Manager mus t b e running
when you print through your NPS 530/530. We strongly r ecommend
that you cop y th e Axi s Print Utility ico n into you r StartUp fold e r .
Client-Server
printing:
Client set up
Follow these steps to install your NPS 530/530 for client-server printing
at a Window s 95 client:
1. Open the N etwork Nei ghborhood folder and s el ect th e se rver wh er e
your printer is set up (see Server setup above).
2. Select the printer, and follow the Add Printer Wizard to set up the
pri nt e r on y our cli e nt.
The client setup is now completed and you can immediately print
through your NPS 530/530.
34 Axis NPS 530/532 User’s Manual
Page 35

Windows NT
Section 4: Setup for Windows
Setup for pee r-to -
peer printin g
Example:
Follow these steps to install your NPS 530/530 for peer-to-peer printing
at a Windows NT workstation:
1. Double-click the Axis Print Utility.
2. In the Port me nu, click Add.
3. In the NPS Port list, select the NPS 530/530 port you want to install.
The port appears as <name>.LP1, where <name> is the NPS 530/530
print s erver name ( AX IS... is a bb re viated to AX .. .) .
AX110086.LP1
4. Accept or change the suggested Windows port name, and type any
comme nts in the Description field. Make a note of the Windows port
name (you will need it later), then click OK to install the Windows
port.
5. In the Port me nu, click Connect to bring up Print Manager.
6. In the Printer menu , cl ick Create Printer.
7. Type a name in the Pr inte r Name field, select a suitable printer driv er
from the Driver list, and select Othe r... in the Print to li s t.
8. In the Print Destinations dialog, select Lo cal Po rt, then c lick OK.
9. In the Port Name field, type: C:\~\<port>
where C:\~ is your spool directory, and <port> is the Windows port
name from ste p 4. Cli c k OK.
10.Close th e Print Manager.
The setup is now completed and you can immediately print through your
NPS 530/530.
Important: Axis Print Utility must be running when you print through
your NPS 530/530. We strongl y rec ommend t hat you copy th e Axis Pr int
Util ity icon into your Star tu p fol d er .
Axis NPS 530/532 User’s Manual 35
Page 36

Section 4: Setup for Windows
Client-Server
printing:
Server setup
Follow these steps to install your NPS 530/530 for client-server printing
at a Window s NT server:
1. Choose a workstation that you want to use as server for network pri nting. The server must be available at all times , and must have suff icient
ha rd dis k spa c e for spoolin g pr int j obs.
2. Install Axis Print Utility on the server.
3. Set up your NPS 530/530 following steps 1 - 9 on page 35 (do not
close Print Manager).
4. In the Printer menu , sel ect Properties...
5. Chec k the Share this prin ter on the n etwo rk box, then click OK.
The ser ve r setu p is now comp l eted . Set up th e c li ents as describ ed belo w.
Impor tan t : Bo th Axis P ri nt Utility an d Print Manager mus t b e running
when you print through your NPS 530/530. We strongly r ecommend
that you cop y th e Axi s Print Utility ico n into you r Sta rt up fo ld er .
Client-Server
printing:
Client set up
Follow these steps to install your NPS 530/530 for client-server printing
at a Windows NT client:
1. Open Print Manager.
2. In the Printer menu , sel ect Connect to printer...
3. In the Shared Printers list, select the printe r yo u wa nt to u se. C lick
OK.
The client setup is now completed and you can immediately print
through your NPS 530/530.
36 Axis NPS 530/532 User’s Manual
Page 37

Windows NT - LPD printing
This section describes how to set up a Windows NT Serv er (ver. 3.5 or
later ) for LPD printing ov er the TCP / IP p ro tocol.
Section 4: Setup for Windows
Install the TCP/IP
Protocol St a ck
Installing a
Printer
In the Control Panel, click the Networ k icon. If the TCP/IP Protocol
entry ap pears, then TCP/IP is already installed. Close the Network folder
and skip to Installing a Printer below.
Follow these steps to install the TCP/IP protocol stack:
1. In the Netwo rk folder, select Add So ftware.
2. Select TC P/IP Proto col and Relate d Componen ts, then click OK.
3. Make sure that the following boxes are checked:
• Connectivity Utilities
• TC P/IP Printi ng Suppo rt
• FTP Serv e r Serv ic e s
4. Clic k OK to comp lete the ins ta llati on.
1. In the Control Panel , c lick the Print Manager.
2. In the Printer menu , sel ect Create Printer.
3. In the Printer Name field, type a name for your printer.
4. Choose a print er dr iver suitable for yo ur printer.
5. In the Print to field, select Other...
6. In the Print D es tinations dial og, ch oos e LPR Port , then clic k OK. Th e
Add LPR Compatible Printe r dialog now appears.
7. In the Name or Address field, type the IP address or the alias name of
your NPS 530/532.
Note: If you use an alias name, this must be defined in the hosts file on
your server prior to the installation. This file is normally located in
/winnt35/system32/driv ers/etc/hosts.
8. In the Name of Printer on the Machine field, typ e th e log ical printer
number you want to use (e.g. pr1), then click OK.
9. Clic k OK to comp lete the ins ta llati on.
Axis NPS 530/532 User’s Manual 37
Page 38

Section 5: Setup for OS/2
Section 5
Setup for OS/2
The bas ic configu r a tion in the OS/2 environ m ent is done using the Axis
Print Utility for OS/2 in cluded on the disk supplied with the NPS 530/
532. It comprises four steps:
1. Activate the NetBEUI protocol (if not already activ ated).
2. In s t al l the Axis Print Utility for OS/2.
3. In s t al l the NPS 530/ 532 using the Axis Print Utilit y.
Before you begin:
4. C reate print queues t o be serv i ced by the NPS 530/532.
Bef ore config uri ng your LA N Server/L A N Mana ger sy s t em , you may
want to configure the NPS 530/ 532 (e.g. log ical printer definitions). This
is done using the AXCFG software on the disk supplied with the NPS
530/532.
On the disk you will find a text file called read.me, cont a ining ins tall a tion
ins tr uctions for AX CFG in the IBM OS/ 2 environ ment.
• Make sure that the NPS 530/532 is powered on and attached to the
net work.
• Have the serial number found on the back of the NPS 530/532
available.
• A ny ne t work configura ti on s hould alw ays inv olve th e ne two rk
manager.
38 Axis NPS 530/532 User’s Manual
Page 39

Activate the NetBEUI Protocol
Activat ing the N e tB E U I p rotoc ol is do ne u s ing the L AN Se r ver/LAN
Manager Setup:
•LAN Server
Use MPTS/LAPS to activate NetBEUI (see the MPTS/LAPS documentation for details).
•LAN Manager
Use SETUP to activate N etB EU I (see the LAN M anager SETUP d ocumenta tion for det ails).
Section 5: Setup for OS/2
Install the Axis Print Utility for OS/2
The Axis Print Utility for OS/2 is included on th e di s k supp lied with th e
NPS 530/532. Start the installation according to th e description in the
read.me file on the same disk. Follow the instructions on the screen to
complete the installation. The Axi s Pr int Utilit y wil l sta r t au tomatically
when the installation proc ess is completed.
Whe n the Ax is P r int Ut il ity is r u nning , an action bar and a list of available
Axis print server ports (i n itially emp t y) will be disp layed . The act ion ba r
contains the following commands: Status, Install, Remove, Logf ile, a nd
Help. The Install comm and is used for installing new Axis p rint servers.
The Help command giv es de tailed desc ri pt ions of the acti ons th a t can be
performed by Axis Print Utility.
Axis NPS 530/532 User’s Manual 39
Page 40

Section 5: Setup for OS/2
Install the NPS 530/532
O nc e the Axis P r int Ut ility is ins tal l ed and r u nni ng, you ca n ins ta ll th e
NPS 530/532 by clicking the Install entr y on the action bar. The Install
comm and initia tes a sea rch for Axis prin t se rv er s on th e network. You r
new NPS 530/532 will appear in the list (together with any other Axis
print servers) as a printer port:
AX110086.LP1
The digits following AX are the six last digits of the NPS 530/532 serial
number (110086 in this example). LP1 is the NPS 530/ 532 printer port
(LPT1).
The Axis print server ports appearing in the list can now be assigned as
print q u eu e de s tinatio ns a s describ ed below.
Note: If the serial number of your NPS 530/532 is 00408C110086
default port name is AX110086
.LP1. The s eria l nu mb er is found on the
label at the back of the NPS 530/532. You may change the default names
by editing parameters LPRINT_1, LPRINT_2, etc. in the config fi le as
descri be d in Appe ndix A. If you want to change the default port name s,
you must do that before installing the NPS 530/532 using Axis Print
Utility.
, then the
40 Axis NPS 530/532 User’s Manual
Page 41

Section 5: Setup for OS/2
Create a Print Queue
Each Axis print server port will be seen as a print queue destination by the
OS/2 P r int Manager. P r int queue destinatio ns a r e referred to a s devices in
OS/2 version 1.x and ports in version 2.x. They appear as pipe names, e.g.
\PIPE\AX110086.LP1, etc. As signing Axis print serve r ports as p rint
queu e de s tinatio ns fol low the stand ard proc ed ur es under OS/ 2. Th e
proced ures are identica l for LAN S er ver and LAN Man ager, but differ
between OS/2 ve rsions 1.x and 2.x as shown below .
The ex amples belo w dem ons trate how to cre ate a new print queue and
assign it to an NPS 530/532 printer port. Alternatively, you may re-direct
an existing queue to an NPS 530/532 port.
OS/2 Version 1.x The print qu eue assign me nt u nd er OS/ 2 ver s ion 1.x requires two
opera tions – the d ef inition of a p r inter, an d the de finition of one or more
print qu eues for tha t prin ter. Foll ow these steps to crea te a pr int queu e
and assign it to an N PS 530/532 printe r port:
1. Double-click the Print Manager icon.
2. Clic k the Setup menu option, then select Printers...
3. Clic k Add to make a new printer definition.
4. Type a printer name in the Name field.
5. Select a Device (a pipe name, e.g. \PIPE\AX110086.LP1).
6. Select a printer driver suitable for the printer attached to the NPS 530/
532.
7. Click Add, then click OK to confirm the new printer definition.
8. Clic k the Setup menu option, then select Queues...
9. Clic k Add to make a new print queue definition.
10.Type a queue name in the Name field (pre fe rab ly the pri nt e r name
assigned above).
11.Select the previo usly defined print er .
12.Click Add, then click OK to confirm the new queue definition.
Axis NPS 530/532 User’s Manual 41
Page 42

Section 5: Setup for OS/2
OS/2 Version 2.x The print queu e as s ign ment procedure und er OS/2 vers ion 2.x is d one in
one operation – the definition of a printer will automatically create a
queue. Follow these steps to create a print queue and ass ign it to an NPS
530/532 printer por t:
1. Double-click the Templates fo lder.
2. Drag the Printer icon ou t to th e Workpl ace Shel l (or into a folde r),
while holding the right mouse button down.
3. Type a name in Printer Name fi el d.
4. Select a prin ter driver from the Standard printer list suitable for the
attached p ri nte r.
5. Select a pipe name (e.g. \PIPE\AX110086.LP1) from the Port list.
6. Click OK to co nf irm the n e w printer de finition.
Sharing Print Queues
To access a print queue from other computers in the network (either
clien t s or other server s ), the queue mus t b e made a shared resource. Ope n
an OS/2 window and issue the following comm and (you will ne ed
admi ni s tr a tor privilege s to do this ) :
NET SHARE <queue name> /PRINT
<Queue name> is the queue created above. No te th at the queu e name
equals the printer name for OS/2 version 2.x, while queue and printer
names may differ for version 1.x.
For furt he r i nfo rmati o n on qu eu e shari ng, ple as e refe r to yo ur LA N
Serve r o r LAN Manag e r document a tio n.
42 Axis NPS 530/532 User’s Manual
Page 43

Verify the Communication
To verify communication by making a test printout, use the NET COPY
command (or any other print method such as drag-and-drop, etc.) to
send a job to one of the print queues that NPS 530/532 will service.
Example: Use NET COPY from the OS/2 or DOS command line when you are
logged into the network, to print a file:
NET COPY <file name> \\<server name>\<queue name>
For further information on printing to print queues, refer to the
appropriate OS/2, LAN Server and LAN Manager documentation.
Section 5: Setup for OS/2
Axis NPS 530/532 User’s Manual 43
Page 44

Section 6: Setup for Unix sy stems
Section 6
Setup for Unix systems
T his se ct ion cove r s the s etu p fo r TCP / I P in a Un ix envir onment. The
steps described on the following pages are:
1. Prepare your system for a new TCP/IP node.
Procedures: Find an unused Internet (IP) address and choose a unique
host name for your NPS 530/532. Update your host table and alias
nam e data ba ses.
2. Set up the NPS 530/532 as a TCP/IP node.
Procedures: Down-load the IP address to your NPS 530/532 using the
arp, rarp or bootp metod.
3. Set up and attach a print queue at your Unix workstation.
Procedures: Use the autom atic axinstall script to complete the setup.
Up- loa d and run the sc rip t, then follo w the inst ruction s on yo ur
screen.
Before you begin: • Make sure that the NPS 530/532 is powered on and attached to the
net work.
•You will need root privileges on the system.
• Have the serial number found on the back of the NPS 530/532
available.
• A ny ne t work configura ti on s hould alw ays inv olve th e ne two rk
manager.
44 Axis NPS 530/532 User’s Manual
Page 45

Prepare your system
Each node in a TCP/IP network must have a unique Internet (IP) address,
and also a unique hos t n a m e to be used as an alias for the IP address.
Before you add your NPS 530/532 to a TCP/IP network, you must
prepare your system for a new node.
Section 6: Setup for Unix sy stems
Find an
unused IP
address
Important:
Update your
system host table
Example:
Update your alias
name data bases
The IP addresses used in your network are listed in the sys tem host table
(/etc/hosts on most Uni x systems). Find an unused IP add re ss, and choose
a unique h ost name for your NPS 530/532.
Don’t use the d efault or example IP ad d re s s w he n in s ta lling your NPS
530/532. Always consul t your networ k manager before assigni ng an
Internet Addre s s.
Open the system host table using a text editor (e.g. vi /etc /hos ts), and add
a line containing the IP address and host na me for your NPS 530/532:
192.36.253.96 salesdept
If your system uses al ias name data bases such as Yellow P ages (YP) or
Ne twork In form at ion Servic es (NIS), u p d at e these us ing the comm a n d s
below. If you int en d to use the arp or bootp m eth od , upda te the YP or
NIS now. If you intend to use the rarp method, you mus t f ir s t u p da te the
node addr es s table, s ee “The rarp method” (page 48).
Commands:
cd /var/yp
make
Note: These comm ands may vary b etw een differ ent sy st em s . Whe n in d ou b t,
consult your system documentation for the proper commands.
Axis NPS 530/532 User’s Manual 45
Page 46

Section 6: Setup for Unix sy stems
Set up your NPS 530/532
When you have prepared your system to accept a new TCP/IP node, you
are ready to set up your NPS 530/532 as a node on your network. This is
done by down-loading the new IP address to the NPS 530/532 using one
of these th r ee me thod s :
• arp – the easiest method, but requires down-loading of the Internet
address to each new device individually.
• rarp – down -loa ds the Intern et addre ss to each de vic e automati ca lly.
Requires a rarp daemon on your system, and operates within a single
networ k s egm ent only.
• bootp – similar t o ra rp, but op erates on th e en tire netw or k. Re q ui re s a
bootp daemon on your system.
Note: NPS 530/532 h as an auto- sensing router facility that automatically
adopts to the network topology. However, if you do run into problems in
a comp lex network, we re com m end th at you specify the de fau l t router
and net ma sk parameters manually . Refe r to th e Axi s NPS Pri nt Serv er
Technical Reference for details.
46 Axis NPS 530/532 User’s Manual
Page 47

Section 6: Setup for Unix sy stems
The arp me thod The arp command associat es your NPS 530/532’s node address with an
IP address . The IP address is then down-lo ad ed by the ping command.
The arp com mand syntax depends on your Unix system (see examples
below). This is the syntax for Syste m V and some BSD-t y pe systems:
arp -s <host name> <node address> temp
ping <host name>
The node address is the serial number found at the back of the NPS
530/532. Each pair of digits must be separated by colons as in examples
below.
Examples: The arp command differs between different Unix systems. Th e ‘ether’
argument is only required for IBM AIX systems, and some BSD-type
systems expect the host name and node address in reversed order.
BSD - T y pe U nix
Systems:
System V Unix
Systems:
IBM AI X System s:
Note: When you exe c u te th e pi ng com m a nd for the first time, you shoul d
arp -s 00:40:8C:11:00:86 salesdept temp
ping salesdept
arp -s salesdept 00:40:8C:11:00:86 temp
ping salesdept
arp -s ether salesdept 00:40:8C:11:00:86 temp
ping salesdept
The host will ret urn ‘ salesdept is alive’ or simila r indi c a ting th at the IP
add re s s has been s et, and that com munic ation is established .
expect a response time significantly longer than usual.
Axis NPS 530/532 User’s Manual 47
Page 48

Section 6: Setup for Unix sy stems
The rarp method The rarp me thod uses a dae mo n to es tab l is h and maintain
comm u nic a tion between the h osts listed in a Ether net add r ess t ab le
(/etc/ e thers on most systems). Rarp daemons are normally only used on
BSD -typ e a n d System V Unix sy st em s . If you are an IBM AIX user , use
the arp or bo otp me th od s instea d .
Follo w th es e step s to use the ra rp me th od :
1. Open the Ethernet address table using a text editor (e.g.
vi /etc/ethers), and add a line containing the Ethernet address and
host name for your NPS 530/532.
Example:
00:40:8C:11:00:86 salesdept
2. Update your alias name data bases (see page 45).
3. Start the rarp daemon (if not already running) by the command
rarpd -a.
4. R estart the NPS 530/532 to down-load th e IP address.
48 Axis NPS 530/532 User’s Manual
Page 49

Section 6: Setup for Unix sy stems
The bo ot p method The bootp m eth od u se s a daem on to est a blish and maintain
comm u nic a tion between the h osts listed in a boot ta ble (/etc/bootptab on
most systems).Follow these steps to use th e bootp method:
1. Open the boot table using a text editor (e.g. vi /etc/bootptab), and
add the following entry for your NPS 530/532:
<host name>:ht=<hardware type>:vm=<vendor magic>:\
:ha=<hardware address>:ip=<internet address>:\
:sm=<subnet mask>:gw=<gateway field>
Example:
salesdept:ht=ether:vm=rfc1048:\
:ha=00408C110086:ip=192.36.253.96:\
:sm=255.255.255.0:gw=192.36.253.254
2. Start the bootp daemon (if not already running) by the command
bootpd.
3. R estart the NPS 530/532 to down-load th e IP address, defau lt router
addre ss, and net mask.
Notes: 1. The ht and vm fields must be entered exactly as in the example.
2. The ha and ip fields a re the Node and IP Addresses respectivel y .
3. The sm and gw fields correspond to the default router address and net
mask (TCP/IP Menu parameters DEF_ROUT and NET_MASK, see
Appen di x A).
Axis NPS 530/532 User’s Manual 49
Page 50

Section 6: Setup for Unix sy stems
Set up and attach a print queue
The final step is done using the axinstall script, which is up-loaded from
the NPS 530/532 to your host using FTP. You don’t need any technical
knowledge about your Unix system; axinstall will automatically detect
your syst em’ s c h a r ac teris tics, an d guide you thr ough the se tup pr oce d u re.
Below is a list of Unix systems that are supported by axinstall:
*
*
(Berkley Unix)
BSD
SunOS 4
ULTRIX
DEC OSF/ 1
FreeBSD
SYS V R3
SCO
(Sun BSD, Solaris 1.x)
(Digital Equipment, DEC) *
(Digital Equipment, Alpha)
(Ber kley Uni x )
(Unix S y stem V Releas e 3 )
(Santa Cruz Opera tion)
(Silicon Graphica, SGI)
IRIX
(BULL DPX 2)
BOS
SYS V R4
SunOS 5
HP -UX
AIX
(UNI X S y stem V Release 4)
(Sun SYS V, Solaris 2.x)
(HP 9000)
(IBM RS /6000, BULL DPX 20)
If your particular system isn’t listed, axinstall tries to use one of the
gener ic Un ix sy s tem s (BSD, SYS V R3 or SYS V R4). If axinstall f ails to
recognize your system, complete the setup manually as described in the
Axis NPS Print Server Technical Reference.
Up-load axinstall 1. Log in to the NPS 530/532 with the command ftp <host name>,
where host name is the name assigned in your system host table (e.g.
salesdept ). You will be prompted for user id and password. Enter root as
use r id , and pass as password.
2. Up-load the script using the command ge t ax i n st all.
3. Log ou t using quit, bye or exit (depending on your FTP version).
50 Axis NPS 530/532 User’s Manual
Page 51

Section 6: Setup for Unix sy stems
Example: Below is a sample FTP session showing how to up-load axin stall (user
entries app ear in bold):
> ftp salesdept
Connected to salesdept.
220 Axis NPS 53X FTP Print Server V5.00 ready.
Name (salesdept:thomas): root
331 User name ok, need password
Password: pass
230 User logged in
ftp> get axinstall
200 PORT command successful.
150 Opening data connection for axinstall (192,36,253,4,13,223)
226 Transfer complete.
local: axinstall remote: axinstall
27545 bytes received in 4.1 seconds (6.5 Kbytes/s)
ftp> bye
221 Goodbye.
>
(not visible)
The axinstall scr ipt has now been up-l oad ed to your host.
Run axinstall Type the command sh axinstall to run the script.
You will be guided through the setup by a step-by-step procedure.
Axinstall will first detect what ki nd of Unix system you are using, and
then suggest a suitabl e print method. The suggested print method will be
sufficient in most cases, but you can also choose one of the PROS
methods for more advanced print capabilities. See page 52 for a brief
overview of the differ ent prin t me t ho ds. For more detailed in fo rma t i on ,
plea se ref er to th e NPS Te chnical Ref er ence.
After you have selected a print method, axinstall will a utom a ti cally set up
the necessary print qu eues, filters, etc. You will then be offered to make a
tes t p r intout, and af te r that the s etup is comple ted.
Axis NPS 530/532 User’s Manual 51
Page 52

Section 6: Setup for Unix sy stems
Print methods
The NPS 530/532 supports several different print methods for printing
unde r TCP/ IP. Axinstall will suggest a print method suitable for your
parti c ular Un i x syste m, but you migh t want to use anoth er metho d
depending on your printing requirements (banner pages, status logging,
etc.) Use th e overview b el ow to d etermine wh ich me thod to use:
LPD The r ecom m ended method wh er e a vailable.
Advantages: Easy to set up – install the NPS 530/532 as a remote queue in SMIT
(AIX), or add a remot e prin ter t o /etc/printcap using the rm and rp fields
(BSD).
Limitations: Spooler features (AIX), and printcap or lpr opti ons ( B SD ) such as
multiple copie s are not available.
FTP The recommended method when LPD is not available.
Advantages: Uses industry standard network software on the host.
Limitations: No printer status logging. BSD: May conflict with other input or output
filt er s . Doesn’t allow both inpu t and outp u t filters . System V: No filters or
inter face programs can be us ed .
PROS A protocol developed at Axis. Comes in two versions; PROS A (named
pipe), and PR OS B (filter).
Advanta ge s: The NPS 530/532 appears as a device to the system. Print traf fic
(including printer status and readback) is logged to file. BSD: All pri ntcap
opti ons ar e a vai lab l e.
Limitations: A C compil er is requ ir ed to b u ild the PROS A driv ers.
Reverse Telnet Often use d for prin ting via a term ina l se rve r pri nt e r po rt . On ly
reco mme nded if you alre a dy have a Rever se Tel ne t driver installed (no t
avai l a ble for AIX).
Advan ta g es: Easy to set up with previously installed Reverse Telnet drivers.
Limitations: No status logging. Drivers are not s upplied with the NPS 530/532.
Exis ting drivers may be slo w.
52 Axis NPS 530/532 User’s Manual
Page 53

Section 7
Setup for Macintosh
The bas ic setu p for M acintosh is done b y opening the C hooser wi nd o w
and clicking a printer.
Bef ore config uri ng your Ma c in t osh syst em , you may wan t to config ure
the NPS 530/532 (e.g. logical printer defini tions). See Appendix A for
detail s.
If you intend to operate your NPS 530/532 in a multi-protocol environment, you should also proceed according to the other “Setup for...” sections as appropriate.
Section 7: Setup for Macintosh
Before you begin:
• Make sure that the NPS 530/532 is powered on and attached to the
net work.
• A ny ne t work configura ti on s hould alw ays inv olve th e ne two rk
manager.
Axis NPS 530/532 User’s Manual 53
Page 54

Section 7: Setup for Macintosh
Choose a Printer
Choosing a printer is slightly different depending on which version of
Lase rWrite r pri nte r driver you ar e using .
The LaserWriter 7.0 driver assumes that you use a standard Post Script
driver, and cannot take advanta ge of any printer specific featur es.
The LaserWriter 8.0 driver uses PPD files that contain printer descriptions. This gives you full control over any features your printer might
have.
LaserWriter 7. 0
Printer Driver
Open the Chooser window by clicking Chooser in the App le m enu . Fo l-
low thes e s tep s to choose a printer :
1. Click the LaserWriter icon.
2. If your ne tw ork has more than on e zon e , cl ick on t h e zon e you wan t.
If your network has no zones, this box does not appear.
3. Click the name of the pri nter you want. The default NPS 530/532
printer name is shown as AXIS<nnnnnn>, where <nnnnnn> is th e last
six digits of the NPS 530/532 serial number.
Example:
AXIS110086
4. Click the close box. This completes the configuration and closes the
Chooser.
Repeat this procedure for each Macintosh using the NPS 530/532.
54 Axis NPS 530/532 User’s Manual
Page 55

Section 7: Setup for Macintosh
LaserWriter 8. 0
Printer Driver
Open the Chooser window by clicking Chooser in the App le m enu . Fo l-
low thes e s tep s to choose a printer :
1. Click the LaserWriter 8.0 icon.
2. If your ne tw ork has more than on e zon e , cl ick on t h e zon e you wan t.
If your network has no zones, this box does not appear.
3. Click the name of the pri nter you want. The default NPS 530/532
printer name is shown as AXIS<nnnnnn>, where <nnnnnn> is th e last
six digits of the NPS 530/532 serial number.
Example:
AXIS110086
4. Click the ‘Setup... ’ butto n, and then the ‘Sel ect PPD . .. ’ bu tton .
5. Choose the PPD file match ing your printer, and click ‘OK’. If your
printer do es n’ t appea r in th e P PD fi le list, contac t your printer ven dor. You may also use the Generic PPD if you don’t need any printer
specific features.
6. Click ‘OK’, and then click the close b ox. This comp letes the conf igu-
ration and closes the Chooser.
Repeat this procedure for each Macintosh using the NPS 530/532.
Verify the Communication
To verify communication by making a test printout, just print a document from th e d esktop or from wit hi n a progr a m . The p ri ntout will
appear on the printer you have chosen.
You have completed the basic installation and the NPS 530/532 is
ready to use as a print server.
Note: For information on advanced EtherTalk functions such as non-PostScript
printer sup port, pl ease r efer to the AXI S NP S Print Server T echnic al R eference.
Axis NPS 530/532 User’s Manual 55
Page 56

Section 8: Adva nced Options
Section 8
Advanced Options
This section takes you beyond the “plu g- and -p r int” concep t a nd into the
area of Print Server Configur ation and Print Management.
This s ection provi d es an ove rv iew of th e un iqu e fu n c tions that mak e the
NPS 530/532 m ore than ’just another print server’. For a complete
de s crip tio n of these func tions , pl ease r efer to the N P S Print Serv e r Technical Reference.
Print Server
Configuration
Print Management The NPS 530/532 has a number of built -in tools an d features to hel p you
How to solve printout related problems by tailoring your NPS 530/532
confi guratio n to meet s pe cific needs. T he key featu r e is th e Log ical Pr inte r
Concept, which will be discussed in the following pages.
to manage and monitor your printing environment. This section covers
the fo llowing topi cs:
• Telnet Login – how to log in to the NPS 530/532 (page 65).
• Accounting – keep track of the last ten print jobs (page 66).
• Status Logging – displa y the current statu s of the log ical prin ters (page
67).
• Lo ca ll y Admi n ist r at ed A ddres s – change the preconfigured node
address (page 68).
• SNMP – monitor the NPS 530/532 using the Simple Network Man-
agement Protocol (page 69).
56 Axis NPS 530/532 User’s Manual
Page 57

Logical Printers
Section 8: Advanced Options
One of the most powerful features of the NPS 530/532 is the Logical
Printer concept. A logical printer is a configurable device driver acting as
an inter face betw een the network and the phys ical printer. You may specify up to ei ght logi ca l printers, each wit h d if ferent prope rt ies.
Logical Printers
Network
Connection
On
Off
Character set conversion
✓
String substitution
✓
ASCII to Postscript conversion
✗
Send control strings to printer
✗
Physical printer
LPT1
Axis NPS 530/532 User’s Manual 57
Page 58

Section 8: Adva nced Options
The following properties can be configured individ ually for each logical
print er:
• Character Set Conversion (page 59)
• Strings Before and After Print Jobs (page 60)
• String Subs titutio ns ( pa ge 6 1)
• PostScript Functions (page 62)
• Hex Dump M od e ( p age 6 4 )
Logical printers are configured by editing a number of parameters in the
config file. Ther e is a menu for each logical printer (PRINTER1 PRINTER 8), see Appendix A.
58 Axis NPS 530/532 User’s Manual
Page 59

Character Set Conversion
A common problem in a multiple host environment is that different hosts
use di ffe re nt ASCII c hara c t er se t s. As a resu lt of thi s, lang uage sp eci fi c
character s (such as å ü ô ñ) are sometim es p rinte d incorr ectl y.
The NPS 530/532 solution to this problem is to assign a character set
conversion filter to a logical printer, and link that logical printer to the
host causing the problem.
There a r e se vera l di ff er ent filters to ch oos e f ro m, see Pr inter1 Menu
par ame ter PR1_ C SET in Ap p endix A. The outpu t from the conver s ion
filter is always IBM PC Set 2 (Code Page 437), and that is the characte r
set the printer must b e set up fo r.
Section 8: Advanced Options
Example: Your ne twork con tains thre e h os ts u s ing the ch ara c ter s ets IBM PC Se t 2 ,
ISO 8859-2, and DEC. In order to direct their print jobs to the same
print er, for instance LPT1, you should assign each host to a separate logical printer, and install character set conversion filters. Edit the foll o wing
entr ies in your conf ig file :
PR1_OUT. : LPT1
PR1_CSET. : NONE
PR2_OUT. : LPT1
PR2_CSET. : ISO>IBM
PR3_OUT. : LPT1
PR3_CSET. : DEC>IBM
The logical printer PR1 prin ts data tr ansparen tl y without conv er s ion,
PR2 converts ISO 8859-2 data to IBM PC Set 2, and PR3 converts DEC
data to IB M P C Set 2. This will pr od u ce correct printouts fo r a ll l anguage
specific characters.
Axis NPS 530/532 User’s Manual 59
Page 60

Section 8: Adva nced Options
Strings Before and After Print Jobs
These string functions provide a way to send printer control commands
before and after each print job. They may be specified individually for
each logical prin ter .
All strings are entered as hexadecimal byte values.
Example 1: Assume that the logica l pri nter PR5 is confi gu re d as a Post Scr ip t pri nter.
To append the PostScript End of File character (ctrl-D, hex 04) after each
print job, edit the fo ll owing entr y in your confi g file:
PR5_AFT. : 04
Example 2: You have a HP LaserJet p rint er with dual in put bins , and w ant to p r int on
pre-p ri nte d for ms wh en usin g the logi cal pr int er PR4. The s tan da rd
for ms ar e ta ken from bi n 1, and the pre-printed f or ms ar e ta ken from b in
2. The strings before and after print jobs should then contain commands
to select bin 2 (
E
C
&l4H) and bin 1 (
E
C
&l1H) respectively. Edit the fol-
lo wing entri es in yo ur con fig file:
PR4_BEF. : 1B 26 6C 34 48
PR4_AFT. : 1B 26 6C 31 48
60 Axis NPS 530/532 User’s Manual
Page 61

String Substitutions
The string substitution function performs search-and-replace operations
on the print data. The primary application is to replace printer control
commands. Up to 20 strin g substitutions may be sp ecified individually
for each lo gical printer.
All strings must be entered as hexadecim al byte values, and each match
and substitute string must be preceded by a count byte .
Example 1: To replace the UNIX New Line (hex 0A) with an ASCII NewLine (hex
0D 0A) for logical printer PR1, edit the following entry in your config file:
PR1_STR. : 01 0A 02 0D 0A
Section 8: Advanced Options
‘01’ is th e m a tch stri ng count byte (length of t he ma tch strin g) , ‘0 A’ is th e
match string, ‘02’ is the substitute count byte, and ‘0D 0A’ is the substitute str in g (Thi s is the d efa ul t setting for logi ca l pri nt er s PR5 throu gh
PR8).
Example 2: To replace the UNIX New Line (hex 0A) with an ASCII NewLine (hex
0D 0A), and the printer command
E
C
G1 (hex 1B 47 31) with
E
C
Y (hex
1B 59) for logical printer PR2, edit the following entry in your config fi le :
PR2_STR. : 01 0A 02 0D 0A 03 1B 47 31 02 1B 59
Note: Extensive use of string substitutions may decrease the throughput rate of
the NPS 530/532.
Axis NPS 530/532 User’s Manual 61
Page 62

Section 8: Adva nced Options
PostScript Functions
The NPS 530/532 can translate standard ASCII print data into
PostScript format. This makes it possible to print wi th a PostScript
printe r f ro m a host that does n ’ t sup por t Po s tScr ipt. The PostScr ipt function s ar e contr olle d b y a number of par amete rs de s cribe d be lo w.
ASCII to
PostSc ript
Conversion
The con ve rsion is selected b y activating a filt er that con verts ASCII d ata
into P ostScript. Th is filter may be ac ti vated indiv id ually for each lo gica l
printer.
Example: The following entries in your config file will activ a te p a s s- t hr o ug h ( no fil-
ter) for PR1, ASCII to PostScript conversion for PR2. On PR3 the
incoming data will be searched, ASCII data will be converted to
PostScr ipt, PostScript da ta will pass-throug h without conversion:
PR1_FILT. : NONE
PR2_FILT. : POSTSCR
PR3_FILT. : AUTO_PS
Use this configu ration wh en p rint job s dir ected to PR1 a r e alr ea d y in
PostScript format, print jobs directed to PR2 are in ASCII format and
direct print jobs to PR3 when you are not sure if it is ASCII or PostScript
format.
PostScript Page
Size
When the ASCII to PostScript filter is active, a page size must be specified. The default page size is A4, and may be specified individually for
each logical printer. See the example on the next page on how to change
the pa ge siz e.
The page s iz e s etti ng is ignored when th e ASCII to PostScr ip t fil ter is
inac tive.
62 Axis NPS 530/532 User’s Manual
Page 63

Section 8: Advanced Options
PostScript Page
Orientation
PostScript Page
Format
Example: The following entries in your config file will ac t iv a te the ASCII t o
When the ASCII to PostScript filter is active, a page orientation must be
specified . Th e de fau lt page or ientati on is P or trait, and may b e s p ecif ied
indiv idua lly for eac h log ica l p ri nt er. Se e th e e xa mple below o n ho w to
change the page orientation.
The page orientation setting is ignored when the ASCII to PostScript filter is inactive .
When th e ASC II to Post Scr ipt filter is active, a page format must be sp ecified. The page format is defined by six byte values: Lines per Page, Charact er s per Li ne, Cha r act e rs p er Inch, Lin es per Inch, Left Margi n, and
Top Margin (see also PR1_FORM, Printer1 Menu in Appendix A).
The page fo rm at settin gs are ignored when th e ASC II to PostSc ri p t filter
is inactive.
PostScript conversi on for PR2, set th e page size to Le tter, th e page orien -
tation to Landscape, and the page format to 48 lines per page, 0 characte rs
per line (equal to disable line w rap), 12 CPI, 6 LPI, 3 mm left margin and
5 mm top marg i n:
PR2_FILT. : POSTSCR
PR2_SIZE. : LETTER
PR2_ORNT. : LANDS
PR2_FORM. : 48 0 120 60 30 50
PostScript Font You may specify a Po st Script fo nt to be used whe n th e A SC II t o
PostScript filter is active. The specified font must be available in the
attached PostScript printer. An invalid font name may cause a PostScr ipt
err or and te rminate the p ri nto ut.
If no fo nt name is sp ecified , Courier (fixed pit c h) will be used .
The font settin gs are ign or ed wh en th e ASC II to P os tScript fil ter is inac-
tive.
Example: The following entry in your config file will se lect t he Helvet i c a p ropo r -
tional font as the PR2 PostScript font:
PR2_FONT. : Helvetica
Axis NPS 530/532 User’s Manual 63
Page 64

Section 8: Adva nced Options
Hex Dump Mode
When he x d ump mo de is activated, the pr int data wil l be p ri nted as hexadeci mal byte values rat he r tha n ch ar ac ters. Prin ter control comma nds are
also pr i nt ed as hex va lue s . This fu nc t io n is use d f o r d ebu g gi ng purpos e s .
Example: The following entry in your config f ile wi ll act iva t e th e hex dump mode
for PR3:
PR3_DUMP. : YES
Note: The page length for hex dump printouts is determined by the Lines per
Page value of the PostScript Page Format para me t er.
64 Axis NPS 530/532 User’s Manual
Page 65

Telnet Login
The Telnet support makes it possible to log in to the NPS 530/532 and
execu te vario us command s as s ho wn in the ex am ple b elow. Use the telnet
<hostname> command to log in.
Example: This sample telnet session illustrates the help command:
> telnet salesdept
Trying 192.36.253.96 ...
Connected to salesdept.
Escape character is '^]'.
Axis NPS 53X TELNET Print Server V5.00
Section 8: Advanced Options
NPS 53X network login: root
Password: pass
Axis NPS 53X TELNET Print Server V5.00
Root> help
Commands may be abbreviated:
logout logout from TELNET
version print current software version
help print this list
status show current printing status
account show current account file
softreset protocol restart of Axis NPS 53X
hardreset reboot of Axis NPS 53X
defaults set default parameters in Axis NPS 53X
Root> logout
Goodbye!
Connection closed by foreign host.
>
(not visible)
The account and stat us comman d s are sh own on the following page s.
Axis NPS 530/532 User’s Manual 65
Page 66

Section 8: Adva nced Options
Accounting
The a cc ounting fi le contains data concerning th e ten last print jobs . It
specifies an internal job number , the user that in itiated th e job, the p ro tocol and logical printer that was used, current status (C
rin ting), nu m b er of bytes p r inted, el a ps ed time and off-l ine time. T h e
or P
file can be accessed using FTP, Telnet, or AXCFG.
Example: This sample telnet session illustrates the account command:
> telnet salesdept
Trying 192.36.253.96 ...
Connected to salesdept.
Escape character is '^]'.
om p l e ted, Off li ne ,
Axis NPS 53X TELNET Print Server V5.00
NPS 53X network login: root
Password: pass
Axis NPS 53X TELNET Print Server V5.00
Root> account
Current account file:
JOB USER PROT LPR S BYTES ETIME OTIME
1 thomas FTP pr2 C 1885 2 0
2 bengt LPD pr1 C 23074 4 0
3 RICARD NETWARE pr2 C 43004 5 0
4 LSLM_user NetBIOS pr1 C 6717 2 0
5 MacUser APPLE pr1 C 6717 2 0
6 patrik PROS pr5 P 832081 9 0
Root>
(not visible)
66 Axis NPS 530/532 User’s Manual
Page 67

Status Logging
The status co mm a nd sho ws wh ich printer po rt the lo gic a l pri nte rs ar e
assigned to, and their current status.
Example: This sample telnet session illustrates the status command:
> telnet salesdept
Trying 192.36.253.96 ...
Connected to salesdept.
Escape character is '^]'.
Axis NPS 53X TELNET Print Server V5.00
Section 8: Advanced Options
NPS 53X network login: root
Password: pass
Axis NPS 53X TELNET Print Server V5.00
Root> status
Current printout status:
Printer Port Status Bytes printed Comments
pr1 LPT1 Printing 20916 Ready
pr1 LPT1 Occupied Ready
pr1 LPT1 Occupied Ready
pr1 LPT1 Occupied Ready
pr1 LPT1 Occupied Ready
pr1 LPT1 Occupied Ready
pr1 LPT1 Occupied Ready
pr1 LPT1 Occupied Ready
Root>
(not visible)
Axis NPS 530/532 User’s Manual 67
Page 68

Section 8: Adva nced Options
Locally Administrated Address
Each NPS 530/532 is preconfigured with a unique Node Address (indentical to the serial number). You may change the node address to a Locally
Administrated Address by editing the Node Address entry in your confi g
fi le.
Important :
Always consult your network manager before changing the
Node Address
The Node Address consists of six hexadecimal numbers in the range 00 FF. The numbers are separated by spaces.
Example 1: The fo llow i ng config entry sho ws an ex a mpl e of a pre configured N od e
Address:
NODE_ADDR. : 00 40 8C 11 00 86
A locally administrated address must begin with one of the hexadecimal
numbers x2, x6, xA, or xE (xxxx xx10 in binary format). Examples: 02,
36, 5A and EE are valid leading numbers. No restrictions apply to the five
remai ning nu mbe rs.
Example 2: The fo llow i ng config entry sho ws an example of a locally administr ated
address:
.
NODE_ADDR. : 36 F3 10 2E 20 0B
If you enter an inv alid addr es s, the curren t Node Addr ess wil l remain
unchanged. It is not p ossibl e to set an ad dre ss other than a valid locally
administrated address or the preconfigured Node Address.
You can restore the preconfigured Node Address by entering the NPS
530/532 serial number, or an address consisting of all 0’ s.
Example 3: The fo llo wing config entry rest ores the Node Addres s to the preco nfigur ed
setting:
NODE_ADDR. : 00 00 00 00 00 00
68 Axis NPS 530/532 User’s Manual
Page 69

SNMP
Section 8: Advanced Options
You m ay use SN M P ( Sim p le Network Man agement Protocol) for re mote
monitoring of the NPS 530/532. All major functions applicable to print
servers are supported.
SNMP actu all y re fe rs to a set of sta n d a rds for network mana gem ent,
including a protocol, a database str ucture specification, and a set of data
objects. The NPS 530/532 SNMP implementation runs in the TCP/IP
envir onment.
The actual management is handled by an NMS (Network Management
System) software running on a host on your network. The NMS software
communicates with network devices by the means of messages, which are
ref er en c es to one or more object s .
An object can be a question or an instruction to a device, or an alarm
triggered by a specific event. Objects are co ntai ned in data bases called
MIBs (Man ag em en t Informatio n Bas e ), wh er e MIB-I I is a standa rd
database.
The NPS 530/532 supports all relevant parts of MIB-II. It also includes a
private enter p ri s e M IB ( th e AX IS MIB des cri b ed in t he NPS Print Ser ve r
Te chnica l R eference).
Axis NPS 530/532 User’s Manual 69
Page 70

Appendix A: The parameter list
Appendix A
The parameter list
This appendix contains an overview of the NPS 530/532 parameters and
how to edit them. Please refer to the NPS Print Ser ver Technical
Reference for a complete description of the parameters.
The current parameter settings are stored in the NPS 530/532 config file .
Ed iting parameter values involve three steps: Up-load the config file to
your system, edit the parameter values, and down-load the modified file
to th e NPS 530/532. There are a number of methods for doing this
depending on the environment you work in.
NetWare, Windows, OS/2
The dis k supplied with th e NPS 530/532 contains AXCFG, a menu dr iv en c onfigu ratio n ut ility that p erforms the t as ks men t ioned above.
F oll ow t he ins tructions giv en in the re a d.me file to in stall a nd u se
AXCFG.
70 Axis NPS 530/532 User’s Manual
Page 71

Unix (TCP/IP)
Appendix A: The parameter list
Use FTP to change the config fi le:
1. Log in to the NPS 530/ 532.
Comm an d: ftp <host name>
Enter root as user id and pass as password.
2. Up-load the config file. Command: get config
3. Edit the file u sing your favorite text editor.
4. Down-load the config file. Comman d: put co nf i g CON F I G
The NPS 530/532 will automatically activate the new settings.
Apple EtherTalk
You will need FTP support (such as the MacTCP utility) to get access to
the conf ig fi le from your Macin tos h . Pr oceed as described for TC P/ IP
above. You can also confi gure yo ur NPS 530/532 fr om a NetWa re ser ver,
LAN Serve r/LAN Manage r s e rver, or a UNIX hos t if you have one of
th os e in yo u r network.
Axis NPS 530/532 User’s Manual 71
Page 72

Appendix A: The parameter list
Factory Default Settings
If you should need to reset the NPS 530/532 to factory default
conditions, the best way to do this is to use the TEST button. This
procedure inv olves switching the NPS 530/532 off and on. If you us e an
external power supply, unplug the power cord to switch off the NPS 530/
532, otherw ise use the printe r’s power s witch.
1. Switc h off t he NPS 530/ 532.
2. Press and hold the TEST button while you switch on the NPS 530/
532. Keep the TEST button pressed for at least 20 seconds u ntil the
PACKET flashes with one second intervals.
3. Release the TEST button and wait at least five seconds (five indicator flas h es ).
4. Press and hold the TEST button for at least five seconds until the
PACK ET indicato r re ma ins con stan t ly lit.
5. Restart the NPS 530/ 532 (power-off/po wer-on).
The NPS 530/532 is now reset to factory default conditions.
Note: T h e Node and I nte rn et Ad d re s ses (NO DE _ AD D R an d INT_ AD D R )
remain unchanged, but all other parameters are reset to factory default
values.
72 Axis NPS 530/532 User’s Manual
Page 73

The Config File
The remainder of this ap pendix contains the complete NPS 530/532
parameter list. The left column shows the parameters and their default
val ues as they appear in the config f ile, and the right colum n contain s
brief descri pt io n s of the parame t e rs. For a full des cript i o n of the
par am eters, pleas e r ef er to the NP S Print Server Te ch nical Refer ence.
--- CONFIG MENU
NODE_ADDR. : 00 40 8C 11 00 86
ROOT_PWD. : pass
USERS. :
Appendix A: The parameter list
Node Address
Root Pas sword
User Aut ho rity and Printer A ccess
--- TCP/IP MENU
TCP_ENB. : YES
INT_ADDR. : 192 36 253 80
DEF_ROUT. : 0 0 0 0
NET_MASK. : 0 0 0 0
TCP_KEY. :
PROS_PWD. : netprinter
PROS_PRT. : 35
LPD_BANN. : YES
BOOTP_ENB. : YES
RARP_ENB. : YES
RTN_OPT. : YES
RTEL_PR1. : 0
RTEL_PR2. : 0
RTEL_PR3. : 0
RTEL_PR4. : 0
RTEL_PR5. : 0
RTEL_PR6. : 0
RTEL_PR7. : 0
RTEL_PR8. : 0
--- SNMP MENU
READ_COM. : public
WRT_COM. : pass
TRAPADDR. : 0 0 0 0
TRAP_COM. : public
SYS_CONT. :
SYS_NAME. :
SYS_LOC. :
SNMP_AUT. : DISABLED
TRAP_PRT. : DISABLED
TCP/IP Protocol En abled
In t ern et Address
Default Router Address (0.0.0.0 for no router)
Net Mask (e.g. 255.255.255.0 f or class C, 0.0.0.0 for auto-sense)
TCP/IP Protocol Key
PROS Protocol Password
PRO S T CP Po rt N u m ber
LPD Banner Page Enabled
BOO T P Protocol Enabled
RA RP Protocol Enabled
Reverse Telne t Options Enabled
PR1 Rever se Telnet TCP Po rt Number (0 for Dis able d)
PR2 Rever se Telnet TCP Po rt Number (0 for Dis able d)
PR3 Rever se Telnet TCP Po rt Number (0 for Dis able d)
PR4 Rever se Telnet TCP Po rt Number (0 for Dis able d)
PR5 Rever se Telnet TCP Po rt Number (0 for Dis able d)
PR6 Rever se Telnet TCP Po rt Number (0 for Dis able d)
PR7 Rever se Telnet TCP Po rt Number (0 for Dis able d)
PR8 Rever se Telnet TCP Po rt Number (0 for Dis able d)
Read-Only Community Name
Read-Write Community Name
S NM P T rap In ternet Ad d ress
SNMP Trap Community Name
System Contact
System Name
System Location
Authentication Failure Traps
Printe r T raps
Axis NPS 530/532 User’s Manual 73
Page 74

Appendix A: The parameter list
--- NETWARE MENU
NETW_ENB. : YES
PS_NAME. : AXIS110086
CONFSERV. :
PS_POLL. : 5
AUTO_SCAN. : BOTH (OFF PSERVER RPRINTE R BOTH)
FR_802_3. : YES
FR_ETH_2. : YES
FR_802_2. : YES
FR_SNAP. : YES
LOGIN1. :
LOGIN2. :
LOGIN3. :
LOGIN4. :
LOGIN5. :
LOGIN6. :
LOGIN7. :
LOGIN8. :
LOGIN9. :
LOGIN10. :
LOGIN11. :
LOGIN12. :
LOGIN13. :
LOGIN14. :
LOGIN15. :
LOGIN16. :
RPRINT1. :
RPRINT2. :
RPRINT3. :
RPRINT4. :
RPRINT5. :
RPRINT6. :
RPRINT7. :
RPRINT8. :
NetWare Protocol Enabled
Print Server Name (110086 are the last six digits of the serial number)
Configuration File Server Name
Print Server Poll In te rv al
Automatic NetWare Print Server/Remote Printer Login
IEEE 802.3 Frame Type Enabled
Ethernet II Frame Type Enabled
IEEE 802.2 Frame Type Enabled
S N AP Frame T y p e En a b led
Print Server Queue Attachment 1
Print Server Queue Attachment 2
Print Server Queue Attachment 3
Print Server Queue Attachment 4
Print Server Queue Attachment 5
Print Server Queue Attachment 6
Print Server Queue Attachment 7
Print Server Queue Attachment 8
Print Server Queue Attachment 9
Print Server Queue Attachment 10
Print Server Queue Attachment 11
Print Server Queue Attachment 12
Print Server Queue Attachment 13
Print Server Queue Attachment 14
Print Server Queue Attachment 15
Print Server Queue Attachment 16
Remote Printer Attachment 1
Remote Printer Attachment 2
Remote Printer Attachment 3
Remote Printer Attachment 4
Remote Printer Attachment 5
Remote Printer Attachment 6
Remote Printer Attachment 7
Remote Printer Attachment 8
--- LAN SERVER/LAN MANAGER MENU
LSLM_ENB. : YES
NB_FR_TYPE. : FR_AUTO (FR_AUTO, FR_802_2, FR_DIX)
LPRINT_1. : AX110086.LP1
LLOGIC_1. : PR1
LPRINT_2. :
LLOGIC_2. : PR2
LPRINT_3. :
LLOGIC_3. : PR3
LPRINT_4. :
LLOGIC_4. : PR4
74 Axis NPS 530/532 User’s Manual
LAN Ser v er/ LAN Manager Protoc ol Enable d
Frame Type
Printer 1 Name (110086 are the last six digits of the serial number)
Print er 1 Lo g ica l Print er
Printer 2 Name
Print er 2 Lo g ica l Print er
Printer 3 Name
Print er 3 Lo g ica l Print er
Printer 4 Name
Print er 4 Lo g ica l Print er
Page 75

--- APPLETALK MENU
ATLK_ENB. : NO
ATLK_KEY. :
ATK_ZONE. :
ZONER_EN. : YES
ATK_FONT. : DEFAULT (DEFAULT 35N ALL)
BINARY. : NO
APRINT_1. : AXIS110086
ATYPE_1. : LaserWriter
ALOGIC_1. : PR1 (PR1 PR2 PR3 PR4
PR5 PR6 PR7 PR8)
--- PRINTER1 MENU
PR1_WAIT. : YES
PR1_BEF. :
PR1_STR. :
PR1_CSET. : NONE (NONE ISO>IBM 7UK>IBM 7SW>IBM
7GE>IBM 7FR>IBM 7ND>IBM DEC>IBM)
PR1_FILT. : NONE (NONE POSTSCR AUTO_PS)
PR1_AFT. :
PR1_DUMP. : NO
PR1_SIZE. : A4 (A4 LETTER LEGAL EXECUT)
PR1_ORNT. : PORTR (PORTR LANDS R_PORTR R_LANDS)
PR1_FORM. : 66 0 100 60 30 50
PR1_FONT. :
Appendix A: The parameter list
AppleTalk Protocol Enabled
AppleTalk Protocol Key
AppleTalk Zone
HP Zoner Enabled
PostScript Font Set
Binary T r ansf e r E nabled
Printer 1 Name (110086 are the last six digits of the serial number)
Printe r 1 Typ e
Print er 1 Lo g ica l Print er
PR1 Wait o n Bu sy
PR1 String Before Print Job
PR1 String Substitutions
PR 1 Cha racter Set Co n v ersion
PR1 Print er L ang u ag e T ranslation
PR1 Str ing Afte r P rint J o b
PR1 Hex Dump Mode
PR1 PostScr ip t Pag e Si z e
PR1 PostScr ip t Pag e Or ientat io n
PR1 PostScr ip t Pag e For ma t (MPL, MPP, CPI, LPI, LM, TM)
PR1 PostScr ip t Font (Courier when not specified)
--- PRINTER2 MENU
PR2_WAIT. : YES
PR2_BEF. :
PR2_STR. :
PR2_CSET. : NONE (NONE ISO>IBM 7UK>IBM 7SW>IBM
7GE>IBM 7FR>IBM 7ND>IBM DEC>IBM)
PR2_FILT. : NONE (NONE POSTSCR AUTO_PS)
PR2_AFT. :
PR2_DUMP. : NO
PR2_SIZE. : A4 (A4 LETTER LEGAL EXECUT)
PR2_ORNT. : PORTR (PORTR LANDS R_PORTR R_LANDS)
PR2_FORM. : 66 0 100 60 30 50
PR2_FONT. :
--- PRINTER3 MENU
PR3_WAIT. : YES
PR3_BEF. :
PR3_STR. :
PR3_CSET. : NONE (NONE ISO>IBM 7UK>IBM 7SW>IBM
7GE>IBM 7FR>IBM 7ND>IBM DEC>IBM)
PR3_FILT. : NONE (NONE POSTSCR AUTO_PS)
PR3_AFT. :
PR3_DUMP. : NO
PR3_SIZE. : A4 (A4 LETTER LEGAL EXECUT)
PR3_ORNT. : PORTR (PORTR LANDS R_PORTR R_LANDS)
PR3_FORM. : 66 0 100 60 30 50
PR3_FONT. :
PR2 Wait o n Bu sy
PR2 String Before Print Job
PR2 String Substitutions
PR 2 Cha racter Set Co n v ersion
PR2 Print er L ang u ag e T ranslation
PR2 Str ing Afte r P rint J o b
PR2 Hex Dump Mode
PR2 PostScr ip t Pag e Si z e
PR2 PostScr ip t Pag e Or ientat io n
PR2 PostScr ip t Pag e For ma t (MPL, MPP, CPI, LPI, LM, TM)
PR2 PostScr ip t Font (Courier when not specified)
PR3 Wait o n Bu sy
PR3 String Before Print Job
PR3 String Substitutions
PR 3 Cha racter Set Co n v ersion
PR3 Print er L ang u ag e T ranslation
PR3 Str ing Afte r P rint J o b
PR3 Hex Dump Mode
PR3 PostScr ip t Pag e Si z e
PR3 PostScr ip t Pag e Or ientat io n
PR3 PostScr ip t Pag e For ma t (MPL, MPP, CPI, LPI, LM, TM)
PR3 PostScr ip t Font (Courier when not specified)
Axis NPS 530/532 User’s Manual 75
Page 76

Appendix A: The parameter list
--- PRINTER4 MENU
PR4_WAIT. : YES
PR4_BEF. :
PR4_STR. :
PR4_CSET. : NONE (NONE ISO>IBM 7UK>IBM 7SW>IBM
7GE>IBM 7FR>IBM 7ND>IBM DEC>IBM)
PR4_FILT. : NONE (NONE POSTSCR AUTO_PS)
PR4_AFT. :
PR4_DUMP. : NO
PR4_SIZE. : A4 (A4 LETTER LEGAL EXECUT)
PR4_ORNT. : PORTR (PORTR LANDS R_PORTR R_LANDS)
PR4_FORM. : 66 0 100 60 30 50
PR4_FONT. :
--- PRINTER5 MENU
PR5_WAIT. : YES
PR5_BEF. :
PR5_STR. : 010A020D0A
PR5_CSET. : NONE (NONE ISO>IBM 7UK>IBM 7SW>IBM
7GE>IBM 7FR>IBM 7ND>IBM DEC>IBM)
PR5_FILT. : NONE (NONE POSTSCR AUTO_PS)
PR5_AFT. :
PR5_DUMP. : NO
PR5_SIZE. : A4 (A4 LETTER LEGAL EXECUT)
PR5_ORNT. : PORTR (PORTR LANDS R_PORTR R_LANDS)
PR5_FORM. : 66 0 100 60 30 50
PR5_FONT. :
PR4 Wait o n Bu sy
PR4 String Before Print Job
PR4 String Substitutions
PR 4 Cha racter Set Co n v ersion
PR4 Print er L ang u ag e T ranslation
PR4 Str ing Afte r P rint J o b
PR4 Hex Dump Mode
PR4 PostScr ip t Pag e Si z e
PR4 PostScr ip t Pag e Or ientat io n
PR4 PostScr ip t Pag e For ma t (MPL, MPP, CPI, LPI, LM, TM)
PR4 PostScr ip t Font (Courier when not specified)
PR5 Wait o n Bu sy
PR5 String Before Print Job
PR5 String Substitutions
PR 5 Cha racter Set Co n v ersion
PR5 Print er L ang u ag e T ranslation
PR5 Str ing Afte r P rint J o b
PR5 Hex Dump Mode
PR5 PostScr ip t Pag e Si z e
PR5 PostScr ip t Pag e Or ientat io n
PR5 PostScr ip t Pag e For ma t (MPL, MPP, CPI, LPI, LM, TM)
PR5 PostScr ip t Font (Courier when not specified)
--- PRINTER6 MENU
PR6_WAIT. : YES
PR6_BEF. :
PR6_STR. : 010A020D0A
PR6_CSET. : NONE (NONE ISO>IBM 7UK>IBM 7SW>IBM
7GE>IBM 7FR>IBM 7ND>IBM DEC>IBM)
PR6_FILT. : NONE (NONE POSTSCR AUTO_PS)
PR6_AFT. :
PR6_DUMP. : NO
PR6_SIZE. : A4 (A4 LETTER LEGAL EXECUT)
PR6_ORNT. : PORTR (PORTR LANDS R_PORTR R_LANDS)
PR6_FORM. : 66 0 100 60 30 50
PR6_FONT. :
--- PRINTER7 MENU
PR7_WAIT. : YES
PR7_BEF. :
PR7_STR. : 010A020D0A
PR7_CSET. : NONE (NONE ISO>IBM 7UK>IBM 7SW>IBM
7GE>IBM 7FR>IBM 7ND>IBM DEC>IBM)
PR7_FILT. : NONE (NONE POSTSCR AUTO_PS)
PR7_AFT. :
PR7_DUMP. : NO
PR7_SIZE. : A4 (A4 LETTER LEGAL EXECUT)
PR7_ORNT. : PORTR (PORTR LANDS R_PORTR R_LANDS)
PR7_FORM. : 66 0 100 60 30 50
PR7_FONT. :
PR6 Wait o n Bu sy
PR6 String Before Print Job
PR6 String Substitutions
PR 6 Cha racter Set Co n v ersion
PR6 Print er L ang u ag e T ranslation
PR6 Str ing Afte r P rint J o b
PR6 Hex Dump Mode
PR6 PostScr ip t Pag e Si z e
PR6 PostScr ip t Pag e Or ientat io n
PR6 PostScr ip t Pag e For ma t (MPL, MPP, CPI, LPI, LM, TM)
PR6 PostScr ip t Font (Courier when not specified)
PR7 Wait o n Bu sy
PR7 String Before Print Job
PR7 String Substitutions
PR 7 Cha racter Set Co n v ersion
PR7 Print er L ang u ag e T ranslation
PR7 Str ing Afte r P rint J o b
PR7 Hex Dump Mode
PR7 PostScr ip t Pag e Si z e
PR7 PostScr ip t Pag e Or ientat io n
PR7 PostScr ip t Pag e For ma t (MPL, MPP, CPI, LPI, LM, TM)
PR7 PostScr ip t Font (Courier when not specified)
76 Axis NPS 530/532 User’s Manual
Page 77

--- PRINTER8 MENU
PR8_WAIT. : YES
PR8_BEF. :
PR8_STR. : 010A020D0A
PR8_CSET. : NONE (NONE ISO>IBM 7UK>IBM 7SW>IBM
7GE>IBM 7FR>IBM 7ND>IBM DEC>IBM)
PR8_FILT. : POSTSCR (NONE POSTSCR AUTO_PS)
PR8_AFT. :
PR8_DUMP. : NO
PR8_SIZE. : A4 (A4 LETTER LEGAL EXECUT)
PR8_ORNT. : PORTR (PORTR LANDS R_PORTR R_LANDS)
PR8_FORM. : 66 0 100 60 30 50
PR8_FONT. :
--- OUTPUT MENU
L1_CENTR. : STNDRD (IBM_PC STNDRD FAST HISPEED)
L1_BSYTM. : 60
--- PANEL MENU
DEF_OUT. : PR1 (PR1 PR2 PR3 PR4
PR5 PR6 PR7 PR8)
LOCK_KEY. : NO
Appendix A: The parameter list
PR8 Wait o n Bu sy
PR8 String Before Print Job
PR8 String Substitutions
PR 8 Cha racter Set Co n v ersion
PR8 Print er L ang u ag e T ranslation
PR8 Str ing Afte r P rint J o b
PR8 Hex Dump Mode
PR8 PostScr ip t Pag e Si z e
PR8 PostScr ip t Pag e Or ientat io n
PR8 PostScr ip t Pag e For ma t (MPL, MPP, CPI, LPI, LM, TM)
PR8 PostScr ip t Font (Courier when not specified)
LPT1 Centronic s Inter f a ce Timing
LPT1 Busy Statu s Time-Out
Int ernal Pr intout D es tinat ion
Lock Test Bu tto n
Axis NPS 530/532 User’s Manual 77
Page 78

Appendix B: Interna l printouts
Appendix B
Internal printouts
Th er e are th r ee d ifferent internal printouts th at ca n be p ri nted using the
TEST button on the NPS 530/532 front panel:
The Test Page The test page shows the software revision and the basic configuration of
the NPS 530/532.
To pri nt th e tes t p age, pres s the TEST button until the STAT US ind ica-
tor star ts to fl as h , th en r el ea se the button.
The Parameter
List
The read.me File The read.me f ile c on ta ins detailed instruct ions abou t ho w to integrate the
The parameter list (or the config file) shows the complete NPS 530/532
configuration. See Appendix A for a sample parameter list.
To p ri nt the parameter list, press the TEST button until the STAT US
indicator starts to flash, release the button, and press it once.
NPS 530/532 for different TCP/IP environ ments and print methods. It
als o con ta in s last -m inute infor m a tion not cove re d by the printed documentation, so you should always read this file before start ing the integration.
To p ri nt the read. me file, press the TEST button until the STATUS indi-
cator starts to flash, release the button, and press it twice.
78 Axis NPS 530/532 User’s Manual
Page 79

Appendix C: Protocol Support Upgrades
Appendix C
Protocol Support Upgrades
The NPS 530/532 is by default delivered with Nov ell Net Ware and LAN
Serve r/LAN Manage r sup po rt . TC P/IP a nd App le Ethe rTalk suppo rt ar e
available as software keys from your dealer. The software keys are sold
separately for TCP/IP and Apple EtherTalk.
Ordering Procedures
A software key is simply a six-digit hexadecimal number that can be
obtained by fax (or over the phone) from your distributor. The keys are
individual for each NPS 530/532. You should have th e following information available when ordering upgrades :
• The protocol (or protocols ) you wis h to up gr a de to.
• The serial number of each NPS 530/532 you wish to upgrade.
Upgrading Procedures
The T C P /IP and Apple EtherTalk protocols a re controlled b y two pa ra meters; TCP_ENB (TCP/IP Menu), and ATLK_ EN B (AppleTalk
Menu). These parameters are by default set to NO, and cannot be
ch a nged unl ess the co r responding s oftwa r e keys h ave been provided .
The p ro tocol upgr ad e is ca rr ied out by edi ting the config file as ou tlined in
Appendix A. The software keys ar e entered as two par am eter values ;
TCP_KEY (TCP/IP Menu), and ATLK_KEY (AppleTalk Menu).
There a r e two ways to enter the software key s , either using AX C FG fr om
a PC running Windows or OS/2, or using FTP from a UNIX host runni ng TCP/IP .
Axis NPS 530/532 User’s Manual 79
Page 80

Appendix C: Prot ocol Support Upgrades
Upgrade using AXCFG
The disk supplied with the NPS 530/532 contains AXCFG, a menudriven configuration utility for Novell NetWare and LAN Server/LAN
Manager that performs the tasks mentioned above. Follow the instructions given in the read.me file to install and use AXCFG.
Follo w th es e step s to upgr ad e u si ng AXCFG:
1. Start AXCFG and select your NPS 530/532 from the list of available
print servers.
2. If you are upgrading to Apple EtherTalk only, then skip to s tep 6.
3. Select TCP/IP MENU, then select TCP_KEY.
4. Ty pe in the six-di git TCP/IP key, an d click OK.
5. If y ou ar e upgra d ing t o TCP/ IP only , t hen skip to st ep 8.
6. Select APPLETALK MENU, then s e lect ATLK_KEY.
7. Ty pe in the six-di git Apple T alk key, and click OK.
8. Click SAVE, then click CANCEL to exit AXCF G .
Notes: • The protocol enable p ar a me ter s TCP_ENB and ATLK_ENB wi ll
autom atically be set to YES wh en correct keys have been p ro vi de d.
You can change these parameters later if you want to disable one or
both protocols.
• I f you e nt e r an inco rre c t key the para me t er wil l re main empty.
• In order to prevent accidental loss of upgrade keys, it is not possible to
edit the key parameters further once the correct key has been entered.
80 Axis NPS 530/532 User’s Manual
Page 81

Upgrade using TCP/IP
Even if the TCP/IP protocol is disabled, the NPS 530/532 has a limited
FTP file transfer suppo rt to allow upgradi ng from a UNIX workstatio n.
Follo w th es e step s to upgr ad e u si ng FTP file trans f er :
1. Crea te a file named upgrade containing the following lines:
TCP_KEY. : 4B26F8
ATLK_KEY. : 603DC2
If you are u pg rading for one protocol onl y, t he n om it th e inap p r op r iate line.
2. D o a basic TCP/IP configuration as described in Sect ion 6, and use
the arp method to set the Internet address.
Appendix C: Protocol Support Upgrades
(the software key values are examples only)
3. Log in to the NPS 530/532. Command: ftp <host name>
Enter root as user id and pass as password.
4. Down -load the upgrad e f il e. C om man d : put upgrade CONFIG
Notes: • The protocol enable p ar a me ter s TCP_ENB and ATLK_ENB wi ll
autom atically be set to YES wh en correct keys have been p ro vi de d.
You can change these parameters later if you want to disable one or
both protocols.
• I f you e nt e r an inco rre c t key the para me t er wil l re main empty.
• In order to prevent accidental loss of upgrade keys, it is not possible to
edit the key parameters further once the correct key has been entered.
Axis NPS 530/532 User’s Manual 81
Page 82

Appendix C: Prot ocol Support Upgrades
Verify the Upgrade
You can verify that the upgrade is successfully completed by printing the
test page af ter the NPS 530/532 h as be en restarted. T o prin t the test p age,
pres s the TES T but ton unt il the ST ATU S indicato r star ts to fl as h , th en
release the button. See Appendix B for a test page sample from an NPS
530/532 in its default configuration.
• If you have upgraded to TCP/IP, the TCP/IP header has changed
from:
** TCP/IP: locked
to:
** TCP/IP: enabled
• If you have upgrad ed to App le E th er Talk, th e Apple EtherT alk header
has changed from:
** Apple EtherTalk: locked
to:
** Apple EtherTalk: enabled
If t he upgrade procedu re failed, r ep eat the p r ocess and m a k e s u re that you
enter th e p roper key into the k ey parameters. Should th e u p gr a d e st ill fail,
contact you r distr ibu tor.
Note: As an alternative, you can also view the parameter list to verify the
upgrade. After a successful upgrade, the parameters TCP_KEY and/or
ATLK_KEY contain the software key, and parameters TCP_ENB and/or
ATLK_ ENB ar e set to YES. If the u pg rade procedure fail ed , the s of t wa re
key parameters (TCP_KEY and ATLK_KEY) re ma i n emp t y.
82 Axis NPS 530/532 User’s Manual
Page 83

Appendix D
Technical specifications
Network envi r onm ents
• NetWare 3.11, 3.12, 4.0x and 4.10 using bindery emulation
• Windows for Workgr oups, Windows 95, Windows NT ver . 3.5 and above
• LAN Server 1.3 and above
• LAN Manage r 2.0c and abov e
• Any system with TCP/IP support
• Apple EtherTalk
Net work atta c hm e nts
•
NP S 530 :
•
NP S 532 :
(software upgrade requ ired)
10baseT (twisted-pai r) via RJ-45 connect or
10base2 (thi n-wire) via BNC connector
(software upgrade required)
Appendix D: Techni cal specifications
Sup porte d pro to c ols
• Net ware: IPX, RIP, NCP, SAP, SPX
• Windows: NetBIOS/NetBEUI, TCP/IP (Windows NT)
• TCP /I P : L PD, FTP , Rev erse Tel net, PROS , BOOTP, ARP, ICMP, IP, RARP , TCP, Teln et , UDP
• OS/2: NetBIOS/NetBEUI
• Et herTal k: AARP, ATP, DDP, NBP, PAP, RTMP, ZIP
General features
• Easy installation
• High-speed printing (>150 kbytes/s)
• Ei g h t logi ca l printe rs (fea turing Ph ysic a l Printer Po rt , Ch ara c te r Se t Conve rsio n, String s Befo re an d Afte r Print
Jobs, String Substitutions, PostScript Functions, and Hex Dump Mode)
• Security functions
• Printo ut sta tis tics loggi ng
• Use of IEEE802.2, IEEE802.3, SNAP and Ethernet II frame types simultaneously
Axis NPS 530/532 User’s Manual 83
Page 84

Appendix D: Technical specifications
Ne tWare fe atu r e s
• Standard installation using PCONSOLE
• Print Server Mode for high-speed printing
• Remote Printer Mode for up to 16 printers per NetWare user licence
• Up to 96 print queues on 16 file servers
• Port Status monitoring
Windows fea tur es
• Automatic installation software (Axis Print Utility for Windows)
• Printing through Windows Print Manager
• Both peer-to-peer and client-server printing
OS/2 features
• Automatic installation software (Axis Print Utility for OS/2)
• Printing through OS/2 Print Manager
• Port Status monitoring
Unix featur es
• SNMP support: Axi s private enterprise MIB and MIB-II
Macintosh features
• Standard insta ll ation using the Chooser
• Supports binary mode
Pri nter atta c hm e nts
• Connects to the printer’s Centronics port (thr oughput exceeding 150 kbytes/s, burst 250 kbytes/s)
Hardware specifications
• Size: 1.2 × 2.2 × 8.5 inches / 29 × 55 × 100 mm
• Weight: 0. 3 lb / 0.15 kg
•Power:
Approvals
• EMC: Limit A of FCC Rules and Regulations part 15 subpart B, cla ss A (US) .
• Safety: EN 60950, UL
Operating environments
• Temperature: 40 - 105 °F / 5 - 40 °C
• Humidity: 10 - 95% non-condensing
NPS 530 :
NPS 532 :
Limit B of EN 55022/1987, EN 50082-1/1992 (Europe).
5 VDC, min. 300 mA supplied by the printer (Centronics pin 18), or
12 VDC or 9 VAC, min 300 mA by external power supply
12-15 VDC or VAC, min 500 mA by external power supply
All spe cificat ion s are s u b ject to c han ge withou t prior notic e
84 Axis NPS 530/532 User’s Manual
Page 85

Appendix E
How to contact Axis
If you need technical support, please contact your dealer. If they can’t
help you, they wil l forward your re q ue st to us.
Axis on-line service
Use the Axis on-line service at any time to retrieve electronically distribute d items. The mate rial avai lable in clude th e NPS P rint Serv er Technic al
Reference, the Adobe Acrobat Reader (requir ed for all Axis on-line documentation), company and product presentations, etc. All items ar e available on Internet by a WWW browser or ftp file transfer, and on the Axis
Bulletin Board by modem.
Appendix E: How to contact Axis
Internet and
W o rl d W ide We b
The Axis B ul le t in
Board
If you are connected to Internet, have a look at the Axis WWW Home
Page at http://www.axis.se. Here you can find information about the
company and our products. You can also down-load online manuals,
tools such as the Acr oba t R ead er fo r different p lat for m s , and th e latest
ver s ions of the NPS ut il ities.
You can also get files and informatio n thro ug h anonymo us ftp at
ftp://ftp.axis.se.
If you want to receive regular information about new produ cts and product updates by e-mail, send an e-mail to Majordomo@axis.se with
SUBSCRIBE AXIS-NEWS
in the message body.
The thir d way to access the Axis archive is the Axis BBS. You will need a
high-speed mode m, a VT100 or VT220 te rminal em ulator, and a Ke rmit
or ZModem compatible software. Dial +4646120632 or
+46 46 211 94 53 and log in as guest (no pass wor d required).
Axis NPS 530/532 User’s Manual 85
Page 86

Appendix E: How to contact Axis
The Axis offices
If you want to con tact an Axis off ice, choose the one ne ar es t to you r
region:
Europe, Middle
East, South
America, Africa
North & Central
America
Japan
Axis Comm un icat ions AB
Scheelevägen 16, S-223 70 Lund, Swede n
Phone: +46 46 19 18 00
Fax: +46 46 13 61 30
Email: info@axis.se
URL: http://www.axis.se/
Axis Comm un ica tions Inc.
4 Con stitution Way, Woburn, MA 01801-1030, USA
Phone: 1-800-444-AXIS, (617) 938-1188
Fax: (617) 938-6161
Ema il: in fo@ a xisinc .c om
Axis Comm unica tions KK
8th Cen ter Plaza 5F, 1-10-16Nihombashi Horidome-cho,
Chuo-ku, Tokyo 103, Japan
Phone: +81 3 3663 8801
Fax: +81 3 3663 8802
Ema il: in fo@axi s c om.c o .jp
Hong Kong, Asia
(except Japan &
Middle East),
Australia
Axis Comm unica tions LTD
Room 602, Asian House, 1 Hennessy Road, Wanchai, Hong Kong
Phone: +852 2836 0813
Fax: +852 2573 5935
Em ail: in f o@axis . com .h k
86 Axis NPS 530/532 User’s Manual
Page 87

Index
Index
A
Accounting 66
alias 45
Anonymous FTP 85
arp 47
ASCII-to-PostScript Conversion 62
AX C FG 1 4
Axis offices 86
Axis P ri nt Utility for OS/ 2 3 9
Axis P ri nt Utility for Wind ows 29
B
Bin con tr ol 60
bootp 49
Bulletin Board 85
C
CAPTURE 28
Ch ara c ter Set C onv er s ion 59
config file 58, 70
E
External power supply 12
F
Fa ctor y Def a u lt Set tings 72
FTP 52
H
Hex Dump Mode 64
host name 45
Host Table 45
I
IBM OS /2
Par a me ter editi ng 70
Inte rnal P rintout s 78
In te rne t 85
Internet address 4 5
L
LAN Server/LAN Manager
Co nfig u ra tio n 3 8
Print Queues 41
Sharing 42
Language specific characters 59
Locally Administra ted Address 13, 68
Logical Printers 57
LPD 52
M
Macintosh
Setup 53
Microsoft Windows
Parameter editing 70
Setup 29
N
NET COPY 43
NET SHARE 42
NetBEUI 38
Network Information Services (NIS) 45
Node Address 47, 68
Novel l NetWare
Parameter editing 70
Print Server Mode 15
Automatic 17
File Server Cont rol le d 2 0
Parameter Controlled 18
Remote Printer Mode 16, 24
Setup 14
NPS Manag er 38
Axis NPS 530/532 User’s Manual 87
Page 88

Index
P
Page Form a t 63
Page Orientation 63
Page Size 62
Parameter editing 70
Factory Defaults 72
Parameter List 70, 78
PostScript
Font 63
Page Format 63
Page Orientation 63
Page Size 62
Postscript functions 62
Power Supply 12
Print Methods 51
Printer cab le extens ion 12
PROS 52
Protocol upgrades, 79
SNMP 69
Software keys, 79
Statu s logging 67
Strin g Su b stitution s 61
Strings before and after print jobs 60
T
TCP/IP
Co nfig u ra tio n 4 4
Parameter editing 71
Te lnet Lo g in 65
TEST Button 72, 78
Test Page 12, 78
U
UN IX- t o-AS CII 61
V
Velcro ribbons 12
R
rarp 48
read.me file 78
Reverse Telnet 52
S
Serial numbe r 13
Setup
IBM OS/2 38
Macintosh 53
Micros of t W indows
Windows 3.1 30
Windows for Workgroups 31
Client-server printing 32
Pee r-to-peer p ri nti ng 3 1
Windows NT
Client-server printing 36
LPD printing 37
Pee r-to-peer p ri nti ng 3 5
Novell NetWare 14
TCP /IP 44
Setup for Microsoft W indows 29
W
Windows NT
LPD printing 37
World Wide Web 85
Y
Yellow Pages (YP) 45
88 Axis NPS 530/532 User’s Manual
 Loading...