

Page 1
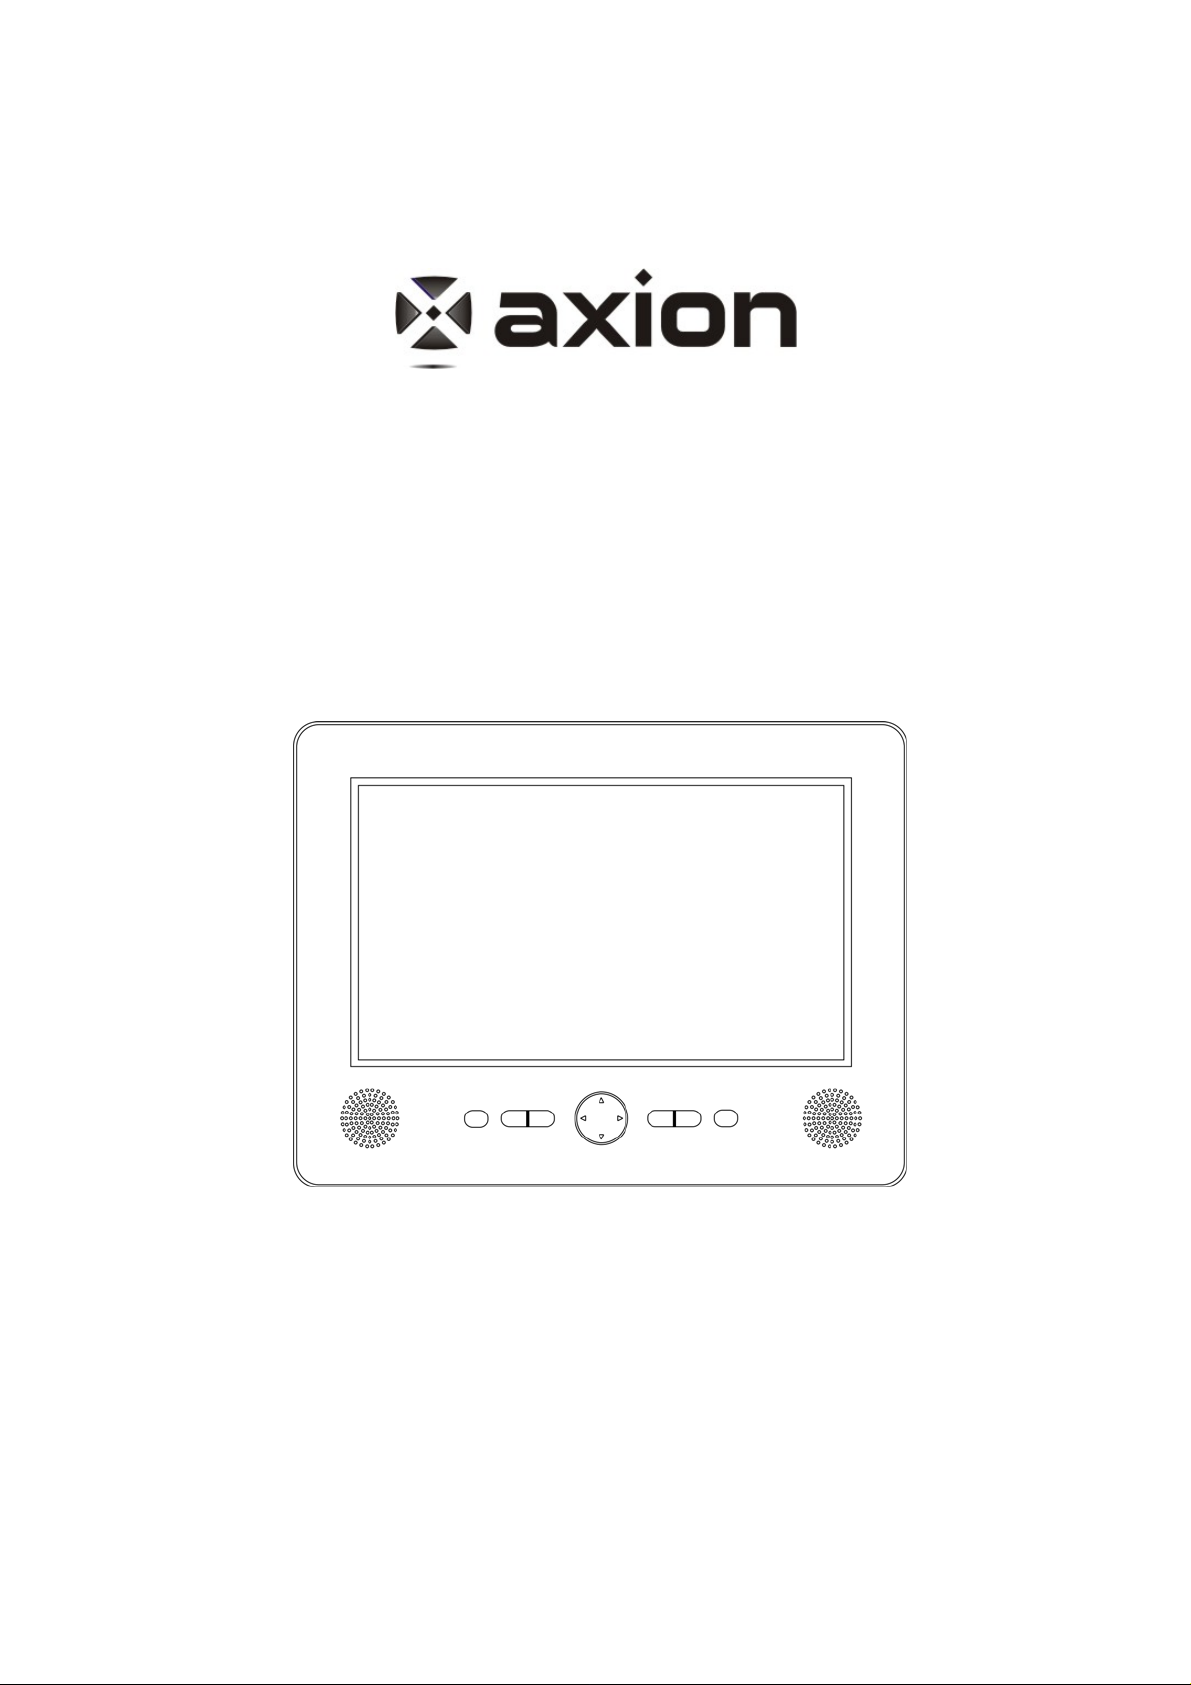
9" Portable ATSC TV
AXN-8905
Owner’s Manual
Page 2

Contents
Cautions and Warnings…………………………………………………………...2
What’s included…………………………………………………………………….3
Powering and installation…………………………………………………...……3
Controls, Indicators, and Connectors…………………………………….........4
Settings Menu………………………………………………………………...…….6
Setting Up Channels……………………………………………………………….7
Setting the DTV………………………………………………………………..……7
Using External Antenna………………………………………………………......7
Using Your TV as a Monitor………………………………………………………8
Using Headphone (not supplied)………………………………………………..8
Specifications…………………………………………………………………...….9
Troubleshooting…………………………………………………………………....9
1
Page 3

Cautions and Warnings
1. Placement
To prevent fire or electric shock, do not expose this appliance to rain or
moisture. Do not place the set on an unstable cart, stand, tripod, bracket or
table to prevent it from falling. Keep the unit away from strong magnets, heat
sources, direct sunlight, excessive dust. If the unit is brought directly from a cold
to a warm location, moisture may condense inside the unit. When you move it
from a cold to a warm location, wait for about one hour before operating the unit,
or leave the unit turned on until the moisture evaporates.
2. Installation
Ensure that 9” the portable TV are installed in accordance with the instructions
and illustrations provided in this manual.
3. Caution
Do not push objects of any kind into the unit through openings; do not spill or
spray liquid of any kind on or in the system (this may result in a fire or electric
shock). Do not place anything heavy on the unit. To ensure proper ventilation
and proper operation, never cover or block the slots and openings with a cloth or
other material. Keep the unit away from an open flame such as fire, candle etc. It
is hazardous to replace the battery incorrectly. Replace the battery only with the
same or equivalent type, in order to protect the environment, please dispose the
battery properly. Do not use the unit in temperatures higher than 95 degrees
Fahrenheit or 35 degrees Celsius.
4. Disassemble
Do not attempt to disassemble the cabinet. There is a risk of electric shock and/or
exposure to Laser Radiation. Contact qualified service personnel if your system
needs repair.
5. Cleaning Unit
When cleaning, make sure the system is unplugged from the power source. Do
not use liquid cleaners or aerosol cleaners. Use a cloth lightly dampened with
water for cleaning the exterior of the system only.
2
Page 4

What’s included
9’’ Portable TV
Remote Control with Battery
AV Cable
AC to DC Adapter
Instruction Manual
Car Cigarette Lighter Adapter
External Antenna Base
External Rod Antenna
Powering and installation
1. Powering the system indoors
Plug one end of the AC to DC adapter into the DC Input jack on the side of the
mobile TV , then plug the other end into the 100~240V AC power receptacle.
Note:
Use the provided AC to DC adapter or an adapter with proper specifications.
2. Powering the system with built-in battery
A built-in rechargeable battery (Li-Polymer) is included for use. When the built-in
battery can not power the TV or is used for the first time, recharge it.
1) Turn off the TV.
2) Connect the AC to DC adapter to the DC jack and a standard wall outlet. Or
connect the car cigarette lighter adapter to the DC jack and the vehicle power
outlet. The red charge indicator will light. Once fully recharged, the light will turn
off.
3) Disconnect the AC to DC adapter or car cigarette lighter adapter after the battery
is fully charged.
Note:
The TV can operate 2 hours with built-in battery. When the sound level
lowers or the picture becomes unstable, charge the battery about 7 hours.
3
Page 5
3. Installing the rod antenna
Screw the rod antenna onto
the RF IN jack.
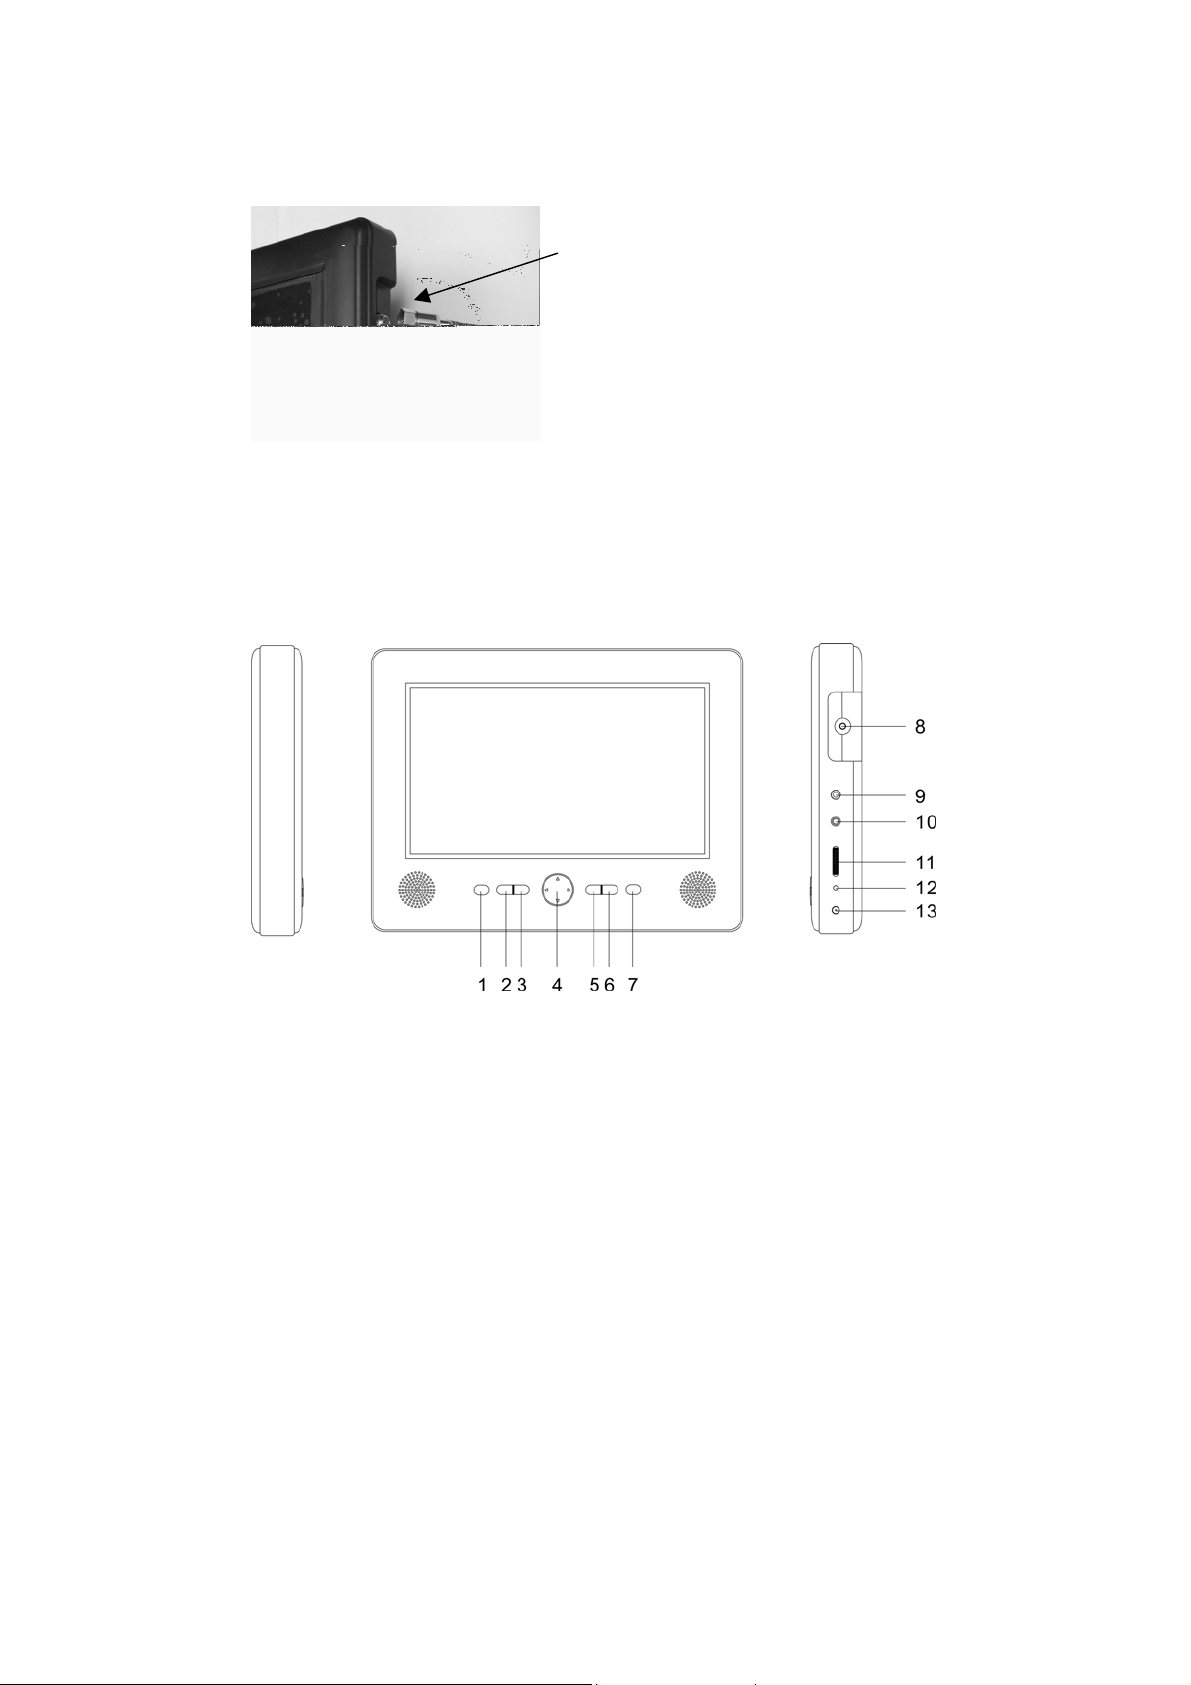
Controls, Indicators, and Connectors
Unit View
1) IR Sensor: Infrared sensor receives information from remote.
2) POWER on/off button.
3) MENU button: Open and close TV menu or pressing and holding it to interrupt the
auto scan.
4) Up/Down/Left/Right buttons: Used to navigate on-screen menus.
CH+/-: Select the previous or next channel.
VOL+/-: Increase/decrease the volume.
5) ENTER button: Confirm your selection.
6) INPUT button: Switch between TV and AV.
7) WIDE button: Switches the screen between the 16:9 and 4:3 screen displays.
8) RF IN: Connect with antenna.
9) AV IN: Connect with AV device.
10) Headphone jack: Insert headphone (not included) for private listening. It can
disable the speakers.
11) Brightness Up/Down Control: Adjust the brightness.
4
Page 6

12) POW/CHG LED: Lights green when the TV on and lights red when the built-in
battery is charging.
13) DC 9V jack: Connect to the provided AC to DC adapter.
Note:
. Moving the TV may cause signal loss, especially for digital programs.
. The TV will shut off automatically if it receives no signal for 15 minutes.
Remote Control
1) MENU button: Open and close TV menu or pressing and holding it to interrupt the
auto scan.
2) Direction/ ENTER buttons: Navigate on-screen menus./ Confirm your selection.
VOL +/-: Press to increase/decrease the volume.
3) NUMBER keys: Use to select channels.
4) AUTO button: Search for channels automatically.
5) DISPLAY button: Press to display channel information.
6) GUIDE button: Display the list of available channels and the corresponding channel
information.
7) INPUT button: Switch between TV and AV IN.
8) MUTE button: Press to stop the voice outputting.
9) AUDIO button: Select one of the audio soundtracks.
10) CH+: Selects next channel.
11) CH-: Selects previous channel.
5
Page 7

Settings Menu
1. To access the setting menu, press MENU button.
2. Using the Left or Right button, select an option and press ENTER to confirm.
3. Always press MENU button to exit.
PICTURE
Set Picture Mode to control video quality (contrast, sharpness, tint, and color).
TIME
Sleep Timer: The TV turns off if inactive for amount of time.
Time zone: Using the Left/Right button to select different time zone.
Day saving Time: On or Off.
OPTION
Menu Language: Using the Left/Right button to select different Language.
Transparency: Using the Left/Right button to make the menu transparent or not.
Closed Caption: You can choose a kind of closed caption you desire and set it
on or off.
Zoom Mode: Switch between Normal and Wide.
Restore Default: Reset settings to factory default.
CHANNEL (only on TV)
Antenna: switch between air and CATV.
Auto Scan: Scans for channels to save to memory. Erases previously saved channel
information.
Auto Scan Add CH: Scans for channels to save to memory, but does not erase
previously saved channel information.
Show/Hide: Set the TV to skip specific channels.
Channel No.: Switch the channel, but remains in Menu mode.
Channel Label: Lets you edit the program label that appears when a channel is
selected.
6
Page 8

Setting Up Channels
You must scan for available analog and digital channels when you set up your TV.
If you do not scan for channels, the Channel Up and Down buttons will not function.
To scan for channels:
1. Turn on your TV and set the input to TV.
2. Press MENU. The Menu screen appears.
3. Press the
4. Use Up or Down button to select Auto Scan, and press ENTER button to confirm.
Then select Start to Scan, the TV starts to scan for available channels. You can
interrupt the scan by pressing and holding MENU on the TV.
5. When the scan is complete, you can adjust the antenna, select
Auto Scan Add CH to add more channels to those scanned.
6. Press MENU again to exit the setting menu.
Note: You can also press the AUTO button on the remote control to scan for
channels.
button until access the Channel Setup menu.
Setting the DTV
Enter the channel number followed by “-1.” For example, enter “11-1” for the
digital channel 11. If available, the digital channel appears.
Some digital stations provide multiple broadcasts on a single channel. To access
these directly, enter higher numbers after the channel number. Take “11-2” “11-3” for
example. If available, these digital channels appear.
7
Page 9

Using External Antenna
When the picture is not clear with the rod antenna, try placing your TV near a window
or connecting an external antenna to the TV for improve reception.
If you are in a weak TV signal area, or are inside a concrete building, you might need
an external antenna to improve reception. Connect the external antenna to the RF IN
jack on the right side of the TV. Follow the install steps below:
1. Screw the rod antenna loose from
the RF IN jack.
2. Screw the rod antenna onto the
top jack of the magnet pedestal.
4. Place the magnet pedestal
vertically; pull the rod antenna to
scan channels.
8
PDF created with pdfFactory Pro trial version www.pdffactory.com
3. Screw the metal plug of the external
antenna onto the RF IN jack on the
TV.
Page 10

Using Your TV as a Monitor
1. Firstly, Press INPUT button to choose AV IN mode.
2. Connect the AV Cable’s plugs to the out jack of AV Device as below:
Yellow plug: Connect to the VIDEO OUT jack on the AV Device.
Red plug: Connect to the AUDIO IN R jack on the AV Device.
White plug: Connect to the AUDIO IN L jack on the AV Device.
3. Finally, Connect the AV cable’s 1/8-inch plug to the AV IN jack on the TV unit.
Using Headphone (not supplied)
For private listening, you can connect an optional headphone with a 1/8-inch plug to
the Headphone jack on the side of the TV. This automatically disables the built-in
speakers.
Listening Safety
To protect your hearing, follow these guidelines when you use headphones.
. Set the volume to the lowest setting before you begin listening. After you begin
listening, adjust the volume to a comfortable level.
. Do not listen at extremely high volume levels. Extended high-volume listening can
lead to permanent hearing loss.
. Once you set the volume, do not increase it. Over time, your ears adapt to the
volume level. So a volume level that does not cause discomfort might still damage
your hearing.
9
Page 11

Specifications
Signal system ATSC
Panel size 9 inch
Power source DC 9V
Operating temperature 5~35°C
Weight 0.79 kg
Dimensions (W x D x H) 9.9 X 7.7 X 1.3 inch
252 x 195 x 34 mm
Troubleshooting
The player won’t turn on?
1. Charge the battery.
2. Check the AC to DC adapter is connected.
3. Connect to another power outlet.
No sound?
1. Increase the volume.
2. Press MUTE on the remote control to turn off mute.
3. Unplug the headphones.
Poor picture?
1. Adjust the telescoping antenna.
2. Move to a window (if inside a structure).
3. Use an external antenna.
Remote control doesn’t work?
1. Remove any obstacles between the remote and the TV.
2. Replace the battery in the remote control.
Design and specifications are subject to change for product
improvement without notice.
10
PDF created with pdfFactory Pro trial version www.pdffactory.com
Page 12

America Action, Inc. (“AXN”) Product Warranty
Information
What the warranty covers:
America Action, Inc. (“AXN” ) warrants your AXN products against defects in material and
workmanship during the warranty period from the original date of purchase, subject to the
following terms and conditions. If a product proves to be defective in material or
workmanship during the warranty period, AXN will, at its discretion, repair or replace the
product with a similar product provided the purchaser adheres to certain return
authorization procedures and guidelines.
How long the warranty is effective:
AXN products are warranted for one (1) year for parts and ninety (90) days for labor, starting
from the original date of purchase/invoice.
What brand(s) can be covered under the warranty:
Any “ACTION” and “AXION” branded products sold by America Action, Inc.
Whom the warranty protects:
The warranty is valid only for the original purchaser within the continental of USA.
What the warranty does not cover:
1. Any product on which the serial number has been defaced, modified or removed.
2. Damage, deterioration or malfunction resulting from:
A. Accident, misuse, neglect, fire, water, lightning, or other acts of nature, unauthorized
product modification, or failure to follow instructions supplied with the product.
B. Repair or attempted repair by anyone not authorized by AXN.
C. Any damage of the product due to shipment.
D. Removal from or installation to the product.
E. Causes external to the product, such as electric power fluctuations or failure.
F. Use of supplies or parts not meeting AXN’s specifications.
G. Normal wear and tear.
H. Battery Leakage.
I. Any other cause which does not relate to a product defect.
3. Cosmetic damage by purchaser, such as markings, discoloration, scratches, dents, gouges
or any other defacement.
4. Physically damaged products by purchaser, such as broken PCB, Housing, damaged LCD
Module.
5. No Defect Found (product returned to AXN as defective but failure is not duplicated by
AXN’s test method).
6. Customer instruction, installation, set up adjustments, or signal reception problems.
7. Rechargeable batteries.
8. Product without proof of purchase. (The proof of purchase should be one of the following
documents: purchase receipt, gift receipt, sales invoice, and packing list that contains the
product model number, price, vendor, and purchase date.)
9. Ninety (90) days after the original purchase date of the AXN product, the customer is
responsible for the shipping fees incurred for the product delivery to and from AXN service
center.
PDF created with pdfFactory Pro trial version www.pdffactory.com
Page 13

How to get service:
1. For additional information on obtaining an extended warranty service, contact your AXN
dealer or AXN’s Customer Service Department by e-mailing to
customerservice@axionzone.com
To obtain warranty service, you will be required to do one of the following: fill out an online
RMA Request Form, print the form, fill it out and fax it to 1-909-869-5545, or call AXN’s
Customer Service number at 1-909-869-6600. You will be asked to provide the following
information:
A. Customer information (name, day-time phone number, and/or residential address).
B. Proof of your purchase (purchase receipt, gift receipt, sales invoice, and/or packing list).
C. Product model number.
D. Product serial number.
E. A description of the problem.
F. Payment information (If any payment is required, you will be asked to provide this
information beforehand. Currently, we only accept personal check, money order or cashier’s
check. The time for us to clear a personal check is approximately 20 days; 10 days for any
money order or cashier’s check.
2. AXN will contact the customer upon receipt of the RMA Request Form, and will issue an
RMA number if the RMA Request Form is completed and delivered as requested.
3. Please take or ship RMA product to AXN or any AXN authorized service center with RMA
number clearly and marked on the outside of the packing. All RMA products should be
returned in secured packaging, preferably in the original package, with the complete set of
accessories. We recommend that you insure the package in case of loss or damage during
shipping.
4. Upon receiving the RMA product, if the correct RMA number is clearly marked on the
packaging, and if the repair payment is pre-paid or is enclosed with the package, depending
on the condition of the defects, AXN will repair or replace all RMA products, and ship the
product back to the customer.
5. For additional information or the name of the nearest AXN service center, please contact
your AXN dealer or AXN Customer Service.
Before contacting us:
In many cases, your product may not need repair. Before contacting us, please consult the
troubleshooting section in your user’s guide or AXN’s FAQ webs page to see if you can easily
remedy the problem yourself.
AXN technical support services:
During the period of product warranty, we support your basic configuration, setup and
troubleshooting questions; and when necessary, we will provide you with all the instructions on
how to return your product for repair.
For customer service and support inquiries, please call 1-909-869-6600 or e-mail us at
customerservice@axionzone.com
REPAIR OR REPLACEMENT AS PROVIDED UNDER THIS WARRANTY IS THE
EXCLUSIVE REMEDY OF THE CONSUMER. AXN SHALL NOT BE LIABLE FOR ANY
PDF created with pdfFactory Pro trial version www.pdffactory.com
Page 14

INCIDENTAL OR CONSEQUENTIAL DAMAGES FOR BREACH OF ANY EXPRESS OR
IMPLIED WARRANTY ON THIS PRODUCT. EXCEPT TO THE EXTENT PROHIBITED
BYAPPLICABLE LAW,ANYIMPLIED WARRANTY OF MERCHANTABILITY OR FITNESS
DURATION TO THE DURATION OF THIS WARRANTY.
Some states do not allow the exclusion or limitation of incidental or consequential damages, or
allow limitations on how long an implied warranty lasts, so the above limitations or exclusion
may not apply to you. This warranty gives you specific legal rights, and you may also have
other rights, which vary from state to state.
AMERICA ACTION INC.
100 EXCHANGE PL
POMONA, CA 91768
PH: (909) 869-6600
FAX: (909) 869-5545
CONTACTUS@AXIONZONE.COM
HTTP://WWW.AXIONZONE.COM
PDF created with pdfFactory Pro trial version www.pdffactory.com
 Loading...