

Page 1
IP SERVER 9310
User Manual
Page 2

IP SERVER 9310 USER MANUAL
- 1 -
USER MANUAL
IP Server 9310
Version: 1.0
2007.3
Page 3

IP SERVER 9310 USER MANUAL
- 2 -
Warning: any changes to this equipment without permission may cause
damages to your equipment! This equipment h as been proved to can be prevented
from the influence of harmful electronic jamming in normal bu siness use co ndition.
IMPORTANT NOTICE
1. IP SERVER 9310 is deigned on the fundamental principle of lea rning in kit.
2. IP SERVER 9310 is deigned to be used in-door, we have no responsibility for
the possible damage in out-door use especially in the rain.
3. Please use the power adaptor provided by the dealer, we have no responsibility
for the possible damage in using other adaptors.
4. Do not use IP SERVER 9310 in strong shaking condition
5. Please contact the dealer If IP SERVER 931 0 works imp roperly.
Copyright © 2007 . All rights reserved. No part of this publicatio n may be
reproduced, stored in a retrieval system, or transmitted in any form or by any
means, electronic, mechanical, photo copying, re cording or otherwi se, without t he
prior written consent of US
All trademarks and products mentioned in this document are the prope rties of
Aviosys.
Page 4

IP SERVER 9310 USER MANUAL
- 3 -
Table of Content
1. INTRODUCTION..........................................................................................................4
FEATURES:.....................................................................................................................
2. BEFORE YOU START ............................................................................................5
9310 PACKAGE CONTENTS..............................................................................................
MINIMUM SYSTEM REQUIREMENTS....................................................................................
3. INTERFACE DESCRIPTION ......................................................................................6
4. HARDWARE & SOFTWARE INSTALLATION ...................................................7
HARDWARE INSTALLATION.................................................................................................
SOFTWARE INSTALLATION ...............................................................................................
5. INITIAL SETTINGS......................................................................................................8
INITIAL SETTINGS THROUGH THE ETHERNET...................................................................
SEARCH 9310 IN INTERNET...........................................................................................
6. WEBPAGE FUNCTION INTRODUCE ..................................................................12
LOGIN SETTINGS ..............................................................................................................
LIVE VIEW SETTINGS.........................................................................................................
IMAGE SETTINGS..........................................................................................................
PTZ CONTROL ..............................................................................................................
REAL TIME VIDEO PLAY, STOP AND STOP SNAP FUNCTION ............................................
PLAY THE RECORDED VIDEO.............................................................................................
PLAY THE RECORDED VIDEO .........................................................................................
VIDEO FORMAT TRANSFORM .........................................................................................
BASIC CONFIGURATION.....................................................................................................
STATUS REPORT...........................................................................................................
USER MANAGEMENT......................................................................................................
CHANGE PASSWORD......................................................................................................
NETWORKING SETTING...................................................................................................
PPPOE CONFIGURATION..............................................................................................
DATE & TIME SETTINGS.................................................................................................
VIDEO SETTINGS ...........................................................................................................
AUDIO SETTINGS...........................................................................................................
LOG SETTINGS...............................................................................................................
ADVANCE CONFIGURATION................................................................................................
MAINTENANCE FUNCTION..............................................................................................
DYNAMIC DNS SETTING................................................................................................
SMTP SETTING.............................................................................................................
FTP SETTING................................................................................................................
GPIO SETTINGS............................................................................................................
IP SERVER SETTINGS .................................................................................................
SNAP SHOT SCHEDULE .................................................................................................
7. FAQ.............................................................................................................................35
Page 5

IP SERVER 9310 USER MANUAL
- 4 -
1. Introduction
Depending on the built-in IP network serve r in 9310, you can transmit t he input video
and audio to the network through an IP address. User can easily achie ve security
protection, children or sickroom nursing, long-distance teaching, TV pl ay, video game
through the standard network brow ser (such as IE ). You can ea sily achieve t he
INTERNET video broadcast through 9310 without need a PC in the
monitoring
location.
Features:
z Built-in Web server, Simple to use!
z Support Internet IP service finder, Easy to find!
z High Quality Full D1 MPEG-4
compliant Video with G.726 Audio lip-sync
streaming.
z Dynamic Bandwidth Management for internet traffic
z Video compression frame rate and bit rate adjustabl e for advance us er.
z Email picture or ftp storage if Motion Detection has been Det ected
z Multiple PTZ camera support through the RS485 interface
z Remote control for both sensors and alarms with GPIO and RS232 interface.
z Build in OSD (On Screen Display) function for customer’ s application.
z File management for Long time recording (over 1 month s D1 /300G)
z UPNP, 802.11g / b wireless LAN (IP9320 only)
Product Specification:
Network:
* Embedded Web server – No need PC for Serve r.
* 10/100 Mbps Base-T Ethernet
*Network Protocols: TCP/IP, UDP, ICMP, HTTP, FTP, Telnet, SMTP, DHCP, NTP,
DDNS includes most of network protocol
* IEEE 802.11g wireless LAN (9320 only)
Video:
* NTSC / PAL Auto detection
* Record to Mpeg-4 format (AVI or mpeg raw file) with D1/
1/2D1/SIF/QSIF at full frame
* Ideal Synchronization of Audio & Video
* Auto / Manual adjust network bandwidth.
* Resolution: 720x576/480/288/240, 352x240/288, 176x 144/122 @ 3 0/25 fps
* Video Bitrate: 128K ~ 3M bits/sec (CBR/VBR configurable)
* Recording& Playback: Directly control from Web Browser
* Video Adjustment: Brightness, Contrast, Hue, Saturation, Frame rate, Bit rate, Bit
Rate, GOP, Frame rate
Audio:
*G.726 U-Law/A-Low
*Adjustable audio data rate, 384Kbps to 64Kbp s, Sample rate: 48K
Control Interface
* RS485 output for controlling PTZ camera
* 6 Digital I/O interface for sensor and alarm
* RS232 Interface for serial communication
Page 6
IP SERVER 9310 USER MANUAL
- 5 -
Others Features
Firmware Upgrade - Remote upgrade via network
O.S.D..
Maximum 20 concurrent viewers.
* Snapshot, Schedule recording, Motion Detect recording.
* Motion detection : Automatic remote image retrieval and storage via e-mail a nd FTP
with event triggering
*Sensitivity ratio adjustable
2. Before you start
9310 package contents
* One set of IP Server 9310
* One network wire with RJ45 port
* One 110~220V adaptor
* One composite video cable (yellow)
* One 3.5Φ audio terminal
* One Europe terminal ( RS232)
* One BNC to composite video
terminal
* One install disc
* One rapid install manual
Page 7

IP SERVER 9310 USER MANUAL
- 6 -
Minimum System Requirements
Minimum Intel Pentium II 600MHz/compatible AMD pr ocessor
WINDOWS operating system (IE6.0+SP1)
Minimum 64MB RAM
VGA Card: with capability of displaying full-Colors and DirectDraw su pport
Network card with RJ45 port
Ethernet Hub / Router
Internet network (Ethernet, ADSL or other ways, dep ends on whether you need
far end control ability or not)
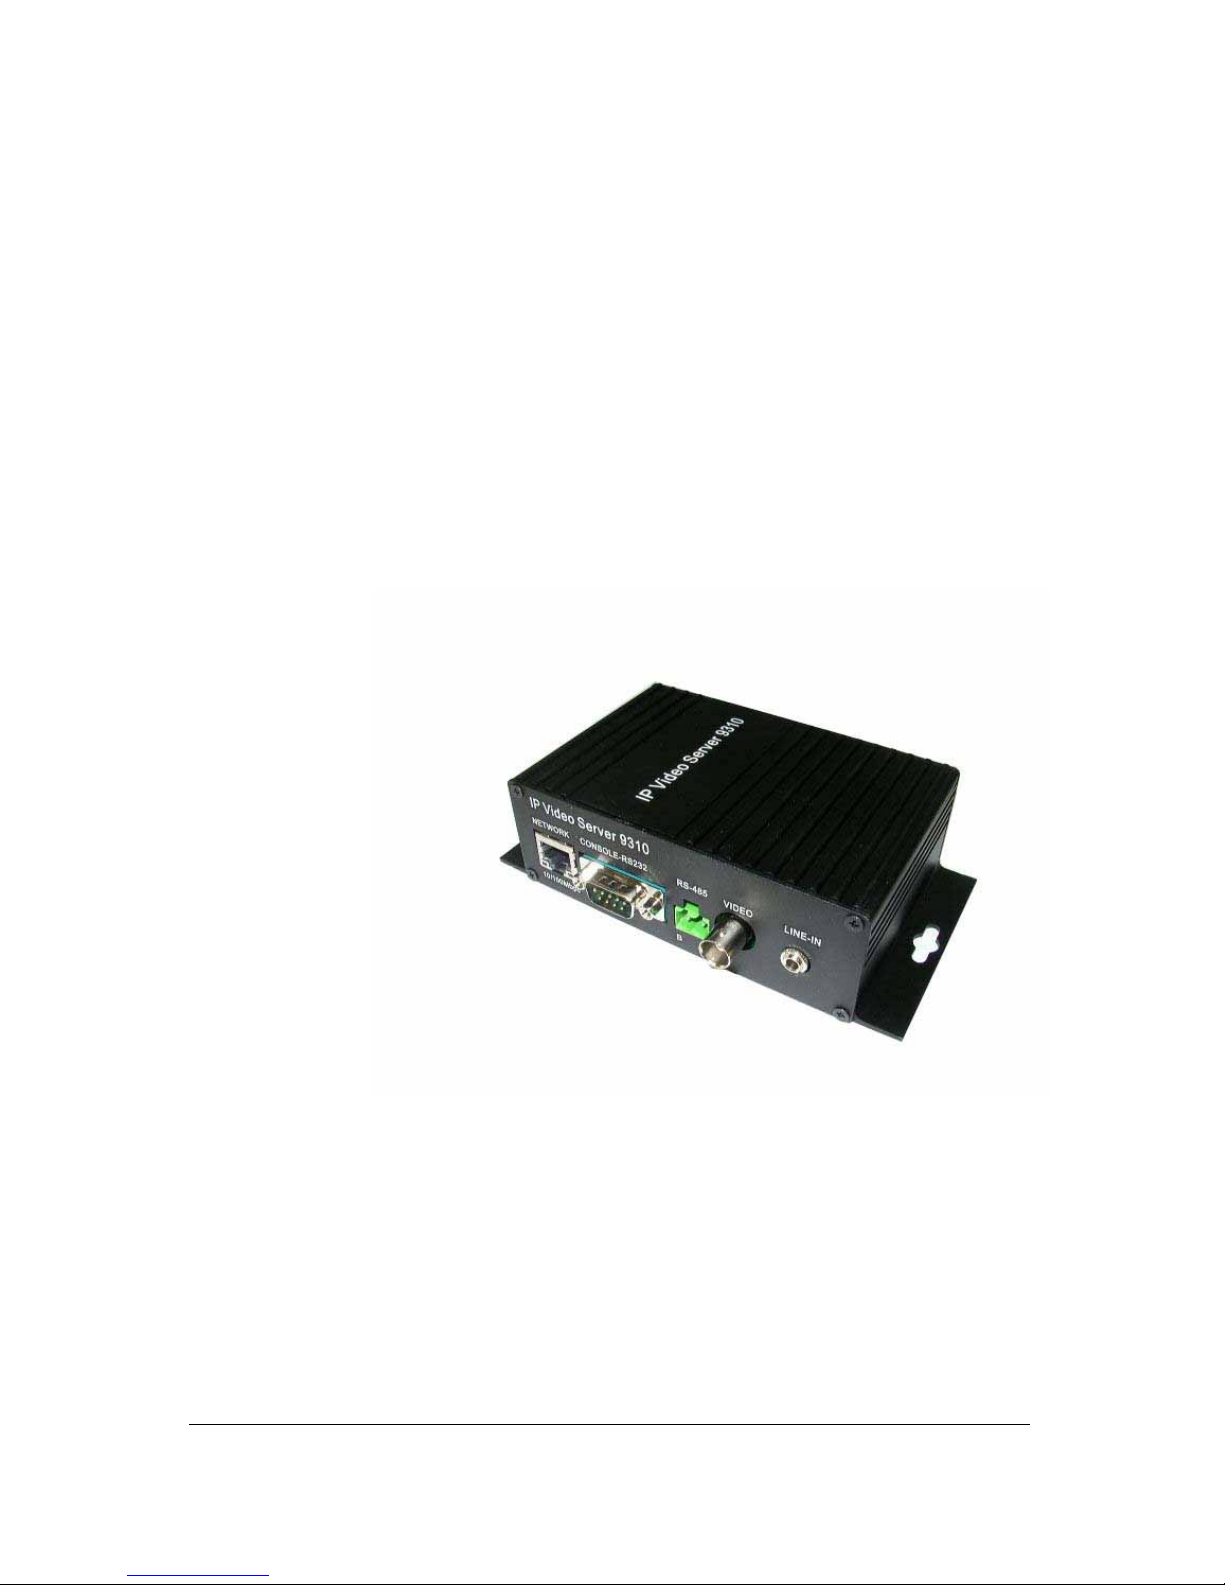
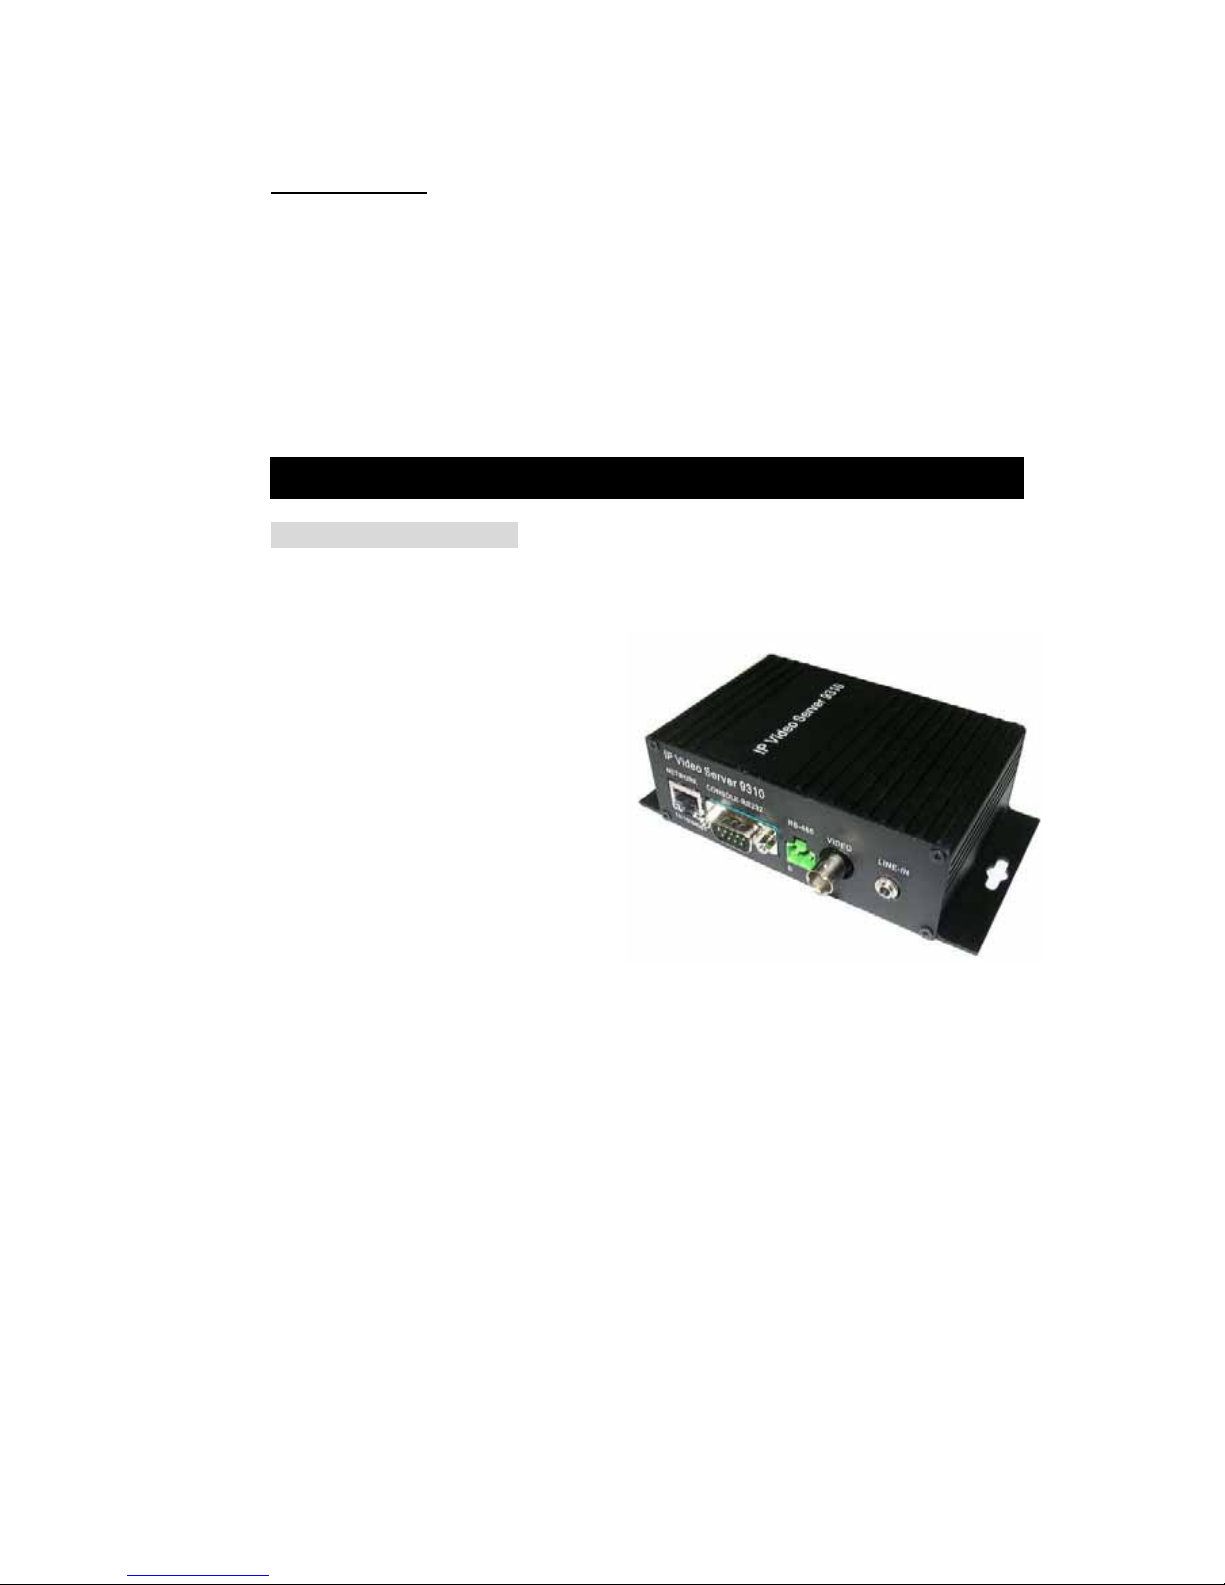
3. Interface Description
The front panel of 9310 :( from left to right)
1. RJ45 network port
2. RS-232 port
3. PTZ control(RS-485) port
4. video input interface
5. audio input interfac e
The rear panel of 9310 :( from left to right)
1. 6 way IO interface (4 way can use in current vision. you needs update the
firmware in the future for full function)
2. Power input interface
3. Reset button: reset to the default value.
Page 8

IP SERVER 9310 USER MANUAL
- 7 -
4. Hardware & Software installation
Before you star to use IP SERVER 9310, please follow the step s below:
Check the package to make sure the co ntents i s complete.
Prepare one Ethernet HUB, or Router
Check the voltage of the power supply to ma ke sure it is AC 11 0-240 volt
Hardware installation
1 Connect the 9310 to HUB through network wire
2 Connect the video and audio source to 9310.
3 Connect the HUB to the Internet (May through ADSL/XDSL modem).
4. Connect the power adapter to the 9310.
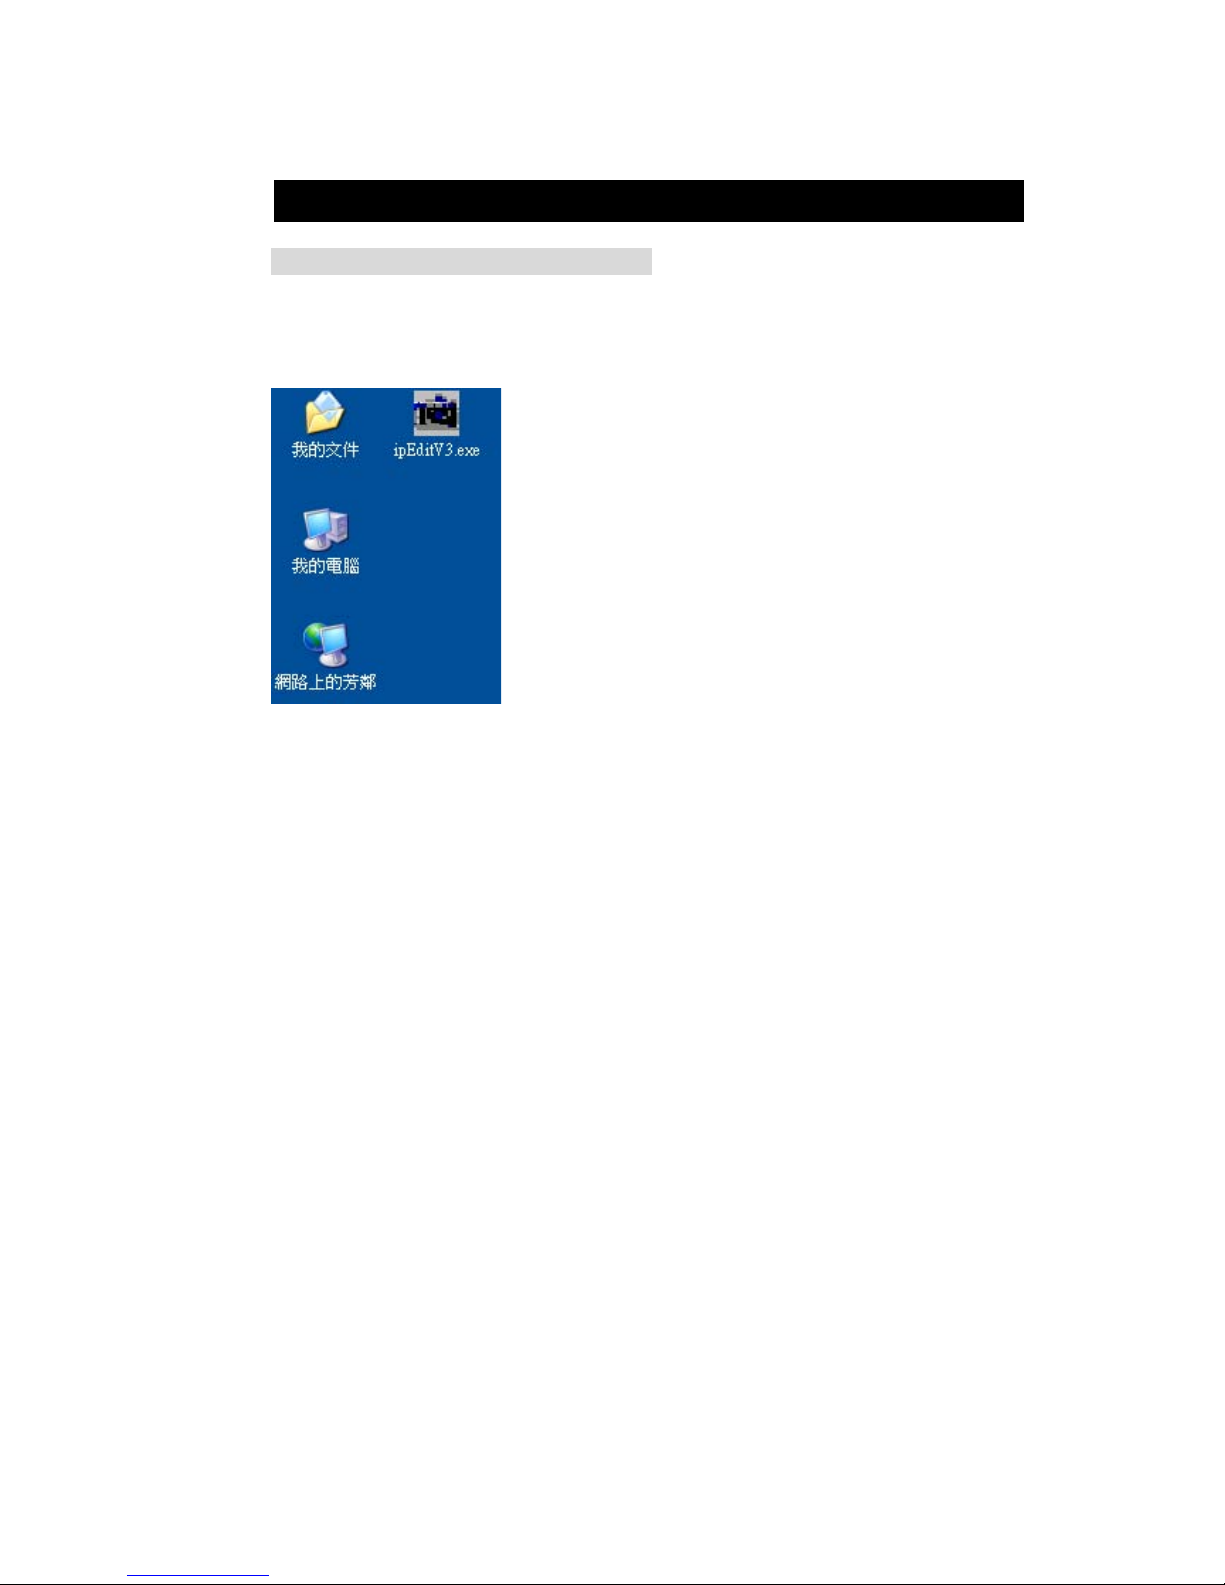
Software Installation
Copy the IPEDIT from the install disc to the desktop, then the software installation is
done. You can begin to set the 9310 after finish i nstalling the d river.
Page 9
IP SERVER 9310 USER MANUAL
- 8 -
5. Initial Settings
Initial settings through the Ethernet
Please make sure that the 9310 is power on and ha s been conne cted to the Ethe rnet,
and the PC installed ipEdit.exe is in the same network. Double cli ck the ipEdit.exe in
the desktop.
2. The software will search the 9310 in the same Ethernet and display the search
results in the window.
Page 10
IP SERVER 9310 USER MANUAL
- 9 -
.
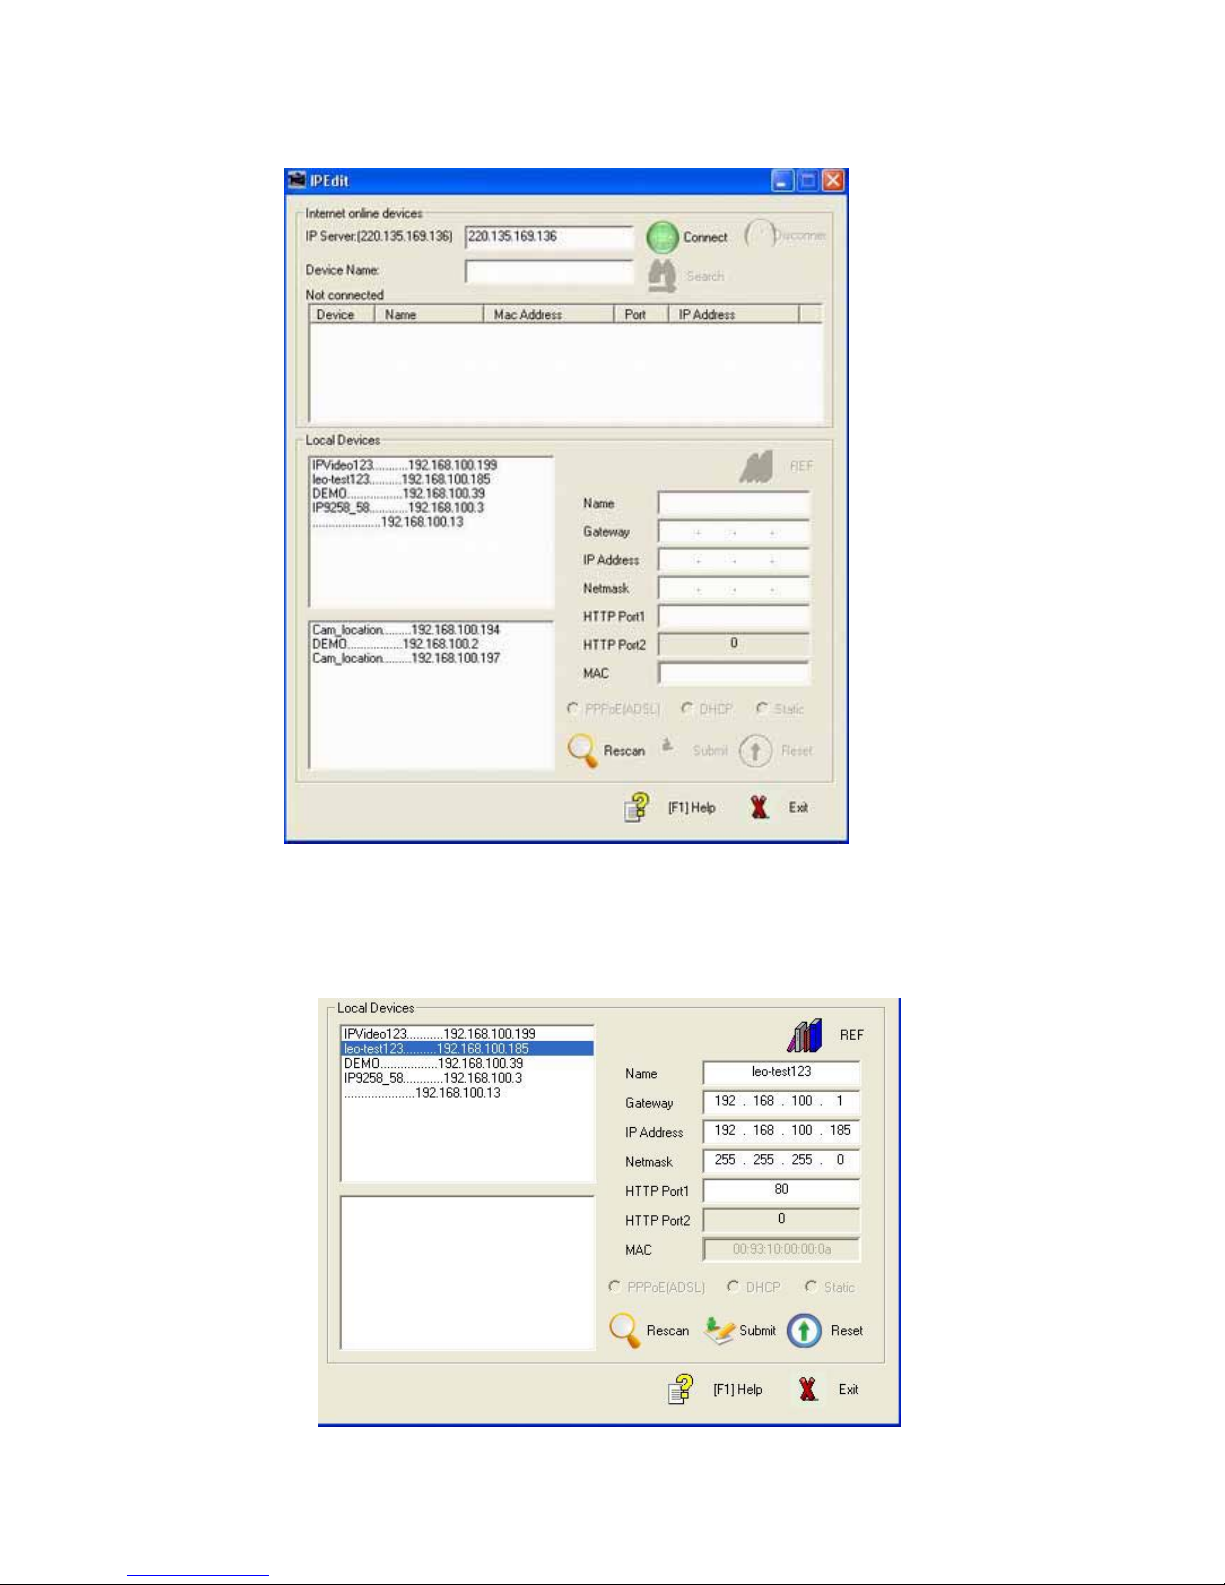
3. Click the equipment you want to edit, its name will turn dark and its name and IP
address will display in the little window below. You can rename (please use numbers
and letters only), set the IP address and subnet mask (plea se set it in the same
network as the pc you want to connect to). Click submit button when finish setting, the
new setting will work in 20 seconds. Click th e search button a gain and the software
will search the 9xxx equipments in the same network.
Page 11
IP SERVER 9310 USER MANUAL
- 10 -
IPEDIT will search the 9xxx series equipments in the same network such as 9310. If
you pc has installed a firewall software, please configure it to allow the IPEDIT visit the
network first.
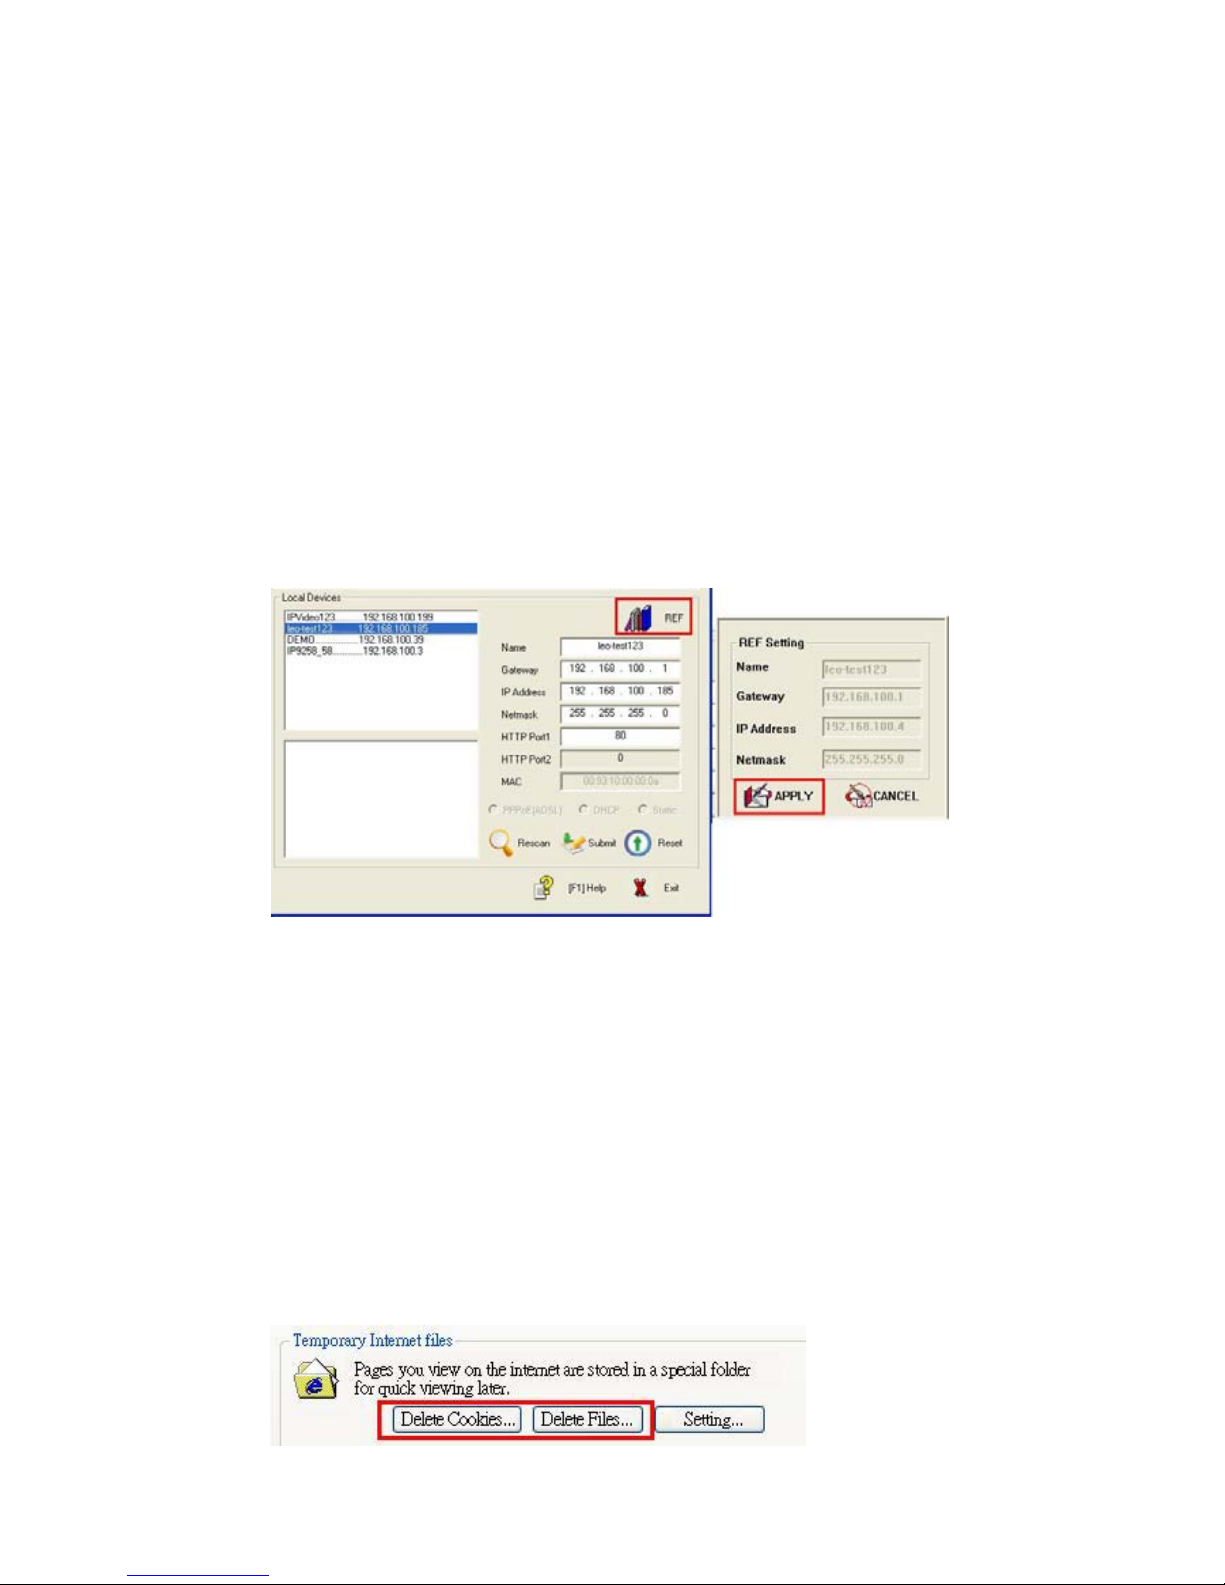
1. Click the IP of 9310, it will turn dark and its name, IP, gateway, subnet mask will
display in the right window. You must configure the IP of PC in the LAN to be i n the
same subnet so that you can open the IE interf ace. The IP of 93 10 is 192.168.1.12 6 in
the figure above, so you should add a IP such as 192.168.1.xxx to your PC and
configure the 9310’s subnet mask, gateway as the same as you r PC.
2. You can change the name, IP address, subnet ma sk of 9310 in name column on
the right (please use number and letter). After finish setti ng, click submit button an d
wait for 20 seconds for the new settings to be come effect ive.
3. You also can click the REF button on the right upside of IPEDIT interface to obtain
the recommend settings by the software according to the local PC settings.
NOTICE:
1. Make sure the RJ45 network wire have been connected correctly and the
9310 are power on.
2. It can obtain the virtual IP address and open the IE interfa ce automatical ly
when you double click the IPEDIT.exe only if the Ethernet support DHCP. If
the Ethernet not support DHCP, 9310 will change its IP address to fixe d IP
address.
3. The default username and password of 9310 are:
Username: admin
NO Password
NOTICE: if you opened the webpage of 9310 an d have not any movement fo r a long
time, IE may remind you ‘cookie time out’, you may need to login again or g et into the
IE tool menu—Internet Option---Delete Cookie to delete the cookie before you carry
on any operation again.
Page 12

IP SERVER 9310 USER MANUAL
- 11 -
2. Search 9310 in INTERNET
After you finish setting a correct IP setting for 9310 and connect it to internet, 9310 will
send data to the preset IP server, report the IP address of 9310 (as the figure sho ws,
you need to open the IP server option and set the IP address of IP server properly).
Then you can run IPEDIT in any PC connected to the internet to submit a search
request to the IP server in order to obtain the IP address of 93 10. The default IP
address of IP server is 220.135.169.136, you can al so set up your own IP se rver.
NOTICE: the default IP server (220. 135.169.136) i s free and we DO NOT assume
any responsibility if the IP server doesn’t provide perfect servi ce because of
network abnormity.
Sometimes your ADSL may change its IP address for some special reasons, but the
9310 send the IP datagram once a while. So the IP serv er may display the old IP
address, you should wait for 3 minutes to use this function to obtai n the new IP agai n.
First step:
Fill the IP address of IP server in the IP server column, the default IP address is
220.135.169.136. Click the connect button. If connect to the IP server successfully,
the disconnect button will turn red.
Second step:
Input the key words for search in the device column (the key word s may be a part of
the 9310 name), click search button, the search result will di splay in the textbox
below.
Page 13

IP SERVER 9310 USER MANUAL
- 12 -
6. Webpage Function Introduce
After you have set the IP configuration of 9310 with IPEDIT, you can achieve all kinds
of settings of 9310 through IE. Click the corresp onding 9310 vide o directly in the
IPEDIT window you can open the IE login interface of 9310.
6. 1 Login settings
The default administrator ID is admin, no password, you can login using this default ID
without password. User can change the ID and passwor d of administrator i n the
setting webpage.
6. 2 Live View Settings
When enter the webpage you can see the window bel ow, click the play butto n on the
left upside of webpage you can see the input vid eo of 9310.
Page 14

IP SERVER 9310 USER MANUAL
- 13 -
Image Settings
There are four setting slides on the left of webpage which are used to set the image
parameters.
1. Brightness Control
Shift the slide’s position under the Brightness Control, the value on the right side will
change along with that, so you can set the brightne ss of image.
2. Contrast, Saturation and Hue Control
The setting of contrast, saturation and hue are in simila r to the brightne ss setting, just
move the corresponding slide position.
Page 15

IP SERVER 9310 USER MANUAL
- 14 -
PTZ Control
User can control the movement of special CCTV camera through the RS485 i nterface
of 9310.
Clicking the direction button in PTZ control area u nder the image settin g area, user
can control the movement of camera. Click th e stop button in the mid dle of PTZ control
user can stop the movement of camera.
NOTICE:
Please use the model provided by us or our dealer, the other b rand or model may n ot
control properly. Please do NOT adjust the digital toggle switch avoid causing the
control problem. The movement of the camera has some delay b ecause of the
network delay, so user should adjust the movement of ca mera softly to avoid exceed
the range.
Model A : CNB PTD302N KC1 B: BU-4004
Controlled by 9310
Signal System
NTSC / PAL NTSC/PAL
Image Sensor
1/3 “ Sony CCD 1/3 “ Sony CCD
Effective Pixels
410K / 470K 410K
Video S/N Ratio
Morn than 48dB 30dB
Horizontal Resolution
480 TV Lines 480 TV Lines
Lens
Fixed Lens ( f= 3.8mm) Fixed Lens ( f= 8mm)
Lens Angel of View
88
42°
Digital Zoom
3x X
Digital Pan / Tilt
9”& 7”( at digital zoom 1.5x) X
Page 16

IP SERVER 9310 USER MANUAL
- 15 -
Panning Travel
Max 320° Max 360°
Tilting Travel
Max 90° Max 90°
Panning Speed
50°/sec 40°/sec
Tilting Speed
40°/sec 30°/sec
Interface
RS-485 RS-485
Temperature
-10°C ~ 50°C -10°C ~ 50°C
Input Voltage
12V DC 500m/A 12V DC / 24V AC
Dimension
107(D) x 110.5(H) 100(D)*110.5 ( H)
Weight
350g 350g
Real time Video play, stop and stop snap function
Click the play or stop button, you can realize the real time play or stop receive image.
When user are using the other function of PC, you can sto p transfer vide o first to lowe r
the load of cpu and convenient for operation.
You can record AV format video file defined by 9310 using RecAV fu nction, you can
also record standard AVI format video file using RecAVI function. The RecAV button
will turn bright orange when recording, the Status on the right will become bright
orange too. User can click the RecAV button to stop recordin g and back to rea l time
playing video state or user can click the st op button to stop al l video transf er.
User can use Snap Shot to snap single picture. Z oom out and Zoom i n button are
used to adjust the image size.
6. 3 Play the Recorded Video
Click the return menu button on the left upside of the webpage, the figu re below will
appear on the left side.
Page 17

IP SERVER 9310 USER MANUAL
- 16 -
Play the Recorded Video
Click the REC View button on the left upside, a new we bpage as the fig ure below
shows will appear. User can find the video f ile you want to play on the browser column
on the upside of the webpage (AV format video file recorded by 9310 o nly). Click the
play button to start playing.
You can use Windows Media Player to play the AVI video files recorded by 9310.
With the other button, you can perform such function s as stop, pause, fast forwa rd and
fast reverse, snap picture, adjust image size.
Video Format Transform
Click the transform button under the AV to AVI, user can transform the selected AV
format video files recorded by 9310 to the standard AVI format which can be accepted
by other video player.
Page 18

IP SERVER 9310 USER MANUAL
- 17 -
6. 4 Basic Configuration
Click the Basic configuration button, the webpage will change as the figure below
shows:
Status Report
Click the STATUS button, a webp age will pop up to report the stat us of 9310, in cluding
the version of firmware, IP parameters and OCX paramet er of activeX control et c.
User Management
Click the Administrator button on the left si de, the user management webpage will pop
up. In this webpage you can add or remove user, change the login password.
Users are divided into 2 kinds: administrat ors and normal users. The admini strators
can manage user can change the video paramete rs, but ordinary user only can watch
the video.
Page 19

IP SERVER 9310 USER MANUAL
- 18 -
1. Remove user:Select a user and cli ck Remov e button can remove thi s user.
2. Add user:Use the Add button, a new area will appear in the webpage as the
figure below shows. After filling in the new name, password, user group and click Add
button, you can add a new user.
3. Anonymous User Settings:
If you select Yes in the option in the figure above, than means yo u allow the use r to
login without user name and password. At the same time you can set the maxim um
number of simultaneous users
4. Camera Name Setting:
You can set the name of your equipment in the Camera Name col umn in order to t he
search service
NOTICE:
Page 20

IP SERVER 9310 USER MANUAL
- 19 -
1. We suggest you do not allow too many simultaneous users which means the
system source maybe mainly occupied by irrel evant users.
2. We suggest you change the user’s password once you begin to use 9310.
3. We suggest you set a particular name for your 9310 if you use the IP se rver
function at the same time, in order to be convenient for searching.
4. After finishing the settings, you should click the Save button to save those settings.
Then click Reset button to restart the equipment and let the new settings in work.
Change password
You can click the Change Pass word option on the left sid e, change one user’ s
password directly.
Networking setting
Click the networking option you can ent er the networking setting webpa ge.
1. Obtain IP Address via DHCP
Page 21

IP SERVER 9310 USER MANUAL
- 20 -
If you are not sure that whether there is a DHCP server i n your network but you reall y
need to use DHCP service, we suggest you use fixed IP for convenie nce in
communication between multiple equipments.
2.Use Fixed IP
The IP address of 9310 should be in the same subnet with the P C you want to visit
9310 in the LAN. For example, IP address of the P C you plan to visit th e video of 9310
is 192.168.10.155, so the IP address of 9310 sh ould be set to 19 2.168.10.x(x=1~ 254,
and can not be the same with the exits IP address).
Subnet mask: same as the PC in the LAN
Route: viz. the default gateway preset in PC. The default gateway when facto ry is
192.168.0.254. if you want the PC in the internet can visit your 9310 i n the LAN via the
router or the gateway of the LAN, please fill the IP of router in this column.
3. DNS Configuration
If you want your 9310 can visit the internet, you need to set the DNS IP properly,
please ask your ISP for DNS setting.
4. HTTP Port Configuration
The port of HTTP is 80 usually. If your IP configuration needs to use other port, you
can fill the new port number here.
5. MAC Configuration:
You can change the MAC address to 9310 as your need, please fill it in the following
field.
NOTICE:
Page 22

IP SERVER 9310 USER MANUAL
- 21 -
After finishing above configurations, you should click the Save button to save those
configurations and click the Reset button to restart th e equipment in orde r to start the
new configurations.
PPPOE Configuration
If you want your 9310 to dial and connect to the internet automatically, you need to
finish the PPPoE configuration. Click the PPPOE option and you can enter the PPPoE
configuration webpage.
1. Enable PPPoE :
Select Yes in the position as the figure bellow shows you can enable the PPPOE dial
function.
2. Input user’s name and password for PPPOE:
Please ask your ISP for the user’s name and password of PPPOE (viz. the user’s
name and password of ADSL) and fill that in the positio n as the figure bello w shows. If
you want 9310 to email the internet IP obtained by PPPOE to your preset mailbox,
please select Yes in email noti fication when IP is changed option.
NOTICE:
After finishing above configurations, you should click the Save button to save those
configurations and click the Reset button to restart th e equipment in orde r to start the
new configurations.
You should fill in the email setting correctly so that 9310 can email the IP address
obtained after dial-up to your preset mailbox. Please refer to the email configu ration in
advance setting on page 29.
3. Check the Status of PPPOE:
Page 23

IP SERVER 9310 USER MANUAL
- 22 -
The status of PPPOE is displayed on the bottom of the webpage and you can check
the status of PPPOE. The parameters will refresh when you click the Refresh button.
Date & Time Settings
Click the DATE&TIME option as the figure bellow shows you can enter the Date &
Time Settings webpage.
1. Time Zone settings
Click on the drag down arrow in the Time Zone fiel d and select you r time zone in th e
menu.
Page 24

IP SERVER 9310 USER MANUAL
- 23 -
2. NTP Server settings:
If you want to adjust the time of 9310 with NTP server, please fill the address of NTP
servers.
3. Update Server Time:
You can choose to update server time via the NTP server, or input th e time manually
then click the Update button to finish the update.
NOTICE:
After finishing above configurations, you should click the Save button to save those
configurations and click the Reset button to restart th e equipment in orde r to start the
new configurations.
Video Settings
Click the video option you can enter the video settin gs webpage.
1. Network Traffic Control:
You can adjust the video settings according to the netwo rk traffic.
Page 25

IP SERVER 9310 USER MANUAL
- 24 -
If you are not able to adjust the frame rate, internet speed and CB R etc according to
the network situation automatically, please enable the auto mode, 9310 will set that
parameter for you automatically.
If you disable the auto mode, 9310 will set the video transfer sp eed as following:
Tune: Adjust according to the Frame rate or QP (Quality of Picture)
Internet Speed: choose according to the speed you apply for y our ISP.
Low: lower than 56Kbps. Medium: 56K~ 2Mbps.
High: 2Mbps~ infinity
CBR: Constant Bit Rate - Disable, 128K~3Mbps
2. Resolution and Compression rate se ttings:
You can set the resolution and compression rate i n the drag-do wn menu.
Supported Resolution:
*D1 -30fps (NTSC) 720X480
-25fps (PAL) 720X576
*CIF -30fps (NTSC) 352X240
-25fps (PAL) 352X288
*QCIF -30fps (NTSC) 352X24 0
-25fps (PAL) 352X288
*FIELD -30fps (NTSC) 720X240
-25fps (PAL) 720X288
Compression: 4~16. (High image quality ~ low image quality)
Notice: When the compression rate is hi gh, the compressed video file is small
but with low image quality.
3. Video MPEG setting:
You can set the MPEG parameter of video in the field as the figure belo w shows.
Page 26

IP SERVER 9310 USER MANUAL
- 25 -
This area is only for professional MPEG-4 users; please refer to related MPEG-4
information for details. We suggest ordinary user use the defa ult values. (User
can back off to the default value by clicking the Defa ult button).
4. Client Motion Detection Setting:
You can choose whether enable the client motion detection and set the motion
detection parameter in this area.
5. 9310 Motion Detection Setting:
You can choose whether enable the motion det ection in 931 0 and set the m otion
detection parameter in this area.
6. Image Snap Shot Setting:
You can choose the path that the snapped images will be save d to, whether put a time
label on the snapped images and the label col or.
7. OSD Setting:
You can choose whether enable the OSD on the video played by 9310 and the
content, position, color, font size of OSD.
8. Video Recording Setting:
Page 27

IP SERVER 9310 USER MANUAL
- 26 -
You can choose the directory that the record file wi ll be saved to, the re cord duration
time, whether enable the record time label and the l abel color in this area.
NOTICE:
After finishing above configurations, you should click the Save button to save those
configurations and click the Reset button to restart th e equipment in orde r to start the
new configurations.
Audio Settings
Click the audio option in the following figure, you can ent er the audio setting men u,
you can set the compression parameter here.
If you can not hear any sound in the PC after conne cted properly , please try to
switch to A-Law in Data Format option.
NOTICE:
After finishing above configurations, you should click the Save button to save those
configurations and click the Reset button to restart th e equipment in orde r to start the
new configurations.
Log Settings
Clicking the log option in the following figure, you can enter th e log setting menu. You
can check the working status, save mode and flas h write time here.
Page 28

IP SERVER 9310 USER MANUAL
- 27 -
6. 5 Advance Configuration
Click the advance configuration option you can enter the advan ce configuration menu .
Maintenance Function
Click the maintenance option you can enter the m aintenance we bpage, you ca n
restart, get back to original factory settings and update th e firmware here.
Page 29

IP SERVER 9310 USER MANUAL
- 28 -
1. Restart:
Click the Restart button,9310 will restart automatically.
2.Restore:
Click the Restore button, 9310 will reset all parameters in MPEG option, except the IP
parameters, to the original factory settings.
3.Default:
Click the default button, 9310 will reset all parameters to the original factory settin gs.
4.Firmware Update:
You can upgrade 9310 with the latest firmwa re to gain more ne w functions. First you
need to download the new firmware from o ur company’ s website or from you r dealer
and save it to your PC. Then you can use the browse button to locate t he new
firmware file and click Upgrade button to updat e it. The update p rocess needs about 1
to 10 minutes, and then restarts the equipment to fi nish the upg rade procedure.
NOTICE:
The firmware upgrade has risks, this opera tion may cause y ou lose the quality
guarantee of your equipment. Please do not op erate the upg rade throug h
internet and we suggest you do it in LAN because of the possibility of losing
date. If there is a power failure while running upgrade procedure, it will cause
Page 30

IP SERVER 9310 USER MANUAL
- 29 -
serious damages to your equipment. So we suggest you DO NOT try firm ware
update in a hurry.
Dynamic DNS Setting
Click the DDNS option and you can enter the dynamic DNS setting webpa ge. You can
perform the internet IP obtain function.
When you use 9310 connect to the internet through the method such as ADSL, the IP
address obtained by 9310 is dynamic distribute by your ISP. So the visitor may not be
able to visit 9310 because he does not know the IP address of 93 10. We use the
dynamic DNS (DDNS) service provided by www.DynDNS .org
to solve this problem.
First we apply a domain name (for example: 9310.homel inux.com), then we input th e
use name, password, domain name, IP address of proxy server in t he DDNS
webpage of 9310.(in some place we can not visit the www.DynDNS.org
directly. We
need to find a proxy server to solve this problem, such as 210.0.212.9 8). Then click
submit button to confirm above settings.
After this, every time after 9310 dial up to the internet, 9310 will send a datagram
including its current IP address and domain name to www.DynDNS.org
.
www.DynDNS.org
will link the current IP address of 9310 to its domain name. so that
the visitor can visit the 9310 through type the domain name of 9310
(9310.homelinux.com) in the address field of IE browser.
Before using the DDNS function, you need to finish the following operations:
1 Go to the following website http://www.dyndns.org to regist er a set of user a ccount
Page 31

IP SERVER 9310 USER MANUAL
- 30 -
and user domain name.
2. Fill the account, password, domain name you applied in the propel field.
3. After confirm the settings, you can click the Save and Reset button to finish the
setting.
SMTP Setting
9310 can obtain internet IP address via e-mail, can rep ort its IP address after power on
via e-mail, can send the snapped images to preset mailbox wh en the motion dete ction
is trigged or on the preset time.
You can set two sets of send and receive mailboxes, using the first set usually. Use
the second set mailbox when the first set is not work properly.
1. Mailbox Setttings;
We take the first set of mailbox for example, in the following settings we set the e-mail
send from aviosys@126.com
and receive by aviosys@163.com. We choose it need
the user name and password when sending e-mail ( the user name and passwo rd of
aviosys@126.com).
2. if you want the 9310 sent email when motion detection is trigg ed, select this opti on
as the figure bellow shows.
NOTICE:
Page 32

IP SERVER 9310 USER MANUAL
- 31 -
After finishing above configurations, you should click the Save button to save those
configurations and click the Reset button to restart th e equipment in orde r to start the
new configurations.
If the address of mail server you input is IP address, you need to i nput the correct IP
address of DNS server, otherwise it will not work normally.
FTP Setting
Click the FTP option in the left side you can enter th e ftp settings webpa ge. You can
perform the function of save the snapped images or reco rded video files to F TP server
here.
For example, we use the port 21 of www.aviosys.com
to setup an ftp server. The
directory 9310 under the root directory of ftp server is u sed to store the i mages and
video files of 9310. User name is 9310test and password is xxxxx. So you should fill
in the settings as the following figure shows.
NOTICE:
After finishing above configurations, you should click the Save button to save those
configurations and click the Reset button to restart th e equipment in orde r to start the
new configurations.
Page 33

IP SERVER 9310 USER MANUAL
- 32 -
GPIO Settings
Click the GPIO option and you can enter the GPI O settings webpage to set the GPIO
output voltage level control.
*We can provide 4 DO currently but we will provide ot her 2 DI in the future, please
pay attention to our website.
Please refer to the following connection guide. Th e red presents the positive pol e while
the black presents the negative pole.
Page 34

IP SERVER 9310 USER MANUAL
- 33 -
IP SERVER Settings
Click the IP SERVER option you can enter the IP server setting s webpage. You can
obtain the IP address of your 9310 through the free IP server provide d by our
company.
Sometimes user can not obtain the internet IP of their 9310 which is dial up to the
internet. The DDNS service sometimes d oes not work normally. At this moment you
can search the name of your 9310 to know its intern et IP address throug h the IP
server provided by our company for free.
The IP address of the IP server provided by our company for free is 220.135.169.136 .
If you enable this function, 9310 will register it in IP se rver automati cally after it
connected to the Internet. User can use the IPEDIT software to connected to IP server
220.135.169.136 and easily obtain the IP address of yo ur 9310 by typing in the na me
of your 9310 and clicking the search button. Please refe r to P11.
Page 35

IP SERVER 9310 USER MANUAL
- 34 -
Snap Shot Schedule
Click the SNAPSHOT SCHEDULE option you can enter the snapshot schedule
setting webpage.
1. Time to snap shot
you can choose snap shot everyday or snap shot on a weekday.
2. Interval to snap shot
As the following figure shows 9310 will snap shot every 10 minutes.
3. Work Time
As the following figure shows the snap shot take place du ring 17:30 to 08:30 i n the
next day.(this option will work only if the snap shot option is selected)
4. Snap Shot Save Type
You can choose to send the snap shot image throu gh email or upload to FTP
server.( this option will work only if the FTP and Email opt ion have been properly
configured)
NOTICE:
Click the save button to save your settings after you finish configuration.
Page 36

IP SERVER 9310 USER MANUAL
- 35 -
7. F AQ
Q1: I forgot the password and can not enter the administration page now, what
can I do?
A1: Turn on the power normally, and then press the reset button in the rear panel of
9310 for 10 seconds at least; it will back to the default settings.
The default IP address is: 192.168.1.126,
User name: admin,
no password.
Q2: I cannot open the IE web page, why?
A2: Please update your IE to version 6.0.
Q3: why the video recording ca n not stop immediately ?
A3: if your 9310 obtain its IP address through DHCP server, the video recording will
stop immediately. But if 9310 use fixed IP address or obtain its IP through PPPOE
method, you need to wait for about one second.
 Loading...