

AVer IFI5OPS4I Installation Manual
AVer CP Series OPS Installation Guide Page 1
AVer OPS Computer for the CP Series IFP
Installation Guide
Thank you for purchasing the AVer OPS Computer. Please use the installation guide
below to guide the installation.
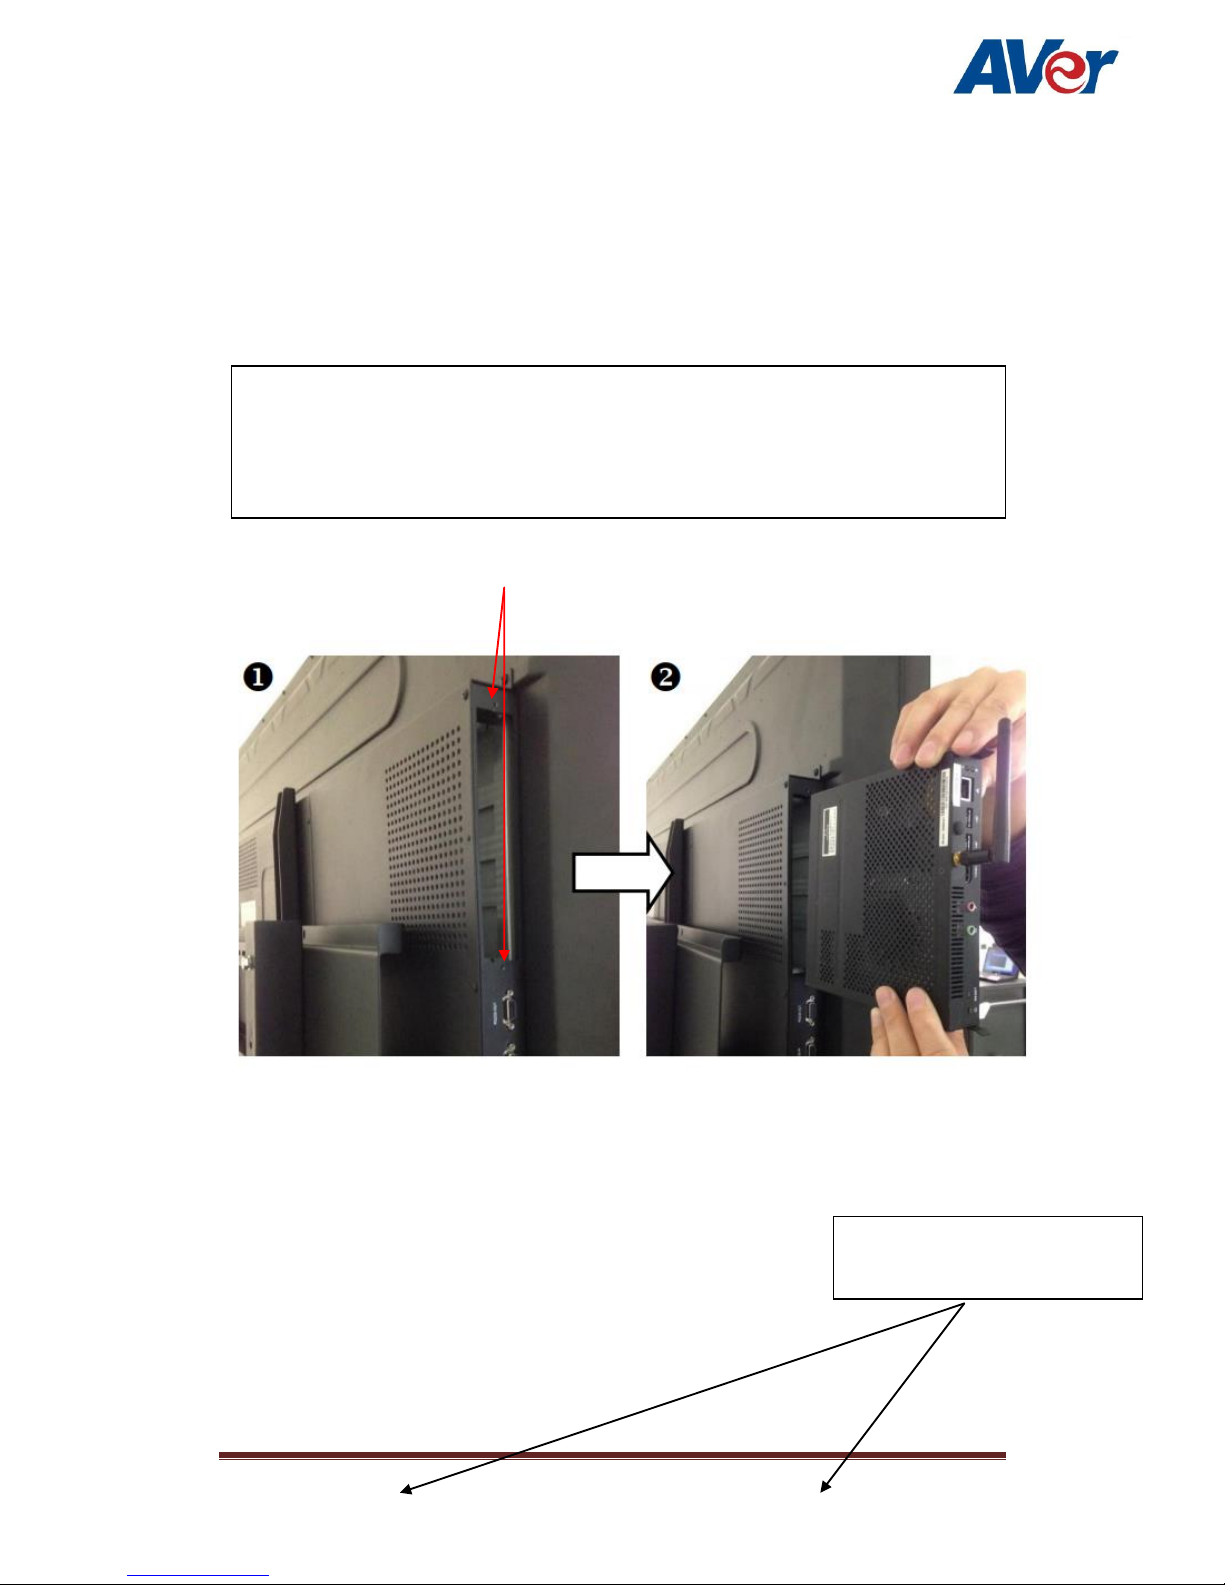
1. Please power off the AVer IFP completely.
2. Remove the OPS slot cover by removing the 2 screws as shown below
3. Slide in the OPS computer as shown in the picture (Top right)
4. The side with the fan should face outwards.
5. Now make sure the screws are tightened.
Make sure both screws are
tighten
Important! The OPS computer does not support hot-swappable operation
(replacing or adding the OPS to the IFP without shutting down the IFP complete).
Simply plugging in or unplugging the OPS from the IFP while it is in operation
may damage the OPS computer or the IFP.
AVer CP Series OPS Installation Guide Page 2
6. You can now turn on the IFP system power.
7. Switch to the OPS source and the OPS will automatically power on.
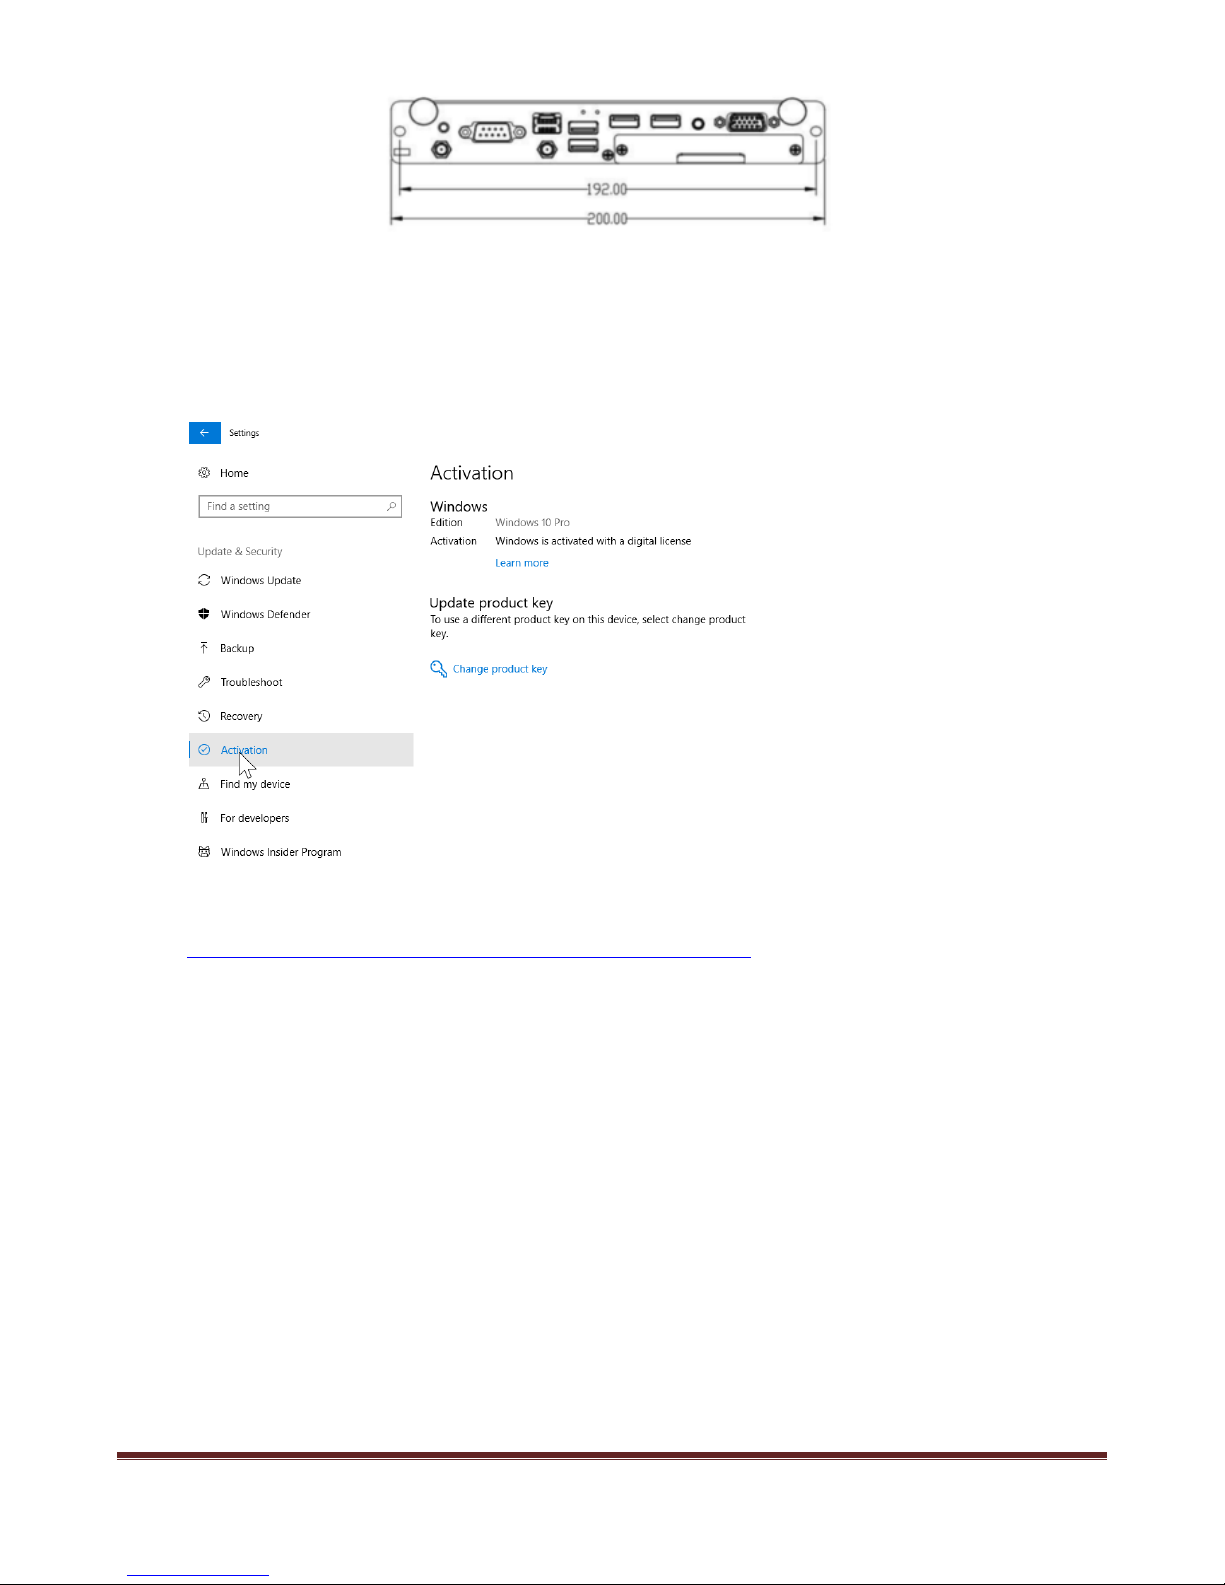
8. You would now need to activate the windows 10 OS pre-installed on the system.
9. Launch the Windows setup screen and navigate to the “Update & Security” section.
10. Click on “Activation” and select the option under “Update product key”.
11. Once windows is activated, please launch internet explorer and go to:
https://www.microsoft.com/en-us/software-download/windows10
12. Click on “Update now” and run the “Windows10Upgrade.exe” application and follow the on screen
instructions. Please be patient as the upgrade process may take up to an hour or more.
 Loading...