

Avaya Remote Supervisor Adapter User Manual

The Avaya Remote Supervisor Adapter
User’s Guide
(for use with Avaya S8500 Media Server)
555-245-702
Issue 3
June 2004

Copyright 2004, Avaya Inc.
All Rights Reserved
Notice
Every effort was made to ensure that the information in this document was
complete and accurate at the time of printing. However, information is
subject to change.
Warranty
Avaya Inc. provides a limited warranty on this product. Refer to your sales
agreement to esta blish the terms of the limit ed w a rranty. In addition,
Avaya’s standard warranty language as well as information r eg ardi ng
support for this product, while under warranty, is available through the
following Web site: http://www.avaya.com/suppo rt
.
Preventing Toll Fraud
“Toll fraud” is the unauthorized use of your telecommunications system by
an unauthorized party (for example, a person who is not a corpora te
employee, agent, subcontractor, or is not working on your co mpany's
behalf). Be aware that there may be a risk of toll fraud associated with your
system and that, if toll frau d o ccur s , it c an result in substantial add itional
charges for your telecommunications services.
Avaya Fraud Intervention
If you suspect that you are being victimiz e d by toll fraud and you need
technical assistance or support, in the United States and Canada, call the
Technical Service Center's Toll Fraud Intervention Hotline at
1-800-643-2353.
Disclaimer
Avaya is not responsible for any modifications, additions or deletions to the
original published version of th is doc umentation unless such
modifications, additi ons or de le tions were performed by Avaya. Customer
and/or End User agree to indemnify and hold harmless Avaya, Avaya's
agents, servant s and employees against all claims, la w s uits, demands and
judgments arising out of, or in connection with, subsequent modifications,
additions or deletions to this doc umentation to the extent made by the
Customer or End User.
How to Get Help
For additional support telephone num be rs , go to the Avaya support Web
site: http://www.avaya.com/support
. If you are:
• Within the United States, click the Escalation Management link.
Then click the approp ria t e li nk for the type of support you need.
• Outside the Unit ed States, click the Escalation Management link.
Then click the International Services link that includes telephone
numbers for the internationa l Centers of Excellence.
Providing Telecommunications Security
Telecommunications security (of voice, data, and/ or vide o
communications) is the prevention of any type of intrusion to (that is, either
unauthorized or malicious access to or use of) your company’ s
telecommunications equipment by some party.
Y our company's “telecommunications equipment” includes both this Avaya
product and any other voice/data/ vide o e quipment that could be accessed
via this Avaya product (that is, “networked equipment” ) .
An “outside party” is anyone who is not a corporate em pl oye e, ag en t,
subcontractor, or is not working on your company's beha lf. Whereas, a
“malicious party” is anyone (includ ing someone who may be otherwise
authorized) who accesses your telecommunications equipment with either
malicious or mischievous intent.
Such intrusions may be either to/through synchronous (time-multiplexed
and/or circuit-based), or asynchronous (character-, message-, or packetbased) equipment, or interfaces for reasons of:
• Utilization (of capabilities special to the accessed equipment)
• Theft (such as, of intellec t ual property, financial assets, or toll
facility access)
• Eavesdropping (privacy invasions to humans)
• Mischief (troubling, but apparently innocuous, tampering)
• Harm (such as harmful tampering , da ta loss or alteration,
regardless of motive or intent)
Be aware that there may be a risk of unauthorized intrusions associated
with your system and/or its networked equipment. Also realize that, if such
an intrusion should occur, it could result in a variety of losses to your
company (including but not limite d to, human/data privacy, intellectual
property, material assets, financial resource s, la bor co sts, and/or legal
costs).
Responsibility for Your Company’s Telecommunications Security
The final responsibility for se cu ri ng bot h this system and its networked
equipment rests with you - Avaya’s customer system administrator, your
telecommunications peers, and your managers. Base the fulfillment of your
responsibility on acquired knowle dge an d resou rce s f ro m a varie ty of
sources including but not li mited to:
• Installation docu ments
• System administration documents
• Security documents
• Hardware-/so ft w ar e-based security tools
• Shared information between you and your peers
• Telecommunications security experts
To prevent intrusions to your telecommunications equipment, you and your
peers should carefully program and configur e :
• Your Avaya-provided telecommunications systems and their
interfaces
• Your Avaya-provided software applications, as well as their
underlying hardw ar e/software platforms and interfaces
• Any other equipment networked to your Avaya products
TCP/IP Facilities
Customers may experien ce differe n c e s in pr oduc t pe r f or ma nce, reliability
and security depending upon network confi gur a tions/design and
topologies, even when the product performs as warranted.
Standards Compliance
Avaya Inc. is not responsible for any radio or television interference caused
by unauthorized modification s of this e quipment or the substitution or
attachment of connecting cables and equipment other than those specified
by Avaya Inc. The correction of interference caused by such unauthorized
modifications, substitution or attachment will be the responsibility of the
user. Pursuant to Part 15 of the Federal Communicati ons Commission
(FCC) Rules, the user is cautione d tha t c ha nges or modifications not
expressly approved by Avaya Inc. could void the user’s authority to operate
this equipment.
Product Safety Standards
This product complies w ith and conforms to the follow ing international
Product Safety standards as applicable:
Safety of Information Technology Equipment, IEC 60950, 3rd Edit ion, or
IEC 60950-1, 1st Edition, including all relevant national deviations as
listed in Complianc e wi th I E C for Electrical Equipment (IECEE) CB- 96A.
Safety of Information Technology Equipment, CAN/CSA-C22.2
No. 60950-00 / UL 60950, 3rd Edition, or CAN/CSA-C22.2 No.
60950-1-03 / UL 60950-1.
Safety Requirements for Customer Equipment, ACA Technical Standard
(TS) 001 - 1997.
One or more of the following Mexican nati ona l sta n dards, as applicable:
NOM 001 SCFI 1993, NOM SCFI 016 1993, NOM 019 SCFI 1998.
The equipment described in this docum ent may con ta in C la ss 1 LAS ER
Device(s). These devices comp l y with th e following standards:
• EN 60825-1, Edition 1. 1, 1998-01
• 21 CFR 1040.10 and CFR 1040.11.
The LASER devices used in Avaya equipment typically operate within the
following parameters:
Typical Center Wavelength Maximum Output Power
830 nm - 860 nm -1.5 dBm
1270 nm - 1360 nm -3.0 dBm
1540 nm - 1570 nm 5.0 dBm
Luokan 1 Laserlaite
Klass 1 Laser Apparat
Use of controls or adjustments or performance of procedures other than
those specified herein may result in hazardous radiation exposures. Contact
your Avaya representative for more laser product inform at ion.
Electromagnetic Compatibility (EM C ) Standards
This product complie s w ith and conforms to the follo w ing international
EMC standards and all relevan t national deviations:
Limits and Methods of Measurem ent of R ad io In te rf ere nc e of In fo rm a tion
Technology Equipment, CISPR 22:1997 and EN55022:1998.
Information Technology Equipment – Immunity Charact eristics – Limits
and Methods of Measurement, CIS PR 2 4:1997 and EN55024:1998,
including:
• Electrostatic Discharge (ESD) IEC 61 000-4-2
• Radiated Immunity IEC 61000-4-3
• Electrical Fast Transient IEC 61000-4-4
• Lightning Effects IEC 61000-4-5
• Conducted Immunity IE C 61000-4-6
• Mains Frequency Magnetic Field IEC 61000-4-8
• Voltage Dips and Variations IEC 61000-4-11
Power Line Emissions, IEC 61000-3-2: Electr omagnetic compatibility
(EMC) – Part 3-2: Limits – Limits for harmonic current emissi ons.
Power Line Emissions, IEC 61000-3-3: Electr omagnetic compatibility
(EMC) – Part 3-3: Limits – Limitation of voltage changes, voltage
fluctuations and flicker in public low-voltage supply systems.
Federal Communications Commission Statement
Part 15:
Note: This equipment has been tested and found to comply with the
limits for a Class A digital device, pursuant to Part 15 of the FCC
Rules. These limits are designed to provide reasonabl e protec tion
against harmful interference when the equipment is operated in a
commercial environment. This equipment generates, uses, and can
radiate radio freque ncy energy and, if not installed and used in
accordance with the instruction manual, may cause harmful
interference to radi o communi ca tions. Operation of this equipment in
a residential area is likely to cause harmful interference in which case
the user will be r equired to correct th e interference at his own ex pense.
Part 68: Answer-Supervision Signaling
Allowing this equipment to be operated in a manner that does not provide
proper answer-supervision signaling is in violation of Part 68 rules. This
equipment returns a nsw e r-supervision signals to the public switched
network when:
• answered by the called station,
• answered by the attendant, or
• routed to a recorde d an n ou ncement that can be administ ered by
the customer premises equipment (CPE) user.
This equipment returns answer-superv isi on signals on all direct inward
dialed (DID) calls forwar de d back to the public switched telephone
network. Permissible exceptions are:
• A call is unanswered.
• A busy tone is received.
• A reorder tone is receive d .
Avaya attests that this registered equipment is cap able of providing users
access to interstate providers of operator services through the use of access
codes. Modification of this equipment by call aggregators to block access
dialing codes is a violation of the Telephone Operator Consumers Act of
1990.
REN Number
For MCC1, SCC1, CMC1, G600, and G 650 M e d ia Gat eways:
This equipment complies with Part 68 of the FCC rules. On either the rear
or inside the front cover of this equipment is a label that contains, among
other information, the FCC registration number, and ringer equivalence
number (REN) for this equipment. If requested, this information must be
provided to the telephone comp an y.
For G350 and G700 Media Gateways:
This equipment complies with Part 68 of the FCC rules and the
requirements adopted by the ACTA. On the rear of this equipment is a label
that contains, among other information, a product identifier in the format
US:AAAEQ##TXXXX. The digits represented by ## are the ringer
equivalence number (REN) without a decimal point (for example , 03 is a
REN of 0.3). If requested, this number mu st be pro vide d to the telephone
company.
For all media gateways:
The REN is used to determine the quantity of de vic e s tha t may be
connected to the telephone line. Excessive RENs on the telephone line may
result in devices not ringing in response to an incoming call. In most, but
not all areas, the sum of RENs should not exceed 5.0. To be certain of the
number of devices that may be connecte d to a line , as det erm ine d by the
total RENs, contact the local tele phone company.
REN is not required for some types of anal og or digital facilities.
Means of Connection
Connection of this equipme nt to the telephone network is show n in the
following tables.
For MCC1, SCC1, CMC1, G600, and G 650 M e d ia Gat eways:
Manufacturer’s Port
Identifier
Off premises station OL13C 9.0F RJ2GX,
DID trunk 02RV2-T 0.0B RJ2GX,
CO trunk 02GS2 0.3A RJ21X
Tie trunk TL31M 9.0F RJ2GX
Basic Rate Interface 02IS5 6.0F, 6.0Y RJ49C
1.544 digital interface 04DU9-BN 6.0F R J48C,
120A4 channel service unit 04DU9-DN 6.0Y RJ48C
FIC Code SOC/REN/
A.S. Code
02LS2 0.3A RJ21X
04DU9-IKN 6.0F RJ48C,
04DU9-ISN 6.0F RJ48C,
Network
Jacks
RJ21X,
RJ11C
RJ21X
RJ48M
RJ48M
RJ48M
For G350 and G700 Media G ate w ays:
Manufactur er’s Port
Identifier
Ground Start CO trunk 02GS2 1.0A RJ11C
DID trunk 02R V2-T AS.0 RJ11C
Loop Start CO trunk 02LS2 0.5A RJ11C
1.544 digital interface 04DU9-BN 6.0Y RJ48C
Basic Rate Interface 02IS5 6.0F RJ49C
FIC Code SOC/REN/
A.S. Code
04DU9-DN 6.0Y RJ48C
04DU9-IKN 6.0Y RJ48C
04DU9-ISN 6.0Y RJ48C
Network
Jacks
For all media gateways:
If the terminal equipment (for example, the media server or media
gateway) causes harm to the telephone network, the telephone com pa ny
will notify you in advance that temporary discontinuance of service may be
required. But if advance notice is not practical, the telephone company will
notify the customer as soon as possible. Also, you will be advised of your
right to file a complai nt w ith the FCC if you belie ve it is ne ce ssary.
The telephone company may make changes in its facilities, equipment,
operations or procedures that could affect the ope rat ion of the equipment.
If this happens, the telephone company will provide advance notice in
order for you to make necessary modifications to maintain uninterrupted
service.
If trouble is experienced with thi s equ ipm en t, for repair or warranty
information, please contact the Technical Service Center at
1-800-242- 2121 or contact your local Avaya representative. If the
equipment is causing harm to the te le phone network, the telephone
company may request that you disconnect the equipment until the problem
is resolved.
A plug and jack used to connect this equipment to the premises wiring and
telephone network must comply with the applicable FCC Part 68 rules and
requirements ado pted by the ACTA. A compliant telephone cord and
modular plug is provided with this product. It is designed to be connected
to a compatible modular jack that is also compliant. It is recommended that
repairs be performed by Avaya certified t ech n ic ian s .
The equipment cannot be used on public coin phone service provided by
the telephone company. Connection to party line service is subject to state
tariffs. Contact the state public utility commission, public se r vic e
commission or corporation commission for info rm a tion.
This equipment, if it uses a telephone receiver, is hearing aid compatible.
Canadian Department of Communications (DOC) Interfe rence
Information
This Class A digital apparatus complies with Canadian ICES-003.
Cet appareil numérique de la classe A est conf or me à la norme
NMB-003 du Canada.
This equipment meets the applicable Industry Canada Terminal Equipment
Technical Specifications. This is confirmed by the registration number. The
abbreviation, IC, before the r egi stration number signifies that regi stration
was performed based on a Declaration of Conformity indicating that
Industry Canada technical specifications were met. It does not imply that
Industry Canada approved the equipment.
Installation and Repairs
Before installing th is equipment, users should e nsur e that it is permissible
to be connected to the facilities of the local telecommunications company.
The equipment must also be installe d usi ng an acceptable method of
connection. The customer should be aware that compliance with t he ab ove
conditions may not prevent degr a d a tion of service in some situations.
Repairs to certified equipment should be coordinated by a representative
designated by the supplier. Any repairs or alterations made by the user to
this equipment, or equipment ma lf unc tions, may give the
telecommunications company cause to request the user to disconnect the
equipment.
Declarations of Conformity
United States FCC Part 68 Supplier’s Declaration of Conformity (SDoC)
Avaya Inc. in the United States of America hereby certifies that the
equipment described in this doc um e nt a nd bearing a TIA TSB-168 label
identification number complies with the FCC’s Rules and Regulations 47
CFR Part 68, and the Administrative Council on Terminal Attachments
(ACTA) adopted technical criteria.
Avaya further asserts that Avaya handset-equipped terminal equipment
described in this document compl ie s with Paragraph 68.316 of the FCC
Rules and Regulations defining Hea ring Aid Compatibility and is deemed
compatible with hearing aids.
Copies of SDoCs signed by the Responsible Party in the U. S. can be
obtained by contacting your local sales representative and are available on
the following Web site: http://www.avaya.com/support
All A v ay a media servers and media g at eways are compliant with FCC Part
68, but many have been registered with the FCC before the SDoC process
was available. A list of all Avaya registered products may be found a t:
http://www.part68.org
manufacturer.
by conducting a search using “Avaya” as
.
European Union Declarations of Conformity
Ava ya Inc. declares that the equipmen t sp ecified in this document beari ng
the “CE” (Conformité Europeénne) mark conforms to the European Union
Radio and Telecommunications Terminal Equipment Directive
(1999/5/EC), including the Ele c tr omagnetic Compatibility Dir e c tive
(89/336/EEC) and Low Voltage Directive (73/23/EEC).
Copies of these Declaration s of Conf or m ity (DoCs) can be obtained by
contacting your local sales repre se n ta t ive and are available on the
following Web site: http://www.avaya.com/support
.
Japan
This is a Class A product based on the standard of the Voluntary Control
Council for Interference by Information Technology Equipment (VCCI). If
this equipment is used in a domestic e nvir onment, radio disturbance m ay
occur, in which case, the user may be required to take corrective actions.
To order copies of this and other documents:
Call: Avaya Publications Center
Write: Globalware Solutions
E-mail: totalware@gwsmail.com
For the most current versions of documentation, go to the Avaya support
Web site: http://www.avaya.com/support
Voice 1.800.457.1235 or 1.207.866.6701
FAX 1.800.457.1764 or 1.207.626.7269
200 Ward Hill Avenue
Haverhill, MA 01835 USA
Attention: Avaya Account Management
.

Contents
About this book 9
•Overview 9
• Audience 9
• Downloading this book and updates from the Web 9
Downloading this book 9
• European Union standards 10
• Standards compliance 10
• Conventions 11
General 11
Physical dimensions 11
Typography 11
Commands 11
Contents
Keys 11
User input 12
System output and field names 12
• Safety labels and security alert labels 12
• Safety precautions 13
• Trademarks 16
• Trademarks and Servic e Mar ks 16
• Technical assistance 18
Within the United States 18
International 18
• Sending us comments 18
Using the Avaya Remote Supervisor Adapter 19
•Overview 19
• Web browser requirements 19
• Connecting and logging in to the RSA 20
• ASM navigation 21
ASM navigation pane layout 21
•ASM control 24
Viewing the configuration summary 24
System settings 24
Setting system information 25
Avaya Remote Supervisor Adapter User Guide 5
June 2004

Contents
Setting ASM information 25
Setting server time-outs 26
Setting ASM date and time 27
• Login profiles 28
Creating a login profile 28
Setting the global login settings 30
•Alerts 31
Configuring a remote alert recipient 32
Adding a remote alert recipient 32
Alert fowarding 33
Configuring global remote alert settings 34
Customizing monitored alerts 35
Critical alerts 36
Warning alerts 37
System alerts 39
Monitored Local Events 40
Serial port 41
Configuring the serial port 42
Assigning advanced modem settings 42
Network interfaces 43
Configuring an Ethernet connection 43
Setting a static IP configuration 44
Setting an advanced Ethernet setup 45
Configuring PPP access over a serial port 46
Network protocols 47
Enabling SNMP agents and traps 48
Enabling DNS 49
SMTP 49
Accessing the configuration window 50
Backing up the ASM configuration 50
Restoring and modifying the ASM configuration 51
Restoring ASM defaults 52
Restoring the Avaya defaults 53
Restarting the RSA 55
Logging off the RSA 55
• Monitoring the S8500 using the RSA 56
6 Avaya Remote Supervisor Adapter User Guide
June 2004

• Viewing system health summary 57
Environmentals 57
Temperature thresholds 57
Voltage thresholds 59
Fan speed 60
• The event log 61
Viewing the event log 61
Clearing the event log 62
Saving the event log 62
• Vital product data 63
Viewing vital product data 63
Component level VPD 64
Component activity log 64
POST/BIOS VPD 64
ASM VPD 65
Contents
Determine the latest firmware version on the RSA 65
Determining the latest available firmware version 66
• Performing RSA tasks 67
Server power and restart activity 68
Accessing server power and restart control 69
Updating RSA or BIOS firmware 70
Accessing remote ASM 71
• Text-based interfaces 71
Telneting into the Remote Supervisor Adapter 72
Using the modem 73
Glossary 75
Index 79
Avaya Remote Supervisor Adapter User Guide 7
June 2004

Contents
8 Avaya Remote Supervisor Adapter User Guide
June 2004

About this book
Overview
This book, Avaya Remote Supervisor Adapter User Guide, 555-245-702, provides procedures to
administer your Remote Supervisor Adapter (RSA) on the Avaya S8500 Media Server.
Audience
This book is for the customer administrator or other personnel who are responsible for configuration of
the RSA.
About this book
Overview
Downloading this book and updates from the Web
You can download the latest version of this book from the Avaya Web site. You must have access to the
Internet, and a copy of Acrobat Reader must be installed on your personal computer.
Avaya makes every effort to ensure that the information in this book is complete and accurate. However,
information can change after we publish this book. Therefore, the A vaya Web site might also contain new
product information and updates to the information in this book. You also can download these updates
from the Avaya Web sit.
Downloading this book
To download the latest version of this book:
1 Access the Avaya Web site at http://support.avaya.com.
2 At the top center of the page, click Product Documentation.
The system displays the Welcome to Production Documentation page.
3 In the upper-left corner, type the 9-digit book number in the Search Support field, and then click
Go.
The system displays the Product Documentation Search Results page.
4 Scroll down to find the latest issue number, and then click the book title that is to the right of the
latest issue number.
5 On the next page, scroll down and click one of the following options:
• PDF Format to download the book in regular PDF format.
• ZIP Format to download the book in zipped PDF format.
Avaya Remote Supervisor Adapter User Guide 9
June 2004

About this book
European Union standards
European Union standards
Avaya declares that the DEFINITY equipment specified in this document bearing the "CE" mark
conforms to the European Union Electromagnetic Compatibility Directives.
The "CE" (Conformité Européenne) mark indicates confo rmance to the European Union Electrom agnetic
Compatibility Directive (89/336/EEC), Low Voltage Directive (73/23/ECC), and Telecommunication
Terminal Equipment (TTE) Directive (91/263/EEC) and with i-CTR3 Basic Rate Interface (BRI) and iCTR4 Primary Rate Interface (PRI) as applicable.
Standards compliance
The equipment presented in this document complies with the following (as appropriate) :
• ITU-T (Formerly CCITT)
• ECMA
• ETSI
• IPNS
• DPNSS
• National ISDN-1
• National ISDN-2
• ISO-9000
• ANSI
• FCC Part 15 and Part 68
• EN55022
• EN50081
• EN50082
• CISPR22
• Australia AS3548 (AS/NZ3548)
• Australia AS3260
• IEC 825
• IEC950
• UL 1459
• UL 1950
• CSA C222 Number 225
• TS001
10 Avaya Remote Supervisor Adapter User Guide
June 2004

Conventions
This section describes the conventions that we use in this book.
General
We show commands and screens from the newest Avaya system and see the most current books. You
must substitute the appropriate commands for your system and see the books that yo u have av ailab le.
Physical dimensions
• All physical dimensions in this book are in English units followed by metric units in parentheses.
• Wire gauge measurements are in AWG followed by the diameter in millimeters in parentheses.
Typography
About this book
Conventions
This section describes the typographical conventions for co mmand s, keys, user input, system outpu t, and
field names.
Commands
•
Commands are in bold typ e .
Example
Type change-switch-time-zone and press Enter.
• Command variables are in bold italic type when they are part of what you mus t t ype, an d in plain
italic type when they are not part of what you must type.
Example
Type ch ma machine_name, where machine_name is the name of the call delivery machine.
• Command options are in bold type inside square brackets.
Example
At the DOS prompt, type copybcf [-F34].
Keys
• The names of keys are in bold sans serif type.
Example
Use the Down Arrow key to scroll through the fields.
• When you must press and hold a key and then press a second or third key, we separate the names
of the keys are separated with a plus sign (+).
Example
Press ALT+D.
Avaya Remote Supervisor Adapter User Guide 11
June 2004

About this book
Safety labels and security alert labels
• When you must press two or more keys in sequence, we separate the names of the keys are
separated with a space.
Example
Press Escape J.
• When you must press a function key, we provide the function of the key in parentheses after the
name of the ke y.
Example
Press F3 (Save).
User input
•
User input is in bold type, whether you mu st type the input, select t he input from a menu, or click
a button or similar element on a screen or a Web page.
Examples
—Type exit, and then press Enter.
—On the File menu, click Save.
— On the Network Gateway page, click Configure > Hardware.
System output and field names
• System output and field names on the screen are in monospaced type.
Examples
— The system displays the following message:
The installation is in progress.
—Type y in the Message Transfer? field.
Safety labels and security alert labels
Observe all caution, warning, and danger statements to help prevent loss of service, equipment damage,
personal injury, and security problems. This book uses the following safety labels and security alert
labels:
CAUTION:
A caution statement calls attention to a situation that can result in harm to software, loss of
data, or an interruption in service.
!
WARNING:
A warning statement calls attention to a situation that can result in harm to hardware or equipment.
Use an ESD warning to call attention to situations that can result in ESD damage to electronic
components.
12 Avaya Remote Supervisor Adapter User Guide
June 2004
!
DANGER:
A danger statement calls attention to a situation that can result in harm to personnel.
A security alert calls attention to a situation that can increase the potential for
unauthorized use of a telecommunications system.
Safety precautions
!
DANGER:
Electrical current from power, telephone, and communication cables is hazardous.
To avoid a shock hazard:
Do not connect or disconnect any cables or perform installation, maintenance, or
reconfiguration of this product during an electrical storm.
About this book
Safety precautions
Connect all power cords to a properly wired and grounded electrical outlet.
Connect to properly wired outlets any equipment that will be attached to this
product.
When possible, use one hand only to connect or disconnect signal cables.
Never turn on any equipment when there is evidence of fire, water, or structural
damage.
Disconnect the attached power cords, telecommunications systems, networks, and
modems before you open the device covers, unless instructed otherwise in the
installation and configuration procedures.
Connect and disconnect cables as described in Table 1,
disconnecting cables, on page 13 when installing, moving, or opening covers on this
product or attached devices.
Table 1: Connecting and disconnecting cables
To connect: To disconnect:
1 Turn everything off. 1 Turn everything off.
2 Attach all cables to devices. 2 Remove power cords from outle t.
Connecting and
3 Attach signal cables to connectors. 3 Remove signal cables from connectors.
4 Attach power cords to outlet. 4 Remove all cables from devices.
5 Turn device ON.
Avaya Remote Supervisor Adapter User Guide 13
June 2004

About this book
Safety pr ecautions
!
DANGER:
Some laser products contain an embedded Class 3A or Class 3B laser d iode. No te the
following:
Laser radiation when open. Do not stare into the beam, do not view directly with
optical instruments, and avoid direct exposure to the beam.
CAUTION:
When laser products (such as CD-ROMs, DVD drives, fiber optic devices, or transmitters)
are installed, note the following:
Do not remove the covers. Removing the covers of the laser product could result in
exposure to hazardous laser radiation. There are no serviceable parts inside the device.
Use of controls or adjustments or performance of procedures other than those specified
herein might result in hazardous radiation exposure.
CAUTION:
Use safe practices when lifting.
For items heavier than 37 lb (18 kg), two people are required.
For items heavier than 70.5 lb (32 kg), three people are required.
For items heavier than 121.2 lb (55 kg), four people are required.
CAUTION:
The power control button on the device and the power switch on the power supply do not
turn off the electrical current supplied to the device. The device also might have more than
one power cord. To remove all electrical current from the device, ensure that all power
cords are disconnected from the power source.
CAUTION:
If you install a strain-relief bracket option over the end of the power cord that is connec ted
to the device, you must connect the other end of the power cord to an easily accessible
power source .
14 Avaya Remote Supervisor Adapter User Guide
June 2004
About this book
Safety precautions
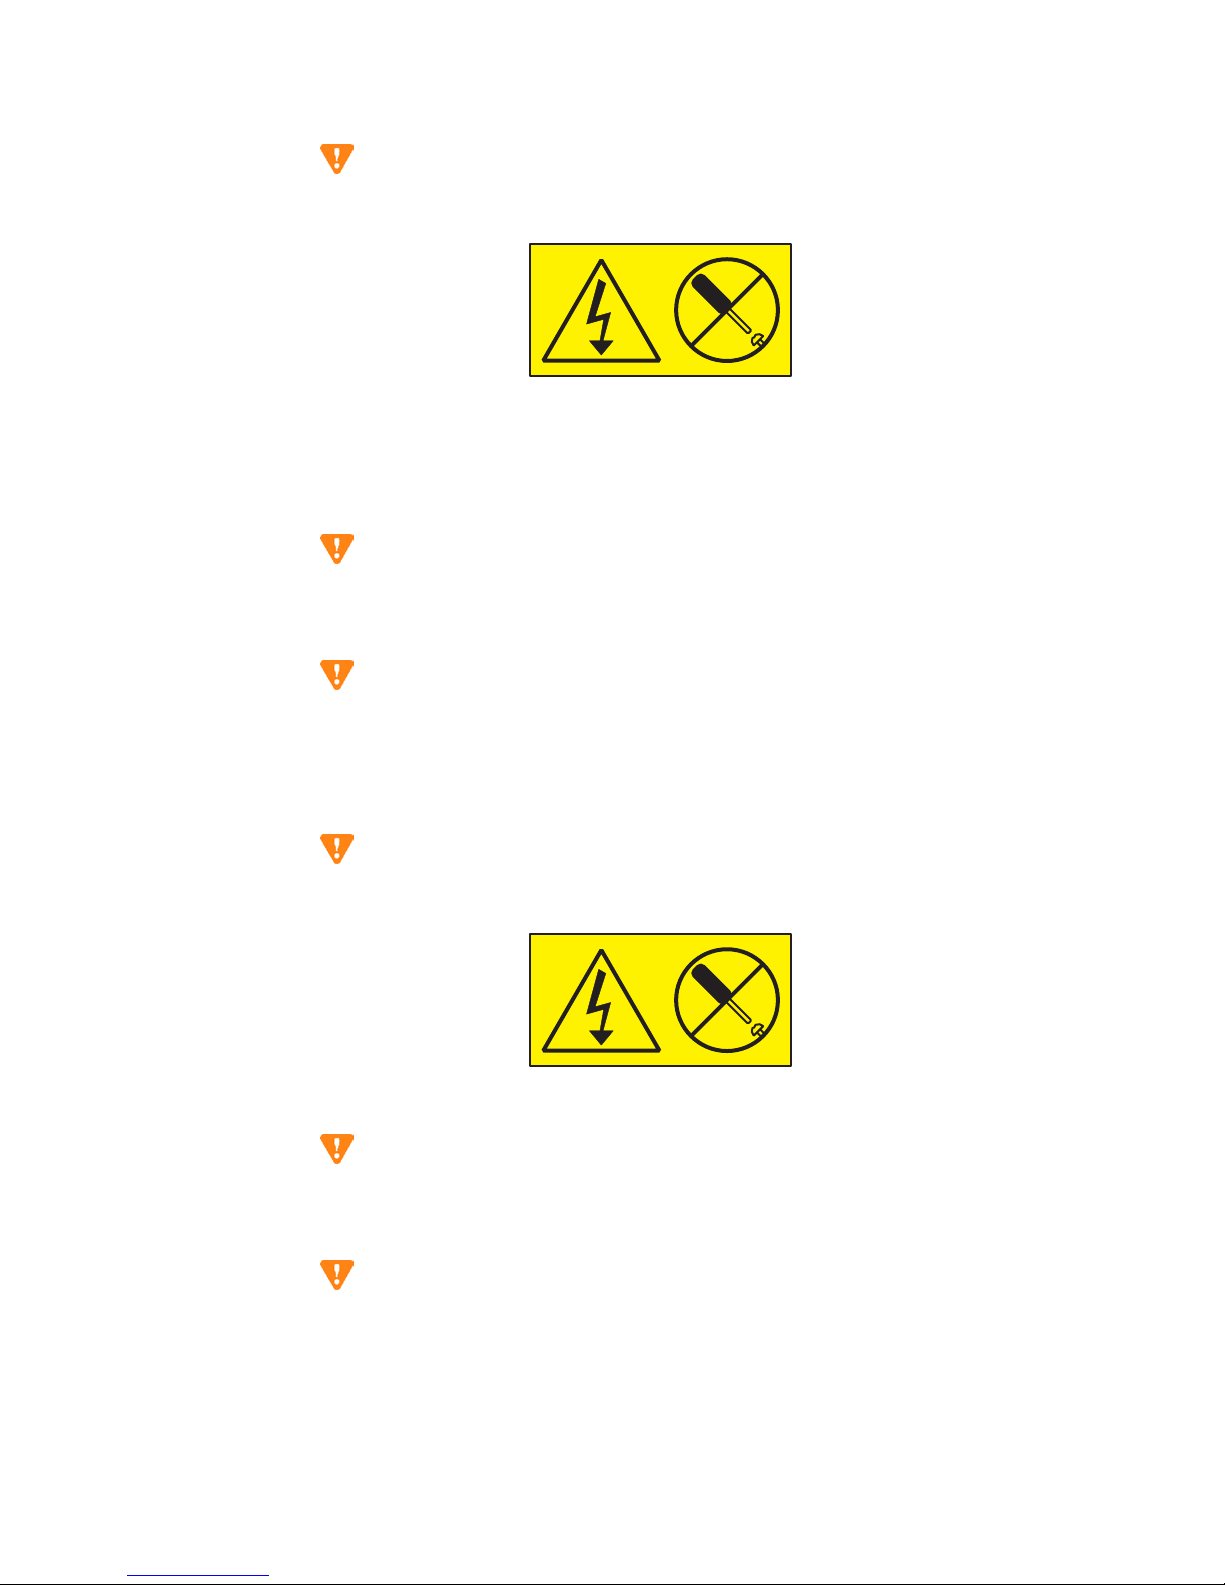
CAUTION:
Never remove the cover on a power supply or any part that has the following label
attached.
lbmswarn LAO 073003
Hazardous voltage, current, and energy levels are present inside any component that has
this label attached. There are no serviceable parts inside these components. If you suspect
a problem with one of these parts, contact a service technician.
CAUTION:
Do not place any object weighing more than 180 lb (82 kg) on top of rack-mounted
devices.
CAUTION:
Overloading a branch circuit is potentially a fire hazard and a shock hazard under certain
conditions. T o avoid these hazards, ensure that your system electrical requirements do not
exceed branch circuit protection requirements. See the information that is provided with
your RSA for electrical specifications.
CAUTION:
Hazardous voltage, current, and energy levels might be present. Only a qualified service
technician is authorized to remove the covers where the following label is attached.
lbmswarn LAO 073003
CAUTION:
Make sure that the rack is secured properly to avoid tipping when the server unit is
extended.
CAUTION:
Some accessory or option board o utputs exceed Class 2 or limited power source limits and
must be installed with appropriate interconnecting cabling in accordance with the national
electric code.
Avaya Remote Supervisor Adapter User Guide 15
June 2004

About this book
Trademarks
CAUTION:
To reduce the risk of electric shock or energy hazards:
This equipment must be installed by trained service personnel in a restricted-access
location, as defined by the NEC and IEC 60950, Third Edition, The Standard for Safety of
Information Technology Equipment.
Connect the equipment to a reliably grounded safety extra low voltage (SELV) source. An
SELV source is a secondary circuit that is designed so that normal and single fault
conditions do not cause the voltages to exceed a safe level (60 volts direct current).
The branch circuit overcurrent protection must be rated at a mi ni mum of 5 amperes to a
maximum of 15 amperes.
Use 14 American Wire Gauge (AWG) or 2.5 mm2 copper conductor only, not exceeding
three meters in length.
Torque the wiring-terminal screws to 12 inch-pounds (1.4 newton-meters).
CAUTION:
The power-control bu tto n on the devi ce do es not turn off the electrical current supplied to
the device. The device might also have more than one connection to dc power. To remove
all electrical current from the device, ensure that all connections to dc power are
disconnected at the dc power input terminals.
Trademarks
All trademarks identified by the ® or TM are registered trademarks or trademarks, respectively, of Avaya
Inc. All other trademarks are the property of their respective owners.
Trademarks and Service Marks
The following are trademarks or registered trademarks of Avaya:
• AUDIX
• Cajun
• Callvisor
• Callmaster
®
®
®
®
• CentreVu™
• CONVERSANT
• DEFINITY
®
• DIMENSION
• INTUITY™
16 Avaya Remote Supervisor Adapter User Guide
®
®
June 2004

About this book
Trademarks and Service Marks
• MERLIN
®
• MultiVantage™
• Softconsole™
• TransTalk
• VOICE POWER
The following are trademarks or registered trademarks of Lucent Technologies:
®
®
• 5ESS™, 4ESS™
The following are trademarks or registered trademarks of AT&T:
• ACCUNET
• DATAPHONE
• MEGACOM
• MULTIQUEST
• TELESEER
The following are trademarks or registered trademarks of other companies:
• Acrobat
• Ascend
• Audichron
• MS-DOS
• MicroChannel
• Microsoft
• MULTIQUEST
• NetMeeting
• PagePac
• PictureTel
• ProShare
• UNIX
®
®
®
®
®
®
(registered trademark of Adobe Systems Incorporated)
®
(registered trademark of Ascend, Inc.)
®
(registered trademark of Audichron Company)
®
(registered trademark of the Microsoft Corporation)
®
(registered trademark of IBM Systems)
®
(registered trademark of Microsoft Corporation)
®
(registered trademark of Telecommunications Service)
®
(registered trademark of Microsoft Corporation)
®
(trademark of the Dracon Division of the Harris Corporation)
®
(registered trademark of PictureTel Corporation)
®
(registered trademark of Intel Corporation)
®
(trademark of the Novell Corporation)
• Zydacron (registration pending for Zydacron Corporation)
Avaya Remote Supervisor Adapter User Guide 17
June 2004

About this book
Technical assistance
Technical assistance
Avaya provides the following resources for technical assistance.
Within the United States
For help with:
• Feature administration and system applications, call the Avaya DEFINITY Helpline at
1-800-225-7585
• Maintenance and repair, call the Avaya National Customer Care Support Line at
1-800-242-2121
• Toll fraud, call Avaya Toll Fraud Intervention at 1-800-643-2353
International
For all international resources, contact your local Avaya authorized dealer for additional help.
Sending us comments
Avaya welcomes your comments about this book. To reach us by:
• Mail, send your comments to:
Avaya Inc.
Product Documentation Group
Room B3-H13
1300 W. 120th Ave.
Westminster, CO 80234 USA
• E-mail, send your comments to:
document@avaya.com
• Fax, send your comments to:
1-303-538-1741
Be sure that you mention the name and number of this book, Avaya Remote Supervisor Adapter User
Guide, 555-245-702.
18 Avaya Remote Supervisor Adapter User Guide
June 2004

Using the Avaya Remote Supervisor Adapter
Using the Avaya Remote Supervisor
Adapter
Overview
The Avaya Remote Supervisor Adapter (RSA) is installed in PCI-X slot 1 of the S8500 Media Server.
Administration of the RSA is accomplished through the Advanced System Management (ASM) Web
interface using a browser.
The following are highlights of the features of the RSA:
• Monitors the health of the Avaya S8500 Media Server
• Timed stamped event logs
• Remote access via LAN or serial modem
• Point-to-point protocol (PPP) support
Overview
• Simple Network Management Protocol (SNMP) support
• Notification and alerts sent via SNMP, modem, e-mail, or numeric pager
• Domain Name System (DNS) and Dynamic Host Configuration Protocol (DHCP) support
• Ability to remotely power on or off the S8500 Media Server
• Remote firmware upgrades
• Web based access using the Advanced System Management Interface
Web browser requirements
You can use the following Web browsers to remotely access the RSA:
• Microsoft Internet Explorer version 4.0 (or later) with Service Pack 1
• Netscape Navigator version 4.72 or later. Netscape Navigator version 6.x is not supported
NOTE:
When using the ASM W e b Interface, monitor resolu tion should be s et to 800 x 600 pixels
and 256 colors, and double-byte character set (DBCS) languages are not supported.
NOTE:
The values in all windows are examples. Yo ur settings will be different.
NOTE:
Disable the Sun Java Virtual machine.
Avaya Remote Supervisor Adapter User Guide 19
June 2004
Using the Avaya Remote Supervisor Adapter
Connecting and logging in to the RSA
Connecting and logging in to the RSA
To access the RSA remotely using the ASM Web interface, you must log in to the adapter.
To connect and log in to the RSA:
1 Connect the services laptop to the Ethernet port on the RSA using a crossover cable.
2 Open an internet browser window.
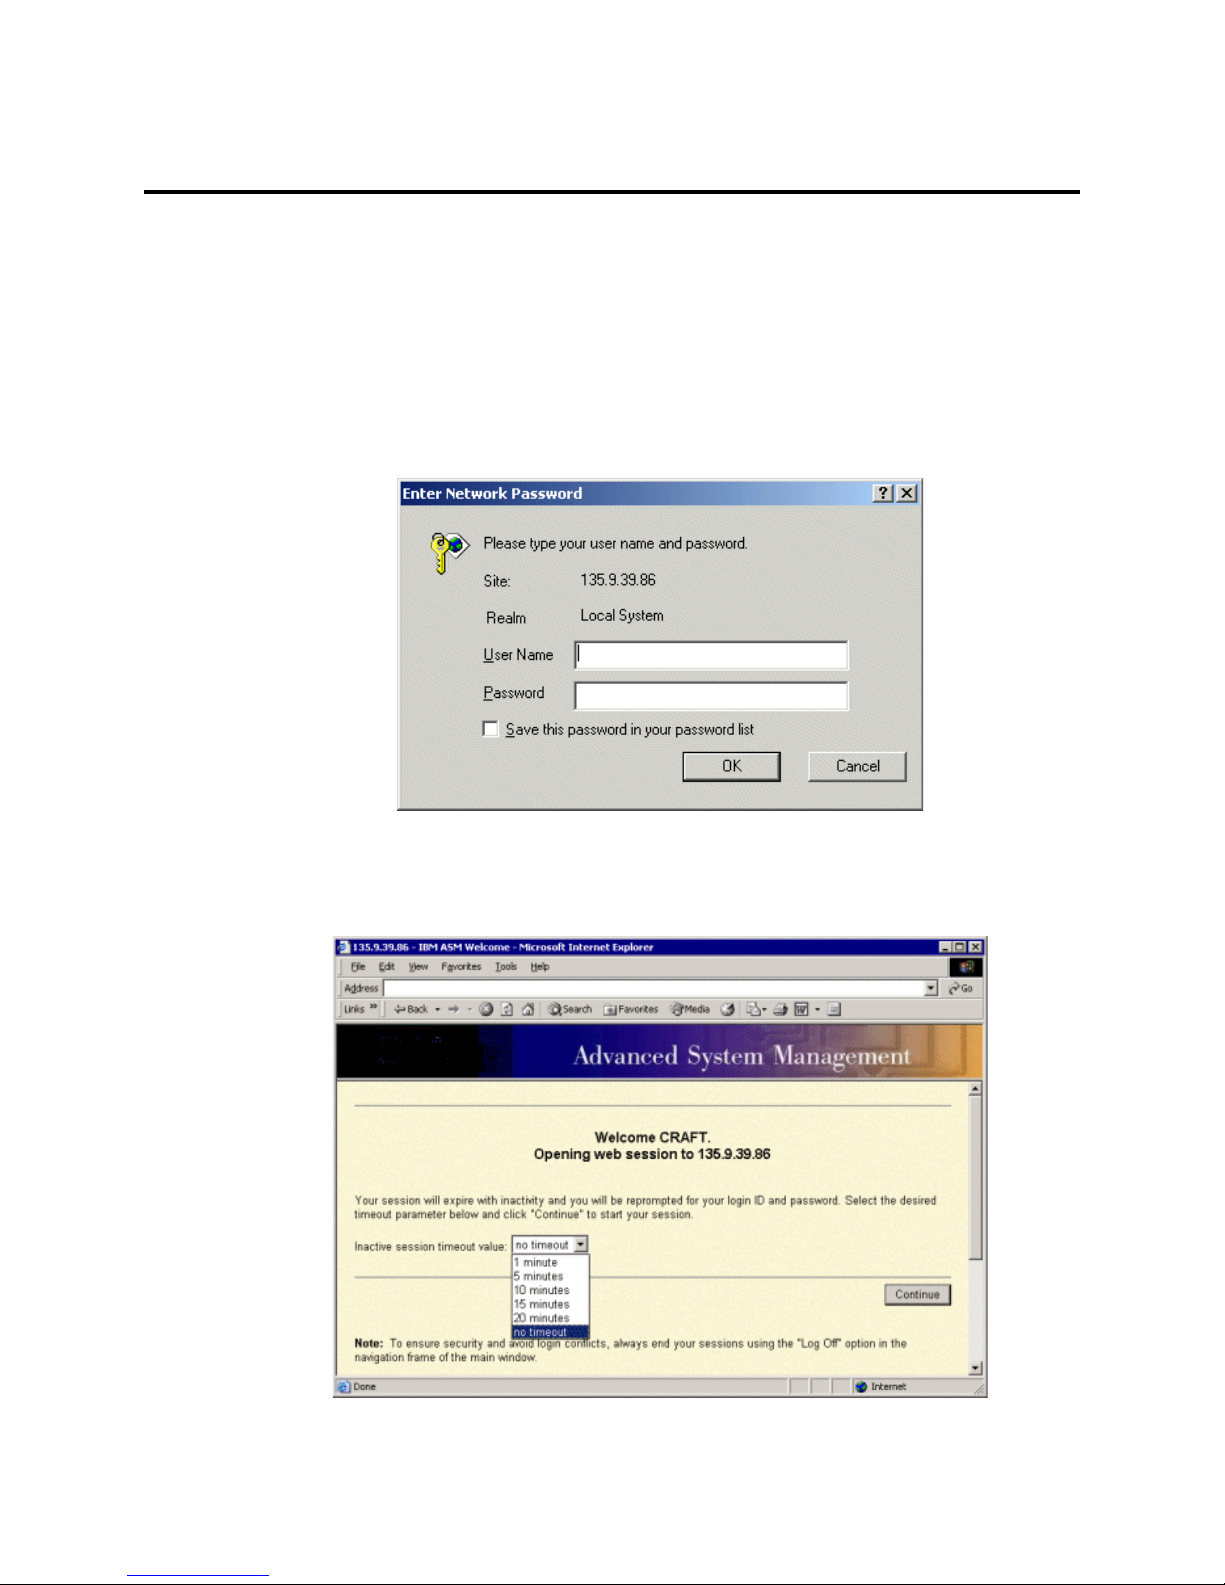
3 In the Address field, type 192.11.13.6 and press Enter.
The Enter Netw or k Pa ss word window appears.
4 Type the default login craft and default password passw0rd (with a zero).
The RSA welcome window appears.
20 Avaya Remote Supervisor Adapter User Guide
June 2004
5 In the Inactive ses sion timeout val ue field, select no timeout. The no timeout value allows 60
minutes of use before disconnecting.
6 Click Continue to start the session.
NOTE:
If the session times out unexpectedly, click Start New Session and Refresh.
!
WARNING:
Executing the
defaults. Avaya defaults can be restored manually using the information found in the
Avaya RSA Defaults sectio n or by res tor in g the Av aya default file. The Avaya default file
can be found at http://support.avaya.com
Linux Servers and Gateways. For instructions on restoring the default file, see
and modifying the ASM configuration.
ASM navigation
Using the Avaya Remote Supervisor Adapter
ASM navigation
Restore ASM Defaults option in the navigation pane removes the Avaya
or on the Communication Manager 2.0 CD for
Restoring
ASM navigation pane layout
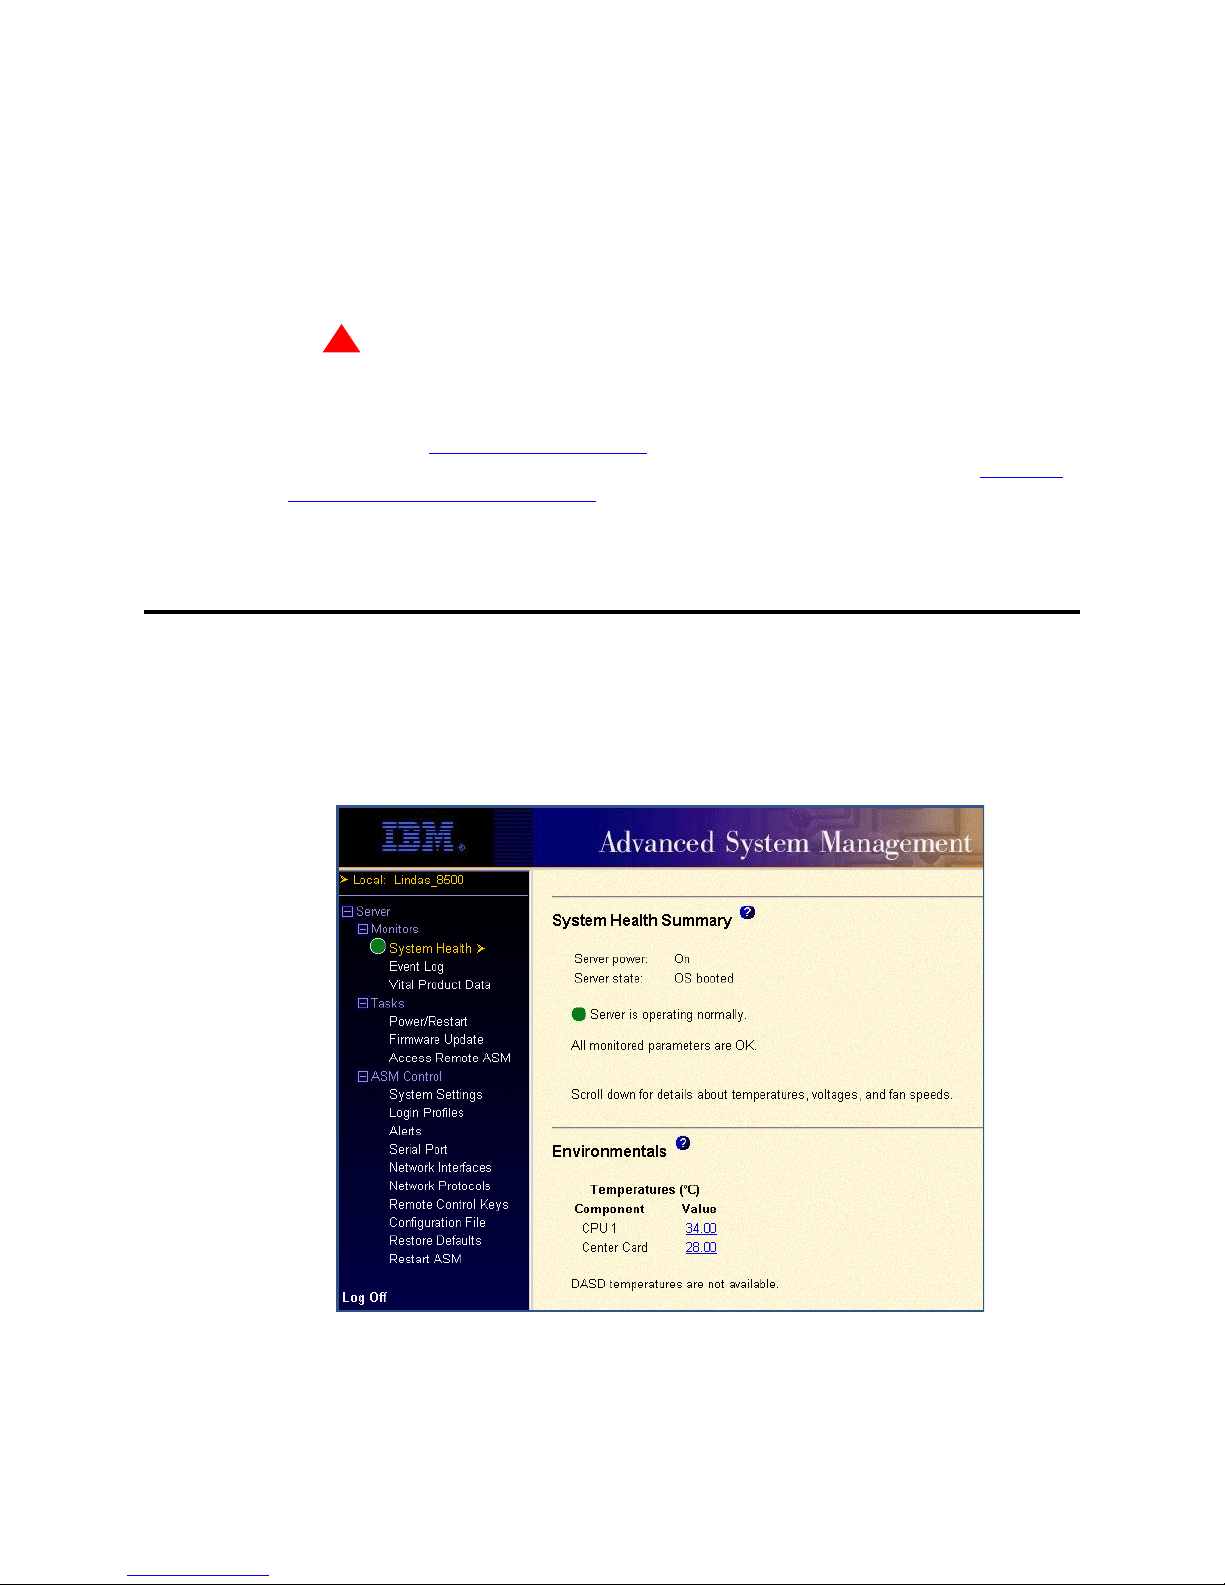
The ASM screen is divided into a navigation pane and a display pane.
Avaya Remote Supervisor Adapter User Guide 21
June 2004

Using the Avaya Remote Supervisor Adapter
ASM navigation
Table 2, Available actions, on page 22 outlines the actions available in the navigation pane.
T able 2: Available actions 1 of 3
Link Action Description
System Health View health of the S8500
Media Server and the users
logged into the RSA.
Event Log View S8500 event logs. Event logs contain S8500 information pertaining
Vital Product
Data (VPD)
Power/Restart Remotely power on/off or
Firmware Update Update the firmware on
Access Remote
ASM
System Settings View and configure
View the VPD for the
S8500 server.
restart the S8500 Media
Server.
the RSA.
Not used in the S8500
Media Server
configuration.
system settings for the
RSA.
View the power, temperature, voltage, and fan
status of the S8500 Media Server. You also can
view the users logged into the RSA.
to Power On Self Test (POST), remote access
attempts, and dial-out events. Events are time
stamped. Some of the events generate an alert if
configured on the Alerts page.
When the server starts, the RSA collects system
data, basic input/output system (BIOS)
information, and the server component VPD, and
stores it in nonvolatile memory.
The RSA provides full power on, power off, and
restart capability for the S8500 Media Server.
The firmware on the RSA can be updated. The
firmware update can be obtained from
http:\\support.avaya.com
This screen is divided into three sections:
.
• ASM Information: S8500 Product ID, ID
number, contact, and location information.
• Server Timeouts: Power off delay.
• ASM Date and Time: Set the date, time,
GMT offset, and daylight savings time.
Login Profiles C onf igure the RSA login
files
22 Avaya Remote Supervisor Adapter User Guide
View, configure, or change individual login
profiles. Up to 12 login profiles can be defined.
1 of 3
June 2004

Using the Avaya Remote Supervisor Adapter
T able 2: Available actions 2 of 3
Link Action Description
ASM navigation
Alerts View and configure local
events, alerts and define
alert recipients.
Serial Port Configure the serial port
and modem settings.
Network
Interfaces
Configure the network
interfaces used with RSA.
This screen is divided into five sections:
• Remote Alert Recipients: Define name,
notification method, number, PIN, e-mail
address, and PPP login ID and password.
• Alert Forwarding: Not used in the S8500
Media Server configuration.
• Global Remote Alert Settings: Defines
the number of times an alert retries and the
delay time between retries.
• Monitored Alerts: Defines the type of
alerts within categories that will be sent to
an remote alarm recipient.
• Monitored Local Events: Defines the
type of monitored events that will be sent
to a local alarm recipient.
Use to configure the serial port and modem
settings. The serial port on the RSA must be
dedicated to the RSA.
This screen is divided into two sections:
• Ethernet: Define if Ethernet is ena ble d o r
disabled and if DHCP or static IP
addressing will be used.
Network
Protocols
Remote Control
Keys
Configuration Fil e Backup, modify, and
Configure the network
protocols used with the
RSA.
Not used in the S8500
Media Server
configuration.
restore ASM
configuration.
• PPP over Serial Port: Define if PPP will
be used over the serial port, local IP
address, remote IP address, subnet mask,
and authentication.
This screen is divided into three sections:
• Simple Network Management Protocol
(SNMP): Enable or disable SNMP agents
and traps, set community names, host
name or IP address.
• Domain Name System (DNS): Enable or
disable DNS, set IP address of the DNS,
and configure the host table.
• Simple Mail Transfer Protocol (SMTP):
Define the server host name or IP address.
Backup and restore the ASM configuration using
the Configuration File selection.
2 of 3
Avaya Remote Supervisor Adapter User Guide 23
June 2004

Using the Avaya Remote Supervisor Adapter
ASM control
T able 2: Available actions 3 of 3
Link Action Description
Restore Defaults Restore the RSA to the
factory default
configuration.
Restart ASM Restart the RS A boa rd. Use to restart the RSA board.
Log Off Log off the RSA. Use to terminate your RSA connection.
ASM control
This section outlines the procedures needed to configure the ASM. Y ou use the links under ASM Control
in the navigation pane to configure the RSA.
Viewing the configuration summary
Use to restore the RSA configuration information
to factory defaults. When this option is selected:
• Your current sess ion terminates.
• Your login and pa ssword are lost.
• All current configuration information is
erased.
• All Av aya default settings are erased.
3 of 3
You may view the entire configuration of the RSA by clicking View Configuration Summary in the
upper right hand corner of all entries under the AS M Co ntr o l heading except for the Configuration File,
Restore Defaults, and Restart ASM windows.
System settings
From the System Settings window, you can:
• Set ASM information
• Set server timeouts
• Set ASM date and time
24 Avaya Remote Supervisor Adapter User Guide
June 2004
Using the Avaya Remote Supervisor Adapter
Setting system inform ation
To set system information:
• In the navigation pane, select System Settings under the ASM Control heading.
The System Settings window appears.
ASM control
NOTE:
The RSA is shipped with recommended Avaya defaults. With write permissions on your
login ID, it is possible to change any default to customize your server. To save any
changes made to this section, scroll to the bottom of the page and click Save.
Setting ASM information
To set ASM information:
1 In the navigation pane, select System Settings under the ASM Control heading.
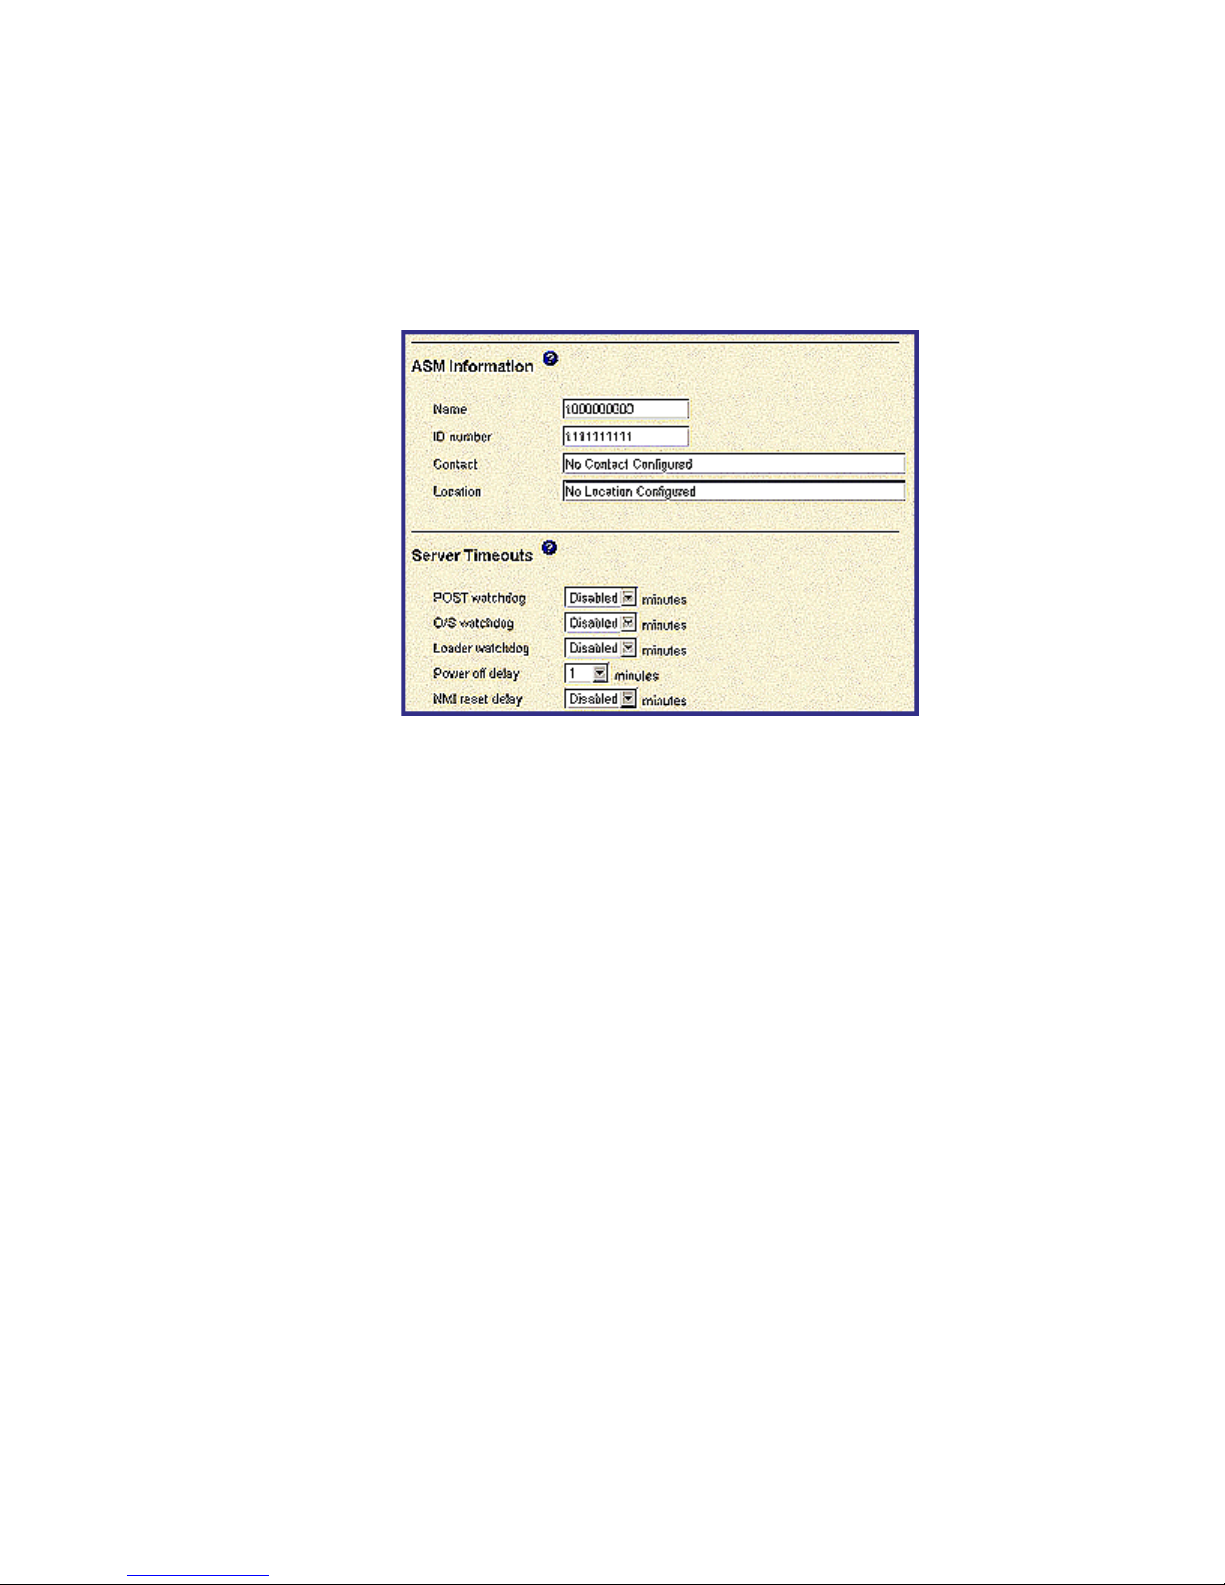
The System Settings window appears.
2 Name [default: 10000 00000]: This required field must contain the p roduct ID associated with the
S8500 Media Server in this location. Avaya Services uses the product ID to identify the RSA and
associated S8500 Media Server.
3 ID Number [default: 100000000]: Type an ID number that will be used to identify the S8500
Media server. This information will be part of the SNMP trap.
4 Contact [default: no contact configured]: An optional field that contains the nam e of the per son
responsible for this server at this location. You can enter a maximum of 47 characters in this field.
5 Location [default: no location configured]: An optional field that contains the address of the
location where the server resides. You can enter a maximum of 47 characters in this field.
6 Scroll to the bottom of the page and click Save.
Avaya Remote Supervisor Adapter User Guide 25
June 2004
 Loading...