

Page 1

Nortel Mobile Communication 3100
Nortel Mobile Communication Client 3100 for Nokia
User Guide
Page 2

Nortel Mobile Communication 3100
Release: 3.0
Publication: NN42030-102
Document status: Standard 03.08
Document release date: July 2009
Copyright © 2007 – 2009 Nortel Networks
All Rights Reserved
Printed in Canada
LEGAL NOTICE
This document contains Nortel confidential and proprietary information. It
is not to be copied, disclosed or distributed in any manner, in whole or in
part, without Nortel’s express written authorization. While the information
in this document is believed to be accurate and reliable, except as
otherwise expressly agreed to in writing NORTEL PROVIDES THIS
DOCUMENT "AS IS" WITHOUT WARRANTY OR CONDITION OF ANY
KIND, EITHER EXPRESS OR IMPLIED. The information and/or products
described in this document are subject to change without notice.
Nortel, the Nortel logo, and the Globemark are tra d em a rks of Nor tel
Networks.
All other trademarks are the property of their respective owners.
Page 3

Contents
Welcome . . . . . . . . . . . . . . . . . . . . . . . . . . . . . . . . . . . . . . . . . 7
Your new Nortel MCC 3100 for Nokia application . . . . . . . . . . 7
New in this release . . . . . . . . . . . . . . . . . . . . . . . . . . . . . . . . . . 7
Features . . . . . . . . . . . . . . . . . . . . . . . . . . . . . . . . . . . . . . . 7
Other changes . . . . . . . . . . . . . . . . . . . . . . . . . . . . . . . . . . 8
Nortel MCC 3100 for Nokia feature overview . . . . . . . . . . . . . 10
Language support . . . . . . . . . . . . . . . . . . . . . . . . . . . . . . . . . . 11
Related publications . . . . . . . . . . . . . . . . . . . . . . . . . . . . . . . . 12
Getting started . . . . . . . . . . . . . . . . . . . . . . . . . . . . . . . . . . . 13
Before you begin . . . . . . . . . . . . . . . . . . . . . . . . . . . . . . . . . . 13
System and network requirements . . . . . . . . . . . . . . . . . . . . . 13
Supported devices . . . . . . . . . . . . . . . . . . . . . . . . . . . . . . 15
Device usage . . . . . . . . . . . . . . . . . . . . . . . . . . . . . . . . . . 15
Network specifications . . . . . . . . . . . . . . . . . . . . . . . . . . . 15
Server specification . . . . . . . . . . . . . . . . . . . . . . . . . . . . . 15
Cellular data plan use of MCC 3100 for Nokia . . . . . . . . . 16
Contents
Subscriber identity module (SIM) card . . . . . . . . . . . . . . . . . . 17
Battery life . . . . . . . . . . . . . . . . . . . . . . . . . . . . . . . . . . . . . . . . 17
Accessing Help . . . . . . . . . . . . . . . . . . . . . . . . . . . . . . . . . . . . 18
Software installation . . . . . . . . . . . . . . . . . . . . . . . . . . . . . . 19
Installing the MCC 3100 for Nokia software from a computer 20
Installing the MCC 3100 for Nokia software over the air . . . . 22
Upgrading the MCC 3100 for Nokia
software from a computer . . . . . . . . . . . . . . . . . . . . . . . . . . . . 24
Upgrading the MCC 310 0 for Nok i a so ftwa r e over th e air . . . 26
Moving the MCC 3100 for Nokia icon to the menu screen . . . 27
Uninstalling the MCC 3100 for Nokia software . . . . . . . . . . . . 28
Nortel Mobile Communication Client 3100 for Nokia User Guide 3
Page 4

Contents
Installing security certificates . . . . . . . . . . . . . . . . . . . . . . . . . 28
MCC 3100 for Nokia configuration . . . . . . . . . . . . . . . . . . . 29
Initial configuration . . . . . . . . . . . . . . . . . . . . . . . . . . . . . . . . . 29
Configuring the system settings . . . . . . . . . . . . . . . . . . . . . . . 31
Configuring your Personal preferences . . . . . . . . . . . . . . . . . 35
Configuring your Call settings . . . . . . . . . . . . . . . . . . . . . . . . . 38
Basic features . . . . . . . . . . . . . . . . . . . . . . . . . . . . . . . . . . . . 41
Starting and exiting the MCC 3100 for Nokia application . . . . 41
Logging on and logging off . . . . . . . . . . . . . . . . . . . . . . . . . . . 42
Hiding the MCC 3100 for Nokia application . . . . . . . . . . . . . . 42
Overview of the main screen . . . . . . . . . . . . . . . . . . . . . . . . . 43
Status pane . . . . . . . . . . . . . . . . . . . . . . . . . . . . . . . . . . . 43
Recent link and preview pane . . . . . . . . . . . . . . . . . . . . . 44
Friends link and preview pane . . . . . . . . . . . . . . . . . . . . . 44
Groups link . . . . . . . . . . . . . . . . . . . . . . . . . . . . . . . . . . . . 44
Corp Dir link . . . . . . . . . . . . . . . . . . . . . . . . . . . . . . . . . . . 45
Contacts link . . . . . . . . . . . . . . . . . . . . . . . . . . . . . . . . . . . 45
Navigating screens . . . . . . . . . . . . . . . . . . . . . . . . . . . . . . . . . 45
Accessing screens . . . . . . . . . . . . . . . . . . . . . . . . . . . . . . 45
Shortcut Keys . . . . . . . . . . . . . . . . . . . . . . . . . . . . . . . . . . 45
Green call and red hangup buttons . . . . . . . . . . . . . . . . . 46
Advanced features . . . . . . . . . . . . . . . . . . . . . . . . . . . . . . . . 47
Placing calls . . . . . . . . . . . . . . . . . . . . . . . . . . . . . . . . . . . . . . 47
Call modes . . . . . . . . . . . . . . . . . . . . . . . . . . . . . . . . . . . . 48
Calling a friend or contact . . . . . . . . . . . . . . . . . . . . . . . . 49
Calling from your extension . . . . . . . . . . . . . . . . . . . . . . . 50
Advanced call . . . . . . . . . . . . . . . . . . . . . . . . . . . . . . . . . . 50
Dialing a number . . . . . . . . . . . . . . . . . . . . . . . . . . . . . . . 52
Dialing an emergency number . . . . . . . . . . . . . . . . . . . . . 52
Device handoff . . . . . . . . . . . . . . . . . . . . . . . . . . . . . . . . . 53
4 NN42030-102 MC 3100 3.0 Standard 03.08 July 2009
Page 5

Contents
Receiving calls . . . . . . . . . . . . . . . . . . . . . . . . . . . . . . . . . . . . 54
Working with friends and contacts . . . . . . . . . . . . . . . . . . . . . 55
Managing contacts . . . . . . . . . . . . . . . . . . . . . . . . . . . . . . . . . 56
Adding a contact . . . . . . . . . . . . . . . . . . . . . . . . . . . . . . . 56
Importing a contact . . . . . . . . . . . . . . . . . . . . . . . . . . . . . . 59
Editing a contact . . . . . . . . . . . . . . . . . . . . . . . . . . . . . . . . 59
Deleting a contact . . . . . . . . . . . . . . . . . . . . . . . . . . . . . . 60
Managing friends . . . . . . . . . . . . . . . . . . . . . . . . . . . . . . . . . . 60
Adding a friend . . . . . . . . . . . . . . . . . . . . . . . . . . . . . . . . . 61
Editing and deleting a friend . . . . . . . . . . . . . . . . . . . . . . . 63
Searching the corporate directory . . . . . . . . . . . . . . . . . . . . . 64
Managing presence . . . . . . . . . . . . . . . . . . . . . . . . . . . . . . . . 65
Changing your presence status . . . . . . . . . . . . . . . . . . . . 65
Adding a custom presence status . . . . . . . . . . . . . . . . . . 66
Viewing the presence status of your friends . . . . . . . . . . 66
Understanding the presence status of your friends . . . . . 68
Clearing the presence status of your friends . . . . . . . . . . 69
Using the Mid-Call Features . . . . . . . . . . . . . . . . . . . . . . . . . . 69
Call hold and retrieve . . . . . . . . . . . . . . . . . . . . . . . . . . . . 69
Call transfer . . . . . . . . . . . . . . . . . . . . . . . . . . . . . . . . . . . 70
Call swap . . . . . . . . . . . . . . . . . . . . . . . . . . . . . . . . . . . . . 70
Three-party conference call . . . . . . . . . . . . . . . . . . . . . . . 71
Speaker mode . . . . . . . . . . . . . . . . . . . . . . . . . . . . . . . . . 71
Sending Instant Messages . . . . . . . . . . . . . . . . . . . . . . . . . . . 72
Sending an IM to a single contact . . . . . . . . . . . . . . . . . . 72
Instant message history indicators . . . . . . . . . . . . . . . . . . 72
Sending a message to multiple contacts . . . . . . . . . . . . . 72
Adding a phrase to an instant message . . . . . . . . . . . . . . 73
Clearing the IM history . . . . . . . . . . . . . . . . . . . . . . . . . . . 73
Receiving instant messages . . . . . . . . . . . . . . . . . . . . . . 74
Working with Groups . . . . . . . . . . . . . . . . . . . . . . . . . . . . . . . 77
Adding a group . . . . . . . . . . . . . . . . . . . . . . . . . . . . . . . . . 77
Nortel Mobile Communication Client 3100 for Nokia User Guide 5
Page 6

Contents
Adding users to a group . . . . . . . . . . . . . . . . . . . . . . . . . . 77
Managing users in a group . . . . . . . . . . . . . . . . . . . . . . . . 78
Managing a group . . . . . . . . . . . . . . . . . . . . . . . . . . . . . . 79
Placing and managing instant conference . . . . . . . . . . . . 79
Managing instant conferences . . . . . . . . . . . . . . . . . . . . . 81
Logging Events . . . . . . . . . . . . . . . . . . . . . . . . . . . . . . . . . . . . 84
Viewing entries on the main screen . . . . . . . . . . . . . . . . . 84
Viewing entries on the Logs screen . . . . . . . . . . . . . . . . . 86
Sorting entries on the Logs screen . . . . . . . . . . . . . . . . . 86
Deleting entries in the Logs screen . . . . . . . . . . . . . . . . . 86
Managing voice mail . . . . . . . . . . . . . . . . . . . . . . . . . . . . . . . . 87
Calling the voice mail system . . . . . . . . . . . . . . . . . . . . . . 87
Acronyms . . . . . . . . . . . . . . . . . . . . . . . . . . . . . . . . . . . . . . . 89
6 NN42030-102 MC 3100 3.0 Standard 03.08 July 2009
Page 7

Welcome
Welcome
This section contains the following topics:
• “Your new Nortel MCC 3100 for Nokia application” on page 7
• “New in this release” on page 7
• “Nortel MCC 3100 for Nokia feature overview” on page 10
• “Language support” on page 11
• “Related publications” on page 12
Your new Nortel MCC 3100 for Nokia application
The Nortel Mobile Communication Client 3100 (MCC 3100) for Nokia
application allows you to achieve real-time communication with the Nortel
Mobile Communication Gateway 3100 (MCG 3100) and Nortel
Communication Server. The term Communication Server means all
communication servers that MC 3100 supports. For more information,
see the MC 3100 Product Bulletin at www.nortel.com
.
New in this release
The following sections detail what’s new in Nortel Mobile Communication
Client 3100 for Nokia User Guide (NN42030-102) in Nortel Mobile
Communication 3100 Release 3.0.
Features
Nortel Mobile Communication 3100 (MC 3100 ) Release 3.0 introduces
an over the air installation and upgrade option.
This release contains new information about Mid-call features:
• “Call hold and retrieve” on page 69
• “Call transfer” on page 70
Nortel Mobile Communication Client 3100 for Nokia User Guide 7
Page 8

Welcome
• “Call swap” on page 70
• “Three-party conference call” on page 71
• “Speaker mode” on page 71
Other changes
The following updates occurred:
• Usability enhancements.
• Welcome section added, containing material from other sections.
• Getting started section added, containing material from other
sections.
• Document reformatted following NCDS standards.
• Contents updated with feedback from reviewers.
Revision history
July 2009
Stan dard 03.08. This document is issu ed to support Nortel Mobile
Communication Release 3.0 and the Communication Server
2100 (CS 2100). A comment is added to indicate that the CS
2100 does not support the Device handoff feature.
Januray 2009
Stan dard 03.07. This document is issu ed to support Nortel Mobile
Communication Release 3.0. Updated the System Requirements
table in Getting Started section and technical content in Software
Installation section.
January 2009
Stan dard 03.06. This document is issu ed to support Nortel Mobile
Communication Release 3.0. Updated to corr ec t for mat t ing
errors.
8 NN42030-102 MC 3100 3.0 Standard 03.08 July 2009
Page 9

December 2008
Stan dard 03.05. This document is issu ed to support Nortel Mobile
Communication 3100 Release 3.0. Updated the Nokia feature
overview and added the procedure “Dialing an emergency
number” on page 52.
December 2008
Stan dard 03.04. This document is issu ed to support Nortel Mobile
Communication 3100 Release 3.0. Updates were made to
include links to multimedia presentations and to “Cellular data
plan use of MCC 3100 for Nokia” on page 16.
November 2008
Stan dard 03.03. This document is issu ed to support Nortel Mobile
Communication 3100 Release 3.0. Updates were made to corr ect
content in “Device handoff” on page 53.
November 2008
Stan dard 03.02. This document is issu ed to support Nortel Mobile
Communication 3100 Release 3.0. Changes were made to the
installation and upgrade procedures.
Welcome
September 2008
Stan dard 03.01. This document is issued to support Nortel Mo bile
Communication 3100 Release 3.0.
April 2008
Stan dard 02.01. This document is issu ed to support Nortel Mobile
Communication 3100 Release 2.1.
October 2007
Standard 01.02. This document is up-issued to contain fixes for
configuring Mobile Communication Gateway 3100 addre sses and
revised Outgoing Call Service DN requirements.
Nortel Mobile Communication Client 3100 for Nokia User Guide 9
Page 10

Welcome
September 2007
Standard 01.01. This document is issued to support the Nortel
Mobile Communications 3100 Series Portfolio on Nortel
Communication Server 1000 Release 5.0.
Nortel MCC 3100 for Nokia feature overview
MCC 3100 for Nokia extends the enterprise collaboration functionality to
a Nokia mobile device using a data (Internet) connection over the ce llular
and WiFi network. With MCC 3100 for Nokia, you can perform the
following tasks:
• Track the presence status of your mobility enabled friends.
• Send instant messages to your mobility enabled friends.
• Designate contacts as friends in order to track their presence.
• Manage your friends and contacts using the MCC 3100 local
directory.
• Search for friends in the Corporate Directory and the MCC 3100 local
directory.
• Click a friend to send an instant message (IM) or place a call.
• Use the logs to view your most recent incoming and outgoing calls,
voice mail indicator, and system events.
• Receive a message waiting indication (MWI) when you rece ive a new
voice mail message.
• Create a friend group containing multiple friends and then initiate an
ad hoc conference call to the group members.
• Redirect your incoming calls to alternative contact locations (for
example, home, other1, other2).
• Associate a single number with all of your outbound calls.
• Automatically download your configuration settings, including a list of
valid emergency numbers, from the Nortel Mobile Communication
Gateway 3100 (MCG 3100).
10 NN42030-102 MC 3100 3.0 Standard 03.08 July 2009
Page 11

Welcome
• When you dial an emergency number (for example, 911) on the
MCC 3100 for Nokia, the system automatically switches to the native
device phone in order to place a call. Your administrator configures
the emergency telephone numbers in the MCG 3100.
• Use the following call modes:
— Call-me-First—In this mode, your calls are set up in two stages.
First, the system calls you. After you answer, the system calls the
other party.
— Direct Outbound—In this mode, you can initiate calls directly from
your Nokia device to other parties.
For more information, see “Call modes” on page 48.
Note: You must configure your Outgoing Call Service DN in the
MCC 3100 settings before you can use the Direct Outbound call
mode. Your system administrator provides the Outgoing Ca ll Servic e
DN to allow direct MCC 3100 calling from your Nokia device.
• Available telephony features:
— call hold and retrieve
— call transfer—supervised and unsupervised
— call swap
— three-way conference call
— speaker mode.
Note: If you are connected to a 3G network, you ca n exchange
instant messages and track presence while you are engaged in a
voice call.
Language support
MCC 3100 for Nokia supports the following languages:
•Chinese
•Dutch
• English
•French
Nortel Mobile Communication Client 3100 for Nokia User Guide 11
Page 12

Welcome
•German
• Japanese
• Norwegian
•Swedish
When you install the client loads using the over the air download method,
the system recommends a different load. You can select download the
recommended software or you can select the software for another
language (as long as your device supports the chosen language). For
example, if you change the language from English to French on the
device, the system will recommend a French load instead of an English
load.
Related publications
The following publications relate to the MCC 3100 for Nokia:
• Nortel Mobile Communication Client 3100 for Nokia Quick Reference
(NN42030-106)
• Nortel Mobile Communication 3100 Planning and Engineering
(NN42030-200)
• Nortel Mobile Communication 3100 Installation and Commissioning
(NN42030-300)
• Nortel Mobile Communication 3100 Release Notes (NN42030-404)
• Nortel Mobile Communication 3100 Administration and Security
(NN42030-600)
12 NN42030-102 MC 3100 3.0 Standard 03.08 July 2009
Page 13

Getting started
Getting started
This section contains the following topics:
• “Before you begin” on page 13
• “System and network requirements” on page 13
• “Subscriber identity module (SIM) card” on page 17
• “Battery life” on page 17
• “Accessing Help” on page 18
Before you begin
Before you install the MCC 3100 for Nokia application, complete the
following checklist:
• Install the Nokia PC Suite software and ensure it is working properly.
• Become familiar with navigation and data entry methods for your
Nokia device.
System and network requirements
The MCC 3100 for Nokia has the following system requirements.
Important Notice:
Users are advised to select and use headsets which are designed to
reduce excessive sound pressure levels or acoustic shocks. Users should
Nortel Mobile Communication Client 3100 for Nokia User Guide 13
Page 14

Getting started
check that their headsets meet their respective National or International
Acoustic and Safety requirements.
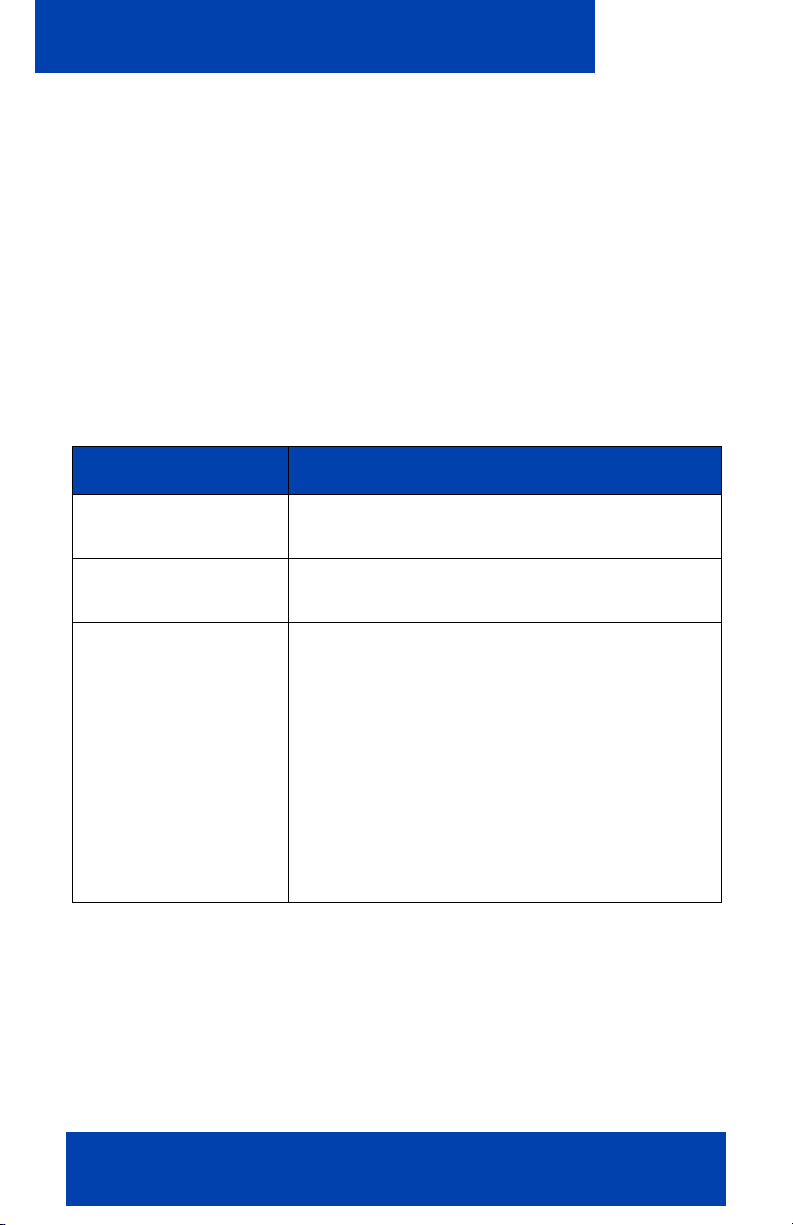
Table 1: System requirements
Hardware and
software
Type
Operating system Symbian v7.0
*The operating system includes Java
software (J2ME, MIDP 2.0, CLDC 1.1).
Languages supported English, French, German, Japanese,
Chinese, Norwegian, Dutch, and Swedish.
Network interface Internet access.
Nokia device Nokia E50, E51, E60, E61, E62, E65, E71,
E90, N95 series device.
Battery Charged battery in your device.
Other hardware A desktop or laptop PC with a USB port.
A USB connection cable.
Other software Nokia PC Suite software installed on your
desktop or laptop PC (to transfer the files to
the device).
A zipped file contains the MCC 3100 for Nokia software and
documentation. Extract the contents of this file to a folder on your
computer before you install the software.
The zip file contains the following files:
• MCC3100_N.jad, the MCC 3100 auto configuration file
• MCC3100_N.jar, the MCC 3100 application
• MCC3100Service-1-7-0.sis, an enhancement support file
• Properties
• Nortel_Eula.html.
14 NN42030-102 MC 3100 3.0 Standard 03.08 July 2009
Page 15

Getting started
For installation information, see “Software installation ” on pa g e 19.
Supported devices
The MCC 3100 is compatible with the Nokia E60, E61, and E65 devices.
For a list of the latest supported devices, see the MC 3100 Product
Bulletin at www.nortel.com
.
Device usage
Functionality can be accessed using the keys and buttons in the following
table.
Table 2: Key and button functionality
Key or button Description
5-way scroll key Use to scroll through screens and menus, and to
selects settings.
Selection keys Use to perform the functions indicated by the
text above it (for example, Menu Selection).
Call key Use to dial numbers and answer calls.
End key Use to end or reject a call.
Menu key Use to open the main menu.
Number keys Use to enter numbers and characters.
Network specifications
The following network specifications are required:
• Cellular network subscription
• Cellular Internet access (for example, GPRS, EDGE, CDMA 1xRTT,
or EVDO)
Server specification
The corporate network requires a minimum of one Communication Server
to support MCC 3100 for Nokia.
Nortel Mobile Communication Client 3100 for Nokia User Guide 15
Page 16

Getting started
The corporate network must have an MCG 3100 to deploy MCC 3100 for
Nokia. Dedicated commercial off the shelf (COTS) server platforms
support the MCG 3100 software.
For MCG 3100 installation information, see Nortel Mobile Communication
3100 Installation and Commissioning (NN42030-300).
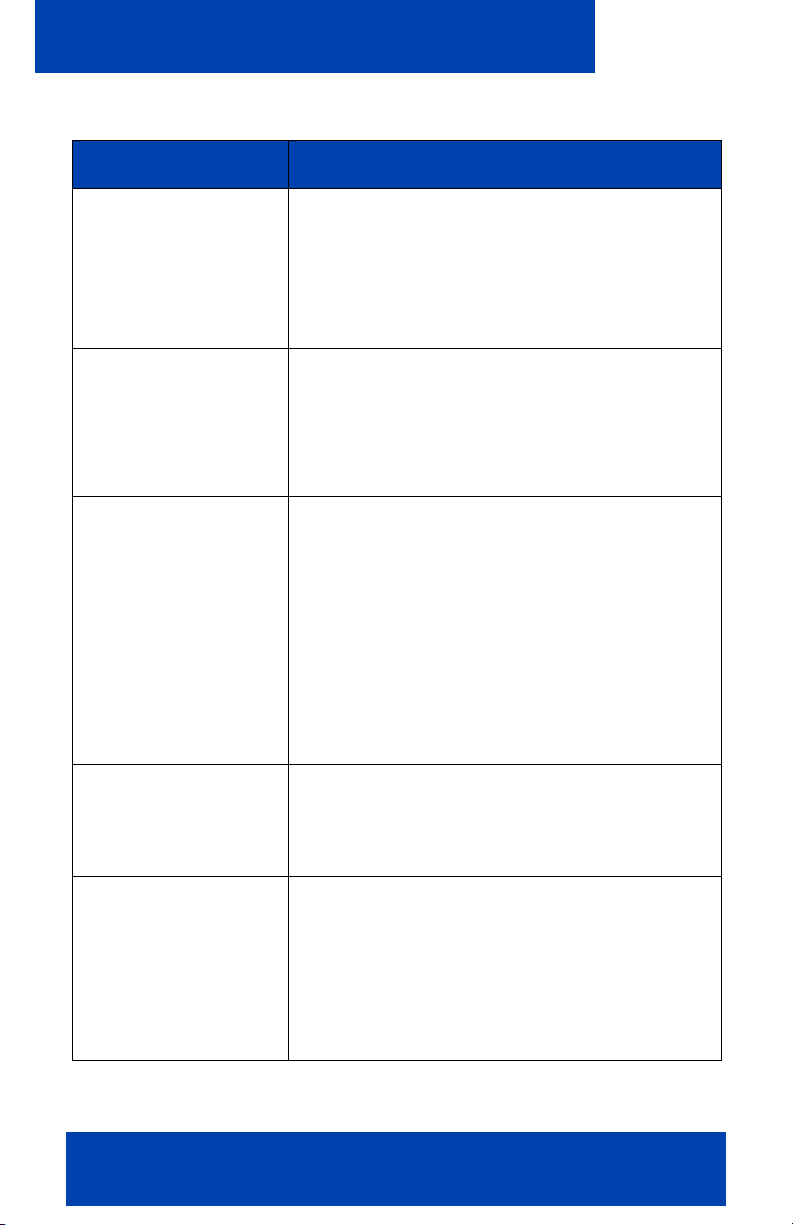
Cellular data plan use of MCC 3100 for Nokia
Table 3 "Cellular data plan usage" on page 16 show the approximate
data usage for various MCC 3100 functions.
Table 3: Cellular data plan usage
Command Bytes (Approximate)
Login 1000
Logout 900
Call screening mode change 800
Incoming call notification 800
Incoming call answer 900
Outgoing call (Call-me-First) 1000
Outgoing call (Direct) 1000
MWI Update 500
Client polling (every 240 seconds) 700
Sample calculation
Using the following assumption for a MCC 3100 user:
• 5 logon or logout attempts per day.
• 3 calls per hour (2 inbound, 1 outbound) within an 8 hour workday.
• 5 message waiting indicator updates per day.
The following calculations show data usage per month, assuming 20 work
days per month:
16 NN42030-102 MC 3100 3.0 Standard 03.08 July 2009
Page 17

Getting started
Logon and logout attempts
((5 * 1000) + (5 * 900)) * 20 = 190 000 bytes
3 calls per hour (2 inbound, 1 outbound) during an 8 hour day
((2 * 800) + 2 * 900) + 1000) * 8 * 20 = 704 000 bytes
5 message waiting indicator updates
500 * 20 = 10 000 bytes
Client polling (every 240 seconds or 15 an hour)
15 * 700 * 24 hours * 30 days = 7 560 000 bytes
The sum of cellular data use per month is:
190 000 + 704 000 + 10 000 + 7 560 000 = 8 464 000 bytes.
Subscriber identity module (SIM) card
You can change the SIM card in your device. As long as the new SIM
card supports a data connection, the device sends the telephone number
associated with the SIM to the MCG 3100 during the log on process. You
continue to make and receive calls without changing your client
configuration. People calling you do not dial different telephone numbers
when you change SIM cards.
Battery life
The battery life of your MCC 3100 device will vary, depending on the
amount of use. While operating in standby mode, you can expect 24
hours standby time while connected to a 2G network, and 10 hours
standby time while connected to a 3G network.
There are many factors that affect battery life. If you have devices for
which you do not get the above standby time, then you should contact
Nortel Support to discuss the scenario.
Nortel Mobile Communication Client 3100 for Nokia User Guide 17
Page 18

Getting started
Accessing Help
The MCC 3100 for Nokia includes embedded, context-sensitive help for
the following topics:
• Emoticon Icons: describes the instant message emoticon icons
• Presence: describes the presence status icons
• Log: describes the log icons
• Abbreviations: explains terms that appear in the Call screens
• About: provides the MCC 3100 for Nokia software version num be r
Accessing help
1. From any screen, select Options, Help.
The Help screen displays information related to the previous screen.
For example, if you select help from the Logs screen, the Logs topic
displays.
2. Change topics by selecting a different item from the menu or list.
18 NN42030-102 MC 3100 3.0 Standard 03.08 July 2009
Page 19

Software installation
Software installation
This section contains the following topics:
• “Installing the MCC 3100 for Nokia software from a computer”
on page 20
• “Installing the MCC 3100 for Nokia software over the air” on
page 22
• “Upgrading the MCC 3100 for Nokia software from a computer”
on page 24
• “Upgrading the MCC 3100 for Nokia software over the air” on
page 26
• “Moving the MCC 3100 for Nokia icon to the menu screen” on
page 27
• “Uninstalling the MCC 3100 for Nokia software” on page 28
• “Installing security certificates” on page 28
This section describes how to install, upgrade, and uninstall the Nortel
Multimedia Communication Client 3100 (MCC 3100) for Nokia on a
supported Nokia device. There are two ways to install or upgrade the
MCC 3100 for Nokia: from a computer or over the air.
Before you install or upgrade the MCC 3100 for Nokia software from a
computer, ensure that your Nokia device and yo ur PC are conn e cte d
using a Universal Serial Bus (USB) cable and ensure that Nokia PC Suite
software is installed on your PC.
Note 1: Ensure that your device has the correct date and time.
Note 2: In some cases, it is necessary to remove the existing
software components prior to performing an upgrade. Check with
your system administrator or read the release notes before
proceeding with an upgrade.
Note 3: If you are upgrading from an earlier release, you must
perform an initial software installation, not an upgrade. After
reinstalling the software, change the MCG 3100 address on the
Nortel Mobile Communication Client 3100 for Nokia User Guide 19
Page 20

Software installation
Systems Settings screen if instructed to do so by your system
administrator.
Note 4: If you wish to use HTTPS with certificates you should install
the certificate prior to installing the MC 3100 client.
Use the following procedures to install, upgrade, and uninstall the
MCC 3100 for Nokia software.
Installing the MCC 3100 for Nokia software from a computer
You can use your desktop PC or laptop to install or upgrade the
MCC 3100 software. After downloading the latest software load, you
install it on your Nokia device using a USB connection.
Prior to installation, install the Nokia PC Suite on your computer and
configure the device with the correct date and time.
The following procedure details the steps required to install the
MCC 3100 for Nokia software from a computer.
Installing the MCC 3100 for Nokia software (new install) from a
computer
1. On your computer, open a web browser and enter the secure
(HTTPS) or regular (HTTP) address of the User Portal:
ECM systems https://<hostname>/adminserver/userportal.html
non-ECM
systems
Note: Obtain the correct hostname and port settings from your
system administrator
2. Use the controls to locate the software file you require for your
device, and click Download.
3. Click Save.
20 NN42030-102 MC 3100 3.0 Standard 03.08 July 2009
http://<hostname>:8282/adminserver/userportal.html
https://<hostname>:8553/adminserver/userportal.html
Page 21

Software installation
4. Navigate to the folder where you want to store the software files and
click Save.
5. Extract the following files from the zip file and save them to a folder
on your computer:
— MCC3100_N.jad—Describes and configures the application.
— MCC3100_N.jar—Application archive.
— MCC3100Service-1-7-0.sis—Usability enhancements module.
— Properties
— Nortel Eula.html
6. Connect the device to your computer using a universal serial bus
(USB) cable.
7. Select Start, Programs, Nokia PC Suite, Nokia PC Suite.
8. Click File Manager.
The Nokia Phone Browser window appears.
9. Use the browser to locate the software files you extracted, and then
select and copy them.
10. Paste the files into the Nokia Phone Browser, Nokia <model>,
Phone memory, Data, Installs directory. See Figure 1 "Nokia
phone browser installs" on page 21.
Figure 1: Nokia phone browser installs
Nortel Mobile Communication Client 3100 for Nokia User Guide 21
Page 22

Software installation
11. On your Nokia device, press the Menu key.
The Menu screen appears.
12. Select Tools, App. mgr
The Applications Manager appears.
13. In the Applications Manager, highlight MCC3100-N.jad.
14. Select Options, Install.
15. Follow the prompts to install the application.
16. In the Applications Manager, highlight MCC3100Service-1-7-0.sis.
17. Select Options, Install.
18. Follow the prompts to install the SIS file.
19. Optionally, move the MCC 3100 for Nokia application icon to the
menu screen of your Nokia device. For more information, see
“Upgrading the MCC 3100 for Nokia software from a computer”
on page 24.
Note: If an error occurs during installation, you may see one of the
following messages: Authorization failed; Incorrect certificate; Invalid
jar. file. You need to restart the device and follow the installation
procedures again.
Installing the MCC 3100 for Nokia software over the air
You can maintain MCC 3100 software directly from your Nokia device
using a wireless internet connection (over the air). To complete the initial
installation, open a browser on your Nokia device, access the software
Web site and download and install the software. To upgrade, see
“Upgrading the MCC 3100 for Nokia software over the air” on
page 26.
When you perform an over the air software installation, the system
recommends a software load that matches your Nokia device’s oper ating
system, features, and language. You can accept the recommendation or
22 NN42030-102 MC 3100 3.0 Standard 03.08 July 2009
Page 23

Software installation
select a different load. For more information, see “Language support”
on page 11.
Click here to view a multimedia presentation on
installation of the client (over the air) (www31.nortel.com/
webcast.cgi?id=7483)
The following procedure details the steps required to initially install the
MCC 3100 for Nokia software over the air.
Installing the MCC 3100 for Nokia software (new install) over the air
1. On your Nokia device, if the MCC 3100 for Nokia is running, select
Quit.
2. Press the Menu key.
The Menu screen appears.
3. On the Menu screen, select Web.
4. Use the following address format to access the user por tal Web page:
http://<hostname | IP address>:8080/m
OR
https://<hostname | IP address>:8443/m
Note: Obtain the actual hostname or IP address and port settings
from your system administrator.
5. Do one of the following:
— To install the recommended software load, select the Installable
link.
— To select a different software load, select All other software for
your platform, scroll to a load, and select the Installable link.
6. After the prompt, MCC 3100_N.jad downloaded, select Open/Later,
then select Open.
7. Select Yes at the prompt to download and install the MCC 3100
application software.
8. At the prompt to download and install the software, select Yes .
Nortel Mobile Communication Client 3100 for Nokia User Guide 23
Page 24

Software installation
9. Review the following details on the details screen:
—Name
— Version
10. Select Continue.
11. If the software is already installed, select OK to upgrade it.
12. Choose where you would like to install the application software, either
the Phone Mem. or Memory Card. Select Select to continue.
13. After the installation completes, exit the web browser.
14. Optionally, move the MCC 3100 for Nokia application icon to the
menu screen of your Nokia device. For more information, see
“Moving the MCC 3100 for Nokia icon to the menu screen” on
page 27.
Upgrading the MCC 3100 for Nokia software from a computer
This section describes how to upgrade or reinstall the MCC 3100 for
Nokia software. When you upgrade the software, your data is saved
automatically.
Upgrading the MCC 3100 for Nokia software from a computer
1. If the MCC 3100 for Nokia is running, stop it by selecting Quit.
1. On your computer, open a web browser and enter the secure
(HTTPS) or regular (HTTP) address of the User Portal:
ECM systems https://<hostname>/adminserver/userportal.html
non-ECM
systems
Note: Obtain the correct hostname and port settings from your
system administrator
2. Use the controls to locate the software file you require for your
device, and click Download.
24 NN42030-102 MC 3100 3.0 Standard 03.08 July 2009
http://<hostname>:8282/adminserver/userportal.html
https://<hostname>:8553/adminserver/userportal.html
Page 25

Software installation
3. Click Save.
4. Navigate to the folder where you want to store the software files and
click Save.
5. Extract the following files from the zip file and save them to a folder
on your computer:
— MCC3100_N.jad—Describes and configures the application.
— MCC3100_N.jar—Application archive.
— MCC3100Service-1-7-0.sis—Usability enhancements module.
— Properties
— Nortel Eula.html
6. Connect the device to your computer using a universal serial bus
(USB) cable.
7. Select Start, Programs, Nokia PC Suite, Nokia PC Suite.
8. Click File Manager.
The Nokia Phone Browser window appears.
9. Use the browser to locate the software files you extracted, and then
select and copy them.
10. Paste the files into the Nokia Phone Browser, Nokia <model>,
Phone memory, Data, Installs directory.
11. When the Confirm File Replace prompt appears, select Yes to all.
12. On your Nokia device, press the Menu key.
The Menu screen appears.
13. Select Tools, App. mgr
The Applications Manager appears.
14. In the Applications Manager, highlight MCC3100-N.jad.
15. Select Options, Install.
16. Follow the prompts to install the application.
17. In the Applications Manager, highlight MCC3100Service-1-7-0.sis.
18. Select Options, Install.
19. Follow the prompts to install the SIS file.
Nortel Mobile Communication Client 3100 for Nokia User Guide 25
Page 26

Software installation
20. Optionally, move the MCC 3100 for Nokia application icon to the
menu screen of your Nokia device. For more information, see
“Moving the MCC 3100 for Nokia icon to the menu screen” on
page 27
Upgrading the MCC 3100 for Nokia software over the air
If you are performing an upgrade from a previous release (2.x), you must
perform an over the air initial installation (see “Installing the MCC 3100
for Nokia software over the air” on page 22) and then update the
MCG 3100 address on the Systems Settings screen if instructed to do so
by your system administrator.
The following procedure details the steps required to upgrade the
MCC 3100 for Nokia software over the air.
Upgrading the software over the air from your Nokia device
1. Start the MCC 3100 for Nokia and log on.
2. From any screen menu, select Options, Help.
3. Choose Options, Software Upgrade.
A web browser opens and the software download site displays.
4. Do one of the following:
— To install the recommended software load, select the Installable
link.
— To select a different software load, select All other software for
your platform, scroll to a load, and select the Installable link.
5. After the prompt, MCC 3100_N.jad downloaded, select Open/Later,
then select Open.
The Details screen appears.
6. Review the following details on the Details screen:
—Name
— Version
— Certificates
26 NN42030-102 MC 3100 3.0 Standard 03.08 July 2009
Page 27

Software installation
7. Select Continue.
8. If the software is already installed, select OK to upgrade it.
9. After installation is complete, exit the web browser.
10. Optionally, move the MCC 3100 for Nokia application icon to the
menu screen of your Nokia device and press OK. For more
information, see “Upgrading the MCC 3100 for Nokia software
from a computer” on page 24.
Moving the MCC 3100 for Nokia icon to the menu screen
Complete this procedure to make the MCC 3100 for Nokia application
icon available on the menu screen of the Nokia device.
Moving the MCC 3100 for Nokia icon to the menu screen
1. On your Nokia device, press the Menu key.
The Menu screen appears.
2. Select Installations.
3. Highlight the MCC 3100 for Nokia icon, and then press Options,
Move to folder.
4. Select Move To: Menu.
5. Press Back to return to the Menu screen.
6. Highlight the MCC 3100 for Nokia icon, and press Options, Move.
A check mark appears in the upper right corner of the icon.
7. Use the five-way scroll key to select the screen position where you
want to place the MCC 3100 icon, and then press OK.
The MCC 3100 for Nokia icon moves to the position you selected.
8. Press OK.
Note: If you do not move the application icon to the Main screen, then
the MCC 3100 is available in the installat folder.
Nortel Mobile Communication Client 3100 for Nokia User Guide 27
Page 28

Software installation
Uninstalling the MCC 3100 for Nokia software
This section describes how to remove the MCC 3100 for Nokia from your
device.
Uninstalling the MCC 3100 for Nokia software
1. Open the Applications Manager from one of the following locations:
— Menu
—Tools
— App. Mgr
The Applications Manager appears.
2. Highlight MCC 3100 Starter.
3. Select Options, Remove.
4. Select Yes to confirm application removal.
5. After you remove the files and applications, turn the device off, and
then back on.
6. Select MCC 3100 from the list and then select Options, Remove,
then click Yes to confirm.
Installing security certificates
Your system administrator may send you instructions for installing a
security certificate on your Nokia device. When the Certificate Uses
prompt appears, you must select the Internet check box.
Note: Install the certificate prior to connecting to the MCG3100.
28 NN42030-102 MC 3100 3.0 Standard 03.08 July 2009
Page 29

MCC 3100 for Nokia configuration
MCC 3100 for Nokia configuration
This section contains the following topics:
• “Initial configuration” on page 29
• “Configuring the system settings” on page 31
• “Configuring your Personal preferences” on page 35
• “Configuring your Call settings” on page 38
Initial configuration
The first time you start the Mobile Communication Client 3100 for Nokia
(MCC 3100) after you install it on your Nokia, you must configure the
following parameters provided by your system administrator:
• your account username and extens ion
• your account password
• the Mobile Communication Gateway 3100 (MCG 3100) IP address
• your Outgoing Call Service Directory Number (DN)
• your Nokia telephone number
The next time you start MCC 3100 for Nokia, you automatically log on to
the network.
The following procedure details the steps required to configure the initial
Nokia parameters.
Configuring initial Nokia parameters
1. Obtain your user name, password, Mobile Communication Gateway
IP address, Outgoing Call Service DN, and Nokia telephone number
from your system administrator.
2. Start the MCC 3100 for Nokia application. For more information, see
“Starting and exiting the MCC 3100 for Nokia application” on
page 41.
Nortel Mobile Communication Client 3100 for Nokia User Guide 29
Page 30

MCC 3100 for Nokia configuration
Note: If the Main screen appears, then your basic settings are
already configured, and you can start using the application.
3. Click the Menu key.
4. From the Menu screen, select the Installations folder an d then select
the Nortel MCC 3100 for Nokia application icon.
5. Select Yes to allow the application to use the network to send and
receive data.
6. On the Systems Settings screen, enter:
—In the Username field, enter user name provided by your system
administrator.
— In the Password field, enter the password provided by your
system administrator.
— In the Primary MCG3100 Address field, enter the address in the
format:
<http | https>://<IP address | FQDN>:<port>
— In the Outgoing Call Service DN field, enter the Outgoing Call
Service DN number provided by your system administrator.
7. Select Options, Save.
8. Select Options, Preferences.
The Preferences screen appears.
9. In the Mobile Contact field, enter the cell telephone number for your
Nokia device.
10. Select Options, Save.
11. Select Options, Login/Logout .
The MCC 3100 application logs onto the system.
12. Select Yes and then OK in response to the prompts.
13. Select Yes to allow the network to send or receive data.
14. At the prompt to download the usability enhancement, select OK and
then select Yes.
15. After reviewing the details, (name, version, certificates), select
Continue.
30 NN42030-102 MC 3100 3.0 Standard 03.08 July 2009
Page 31

MCC 3100 for Nokia configuration
16. When prompted to allow the application to start when needed, select
Yes.
If logon is successful, the remainder of your configuration settings are
automatically downloaded from the MCG 3100 and you can begin
using the MCC 3100 for Nokia to place calls and send instant
messages.
Note: If you are using a GSM device, your service provider may
require you to program an Access Point Name (APN), username and
password on the device under Tools, Settings, Connection, Access
points.
Configuring the system settings
Use the System Settings screen to manage your connection to the
network. As a minimum, you must enter your user name, password,
MCC 3100 address, and Outgoing Call Service DN on this screen. For
more information, see “Initial configuration” on page 29.
Nortel recommends that the Outgoing Call Service DN includes the
international access code (+) and your country code as part of the
number to facilitate roaming. For example, +1 613 123 1111. For more
information, see Figure 2 "Outgoing Call Service DN structure" on
page 31.
Figure 2: Outgoing Call Service DN structure
Consult your system administrator to obtain your Outgoing Call Service
DN and other system settings.
Nortel Mobile Communication Client 3100 for Nokia User Guide 31
Page 32
MCC 3100 for Nokia configuration
Configuring your system settings
1. Start the MCC 3100 for Nokia application. For more information, see
“Starting and exiting the MCC 3100 for Nokia application” on
page 41.
2. From the Nortel MCC 3100 for Nokia main screen, select Options,
System Settings.
The System Settings screen appears.
3. Complete the fields on the System Settings screen using the
information provided by your system administrator. Consult your
system administrator if you need assistance.
Table 4: System Settings fields
Field Settings
Username The account user name on the MCG 3100.
(Required).
Password The account password on the MCG 3100.
(Required).
Primary MCG3100
Address
Enter the IP address or the domain name and
port of the primary MCG 3100:
Format:
<http | https>://<IP address | FQDN>:<port>
Note 1: If the default port (8080 for HTTP,
or 8443 for HTTPS) is in use, then only
the IP address or FQDN is required.
Note 2: You may need to use the FQDN
because of certificate requirements.
32 NN42030-102 MC 3100 3.0 Standard 03.08 July 2009
Page 33

Table 4: System Settings fields
Field Settings
MCC 3100 for Nokia configuration
Secondary MCG3100
Address
Voicemail DN/SIP
Address
Outgoing Call
Service DN
Enter the IP address or the domain name and
port of the secondary MCG 3100:
Format:
<http | https>://<IP address | FQDN>:<port>
Note 1: If the default port (8080 for HTTP,
or 8443 for HTTPS) is in use, then only
the IP address or FQDN is required.
Note 2: You may need to use the FQDN
because of certificate requirements.
Enter the number or SIP address to access
the voice mail server. This number enables
you to access your voice mail messages
directly from the Logs screen.
Enter the call service directory number (DN)
for client calls. You can obtain this required
setting from your system administrator.
You can place calls directly from your wireless
device to other parties using the Direct
Outbound mode.
Note: To enable the Direct Outbound
mode, leave your caller ID visible on the
device.
Max No. of recent
(1 - x)
Specify the number of recent incoming and
outgoing calls that appear in the recent
preview pane of the MCC 3100 for Nokia. You
can choose from a range of 1 to x items,
where x is determined by your device’s screen
size. For example, if your device has a large
screen, the upper limit may appear as 10 or
more items. The default is 3 items.
Nortel Mobile Communication Client 3100 for Nokia User Guide 33
Page 34
MCC 3100 for Nokia configuration
Table 4: System Settings fields
Field Settings
No. of Visible Entries
in Friends Popup
(0 - x)
Specify the number of friends that display in
the Friends preview pane of the MCC 3100 for
Nokia where x is determined by your device’s
screen size. For example, if your device has a
large screen, the upper limit may appear as 20
or more items. The default is 7 items.
Best Performance for
Call Delivery
Select this parameter to improve call delivery
performance if you do not receive some of
your incoming calls.
Warning: Enabling this feature increases your
device’s power consumption.
Auto Update
Presence
Select this check box to have MCC 3100 for
Nokia receive automatic presence
notifications from mobility enabled friends
(mobile client users on the same system)
whenever their status changes.
Warning: Because the client connects to the
network for every status update, enabling this
feature increases power consumption on the
device and may cause extra airtime to be
consumed.
Auto Clear Presence Select this check box to have the MCC 3100
for Nokia automatically clear all presence
notifications from the Friends screen when the
Clear Presence interval expires.
Clear Presence
interval (1-120min)
When this timer expires, the MCC 3100 for
Nokia automatically clears all presence
notifications from the Friends screen. Auto
Clear Presence must be enabled for this timer
to operate. The timer can be set to a value
between 1 and 120 minutes. Setting the timer
to 0 disables this functionality.
4. From the menu, select Options, Save.
34 NN42030-102 MC 3100 3.0 Standard 03.08 July 2009
Page 35

MCC 3100 for Nokia configuration
You log on and the Main screen appears.
Configuring your Personal preferences
Use the Preferences screen to enter personal information, such as your
name, contact, and call prefix settings. As a minimum, you must enter
your mobile telephone number on this screen after you perform th e steps
in “Initial configuration” on page 29. Check with your system
administrator to determine whether the international access and countr y
codes are required.
Configuring your personal preferences
1. Start the MCC 3100 for Nokia application. For more information, see
“Starting and exiting the MCC 3100 for Nokia application” on
page 41.
2. From the Nortel MCC 3100 for Nokia Main or System Settings
screen, select Options, Preferences.
The Preferences screen appears. For more information, see Table 5
"Preferences screen fields" on page 35
3. Complete the fields on the Preferences screen using the information
in the following table as a guide.
Table 5: Preferences screen fields
Field Settings
First Name Enter your first name
Last Name Enter your last name
Display Name Enter the name that appears in the status
pane of the main screen.
Mobile Contact Enter your Nokia telephone number.
This is your default contact location. Select
other contact locations when you place an
Advanced Call.
Nortel Mobile Communication Client 3100 for Nokia User Guide 35
Page 36

MCC 3100 for Nokia configuration
Table 5: Preferences screen fields
Field Settings
Mobile Contact
Default Prefix
Select the mobile telephone default call prefix.
Options include:
•Use No Prefix
• Local Prefix
• Long Distance Prefix
• International Prefix
• Corporate Prefix
When you execute a basic call, the system
automatically inserts this prefix ahead of your
mobile telephone number.
Extension Contact Enter your business extension number if it
differs from your User name. You can direct a
call to this number when calling someone
using Call-me-First mode.
Home Contact Enter your home number. You can direct a
call to this number when:
• You call someone using Call-me-First
mode.
• You receive an incoming call and Call
Screening mode is enabled.
Other1 Contact Enter an additional number, such as a
temporary business number). You can direct
a call to this number when:
• You call someone using Call-me-First
mode.
• You receive an incoming call and Call
Screening mode is enabled.
36 NN42030-102 MC 3100 3.0 Standard 03.08 July 2009
Page 37

MCC 3100 for Nokia configuration
Table 5: Preferences screen fields
Field Settings
Other2 Contact Enter an additional number. You can direct a
call to this number when:
• You call someone using Call-me-First
mode.
• You receive an incoming call and Call
Screening mode is enabled.
Local Prefix Enter the digits required to make a local call.
For example, if the telephone dialing plan
requires a prefix of 9 for local calls, enter 9.
Long Distance Prefix Enter a long-distance prefix. For example, if
your telephone company requires a prefix of 1
for long-distance calls, enter 1.
International Prefix Enter an international prefix. For example, if
your telephone company requires a prefix of
011 for international calls, enter 011.
Corporate Prefix Enter the digits required to make a call within
the company. For example, if the telephone
dialing plan requires corporate calls to use a
specific trunk, configure the digits required to
access that trunk. The corporate prefix is also
known as the trunk steering code
New IM Alert When this box is checked, each time you
receive an instant message, the New IM Alert
screen appears. From this screen, you can
reply to the message or dismiss it before
returning to the screen you were viewing.
When this box is unchecked, each time you
receive an instant message, the IM screen
appears if you are on a read-only screen such
as Friends or Contacts. If you are on a data
input screen, such as Preferences or System
Settings, no alert appears but the message is
added to the Logs screen.
Nortel Mobile Communication Client 3100 for Nokia User Guide 37
Page 38

MCC 3100 for Nokia configuration
Table 5: Preferences screen fields
Field Settings
IM Notification repeat Specify the maximum number of notifications
you receive for incoming instant messages.
The permitted range is 0 to 9; the default is 2.
IM Notification
volume
Call Notification
Repeat (0-9)
Call Notification
Volume (0-9)
Presence Alert
Notification Repeat
(0-9)
Presence Alert
Notification volume
(0-9)
Only the MCC 3100 for Nokia uses the information you enter on the
Preferences screen. No information is uploaded to any other
application.
Specify the volume of the audible alert that
plays for incoming instant message
notifications. The permitted range is 0 to 9;
the default is 5.
Specify the maximum number of notifications
that you receive for incoming voice calls.
Choose from a range of 0 to 9 notifications
(default is 2).
Specify the volume of the audible alert that
plays for incoming voice call notifications.
Choose from a range of 0 to 9 (default is 5).
Specify the maximum number of notifications
you receive for incoming presence alerts. The
permitted range is 0 to 9; the default is 2.
Specify the volume of the audible alert that
plays for incoming presence alert
notifications. The permitted range is 0 to 9;
the default is 5.
4. Select Options, Save.
Configuring your Call settings
Use the Call Settings screen to select a call screening mode and
configure the instant conference notification period.
38 NN42030-102 MC 3100 3.0 Standard 03.08 July 2009
Page 39

MCC 3100 for Nokia configuration
Configuring your call settings
1. Start the MCC 3100 for Nokia application. For more information, see
“Starting and exiting the MCC 3100 for Nokia application” on
page 41.
2. From the menu, select Options, Call Settings.
The Call Settings menu screen appears. For more information, see
Figure 3 "Call Settings" on page 39.
Figure 3: Call Settings
3. Use the radio buttons to select a Call Screening Mode:
— Call Screening Enabled—When you receive an incoming call,
the MCC 3100 for Nokia displays a dialog that allows you to
either accept the call on your Nokia, redirect the call to another
number, or decline the call.
— Call Screening Disabled—When you receive an incoming call,
the MCC 3100 for Nokia only accepts calls on your Nokia device.
— Mobile Do-Not-Disturb—When you receive an incoming call,
your desktop phone rings, not your wireless device. Except for a
record added to the logs, you are not alerted of the call in any
way on the MCC 3100.
4. Configure your contact locations on the Preferences screen. For
more information, see “Configuring your Personal preferences”
on page 35.
Nortel Mobile Communication Client 3100 for Nokia User Guide 39
Page 40

MCC 3100 for Nokia configuration
5. Configure the Instant Conference Notify Period for a time period
between 1 and 30 minutes (default is 5 minutes). This setting controls
how often the MCC 3100 for Nokia prompts you to join an instant
conference after you have received the initial invitation and selected
Join Later.
6. From the menu, select Options, Save.
40 NN42030-102 MC 3100 3.0 Standard 03.08 July 2009
Page 41

Basic features
Basic features
This section contains the following topics:
• “Starting and exiting the MCC 3100 for Nokia application” on
page 41
• “Logging on and logging off” on page 42
• “Hiding the MCC 3100 for Nokia application” on page 42
• “Overview of the main screen” on page 43
• “Navigating screens” on page 45
Starting and exiting the MCC 3100 for Nokia application
This section describes how to start and exit the MCC 3100 application.
Starting the MCC 3100 application on a Nokia device
1. Press the Menu button.
2. Select the Nortel MCC 3100 application icon.
The MCC 3100 for Nokia application starts.
Note: On some Nokia devices, the application i con is available un der
Menu, Installations.
Exiting the MCC 3100 app l ica t io n o n a No ki a de vi ce
1. Start the MCC 3100 for Nokia application. For more information, see
“Starting and exiting the MCC 3100 for Nokia application” on
page 41.
2. From the menu, select Options, Quit.
The Quit confirmation screen appears.
3. Select Yes and then OK to exit the application, or Cancel to return to
the application.
Nortel Mobile Communication Client 3100 for Nokia User Guide 41
Page 42

Basic features
Note 1: Nortel recommends that you exit the MCC 3100 for Nokia
application before you shut off your device.
Note 2: On some Nokia devices, you can exit the application by
selecting Quit from any menu.
Logging on and logging off
At times, you may wish to log out of the MCC 3100 for Nokia but leave the
client running. Once logged off, you can easily log back on again.
Logging on
1. Start the MCC 3100 for Nokia application. For more information, see
“Starting and exiting the MCC 3100 for Nokia application” on
page 41.
2. Select Options, Login/Logout from the menu.
The status indicator changes to Connected.
Logging off
1. Start the MCC 3100 for Nokia application. For more information, see
“Starting and exiting the MCC 3100 for Nokia application” on
page 41.
2. Select Options, Login/Logout from the menu.
The status indicator changes to Logged out.
The MCC 3100 for Nokia application remains active when you are logged
off. To exit the application, see “Starting and exiting the MCC 3100 for
Nokia application” on page 41
Hiding the MCC 3100 for Nokia application
To use another application, you can temporarily hide the MCC 3100 for
Nokia application.
From any screen, press the Menu key.
42 NN42030-102 MC 3100 3.0 Standard 03.08 July 2009
Page 43

Basic features
The application does not appear, but remains running in the background.
When you access the Nortel MCC 3100 for Nokia again, you return to the
last screen you used.
Overview of the main screen
After you configure the MCC 3100 for Nokia (see “Initial configuration”
on page 29), the Main screen appears whenever you start the MCC 3100
for Nokia. The Main screens menu provides access to the full functionality
of the MCC 3100 for Nokia. For more information, see Figure 4 "Main
screen" on page 43.
Figure 4: Main screen
Status pane
The Status pane indicates your current presence status on the network.
For example, if Connected appears, then you are logged on and available
to take calls. The text color visually indicates your availability:
• Connected (green text)—Logged on.
• Logged Out (grey text)—Logged off.
• Logged Out by Admin (grey text)—The MCG 3100 for Nokia
administrator has logged you off.
Nortel Mobile Communication Client 3100 for Nokia User Guide 43
Page 44

Basic features
• Logged out by Another Device (grey text)—You have been logged o ff
because you logged on with another device.
• Logged out by Server (grey text)—You are logged off because the
MCG 3100 for Nokia is unavailable. You automatically log on when
the server becomes available.
The status pane also displays the following information:
• (VM) if you have new voice mail messages
• an asterisk (*) if you registered with the secondary Mobile
Communication Gateway 3100.
Recent link and preview pane
Select the Recent link to go to the Logs screen, which provides a history
of incoming and outgoing calls, voice mail messages, and system events.
The Logs screen can contain up to 50 entries.
The Recent preview pane (below the link) displays up to 10 friends that
you have recently communicated with. After you access the list, place a
call to a friend.
Friends link and preview pane
Select the Friends link to go to the Friends screen, which provides a
complete list of contacts that you designated as friends. Call, add, edit,
delete and send IMs and track the online status of your friends provided
that they are mobility enabled (for example another MCC 3100 for Nokia
user on the same system).
The Friends preview pane (below the link) displays a partial list of your
friends (up to 50 entries visible) that you can quickly select and call.
Groups link
Select the Groups link to go to the Groups Management screen, which
provides a complete list of user groups that yo u ad de d to the MCC 3100
for Nokia. You can call your groups, each of which can contain multiple
friends.
44 NN42030-102 MC 3100 3.0 Standard 03.08 July 2009
Page 45

Basic features
Corp Dir link
Select the Corp Dir link to initiate a search for contacts in your corporate
directory. Expand the search to include your local directory of friends on
the MCC 3100 for Nokia.
Contacts link
Select the Contacts link to go to the Contacts screen, which provides a
complete list of contacts you have added to your MCC 3100 for Nokia
device. You can call and send instant messages to your contacts. In
addition to being able to call your contacts, you can add, edit, and delete
them.
Navigating screens
Use the five-way scroll key to scroll screens, select or navigate menus,
and select settings. Use Selection keys to perform functions indicated by
the text above the key (for example, to select from a menu). Use the
keypad to enter numbers and characters. Use the Send key to initiate
calls and the End key to terminate calls. Use the Menu key to open the
main menu.
Accessing screens
The Main screen contains links from which you can access other screens.
Access some screens by selecting menu commands. For example,
access the System Settings and Preferences screens from the menu.
Shortcut Keys
In addition to standard navigational aids, MCC 3100 for Nokia provides
shortcut keys to speed your workflow. For more information, see Table 6
"Shortcut keys" on page 46.
Nortel Mobile Communication Client 3100 for Nokia User Guide 45
Page 46

Basic features
Note: Some devices may not offer the full range of shortcut keys.
Table 6: Shortcut keys
Key Action
a-z While focus is on the Main screen or the Friends preview
pane, press a key to search for friends with names that
start with that letter.
<space> Go to the Place Call screen to initiate a call. If focus is on
the Friends preview pane when you press space, the
highlighted friend’s contact location is preconfigured.
Green call and red hangup buttons
If your wireless device includes a green call button and a red hangup
button, use them to quickly access key functions of the MCC 3100 for
Nokia application.
Use the green call button to do the following:
• Accept an incoming call.
• Initiate a call after you have dialed a number, set up an advanced call,
or highlighted a friend, contact, log entry, or search result.
• Go to the Place Call (dial) screen from a non-call screen.
Use the red hangup button to do the following:
• Reject an incoming call.
• Minimize the MCC 3100 for Nokia application on the mobile device.
Selecting the red key does not exit the application.
46 NN42030-102 MC 3100 3.0 Standard 03.08 July 2009
Page 47

Advanced features
Advanced features
This section contains the following topics:
• “Placing calls” on page 47
• “Receiving calls” on page 54
• “Working with friends and contacts” on page 55
• “Managing contacts” on page 56
• “Managing friends” on page 60
• “Searching the corporate directory” on page 64
• “Managing presence” on page 65
• “Using the Mid-Call Features” on page 69
• “Sending Instant Messages” o n pa g e 72
• “Working with Groups” on page 77
• “Logging Events” on page 84
• “Managing voice mail” on page 87
Placing calls
Your enterprise telephone system manages all calls that you place on the
MCC 3100 for Nokia. Quickly and easily call your co-workers either by
selecting them from a friends list or by dialing their extension number. As
well, one number is associated with all of your outbound calls, regardless
of your actual location. At various times of the day, use the MCC 3100 to
initiate calls from your desktop telephone, mobile telephone, or home
telephone, but the people you call always see the same number.
Nortel Mobile Communication Client 3100 for Nokia User Guide 47
Page 48

Advanced features
Important Notice:
Select and use headsets that are designed to reduce excessive sound
pressure levels or acoustic shocks. Check that your headset meet its
respective National or International Acoustic and Safety requirements.
Click here to view a multimedia presentation
on making a call from your mobile phone
(www31.nortel.com/webcast.cgi?id=7484)
Click here to view a multimedia presentation
on making a call from your home phone
(www31.nortel.com/webcast.cgi?id=7485)
Call modes
Two call modes are available: Direct Outbound and Call-me-First.
How the system handles calls depends on your MCC 3100 for Nokia
system configuration. An Outgoing Call Service DN is mandatory for
MCC 3100 for Nokia call features.
Direct Outbound mode
In Direct Outbound mode, initiate calls directly from your device to other
parties through the enterprise telephony system. For more information,
see Figure 5 "Direct outbound mode" on page 48.
Figure 5: Direct outbound mode
48 NN42030-102 MC 3100 3.0 Standard 03.08 July 2009
Page 49

Advanced features
Direct Outbound mode requires an Outgoing Call Service DN configured
in your MCC 3100 for Nokia settings. For more information, see
“Configuring the system settings” on page 31.
When the MCC 3100 for Nokia is configured for Direct Outbound mode,
you can switch from Direct Outbound mode to Call-me-First mode for
advanced calls. For more information, see “Advanced call” on page 50.
Call-me-First mode
In Call-me-First mode, your calls are completed in two steps. First the
enterprise telephony system calls you. After you answer, the enterprise
telephony system calls the other party. After the other party answers, you
are connected and can begin talking. F or mor e in form ation, see Figure 6
"Call-me-First mode" on page 49.
To use both call modes, you must configure an Outgoing Call Service DN
in your MCC 3100 system settings. For more information, see
“Configuring the system settings” on page 31.
Figure 6: Call-me-First mode
Calling a friend or contact
Place a call to a friend or contact directly from your Nokia device. Your
friend receives the call at their default contact location.
Placing a call to a friend or contact from your Nokia device
Nortel Mobile Communication Client 3100 for Nokia User Guide 49
Page 50

Advanced features
1. Navigate to the Main, Logs, Friends, Contacts or Search Results
screen.
2. Scroll to log entry or click a shortcut key to find someone in the
Friend’s preview pane.
3. Press the green call button or select Options, Call.
The system sets up a direct call between your wireless device and
your friend at their default contact location.
Note: Numerous prompts may appear the first time you place a call in
Direct Outbound mode. Answer Yes or OK to each prompt.
Calling from your extension
You can initiate a call on your Nokia device and then have the
conversation on your desktop phone extension.
Calling from your desktop phone extension
1. Navigate to the Main, Logs, Friends or Search Results screen.
2. Scroll to a log entry, or click a shortcut key to find someone in the
Friends preview pane of the Main screen.
3. Select Options, Call from Extension.
The enterprise telephony system calls your desktop extension. After you
answer, the enterprise telephony system calls your friend at their default
contact location.
Note: When you select Call from Extension the system always calls
your desktop extension regardless of whether the MCC 3100 is
configured to operate in Call-me-First or Direct Outbound mode.
Advanced call
An Advanced call lets you take advantage of the following features:
• Use either Call mode, Direct Outbound, or Call-me-First.
• Use one device to start the call and another to hold th e conver sa tio n.
For example, you can initiate the call on your wireless device and
then talk on your desktop phone.
• Select the current contact location of your party from a list.
50 NN42030-102 MC 3100 3.0 Standard 03.08 July 2009
Page 51

Advanced features
• If the contact location of your party is unknown, dial their extension or
PSTN number.
• Select a prefix (for example, local or long distance) to insert ahead of
your own number or the number of the party that you are calling.
Placing an advanced call
1. Navigate to the Main, Logs, Friends, Contacts, or Search Results
screen.
2. Scroll to a log entry friend, or contact, or click a shortcut key to find
someone in the Friends preview pane of the Main screen.
3. Select Options, Advanced Call from the menu.
The Place Call screen appears.
4. In the To list, select the contact location of the person you wish to
call.
OR
Enter a number below the To list.
5. Select a prefix in the To Prefix list if required.
6. Select your contact location or enter a number in the Using list.
Note: To use Direct Outbound mode, select mobile - direct as your
contact location. Selecting any other contact location causes the call
to be placed in Call-me-First mode.
7. Select your call prefix in the Using Prefix list.
8. Press the green call button or select Options, Call from the menu.
— Call-me-First mode—The system calls you at the contact location
you specified. After you answer, the system calls your friend at
their contact location. The system connects both parties and the
call begins.
— Direct Outbound mode (mobile-direct selected as your contact
location)—The system sets up a call between your wireless
device and your friend at the contact location you specified.
Nortel Mobile Communication Client 3100 for Nokia User Guide 51
Page 52

Advanced features
Note 1: If you need to use the telephone keypad during a call (for
example, to respond to voice mail prompts), switch to the phone
application on your wireless device.
Note 2: To cancel a call before it is answered, press the Reject
button on your wireless device.
Dialing a number
The following procedure details the steps required to place a call by
dialing an extension or telephone number.
Placing a call by dialing an extension or telephone number
1. Start the MCC 3100 for Nokia application. For more information, see
“Starting and exiting the MCC 3100 for Nokia application” on
page 41.
2. Select Options, Dial.
3. Highlight a friend in the Friends preview pane and press the space
bar or Enter key.
The Place Call screen appears.
4. Enter the telephone number of the person you wish to call in the To
field. Two number formats are supported:
— Internal office extension numbers (for example, 4489).
— External Public Switched Telephone Network (PSTN) numbers
(for example, +16131231111).
5. Press the green call button or from the menu, select Options, Call
from your Nokia device.
OR
Choose Call from Extension to call the number from your desktop
phone.
OR
Choose Advanced Call to access the Advanced Call screen before
placing the call.
Dialing an emergency number
When you dial an emergency number, such as 911 or 112, the MCC 3100
for Nokia switches to the native device phone and the call proceeds over
the cellular network.
52 NN42030-102 MC 3100 3.0 Standard 03.08 July 2009
Page 53

Advanced features
You do not need to configure your client for emergency dialing.
MCC 3100 for Nokia automatically downloads a list of valid emergency
numbers from the MCG 3100.
To dial an emergency number
1. Ensure that the cellular network connection is active.
2. From the Main screen, select Options, Dial.
3. Enter the emergency number in the To field (for example 911).
4. Press the green call button or select Options, Call . The native phone
appears and the system attempts to place the call on the cellular
network.
CAUTION
If the native phone does not appear, hide
or close the MCC 3100, press the green
Call button on your device, and redial the
emergency number in the native phone.
Device handoff
Device handoff requires a Handoff key on your desktop telephone. If you
do not have this key configured, contact your system administrator.
The Communication Server 2100 does not support the Device handoff
feature.
Moving a call from your desk telephone to the MCC 3100
You can move a call from your desk telephone phone to the MCC 3100.
1. While a call is connected on the desktop telephone, press the
Handoff key.
2. Answer the call on your Nokia device.
3. Hang up your desktop telephone
Moving a call from the MCC 3100 to the desktop telephone
You can move a call from your MCC 3100 to your desktop telephone.
Nortel Mobile Communication Client 3100 for Nokia User Guide 53
Page 54

Advanced features
1. While a call is connected on the MCC 3100, press the Handoff key
on your desk telephone.
2. If you have Station Control Password (SCPW) privacy pr ot ec tion
configured, enter the SCPW on your desktop telephone.
3. Disconnect from the call on your MCC 3100.
Receiving calls
After you log on, you can receive audio calls from any MCC 3100 for
Nokia screen.
• If the MCC 3100 for Nokia has call screening enabled, accept the call
on the Nokia device, redirect the call to another device, or decline the
call.
• If the MCC 3100 for Nokia has call screening disabled, the call is
automatically directed to your Nokia device.
• If the MCC 3100 for Nokia has Mobile Do-Not-Disturb enabled, when
you receive an incoming call, only your desktop phone rings, not your
wireless device. Except for a record added to logs, you are not
alerted of the call in any way on the MCC 3100.
Before you receive calls, configure your contact locations and your call
settings. For more information, see “Configuring your Personal
preferences” on page 35 and “Configuring your Call settings” on
page 38.
Click here to view a multimedia presentation
on accepting a call on your mobile phone
(www31.nortel.com/webcast.cgi?id=7486)
Click here to view a multimedia presentation
on accepting a call on your home phone
(www31.nortel.com/webcast.cgi?id=7487)
Receiving a call when call screening is enabled
54 NN42030-102 MC 3100 3.0 Standard 03.08 July 2009
Page 55

Advanced features
1. When you receive an incoming call, the MCC 3100 for Nokia
Incoming Call Confirmation dialog box appears.
2. To accept the call, choose the contact location where you want to
receive the call, then press the green Call button or select Accept
from the menu. The call is forwarded to the contact location you
specified where you can answer it.
3. To decline the call, press the red hangup button or select Decline
from the menu. The call terminates.
During the call, the MCC 3100 runs in the background. After the call, the
MCC 3100 returns to its original display status.
If you do not answer the call, it is forwarded to your a lternate ca ll handling
point—another phone or voice mail.
Working with friends and contacts
Add people to the MCC 3100 local address book and designate them as
either Contacts or Friends. Although there are many functional similarities
between friends and contacts, the two groups are ma naged se pa ratel y in
the MCC 3100. Your contacts are listed on one screen and your friends
on another.
Use the MCC 3100 for Nokia to:
• add friends and contacts
• call friends and contacts individually or as a member of an instant
conference
• view their contact details
With mobility enabled friends and contacts, you can:
• import them from the corporate directory to the MCC 3100 for Nokia
• track their presence status
• send them instant messages
Each friend has a name and at least one contact number: an extension
number. Other contact numbers (for example, home, mobile) are optional.
Nortel Mobile Communication Client 3100 for Nokia User Guide 55
Page 56

Advanced features
Managing contacts
Use the following procedures to manage your contacts:
• “Adding a contact” on page 56
• “Importing a contact” on page 59
• “Editing a contact” on page 59
• “Deleting a contact” on page 60
Adding a contact
Create a new contact using the MCC 3100 for Nokia. The new contact is
added to your MCC 3100 for Nokia Local Address Book and is not
uploaded to the MCG 3100.
Adding a new contact
1. From the Main screen, select the Contacts link; or Options,
Contacts.
The Contacts screen appears.
2. Select Options, New Contact.
The New Contact screen appears.
Complete the fields on the Edit Contact screen using the information
in Table 7 "Adding a contact" on page 56 as a guide.
Table 7: Adding a contact
Field Settings
Display Name Enter a display name for your contact. This
name appears on the Contacts screen.
Extension Enter the office extension number associated
with your contact.
It also displays on the Incoming Call
Confirmation dialog for calls that match this
record.
56 NN42030-102 MC 3100 3.0 Standard 03.08 July 2009
Page 57

Advanced features
Table 7: Adding a contact
Field Settings
Last Name Enter the last name for your contact.
First Name Enter the first name for your contact.
Friend Choose Yes to make the contact a friend. You
can track the online presence status of
friends. The default setting is No.
Office contact Enter the office telephone number of your
contact. When you place a call to this contact,
choose this number from a list.
Mobile contact Enter the mobile telephone number of your
contact. When you call this contact, choose
this number from a list.
Home contact Enter the home telephone number of your
friend. When placing a call to this friend,
choose this number from a list.
Other1 contact Enter an additional telephone number of your
contact. When you call this contact, choose
this number from a list.
Other2 contact Enter an additional telephone number of your
contact. When placing a call to this contact,
choose this number from a list.
Nortel Mobile Communication Client 3100 for Nokia User Guide 57
Page 58

Advanced features
Table 7: Adding a contact
Field Settings
Default contact Select the contact’s default contact location.
Options include:
• Mobile Contact
• Extension (default setting)
• Office Contact
• Home Contact
• Other1 Contact
• Other2 Contact
When you call the contact, the system
automatically calls this contact location.
All contacts are regular telephone numbers
except the Extension. If you select Extension,
the system calls all of the friend’s contact
locations that are registered on the
MCG 3100.
Default Prefix Select the contact’s default prefix.
•Use No Prefix
• Local Prefix
• Long Distance Prefix
• International Prefix
• Corporate Prefix
When you call this contact, the system
automatically inserts this prefix ahead of the
call to contact number.
Note: Provide at least one contact location: Extension, Office
number, Mobile number, Home number, or Other number.
3. After you enter the information, select Options, Save from the menu.
58 NN42030-102 MC 3100 3.0 Standard 03.08 July 2009
Page 59

Advanced features
Your contact is added to the MCC 3100 for Nokia local address book
and appears on the Contacts screen.
Importing a contact
Import a contact to the MCC 3100 for Nokia from other sources:
• Logs screen
• Corporate Directory (search results) screen
Importing saves you from manually entering a contact’s contact
information.
Importing a contact
1. From the MCC 3100 Main screen, select one of the following menu
items:
— Options, Logs to go to the Logs screen.
— Options, Corp Dir to go to the Corp Dir screen.
2. Highlight a call record.
3. Select Options, Add to Contacts.
Your new contact is added to the MCC 3100 for Nokia local address
book.
4. Click Options, Save.
Note: After you add a contact from the logs screen, check that the
contact information is complete. You may need to add a prefix or
special character that was removed from the original record.
Editing a contact
To edit contacts in the local address book, you can update the following
information:
• Change the contact’s extension
• Designate the contact as a friend
• Change the contact’s contact information
Nortel Mobile Communication Client 3100 for Nokia User Guide 59
Page 60

Advanced features
Editing a contact
1. From the Main screen, select the Contacts link or Options,
Contacts.
The Contacts screen appears.
2. Highlight the contact you want to edit.
3. Select Options, Edit Contact.
The Edit Contact screen appears.
4. Edit the contact information as required.
5. After you edit a contact, select Options, Save from the menu.
The screen displays the contact’s updated information.
Deleting a contact
You can delete a contact from the MCC 3100 for Nokia local address
book.
Deleting a contact from the MCC 3100 for Nokia local address book
1. From the MCC 3100 for Nokia m ain scre en , se lect the Contacts link
or Options, Contacts.
The Contacts screen appears.
2. Highlight the contact you want to edit.
3. Select Options, Delete Contact.
4. Click Yes and then select OK to confirm the deletion.
The contact is deleted from the MCC 3100 for Nokia local address
book.
Managing friends
Use the following procedures to manage your friends.
• “Adding a friend” on page 61
• “Editing and deleting a friend” on page 63
60 NN42030-102 MC 3100 3.0 Standard 03.08 July 2009
Page 61
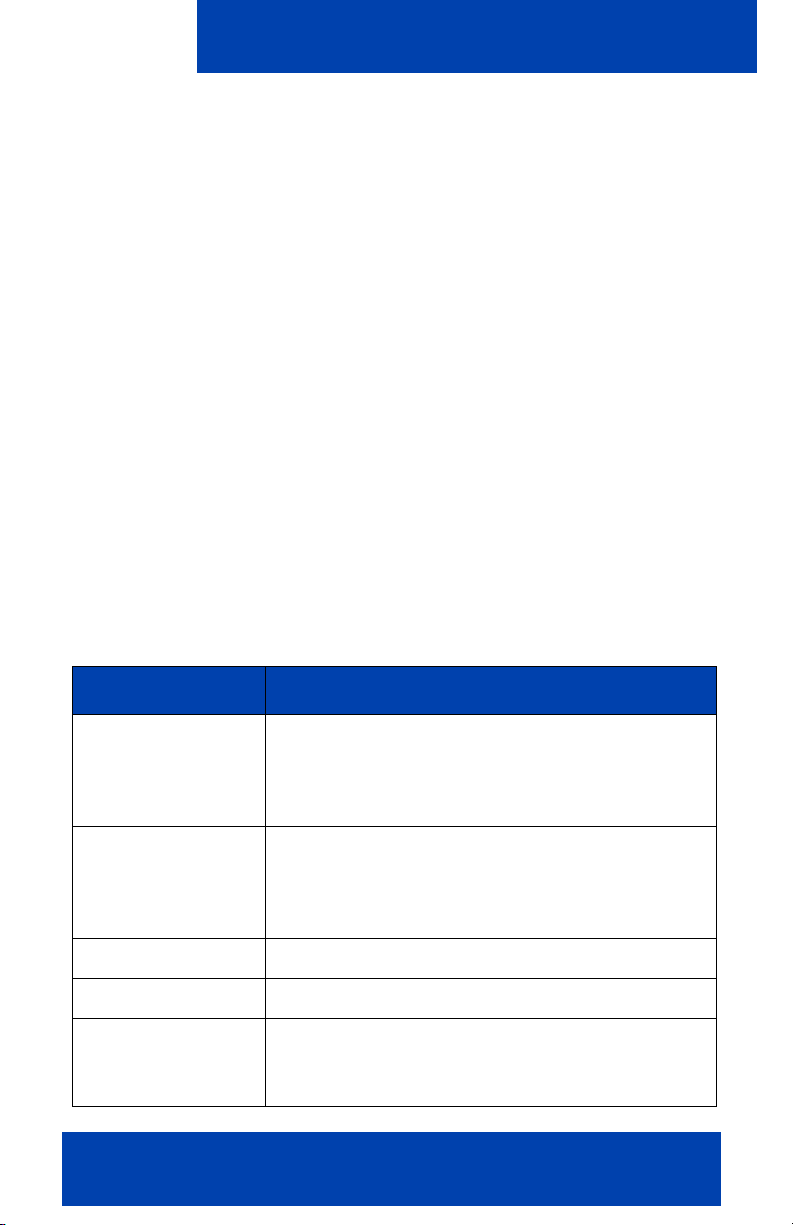
Advanced features
Adding a friend
You can create a new friend and add it to the MCC 3100 local address
book.
The phone numbers that you enter for your friend’s contact locations can
include alphabetic and special characters in addition to numeric
characters.
Note: Adding a friend is different from adding a contact. For more
information on adding a contact, see “Adding a contact” on
page 56.
Adding a friend
1. From the Main screen, select the Friends link or Option, Friends.
The Friends screen appears.
2. Select Options, New Friend.
The New Friend screen appears.
3. Complete the fields on this screen using the information in the table
below as a guide.
Table 8: Adding a friend
Field Settings
Display name Enter a display name for your friend. This name
appears on the Friends screen. It also displays
on the Incoming Call Confirmation dialog for
calls that match this record.
Extension Enter the office extension number associated
with your friend. The extension number enables
you to track the presence status of your friend,
provided that the friend is mobility enabled.
Last name Enter the last name for your friend.
First name Enter the first name for your friend.
Office contact Enter the office number of your friend. When you
call this friend, you can choose this number from
a list.
Nortel Mobile Communication Client 3100 for Nokia User Guide 61
Page 62

Advanced features
Table 8: Adding a friend
Field Settings
Mobile contact Enter the mobile phone number of your friend.
When you call this friend, you can choose this
number from a list.
Home contact Enter the home phone num ber of your friend.
When you call this friend, you can choose this
number from a list.
Other1 contact En ter an additional phone number of yo ur friend.
When you call this friend, you can choose this
number from a list.
Other2 contact En ter an additional phone number of yo ur friend.
When you call this friend, you can choose this
number from a list.
Default contact Select the friend’s default contact location.
Options include:
• Extension (default setting)
• Mobile
•Office
• Home
•Other1
•Other2
The system automatically calls this contact
location when you place a call to your friend.
All contacts are regular PSTN numbers with the
exception of Extension. If you select Extension,
the system calls all of the friend’s contact
locations that are registered on the MCC 3100.
62 NN42030-102 MC 3100 3.0 Standard 03.08 July 2009
Page 63

Advanced features
Table 8: Adding a friend
Field Settings
Default prefix Select your friend’s default prefix. Options
include:
• Use No Prefix
• Local Prefix
• Long Distance Prefix
• International Prefix
• Corporate Prefix
The system automatically inserts this prefix
ahead of the Call to contact number when you
place a call to your friend.
Note: Provide at least one conta ct location: Extension, Office, Mobile,
Home, or Other.
4. When you have completed entering the information, select Options,
Save.
Your new friend is added to the MCC 3100 local address book and
appears on the Friends screen. Your friend does not appe ar on the
Contacts screen.
Editing and deleting a friend
You can edit friends that you have added to the MCC 3100. You are able
to update the following information:
• Friend’s extension
• Friend’s name
• Friend’s contact information
Editing a friend
1. From the MCC 3100 for Nokia Main screen, select the Friends link or
Options, Friends.
2. Highlight the friend you want to edit.
Nortel Mobile Communication Client 3100 for Nokia User Guide 63
Page 64

Advanced features
3. Select Options, Edit Friend.
The Edit Friend screen appears.
4. Edit the contact information as required.
5. When you have finished editing, select Options, Save.
The screen displays the updated information for your friend.
Deleting a friend
1. From the MCC 3100 for Nokia Main screen, select the Friends link or
Options, Friends.
2. Highlight the friend you want to delete.
3. Select Options, Delete Friend.
4. Click Yes and then select OK to confirm the deletion.
The friend is deleted from the MCC 3100.
Searching the corporate directory
You can search for people in the Corporate Directory on the server.
Optionally, widen the search to include friends and contacts you saved on
the MCC 3100 for Nokia.
Searching the corporate directory
1. From the MCC 3100 for Nokia M ain scre en , se lect the Corp Dir link,
or Options, Corp Dir.
2. Enter as much of the person’s name as you know. You must enter at
least one character.
3. To search for friends or contacts that you saved on the MCC 3100 for
Nokia, select Also search local contacts.
4. Select Options, Search Now. Your search results appear on the
Search Results screen. If you search in both the local and corporate
directories, your search results appear in two panes: local and
corporate.
5. A maximum of ten entries are returned at one time. If additional
results are available, scroll to the bottom of the list, and se lect More
available.
64 NN42030-102 MC 3100 3.0 Standard 03.08 July 2009
Page 65

Advanced features
6. Once you obtain your search results, highlight an entry and select
one of the following menu options:
• Select IM to send an instant message to the person.
• Select Call/Call from Extension/Advanced Call to initiate a basic
call to the person.
• Select Query Presence to check the presence status of the person,
provided that they are mobility enabled.
• Select View/Edit to display the person’s information.
• Select Add to Contacts to add the person to the MCC 3100 for
Nokia.
• Select Add to Group to add the person to a group.
Note 1: Corporate Directory search results do not rem ain in memo ry.
When you select More available, or if you move to another screen,
the results are cleared.
Note 2: To locate a friend or contact, you require a first name or a last
name. You cannot locate individuals that have only a display name.
Managing presence
Presence is a feature that allows you to see when your friends are online
and available, and it is also a way to inform your friends of your own
status. For example, if you are busy and want to inform your friends that
you will not be taking calls, you can change your status to Unavailable.
Your presence information can only be shared with mobility-enabled
friends.
Changing your presence status
Your presence status automatically updates when you connect to, or
disconnect from, the network. Manually configure your curren t presence
status by selecting an entry from a list (for example, Away, On Vacation,
Busy), or by adding a customized entry (for example, Working at home
today) and selecting it.
Changing your presence status
Nortel Mobile Communication Client 3100 for Nokia User Guide 65
Page 66

Advanced features
1. From the MCC 3100 for Nokia Main screen, select the Status pane or
Options, Change Presence.
The Change Presence screen appears.
2. Select a Presence status from the list.
3. Select Options, Update Presence from the menu.
Your presence status is updated for your mobility-enabled friends.
Adding a custom presence status
Add a customized note to the Connected or Unavailable presence status.
Provide your friends with additional information about your status. For
example, add the note Back at Noon to let your friends know when you
plan to return to the office.
Adding a note
1. From the MCC 3100 for No kia M ain sc re en menu , sele ct the Status
pane or Options, Change Presence.
The Change Presence screen appears.
2. Select a Custom Notes prefix:
— Connected
— Unavailable
3. Enter the note that you want to be displayed with your status in the
Custom Notes field.
4. Select Options, Add Custom Note from the list.
OR
Select the custom note from the list.
5. Select Options, Update Presence.
Your presence is updated with the note appearing in the Presence
indicator.
Add up to five custom notes to a presence status. If you already have
five custom notes, delete one before adding an o th er .
Viewing the presence status of your friends
Track the presence status of your mobility-enabled friends.
66 NN42030-102 MC 3100 3.0 Standard 03.08 July 2009
Page 67

Advanced features
The following view options are available for your mobility enabled friends.
• Check the status of a single friend
• Check the status of all friends
• Request to be notified when the presence status of a friend changes.
Optionally, program the MCC 3100 for Nokia to receive automatic
presence status updates. This enables you to stay up-to-date with the
latest status information for all of your mobility-enabled friends. To switch
from manual mode (default) to automatic mode, enable Auto Update
Presence on the Systems Settings screen.
Note: Because the MCC 3100 for Nokia connects to the network for
every status update, enabling Auto Update Presence uses extra
airtime and reduces battery life.
Viewing the presence status of your friends
1. From the MCC 3100 for Nokia Main screen, select the Friends link or
Options, Friends.
The Friends screen appears.
The screen displays a list of the contacts you have designated as
friends. Check the presence of an individual friend, or of all friends in
the list. If you fail to receive a response, the friend that you are
checking may not be mobility enabled on the system.
2. From the Options menu, choose
— Query Presence—to check the status of an individual friend in
the list. You must first select the friend from the list.
— Query All Friends—to check the status of all friends in the list.
— Alert on Presence Changes—to be alerted when the status of
friends changes. Only the next change is tracked. You must first
select the friend from the list.
The Friends screen is updated with the current presence status of
your mobility enabled friends.
Nortel Mobile Communication Client 3100 for Nokia User Guide 67
Page 68

Advanced features
Understanding the presence status of your friends
Presence status is represented by a colored icon and a description, as
shown in the following table.
Table 9: Presence status descriptions
Color Description
green connected
yellow away
yellow out to lunch
yellow be right back
red unavailable
red busy
red on vacation
red offline
If your friend has multiple devices associated with a single extension (for
example, a mobile phone and a desktop phone), the system reports the
presence according to the following rules.
1. If the devices of all of your friends are available, a green icon
displays.
2. If the devices of all friends are offline, a red icon displays.
3. If any of your friends devices is busy, a red icon displays.
4. If the devices of all of your friends are busy, a red icon displays.
5. If at least one device is available and no devices are busy, a green
icon displays.
6. If no devices are available and at least one device is away or out to
lunch, a yellow icon displays.
The rules are checked in order, from one to six, until a match is made.
68 NN42030-102 MC 3100 3.0 Standard 03.08 July 2009
Page 69

Advanced features
Note 1: IM and presence information is only available for your friends
who are on the same MCC 3100 system as you.
Note 2: IM and presence information is related only to an individual
mobile device (not all of the devices associated with the DN).
Clearing the presence status of your friends
You can clear presence status information provided that it was obtained
manually, not automatically. The MCC 3100 for Nokia is configured to
operate in manual mode. To switch to automatic mode, enable Auto
Update Presence on the System Settings screen.
Clearing the presence status of your friends
From the MCC 3100 for Nokia Main or Friends screen, select Options,
Clear All Presences from the menu.
The presence status information is cleared for all of your friends.
Note: The commands noted above are available only when the
MCC 3100 for Nokia is configured to operate in manual mode (for
example, Auto Update Presence is disabled).
Using the Mid-Call Features
While you are engaged in a voice call, you can use the following voice call
telephony features:
• Call hold and retrieve—Place the current call on hold, then resume it.
• Call transfer—Transfer the call to another party.
• Swap—Call another party while you are in an established two-party
call.
• Conference call—Hold an impromptu three-way conference.
• Speaker mode—Switch call audio from the ear piece to the system
speaker.
Call hold and retrieve
Place a call on hold and then resume the call.
Nortel Mobile Communication Client 3100 for Nokia User Guide 69
Page 70

Advanced features
Placing a call on hold
• While the call is connected, select Options, Hold Call.
The call is placed on hold.
Retrieving a held call
• Select Options, Unhold Call.
Call transfer
There are two types of call transfers available:
• Blind—Transfer the call without speaking to the other party.
• Supervised—Speak to the other party before transferring the call.
Transferring a call
1. While in a call, select Options, Features.
2. Dial the number of the other party.
3. Select Hold & Call.
The call is placed on hold.
4. To complete a blind transfer, select Options, Transfer Call from the
menu while the call is still ringing.
5. To complete a supervised transfer, wait for an answer, consult, then
select Transfer Call.
6. To resume the call, select Options, Cancel Call from the menu while
the call is ringing.
CAUTION
Do not press the red End key to transfer a
call. The call will be dropped.
Call swap
You can call another party while you are engaged in an established twoparty call.
70 NN42030-102 MC 3100 3.0 Standard 03.08 July 2009
Page 71

Advanced features
Swapping between two parties
1. While in a call, select Options, Features from the menu.
2. Dial the number of the other party.
3. Select Hold & Call.
The call is placed on hold.
After the other party answers, select Swap (or right soft key) to
alternate between the two parties.
Three-party conference call
Use this procedure to hold three-party conference calls.
Holding a conference call
1. While a call is connected, select Options, Features from the menu.
2. Dial the number of the person you wish to call.
3. Select Hold & Call from the menu.
The call is placed on hold.
4. After the other party answers, request permission to initiate the
conference, then select Options, 3-Way Conference Call from the
menu.
Note: While you are engaged in a three-party conference call, you
can execute a variety of dialpad controls (for example *5). However, if
any of the participants are engaged in a second conference call, the
dialpad controls are no longer available.
Speaker mode
To switch from the ear piece speaker to the system speaker:
• While a call is connected, select Options, Activate Loudspeaker.
To switch from the system speaker to the ear piece speaker:
• While a call is connected, select Options, Activate Handset.
Nortel Mobile Communication Client 3100 for Nokia User Guide 71
Page 72

Advanced features
Sending Instant Messages
Send instant messages (IM) to your mobility-enabled friends on the same
MCC 3100 for Nokia system. You cannot send instant messages to
someone on another messaging system (for example, MSN).
Sending an IM to a single contact
1. Select a friend or log entry.
2. Select Options, IM from the menu.
The Instant Message screen appears.
3. Type your message in the Message field.
On some Nokia devices, select the Message field to display the Edit
Text screen, enter your message and select Done.
4. Select Options, Send.
Your message is sent.
A record of your most current IM sessions appear in the IM/Call History
section of the Instant Message screen. The screen displays the most
recent 20 messages from each friend or contact.
Instant message history indicators
The following indicators provide information concerning the state of the
instant messages sent between you and the other party:
• ~>Contacting server in order to send message
• =>Server sending message
• -> Message failed
• +> Message successful
• ?> Unknown result
• < Incoming message
Sending a message to multiple contacts
1. Navigate to either the MCC 3100 for Nokia Main (including preview
panes), Logs, Friends, or Place Call screens.
72 NN42030-102 MC 3100 3.0 Standard 03.08 July 2009
Page 73

Advanced features
2. Select Options, New IM.
The Instant Message screen appears.
3. Enter the extension number of each friend in the To field. Separate
each entry with a comma (no spaces).
4. Enter your message in the Message field.
On some wireless devices, select the Message field to display the
Edit Text Screen; enter your message and select Done.
5. Select Options, Send from the menu.
Your message is sent to the friends and contacts that you specified.
Hold separate IM sessions with each friend or contact that responds to
your initial message.
Note: To send an instant message to a preconfigured group of users.
For more information, see “Working with Groups” on page 77.
Adding a phrase to an instant message
Instead of typing a message, select from a list of emoticons and handy
phrases such as Driving - I will IM you later.
Adding a phrase to an instant message
1. From the Instant Message screen menu, select Options, Add
Phrase to display the Add Phrase screen.
The Add Phrase screen appears.
2. Select a phrase or emoticon from the list, then from the Options
menu, select either:
Options, Paste & Send to send the IM
OR
Options, Paste Only to paste the phrase or emoticon into the
Message field.
Clearing the IM history
Clear the record of your most recent messages (up to 20 entries) from the
Instant Message screen.
Nortel Mobile Communication Client 3100 for Nokia User Guide 73
Page 74

Advanced features
Clearing the IM history
1. From the Instant Message screen menu, select Options, Clear
History.
The IM/Call History portion of the screen is cleared and the messages
are permanently deleted.
Receiving instant messages
When you receive an instant message, you are alerted by an audible tone
and a visual alert.
• The audible tone is controlled by the device. To select a new tone,
disable the tone, or use vibrate mode in place of the tone, refer to
your device documentation.
• The visual alert is controlled by the MCC 3100 for Nokia New IM Alert
parameter. To enable or disable this parameter, refer to
“Configuring your Personal preferences” on page 35.
74 NN42030-102 MC 3100 3.0 Standard 03.08 July 2009
Page 75

Advanced features
The type of alert you receive depends on the current state of the
MCC 3100 for Nokia. The following table describes the alerts.
Table 10: Instant Message alerts
MCC 3100
configuration
New IM Alert
disabled in
Personal
Preferences
Current
screen
Audible tone Visual alert
IM screen Yes, if tone
notification is
enabled on
the device.
Read only
screen
Yes, if tone
notification is
enabled on
the device.
Data
entry
screen
Yes, if tone
notification is
enabled on
the device.
If someone sends
you a message while
you are typing them a
message, their
message is added to
the IM screen. If
anyone else sends
you a message,
Received New
appears on the IM
screen.
If someone sends
you a message while
you are in a read only
screen (for example,
Friends), the IM
screen appears,
where you can
compose a reply.
If someone sends
you a message while
you are on a data
entry screen (such as
Edit Friend), you do
not receive a visual
alert. You must go to
the Logs to view the
message.
Nortel Mobile Communication Client 3100 for Nokia User Guide 75
Page 76

Advanced features
Table 10: Instant Message alerts
MCC 3100
configuration
New IM Alert
enabled in
personal
preferences
Current
screen
Audible tone Visual alert
IM screen Yes, if tone
notification is
enabled on
the device.
Any other
screen
Yes, if tone
notification is
enabled on
the device.
If someone sends
you a message while
you are typing them a
message, their
message is added to
the IM screen. If
anyone else sends
you a message,
Received New
appears on the IM
screen.
If someone sends
you a message while
you are on a non-IM
screen, the New IM
Alert screen appears.
From here, you can
select one of the
following options:
• Reply Now—The
IM screen
appears, where
you can compose
a reply.
• Dismiss—The IM
alert is
dismissed. You
can review it later
in the logs.
• Dismiss All—All
IM Alerts are
dismissed. You
can review them
later in the logs.
76 NN42030-102 MC 3100 3.0 Standard 03.08 July 2009
Page 77

Advanced features
Working with Groups
Add and manage a group that contains multiple friends, and then initiate
conference calls to the group.
Adding a group
The following procedure details the steps required to add a group.
Adding a group
1. From the MCC 3100 for No kia M ain sc re en menu , sele ct Options,
Group Mgmt.
The Group Management screen appears.
2. From the menu, select Options, New Group.
The New Group screen appears.
3. Enter the name of the group in the Group Name box.
4. From the menu, select Options, Save.
The new group is added and appears on the Group Management
screen. You must add friends before you can call the group.
Adding users to a group
The following procedure details the steps required to add friends to a
group.
Adding users to a group
1. Select a contact from the Contacts screen.
OR
Select a friend from the Friends screen or the Friend pane on the
Main screen.
2. Select Options, Add to Group.
The Add to Group dialog appears.
3. Select the group that you want to add the user to.
4. Select Options, Add Now.
The user is added to the group you selected.
Nortel Mobile Communication Client 3100 for Nokia User Guide 77
Page 78

Advanced features
5. Repeat for all users in the group.
Select one or more users in one group and add them to another group.
For more information, see “Managing users in a group” on page 78.
Add users to a group after you search in the Corporate Directory. For
more information, see “Searching the corporate directory” on
page 64.
Managing users in a group
View users, delete users, query the presence status of users, and add
users to another group. You can save your preferred selection settings for
the users of a group.
Managing users in a group
1. From the MCC 3100 for Nokia M ain scre en , se lect the Groups link;
or, from the MCC 3100 for Nokia Main screen menu select Options,
Group Mgmt.
The Group Management screen appears.
2. From the Group List, select a group.
3. Select Options, Group Details.
The Group Details screen appears.
4. Select or deselect the users you wish to manage.
5. From the menu, select one of the following options:
— Options, Call to initiate an instant conference to the selected
users.
— Options, IM to send an instant message to a selected user.
— Options, Edit to view or edit the selected user on the Edit Friend
screen. Only one friend at a time can be edited.
— Options, Query Presence to query the presence status of a
selected user. The users must be mobility enabled.
— Options, Add to Another Group to add the selected users to
another group.
— Options, Select All to select all users in a group.
— Options, Clear All to remove all selected users in a group.
78 NN42030-102 MC 3100 3.0 Standard 03.08 July 2009
Page 79

Advanced features
— Options, Delete Selected Users to delete the selected users
from the group.
— Options, Save Selections to save the current user selections.
The next time you enter the Group Details screen, the same
users are selected.
Managing a group
Manage groups by deleting groups and changing group names.
Managing a group
1. From the MCC 3100 for Nokia M ain scre en , se lect the Groups link;
or, from the Nortel MCC 3100 for Nokia Main screen menu, select
Options, Group Mgmt.
The Group Management screen appears.
2. Select a group from the Groups list.
3. From the Options menu, select one of the following options:
— Options, Delete Group to delete the Group.
— Options, Change Group Name to go to the Edit Group screen
and change the group name.
Placing and managing instant conference
This section describes how to place and manage instant conference.
When you start a regular instant conference, the system first calls you at
your mobile contact location and prompts you to record a greeting
message. The system calls the users in the group and provides the option
to join the call, decline the call, or join the call later.
Before you initiate an instant conference, configure your default contact
locations for all users in the group (including yourself). To configure your
own default contact location, see “Configuring your Personal
preferences” on page 35. To configure the default contact locations of
users, see “Working with friends and contacts” on page 55.
Note: Mid-call features such as Call Hold, Call Transfer and Call
Swap, are not available during instant conferences. The call handoff
Nortel Mobile Communication Client 3100 for Nokia User Guide 79
Page 80

Advanced features
features is available during instant conferences, but only to the
conference participants, not the conference originator.
Initiating an instant conference
With an instant conference, you can select a non-mobile contact location
for yourself. Set up the call on your Nokia device and then engage in the
conversation on another device, such as your desktop telephone.
1. From the MCC 3100 for Nokia M ain scre en , se lect the Groups link,
or select Options, Group Mgmt.
The Group Management screen appears.
2. From the Group List, select a group.
3. Select Options, Group Details.
The Group Details screen appears.
4. Select Options, Query Presence to query the presence status of all
users in the group.
5. Select the users to call. Each user’s default contact location appears
in brackets next to the user’s name.
6. Select Options, Call.
7. In the Using list, select your contact location for the instant
conference, or accept the default.
8. In the Using Prefix list, select your call prefix for the instant
conference, or accept the default.
9. Press the green call button or select Options, Call.
The Instant Conference Session screen appears.
10. The MCG 3100 system calls you at the contact location you specified.
11. Accept the call, and then follow the prompts. As the instant
conference initiator, you perform the follo win g step s:
a. Record the conference greeting, then press pound (#) on your
telephone dialpad.
b. Press 1 to review the greeting, press 2 to rerecord the greeting,
or press any other key to accept the greeting and start the
conference.
80 NN42030-102 MC 3100 3.0 Standard 03.08 July 2009
Page 81

Advanced features
12. The MCG 3100 calls the users you selected at their default contact
locations. They are prompted to select one of the following options on
the MCC 3100.
— Join Now to join the instant conference immediately.
— Join Later to be prompted to join the instant conference at a later
time. To set your reminder notification interval, see “Configuring
your Call settings” on page 38.
— Decline to reject the instant conference.
Users can also join an instant conference by pressing # on their
telephone dialpad. A tone is heard each time someone joins the
instant conference.
Managing instant conferences
Use the following procedures to manage group voice calls:
• Joining an instant conference that is in progress
• Managing an instant conference with the dialpad
• Leaving an instant conference
• Ending an instant conference
Joining an instant conference that is in progress
1. Navigate to the Logs screen. For more inform a tio n, see “Logging
Events” on page 84.
2. Select the instant conference entry that you want to join.
3. Select Options, Join Now from the menu.
The Instant Conference Session screen appears and lists the instant
conference participants.
4. To join the instant conference, select Options, Join Now.
5. Press # when you are prompted.
If the instant conference is in progress, you join it. If the instant
conference ended, you receive an error message.
Nortel Mobile Communication Client 3100 for Nokia User Guide 81
Page 82

Advanced features
If you selected Join Later when the instant conference started, you
receive periodic reminders to participate in the call. You can select Join
Now, Join Later, or Decline in response to these reminders. To configure
the reminder notification interval, see “Configuring your Call settings”
on page 38.
Managing an instant conference with the Dialpad
The instant conference initiator can execute a variety of functions using
the telephone dialpad. Instant conference participants have a limited set
of these functions available.
Note: Mid-call features such as Call Hold, Call Transfer and Call
Swap, are not available during instant conferences. The call handoff
features is available during instant conferences, but only to the
conference participants, not the conference originator.
Refer to the following table for a list of instant conference dialpad controls.
Table 11: Instant conference dialpad controls
Dialpad
control
** Starts the help
Function Comments
The help system plays a recorded
system
list of command descriptions. The
available functions depend on your
status as either an instant
conference initiator or participant.
*1 Terminates an
instant conference
The instant conference initiator
can terminate the call at any time
by pressing *1 and then confirming
the selection by pressing 1 a
second time.
82 NN42030-102 MC 3100 3.0 Standard 03.08 July 2009
Page 83

Table 11: Instant conference dialpad controls
Advanced features
Dialpad
control
Function Comments
*3 Enables user
numbers to be dialed
mid-call
*5 Lecture Mode—
mutes and unmutes
the voices of all
participants except
instant conference
initiators.
*7 Locks and unlocks a
conference.
The instant conference initiator
can add another person to an
ongoing call:
• Press *3
• Dial the extension, PSTN or
mobile number of the other
party.
• Press #. The system calls the
other party.
• The other party is prompted to
press # to join the
conversation.
The instant conference initiator
can mute the voices of all
participants. This is equivalent to a
Lecture Mode as the moderator’s
voice is the only voice that can be
heard.
The instant conference initiator
can choose to lock access to the
call. Once locked, no additional
participants can join the call, but
active participants can leave the
call.
*8 A roll call sounds
listing all of the
participants in an
instant conference.
All instant conference participants
can use this feature to find out who
is in the call. When a roll call is in
progress you cannot hear other
participants talking.
*9 Stops the help
system.
The help system stops playing the
recorded list of command
descriptions.
Nortel Mobile Communication Client 3100 for Nokia User Guide 83
Page 84

Advanced features
Leaving or ending an instant conference
To leave an instant conference, hang up the handset or end the call.
A tone is heard each time someone leaves the instant conference.
A call automatically ends when all users leave an instant conference or
when the instant conference initiator presses *1 on the phone dialpad.
Logging Events
The MCC 3100 for Nokia retains a record of your recent communication
sessions. The following events are logged:
• Incoming calls (answered, missed)
• Outgoing calls (successful, unsuccessful, in progress)
• System events
View an abbreviated list of log events on the Main screen. For a complete
list and for details concerning individual events, access the Logs screen.
If for any reason you lose your network connection, the system retains a
record of your missed calls, voice mail notifications, and system event
notifications. When you reconnect to the network, these events are
downloaded for you to view on the Logs screen.
Viewing entries on the main screen
The Recent preview pane on the Main screen disp lays a list of the fr iends
you recently communicated with, along with icons that represent their
calls and voice mail messages.
To change the number of friends that appear in the Recent preview p anel
(three by default), update the system settings. For more information, see
“Configuring the system settings” on page 31.
Viewing entries on the main screen
1. From the Nortel MCC 3100 for Nokia Main screen, select the Recent
preview pane.
84 NN42030-102 MC 3100 3.0 Standard 03.08 July 2009
Page 85

Advanced features
The Recent preview pane displays up to 10 friends that you recently
communicated with.
2. Optionally, select an entry and select a menu command such as
Options, Call.
For call icon explanations, see Figure 7 "Call icons" on page 85.
Figure 7: Call icons
For instant conference icon explanations, see Figure 8 "Instant
conference icons" on page 85.
Figure 8: Instant conference icons
For system notification icon explanations, see Figure 9 "System
notification icons" on page 85.
Figure 9: System notification icons
Nortel Mobile Communication Client 3100 for Nokia User Guide 85
Page 86

Advanced features
Viewing entries on the Logs screen
The Logs screen provides a history of your mos t rec en t in co m i ng an d
outgoing calls, voice mail messages, and system event notifications. The
Logs screen can contain a maximum of 50 entries.
By default, the entries are organized by time and date, but you can
reorganized them by name. You can delete all of the entries. You can
also select an individual entry to view details, to place a call, or to delete
the entry.
Viewing logs on the Logs screen
1. From the MCC 3100 for Nokia Main screen or from the MCC 3100 for
Nokia Main screen menu, select the Recent link or select Options,
Logs.
The Logs screen appears.
2. To view the details concerning an individual entry, select the entry,
and select Options, Log Details.
The Details screen appears.
You can place a call to your contact by choosing a command from the
Details screen Options menu.
Sorting entries on the Logs screen
Sort items in the Logs screen by the name of the individual associated
with the log or by the time and date. Also re-sort the list to only display
missed calls or voice mail notifications.
Sorting entries on the Logs screen
1. Navigate to the Logs screen.
2. Select Options, Sort by Time (default) or Options, Sort by Date.
The entries are sorted according to your preference.
3. Select Options, All Logs (default) or Options, Missed Call Logs.
The entries are displayed according to your view preference.
Deleting entries in the Logs screen
Delete individual entries in the Logs screen, or you can delete all entries.
86 NN42030-102 MC 3100 3.0 Standard 03.08 July 2009
Page 87

Advanced features
Deleting one entry
1. Navigate to the Logs screen.
2. Highlight the entry you want to delete.
3. Select Options, Delete Selected.
The entry is deleted.
Deleting all entries
1. Navigate to the Logs screen.
2. From the menu, select Options, Delete All.
3. Select Yes or No in response to the prompt.
4. Click OK or Back.
Managing voice mail
In addition to checking whether you have any messages, quickly and
easily call the voice mail system to access your mailbox.
Voice mail message waiting indication
When you receive a new voice mail message, the voice mail indicator
(VM) appears on the Main screen.
Note: Before using this feature, you must con figu r e the Voicemail
DN/SIP Address number on the System Settings screen. For more
information, see “Configuring the system settings” on page 31.
Calling the voice mail system
The Main screen contains the message waiting indicator and provides a
quick and easy way to access the voice mail system.
Calling the voice mail system
1. Navigate to the Nortel MCC 3100 for Nokia Main screen.
2. From the Main screen, select Options, Call VM.
3. The MCG 3100 calls the voice mail server.
Nortel Mobile Communication Client 3100 for Nokia User Guide 87
Page 88

Advanced features
4. When prompted, enter your voice mail mailbox number and password
using the Nokia telephone application.
5. The MCG 3100 calls the voice mail server.
Note 1: You must use the Nokia telephone application to generate
DTMF tones.
Note 2: Y ou can also call voice mail from the Recent preview p ane by
selecting the voice mail entry, and choose Call from the menu. The
Recent preview pane can contain up to 10 voice mail and call entries.
88 NN42030-102 MC 3100 3.0 Standard 03.08 July 2009
Page 89
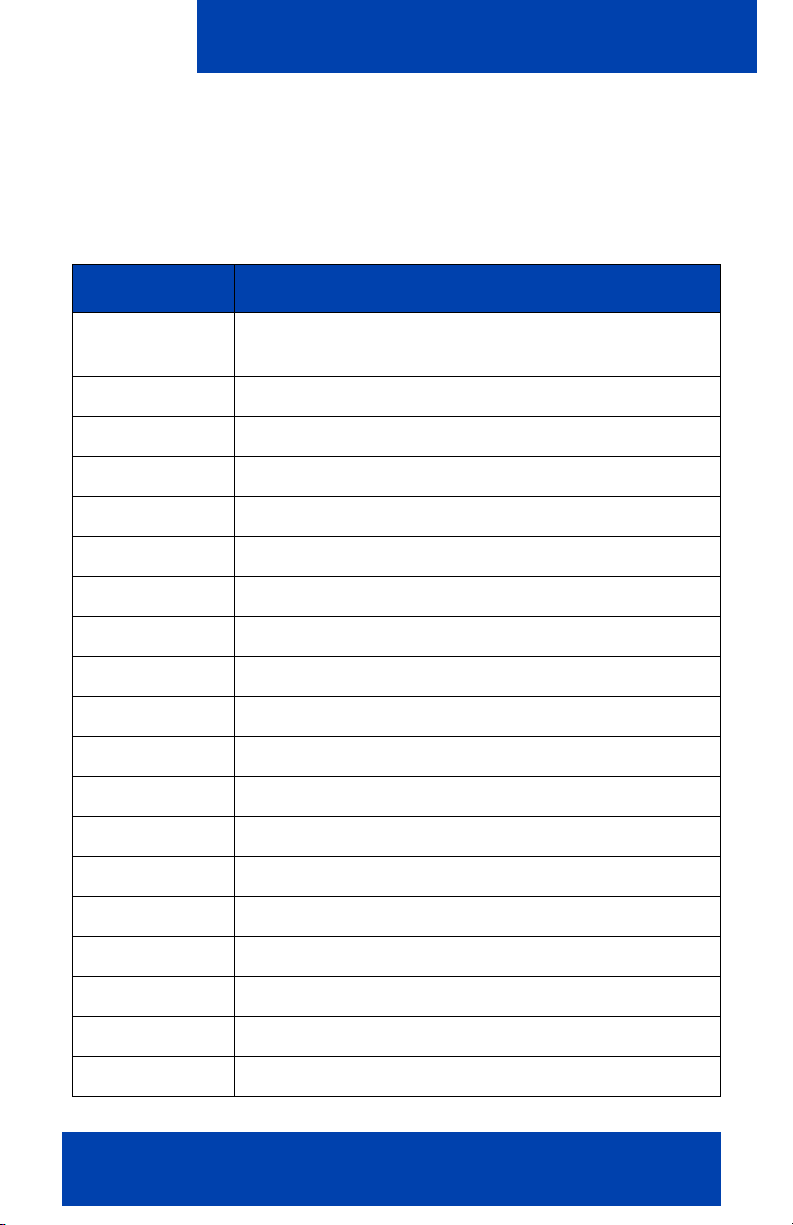
Acronyms
Acronyms
Table 12 lists the acronyms used in this guide.
Table 12: Acronyms
Acronym Full Name
CDMA 1xRTT Code Division Multiple Access Single Carrier (1x)
Radio Transmission Technology
COTS Commercial off the Shelf
DND Do Not Disturb
DTMF Dual Tone Multi Frequency
EDGE Enhanced Data rates for Global Evolution
EVDO Evolution Data Only
FQDN Fully Qualified Domain Name
GSM Global System for Mobile Communications
LAN Local Area Network
MCC 3100 Mobile Communication Client 3100
MCG 3100 Mobile Communication Gateway 3100
RAM Random Access Memory
SIP Session Initiation Protocol
SMS Short Message Service
PBX Private Branch Exchange
PSTN Public System Telephone Network
URI Uniform Resource Identifier
URL Uniform Resource Locator
USB Universal Serial Bus
Nortel Mobile Communication Client 3100 for Nokia User Guide 89
Page 90

Acronyms
Table 12: Acronyms
Acronym Full Name
VM Voice Mail
VPN Virtual Private Network
WiFi Wireless Fidelity
90 NN42030-102 MC 3100 3.0 Standard 03.08 July 2009
Page 91

Page 92

Nortel Mobile Communication 3100
Nortel Mobile Communication Client 3100 for Nokia
User Guide
Copyright © 2007 – 2009 Nortel Networks.
All Rights Reserved.
LEGAL NOTICE
While the information in this document is believed to be accurate and
reliable, except as otherwise expressly agreed to in writing NORTEL
PROVIDES THIS DOCUMENT "AS IS" WITHOUT WARRANTY OR
CONDITION OF ANY KIND, EITHER EXPRESS OR IMPLIED. The
information and/or products described in this document are subject to
change without notice.
Nortel, the Nortel logo, and the Globemark are trademarks of
Nortel Networks.
All other trademarks are the property of their respective owners.
Product: Nortel Mobile Communication 3100 Release 3.0
Publication Number: NN42030-102
Document Release: Standard 03.08
Date: July 2009
Produced in Canada
To provide feedback or to report a problem in this document, go to
www.nortel.com/documentfeedback
 Loading...