


CS7000 Conferencing Server
Version 2.5
Guide for Operators
81100317
Revision A
March 2005

Copyright 2005, Avaya Inc.
All Rights Reserved
Notice
Every effort was made to ensure that the information in this document
was complete and accurate at the time of printing. However, information
is subject to change.
Warranty
Avaya Inc. provides a limited warranty on this product. Refer to your
sales agreement to establish the terms of the limited war ranty. In
addition, Avaya’s standard warranty language as well as information
regarding support for this product, while under warranty, is available
through the following Web site: http://www.avaya.com/support
.
Preventing Toll Fraud
"Toll fraud" is the unauthorized use of your telecommunications system
by an unauthorized party (for example, a person who is not a corporate
employee, agent, subcontractor, or is not working on your company's
behalf). Be aware that there may be a risk of toll fraud associated with
your system and that, if toll fraud occurs, it can result in substantial
additional charges for your telecommunications services.
Avaya Fraud Intervention
If you suspect that you are being victimized by toll fraud and you need
technical assistance or support, in the Unit ed S t ates and Canada , call the
Technical Service Center's Toll Fraud Intervention Hotline at
1-800-643-2353.
Disclaimer
Avaya is not responsible for any modifications, additi ons or deletions to
the original published version of this documentation unless such
modifications, additions or deletions were performed by Avaya. Customer
and/or End User agree to indemnify and hold harmless Avaya, Avaya's
agents, servants and employees against all claims, lawsuits, demands
and judgments arising out of, or in connection with, subsequent
modifications, additions or deletions to this documentation to the extent
made by the Customer or End User.
How to Get Help
For additional support telephone numbers, go to the Avaya support Web
site: http://www.avaya.com/support
. If you are:
• Within the United States, click the Escalation Contacts link.
Then click the appropriate link for the type of support you
need.
• Outside the United States, click the Escalation Contacts link.
Then click the International Services link that includes
telephone numbers for the international Centers of
Excellence.
Providing Telecommunications Security
Telecommunications security (of voice, data, and/or video
communications) is the prevention of any type of intrusion to (that is,
either unauthorized or malicious access to or use of) your company's
telecommunications equipment by some party.
Your company's "telecommunications equipment" includes both this
Avaya product and any other voice/data/video equipment that could be
accessed via this Avaya product (that is, "networked equipment").
An "outside party" is anyone who is not a corporate employee, agent,
subcontractor, or is not working on your company's behalf. Whereas, a
"malicious party" is anyone (including someone who may be otherwise
authorized) who accesses your telecommunications equipment with
either malicious or mischievous intent.
Such intrusions may be either to/throu gh synchronous (time-multiplexed
and/or circuit-based), or asynchronous (character-, message-, or
packet-based) equipment, or interfaces for reasons of:
• Utilization (of capabilities special to the accessed equipment)
• Theft (such as, of intellectual property, financial assets, or t oll
facility access)
• Eavesdropping (privacy invasions to humans)
• Mischief (troubling, but apparently innocuous, tampering)
• Harm (such as harmful tampering, data loss or alteration,
regardless of motive or intent)
Be aware that there may be a risk of unauthorized intrusions associated
with your system and/or its networked equipment. Also realize that, if
such an intrusion should occur, it could result in a variet y of losses to your
company (including but not limited to, human/data privacy, intellectual
property, material assets, financial resources, labor costs, and/or legal
costs).
Responsibility for Your Company’s Telecommunications Security
The final responsibility for securing both this system and its networked
equipment rests with you - Avaya’s customer system administrator, your
telecommunications peers, and your managers. Base the fulfillment of
your responsibility on acquired knowledge and resources from a variety
of sources including but not limited to:
• Installation documents
• System administration documents
• Security documents
• Hardware-/software-based security tools
• Shared information between you and your peers
• Telecommunications security experts
To prevent intrusions to your telecommunications equipment, you and
your peers should carefully program and configure:
• Your Avaya-provided telecommunications systems and their
interfaces
• Your Avaya-provided software applications, as well as their
underlying hardware/software platforms and interfaces
• Any other equipment networked to your Avaya products
TCP/IP Facilities
Customers may experience differences in product performance, reliability
and security depending upon network configurations/design and
topologies, even when the product performs as warranted.
Standards Compliance
Avaya Inc. is not responsible for any radio or television interference
caused by unauthorized modifications of this equipment or the
substitution or attachment of connecting cables and equipment other
than those specified by Avaya Inc. The correction of interference caused
by such unauthorized modifications, substitution or attachment will be the
responsibility of the user. Pursu ant to Part 15 of the Federal
Communications Commission (FCC) Rules, the user is cautioned that
changes or modifications not expressly approved by Avaya Inc. could
void the user’s authority to operate this equipment.
Product Safety Standards
This product complies with and conforms to the following international
Product Safety standards as applicable:
Safety of Information Technology Equipment, IEC 60950, 3rd Edition, or
IEC 60950-1, 1st Edition, including all relevant national deviations as
listed in Compliance with IEC for Electrical Equipment (IECEE) CB-96A.
Safety of Information Technology Equipment, CAN/CSA-C22.2
No. 60950-00 / UL 60950, 3rd Edition, or CAN/CSA-C22.2 No.
60950-1-03 / UL 60950-1.
Safety Requirements for Customer Equipment, ACA Technical Standard
(TS) 001 - 1997.
One or more of the following Mexican national standards, as applicable:
NOM 001 SCFI 1993, NOM SCFI 016 1993, NOM 019 SCFI 1998.
The equipment described in this document may contain Class 1 LASER
Device(s). These devices comply with the following standards:
• EN 60825-1, Edition 1.1, 1998-01
• 21 CFR 1040.10 and CFR 1040.11.
The LASER devices used in Avaya equipment typically operate within the
following parameters:
Luokan 1 Laserlaite
Klass 1 Laser Apparat
Use of controls or adjustments or performance of procedures other than
those specified herein may result in hazardous radiation exposures.
Contact your Avaya representative for more laser product information.
Typical Center Wav elength Maximum Output Power
830 nm - 860 nm -1.5 dBm
1270 nm - 1360 nm -3.0 dBm
1540 nm - 1570 nm 5.0 dBm
Electromagnetic Compatibility (EMC) Standards
This product complies with and conforms to the following international
EMC standards and all relevant national deviations:
Limits and Methods of Measurement of Radio Inter ference of Informat ion
Technology Equipment, CISPR 22:1997 and EN55022:1998.
Information Technology Equipment - Immunity Characteristics - Limits
and Methods of Measurement, CISPR 24:1997 and EN55024:1998,
including:
• Electrostatic Discharge (ESD) IEC 61000-4-2
• Radiated Immunity IEC 61000-4-3
• Electrical Fast Transient IEC 61000-4-4
• Lightning Effects IEC 61000-4-5
• Conducted Immunity IEC 61000-4-6
• Mains Frequency Magnetic Field IEC 61000-4-8
• Voltage Dips and Variations IE C 61000-4-11
Power Line Emissions, IEC 61000-3-2: Electromagnetic compatibility
(EMC) - Part 3-2: Limits - Limits for harmonic current emissions.
Power Line Emissions, IEC 61000-3-3: Electromagnetic compatibility
(EMC) - Part 3-3: Limits - Limitation of voltage changes, voltage
fluctuations and flicker in public low-voltage supply systems.
Federal Communications Commission Statement
Part 15:
Part 68: Answer-Supervision Signaling
Allowing this equipment to be operated in a manner that d oes not provide
proper answer-supervision signaling is in violation of Part 68 rules. This
equipment returns answer-supervision signals to the public switched
network when:
• answered by the called station,
• answered by the attendant, or
• routed to a recorded announcement that can be administered
by the customer premises equipment (CPE) user.
This equipment returns answer-supervision signals on all direct inward
dialed (DID) calls forwarded back to the public switched telephone
network. Permissible exceptions are:
• A call is unanswered.
• A busy tone is received.
• A reorder tone is received.
Avaya attests that this registered equipment is capable of providing users
access to interstate providers of operator services through the use of
access codes. Modification of this equipment by call aggregators to block
access dialing codes is a violation of the Telephone Operator Consumers
Act of 1990.
REN Number
For MCC1, SCC1, CMC1, G600, and G650 Media Gateways:
This equipment complies with Part 68 of the FCC rules. On either the
rear or inside the front cover of this equipment is a label that contains,
among other information, the FCC registration number, and ringer
equivalence number (REN) for this equipment. If requested, this
information must be provided to the telephone company.
For G350 and G700 Media Gateways:
This equipment complies with Part 68 of the FCC rules and the
requirements adopted by the ACTA. On the rear of this equipment is a
label that contains, among other information, a product identifier in the
format US:AAAEQ##TXXXX. The digits represent ed by ## ar e the r inge r
equivalence number (REN) without a decimal point (for example, 03 is a
REN of 0.3). If requested, this number must be provided to the telephone
company.
For all media gateways:
The REN is used to determine the quantity of devices that may be
connected to the telephone line. Excessive RENs on the telephone line
may result in devices not ringing in response to an incoming call. In most,
but not all areas, the sum of RENs should not exceed 5.0. To be certain
of the number of devices that may be connected to a line, as determined
by the total RENs, contact the local telephone company.
REN is not required for some types of analog or digital facilities.
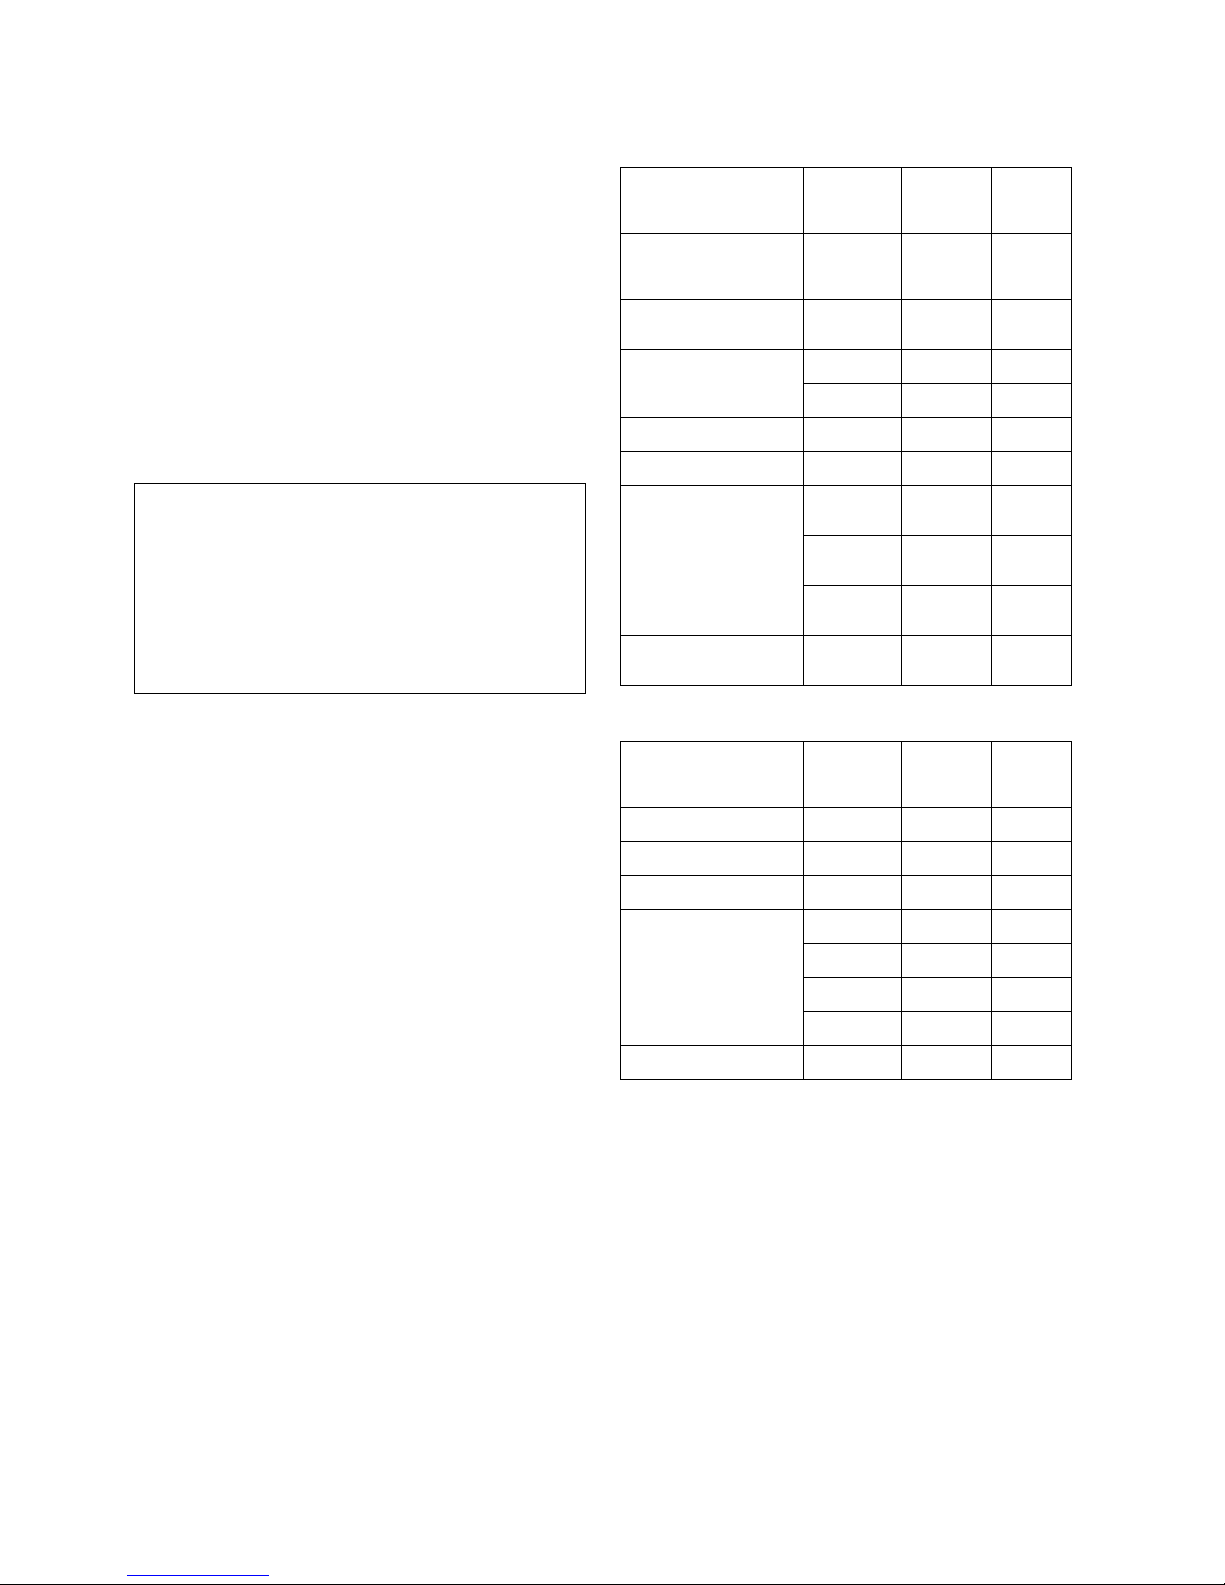
Means of Connection
Connection of this equipment to the telephone network is shown in the
following tables.
For MCC1, SCC1, CMC1, G600, and G650 Media Gateways:
For G350 and G700 Media Gateways:
For all media gateways:
If the terminal equipment (for example, the media server or media
gateway) causes harm to the telephone network, the telephone co mpany
will notify you in advance that temporary discontinuance of service may
be required. But if advance notice is not practical, the telephone
company will notify the customer as soon as possible. Also, you will be
advised of your right to file a complaint with the FCC if you believe it is
necessary.
The telephone company may make changes in its facilities, equipment,
operations or procedures that could affect the operation of the
equipment. If this happens, the telephone company will provide advance
notice in order for you to make necessary modifications to maintain
uninterrupted service.
If trouble is experienced with this equipment, for repair or warranty
information, please contact the Technical Service Center at
1-800-242- 2121 or contact your local Avaya representative. If the
equipment is causing harm to the telephone network, the telephone
company may request that you disconnect the equipment until the
problem is resolved.
Note: This equipment has been tested and found to comply with
the limits for a Class A digital device, pursuant to Part 15 of the
FCC Rules. These limits are designed to provide reasonable
protection against harmful interference when the equipment is
operated in a commercial environment. This equipment
generates, uses, and can radiate radio frequency energy and, if
not installed and used in accordance with the instruction
manual, may cause harmful interference to radio
communications. Operation of this equipment in a residential
area is likely to cause harmful interference in which case the
user will be required to correct the interference at his own
expense.
Manufacturer’s Port
Identifier
FIC Code SOC/
REN/
A.S. Code
Network
Jacks
Off premises station OL13C 9.0F RJ2GX,
RJ21X,
RJ11C
DID trunk 02RV2-T 0.0B RJ2GX,
RJ21X
CO trunk 02GS2 0.3A RJ21X
02LS2 0.3A RJ21X
Tie trunk TL31M 9.0F RJ2GX
Basic Rate Interface 02IS5 6.0F, 6.0Y RJ49C
1.544 digital interface 04DU9-BN 6.0F RJ4 8C,
RJ48M
04DU9-IKN 6.0F RJ48C,
RJ48M
04DU9-ISN 6.0F RJ48C,
RJ48M
120A4 channel service
unit
04DU9-DN 6.0Y RJ48C
Manufacturer’s Port
Identifier
FIC Code SOC/
REN/
A.S. Code
Network
Jacks
Ground Start CO trunk 02GS2 1.0A RJ11C
DID trunk 02RV2-T AS.0 RJ11C
Loop Start CO trunk 02LS2 0.5A RJ11C
1.544 digital interface 04DU9-BN 6.0Y RJ48C
04DU9-DN 6.0Y RJ48C
04DU9-IKN 6.0Y RJ48C
04DU9-ISN 6.0Y RJ48C
Basic Rate Interface 02IS5 6.0F RJ49C

A plug and jack used to connect this equipment to the premises wiring
and telephone network must comply with the applicable FCC Part 68
rules and requirements adopted by the ACTA. A compliant telephone
cord and modular plug is provided with this product. It is designed to be
connected to a compatible modular jack that is also compliant. It is
recommended that repairs be performed by Avaya certified technicians.
The equipment cannot be used on public coin phone service provided by
the telephone company. Connection to party line service is subject to
state tariffs. Contact the state public utility commission, public service
commission or corporation commission for information.
This equipment, if it uses a telephone receiver, is hearing aid compatible.
Canadian Department of Communications (DOC) Interference
Information
This Class A digital apparatus complies with Canadian ICES-003.
Cet appareil numérique de la classe A est conforme à la norme
NMB-003 du Canada.
This equipment meets the applicable Industry Canada Terminal
Equipment Technical Specifications. This is confirmed by the registration
number. The abbreviation, IC, before the registration number signifies
that registration was performed based on a Declaration of Conformity
indicating that Industry Canada technical specificatio ns were met. It do es
not imply that Industry Canada approved the equipment.
Installation and Repairs
Before installing this equipment, users should ensure that it is
permissible to be connected to the facilities of the local
telecommunications company. The equipment must also be installed
using an acceptable method of connection. The customer should be
aware that compliance with the above conditions may not prevent
degradation of service in some situations.
Repairs to certified equipment should be coor dinated by a representative
designated by the supplier . Any repairs or alterations made by the user to
this equipment, or equipment malfunctions, may give the
telecommunications company cause to request the user to disconnect
the equipment.
Declarations of Conformity
United States FCC Part 68 Supplier’s Declaration of Conformity (SDoC)
Avaya Inc. in the United States of America hereby certifies that the
equipment described in this document and bearing a TIA TSB-168 label
identification number complies with the FCC’s Rules and Regulations 47
CFR Part 68, and the Administrative Council on Terminal Attachments
(ACTA) adopted technical criteria.
Avaya further asserts that Avaya handset-equipped terminal equipment
described in this document complies with Paragraph 68.316 of the FCC
Rules and Regulations defining Hearing Aid Compatibility and is deemed
compatible with hearing aids.
Copies of SDoCs signed by the Responsible Party in the U. S. can be
obtained by contacting your local sales representative and are available
on the following Web site: http://www.avaya.com/support
.
All Avaya media servers and media gateways are compliant with FCC
Part 68, but many have been registered with the FCC before the SDoC
process was available. A list of all Avaya registered products may be
found at: http://www.part68.org
by conducting a search using "Avaya" as
manufacturer.
European Union Declarations of Conformity
Avaya Inc. declares that the equipment specified in this document
bearing the "CE" (Conformité Europeénne) mark conforms to the
European Union Radio and Telecommunications Terminal Equipment
Directive (1999/5/EC), including the Electromagnetic Compatibility
Directive (89/336/EEC) and Low Voltage Directive (73/23/EEC).
Copies of these Declarations of Conformity (DoCs) ca n be obtained by
contacting your local sales representative and are available on the
following Web site: http://www.avaya.com/support
.
Japan
This is a Class A product based on the standard of the Voluntary Control
Council for Interference by Information Technology Equipment (VCCI). If
this equipment is used in a domestic environment, radio disturbance may
occur, in which case , the user may be required to take corrective action s.
To order copies of this and other documents:
Call: Avaya Publications Center
Voice 1.800.457.1235 or 1.207.866.6701
FAX 1.800.457.1764 or 1.207.626.7269
Write: Globalware Solutions
200 Ward Hill Avenue
Haverhill, MA 01835 USA
Attention: Avaya Account Management
E-mail: totalware@gwsmail.com
For the most current versions of documentation, go to the A vaya su pport
Web site: http://www.avaya.com/support
.

Table of Contents
Chapter 1
Introducing the Operator Guide
Introduction to CRS . . . . . . . . . . . . . . . . . . . . . . . . . . . . . . . . . . . . . . . . . . . . . 9
Introduction to the Operator Console. . . . . . . . . . . . . . . . . . . . . . . . . . . . . . . 9
New Features with CRS 2.5 in Suite 9.3 . . . . . . . . . . . . . . . . . . . . . . . . . . . . 10
Chapter 2
Introducing CRS Front End Installation
System Requirements . . . . . . . . . . . . . . . . . . . . . . . . . . . . . . . . . . . . . . . . . . 13
Browsers. . . . . . . . . . . . . . . . . . . . . . . . . . . . . . . . . . . . . . . . . . . . . . . . . . . . 13
Web Server Operating Systems. . . . . . . . . . . . . . . . . . . . . . . . . . . . . . . . . . 13
Client Operating Systems. . . . . . . . . . . . . . . . . . . . . . . . . . . . . . . . . . . . . . . 13
Important Notes. . . . . . . . . . . . . . . . . . . . . . . . . . . . . . . . . . . . . . . . . . . . . . . . 14
Chapter 3
Installing CRS Front End
Starting the CRS Front End Installe r. . . . . . . . . . . . . . . . . . . . . . . . . . . . . . . 15
Chapter 4
Uninstalling CRS Front End
Starting the CRS Front End Uninstaller . . . . . . . . . . . . . . . . . . . . . . . . . . . . 23
Uninstalling CRS Front End. . . . . . . . . . . . . . . . . . . . . . . . . . . . . . . . . . . . . . 23
Chapter 5
Creating a Company Account
The Company Account. . . . . . . . . . . . . . . . . . . . . . . . . . . . . . . . . . . . . . . . . . 27
The External ID. . . . . . . . . . . . . . . . . . . . . . . . . . . . . . . . . . . . . . . . . . . . . . . 27
Disabling a Company’s Conferencing Privileges . . . . . . . . . . . . . . . . . . . . . 32
Filtering Company Details. . . . . . . . . . . . . . . . . . . . . . . . . . . . . . . . . . . . . . . 33
5

Avaya CS7000 Conferencing Server Operator Guide
Filtering by Wholesaler. . . . . . . . . . . . . . . . . . . . . . . . . . . . . . . . . . . . . . . . . 34
Chapter 6
Creating a Client Account
The Client Account . . . . . . . . . . . . . . . . . . . . . . . . . . . . . . . . . . . . . . . . . . . . . 37
International Calling Cards . . . . . . . . . . . . . . . . . . . . . . . . . . . . . . . . . . . . . . 38
Web Portal Password. . . . . . . . . . . . . . . . . . . . . . . . . . . . . . . . . . . . . . . . . . 38
Client Account Number. . . . . . . . . . . . . . . . . . . . . . . . . . . . . . . . . . . . . . . . . 38
Contact Details . . . . . . . . . . . . . . . . . . . . . . . . . . . . . . . . . . . . . . . . . . . . . . . 38
Editing a Clients Account Details . . . . . . . . . . . . . . . . . . . . . . . . . . . . . . . . . 40
Setting Phone Details. . . . . . . . . . . . . . . . . . . . . . . . . . . . . . . . . . . . . . . . . . 44
Setting Calling Card Details for a Client . . . . . . . . . . . . . . . . . . . . . . . . . . . . 45
Filtering Client Details . . . . . . . . . . . . . . . . . . . . . . . . . . . . . . . . . . . . . . . . . . 47
Creating a Participant Profile. . . . . . . . . . . . . . . . . . . . . . . . . . . . . . . . . . . . . 48
Adding Participants to a Conference Group . . . . . . . . . . . . . . . . . . . . . . . . . 48
Entering Participant Details . . . . . . . . . . . . . . . . . . . . . . . . . . . . . . . . . . . . . 48
Enabling Ad Hoc Conference Booking via DTMF . . . . . . . . . . . . . . . . . . . . 51
Chapter 7
Creating a Conference Reservation for a Client
What is a Conference Reservation? . . . . . . . . . . . . . . . . . . . . . . . . . . . . . . . 55
Defining Conference type. . . . . . . . . . . . . . . . . . . . . . . . . . . . . . . . . . . . . . . 56
Setting Moderator privileges. . . . . . . . . . . . . . . . . . . . . . . . . . . . . . . . . . . . . 56
Setting Time Zone . . . . . . . . . . . . . . . . . . . . . . . . . . . . . . . . . . . . . . . . . . . . 56
Establishing How Many and Who Can Attend a Conference. . . . . . . . . . . . 57
Selecting Appropriate Conference DDIs. . . . . . . . . . . . . . . . . . . . . . . . . . . . 57
Additional Options . . . . . . . . . . . . . . . . . . . . . . . . . . . . . . . . . . . . . . . . . . . . 57
Setting Conference Messages . . . . . . . . . . . . . . . . . . . . . . . . . . . . . . . . . . . 57
Creating a Conference Reservation . . . . . . . . . . . . . . . . . . . . . . . . . . . . . . . 59
Demand Conferences. . . . . . . . . . . . . . . . . . . . . . . . . . . . . . . . . . . . . . . . . . . 72
Filtering Demand Conferences. . . . . . . . . . . . . . . . . . . . . . . . . . . . . . . . . . . 75
Overview of recurring conferences. . . . . . . . . . . . . . . . . . . . . . . . . . . . . . . . 77
Creating a daily conference . . . . . . . . . . . . . . . . . . . . . . . . . . . . . . . . . . . . . 77
Creating a weekly conference . . . . . . . . . . . . . . . . . . . . . . . . . . . . . . . . . . . 78
Creating Sub Conferences. . . . . . . . . . . . . . . . . . . . . . . . . . . . . . . . . . . . . . . 82
6

Avaya CS7000 Conferencing Server Operator Guide
DDI Management. . . . . . . . . . . . . . . . . . . . . . . . . . . . . . . . . . . . . . . . . . . . . . . 82
Creating DDIs. . . . . . . . . . . . . . . . . . . . . . . . . . . . . . . . . . . . . . . . . . . . . . . . 82
Selecting DDI’s for a Conference . . . . . . . . . . . . . . . . . . . . . . . . . . . . . . . . . 82
Selecting the Appropriate DDI . . . . . . . . . . . . . . . . . . . . . . . . . . . . . . . . . . . 84
Maximum Number of DDIs Associated with a Conference. . . . . . . . . . . . . . 85
Chapter 8
Working with Conference Types
Meet Me Conferences. . . . . . . . . . . . . . . . . . . . . . . . . . . . . . . . . . . . . . . . . . . 88
Scheduling a Meet Me Conference . . . . . . . . . . . . . . . . . . . . . . . . . . . . . . . 88
Meet Me Operator Assisted Conferences (Bell Mode). . . . . . . . . . . . . . . . . 90
Scheduling an Operator Assisted Conference . . . . . . . . . . . . . . . . . . . . . . . 90
Meet Me Secure Conferences . . . . . . . . . . . . . . . . . . . . . . . . . . . . . . . . . . . . 91
Scheduling a Meet Me Secure Conference . . . . . . . . . . . . . . . . . . . . . . . . . 92
CLI-based Meet Me Secure Conference . . . . . . . . . . . . . . . . . . . . . . . . . . . 95
Dial Out Conferences . . . . . . . . . . . . . . . . . . . . . . . . . . . . . . . . . . . . . . . . . . 101
Scheduling a Dial Out Conference . . . . . . . . . . . . . . . . . . . . . . . . . . . . . . . 101
Self Dial Conferences. . . . . . . . . . . . . . . . . . . . . . . . . . . . . . . . . . . . . . . . . . 102
Scheduling a Self Dial Conference. . . . . . . . . . . . . . . . . . . . . . . . . . . . . . . 102
Self Registration Conferences. . . . . . . . . . . . . . . . . . . . . . . . . . . . . . . . . . . 103
The Self Registration for Event Calls Process . . . . . . . . . . . . . . . . . . . . . . 104
Q&A Conferences . . . . . . . . . . . . . . . . . . . . . . . . . . . . . . . . . . . . . . . . . . . . . 105
Booking Q&A Conferences. . . . . . . . . . . . . . . . . . . . . . . . . . . . . . . . . . . . . 105
Polling Conferences . . . . . . . . . . . . . . . . . . . . . . . . . . . . . . . . . . . . . . . . . . . 106
Chapter 9
Confirming a Conference Reservation
What happens if Conference Resources are Unavailable?. . . . . . . . . . . . 107
Completing the Reservation . . . . . . . . . . . . . . . . . . . . . . . . . . . . . . . . . . . . 112
Selecting Participants for a Reservation. . . . . . . . . . . . . . . . . . . . . . . . . . . 115
Traffic Charged. . . . . . . . . . . . . . . . . . . . . . . . . . . . . . . . . . . . . . . . . . . . . . 117
Additional Options . . . . . . . . . . . . . . . . . . . . . . . . . . . . . . . . . . . . . . . . . . . . 122
Setting in-conference Messages for a Participant . . . . . . . . . . . . . . . . . . . 123
Setting General Options . . . . . . . . . . . . . . . . . . . . . . . . . . . . . . . . . . . . . . . 124
Setting Notification Options . . . . . . . . . . . . . . . . . . . . . . . . . . . . . . . . . . . . 127
7

Avaya CS7000 Conferencing Server Operator Guide
Setting Recording Options . . . . . . . . . . . . . . . . . . . . . . . . . . . . . . . . . . . . . 129
Reviewing the Conference Summary. . . . . . . . . . . . . . . . . . . . . . . . . . . . . 131
Chapter 10
Working with Reserved Conferences
Reviewing Reservation Details. . . . . . . . . . . . . . . . . . . . . . . . . . . . . . . . . . 133
Reviewing Scheduled Conference Details . . . . . . . . . . . . . . . . . . . . . . . . . 135
Editing a Scheduled Conference . . . . . . . . . . . . . . . . . . . . . . . . . . . . . . . . 139
Reviewing Conference DDI/PIN details . . . . . . . . . . . . . . . . . . . . . . . . . . . 147
Chapter 11
Reviewing the Schedule
Filtering Scheduled Conferences . . . . . . . . . . . . . . . . . . . . . . . . . . . . . . . . 151
Analyzing System Resource Usage . . . . . . . . . . . . . . . . . . . . . . . . . . . . . . 153
Customizing the Schedule View. . . . . . . . . . . . . . . . . . . . . . . . . . . . . . . . . 157
Reviewing Caller Duration Records . . . . . . . . . . . . . . . . . . . . . . . . . . . . . . 161
Chapter 12
Search and Print Features in the CRS Front End
Using the Search Utility . . . . . . . . . . . . . . . . . . . . . . . . . . . . . . . . . . . . . . . . 163
Filtering Conferences Using Search. . . . . . . . . . . . . . . . . . . . . . . . . . . . . . 168
Printing Company, Client, and Reservation Details . . . . . . . . . . . . . . . . . 169
Printing Company Details. . . . . . . . . . . . . . . . . . . . . . . . . . . . . . . . . . . . . . 170
Printing Client Details. . . . . . . . . . . . . . . . . . . . . . . . . . . . . . . . . . . . . . . . . 171
Printing Reservation Details . . . . . . . . . . . . . . . . . . . . . . . . . . . . . . . . . . . . 173
Exporting Reports for Distribution . . . . . . . . . . . . . . . . . . . . . . . . . . . . . . . 176
Compatible Exporting Formats. . . . . . . . . . . . . . . . . . . . . . . . . . . . . . . . . . 176
Destination of Exported Reports. . . . . . . . . . . . . . . . . . . . . . . . . . . . . . . . . 176
Chapter 13
Additional Features
Reviewing Existing Conference Recordings . . . . . . . . . . . . . . . . . . . . . . . 179
Who/What is Currently Logged onto the CRS Server? . . . . . . . . . . . . . . . 180
Cloning a Reservation or Conference. . . . . . . . . . . . . . . . . . . . . . . . . . . . . 182
8

Avaya CS7000 Conferencing Server Operator Guide
Chapter 14
Guide to the Avaya Operator Console
Avaya Operator Console Terminology . . . . . . . . . . . . . . . . . . . . . . . . . . . . 188
Interface Configuration. . . . . . . . . . . . . . . . . . . . . . . . . . . . . . . . . . . . . . . . . 189
Configuring Overall View and Layout . . . . . . . . . . . . . . . . . . . . . . . . . . . . . 190
Configuring the Contents of Conference Headers . . . . . . . . . . . . . . . . . . . 197
Configuring the Contents of the Participant Line . . . . . . . . . . . . . . . . . . . . 202
Configuring Settings . . . . . . . . . . . . . . . . . . . . . . . . . . . . . . . . . . . . . . . . . . 207
Configuring Clocks . . . . . . . . . . . . . . . . . . . . . . . . . . . . . . . . . . . . . . . . . . . 211
Conference Management . . . . . . . . . . . . . . . . . . . . . . . . . . . . . . . . . . . . . . . 214
Getting Started . . . . . . . . . . . . . . . . . . . . . . . . . . . . . . . . . . . . . . . . . . . . . . 215
Participant Status Management . . . . . . . . . . . . . . . . . . . . . . . . . . . . . . . . . 223
Operator Procedures . . . . . . . . . . . . . . . . . . . . . . . . . . . . . . . . . . . . . . . . . 228
Operator Tools . . . . . . . . . . . . . . . . . . . . . . . . . . . . . . . . . . . . . . . . . . . . . . 245
Chapter 15
DTMF Polling
Configuring Polling Questions . . . . . . . . . . . . . . . . . . . . . . . . . . . . . . . . . . 256
Initiating Polling . . . . . . . . . . . . . . . . . . . . . . . . . . . . . . . . . . . . . . . . . . . . . . 259
Adding Question Types . . . . . . . . . . . . . . . . . . . . . . . . . . . . . . . . . . . . . . . . 261
Chapter 16
Hoot and Holler Conferencing
Connecting Hoot and Holler Circuits. . . . . . . . . . . . . . . . . . . . . . . . . . . . . . 265
Connecting Hoot and Holler Groups. . . . . . . . . . . . . . . . . . . . . . . . . . . . . . 267
During a Conference . . . . . . . . . . . . . . . . . . . . . . . . . . . . . . . . . . . . . . . . . 270
Hoot and Holler Display Configuration . . . . . . . . . . . . . . . . . . . . . . . . . . . . 271
Appendix A
Compatible Exporting Formats for Conference Reports. . . . . . . . . 273
Appendix B
File Locations . . . . . . . . . . . . . . . . . . . . . . . . . . . . . . . . . . . . . . . . . . . 275
File Locations . . . . . . . . . . . . . . . . . . . . . . . . . . . . . . . . . . . . . . . . . . . . . . . . 275
9

Avaya CS7000 Conferencing Server Operator Guide
10

Chapter 1
Introducing the Operator Guide
Introduction to CRS
The CRS (Client Registration Server) Front End is primarily a booking and
scheduling application. Here you can create both scheduled and demand
conferences with additional attributes to suit customer requirements. The CRS
Front End is also used to enter new company and client acco unt details. These
are necessary as the relationship between company, client and conference
reservation is crucial for billing purposes. Using the CRS Front End you can also:
Check conference schedule
Analyze resource usage
Check conference recording details
Set operator features
Extend or reduce live conference participation
Extend or reduce live conference duration
All features described in this guide and content written reflect s the CRS Front End
release 2.3.
Introduction to the Operator Console
The Operator Console enables you to efficiently manage conferences. It is a
windows application with an intuitive, graphical user interface.
Using the Operator Console you can perform the following:
Mute callers already in conference
Allow one or more callers to listen and speak in the conference
Put one or more callers on hold
Dial out one or more called parties
9

Avaya CS7000 Conferencing Server Operator Guide
Intercept one caller at a time fo r a on e- to-one consultation
Roam through each active conference to listen to a sample of speech from
each one
Delete one or more callers from the active conference
Move one or more callers from one conference to another conference using
drag & drop
Using remote operator capability to manage conferences from an off-site
location
Attend to callers who require operator attention, i.e., those who press the
operator recall sequence during the conference
Quickly identify callers in conv er sa tion
Pause a conference recording
New Features with CRS 2.5 in Suite 9.3
Creation and Management of Clients
The layout of client information on the Client dialogs has been update d in this
release. Client details are now displayed more clearly. For more information,
see
“Creating a Client Account” on page 37.
Color-Coded DDIs
DDIs are now color coded on the DDI Selectio n dialog. System-wide DDIs ar e
differentiated from company-specific, active DDIs. For more information, see
“DDI Management” on page 82.
SMS Notifications
Short message service (SMS) notification is a new option with the CRS 2.5.
SMS is part of the GSM standard and consists of text messages of up to 160
characters in length, which may be sent and received by mobile handsets. For
more information, see
Note: SMS notification is a chargeable extra and so may not be included in your
configuration.
“Setting Notification Options” on page 127.
Cancelling Alerts
In this release, Operators can switch off Alerts. This feature is especially
useful for Operators who receive large numbers of Alert notifications. A
10

Avaya CS7000 Conferencing Server Operator Guide
Cancel button is displayed on each Alert dialog. For more information, see
“Alerts” on page 248.
View Filter Feature
Using the filters feature, Operators can customize their conference view so
that only certain conferences are disp layed. For example, Operator s can view
only Demand conferences or only Scheduled conferences. Conferences not
matching the selected filters are hidden from all views: Conference View
dialog, Conference List, Schedule Open dialog, Autoview, and the main
display. For more information, see
New Exclusion in the Select All Feature
The Select All feature enables Operators to se lect all conferences. The Select
All feature has a number of configuration exclusions. In this release, a new
exclusion has been added. If Exclude BELL is selected, the Select All function
selects all calls that are not in BELL mode. For more information, see
Table 14.11 on page 209.
New Button on Intercept Dialog
“Configuring Filters” on page 191.
In suite 9.3, Operators can disconnect participants by clicking the new
Disconnect button on the Intercept dialog. If Operators click Disconnect, a
prompt is displayed. Click Yes to disconnect the participant. If Yes is not
selected, the intercept is released. For more information, see
“Intercepting” on
page 230.
Moderator Dial Out
The Dial Conf dialog has a new option: Moderator Dial Out. Operators can
now select the Moderator checkbox to dial the call as a Moderator. The
checkbox is disabled when dialling from non-Moderator conferences. For
more information, see
New Conference Modify Feature
“Dialing Out” on page 232.
In suite 9.3, Operators can modify live conferences. For example, they can
update the tone and name announce configuration. For more information, see
“Modifying Conferences” on page 244.
New Fields on the Conference Title and Conference List
There are a number of new columns available for display on the Conference
Title and Conference List. These are: Group, Language, and Comment. For
more information, see
Table 14.3 on page 198.
11

Avaya CS7000 Conferencing Server Operator Guide
Wholesaler Display Filter
Wholesalers are an optional feat ur e in this rele as e. Ope ra to rs can no w view
all companies associated with a particular Wholesaler using the new
Wholesaler Display Filter. For more information, see
“Filtering by Wholesaler”
on page 34.
12

Chapter 2
Introducing CRS Front End Installation
This chapter introduces the CRS FrontEnd in stallation procedure. It describes the system
requirements and lists several important notes.
System Requirements
The minimum system requirements for the installation of the CRS Front End are:
Browsers
• Internet Explorer 5.5 with Microsoft JVM Release 5.0.0.3810 or Sun JVM v1.4 .0_03
• Internet Explorer 6.0 with Microsoft JVM Release 5.0.0.3810 or Sun JVM v1 .4.0_03
Web Server Operating Systems
• Microsoft Windows 2000 Server
• Microsoft Windows NT
Client Operating Systems
• Microsoft Windows NT
• Microsoft Windows 2000
• Microsoft Windows XP Professional
Note: Java Virtual Machines are available online at:
http://www.ZeroG.com/goto/vmpack
13

Important Notes
• The Installation Engineer must have local administrative privileges on the server.
• The CRS Front End Inst aller does no t phys ically inst all until the User clicks the Install
button. As a result, Users can return to previous installation dialogs and make
changes to the configuration settings at any point during the installation process.
• Do n ot run two instances of the CRS Front End Inst aller at the same time. Similarly, do
not run two instances of the CRS Front End Uninstaller at the same time.
14 Avaya CS7000 Conferencing Server Operator Guide
Chapter 3
Installing CRS Front End
This chapter describes how to install the CRS Front End application.
Starting the CRS Front End Installer
Note: At any point during the installation process, Users can click Cancel to stop the
installation or Previous to return to the previous dialog.
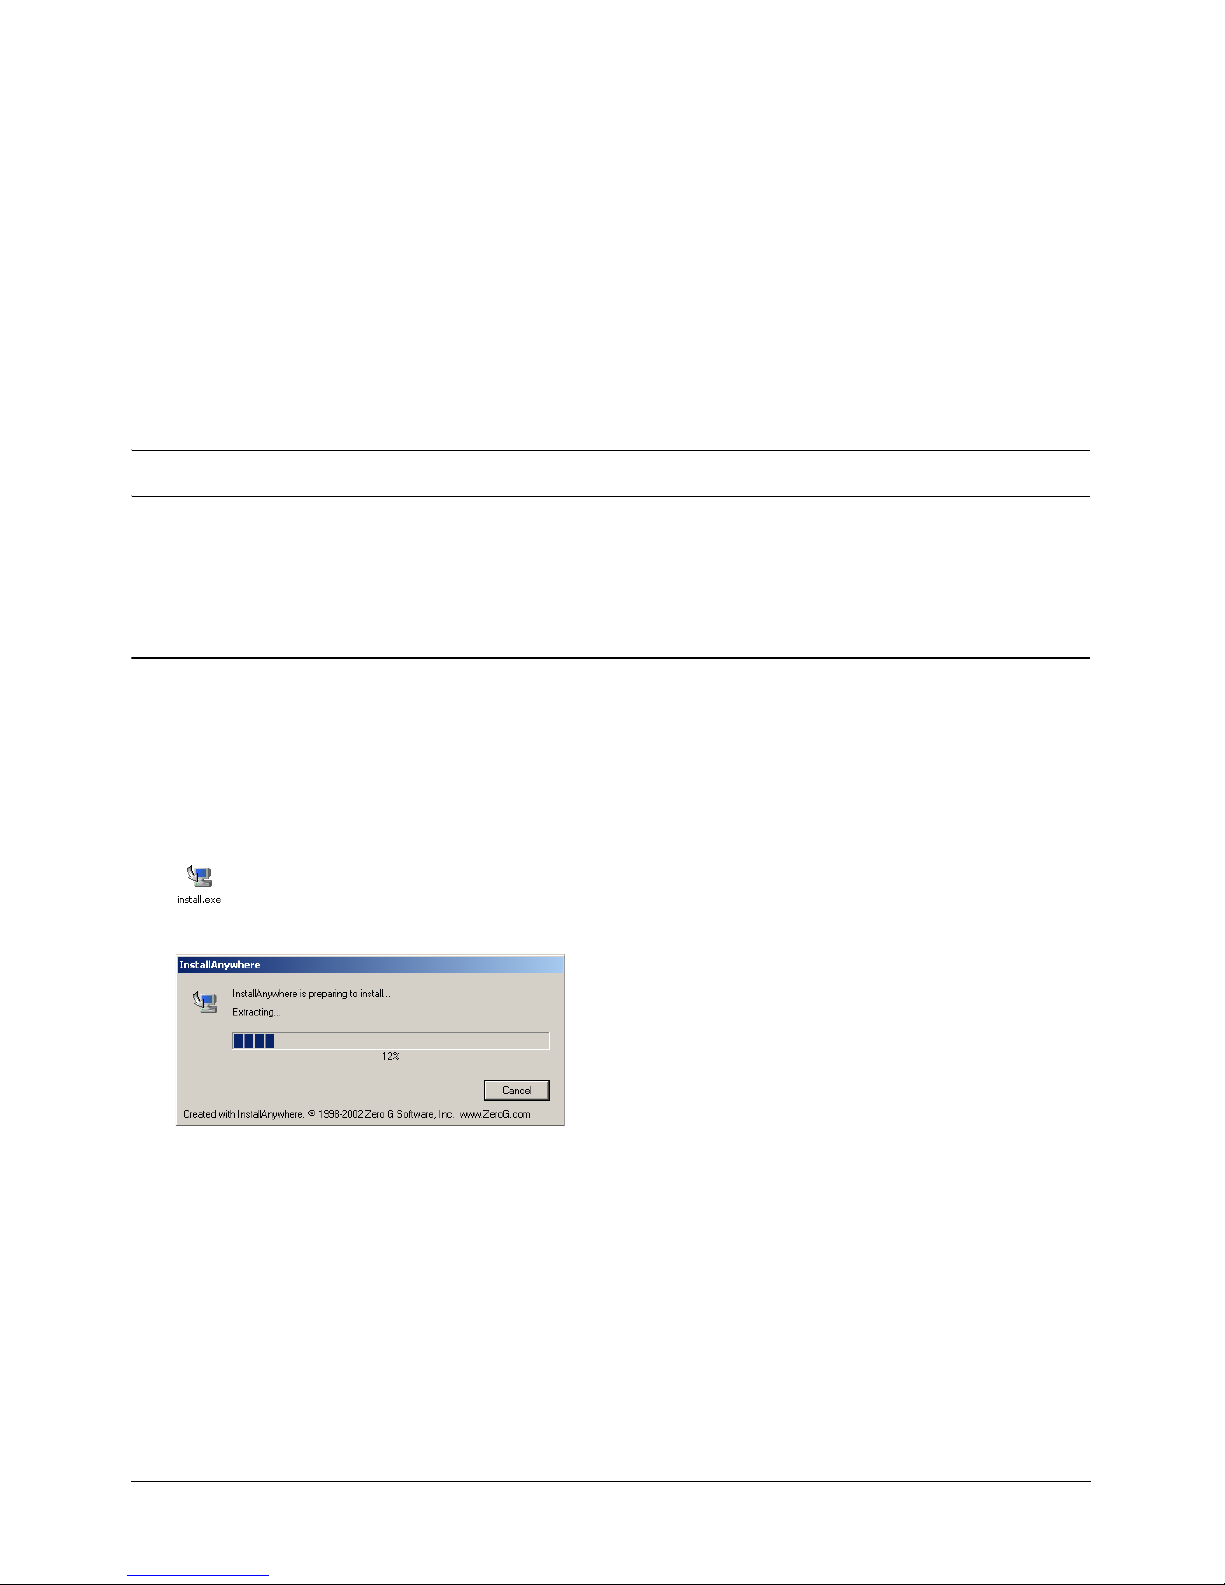
1. Close all applications that are currently running.
It is a good idea to make a backup copy of the bands.ini file.
2. Click the install.exe icon.
The CRS Front End Installer extracts.
15
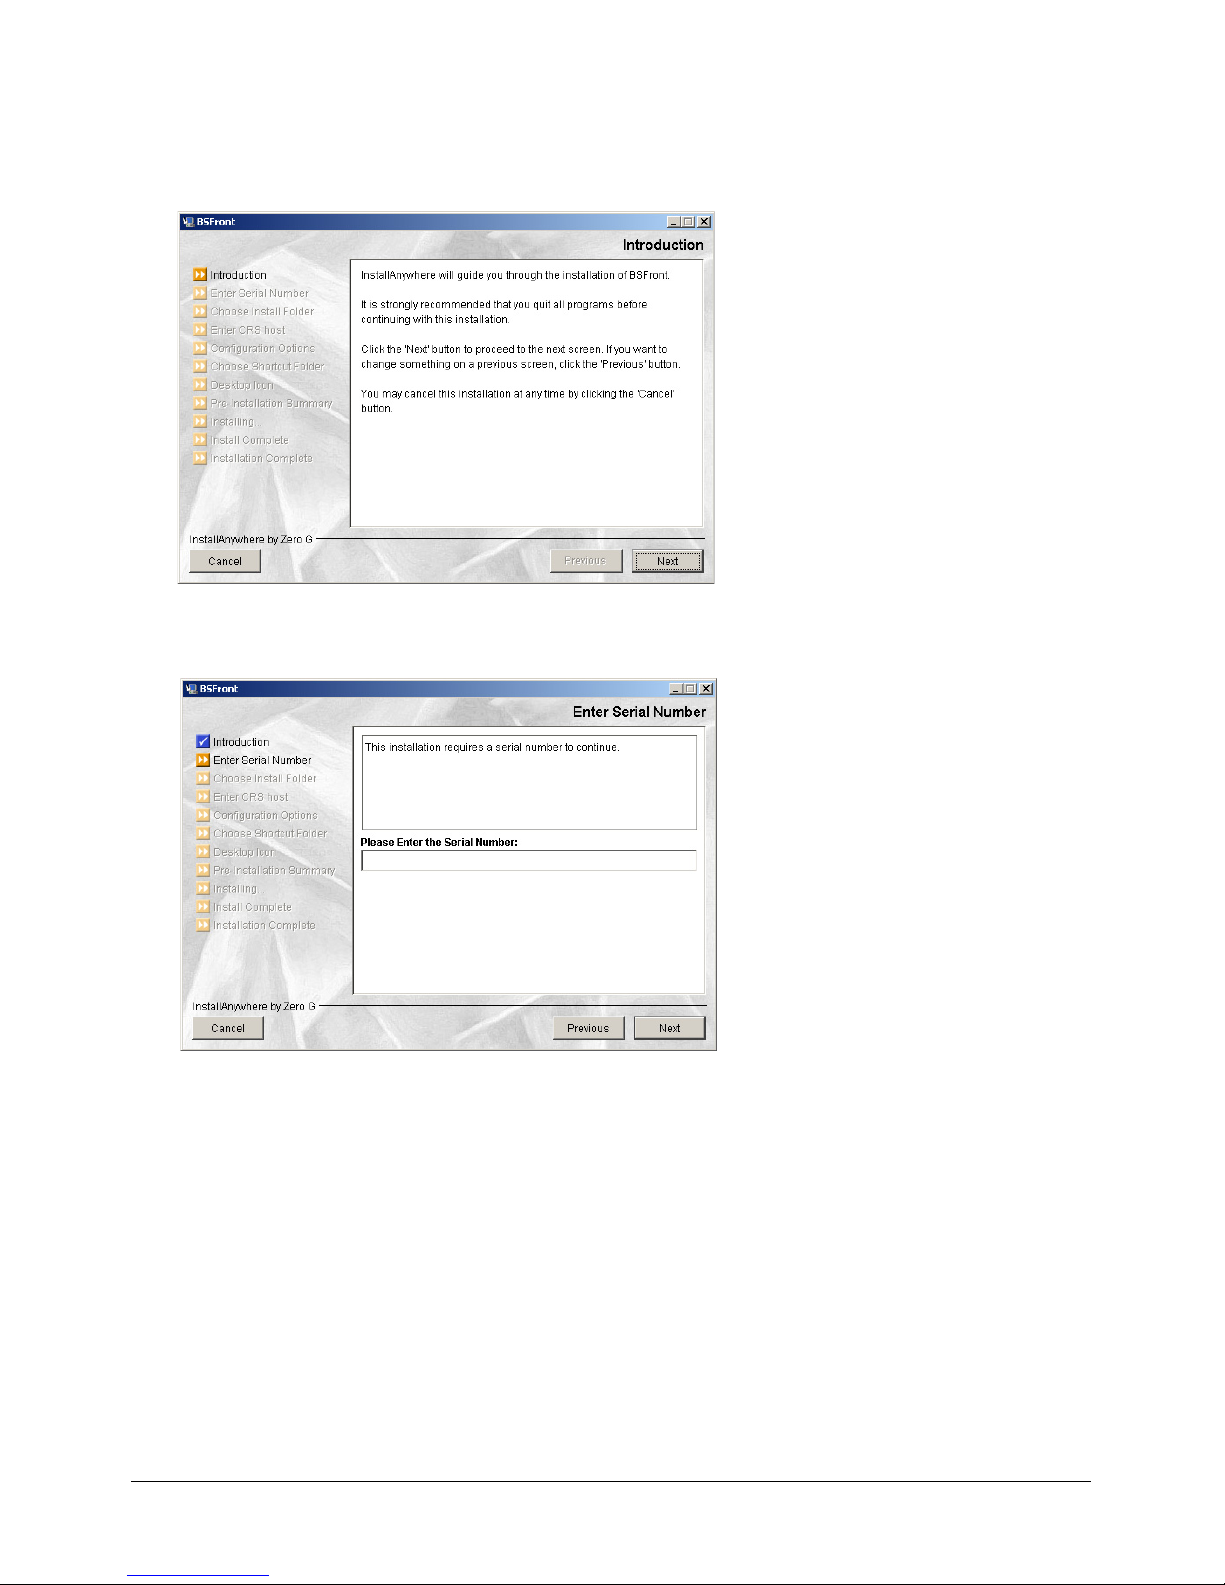
The CRS Front End Installer Introduction dialog is displayed.
3. Click the Next button.
The Enter Serial Number dialog is displayed.
4. Enter the Avaya serial number in the Please Enter the Serial Number field.
The appropriate serial numbers are listed in the serial_numbers.txt file. The
Avaya serial number is DRRKDK. The serial_numbers.txt file ships with the
Installer.
5. Click the Next button.
16 Avaya CS7000 Conferencing Server Operator Guide
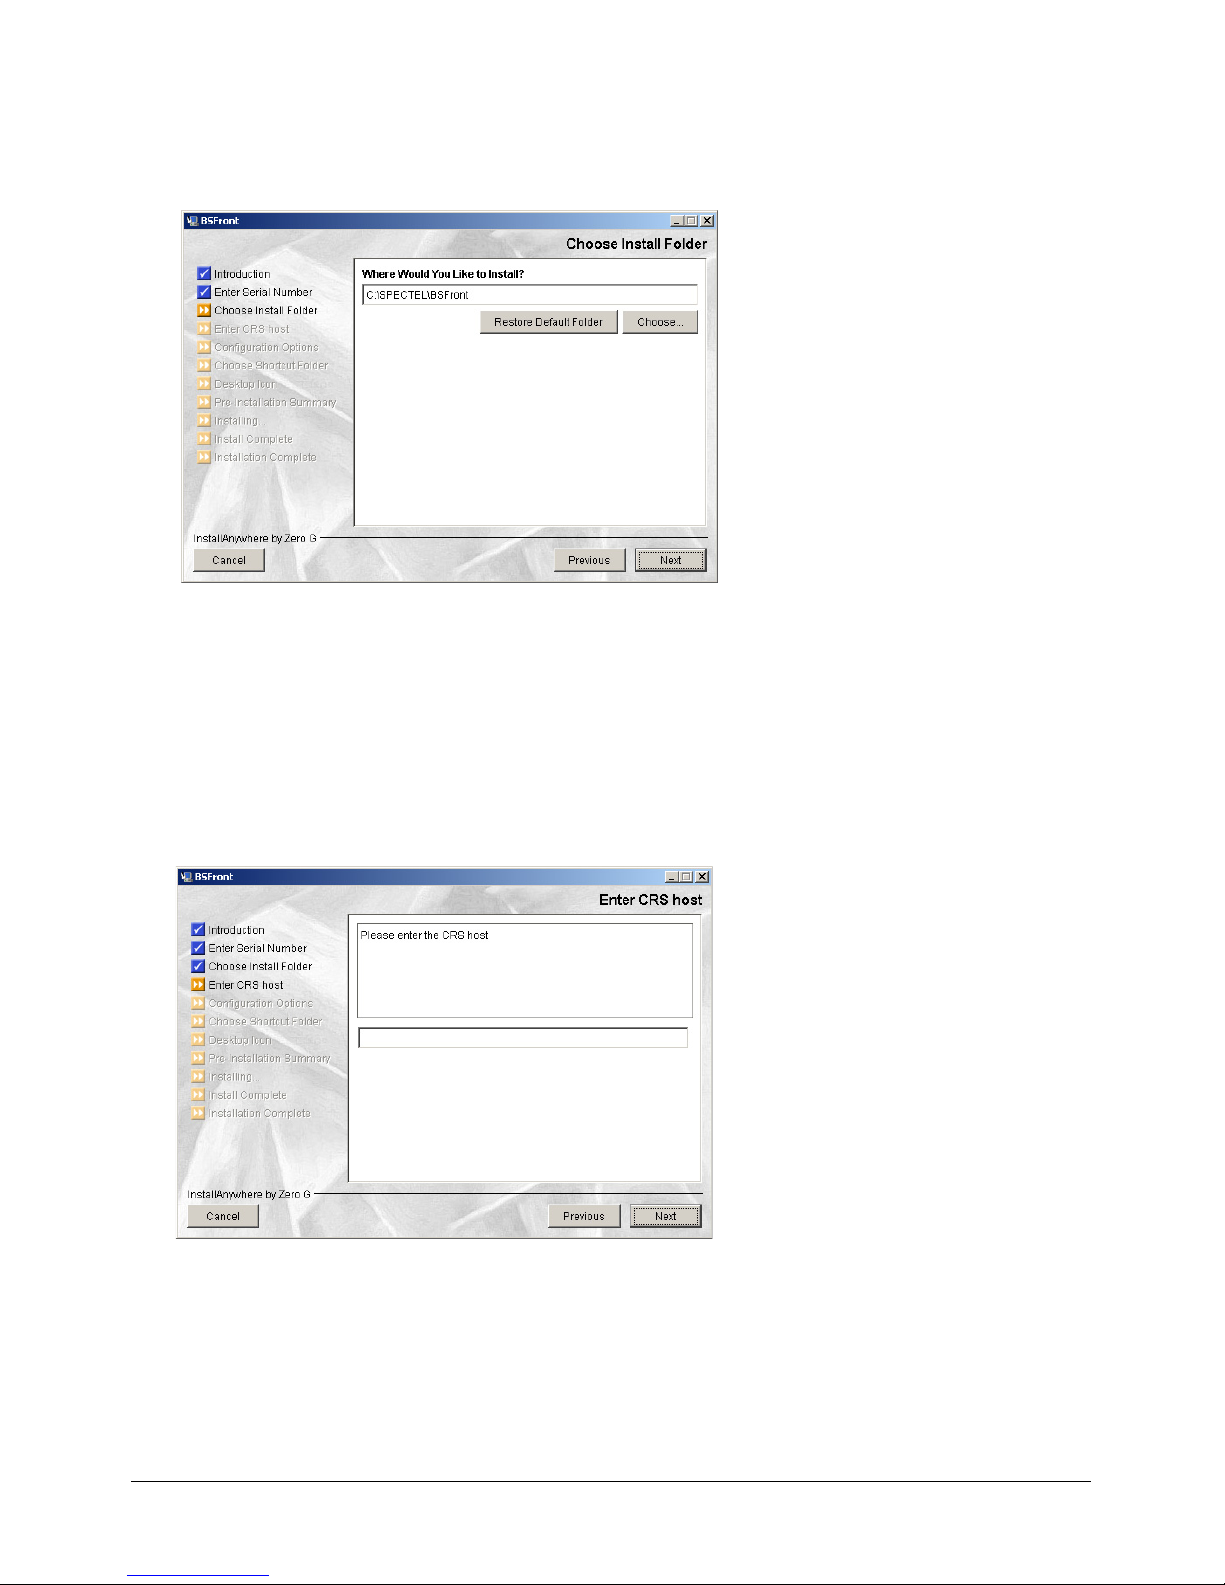
The Choose Install Folder dialog is displayed.
The exact appearance of this dialog varies according to the type of installation or
upgrade. In the case of an upgrade, the previous installatio n directory is displayed. In
the case of a new installation, the default installation directory is displayed .
6. Enter an installation directory in the Where Would Y ou Like to Insta ll/Upgrade? field
Alternatively, accept the suggested location.
7. Click the Next button.
The Enter CRS Host dialog is displayed.
8. Enter a CRS Host IP address.
The IP address is saved in the bands.ini file.
In the case of an upgrade, the previous CRS Host IP is displayed.
9. Click the Next button.
17
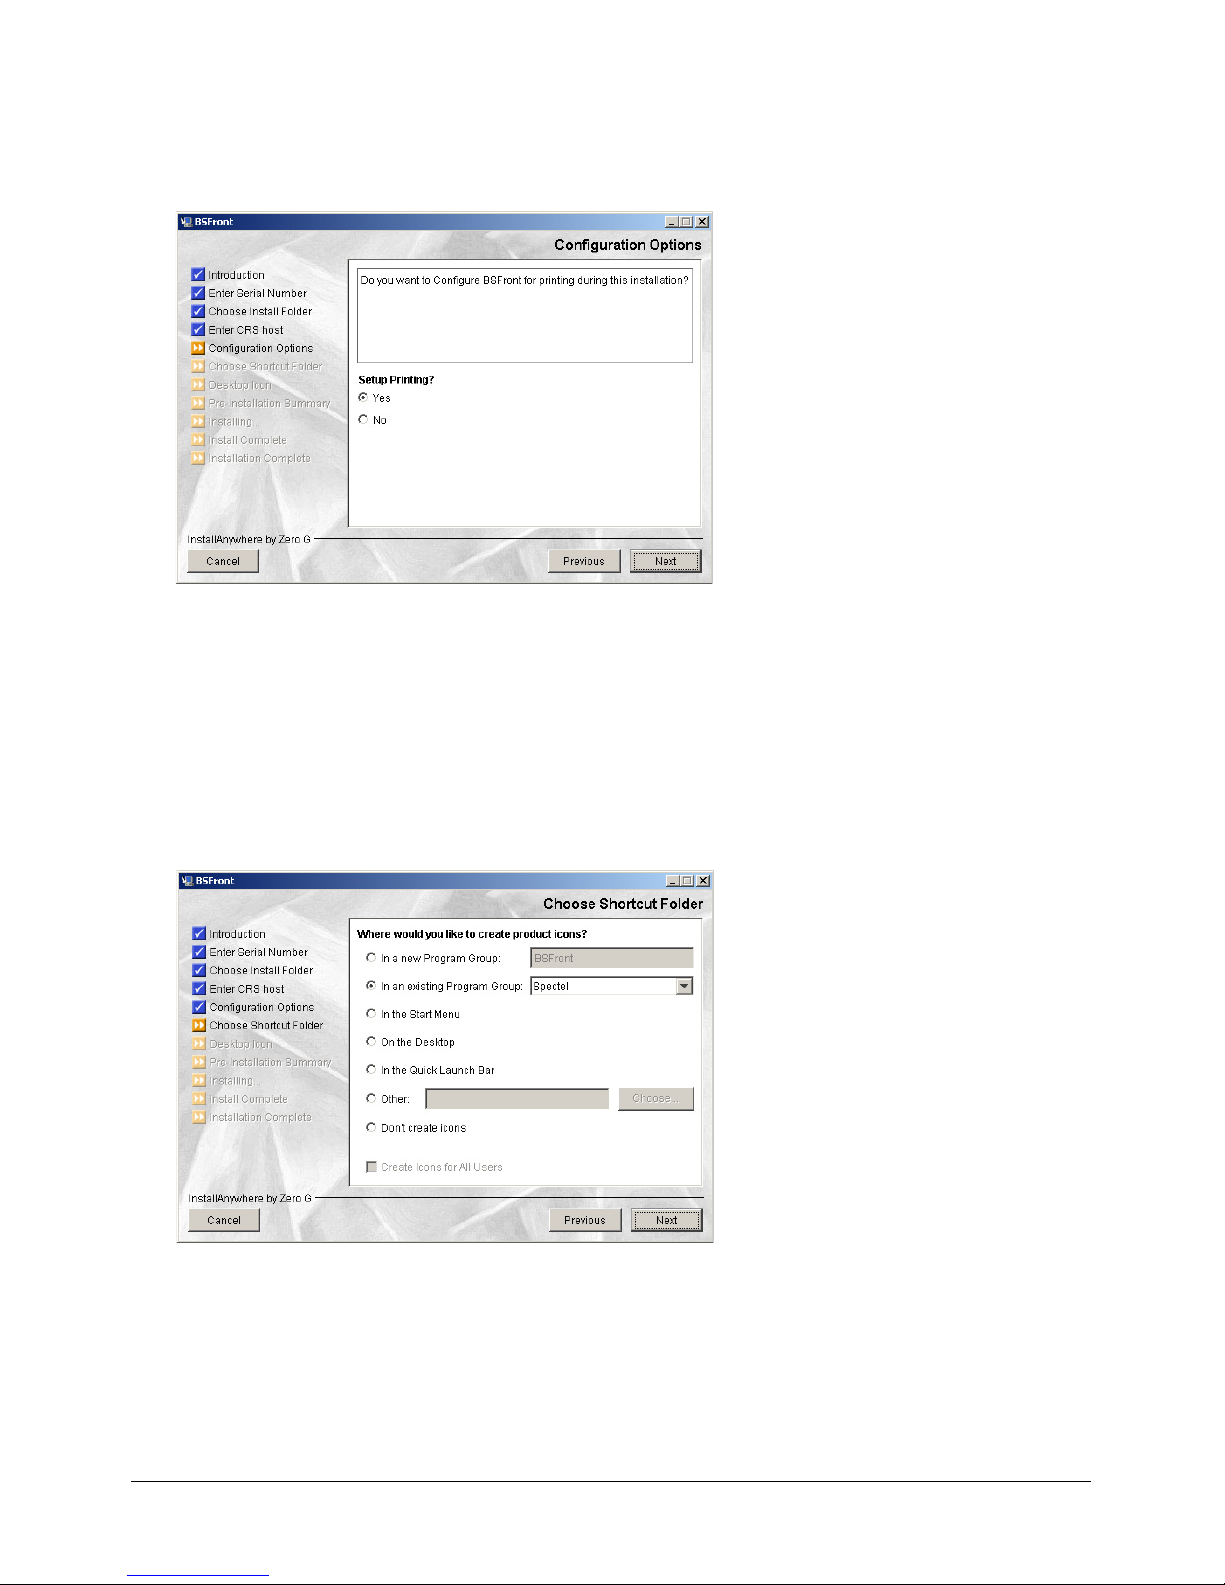
The Configuration Options dialog is displayed.
In the case of an upgrade, the Configuration Option s dialo g is not d isp layed if pr inting
has been set up on a previous occasion.
10. Select Yes to configure printing functionality with the CRS Front End application.
Clicking Yes enables the installation of Crystal Reports and configu ration of an ODBC
connection.
11. Click the Next button.
The Choose Shortcut Folder dialog is displayed.
12. Select a location for the CRS Front End application shortcut icon.
Users can choose to display the CRS Front End application shortcut icon as follows:
1. As a new option in the Programs menu
2. As an option within an existing Programs menu option
18 Avaya CS7000 Conferencing Server Operator Guide
3. As an option on the Start Menu
4. As an item on the desktop
5. As an item on the Quick Launch Bar
6. As an item in another, specified, location
Alternatively, Users can choose not to create a CRS Front End application shortcut
icon.
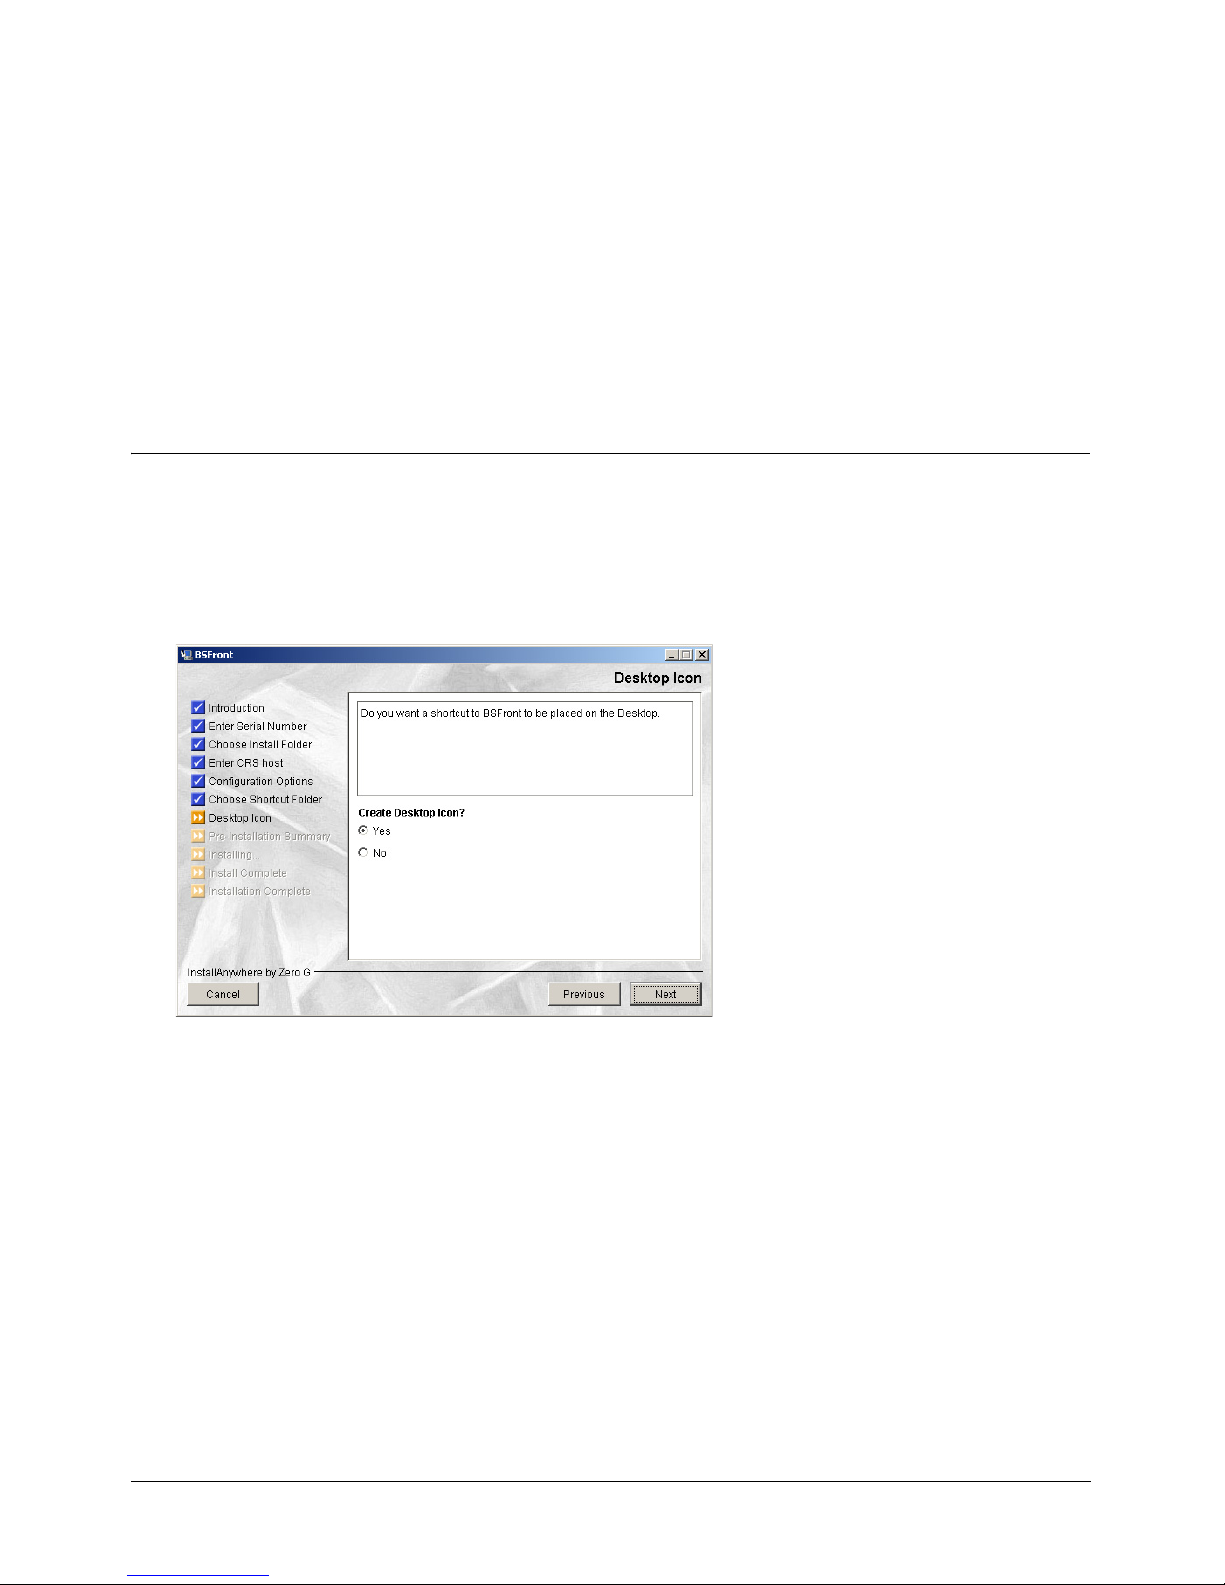
Note: The Create Icons for All Users field is enabled if options 1, 3, or 4, ar e selected.
Using this field, the shortcut icon can be created for all users or for the current
user.
13. Click the Next button.
The Desktop Icon dialog is displayed.
14. Select Yes to display a CRS Front End application shortcut icon on the desktop.
This desktop icon is displayed in addition to the shortcut icon selected on the previo us
dialog. If the desktop is selected on the Choose Shortcut Folder dialog, the Desktop
Icon dialog is not displayed.
In the case of an upgrade, the Desktop Icon dialog is not displayed if a desktop icon
already exists.
15. Click the Next button.
19

The Pre-Installation Summary dialog is displayed.
16. Ensure that this information is correct.
In particular, ensure that the available space is greater than the required space.
17. Click Install.
The Installing BSFront dialog is displayed.
If the Yes option was selected on the Configuration Options dialog, Crystal Reports is
also installed.
18. Allow the progress bar to reach its end point.
20 Avaya CS7000 Conferencing Server Operator Guide
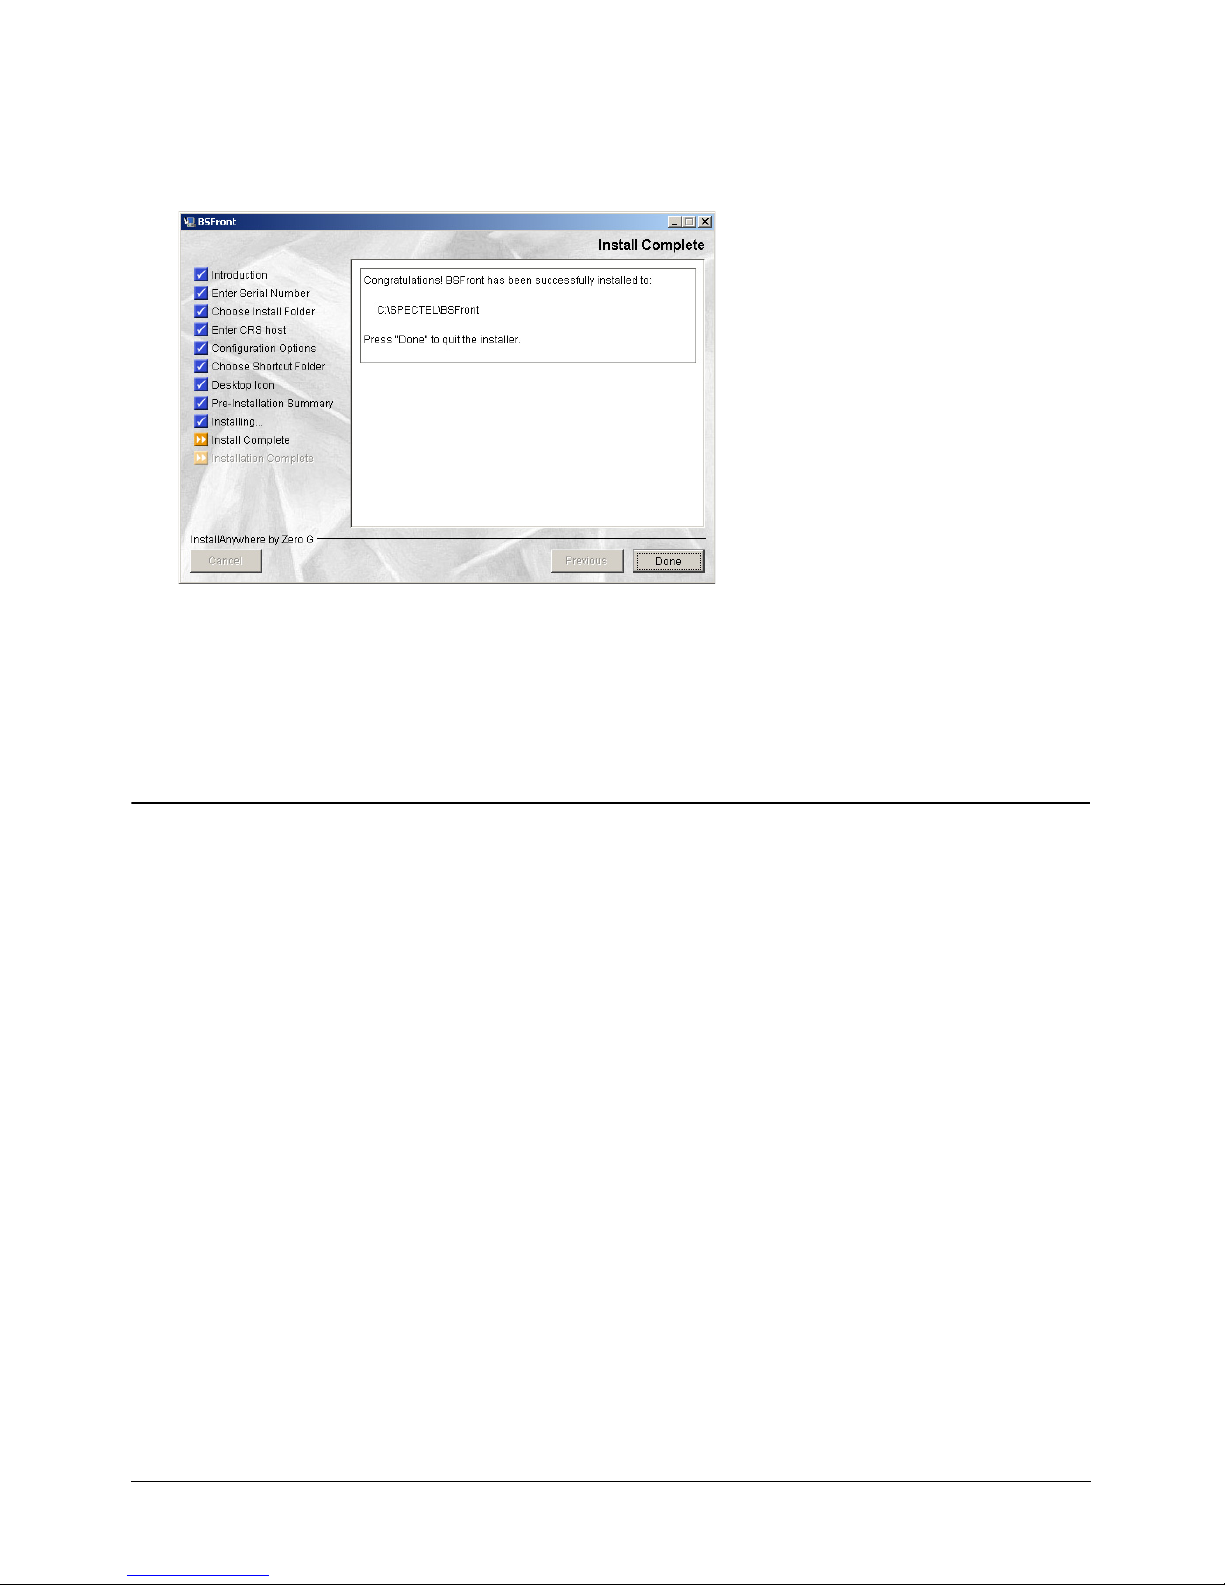
The Install Complete dialog is displayed.
Click the Done button.
The CRS Front End installer closes.
The CRS Front End is installed.
The user may be prompted to reboot. A reboot is necessary in certain situations.
Note: The registration of all OCX files is handled automatically.
In the case of an upgrade, the CRS Front End Installer me rges old file values with
new file values to create a new bands.ini file.
21

22 Avaya CS7000 Conferencing Server Operator Guide

Chapter 4
Uninstalling CRS Front End
This chapter describes how to uninstall the CRS Fron t End application.
Starting the CRS Front End Uninstaller
There are three ways to start the CRS Front End Uninstaller.
• Via Add/Remove Programs
1. Click Start.
2. Select Settings.
3. Select Control Panel.
4. Click Add/Remove Programs.
• Via the shortcut folder defined at installation time.
Typically, this is located in the Avaya option on the Programs menu.
• Via the installation folder defined at installation time.
Typically, this is located in C:\AVAYA\BSFront
Uninstalling CRS Front End
1. Close all applications that are currently running.
2. Run the CRS Front End Uninstaller.
23
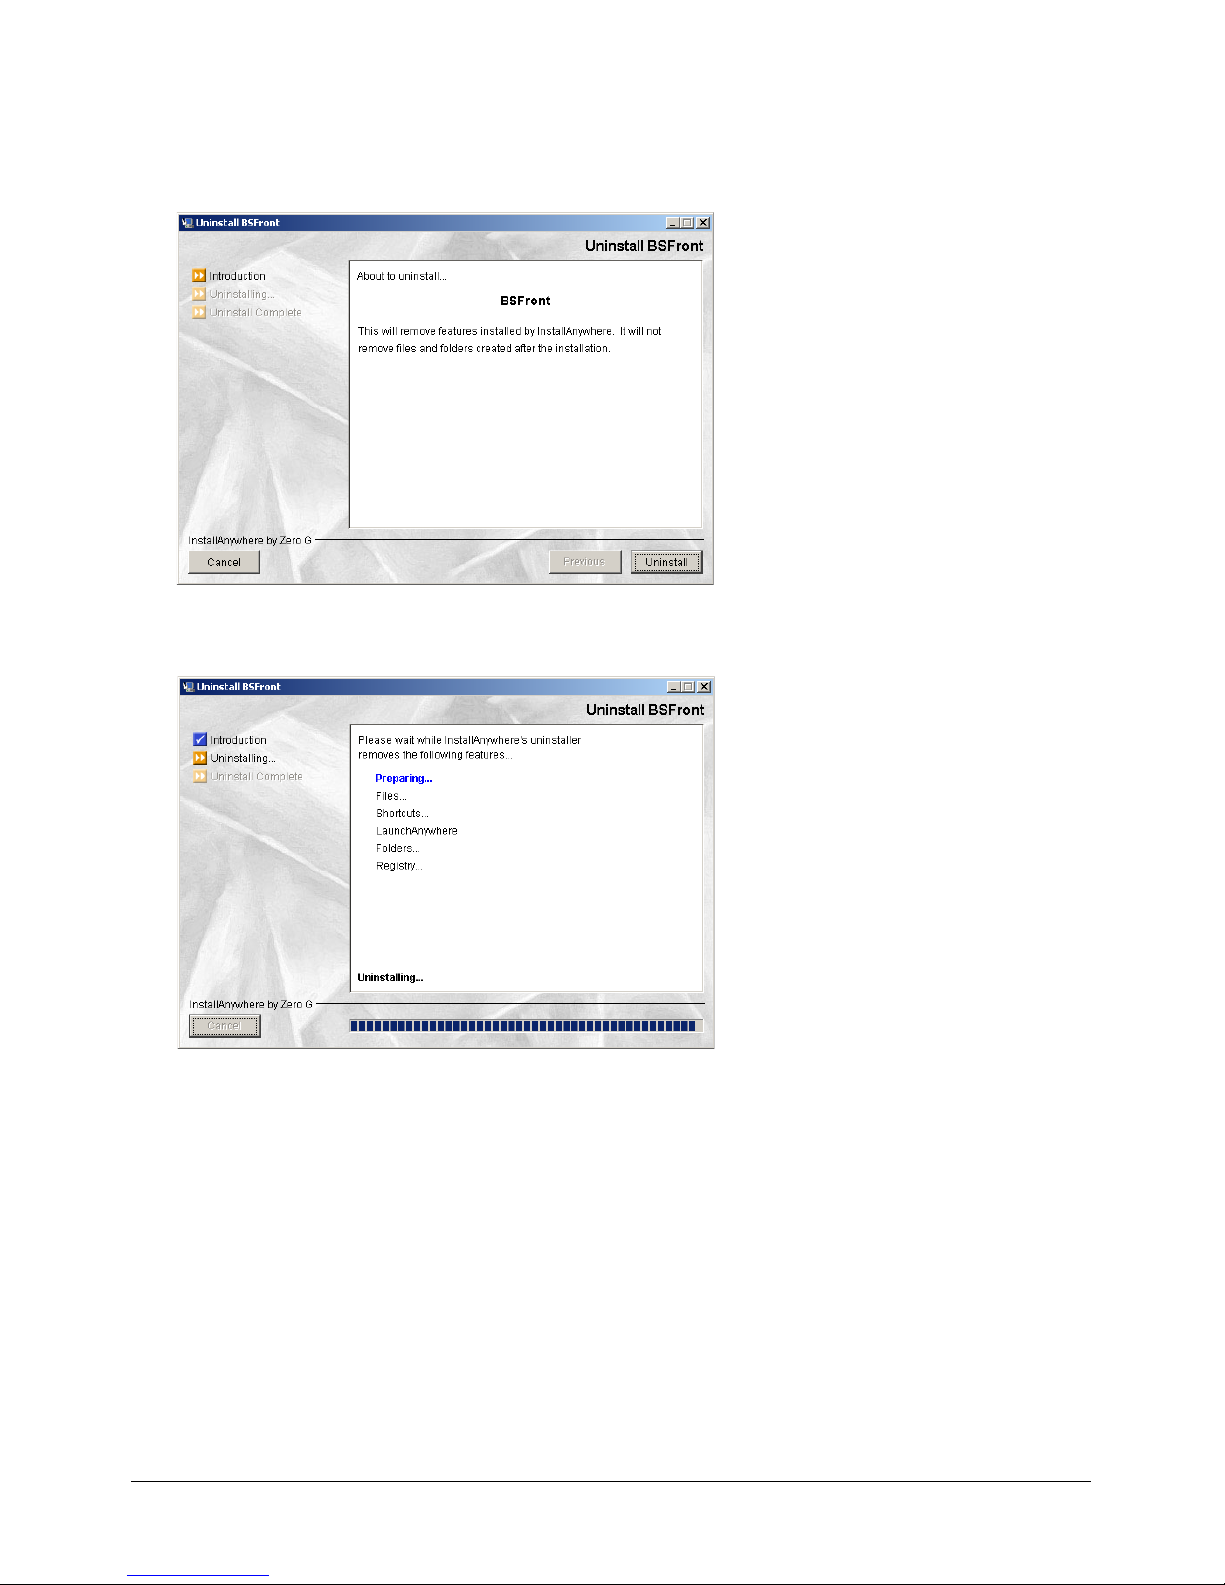
The Uninstall BS Front dialog is displayed.
3. Click Uninstall.
The second Uninstall BS Front dialog is displayed.
4. Allow the progress bar to reach its end point.
24 Avaya CS7000 Conferencing Server Operator Guide
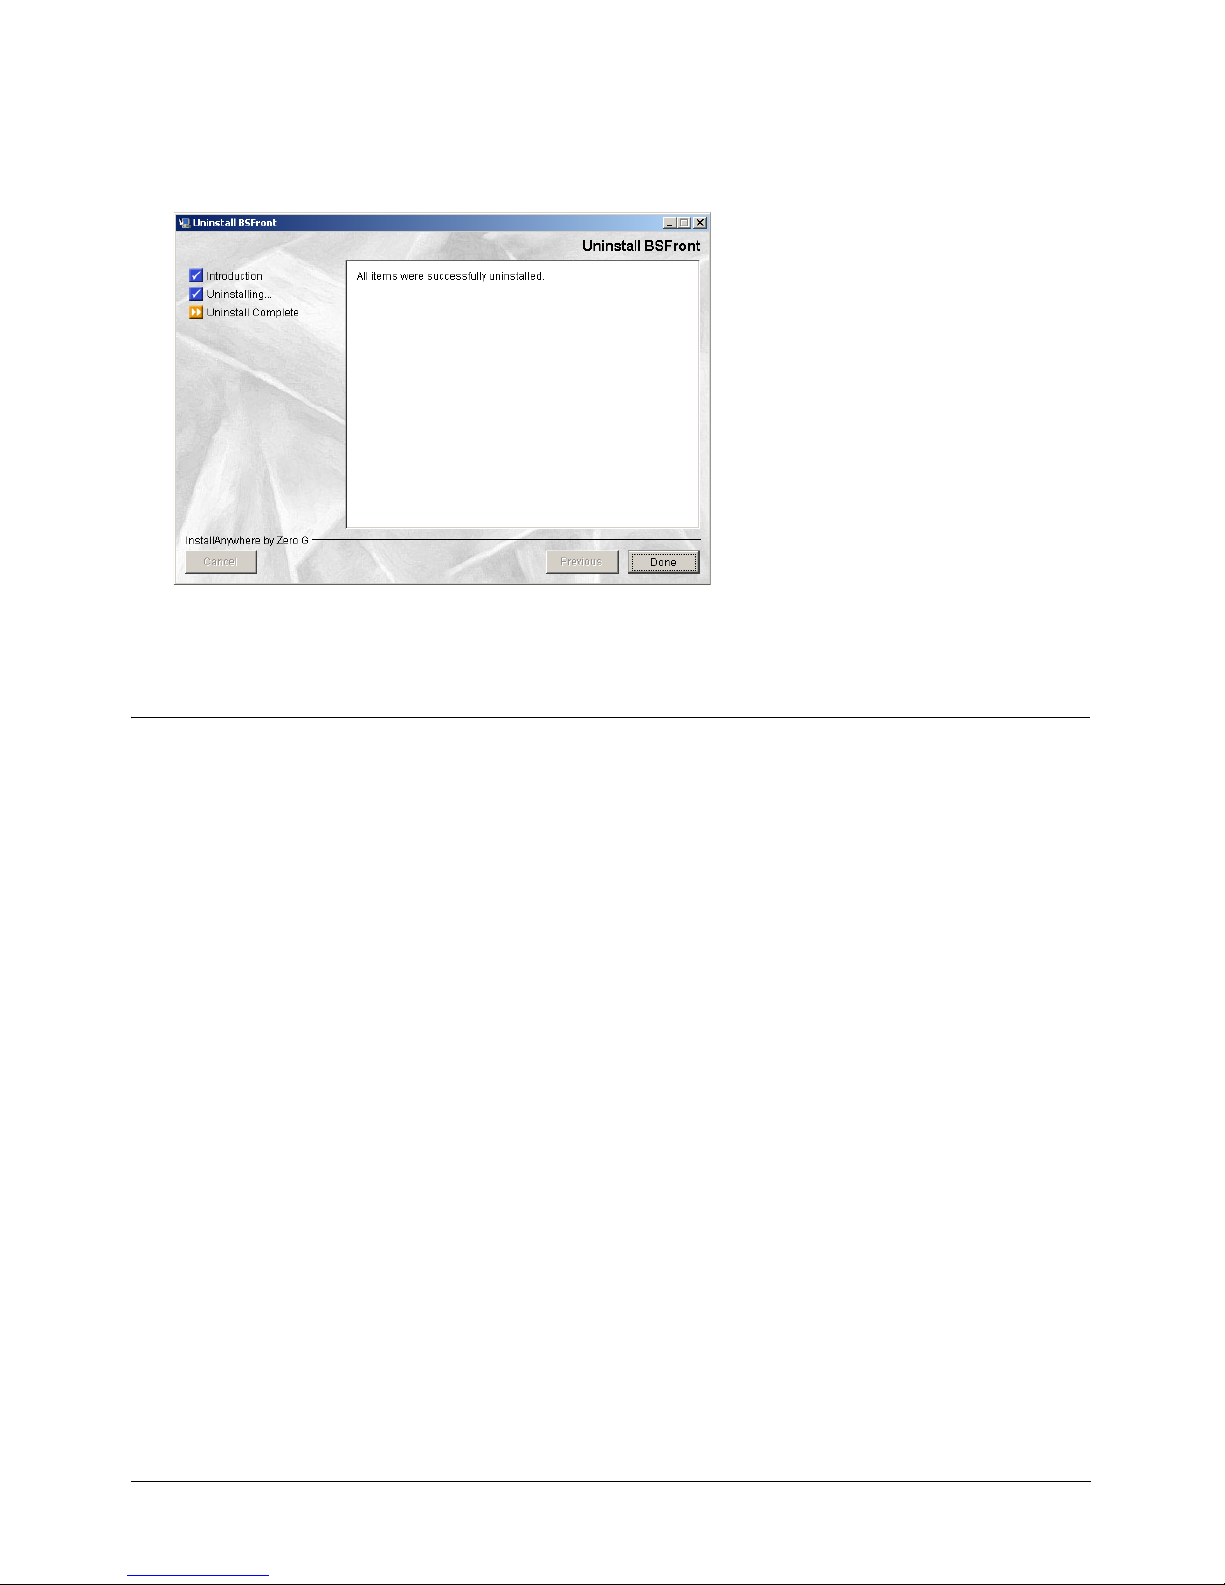
When the CRS Front End Uninstaller is complete, the following dialog is displayed.
5. Click the Done button.
CRS Front End is uninstalled.
Note: Crystal Reports is not removed.
25

26 Avaya CS7000 Conferencing Server Operator Guide
Chapter 5
Creating a Company Account
Before you can start reserving conferences, a company account must be
established. Client accounts are then created relative to the company.
The Company Account
Once a company account is created, the left view p anel in the Customer Boo kings
screen displays a new entry. Each new entry is represented by the icon displayed
directly below:
Figure 5.1: Company Icon
When this icon is selected, the Customer Details view panel displays all entered
details. This includes a # Ref (company reference) number automatically
assigned by the CRS when the company details are saved to the system for the
first time. This is a fixed field and cannot be edited.
Once a company account has been created you can:
Edit an existing company’s details. For more information, see “Editing a
Company Account” on page 31.
Delete a company’s details. For more information, see “Deleting a Company
Account” on page 31.
Disable a company’s conferencing facilities. For more information, see
“Disabling a Company’s Conferencing Facilities” on page 32.
Note: The Name and Phone text fields are mandatory
The External ID
The External ID field is a numeric reference to client details already available on
an existing database. This field defaults to ‘0’.
27
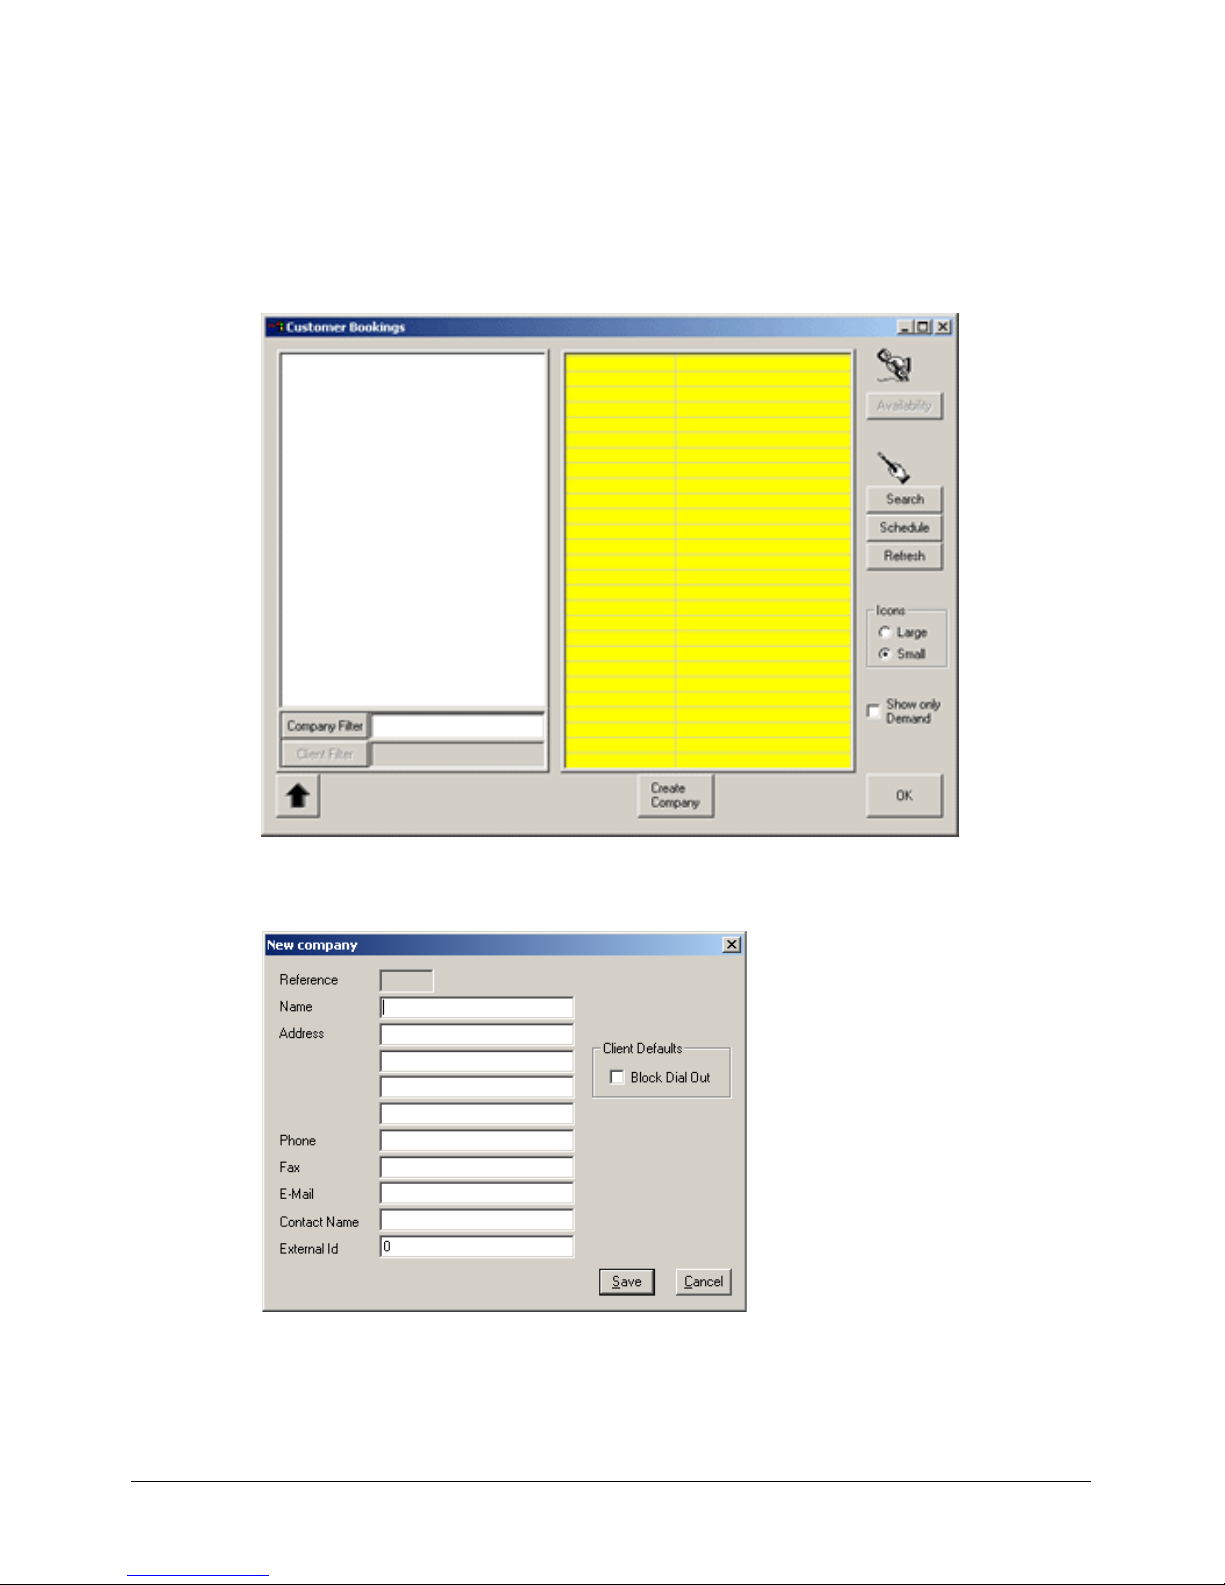
Creating a Company Account
1. From the Client Registration Server front end, click Customer Bookings. If
this is the first time the CRS has been used, the following Customer Bookings
screen is displayed:
Avaya CS7000 Conferencing Server Operator Guide
Figure 5.2: Customer Bookings Screen
2. Click Create Company.
Figure 5.3: New Company Dialog
3. Enter your company details in the editable text fields.
28
 Loading...