

Page 1

Avaya Call Management System
Release 14
Administration
07-601585
July 2007
Page 2

© 2007 Avaya Inc. All Rights Reserved.
Notice
While reasonable efforts were made to ensure that the information in this
document was complete and accurate at the time of printing, Avaya Inc. can
assume no liability for any errors. Changes and corrections to the information
in this document might be incorporated in future releases.
Documentation disclaimer
Avaya Inc. is not responsible for any modifications, additions, or deletions to
the original published version of this documentation unless such modifications,
additions, or deletions were performed by Avaya. Customer and/or End User
agree to indemnify and hold harmless Avaya, Avaya's agents, servants and
employees against all claims, lawsuits, demands and judgments arising out of,
or in connection with, subsequent modifications, additions or deletions to this
documentation to the extent made by the Customer or End User.
Link disclaimer
Avaya Inc. is not responsible for the contents or reliability of any linked Web
sites referenced elsewhere within this documentation, and Avaya does not
necessarily endorse the products, services, or information described or offered
within them. We cannot guarantee that these links will work all the time and we
have no control over the availability of the linked pages.
Warr ant y
Avaya Inc. provides a limited warranty on this product. Refer to your sales
agreement to establish the terms of the limited warranty. In addition, Avaya’s
standard warranty language, as well as information regarding support for this
product, while under warranty, is available through the Avaya Support Web
site:
http://www.avaya.com/support
License
USE OR INSTALLATION OF THE PRODUCT INDICATES THE END USER'S
ACCEPTANCE OF THE TERMS SET FORTH HEREIN AND THE GENERAL
LI CE N SE TE RMS AVAI LAB LE ON THE AVAYA W EB SIT E
http://support.avaya.com/LicenseInfo/
YOU DO NOT WISH TO BE BOUND BY THESE TERMS, YOU MUST
RETURN THE PRODUCT(S) TO THE POINT OF PURCHASE WITHIN TEN
(10) DAYS OF DELIVERY FOR A REFUND OR CREDIT.
Avaya grants End User a license within the scope of the license types
described below. The applicable number of licenses and units of capacity for
which the license is granted will be one (1), unless a different number of
licenses or units of capacity is specified in the Documentation or other
materials available to End User. "Designated Processor" means a single
stand-alone computing device. "Server" means a Designated Processor that
hosts a software application to be accessed by multiple users. "Software"
means the computer programs in object code, originally licensed by Avaya and
ultimately utilized by End User, whether as stand-alone Products or
pre-installed on Hardware. "Hardware" means the standard hardware
Products, originally sold by Avaya and ultimately utilized by End User.
License type(s)
Designated System(s) License (DS). End User may install and use each
copy of the Software on only one Designated Processor, unless a different
number of Designated Processors is indicated in the Documentation or other
materials available to End User. Avaya may require the Designated
Processor(s) to be identified by type, serial number, feature key, location or
other specific designation, or to be provided by End User to Avaya through
electronic means established by Avaya specifically for this purpose.
Concurrent User License (CU). End User may install and use the Software on
multiple Designated Processors or one or more Servers, so long as only the
licensed number of Units are accessing and using the Software at any given
time. A "Unit" means the unit on which Avaya, at its sole discretion, bases the
pricing of its licenses and can be, without limitation, an agent, port or user, an
e-mail or voice mail account in the name of a person or corporate function
(e.g., webmaster or helpdesk), or a directory entry in the administrative
database utilized by the Product that permits one user to interface with the
Software. Units may be linked to a specific, identified Server.
Copyright
Except where expressly stated otherwise, the Product is protected by copyright
and other laws respecting proprietary rights. Unauthorized reproduction,
transfer, and or use can be a criminal, as well as a civil, offense under the
applicable law.
Third-party components
Certain software programs or portions thereof included in the Product may
contain software distributed under third party agreements ("Third Party
Components"), which may contain terms that expand or limit rights to use
certain portions of the Product ("Third Party Terms"). Information identifying
Third Party Components and the Third Party Terms that apply to them is
available on the Avaya Support Web site:
http://support.avaya.com/ThirdPartyLicense/
("GENERAL LICENSE TERMS"). IF
Preventing toll fraud
"Toll fraud" is the unauthorized use of your telecommunications system by an
unauthorized party (for example, a person who is not a corporate employee,
agent, subcontractor, or is not working on your company's behalf). Be aware
that there can be a risk of toll fraud associated with your system and that, if toll
fraud occurs, it can result in substantial additional charges for your
telecommunications services.
Avaya fraud intervention
If you suspect that you are being victimized by toll fraud and you need technical
assistance or support, call Technical Service Center Toll Fraud Intervention
Hotline at +1-800-643-2353 for the United States and Canada. For additional
support telephone numbers, see the Avaya Support Web site:
http://www.avaya.com/support
Trademarks
Avaya and the Avaya logo are either registered trademarks or trademarks of
Avaya Inc. in the United States of America and/or other jurisdictions.
MultiVantage is a trademark of Avaya Inc.
All other trademarks are the property of their respective owners.
Downloading documents
For the most current versions of documentation, see the Avaya Support Web
site:
http://www.avaya.com/support
Avaya support
Avaya provides a telephone number for you to use to report problems or to ask
questions about your product. The support telephone number
is 1-800-242-2121 in the United States. For additional support telephone
numbers, see the Avaya Support Web site:
http://www.avaya.com/support
Page 3

Contents
Preface . . . . . . . . . . . . . . . . . . . . . . . . . . . . . . . . . . . . . . . . . . . 19
Purpose. . . . . . . . . . . . . . . . . . . . . . . . . . . . . . . . . . . . . . . . . . . . 19
Intended users . . . . . . . . . . . . . . . . . . . . . . . . . . . . . . . . . . . . . . . . 19
Overview . . . . . . . . . . . . . . . . . . . . . . . . . . . . . . . . . . . . . . . . . . . 20
Conventions and terminology . . . . . . . . . . . . . . . . . . . . . . . . . . . . . . . 21
Reasons for reissue . . . . . . . . . . . . . . . . . . . . . . . . . . . . . . . . . . . . . 22
Availability . . . . . . . . . . . . . . . . . . . . . . . . . . . . . . . . . . . . . . . . . . 22
Related documentation . . . . . . . . . . . . . . . . . . . . . . . . . . . . . . . . . . . 23
Change description . . . . . . . . . . . . . . . . . . . . . . . . . . . . . . . . . . . 23
Administration documents . . . . . . . . . . . . . . . . . . . . . . . . . . . . . . . 23
Software documents. . . . . . . . . . . . . . . . . . . . . . . . . . . . . . . . . . . 24
Hardware documents . . . . . . . . . . . . . . . . . . . . . . . . . . . . . . . . . . 24
Call Center documents . . . . . . . . . . . . . . . . . . . . . . . . . . . . . . . . . 24
Avaya CMS upgrade documents . . . . . . . . . . . . . . . . . . . . . . . . . . . . 25
Base load upgrades . . . . . . . . . . . . . . . . . . . . . . . . . . . . . . . . . 25
Platform upgrades and data migration . . . . . . . . . . . . . . . . . . . . . . . 25
Avaya Call Management System Upgrade Express (CUE) . . . . . . . . . . . . 25
Documentation Web sites . . . . . . . . . . . . . . . . . . . . . . . . . . . . . . . . 26
Support . . . . . . . . . . . . . . . . . . . . . . . . . . . . . . . . . . . . . . . . . . . . 26
Chapter 1: Introduction . . . . . . . . . . . . . . . . . . . . . . . . . . . . . . . . . . . . . 27
What is Avaya CMS? . . . . . . . . . . . . . . . . . . . . . . . . . . . . . . . . . . . . 27
Operating system . . . . . . . . . . . . . . . . . . . . . . . . . . . . . . . . . . . . 27
How Avaya CMS stores ACD data . . . . . . . . . . . . . . . . . . . . . . . . . . . . . 27
How Avaya CMS logically stores ACD data . . . . . . . . . . . . . . . . . . . . . . 28
Real-time databases . . . . . . . . . . . . . . . . . . . . . . . . . . . . . . . . . 28
Historical databases . . . . . . . . . . . . . . . . . . . . . . . . . . . . . . . . . 28
Data summarizing . . . . . . . . . . . . . . . . . . . . . . . . . . . . . . . . . . 28
CMS data storage . . . . . . . . . . . . . . . . . . . . . . . . . . . . . . . . . . 29
How Avaya CMS physically stores ACD data . . . . . . . . . . . . . . . . . . . . . 31
Dbspace . . . . . . . . . . . . . . . . . . . . . . . . . . . . . . . . . . . . . . . 31
Chunks . . . . . . . . . . . . . . . . . . . . . . . . . . . . . . . . . . . . . . . . 32
ACD Administration . . . . . . . . . . . . . . . . . . . . . . . . . . . . . . . . . . . . . 33
How Avaya CMS tracks ACD data . . . . . . . . . . . . . . . . . . . . . . . . . . . 33
How CMS tracks a call . . . . . . . . . . . . . . . . . . . . . . . . . . . . . . . . 33
Events that start or stop data collection . . . . . . . . . . . . . . . . . . . . . . 34
Chapter 2: Configuring Avaya CMS Supervisor . . . . . . . . . . . . . . . . . . . . . . . . 37
Before you begin. . . . . . . . . . . . . . . . . . . . . . . . . . . . . . . . . . . . . . . 37
General tab . . . . . . . . . . . . . . . . . . . . . . . . . . . . . . . . . . . . . . . . . . 38
Administration July 2007 3
Page 4

Contents
Scripting tab . . . . . . . . . . . . . . . . . . . . . . . . . . . . . . . . . . . . . . . . . 39
Report Colors tab . . . . . . . . . . . . . . . . . . . . . . . . . . . . . . . . . . . . . . 40
Creating a new report color scheme . . . . . . . . . . . . . . . . . . . . . . . . . . . . 41
Threshold Colors tab . . . . . . . . . . . . . . . . . . . . . . . . . . . . . . . . . . . . 43
Creating a new threshold color scheme . . . . . . . . . . . . . . . . . . . . . . . . . . 44
Name Format tab. . . . . . . . . . . . . . . . . . . . . . . . . . . . . . . . . . . . . . . 46
Defining entity formats . . . . . . . . . . . . . . . . . . . . . . . . . . . . . . . . . . . 47
Chapter 3: Using the Dictionary to name contact center entities . . . . . . . . . . . . . . 49
About the Dictionary. . . . . . . . . . . . . . . . . . . . . . . . . . . . . . . . . . . . . 50
Before you begin. . . . . . . . . . . . . . . . . . . . . . . . . . . . . . . . . . . . . . . 50
Dictionary rules . . . . . . . . . . . . . . . . . . . . . . . . . . . . . . . . . . . . . . . 51
Searching the Dictionary . . . . . . . . . . . . . . . . . . . . . . . . . . . . . . . . . . 52
ACD Groups . . . . . . . . . . . . . . . . . . . . . . . . . . . . . . . . . . . . . . . . . 54
Before you begin. . . . . . . . . . . . . . . . . . . . . . . . . . . . . . . . . . . . . 54
Permissions . . . . . . . . . . . . . . . . . . . . . . . . . . . . . . . . . . . . . . . 55
Listing all ACD Groups . . . . . . . . . . . . . . . . . . . . . . . . . . . . . . . . . 55
Viewing the contents of an ACD Group . . . . . . . . . . . . . . . . . . . . . . . . 56
ACDs . . . . . . . . . . . . . . . . . . . . . . . . . . . . . . . . . . . . . . . . . . . . . 57
Permissions . . . . . . . . . . . . . . . . . . . . . . . . . . . . . . . . . . . . . . . 58
Adding an ACD name . . . . . . . . . . . . . . . . . . . . . . . . . . . . . . . . . . 58
Modifying an ACD name. . . . . . . . . . . . . . . . . . . . . . . . . . . . . . . . . 59
Deleting an ACD Name . . . . . . . . . . . . . . . . . . . . . . . . . . . . . . . . . 60
Agent groups. . . . . . . . . . . . . . . . . . . . . . . . . . . . . . . . . . . . . . . . . 61
Permissions . . . . . . . . . . . . . . . . . . . . . . . . . . . . . . . . . . . . . . . 62
Adding an agent group . . . . . . . . . . . . . . . . . . . . . . . . . . . . . . . . . 63
Listing agents in an agent group . . . . . . . . . . . . . . . . . . . . . . . . . . . . 64
Copying an existing agent group to a new name . . . . . . . . . . . . . . . . . . . 66
Adding agents to an existing agent group . . . . . . . . . . . . . . . . . . . . . . . 67
Deleting agents in an existing agent group . . . . . . . . . . . . . . . . . . . . . . 69
Deleting an agent group. . . . . . . . . . . . . . . . . . . . . . . . . . . . . . . . . 70
Agent string values . . . . . . . . . . . . . . . . . . . . . . . . . . . . . . . . . . . . . 71
Permissions . . . . . . . . . . . . . . . . . . . . . . . . . . . . . . . . . . . . . . . 71
Changing agent string value descriptions . . . . . . . . . . . . . . . . . . . . . . . 72
Agent string value field descriptions. . . . . . . . . . . . . . . . . . . . . . . . . . 74
Announcement names . . . . . . . . . . . . . . . . . . . . . . . . . . . . . . . . . . . 75
Permissions . . . . . . . . . . . . . . . . . . . . . . . . . . . . . . . . . . . . . . . 76
Before you begin. . . . . . . . . . . . . . . . . . . . . . . . . . . . . . . . . . . . . 76
Adding an announcement name . . . . . . . . . . . . . . . . . . . . . . . . . . . . 77
4 Administration July 2007
Page 5

Contents
Viewing an announcement name . . . . . . . . . . . . . . . . . . . . . . . . . . . . 78
Listing all announcement names for an ACD . . . . . . . . . . . . . . . . . . . . . 79
Modifying an announcement name. . . . . . . . . . . . . . . . . . . . . . . . . . . 80
Deleting an announcement name. . . . . . . . . . . . . . . . . . . . . . . . . . . . 81
AUX reason code names . . . . . . . . . . . . . . . . . . . . . . . . . . . . . . . . . . 82
Permissions . . . . . . . . . . . . . . . . . . . . . . . . . . . . . . . . . . . . . . . 82
Before you begin. . . . . . . . . . . . . . . . . . . . . . . . . . . . . . . . . . . . . 83
Adding an AUX reason code name . . . . . . . . . . . . . . . . . . . . . . . . . . . 83
Viewing an AUX reason code name . . . . . . . . . . . . . . . . . . . . . . . . . . 84
Listing all AUX reason code names . . . . . . . . . . . . . . . . . . . . . . . . . . 85
Modifying an AUX reason code name . . . . . . . . . . . . . . . . . . . . . . . . . 87
Deleting an AUX reason code. . . . . . . . . . . . . . . . . . . . . . . . . . . . . . 88
Calculations . . . . . . . . . . . . . . . . . . . . . . . . . . . . . . . . . . . . . . . . . 89
Permissions . . . . . . . . . . . . . . . . . . . . . . . . . . . . . . . . . . . . . . . 89
Before you begin. . . . . . . . . . . . . . . . . . . . . . . . . . . . . . . . . . . . . 90
Viewing a calculation . . . . . . . . . . . . . . . . . . . . . . . . . . . . . . . . . . 91
Listing all calculations . . . . . . . . . . . . . . . . . . . . . . . . . . . . . . . . . 92
Adding a calculation. . . . . . . . . . . . . . . . . . . . . . . . . . . . . . . . . . . 93
Modifying a custom calculation . . . . . . . . . . . . . . . . . . . . . . . . . . . . 94
Deleting a custom calculation . . . . . . . . . . . . . . . . . . . . . . . . . . . . . 95
Call work codes . . . . . . . . . . . . . . . . . . . . . . . . . . . . . . . . . . . . . . . 96
Permissions . . . . . . . . . . . . . . . . . . . . . . . . . . . . . . . . . . . . . . . 97
Before you begin. . . . . . . . . . . . . . . . . . . . . . . . . . . . . . . . . . . . . 97
Adding a name to a call work code . . . . . . . . . . . . . . . . . . . . . . . . . . . 98
Viewing a call work code name . . . . . . . . . . . . . . . . . . . . . . . . . . . . . 99
Listing all call work code names . . . . . . . . . . . . . . . . . . . . . . . . . . . . 100
Modifying a call work code name. . . . . . . . . . . . . . . . . . . . . . . . . . . . 101
Deleting a call work code name. . . . . . . . . . . . . . . . . . . . . . . . . . . . . 102
Constants. . . . . . . . . . . . . . . . . . . . . . . . . . . . . . . . . . . . . . . . . . . 103
Permissions . . . . . . . . . . . . . . . . . . . . . . . . . . . . . . . . . . . . . . . 103
Adding a constant . . . . . . . . . . . . . . . . . . . . . . . . . . . . . . . . . . . . 104
Viewing a constant . . . . . . . . . . . . . . . . . . . . . . . . . . . . . . . . . . . 105
Listing all constants . . . . . . . . . . . . . . . . . . . . . . . . . . . . . . . . . . . 106
Modifying a constant . . . . . . . . . . . . . . . . . . . . . . . . . . . . . . . . . . 107
Deleting a constant . . . . . . . . . . . . . . . . . . . . . . . . . . . . . . . . . . . 108
Custom database items . . . . . . . . . . . . . . . . . . . . . . . . . . . . . . . . . . . 109
Permissions . . . . . . . . . . . . . . . . . . . . . . . . . . . . . . . . . . . . . . . 109
Before you begin. . . . . . . . . . . . . . . . . . . . . . . . . . . . . . . . . . . . . 109
Adding a custom database item . . . . . . . . . . . . . . . . . . . . . . . . . . . . 110
Viewing a custom database item . . . . . . . . . . . . . . . . . . . . . . . . . . . . 111
Administration July 2007
5
Page 6

Contents
Listing all custom database items . . . . . . . . . . . . . . . . . . . . . . . . . . . 112
Modifying a custom database item . . . . . . . . . . . . . . . . . . . . . . . . . . . 113
Deleting a custom database item . . . . . . . . . . . . . . . . . . . . . . . . . . . . 114
Generic string values synonyms . . . . . . . . . . . . . . . . . . . . . . . . . . . . . . 115
Permissions . . . . . . . . . . . . . . . . . . . . . . . . . . . . . . . . . . . . . . . 115
Viewing generic string values . . . . . . . . . . . . . . . . . . . . . . . . . . . . . 115
Modifying generic string values . . . . . . . . . . . . . . . . . . . . . . . . . . . . 116
Location IDs . . . . . . . . . . . . . . . . . . . . . . . . . . . . . . . . . . . . . . . . . 117
Permissions . . . . . . . . . . . . . . . . . . . . . . . . . . . . . . . . . . . . . . . 117
Adding a location ID . . . . . . . . . . . . . . . . . . . . . . . . . . . . . . . . . . . 118
Viewing a location ID . . . . . . . . . . . . . . . . . . . . . . . . . . . . . . . . . . 119
Listing all location IDs. . . . . . . . . . . . . . . . . . . . . . . . . . . . . . . . . . 120
Modifying a location ID . . . . . . . . . . . . . . . . . . . . . . . . . . . . . . . . . 121
Deleting a Location ID . . . . . . . . . . . . . . . . . . . . . . . . . . . . . . . . . . 122
Login ID names . . . . . . . . . . . . . . . . . . . . . . . . . . . . . . . . . . . . . . . 123
Permissions . . . . . . . . . . . . . . . . . . . . . . . . . . . . . . . . . . . . . . . 123
Before you begin. . . . . . . . . . . . . . . . . . . . . . . . . . . . . . . . . . . . . 124
Adding a name to a login ID. . . . . . . . . . . . . . . . . . . . . . . . . . . . . . . 124
Viewing a login ID name. . . . . . . . . . . . . . . . . . . . . . . . . . . . . . . . . 125
Listing all login ID names . . . . . . . . . . . . . . . . . . . . . . . . . . . . . . . . 126
Modifying a login ID name . . . . . . . . . . . . . . . . . . . . . . . . . . . . . . . 127
Deleting a login ID name . . . . . . . . . . . . . . . . . . . . . . . . . . . . . . . . 128
Logout reason code names . . . . . . . . . . . . . . . . . . . . . . . . . . . . . . . . . 129
Permissions . . . . . . . . . . . . . . . . . . . . . . . . . . . . . . . . . . . . . . . 130
Before you begin. . . . . . . . . . . . . . . . . . . . . . . . . . . . . . . . . . . . . 130
Adding a logout reason code name . . . . . . . . . . . . . . . . . . . . . . . . . . 130
Viewing a logout reason code name . . . . . . . . . . . . . . . . . . . . . . . . . . 131
Listing all logout reason code names . . . . . . . . . . . . . . . . . . . . . . . . . 132
Modifying a logout reason code name . . . . . . . . . . . . . . . . . . . . . . . . . 134
Deleting a logout reason code name . . . . . . . . . . . . . . . . . . . . . . . . . . 135
Split/skill string values . . . . . . . . . . . . . . . . . . . . . . . . . . . . . . . . . . . 136
Permissions . . . . . . . . . . . . . . . . . . . . . . . . . . . . . . . . . . . . . . . 137
Before you begin. . . . . . . . . . . . . . . . . . . . . . . . . . . . . . . . . . . . . 137
Viewing split/skill string values. . . . . . . . . . . . . . . . . . . . . . . . . . . . . 137
Modifying split/skill string values . . . . . . . . . . . . . . . . . . . . . . . . . . . 138
Split/skill string value field descriptions . . . . . . . . . . . . . . . . . . . . . . . . 140
Split/Skill names . . . . . . . . . . . . . . . . . . . . . . . . . . . . . . . . . . . . . . . 141
Permissions . . . . . . . . . . . . . . . . . . . . . . . . . . . . . . . . . . . . . . . 142
Before you begin. . . . . . . . . . . . . . . . . . . . . . . . . . . . . . . . . . . . . 142
Adding a split/skill name . . . . . . . . . . . . . . . . . . . . . . . . . . . . . . . . 143
6 Administration July 2007
Page 7

Contents
Viewing a split/skill name . . . . . . . . . . . . . . . . . . . . . . . . . . . . . . . . 144
Listing all the split/skill names . . . . . . . . . . . . . . . . . . . . . . . . . . . . . 145
Modifying a split/skill name . . . . . . . . . . . . . . . . . . . . . . . . . . . . . . . 146
Deleting a split/skill name . . . . . . . . . . . . . . . . . . . . . . . . . . . . . . . . 147
Standard database items . . . . . . . . . . . . . . . . . . . . . . . . . . . . . . . . . . 148
Permissions . . . . . . . . . . . . . . . . . . . . . . . . . . . . . . . . . . . . . . . 148
Viewing a standard database item . . . . . . . . . . . . . . . . . . . . . . . . . . . 149
Viewing all standard database items alphabetically . . . . . . . . . . . . . . . . . 150
Trunk group names . . . . . . . . . . . . . . . . . . . . . . . . . . . . . . . . . . . . . 151
Permissions . . . . . . . . . . . . . . . . . . . . . . . . . . . . . . . . . . . . . . . 151
Before you begin. . . . . . . . . . . . . . . . . . . . . . . . . . . . . . . . . . . . . 151
Adding a trunk group name . . . . . . . . . . . . . . . . . . . . . . . . . . . . . . . 152
Viewing a trunk group name . . . . . . . . . . . . . . . . . . . . . . . . . . . . . . 153
Listing all trunk group names. . . . . . . . . . . . . . . . . . . . . . . . . . . . . . 154
Modifying a trunk group name . . . . . . . . . . . . . . . . . . . . . . . . . . . . . 155
Deleting a trunk group name . . . . . . . . . . . . . . . . . . . . . . . . . . . . . . 156
Trunk string values . . . . . . . . . . . . . . . . . . . . . . . . . . . . . . . . . . . . . 157
Permissions . . . . . . . . . . . . . . . . . . . . . . . . . . . . . . . . . . . . . . . 157
Viewing and modifying trunk string values . . . . . . . . . . . . . . . . . . . . . . 158
Trunk string values field descriptions . . . . . . . . . . . . . . . . . . . . . . . . . 159
VDN names . . . . . . . . . . . . . . . . . . . . . . . . . . . . . . . . . . . . . . . . . . 160
Permissions . . . . . . . . . . . . . . . . . . . . . . . . . . . . . . . . . . . . . . . 161
Before you begin. . . . . . . . . . . . . . . . . . . . . . . . . . . . . . . . . . . . . 161
Adding a VDN name . . . . . . . . . . . . . . . . . . . . . . . . . . . . . . . . . . . 162
Viewing a VDN name . . . . . . . . . . . . . . . . . . . . . . . . . . . . . . . . . . 163
Listing all VDN names . . . . . . . . . . . . . . . . . . . . . . . . . . . . . . . . . . 164
Modifying a VDN name . . . . . . . . . . . . . . . . . . . . . . . . . . . . . . . . . 165
Deleting a VDN name . . . . . . . . . . . . . . . . . . . . . . . . . . . . . . . . . . 166
Vector names. . . . . . . . . . . . . . . . . . . . . . . . . . . . . . . . . . . . . . . . . 167
Permissions . . . . . . . . . . . . . . . . . . . . . . . . . . . . . . . . . . . . . . . 167
Before you begin. . . . . . . . . . . . . . . . . . . . . . . . . . . . . . . . . . . . . 168
Adding a vector name . . . . . . . . . . . . . . . . . . . . . . . . . . . . . . . . . . 168
Viewing a vector name . . . . . . . . . . . . . . . . . . . . . . . . . . . . . . . . . 169
Listing all vector names . . . . . . . . . . . . . . . . . . . . . . . . . . . . . . . . . 170
Modifying a vector name . . . . . . . . . . . . . . . . . . . . . . . . . . . . . . . . 171
Deleting a vector name . . . . . . . . . . . . . . . . . . . . . . . . . . . . . . . . . 172
Dictionary reports . . . . . . . . . . . . . . . . . . . . . . . . . . . . . . . . . . . . . . 173
Permissions . . . . . . . . . . . . . . . . . . . . . . . . . . . . . . . . . . . . . . . 173
Printing Dictionary reports . . . . . . . . . . . . . . . . . . . . . . . . . . . . . . . 174
Running an agent group members report . . . . . . . . . . . . . . . . . . . . . . . 176
Administration July 2007
7
Page 8

Contents
Chapter 4: Using reports . . . . . . . . . . . . . . . . . . . . . . . . . . . . . . . . . . . . 179
Background . . . . . . . . . . . . . . . . . . . . . . . . . . . . . . . . . . . . . . . . . 179
Interfaces for reports . . . . . . . . . . . . . . . . . . . . . . . . . . . . . . . . . . 180
Types of reports . . . . . . . . . . . . . . . . . . . . . . . . . . . . . . . . . . . . . 180
What reports summarize . . . . . . . . . . . . . . . . . . . . . . . . . . . . . . . . 181
Choosing a report . . . . . . . . . . . . . . . . . . . . . . . . . . . . . . . . . . . . . . 181
Generating a report . . . . . . . . . . . . . . . . . . . . . . . . . . . . . . . . . . . . . 183
Printing a report . . . . . . . . . . . . . . . . . . . . . . . . . . . . . . . . . . . . . . . 184
Printing a Historical report . . . . . . . . . . . . . . . . . . . . . . . . . . . . . . . . . 185
Changing the print setup . . . . . . . . . . . . . . . . . . . . . . . . . . . . . . . . . . 185
Restarting a report. . . . . . . . . . . . . . . . . . . . . . . . . . . . . . . . . . . . . . 186
Chapter 5: Scripting CMS operations . . . . . . . . . . . . . . . . . . . . . . . . . . . . . 187
Before you begin. . . . . . . . . . . . . . . . . . . . . . . . . . . . . . . . . . . . . . . 187
Tasks scripts can automate . . . . . . . . . . . . . . . . . . . . . . . . . . . . . . . . . 187
Interactive and automatic scripts. . . . . . . . . . . . . . . . . . . . . . . . . . . . . . 188
Creating scripts . . . . . . . . . . . . . . . . . . . . . . . . . . . . . . . . . . . . . . . 188
Accessing scripts . . . . . . . . . . . . . . . . . . . . . . . . . . . . . . . . . . . . 189
Accessing the script options . . . . . . . . . . . . . . . . . . . . . . . . . . . . . . 189
Creating an interactive report script . . . . . . . . . . . . . . . . . . . . . . . . . . 191
Creating an automatic report script . . . . . . . . . . . . . . . . . . . . . . . . . . 192
Creating a script to export report data . . . . . . . . . . . . . . . . . . . . . . . . . 193
Creating a script to export report data as HTML . . . . . . . . . . . . . . . . . . . 194
Scripting other Supervisor operations . . . . . . . . . . . . . . . . . . . . . . . . . . . 195
Actions not associated with reports . . . . . . . . . . . . . . . . . . . . . . . . . . 195
Scripting an input window . . . . . . . . . . . . . . . . . . . . . . . . . . . . . . . 196
Scripting an action. . . . . . . . . . . . . . . . . . . . . . . . . . . . . . . . . . . . 197
Organizing scripts . . . . . . . . . . . . . . . . . . . . . . . . . . . . . . . . . . . . 199
Error and warning messages . . . . . . . . . . . . . . . . . . . . . . . . . . . . . . . . 200
Chapter 6: Administering contact center agents . . . . . . . . . . . . . . . . . . . . . . . 201
Starting or stopping an agent trace . . . . . . . . . . . . . . . . . . . . . . . . . . . . 201
Viewing current agent trace states . . . . . . . . . . . . . . . . . . . . . . . . . . . . . 204
Listing agents traced . . . . . . . . . . . . . . . . . . . . . . . . . . . . . . . . . . . . 206
Changing agent skills . . . . . . . . . . . . . . . . . . . . . . . . . . . . . . . . . . . . 208
Changing skills for multiple agents . . . . . . . . . . . . . . . . . . . . . . . . . . . . 215
Changing extension split assignments . . . . . . . . . . . . . . . . . . . . . . . . . . 219
Moving extensions between splits . . . . . . . . . . . . . . . . . . . . . . . . . . . . . 222
8 Administration July 2007
Page 9

Contents
Running a split members report . . . . . . . . . . . . . . . . . . . . . . . . . . . . . . 224
Chapter 7: Administering the contact center configuration . . . . . . . . . . . . . . . . . 227
Before you begin. . . . . . . . . . . . . . . . . . . . . . . . . . . . . . . . . . . . . . . 227
ACD Groups . . . . . . . . . . . . . . . . . . . . . . . . . . . . . . . . . . . . . . . . . 227
Before you begin. . . . . . . . . . . . . . . . . . . . . . . . . . . . . . . . . . . . . 228
ACD Group capabilities . . . . . . . . . . . . . . . . . . . . . . . . . . . . . . . . . 229
ACD Groups feature interfaces . . . . . . . . . . . . . . . . . . . . . . . . . . . . . 230
Permissions . . . . . . . . . . . . . . . . . . . . . . . . . . . . . . . . . . . . . . . 230
Adding an ACD Group. . . . . . . . . . . . . . . . . . . . . . . . . . . . . . . . . . 230
Listing all ACD Groups . . . . . . . . . . . . . . . . . . . . . . . . . . . . . . . . . 231
Adding an ACD to an ACD Group . . . . . . . . . . . . . . . . . . . . . . . . . . . 233
Viewing the contents of an ACD Group . . . . . . . . . . . . . . . . . . . . . . . . 234
Deleting an ACD from an ACD Group . . . . . . . . . . . . . . . . . . . . . . . . . 236
Modifying an ACD Group . . . . . . . . . . . . . . . . . . . . . . . . . . . . . . . . 238
Deleting an ACD Group . . . . . . . . . . . . . . . . . . . . . . . . . . . . . . . . . 240
Call work codes . . . . . . . . . . . . . . . . . . . . . . . . . . . . . . . . . . . . . . . 241
Before you begin. . . . . . . . . . . . . . . . . . . . . . . . . . . . . . . . . . . . . 241
Permissions . . . . . . . . . . . . . . . . . . . . . . . . . . . . . . . . . . . . . . . 242
Adding call work codes . . . . . . . . . . . . . . . . . . . . . . . . . . . . . . . . . 242
Viewing call work codes. . . . . . . . . . . . . . . . . . . . . . . . . . . . . . . . . 244
Listing all call work codes . . . . . . . . . . . . . . . . . . . . . . . . . . . . . . . 245
Deleting call work codes . . . . . . . . . . . . . . . . . . . . . . . . . . . . . . . . 246
VDN skill preferences . . . . . . . . . . . . . . . . . . . . . . . . . . . . . . . . . . . . 247
Before you begin. . . . . . . . . . . . . . . . . . . . . . . . . . . . . . . . . . . . . 247
Permissions . . . . . . . . . . . . . . . . . . . . . . . . . . . . . . . . . . . . . . . 248
Changing VDN skill preferences . . . . . . . . . . . . . . . . . . . . . . . . . . . . 248
Viewing VDN skill preferences . . . . . . . . . . . . . . . . . . . . . . . . . . . . . 249
Listing all VDN skill preferences . . . . . . . . . . . . . . . . . . . . . . . . . . . . 251
Split/skill call profiles . . . . . . . . . . . . . . . . . . . . . . . . . . . . . . . . . . . . 252
Before you begin. . . . . . . . . . . . . . . . . . . . . . . . . . . . . . . . . . . . . 252
Permissions . . . . . . . . . . . . . . . . . . . . . . . . . . . . . . . . . . . . . . . 253
Adding split/skill call profiles . . . . . . . . . . . . . . . . . . . . . . . . . . . . . . 253
Viewing an existing split/skill call profile . . . . . . . . . . . . . . . . . . . . . . . 255
Modifying a split/skill call profile . . . . . . . . . . . . . . . . . . . . . . . . . . . . 256
Deleting a split/skill call profile . . . . . . . . . . . . . . . . . . . . . . . . . . . . . 258
Trunk group assignments. . . . . . . . . . . . . . . . . . . . . . . . . . . . . . . . . . 259
Before you begin. . . . . . . . . . . . . . . . . . . . . . . . . . . . . . . . . . . . . 260
Permissions . . . . . . . . . . . . . . . . . . . . . . . . . . . . . . . . . . . . . . . 260
Viewing all trunk group assignments . . . . . . . . . . . . . . . . . . . . . . . . . 260
Administration July 2007
9
Page 10

Contents
Viewing a single trunk group assignment . . . . . . . . . . . . . . . . . . . . . . . 262
Viewing a trunk group assignment by VDN or split . . . . . . . . . . . . . . . . . . 263
Trunk group members report . . . . . . . . . . . . . . . . . . . . . . . . . . . . . . . . 264
Before you begin. . . . . . . . . . . . . . . . . . . . . . . . . . . . . . . . . . . . . 265
Permissions . . . . . . . . . . . . . . . . . . . . . . . . . . . . . . . . . . . . . . . 265
Running a trunk group members report . . . . . . . . . . . . . . . . . . . . . . . . 265
VDN-to-vector assignments. . . . . . . . . . . . . . . . . . . . . . . . . . . . . . . . . 266
Before you begin. . . . . . . . . . . . . . . . . . . . . . . . . . . . . . . . . . . . . 267
Permissions . . . . . . . . . . . . . . . . . . . . . . . . . . . . . . . . . . . . . . . 267
Viewing all VDN-to-vector assignments . . . . . . . . . . . . . . . . . . . . . . . . 267
Listing VDNs associated with a vector . . . . . . . . . . . . . . . . . . . . . . . . . 268
Modifying VDN-to-vector assignments. . . . . . . . . . . . . . . . . . . . . . . . . 269
VDN call profiles . . . . . . . . . . . . . . . . . . . . . . . . . . . . . . . . . . . . . . . 271
Before you begin. . . . . . . . . . . . . . . . . . . . . . . . . . . . . . . . . . . . . 271
Permissions . . . . . . . . . . . . . . . . . . . . . . . . . . . . . . . . . . . . . . . 272
Adding a VDN call profile . . . . . . . . . . . . . . . . . . . . . . . . . . . . . . . . 272
Viewing an existing VDN call profile . . . . . . . . . . . . . . . . . . . . . . . . . . 274
Modifying a VDN call profile . . . . . . . . . . . . . . . . . . . . . . . . . . . . . . 275
Deleting a VDN call profile . . . . . . . . . . . . . . . . . . . . . . . . . . . . . . . 277
Vector configuration report . . . . . . . . . . . . . . . . . . . . . . . . . . . . . . . . . 278
Before you begin. . . . . . . . . . . . . . . . . . . . . . . . . . . . . . . . . . . . . 279
Permissions . . . . . . . . . . . . . . . . . . . . . . . . . . . . . . . . . . . . . . . 279
Running vector configuration reports . . . . . . . . . . . . . . . . . . . . . . . . . 279
Chapter 8: Administering exceptions . . . . . . . . . . . . . . . . . . . . . . . . . . . . . 283
About exceptions . . . . . . . . . . . . . . . . . . . . . . . . . . . . . . . . . . . . . . 284
Types of Exceptions . . . . . . . . . . . . . . . . . . . . . . . . . . . . . . . . . . . 284
Notification . . . . . . . . . . . . . . . . . . . . . . . . . . . . . . . . . . . . . . . . 285
Exception capacities . . . . . . . . . . . . . . . . . . . . . . . . . . . . . . . . . . 286
Before you begin. . . . . . . . . . . . . . . . . . . . . . . . . . . . . . . . . . . . . . . 286
Permissions . . . . . . . . . . . . . . . . . . . . . . . . . . . . . . . . . . . . . . . . . 287
Exception notification . . . . . . . . . . . . . . . . . . . . . . . . . . . . . . . . . . . . 288
Changing exception notification . . . . . . . . . . . . . . . . . . . . . . . . . . . . 288
Agent exceptions . . . . . . . . . . . . . . . . . . . . . . . . . . . . . . . . . . . . . . 289
Before you begin. . . . . . . . . . . . . . . . . . . . . . . . . . . . . . . . . . . . . 289
Permissions . . . . . . . . . . . . . . . . . . . . . . . . . . . . . . . . . . . . . . . 290
Adding agent exceptions . . . . . . . . . . . . . . . . . . . . . . . . . . . . . . . . 290
Modifying agent exceptions. . . . . . . . . . . . . . . . . . . . . . . . . . . . . . . 292
Deleting agent exceptions . . . . . . . . . . . . . . . . . . . . . . . . . . . . . . . 294
Agent exception definitions. . . . . . . . . . . . . . . . . . . . . . . . . . . . . . . 297
10 Administration July 2007
Page 11

Contents
Agent exceptions report. . . . . . . . . . . . . . . . . . . . . . . . . . . . . . . . . 299
Split/skill exceptions . . . . . . . . . . . . . . . . . . . . . . . . . . . . . . . . . . . . 302
Before you begin. . . . . . . . . . . . . . . . . . . . . . . . . . . . . . . . . . . . . 303
Permissions . . . . . . . . . . . . . . . . . . . . . . . . . . . . . . . . . . . . . . . 303
Adding split/skill exceptions . . . . . . . . . . . . . . . . . . . . . . . . . . . . . . 303
Modifying split/skill exceptions. . . . . . . . . . . . . . . . . . . . . . . . . . . . . 306
Deleting split/skill exceptions. . . . . . . . . . . . . . . . . . . . . . . . . . . . . . 308
Split/skill exception definitions . . . . . . . . . . . . . . . . . . . . . . . . . . . . . 310
Split/skill exceptions report . . . . . . . . . . . . . . . . . . . . . . . . . . . . . . . 311
Trunk group exceptions . . . . . . . . . . . . . . . . . . . . . . . . . . . . . . . . . . . 314
Before you begin. . . . . . . . . . . . . . . . . . . . . . . . . . . . . . . . . . . . . 315
Permissions . . . . . . . . . . . . . . . . . . . . . . . . . . . . . . . . . . . . . . . 315
Adding trunk group exceptions. . . . . . . . . . . . . . . . . . . . . . . . . . . . . 315
Modifying trunk group exceptions . . . . . . . . . . . . . . . . . . . . . . . . . . . 317
Deleting trunk group exceptions . . . . . . . . . . . . . . . . . . . . . . . . . . . . 319
Trunk group exception definitions . . . . . . . . . . . . . . . . . . . . . . . . . . . 321
Trunk group exceptions report . . . . . . . . . . . . . . . . . . . . . . . . . . . . . 322
VDN exceptions . . . . . . . . . . . . . . . . . . . . . . . . . . . . . . . . . . . . . . . 324
Before you begin. . . . . . . . . . . . . . . . . . . . . . . . . . . . . . . . . . . . . 325
Permissions . . . . . . . . . . . . . . . . . . . . . . . . . . . . . . . . . . . . . . . 326
Adding VDN exceptions . . . . . . . . . . . . . . . . . . . . . . . . . . . . . . . . . 326
Modifying VDN exceptions . . . . . . . . . . . . . . . . . . . . . . . . . . . . . . . 328
Deleting VDN exceptions . . . . . . . . . . . . . . . . . . . . . . . . . . . . . . . . 330
VDN exception definitions . . . . . . . . . . . . . . . . . . . . . . . . . . . . . . . 332
VDN exceptions report . . . . . . . . . . . . . . . . . . . . . . . . . . . . . . . . . 333
Vector exceptions . . . . . . . . . . . . . . . . . . . . . . . . . . . . . . . . . . . . . . 336
Before you begin. . . . . . . . . . . . . . . . . . . . . . . . . . . . . . . . . . . . . 337
Permissions . . . . . . . . . . . . . . . . . . . . . . . . . . . . . . . . . . . . . . . 337
Adding vector exceptions . . . . . . . . . . . . . . . . . . . . . . . . . . . . . . . . 337
Modifying vector exceptions . . . . . . . . . . . . . . . . . . . . . . . . . . . . . . 339
Deleting vector exceptions . . . . . . . . . . . . . . . . . . . . . . . . . . . . . . . 341
Vector exception definitions . . . . . . . . . . . . . . . . . . . . . . . . . . . . . . 342
Vector exceptions report . . . . . . . . . . . . . . . . . . . . . . . . . . . . . . . . 343
Data collection exceptions report . . . . . . . . . . . . . . . . . . . . . . . . . . . . . 346
Before you begin. . . . . . . . . . . . . . . . . . . . . . . . . . . . . . . . . . . . . 346
Running a data collection exceptions report . . . . . . . . . . . . . . . . . . . . . 347
Malicious call trace report. . . . . . . . . . . . . . . . . . . . . . . . . . . . . . . . . . 349
Before you begin. . . . . . . . . . . . . . . . . . . . . . . . . . . . . . . . . . . . . 349
Running a malicious call trace report . . . . . . . . . . . . . . . . . . . . . . . . . 349
Real-time exceptions log . . . . . . . . . . . . . . . . . . . . . . . . . . . . . . . . . . 351
Administration July 2007
11
Page 12

Contents
Before you begin. . . . . . . . . . . . . . . . . . . . . . . . . . . . . . . . . . . . . 352
Running the real-time exceptions log . . . . . . . . . . . . . . . . . . . . . . . . . 352
Chapter 9: Administering user permissions . . . . . . . . . . . . . . . . . . . . . . . . . . 355
Before you begin. . . . . . . . . . . . . . . . . . . . . . . . . . . . . . . . . . . . . . . 355
Example of user permissions. . . . . . . . . . . . . . . . . . . . . . . . . . . . . . . . 356
User data . . . . . . . . . . . . . . . . . . . . . . . . . . . . . . . . . . . . . . . . . . . 356
Adding a CMS user . . . . . . . . . . . . . . . . . . . . . . . . . . . . . . . . . . . 357
Viewing CMS users . . . . . . . . . . . . . . . . . . . . . . . . . . . . . . . . . . . 360
Modifying CMS users . . . . . . . . . . . . . . . . . . . . . . . . . . . . . . . . . . 362
Deleting CMS users . . . . . . . . . . . . . . . . . . . . . . . . . . . . . . . . . . . 364
ACD access . . . . . . . . . . . . . . . . . . . . . . . . . . . . . . . . . . . . . . . . . 367
Before you begin. . . . . . . . . . . . . . . . . . . . . . . . . . . . . . . . . . . . . 367
Permissions . . . . . . . . . . . . . . . . . . . . . . . . . . . . . . . . . . . . . . . 368
Adding ACD access . . . . . . . . . . . . . . . . . . . . . . . . . . . . . . . . . . . 368
Viewing ACD access. . . . . . . . . . . . . . . . . . . . . . . . . . . . . . . . . . . 369
Listing all ACD access . . . . . . . . . . . . . . . . . . . . . . . . . . . . . . . . . 371
Modifying ACD access . . . . . . . . . . . . . . . . . . . . . . . . . . . . . . . . . 372
Deleting ACD access . . . . . . . . . . . . . . . . . . . . . . . . . . . . . . . . . . 374
Feature access. . . . . . . . . . . . . . . . . . . . . . . . . . . . . . . . . . . . . . . . 376
Contents . . . . . . . . . . . . . . . . . . . . . . . . . . . . . . . . . . . . . . . . . 376
Before you begin. . . . . . . . . . . . . . . . . . . . . . . . . . . . . . . . . . . . . 377
Permissions . . . . . . . . . . . . . . . . . . . . . . . . . . . . . . . . . . . . . . . 377
Viewing Feature Access user permissions . . . . . . . . . . . . . . . . . . . . . . 378
Listing all Feature Access user permissions . . . . . . . . . . . . . . . . . . . . . 379
Modifying Feature Access user permissions . . . . . . . . . . . . . . . . . . . . . 381
Main Menu Addition Access . . . . . . . . . . . . . . . . . . . . . . . . . . . . . . . . 382
Contents . . . . . . . . . . . . . . . . . . . . . . . . . . . . . . . . . . . . . . . . . 383
Before you begin. . . . . . . . . . . . . . . . . . . . . . . . . . . . . . . . . . . . . 383
Permissions . . . . . . . . . . . . . . . . . . . . . . . . . . . . . . . . . . . . . . . 383
Viewing Main Menu Addition Access. . . . . . . . . . . . . . . . . . . . . . . . . . 383
Listing all Main Menu Addition Access . . . . . . . . . . . . . . . . . . . . . . . . 385
Assigning or modifying Main Menu Addition Access . . . . . . . . . . . . . . . . . 386
Split/Skill access. . . . . . . . . . . . . . . . . . . . . . . . . . . . . . . . . . . . . . . 388
Before you begin. . . . . . . . . . . . . . . . . . . . . . . . . . . . . . . . . . . . . 389
Permissions . . . . . . . . . . . . . . . . . . . . . . . . . . . . . . . . . . . . . . . 389
Adding split/skill user permissions . . . . . . . . . . . . . . . . . . . . . . . . . . 389
Viewing split/skill user permissions . . . . . . . . . . . . . . . . . . . . . . . . . . 391
Listing all split/skill user permissions . . . . . . . . . . . . . . . . . . . . . . . . . 393
Modifying split/skill user permissions . . . . . . . . . . . . . . . . . . . . . . . . . 394
12 Administration July 2007
Page 13

Contents
Deleting split/skill user permissions . . . . . . . . . . . . . . . . . . . . . . . . . . 396
Trunk group access . . . . . . . . . . . . . . . . . . . . . . . . . . . . . . . . . . . . . 398
Before you begin. . . . . . . . . . . . . . . . . . . . . . . . . . . . . . . . . . . . . 398
Permissions . . . . . . . . . . . . . . . . . . . . . . . . . . . . . . . . . . . . . . . 399
Adding trunk group user permissions . . . . . . . . . . . . . . . . . . . . . . . . . 399
Viewing trunk group user permissions . . . . . . . . . . . . . . . . . . . . . . . . 401
Listing all trunk group user permissions . . . . . . . . . . . . . . . . . . . . . . . 403
Modifying trunk group user permissions . . . . . . . . . . . . . . . . . . . . . . . 404
Deleting trunk group user permissions . . . . . . . . . . . . . . . . . . . . . . . . 406
Vector access . . . . . . . . . . . . . . . . . . . . . . . . . . . . . . . . . . . . . . . . 408
Before you begin. . . . . . . . . . . . . . . . . . . . . . . . . . . . . . . . . . . . . 408
Permissions . . . . . . . . . . . . . . . . . . . . . . . . . . . . . . . . . . . . . . . 409
Adding vector user permissions . . . . . . . . . . . . . . . . . . . . . . . . . . . . 409
Viewing vector user permissions. . . . . . . . . . . . . . . . . . . . . . . . . . . . 411
Listing all vector user permissions. . . . . . . . . . . . . . . . . . . . . . . . . . . 413
Modifying vector user permissions . . . . . . . . . . . . . . . . . . . . . . . . . . 414
Deleting vector user permissions . . . . . . . . . . . . . . . . . . . . . . . . . . . 416
VDN access . . . . . . . . . . . . . . . . . . . . . . . . . . . . . . . . . . . . . . . . . 418
Before you begin. . . . . . . . . . . . . . . . . . . . . . . . . . . . . . . . . . . . . 418
Permissions . . . . . . . . . . . . . . . . . . . . . . . . . . . . . . . . . . . . . . . 419
Adding VDN user permissions . . . . . . . . . . . . . . . . . . . . . . . . . . . . . 419
Viewing VDN user permissions . . . . . . . . . . . . . . . . . . . . . . . . . . . . . 421
Listing all VDN user permissions. . . . . . . . . . . . . . . . . . . . . . . . . . . . 423
Modifying VDN user permissions. . . . . . . . . . . . . . . . . . . . . . . . . . . . 424
Deleting VDN user permissions . . . . . . . . . . . . . . . . . . . . . . . . . . . . 426
Chapter 10: Configuring CMS system settings . . . . . . . . . . . . . . . . . . . . . . . . 429
Before you begin. . . . . . . . . . . . . . . . . . . . . . . . . . . . . . . . . . . . . . . 429
CMS state. . . . . . . . . . . . . . . . . . . . . . . . . . . . . . . . . . . . . . . . . . . 429
Before you begin. . . . . . . . . . . . . . . . . . . . . . . . . . . . . . . . . . . . . 430
Permissions . . . . . . . . . . . . . . . . . . . . . . . . . . . . . . . . . . . . . . . 430
Changing the CMS state. . . . . . . . . . . . . . . . . . . . . . . . . . . . . . . . . 431
Changing the master ACD . . . . . . . . . . . . . . . . . . . . . . . . . . . . . . . 432
Data collection . . . . . . . . . . . . . . . . . . . . . . . . . . . . . . . . . . . . . . . . 433
Before you begin. . . . . . . . . . . . . . . . . . . . . . . . . . . . . . . . . . . . . 433
Permissions . . . . . . . . . . . . . . . . . . . . . . . . . . . . . . . . . . . . . . . 434
Changing the data collection state . . . . . . . . . . . . . . . . . . . . . . . . . . . 434
Data Storage Allocation . . . . . . . . . . . . . . . . . . . . . . . . . . . . . . . . . . . 436
Before you begin. . . . . . . . . . . . . . . . . . . . . . . . . . . . . . . . . . . . . 436
Permissions . . . . . . . . . . . . . . . . . . . . . . . . . . . . . . . . . . . . . . . 437
Administration July 2007
13
Page 14

Contents
Viewing Data Storage Allocation . . . . . . . . . . . . . . . . . . . . . . . . . . . . 437
Modifying Data Storage Allocation . . . . . . . . . . . . . . . . . . . . . . . . . . . 439
Data summarizing . . . . . . . . . . . . . . . . . . . . . . . . . . . . . . . . . . . . . . 444
Before you begin. . . . . . . . . . . . . . . . . . . . . . . . . . . . . . . . . . . . . 445
Permissions . . . . . . . . . . . . . . . . . . . . . . . . . . . . . . . . . . . . . . . 445
Archiving data . . . . . . . . . . . . . . . . . . . . . . . . . . . . . . . . . . . . . . 446
External Application Status . . . . . . . . . . . . . . . . . . . . . . . . . . . . . . . . . 447
Before you begin. . . . . . . . . . . . . . . . . . . . . . . . . . . . . . . . . . . . . 448
Permissions . . . . . . . . . . . . . . . . . . . . . . . . . . . . . . . . . . . . . . . 448
Enabling or disabling the External Application Status feature . . . . . . . . . . . . 448
Viewing the states of external applications . . . . . . . . . . . . . . . . . . . . . . 450
Starting or stopping external applications. . . . . . . . . . . . . . . . . . . . . . . 451
Free Space Allocation . . . . . . . . . . . . . . . . . . . . . . . . . . . . . . . . . . . . 452
Before you begin. . . . . . . . . . . . . . . . . . . . . . . . . . . . . . . . . . . . . 453
Permissions . . . . . . . . . . . . . . . . . . . . . . . . . . . . . . . . . . . . . . . 454
Viewing Free Space Allocation . . . . . . . . . . . . . . . . . . . . . . . . . . . . . 454
Viewing Free Space Allocation contents. . . . . . . . . . . . . . . . . . . . . . . . 456
Modifying Free Space Allocation . . . . . . . . . . . . . . . . . . . . . . . . . . . . 458
Verifying chunk allocation . . . . . . . . . . . . . . . . . . . . . . . . . . . . . . . 459
Migrating CMS data . . . . . . . . . . . . . . . . . . . . . . . . . . . . . . . . . . . . . 460
Before you begin. . . . . . . . . . . . . . . . . . . . . . . . . . . . . . . . . . . . . 460
Permissions . . . . . . . . . . . . . . . . . . . . . . . . . . . . . . . . . . . . . . . 460
Migrating R3 data . . . . . . . . . . . . . . . . . . . . . . . . . . . . . . . . . . . . 461
Pseudo-ACDs . . . . . . . . . . . . . . . . . . . . . . . . . . . . . . . . . . . . . . . . 464
Before you begin. . . . . . . . . . . . . . . . . . . . . . . . . . . . . . . . . . . . . 464
Permissions . . . . . . . . . . . . . . . . . . . . . . . . . . . . . . . . . . . . . . . 466
Creating a pseudo-ACD . . . . . . . . . . . . . . . . . . . . . . . . . . . . . . . . . 466
Viewing pseudo-ACDs. . . . . . . . . . . . . . . . . . . . . . . . . . . . . . . . . . 467
Deleting a pseudo-ACD . . . . . . . . . . . . . . . . . . . . . . . . . . . . . . . . . 468
Loading pseudo-ACD data . . . . . . . . . . . . . . . . . . . . . . . . . . . . . . . 470
Storage intervals. . . . . . . . . . . . . . . . . . . . . . . . . . . . . . . . . . . . . . . 472
Before you begin. . . . . . . . . . . . . . . . . . . . . . . . . . . . . . . . . . . . . 473
Permissions . . . . . . . . . . . . . . . . . . . . . . . . . . . . . . . . . . . . . . . 473
Viewing storage interval settings. . . . . . . . . . . . . . . . . . . . . . . . . . . . 473
Changing the intrahour interval . . . . . . . . . . . . . . . . . . . . . . . . . . . . 474
Changing switch time zone . . . . . . . . . . . . . . . . . . . . . . . . . . . . . . . 476
Modifying data summarizing settings . . . . . . . . . . . . . . . . . . . . . . . . . 479
Switch setup . . . . . . . . . . . . . . . . . . . . . . . . . . . . . . . . . . . . . . . . . 482
Before you begin. . . . . . . . . . . . . . . . . . . . . . . . . . . . . . . . . . . . . 482
Permissions . . . . . . . . . . . . . . . . . . . . . . . . . . . . . . . . . . . . . . . 482
14 Administration July 2007
Page 15

Contents
Viewing switch setup data . . . . . . . . . . . . . . . . . . . . . . . . . . . . . . . 483
Listing all switch setup data . . . . . . . . . . . . . . . . . . . . . . . . . . . . . . 484
Chapter 11: Maintaining CMS . . . . . . . . . . . . . . . . . . . . . . . . . . . . . . . . . . 487
Before you begin. . . . . . . . . . . . . . . . . . . . . . . . . . . . . . . . . . . . . . . 487
ACD status . . . . . . . . . . . . . . . . . . . . . . . . . . . . . . . . . . . . . . . . . . 488
Before you begin. . . . . . . . . . . . . . . . . . . . . . . . . . . . . . . . . . . . . 488
Permissions . . . . . . . . . . . . . . . . . . . . . . . . . . . . . . . . . . . . . . . 488
Viewing ACD status . . . . . . . . . . . . . . . . . . . . . . . . . . . . . . . . . . . 489
Listing ACD status. . . . . . . . . . . . . . . . . . . . . . . . . . . . . . . . . . . . 492
Description of the ACD Status window - with EAS . . . . . . . . . . . . . . . . . . 493
Description of the ACD Status window - without EAS . . . . . . . . . . . . . . . . 494
Requesting ACD translations . . . . . . . . . . . . . . . . . . . . . . . . . . . . . . 495
Archiving status . . . . . . . . . . . . . . . . . . . . . . . . . . . . . . . . . . . . . . . 495
Before you begin. . . . . . . . . . . . . . . . . . . . . . . . . . . . . . . . . . . . . 495
Permissions . . . . . . . . . . . . . . . . . . . . . . . . . . . . . . . . . . . . . . . 496
Viewing the archiving status of a single ACD . . . . . . . . . . . . . . . . . . . . . 496
Viewing the archiving status of all ACDs . . . . . . . . . . . . . . . . . . . . . . . 498
Description of the Archiving Status - List All window . . . . . . . . . . . . . . . . 499
Backup/restore devices . . . . . . . . . . . . . . . . . . . . . . . . . . . . . . . . . . . 500
Permissions . . . . . . . . . . . . . . . . . . . . . . . . . . . . . . . . . . . . . . . 501
Viewing a backup/restore device . . . . . . . . . . . . . . . . . . . . . . . . . . . . 501
Listing all backup/restore devices . . . . . . . . . . . . . . . . . . . . . . . . . . . 503
Adding a backup/restore device . . . . . . . . . . . . . . . . . . . . . . . . . . . . 504
Modifying a backup/restore device . . . . . . . . . . . . . . . . . . . . . . . . . . . 506
Deleting a backup/restore device. . . . . . . . . . . . . . . . . . . . . . . . . . . . 507
Data Backup . . . . . . . . . . . . . . . . . . . . . . . . . . . . . . . . . . . . . . . . . 508
CMSADM backup . . . . . . . . . . . . . . . . . . . . . . . . . . . . . . . . . . . . 509
Maintenance backup. . . . . . . . . . . . . . . . . . . . . . . . . . . . . . . . . . . 509
Tape drives and cartridges . . . . . . . . . . . . . . . . . . . . . . . . . . . . . . . 510
Things to consider when backing up or restoring data . . . . . . . . . . . . . . . . 510
Factors that impact backup and restore times . . . . . . . . . . . . . . . . . . 510
Reducing tape backup and restore times . . . . . . . . . . . . . . . . . . . . . 511
Alternate methods for backing up and restoring data . . . . . . . . . . . . . . 512
Performing a CMSADM backup . . . . . . . . . . . . . . . . . . . . . . . . . . . . . 512
Performing a maintenance backup . . . . . . . . . . . . . . . . . . . . . . . . . . . 514
Description of the Backup Data window . . . . . . . . . . . . . . . . . . . . . . . . 517
The Backup Data window . . . . . . . . . . . . . . . . . . . . . . . . . . . . . . 517
Field descriptions . . . . . . . . . . . . . . . . . . . . . . . . . . . . . . . . . . 517
Data to back up descriptions . . . . . . . . . . . . . . . . . . . . . . . . . . . . 518
Administration July 2007
15
Page 16

Contents
Common backup error messages . . . . . . . . . . . . . . . . . . . . . . . . . . . 519
Labeling the backup volume . . . . . . . . . . . . . . . . . . . . . . . . . . . . . . 519
Recovery kit . . . . . . . . . . . . . . . . . . . . . . . . . . . . . . . . . . . . . . . 520
Restoring data . . . . . . . . . . . . . . . . . . . . . . . . . . . . . . . . . . . . . . . . 521
Before you begin. . . . . . . . . . . . . . . . . . . . . . . . . . . . . . . . . . . . . 521
Permissions . . . . . . . . . . . . . . . . . . . . . . . . . . . . . . . . . . . . . . . 522
Automatic restore . . . . . . . . . . . . . . . . . . . . . . . . . . . . . . . . . . . . 522
Manual restore . . . . . . . . . . . . . . . . . . . . . . . . . . . . . . . . . . . . . . 524
Recommendation to restart your CMS server . . . . . . . . . . . . . . . . . . . . . . . 526
Connection status . . . . . . . . . . . . . . . . . . . . . . . . . . . . . . . . . . . . . . 527
Permissions . . . . . . . . . . . . . . . . . . . . . . . . . . . . . . . . . . . . . . . 527
Viewing the connection status of an ACD . . . . . . . . . . . . . . . . . . . . . . . 528
Listing the connection status of all ACDs . . . . . . . . . . . . . . . . . . . . . . . 529
Description of the Connection Status window . . . . . . . . . . . . . . . . . . . . 531
Administering a printer . . . . . . . . . . . . . . . . . . . . . . . . . . . . . . . . . . . 532
Before you begin. . . . . . . . . . . . . . . . . . . . . . . . . . . . . . . . . . . . . 533
Permissions . . . . . . . . . . . . . . . . . . . . . . . . . . . . . . . . . . . . . . . 533
Adding a new printer . . . . . . . . . . . . . . . . . . . . . . . . . . . . . . . . . . 534
Listing all printers . . . . . . . . . . . . . . . . . . . . . . . . . . . . . . . . . . . . 535
Modifying printer options . . . . . . . . . . . . . . . . . . . . . . . . . . . . . . . . 537
Deleting a printer . . . . . . . . . . . . . . . . . . . . . . . . . . . . . . . . . . . . 538
Maintenance Error Log . . . . . . . . . . . . . . . . . . . . . . . . . . . . . . . . . . . 539
Before you begin. . . . . . . . . . . . . . . . . . . . . . . . . . . . . . . . . . . . . 540
Running a Maintenance Error Log . . . . . . . . . . . . . . . . . . . . . . . . . . . 540
Severity of errors . . . . . . . . . . . . . . . . . . . . . . . . . . . . . . . . . . . . 542
Maintenance Error Log messages . . . . . . . . . . . . . . . . . . . . . . . . . . . 542
ACD Administration Log . . . . . . . . . . . . . . . . . . . . . . . . . . . . . . . . . . 566
Before you begin. . . . . . . . . . . . . . . . . . . . . . . . . . . . . . . . . . . . . 567
Permissions . . . . . . . . . . . . . . . . . . . . . . . . . . . . . . . . . . . . . . . 567
Running the ACD Administration Log report . . . . . . . . . . . . . . . . . . . . . 568
ACD Administration Log window field descriptions . . . . . . . . . . . . . . . . . 570
Chapter 12: Using Solaris . . . . . . . . . . . . . . . . . . . . . . . . . . . . . . . . . . . 571
Before you begin. . . . . . . . . . . . . . . . . . . . . . . . . . . . . . . . . . . . . . . 571
Logging in to CMS . . . . . . . . . . . . . . . . . . . . . . . . . . . . . . . . . . . . . . 571
Logging in to CMS from the remote console . . . . . . . . . . . . . . . . . . . . . 571
Logging in to CMS from the server console . . . . . . . . . . . . . . . . . . . . . . 572
Administering passwords. . . . . . . . . . . . . . . . . . . . . . . . . . . . . . . . . . 574
Before you begin. . . . . . . . . . . . . . . . . . . . . . . . . . . . . . . . . . . . . 574
Changing a user's password . . . . . . . . . . . . . . . . . . . . . . . . . . . . . . 575
16 Administration July 2007
Page 17

Contents
Administering password aging . . . . . . . . . . . . . . . . . . . . . . . . . . . . . 576
Using Solaris printer commands . . . . . . . . . . . . . . . . . . . . . . . . . . . . . . 576
Chapter 13: Using timetables and shortcuts. . . . . . . . . . . . . . . . . . . . . . . . . . 579
Timetables . . . . . . . . . . . . . . . . . . . . . . . . . . . . . . . . . . . . . . . . . . 579
Before you begin. . . . . . . . . . . . . . . . . . . . . . . . . . . . . . . . . . . . . 580
Permissions . . . . . . . . . . . . . . . . . . . . . . . . . . . . . . . . . . . . . . . 581
Creating and scheduling a timetable . . . . . . . . . . . . . . . . . . . . . . . . . . 581
Adding tasks to a timetable . . . . . . . . . . . . . . . . . . . . . . . . . . . . . . . 585
Listing all timetables . . . . . . . . . . . . . . . . . . . . . . . . . . . . . . . . . . 587
Copying a timetable . . . . . . . . . . . . . . . . . . . . . . . . . . . . . . . . . . . 588
Copying timetable tasks. . . . . . . . . . . . . . . . . . . . . . . . . . . . . . . . . 589
Modifying timetable tasks . . . . . . . . . . . . . . . . . . . . . . . . . . . . . . . . 591
Editing timetables globally . . . . . . . . . . . . . . . . . . . . . . . . . . . . . . . 593
Globally editing tasks in a timetable . . . . . . . . . . . . . . . . . . . . . . . . . . 595
Deleting tasks from a timetable. . . . . . . . . . . . . . . . . . . . . . . . . . . . . 598
Deleting a timetable . . . . . . . . . . . . . . . . . . . . . . . . . . . . . . . . . . . 600
Shortcuts . . . . . . . . . . . . . . . . . . . . . . . . . . . . . . . . . . . . . . . . . . . 602
Before you begin. . . . . . . . . . . . . . . . . . . . . . . . . . . . . . . . . . . . . 602
Permissions . . . . . . . . . . . . . . . . . . . . . . . . . . . . . . . . . . . . . . . 603
Creating a shortcut . . . . . . . . . . . . . . . . . . . . . . . . . . . . . . . . . . . 603
Adding tasks to a shortcut . . . . . . . . . . . . . . . . . . . . . . . . . . . . . . . 605
Running a shortcut . . . . . . . . . . . . . . . . . . . . . . . . . . . . . . . . . . . 606
Modifying a shortcut description . . . . . . . . . . . . . . . . . . . . . . . . . . . . 607
Copying a shortcut . . . . . . . . . . . . . . . . . . . . . . . . . . . . . . . . . . . 608
Copying shortcut tasks . . . . . . . . . . . . . . . . . . . . . . . . . . . . . . . . . 609
Modifying shortcut tasks . . . . . . . . . . . . . . . . . . . . . . . . . . . . . . . . 611
Deleting shortcut tasks . . . . . . . . . . . . . . . . . . . . . . . . . . . . . . . . . 612
Deleting a shortcut . . . . . . . . . . . . . . . . . . . . . . . . . . . . . . . . . . . 613
Glossary . . . . . . . . . . . . . . . . . . . . . . . . . . . . . . . . . . . . . . . . . . . 615
Index . . . . . . . . . . . . . . . . . . . . . . . . . . . . . . . . . . . . . . . . . . . 627
Administration July 2007
17
Page 18

Contents
18 Administration July 2007
Page 19

Preface
Avaya Call Management System (CMS) is an application for businesses and organizations that
use Avaya communication servers to process large volumes of telephone calls using the
Automatic Call Distribution (ACD) feature. Avaya CMS supports solutions for routing and agent
selection, multi-site contact centers, remote agents, reporting, interfaces to other systems,
workforce management, desktop applications, system recovery, and quality monitoring.
Avaya CMS is part of the Operational Effectiveness solution of the Avaya Customer Interaction
Suite.
This section includes the following topics:
● Purpose on page 19
● Intended users on page 19
● Overview on page 20
● Conventions and terminology on page 21
● Reasons for reissue on page 22
● Availability on page 22
● Related documentation on page 23
● Support on page 26
Purpose
The purpose of this document is to provide instructions on administering a contact center
through Avaya CMS Supervisor.
This information product specifically addresses the functionality of CMS.
Intended users
This document is written for:
● Avaya Call Management System (CMS) administrators who have access to all parts of
CMS
Administration July 2007 19
Page 20

Preface
● Split/Skill supervisors with limited access to CMS
Overview
This document includes the following topics:
● Chapter 1: Introduction on page 27
This chapter provides an overview of this document, password information, and
cross-references for Avaya CMS Supervisor usage
● Chapter 2: Configuring Avaya CMS Supervisor on page 37
This chapter describes the Supervisor configuration options
● Chapter 3: Using the Dictionary to name contact center entities on page 49
This chapter describes how to create synonyms in the Dictionary
● Chapter 4: Using reports on page 179
This chapter describes the basic use of the Reports subsystem
● Chapter 5: Scripting CMS operations on page 187
This chapter describes how to script common actions
● Chapter 6: Administering contact center agents on page 201
This chapter describes how to change agent splits/skills, create agent templates, move
extensions between splits, and use agent trace
● Chapter 7: Administering the contact center configuration on page 227
This chapter describes how to add or delete call work codes and split/skill call profiles,
change VDN skill preferences, view trunk group assignments, change VDN call profiles,
and other contact center activities
● Chapter 8: Administering exceptions on page 283
This chapter describes how to define exceptions and run exception reports for agents,
split/skills, trunk groups, VDNs, and vectors
● Chapter 9: Administering user permissions on page 355
This chapter describes how to create users and define, change, or modify associated CMS
permissions
● Chapter 10: Configuring CMS system settings on page 429
This chapter describes how to change the state of CMS, allocate storage space, specify
storage intervals, and other system setup activities
20 Administration July 2007
Page 21

● Chapter 11: Maintaining CMS on page 487
This chapter describes backups, restores, backup strategies, maintenance reports,
backup volumes, and labeling
● Chapter 12: Using Solaris on page 571
This chapter describes the Sun Microsystems, Inc. Solaris operating system and how to
use it with CMS
● Chapter 13: Using timetables and shortcuts on page 579
This chapter describes how to use timetables and shortcuts to streamline activities
Conventions and terminology
If you see any of the following safety labels in this document, take careful note of the information
presented.
Conventions and terminology
!
CAUTION:
CAUTION: Caution statements call attention to situations that can result in harm to software,
loss of data, or an interruption in service.
!
!
WARNING:
WARNING: Warning statements call attention to situations that can result in harm to hardware
or equipment.
!
!
DANGER
DANGER: Danger statements call attention to situations that can result in harm to personnel.
!
!
SECURITY ALERT:
SECURITY ALERT: Security alert statements call attention to situations that can increase the potential
:
for unauthorized use of a telecommunications system.
Note:
Note: In some instances, your communication server and its associated software may
be referred to as "switch". Unless otherwise noted, the term, Communication
Manager, includes earlier Avaya communication servers, such as MultiVantage
and DEFINITY®.
Administration July 2007
21
Page 22

Preface
Reasons for reissue
This is the first issue of this document.
Availability
Copies of this document are available from one or both of the following sources:
Note:
Note: Although there is no charge to download documents through the Avaya Web site,
documents ordered from the Avaya Publications Center must be purchased.
● The Avaya online support Web site, http://www.avayadocs.com
● The Avaya Publications Center, which you can contact by:
Voice:
+1-207-866-6701
+1-800-457-1764 (Toll-free, U.S. and Canada only)
Fax:
+1-207-626-7269
+1-800-457-1764 (Toll-free, U.S. and Canada only)
Mail:
GlobalWare Solutions
200 Ward Hill Avenue
Haverhill, MA 01835 USA
Attention: Avaya Account Manager
E-mail:
totalware@gwsmail.com
22 Administration July 2007
Page 23

Related documentation
You might find the following Avaya CMS documentation useful. This section includes the
following topics:
● Change description on page 23
● Administration documents on page 23
● Software documents on page 24
● Hardware documents on page 24
● Call Center documents on page 24
● Avaya CMS upgrade documents on page 25
● Documentation Web sites on page 26
Change description
Related documentation
For information about recent changes made in Avaya CMS, see:
● Avaya Call Management System Release 14 Change Description, 07-601579
Administration documents
For more information about Avaya CMS administration, see:
● Avaya Call Management System Release 14 Administration, 07-601585
● Avaya Call Management System (CMS) Release 14 Database Items and Calculations,
07-601591
● Avaya Call Management System Supervisor Release 14 Reports, 07-601590
● Avaya Call Management System (CMS) Supervisor Release 14 Installation and Getting
Started, 07-601587
● Avaya Call Management System High Availability User Guide, 07-300066
● Avaya Call Management System High Availability Connectivity, Upgrade and
Administration, 07-600957
Administration July 2007
23
Page 24

Preface
Software documents
For more information about Avaya CMS software, see:
● Avaya Call Management System Release 14 Software Installation, Maintenance, and
Troubleshooting Guide, 07-601578
● Avaya CMS Open Database Connectivity Version 5.2, 07-601580
● Avaya Call Management System Release 14 LAN Backup User Guide, 07-601589
● Avaya Call Management System Release 14 External Call History Interface, 07-601586
● Avaya CMS Custom Reports, 585-215-822
● Avaya CMS Forecast User Guide, 585-215-825
● Avaya Call Management System (CMS) Supervisor Release 14 Report Designer,
07-601588
● Avaya Business Advocate Reports, 07-601618
Hardware documents
For more information about Avaya CMS hardware, see:
● Avaya Call Management System Sun Netra 210 Computer Hardware Installation,
Maintenance, and Troubleshooting, 07-600963
● Avaya Call Management System Sun Fire V880/V890 Computer Hardware Installation,
Maintenance, and Troubleshooting, 07-600965
● Avaya Call Management System Sun Blade 100/150 Workstation Hardware Installation,
Maintenance, and Troubleshooting, 07-600964
● Avaya Call Management System Terminals, Printers, and Modems, 585-215-874
Call Center documents
For more information about Avaya Call Center documents, see:
● Avaya Call Management System Switch Connections, Administration, and
Troubleshooting, 07-601582
24 Administration July 2007
Page 25

Avaya CMS upgrade documents
There are several upgrade paths supported with Avaya CMS. There is a document designed to
support each upgrade.
This section includes the following topics:
● Base load upgrades on page 25
● Platform upgrades and data migration on page 25
● Avaya Call Management System Upgrade Express (CUE) on page 25
Base load upgrades
Use a base load upgrade when upgrading CMS to the latest load of the same version (for
example, r14ak.g to r14al.k). A specific set of instructions is included with the upgrade. The
Avaya Call Management System Release 14 Base Load Upgrade document is shipped to the
customer site with the CMS software CD-ROM as part of a Product Correction Notice (PCN).
Related documentation
Platform upgrades and data migration
Use a platform upgrade when upgrading to a new hardware platform (for example, upgrading
from a SPARCserver 5 to a Sun Netra 210). The new hardware platform is shipped from the
Avaya factory with the latest CMS load. Therefore, as part of the upgrade you will have the
latest CMS load (for example, R3V11 to R14).
For more information about platform upgrades and data migration, see:
● Avaya Call Management System Release 14 Platform Upgrade and Data Migration,
07-601581
Avaya Call Management System Upgrade Express (CUE)
Use CUE when CMS is being upgraded from an earlier version (for example, R3V11) to the
latest version (for example, R14).
A specific set of upgrade instructions is included with the upgrade. The Avaya Call Management
System Release 14 CMS Upgrade Express (CUE) for Sun Computers document is included on
the CUE software CD-ROM that is shipped to the customer site with the CUE kit.
For information about customer requirements for CUE upgrades, see:
● Avaya Call Management System Release 14 CMS Upgrade Express (CUE) Customer
Requirements, 700419930
Administration July 2007
25
Page 26

Preface
Documentation Web sites
For Avaya product documentation, go to http://www.avayadocs.com. Additional information
about new software or hardware updates will be contained in future issues of this book. New
issues of this book will be placed on the Web site when available.
Use the following Web sites to view related support documentation:
● Information about Avaya products and service
● Sun hardware documentation
Support
Contacting Avaya technical support
Avaya provides support telephone numbers for you to report problems or ask questions about
your product.
For United States support:
1- 800- 242-2121
For international support:
See the 1-800 Support Directory
http://www.avaya.com
http://docs.sun.com
listings on the Avaya Web site.
Escalating a technical support issue
Avaya Global Services Escalation Management provides the means to escalate urgent service
issues. For more information, see the Escalation Management
listings on the Avaya Web site.
26 Administration July 2007
Page 27

Chapter 1: Introduction
This section provides introductory information on Avaya CMS Supervisor and complementary
products. Basic information regarding the interfaces and usage of Supervisor can be found in
the Avaya CMS Supervisor Installation and Getting Started document.
This section contains the following topics:
● What is Avaya CMS? on page 27
● How Avaya CMS stores ACD data on page 27
● ACD Administration on page 33
What is Avaya CMS?
Avaya CMS is a software product for businesses and organizations that have an Avaya
Communication Manager system and receive a large volume of telephone calls that are
processed through the Automatic Call Distribution (ACD) feature. Avaya CMS collects call-traffic
data, formats management reports, and provides an administrative interface to the ACD feature
on the Communication Manager system.
A CMS administrator accesses the CMS database, generates reports, administers ACD
parameters, and monitors call activities to determine the most efficient service for the calling
customers.
Operating system
Avaya CMS resides on the Sun Microsystems, Inc. Solaris operating system and uses several
Solaris system utilities to communicate with terminals and printers, to log errors, and to execute
processes. CMS utilizes the Informix Software, Inc. INFORMIX database management system,
which provides an interface to the CMS historical database.
How Avaya CMS stores ACD data
There are two ways to describe how Avaya Call Management System (CMS) stores ACD data:
● Logically - How the CMS system organizes data for processing
Administration July 2007 27
Page 28

Chapter 1: Introduction
● Physically - How the CMS system mechanically stores the data on the disk drive
This section includes the following topics:
● How Avaya CMS logically stores ACD data on page 28
● How Avaya CMS physically stores ACD data on page 31
How Avaya CMS logically stores ACD data
The logical storage of the ACD data has more impact on the CMS user than does the physical
storage. The logical data storage controls how a CMS user is able to access and manipulate
ACD data. CMS stores all of the ACD data received from the communication server in the
real-time and historical databases.
Real-time databases
Real-time databases include tables for the current intrahour interval data and the previous
intrahour interval data. The storage interval can be 15, 30, or 60 minutes.
Historical databases
Historical databases include tables for the intrahour, daily, weekly, and monthly data. The
following table shows all of the historical database tables and the maximum amount of time data
can be stored in a particular table:
Historical database tables Maximum time for data storage
Intrahour historical data 62 days
Daily historical data 5 years (1825 days)
Weekly historical data 10 years (520 weeks)
Monthly historical data 10 years (120 months)
Note:
Note: You can use historical data to predict future call traffic and future agent and trunk
requirements. For more information see Avaya CMS Forecast User Guide.
Data summarizing
When CMS collects data from the ACD, the data is stored in the real-time database for the
current interval. At the end of the current interval, the following events occur:
28 Administration July 2007
Page 29

How Avaya CMS stores ACD data
● The data that was in current interval database table is archived to the previous interval
database table.
● The data that was in previous interval database table is archived in the historical database
as intrahour historical data.
The data remains in the historical database as intrahour historical data for a maximum of 62
days. At your designated data summarizing time, the intrahour historical data is summarized
into daily historical data.
The daily historical data is summarized on a weekly and monthly basis. At the end of your
designated week, the daily historical data is summarized into weekly historical data. On the first
day of a new month, the daily historical data is summarized into monthly historical data for the
previous month.
For more information, see CMS data storage
CMS data storage
The following figure illustrates how CMS stores data.
on page 29.
Administration July 2007
29
Page 30
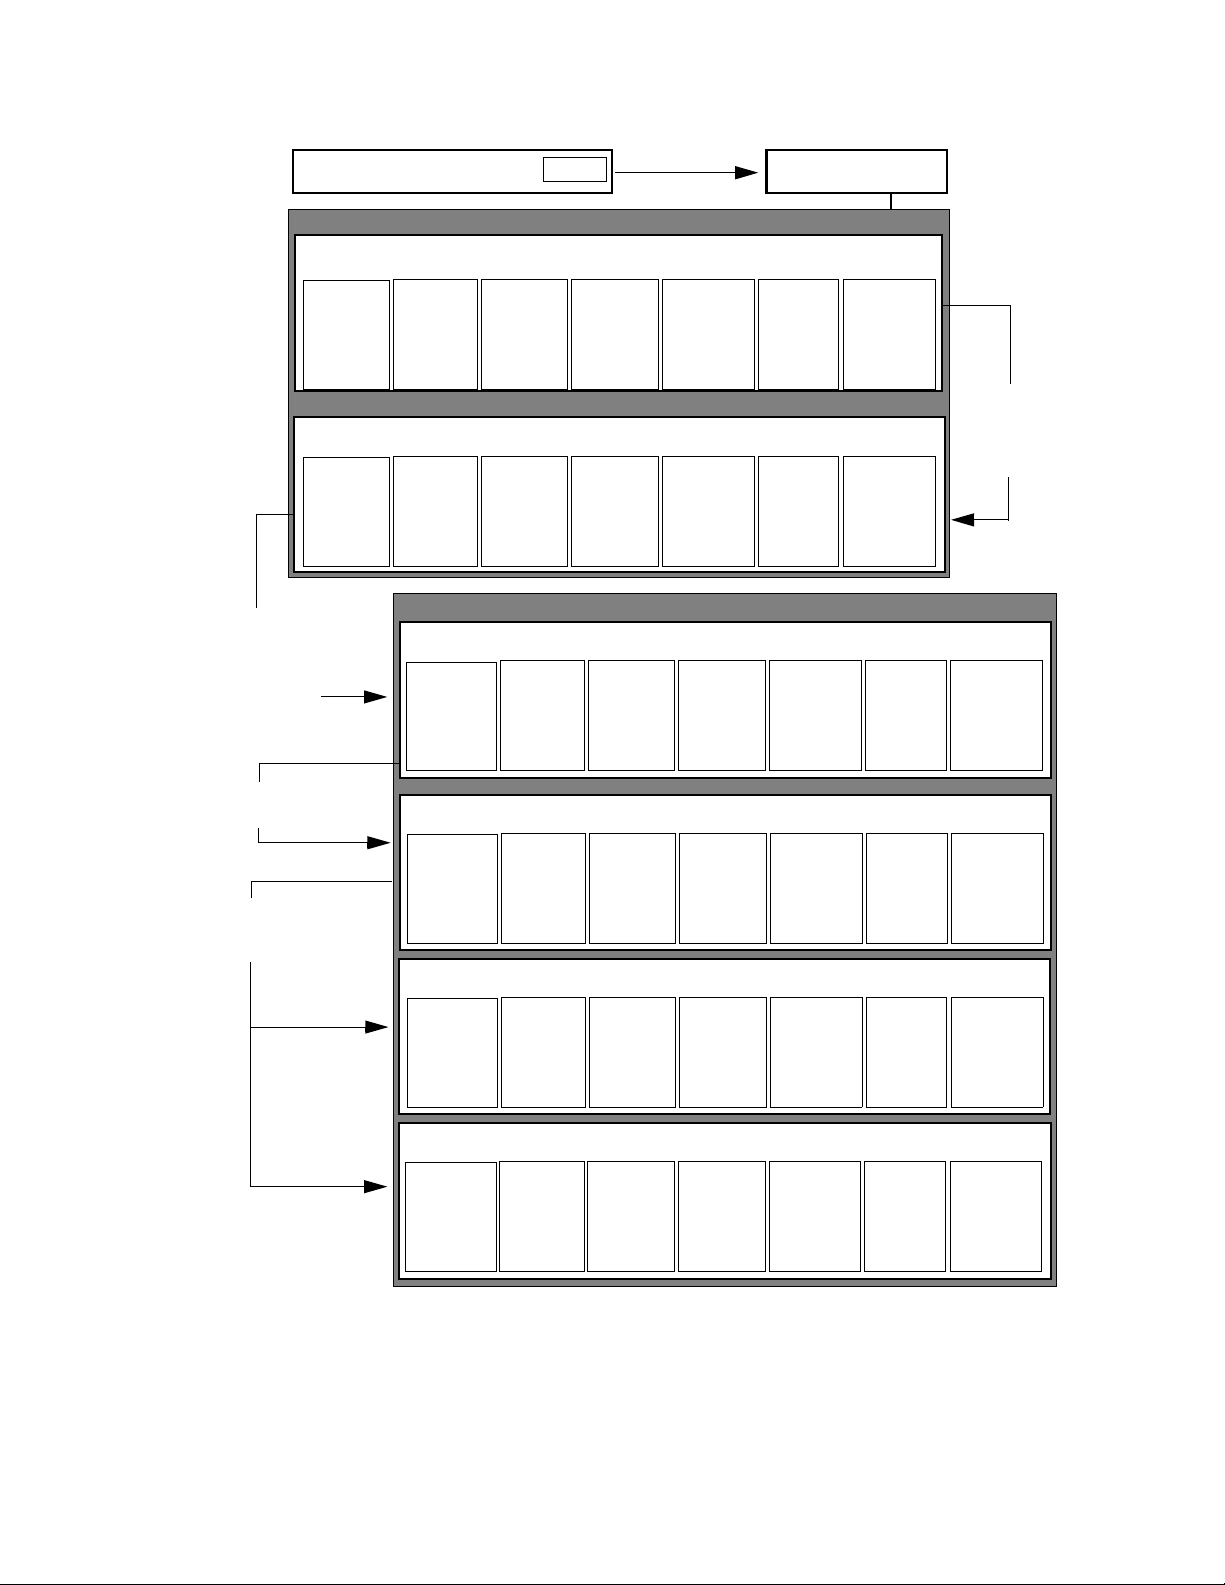
Chapter 1: Introduction
Agent
(cagent)
Agent
(pagent)
The previous
interval data is
archived at the
end of the interval
to the intrahour
historical data
Split
(csplit)
Split
(psplit)
Agent
(hagent)
ACD#
Data
Real-time database
Current interval data
Trunk
(ctrunk)
Trunk
group
(ctkgrp)
Previous interval data
Trunk
(ptrunk)
Trunk
group
(ptkgrp)
Historical database
Intrahour historical data
Split
(hsplit)
Trunk
(htrunk)
Vector
(cvector)
Vector
(pvector)
Trunk
group
(htkgrp)
CMS processorCommunication Server
VDN
(cvdn)
VDN
(pvdn)
Vector
(hvector)
Call
work
codes
(ccwc)
Call
work
codes
(pcwc)
VDN
(hvdn)
The current
interval data is
archived at the
end of the interval
to the previous
interval data
Call
work
codes
(hcwc)
Intrahour data is
summarized into
daily data.
Daily data is
summarized into
weekly data and
monthly data
Weekly data is
summarized at
the end of your
designated week.
Monthly data is
summarized on
the first day of
the month for the
previous month.
Agent
(dagent)
Agent
(wagent)
Agent
(magent)
Split
(dsplit)
Split
(wsplit)
Split
(msplit)
Daily historical data
Trunk
(dtrunk)
Trunk
group
(dtkgrp)
Vector
(dvector)
Weekly historical data
Trunk
(wtrunk)
Trunk
group
(wtkgrp)
Vector
(wvector)
Monthly historical data
Trunk
(mtrunk)
Trunk
group
(mtkgrp)
Vector
(mvector)
VDN
(dvdn)
VDN
(wvdn)
VDN
(mvdn)
Call
work
codes
(dcwc)
Call
work
codes
(wcwc)
Call
work
codes
(mcwc)
30 Administration July 2007
Page 31

How Avaya CMS physically stores ACD data
The relational database used by CMS R3V9 and later is Informix Dynamic Server (IDS). IDS
manages the CMS data in specific dbspaces. The historical database can span multiple disks.
Each ACD dbspace contains the CMS historical database table for a single ACD.
In the following example:
● The dbspace acd1 contains the historical database table for ACD 1
● The dbspace acd2 contains the historical database table for ACD 2
Logical Physical
How Avaya CMS stores ACD data
Dbspace
A dbspace is a logical unit that consists of one or more chunks. Dbspaces can exist across
multiple disks. A CMS system contains the following dbspaces:
● rootdbs
● physdbs
● logdbs
● dbtemp
Historical
database
tables
agent
split
trunk
tkgrp
vector
vdn
cwc
Disk 1 Disk 2
dbspace acd1
dbspace acd1
dbspace acd2
Disk 3
dbspace acd1
dbspace acd2
● aasdbs
● cmsdbs
● freedbs
● acd1 through acd26
Administration July 2007
31
Page 32

Chapter 1: Introduction
!
Important:
Important: Do not attempt to alter rootdbs, physdbs, logdbs, dbtemp, aasdbs, or cmsdbs.
Contact CMS services if you think you have a problem with any of these
dbspaces.
In the following example, the dbspace acd1 exists across multiple disks.
Chunks
A chunk is a unit of physical disk space used to store database data that is managed by IDS.
Each chunk contains 256 MB of disk space. In the following example, the dbspace acd1
contains multiple chunks.
Individual
dbspaces
rootdbs through
freedbs
acd1
acd2 through acd26
Disk 1
rootdbs through
freedbs
acd1
acd2 through acd26
Chunk
acd1
Chunk
Chunk
Chunk
Chunk
Chunk
Chunk
acd1
Disk 2
acd1
acd1
Disk 3
Chunk
Disk 1
Disk 2
Disk 3
32 Administration July 2007
Page 33

ACD Administration
CMS provides an administrative interface to the communication server. From the ACD interface,
you can view or change parameters on the communication server related to ACDs, Call
Vectoring, and Expert Agent Selection (EAS). An administrator can also run reports that
describe your contact center configuration.
For example, an administrator can:
● Add or remove agents from splits or skills
● Move extensions between splits
● Change skill assignments
● Change trunk group-to-split
● Change trunk group-to-VDN
● Change VDN-to-vector assignments
● Start an agent trace
ACD Administration
● List the agents being traced
● Create, copy, and edit call vectors
How Avaya CMS tracks ACD data
CMS uses the data in the real-time and historical databases to generate standard reports that
help you monitor your contact center’s activities. Various agent, split/skill, trunk, trunk group,
vector, and VDN activities are tracked at different points in the call process.
This section includes the following topics:
● How CMS tracks a call on page 33
● Events that start or stop data collection on page 34
How CMS tracks a call
The following diagram shows how CMS tracks a call from the time the call seizes a trunk until
an agent ends after-call-work (ACW) activity.
The trunk table, trunk group table, vector table, VDN table, split/skill table, agent table, and call
work code (CWC) table are CMS database tables that store call data. In the following diagram,
the positions of the CMS database tables identify the points where CMS begins to collect call
data. The arrowheads identify the points where data collection ends. The data is not recorded in
the tables until the call and any ACW is complete.
Administration July 2007
33
Page 34

Chapter 1: Introduction
Note:
Note: With vectoring, the Stop command stops the processing of vector commands.
Call process
Call
queues to
split/skill
Trunk/trunk group
table
Call
seizes
trunk
Vector table
VDN table
Call enters
VDN/vector
Split/Skill table
Events that start or stop data collection
Data collection starts or stops when one of these events occur:
● The Agent table starts collecting data on non-ACD calls when the agent answers or
completes dialing.
● The Split/Skill table stops collecting data when:
-
The ACW for an ACD call ends
Vector
processing
ends
Agent table
Call rings
agent
CWC table
Agent
answers
call
Trunk
drops
call
Agent
ends ACW
-
The call leaves the split queue and is forwarded to another destination (for example,
intraflow)
-
The caller abandons the call
● The Vector table stops collecting data for the current vector when the call is:
-
Sent to an ACD agent
-
Connected to a station or trunk
-
Routed to a VDN or vector
-
Abandoned by the caller
Note:
Note: Time in the vector stops but the vector tracks the call disposition to determine if
the call was answered or abandoned.
● The VDN table stops collecting data for the current VDN when:
-
The ACW for an ACD call ends
-
The call is routed to a trunk or VDN
34 Administration July 2007
Page 35

-
The call is transferred
-
The caller abandons the call
ACD Administration
Administration July 2007
35
Page 36

Chapter 1: Introduction
36 Administration July 2007
Page 37

Chapter 2: Configuring Avaya CMS
Supervisor
This section contains information regarding configuration of Avaya CMS Supervisor through the
Options window.
The Options window allows you to adjust and control the following types of settings:
● The default ACD for all operations and reports windows
● Scripting defaults
● Colors used in Supervisor reports
● Formatting of the different types of fields displayed in Supervisor reports
This section contains the following topics:
● Before you begin on page 37
● General tab on page 38
● Scripting tab on page 39
● Report Colors tab on page 40
● Creating a new report color scheme on page 41
● Threshold Colors tab on page 43
● Creating a new threshold color scheme on page 44
● Name Format tab on page 46
● Defining entity formats on page 47
Before you begin
Except for the CMS Servers tab, all other tabs of the Options window are only available after a
successful login to a CMS server. The CMS Servers tab is disabled when you are logged in to a
CMS server.
Administration July 2007 37
Page 38

Chapter 2: Configuring Avaya CMS Supervisor
General tab
Use the General tab to set your first calendar day, default ACD, and other interface usage
options.
This tab of the Options dialog contains the following controls:
● First Day of Week - This option affects only how the calendar is displayed. For example, if
you browse for a date, the calendar starts the week based on the day that you choose. It
does not change the Start of Week day for weekly data collection which is set through the
System Setup - Storage Intervals window.
● Default ACD - Select the ACD that will be used as the default ACD for operations and
reports windows. Note that an ACD Group can also be set as the default.
● Synchronize PC and CMS Time at Login - Select this check box to change the internal
clock of the PC to match the current time on the CMS server. This option does not affect
the time on the CMS server.
● Use Sound - Select this check box to receive an audible alert when the Exceptions
Indicator box is updated. The Exceptions Indicator box is located on the Controller
status bar. The sound that you hear is the sound that you chose for the exclamation event
in Windows. Note that Threshold Highlighting does not use sound. It uses color only as an
indicator of a threshold being met.
● Use Tooltips - Select this check box to make tooltips visible for the controls in the
Supervisor interface. For example, when you are working in the Supervisor Controller
window, you can place your mouse cursor over a toolbar button and the system displays a
yellow box that provides a brief description of that button.
● Use Taskbar Icon - Select this check box to have Supervisor place an icon in the system
tray.
38 Administration July 2007
Page 39

● Window Menu Sort Order - Use this option group to determine how items that are
displayed in the menu for system tray icon are sorted:
-
Start Order - Select this option to display the items in the system tray icon menu
where the last item used appears at the top of the menu.
-
Alphabetical - Select this option to display the items in the system tray icon menu in
alphabetical order.
Scripting tab
Use the Scripting tab to set the user ID used to run scripts, adjust the logging level, and set the
file used for logging.
Scripting tab
This tab of the Options dialog contains the following controls:
● User ID - The login ID for a CMS user.
● Set User Button - Select this button to open the Save as Script - User Information
dialog box.
● Logging Level - This option group allows the following logging levels in configuring the
amount of information that is recorded during the use of scripting:
-
Minimum - The only activities that will be logged are errors and messages from
Supervisor that would have been displayed to the window as if the user performed the
scripted activity manually.
-
Normal - All of the above activities are logged plus the start and stop time of each task
of the script. The script name is also included.
Administration July 2007
39
Page 40

Chapter 2: Configuring Avaya CMS Supervisor
-
Maximum - All of the above activities are logged plus additional information that may
be useful for debugging a script. Any message that displays as the script runs is
logged.
● Log File Path - Enter the path and filename of the logfile in this field. You may also use the
Browse button to the right of this field to select an existing file on the PC.
● Log File Size - This field determines how large the script log file can get before it is begins
replacing the oldest data. The field defaults to a value of 200KB.
● View Log Button - Select this button to view the script log file.
Report Colors tab
Use the Report Colors tab to set the colors that are used in your graphical reports.
This tab of the Options dialog contains the following controls:
● Scheme - This drop-down list box contains all of the existing color schemes available.
● Save As - Selecting this button saves any changes made in the color bar window as a new
scheme. See Creating a new report color scheme
on page 41 for instructions on creating
report color schemes.
● Remove - Selecting this button deletes the currently displayed scheme.
● Color window - This displays of 16 bars allows you to change the color and pattern of
each bar by performing a right-click on that bar.
● Background - There are two choices for the background color of reports:
-
White - Select this option to display a white background for all reports.
40 Administration July 2007
Page 41

-
Automatic - Select this option to have the background of all reports use the color
scheme configured through Windows.
Creating a new report color scheme
To create a new color scheme for reports:
1. From the menu bar of the Controller window, select Tools > Options.
Supervisor displays the Options window.
2. Select the Report Colors tab.
3. From the Scheme drop-down list, select the color scheme you want to use as a basis for
the new color scheme.
Supervisor displays the configuration of the scheme in the color bar window.
Creating a new report color scheme
4. From the Background options, select White or Automatic.
5. Click the color bar (1 through 16) that you want to modify.
Administration July 2007
41
Page 42

Chapter 2: Configuring Avaya CMS Supervisor
6. If you want to modify the color, select the Change Color button and select the color
through the Color dialog that is displayed.
7. If you want to modify the pattern, select the Change Pattern button and select the pattern
from the resulting list.
8. Repeat Step 5 through Step 7 until you have updated all of the color bars that you want to
modify.
42 Administration July 2007
Page 43

Threshold Colors tab
9. When you are done modifying color bars, select the Save As button.
Supervisor displays the Save Scheme As window.
Note:
Note: If you do not save the new color scheme using the Save As button, the changes
that you have made will overwrite the default color scheme that you modified.
10. Enter a name for this new color scheme in the text box.
11. Select OK to save this scheme.
To view the changes that you made to a color scheme at any point in the modification,
select the Apply button. The current color scheme is then applied to any reports that are
running.
Threshold Colors tab
Use the Threshold Colors tab to set the colors that are used in reports to notify you when
exceptions thresholds are reached.
Administration July 2007
43
Page 44

Chapter 2: Configuring Avaya CMS Supervisor
This tab of the Options dialog contains the following controls:
● Scheme - This drop-down list box contains all of the existing color schemes available.
● Save As - Selecting this button saves any changes made in the color bar window as a new
scheme. See Creating a new threshold color scheme
creating new color schemes.
● Remove - Selecting this button deletes the currently displayed scheme.
● View/set colors for report threshold indicators - This list box displays the states used
for exception thresholds. A graphical representation of the selected state is displayed in
the area to the right.
● Color - Use the button to the right of this field to change the color for the selected
exception threshold state.
● Pattern - Use the button to the right of this field to change the graphical pattern applied for
the selected exception threshold state.
on page 44 for instructions on
Creating a new threshold color scheme
To create a new threshold color scheme for reports:
1. From the menu bar of the Controller window, select Tools > Options.
Supervisor displays the Options window.
2. Select the Threshold Colors tab.
44 Administration July 2007
Page 45

Creating a new threshold color scheme
3. From the Scheme drop-down list, select the color scheme you want to use as a basis for
the new color scheme.
Supervisor displays the view of the scheme.
4. In the View/set colors for report threshold indicators list, select the item you want to
change.
Supervisor displays the current setting for the selected item in the area to the right of the
list box. The Color: and Pattern:/Background: fields display the respective settings for
the current item.
5. If you want to change the color of the selected item, select the Change Color button at the
right of the Color: field.
Supervisor displays the standard Color window from Windows allowing you to select the
new color.
Administration July 2007
45
Page 46

Chapter 2: Configuring Avaya CMS Supervisor
6. If you want to change the pattern/background color for the selected item, select the button
at the right of the Pattern:/Background: field.
Depending on the item selected, Supervisor will display either the pattern list or the Color
window which allows you to select a new pattern or background color.
7. Repeat Steps 4 through 6 until you have updated all of the threshold element colors that
you want to modify.
8. When you are done modifying the threshold element colors, select the Save As button.
Supervisor displays the Save Scheme As window:
9. In the text box, enter a name for this new threshold color scheme you have just created.
10. Select the OK button to save this new color scheme.
To view the changes that you made to a color scheme at any point in the modification,
select the Apply button. The current color scheme is then applied to any reports that are
running.
Name Format tab
Use the Name Format tab to choose or create formats for how CMS entities (splits/skills,
ACDs, VDNs, vectors, trunks, trunk groups, call work codes, and AUX codes) are displayed in
Supervisor. The display can be set to any one or a combination of {name} for Dictionary Name,
{entity} for entity type, and {number} for entity number.
46 Administration July 2007
Page 47

Defining entity formats
Choose or create a name format using {name} for entity name (as entered in the Dictionary),
{entity} for entity type, and {number} for entity number. These formats determine how items are
displayed in reports. For example, if you select the name format of {entity}{number}, all of the
entities that can be named in the Dictionary are displayed as the entity type and number instead
of the name defined in the Dictionary. If you selected {name} as the name format, the names
that are assigned to the entities in the Dictionary are displayed.
Defining entity formats
To define the name format for an entity:
1. From the Entity field, select the item for which you want to change the format.
2. In the Format field, use one of the following methods to select a format for the specified
entity type:
● Manually enter the format that you want using the three possible types: {name},
{entity}, and/or {number}. It is not necessary to use a separator character between
formats unless you want the separator to appear in the report.
For example, if you want to display agent names and extension numbers on reports,
enter {name} {number} in the Format box.
● Use the drop-down list to choose from a set of preformatted options.
The Example field provides an example of what the format looks like based on your
current definition.
If you entered a nonstandard name format, it is not saved in the Format list.
3. Select OK to save your changes.
Administration July 2007
47
Page 48

Chapter 2: Configuring Avaya CMS Supervisor
48 Administration July 2007
Page 49

Chapter 3: Using the Dictionary to name
contact center entities
This section provides information on procedures for using the Dictionary to administer names
associated with contact center entities.
This section includes the following topics:
● About the Dictionary on page 50
● Before you begin on page 50
● Dictionary rules on page 51
● Searching the Dictionary on page 52
● ACD Groups on page 54
● ACDs on page 57
● Agent groups on page 61
● Agent string values on page 71
● Announcement names on page 75
● AUX reason code names on page 82
● Calculations on page 89
● Call work codes on page 96
● Constants on page 103
● Custom database items on page 109
● Generic string values synonyms on page 115
● Location IDs on page 117
● Login ID names on page 123
● Logout reason code names on page 129
● Split/skill string values on page 136
● Split/Skill names on page 141
● Standard database items on page 148
● Trunk group names on page 151
● Trunk string values on page 157
● VDN names on page 160
Administration July 2007 49
Page 50

Chapter 3: Using the Dictionary to name contact center entities
● Vector names on page 167
● Dictionary reports on page 173
About the Dictionary
The Dictionary subsystem is used to assign synonyms or names to contact center entities. The
following list gives a short sample of the items used in the Dictionary:
● Login IDs
● Splits/skills
● Call work codes
● ACDs
● AUX reason codes
● Logout reason codes
● Trunk groups
● VDNs
● Vectors
The Dictionary also allows users to work with items in the database such as:
● Viewing standard database items
● Viewing standard calculations
● Creating and administering custom calculations
● Creating and administering constants
● Creating and administering custom database items
The names assigned through the Dictionary appear on reports to help users understand them
better. The Dictionary also makes it possible for users to create agent groups, change agent
splits/skills, and change trunk string values for reporting purposes. The Dictionary also provides
a global search function to find any item within it.
Before you begin
If an ACD Group is selected as the current ACD in the Dictionary window, only those
operations that are valid for the ACD Group will appear in the Operations: list.
50 Administration July 2007
Page 51

Dictionary rules
The following rules apply to the names assigned in the Dictionary:
● Dictionary names can have from 1 to 20 characters.
● Names (synonyms) must begin with an alphabetic character.
● Dictionary names can include the following characters:
-
Any alphanumeric character
-
Underscore (_)
-
Blank ( )
-
Comma (,)
-
Period (.)
-
Apostrophe (')
-
Plus sign (+)
Dictionary rules
● Blanks ( ) are allowed in all Dictionary names except:
-
Calculation names
-
Constant names
● Names must be unique within each section of the Dictionary for an ACD.
For example, you can name trunk group 1 as sales, and split/skill 1 as sales, but you
cannot name split/skill 1 as sales and split/skill 2 as sales on the same ACD.
● Fields and entries made in the Dictionary are case-sensitive.
The following rules apply to the descriptions assigned in the Dictionary:
● Descriptions in the Dictionary can have from 1 to 50 characters.
● Descriptions can include all printable characters except:
-
Semicolon (;)
-
Backward slash (\)
-
Grave accent (`)
-
Tilde (~)
-
Double quotes (")
-
Pipe symbol (|)
-
Asterisk (*)
-
Question mark (?)
Administration July 2007
51
Page 52

Chapter 3: Using the Dictionary to name contact center entities
Searching the Dictionary
The Dictionary contains a global search feature that can be used to find a wide variety of
information. Some examples of the types of information you can search for in the dictionary are:
● A login ID or a group of login IDs
● A split, skill, or trunk group
● ACD names
● Database items
● Calculations
● Agent names
Permissions
To do a global search in the dictionary, you need write permissions for the Dictionary
subsystem.
Steps
1. From the Controller Window, select Commands > Dictionary.
Supervisor displays the Dictionary window.
52 Administration July 2007
Page 53

2. In the Operations: list, highlight Global Search.
Supervisor displays the Dictionary Global Search Input window.
Note:
Note: Remember the following before entering search criteria:
-
You can search on any pattern
-
You can include an asterisk (*) or question mark (?) in your pattern
-
The search is case sensitive
3. In the Search for: field, enter the item name or pattern.
4. From the Actions menu, select Run.
Supervisor displays the Dictionary Global Search Results window.
Searching the Dictionary
Field Contents
Value matched Displays the matches for your pattern.
Field matched Displays the name of the field in the Dictionary that
corresponds to value matched.
In submenu The Dictionary submenu where your search pattern was
found.
Name The name that corresponds to the value matched.
Administration July 2007
53
Page 54

Chapter 3: Using the Dictionary to name contact center entities
ACD Groups
This section provides information for viewing ACD Groups in the Dictionary. ACD Groups and
the corresponding members can only be viewed through the Dictionary Operations window.
Administration of ACD Groups is done through the Call Center Administration subsystem.
The capability of viewing ACD Groups through the Dictionary subsystem allows those
individuals who only run reports in the contact center to view which ACDs are defined within
each ACD Group. This capability can assist these individuals in determining which ACD Groups
should be used when running reports.
Note:
Note: ACD Groups cannot be selected to display information through standard CMS
reports. To run reports for ACD Groups, you will need to create custom reports
through the CMS ASCII interface or have them created for you by contacting the
Avaya Professional Services Organization.
This section contains the following topics:
● Before you begin on page 54
● Permissions on page 55
● Listing all ACD Groups on page 55
● Viewing the contents of an ACD Group on page 56
Related topic
For more information on ACD Groups and their usage, see ACD Groups on page 227.
Before you begin
The following should be read and understood before working with ACD Groups in the
Dictionary:
● If you add an ACD Group, you will need to log out of Supervisor and log back in to see this
group as a choice in the appropriate dialogs.
● An ACD Group cannot serve as the CMS master ACD.
● Overlapping ACD Groups (groups having common member ACDs), could result in
synonym conflict within the members of an ACD Group if poorly administered. Because of
this capability, entity IDs in overlapping ACD Groups must be mutually exclusive.
● Entity synonyms must be unique for an ACD Group and across all of the ACDs that are
members of the ACD Group.
● User permissions are administered separately for an ACD Group and its member ACDs.
54 Administration July 2007
Page 55

● CMS real-time custom reports are only displayed if data collection is enabled and the ACD
link status is 'up' for at least one member ACD in the specified ACD Group. An error
message will be displayed if these conditions are not met.
● Custom reports that are created with the Single ACD Only option enabled cannot be run
for an ACD Group and vice versa.
Permissions
Depending on the procedure that you want to perform, you need the following permissions:
● To view ACD Group names, you need read permissions for the Dictionary subsystem and
the ACD Group.
Listing all ACD Groups
To view all ACD Groups defined on the CMS server:
ACD Groups
1. From the Controller Window, select Commands > Dictionary.
Supervisor displays the Dictionary window.
2. In the Operations: list, highlight ACD Groups.
Administration July 2007
55
Page 56

Chapter 3: Using the Dictionary to name contact center entities
3. Select OK.
Supervisor displays the Dictionary ACD Groups window.
4. From the menu bar, select Actions > List all.
Supervisor displays the Dictionary ACD Groups List all window listing all ACD Groups
defined on this CMS server.
Viewing the contents of an ACD Group
To view the ACDs assigned to an ACD Group:
1. From the Controller Window, select Commands > Dictionary.
Supervisor displays the Dictionary window.
2. In the Operations: list, highlight ACD Groups.
56 Administration July 2007
Page 57

ACDs
3. Select OK.
Supervisor displays the Dictionary ACD Groups window.
4. In the ACD Group Name: field, enter the name of the ACD Group that you want to view.
5. From the menu bar, select Actions > Find one.
Supervisor retrieves the information for the specified ACD Group, if valid.
6. From the menu bar, select Actions > Get contents.
Supervisor displays the Dictionary ACD Groups Get contents window which lists all
ACDs assigned to this ACD Group.
ACDs
This section provides information on administering ACD names in the Dictionary. The
Dictionary Operations window is used to assign names to real and pseudo ACDs. Generated
reports will contain the ACDs names, rather than the assigned ACD numbers.
You can add, delete, or change an ACD name regardless of the ACD that you are currently
logged in to. For example, you can be logged in to ACD 1 and change the name for ACD 3. This
change does not appear on the changed window border of the ACD until you open a new
window.
Important: The Dictionary naming rules apply to these procedures. See Dictionary rules on
This section contains the following topics:
!
Important:
page 51 for more information.
● Permissions on page 58
● Adding an ACD name on page 58
● Modifying an ACD name on page 59
● Deleting an ACD Name on page 60
Administration July 2007
57
Page 58

Chapter 3: Using the Dictionary to name contact center entities
Permissions
Depending on the procedure that you want to perform, you need the following permissions:
● To add, delete, or modify the name of an ACD, you need write permissions for the
Dictionary subsystem and for the ACD.
● To view ACD names, you need read permissions for the Dictionary subsystem and for the
ACD.
Adding an ACD name
To add a name for an ACD to the Dictionary:
1. From the Controller Window, select Commands > Dictionary.
Supervisor displays the Dictionary window.
2. In the Operations: list, highlight ACDs.
3. Select OK.
Supervisor displays the Dictionary ACDs window.
58 Administration July 2007
Page 59

4. In the ACD Name: field, enter the name of the ACD or ACD Group that you want to add,
delete, or change.
The name you assign to an ACD, pseudo ACD, or ACD Group in the Dictionary is
displayed on all reports and window titles that are associated with that ACD.
5. In the ACD Number: field, enter a number between 1 and 38 to correspond with the new
ACD name where 1 through 8 is reserved for real ACDs, 9 through 26 is reserved for
pseudo-ACDs, and 27 through 38 is reserved for ACD Groups.
Any additional information about the ACD can be entered in the Description: field. Only
50 or fewer characters can be entered in this field.
6. To add your changes to the Dictionary, select Actions > Add.
Modifying an ACD name
To modify the name of an ACD in the Dictionary:
1. From the Controller Window, select Commands > Dictionary.
ACDs
Supervisor displays the Dictionary window.
2. In the Operations: list, highlight ACDs.
Administration July 2007
59
Page 60

Chapter 3: Using the Dictionary to name contact center entities
3. Select OK.
Supervisor displays the Dictionary ACDs window.
4. In the ACD Number: field, enter the number of the ACD, pseudo-ACD, or ACD Group that
you want to modify.
5. From the Actions menu, select Find One.
6. In the ACD Name: field, enter the new name for the selected ACD.
7. To add your changes to the Dictionary, select Actions > Modify.
Deleting an ACD Name
!
Important:
Important: Deleting an ACD name from the Dictionary only removes the name of the ACD.
The ACD is then displayed as unnamed_acd n where n is the number of the
ACD. No warnings are given during the process of deleting an ACD name. This
procedure should not be performed unless you are certain that you want to delete
the ACD name.
60 Administration July 2007
Page 61

To delete the name of an ACD in the Dictionary:
1. From the Controller Window, select Commands > Dictionary.
Supervisor displays the Dictionary window.
2. In the Operations: list, highlight ACDs.
Agent groups
3. Select OK.
Supervisor displays the Dictionary window.
4. In the ACD Number: field, enter the number of the ACD, psuedo-ACD, or ACD Group for
which you want to delete the name.
5. From the Actions menu, select Find One.
The name of the ACD is displayed in the ACD Name: field.
6. Select Actions > Delete to remove the ACD from the Dictionary.
Agent groups
This section provides procedures for creating and naming, copying, and deleting agent groups
in the Dictionary using the Agent Groups window.
Administration July 2007
61
Page 62

Chapter 3: Using the Dictionary to name contact center entities
Agents can be grouped for reporting purposes, without regard to the split/skill assignment for
the agent. For example, you can create a group for new employees or a group for employees
with special skills.
This section contains the following topics:
● Permissions on page 62
● Adding an agent group on page 63
● Listing agents in an agent group on page 64
● Copying an existing agent group to a new name on page 66
● Adding agents to an existing agent group on page 67
● Deleting agents in an existing agent group on page 69
● Deleting an agent group on page 70
Permissions
Depending on the procedure that you want to perform, you need the following permissions:
● To add, delete, or modify agent groups, you need write permissions for the Dictionary
subsystem.
● To view agent groups, you need read permissions for the Dictionary subsystem.
62 Administration July 2007
Page 63

Adding an agent group
To add an agent group to the Dictionary:
1. From the Controller Window, select Commands > Dictionary.
Supervisor displays the Dictionary window.
Agent groups
2. In the Operations: list, highlight Agent Groups.
3. In the ACD: field, enter the ACD or ACD Group on which you want to create the agent
group.
4. Select OK.
Supervisor displays the Dictionary Agent Groups window.
5. In the Agent group name: field, enter the name of the new agent group.
6. To add the agent group to the Dictionary, select Actions > Add.
Administration July 2007
63
Page 64

Chapter 3: Using the Dictionary to name contact center entities
7. To add the Login IDs for this agent group, select Actions > Get Contents.
Supervisor displays the Agent Groups-Get Contents window.
8. Enter the Login IDs for the new group.
9. To add the Login IDs to the Dictionary for this agent group, select the Actions > Add.
Listing agents in an agent group
To list the agents defined in an agent group in the Dictionary:
1. From the Controller Window, select Commands > Dictionary.
Supervisor displays the Dictionary window.
2. In the Operations: list, highlight Agent Groups.
3. In the ACD: field, enter the ACD or ACD Group on which the agent group exists.
64 Administration July 2007
Page 65

4. Select OK.
Supervisor displays the Dictionary Agent Groups window.
5. In the Agent group name: field, enter the name of the agent group.
6. From the Actions menu, select Get contents.
Supervisor displays the Agent Groups-Get Contents window.
Agent groups
7. From the Actions menu, select List All.
Supervisor displays the Dictionary Agent Groups-Get Contents-List All window listing
the agents in the group.
Administration July 2007
65
Page 66

Chapter 3: Using the Dictionary to name contact center entities
Copying an existing agent group to a new name
To copy an existing agent group in the Dictionary to a new name:
1. From the Controller Window, select Commands > Dictionary.
Supervisor displays the Dictionary window.
2. In the Operations: list, highlight Agent Groups.
3. In the ACD: field, enter the ACD or ACD Group on which the agent group exists.
4. Select OK.
Supervisor displays the Dictionary Agent Groups window.
5. In the Agent group name: field, enter the name of the new agent group.
66 Administration July 2007
Page 67

6. From the Actions menu, select Copy Group.
Supervisor displays the Dictionary-Agent Groups-Copy window.
7. In the Copy from: field, enter the name of the agent group that you want to copy.
8. From the Actions menu, select Copy Group.
The new agent group is automatically populated with all the agents from the copied group.
Adding agents to an existing agent group
Agent groups
To add agents to a group that already exists in the Dictionary:
1. From the Controller Window, select Commands > Dictionary.
Supervisor displays the Dictionary window.
2. In the Operations: list, highlight Agent Groups.
3. In the ACD: field, enter the ACD or ACD Group on which the agent group exists.
Administration July 2007
67
Page 68

Chapter 3: Using the Dictionary to name contact center entities
4. Select OK.
Supervisor displays the Dictionary Agent Groups window.
5. In the Agent group name: field, enter the name of the agent group to which you will add
agents.
6. From the Actions menu, select Get Contents.
Supervisor displays the Dictionary-Agent Groups-Get Contents window.
7. Enter the Login IDs that you want to add to this group.
8. From the Actions menu, select Add.
68 Administration July 2007
Page 69

Deleting agents in an existing agent group
To delete agents from an existing group in the Dictionary:
1. From the Controller Window, select Commands > Dictionary.
Supervisor displays the Dictionary window.
Agent groups
2. In the Operations: list, highlight Agent Groups.
3. In the ACD: field, enter the ACD or ACD Group on which the agent group exists.
4. Select OK.
Supervisor displays the Dictionary Agent Groups window.
5. In the Agent group name: field, enter the name of the agent group from which agents will
be deleted.
Administration July 2007
69
Page 70

Chapter 3: Using the Dictionary to name contact center entities
6. From the Actions menu, select Get contents.
Supervisor displays the Agent Groups-Get Contents window.
7. Enter the Login IDs to delete from this group.
8. From the Actions menu, select Delete.
Deleting an agent group
To delete an agent group from the Dictionary:
1. From the Controller Window, select Commands > Dictionary.
Supervisor displays the Dictionary window.
2. In the Operations: list, highlight Agent Groups.
3. In the ACD: field, enter the ACD or ACD Group on which the agent group exists.
70 Administration July 2007
Page 71

4. Select OK.
Supervisor displays the Dictionary Agent Groups window.
5. In the Agent group name: field, enter the name of the agent group to delete.
6. From the Actions menu, select Delete.
The selected agent group name is removed from the Dictionary.
Agent string values
Agent string values
Agent string values are the descriptive words in reports that correspond with agent states.
These words, such as ACD, ACW, or AUX, describe the value of the data. Strings are changed
to the values you administer when they are displayed as data in a report. The report heading is
not affected.
This section contains the following topics:
● Permissions on page 71
● Changing agent string value descriptions on page 72
● Agent string value field descriptions on page 74
Permissions
Depending on the procedure that you want to perform, you will need the following permissions:
● To modify agent string values, you need write permissions for the Dictionary subsystem.
● To view agent string values, you need read permissions for the Dictionary subsystem.
Administration July 2007
71
Page 72

Chapter 3: Using the Dictionary to name contact center entities
Changing agent string value descriptions
To change agents string value descriptions in the Dictionary:
1. From the Controller Window, select Commands > Dictionary.
Supervisor displays the Dictionary window.
2. In the Operations: list, highlight Agent String Values.
72 Administration July 2007
Page 73

Agent string values
3. In the ACD: field, select the ACD or ACD Group that you want to modify.
Supervisor displays the Dictionary Agent String Values window.
4. Enter a new descriptive word in the field that you want to change. See Agent string value
field descriptions on page 74 for field descriptions.
Administration July 2007
73
Page 74

Chapter 3: Using the Dictionary to name contact center entities
Agent string value field descriptions
The following table describes the fields for the agent string values:
Field Description
Work Mode To change any of the work-mode default names, enter the new
descriptive word in the appropriate work mode field. Agents can be in
any one of the following work modes:
● ACD - The agent is on an ACD call.
● ACW - The agent is in the after-call work mode.
● AUX - The agent is in the auxiliary work mode.
● AVAIL - The agent is available to take an ACD call.
● DACD - The agent is on a direct agent ACD call.
● DACW - The agent is in the after-call work mode for a direct agent
ACD call.
● OTHER - The agent has just logged in and CMS has not yet been
notified of the agent's state, or the agent is dialing to place an
extension call while in auto-in/manual-in (AI/MI), or the agent is in
AI/MI and has an extension call ringing, or the agent has put a call
on hold and has taken no further call-related action.
● RINGING - An ACD call is ringing at the agent's voice terminal and
the agent is not doing anything else.
● UNKNOWN - CMS does not recognize the current state.
● UNSTAFF - The agent is not logged in (is not staffed).
Agent Trace
Work Mode
To change the agent trace, work-mode default names, enter the new
descriptive word next to LOGON or LOGOFF.
● LOGON - An agent is logged in.
● LOGOFF - An agent is logged out and is not available to take ACD
calls.
Call Handling
Preference
To change the call-handling preference default names, enter the new
descriptive word next to LEVEL, NEED, or PERCENT.
● LEVEL - The agent's call-handling preference is by skill level.
● NEED - The agent's call-handling preference is by greatest need.
● PERCENT - The agent's call-handling preference is based on an
assigned percentage of time allocated to each skill.
Reserve Level To change the reserve-level default names, enter the new descriptive
word next to Rsv1 or Rsv2.
● Rsv1 - The agent begins answering calls when the skill's 1st
threshold is crossed.
● Rsv2 - The agent begins answering calls when the skill's second
threshold is crossed.
74 Administration July 2007
Page 75

Announcement names
Field Description
Call Direction To change the call-direction default names, enter the new descriptive
word next to IN or OUT.
● IN - The agent is on an incoming call.
● OUT - The agent is on an outbound call.
Call Origination To change the call-origination default names, enter the new
descriptive word next to PHONE or KEYBOARD. Agents can be on
either type of the following outbound calls:
● PHONE - The agent dialed an outbound call using the voice
terminal dial pad.
● KEYBOARD - The agent dialed an outbound call using the
computer keyboard.
Call Destination To change the call-destination default names, enter the new
descriptive word next to PBX or OFF.
● PBX - Internal to the switch.
● OFF - External to the switch.
Agent Role To change the agent role default names, enter the new descriptive
word next to TOP, ALLOCATED, BACKUP, ROVING, or RESERVE.
● TOP - The agent can be counted on to answer the skill's calls
(unless an agent's other skills go into overload).
● ALLOCATED - The agent has a percentage of his/her time
allocated to answering the skill's calls.
● BACKUP - The agent helps to answer the skill's calls when his/her
top skill is not busy.
● ROVING - The agent answers a skill's calls when this skill has the
greatest need.
● RESERVE - The agent helps answer the skill's calls when the skill
is over threshold. These roles vary according to call-handling
preference.
Announcement names
This section provides information on working with announcement names in the Dictionary.
Announcements are recorded messages that are played for callers. Announcement names are
synonyms assigned to these recorded messages in the Dictionary.
This section contains the following topics:
● Permissions on page 76
● Before you begin on page 76
Administration July 2007
75
Page 76

Chapter 3: Using the Dictionary to name contact center entities
● Adding an announcement name on page 77
● Viewing an announcement name on page 78
● Listing all announcement names for an ACD on page 79
● Modifying an announcement name on page 80
● Deleting an announcement name on page 81
Permissions
Depending on the procedure that you want to perform, you need the following permissions:
● To view announcement names, you need read permissions for the Dictionary subsystem.
● To add, delete, or modify announcement names, you need write permissions for the
Dictionary subsystem.
Before you begin
The following items should be read and understood before working with announcement names
in the Dictionary:
● Announcement names must be unique.
● Multiple values are not allowed for announcement names or numbers.
76 Administration July 2007
Page 77

Adding an announcement name
To add a name for an announcement to the Dictionary:
1. From the Controller Window, select Commands > Dictionary.
Supervisor displays the Dictionary window.
Announcement names
2. In the Operations: list, highlight Announcements.
3. In the ACD: field, enter the ACD on which the announcement resides.
4. Select OK.
Supervisor displays the Dictionary Announcements window.
5. In the Announcement Name: field, enter the name that you want to assign to the
announcement.
6. In the Announcement Number: field, enter a number that will correspond with the
announcement name.
Any additional information about the announcement can be entered in the Description:
field. Only 50 or fewer characters can be entered in this field.
7. From the Action menu, select Add.
Administration July 2007
77
Page 78

Chapter 3: Using the Dictionary to name contact center entities
Viewing an announcement name
To view an announcement name in the Dictionary:
1. From the Controller Window, select Commands > Dictionary.
Supervisor displays the Dictionary window.
2. In the Operations: list, highlight Announcements.
3. In the ACD: field, enter the ACD on which the announcement resides.
4. Select OK.
Supervisor displays the Dictionary Announcements window.
5. To find an announcement name to view, only one of the fields requires an announcement
to be specified. Perform one of the following actions to specify an existing announcement
in the Dictionary:
● In the Announcement Name: field, enter the synonym name of the announcement.
● In the Announcement Number: field, enter the number of the announcement.
6. From the Action menu, select Find One.
Supervisor retrieves and displays the data for the specified announcement, if valid.
78 Administration July 2007
Page 79

Listing all announcement names for an ACD
To list all announcement names that are defined in the Dictionary for an ACD:
1. From the Controller Window, select Commands > Dictionary.
Supervisor displays the Dictionary window.
Announcement names
2. In the Operations: list, highlight Announcements.
3. In the ACD: field, enter the ACD on which the announcement resides.
4. Select OK.
Supervisor displays the Dictionary Announcements window.
5. From the Action menu, select List All.
Administration July 2007
79
Page 80

Chapter 3: Using the Dictionary to name contact center entities
Modifying an announcement name
To modify an announcement name in the Dictionary:
1. From the Controller Window, select Commands > Dictionary.
Supervisor displays the Dictionary window.
2. In the Operations: list, highlight Announcements.
3. In the ACD: field, enter the ACD on which the announcement resides.
4. Select OK.
Supervisor displays the Dictionary Announcements window.
5. To find an announcement name to modify, only one of the fields requires an
announcement to be specified so that it can be found. Perform one of the following actions
to specify an existing announcement in the Dictionary:
● In the Announcement Name: field, enter the name of the announcement.
● In the Announcement Number: field, enter the number of the announcement.
6. From the Action menu, select Find One.
Supervisor retrieves and displays the data for the specified announcement, if valid.
80 Administration July 2007
Page 81

7. In the Announcement Name: field, enter the new announcement name.
8. From the Action menu, select Modify.
Deleting an announcement name
To delete an announcement name in the Dictionary:
1. From the Controller Window, select Commands > Dictionary.
Supervisor displays the Dictionary window.
Announcement names
2. In the Operations: list, highlight Announcements.
3. In the ACD: field, enter the ACD on which the announcement resides.
4. Select OK.
Supervisor displays the Dictionary Announcements window.
5. To find an announcement name to delete, only one of the fields requires an announcement
to be specified so that it can be found in the Dictionary. Perform one of the following
actions to specify an existing announcement in the Dictionary:
● In the Announcement Name: field, enter the name of the announcement.
Administration July 2007
81
Page 82

Chapter 3: Using the Dictionary to name contact center entities
● In the Announcement Number: field, enter the number of the announcement.
6. From the Action menu, select Find One.
Supervisor retrieves and displays the data for the specified announcement, if valid.
7. From the Action menu, select Delete.
AUX reason code names
This section provides information on working with AUX reason code names in the Dictionary.
AUX reason codes enable a contact center to track an agent's time more precisely when the
agent is in the AUX work mode. The agent can specify exactly why the AUX state is used, such
as for lunch or meetings. You can view, add, delete, or change AUX reason code names by
selecting AUX Reason Codes from the Dictionary menu.
Complete the AUX Reason Codes window if you want names associated with your AUX
reason codes to appear in the AUX Reasons Code standard real-time and historical reports.
This section contains the following topics:
● Permissions on page 82
● Before you begin on page 83
● Adding an AUX reason code name on page 83
● Viewing an AUX reason code name on page 84
● Listing all AUX reason code names on page 85
● Modifying an AUX reason code name on page 87
● Deleting an AUX reason code on page 88
Permissions
Depending on the procedure that you want to perform, you need the following permissions:
● To view AUX reason codes, you need read permissions for the Dictionary subsystem.
● To add, delete, or modify AUX reason codes, you need write permissions for the Dictionary
subsystem.
82 Administration July 2007
Page 83

Before you begin
The following items should be read and understood before working with AUX reason code
names in the Dictionary:
● To use AUX reason codes, your switch must have EAS.
● AUX reason codes are single digits, 0 through 9.
● AUX reason code names can be up to 20 characters long.
● AUX reason code 0 is used for cases in which the switch automatically puts an agent into
AUX work mode. You can change this name.
● Names must be unique within an ACD. No two AUX reason codes in the same ACD can
have the same name.
● If you make changes to the AUX reason code names you must restart any report that uses
AUX reason codes to see the changes.
AUX reason code names
Adding an AUX reason code name
To add a name in the Dictionary for an AUX reason code:
1. From the Controller Window, select Commands > Dictionary.
Supervisor displays the Dictionary window.
2. In the Operations: list, highlight AUX Reason Codes.
3. In the ACD: field, enter the ACD or ACD Group on which the AUX Reason Codes reside.
Administration July 2007
83
Page 84

Chapter 3: Using the Dictionary to name contact center entities
4. Select OK.
Supervisor displays the Dictionary AUX Reason Codes window.
5. In the AUX Reason Code name: field, enter the name for the AUX reason code.
6. In the AUX Reason Code: field, enter the one-digit AUX reason code number, between 0
and 9.
Any additional information about the AUX reason code can be entered in the Description:
field. Only 50 or fewer characters can be entered in this field.
7. From the Action menu, select Add.
Viewing an AUX reason code name
To view the name of an AUX reason code in the Dictionary:
1. From the Controller Window, select Commands > Dictionary.
Supervisor displays the Dictionary window.
2. In the Operations: list, highlight AUX Reason Codes.
3. In the ACD: field, enter the ACD or ACD Group on which the AUX Reason Codes reside.
84 Administration July 2007
Page 85

AUX reason code names
4. Select OK.
Supervisor displays the Dictionary AUX Reason Codes window.
5. To find an AUX reason code name to view, only one of the fields requires an AUX reason
code to be specified. Perform one of the following actions to specify an existing AUX
reason code in the Dictionary:
● In the AUX Reason Code name: field, enter the name for the AUX reason code.
● In the AUX Reason Code: field, enter the one-digit AUX reason code number,
between 0 and 9.
6. From the Actions menu, select Find One.
Supervisor retrieves and displays the information for the specified AUX reason code, if
valid.
Listing all AUX reason code names
To list all AUX reason code names in the Dictionary for an ACD:
1. From the Controller Window, select Commands > Dictionary.
Supervisor displays the Dictionary window.
2. In the Operations: list, highlight AUX Reason Codes.
Administration July 2007
85
Page 86

Chapter 3: Using the Dictionary to name contact center entities
3. In the ACD: field, enter the ACD or ACD Group on which the AUX Reason Codes reside.
4. Select OK.
Supervisor displays the Dictionary AUX Reason Codes window.
5. From the Actions menu, select List All.
Supervisor displays the Dictionary AUX Reason Codes - List All window.
86 Administration July 2007
Page 87

Modifying an AUX reason code name
To modify an AUX reason code name in the Dictionary:
1. From the Controller Window, select Commands > Dictionary.
Supervisor displays the Dictionary window.
AUX reason code names
2. In the Operations: list, highlight AUX Reason Codes.
3. In the ACD: field, enter the ACD or ACD Group on which the AUX reason codes reside.
4. Select OK.
Supervisor displays the Dictionary AUX Reason Codes window.
5. To find an AUX reason code name to modify, only one of the fields requires an AUX reason
code name to be specified. Perform one of the following actions to specify an existing AUX
reason code name in the Dictionary:
● In the AUX Reason Code name: field, enter the name for the AUX reason code.
● In the AUX Reason Code: field, enter the one-digit AUX reason code number,
between 0 and 9.
Administration July 2007
87
Page 88

Chapter 3: Using the Dictionary to name contact center entities
6. From the Actions menu, select Find One.
Supervisor retrieves and displays the information for the specified AUX reason code, if
valid.
7. In the AUX Reason Code name: field, enter the new name for the AUX reason code.
8. From the Actions menu, select Modify.
Supervisor updates the name for the AUX reason code in the database.
Deleting an AUX reason code
To delete an AUX reason code name from the Dictionary:
1. From the Controller Window, select Commands > Dictionary.
Supervisor displays the Dictionary window.
2. In the Operations: list, highlight AUX Reason Codes.
3. In the ACD: field, enter the ACD or ACD Group on which the AUX reason codes reside.
4. Select OK.
Supervisor displays the Dictionary AUX Reason Codes window.
88 Administration July 2007
Page 89

5. To find an AUX reason code name to delete, only one of the fields requires an AUX reason
code to be specified. Perform one of the following actions to specify an existing AUX
reason code in the Dictionary:
● In the AUX Reason Code name: field, enter the name for the AUX reason code.
● In the AUX Reason Code: field, enter the one-digit AUX reason code number,
between 0 and 9.
6. From the Actions menu, select Find One.
Supervisor retrieves and displays the information for the specified AUX reason code, if
valid.
7. From the Actions menu, select Delete.
Supervisor removes the specified AUX reason code from the Dictionary.
Calculations
Calculations
Calculation names are abbreviated names for the calculations in the database that are used to
create reports. You can view standard calculations or create your own custom calculations to
use in custom reports. The names for calculations used in standard reports already exist in the
Dictionary.
This section contains the following topics:
● Permissions on page 89
● Before you begin on page 90
● Viewing a calculation on page 91
● Listing all calculations on page 92
● Adding a calculation on page 93
● Modifying a custom calculation on page 94
● Deleting a custom calculation on page 95
Permissions
Depending on the procedure that you want to perform, you need the following permissions:
● To view calculations, you need read permissions for the Dictionary subsystem.
● To create, delete or modify a custom calculation, you need write permissions for the
Dictionary subsystem.
Administration July 2007
89
Page 90

Chapter 3: Using the Dictionary to name contact center entities
Before you begin
The following items should be read and understood before changing calculations in the
Dictionary:
● Calculations must be one word with no blanks.
● Reports will not run if you embed calculations more than three levels deep.
● Standard calculations cannot be deleted.
The standard CMS calculations are listed in the following documents:
-
Avaya CMS Database Items and Calculations
-
Avaya CMS Supervisor Report Designer User Guide
-
Avaya CMS Supervisor Reports
-
Avaya CMS Custom Reports
● It is recommended that you identify your own calculations in all lowercase letters to
distinguish them from the standard CMS calculations, which are in all uppercase letters.
● If you delete a custom calculation from the Dictionary, any reports that it appeared in will
not run.
● You can adversely affect standard reports if you change a standard CMS calculation.
Reports will probably run, but the results may be different from those expected.
● Reports will not run if you create calculations that reference each other in a circular
fashion. For example, assume that CALC_1 uses CALC_2 in its processing. If CALC_2
then uses CALC_1 in its processing, this creates a circular pattern where processing
cannot be completed.
90 Administration July 2007
Page 91

Viewing a calculation
To view a calculation in the Dictionary:
1. From the Controller Window, select Commands > Dictionary.
Supervisor displays the Dictionary window.
Calculations
2. In the Operations: list, highlight Calculations.
3. Select OK.
Supervisor displays the Dictionary Calculations window.
4. To find a calculation to view, only one of the fields requires a calculation to be specified.
Perform one of the following actions to specify an existing database calculation in the
Dictionary:
● If you know the name of the calculation, enter it in the Calculation name: field.
● If you do not know the name of the calculation, perform the following steps to view all
the calculations alphabetically:
1. Leave all the fields in the Dictionary Calculations window blank, and from the
Actions menu, select Find One.
Administration July 2007
91
Page 92

Chapter 3: Using the Dictionary to name contact center entities
2. Use the Next or Previous buttons to move through the list of existing calculations.
Listing all calculations
To list all calculations in the Dictionary:
1. From the Controller Window, select Commands > Dictionary.
Supervisor displays the Dictionary window.
2. In the Operations: list, highlight Calculations.
3. Select OK.
Supervisor displays the Dictionary Calculations window.
4. From the Actions menu, select List All.
92 Administration July 2007
Page 93

Adding a calculation
To add a calculation in the Dictionary:
1. From the Controller Window, select Commands > Dictionary.
Supervisor displays the Dictionary window.
Calculations
2. In the Operations: list, highlight Calculations.
3. Select OK.
Supervisor displays the Dictionary Calculations window.
4. Enter the name of the calculation in the Calculation name: field.
!
Important:
Important: Use lowercase letters in the name to distinguish this custom calculations from a
standard CMS calculation.
5. In the Calculation: field, enter the formula for the calculation.
Formulas can include:
● Database items
Administration July 2007
93
Page 94

Chapter 3: Using the Dictionary to name contact center entities
● Constants
● Calculations (the maximum nesting level is 3)
● The following arithmetic operators:
-
+ (add)
-
- (subtract)
-
* (multiply)
-
/ (divide)
-
( ) (do first, as in standard mathematical operations)
Any additional information about the calculation can be entered in the Description: field.
Only 50 or fewer characters can be entered in this field.
6. From the Actions menu, select Add.
The custom calculation is added to the Dictionary.
Modifying a custom calculation
!
Important:
Important: Modifying a standard CMS calculation is not recommended. If you modify a
standard CMS calculation, the meaning of that calculation is changed in every
report in which it appears.
To modify a custom calculation:
1. From the Controller Window, select Commands > Dictionary.
Supervisor displays the Dictionary window.
2. In the Operations: list, highlight Calculations.
94 Administration July 2007
Page 95

3. Select OK.
Supervisor displays the Dictionary Calculations window.
4. Enter the name of the custom calculation in the Calculation name: field.
5. From the Actions menu, select Find One.
6. In the Calculation: field, enter the new formula.
Any changes to the descriptive information, can be entered in the Description: field.
7. From the Actions menu, select Modify.
Calculations
Deleting a custom calculation
To delete a custom calculation:
1. From the Controller Window, select Commands > Dictionary.
Supervisor displays the Dictionary window.
2. In the Operations: list, highlight Calculations.
Administration July 2007
95
Page 96

Chapter 3: Using the Dictionary to name contact center entities
3. Select OK.
Supervisor displays the Dictionary Calculations window.
4. Enter the name of the custom calculation in the Calculation name: field.
5. From the Actions menu, select Find One.
Supervisor retrieves and displays the information for the specified calculation, if valid.
6. From the Actions menu, select Delete.
The specified calculation is removed from the Dictionary.
Call work codes
Call work codes are numeric sequences that are entered by agents to categorize the type of call
that they have just received or are currently handling. By entering call work codes, agents can
assign one of many defined categories to the calls which can be later viewed in detail through
reports. The call work codes are defined in the Dictionary and can be used to represent any
type of call in which there is an interest in tracking, such as complaints, special sales,
promotional events, and so forth. Up to five call work codes can be assigned to each call. You
can view, add, delete, or modify call work codes and their names from the Call Work Codes
window. These names then appear in the standard Call Work Code historical report.
This section contains the following topics:
● Permissions on page 97
● Before you begin on page 97
● Adding a name to a call work code on page 98
● Viewing a call work code name on page 99
● Listing all call work code names on page 100
● Modifying a call work code name on page 101
● Deleting a call work code name on page 102
96 Administration July 2007
Page 97

Permissions
Depending on the procedure that you want to perform, you need the following permissions:
● To view call work code names, you need read permissions for the Dictionary subsystem.
● To add, delete or modify call work code names, you need write permissions for the
Dictionary subsystem.
Before you begin
The following items should be read and understood before changing call work codes in the
Dictionary:
● Call work codes must be activated on the ACD before the administration and naming of
them can be performed.
● Call work codes require storage space on the CMS file system. The number of call work
codes available on a system must be configured through the Data Storage Allocation
window. See Chapter 10:
information.
Call work codes
Configuring CMS system settings on page 429 for more
● Call Work Code 0 is reserved for unadministered work codes so that summary data can
be collected. The default name for Call Work Code 0 is Unadministered codes, but this
name can be modified.
● Even though call work codes can be up to 16 digits in length, a Dictionary name can only
be assigned to a call work code that is 9 digits in length.
Administration July 2007
97
Page 98

Chapter 3: Using the Dictionary to name contact center entities
Adding a name to a call work code
To add a name to a call work code:
1. From the Controller Window, select Commands > Dictionary.
Supervisor displays the Dictionary window.
2. In the Operations: list, highlight Call Work Codes.
3. In the ACD: field, enter the ACD on which the call work code resides.
4. Select OK.
Supervisor displays the Dictionary Call Work Codes window.
5. In the Call work code name: field, enter the name of the of the new call work code.
6. In the Call work code: field, enter the number of the of the new call work code.
7. From the Actions menu, select Add.
The specified call work code and its associated name is added to the Dictionary.
98 Administration July 2007
Page 99

Viewing a call work code name
To view the name assigned to a call work code in the Dictionary:
1. From the Controller Window, select Commands > Dictionary.
Supervisor displays the Dictionary window.
Call work codes
2. In the Operations: list, highlight Call Work Codes.
3. In the ACD: field, enter the ACD on which the call work code resides.
4. Select OK.
Supervisor displays the Dictionary Call Work Codes window.
5. To find a call work code name to view, only one of the fields requires a call work code to be
specified. Perform one of the following actions to specify an existing call work code in the
Dictionary:
● In the Call work code name: field, enter the name of the call work code.
● In the Call work code: field, enter the number of the of the call work code.
6. From the Actions menu, select Find One.
Supervisor retrieves and displays the information for the specified call work code, if valid.
Administration July 2007
99
Page 100

Chapter 3: Using the Dictionary to name contact center entities
Listing all call work code names
To list all call work code names in the Dictionary:
1. From the Controller Window, select Commands > Dictionary.
Supervisor displays the Dictionary window.
2. In the Operations: list, highlight Call Work Codes.
3. In the ACD: field, enter the ACD on which the call work codes reside.
4. Select OK.
Supervisor displays the Dictionary Call Work Codes window.
5. From the Actions menu, select List All.
100 Administration July 2007
 Loading...