

Avaya Aura 5300 User Manual

Avaya Aura® Application Server 5300
Office Client User Guide
Release 3.0
NN42040-114
Issue 03.04
October 2017

©
2008-2017, Avaya Inc.
All Rights Reserved.
Notice
While reasonable efforts have been made to ensure that the
information in this document is complete and accurate at the time of
printing, Avaya assumes no liability for any errors. Avaya reserves
the right to make changes and corrections to the information in this
document without the obligation to notify any person or organization
of such changes.
Documentation disclaimer
“Documentation” means information published in varying mediums
which may include product information, operating instructions and
performance specifications that are generally made available to users
of products. Documentation does not include marketing materials.
Avaya shall not be responsible for any modifications, additions, or
deletions to the original published version of Documentation unless
such modifications, additions, or deletions were performed by or on
the express behalf of Avaya. End User agrees to indemnify and hold
harmless Avaya, Avaya's agents, servants and employees against all
claims, lawsuits, demands and judgments arising out of, or in
connection with, subsequent modifications, additions or deletions to
this documentation, to the extent made by End User.
Link disclaimer
Avaya is not responsible for the contents or reliability of any linked
websites referenced within this site or Documentation provided by
Avaya. Avaya is not responsible for the accuracy of any information,
statement or content provided on these sites and does not
necessarily endorse the products, services, or information described
or offered within them. Avaya does not guarantee that these links will
work all the time and has no control over the availability of the linked
pages.
Warranty
Avaya provides a limited warranty on Avaya hardware and software.
Refer to your sales agreement to establish the terms of the limited
warranty. In addition, Avaya’s standard warranty language, as well as
information regarding support for this product while under warranty is
available to Avaya customers and other parties through the Avaya
Support website:
https://support.avaya.com/helpcenter/
getGenericDetails?detailId=C20091120112456651010 under the link
“Warranty & Product Lifecycle” or such successor site as designated
by Avaya. Please note that if You acquired the product(s) from an
authorized Avaya Channel Partner outside of the United States and
Canada, the warranty is provided to You by said Avaya Channel
Partner and not by Avaya.
“Hosted Service” means an Avaya hosted service subscription that
You acquire from either Avaya or an authorized Avaya Channel
Partner (as applicable) and which is described further in Hosted SAS
or other service description documentation regarding the applicable
hosted service. If You purchase a Hosted Service subscription, the
foregoing limited warranty may not apply but You may be entitled to
support services in connection with the Hosted Service as described
further in your service description documents for the applicable
Hosted Service. Contact Avaya or Avaya Channel Partner (as
applicable) for more information.
Hosted Service
THE FOLLOWING APPLIES ONLY IF YOU PURCHASE AN AVAYA
HOSTED SERVICE SUBSCRIPTION FROM AVAYA OR AN AVAYA
CHANNEL PARTNER (AS APPLICABLE), THE TERMS OF USE
FOR HOSTED SERVICES ARE AVAILABLE ON THE AVAYA
WEBSITE,
HTTPS://SUPPORT.AVAYA.COM/LICENSEINFO UNDER
THE LINK “Avaya Terms of Use for Hosted Services” OR SUCH
SUCCESSOR SITE AS DESIGNATED BY AVAYA, AND ARE
APPLICABLE TO ANYONE WHO ACCESSES OR USES THE
HOSTED SERVICE. BY ACCESSING OR USING THE HOSTED
SERVICE, OR AUTHORIZING OTHERS TO DO SO, YOU, ON
BEHALF OF YOURSELF AND THE ENTITY FOR WHOM YOU ARE
DOING SO (HEREINAFTER REFERRED TO INTERCHANGEABLY
AS “YOU” AND “END USER”), AGREE TO THE TERMS OF USE. IF
YOU ARE ACCEPTING THE TERMS OF USE ON BEHALF A
COMPANY OR OTHER LEGAL ENTITY, YOU REPRESENT THAT
YOU HAVE THE AUTHORITY TO BIND SUCH ENTITY TO THESE
TERMS OF USE. IF YOU DO NOT HAVE SUCH AUTHORITY, OR IF
YOU DO NOT WISH TO ACCEPT THESE TERMS OF USE, YOU
MUST NOT ACCESS OR USE THE HOSTED SERVICE OR
AUTHORIZE ANYONE TO ACCESS OR USE THE HOSTED
SERVICE.
Licenses
THE SOFTWARE LICENSE TERMS AVAILABLE ON THE AVAYA
WEBSITE,
HTTPS://SUPPORT.AVAYA.COM/LICENSEINFO,
UNDER THE LINK “AVAYA SOFTWARE LICENSE TERMS (Avaya
Products)” OR SUCH SUCCESSOR SITE AS DESIGNATED BY
AVAYA, ARE APPLICABLE TO ANYONE WHO DOWNLOADS,
USES AND/OR INSTALLS AVAYA SOFTWARE, PURCHASED
FROM AVAYA INC., ANY AVAYA AFFILIATE, OR AN AVAYA
CHANNEL PARTNER (AS APPLICABLE) UNDER A COMMERCIAL
AGREEMENT WITH AVAYA OR AN AVAYA CHANNEL PARTNER.
UNLESS OTHERWISE AGREED TO BY AVAYA IN WRITING,
AVAYA DOES NOT EXTEND THIS LICENSE IF THE SOFTWARE
WAS OBTAINED FROM ANYONE OTHER THAN AVAYA, AN AVAYA
AFFILIATE OR AN AVAYA CHANNEL PARTNER; AVAYA
RESERVES THE RIGHT TO TAKE LEGAL ACTION AGAINST YOU
AND ANYONE ELSE USING OR SELLING THE SOFTWARE
WITHOUT A LICENSE. BY INSTALLING, DOWNLOADING OR
USING THE SOFTWARE, OR AUTHORIZING OTHERS TO DO SO,
YOU, ON BEHALF OF YOURSELF AND THE ENTITY FOR WHOM
YOU ARE INSTALLING, DOWNLOADING OR USING THE
SOFTWARE (HEREINAFTER REFERRED TO
INTERCHANGEABLY AS “YOU” AND “END USER”), AGREE TO
THESE TERMS AND CONDITIONS AND CREATE A BINDING
CONTRACT BETWEEN YOU AND AVAYA INC. OR THE
APPLICABLE AVAYA AFFILIATE (“AVAYA”).
Avaya grants You a license within the scope of the license types
described below, with the exception of Heritage Nortel Software, for
which the scope of the license is detailed below. Where the order
documentation does not expressly identify a license type, the
applicable license will be a Designated System License as set forth
below in the Designated System(s) License (DS) section as
applicable. The applicable number of licenses and units of capacity
for which the license is granted will be one (1), unless a different
number of licenses or units of capacity is specified in the
documentation or other materials available to You. “Software” means
computer programs in object code, provided by Avaya or an Avaya
Channel Partner, whether as stand-alone products, pre-installed on
hardware products, and any upgrades, updates, patches, bug fixes,
or modified versions thereto. “Designated Processor” means a single
stand-alone computing device. “Server” means a set of Designated
Processors that hosts (physically or virtually) a software application
to be accessed by multiple users. “Instance” means a single copy of
the Software executing at a particular time: (i) on one physical
machine; or (ii) on one deployed software virtual machine (“VM”) or
similar deployment.
License types
Named User License (NU). You may: (i) install and use each copy or
Instance of the Software on a single Designated Processor or Server
per authorized Named User (defined below); or (ii) install and use
each copy or Instance of the Software on a Server so long as only
authorized Named Users access and use the Software. “Named
User”, means a user or device that has been expressly authorized by
Avaya to access and use the Software. At Avaya’s sole discretion, a
“Named User” may be, without limitation, designated by name,
corporate function (e.g., webmaster or helpdesk), an e-mail or voice
mail account in the name of a person or corporate function, or a
directory entry in the administrative database utilized by the Software
that permits one user to interface with the Software.
Heritage Nortel Software
“Heritage Nortel Software” means the software that was acquired by
Avaya as part of its purchase of the Nortel Enterprise Solutions
Business in December 2009. The Heritage Nortel Software is the
software contained within the list of Heritage Nortel Products located
https://support.avaya.com/LicenseInfo under the link “Heritage
at
Nortel Products” or such successor site as designated by Avaya. For
Heritage Nortel Software, Avaya grants Customer a license to use
Heritage Nortel Software provided hereunder solely to the extent of
the authorized activation or authorized usage level, solely for the
purpose specified in the Documentation, and solely as embedded in,
for execution on, or for communication with Avaya equipment.

Charges for Heritage Nortel Software may be based on extent of
activation or use authorized as specified in an order or invoice.
Copyright
Except where expressly stated otherwise, no use should be made of
materials on this site, the Documentation, Software, Hosted Service,
or hardware provided by Avaya. All content on this site, the
documentation, Hosted Service, and the product provided by Avaya
including the selection, arrangement and design of the content is
owned either by Avaya or its licensors and is protected by copyright
and other intellectual property laws including the sui generis rights
relating to the protection of databases. You may not modify, copy,
reproduce, republish, upload, post, transmit or distribute in any way
any content, in whole or in part, including any code and software
unless expressly authorized by Avaya. Unauthorized reproduction,
transmission, dissemination, storage, and or use without the express
written consent of Avaya can be a criminal, as well as a civil offense
under the applicable law.
Virtualization
The following applies if the product is deployed on a virtual machine.
Each product has its own ordering code and license types. Note,
unless otherwise stated, that each Instance of a product must be
separately licensed and ordered. For example, if the end user
customer or Avaya Channel Partner would like to install two
Instances of the same type of products, then two products of that
type must be ordered.
Third Party Components
“Third Party Components” mean certain software programs or
portions thereof included in the Software or Hosted Service may
contain software (including open source software) distributed under
third party agreements (“Third Party Components”), which contain
terms regarding the rights to use certain portions of the Software
(“Third Party Terms”). As required, information regarding distributed
Linux OS source code (for those products that have distributed Linux
OS source code) and identifying the copyright holders of the Third
Party Components and the Third Party Terms that apply is available
in the products, Documentation or on Avaya’s website at:
support.avaya.com/Copyright or such successor site as designated
by Avaya. The open source software license terms provided as Third
Party Terms are consistent with the license rights granted in these
Software License Terms, and may contain additional rights benefiting
You, such as modification and distribution of the open source
software. The Third Party Terms shall take precedence over these
Software License Terms, solely with respect to the applicable Third
Party Components to the extent that these Software License Terms
impose greater restrictions on You than the applicable Third Party
Terms.
The following applies only if the H.264 (AVC) codec is distributed with
the product. THIS PRODUCT IS LICENSED UNDER THE AVC
PATENT PORTFOLIO LICENSE FOR THE PERSONAL USE OF A
CONSUMER OR OTHER USES IN WHICH IT DOES NOT RECEIVE
REMUNERATION TO (i) ENCODE VIDEO IN COMPLIANCE WITH
THE AVC STANDARD (“AVC VIDEO”) AND/OR (ii) DECODE AVC
VIDEO THAT WAS ENCODED BY A CONSUMER ENGAGED IN A
PERSONAL ACTIVITY AND/OR WAS OBTAINED FROM A VIDEO
PROVIDER LICENSED TO PROVIDE AVC VIDEO. NO LICENSE IS
GRANTED OR SHALL BE IMPLIED FOR ANY OTHER USE.
ADDITIONAL INFORMATION MAY BE OBTAINED FROM MPEG LA,
L.L.C. SEE
Service Provider
THE FOLLOWING APPLIES TO AVAYA CHANNEL PARTNER’S
HOSTING OF AVAYA PRODUCTS OR SERVICES. THE PRODUCT
OR HOSTED SERVICE MAY USE THIRD PARTY COMPONENTS
SUBJECT TO THIRD PARTY TERMS AND REQUIRE A SERVICE
PROVIDER TO BE INDEPENDENTLY LICENSED DIRECTLY FROM
THE THIRD PARTY SUPPLIER. AN AVAYA CHANNEL PARTNER’S
HOSTING OF AVAYA PRODUCTS MUST BE AUTHORIZED IN
WRITING BY AVAYA AND IF THOSE HOSTED PRODUCTS USE
OR EMBED CERTAIN THIRD PARTY SOFTWARE, INCLUDING
BUT NOT LIMITED TO MICROSOFT SOFTWARE OR CODECS,
THE AVAYA CHANNEL PARTNER IS REQUIRED TO
INDEPENDENTLY OBTAIN ANY APPLICABLE LICENSE
AGREEMENTS, AT THE AVAYA CHANNEL PARTNER’S EXPENSE,
DIRECTLY FROM THE APPLICABLE THIRD PARTY SUPPLIER.
HTTP://WWW.MPEGLA.COM.
https://
WITH RESPECT TO CODECS, IF THE AVAYA CHANNEL
PARTNER IS HOSTING ANY PRODUCTS THAT USE OR EMBED
THE G.729 CODEC, H.264 CODEC, OR H.265 CODEC, THE
AVAYA CHANNEL PARTNER ACKNOWLEDGES AND AGREES
THE AVAYA CHANNEL PARTNER IS RESPONSIBLE FOR ANY
AND ALL RELATED FEES AND/OR ROYALTIES. THE G.729
CODEC IS LICENSED BY SIPRO LAB TELECOM INC. SEE
WWW.SIPRO.COM/CONTACT.HTML. THE H.264 (AVC) CODEC IS
LICENSED UNDER THE AVC PATENT PORTFOLIO LICENSE FOR
THE PERSONAL USE OF A CONSUMER OR OTHER USES IN
WHICH IT DOES NOT RECEIVE REMUNERATION TO: (I) ENCODE
VIDEO IN COMPLIANCE WITH THE AVC STANDARD (“AVC
VIDEO”) AND/OR (II) DECODE AVC VIDEO THAT WAS ENCODED
BY A CONSUMER ENGAGED IN A PERSONAL ACTIVITY AND/OR
WAS OBTAINED FROM A VIDEO PROVIDER LICENSED TO
PROVIDE AVC VIDEO. NO LICENSE IS GRANTED OR SHALL BE
IMPLIED FOR ANY OTHER USE. ADDITIONAL INFORMATION
FOR H.264 (AVC) AND H.265 (HEVC) CODECS MAY BE
OBTAINED FROM MPEG LA, L.L.C. SEE
WWW.MPEGLA.COM.
Compliance with Laws
You acknowledge and agree that it is Your responsibility for
complying with any applicable laws and regulations, including, but not
limited to laws and regulations related to call recording, data privacy,
intellectual property, trade secret, fraud, and music performance
rights, in the country or territory where the Avaya product is used.
Preventing Toll Fraud
“Toll Fraud” is the unauthorized use of your telecommunications
system by an unauthorized party (for example, a person who is not a
corporate employee, agent, subcontractor, or is not working on your
company's behalf). Be aware that there can be a risk of Toll Fraud
associated with your system and that, if Toll Fraud occurs, it can
result in substantial additional charges for your telecommunications
services.
Avaya Toll Fraud intervention
If You suspect that You are being victimized by Toll Fraud and You
need technical assistance or support, call Technical Service Center
Toll Fraud Intervention Hotline at +1-800-643-2353 for the United
States and Canada. For additional support telephone numbers, see
the Avaya Support website:
successor site as designated by Avaya.
Security Vulnerabilities
Information about Avaya’s security support policies can be found in
the Security Policies and Support section of
support.avaya.com/security.
Suspected Avaya product security vulnerabilities are handled per the
Avaya Product Security Support Flow (
support.avaya.com/css/P8/documents/100161515).
Downloading Documentation
For the most current versions of Documentation, see the Avaya
Support website:
as designated by Avaya.
Contact Avaya Support
See the Avaya Support website:
product or Hosted Service notices and articles, or to report a problem
with your Avaya product or Hosted Service. For a list of support
telephone numbers and contact addresses, go to the Avaya Support
website: https://support.avaya.com (or such successor site as
designated by Avaya), scroll to the bottom of the page, and select
Contact Avaya Support.
Trademarks
The trademarks, logos and service marks (“Marks”) displayed in this
site, the Documentation, Hosted Service(s), and product(s) provided
by Avaya are the registered or unregistered Marks of Avaya, its
affiliates, its licensors, its suppliers, or other third parties. Users are
not permitted to use such Marks without prior written consent from
Avaya or such third party which may own the Mark. Nothing
contained in this site, the Documentation, Hosted Service(s) and
product(s) should be construed as granting, by implication, estoppel,
https://support.avaya.com, or such successor site
https://support.avaya.com or such
https://support.avaya.com for
HTTP://
https://
https://

or otherwise, any license or right in and to the Marks without the
express written permission of Avaya or the applicable third party.
Avaya is a registered trademark of Avaya Inc.
All non-Avaya trademarks are the property of their respective owners.
Linux® is the registered trademark of Linus Torvalds in the U.S. and
other countries.
Java is a registered trademark of Oracle and/or its affiliates.

Contents
Chapter 1: Welcome............................................................................................................... 10
Your AS 5300 Office Client..................................................................................................... 10
New in this release................................................................................................................ 11
Other changes................................................................................................................. 11
AS 5300 Office Client configurations....................................................................................... 12
AS 5300 Office Client...................................................................................................... 12
Multimedia Client Set....................................................................................................... 12
AS 5300 Office Client without voice.................................................................................. 13
Text and graphics conventions................................................................................................ 13
Related publications.............................................................................................................. 14
How to get help..................................................................................................................... 14
Chapter 2: Getting Started..................................................................................................... 15
Before you begin................................................................................................................... 15
Minimum recommended hardware and operating system requirements............................... 15
Optional hardware........................................................................................................... 16
Software requirements..................................................................................................... 16
Recommended Microsoft Outlook configurations................................................................ 17
Limitations and restrictions............................................................................................... 17
Installing the AS 5300 Office Client......................................................................................... 18
Launching the AS 5300 Office Client....................................................................................... 19
Logging on to the AS 5300 Office Client............................................................................ 19
Understanding the AS 5300 Office Client interface................................................................... 20
Multimedia main menu..................................................................................................... 21
Multimedia toolbar........................................................................................................... 22
Notification toolbar........................................................................................................... 23
Shortcut menu................................................................................................................ 24
System tray menu........................................................................................................... 24
Avaya Aura® Application Server 5300 Office Client folder group.......................................... 25
AS 5300 Office Client using Microsoft Outlook 2000................................................................. 25
Chapter 3: Multimedia communication................................................................................. 26
Making a call......................................................................................................................... 26
Sending and receiving video............................................................................................ 27
Making a voice call.......................................................................................................... 27
Making a video call.......................................................................................................... 28
Receiving a call..................................................................................................................... 30
Incoming call................................................................................................................... 30
Answering a call.................................................................................................................... 30
Answering a voice call..................................................................................................... 31
Answering a video call..................................................................................................... 32
October 2017 Avaya Aura® Application Server 5300 Office Client User Guide 5
Comments on this document? infodev@avaya.com

Contents
Disabling call waiting....................................................................................................... 32
Ending a call......................................................................................................................... 32
Holding a call........................................................................................................................ 33
Retrieving a held call............................................................................................................. 33
Parking a call........................................................................................................................ 34
Parking a call in a general lot............................................................................................ 34
Parking call against a user............................................................................................... 34
Retrieving a parked call......................................................................................................... 35
Picking up a call.................................................................................................................... 35
Picking up a group call..................................................................................................... 35
Transferring a call.................................................................................................................. 36
Transferring a call using blind transfer............................................................................... 36
Transferring a call using consult transfer........................................................................... 36
Transferring a call to voice mail........................................................................................ 37
Conference calling................................................................................................................. 37
Creating a conference..................................................................................................... 38
Leaving a conference...................................................................................................... 38
Controlling a call with the Avaya USB headset......................................................................... 38
Instant messaging................................................................................................................. 39
Sending an instant message............................................................................................ 40
Replying to an instant message........................................................................................ 41
Querying the presence of a user in an instant message conversation window...................... 41
Clearing your instant messages history............................................................................. 42
Using voice mail.................................................................................................................... 42
Message Waiting Indicator............................................................................................... 43
Accessing your voice mail box.......................................................................................... 43
Using voice mail functions................................................................................................ 43
Chapter 4: Presence............................................................................................................... 45
Understanding presence........................................................................................................ 45
Using Automatic presence............................................................................................... 46
Presence watch authorization........................................................................................... 46
Viewing your Presence watchers list................................................................................. 47
Managing your presence........................................................................................................ 47
Changing your presence state from the Multimedia menu................................................... 48
Changing your presence state from the Multimedia toolbar................................................. 48
Changing your presence state from the system tray menu.................................................. 48
Creating custom presence state notes.............................................................................. 49
Routing your calls based on your presence state............................................................... 49
Banning users from viewing your presence state................................................................ 49
Chapter 5: Managing your contacts and calls..................................................................... 50
Managing your call logs......................................................................................................... 50
Checking your Incoming Calls folder................................................................................. 50
Responding to a caller..................................................................................................... 51
October 2017 Avaya Aura® Application Server 5300 Office Client User Guide 6
Comments on this document? infodev@avaya.com

Contents
Acknowledging missed call entries.................................................................................... 51
Checking your Outgoing Calls folder................................................................................. 52
Deleting call log entries.................................................................................................... 52
Saving call log entries...................................................................................................... 52
Managing your contacts......................................................................................................... 53
Communicating with users from other communities............................................................ 54
Viewing your contact........................................................................................................ 54
Contact entry commands................................................................................................. 55
Adding new contacts using the contact details window....................................................... 55
Adding new contacts by importing from the global address book......................................... 56
Viewing a contact entry.................................................................................................... 58
Editing a contact entry..................................................................................................... 58
Deleting a contact entry................................................................................................... 59
Managing groups of Friends................................................................................................... 59
Adding a new group......................................................................................................... 60
Removing a contact group............................................................................................... 60
Managing your Friends.......................................................................................................... 61
Viewing your Friends....................................................................................................... 61
Friends entry commands.................................................................................................. 62
Adding a Friend to the Friends display.............................................................................. 62
Removing a Friend.......................................................................................................... 63
Chapter 6: Sharing.................................................................................................................. 64
Understanding sharing........................................................................................................... 64
Starting a sharing conversation.............................................................................................. 65
Starting a sharing conversation during a call...................................................................... 65
Starting a sharing conversation without a call.................................................................... 65
Ending a sharing conversation................................................................................................ 66
Sending web pages............................................................................................................... 66
Pushing a web page to another party on an active call....................................................... 66
Pushing a web page to another party not on an active call.................................................. 67
Receiving web pages....................................................................................................... 67
Co-browsing web pages................................................................................................... 68
Sending files......................................................................................................................... 68
Sending and receiving files............................................................................................... 69
Receiving files................................................................................................................. 69
Accessing received files................................................................................................... 70
Sharing a whiteboard ............................................................................................................ 70
Sending a share whiteboard request................................................................................. 70
Receiving a share whiteboard request............................................................................... 71
Using the whiteboard ...................................................................................................... 71
Saving whiteboard drawings............................................................................................. 72
Restoring whiteboard drawings ........................................................................................ 72
Transferring the clipboard...................................................................................................... 73
October 2017 Avaya Aura® Application Server 5300 Office Client User Guide 7
Comments on this document? infodev@avaya.com

Contents
Placing content in the Windows clipboard ......................................................................... 73
Sending clipboard data ................................................................................................... 73
Receiving a transfer clipboard request ............................................................................. 74
Using or saving the received clipboard data....................................................................... 74
Chapter 7: Advanced setup................................................................................................... 76
Configuring your preferences................................................................................................. 76
Configuring user preferences........................................................................................... 77
Configuring connection preferences.................................................................................. 78
Configuring network preferences...................................................................................... 78
Configuring ring tones preferences................................................................................... 79
Configuring audio devices preferences.............................................................................. 80
Configuring audio preferences.......................................................................................... 80
Configuring video preferences (optional)........................................................................... 81
Configuring voice mail preferences................................................................................... 91
Configuring a Avaya IP Deskphone (optional).................................................................... 92
Configuring file exchange preferences (optional)................................................................ 93
Configuring presence preferences ................................................................................... 93
Configuring instant messaging preferences ...................................................................... 94
Specifying calls preferences ............................................................................................ 95
Specifying system preferences ........................................................................................ 97
Specifying miscellaneous preferences............................................................................... 97
Specifying user interface preferences ............................................................................... 98
Specifying MS Office preference ...................................................................................... 98
Using the Audio Wizard to configure audio volume .................................................................. 99
Installing QoS enhancement (optional) ................................................................................. 100
Configuring multiple profiles................................................................................................. 100
Adding a profile............................................................................................................. 101
Removing a profile........................................................................................................ 101
Automatic software updates................................................................................................. 102
Manually checking for software updates ............................................................................... 102
Uninstalling the AS 5300 Office Client................................................................................... 103
Uninstalling the AS 5300 Office Client using Add/Remove programs................................. 103
Chapter 8: Troubleshooting................................................................................................. 105
Troubleshooting performance problems................................................................................ 105
Troubleshooting audio problems .......................................................................................... 105
Echo............................................................................................................................ 105
No voice....................................................................................................................... 106
Distorted voice.............................................................................................................. 106
Cannot speak when the other party is speaking .............................................................. 107
Cannot hear with headphones ....................................................................................... 107
Choppy audio when using a USB headset ...................................................................... 107
Troubleshooting IP Deskphone configuration problems .......................................................... 107
Private IP address with IP Deskphone ............................................................................ 107
October 2017 Avaya Aura® Application Server 5300 Office Client User Guide 8
Comments on this document? infodev@avaya.com

Contents
Troubleshooting calling and messaging problems ................................................................. 108
Cannot complete call .................................................................................................... 108
Voicemail button is disabled .......................................................................................... 108
Troubleshooting Sharing problems ....................................................................................... 108
Cannot send a copied file using Send Clipboard ............................................................. 109
Cannot paste from my clipboard into my whiteboard ........................................................ 109
Web co-browsing does not work .................................................................................... 109
Troubleshooting Video problems .......................................................................................... 109
Blurry video................................................................................................................... 109
Poor color, contrast, or brightness................................................................................... 109
Adding a new video camera ........................................................................................... 110
No Codecs video message............................................................................................. 110
Camera switches to receive-only .................................................................................... 111
Blue screen error .......................................................................................................... 111
Chapter 9: Hardware notes.................................................................................................. 112
Compatible video cameras and headsets.............................................................................. 112
Compatibility with the client application ................................................................................. 112
Chapter 10: Terms you should know.................................................................................. 114
Terms................................................................................................................................. 114
Address........................................................................................................................ 114
Call logs........................................................................................................................ 114
Conference................................................................................................................... 114
Conversation................................................................................................................. 115
Friends......................................................................................................................... 115
Global address book...................................................................................................... 115
Personal address book.................................................................................................. 116
Presence...................................................................................................................... 116
Proxy server.................................................................................................................. 116
Services........................................................................................................................ 116
Acronyms............................................................................................................................ 117
October 2017 Avaya Aura® Application Server 5300 Office Client User Guide 9
Comments on this document? infodev@avaya.com

Chapter 1: Welcome
The Avaya Aura® AS 5300 Office Client User Guide provides you with the instructions to get up and
run with this product. This guide also describes the capabilities of the Avaya Aura® AS 5300 Office
Client.
Topics include:
• Getting Started on page 15
• Multimedia communication on page 26
• Presence on page 45
•
Managing your contacts and calls on page 50
• Sharing on page 64
• Advanced setup on page 76
• Troubleshooting on page 105
• Hardware notes on page 112
•
Terms you should know on page 114
Topics in this section include:
Your AS 5300 Office Client on page 10
•
•
New in this release on page 11
• AS 5300 Office Client configurations on page 12
• Text and graphics conventions on page 13
• Related publications on page 14
• How to get help on page 14
Your AS 5300 Office Client
The Avaya Aura® AS 5300 Office Client is a Microsoft Outlook plug-in. It provides the features of the
Avaya Aura® AS 5300 UC Client within Microsoft Outlook. This transforms the e-mail application into
a complete communications center that provides the following advanced IP telephony features:
• SIP calls: to make calls from inside Outlook
October 2017 Avaya Aura® Application Server 5300 Office Client User Guide 10
Comments on this document? infodev@avaya.com

New in this release
• advanced call logging: to keep track of incoming, outgoing, and missed calls in Outlook folders
• personal address book: to use Outlook contacts as your Avaya Aura® AS 5300 Office Client
directory
• presence: to see who is online and let others know that you are online
• control of Avaya IP Deskphones
• file transfer: to send files to and receive files from contacts with a SIP address
• sharing tools: to push web pages, whiteboards, and clipboards
• call handling: to decline, redirect, or ignore incoming calls
• instant messaging: to send and receive text messages
• conference calls (requires network conference server)
• web collaboration (requires network web collaboration server)
This guide describes all services and features available on the Avaya Aura® AS 5300 Office Client,
although the actual set of services and features available to you are determined by your
administrator or service provider.
New in this release
The following section detail what’s new in Avaya Aura® Application Server 5300 Office Client User
Guide, NN42040–114 for Avaya Aura® Application Server 5300 Release 3.0.
• Other changes on page 11
Other changes
This book has been reformatted to conform with new standards.
Revision history
October 2017
March 2013 Standard 03.02.
September 2012 Standard 03.01. This document is issued to support Avaya Aura® Application Server
July 2010 Standard 01.03. This document is issued to support Avaya Aura® Application Server
Updated the legal page for Avaya Aura® Application Server 5300 Release 3.0.
This document is issued to support Avaya Aura® Application Server 5300 Release
3.0.
Made editorial corrections.
5300 Release 3.0.
5300 Release 2.0. Editorial changes were made.
Table continues…
October 2017 Avaya Aura® Application Server 5300 Office Client User Guide 11
Comments on this document? infodev@avaya.com

Welcome
May 2010 Standard 01.02. This document is issued to support Avaya Aura® Application Server
5300 Release 2.0. Editorial changes were made.
April 2010 Standard 01.01. This document is issued to support Avaya Aura® Application Server
5300 Release 2.0.
AS 5300 Office Client configurations
The Avaya Aura® AS 5300 Office Client is available in four configurations:
• AS 5300 Office Client on page 12
• Multimedia Client Set on page 12
• AS 5300 Office Client without voice on page 13
AS 5300 Office Client
The Avaya Aura® AS 5300 Office Client is a software application that transforms your PC into a
telephony and multimedia communications tool. This software application runs on your PC with
Microsoft Outlook and provides access to SIP features and multimedia services.
Most users use a headset to speak and hear during calls. Optionally, you can use a separate
microphone and your computer’s speakers for the voice part of the call (not recommended in open
office environments).
Tip:
Keep the Avaya Aura® AS 5300 Office Client running in the background whenever you are using
your computer so you can easily accept incoming calls.
Multimedia Client Set
When the Avaya Aura® AS 5300 Office Client controls a Avaya IP Deskphone, the configuration is
called a Multimedia Client Set. The IP Deskphone provides premium-quality voice, while your
computer is dedicated to the data and video components of the multimedia conversation.
The Multimedia Client Set is ideal when your conversations include processing-intensive tasks such
as real-time video, which would otherwise consume the bandwidth (CPU and network) required for
voice processing.
To configure the Avaya Aura® AS 5300 Office Client to control your IP Deskphone, see Configuring
a Avaya IP Deskphone (optional) on page 92.
October 2017 Avaya Aura® Application Server 5300 Office Client User Guide 12
Comments on this document? infodev@avaya.com

Text and graphics conventions
AS 5300 Office Client without voice
When your Avaya Aura® AS 5300 Office Client is not enabled for voice, you cannot make voice or
video calls. Consequently, Call, Call context menus, Incoming Calls, Outgoing Calls, and all options
requiring voice or video capability are unavailable to you. However, you can use your Avaya Aura
AS 5300 Office Client without voice for sending and receiving instant messages and for starting a
collaboration session, which enables you to send files, transfer clipboard, send a web page, and
share whiteboard with another user.
Your system administrator manages the ability to use voice.
Text and graphics conventions
This guide uses the following text conventions:
®
bold text Indicates the command key or link you need to press or click. Examples: Press ENTER.
Click Help.
italic text Indicates new terms and document titles for reference.
Avaya Aura® AS 5300 Office Client documentation shows Internet Explorer as the default browser.
However, if you are using another browser (for example, Firefox), your screen may look slightly
different. Also, screen captures and menus show the full content of the Avaya Aura® AS 5300 Office
Client functionality. Additionally, your screen may look different depending upon your operating
system, such as Windows XP, Windows Vista, or Windows 7.
Screen captures in the Avaya Aura® AS 5300 Office Client document use Microsoft Outlook 2003,
unless otherwise specified. If you are using another version of Microsoft Outlook, your screen may
look different.
Screen captures in the Avaya Aura® AS 5300 Office Client document show Internet Explorer as the
default browser. However, if you are using another browser (for example, Firefox), your screen can
look slightly different.
The interface that is presented in this document may or may not be fully present, based upon what
is enabled by your administrator and the services and service sets assigned to you.
Avaya recommends that you keep your client open when you follow the steps described in this
document.
October 2017 Avaya Aura® Application Server 5300 Office Client User Guide 13
Comments on this document? infodev@avaya.com

Welcome
Related publications
The following publications are related to this document:
• Avaya Aura® Application Server 5300 Personal Agent User Guide, (NN42040-105).
• Avaya Aura® Application Server 5300 UC Client User Guide, (NN42040-107)
How to get help
For services issues, contact your local support or Information Services team.
October 2017 Avaya Aura® Application Server 5300 Office Client User Guide 14
Comments on this document? infodev@avaya.com

Chapter 2: Getting Started
This chapter describes getting started with your Avaya Aura® AS 5300 Office Client.
This chapter includes the following topics:
Before you begin on page 15
•
•
Installing the AS 5300 Office Client on page 18
• Launching the AS 5300 Office Client on page 19
• Understanding the AS 5300 Office Client interface on page 20
• AS 5300 Office Client using Microsoft Outlook 2000 on page 25
Before you begin
You need the following items to start using the Avaya Aura® AS 5300 Office Client:
• a PC configured with the required minimum software and hardware, as described in the
following section
• network access with a connection that meets the minimum transmission speed requirements,
as described in the following section
• Application Server 5300 account and proxy information
Warning:
You cannot run the Avaya Aura® AS 5300 Office Client and the Avaya Aura® AS 5300 UC Client
at the same time.
Minimum recommended hardware and operating system requirements
• 1-GHz (or higher) Pentium-class or equivalent processor
• Windows XP, Windows Vista, or Windows 7
• 56-kbit/s modem or faster network connection (Cable modem, DSL, or 10base-T Ethernet
connection provides a better user experience.)
October 2017 Avaya Aura® Application Server 5300 Office Client User Guide 15
Comments on this document? infodev@avaya.com

Getting Started
• Full-duplex sound card with headset (microphone-headphone combination)
• 256-MB RAM (This requirement is in addition to the memory requirements of the operating
system and other concurrent applications.)
• 75-MB free hard disk space
• 800x600 @16bpp (65,536 colors) SVGA or better video graphics card and monitor
• mouse or any pointing device
Optional hardware
The optional hardware required includes:
• Avaya IP Deskphone
• USB-based video camera (webcam). A 16bpp (65,536) VGA or better video graphics mode is
required to send video. See Compatible video cameras and headsets on page 112 for more
information about video camera support.
• Web browser for automatic web push (Internet Explorer 6.0 and above or Firefox 2.0 and
above)
Tip:
Using a USB headset for voice communication together with a USB video camera for video
communication can have a significant effect on voice quality, or produce a blue screen error.
Software requirements
Avaya Aura® AS 5300 Office Client supports the following Outlook releases on compatible operating
systems:
• Office 2000
• Office 2002
• Office 2003
• Office 2007
The Avaya Aura® AS 5300 Office Client runs on the following operating systems:
• Windows XP SP2 (or later SP)
• Windows Vista SP1 (or later SP)
• Windows 7 (or later SP)
Embedded versions of Windows XP and Windows Vista are not supported.
October 2017 Avaya Aura® Application Server 5300 Office Client User Guide 16
Comments on this document? infodev@avaya.com

Before you begin
Recommended Microsoft Outlook configurations
For optimum performance of Microsoft Outlook with the Avaya Aura® AS 5300 Office Client, Avaya
recommends the following configurations.
Microsoft Outlook 2003 and 2007 configuration
Avaya recommends that your Microsoft Exchange e-mail account use Cached Exchange mode for
optimum performance of Microsoft Outlook 2003 or Microsoft Outlook 2007. For information about
configuring your Microsoft Exchange e-mail account to use Cached Exchange mode, contact your
system administrator.
Microsoft Outlook 2000 and 2002 configuration
Avaya recommends that your Microsoft Exchange e-mail account use a local.pst file to store your
messages for optimum performance of Microsoft Outlook 2000 and Microsoft Outlook 2002. For
information about configuring your Microsoft Exchange e-mail account to use a local.pst file, contact
your system administrator.
Limitations and restrictions
• Avaya Aura® AS 5300 Office Client and Avaya Aura® AS 5300 UC Client can be installed on
the same system; however, they cannot be used at the same time. If the Avaya Aura® AS 5300
UC Client is already running, the Avaya Aura® AS 5300 Office Client will not start when Outlook
starts.
• The following Avaya Aura® AS 5300 UC Client features are not available with the Avaya Aura
AS 5300 Office Client:
- chat
- Assistant console
- user-specific ring tones for each address book contact
- access to routes from the toolbar and menu
- customization of the toolbar and menu
• The Avaya Aura® AS 5300 Office Client does not support Multilevel Precedence and
Preemption (MLPP).
®
October 2017 Avaya Aura® Application Server 5300 Office Client User Guide 17
Comments on this document? infodev@avaya.com

Getting Started
Installing the AS 5300 Office Client
About this task
Tip:
Users must have administrator privileges to install clients. After installation, clients can be run in
standard user mode.
For Windows Vista and Windows 7 users, it is important to note that if UAC mode is turned off,
the standard user is not prompted for an administrator user’s password required for successful
installation, which will cause installation failure.
Use this procedure to install the Avaya Aura® AS 5300 Office Client.
Procedure
1. Exit from Microsoft Outlook (if running).
2. Double-click the Avaya Aura® AS 5300 Office Client installation file you downloaded or
received on CD.
3. Click Next.
If your operating system is Windows Vista or Windows 7 and you are a standard user, the
Avaya Aura® AS 5300 Office Client window appears. Otherwise, go to Step 6.
4. Click Continue.
You are prompted to type an administrator user's password.
5. Type the user’s password.
6. At the Welcome screen, click Next.
7. Read the License Agreement.
8. If you do not want to accept the license agreement, select I do not accept the terms in the
license agreement and click Cancel.
9. To install the client, select I accept the terms in the license agreement and click Next.
10. Read the contents of the Information screen and click Next.
11. In the Destination Folder window, click Next. Avaya recommends that you install the Avaya
Aura® AS 5300 Office Client in the default location.
12. Click Install.
13. If a Files in Use window appears because Microsoft Outlook is running, close Microsoft
Outlook and click Retry.
14. In the final Client installation dialog window, select your desired options.
15. Click Finish to complete the installation.
October 2017 Avaya Aura® Application Server 5300 Office Client User Guide 18
Comments on this document? infodev@avaya.com

Launching the AS 5300 Office Client
Launching the AS 5300 Office Client
After you have installed the Avaya Aura® AS 5300 Office Client, it adds new features to Microsoft
Outlook. Double-click the Microsoft Outlook desktop icon (if present) or select Microsoft Outlook
from the Windows Start menu to open the Avaya Aura® AS 5300 Office Client application.
Advanced setup on page 76 for detailed information about how to configure your Avaya Aura
See
AS 5300 Office Client.
Logging on to the AS 5300 Office Client
About this task
If the Avaya Aura® AS 5300 Office Client is not configured to automatically log on, you must log on
manually.
Tip:
If you chose the option to have the Avaya Aura® AS 5300 Office Client automatically start up,
and you configure your network preferences to automatically connect to your proxy server, be
sure to select the Remember my password option so that you do not have to type your
password every time you log on. For more information, see
page 77.
Configuring user preferences on
®
Use this procedure to log in to the Avaya Aura® AS 5300 Office Client.
Procedure
1. From the Microsoft Outlook main menu select Multimedia > Login.
The Log In window appears with your proxy server IP address and your user name.
2. Enter your password.
3. Select the Remember my password check box if you do not want to enter your password
every time you log on.
4. Select the Sign me in automatically check box if you want the Avaya Aura® AS 5300 Office
Client to automatically log on when you open Microsoft Outlook.
Tip:
If you select Remember my password and Sign me in automatically, you are not
prompted to log on again.
If you log off from the Avaya Aura® AS 5300 Office Client without closing Microsoft
Outlook and you want to log on again, you are not prompted for your password when
you select Multimedia > Login.
5. Select your Location.
The physical location you choose becomes your default location whenever you log on to the
Avaya Aura® AS 5300 Office Client until you decide to change it again.
October 2017 Avaya Aura® Application Server 5300 Office Client User Guide 19
Comments on this document? infodev@avaya.com

Getting Started
Caution:
You must provide the correct location information on your Avaya Aura® AS 5300 Office
Client; otherwise, some services, such as emergency and conferencing services, may
not work properly. For example, the location you choose determines where you are
during an emergency. If you choose Other as your default location, and you have to
make an emergency call, the emergency call may route to the incorrect Public Safety
Answering Point (PSAP).
6. Click OK.
Tip:
If you want to change your location while signed in to the Avaya Aura® AS 5300 Office
Client, select Multimedia > Preferences and then select the User list item. Click
Change to change your location.
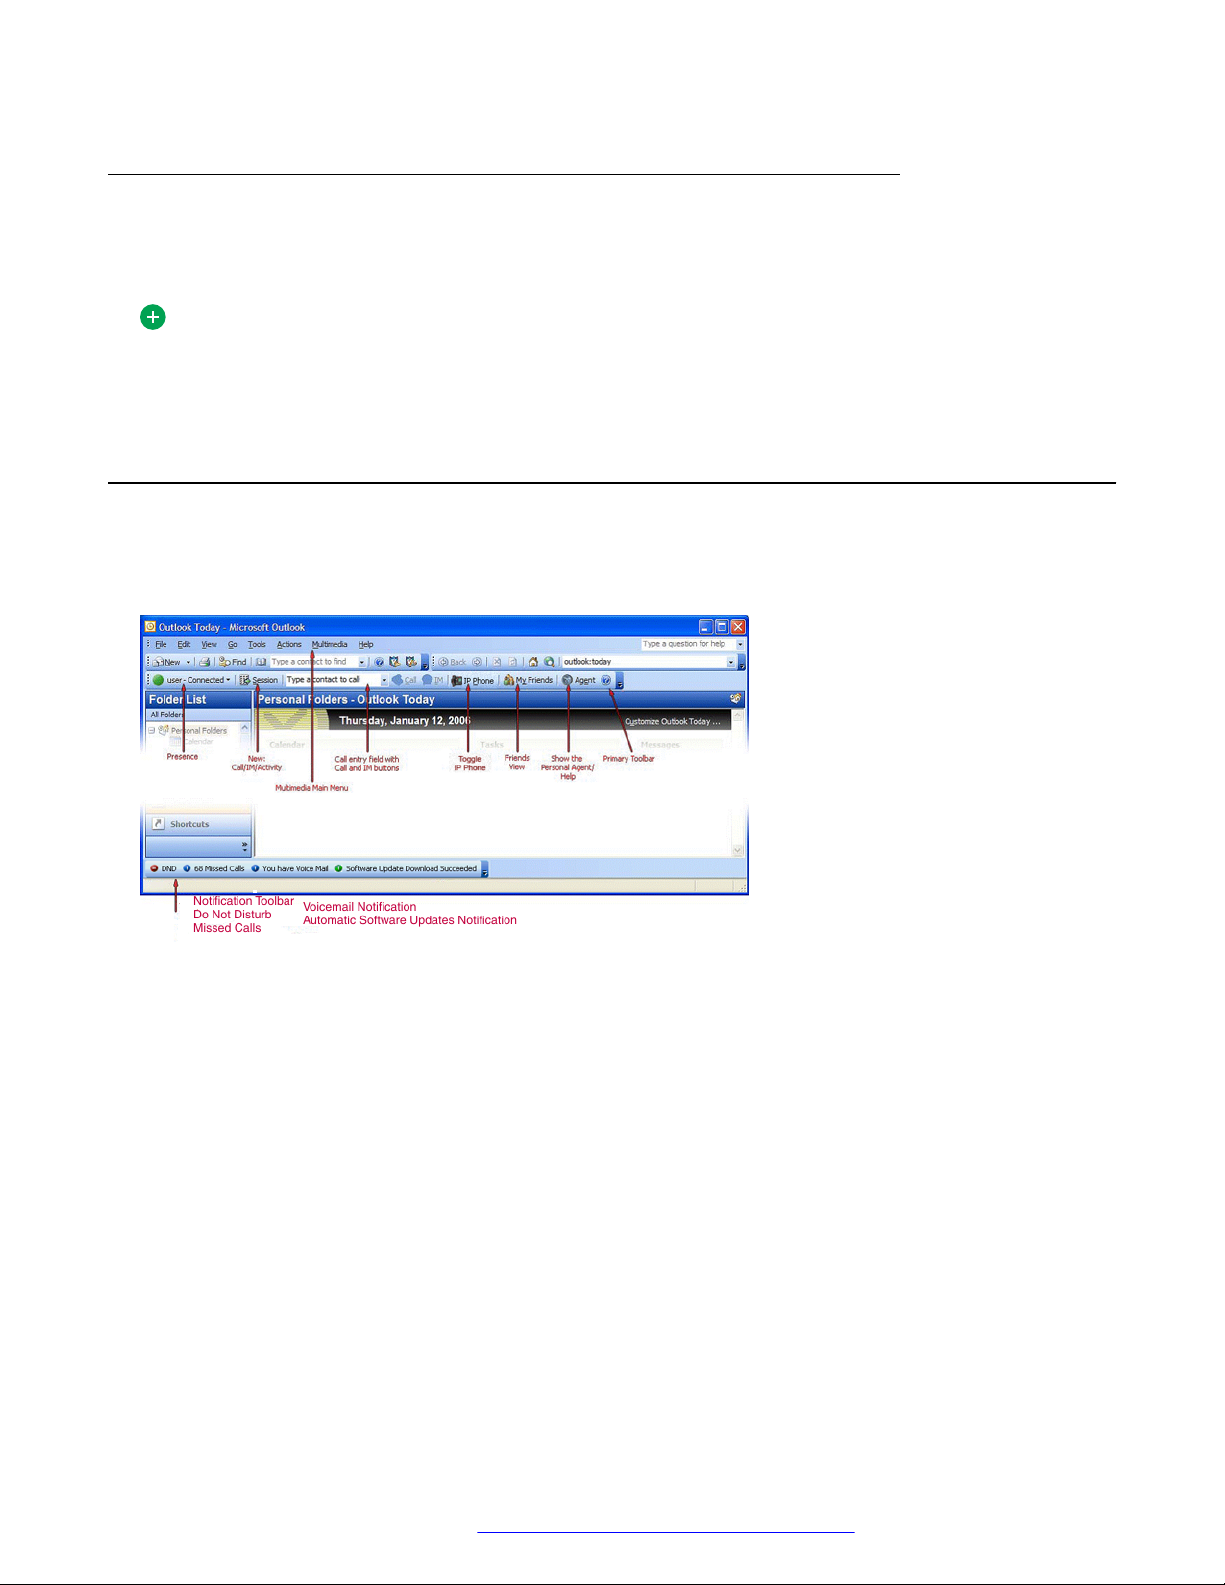
Understanding the AS 5300 Office Client interface
The Avaya Aura® AS 5300 Office Client adds the following items to the Microsoft Outlook interface:
• Multimedia main menu
• Multimedia toolbar
• Notification toolbar
• Context menus
• System tray icon and menu
• Avaya Aura® AS 5300 Office Client folder group
The following figure shows the main window that appears when you open Microsoft Outlook after
installing the Avaya Aura® AS 5300 Office Client.
Figure 1: Main window after installing AS 5300 Office Client
October 2017 Avaya Aura® Application Server 5300 Office Client User Guide 20
Comments on this document? infodev@avaya.com

Understanding the AS 5300 Office Client interface
Multimedia main menu
A complete set of Avaya Aura® AS 5300 Office Client controls appears in the main menu under the
heading Multimedia.
The following table describes the actions you can perform from the Multimedia menu.
Menu item Menu action
Login/Logout Activate or deactivate the Avaya Aura® AS 5300 Office Client.
Presence • Set user presence (status).
• Add a note for custom status.
• Enable Do Not Disturb.
New Session Open a New Session window.
Call • Place a call to the selected contact.
• List all call numbers in a submenu.
IM Send an instant message to selected contact.
Sharing • Start a sharing activity with a selected contact.
• Activities listed in the submenu are:
Browse Web Pages
Send a File
Share Whiteboard
Send Clipboard
Voice mail Open a voice mailbox session.
Incoming Calls Open the Incoming Calls folder and displays its contents.
Outgoing Calls Open the Outgoing Calls folder and displays its contents.
My Friends Open the My Friends view showing grouped Friends and their presence status.
Agent Open the Personal Agent application in the Outlook main content window.
Import Contacts Search for and add contacts from the global address book.
Manage Groups Add, edit, and delete groups in the My Friends view.
Preferences Open the application preferences window.
Check for Software
Updates
Presence Watchers Manage presence authorizations.
About View information about the Avaya Aura® AS 5300 Office Client.
Help Open the Avaya Aura® Application Server 5300 Office Client User Guide,
Remotely check for software updates.
NN42040-114 in the Outlook main content window.
October 2017 Avaya Aura® Application Server 5300 Office Client User Guide 21
Comments on this document? infodev@avaya.com

Getting Started
Your Avaya Aura® AS 5300 Office Client must be enabled for voice to use the following options from
the Multimedia menu:
• Call, Call Log entries
• Voice mail option
• Incoming calls folder
• Outgoing calls folder
Multimedia toolbar
You access the Avaya Aura® AS 5300 Office Client functions from menu items in Microsoft Outlook.
The Multimedia toolbar contains the most frequently used functions. This includes access to user
status, handset control, and call initiation. To access the Call button, Call entry field, and IP
Deskphone button, your Avaya Aura® AS 5300 Office Client must have voice enabled.
The following table contains a description of the Multimedia toolbar components.
Name Description
Presence • Indicates user identification and presence.
• User can change status by clicking this button and selecting an option from the
list.
• Presence is disabled when the user is not connected.
Session • Starts a New Session.
• Opens a secondary call window.
• Inactive when the user is not connected.
• User can enter a number and click Call or select a number from a drop-down
menu if previous calls were made.
• User can enter a SIP address and click Call, IM, Browse Web Page, Send File,
or Share Clipboard.
Call entry field • User can enter a number and click Call.
• User can enter a SIP address and click Call or IM.
• Entry field is populated with a SIP address or phone number when a contact is
selected.
• Inactive when not connected.
• The field is a fixed size. Long strings are cut off on the right side of the field.
Opening the window shows the unabbreviated list of data.
Call • This is active when a contact or call log entry is selected.
• This is active when a number or SIP address populates the Call entry field.
Table continues…
October 2017 Avaya Aura® Application Server 5300 Office Client User Guide 22
Comments on this document? infodev@avaya.com
Understanding the AS 5300 Office Client interface
Name Description
• This is inactive when the user is not connected.
IM • This is active when a contact with a SIP address is selected.
• This is active when a SIP address populates the Call entry field.
• This is inactive when the user is not connected.
IP Phone An IP Deskphone handset can be toggled using data as defined under
Preference IP Phone by clicking the IP Phone button. The button becomes
shaded when clicked to indicate that you are in Client Set mode.
My Friends This is the link to My Friends view.
Agent Opens the Personal Agent HTML page in a new browser window.
Help Open the Avaya Aura® Application Server 5300 Office Client User Guide,
(NN42040-114) in the Outlook main content window.
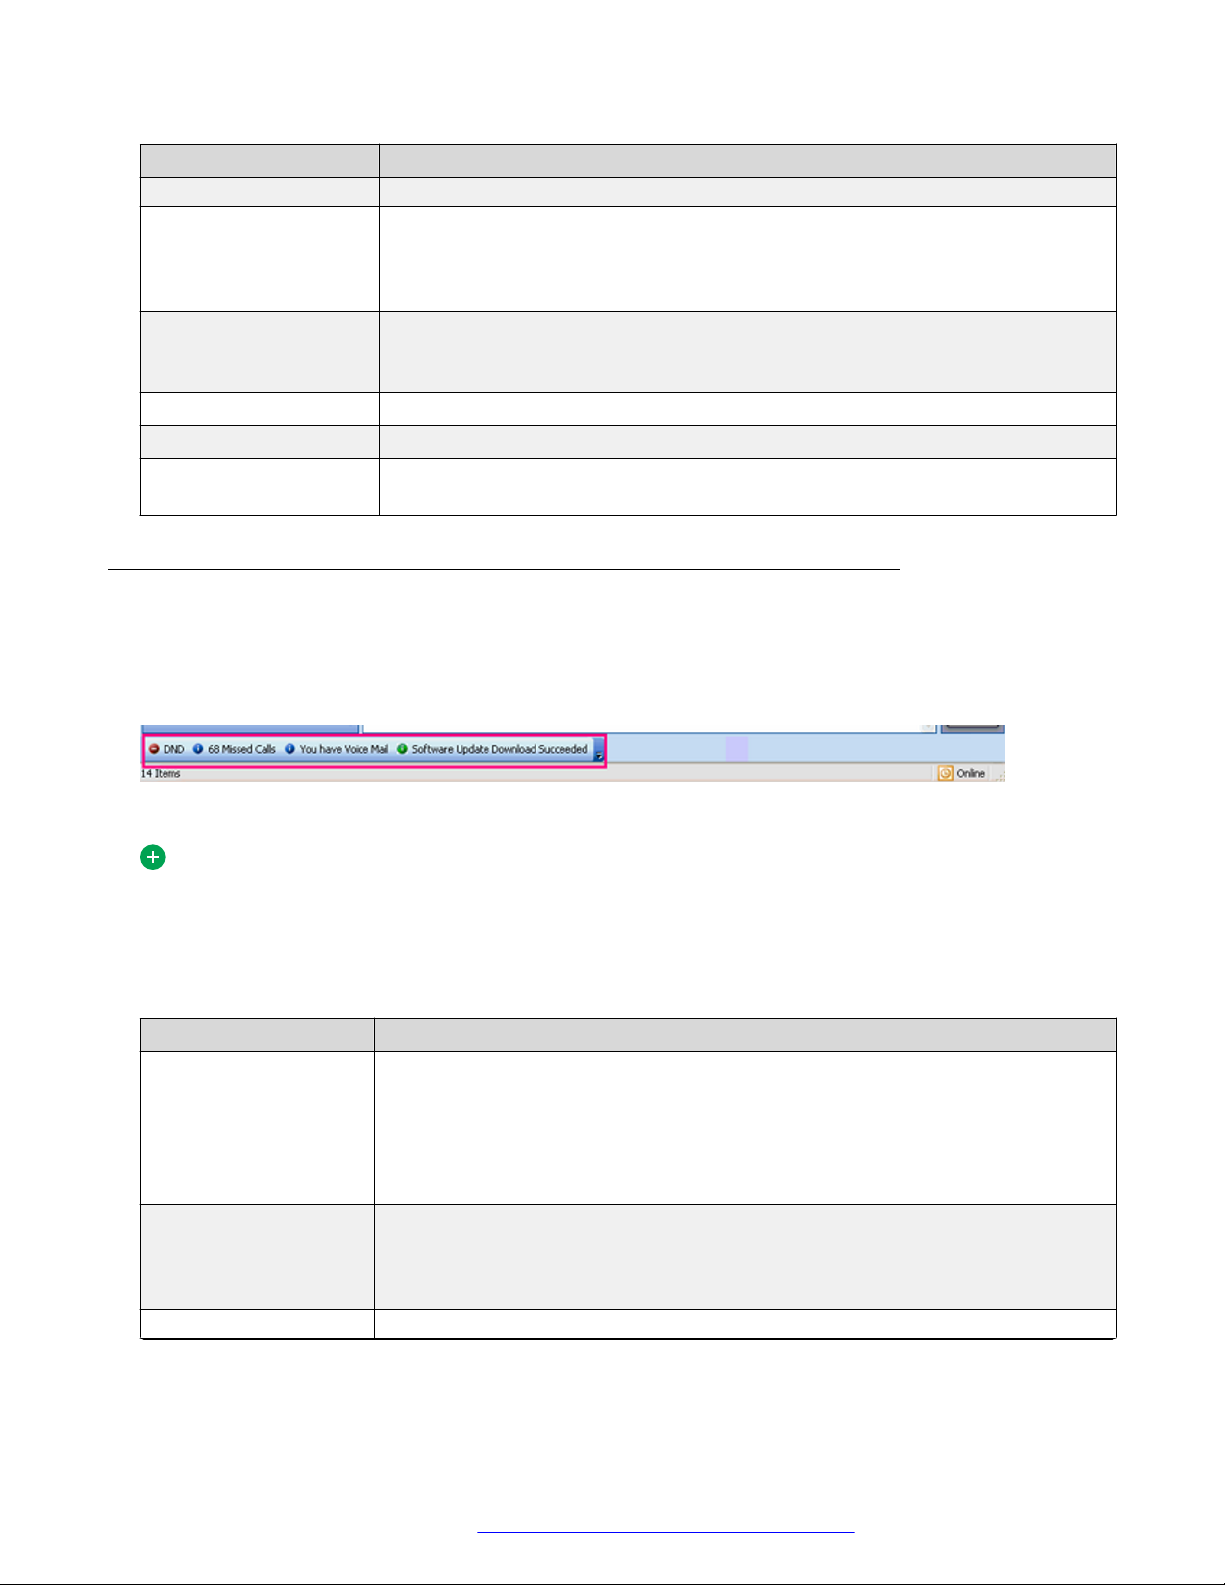
Notification toolbar
The Notification toolbar appears only when there is a notification. It shows the number of missed
calls, if you have voicemail, if Do Not Disturb is activated, and if any software updates have been
downloaded.
Figure 2: Notification toolbar
Tip:
To receive missed calls and voice mail notifications, your Avaya Aura® AS 5300 Office Client
must have voice enabled.
See the following table for a description of the Notification toolbar components.
Name Description
Do Not Disturb • Do Not Disturb appears when you select Do Not Disturb mode from the
Multimedia menu or the Presence list on the Multimedia toolbar.
• Click the Do Not Disturb link to turn it off.
The Do Not Disturb feature is bypassed when you place an emergency services
call. Calls returned by emergency services personnel override this feature.
Missed Calls • Indicates the number of missed calls.
• Click the Missed Calls link to open the Incoming Calls view.
• Appears only when you have missed calls.
You Have Voice Mail • Indicates the number of new voicemail messages.
Table continues…
October 2017 Avaya Aura® Application Server 5300 Office Client User Guide 23
Comments on this document? infodev@avaya.com
Getting Started
Name Description
• Click the You Have Voice Mail link to open a voicemail session.
• Appears only when you have new voicemail messages.
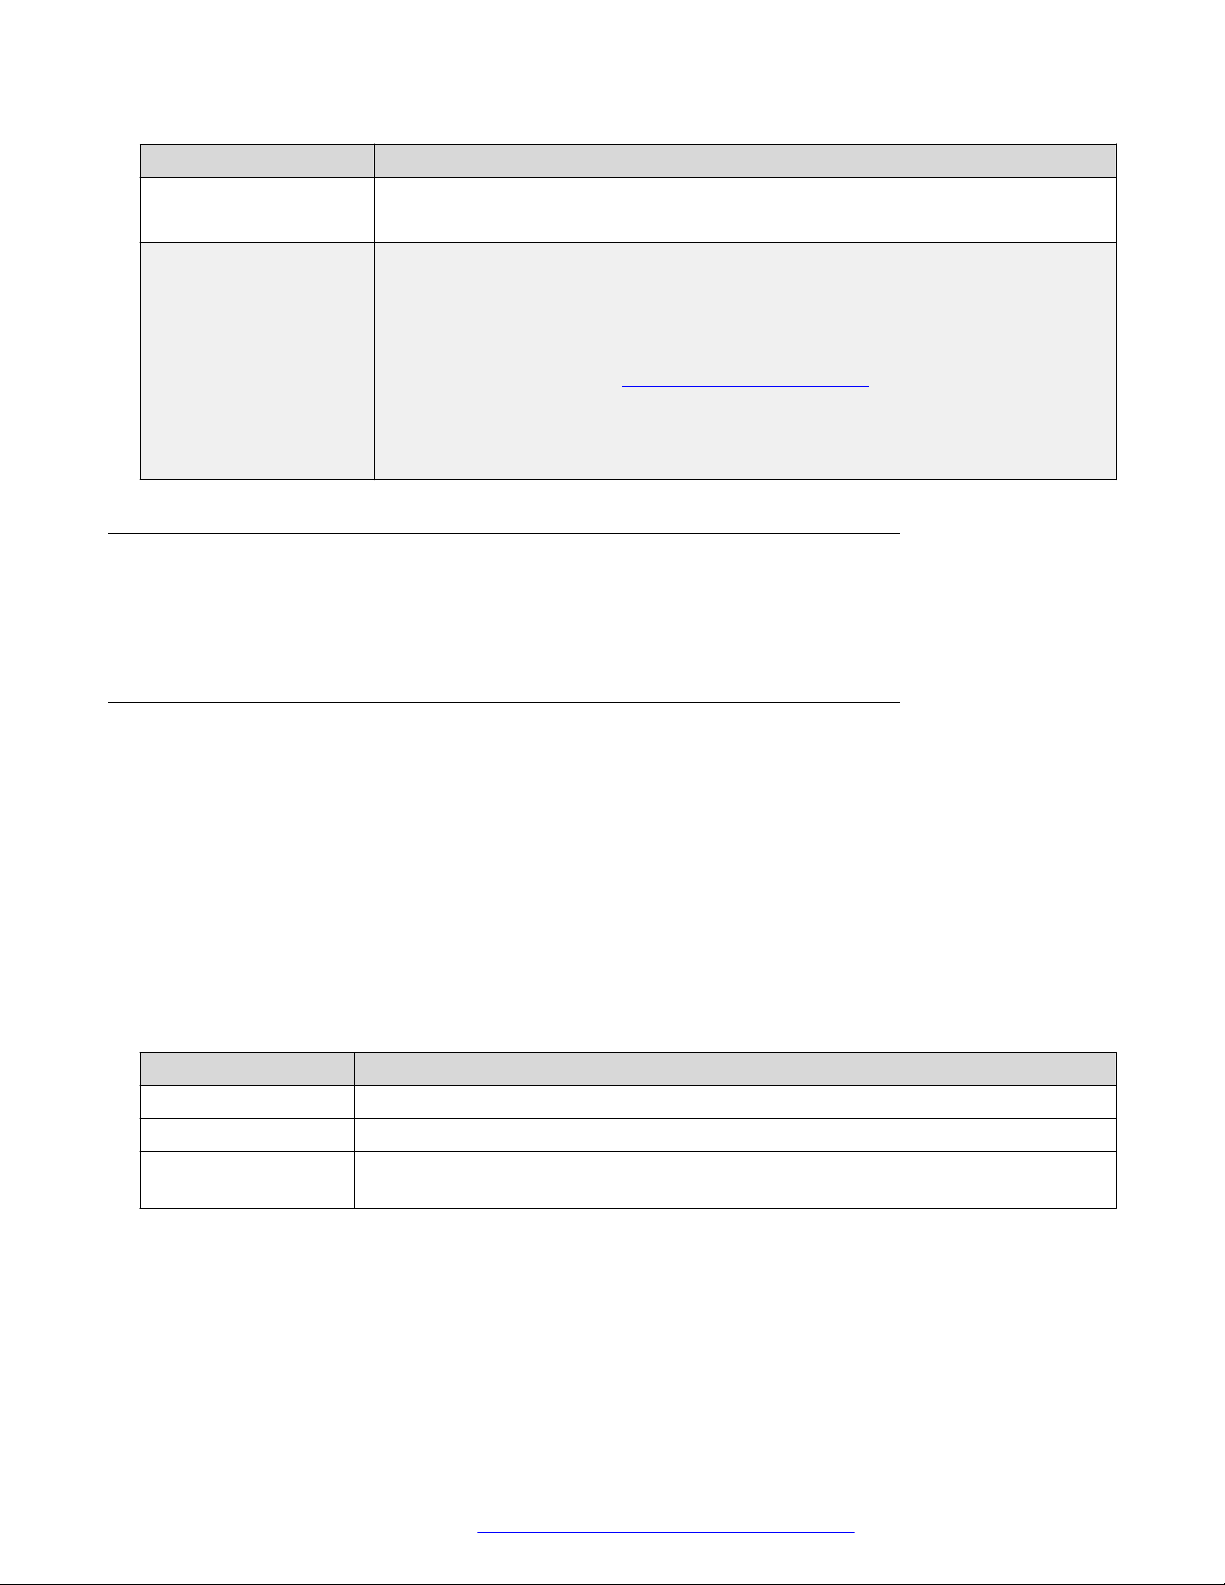
Software Update
Available
• Indicates that a new software version is available for download.
• Appears until the user decides to accept the new load.
• With the Automatic Software Upgrade (ASU), the new software update is
automatically downloaded. It is then up to the user to update. For more
information on ASU, see Automatic software updates on page 102.
If a software update is already downloaded, a message appears when you launch
Avaya Aura® AS 5300 Office Client in Outlook, allowing you to choose whether to
install the update.
Shortcut menu
Right-click on a contact, call log entry, or Friends entry to access the basic Avaya Aura® AS 5300
Office Client functions.
System tray menu
The Avaya Aura® AS 5300 Office Client system tray icon indicates the user status:
• Green indicates that you are online.
• Gray indicates that the you are online but your presence is configured to Connected/note
(either predefined or custom note).
• Red indicates that you are offline.
Right-click the system tray icon to display the system tray menu.
The following table describes the menu items and their actions.
Menu item Menu action
Change my Status Change your presence status by selecting an option from the submenu.
Preferences Display the Avaya Aura® AS 5300 Office Client Preferences window.
About Display the Avaya Aura® AS 5300 Office Client About window. Double-clicking the
system tray icon also displays this window.
Double-click the system tray icon to open the Avaya Aura® AS 5300 Office Client About window.
Click Capture Logs to save Avaya Aura® AS 5300 Office Client troubleshooting logs. These logs
are saved to a folder on your desktop called Outlook_Client_Logs.
October 2017 Avaya Aura® Application Server 5300 Office Client User Guide 24
Comments on this document? infodev@avaya.com
AS 5300 Office Client using Microsoft Outlook 2000
Avaya Aura® Application Server 5300 Office Client folder group
The Avaya Aura® AS 5300 Office Client uses an Outlook folder group titled Avaya Aura® Application
Server 5300 Office Client to log calls. Subfolders list the incoming calls and outgoing calls.
Tip:
The My Friends folder is listed in the Avaya Aura® AS 5300 Office Client folder group in
Microsoft Outlook 2000, 2002, and 2003, but is not listed in later versions.
AS 5300 Office Client using Microsoft Outlook 2000
The following window shows the Avaya Aura® AS 5300 Office Client interface using Microsoft
Outlook 2000.
Figure 3: AS 5300 Office Client interface
Selecting Online Help downloads the Avaya Aura® Application Server 5300 Office Client User
Guide, (NN42040-114) to your computer.
October 2017 Avaya Aura® Application Server 5300 Office Client User Guide 25
Comments on this document? infodev@avaya.com

Chapter 3: Multimedia communication
This chapter includes the following sections:
• Making a call on page 26
• Receiving a call on page 30
• Answering a call on page 30
• Ending a call on page 32
• Holding a call on page 33
•
Retrieving a held call on page 33
• Parking a call on page 34
• Retrieving a parked call on page 35
• Picking up a call on page 35
•
Transferring a call on page 36
• Conference calling on page 37
• Controlling a call with the Avaya USB headset on page 38
• Instant messaging on page 39
• Using voice mail on page 42
Making a call
There are multiple ways to initiate a call using the Avaya Aura® AS 5300 Office Client.
Tip:
To make voice or video calls, your Avaya Aura® AS 5300 Office Client must have voice enabled.
• Select Multimedia > New Session.
• Click the Session button on the Multimedia toolbar.
• Enter the SIP address or number in the Multimedia toolbar Call entry field and click the Call
button.
• Double-click any Friend, Outlook contact, or call log entry and click Call.
October 2017 Avaya Aura® Application Server 5300 Office Client User Guide 26
Comments on this document? infodev@avaya.com

Making a call
• Right-click any Outlook contact, Friend, or call log entry and select Call from the shortcut
menu.
Tip:
Right-clicking is a quick way to access extended actions that you can perform on a selected
entry.
Sending and receiving video
You can use the Avaya Aura® AS 5300 Office Client to make both voice and video calls. For video
calls you must have a web camera for your PC to easily transmit video to the other party. A highbandwidth network connection and fast PC processor are recommended for optimal video
performance. If the other party has a camera and subscribes to video service, you can receive their
video transmission as well.
Tip:
For more information about how to make or receive video calls, see Making a video call on
page 28 or
Answering a call on page 30.
There are predefined video configurations for:
• very low bandwidth (dialup modem)
• low bandwidth (ISDN, cable modem, DSL)
• medium bandwidth (high-speed LAN)
• high bandwidth (high-speed LAN)
• very high bandwidth
• receive-only video
In addition, you can specify a custom video configuration.
The default setting for video is receive-only video. Before you send video, you must configure the
video settings. See
video configuration procedures.
Configuring video preferences (optional) on page 81 for more information about
Making a voice call
About this task
Use this procedure to make a voice call.
Procedure
1. Select Multimedia > New Session or click Session on the Multimedia toolbar.
The Start Session window appears.
October 2017 Avaya Aura® Application Server 5300 Office Client User Guide 27
Comments on this document? infodev@avaya.com

Multimedia communication
2. In the To field, enter an address (user name, SIP address, or public telephone number) or
enter the number using the numeric key pad.
Tip:
If you have not enabled the dialing prefixes feature, be sure to include any necessary
access codes for outside calls from an office system, or for long-distance calls, for
example, dial +1 9725556245.
For more information about enabling the dialing prefixes feature, see
prefixes on page 95.
From the Start Session window, access your contacts as well as a redial list of the last five
incoming and outgoing calls. Click the To button or the To list to access these extra address
resources.
3. From the Select Action list, select Call to make a call to the address you have entered.
4. Click Connect.
If the address you have entered is a routable number, the Choose a Dialing Prefix window
appears. Otherwise, the Conversation window appears.
Tip:
If the first character of the address you entered is a plus sign (+), the Choose a Dialing
Prefix window will not appear. For example, if you enter the address +14165551212, the
Choose a Dialing Prefix window will not appear after you click Connect.
5. From the Dialing Prefix list, select the dialing prefix you want to use.
6. Click OK.
The Conversation window appears.
Tip:
Specifying dialing
You can also make a call by right-clicking any Outlook contact, Friend, or call log entry
and selecting Call from the shortcut menu.
Making a video call
About this task
The ability to make video calls depends on whether you have video support. If you do not have
video support, you cannot make video calls.
Use this procedure to make a video call.
Procedure
1. Select Multimedia > New Session or click Session on the Multimedia toolbar.
The Start Session window appears.
October 2017 Avaya Aura® Application Server 5300 Office Client User Guide 28
Comments on this document? infodev@avaya.com

Making a call
2. In the To field enter an address (user name, SIP address, or public telephone number) or
enter the number using the numeric key pad.
Tip:
If you have not enabled the dialing prefixes feature, be sure to include any necessary
access codes for outside calls from an office system, or for long-distance calls, for
example, dial +1 9725556245.
For more information about enabling the dialing prefixes feature, see
Specifying dialing
prefixes on page 95.
From the Start Session window you can access your contacts as well as a redial list of the
last five incoming and outgoing calls. Click the To button or the To list to access these extra
address resources.
3. From the Select Action list, select Call to make a call to the address you have entered.
4. Click Connect.
If the address you have entered is a routable number, the Choose a Dialing Prefix window
appears. Otherwise, the Conversation window appears.
Tip:
If the first character of the address you entered is a plus sign (+), the Choose a Dialing
Prefix window will not appear. For example, if you enter the address +14165551212, the
Choose a Dialing Prefix window will not appear after you click Connect.
5. From the Dialing Prefix list select the dialing prefix you want to use.
6. Click OK.
The Conversation window appears.
Tip:
You can also make a call by right-clicking any Outlook contact, Friend, or call log entry
and selecting Call from the shortcut menu.
7. Click the Start Video button to initiate the two-way video conversation.
See the following table for a description of the various video controls.
Control Name Function
Play Starts the two-way video communication.
Stop Terminates all video communication.
Pause • Pauses the local video feed.
• You still receive video feed from other party on the call.
Preview local image Opens a secondary window that shows the outgoing video view.
Video size list • Embedded (default): video appears within the session window as shown
above.
Table continues…
October 2017 Avaya Aura® Application Server 5300 Office Client User Guide 29
Comments on this document? infodev@avaya.com

Multimedia communication
Control Name Function
• 2x: video is shown in a separate window at 2 times magnification. Closing
this window returns the video to the embedded view.
• 4x: video is shown in a separate window at 4 times magnification. Closing
this window returns the video to the embedded view.
Tip:
To make video calls successfully, ensure that you enable the video option. Select
Multimedia > Preferences and then select the Video list item to configure video.
Receiving a call
When the Avaya Aura® AS 5300 Office Client is running on your computer and receives an incoming
call, a Conversation window appears that displays "Receiving Call" on your desktop.
Tip:
You cannot receive an incoming call while you are on an emergency services call.
Incoming call
When you receive an incoming call, the Voice Conversation window appears. The receiving call
Conversation window contains the following status information:
• The name of the calling party appears in the title bar. The name displayed in the window is
selected using the following order of precedence.
- If the calling party is defined in your personal address book, the user’s nickname appears.
- If the calling party provided a display name and the user is not in your personal address
book, the user’s display name appears.
• If the calling party is not in your personal address book, and no display name is provided, the
user’s user name appears. If the caller provides a network calling picture ID, a photo of the
caller appears. The user’s name also appears at the bottom of the user’s photo.
Answering a call
The receiving call Conversation window contains the following buttons:
Table 1: Conversation window buttons
October 2017 Avaya Aura® Application Server 5300 Office Client User Guide 30
Comments on this document? infodev@avaya.com
 Loading...