

Page 1

User Guide for the Avaya P580 and P882
Multiservice Switches
Software Version 6.1
Doc. No. 10-300077
Issue 2
May 2004
Page 2

User Guide for the Avaya P580 and P882 Multiservice Switches, Software Version 6.1
© Copyright Avaya Inc., 2004 ALL RIGHTS RESERVED
Produced in USA, May 2004
The products, specifications, and other technical information regarding the products contained in this
document are subject to change wit hout noti ce. All info rmatio n in this documen t is beli eved to be accura te
and reliable, but is presented without warranty of any kind, express or implied, and users must take full
responsibility for their application of any products specified in this document. Avaya disclaims
responsibility for errors which may appear in this document, and it reserves the right, in its sole discretion
and without notice, to make substitutions and modifications in the products and practices described in this
document.
P550R is a registered trademark of Avaya Inc.
Microsoft, Windows, Windows NT, Windows 95, Windows 98, and Internet Explorer are trademarks or
registered trademarks of Microsoft Corporation in the U.S. and/or other countries.
Netscape and Netscape Navigator are registered trademarks of Netscape Communications Corporation in
the United States and other countries.
Sybase is a registered trademark of Sybase, Inc.
Novell, NDS, Netware, and Novell Directory Services are registered trademarks of Novell, Inc.
Solaris is a trademark of S un Microsystems, Inc.
Intel and Pentium are registered trademarks of Intel Corporation.
ALL OTHER TRADEMARKS MENTIONED IN THIS DOCUMENT ARE PROPERTY OF THEIR
RESPECTIVE OWNERS.
Page 3

Table of Contents
Preface. . . . . . . . . . . . . . . . . . . . . . . . . . . . . . . . . . . . . . . . . . . . . . . . . . . . . . . .xvii
Preface Contents . . . . . . . . . . . . . . . . . . . . . . . . . . . . . . . . . . . . . . . . . . xvii
Overview of User Guide Contents. . . . . . . . . . . . . . . . . . . . . . . . . . . . . xvii
Technical Support . . . . . . . . . . . . . . . . . . . . . . . . . . . . . . . . . . . . . . . . . . xx
Avaya Products and Services. . . . . . . . . . . . . . . . . . . . . . . . . . . . . . . . . . xx
P580 and P882 Documentation . . . . . . . . . . . . . . . . . . . . . . . . . . . . . . . . xx
Available Documentation. . . . . . . . . . . . . . . . . . . . . . . . . . . . . . . . . xx
Installing the Online Help Files . . . . . . . . . . . . . . . . . . . . . . . . . . . .xxi
Setting the Location of the Online Help Files . . . . . . . . . . . . . . . . .xxi
Document Conventions . . . . . . . . . . . . . . . . . . . . . . . . . . . . . . . . . . . . . xxii
Notes, Cautions, and Warnings . . . . . . . . . . . . . . . . . . . . . . . . . . xxiii
Terminology . . . . . . . . . . . . . . . . . . . . . . . . . . . . . . . . . . . . . . . . . . . . .xxiv
Documentation Feedback . . . . . . . . . . . . . . . . . . . . . . . . . . . . . . . . . . .xxiv
Chapter 1 — Introduction. . . . . . . . . . . . . . . . . . . . . . . . . . . . . . . . . . . . . . . . . 1-1
Overview . . . . . . . . . . . . . . . . . . . . . . . . . . . . . . . . . . . . . . . . . . . . . . . . . . . . . .1-1
Switch Descriptions . . . . . . . . . . . . . . . . . . . . . . . . . . . . . . . . . . . . . . . . . . . . . .1-1
Hardware Components. . . . . . . . . . . . . . . . . . . . . . . . . . . . . . . . . . . . . . . . . . . .1-2
Overview. . . . . . . . . . . . . . . . . . . . . . . . . . . . . . . . . . . . . . . . . . . . . . . . . . .1-2
Avaya P580 Multiservice Switch Chassis . . . . . . . . . . . . . . . . . . . . . . . . .1-3
Avaya P882 Multiservice Switch Chassis . . . . . . . . . . . . . . . . . . . . . . . . .1-5
The Power System . . . . . . . . . . . . . . . . . . . . . . . . . . . . . . . . . . . . . . . . . . .1-6
The M8000R-SUP Supervisor Module . . . . . . . . . . . . . . . . . . . . . . . . . . .1-8
Media Modules. . . . . . . . . . . . . . . . . . . . . . . . . . . . . . . . . . . . . . . . . . . . .1-10
Software Features. . . . . . . . . . . . . . . . . . . . . . . . . . . . . . . . . . . . . . . . . . . . . . .1-15
Security. . . . . . . . . . . . . . . . . . . . . . . . . . . . . . . . . . . . . . . . . . . . . . . . . . .1-16
VLANs . . . . . . . . . . . . . . . . . . . . . . . . . . . . . . . . . . . . . . . . . . . . . . . . . . .1-16
Hunt Groups . . . . . . . . . . . . . . . . . . . . . . . . . . . . . . . . . . . . . . . . . . . . . . .1-17
Spanning Tree. . . . . . . . . . . . . . . . . . . . . . . . . . . . . . . . . . . . . . . . . . . . . .1-17
Extensive Fault Tolerance . . . . . . . . . . . . . . . . . . . . . . . . . . . . . . . . . . . .1-18
Routing Protocols. . . . . . . . . . . . . . . . . . . . . . . . . . . . . . . . . . . . . . . . . . .1-19
Access Lists . . . . . . . . . . . . . . . . . . . . . . . . . . . . . . . . . . . . . . . . . . . . . . .1-19
IP Multicast. . . . . . . . . . . . . . . . . . . . . . . . . . . . . . . . . . . . . . . . . . . . . . . .1-19
50-Series Buffers and Queues . . . . . . . . . . . . . . . . . . . . . . . . . . . . . . . . .1-20
80-Series QoS. . . . . . . . . . . . . . . . . . . . . . . . . . . . . . . . . . . . . . . . . . . . . .1-20
System Management. . . . . . . . . . . . . . . . . . . . . . . . . . . . . . . . . . . . . . . . .1-21
Routing Overview . . . . . . . . . . . . . . . . . . . . . . . . . . . . . . . . . . . . . . . . . . . . . .1-21
Compatibility with Layer 2 Modules . . . . . . . . . . . . . . . . . . . . . . . . . . . .1-21
Routing with Layer 2 and Layer 3 Modules. . . . . . . . . . . . . . . . . . . . . . .1-22
User Guide for the Avaya P580 and P882 Multiservice Switches, v6.1 iii
Page 4

Table of Contents
Chapter 2 — Setting Up the Switch . . . . . . . . . . . . . . . . . . . . . . . . . . . . . . . . . 2-1
Overview . . . . . . . . . . . . . . . . . . . . . . . . . . . . . . . . . . . . . . . . . . . . . . . . . . . . . . 2-1
Setting Up Your Laptop or PC . . . . . . . . . . . . . . . . . . . . . . . . . . . . . . . . . . . . . 2-2
Performing Initial Setup of the Switch . . . . . . . . . . . . . . . . . . . . . . . . . . . . . . . 2-2
Using Telnet to Manage the Switch . . . . . . . . . . . . . . . . . . . . . . . . . . . . . . . . . 2-5
Setting up a Management Interface. . . . . . . . . . . . . . . . . . . . . . . . . . . . . . 2-6
Establishing a Telnet Session . . . . . . . . . . . . . . . . . . . . . . . . . . . . . . . . . . 2-6
Terminating a Telnet session. . . . . . . . . . . . . . . . . . . . . . . . . . . . . . . . . . . 2-7
Viewing Active Telnet Sessions . . . . . . . . . . . . . . . . . . . . . . . . . . . . . . . . 2-7
Telnet Session Expiration Timer. . . . . . . . . . . . . . . . . . . . . . . . . . . . . . . . 2-7
Using the Web Agent to Configure the Switch. . . . . . . . . . . . . . . . . . . . . . . . . 2-8
Opening the Web Agent . . . . . . . . . . . . . . . . . . . . . . . . . . . . . . . . . . . . . . 2-9
Logging Out of the Web Agent. . . . . . . . . . . . . . . . . . . . . . . . . . . . . . . . 2-11
Configuring Custom Access Types . . . . . . . . . . . . . . . . . . . . . . . . . . . . . . . . . 2-12
Overview . . . . . . . . . . . . . . . . . . . . . . . . . . . . . . . . . . . . . . . . . . . . . . . . . 2-12
Creating a Custom Access Type . . . . . . . . . . . . . . . . . . . . . . . . . . . . . . . 2-13
Modifying a Custom Access Type . . . . . . . . . . . . . . . . . . . . . . . . . . . . . 2-15
Deleting a Custom Access Type . . . . . . . . . . . . . . . . . . . . . . . . . . . . . . . 2-16
Configuring User Accounts. . . . . . . . . . . . . . . . . . . . . . . . . . . . . . . . . . . . . . . 2-17
Configuring User Account Security . . . . . . . . . . . . . . . . . . . . . . . . . . . . 2-17
Creating a User Account . . . . . . . . . . . . . . . . . . . . . . . . . . . . . . . . . . . . . 2-19
Modifying a User Account . . . . . . . . . . . . . . . . . . . . . . . . . . . . . . . . . . . 2-22
Changing Your Password . . . . . . . . . . . . . . . . . . . . . . . . . . . . . . . . . . . . 2-24
Disabling a User Account . . . . . . . . . . . . . . . . . . . . . . . . . . . . . . . . . . . . 2-25
Deleting a User Account . . . . . . . . . . . . . . . . . . . . . . . . . . . . . . . . . . . . . 2-25
Changing the Console Serial Port Settings . . . . . . . . . . . . . . . . . . . . . . . . . . . 2-26
Configuring the Serial Console Port as a TTY Console . . . . . . . . . . . . . 2-27
Configuring the Serial Console Port as a PPP Console. . . . . . . . . . . . . . 2-29
Regaining Configuration Access to the PPP Serial Port Console . . . . . . 2-32
Configuring Dial-Up Networking. . . . . . . . . . . . . . . . . . . . . . . . . . . . . . . . . . 2-32
Using Dial-Up Networking with a PPP Serial Port Console. . . . . . . . . . 2-34
Changing the TCP Ports for HTTP and Telnet . . . . . . . . . . . . . . . . . . . . . . . . 2-35
Overview . . . . . . . . . . . . . . . . . . . . . . . . . . . . . . . . . . . . . . . . . . . . . . . . . 2-35
Changing the TCP Port Number for HTTP and Telnet Requests . . . . . . 2-35
Starting a Telnet Session. . . . . . . . . . . . . . . . . . . . . . . . . . . . . . . . . . . . . 2-37
Opening the Web Agent . . . . . . . . . . . . . . . . . . . . . . . . . . . . . . . . . . . . . 2-37
Managing Configuration Files. . . . . . . . . . . . . . . . . . . . . . . . . . . . . . . . . . . . . 2-38
Viewing the Running Configuration. . . . . . . . . . . . . . . . . . . . . . . . . . . . 2-39
Viewing the Startup Configuration . . . . . . . . . . . . . . . . . . . . . . . . . . . . . 2-39
Viewing the Script Execution Log File. . . . . . . . . . . . . . . . . . . . . . . . . . 2-39
Copying Configuration Files. . . . . . . . . . . . . . . . . . . . . . . . . . . . . . . . . . 2-40
Copying Files. . . . . . . . . . . . . . . . . . . . . . . . . . . . . . . . . . . . . . . . . . . . . . 2-42
Viewing the Status of a TFTP Transfer. . . . . . . . . . . . . . . . . . . . . . . . . . 2-45
Chapter 3 — Configuring System Information. . . . . . . . . . . . . . . . . . . . . . . . 3-1
Overview . . . . . . . . . . . . . . . . . . . . . . . . . . . . . . . . . . . . . . . . . . . . . . . . . . . . . . 3-1
Entering General System Information. . . . . . . . . . . . . . . . . . . . . . . . . . . . . . . . 3-2
iv User Guide for the Avaya P580 and P882 Multiservice Switches, v6.1
Page 5

Table of Contents
Enabling the Simple Network Time Protocol . . . . . . . . . . . . . . . . . . . . . . . . . .3-3
Setting Summer Time Hours . . . . . . . . . . . . . . . . . . . . . . . . . . . . . . . . . . . . . . .3-5
Setting Recurring Summer Time Hours. . . . . . . . . . . . . . . . . . . . . . . . . . .3-5
Setting One-Time Summer Time Hours. . . . . . . . . . . . . . . . . . . . . . . . . .3-10
Setting the System Clock . . . . . . . . . . . . . . . . . . . . . . . . . . . . . . . . . . . . . . . . .3-11
Setting the Temperature System. . . . . . . . . . . . . . . . . . . . . . . . . . . . . . . . . . . .3-13
Displaying the Power System Statistics. . . . . . . . . . . . . . . . . . . . . . . . . . . . . .3-15
Displaying Cooling System Statistics . . . . . . . . . . . . . . . . . . . . . . . . . . . . . . .3-16
Performing a Reset. . . . . . . . . . . . . . . . . . . . . . . . . . . . . . . . . . . . . . . . . . . . . .3-17
Chapter 4 — Security . . . . . . . . . . . . . . . . . . . . . . . . . . . . . . . . . . . . . . . . . . . . 4-1
Overview . . . . . . . . . . . . . . . . . . . . . . . . . . . . . . . . . . . . . . . . . . . . . . . . . . . . . .4-1
Secure Mode. . . . . . . . . . . . . . . . . . . . . . . . . . . . . . . . . . . . . . . . . . . . . . . . . . . .4-1
Overview. . . . . . . . . . . . . . . . . . . . . . . . . . . . . . . . . . . . . . . . . . . . . . . . . . .4-1
Enabling Secure Mode . . . . . . . . . . . . . . . . . . . . . . . . . . . . . . . . . . . . . . . .4-3
Disabling Secure Mode. . . . . . . . . . . . . . . . . . . . . . . . . . . . . . . . . . . . . . . .4-3
Viewing the Secure Mode Setting . . . . . . . . . . . . . . . . . . . . . . . . . . . . . . .4-3
SSHv2. . . . . . . . . . . . . . . . . . . . . . . . . . . . . . . . . . . . . . . . . . . . . . . . . . . . . . . . .4-3
Overview. . . . . . . . . . . . . . . . . . . . . . . . . . . . . . . . . . . . . . . . . . . . . . . . . . .4-3
Enabling SSH on a TCP Port . . . . . . . . . . . . . . . . . . . . . . . . . . . . . . . . . . .4-4
Disabling SSH . . . . . . . . . . . . . . . . . . . . . . . . . . . . . . . . . . . . . . . . . . . . . .4-5
Generating an SSH Server Key . . . . . . . . . . . . . . . . . . . . . . . . . . . . . . . . .4-6
Displaying the Public SSH Key . . . . . . . . . . . . . . . . . . . . . . . . . . . . . . . . .4-7
Configuring SSH Server. . . . . . . . . . . . . . . . . . . . . . . . . . . . . . . . . . . . . . .4-7
Displaying SSH Connections . . . . . . . . . . . . . . . . . . . . . . . . . . . . . . . . . . .4-9
Using the SSH Client . . . . . . . . . . . . . . . . . . . . . . . . . . . . . . . . . . . . . . . . .4-9
HTTPS Using SSLv3 or TLSv1. . . . . . . . . . . . . . . . . . . . . . . . . . . . . . . . . . . .4-10
Overview. . . . . . . . . . . . . . . . . . . . . . . . . . . . . . . . . . . . . . . . . . . . . . . . . .4-10
Supported Cipher Suites. . . . . . . . . . . . . . . . . . . . . . . . . . . . . . . . . . . . . .4-11
Viewing Cipher Suites . . . . . . . . . . . . . . . . . . . . . . . . . . . . . . . . . . . . . . .4-12
Viewing the SSL Configuration. . . . . . . . . . . . . . . . . . . . . . . . . . . . . . . .4-12
Creating a Self-Signed SSL Server Certificate. . . . . . . . . . . . . . . . . . . . .4-13
Viewing the Server Certificate. . . . . . . . . . . . . . . . . . . . . . . . . . . . . . . . .4-15
Enabling SSL/HTTPS. . . . . . . . . . . . . . . . . . . . . . . . . . . . . . . . . . . . . . . .4-17
Disabling SSL/HTTPS . . . . . . . . . . . . . . . . . . . . . . . . . . . . . . . . . . . . . . .4-17
Restarting SSL/HTTPS. . . . . . . . . . . . . . . . . . . . . . . . . . . . . . . . . . . . . . .4-18
Reverting to a Backup Certificate. . . . . . . . . . . . . . . . . . . . . . . . . . . . . . .4-18
RADIUS Client Support. . . . . . . . . . . . . . . . . . . . . . . . . . . . . . . . . . . . . . . . . .4-19
Overview. . . . . . . . . . . . . . . . . . . . . . . . . . . . . . . . . . . . . . . . . . . . . . . . . .4-19
Realms and Groups. . . . . . . . . . . . . . . . . . . . . . . . . . . . . . . . . . . . . . . . . .4-20
Login Order of Operations . . . . . . . . . . . . . . . . . . . . . . . . . . . . . . . . . . . .4-21
Avaya VSAs . . . . . . . . . . . . . . . . . . . . . . . . . . . . . . . . . . . . . . . . . . . . . . .4-22
RADIUS Server Files. . . . . . . . . . . . . . . . . . . . . . . . . . . . . . . . . . . . . . . .4-24
Configuring a RADIUS Client. . . . . . . . . . . . . . . . . . . . . . . . . . . . . . . . .4-26
Chapter 5 — Configuring SNMP. . . . . . . . . . . . . . . . . . . . . . . . . . . . . . . . . . . 5-1
Overview . . . . . . . . . . . . . . . . . . . . . . . . . . . . . . . . . . . . . . . . . . . . . . . . . . . . . .5-1
Authentication and Encryption. . . . . . . . . . . . . . . . . . . . . . . . . . . . . . . . . . . . . .5-3
Document No. 10-300077, Issue 2 v
Page 6

Table of Contents
Localized Keys . . . . . . . . . . . . . . . . . . . . . . . . . . . . . . . . . . . . . . . . . . . . . 5-3
Engine ID. . . . . . . . . . . . . . . . . . . . . . . . . . . . . . . . . . . . . . . . . . . . . . . . . . 5-3
Timeliness Checks. . . . . . . . . . . . . . . . . . . . . . . . . . . . . . . . . . . . . . . . . . . . . . . 5-4
Views. . . . . . . . . . . . . . . . . . . . . . . . . . . . . . . . . . . . . . . . . . . . . . . . . . . . . . . . . 5-4
Overview . . . . . . . . . . . . . . . . . . . . . . . . . . . . . . . . . . . . . . . . . . . . . . . . . . 5-4
Predefined Views. . . . . . . . . . . . . . . . . . . . . . . . . . . . . . . . . . . . . . . . . . . . 5-5
User Groups. . . . . . . . . . . . . . . . . . . . . . . . . . . . . . . . . . . . . . . . . . . . . . . . . . . . 5-5
Overview . . . . . . . . . . . . . . . . . . . . . . . . . . . . . . . . . . . . . . . . . . . . . . . . . . 5-5
Predefined Groups. . . . . . . . . . . . . . . . . . . . . . . . . . . . . . . . . . . . . . . . . . . 5-6
Migration of Existing Community Strings . . . . . . . . . . . . . . . . . . . . . . . . 5-7
ATM Uplink Module. . . . . . . . . . . . . . . . . . . . . . . . . . . . . . . . . . . . . . . . . . . . . 5-8
Initial SNMPv3 User and SNMPv3 Administrator. . . . . . . . . . . . . . . . . . . . . . 5-9
Changing the Engine ID of the Switch . . . . . . . . . . . . . . . . . . . . . . . . . . . . . . 5-10
Viewing the Engine ID . . . . . . . . . . . . . . . . . . . . . . . . . . . . . . . . . . . . . . 5-11
Creating an SNMPv3 Administrator. . . . . . . . . . . . . . . . . . . . . . . . . . . . . . . . 5-11
Configuring Views . . . . . . . . . . . . . . . . . . . . . . . . . . . . . . . . . . . . . . . . . . . . . 5-12
Creating or Modifying a View. . . . . . . . . . . . . . . . . . . . . . . . . . . . . . . . . 5-12
Viewing Configured Views. . . . . . . . . . . . . . . . . . . . . . . . . . . . . . . . . . . 5-13
Deleting a View. . . . . . . . . . . . . . . . . . . . . . . . . . . . . . . . . . . . . . . . . . . . 5-13
Configuring Groups. . . . . . . . . . . . . . . . . . . . . . . . . . . . . . . . . . . . . . . . . . . . . 5-13
Creating or Modifying a Group. . . . . . . . . . . . . . . . . . . . . . . . . . . . . . . . 5-14
Viewing Configured Groups . . . . . . . . . . . . . . . . . . . . . . . . . . . . . . . . . . 5-14
Deleting a Group . . . . . . . . . . . . . . . . . . . . . . . . . . . . . . . . . . . . . . . . . . . 5-15
Configuring an SNMPv3 User . . . . . . . . . . . . . . . . . . . . . . . . . . . . . . . . . . . . 5-15
Creating or Modifying a User . . . . . . . . . . . . . . . . . . . . . . . . . . . . . . . . . 5-15
Adding a User to a Group . . . . . . . . . . . . . . . . . . . . . . . . . . . . . . . . . . . . 5-16
Removing a User from a Group. . . . . . . . . . . . . . . . . . . . . . . . . . . . . . . . 5-17
Viewing Configured Users . . . . . . . . . . . . . . . . . . . . . . . . . . . . . . . . . . . 5-17
Deleting a User . . . . . . . . . . . . . . . . . . . . . . . . . . . . . . . . . . . . . . . . . . . . 5-17
Changing a User Password . . . . . . . . . . . . . . . . . . . . . . . . . . . . . . . . . . . . . . . 5-18
Configuring SNMPv1 or v2 Community Strings . . . . . . . . . . . . . . . . . . . . . . 5-18
Creating or Modifying a Community String for the Switch . . . . . . . . . . 5-18
Creating or Modifying a Community String for the ATM-Uplink Module 5-
19
Viewing Configured Community Strings . . . . . . . . . . . . . . . . . . . . . . . . 5-20
Setting the Trap Receiver . . . . . . . . . . . . . . . . . . . . . . . . . . . . . . . . . . . . 5-20
Deleting a Community String . . . . . . . . . . . . . . . . . . . . . . . . . . . . . . . . . 5-20
Setting the Administrative Contact. . . . . . . . . . . . . . . . . . . . . . . . . . . . . . . . . 5-21
Setting the Physical Location of the Switch . . . . . . . . . . . . . . . . . . . . . . . . . . 5-22
Disabling or Reenabling SNMP . . . . . . . . . . . . . . . . . . . . . . . . . . . . . . . . . . . 5-23
Viewing the SNMP Status. . . . . . . . . . . . . . . . . . . . . . . . . . . . . . . . . . . . . . . . 5-23
Chapter 6 — Using VLANs, Hunt Groups, and VTP Snooping. . . . . . . . . . . 6-1
Overview . . . . . . . . . . . . . . . . . . . . . . . . . . . . . . . . . . . . . . . . . . . . . . . . . . . . . . 6-1
VLAN Introduction. . . . . . . . . . . . . . . . . . . . . . . . . . . . . . . . . . . . . . . . . . . . . . 6-1
What is a VLAN? . . . . . . . . . . . . . . . . . . . . . . . . . . . . . . . . . . . . . . . . . . . 6-2
Ingress Rules . . . . . . . . . . . . . . . . . . . . . . . . . . . . . . . . . . . . . . . . . . . . . . . 6-4
Forwarding Rules. . . . . . . . . . . . . . . . . . . . . . . . . . . . . . . . . . . . . . . . . . . . 6-5
vi User Guide for the Avaya P580 and P882 Multiservice Switches, v6.1
Page 7

Table of Contents
Egress Rules . . . . . . . . . . . . . . . . . . . . . . . . . . . . . . . . . . . . . . . . . . . . . . . .6-6
Creating and Implementing VLANs . . . . . . . . . . . . . . . . . . . . . . . . . . . . . . . . .6-7
VLAN Considerations . . . . . . . . . . . . . . . . . . . . . . . . . . . . . . . . . . . . . . . .6-7
Creating a VLAN . . . . . . . . . . . . . . . . . . . . . . . . . . . . . . . . . . . . . . . . . . . .6-7
Configuring VLAN Parameters . . . . . . . . . . . . . . . . . . . . . . . . . . . . . . . .6-10
Assigning Ports to VLANs. . . . . . . . . . . . . . . . . . . . . . . . . . . . . . . . . . . .6-13
Using Hunt Groups to Aggregate Bandwidth . . . . . . . . . . . . . . . . . . . . . . . . .6-13
Overview. . . . . . . . . . . . . . . . . . . . . . . . . . . . . . . . . . . . . . . . . . . . . . . . . .6-13
Hunt Group Features. . . . . . . . . . . . . . . . . . . . . . . . . . . . . . . . . . . . . . . . .6-14
Hunt Group Terminology. . . . . . . . . . . . . . . . . . . . . . . . . . . . . . . . . . . . .6-15
How Hunt Groups Load Share . . . . . . . . . . . . . . . . . . . . . . . . . . . . . . . . .6-15
Hunt Group Example . . . . . . . . . . . . . . . . . . . . . . . . . . . . . . . . . . . . . . . .6-17
Optimizing Hunt Group Throughput . . . . . . . . . . . . . . . . . . . . . . . . . . . .6-19
Hunt Group Configuration Considerations. . . . . . . . . . . . . . . . . . . . . . . .6-20
Hunt Groups and Multicast Traffic. . . . . . . . . . . . . . . . . . . . . . . . . . . . . .6-21
Creating Hunt Groups. . . . . . . . . . . . . . . . . . . . . . . . . . . . . . . . . . . . . . . .6-21
Adding Ports to the Hunt Group. . . . . . . . . . . . . . . . . . . . . . . . . . . . . . . .6-23
Viewing Hunt Group Members . . . . . . . . . . . . . . . . . . . . . . . . . . . . . . . .6-27
Removing Ports from Hunt Groups . . . . . . . . . . . . . . . . . . . . . . . . . . . . .6-28
Configuring VTP Snooping . . . . . . . . . . . . . . . . . . . . . . . . . . . . . . . . . . . . . . .6-29
Chapter 7 — Configuring Rapid Spanning Tree. . . . . . . . . . . . . . . . . . . . . . . 7-1
Overview . . . . . . . . . . . . . . . . . . . . . . . . . . . . . . . . . . . . . . . . . . . . . . . . . . . . . .7-1
How RSTP Achieves Rapid Recovery. . . . . . . . . . . . . . . . . . . . . . . . . . . . . . . .7-3
Spanning Tree Configurations . . . . . . . . . . . . . . . . . . . . . . . . . . . . . . . . . . . . . .7-4
Configuring Global Spanning Tree Options. . . . . . . . . . . . . . . . . . . . . . . . . . . .7-7
Viewing Global Spanning Tree Information . . . . . . . . . . . . . . . . . . . . . . . . . .7-10
Configuring Spanning Tree Bridges. . . . . . . . . . . . . . . . . . . . . . . . . . . . . . . . .7-11
Viewing Bridge Port Information. . . . . . . . . . . . . . . . . . . . . . . . . . . . . . . . . . .7-14
Configuring a Bridge Port . . . . . . . . . . . . . . . . . . . . . . . . . . . . . . . . . . . . . . . .7-17
Configuring Spanning Tree Settings for Switch Ports. . . . . . . . . . . . . . . . . . .7-21
Chapter 8 — Configuring Ports . . . . . . . . . . . . . . . . . . . . . . . . . . . . . . . . . . . . 8-1
Overview . . . . . . . . . . . . . . . . . . . . . . . . . . . . . . . . . . . . . . . . . . . . . . . . . . . . . .8-1
Two Categories of Port Settings. . . . . . . . . . . . . . . . . . . . . . . . . . . . . . . . . . . . .8-1
Physical Port Features. . . . . . . . . . . . . . . . . . . . . . . . . . . . . . . . . . . . . . . . .8-2
Switch Port Features. . . . . . . . . . . . . . . . . . . . . . . . . . . . . . . . . . . . . . . . . .8-7
Relationship Between Different Switch Port Parameters. . . . . . . . . . . . . .8-7
Assigning VLANs to a Port and Associated Issues . . . . . . . . . . . . . . . . . .8-9
Configuring Physical Port Settings . . . . . . . . . . . . . . . . . . . . . . . . . . . . . . . . .8-11
Configuring Physical Ports on 10-Gigabit Ports . . . . . . . . . . . . . . . . . . .8-11
Configuring Physical Ports on Gigabit Ports . . . . . . . . . . . . . . . . . . . . . .8-16
Configuring Physical Ports on Fast Ethernet Ports. . . . . . . . . . . . . . . . . .8-21
Using the All Ports Configuration Web Page. . . . . . . . . . . . . . . . . . . . . .8-28
Configuring Switch Ports Settings . . . . . . . . . . . . . . . . . . . . . . . . . . . . . . . . . .8-28
Configuring Switch Ports . . . . . . . . . . . . . . . . . . . . . . . . . . . . . . . . . . . . .8-29
Automatic VLAN Creation. . . . . . . . . . . . . . . . . . . . . . . . . . . . . . . . . . . .8-35
Configuring MAC Address Lock and Intrusion Detection. . . . . . . . . . . .8-37
Document No. 10-300077, Issue 2 vii
Page 8

Table of Contents
Using the All Module Ports Configuration Web Page . . . . . . . . . . . . . . 8-39
Viewing Switch Port Settings . . . . . . . . . . . . . . . . . . . . . . . . . . . . . . . . . 8-41
Configuring Port Redundancy. . . . . . . . . . . . . . . . . . . . . . . . . . . . . . . . . . . . . 8-42
Overview . . . . . . . . . . . . . . . . . . . . . . . . . . . . . . . . . . . . . . . . . . . . . . . . . 8-42
Creating a Port Redundancy Pair. . . . . . . . . . . . . . . . . . . . . . . . . . . . . . . 8-43
Deleting a Port Redundancy Pair. . . . . . . . . . . . . . . . . . . . . . . . . . . . . . . 8-44
Disabling or Enabling Port Redundancy . . . . . . . . . . . . . . . . . . . . . . . . . 8-45
GBIC Identification. . . . . . . . . . . . . . . . . . . . . . . . . . . . . . . . . . . . . . . . . . . . . 8-46
Network Error Detection and Recovery . . . . . . . . . . . . . . . . . . . . . . . . . . . . . 8-47
Overview . . . . . . . . . . . . . . . . . . . . . . . . . . . . . . . . . . . . . . . . . . . . . . . . . 8-47
Enabling NEDR. . . . . . . . . . . . . . . . . . . . . . . . . . . . . . . . . . . . . . . . . . . . 8-48
Internal Error Detection and Recovery . . . . . . . . . . . . . . . . . . . . . . . . . . . . . . 8-51
Overview . . . . . . . . . . . . . . . . . . . . . . . . . . . . . . . . . . . . . . . . . . . . . . . . . 8-51
Enabling IEDR. . . . . . . . . . . . . . . . . . . . . . . . . . . . . . . . . . . . . . . . . . . . . 8-52
Enabling IEDR for Hunt Groups. . . . . . . . . . . . . . . . . . . . . . . . . . . . . . . 8-52
Setting the IEDR Threshold for Internal Errors . . . . . . . . . . . . . . . . . . . 8-53
Viewing IEDR Settings. . . . . . . . . . . . . . . . . . . . . . . . . . . . . . . . . . . . . . 8-53
Viewing IEDR Settings for Hunt Groups . . . . . . . . . . . . . . . . . . . . . . . . 8-53
Error Messages . . . . . . . . . . . . . . . . . . . . . . . . . . . . . . . . . . . . . . . . . . . . 8-54
System Messages. . . . . . . . . . . . . . . . . . . . . . . . . . . . . . . . . . . . . . . . . . . 8-54
Chapter 9 — Managing the Address Forwarding Table. . . . . . . . . . . . . . . . . 9-1
Overview . . . . . . . . . . . . . . . . . . . . . . . . . . . . . . . . . . . . . . . . . . . . . . . . . . . . . . 9-1
Relationship between VLANs, AFT and Hash Table Sizes . . . . . . . . . . . . . . . 9-2
Hash Table guidelines for creating VLANs . . . . . . . . . . . . . . . . . . . . . . . . . . . 9-3
Examples of Configuring VLANs and Hash Table Size. . . . . . . . . . . . . . . . . . 9-6
AFT Default Settings. . . . . . . . . . . . . . . . . . . . . . . . . . . . . . . . . . . . . . . . . . . . . 9-7
Address Forwarding Table, Auto-Sizing, Auto Increment and Threshold . . . . 9-7
Total Entries, Address Memory, Age and Super-Age Timers . . . . . . . . . . . . . 9-9
Overview . . . . . . . . . . . . . . . . . . . . . . . . . . . . . . . . . . . . . . . . . . . . . . . . . . 9-9
Configuring the AGE and Super Age Timers . . . . . . . . . . . . . . . . . . . . . . 9-9
Instance Table Information . . . . . . . . . . . . . . . . . . . . . . . . . . . . . . . . . . . . . . . 9-10
Searching the Switch AFT. . . . . . . . . . . . . . . . . . . . . . . . . . . . . . . . . . . . . . . . 9-13
Adding Static Entries to the AFT . . . . . . . . . . . . . . . . . . . . . . . . . . . . . . . . . . 9-19
Option 82 for DHCP . . . . . . . . . . . . . . . . . . . . . . . . . . . . . . . . . . . . . . . . . . . . 9-21
Chapter 10 — Configuring Redundancy Options. . . . . . . . . . . . . . . . . . . . . 10-1
Overview . . . . . . . . . . . . . . . . . . . . . . . . . . . . . . . . . . . . . . . . . . . . . . . . . . . . . 10-1
Configuring Redundant Hardware . . . . . . . . . . . . . . . . . . . . . . . . . . . . . . . . . 10-3
Redundant Switch Controllers and Elements . . . . . . . . . . . . . . . . . . . . . 10-3
Installing and Enabling Redundant Hardware. . . . . . . . . . . . . . . . . . . . . . . . . 10-5
Installing Redundant Hardware. . . . . . . . . . . . . . . . . . . . . . . . . . . . . . . . 10-5
Enabling Redundant Hardware . . . . . . . . . . . . . . . . . . . . . . . . . . . . . . . . 10-6
Replacing the Primary Controller . . . . . . . . . . . . . . . . . . . . . . . . . . . . . . . . . . 10-7
Replacing an Element . . . . . . . . . . . . . . . . . . . . . . . . . . . . . . . . . . . . . . . . . . . 10-9
Configuring Supervisor Module Redundant Ethernet Console IP Addresses10-10
Synchronizing the Active and Standby CPUs. . . . . . . . . . . . . . . . . . . . . . . . 10-12
Overview . . . . . . . . . . . . . . . . . . . . . . . . . . . . . . . . . . . . . . . . . . . . . . . . 10-12
viii User Guide for the Avaya P580 and P882 Multiservice Switches, v6.1
Page 9

Table of Contents
Supervisor Module Redundancy Statistics. . . . . . . . . . . . . . . . . . . . . . .10-13
Active and Standby Roles. . . . . . . . . . . . . . . . . . . . . . . . . . . . . . . . . . . .10-13
Synchronization Procedure. . . . . . . . . . . . . . . . . . . . . . . . . . . . . . . . . . .10-15
Chapter 11 — Configuring DNS Client. . . . . . . . . . . . . . . . . . . . . . . . . . . . . 11-1
Overview . . . . . . . . . . . . . . . . . . . . . . . . . . . . . . . . . . . . . . . . . . . . . . . . . . . . .11-1
DNS Client Support . . . . . . . . . . . . . . . . . . . . . . . . . . . . . . . . . . . . . . . . . . . . .11-1
Overview. . . . . . . . . . . . . . . . . . . . . . . . . . . . . . . . . . . . . . . . . . . . . . . . . .11-1
Sample Recursive DNS Query . . . . . . . . . . . . . . . . . . . . . . . . . . . . . . . . .11-3
DNS Client on the Avaya Multiservice Switch . . . . . . . . . . . . . . . . . . . . . . . .11-4
Order of Operations for DNS on the Switch . . . . . . . . . . . . . . . . . . . . . .11-5
Configuring the DNS Client. . . . . . . . . . . . . . . . . . . . . . . . . . . . . . . . . . . . . . .11-6
Chapter 12 — Configuring IP Routing . . . . . . . . . . . . . . . . . . . . . . . . . . . . . 12-1
Overview . . . . . . . . . . . . . . . . . . . . . . . . . . . . . . . . . . . . . . . . . . . . . . . . . . . . .12-1
Routing Function . . . . . . . . . . . . . . . . . . . . . . . . . . . . . . . . . . . . . . . . . . . . . . .12-2
Requirements for IP Routing . . . . . . . . . . . . . . . . . . . . . . . . . . . . . . . . . . . . . .12-3
Hardware Requirements. . . . . . . . . . . . . . . . . . . . . . . . . . . . . . . . . . . . . .12-3
Software Requirements. . . . . . . . . . . . . . . . . . . . . . . . . . . . . . . . . . . . . . .12-3
Minimum Configuration Requirements . . . . . . . . . . . . . . . . . . . . . . . . . .12-3
Routing Configuration Quickstart . . . . . . . . . . . . . . . . . . . . . . . . . . . . . . . . . .12-4
Displaying Existing IP Interfaces. . . . . . . . . . . . . . . . . . . . . . . . . . . . . . . . . . .12-4
Creating and Assigning IP Interfaces to the VLAN. . . . . . . . . . . . . . . . . . . . .12-6
Enabling IP Routing Global Parameters. . . . . . . . . . . . . . . . . . . . . . . . . . . . .12-10
IP Multinetting . . . . . . . . . . . . . . . . . . . . . . . . . . . . . . . . . . . . . . . . . . . . . . . .12-14
Creating a Multinet Interface . . . . . . . . . . . . . . . . . . . . . . . . . . . . . . . . .12-15
Configuring Short-Lived IP Protocol Filters . . . . . . . . . . . . . . . . . . . . . . . . .12-15
Overview. . . . . . . . . . . . . . . . . . . . . . . . . . . . . . . . . . . . . . . . . . . . . . . . .12-15
Enabling a Short-Lived IP Protocol Filter . . . . . . . . . . . . . . . . . . . . . . .12-16
Disabling a Short-Lived IP Protocol Filter. . . . . . . . . . . . . . . . . . . . . . .12-17
Displaying Short-Lived IP Protocol Filters . . . . . . . . . . . . . . . . . . . . . .12-18
Creating IP Static Routes . . . . . . . . . . . . . . . . . . . . . . . . . . . . . . . . . . . . . . . .12-19
Creating a Static Route to a Null Interface. . . . . . . . . . . . . . . . . . . . . . . . . . .12-20
Overview. . . . . . . . . . . . . . . . . . . . . . . . . . . . . . . . . . . . . . . . . . . . . . . . .12-20
Procedure . . . . . . . . . . . . . . . . . . . . . . . . . . . . . . . . . . . . . . . . . . . . . . . .12-22
Creating IP Static ARP Entries. . . . . . . . . . . . . . . . . . . . . . . . . . . . . . . . . . . .12-22
Creating a BOOTP/DHCP Server Entry . . . . . . . . . . . . . . . . . . . . . . . . . . . .12-24
Configuring Route Redistribution . . . . . . . . . . . . . . . . . . . . . . . . . . . . . . . . .12-25
Overview. . . . . . . . . . . . . . . . . . . . . . . . . . . . . . . . . . . . . . . . . . . . . . . . .12-25
Creating an IP Redistribute List Entry . . . . . . . . . . . . . . . . . . . . . . . . . .12-26
Viewing IP Redistribute List Entries . . . . . . . . . . . . . . . . . . . . . . . . . . .12-28
Modifying an IP Redistribute List Entry . . . . . . . . . . . . . . . . . . . . . . . .12-28
Deleting an IP Redistribute Entry. . . . . . . . . . . . . . . . . . . . . . . . . . . . . .12-29
IP Multicast . . . . . . . . . . . . . . . . . . . . . . . . . . . . . . . . . . . . . . . . . . . . . . . . . .12-30
Configuring IGMP . . . . . . . . . . . . . . . . . . . . . . . . . . . . . . . . . . . . . . . . .12-31
Globally Enabling IGMP . . . . . . . . . . . . . . . . . . . . . . . . . . . . . . . . . . . .12-31
Modifying IGMP Interfaces . . . . . . . . . . . . . . . . . . . . . . . . . . . . . . . . . .12-32
Configuring and Modifying DVMRP. . . . . . . . . . . . . . . . . . . . . . . . . . .12-35
Document No. 10-300077, Issue 2 ix
Page 10

Table of Contents
Configuring the DVMRP Global Configuration . . . . . . . . . . . . . . . . . . 12-35
Modifying a DVMRP Interface. . . . . . . . . . . . . . . . . . . . . . . . . . . . . . . 12-38
Monitoring Switch Performance Using IP Statistics. . . . . . . . . . . . . . . . . . . 12-40
Displaying Global IP Routing Statistics . . . . . . . . . . . . . . . . . . . . . . . . 12-40
Searching the IP Routing Table. . . . . . . . . . . . . . . . . . . . . . . . . . . . . . . 12-46
Displaying the IP Routing Table Statistics . . . . . . . . . . . . . . . . . . . . . . 12-48
Searching the IP ARP Cache. . . . . . . . . . . . . . . . . . . . . . . . . . . . . . . . . 12-49
IP Multicast Statistics . . . . . . . . . . . . . . . . . . . . . . . . . . . . . . . . . . . . . . . . . . 12-51
Displaying IGMP Global Statistics. . . . . . . . . . . . . . . . . . . . . . . . . . . . 12-51
Displaying IGMP Interface Statistics . . . . . . . . . . . . . . . . . . . . . . . . . . 12-52
Displaying the IGMP Group Membership Table . . . . . . . . . . . . . . . . . 12-55
Displaying the IGMP Local Multicast Forwarding Cache . . . . . . . . . . 12-56
Displaying DVMRP Global Statistics. . . . . . . . . . . . . . . . . . . . . . . . . . 12-57
Displaying DVMRP Interface Statistics . . . . . . . . . . . . . . . . . . . . . . . . 12-59
Displaying DVMRP Neighbor Routers. . . . . . . . . . . . . . . . . . . . . . . . . 12-61
Displaying DVMRP Routing Table Statistics. . . . . . . . . . . . . . . . . . . . 12-62
Displaying the DVMRP Route Table . . . . . . . . . . . . . . . . . . . . . . . . . . 12-63
Displaying the DVMRP Upstream Routers. . . . . . . . . . . . . . . . . . . . . . 12-65
Displaying the DVMRP Designated Forwarder(s) Table . . . . . . . . . . . 12-66
Displaying the DVMRP Downstream Dependent Routers . . . . . . . . . . 12-67
Displaying the DVMRP Multicast Forwarding Cache . . . . . . . . . . . . . 12-67
Configuring VRRP . . . . . . . . . . . . . . . . . . . . . . . . . . . . . . . . . . . . . . . . . . . . 12-72
Globally Enabling VRRP . . . . . . . . . . . . . . . . . . . . . . . . . . . . . . . . . . . 12-72
Enabling VRRP on an Interface . . . . . . . . . . . . . . . . . . . . . . . . . . . . . . 12-73
Creating a VRRP Virtual Router. . . . . . . . . . . . . . . . . . . . . . . . . . . . . . 12-74
Displaying VRRP Statistics. . . . . . . . . . . . . . . . . . . . . . . . . . . . . . . . . . 12-78
VRRP Configuration Considerations . . . . . . . . . . . . . . . . . . . . . . . . . . 12-80
Configuring IRDP . . . . . . . . . . . . . . . . . . . . . . . . . . . . . . . . . . . . . . . . . . . . . 12-83
Enabling IRDP on an Interface . . . . . . . . . . . . . . . . . . . . . . . . . . . . . . . 12-83
Configuring LDAP . . . . . . . . . . . . . . . . . . . . . . . . . . . . . . . . . . . . . . . . . . . . 12-86
Configuring LDAP Settings . . . . . . . . . . . . . . . . . . . . . . . . . . . . . . . . . 12-86
Viewing LDAP Statistics. . . . . . . . . . . . . . . . . . . . . . . . . . . . . . . . . . . . 12-89
Configuring a Static Route for the PPP Console. . . . . . . . . . . . . . . . . . . . . . 12-90
Configuring the IP Interface for the PPP Console. . . . . . . . . . . . . . . . . . . . . 12-91
Chapter 13 — Configuring Access Lists . . . . . . . . . . . . . . . . . . . . . . . . . . . . 13-1
Overview . . . . . . . . . . . . . . . . . . . . . . . . . . . . . . . . . . . . . . . . . . . . . . . . . . . . . 13-1
Creating Access Rules. . . . . . . . . . . . . . . . . . . . . . . . . . . . . . . . . . . . . . . . . . . 13-6
Creating Standard Access Rules . . . . . . . . . . . . . . . . . . . . . . . . . . . . . . . 13-6
Creating Extended Access Rules. . . . . . . . . . . . . . . . . . . . . . . . . . . . . . . 13-8
Enabling an Access List . . . . . . . . . . . . . . . . . . . . . . . . . . . . . . . . . . . . . . . . 13-12
Example: Using an Access Control Rule to Filter Web Traffic . . . . . . . . . . 13-13
Logging ACL Activity . . . . . . . . . . . . . . . . . . . . . . . . . . . . . . . . . . . . . . . . . 13-15
Overview . . . . . . . . . . . . . . . . . . . . . . . . . . . . . . . . . . . . . . . . . . . . . . . . 13-15
Enabling ACL Logging. . . . . . . . . . . . . . . . . . . . . . . . . . . . . . . . . . . . . 13-16
Setting a Logging Interval. . . . . . . . . . . . . . . . . . . . . . . . . . . . . . . . . . . 13-17
Optimizing Switch Performance. . . . . . . . . . . . . . . . . . . . . . . . . . . . . . . . . . 13-18
Overview . . . . . . . . . . . . . . . . . . . . . . . . . . . . . . . . . . . . . . . . . . . . . . . . 13-18
x User Guide for the Avaya P580 and P882 Multiservice Switches, v6.1
Page 11

Table of Contents
Recognizing Performance Issues . . . . . . . . . . . . . . . . . . . . . . . . . . . . . .13-20
Evaluating System Performance. . . . . . . . . . . . . . . . . . . . . . . . . . . . . . .13-21
Enabling Routing at the Module. . . . . . . . . . . . . . . . . . . . . . . . . . . . . . .13-23
Designing Safe, Efficient ACLs. . . . . . . . . . . . . . . . . . . . . . . . . . . . . . .13-24
Identifying the Ports . . . . . . . . . . . . . . . . . . . . . . . . . . . . . . . . . . . . . . . .13-25
Configuring Hash Mode. . . . . . . . . . . . . . . . . . . . . . . . . . . . . . . . . . . . .13-26
Using Protocol or Port IDs in Access Rules. . . . . . . . . . . . . . . . . . . . . .13-27
Managing F-chip Memory . . . . . . . . . . . . . . . . . . . . . . . . . . . . . . . . . . .13-28
Chapter 14 — Configuring RIP Routing. . . . . . . . . . . . . . . . . . . . . . . . . . . . 14-1
Overview . . . . . . . . . . . . . . . . . . . . . . . . . . . . . . . . . . . . . . . . . . . . . . . . . . . . .14-1
Configuring RIP on the Switch . . . . . . . . . . . . . . . . . . . . . . . . . . . . . . . . . . . .14-1
Modifying RIP Interfaces. . . . . . . . . . . . . . . . . . . . . . . . . . . . . . . . . . . . . . . . .14-3
Creating Trusted RIP Neighbors . . . . . . . . . . . . . . . . . . . . . . . . . . . . . . . . . . .14-6
Key Chains . . . . . . . . . . . . . . . . . . . . . . . . . . . . . . . . . . . . . . . . . . . . . . . . . . . .14-7
Overview. . . . . . . . . . . . . . . . . . . . . . . . . . . . . . . . . . . . . . . . . . . . . . . . . .14-7
Key Chains on the Avaya Multiservice Switch . . . . . . . . . . . . . . . . . . . .14-8
Configuring Key Chains. . . . . . . . . . . . . . . . . . . . . . . . . . . . . . . . . . . . . .14-8
Viewing RIP Statistics . . . . . . . . . . . . . . . . . . . . . . . . . . . . . . . . . . . . . . . . . .14-11
NBMA IP Interfaces. . . . . . . . . . . . . . . . . . . . . . . . . . . . . . . . . . . . . . . . . . . .14-12
Chapter 15 — Configuring the OSPF Routing Protocol . . . . . . . . . . . . . . . 15-1
Overview . . . . . . . . . . . . . . . . . . . . . . . . . . . . . . . . . . . . . . . . . . . . . . . . . . . . .15-1
What is OSPF? . . . . . . . . . . . . . . . . . . . . . . . . . . . . . . . . . . . . . . . . . . . . . . . . .15-1
Configuring OSPF . . . . . . . . . . . . . . . . . . . . . . . . . . . . . . . . . . . . . . . . . . . . . .15-2
Configuring the OSPF Global Configuration. . . . . . . . . . . . . . . . . . . . . .15-3
Creating OSPF Areas . . . . . . . . . . . . . . . . . . . . . . . . . . . . . . . . . . . . . . . .15-5
Deleting OSPF Areas . . . . . . . . . . . . . . . . . . . . . . . . . . . . . . . . . . . . . . . .15-7
Modifying OSPF Areas . . . . . . . . . . . . . . . . . . . . . . . . . . . . . . . . . . . . . .15-8
Enabling OSPF on an IP Interface . . . . . . . . . . . . . . . . . . . . . . . . . . . . . .15-8
Modifying OSPF Interfaces . . . . . . . . . . . . . . . . . . . . . . . . . . . . . . . . . . .15-9
Configuring an OSPF Passive-Interface. . . . . . . . . . . . . . . . . . . . . . . . .15-12
Creating OSPF Virtual Links . . . . . . . . . . . . . . . . . . . . . . . . . . . . . . . . .15-12
Deleting OSPF Virtual Links . . . . . . . . . . . . . . . . . . . . . . . . . . . . . . . . .15-15
Modifying OSPF Virtual Links . . . . . . . . . . . . . . . . . . . . . . . . . . . . . . .15-15
Creating OSPF Summaries. . . . . . . . . . . . . . . . . . . . . . . . . . . . . . . . . . .15-16
Deleting OSPF Summaries. . . . . . . . . . . . . . . . . . . . . . . . . . . . . . . . . . .15-17
Modifying OSPF Summaries . . . . . . . . . . . . . . . . . . . . . . . . . . . . . . . . .15-18
Monitoring Switch Performance Using OSPF Statistics . . . . . . . . . . . . . . . .15-18
Displaying OSPF Statistics. . . . . . . . . . . . . . . . . . . . . . . . . . . . . . . . . . .15-19
Displaying OSPF Links . . . . . . . . . . . . . . . . . . . . . . . . . . . . . . . . . . . . .15-21
Displaying OSPF Neighbors. . . . . . . . . . . . . . . . . . . . . . . . . . . . . . . . . .15-22
Searching the OSPF Link State Database. . . . . . . . . . . . . . . . . . . . . . . .15-24
NBMA IP Interfaces. . . . . . . . . . . . . . . . . . . . . . . . . . . . . . . . . . . . . . . . . . . .15-28
Overview. . . . . . . . . . . . . . . . . . . . . . . . . . . . . . . . . . . . . . . . . . . . . . . . .15-28
Setting Up an NBMA IP Interface . . . . . . . . . . . . . . . . . . . . . . . . . . . . .15-29
Setting Up NBMA Neighbors . . . . . . . . . . . . . . . . . . . . . . . . . . . . . . . .15-30
Removing NBMA Neighbors. . . . . . . . . . . . . . . . . . . . . . . . . . . . . . . . .15-31
Document No. 10-300077, Issue 2 xi
Page 12

Table of Contents
Chapter 16 — Configuring IPX Routing. . . . . . . . . . . . . . . . . . . . . . . . . . . . 16-1
Overview . . . . . . . . . . . . . . . . . . . . . . . . . . . . . . . . . . . . . . . . . . . . . . . . . . . . . 16-1
IPX Overview . . . . . . . . . . . . . . . . . . . . . . . . . . . . . . . . . . . . . . . . . . . . . . . . . 16-1
IPX Datagram Structure . . . . . . . . . . . . . . . . . . . . . . . . . . . . . . . . . . . . . 16-2
Configuring the Avaya Switch as an IPX Router . . . . . . . . . . . . . . . . . . . . . . 16-3
Hardware Requirements . . . . . . . . . . . . . . . . . . . . . . . . . . . . . . . . . . . . . 16-4
Configuring IPX Routing Globally . . . . . . . . . . . . . . . . . . . . . . . . . . . . . 16-4
Configuring IPX Interfaces . . . . . . . . . . . . . . . . . . . . . . . . . . . . . . . . . . . 16-5
Creating IPX Static Routes . . . . . . . . . . . . . . . . . . . . . . . . . . . . . . . . . . . 16-9
Deleting IPX Static Routes . . . . . . . . . . . . . . . . . . . . . . . . . . . . . . . . . . 16-11
Modifying IPX Static Routes. . . . . . . . . . . . . . . . . . . . . . . . . . . . . . . . . 16-12
Creating IPX Static Services . . . . . . . . . . . . . . . . . . . . . . . . . . . . . . . . . 16-12
Deleting IPX Static Service. . . . . . . . . . . . . . . . . . . . . . . . . . . . . . . . . . 16-15
Modifying IPX Static Service . . . . . . . . . . . . . . . . . . . . . . . . . . . . . . . . 16-15
Monitoring Your Switch Using IPX . . . . . . . . . . . . . . . . . . . . . . . . . . . . . . . 16-16
Displaying IPX Global Statistics. . . . . . . . . . . . . . . . . . . . . . . . . . . . . . 16-16
Searching the IPX Route Table . . . . . . . . . . . . . . . . . . . . . . . . . . . . . . . 16-18
Displaying the IPX Route Table . . . . . . . . . . . . . . . . . . . . . . . . . . . . . . 16-20
Displaying IPX Route Table Statistics . . . . . . . . . . . . . . . . . . . . . . . . . 16-20
Searching the IPX Service Table. . . . . . . . . . . . . . . . . . . . . . . . . . . . . . 16-21
Displaying the IPX Service Table . . . . . . . . . . . . . . . . . . . . . . . . . . . . . 16-23
Displaying IPX Service Table Statistics . . . . . . . . . . . . . . . . . . . . . . . . 16-24
Chapter 17 — Configuring the IPX RIP Protocol . . . . . . . . . . . . . . . . . . . . 17-1
Overview . . . . . . . . . . . . . . . . . . . . . . . . . . . . . . . . . . . . . . . . . . . . . . . . . . . . . 17-1
Configuring IPX RIP Interfaces . . . . . . . . . . . . . . . . . . . . . . . . . . . . . . . . . . . 17-1
Creating and Modifying IPX RIP Filters. . . . . . . . . . . . . . . . . . . . . . . . . . . . . 17-3
Viewing RIP Interface Statistics. . . . . . . . . . . . . . . . . . . . . . . . . . . . . . . . . . . 17-8
Chapter 18 — Configuring the IPX SAP Protocol . . . . . . . . . . . . . . . . . . . . 18-1
Overview . . . . . . . . . . . . . . . . . . . . . . . . . . . . . . . . . . . . . . . . . . . . . . . . . . . . . 18-1
Configuring IPX SAP Interfaces. . . . . . . . . . . . . . . . . . . . . . . . . . . . . . . . . . . 18-1
Creating IPX SAP Filters . . . . . . . . . . . . . . . . . . . . . . . . . . . . . . . . . . . . . . . . 18-3
Creating IPX SAP Name Filters . . . . . . . . . . . . . . . . . . . . . . . . . . . . . . . 18-4
Creating IPX SAP Network Filters . . . . . . . . . . . . . . . . . . . . . . . . . . . . . 18-7
Interpreting IPX SAP Interface Statistics . . . . . . . . . . . . . . . . . . . . . . . . . . . 18-12
Chapter 19 — Configuring AppleTalk Routing . . . . . . . . . . . . . . . . . . . . . . 19-1
Overview . . . . . . . . . . . . . . . . . . . . . . . . . . . . . . . . . . . . . . . . . . . . . . . . . . . . . 19-1
Implementation . . . . . . . . . . . . . . . . . . . . . . . . . . . . . . . . . . . . . . . . . . . . . . . . 19-1
What is AppleTalk Routing?. . . . . . . . . . . . . . . . . . . . . . . . . . . . . . . . . . 19-1
Need for AppleTalk Routing. . . . . . . . . . . . . . . . . . . . . . . . . . . . . . . . . . 19-3
Configuring AppleTalk Routing . . . . . . . . . . . . . . . . . . . . . . . . . . . . . . . . . . . 19-3
Enabling AppleTalk Global Routing. . . . . . . . . . . . . . . . . . . . . . . . . . . . 19-4
Creating an AppleTalk Routing Interface . . . . . . . . . . . . . . . . . . . . . . . . 19-4
Editing AppleTalk Interfaces. . . . . . . . . . . . . . . . . . . . . . . . . . . . . . . . . . 19-7
xii User Guide for the Avaya P580 and P882 Multiservice Switches, v6.1
Page 13

Table of Contents
Deleting an AppleTalk Interface . . . . . . . . . . . . . . . . . . . . . . . . . . . . . . .19-9
Creating an AppleTalk Static Route. . . . . . . . . . . . . . . . . . . . . . . . . . . .19-10
Editing AppleTalk Static Routes . . . . . . . . . . . . . . . . . . . . . . . . . . . . . .19-12
Deleting an AppleTalk Static Route. . . . . . . . . . . . . . . . . . . . . . . . . . . .19-13
Creating an AppleTalk Name-Binding Protocol (NBP) Filter. . . . . . . .19-14
Editing an AppleTalk NBP Filter. . . . . . . . . . . . . . . . . . . . . . . . . . . . . .19-16
Adding or Deleting Interfaces to an NBP Filter. . . . . . . . . . . . . . . . . . .19-17
Creating an AppleTalk Zone Filter. . . . . . . . . . . . . . . . . . . . . . . . . . . . .19-19
Editing an AppleTalk Zone Filter. . . . . . . . . . . . . . . . . . . . . . . . . . . . . .19-20
Adding or Deleting Interfaces to a Zone Filter. . . . . . . . . . . . . . . . . . . .19-21
Viewing AppleTalk Statistics. . . . . . . . . . . . . . . . . . . . . . . . . . . . . . . . . . . . .19-22
Viewing AppleTalk Global Statistics. . . . . . . . . . . . . . . . . . . . . . . . . . .19-23
Viewing the AppleTalk Interface Statistics Table . . . . . . . . . . . . . . . . .19-25
Viewing the AppleTalk Route Table . . . . . . . . . . . . . . . . . . . . . . . . . . .19-26
Viewing AppleTalk Route Table Statistics . . . . . . . . . . . . . . . . . . . . . .19-28
Viewing the AppleTalk ARP Cache Table. . . . . . . . . . . . . . . . . . . . . . .19-29
Viewing the AppleTalk Zone Table. . . . . . . . . . . . . . . . . . . . . . . . . . . .19-31
Viewing AppleTalk Zone Table Statistics . . . . . . . . . . . . . . . . . . . . . . .19-32
Viewing the AppleTalk NBP Table . . . . . . . . . . . . . . . . . . . . . . . . . . . .19-33
Chapter 20 — Managing Intelligent Multicasting . . . . . . . . . . . . . . . . . . . . 20-1
Overview . . . . . . . . . . . . . . . . . . . . . . . . . . . . . . . . . . . . . . . . . . . . . . . . . . . . .20-1
Introduction . . . . . . . . . . . . . . . . . . . . . . . . . . . . . . . . . . . . . . . . . . . . . . . . . . .20-1
Manually Configured Intelligent Multicasting. . . . . . . . . . . . . . . . . . . . .20-2
Dynamic Intelligent Multicasting. . . . . . . . . . . . . . . . . . . . . . . . . . . . . . .20-2
Configuring Intelligent Multicasting . . . . . . . . . . . . . . . . . . . . . . . . . . . . . . . .20-5
Configuring Global Intelligent Multicasting . . . . . . . . . . . . . . . . . . . . . .20-5
Displaying Router Ports . . . . . . . . . . . . . . . . . . . . . . . . . . . . . . . . . . . . . .20-8
Configuring Static Router Ports . . . . . . . . . . . . . . . . . . . . . . . . . . . . . . . .20-9
Searching for Intelligent Multicast Sessions . . . . . . . . . . . . . . . . . . . . .20-10
Deleting an Intelligent Multicast Session. . . . . . . . . . . . . . . . . . . . . . . .20-13
Deleting a Multicast Session Client Port . . . . . . . . . . . . . . . . . . . . . . . .20-14
Creating a Static Multicast Session . . . . . . . . . . . . . . . . . . . . . . . . . . . .20-15
Deleting Static Multicast Sessions . . . . . . . . . . . . . . . . . . . . . . . . . . . . .20-17
Creating Static Client Ports . . . . . . . . . . . . . . . . . . . . . . . . . . . . . . . . . .20-18
Deleting Static Client Ports . . . . . . . . . . . . . . . . . . . . . . . . . . . . . . . . . .20-19
Managing IGMP Snooping. . . . . . . . . . . . . . . . . . . . . . . . . . . . . . . . . . . . . . .20-20
Enabling IGMP Snooping. . . . . . . . . . . . . . . . . . . . . . . . . . . . . . . . . . . .20-20
Viewing IGMP Snooping Statistics . . . . . . . . . . . . . . . . . . . . . . . . . . . .20-21
Managing the LGMP Server . . . . . . . . . . . . . . . . . . . . . . . . . . . . . . . . . . . . .20-22
Configuring the LGMP Server. . . . . . . . . . . . . . . . . . . . . . . . . . . . . . . .20-22
Viewing the LGMP Server Statistics . . . . . . . . . . . . . . . . . . . . . . . . . . .20-25
Viewing the LGMP Server Statistics per VLAN . . . . . . . . . . . . . . . . . .20-26
Managing the LGMP Client. . . . . . . . . . . . . . . . . . . . . . . . . . . . . . . . . . . . . .20-28
Enabling the LGMP Client. . . . . . . . . . . . . . . . . . . . . . . . . . . . . . . . . . .20-30
Viewing LGMP Clients Statistics. . . . . . . . . . . . . . . . . . . . . . . . . . . . . .20-30
Viewing LGMP Clients per VLAN statistics. . . . . . . . . . . . . . . . . . . . .20-31
Managing CGMP Snooping. . . . . . . . . . . . . . . . . . . . . . . . . . . . . . . . . . . . . .20-32
Document No. 10-300077, Issue 2 xiii
Page 14

Table of Contents
Enabling CGMP Snooping . . . . . . . . . . . . . . . . . . . . . . . . . . . . . . . . . . 20-33
Viewing CGMP Snooping. . . . . . . . . . . . . . . . . . . . . . . . . . . . . . . . . . . 20-35
Chapter 21 — Monitoring the Avaya Multiservice Switch . . . . . . . . . . . . . . 21-1
Overview . . . . . . . . . . . . . . . . . . . . . . . . . . . . . . . . . . . . . . . . . . . . . . . . . . . . . 21-1
Interpreting Front Panel LED Displays. . . . . . . . . . . . . . . . . . . . . . . . . . . . . . 21-1
Checking Active Alarms. . . . . . . . . . . . . . . . . . . . . . . . . . . . . . . . . . . . . . . . . 21-2
Using the Event Subsystem. . . . . . . . . . . . . . . . . . . . . . . . . . . . . . . . . . . . . . . 21-3
Overview . . . . . . . . . . . . . . . . . . . . . . . . . . . . . . . . . . . . . . . . . . . . . . . . . 21-3
Configuring Event Notification. . . . . . . . . . . . . . . . . . . . . . . . . . . . . . . . 21-4
Configuring Notification of Protocol Events. . . . . . . . . . . . . . . . . . . . . . 21-8
Setting Log Size. . . . . . . . . . . . . . . . . . . . . . . . . . . . . . . . . . . . . . . . . . . 21-10
Viewing the Event and Shutdown Logs . . . . . . . . . . . . . . . . . . . . . . . . 21-11
Clearing the Event Log . . . . . . . . . . . . . . . . . . . . . . . . . . . . . . . . . . . . . 21-13
Viewing Event Statistics . . . . . . . . . . . . . . . . . . . . . . . . . . . . . . . . . . . . 21-13
Configuring Syslog Event Reporting . . . . . . . . . . . . . . . . . . . . . . . . . . . . . . 21-14
Overview . . . . . . . . . . . . . . . . . . . . . . . . . . . . . . . . . . . . . . . . . . . . . . . . 21-14
Configuring Syslog . . . . . . . . . . . . . . . . . . . . . . . . . . . . . . . . . . . . . . . . 21-15
Configuring Utilization Monitoring . . . . . . . . . . . . . . . . . . . . . . . . . . . . . . . 21-17
Overview . . . . . . . . . . . . . . . . . . . . . . . . . . . . . . . . . . . . . . . . . . . . . . . . 21-17
Enabling Utilization Monitoring . . . . . . . . . . . . . . . . . . . . . . . . . . . . . . 21-17
Enabling Event Logging of Utilization . . . . . . . . . . . . . . . . . . . . . . . . . 21-18
Setting a Utilization Threshold . . . . . . . . . . . . . . . . . . . . . . . . . . . . . . . 21-19
Viewing Utilization Settings . . . . . . . . . . . . . . . . . . . . . . . . . . . . . . . . . 21-20
Viewing CPU Utilization Statistics . . . . . . . . . . . . . . . . . . . . . . . . . . . . 21-20
Viewing Statistics for Forwarding Engine Utilization . . . . . . . . . . . . . 21-21
Chapter 22 — Monitoring and Configuring the Forwarding Cache . . . . . . 22-1
Overview . . . . . . . . . . . . . . . . . . . . . . . . . . . . . . . . . . . . . . . . . . . . . . . . . . . . . 22-1
Configuring the Forwarding Cache. . . . . . . . . . . . . . . . . . . . . . . . . . . . . . . . . 22-2
Monitoring the Forwarding Cache Statistics. . . . . . . . . . . . . . . . . . . . . . . . . . 22-4
Displaying Frame Forwarding Statistics . . . . . . . . . . . . . . . . . . . . . . . . . 22-4
Displaying and Searching the L3 Forwarding Cache for an Entry . . . . . 22-6
Displaying the Forwarding Cache. . . . . . . . . . . . . . . . . . . . . . . . . . . . . . . . . . 22-9
Chapter 23 — Using RMON and Ethernet Statistics to Analyze Network
Performance . . . . . . . . . . . . . . . . . . . . . . . . . . . . . . . . . . . . . . . . . . . . . . . . . . 23-1
Overview . . . . . . . . . . . . . . . . . . . . . . . . . . . . . . . . . . . . . . . . . . . . . . . . . . . . . 23-1
Viewing Network Statistics. . . . . . . . . . . . . . . . . . . . . . . . . . . . . . . . . . . . . . . 23-1
Setting Up Port Mirroring. . . . . . . . . . . . . . . . . . . . . . . . . . . . . . . . . . . . . . . . 23-7
Setting Up a Port Mirror on a Switch in Fabric Mode 1 . . . . . . . . . . . . . 23-8
Setting Up Port Mirroring on a Switch in Fabric Mode 2. . . . . . . . . . . 23-12
Removing a Fabric Mode 2 Port Mirror . . . . . . . . . . . . . . . . . . . . . . . . 23-18
Viewing Information about a Fabric Mode 2 Port Mirror. . . . . . . . . . . 23-18
xiv User Guide for the Avaya P580 and P882 Multiservice Switches, v6.1
Page 15

Table of Contents
Chapter 24 — Managing Buffers and Queues on 50-Series Modules . . . . .24-1
Overview . . . . . . . . . . . . . . . . . . . . . . . . . . . . . . . . . . . . . . . . . . . . . . . . . . . . .24-1
How Queues Work. . . . . . . . . . . . . . . . . . . . . . . . . . . . . . . . . . . . . . . . . . . . . .24-1
Managing Buffers and Queues. . . . . . . . . . . . . . . . . . . . . . . . . . . . . . . . . . . . .24-2
Chapter 25 — 80-Series QoS . . . . . . . . . . . . . . . . . . . . . . . . . . . . . . . . . . . . . 25-1
Overview . . . . . . . . . . . . . . . . . . . . . . . . . . . . . . . . . . . . . . . . . . . . . . . . . . . . .25-1
Why implement QoS? . . . . . . . . . . . . . . . . . . . . . . . . . . . . . . . . . . . . . . . . . . .25-2
How Does QoS Work?. . . . . . . . . . . . . . . . . . . . . . . . . . . . . . . . . . . . . . . . . . .25-3
QoS Process for Ingress Traffic . . . . . . . . . . . . . . . . . . . . . . . . . . . . . . . .25-3
QoS Process for Egress Traffic. . . . . . . . . . . . . . . . . . . . . . . . . . . . . . . . .25-4
Diagram of QoS Process. . . . . . . . . . . . . . . . . . . . . . . . . . . . . . . . . . . . . .25-6
Classification of Traffic . . . . . . . . . . . . . . . . . . . . . . . . . . . . . . . . . . . . . . . . . .25-7
Default Priority. . . . . . . . . . . . . . . . . . . . . . . . . . . . . . . . . . . . . . . . . . . . .25-8
Classifying Traffic by Layer 2 Characteristics. . . . . . . . . . . . . . . . . . . . .25-9
Classifying Traffic by Layer 3 or Layer 4 Characteristics . . . . . . . . . . . .25-9
Diffserv. . . . . . . . . . . . . . . . . . . . . . . . . . . . . . . . . . . . . . . . . . . . . . . . . .25-11
Precedence of Priorities . . . . . . . . . . . . . . . . . . . . . . . . . . . . . . . . . . . . .25-11
Supported Number of Queues . . . . . . . . . . . . . . . . . . . . . . . . . . . . . . . .25-12
Setting the Priority of a Physical Port. . . . . . . . . . . . . . . . . . . . . . . . . . .25-13
Setting a Physical Port to Ignore Tag Priority . . . . . . . . . . . . . . . . . . . .25-14
Setting the Priority of a MAC Address. . . . . . . . . . . . . . . . . . . . . . . . . .25-16
Displaying the Priority of a MAC Address . . . . . . . . . . . . . . . . . . . . . .25-18
Setting a Physical Port to Use DiffServ . . . . . . . . . . . . . . . . . . . . . . . . .25-19
Setting a Physical Port to Mask DiffServ Bits . . . . . . . . . . . . . . . . . . . .25-20
Assigning a Priority to a DSCP . . . . . . . . . . . . . . . . . . . . . . . . . . . . . . .25-21
Displaying the DiffServ Table . . . . . . . . . . . . . . . . . . . . . . . . . . . . . . . .25-21
Displaying the QoS Settings for a Physical Port . . . . . . . . . . . . . . . . . .25-22
Setting Up an ACL Rule. . . . . . . . . . . . . . . . . . . . . . . . . . . . . . . . . . . . .25-22
Setting Up a Default ACL Rule . . . . . . . . . . . . . . . . . . . . . . . . . . . . . . .25-28
Displaying ACL Rules . . . . . . . . . . . . . . . . . . . . . . . . . . . . . . . . . . . . . .25-29
Ingress Policing . . . . . . . . . . . . . . . . . . . . . . . . . . . . . . . . . . . . . . . . . . . . . . .25-29
Setting Up Policing. . . . . . . . . . . . . . . . . . . . . . . . . . . . . . . . . . . . . . . . .25-30
Displaying the Policing Settings. . . . . . . . . . . . . . . . . . . . . . . . . . . . . . .25-32
Queue-Servicing Algorithms . . . . . . . . . . . . . . . . . . . . . . . . . . . . . . . . . . . . .25-33
WFQ . . . . . . . . . . . . . . . . . . . . . . . . . . . . . . . . . . . . . . . . . . . . . . . . . . . .25-33
Strict Priority Queueing . . . . . . . . . . . . . . . . . . . . . . . . . . . . . . . . . . . . .25-35
CBQ . . . . . . . . . . . . . . . . . . . . . . . . . . . . . . . . . . . . . . . . . . . . . . . . . . . .25-35
CBWFQ . . . . . . . . . . . . . . . . . . . . . . . . . . . . . . . . . . . . . . . . . . . . . . . . .25-35
Management Traffic . . . . . . . . . . . . . . . . . . . . . . . . . . . . . . . . . . . . . . . .25-36
Setting Up WFQ. . . . . . . . . . . . . . . . . . . . . . . . . . . . . . . . . . . . . . . . . . .25-37
Setting Up Strict Priority Queueing . . . . . . . . . . . . . . . . . . . . . . . . . . . .25-38
Setting Up CBQ . . . . . . . . . . . . . . . . . . . . . . . . . . . . . . . . . . . . . . . . . . .25-39
Setting Up CBWFQ . . . . . . . . . . . . . . . . . . . . . . . . . . . . . . . . . . . . . . . .25-40
Displaying the Queue-Service Settings . . . . . . . . . . . . . . . . . . . . . . . . .25-43
QoS Statistics . . . . . . . . . . . . . . . . . . . . . . . . . . . . . . . . . . . . . . . . . . . . . . . . .25-44
Displaying QoS Statistics. . . . . . . . . . . . . . . . . . . . . . . . . . . . . . . . . . . .25-50
Document No. 10-300077, Issue 2 xv
Page 16

Table of Contents
Resetting the QoS Statistics. . . . . . . . . . . . . . . . . . . . . . . . . . . . . . . . . . 25-51
Displaying the Buffer Settings for Egress Queues . . . . . . . . . . . . . . . . 25-52
Appendix A — Upgrading the Application Software . . . . . . . . . . . . . . . . . . .A-1
Overview . . . . . . . . . . . . . . . . . . . . . . . . . . . . . . . . . . . . . . . . . . . . . . . . . . . . . .A-1
Backing Up the Current Software. . . . . . . . . . . . . . . . . . . . . . . . . . . . . . . . . . .A-2
Backing Up the Previous Configuration . . . . . . . . . . . . . . . . . . . . . . . . . . . . . . A-3
Downloading Application Software . . . . . . . . . . . . . . . . . . . . . . . . . . . . . . . . .A-5
Setting the Startup Image . . . . . . . . . . . . . . . . . . . . . . . . . . . . . . . . . . . . . . . . .A-7
Synchronizing the Active and Standby Supervisor Modules . . . . . . . . . . . . . .A-7
Resetting the Active Supervisor . . . . . . . . . . . . . . . . . . . . . . . . . . . . . . . . . . . .A-8
Resetting the Standby Supervisor . . . . . . . . . . . . . . . . . . . . . . . . . . . . . . . . . . .A-9
Verifying the Upgrade. . . . . . . . . . . . . . . . . . . . . . . . . . . . . . . . . . . . . . . . . . .A-10
Upgrading a Switch with Multiple VLANs
Statically Bound to Hunt Group Ports. . . . . . . . . . . . . . . . . . . . . . . . . . . . . . .A-10
Appendix B — Boot Mode . . . . . . . . . . . . . . . . . . . . . . . . . . . . . . . . . . . . . . . .B-1
Accessing BOOT Mode . . . . . . . . . . . . . . . . . . . . . . . . . . . . . . . . . . . . . . . . . .B-1
Accessing BOOT Mode During Power Up. . . . . . . . . . . . . . . . . . . . . . . .B-1
Accessing BOOT Mode with Corrupted Operational Images. . . . . . . . . .B-2
Password Recovery . . . . . . . . . . . . . . . . . . . . . . . . . . . . . . . . . . . . . . . . . . . . . .B-2
Downloading New Operational Code. . . . . . . . . . . . . . . . . . . . . . . . . . . . . . . .B-3
Appendix C — Supported MIB Groups. . . . . . . . . . . . . . . . . . . . . . . . . . . . . .C-1
AppleTalk . . . . . . . . . . . . . . . . . . . . . . . . . . . . . . . . . . . . . . . . . . . . . . . . . . . . .C-1
Application Software Management. . . . . . . . . . . . . . . . . . . . . . . . . . . . . . . . . .C-1
ATM Uplink . . . . . . . . . . . . . . . . . . . . . . . . . . . . . . . . . . . . . . . . . . . . . . . . . . .C-2
Bridging. . . . . . . . . . . . . . . . . . . . . . . . . . . . . . . . . . . . . . . . . . . . . . . . . . . . . . .C-2
DVMRP. . . . . . . . . . . . . . . . . . . . . . . . . . . . . . . . . . . . . . . . . . . . . . . . . . . . . . .C-2
General Private MIBs . . . . . . . . . . . . . . . . . . . . . . . . . . . . . . . . . . . . . . . . . . . .C-2
IGMP. . . . . . . . . . . . . . . . . . . . . . . . . . . . . . . . . . . . . . . . . . . . . . . . . . . . . . . . .C-2
IP . . . . . . . . . . . . . . . . . . . . . . . . . . . . . . . . . . . . . . . . . . . . . . . . . . . . . . . . . . . .C-3
IPX. . . . . . . . . . . . . . . . . . . . . . . . . . . . . . . . . . . . . . . . . . . . . . . . . . . . . . . . . . .C-3
Monitoring. . . . . . . . . . . . . . . . . . . . . . . . . . . . . . . . . . . . . . . . . . . . . . . . . . . . .C-4
SNMP . . . . . . . . . . . . . . . . . . . . . . . . . . . . . . . . . . . . . . . . . . . . . . . . . . . . . . . .C-4
Appendix D — FCC Notice . . . . . . . . . . . . . . . . . . . . . . . . . . . . . . . . . . . . . . .D-1
Index . . . . . . . . . . . . . . . . . . . . . . . . . . . . . . . . . . . . . . . . . . . . . . . . . . . . . . . . IN-1
xvi User Guide for the Avaya P580 and P882 Multiservice Switches, v6.1
Page 17

Preface
Preface Contents
This Preface contains the following information:
■ Overview of User Guide Contents
■ Technical Support
■ Avaya Products and Services
■ P580 and P882 Documentation
■ Document Conventions
■ Te rminology
■ Documentation Feedback
Overview of User Guide Contents
This guide provides information and procedures for configuring the Avaya
P580 and P882 Multiservice switches. You can use the Web Agent,
command li ne interface (CLI), or SNMP to configure the switches. This
guide provides information for the Web Agent and CLI. The Avaya
switches support both layer 2 and layer 3 functionality.
For the most current issue of this document and software downloads, see
http://support.avaya.com.
* Note: For detailed information about the CLI, se e Command
Reference Guide for the Avaya P580 and P882 Multiservice
Switches, Software Version 6.1.
User Guide for the Avaya P580 and P882 Multiservice Switches, v6.1 xvii
Page 18

Preface
This guide is divided in to the following chapters:
■ Chapter 1, Introduction — Provides an overview of hardware and
software used on the P580 and P882.
■ Chapter 2, Setting Up th e Switch — Explains how to initially
configure the P580 and P882, create user accounts, configure
protocols, manage configuration files, and configure the switches
for dial-up networking.
■ Chapter 3, Configuring System Information — Explains how to
view and configure switch information such as system clock
settings, and temperature, power, and cooling statistics.
■ Chapter 4, Security — Provides information and procedures for
configuring secure mode, SSHv2, and HTTPS Using SSLv3 or
TLSv1.
■ Chapter 5, Configuring SNMP —Provides information and
procedures for configuring SNMPv1, v2, and v3.
■ Chapter 6, Using VLANs, Hunt Groups, and VTP Snooping —
Provides detailed information on how to create and configure
VLANs, hunt groups, and VTP Snooping on your switch.
■ Chapter 7, Configuring Rapid Spanning Tree — Provides
information and procedures for configuring Rapid Spanning Tree
Protocol (RSTP).
■ Chapter 8, Configuring Ports — Explains h ow to confi gure physi cal
port and switch port parameters on your switch.
■ Chapter 9, Managing the Address Forwarding Table — Provides
information on how to configure and manage the address
forwarding tables in your switch.
■ Chapter 10, Configuring Redundancy Options — Explains how to
install, enable and configure redundancy hardware options on your
switch.
■ Chapter 11, Configuring DNS Client — Explains how to configure
DNS and RADIUS clients on your switch.
■ Chapter 12, Configuring IP Routing — Explains how to configure
your switch for IP routing and interpret IP routing statistics.
■ Chapter 13, Configuring Access Lists — Provides information and
procedures for creat ing access ru les, enabli ng an access li st, log ging
ACL activity, and optimizing switch performance when an access
list is enabled.
■ Chapter 14, Configuring RIP Routing — Explains how t o confi gure
IP RIP on your switch.
xviii User Guide for the Avaya P580 and P882 Multiservice Switches, v6.1
Page 19

Preface
■ Chapter 15, Configuring the OSPF Routing Protocol — Explains
how to configure OSPF routing protocol on your switch. Also
provided is information on OSPF statistical displays.
■ Chapter 16, Configuri ng IPX Routing — Explains how to confi gure
IPX on your switch.
■ Chapter 17, Configuring the IPX RIP Protocol — Explains how to
configure IPX RIP protocol on your switch.
■ Chapter 18, Configuring the IPX SAP Protocol — Explains how to
configure IPX SAP on your switch.
■ Chapter 19, Configuring AppleTalk Routing — Explains how to
configure AppleTalk parameters and view AppleTalk statistics.
■ Chapter 20, Managing Intelligent Multicasting — Explains how to
configure and manage intelligent multicast sessions on your switch.
■ Chapter 21, Monitoring the Avaya Multiservice Switch — Explains
how to use the Web Agent to assess your switch’s current
operational status.
■ Chapter 22, Monitoring and Configuring the Forwarding Cache —
Explains how to interpret and monitor forwarding operations that
occur in the address cache of the multilayer media modules.
■ Chapter 23, Using RMON and Ethernet Statistics to Analyze
Network Performance — Provides information on how to interpret
the statistics counter values displayed in your switch.
■ Chapter 24, Managing Buffers and Queues on 50-Series Modules
— Explains how to use your swit ch’ s buf fer manageme nt features to
optimize traffic throughput through the switch fabric.
■ Chapter 25, 80-Series QoS — Provides information about Quality
of Service (QoS) and explains how to configure QoS on the switch.
■ Appendix A, Upgrading the Application Software — Explains how
to update the operational code on your switch.
■ Appendix B, Boot Mode — Explains how to use boot mode on the
Avaya Multiservice switches.
■ Appendix C, Supported MIB Groups — Provides information on
the supported MIB groups.
■ Appendix D, FCC Notice — Provides the FCC notice statement.
■ Index
Document No. 10-300077, Issue 2 xix
Page 20

Preface
Technical Support
To contact Avaya’s technical support:
■ From the United States:
1-800-237-0016
■ From North America:
1-800-242-2121
■ Outside North America:
Contact your distributor
Avaya Products and Services
See the Avaya World Wide Web site at http://www.avaya.com for
information about Avaya products and services.
P580 and P882 Documentation
This section contains th e following information:
■ Available Documentation
■ Installing the Online Help Files
■ Setting the Lo cation of the Online Help Files
Available Documentation
Documents The following documents provide additional information on the Avaya
P580 and P882 Multiservice switches:
■ Installation Guide for the Avaya P550R, P580, P880, and P882
Multiservice Switches describes how to install and set up the family
of Avaya Multiservice switches.
■ Command Reference Guide for the Avaya P580 and P882
Multiservice Switches, Software Version 6.1 provides details and
command syntax for the Command Line Interface (CLI).
xx User Guide for the Avaya P580 and P882 Multiservice Switches, v6.1
Page 21

Preface
■ Release Notes for the Avaya P580 and P882 Multiservice Switches,
Software Version 6.1 lists new software features, reso lved issues,
and known issues in v6.1 application software.
■ Functional Restrictions for the Avaya P580 and P882 Multiservice
Switches, Software Version 6.1 lists functional restrictions of
switches that are running v6.1 application software. Functional
restrictions are issues that restrict the functionality of a particular
feature. For most of these issues a workaround exists.
For the most current iss ues of these d ocuments and this User Guide, see
http://support.avaya.com.
Online Help You must have a browser installed on your system to view the online help.
To access the Web Agent online help, you must install the help files on an
existing Web server in your network. Once the help files are installed, you
must point the P580 or P882 to the location of the help files. The following
two sections provide procedures for these tasks:
■ Installing the Online Help Files
■ Setting the Location of the Online Help Files
Installing the Online Help Files
To install the online help files on a Web server:
1. Download the online help from http://support.avaya.com to the directory
where you want to store the help files.
By default, the Web Agent is set to retrieve online help files from the
help subdirectory of the Web server’s root directory. If you install the
online help files in a different directory, you must change the Web
Agent’s setting for th e help file loc ation. For information on changing
this setting, see the following section, “Setting the Location of the
Online Help Files.”
2. Unzip the zip file.
Setting the Location of the Online Help Files
To set the location of the online help f iles:
1. Launch a Web browser and connect to the switch.
2. Enter your user name and password, and click OK.
Document No. 10-300077, Issue 2 xxi
Page 22

Preface
3. In the navigation pane, expand t he System > Configuration folders, and
then click Online Help.
The Online Help Configuration Web page is displayed in the content
pane.
4. In the HTTP Server Location field, enter the URL of the Web server
followed by the TCP por t that the Web server uses. You can enter either
the host name or IP address for the URL. For example, http://
10.10.10.10:80.
The default setting for the TCP port is 2010.
5. In the HELP Directory Location field, enter the directory where the
files are stored. The de fault settin g is help.
6. Click APPLY.
Document Conventions
The following conventions are used throughout this guide:
Convention Represents Examples
User Input User entered text. To create a new password,
type store password root.
Boldface Te xt A menu command, a keyword
to be acted upon, or a button
name.
System Output Text displayed by the system. If you attempt to find the
In the Interface field, select
Default.
Click Cancel to stop the
installation.
physical lo cation of port 30,
the system displays
Unit 2 Port 2
“Save the
running
configuration to
the startup
configuration”
Always save the running
configuration to startup
configuration before you turn
off the switch
Note: Never save the startup
configuration to the
running
configuration.
“Save the running
configuration to the startup
configuration and turn off
the switch”.
1 of 2
xxii User Guide for the Avaya P580 and P882 Multiservice Switches, v6.1
Page 23

CAUTION:
Convention Represents Examples
Preface
Using the Web
Agent.
Web Agent vs.
Command Line
Interface (CLI)
steps.
Knowledge level All procedures in this guide
The Web Agent consists of
folders that you must expand
to perform specific operations.
The folders are located in the
navigation pane of the Web
Agent.
The procedures in this guide
provide detailed steps for the
Web Agent. A series of CLI
commands are also available
that accomplish the same
actions. These commands are
listed after the Web Agent
procedure. For more
information about these
commands, see the Command
Reference Guide for the A vaya
P580 and P882 Multiservice
Switches, Software Version
6.1.
are written with the
assumption that the reader
knows how to navigate a
windows-type environment
(use scroll bars, open pulldown menus, etc.).
In the navigation pane,
expand Modules & Ports
folder, and then click
Configuration.
In the Ports field, select the
port number of the module.
T o view switch port se ttings,
use the following CLI
command: > show port
<mod-num>.
Scroll to the “Configuring
IP” section.
Open the In-band IPC pulldown menu.
2 of 2
Notes, Cautions, and Warnings
The following text and icon conventions are used in this guide for Notes,
Cautions, and Warnings.
* Note: Provides additional information about a procedure or topic.
WARNING:
Document No. 10-300077, Issue 2 xxiii
Indicates a condition that may cause bodily injury or death.
Indicates a condition that may damage hardware or software.
Page 24

Preface
Terminology
Throughout this guide, the term layer 2 refers to switching capability. For
example, layer 2 module is a module that provides switching capability.
The term layer 3 refers to the combined ab ility to switc h and route. For
example, layer 3 module is a module that provides both switching and
routing ca pabilities.
Documentation Feedback
If you have comments about the technical ac curacy or gener al quality of this
document, please send an e-mail message to techpubs@avaya.com.
Please cite the documen t tit le, par t number (if applic able), and pag e number.
xxiv User Guide for the Avaya P580 and P882 Multiservice Switches, v6.1
Page 25

Introduction
1
Overview
The following information is provided in this chapter:
■ Switch Descriptions
■ Hardware Components
■ Software Features
■ Routing Overview
Switch Descriptions
The Avaya P580 and P882 Multiservice switches are high performance
Gigabit Ethernet switches for LAN backbone applications. These switches
are the centerpiece for Avaya data, voice, and multimedia LANs. The P580
switching capacity ranges from 46Gbps in Fabric mode 1 to 55Gbps in
Fabric mode 2. The P882 switch ing ca pacit y range s fr om 56Gbps, i n Fabr ic
mode 1, to 139Gbps, in Fabric mode 2.
The Avaya Multiservice switch family supports specific hardware
components and various software features, including:
■ Increased bandwidth
■ Elimination of bottlenecks
■ Better manageability
■ Routing
■ Dependable multimedia support
■ Redundant switch-to-s wit ch tru nks (or hunt groups)
User Guide for the Avaya P580 and P882 Multiservice Switches, v6.1 1-1
Page 26

Chapter 1
Hardware Components
Overview
Chassis The Avaya switch chassi s comes in tw o models:
■ The P580 chassis.
■ The P882 chassis.
The P580 and P882 chassis can run in two modes:
■ Fabric Mode 1 = 55MHz or Fabric_mode 1
■ Fabric Mode 2 = 66Mhz or Fabric_mode 2
Fabric Mode 1 Fabric mode 1 has a switching fabric performance of 1.76 Gigabits per
second per fabric port. Fabric mode 1 modules operate at 55MHz only.
In Fabric mode 1 the P580 chassis will have a 13x13 crossbar switching
fabric, while the P882 chassis will have a 16x16 cros s bar swit chi ng fab ric.
In addition, the P882 chassis is limited to sixteen functional slots in this
mode (slot 17 can not be used).
Fabric Mode 2 The 80-series (also called series 2) platform is an evolution of the 50-series
(also called series 1) architecture. It offers a 20% increase in switc hing
fabric performance or 2.11 Gigabits per second per fabric port. This allows
greater 10/100/1000 port density on a per crossbar port basis.
This increase in performance is accomplished with Avaya ApplicationSpecific Integrated Cir cuits (ASICs) that operate at 66MHz (as well as
55MHz capable) and consolidates and enriches the functionality of a
number of ASICs used in the 50-series modules.
If any 50-series modules are installed in the chassis, they do not turn on
when the switch is in Fabric mode 2.
In Fabric mode 2, the P580 chassis will have a 13x13 crossbar switching
fabric, while the P882 chassis will have a 33x33 cros s bar swit chi ng fab ric.
All 17 slots in the P882 chassis can be used in Fabric 2 mode.
Contents This section covers the following hardware components:
■ Avaya P580 Multiservice Switch Chassis
■ Avaya P882 Multiservice Switch Chassis
1-2 User Guide for the Avaya P580 and P882 Multiservice Switches, v6.1
Page 27

■ The Power System
■ The M8000R-SUP Supervisor Module
■ Media Modules
Avaya P580 Multiservice Switch Chassis
The Avaya P580 Multiservice Switch chassis consists of:
■ Seven slots (1 slot for the supervisor module and six payload slots
for media modules)
■ Fan Tray
■ Up to three power supplies
■ A 13x13 crossbar switch fabric
Slots There are seven slots in the P580 chassis. Slot 1 is dedicated for a
supervisor module and the remaining six are payload slots. If a redundant
supervisor is used in the chassis, it must be inserted in slot 2.
Introduction
Ports The P580 chassis configured with 50-series modules provides support for:
■ Up to 120 10/100BASE-TX ports (RJ-45 connector, autosensing)
■ Up to 288 10/100BASE-TX ports (Telco connector, autosensing)
■ Up to 60 100BASE-FX ports
■ Up to 24 gigabit-speed Ethernet ports
The P580 chassis configured with 80-series modules provides support for:
■ Up to 144 10/100BASE-TX ports (RJ-45 connector, autosensing)
■ Up to 288 10/100BASE-TX ports (Telco connector, autosensing)
■ Up to 144 100BASE-FX ports (MT-RJ connector)
■ Up to 48 gigabit-speed Ethernet ports
Fan Tray There are two fan assemblies in the chassis. One fan assembly is located on
the left side of the chassis to provide air flow to th e media modules. This fan
assembly is hot-swappable. The oth er fan assembly is located in the rear of
the chassis to provide air flow to the switch fabric. This fan assembly is not
field replaceable.
Document No. 10-300077, Issue 2 1-3
Page 28
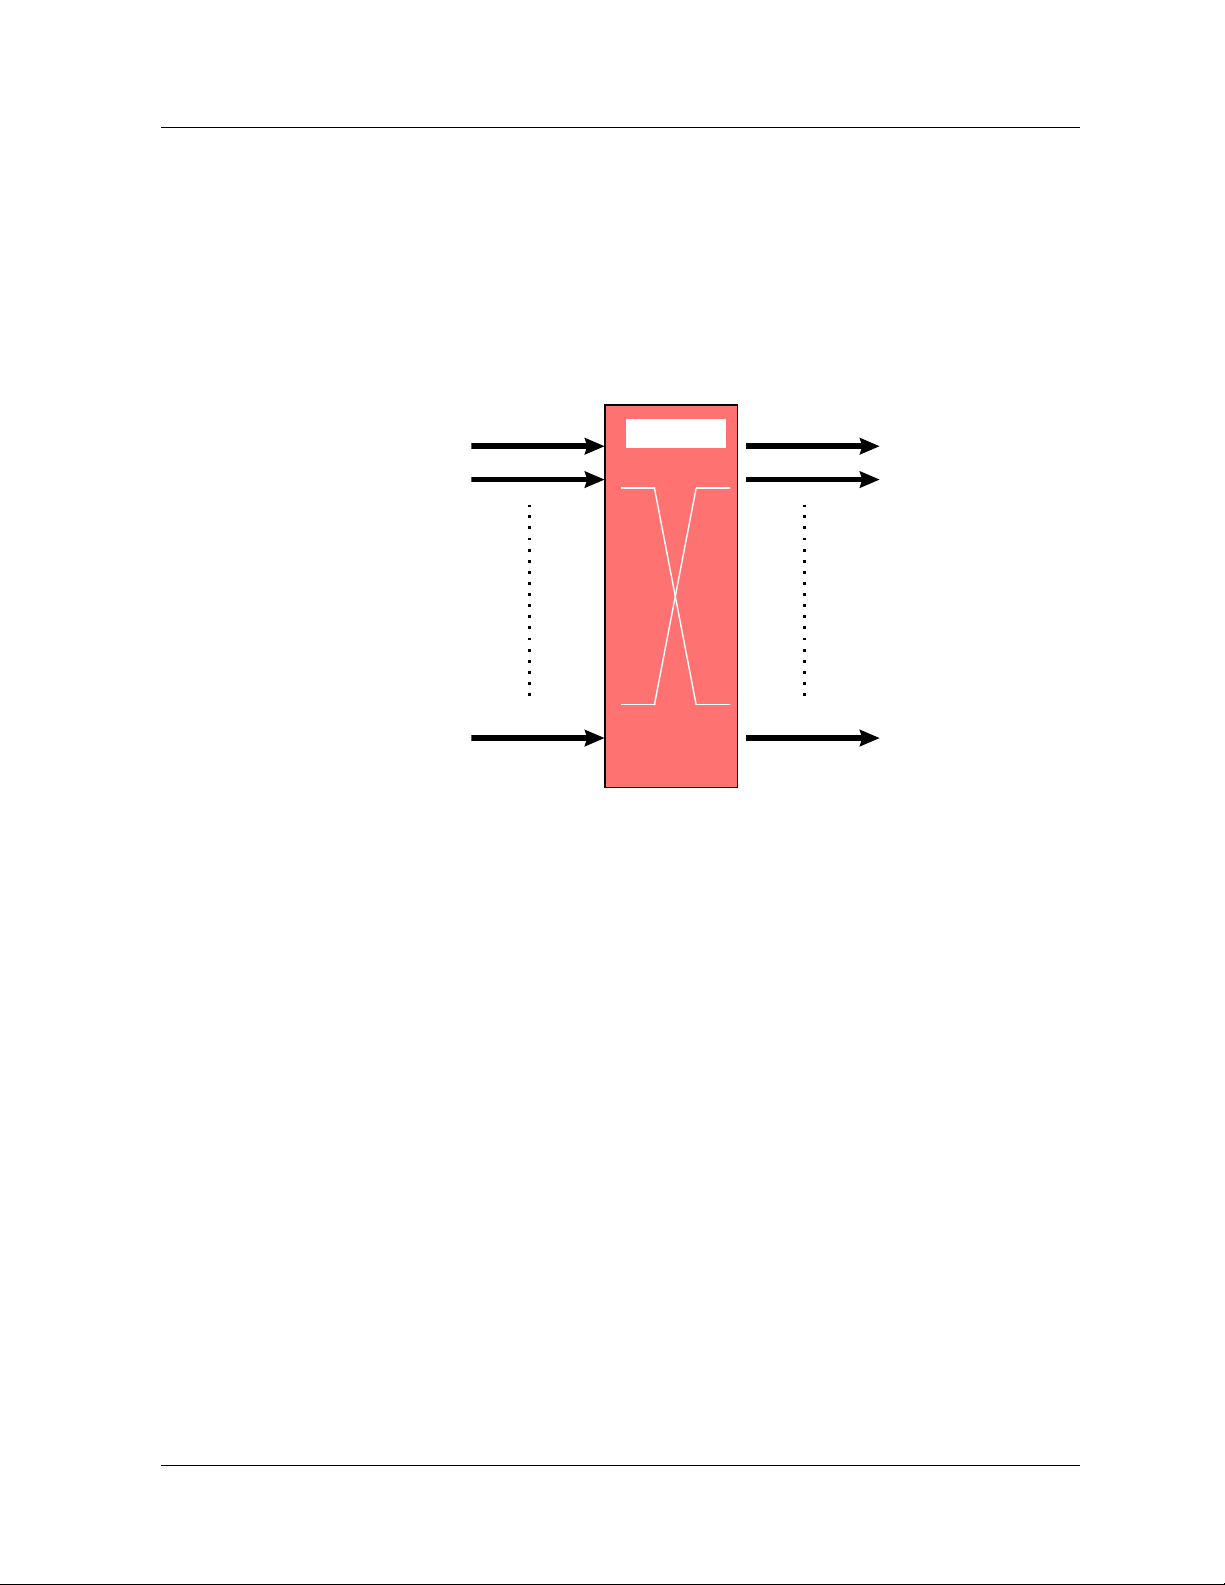
Chapter 1
Switch Fabric In Fabric mode 1, the switching fabric provides 45.76 Gbps aggregate
bandwidth. In Fabric mode 2 (P580 only), the switching fabric provides
54.91 Gbps aggregate bandwidth.
The crossbar switch matrix provides low latency, high throughput packet
switching using a crossbar architecture (Figure 1-1).
Figure 1-1. Crossbar Architecture
Port 1
Port 2
Port 13
1.76 Gb/s
22.88 Gb/s
45.76 Gb/s
1.76 Gb/s
Port 1
Port 2
Crossbar
Port 13
The crossbar supports:
■ 13 fabric ports (two per I/O module slot, one for the supervisor
module).
■ 1.76 Gbps (in and out) on each fabric port in 50-series mode and
2.11 Gbps (in and out) on each fabric port in Fabric mode 2.
■ 45.76 Gbps backplane capacity in Fabric mode 1 and 54.91 Gbps
backplane capacity in Fabric mode 2.
■ Under-subscribed switching fabric in most configurations.
■ Single copy replication—Input frames destined for multiple output
switch ports pass through the crossbar only once and are copied by
the crossbar to each destination.
■ Hardware-assisted multicast pruning—The switch only forwards to
appropriate destination switch ports.
1-4 User Guide for the Avaya P580 and P882 Multiservice Switches, v6.1
Page 29

Introduction
Avaya P882 Multiservice Switch Chassis
The Avaya P882 Multiservice Switch Chassis consists of:
■ Seventeen slots (1 slot for the supervisor module and sixteen
payload slots for media modules)
■ Fan Tray
■ Up to three power supplies
■ A 33x33 crossbar switch fabric
Slots The P882 chassis provides seventeen slots. Slot 1 is dedicated for a
supervisor module and the remaining sixteen are payload slots.
In Fabric mode 1, the P882 Chassis supports up to 15 payload slots. Slot
seventeen is unsupported in Fabric mode 1. In Fabric mode 2, all sixteen
payload slots are usable.
If a redundant supervisor is used in the chassis, the redundant supervisor
must be installed in slot 2.
Ports With 50-Series modules, the P882 Chassis supports:
■ Up to 300 10/100BASE-TX ports (RJ-45 connector, autosensing)
■ Up to 720 10/100BASE-TX ports (Telco connector, autosensing)
■ Up to 150 100BASE-FX ports
■ Up to 60 gigabit-speed Ethernet ports
With 80-Series modules, the P882 chassis supports:
■ Up to 384 10/100BASE-TX ports (RJ-45 connector, autosensing)
■ Up to 768 10/100BASE-TX ports (Telco connector, autosensing)
■ Up to 384 100BASE-FX ports (MT-RJ connector)
■ Up to 128 gigabit-speed Ethernet ports
Fan Tray There are two fan assemblies in the chassis. One fan assembly is located on
the left side of the chassis to provide air flow to the media modules. The
other fan assembly is located in the rear of the chassis to provide air flow to
the switch fabric. Both fan assemblies are hot-swappable and field
replaceable.
Document No. 10-300077, Issue 2 1-5
Page 30

Chapter 1
Switch Fabric In Fabric mode 1, th e swit ching f abric provi des a 16 x16 cr ossbar with 56.32
Gbps aggregate bandwidth. In Fabric mode 2, the switchi ng fabri c provide s
a 33x33 crossbar with 139.392 Gbps aggregate bandwidth.
The crossbar switch matrix provides low latency, high throughput packet
switching using a crossbar architecture.
The Avaya P882 Multiservice switch chassis crossbar suppo rts:
■ 33 fabric ports ( two per I /O module slot, plus one for t he supe rvisor
module - Fabric mode 2).
■ 1.76 Gb/s (in and out ) on ea ch fabr ic por t in Fa bric mod e 1 a nd 2.11
Gb/s (in and out) on each fabric port
in Fabric mode 2.
■ 56.32 Gb/s backplane capacity in Fabric mode 1 and 139.392 Gb/s
backplane capacity in Fabric mode 2.
■ Under-subscribed switching fabric in most configurations.
■ Single copy replication—Input frames destined for multiple output
switch ports pass through the crossbar only once and are copied by
the crossbar to each destination.
■ Hardware-assisted multicast pruning—The switch only forwards to
appropriate destination switch ports
The Power System
Overview Two power supplies are required to operate a fully-loaded P580 or P882
chassis. You can install a third power supply for backup if one of the other
two fails.
Features of the power system include:
■ Load sharing by the installed power supplies.
■ Power supplies can be warm swapped. (Before removing a power
supply, you must turn it off and unplug it; however, the othe r po wer
supplies can remain turned on).
■ Both AC and DC power supplies are supported.
■ Static power allocation or dynamic power allocation if insufficient
power is available for all modules in the chassis.
1-6 User Guide for the Avaya P580 and P882 Multiservice Switches, v6.1
Page 31

Introduction
Static Power Allocation
The switch uses st at ic power alloc ati on at st artup when the switch has
insufficient power to turn on all modules in the chassis.
When using static powe r all ocati on, the switc h tu rns on the modu le in sl ot 2
(slot 3 if slot 2 contains a redundant supervisor) and then turns on each
consecutive module for which sufficient power is available. When the
switch reaches a module for which insufficient power is available, the
switch stops attempting to turn on modules. All modules below the first
module for which insufficient power is available remain turned off.
For example:
1. You turn on a P882 that has only 700 watts available.
— Modules 1 through 10 require 660 watts.
— Module 11 requires 50 watts.
2. Modules 1 through 10 are turned on and operate normally.
3. Modules 11 through 17 remain turned off.
The remaining 40 watts of available power is unused.
Dynamic Power Allocation
The switch uses dynamic power allocation when the amount of available
power changes. For example, one power supply is turned on and you add
another power supply or two power supp li es are tu rned on and yo u turn one
off. Unlike static power allocation, dynamic power allocation maximizes
the number of modules that are turned on.
When using dynamic power alloc ation, the swit ch first turns of f all modules
in the chassis and then turns on the modules for which sufficient power is
available. The module in slot 2 (slot 3 if slot 2 contains a redundant
supervisor) is turned on first and then each consecutive module for which
sufficient power is available. When the switch reaches a module for which
insufficient power is available, that module remains turned off, and the
switch searches for and tu rns on the next modu le for which suf fi cient power
is available.
For example:
1. One power supply fails and the switch has only 700 watts of power
available.
— Modules 1 through 10 consume 660 watts.
— Module 11 and 12 each require 50 watts. But module 13
requires only 40 watts.
2. Modules 1 through 10 are turned on and operate normally.
Document No. 10-300077, Issue 2 1-7
Page 32

Chapter 1
3. Modules 11 and 12 remain turned off.
4. Module 13 is turned on.
5. Modules 14 through 17 remain turned off because all available power
is now consumed.
The M8000R-SUP Supervisor Module
Functions The M8000R-SUP supervisor module is responsible for learning addresses
and managing the address cache, as well as protocol management and
switch management.
The supervisor module is p art of the path that s ome packets take t hrough th e
system.
Figure 1-2 illustrates a conceptual diagram of the supervisor module’s
functions.
Figure 1-2. Layer 3 Supervisor Conceptual Operation
Wirespeed Routing
High-
Speed
Access
To /
From
Switch
Fabric
in H ard w a re
Software-based
Routing
High-speed
CPU
management
Routing Table and
System
Manage-
ment
In te r-
faces
Cache Management
Multilayer Supervisor Conceptual Diagram
Hardware Features Hardware features of the M8000R-SUP supervisor module are:
■ PowerPC 750 (RISC) processor
■ Memory: 4 MB Flash, 256 MB DRAM, 128 KB NVRAM, 512 KB
cache
■ Multiple me mory configurations (see Table 1-1)
1-8 User Guide for the Avaya P580 and P882 Multiservice Switches, v6.1
Page 33

Table 1-1. Supported Memory, Boot Code, and Software Configurations
Introduction
Memory
(in MB)
Boot
Code
Software
Vers ion
Switch Boots? Support of
Configuration
64 v5.00.01 Earlier than 6.0 Boots Supported
64 v5.00.01 6.0 or later Does not boot Unsupported
64 v6.00.00 Earlier than 6.0 Boots Unsupported
64 v6.00.00 6.0 or later Boots, but displays the
Unsupported
following error message:
WARNING! The current
version of application code
(v6.01.00) requires a memory
upgrade to maintain proper
operation of the switch. Failure
to upgrade will result in switch
instability. Please refer to the
user documentation for
detailed instructions.
256 v5.00.01 Earlier than 6.0 Boots Supported
*However, the
switch will use
only 64 MB of
memory and
display only 64
MB for total
memory.
256 v5.00.01 6.0 or later Does not boot Unsupported
256 v6.00.00 Earlier than 6.0 Boots Unsupported
256 v6.00.00 6.0 or later Boots Supported
■ Real-time clock
■ Out-of-band console: 10/100BASE-T and RS-232
■ Dot matrix display
■ System management functions and interfaces
■ 1.5 million packets per second of hardware-based routing for
packets that arrive on layer 2-only media modules
Document No. 10-300077, Issue 2 1-9
Page 34

Chapter 1
Redundant Supervisor
Media Modules
The redundant supervisor module is an auxiliary (standby) supervisor
module that acts as a fau lt-tolerant supervisor in the event tha t the active
supervisor fails. The redundant supervisor provides a seamless solution to
switch failure. Once the redundant supervisor is installed, loaded with the
same software versio n as t he active su pervisor, and synchronized, it is rea dy
to act as a backup to the active supervisor. If the active supervisor does f ai l,
the redundant module quic kly ass umes contr ol with the leas t pos sible ef fect
on network operation. No user intervention is required for the CPU module
switchover. The management view is accessible without changing IP or
MAC addresses.
For more information about the redundant supervisor module, see
Chapter 10, “Configuring Redundancy Options.”
The layer 2 and layer 3 media modules implement wire speed routing and
bridging in ASICs. The ro uting a nd brid ging ASICs c an proc ess 1.5 mil lion
packets per second of minimum-sized Ethernet frames.
* Note: All layer 3 modules interoperate with layer 2 modules.
The ATM Uplink module provides LAN Emulation (LANE) connectivity
over an ATM network and supports RFC 1483.
Bridging and routing are p erformed o n the inp ut side o f each medi a module.
Frames whose destination Media Access Control (MAC) address is on the
same Virtual LAN (VLAN ) as the interface on which they arrived are
bridged. Frames that are goin g from one VLAN to another a re routed . Some
frames are both bridged and routed, as is the case with multicast.
The media modules’ features include:
■ Onboard routing—See “Routing Overview” later in this chapter
for more information about the onboard routing capability of the
media modules.
■ IEEE 802.3x full-duplex flow control—This allows the switch
ports to send a pause command before input buffers overflow. Halfduplex ports support active back pre ssu re (jamming).
■ VLAN trunking or non-tagged access modes —This allows the
switch ports to interoperate with popular tagged trunking schemes
used by other vendors.
■ Priority Queuing and Cl ass of Servic e—These feat ures al low you
to prioritize traffic between particular stations or sets of stations to
support jitter-sensitive application s.
1-10 User Guide for the Avaya P580 and P882 Multiservice Switches, v6.1
Page 35

Introduction
50-Series Media Modules
Table 1-2 lists the 50-series (also called series 1), layer 2 and layer 3, Fast
Ethernet modules that the Avaya P580 and P882 Multiservice switches
support.
* Note: HDX stands for Half Duplex, FDX stands for Full Duplex.
Table 1-2. 50-Series Fast Etherne t Modules
Model Number Description
M5520-100TX 20-Port 10/100BASE-TX module with RJ-45 connectors
(layer 2 support)– 10/100, HDX/FDX 100m
M5510-100FX 10-Port 100BASE-FX mo dul e wi t h SC conn ect ors (l ayer 2
support) – 1300 nM, HDX/FDX multimode fiber, 2Km
M5548N-100TC 48-Port, 10/100BASE-TX module with RJ-21 Telco
connectors (layer 2 support) – 10/100, HDX/FDX, 100M
M5510R-100FX 10-Port 100BASE-FX module with SC conn ect ors (layer 2
and layer 3 support),– 1300 nM, HDX/FDX, multimode
fiber, 2 Km
M5512R-100TX 12-Port 10/100BASE-TX module with RJ-45 connectors
(layer 2 and layer 3 support) – 10/100, HDX/FDX, 100m
Table 1-3 lists the 50-series layer 2 and layer 3 Gigabit Ethernet modules
that the Avaya P580 and P882 Multiservice switches support. All of the
modules have SC connectors.
Table 1-3. 50-Series Gigabit Modules
Model Number Description
M5502-1000SX-F2-Port, Full-Duplex1000BASE-SX module (layer 2
support), 550M, 850 nM optics, multimode fiber
M5502-1000LX-F2-Port, Full-Duplex 1000BASE-LX module (layer 2
support) 1310 nM optics, 5Km, singlemode fiber
M55021000SLX-F
M5504-1000SX-F4-Port, Full-Duplex 1000BASE-SX module (layer 2
M5504-1000LX-F4-port 1000BASE-LX module (layer 2 support), 5Km,
M55041000SLX-F
2-Port, Full-Duplex 1000BASE-SLX module (layer 2
support) 10 Km, 1310nM optics, singlemode fiber
support) 550m, 850 nM optics, multimode fiber
1310nM optics, singlemode fiber
4-port 1000BASE-SLX module (layer 2 support), 10Km,
1310nM optics, singlemode fiber
1 of 2
Document No. 10-300077, Issue 2 1-11
Page 36

Chapter 1
Table 1-3. 50-Series Gigabit Modules
Model Number Description
80-Series Media Modules
M5502R1000SX-F
M5502R1000LX-F
M5502R 1000SLX-F
2-Port, Full-Duplex 1000BASE-SX module (layer 2 and
layer 3 support) 550m, 850 nM optics, multimode fiber
2-Port, Full-Duplex 1000BASE-LX module (layer 2 and
layer 3 support), 1310 nM optics, 5Km, singlemode fiber
2-port 1000BASE-SLX module (lay er 2 and layer 3
support), 1310nM optics, 10Km, singlemode fiber
2 of 2
Table 1-4 lists the 80-series (also c alled series 2), 10-Gigabit modules that
the Avaya P580 and P882 Multiservice switches support.
Table 1-4. 80-Series 10-Gigabit Modules
Model Number Description
M8001R10000LR
M8001R10000ER
1-Port L3 10-Gigabit LR module, single mode fiber, 1310
nM, distances up to 10 km.
1-Port L3 10-Gigabit ER module, single mode fiber, 1550
nM, distances up to 40 km.
Table 1-5 lists the 80-series Gigabit modules that t he Avaya P580 and P882
Multiservice switches support.
1-12 User Guide for the Avaya P580 and P882 Multiservice Switches, v6.1
Page 37

Table 1-5. 80-Series Gigabit Modules
Model Number Description
Introduction
M8004R1000GB
M8008R1000GB
4-port, Gigabit Interface Card (GBIC) based module. This
module can be configured with up to 4 GBIC optical
modules. The 4-port GBIC module supports the following
GBIC-type connectors:
• 1000BASE-SX (850 nM)
— 50-micron multimode fiber (MMF) for
distances up to 550m
— 62.5-micron MMF for distances up to 260m
• 1000BASE-LX (1300 nM)
— 50-micron MMF for distances up to 550m
— 62.5-micron MMF for distances up to 440m
— Singlemode fiber for distances up to 10km
• 1000BASE-ELX (1550 nM) for singlemode fiber for
distances up to 80km
Note: If you use the 1000BASE-SX GBIC with single
mode fiber , you must use mode condit ioning p atch
cords with a maximum distance of 500m. •
8-port, GB IC based module. This module can be
configured with up to 8 GBIC optical modules. The 8-port
GBIC module supports the following GBIC-type
connectors:
• 1000BASE-SX (850 nM)
— 50-micron multimode fiber (MMF) for
distances up to 550m
— 62.5-micron MMF for distances up to 260m
• 1000BASE-LX (1300 nM)
— 50-micron MMF for distances up to 550m
— 62.5-micron MMF for distances up to 440m
— Singlemode fiber for distances up to 10km
• 1000BASE-ELX (1550 nM) for singlemode fiber for
distances up to 80km
Note: If you use the 1000BASE-SX GBIC with single
mode fiber , you must use mode condit ioning p atch
cords with a maximum distance of 500m.
1 of 2
Document No. 10-300077, Issue 2 1-13
Page 38

Chapter 1
Table 1-5. 80-Series Gigabit Modules
Model Number Description
M8004R-1000T 4 -Port 1000BASE-T module with RJ-45 connectors (layer
2 and layer 3 support), 100M
M8008R-1000T 8 -Port 1000BASE-T module with RJ-45 connectors (layer
2 and layer 3 support), 100M
2 of 2
Table 1-6 lists the 80-series Fast Ethernet mod ule s t hat the Avaya P580 and
P882 Multiservice switches support.
Table 1-6. 80-Series Fast Ethernet Modules
Model Number Description
M8024R-100TX 24-Port 10/100BASE-TX module with RJ-45 connectors
(layer 2 and layer 3 support) – 10/100, Half Duplex (HDX)/
Full Duplex (FDX)
ATM Up link Module
M8024R-100FX 24-Port 100BASE-FX module with MT-RJ connectors
(layer 2 and layer 3 support), multimode fiber, 2Km
M8048R-100TC 48-Port 10/100BASE-TX module with RJ-21 Telco
connectors (layer 2 and layer 3 support) - 10/100, HDX/
FDX, 100M
M8048R-100TX 48-Port 10/100 module with RJ-45 connectors (layer 2 and
layer 3 support)
There are four variations of the ATM Uplink module:
■ 2-port Synchronous Optical NETwork (SONET)/ Synchronous
Digital Hierarchy (SDH) OC-3c/STM-1 Single Mode Fiber (SMF)
■ 2-port SONET/SDH OC-3c/STM-1 MMF (MultiMode Fiber)
■ 2-port SONET/SDH OC-12c/STM-4c SMF
■ 2-port SONET/SDH OC-12c/STM-4c MMF
Each module has two physical interfaces that are capable of being active
simultaneously.
1-14 User Guide for the Avaya P580 and P882 Multiservice Switches, v6.1
Page 39

Chapter 1
The major features of the ATM Uplink module are:
■ LANE V2 Client - with LANE 1 compatibility, supports 128
interfaces
■ QoS (Quality of Service) support for UBR, nrt-VBR, rt-VBR, and
CBR
■ ATM UNI (User-to-Network Interface) V 3.0, 3.1 and 4.0 signaling
■ RFC 1483 support
■ ILMI (Integrated Local Management Interface) Version 4.0
■ PNNI (Private Network - to - Network Interface) non-transit
■ Link Failover
■ Spanning Tree
■ Load sharing
* Note: All ATM protocols are ATM Forum standard.
See Avaya P550R/P580/P880/P882 Multiservice Switch ATM Uplink
Module User Guide for more detailed information.
Software Features
The Avaya P580 and P882 Multiservice switches support the following
software features:
■ Security
■ VLANs
■ Hunt Groups
■ Spanning Tree
■ Extensive Fa ult Tolerance
■ Routing Protocols
■ Access Lists
■ IP Multicast
■ 50-Series Buffers and Queues
■ 80-Series QoS
■ System Management
1-15 User Guide for the Avaya P580 and P882 Multiservice Switches, v6.1
Page 40

Chapter 1
Security
The P580 and P882 support the following security features:
■ Secure Mode—Secure mode restricts management of the switch to
the following secure protocols: HTTPS, SSH, and SNMPv3. For
information on secure mode, see Chapter 4, “Security.”
■ SSHv2—SSH is a protocol for se cure r emote l ogin an d other secur e
services. SSH provides a secure service that is similar to Telnet. For
information on SSHv2, see Chapter 4, “Security.”
■ HTTPS Using SSLv3 or TLSv1—SSL and TLS are protocols that
provide data security bet ween application protocols (such as HTTP,
Telnet, NNTP, FTP) and TCP/IP. SSL and TLS are used to transmit
encrypted data over TCP/IP networks, and authenticate sites and
clients with certificates. For information on HTTPS, see Chapter 4 ,
“Security.”
■ RADIUS Client Support—RADIUS is a service that authenticates
users when they attempt to log in to a Network Access Device
(NAD) such as an Avaya switch. For information on RADIUS, see
Chapter 4, “Security.”
VLANs
■ SNMPv3. SNMPv3 provides encryption and timeliness checks of
PDUs and authentication of user s. For informa tion on SNMPv3, see
Chapter 5, “Configuring SNMP.”
■ Enhanced user account security, including maximum number of
login attempts, timeout limit, minimum password length, and
expiration. For information on user account security, see Chapter 2,
“Setting Up the Switch.”
VLANs provide network managers with two significant capabilities:
■ The ability to segment tr affic in a flat switched network. This helps
prevent traffic from being forwarded to stations where it is not
needed.
■ The ability to ignore physical switch locations when creating
workgroups. VLANs are logical constructions and can traverse
physical switch boundaries.
1-16 User Guide for the Avaya P580 and P882 Multiservice Switches, v6.1
Page 41

Hunt Groups
Introduction
The hardware on all multiservice switches support port-based VLANs with
the following characteristics:
■ Frames classified as Layer 1 (port-based) when they enter the
switch
■ Explicitly tagged VLAN packets — these are forwarded based on
the information in the packet.
■ Up to 1,000 VLANs — VLANs define a set of ports in a flooding
domain. Packets that need to be flooded are sent only to ports
participating in that VLAN.
For more information on VLANs, see Chapter 6, “Using VLANs, Hunt
Groups, and VTP Snooping.”
Hunt groups allow you to aggregate bandwidth from multiple ports so they
act as one high-bandwidth switch port. Hunt groups create multi-gigabit
pipes to transport traffic through the highest traffic areas of your network.
You can create hunt groups that interoperate with oth er vendor s’ equip ment
(for example, Cisco’s Etherchannel and Sun’s Quad Adapter).
Spanning Tree
For more information on hunt groups, see Chapter 6, “Using VLANs, Hunt
Groups, and VTP Snooping.”
Spanning tree protocol is used to prevent loops from forming in your
network. The spanning tree algorithm creates a single path through the
network by ensuring that i f more tha n one pat h exists between two parts of a
network, only one of these paths is used, while the others are blocked.
The P580 and P882 support common Spanning Tree and Rapid Spanning
Tree. Rapid Spanning Tree provides faster recovery from network failures
than common Spanning Tree provides.
All multiservice switches support the following four Spanning Tree
configurations:
■ IEEE 802.1D Spanning Tree
■ Per-VLAN Spanning Tree
Document No. 10-300077, Issue 2 1-17
Page 42

Chapter 1
■ Dual-Layer Spanning Tree
■ Global Disable
For more information about Spanning Tree, see Chapter 7, “Configuring
Rapid Spanning Tree.”
Extensive Fault Tolerance
All multiservice switches are designed to function as backbone switches.
You can install each switch in your netwo rk’s core without creating a single
point of failure.
Extensive fault tolerance features include:
■ Port redundancy. If the primary port fails, the secondary port
becomes the active port. Failover time is less than 5 seconds. For
information on port redundancy, see Chapter 8, “Configuring
Ports.”
■ VRRP. Virtual Router Redundancy Protocol (VRRP) is used to
provide fast-fail over for hosts if the default gateway fails. For
information on VRRP, see Chapter 12, “Configuring IP Routing.”
■ N+1 power. Power supplies share the power supply load. If one
fails, the remaining supplie (s) assume the load aut omatically and the
switch management system warns of the failure.
■ Hot-swappable fans and modules—Each fan and module can be
changed from the switch front panel, without powering down the
switch.
■ Redundant switch links (using spanning tree and hunt groups).
■ Front-loadable cables, modules, power supplies and fans.
■ Redundant switch element and switch controller modules (fault-
tolerant switches only).
■ Redundant supervisor modules.
For more information hardware redundancy, see Chapter 10, “Configuring
Redundancy Options.”
1-18 User Guide for the Avaya P580 and P882 Multiservice Switches, v6.1
Page 43

Routing Protocols
The P580 and P882 support the following routing protocols:
Introduction
■ IRDP. For information on IRDP, see Chapter 12, “Configuring IP
Routing.”
■ RIP. For information on RIP, see Chapter 14, “Configuring RIP
Routing.”
■ OSPF. For information on OSPF, see Chapter 15, “Conf iguring the
OSPF Routing Protocol.”
■ IPX. For information on IPX , see Chapter 16, “Configu ring IPX
Routing.”
■ IPX RIP . For information on IPX RIP , see Chapter 17, “Configuring
the IPX RIP Protocol.”
■ IPX SAP. For information on IPX SAP, see Chapter 18,
“Configuring the IPX SAP Protocol.”
Access Lists
IP Multicast
■ AppleTalk. For information on AppleTalk, see Chapter 19,
“Configuring AppleTalk Routing.”
An access list is a group of access control rules. Access control rules
describe how to forward (route) packets, as opposed to where to forward
them. The how can be to forward the packet with a specific priority(0-7),
forward the traffic with an unchange d priority, or filter packets (drop). For
information on access lists, see Chapter 13, “Configuring Access Lists .”
IP multicast enables a s ingle host to distribute information to multiple
recipients. The P580 and P88 2 suppor t the followi ng IP multi cast prot ocols:
■ IGMP
■ DVMRP
For information on IGMP and DVMRP, see Chapter 12,
“Configuring IP Routing.”
■ Intelligent Multicast—LGMP, CGMP Snooping, and IGMP
Snooping. For information on intelligent multicast, see Chapter 20,
“Managing Intelligent Mu lticasting.”
Document No. 10-300077, Issue 2 1-19
Page 44

Chapter 1
50-Series Buffers and Queues
Buffer and queue management relieves congestion in a network. Adding
gigabit speeds to exis ti ng netwo rks means that t here c an be a hug e di sparity
between link speeds. For example , anything more tha n a 1-perc ent load o n a
gigabit link could easily overwhelm a 10 Mb/s Ethernet link.
Each switch employs the following buffer and queue management
techniques:
■ Configurable active backpressure:
— Half-duplex ports use active backpressure to jam input ports
when their frame buffers are full.
— Full-duplex links use IEEE 802.3z pause control frames to
pause traffic when buffers are full.
■ Packed frame buffers for optimal memory utilization. The memory
management allows virtually 100% utilization of buffer memory.
80-Series QoS
■ Two CoS priority queues for 50-Series modules and eight CoS
priority q ueues for 80- Series modules provide flexible queue
management algorithms to meet application requirements.
■ Configurable queue depth for each prioritized packet queues.
■ Configurable priority th reshold.
■ Configurable service ratio tunes queue priority.
For more information on 50-series buffers and queues, see Chapter 24,
“Managing Buffers and Queues on 50-Series Modules.”
Quality of Service (QoS) is a set of tools that make it possible for you to
manage traffic across a switch or a network. These tools protect specific
traffic from the ef fects of network congesti on. You can enable these features
for a module or individual ports on a module to control the flow of traffic
across your network. This control makes it possible for you to guarantee
that delay-sensi tive traf f ic suc h as voi ce o ver IP ( VoIP) re ceive s the pr iori ty
it requires, while also ensuring th at the switch services oth er low priori ty
data.
QoS makes it possible for you to prioritize time-sensitive traffic and assign
larger amounts of bandwidth to those applications that require it.
For more information o n QoS, see Chapter 25, “80-Series QoS.”
1-20 User Guide for the Avaya P580 and P882 Multiservice Switches, v6.1
Page 45

System Management
The P580 and P882 support the following system management features:
■ LDAP. For information on LDAP, see Chapter 12, “Configuring IP
■ RMON. For information on RMON, see Chapter 23, “Using RMON
■ SNMP. For information on SNMP, see Chapter 5, “Configuring
■ Port mirroring. For information on port mirroring, see Chapter 23,
■ Syslog event reporting. For information on syslog, see Chapter 21,
Introduction
Routing.”
and Ethernet Statistics to Analyze Network Performance.”
SNMP.”
“Using RMON and Ethernet Statistics to Analyze Network
Performance.”
“Monitoring the Avaya Multiservice Switch.”
Routing Overview
All P580 and P882 Multiservice switches can be configured as an IP, IPX,
and AppleTalk router with virtual interfaces. Virtual interfaces are mapped
to physical ports or VLANs. Layer 3 IP traffic is routed between the virtual
interfaces.
Ports become members of VLANs by being assigned or by rules. Mu ltiple
VLANs can share a single trunk port. In contrast, multiple physical ports
can be associated with a single VLAN. In all cases, traffic that arrives and
leaves the same VLAN is bridged, not routed.
This section provides the following sections:
■ Compatibility with Layer 2 Modules
■ Routing with Layer 2 and Layer 3 Modules
Compatibility with Layer 2 Modules
Each switch is completely backward compatible with all of th e layer 2
media modules that the switch currently supports. Layer 3 traffic is routed
by sending that traffic to the supervisor module. The supervisor module
routes all traffic from layer 2 media modules as described in the next
section, “Routing with Layer 2 and Layer 3 Modules.”
Document No. 10-300077, Issue 2 1-21
Page 46

Chapter 1
* Note: Layer 2 traffic that does not require routing is bridged
independently of the layer 3 traffic based on the MAC address
or VLAN information.
Routing with Layer 2 and Layer 3 Modules
When a switch contains a combination of layer 2 and layer 3 modules, IP
and IPX routing is performed by the layer 3 media modules or the
supervisor module using special ASICs present on those modules. These
ASICs contain an address cache (forwarding table) that can contain a
maximum of 20,000 cache entries. The address cache entries consist of
packet addressing information and next hop information that enable the
switch to effectively route the packets to their destination.
The supervisor module also maintains a master routing table that is kept in
the its memory. The master routing table can contain up to 28,000 entries.
This routing table enables the supervisor module to keep track of which
entries are in each address cache. As a result, each time a change occurs in
the master routing table, the supervisor module updates the appropriate
address caches. For example, if a unicast route is removed from the master
routing table, all matching entries in address caches are also removed.
Consequently, when you connect a switch to the network, it begins to
receive frames from the network and builds a master routing table
(supervisor module) and forwarding tables (address caches of media
modules) based on those frames.
This process creates three distinct results:
■ All known (learned) layer 3 traffic that requires routing, is routed
directly by the 50-series layer 3 or 80-series media module without
a need to traverse the switching fabric to get to the supervisor
module’s software routing function. This is referred to as the FIRE
path, or Fast Inband Routing Engine, since the routing is
accomplished in the hardware in the media modules.
■ All unknown (not learn ed) layer 3 tra f fic mus t first be sen t to t he 5 0-
series layer 3 or 80-ser ie s supervisor module, where infor ma ti on on
the frame is added to the supervisor module’s master routing table,
then it is added to the address cache of each applicable layer 3
media module. This is referred to as the Slow Path, since the
routing is accomplished by the CPU and software in either
supervis or module instead of the hardware in the media
modules.The Slow Path is used when the destination is unknown
for IP and IPX packets and for all AppleTalk routing.
1-22 User Guide for the Avaya P580 and P882 Multiservice Switches, v6.1
Page 47

■ Since layer 2 modules have no routing capability, packets that are
received by a layer 2 module and require routing are forwarded by
sending the packet to the 50-series layer 3 or 80-series supervisor
module. The routing engine on the supe rviso r module t hen perf orms
the routing operation for the layer 2 modules and sends the packet
back through the switching fabric to the destination port.This is
referred to as the FORE path, or Fast Out of Bands Routing Engine,
since the routing is acco mplished in the hardware of either
supervisor module.
Figure 1-3 shows how traffic is routed in a switch.
Figure 1-3. Layer 2 and Layer 3 Routing in a Switch
Introduction
Document No. 10-300077, Issue 2 1-23
Page 48

Chapter 1
1-24 User Guide for the Avaya P580 and P882 Multiservice Switches, v6.1
Page 49

2
Overview
Setting Up the Switch
The following information and procedures that are provided in this chapter
are common to both layer 2 and layer 3 module:
■ Setting Up Yo ur Laptop o r PC
■ Performing Initial Setup of the Switch
■ Using Telnet to Manage the Switch
■ Using the Web Agent to Configure the Switch
■ Configuring Custom Access Types
■ Configuring User Accounts
■ Changing the Console Serial Port Settings
■ Configuring Dial-Up Networkin g
■ Changing the TCP Ports for HTTP and Telnet
■ Managing Configuration Files
* Note: The last step in each procedure tells you to Click APPLY to
save the setup or changes that you made. This step saves the
setup or any changes to the running configuration only. The
startup configurat io n is n ot cha nged. There fore, these and ot her
changes will be lo st if t he switch g oes down or if you turn it off .
T o save any change s to the startu p configurati on, you must copy
the running configuration to the startup configuration. For
information on how to perform this task, see “Copying
Configuration Files” later in this chapter.
For more information about the CLI commands that are mentioned in this
chapter, see Command Reference Guide for the Avaya P580 and P882
Multiser vice Switches, Software Version 6.1.
User Guide for the Avaya P580 and P882 Multiservice Switches, v6.1 2-1
Page 50

Chapter 2
Setting Up Your Laptop or PC
You need a laptop or PC to make a serial line connection to the switch to
complete initial switch setup. Table 2-1 lists the settings required for the
laptop or PC to communicate with the switch.
Table 2-1. Laptop or PC Settings
Baud Rate Stop Bits Data Bits Flow Control Parity
9,600 1 8 Xon/Xoff None
Performing Initial Setup of the Switch
Before you can use Telnet or the Web Agent to configure the switch, you
must connect a laptop or PC to the console port and assign the switch an IP
address and subnet mask.
Before Moving a Supervisor Module
Assigning an IP Address
Before moving a supervisor module (either active or standby) to another
chassis, you must initialize NVRAM on the module (nvram initialize CLI
command).
If you do not initialize NVRAM before moving a supervisor module to
another chassis and assigning it a new IP address, the supervisor retains its
console IP address, console MAC address, and chassis information. This
problem may cause:
■ Duplicate IP addresses
■ Inaccurate chassis information that can cause the switch to not
operate correctly.
To perform initial setup of the switc h:
1. Attach a 9-pin straight-through male-to-female serial cable from the
serial port on your laptop or PC to the serial port on the supervisor
module’s front panel (Figure 2-1).
2-2 User Guide for the Avaya P580 and P882 Multiservice Switches, v6.1
Page 51

Setting Up the Switch
Figure 2-1. Avaya P580 Multiservice Switch Front View
Attach serial port
cable here
(console port)
Attach Ethernet cable
here (10Base-T or 10/
100Base-T)
Supervisor Module
front panel
2. Run a terminal emulation program (HyperTerminal, for example) on the
attached laptop or PC. Verify that the laptop or PC monitor settings
match those listed in Table 2-1.
3. Turn on the switch. The switch displays a series of startup messages in
the terminal emulation program:
4. At the
Login: prompt, enter root. The password prompt displays.
* Note: Login information and password prompts are case sensitive.
5. At the
Password prompt, enter root. The command line interface
prompt displays. You must now change the command mode to the
Global Configuration mode so that you can use the setup command.
6. Perform the following step s to change the command mode to the Global
Configuration mode:
a. Enter the enable
b. Enter the configure
command.
command.
7. Enter the setup command. This comman d initiates a series of quer ies.
Answer each query as follows:
a. Press Enter when prompted to change the super user password.
This accepts the default of Yes.
b. Enter your old password. T he system th en prompts yo u for a n ew
password.
c. Enter your new password, then re-enter the new password to
verify your choice.
Document No. 10-300077, Issue 2 2-3
Page 52

Chapter 2
* Note: Avaya strongly recommends that you change the default
password.
d. Enter the IP address for the switch manager’s Ethernet console.
e. Enter the subnet mask.
f. Enter the default gateway for the switch.
The following is a sample output of the Setup command to change or
modify the Supervisor’s Ethernet Console’s IP address, subnet mask,
default gateway or changing the super user password.
Welcome to Switch Setup. The brief series of
questions that follows will help you to configure
this switch. After completing this process, you
will be able to manage the switch using:
- the switch-based HTTP server
- the Element Management System.
Text in [] is the default answer for each
questions.
To accept the default, press ENTER.
Would you like to change the super user password
[Yes]? Y
Old Password: xxxx
New Password: xxxx
Re-type New Password: xxxx
User password changed successfully
What do you want the switch manager’s console
Ethernet IP Address to be [0.0.0.0]? 10.0.0.1
What is the subnet mask for your network’s
IP address [0.0.0.0]? 255.255.255.0
What is the IP address of the default gateway for
this network segment [0.0.0.0]?
2-4 User Guide for the Avaya P580 and P882 Multiservice Switches, v6.1
Page 53

Setting Up the Switch
You can now connect to the switch using the front-panel out-of-band
10Base-T connection. This allows you to log in using either the embedded
Web Agent or the EMS.
See the Installation and Operation guides for instruction on establishing
additional IP network connections.
Connecting to the Supervisors 10/ 100Base-T port
Connect one end of a crossover patch cable to the 10/100Base-T on the
Supervisor module front panel ( Figure2-1). Connect the other end to an out
of band device.
See Table 2-2 for an explanation of the pinouts for the 10Base-t crossover
patch cable.
Table 2-2. Pinouts for 10Base-T Crossover Patch Cables
Pin # Color Pin # Color
1WO3WG
2O6G
3WG1WO
4B4B
5WB5WB
6G2O
7WBr7WBr
8Br8Br
Using Telnet to Manage the Switch
You can manage the A vaya Mul tise rvice switch sev era l ways. In a dditi on to
managing the switch by means of the Web Agent, SNMP and seri al co nsole
command line interface (CLI) commands, the switch provides Telnet server
capability. Through this Telnet session, an administrator can manage the
switch by means of CLI commands.
This section contains the following information:
■ Setting up a Management Interface
■ Establishing a Telnet Session
■ Terminating a Telnet session
Document No. 10-300077, Issue 2 2-5
Page 54

Chapter 2
■ Viewing Active Telnet Sessions
■ Te lnet Session Expiration Timer
As a more secure alternat ive to Telnet, you can use SSHv2. For infor mation
on using an SSH connection to manage the switch, see “SSHv2” in
Chapter 4, “Security.”
Setting up a Management Interface
Before you can es tablish a Telnet session you must con figure an I P interf ace
to allow management of the switch. Using the IP Interfaces Web page or a
CLI command, create an IP interface and set the IP Routing option to either
Routing/Mgmt or Mgmt Only. For more information on setting up an IP
interface on the switch, see “Creating and Assigning IP Interfaces to the
VLAN” in Chapter 12, “Configuring IP Routing.”
Establishing a Telnet Session
Supported Number of Telnet Sessions
Once you have set up an IP interf ace and config ured it to all ow management
traffic, you can open a Telnet session to the switch. To open a Telnet
session, you must use one of the commercially available Telnet clients.
Launch the Telnet client application and open a Telnet session with the IP
address of the management interface. The switch will display its login
prompt.
If the TCP port for Telnet requests is se t to a por t numbe r othe r than 23, you
must specify the TCP port number i n addition to th e IP address or hos t name
to start a T elnet session. For exampl e, if you change the TCP port from 23 to
9998 on switch 192.168.0.126, enter telnet 192.168.0.126 9998 to start a
Telnet session. For information on how to change the TCP port for Telnet
requests, see “Changing the TCP Ports for HTTP and Telnet” later in this
chapter.
Once logged into the switch through a Telnet session, you can manage the
switch using CLI commands. For more information on CLI commands, see
the Command Reference Guide for the Avaya P580 and P882 Multiservice
Switches, Software Version 6.1.
The A vaya Multiservice Switch suppor ts a maximum of 6 concurren t Telnet
sessions. This number make s it possibl e for multiple ne twork administ rators
to connect to and manage the switch. However, if multip le Telnet sessions
are open, configuration changes from one session could be overwritten by
configuration changes from another.
* Note: A vaya recommends that you use one Telnet session at a time to
manage the switch.
2-6 User Guide for the Avaya P580 and P882 Multiservice Switches, v6.1
Page 55

Although it is possible to establish nested Telnet sessions, Avaya
recommends that you estab lish a separa te T el net session f or each switch t hat
you want to manage. A nested Telnet session occurs when you establish a
Telnet session from a client to one switch, then through that session, open
another Telnet session to a second switch. Having a separate Telnet session
for each switch that you want to manage helps to avoid confusion.
Terminating a Telnet session
To terminate the Telnet session gracefully, exit the management session by
repeatedly typing exit until the switch displays the login prompt. To
terminate the Telnet session from the client, enter the client-specific
command to terminate the session.
Setting Up the Switch
Troubleshooting Tip
When you enter CLI commands in a Telnet session, memory is allocated to
hold the CLI command history. Closing the Telnet session abruptly by
terminating the Telnet client appl icat ion doe s no t fre e thi s memor y and m ay
cause the switch to reset. Cl ose the Telnet session gracefully as expl ained in
the previous paragraph.
Viewing Active Telnet Sessions
To view active Telnet sessions on the switch enter the show sessions
command as shown in the example below. A list of active telnet sessions is
displayed.
Welcome to the Avaya *Enhanced* CLI
Avaya>
Session ID Line ID Location
*0 9vty 123.123.123.123:1211
show sessions
Telnet Session Expiration Timer
Once a telnet session is established, the session will remain open while
there is activity. However, if the session is left idle, the session expires and
is automatically terminated based on the setting of the Telnet inactivity
timer. The default setting for this timer is 900 seconds or 15 minutes.
Setting this timer to 0 deactivates the inactivity timer so the Telnet session
will not expire.
To set the T elnet inactivity timer, enter Global Configuration mode and then
the following CLI command:
(configure)# ip telnet inactivity-period <time-out in seconds>
Document No. 10-300077, Issue 2 2-7
Page 56

Chapter 2
CAUTION:
Table 2-3 lists the minimum, maximum, and default values for the Telnet
inactivity timer.
Table 2-3. Telnet Inactivity Timer
Minimum value: 0 seconds Disables inactivity timer
Default value: 900 seconds Expiratio n t ime is 15 mi nutes.
Maximum value: 65,536 seconds Expiration t ime is approx. 18 hrs.
Avaya recommends that you not disable the inactivity timer. If the
inactivity timer is disabled and the maximum number of Telnet
sessions is open, none of them will expire. Subsequent atte mpts to
establish a Telnet session will fail. Additionally, idle Telnet sessions
may represent security risks.
Using the Web Agent to Configure the Switch
The switch provides an embedded HTTP server that allows you to set
switch parameters by using the Web Agent. You can use this interface for
quick and simple configuration changes.
As a more secure alternati ve to HTTP, you can use HTTPS. For info rmation
on using an HTTPS connection to manage the switch, see “HTTPS Using
SSLv3 or TLSv1” in Chapter 4, “Security.”
Although this manual provides de tailed procedu res for using the Web Agent
to configure the switch, the CLI commands to perform the same task are
listed after each proc edure. See Command Reference Guide for the Avaya
P580 and P882 Multiservice Switches, Software Version 6.1 for details
about these commands.
This section contains the following procedures:
■ Opening the Web Agent
■ Logging Out of the Web Agent
2-8 User Guide for the Avaya P580 and P882 Multiservice Switches, v6.1
Page 57

Opening the Web Agent
Although the Web Agent is supported by any frames-capable browser, the
system has been specifically qualified only with the following browsers:
■ Microsoft Internet Explorer 5.5 or later. To download Microsoft
Internet Explorer, see http://www.microsoft.com.
■ Netscape Navigator 7.0 or later. To download Netscape Navigator,
see http://www.netscape.com.
To open to the Web Agen t:
1. Start your browser.
2. Enter the IP address for the s witch you wan t to manage in th e Address
bar. For example: http://10.91.7.23.
If the TCP port for HTTP requests is set to a port number other tha n 80,
you must specify the TCP port number in addition to the IP address to
open the Web Agent. For example, if you change the TCP port from 80
to 9999 on switch 192.168.0.126, enter http://192.168.0.126:9999 to
open the Web Agent. For information a bout how t o change the TCP port
for HTTP requests, see “Changin g the TCP Ports fo r HTTP and Telnet”
later in this chapter.
Setting Up the Switch
*Note: You must enter a separate IP address for each supervisor
module interface (co nsole or i nband). For layer 3, yo u can
use can any of the router interfaces.
3. Press Enter. The Welcome to the Switch Management Web page is
displayed.
4. Click Login. The Enter Network Password dialog box is displayed.
See Figure 2-2.
Document No. 10-300077, Issue 2 2-9
Page 58

Chapter 2
Figure 2-2. Enter Network Password Dialog Box
5. In the User Name field, enter a valid user name. The default super user
name is root.
6. In the Password field, enter a valid password. The default passwo rd is
root.
7. Click OK. The General Information Web page is displayed in the content
pane. See Figure 2-3.
*Note: To optimize security, change the root password for the
system as soon as possible.
2-10 User Guide for the Avaya P580 and P882 Multiservice Switches, v6.1
Page 59

Figure 2-3. General Information Web Page
Setting Up the Switch
Navigation pane
Content pane
Logging Out of the Web Agent
To exit the Web Agent securely, you must log out of the Web Agent and
close all open browser windows.
If you do not log o ut and cl ose all open browser windows , i t is pos sible that
another user could access the Web Agent and change the switch
configuration.
*Important: For the logout feature to work correctly in Microsoft
Internet Explorer, it must be set to run ActiveX
controls.
System Status pane
Document No. 10-300077, Issue 2 2-11
Page 60

Chapter 2
To log out of the Web Agent:
1. In the navigation pane, expand the System folder.
2. Click Logout. The Logout Web page is displayed in the content pane.
See Figure 2-4.
Figure 2-4. Logout Web Page
3. Click YES to log out.
4. Close all other open Web browser windows.
Configuring Custom Access Types
Overview
Custom access types make it possible for you to create a user profile that
has specific functional privileges. The functional privileges that you can
assign a user profile are:
■ System configuration
■ Module and port management
■ Events management
■ L2 switching
■ Routing
2-12 User Guide for the Avaya P580 and P882 Multiservice Switches, v6.1
Page 61

After creating one or more custom access types (user profiles), you can
create a user account and assign a custom access type to that account. The
user is then able to manage the switch based on the custom access type that
was assigned to his or her user account.
The switch supports a maximum of 30 custom access types.
This section contains procedures for the following tasks:
■ Creating a Custom Access Type
■ Modifying a Custom Access Type
■ Deleting a Custom Access Type
Creating a Custom Access Ty pe
Setting Up the Switch
Web Agent Procedure
To create a custom access type:
1. In the navigation pane, expand the System > Administration folders,
and then click Custom Access Types.
The Custom Access Types Web page is displayed in the content pane.
See Figure 2-5.
Figure 2-5. Custom Access Types Web Page
2. Click Create.
The Create Custom Access Type Web page is displayed in the content
pane. See Figure 2-6.
Document No. 10-300077, Issue 2 2-13
Page 62

Chapter 2
Figure 2-6. Create Custom Access Type Web Page
3. In the Type Name field, enter a name for the custom access type. You
can enter up to 31 characters. Do not use spaces.
4. For each feature in the Ac cessible Feature s list , select the per mission t hat
you want to assign the custom access type:
— Read-Write allows users to view and modify settings for the
feature.
— Read-Only allows users only to view settings for the feature.
— None allows users to neither view or modify settings for the
feature.
5. Click Apply to save the custom acces s type or Cancel to clear your
entries.
CLI Command To create a custom access type, use the following CLI command:
(configure)# custom-access-type <catName> [sys-configuration
[ro]] [module- port-mgmt [ro]] [events-mg mt [ro]] [l2-switching [ro]]
[routing [ro]]
2-14 User Guide for the Avaya P580 and P882 Multiservice Switches, v6.1
Page 63

Modifying a Custom Access Type
Setting Up the Switch
Web Agent Procedure
To modify a custom access type:
1. In the navigation pane, expand the System > Administration folders,
and then click Custom Access Types.
The Custom Access Types Web page is displayed in the content pane.
See Figure 2-5.
2. In the Type Name field, select the custom access type that you want to
modify.
3. Click Modify.
The Modify Custom Access Type Web page is displayed in the content
pane. See Figure 2-7.
Figure 2-7. Modify Custom Access Type Web Page
4. In the Accessible Features list, modify the permissions as necessary:
— Read-Write allows users to view and modify settings for the
feature.
— Read-Only allows users only to view settings for the feature.
— None allows users to neither view or modify settings for the
feature.
5. Click Apply to save the custom access type or Cancel to clear your
entries.
Document No. 10-300077, Issue 2 2-15
Page 64

Chapter 2
CLI Command To modify a custom access type, use the following CLI command:
(configure)# set custom-access-type <catName> [sys-configuration
{ro | rw | none}] [module-p ort-mgmt {r o | rw | none}] [e vents-mgmt {r o |
rw | none}] [l2-switching {ro | rw | none}] [routing {ro | rw | none}]
* Note: Unlike the custom-access-type command that you use to create
a custom access type, you must specify read-only, read-write,
or no permission when you use the set custom-access-type
command to modify a custom access type.
Deleting a Custom Access Type
Web Agent Procedure
To delete a custom access type:
1. In the navigation pane, expand the System > Administration folders,
and then click Custom Access Types.
The Custom Access Types Web page is displayed in the content pane.
See Figure 2-5.
2. In the Type Name field, select the access type that you want to delete.
3. Click Delete.
The Delete Custom Access Type Web page is displayed in the content
pane. See Figure 2-8.
Figure 2-8. Delete Custom Access Type Web Page
4. Click Yes to delete the custom access type that is displayed, or click No
to keep the access type.
*Note: User accounts that are assigned this custom access type
will no long er be able to log into the switch.
2-16 User Guide for the Avaya P580 and P882 Multiservice Switches, v6.1
Page 65

Setting Up the Switch
CLI Command To delete a custom access type, use the following CLI command:
(configure)# no custom-access-type <cat name>
Configuring User Accounts
This section contains procedures for the following tasks:
■ Configuring User Account Security
■ Creating a User Account
■ Modifying a User Account
■ Changing Your Password
■ Disabling a User Account
■ Deleting a User Account
You must have administrator access to configure user accounts.
Configuring User Account Security
Web Agent Procedure
1. In the navigation pane, expand the System > Administration folders.
2. Click User Accounts. The User Account Management Web page is
displayed in the content pane. See Figure 2-9.
Document No. 10-300077, Issue 2 2-17
Page 66

Chapter 2
Figure 2-9. User Account Management Web Page
3. In the Login A tt em p ts fiel d, en ter the nu mber of logi n att empts t hat you
want to allow users. When a user exceeds the limit for login attempts,
his or her user account is disabled and the switch displays an error
message.
Valid values for this field are 3 to 99 login attempts.
4. In the Timeout Limit (secs) field, enter the number of seconds that you
want a user account disabled when the limit for login attempts is
exceeded. Once the timeout limit expires, the user can attem pt to login
again.
5. In the Minimum Password Length field, enter the minimum number of
characters that you want to allow for user passwo rds. If a user attempts
to create a password with fewer characters, the switch displa ys the
following error message :
Password too short – must be at least <x> characters .
6. Click APPLY.
2-18 User Guide for the Avaya P580 and P882 Multiservice Switches, v6.1
Page 67

Setting Up the Switch
CLI Commands To configure user account security, use the following CLI command:
(configure)# set login [attempts <num-login-attempts>] [timeout-
limit <timeout-limit>] [min-password-len gth <min-password-length>]
T o view the cur rent sett ings for us er account security, use the following CLI
command:
# show login
Creating a User Account
You can create up to 27 user accounts.
Only users that have administrator access can perform the following tasks:
■ View the running configuration and startup configuration.
Web Agent Procedure
■ Copy text files to or from a TFTP server.
■ Download BOOT, APP1, and APP2 images to the switch.
■ Update the software on a module.
■ Access the Load MIB.
* Note: To log in to the ATM Uplink module, a user must:
• Have read-write access to the Modules and Ports
Management features.
• Enter Privileged mode or Global Configuration mode to
enter the session <slot number> command.
In earlier versions of application software, you could log in to
the ATM Uplink module from User mode. This change in
functionality prev ents unauthor ized users from logging i n to the
ATM Uplink module.
To create a user account:
1. In the navigation pane, expand the System > Administration folders.
2. Click User Accounts. The User Account Management Web page is
displayed in the content pane. See Figure 2-9.
3. Click Add. The Add User Account Web page is displayed in the cont ent
pane. See Figure 2-10.
Document No. 10-300077, Issue 2 2-19
Page 68

Chapter 2
Figure 2-10. Add User Account Web Page
4. In the User Name field, enter a unique user name. User names can
consist of a maximum of 31 characters.
5. In the Password field, enter a password for the user name. Password s
can consist of a maximum of 31 characters.
*Note: Do not use a combination of the following special
characters for the password ;, ?, \,(,),#, $,%, ^, &, or *.
6. In the Re-enter Pa sswor d field, ree nter the pa ssword th at you entered i n
the Password field.
7. In the Expiration Period (weeks) field, enter the number of weeks for
which the user account is vali d. The expiration period can range from 3
to 999 weeks. The default setting is 0, no expiration.
When a user account expires, you must reset the account. For
information on resetting a user account, see “Modifying a User
Account” later in this chapter.
2-20 User Guide for the Avaya P580 and P882 Multiservice Switches, v6.1
Page 69

Setting Up the Switch
8. In the Expiration Warning (weeks) field, enter the number of weeks
before user account expiration that you want the user warned. The
expiration warning can range from 0 to the expiration period. A setting
of 0 indicates that no warning is generated.
9. In the Access Type field, select an access type for the user. The opti ons
are:
— READ_ONLY
— READ_WRITE
— ADMINISTRATOR
— Custom access types—All custom access types that are
configured on the switch are displayed. For information on
custom access types, see “Configuring Custom Access Types”
earlier in this chapter.
10. In the Management Type field, select the interfaces from which the
user can manage the switch. The options are:
— Local CLI. User can manage the switch from the serial console
on the supervisor module.
— Remote CLI. User can manage the switch by means of a Telnet
or SSH session.
— Web. User can manage the switch by means of the Web Agent.
11. Click APPLY.
CLI Command To create a user account, use the following CLI commands:
■ To create a user account:
(configure)# username <name> password [encrypted-
type1] <passwd> [access-type {read-only | read-write | admin |
<catName>}] [mgmt-type [all] [local-cli] [remote-cli] [web]]
■ To set an expiration period and expiration warning:
(configure)# username <name> [exp-period <exp-period>]
[exp-warning <exp-warning>]
Document No. 10-300077, Issue 2 2-21
Page 70

Chapter 2
Modifying a User Account
To modify a user account:
1. In the navigation pane, expand the System > Administration folders.
2. Click User Accounts. The User Account Management Web page is
displayed in the content pane. See Figure 2-9.
3. In the User Name field, select the user account t hat you want to modify.
4. Click Modify. The Modify User Account Web page is displayed in the
content pane. See Figure 2-11.
Figure 2-11. Modify User Account Web Page
5. To change the user password:
a. In the New Password field, enter a new password for the user
name. Passwords can consist of a maximum of 31 characters.
*Note: Do not use a combination of the following special
characters for the password ;, ?, \,(,),#, $,%, ^, &, or *.
b. In the Re-enter New Password field, re enter the pass word that
you entered in the New Password field.
2-22 User Guide for the Avaya P580 and P882 Multiservice Switches, v6.1
Page 71

Setting Up the Switch
6. To change the number of weeks for which the user account is valid,
change the setting of the Expiration Period (weeks) field. The
expiration period can range from 3 to 999 weeks. The default setting is
0, no expiration.
7. To change the number of weeks before user account expiration that the
user is war ned, change the setting of the Expiration Warning (weeks)
field. The expiration warni ng can range from 0 to the expirat ion period.
A setting of 0 indicates that no warning is generated.
8. In the Status field, select Enable or Disable to change the status of the
user account.
When a user account expires, you reset the account by changing the
setting of this field from Disable to Enable.
9. Click APPLY.
CLI Commands To modify a user account, use the following CLI commands:
■ To modify a user account, (configure)# username <name>
password [encrypted-type1] <passwd> [access-type {read-only |
read-write | admin | <catName>}] [mgmt-type [all] [local-cli]
[remote-cli] [web]]
■ To modify the expiration period or expiration warning for a user
account,
(configure)# username <name> [exp-period <exp-
period>] [exp-warning <exp-warning>]
■ To modify the status of a user account, (configure)#
username <name> status {enable | disable}
■ To view the settings for a user account, > show username
[<name>]
Document No. 10-300077, Issue 2 2-23
Page 72

Chapter 2
Changing Your Password
All users can change their own passwords.
Web Agent Procedure
To change your password:
1. In the navigation pane, expand the System folder.
2. Click Change P assword. The Change Password Web page is displayed
in the content pane. See Figure 2-12.
Figure 2-12. Change Password Web Page
3. In the Old Password field, enter your currently active password.
4. In the New Password field, enter a new password. Passwords can
consist of a maximum of 31 characters.
*Note: Do not use a combination of the following special
characters for the password ;, ?, \,(,),#, $,%, ^, &, or *.
5. In the Re-enter New Password field, reenter the password that you
entered in the New Password field.
6. Click APPLY.
CLI Command To change your password, use the following CLI command:
> password <passwd>
2-24 User Guide for the Avaya P580 and P882 Multiservice Switches, v6.1
Page 73

Disabling a User Account
For security reasons , you may want t o d isable c ertai n user acco unt s, such as
the manuf and diag accounts.
Setting Up the Switch
Web Agent
To disable a user account:
Procedure
1. Expand the System > Administration fol ders.
2. Click User Accounts. The User Account Management Web page is
displayed in the content pane. See Figure 2-9.
3. Select the manuf or diag account that you want to disable.
4. Click Modify. The Modify User Account Web page is displayed in the
content pane. See Figure 2-11.
5. In the Status field, select Disable.
6. Click APPLY.
CLI Command To disable a user account, use the following CLI command:
(configure)# username <name> status disable
Deleting a User Account
Web Agent Procedure
To delete a user account:
modify a user account:
1. In the navigation pane, expand the System > Administration folders.
2. Click User Accounts. The User Account Management Web page is
displayed in the content pane. See Figure 2-9.
3. In the User Name field, select the user account that you want to delete.
4. Click Delete. The Delete User Account Web page is displayed in the
content pane. See Figure 2-13.
Document No. 10-300077, Issue 2 2-25
Page 74

Chapter 2
Figure 2-13. Delete User Account We b Page
5. Click YES to delete the user account.
CLI Command To delete a user account, use the following CLI command:
(configure)# no username <name>
Changing the Console Serial Port Settings
You can change the communications settings for the serial port connection
located on the front panel of the layer 3 supervisor module from the Web
Agent. The switch’ s c onsole port is init ially confi gured as a TTY Console to
support a TTY connection. The layer 2 and layer 3 supervisor modules
allow you to reco nfigure the conso le se rial port as a PPP Consol e to sup port
a dial-in PPP connection using a modem.
* Note: If you reconfigure the serial port a s a PPP cons ole, you can o nly
change the switch’s baud rate and flow control paramete rs. The
flow control parameters are limited to None or X on/Xoff.
This section contains procedures for the following tasks:
■ Configuring the Serial Console Port as a TTY Console
■ Configuring the Serial Console Port as a PPP Console
■ Regaining Configuration Access to the PPP Serial Port Console
2-26 User Guide for the Avaya P580 and P882 Multiservice Switches, v6.1
Page 75

Setting Up the Switch
Configuring the Serial Console Port as a TTY Console
You can configure the serial port as a TTY console using either the Web
Agent or the CLI.
Web Agent Procedure
T o conf igure the con sole s erial port as a TTY Console using t he Web Agent:
1. In the navigation pane, expa nd the System > Conf igurati on folders, and
then click Console Configuration.
The Console Configuration Web page is displayed in the content pane.
See Figure 2-14.
Figure 2-14. Console Configuration Web Page
2. Select TTY as the console type and click SELECT.
The Console Port Configuration Web page is displayed in the content
pane and displays TTY in the Console Type field (Figure 2-15).
Document No. 10-300077, Issue 2 2-27
Page 76

Chapter 2
Figure 2-15. Console Port Configuration Web Page
3. See Table 2-4 and configure the other Console Port Configuration Web
page parameters.
4. Click APPLY to save your changes, or CANCEL to clear your
selection.
Table 2-4. Console Port Configuration Web Page Parameters
Option Default Available Settings
Baud Rate 9600 300, 1200, 2400, 4800, 9600, 19200,
38400, 57600, 115200
Flow Control Xon/Xoff (TTY) None, Xon/Xoff (TTY)
Data Bits 8 7 or 8
Parity None Odd, Even, or None
Stop Bits 1 1 or 2
CLI Command To configure the console serial port as a TTY Console, use the following
CLI command:
(configure)# set console type {tty | ppp}
2-28 User Guide for the Avaya P580 and P882 Multiservice Switches, v6.1
Page 77

Setting Up the Switch
Configuring the Serial Console Port as a PPP Console
You can reconfigure the seri al port as a PP P console to su pport a dial-in PPP
connection using either the Web Agent or the CLI. Before you can do so,
however, you must connect a modem to the switch.
* Note: If you do not configure an IP address for the PPP serial
interface, the switch immediately sends the modem
configuration string. If you type TTY, you will re-access the
CLI login prompt.
Connecting a Modem
After you connect a modem to your switch with the specified serial cable
and connectors, and configure the serial port in PPP mode, the switch will
convert the normal Distribu ted Comp uting Envi ronment (DCE) inte rfac e to
a Data Terminal Equipm ent (DTE) interface that is used by modems.
It then periodically sends the modem configuration string from the serial
console port. This synchronizes the baud rates between the modem and the
console port and configures the modem to operate with the switch’s DTE
interface.
To connect a modem (Figure 2-16):
1. Attach a DB25M-RJ45 (P/N 38210003) connector to the modem.
2. Attach the DB9M-RJ45 MDCE connector to the switch’s serial console
port on the front panel of the switch.
Figure 2-16. Typical Modem Connection to a Switch
Document No. 10-300077, Issue 2 2-29
Page 78

Chapter 2
Web Agent Procedure
To configure the console serial port as a PPP console from the Web Agent:
1. In the navigation pane, expand t he System > Configuration folders, and
then click Console.
The Console Configuration Web page is displayed in the content pane.
See Figure 2-14.
2. Select PPP as the console type and click SELECT.
The Console Port Configuration Web page is displayed in the content
pane and displays PPP for the Console Type (Figure 2-17).
* Note: If you select PPP, the PPP Console Port Configuration Web
page is displayed.
Figure 2-17. PPP Console Configuration Web Page
3. Select a baud rate from the Baud Rate field pull-down menu that is
different from the one already selected.
4. Select an option from the Flow Control field pull-down menu. The
options are: None and Xon/Xoff.
*Note: You can only change the baud rate and flow control
parameters after you configure the serial port as a PPP
console.
2-30 User Guide for the Avaya P580 and P882 Multiservice Switches, v6.1
Page 79

Setting Up the Switch
5. Enter the modem initi ali za tion command in the Modem Init Cmd field.
The default modem configuration init command is AT&D0SO=1.
See Table 2-5 for a definition of the Modem Configuration Init
command p arameters.
Table 2-5. Modem Configuration String Parameters
Parameter Definition
&D0 Disable DTR
S0=1 Auto-answer mode (one ring)
CD follows carrier Depends on modem
E0 Disable local echo
Software Flow Control
(Receive and Transmit)
Depends on modem
* Note: If you misconfi gur e th e PPP serial console port, you can r egai n
CLI access to correct the configuration parame ters. For more
information, see “Regaining Configuration Access to the PPP
Serial Port Console” later in this chapter.
Safety Tip: To successfully dial-in with PPP to the switch, you must also
configure an IP address and interface for the PPP Serial
Interface (Serial-Console). See “Managing Configuration
Files,” later in this chapter for m ore information.
6. Click APPLY to save your changes, or CANCEL to clear your
selection.
* Note: If you clic k Apply, the changes are saved in the Running config
only. The Startup config has not changed. Therefore, these and
other changes will be lost if your switch goes down or if you
power it off.
To save these changes, you must copy the Running config to
the Startup config. See “Copying Configuration Files” later in
this section.
CLI Command To configure the console serial port as a TTY console after you install a
mode, use the following CLI command:
(configure)# set console type {tty | ppp}
Document No. 10-300077, Issue 2 2-31
Page 80

Chapter 2
Regaining Configuration Access to the PPP Serial Port Console
If you incorrectly configure the PPP serial port console, you cannot regain
configuration access to the Web Agent or the CLI. This is a temporary
situation and can corrected.
To regain configuration access to the Web Agent or the CLI when the
console port is in PPP mode:
1. Enter
2. Enter your user name at the Login prompt. The password prompt
3. Enter your password at the Password prompt. The switch CLI prompt
4. Enter
* Note: You do not need to exit from CL I if the serial port console has
TTY in the console window. The CLI login prompt display s. It ma y
be necessary to press Enter several times to see the login prompt. You
may see the modem init command string.
displays.
displays.
Enter the PPP configuration commands necessary to start PPP. See
Command Reference Guide for the Avaya P580 and P882
Multiser vice Switches, Software Version 6.1 for details about these
PPP commands.
exit at the CLI prompt after you complete your configuration
settings to reinvoke the modem control software and exit CLI mode.
been configured as a TTY console, or if you do not i ntend to reattempt connecting using PPP.
Configuring Dial-Up Networking
To configure your PC for dial-up networki ng with a PPP serial port console:
1. Open My Computer on your PC.
2. Double-click Dial-Up Networkin g. The Dial-Up Networking window
opens.
*Note: You must have dial-up networking installed on your PC.
3. Double-click Make New Connection to configure your modem. The
Make New Connection wizard opens.
4. Enter a connection name for the computer you are dialing in the Type a
name for the computer you are dialing field.
2-32 User Guide for the Avaya P580 and P882 Multiservice Switches, v6.1
Page 81

Setting Up the Switch
5. Open the Select a Modem pull-down menu.
6. Select your modem and select Configure. The Modem Properties
window opens.
7. Select the Connection tab. The Connection window opens.
8. Select the following from the Connection Preferences window:
— Open the Data bits pull-down menu and select 8.
— Open the Parity pull-down menu and select None.
— Open the Stop bits pull-down menu and select 1.
9. Select Advanced. The Advanced Connection Settings window opens.
10. Select Software (XON/XOFF) from the Use flow control field.
11. Select OK to close the window. The Modem Properties window
reopens.
12. Select the Options tab. The Options window opens.
13. Select Bring up termin al window after dialing from the Connection
Control field. Select OK. The Modem Properties window closes and
the wizard continues.
14. Select Next from the wizard window and enter the telephone number
you are calling.
15. Select Next. The wiza rd repor ts that you have success fully c onfigured a
modem.
16. Select Finish. The wizard closes and the newly configured connection
displays in your Dial-Up networking program folder.
17. Select your new connection right click the mouse.
18. Select Properties. The Properties window opens.
19. Select the Server Types tab and de-select all advanced options except
TCP/IP.
20. Select TCP/IP Settings. The TCP/IP Settings window opens.
21. Select Specify an IP Addre ss an d enter t he IP addre ss fro th e ser ial por t
interface.
22. Select Server assigned name server addresses.
23. De-select Use IP header Compression and Use Default Gateway on
remote network.
Document No. 10-300077, Issue 2 2-33
Page 82

Chapter 2
24. Select OK to close the TCP/IP window.
25. Select OK to close the New Connections Properties window.
Using Dial-Up Networking with a PPP Serial Port Console
To use TCP/IP applications (Telnet, HTTP, and SNMP) over your PPP
serial port interface:
1. Open My Computer on your PC.
2. Double-click Dial-Up Networkin g. The Dial-Up Networking program
folder opens.
*Note: You must have dial-up networking installed on your PC.
3. Double-click the PPP modem you previously created. The Connect To
window opens.
4. Enter your password and select Connect. A Pre-Dial Terminal screen
opens.
When the modem has successfully connected, a Post-Dial Terminal
screen opens.
5. Login in the Post-Dial Terminal screen using your CLI user name and
password. It may be necessary to enter several carriage returns to view
the Login prompt.
6. At the CLI prompt, go to configuration mode.
7. Enter
8. Select Continue (F7) from the Post-Dia l Terminal screen. PPP
set console transfer PPP. ASCII characters display
below the CLI prompt. This is typical while the switch attempts to
connect via PPP.
verification completes and the Connected To window displays a
message that the modem connection has been successfully established.
2-34 User Guide for the Avaya P580 and P882 Multiservice Switches, v6.1
Page 83

Setting Up the Switch
Changing the T CP Ports for HTTP and Teln e t
Overview
For security purposes, you may want to change the TCP port number for
Telnet requests and HTTP requests. The default settings for these ports are
the well-known TCP ports. HTTP requests use TCP port 80, and Telnet
requests use TCP port 23.
Once you change the TCP port number for HTTP, only users who know the
new port number can open the Web Agent. And once you change the TCP
port for Telnet, only users who know the new port number can start Telnet
sessions to the switch.
When you change the TCP port number for either of these protocols, the
change takes effect immediately and all connections through the previous
port number are disconnected. Any changes that you make to these TCP
port numbers are retained if you reset the switch or if the primary supervisor
module fails over to the standby supervisor.
This section contains procedures for the following tasks:
■ Changing the TCP Port Number for HTTP and Telnet Requests
■ Starting a Telnet Session
■ Opening the Web Agent
You must have administrative privileg e to view or change the TCP port for
HTTP or Telnet.
Changing the TCP Port Number for HTTP and Telnet Requests
Web Agent Procedure
To change the TCP port for HTTP requests or Telnet requests by using the
Web Agent:
1. In the navigation pane, expand the System > Administration folders.
2. Click TCP ports.
The TCP Ports Web page is displayed in the content pane. See Figure 2-
18.
Document No. 10-300077, Issue 2 2-35
Page 84

Chapter 2
Figure 2-18. TCP Ports Web page
3. T o change the TCP port for Telnet requests, in the Port Number field for
Telnet, enter the port number that you want to use.
Valid port numbers are 23 or a port number from 9000 through 65355.
The default port for Telnet is port 23.
4. To change the TCP port for SSH reques ts, in the Port Number field for
SSH, enter the port number that you want to use.
Valid port numbers are 22 or a port number from 9000 through 65535.
The default port for SSH is port 22.
5. To change the TCP port for HTTP requests, in the Port Number field for
HTTP, enter the port number that you want to use.
Valid port numbers are 80 or a port number from 9000 through 65535.
The default port for HTTP is port 80.
6. To change the TCP port for HTTPS requests, in the Port Number field
for SSL/HTTPS, enter the port number that you want to use.
Valid port numbers are 443 or a port number from 9000 through 65535.
The default port for HTTPS is 443.
7. Click Apply.
2-36 User Guide for the Avaya P580 and P882 Multiservice Switches, v6.1
Page 85

Setting Up the Switch
CLI Commands To chang e the TCP por t for Telnet requests, use the followi ng CLI
command:
(configure)# ip telnet port <tcp-telnet-port>
To change the TCP port for HTTP requests, use the following CLI
command:
(configure)# ip http port <tcp-http-port>
To view the current TCP port settings for Telnet and HTTP, use the
following CLI command:
> show tcp configuration
* Note: You must have administrative privilege to enter these
commands.
Starting a Telnet Session
After changing the TCP port for Telnet requests to a port number oth er than
23, you must specify the TCP port number in addition to the IP address or
host name to start a Telnet session.
For example, if you change the TCP port from 23 to 9998 on switch
192.168.0.126, enter telnet 192.168.0.126 9998 to start a Telnet session.
Opening the Web Agent
After changing the TCP port for HTTP requ ests t o a port number other th an
80, you must specify the TCP port number in addition to the IP address to
open the Web Agent.
For example, if you change the TCP port from 80 to 9999 on switch
192.168.0.126, enter http://192.168.0.126:9999 to open the Web Agent.
Document No. 10-300077, Issue 2 2-37
Page 86

Chapter 2
Managing Configurat ion Files
When you first install the switch, or upgrade from a previous installation,
your configuration parameters are stored in a startup.txt file located in the
switch’s Non-Volatile Random Access Memory (NVRAM). When the
switch is restarted, the startup.txt file runs and stores configuration
parameters in volatile RAM as a running configuration.
Any changes you make to the switch configuration are automatically
recorded in RAM, but not in NVRAM. When you want to retain your
current configuration, you must manually save it to NVRAM through the
Web Agent or the CLI.
For information about how to save your running configuration file to your
startup configuration, see “Copying Configuration Files” later in this
chapter. Always view and compare your running and startup configuration
files to determine changes that you made to your running configuration.
*Important: Do not copy t he startup configuration to the running
configuration. The switch does not support this
activity. If you need to reapply the startup
configuration, rest art the switch.
* Note: If you initialize NVRAM (nvram initialize command), all
switch settings except the following are reset to their default:
• Startup image
•Fabric mode
• 48-port mode
You can manage the files that contain the configuration data for your
multiservice switch from either the Web Agent or the CLI. This section
contains procedures for the following tasks:
■ Viewing the Running Configuration
■ Viewing the Startup Configuration
■ Viewing the Script Execution Log File
■ Copying Configuration Files
■ Copying Files
■ Viewing the Status of a TFTP Transfer
2-38 User Guide for the Avaya P580 and P882 Multiservice Switches, v6.1
Page 87

Viewing the Running Configuration
You must have administrator access to view the running configuration.
Setting Up the Switch
Web Agent
To view the running configuration:
Procedure
1. In the navigation pane, expand the System > Configuration >
Configuration Files folders.
2. Click Running Config. The Running Configuration Web page is
displayed in the content pane.
CLI Command To view the running configuration, use the following CLI command:
# show running-config
Viewing the Startup Configuration
You must have administrator access to view the startup configuration.
Web Agent Procedure
To view the startup configuration:
1. In the navigation pane, expand the System > Configuration >
Configuration Files folders.
2. Click Startup Config. The Startup Configuration Web page is displayed
in the content pane.
CLI Command To view the startup configuration, use the following CLI command:
# show start up-config
Viewing the Script Execution Log File
Each time the startup.t xt f ile or other scri pt r uns, a l og fi le is genera ted. Lo g
files contain the data returned from the script. You can view log file data
from the Script Execution Log File using either the Web Agent or the CLI.
Web Agent Procedure
CLI Command To view your Script Execution Log File from the CLI, use the following
To view your Script Execution Log File from the Web Agent, select Script
Log File from the Configuration Management folder in the navigation
pane. The Script Execution Log file displays
CLI comm and:
# show file_nam e logfile.txt
Document No. 10-300077, Issue 2 2-39
Page 88

Chapter 2
Copying Configuration Files
You must have administrator access to copy the configuration files.
If you make any changes, you must save the running configuration as the
startup configuration to save the changes. Before you do this, always copy
your startup configuration to a file on the switch or on a TFTP server.
You can save the running configuration to the startup configuration and
copy the startup configuration to a file using either the Web Agent or the
CLI.
Configuration files are automatically saved as text files using the *.txt
extension on your swit ch. If you save the new file to a TFTP server , yo u can
edit the startup.txt file using a text editor of your choice and save copies of
it with a .txt extension.
*Important: Do not copy t he startup configuration to the running
configuration. The switch does not support this
activity. If you need to reapply the startup
configuration, rest art the switch.
Web Agent Procedure
To save your running configuration as your startup configuration in
NVRAM using the Web Agent:
1. In the navigation pane, expand the System > Configuration >
Configuration Files folders, and then click File Management.
The Configuration File Management Web page is displayed in the
content pane. See Figure 2-19.
2-40 User Guide for the Avaya P580 and P882 Multiservice Switches, v6.1
Page 89

Setting Up the Switch
Figure 2-19. Configuration File Management Web Page
2. Click Save. The running configuration is saved as the startup
configuration.
* Note: You can also save the running configuration to the startup
configuration through the Configuration Fil e Management Web
page. See “Copying Files” for that procedure.
CLI Command To save your running configuration as your startup configuration in
NVRAM, use the followin g CLI command in Enable mode:
# copy running-config startup-config
Document No. 10-300077, Issue 2 2-41
Page 90

Chapter 2
Copying Files
You must have administrator access to copy text files and BOOT, APP1,
and APP2 images.
You can copy fil es to and from multiple locations. For example, if you
modify the running configuration and you want to reinstate your startup
configuration parameters, you can copy your startup configuration to your
running configuration in volatile RAM. You can also upload or download
configuration files by copying files from a TFTP server directory to the
switch or to a star tup or runni ng conf igura tion f ile. You can copy fil es usi ng
either the Web Agent or the CLI.
Web Agent
To copy files using the Web Agent:
Procedure
1. In the navigation pane, expand the System > Configuration >
Configuration Files folders, and then click File Management.
The Configuration File Management Web page is displayed in the
content pane. See Figure 2-19.
2. See Table 2-6 for an explanation of the Configuration File Management
Web page parameters.
Table 2-6. Configuration File Management Web Page Parameters
Parameter Description Options
Save Running-Config to
Startup-Config
Copy Source Specifies the source file to be
Saves the running configuration
to the startup configuration
copied
N/A
• Unspecified - Specifies an initialized value.
• File - Specifies a source file located on the
switch in NVRAM.
• Running-Config - Specifies a running
configuration.
• Startup-Config - Specifies a startup
configuration.
• TFTP Server - Specifies a source file located
in a directory on a TFTP server.
Source Filename Specifies the path and name of
the source file
2-42 User Guide for the Avaya P580 and P882 Multiservice Switches, v6.1
Source files can be ASCII files in NVRAM
available for upload or files located on a TFTP
server available for download
1 of 2
Page 91

Table 2-6. Configuration File Management Web Page Parameters
Parameter Description Options
Setting Up the Switch
Copy Destination Specifies the location of the
destination
Destination Filename Specifies the path and name of
the destination file
TFTP Server IP Address Specifies the IP address of a
source or destination TFTP
server
—
File — To copy a file stored on the switch to your running or
startup configurat ion, to a locat ion on the switch , or to a locati on
on a TFTP server.
• Unspecified- Specifies an initialized value.
• File - Specifies that a source is copied or
downloaded to NVRAM.
• Running-Config - Specifies that a source is
copied to the running configuration.
• Startup-Config - Specifies that a source is
copied to the startup configuration.
• TFTP Server - Specifies that a source is
copied to a TFTP server location.
Configuration files and other fi les can be copied
to NVRAM on the switch or to a TFTP server as
a destination location.
Copy (download) source files, located on a
TFTP server, to your running configuration,
your startup configuration, or a location on the
switch. Or, copy (upload) your configuration
files, or a file located on the switch, to a TFTP
server.
2 of 2
— TFTP Server — To copy a file stored on a TFTP server to your
running or startup configuration or to a file on the switch.
*Note: If you select File or TFTP Server, you must also provide
the path and filename of the source file in the Destination
Filename field.
3. Select one of the following from the Copy Destination
pull-down menu.
— Running-Config — Copies your startup configura ti on, or other
file located on the switch or on a TFTP server, to your running
configuration.
— Startup-Config — Copies your running configuration, or other
file located on the switch or on a TFTP server, to your startup
configuration.
— File — Copies your startup or running configuration, another
file located on the switc h, or a f ile loca te d on a TFTP s erver to a
file on the switch.
Document No. 10-300077, Issue 2 2-43
Page 92

Chapter 2
— TFTP Server — Copies your startup or running configuration,
or another file located on the switch, to a location on a TFTP
server.
*Note: If you select File or TFTP Server, you must also provide
the path and filename of the destination file in the Source
Destination field.
4. Enter the IP address of the source or destination TFTP server in the
TFTP Server IP Address field, if applicable.
5. Click Copy. The source configuration or file is copied to your specified
destination.
*Note: The Web Agent displays an
Invalid operation!
error message if you at tempt t o co py one of the following:
• The current running configuration to the running
configuration.
• The startup configuration to the same startup configuration.
• The specified TFTP server to a TFTP server.
CLI Command To copy files, use the following CLI command in Enable mode:
# copy running-config +
* Note: Entering a + sign lists all of th e applicable options for t he copy
running-config command
2-44 User Guide for the Avaya P580 and P882 Multiservice Switches, v6.1
Page 93

Viewing the Status of a TFTP Transfer
After you have copied the startup configuration or other files to a TFTP
server, you can use either the Web Agent or the CLI to check the status of
the TFTP transfer to ensure that files copied correctly.
Setting Up the Switch
Web Agent
To view the status of a TFTP transfer using the Web Agent:
Procedure
1. In the navigation pane, expand the System > Configuration >
Configuration Files folders, and then clic k File Management .
The Configuration File Management Web page is displayed in the
content pane. See Figure 2-19.
2. Select Status from the Get Status of Most Rec ent TFTP Copy field. A
status message displays in the Status pane.
CLI Command While doing a TFTP transfer using the CLI, the status, either successfully
transferring or an error condition, is immediately returned.
* Note: You cannot view the status of a TFTP transfer done using the
CLI from the Get Status of Most Recent TFTP Copy field on
the Web Agent.
> show start up-config
Document No. 10-300077, Issue 2 2-45
Page 94

Chapter 2
2-46 User Guide for the Avaya P580 and P882 Multiservice Switches, v6.1
Page 95

3
Overview
Configuring System Information
You can manage system information by using either the Web Agent or the
CLI. The following procedures to manage your system information are
provided in this chapter:
■ Entering General System Information
■ Enabling the Simple Network Time Protocol
■ Setting Summer Time Hours
■ Setting the System Clock
■ Setting the Temperature System
■ Displaying the Power System Statistics
■ Displaying Cooling System Statistics
■ Performing a Reset
* Note: The last step in each procedure tells you to click Apply to save
the setup or c hanges that you made. This step save s the set up or
any changes to the running configuration only. The startup
configuration is not changed. Therefore, these and other
changes will be lo st if t he switch g oes down or if you turn it off .
T o save any change s to the startu p configurati on, you must copy
the running configuration to the startup configuration. For
information on how to perform this task, see “Copying
Configuration Files” in Chapter 2, “Setting U p the Switch.”
For more information about the CLI commands that are mentioned in this
chapter, see Command Reference Guide for the Avaya P580 and P882
Multiser vice Switches, Software Version 6.1
User Guide for the Avaya P580 and P882 Multiservice Switches, v6.1 3-1
Page 96

Chapter 3
Entering General System Information
You can enter general information about your system by using either the
Web Agent or the CLI.
Web Agent Procedure
You can enter general system information using the following Web Agent
fields:
■ Switch name
■ Device location
■ Device contact
To enter general system information from the Web Agent:
1. In the navigation pane, expand the System folder, and then click
General Information.
The General Informat ion Web page is displaye d in the content pane. See
Figure 3-1.
Figure 3-1. General Information Web Page
2. Enter the switch name in the Name field.
3. Enter the location for the switch (for example, floor, closet in the
Location field.
3-2 User Guide for the Avaya P580 and P882 Multiservice Switches, v6.1
Page 97

Configuring System Information
4. Enter the person who should be contacted in the event of a problem in
the Contact field.
5. Click APPLY to save your changes, or CANCEL to clear your selection.
Enabling the Simple Network Time Protocol
You can enable Simple Network Time Protocol (SNTP) on your switch
using either the Web Agent or the CLI. Enabling SN TP automatically
synchronizes time on all computers, switches, and other devices connected
to your switch.
When you enable SNTP, you are requir ed t o s et your t ime z one and the rule
or dates of Summer Time Hours for your location. For information about
setting one-time summer hours, see “Setting One-Time Summer Time
Hours” later in this chapter. For information about setting Summer Time
Hours, see “Setting Summer Time Hours” later in this chapter.
Web Agent Procedure
To enable SNTP on your switch using the Web Agent:
1. In the navigat ion p ane, e xpand the System > Configuration folders, and
then click System Clock.
The System Clock Web page is displayed in the content pane. See
Figure 3-2.
Figure 3-2. System Clock Web page.
Document No. 10-300077, Issue 2 3-3
Page 98

Chapter 3
2. Select Simple Network Time Protocol (SNTP) from the Clock Options
box.
The SNTP Client Configuration Web page is displayed in the content
pane. See Figure 3-3.
Figure 3-3. SNTP Client Configuration We b Page
3. Select Enable from the Enable State pull-down menu. The default is
Disable.
4. Enter the server IP ad dress in the Se rver IP address field for the switch
on which you want to ena ble SNTP.
5. Click APPLY to save your changes, or CANCEL to clear your selection.
CLI Command To enable S NTP on your switch using the CLI, enter th e following
command in Configure mode:
(configure)# sntp server <ip-address>
3-4 User Guide for the Avaya P580 and P882 Multiservice Switches, v6.1
Page 99

Setting Summer Time Hours
Summer Time Hours, also referred to as Daylight Savings Time (DST), is
the strategy of moving clocks ahead to provide greater amounts of daylight
in the afternoon and to standardize time with other parts of the world. In
many par ts of the world, the Summ er Time Hours algorithm is ba sed on a
standardized rule. Fo r ex ample, in th e Western hemisphere, t he rul e used by
most locations in Canada, Mexico, and the United States is to set clocks
forward by one hour at 2:00 a.m. on the first Sunday in April and back an
hour at 2:00 a.m. on the f irst Sund ay in Octob er annual ly. Many countries in
Europe and Asia follow similar rules. The offset, or amount of time by
which the clock is set forward or backward, varies from country to country.
Many parts of the world follow a one-time change of Summer Time Hours.
When you configure the switch for these locations, you reset the clock by
specifying a scheduled time and date.
This section provides the following procedures:
Configuring System Information
■ Setting Recurring Summer Time Hours
■ Setting One-Time Summer Time Hours
* Note: If you upgrade your switch from a previous version, the local
time settings are saved as Greenwich Mean Time values.
Always change the Summer Time Hours Algorithm before you
set the clock.
Setting Recurring Summer Time Hours
You can set recurring summer time hours using either the Web Agent or the
CLI.
Web Agent Procedure
To set recurring Summer Time Hours using the Web Agent:
1. In the navigat ion p ane, e xpand t he System > Configuration folders, and
then click System Clock.
The System Clock Web page is displayed in the content pane. See
Figure 3-4.
Document No. 10-300077, Issue 2 3-5
Page 100

Chapter 3
Figure 3-4. System Clock Web Page
2. Select Summer Time Hours Algorithm from the Clock Options field.
The Summer Time Hours Configuration Web page is displayed in the
content pane. See Figure 3-5.
3-6 User Guide for the Avaya P580 and P882 Multiservice Switches, v6.1
 Loading...