

Page 1

AutoCAD Mechanical 2012
Installation FAQ
Page 2

©
2011 Autodesk, Inc. All Rights Reserved. Except as otherwise permitted by Autodesk, Inc., this publication, or parts thereof, may not
be reproduced in any form, by any method, for any purpose.
Certain materials included in this publication are reprinted with the permission of the copyright holder.
Trademarks
The following are registered trademarks or trademarks of Autodesk, Inc., and/or its subsidiaries and/or affiliates in the USA and other countries:
3DEC (design/logo), 3December, 3December.com, 3ds Max, Algor, Alias, Alias (swirl design/logo), AliasStudio, Alias|Wavefront (design/logo),
ATC, AUGI, AutoCAD, AutoCAD Learning Assistance, AutoCAD LT, AutoCAD Simulator, AutoCAD SQL Extension, AutoCAD SQL Interface,
Autodesk, Autodesk Intent, Autodesk Inventor, Autodesk MapGuide, Autodesk Streamline, AutoLISP, AutoSnap, AutoSketch, AutoTrack, Backburner,
Backdraft, Beast, Built with ObjectARX (logo), Burn, Buzzsaw, CAiCE, Civil 3D, Cleaner, Cleaner Central, ClearScale, Colour Warper, Combustion,
Communication Specification, Constructware, Content Explorer, Dancing Baby (image), DesignCenter, Design Doctor, Designer's Toolkit,
DesignKids, DesignProf, DesignServer, DesignStudio, Design Web Format, Discreet, DWF, DWG, DWG (logo), DWG Extreme, DWG TrueConvert,
DWG TrueView, DXF, Ecotect, Exposure, Extending the Design Team, Face Robot, FBX, Fempro, Fire, Flame, Flare, Flint, FMDesktop, Freewheel,
GDX Driver, Green Building Studio, Heads-up Design, Heidi, HumanIK, IDEA Server, i-drop, Illuminate Labs AB (design/logo), ImageModeler,
iMOUT, Incinerator, Inferno, Inventor, Inventor LT, Kynapse, Kynogon, LandXplorer, LiquidLight, LiquidLight (design/logo), Lustre, MatchMover,
Maya, Mechanical Desktop, Moldflow, Moldflow Plastics Advisers, MPI, Moldflow Plastics Insight, Moldflow Plastics Xpert, Moondust, MotionBuilder,
Movimento, MPA, MPA (design/logo), MPX, MPX (design/logo), Mudbox, Multi-Master Editing, Navisworks, ObjectARX, ObjectDBX, Opticore,
Pipeplus, PolarSnap, PortfolioWall, Powered with Autodesk Technology, Productstream, ProMaterials, RasterDWG, RealDWG, Real-time Roto,
Recognize, Render Queue, Retimer, Reveal, Revit, RiverCAD, Robot, Showcase, Show Me, ShowMotion, SketchBook, Smoke, Softimage,
Softimage|XSI (design/logo), Sparks, SteeringWheels, Stitcher, Stone, StormNET, StudioTools, ToolClip, Topobase, Toxik, TrustedDWG, U-Vis,
ViewCube, Visual, Visual LISP, Volo, Vtour, WaterNetworks, Wire, Wiretap, WiretapCentral, XSI.
All other brand names, product names or trademarks belong to their respective holders.
Disclaimer
THIS PUBLICATION AND THE INFORMATION CONTAINED HEREIN IS MADE AVAILABLE BY AUTODESK, INC. "AS IS." AUTODESK, INC. DISCLAIMS
ALL WARRANTIES, EITHER EXPRESS OR IMPLIED, INCLUDING BUT NOT LIMITED TO ANY IMPLIED WARRANTIES OF MERCHANTABILITY OR
FITNESS FOR A PARTICULAR PURPOSE REGARDING THESE MATERIALS.
Published by:
Autodesk, Inc.
111 McInnis Parkway
San Rafael, CA 94903, USA
Page 3

Contents
Chapter 1 Introduction . . . . . . . . . . . . . . . . . . . . . . . . . . . . 1
Installation Overview . . . . . . . . . . . . . . . . . . . . . . . . . . . 1
Chapter 2 Installing AutoCAD Mechanical on a Single Computer . . . . . . 5
How can I prepare for a successful installation? . . . . . . . . . . . . . . 5
How can I choose the language in which the Installer instructions
are presented? . . . . . . . . . . . . . . . . . . . . . . . . . . . . . . . 5
How do I choose the language for my software? . . . . . . . . . . . . . 6
Where can I find my serial number and product key? . . . . . . . . . . . 6
What if I've lost my serial number or product key? . . . . . . . . . . . . 6
How do I know if I have enough disk space for the installation? . .
7
How do I select a license type? What is the difference between a
stand-alone license and a network license? . . . . . . . . . . . . . . . 7
What is the purpose of a client log file? . . . . . . . . . . . . . . . . . . 8
How do I register and activate my software after I have finished the
installation? . . . . . . . . . . . . . . . . . . . . . . . . . . . . . . . 8
What are the additional products available for installation? . . . . . . . 8
Where do I customize my installation? . . . . . . . . . . . . . . . . . . 9
What are content libraries and how do I install them? . . . . . . . . . . 9
How can I install medium resolution Material Library images? . . . . . 9
How can I be sure available service packs are included in my
installation? . . . . . . . . . . . . . . . . . . . . . . . . . . . . . . . 10
iii
Page 4

What features can I customize? . . . . . . . . . . . . . . . . . . . . . 10
Chapter 3 Creating a deployment to multiple computers . . . . . . . . . . 13
How can I prepare to create a successful deployment to multiple
computers? . . . . . . . . . . . . . . . . . . . . . . . . . . . . . . . 13
How do I select a license type? What is the difference between a
stand-alone license and a network license? . . . . . . . . . . . . . . 14
How can I choose the language in which the Installer instructions
are presented? . . . . . . . . . . . . . . . . . . . . . . . . . . . . . . 14
What is the benefit of a network licensed version of the software?
. . . . . . . . . . . . . . . . . . . . . . . . . . . . . . . . . . . . . . 15
What is the purpose of a client log file? . . . . . . . . . . . . . . . . . 15
What is the purpose of a network log file? . . . . . . . . . . . . . . . . 15
What is an administrative image? . . . . . . . . . . . . . . . . . . . . 16
Where should the administrative image of my deployment be located?
. . . . . . . . . . . . . . . . . . . . . . . . . . . . . . . . . . . . . . 16
How will individual users find the deployed administrative image?
. . . . . . . . . . . . . . . . . . . . . . . . . . . . . . . . . . . . . . 16
What is 'silent' deployment mode? . . . . . . . . . . . . . . . . . . . . 16
What are the additional products available for installation? . . . . . . 17
Where do I customize my installation? . . . . . . . . . . . . . . . . . 17
What features can I customize? . . . . . . . . . . . . . . . . . . . . . 17
How can I install medium resolution Material Library images? . . . . . 19
How do I include Service Packs with my deployment? . . . . . . . . . . 19
What are content libraries and how do I install them? . . . . . . . . . 19
What is the purpose of configuring additional files in a deployment?
. . . . . . . . . . . . . . . . . . . . . . . . . . . . . . . . . . . . . . 20
What are the services of the Communication Center? . . . . . . . . . 20
What is Autodesk Exchange? . . . . . . . . . . . . . . . . . . . . . . . 21
How do I modify a deployment configuration? . . . . . . . . . . . . . 21
Chapter 4 Maintaining and Reconfiguring Your Installation . . . . . . . . 23
How do I add or remove features after installation? . . . . . . . . . . . 23
What are content libraries and how do I install them? . . . . . . . . . 23
What if I accidentally delete or alter required files? Can I replace or
repair them? . . . . . . . . . . . . . . . . . . . . . . . . . . . . . . 24
After repairing my installation, is it possible to recover my settings?
. . . . . . . . . . . . . . . . . . . . . . . . . . . . . . . . . . . . . . 24
How do I uninstall my software? . . . . . . . . . . . . . . . . . . . . . 24
What are the tools and utilities available for installation? . . . . . . . 25
Chapter 5 System Requirements . . . . . . . . . . . . . . . . . . . . . . . 27
AutoCAD Mechanical 2012 System Requirements . . . . . . . . . . . . 27
iv | Contents
Page 5

AutoCAD Mechanical 2012 System Requirements for 32-bit
Workstations . . . . . . . . . . . . . . . . . . . . . . . . . . . . . . 27
AutoCAD Mechanical 2012 System Requirements for 64-bit
Workstations . . . . . . . . . . . . . . . . . . . . . . . . . . . . . . 29
Requirements for GPO (Group Policy Objects) Deployments . . . . . . 31
Contents | v
Page 6

vi
Page 7
Introduction
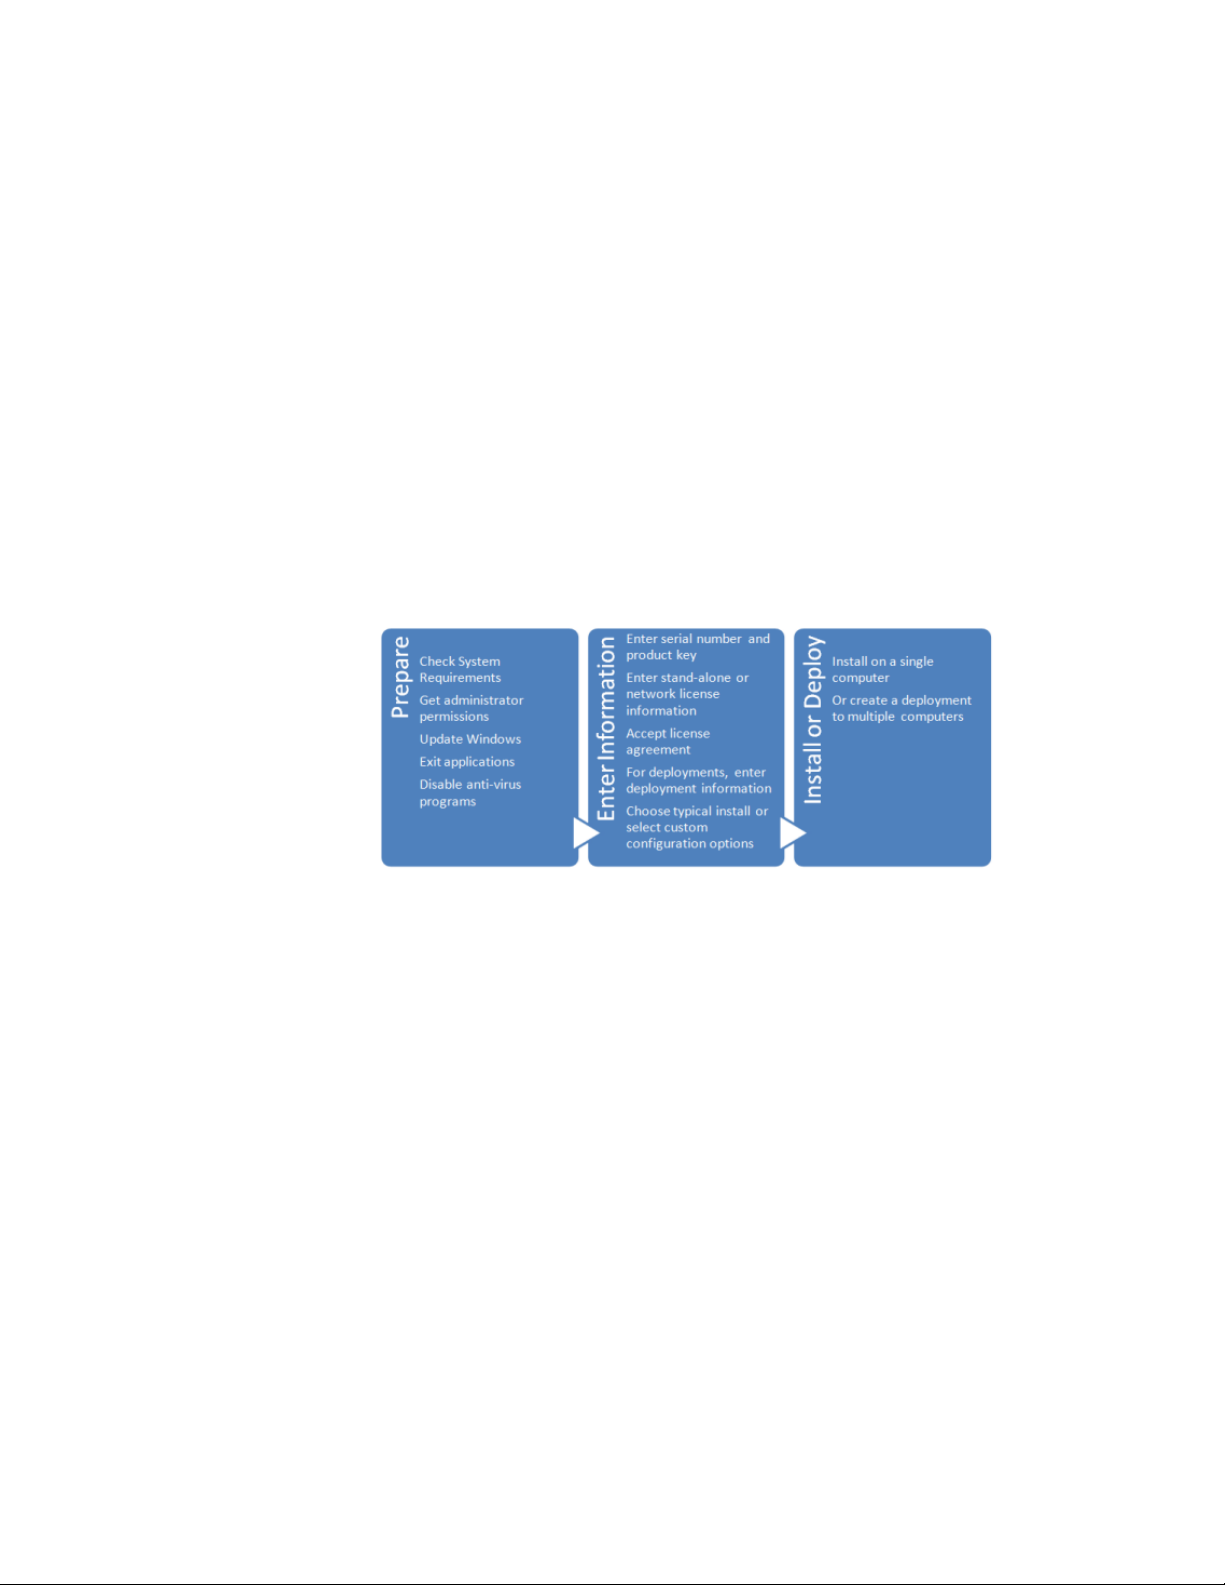
Installation Overview
1
The process of installing or deploying AutoCAD Mechanical 2012 consists of
the three main steps shown in the diagram above.
■ Preparation is very important for achieving a trouble-free and successful
installation.
■ Entering Information varies depending upon the kind of installation or
deployment you need.
■ Installation or Deployment executes quickly once you have made and
specified your choices.
You will either perform an installation on a single computer or create a
deployment for multiple computers. In both cases, you decide whether to accept
the typical default options or select your own options to configure a custom
installation. Although the AutoCAD Mechanical Installer has been designed to
be self-explanatory, you can find answers to your installation questions in the
1
Page 8

FAQ provided here. Note that complete details for creating deployments are
provided in the Network Administrator's Guide.
What kind of installation will you perform?
Here are the four main installation types with a summary of the data and
decisions they require:
■ Typical installation with default options. For a typical installation,
begin with a proper preparation (page 5). Then, just click through the
installer, providing your serial number (page 6), product key (page 6),
and license information (page 7). Pre-selected components will be installed
with AutoCAD Mechanical.
■ Custom installation with selected options. For a custom installation,
in addition to the items listed above for a typical installation, you will also
need to determine:
■ Which of the additional bundled products (such as Autodesk Design
Review) to install with AutoCAD Mechanical.
■ Which features (page 10) (such as Express Tools) to install with
AutoCAD Mechanical.
■ Whether to install new content libraries or use existing shared libraries.
■ Select standard content libraries to install.
■ Whether to accept the default to create a desktop shortcut.
■ Whether to install any available service packs (page 10), either from
Autodesk or from a local or network drive.
■ Typical deployment with default options. To create a typical
deployment using default options, in addition to providing your serial
number, product key, and license information, you will:
■ Name your deployment.
■ Specify a location for your administrative image (page 16).
■ Specify whether you want a network log file (page 15).
■ Determine whether to run installations to workstations in silent mode
(page 16).
■ Determine whether you want to create a client log file (page 8) in the
Temp directory of each workstation.
2 | Chapter 1 Introduction
Page 9

■ Custom deployment with selected options. For a custom deployment,
in addition to the items listed above for a typical deployment, you will
also specify:
■ Which of the additional bundled products (such as Autodesk Design
Review) to install with AutoCAD Mechanical.
■ Which features (page 10) (such as Express Tools) to install with
AutoCAD Mechanical.
■ Whether to install any available service packs (page 19) and whether
to merge them with the deployment or append them.
■ Whether to add additional files (page 20) to the deployment.
■ Whether to install new content libraries or use existing shared libraries.
■ Select standard content libraries to install.
■ What modifications to make to the default search paths and the location
of some program files.
■ User preferences.
■ Whether to enable access to communication channels (page 20), live
updates, and RSS feeds.
■ Whether to enable access to online resources.
Installation Overview | 3
Page 10

4
Page 11

Installing AutoCAD
Mechanical on a Single
2
Computer
How can I prepare for a successful installation?
You can avoid problems and ensure a smooth installation of AutoCAD
Mechanical by employing the following best practices:
■ Confirm that your computer meets the minimum System Requirements.
(Click "System Requirements" at the bottom of the Installer window.)
Important: Microsoft .NET Framework 4.0 (available on product disc) must
be installed before you install AutoCAD Mechanical.
■ Be sure you have Administrator permissions in Windows
■ Remove previous installations of this release of AutoCAD Mechanical,
including any Beta versions.
■ Install all Microsoft Windows
■ Before you install, exit all active applications. An even better approach is to
install AutoCAD Mechanical first thing after starting your computer, before
using any applications.
■ Turn off your anti-virus program.
®
system updates and restart your computer.
®
.
How can I choose the language in which the Installer instructions are presented?
If other languages are available, you can choose the language in which Installer
instructions are presented from the Installation instructions drop-down list on
5
Page 12
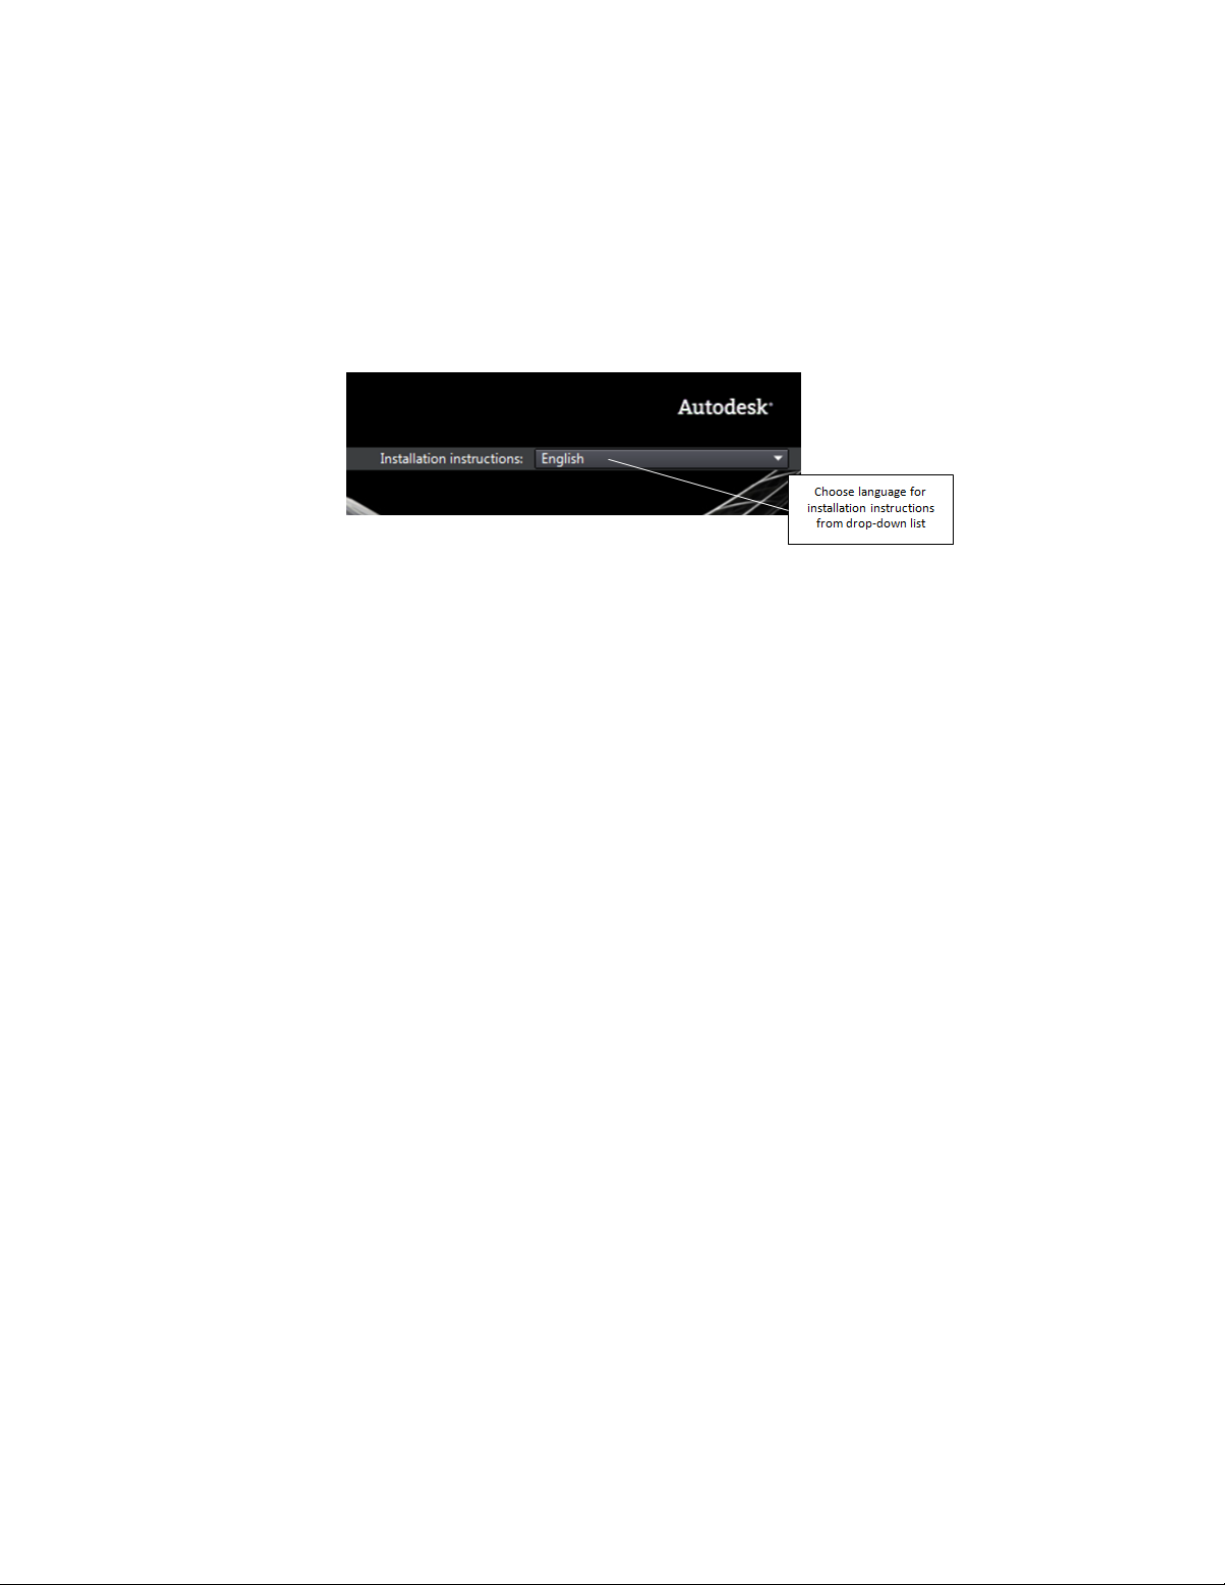
the Installer Launch page. Note that this will also set the language for your
software, although later you can change that by selecting another language
from the Product Language drop-down list on the Install > Configure & Begin
Installation page of the Installer.
How do I choose the language for my software?
If other languages are available, you can choose the one you want to use within
AutoCAD Mechanical. Select a language from the Product Language drop-down
list on the Install > Configure & Begin Installation page of the Installer.
Where can I find my serial number and product key?
Your serial number and product key are on the outside of the product
packaging, or in the Autodesk Upgrade Licensing Information email. The serial
number must contain a three-digit prefix followed by an eight-digit number.
The product key consists of five characters.
What if I've lost my serial number or product key?
Contact the Autodesk Business Center (ABC) at 800-538-6401 for assistance
if you lose your serial number or product key.
6 | Chapter 2 Installing AutoCAD Mechanical on a Single Computer
Page 13

How do I know if I have enough disk space for the installation?
The Install > Configure & Begin Installation page of the Installer shows you how
much disk space is required for your installation and how much disk space
you have available.
How do I select a license type? What is the difference between a stand-alone license and a network license?
Choose the type of installation to deploy based on the type of software license
you purchased: stand-alone license or network license.
A product with a stand-alone license is registered and activated for an individual
computer. While your software can be installed on multiple computers in
your facility, a stand-alone license allows only one AutoCAD Mechanical to
be operational. If you need to run AutoCAD Mechanical on more computers,
you need to either purchase more stand-alone licenses or convert to using
network licenses.
With network licenses, AutoCAD Mechanical can be installed and run on
multiple computers, up to the maximum number of licenses you've purchased.
The Network License Manager utility "checks out" licenses until they are all
in use. No additional computers can run the program until a license is "checked
in."
For more information, see the Network Administrator's Guide.
How do I know if I have enough disk space for the installation? | 7
Page 14

What is the purpose of a client log file?
A client log file contains detailed installation information for each workstation.
This information may be useful in diagnosing any installation problems.
The client log file is located in your Windows "Temp" folder.
How do I register and activate my software after I have finished the installation?
After you've installed your software, the easiest way to register and activate
your software is with the Product License Activation wizard. You can navigate
to the wizard from the Start menu. Alternatively, you can send an email
message, fax, or postal mail with registration information to Autodesk.
What are the additional products available for installation?
The following additional products are available to install:
■ Autodesk Design Review — Allows users to review, measure, redline, and
annotate DWG, DWF, and DXFx files without the original Autodesk
creation software.
■ Autodesk Inventor Fusion— Digital prototyping technology that unites the
control of parametric, history-based modeling with the speed of direct,
history-free modeling, enabling users to choose the modeling approach
that is right for the task at hand.
Note: To effectively install Inventor Fusion, you must install both the Inventor
Fusion product and the Inventor Fusion plug-in listed in the configuration
area. Click on the Autodesk Inventor Fusion band to reveal the configuration
area.
■ Autodesk Vault— Data management tool to track work in progress and
maintain version control in multi-user environments. It allows design
teams to organize and reuse designs by consolidating product information.
Users can store and search both CAD data and non-CAD documents.
8 | Chapter 2 Installing AutoCAD Mechanical on a Single Computer
Page 15

Where do I customize my installation?
Click on the AutoCAD Mechanical band of the Install > Configure & Begin
Installation page of the Installer to reveal the configuration area. Optional
features are listed there, many of them pre-selected for installation.
What are content libraries and how do I install them?
AutoCAD Mechanical provides content libraries with hundreds of thousands
of pre-drawn standard parts. Libraries are available for each of eighteen
countries, containing parts that correspond to the standards of those countries.
During installation of AutoCAD Mechanical, you choose whether to install
one or more of these libraries or instead use your own existing shared libraries.
If you choose to install content libraries, you select the libraries for those
country standards you need.
If later, after installation, you want to add or remove content libraries, you
do this by launching the Installer in maintenance mode and choosing Add
or Remove Features to select the standard content libraries you require. To
launch the Installer in maintenance mode, navigate from Windows Start to
the control panel for adding, changing, and removing programs. When you
select AutoCAD Mechanical as the program to change, the Installer will open
in maintenance mode.
How can I install medium resolution Material Library images?
In addition to the Material Library images installed by default with AutoCAD
Mechanical, you may also install the Medium Image Material Library if you plan
to perform large renders or create close-ups of objects which require high
quality textures. Installation takes place after you've installed AutoCAD
Mechanical. When you invoke either the RENDER or RENDERCROP command
from within AutoCAD Mechanical, a task dialog will appear to provide an
opportunity for downloading the Medium Image Material Library.
Where do I customize my installation? | 9
Page 16

How can I be sure available service packs are included in my installation?
You can include a service pack for your installation in the Service Pack section
of the Installer configuration page. Three options are available:
■ Download the available service packs from Autodesk.
■ Install a service pack from your local network drive.
■ Do not install a service pack.
If you select the option to download and apply a service pack from Autodesk,
it will be downloaded automatically. If your installation is up-to-date, a message
will tell you that a service pack is not available.
What features can I customize?
Most features are pre-selected for installation with AutoCAD Mechanical.
However, you can de-select any feature you choose not to install or select one
of the few features that have not been pre-selected. To do so, you must first
reveal the feature tree, which is hidden when you choose a Typical install in
the configuration area. To reveal the feature tree, choose the Custom install
option.
Here are the features available when you install AutoCAD Mechanical:
■ Model Documentation: Interface for Autodesk Inventor Server, a
programming component that allows you to open and query the geometry
and feature information of an Autodesk Inventor part file or other imported
models and to create the corresponding data within AutoCAD Mechanical.
■ Autodesk Inventor Link: Tool for linking Autodesk Inventor assembly
(.iam) and part (.ipt) documents to .dwg files. Once linked, a 3D model is
displayed in model space. Then you can generate drawing views in paper
space and annotate them.
■ CAD Standards: Tools for managing design files for compliance with
your standards.
■ Database: Database access tools.
■ Dictionaries: Multi-language dictionaries.
■ Drawing Encryption: Security tool for protecting drawing files with a
password.
10 | Chapter 2 Installing AutoCAD Mechanical on a Single Computer
Page 17

■ Express Tools: Productivity tools to extend AutoCAD functions for
dimensioning, drawing, object selection, and object modification. These
tools are not supported by Autodesk.
■ Fonts: AutoCAD fonts and TrueType
■ Autodesk Content Explorer: Interface for quick browsing of DWG files
®
fonts.
on local and network drives and on Autodesk Seek. Note: In order to search
network folders, the Autodesk Content Service utility must also be installed
from the Tools & Utilities component of the Installer.
■ Autodesk Seek: Web service for finding, previewing, and downloading
branded and generic building information modeling (BIM) files, models,
drawings, and product specifications directly into an active AutoCAD
Mechanical session. AutoCAD Mechanical users can also upload their
drawings to Seek.
■ License Transfer Utility: Tool to allow users to transfer an Autodesk
product license between computers.
■ Reference Manager: Utility that allows users to view and edit the paths
of externally referenced files associated with a drawing.
■ Samples: AutoCAD Mechanical samples, DesignCenter samples, and
Visual Lisp® samples.
■ Tutorials: Visual Lisp
®
Tutorials
What features can I customize? | 11
Page 18

12
Page 19

Creating a deployment to multiple computers
3
How can I prepare to create a successful deployment to multiple computers?
You can avoid problems and ensure a smooth deployment of AutoCAD
Mechanical by employing the following best practices.
■ Confirm that your network, servers, and client workstations meet the
minimum System Requirements for AutoCAD Mechanical. (Click "System
Requirements" at the bottom of the Installer.) Be sure that you have installed
the .NET 4.0 Framework.
■ Understand the type of license you have purchased. For a network license
deployment, you should also be familiar with the type of license server model
you want to use, as well as the license server name(s).
■ Obtain Administrator permissions to create and install deployments.
■ Install the latest Windows
Mechanical will be deployed and restart them.
■ Create a shared folder where deployments will reside. Create a subfolder for
each deployment you plan to create. Verify that all users have full read/write
access to the network share where your deployments will be located. Note:
If you create AutoCAD Mechanical deployments in multiple languages, each
language requires a new deployment in a separate deployment folder.
■ Identify locations for your support content files and any additional files you
need.
■ Copy the entire installation from the product media to a local drive and
create the deployment from that location.
®
updates on all computers to which AutoCAD
13
Page 20

■ Before you create the deployment, exit all applications and turn off
anti-virus programs.
How do I select a license type? What is the difference between a stand-alone license and a network license?
Choose the type of installation to deploy based on the type of software license
you purchased: stand-alone license or network license.
A product with a stand-alone license is registered and activated for an individual
computer. While your software can be installed on multiple computers in
your facility, a stand-alone license allows only one AutoCAD Mechanical to
be operational. If you need to run AutoCAD Mechanical on more computers,
you need to either purchase more stand-alone licenses or convert to using
network licenses.
With network licenses, AutoCAD Mechanical can be installed and run on
multiple computers, up to the maximum number of licenses you've purchased.
The Network License Manager utility "checks out" licenses until they are all
in use. No additional computers can run the program until a license is "checked
in."
For more information, see the Network Administrator's Guide.
How can I choose the language in which the Installer instructions are presented?
If other languages are available, you can choose the language in which Installer
instructions are presented from the Installation instructions drop-down list on
the Installer Launch page. Note that this will also set the language for your
software, although later you can change that by selecting another language
from the Product Language drop-down list on the Install > Configure & Begin
Installation page of the Installer.
14 | Chapter 3 Creating a deployment to multiple computers
Page 21

What is the benefit of a network licensed version of the software?
With a network license, you can use the Network License Manager to install
your software on more systems than the number of licenses you have
purchased. At any one time, you can run the software on the maximum number
of systems for which you have licenses.
What is the purpose of a client log file?
A client log file contains detailed installation information for each workstation.
This information may be useful in diagnosing any installation problems.
The client log file is located in your Windows "Temp" folder.
What is the purpose of a network log file?
A network log file keeps a record of all workstations that run the deployment.
The log lists the user name, workstation name, and the status of the
installation. You can refer to this file for status information and details about
problems (such as low disk space or inadequate permissions) that users have
encountered during installation.
What is the benefit of a network licensed version of the software? | 15
Page 22

What is an administrative image?
An administrative image is a collection of shared file resources created during
the deployment process and placed in the shared network deployment folder
from which multiple workstations install the product.
Where should the administrative image of my deployment be located?
The administrative image for your deployment should be stored in a shared
folder (a network share) you have created before you launch the deployment.
Name the shared folder "Deployments" and put it on the Desktop of the server
where you will store deployments.
How will individual users find the deployed administrative image?
When you are finished creating the deployment, users can install their software
by using the shortcut located with the administrative image. The shortcut
name matches the deployment name that you specified when you created the
deployment.
Notify users of the location of the administrative image, instruct them to
double-click the shortcut, and provide any other necessary information.
What is 'silent' deployment mode?
A deployment running in 'silent' mode proceeds without input from individual
users, who receive no requests for interaction.
When silent mode is 'off', interactive entries may be made during the
deployment process.
16 | Chapter 3 Creating a deployment to multiple computers
Page 23

What are the additional products available for installation?
The following additional products are available to install:
■ Autodesk Design Review — Allows users to review, measure, redline, and
annotate DWG, DWF, and DXFx files without the original Autodesk
creation software.
■ Autodesk Inventor Fusion— Digital prototyping technology that unites the
control of parametric, history-based modeling with the speed of direct,
history-free modeling, enabling users to choose the modeling approach
that is right for the task at hand.
Note: To effectively install Inventor Fusion, you must install both the Inventor
Fusion product and the Inventor Fusion plug-in listed in the configuration
area. Click on the Autodesk Inventor Fusion band to reveal the configuration
area.
■ Autodesk Vault— Data management tool to track work in progress and
maintain version control in multi-user environments. It allows design
teams to organize and reuse designs by consolidating product information.
Users can store and search both CAD data and non-CAD documents.
Where do I customize my installation?
Click on the AutoCAD Mechanical band of the Install > Configure & Begin
Installation page of the Installer to reveal the configuration area. Optional
features are listed there, many of them pre-selected for installation.
What features can I customize?
Most features are pre-selected for installation with AutoCAD Mechanical.
However, you can de-select any feature you choose not to install or select one
of the few features that have not been pre-selected. To do so, you must first
reveal the feature tree, which is hidden when you choose a Typical install in
the configuration area. To reveal the feature tree, choose the Custom install
option.
What are the additional products available for installation? | 17
Page 24

Here are the features available when you install AutoCAD Mechanical:
■ Model Documentation: Interface for Autodesk Inventor Server, a
programming component that allows you to open and query the geometry
and feature information of an Autodesk Inventor part file or other imported
models and to create the corresponding data within AutoCAD Mechanical.
■ Autodesk Inventor Link: Tool for linking Autodesk Inventor assembly
(.iam) and part (.ipt) documents to .dwg files. Once linked, a 3D model is
displayed in model space. Then you can generate drawing views in paper
space and annotate them.
■ CAD Standards: Tools for managing design files for compliance with
your standards.
■ Database: Database access tools.
■ Dictionaries: Multi-language dictionaries.
■ Drawing Encryption: Security tool for protecting drawing files with a
password.
■ Express Tools: Productivity tools to extend AutoCAD functions for
dimensioning, drawing, object selection, and object modification. These
tools are not supported by Autodesk.
■ Fonts: AutoCAD fonts and TrueType
■ Autodesk Content Explorer: Interface for quick browsing of DWG files
®
fonts.
on local and network drives and on Autodesk Seek. Note: In order to search
network folders, the Autodesk Content Service utility must also be installed
from the Tools & Utilities component of the Installer.
■ Autodesk Seek: Web service for finding, previewing, and downloading
branded and generic building information modeling (BIM) files, models,
drawings, and product specifications directly into an active AutoCAD
Mechanical session. AutoCAD Mechanical users can also upload their
drawings to Seek.
■ License Transfer Utility: Tool to allow users to transfer an Autodesk
product license between computers.
■ Reference Manager: Utility that allows users to view and edit the paths
of externally referenced files associated with a drawing.
■ Samples: AutoCAD Mechanical samples, DesignCenter samples, and
Visual Lisp® samples.
■ Tutorials: Visual Lisp
®
Tutorials
18 | Chapter 3 Creating a deployment to multiple computers
Page 25

How can I install medium resolution Material Library images?
In addition to the Material Library images installed by default with AutoCAD
Mechanical, you may also install the Medium Image Material Library if you plan
to perform large renders or create close-ups of objects which require high
quality textures. Installation takes place after you've installed AutoCAD
Mechanical. When you invoke either the RENDER or RENDERCROP command
from within AutoCAD Mechanical, a task dialog will appear to provide an
opportunity for downloading the Medium Image Material Library.
How do I include Service Packs with my deployment?
You can include a service pack for your deployment in the Service Pack section
of the Installer configuration page. If you select the option to download and
apply a service pack from Autodesk, it will be downloaded automatically. If
your installation is up-to-date, a message will tell you that a service pack is
not available.
If you choose to apply a service pack from your local drive or a drive in your
network, you will need to choose between two options:
■ Append the service pack(s) onto the deployment by applying the pack
after your software is deployed. With this method, the service pack is
applied to the current deployment only; the Administrative Image MSI
file is not affected.
■ Merge the service pack(s) into the Administrative Image MSI file. With this
method, the service pack may not be removed from the image.
What are content libraries and how do I install them?
AutoCAD Mechanical provides content libraries with hundreds of thousands
of pre-drawn standard parts. Libraries are available for each of eighteen
countries, containing parts that correspond to the standards of those countries.
During installation of AutoCAD Mechanical, you choose whether to install
one or more of these libraries or instead use your own existing shared libraries.
How can I install medium resolution Material Library images? | 19
Page 26

If you choose to install content libraries, you select the libraries for those
country standards you need.
If later, after installation, you want to add or remove content libraries, you
do this by launching the Installer in maintenance mode and choosing Add
or Remove Features to select the standard content libraries you require. To
launch the Installer in maintenance mode, navigate from Windows Start to
the control panel for adding, changing, and removing programs. When you
select AutoCAD Mechanical as the program to change, the Installer will open
in maintenance mode.
What is the purpose of configuring additional files in a deployment?
You can configure your installation to include additional files to accomplish
the following tasks:
■ Specify script files to include with your deployment.
■ Install user files of any format and place them in any directory on a client
workstation.
■ Add subfolders under the installation folder.
■ Add sample files to the same location as program files.
■ Add files to the root of the installation directory.
What are the services of the Communication Center?
During a custom deployment, you can choose whether or not to activate user
preferences for Communication Center services.
■ Enable live updates: Allows users to check for updates when an internet
connection is established. If a product patch is available, notification of
its availability is received on the program's status bar; the patch can be
either downloaded directly from an Autodesk server or modified before
being copied to workstations.
■ Enable CAD Manager Channel: Controls the display of CAD Manager
Channels, allowing users to toggle CAD Manager Channels, define the
CAD Manager feed location, and set the CAD Manager Channel display
name.
20 | Chapter 3 Creating a deployment to multiple computers
Page 27

What is Autodesk Exchange?
Autodesk Exchange is a new central portal for Help, learning aids, tips and
tricks, videos, and downloadable apps. If you accept the User Preference default
to display Autodesk Exchange at startup, you will have access to a dynamic
selection of tools from the Autodesk community.
How do I modify a deployment configuration?
Once you have created a deployment, you can modify its configuration.
To modify a deployment configuration:
1 Locate and open the shared folder where your deployment is located.
2 Open the Tools subfolder within your deployment folder.
3 Locate the shortcut for Create or Modify a Deployment.
4 Double-click the Create or Modify a Deployment shortcut to launch the
Installer in Modify Deployment Configuration mode.
5 On the Modify Deployment Configuration > Settings page, enter information
about your deployment and select an option.
What is Autodesk Exchange? | 21
Page 28

22
Page 29

Maintaining and Reconfiguring Your Installation
How do I add or remove features after installation?
To add or remove features from AutoCAD Mechanical, navigate from Windows
Start to the control panel for adding, changing, and removing programs. When
you select AutoCAD Mechanical as the program you want to change, the Installer
will open in maintenance mode. Click Add or Remove Features and follow the
instructions in the Installer.
4
What are content libraries and how do I install them?
AutoCAD Mechanical provides content libraries with hundreds of thousands
of pre-drawn standard parts. Libraries are available for each of eighteen countries,
containing parts that correspond to the standards of those countries. During
installation of AutoCAD Mechanical, you choose whether to install one or more
of these libraries or instead use your own existing shared libraries. If you choose
to install content libraries, you select the libraries for those country standards
you need.
If later, after installation, you want to add or remove content libraries, you do
this by launching the Installer in maintenance mode and choosing Add or
Remove Features to select the standard content libraries you require. To launch
the Installer in maintenance mode, navigate from Windows Start to the control
23
Page 30

panel for adding, changing, and removing programs. When you select
AutoCAD Mechanical as the program to change, the Installer will open in
maintenance mode.
What if I accidentally delete or alter required files? Can I replace or repair them?
You may be able to fix a problem that stems from a missing or altered support
file by running the Installer to repair or reinstall AutoCAD Mechanical. To
launch the Installer, navigate from Windows Start to the control panel for
adding, changing, and removing programs. When you select AutoCAD
Mechanical as the program to change, the Installer will open in maintenance
mode. Click Repair or Reinstall and follow the instructions in the Installer.
After repairing my installation, is it possible to recover my settings?
Custom settings can be exported and later re-imported to the same system in
case you have to repair the installation of your program. For more detailed
information regarding exporting and importing custom settings, see the
Customization Guide.
How do I uninstall my software?
To uninstall AutoCAD Mechanical and all of its components from your
computer, navigate from Windows Start to the control panel for adding,
changing, and removing programs. When you select AutoCAD Mechanical
as the program you want to change, the Installer will open in maintenance
mode. Click Uninstall and follow the instructions in the Installer.
Note: AutoCAD Mechanical installs a material library and base resolution
image library by default. These must be uninstalled separately through the
Windows control panel for adding or removing programs.
24 | Chapter 4 Maintaining and Reconfiguring Your Installation
Page 31

What are the tools and utilities available for installation?
You can install the following products from the Tools & Utilities section of
the Installer.
■ Autodesk Network License Manager — Manages network licenses for
your software by "checking out" and "checking in" licenses.
■ Autodesk CAD Manager Tools — Utility to allow CAD administrators
to modify resource settings after a deployment is completed.
■ Autodesk Content Service — Utility (for installation on network server)
to build index and enable searching on shared network folders and in
Autodesk Seek. Works in conjunction with Autodesk Content Explorer
(preselected feature for installation), which must also be installed.
What are the tools and utilities available for installation? | 25
Page 32

26
Page 33

System Requirements
AutoCAD Mechanical 2012 System Requirements
Here are the minimum system requirements for both 32-bit and 64-bit operating
systems.
Recommended requirements: In addition to the minimum requirements, these
system requirements also include recommended requirements for memory and
graphics cards. The recommended operating system is Windows 7 (64-bit).
AutoCAD Mechanical 2012 System Requirements for 32-bit Workstations (page
27)
AutoCAD Mechanical 2012 System Requirements for 64-bit Workstations (page
29)
5
Requirements for GPO (Group Policy Objects) Deployments (page 31)
AutoCAD Mechanical 2012 System Requirements for 32-bit Workstations
RequirementDescription
Service Pack 3 (SP3) or later of the following:Operating system
■ Microsoft
■ Microsoft
®
Windows® XP Professional
®
Windows® XP Home
27
Page 34

Service Pack 2 (SP2) or later of the following:
■ Microsoft Windows Vista
®
Enterprise
■ Microsoft Windows Vista Business
■ Microsoft Windows Vista Ultimate
■ Microsoft Windows Vista Home Premi-
um
The following operating systems:
■ Microsoft Windows 7 Enterprise
■ Microsoft Windows 7 Ultimate
■ Microsoft Windows 7 Professional
■ Microsoft Windows 7 Home Premium
Internet Explorer ® 7.0 or laterBrowser
Windows XPProcessor
Intel® Pentium® 4 or AMD Athlon™ Dual
Core, 1.6 GHz or Higher with SSE2 technology
Windows Vista or Windows 7
Intel Pentium 4 or
AMD Athlon Dual Core, 3.0 GHz or Higher
with SSE2 technology
28 | Chapter 5 System Requirements
2 GB RAM (8 GB Recommended)Memory
1024x768 with True ColorDisplay resolution
Installation 2.5 GBDisk Space
MS-Mouse compliantPointing Device
Download and Installation from DVDMedia (DVD)
.NET Framework Version 4.0.NET Framework
Page 35

Additional requirements for 3D Modeling
Intel Pentium 4 processor or AMD Athlon,
3.0 GHz or greater or Intel or AMD Dual
Core processor, 2.0 GHz or greater
2 GB RAM
2 GB free hard disk available not including
installation requirements
1280 x 1024 True color video display adapter with 128 MB (recommended: 256
MB for normal images and 512 MB for
Medium Image Material Library images),
Pixel Shader 3.0 or greater, Direct3D
capable workstation class graphics card.
AutoCAD Mechanical 2012 System Requirements for 64-bit Workstations
RequirementDescription
®
Operating system
Service Pack 2 (SP2) or later of the following:
■ Microsoft
Service Pack 2 (SP2) or later of the following:
■ Microsoft Windows Vista
■ Microsoft Windows Vista Business
■ Microsoft Windows Vista Ultimate
■ Microsoft Windows Vista Home Premi-
um
The following operating systems:
■ Microsoft Windows 7 Enterprise
■ Microsoft Windows 7 Ultimate
■ Microsoft Windows 7 Professional
■ Microsoft Windows 7 Home Premium
®
Windows® XP Professional
®
Enterprise
AutoCAD Mechanical 2012 System Requirements for 64-bit Workstations | 29
Page 36

Internet Explorer ® 7.0 or laterBrowser
Processor
Additional requirements for 3D Modeling
AMD Athlon 64 with SSE2 technology
AMD Opteron™ with SSE2 technology
Intel Xeon ® with Intel EM64T support and
SSE2
Intel Pentium 4 with Intel EM64T support
and SSE2 technology
2 GB RAM (8 GB Recommended)Memory
1024x768 with True ColorDisplay resolution
Installation 3.1 GBDisk Space
MS-Mouse compliantPointing Device
Download and Installation from DVDMedia (DVD)
.NET Framework Version 4.0.NET Framework
Intel Pentium 4 processor or AMD Athlon,
3.0 GHz or greater; or Intel or AMD Dual
Core processor, 2.0 GHz or greater.
2 GB RAM or more
2 GB free hard disk available not including
installation requirements
1280 x 1024 True color video display adapter 128 MB (recommended: 256 MB for
normal images and 512 MB for Medium
Image Material Library images), Pixel Shader
3.0 or greater, Direct3D® capable worksta-
tion class graphics card.
30 | Chapter 5 System Requirements
Page 37

Requirements for GPO (Group Policy Objects) Deployments
In addition to the minimum system requirements, addtional items are needed
for a successful GPO deployment. See the Network Administrator's Guide for
further information about GPO deployments.
Available on the product disc
Microsoft .NET 4.0
DirectX 9.0C
Microsoft Visual C++ 2010 Redistributable (x86) for 32 bit and 64 bit operating systems
Microsoft Visual C++ 2008 SP1 Redistributable (x86) for 32 bit and 64 bit operating systems
Microsoft Visual C++ 2005 Redistributable (x86) for 32 bit and 64 bit operating systems
Microsoft Visual C++ 2008 SP1 Redistributable (x64) for 64 bit operating systems
Microsoft Visual C++ 2005 Redistributable (x64) for 64-bit operating systems
Microsoft National Language Support Downlevel APIs (for x64 only)
FARO LS
Autodesk Design Review 2012
Autodesk Content Service (Private or Public)
Autodesk Inventor Fusion and The Autodesk Inventor Fusion Add-in for AutoCAD 2012
Autodesk Material Library 2012
Autodesk Material Base Resolution Image Library 2012
Other
Microsoft Internet Explorer version 7.0 Service Pack 1 or later. You can download Microsoft
Internet Explorer from the Microsoft website by visiting www.microsoft.com .
Requirements for GPO (Group Policy Objects) Deployments | 31
Page 38

Microsoft Installer Package (MSI) 4.5
Microsoft Windows Media Format 9.5 (prerequisite for 64-bit)
32 | Chapter 5 System Requirements
 Loading...