

Page 1
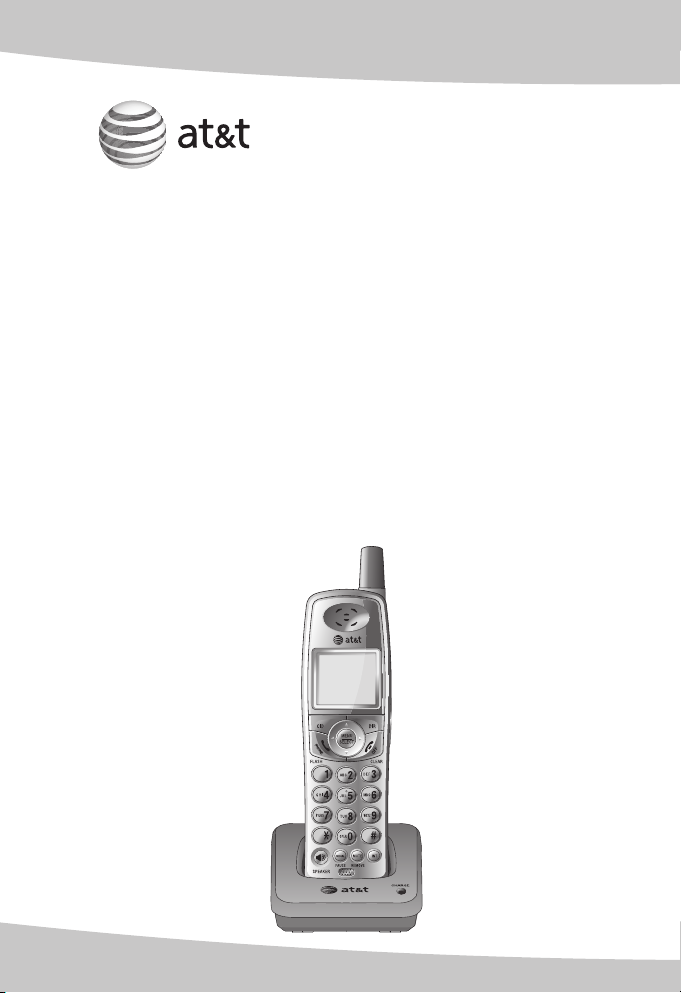
Quick start guide
E598-1
5.8 GHz expansion handset for
use with AT&T models E5901/
E5902B/E5903B/ E5911/
E5912B/E5913B/E5914B/
E5921/E5922B/E5923B/
E5924B/E6001/E6002B/
E6012B/E6013B/E6014B/
E3813B
Page 2
Getting started
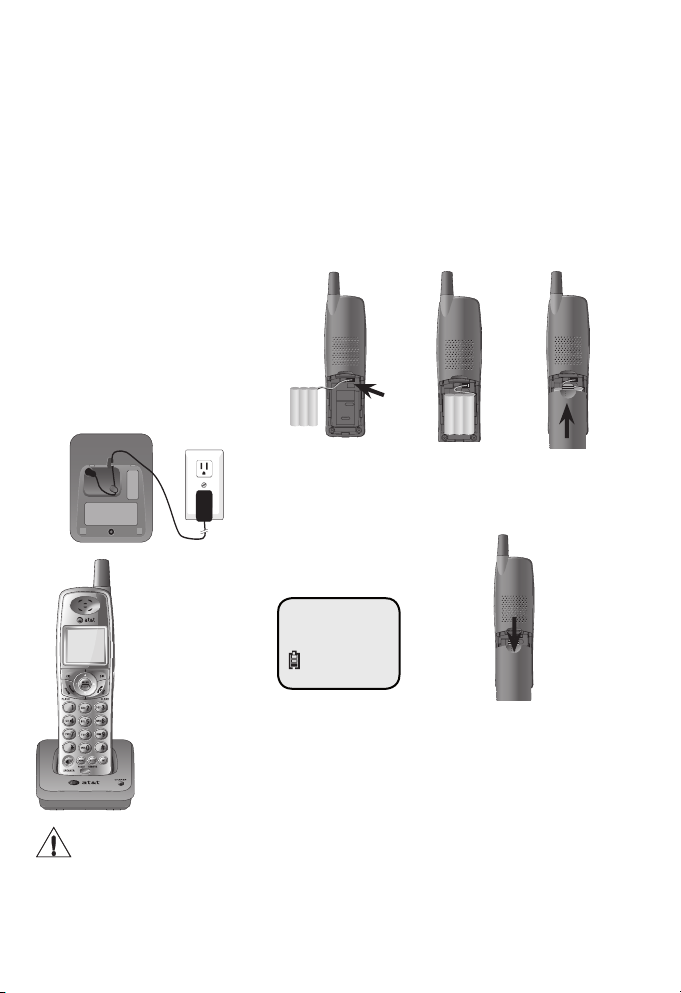
Battery installation & charging
After battery installation, the battery may have enough charge to allow
you to make a short call. For best performance, place the handset in the
charger or telephone base and allow it to charge for 16 hours before use.
You can keep the battery charged by returning the handset to the
charger or the telephone base after each use. When the battery is fully
depleted, a recharge takes about 12 hours. The average talk time on a
fully charged battery is about eight hours depending on environmental
conditions, and the standby time when idle is approximately five days.
1. Plug the small
end of the smaller power adapter
into the jack on
the underside
of charger, then
route the cord
through the slot
as shown.
2. Plug the
large end of
the smaller
power
adapter into
an electrical
outlet.
5. Slide battery
compartment
cover towards
the center
until it clicks
closed.
6. The battery may have
enough charge
to allow you
to make a short
call. For best
performance,
place handset in
the telephone
base or charger
to charge for at
lease 16 hours
before first use.
3. Plug the battery securely into
the plug inside the
handset battery
compartment, matching the color-corded
label.
LOW BATTERY
Low battery indicator
Return handset to the
telephone base or charger to recharge when
this symbol flashes.
(Handset will beep
when battery is low.)
4. Place the
battery and
wires neatly
inside the
compartment.
To replace the battery, press
in and downward on the tab
to open the battery compartment cover. Then lift out
the old battery and disconnect. Follow the instructions
on this page to install and
charge the new battery.
Caution: Use only the supplied rechargeable battery or AT&T replacement
battery model 27910 (part number 89-0099-00-00). To purchase a replacement
battery, visit our website atvisit our website at www.telephones.att.com or callcall
1 (800) 222-3111. In Canada dial 1 (866) 288-4268.
1
Page 3

Getting started
Adding and registering handsets
Before using a new E598-1 handset, you must register it with the
E5901/E5902B/E5903B/E5911/E5912B/E5913B/E5914B/E5921/
E5922B/E5923B/E5924B/E6001/E6002B/E6012B/E6013B/
E6014B/E3813B telephone base (purchased separately). The E5901/
E5902B/E5903B/E5911/E5912B/E5913B/E5914B/E5921/E5922B/
E5923B/E5924B/E6012B/E6013B/E6014B/E3813B telephone can/E3813B telephone can telephone can
accommodate up to four cordless handsets.
• The handset provided with the E5901/E5911/E5921/E6001 is
automatically registered as handset 1. Additional handsets will be
assigned numbers in the order they are registered (handset 2, handset 3, or handset 4). You can register a maximum of four handsets.
• The E5902B/E5912B/E5922B/E6002B/E6012B has two handsets
automatically registered as handset 1 and 2. You can register two
additional handsets, which will be assigned number 3 and 4.
• The E5903B/E5913B/E5923B/E6013B/E3813B has three handsets automatically registered as handset 1, 2 and 3. You can register
one additional handset, which will be assigned number 4.
• The E5904B/E5914/E5924B/E6014B has four pre-registered
handsets, so you cannot register any additional handset to it.
Before using a new E598-1 handset, you
must register it with the telephone base.
Each handset must be registered seperately.
To register a handset to your telephone
base
NOT REGISTERED
PRESS HNDST LOC
4 SEC ON BASE
• When first purchased, all optional
accessory handsets show NOT
REGISTERED on the screen. The new
handset may need to be charged for
five minutes before registering to the
telephone base.
•
Make sure your handset battery is properly installed and charged (page 1).
2
Page 4

Getting started
Adding and registering handsets
• Place the unregistered handset into
the telephone base. After a few seconds
PRESS HNDST LOC 4 SEC ON
BASE
will be shown on the screen.
• Press and hold HANDSET LOCATOR
PLEASE WAIT...
HS X REGISTERED
12:00PM
on the main telephone base until the
IN USE light comes on (about four
seconds), then release the button.
• The handset will show PLEASE WAIT...
for a while.
• The handset will show HS X REGISTERED
and will beep if the registration was successful.
NOTES:
1.
If you are on a call, using the call log or directory,
or another telephone phones on at the same
line, you cannot register a handset.
2. If the registration is not successful, the display
will show NOT REGISTERED. Reset the handset
by lifting the handset out of the telephone base
and then place the handset back in the telephone base. Now try the registration process
again.
3
Page 5

Getting started
Replacing a handset
If you are replacing a handset on a system that has the maximum number of registered handsets (four) or wish to change the
assigned handset number of your registered handsets, you must
first follow the below steps to de-register the handsets, then register all handsets again (page 2-3).
To de-register all handsets
• Press and hold HANDSET LOCATOR on the main telephone
base E5901/E5902B/E5903B/E5911/E5912B/E5913B/E5914B/
E5921/E5922B/E5923B/E5924B/E6001/6002B/E6012B/E6013B/
E6014B/E3813B until the IN USE light starts to turn on then flash
(about 10 seconds), then release the HANDSET LOCATOR but-
ton.
• Press and release HANDSET LOCATOR again. The IN USE
light will turn off and in a few seconds, all handsets will be
de-registered.
• All handsets will show NOT REGISTERED if de-registration was
successful.
NOT REGISTERED
• To re-register the handset to the telephone base, follow the
registration instructions on pages 2-3.
NOTES:
1. If the de-registration process was not successful, you may need to reset the
system and try again. To reset: pick up any registered handset and press the
PHONE/FLASH button, then press the OFF/CLEAR button and place the
handset back into the telephone base.
2. You can only de-register handsets when the handsets and the telephone base
are not being used.
4
Page 6

Getting started
TONE
DELETE
PAUSE
MUTE
REDIAL
Quick reference guide
For complete instructions, please refer to the manual provided with your
E5901/E5902B/E5903B/E5911/E5912B/E5913B/E5914B/E5921/
E5922B/E5923B/E5924B/E6001/E6002B/E6012B/E6013B/E6014B/
E3813B telephone. If you are unable to find your manual, you may
read and/or download the manual at www.telephones.att.com.
CENTER
LEFT
UP
DOWN
RIGHT
MENU/SELECT
Pres s MENU/ SELECT
to dis pl ay menu, or to
select a highlighted item
from menu or save an
entry. Press or to
scroll up or down while
in menus. While entering
names or numbers, press
or to move the cur-
sor to the left or right.
DIR
Press to display directory
entries.
OFF/CLEAR
During a call, press to
hang up. While using
menus, press to cancel
an operation, back up to
the previous menu, or
exit the menu display.
REDIAL/PAUSE
Press to view redial
memory. While entering
numbers, press and hold
to insert a dialing pause.
Press to initiate an intercom conversation or
transfer a call.
5
Handset
CID
Press to display caller
ID information.
PHONE/FLASH
Press to make or
answer a call.
During a call, press to
receive an incoming call
if call waiting is activated.
MUTE/DELETE
While on a call, press to
mute microphone. While
reviewing the call log,
press to delete an individual entry, or press and
hold to clear the caller
ID log.
While predialing, press to
delete digits from a string.
SPEAKER
Press to activate handset speakerphone. Press
again to resume normal
handset use.
Navkeys
INT
Page 7

www.telephones.att.com
AT&T and the AT&T logo are trademarks of AT&T Knowledge Ventures, licensed to
© 2007 Advanced American Telephones. All rights reserved.
Advanced American Telephones. Printed in China. Issue 3 07/07.
91-001109-010-100
 Loading...