

Atmel ATmega128A-STK600, STK600-TQFP64 Application Note

Atmel-41074B-Aero-Hardware and Software Getting Started-05/2016
APPLICATION NOTE
Hardware and Software Getting Started
ATmega128A-STK600
Introduction
An easy and fast way to start developing and evaluating the ATmegaS128 device
is to use the ATmega128A industrial version with the STK600 starter-kit.
This document guides you step by step to setup the hardware and software, to
program and run your first code with the ATmega128A device.
Requirements
To use this “Getting Started” document you need to gather the following
materials:
- One STK600 evaluation kit (ATSTK600)
- One STK600-RC064M-9 Routing board (ATSTK600-RC09)
- One STK600-TQFP64 Socket Board with a ZIF socket. (ATSTK600-SC02)
- One ATmega128A in TQFP64 package
- Atmel Studio available from : http://www.atmel.com/Microsite/atmel-studio
- “ATmegaS128_led_chaser.zip” software File
Objective
The aim is prepare the hardware, program and run a short demo based on the
“led chaser” software.
2
1 Hardware Configurat ion
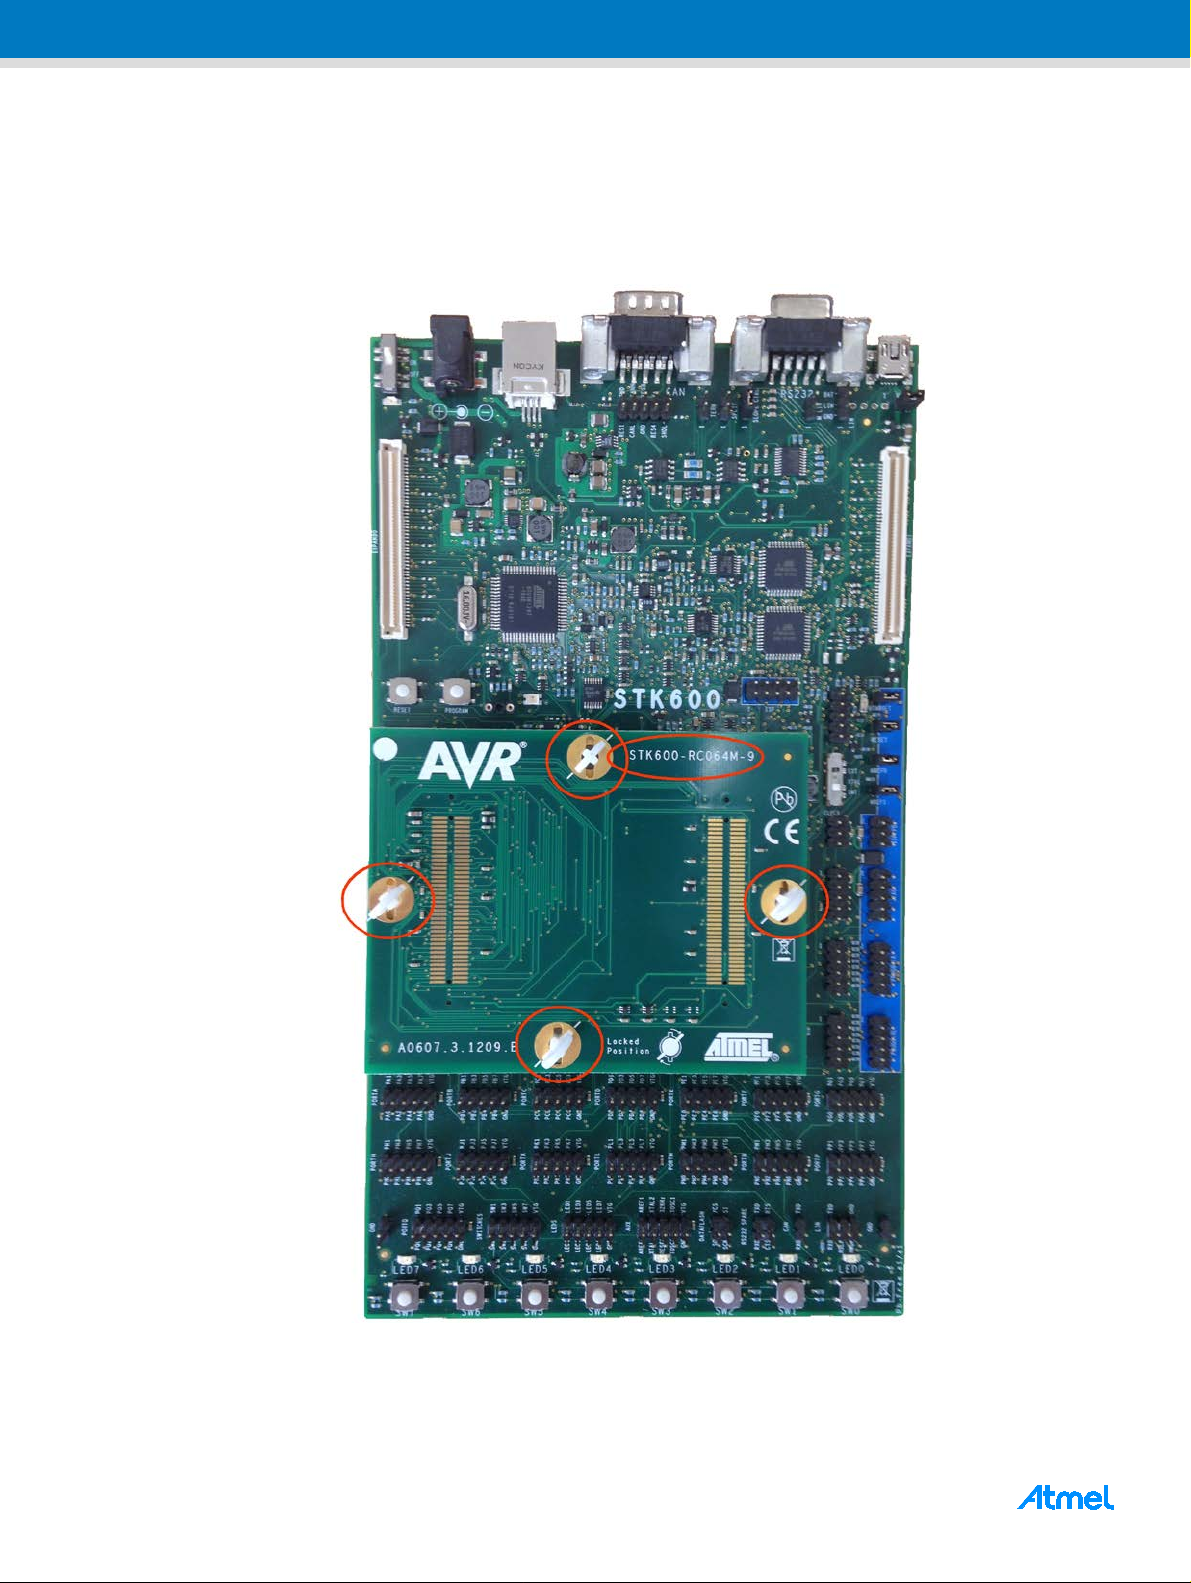
1.1 Step 1.
Unpack the STK600 kit and install the RC064M-9 routing board as shown on the figure below.
ATmega128A-STK600 [APPLICATION NOTE]
Atmel-41074B-Aero-Hardware and Software Getting Started-05/2016
3
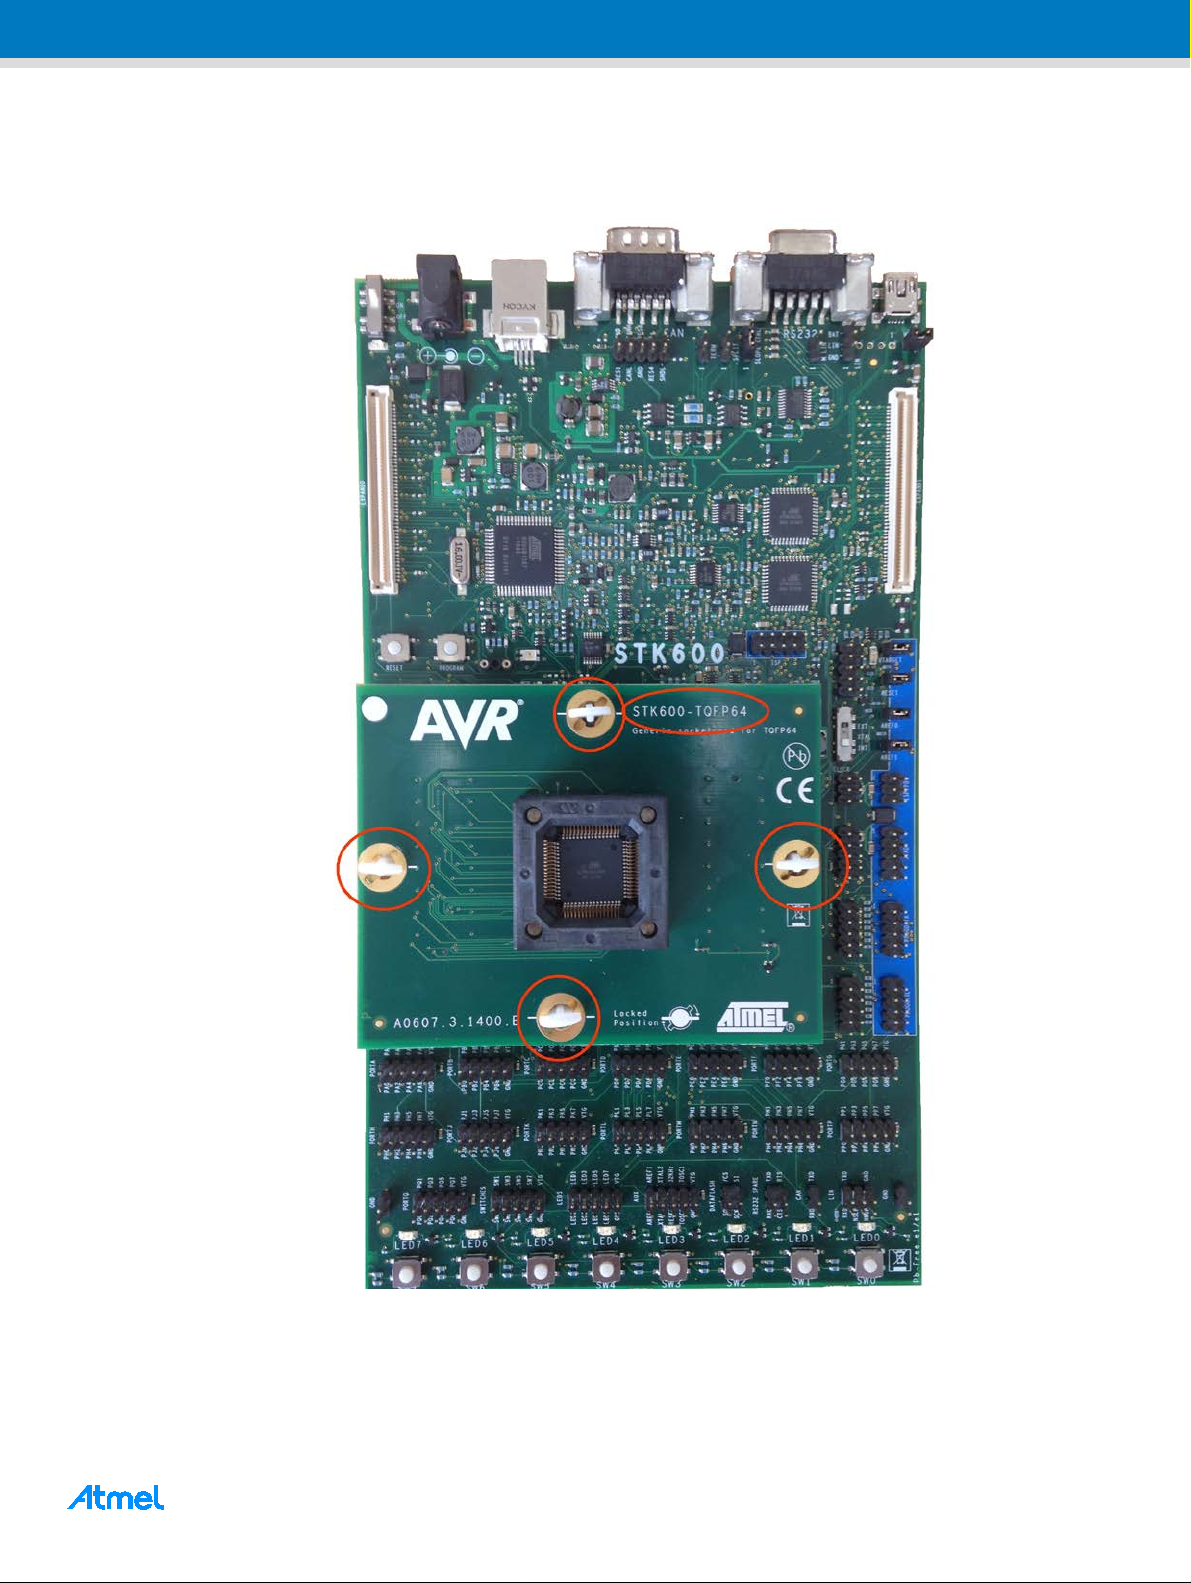
1.2 Step 2.
Install the STK600-TQFP64 socket board as shown on the figure below.
ATmega128A-STK600 [APPLICATION NOTE]
Atmel-41074B-Aero-Hardware and Software Getting Started-05/2016

4
1.3 Step 3.
Connect an USB cable between your work s tation and the STK600 board and connect an 8-wires flat cable
between the ports A(0-7) and LED(0-7) as shown in the figure below. Before connecting the USB cable, set the
power switch to “Off” position. Those two cables are supplied in the STK600 kit.
ATmega128A-STK600 [APPLICATION NOTE]
Atmel-41074B-Aero-Hardware and Software Getting Started-05/2016
5
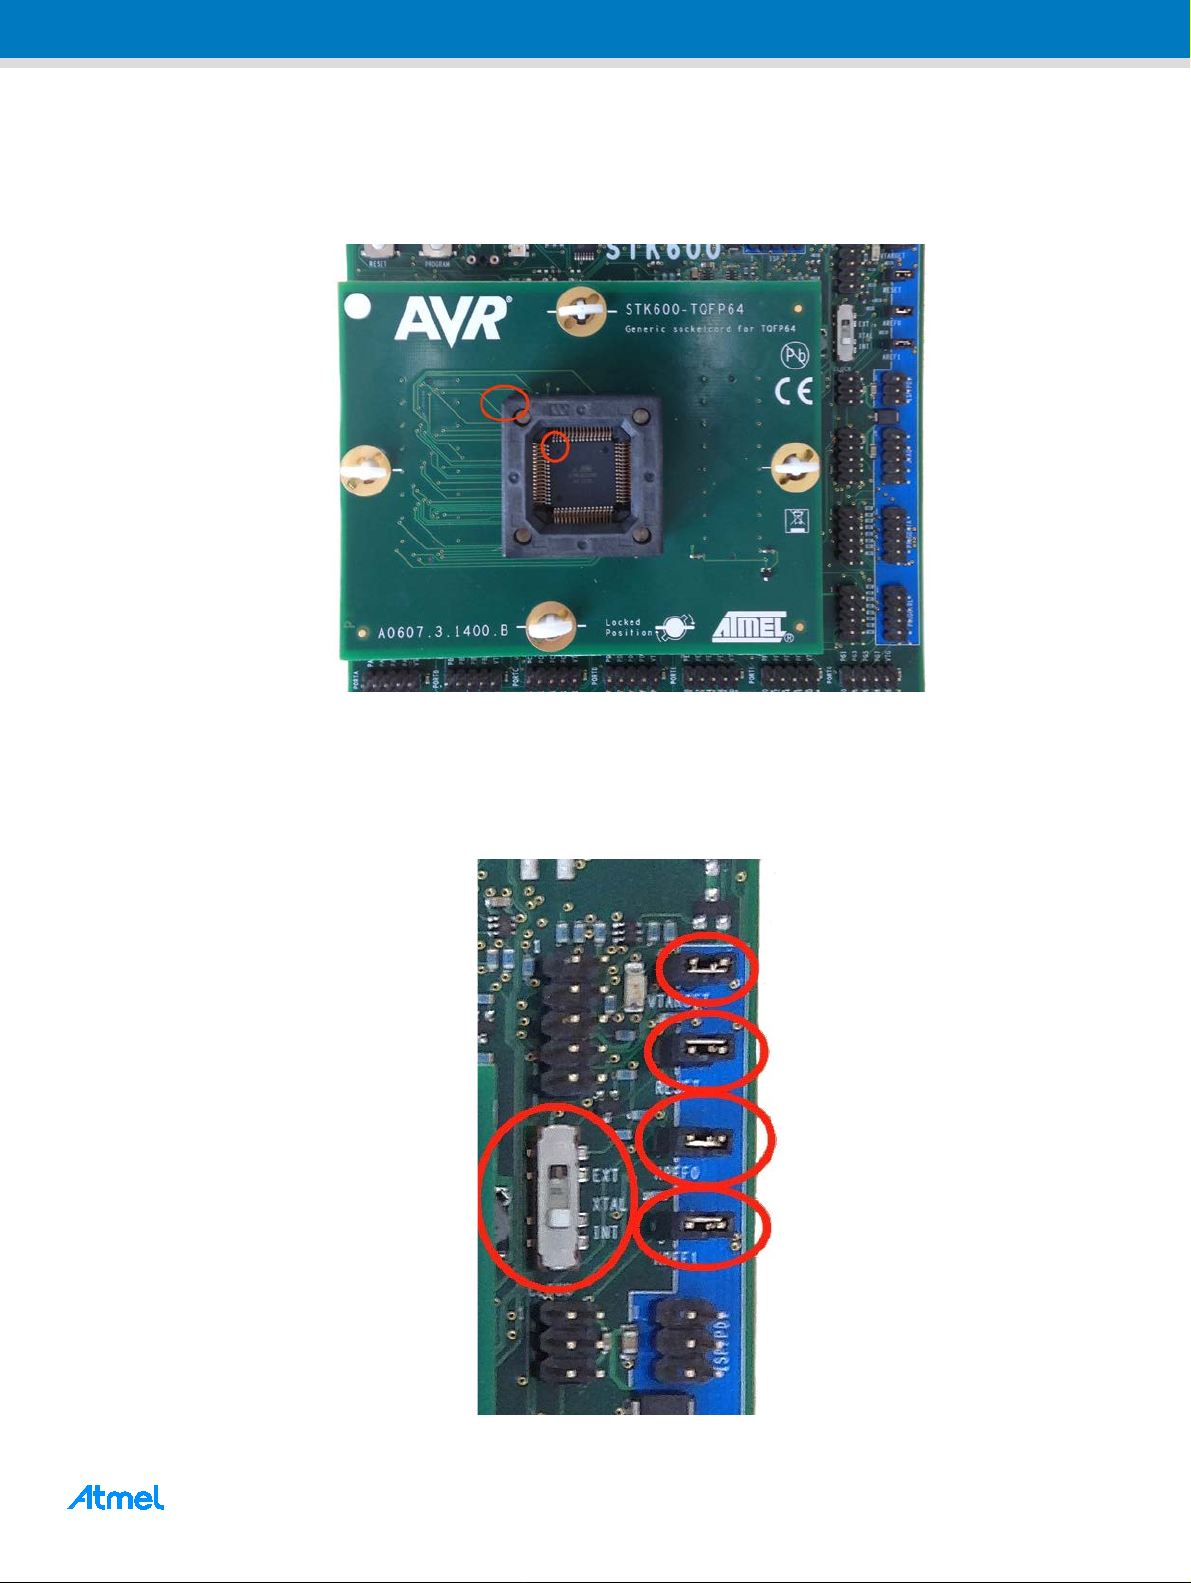
1.4 Step 4.
Install the ATmega128A device into the TQFP64 socket being careful to insert it in the right direction by
matching together the indexes of the package and the device as shown in the figure below.
1.5 Step 5.
Verify that the jumpers and the switch are configured as shown on the figure below. The jumpers VTARGET,
RESET, AREF0, AREF1 must be set and the clock switch must be set to “INT” position.
ATmega128A-STK600 [APPLICATION NOTE]
Atmel-41074B-Aero-Hardware and Software Getting Started-05/2016
 Loading...