

Page 1

USB-to-Serial Converter
USER MANUAL
UC-232A
Page 2
FCC Information
This equipment has been tested and f ound to comply with the limits
for a Class B digital device, pursuant to Part 15 of the FCC Rules.
These limits are designed to provide reasonable protection against
harmful interference in a residential installation. This equipment
generates, uses and can radiate radio frequency energy, and if not
installed and used in accordance with the instruction manual, may
cause interference to radio communic ati on s. However, ther e is no
guarantee that interference will not occur in a particular installation. If
this equipment does cause ha rmful interf erence to radio o r televisi on
reception, which can be determined by turning the equipment off and
on, the user is encourag ed to try to corr ect the i nterfer ence by one or
more of the following measures:
Reorient or relocate the rece iving antenna;
Increase the separation between the equipment and receiver;
Connect the equipment into an outl et on a circuit different from
that which the receiver is conn ected;
Consult the dealer or an experienc ed radio/television technician
for help.
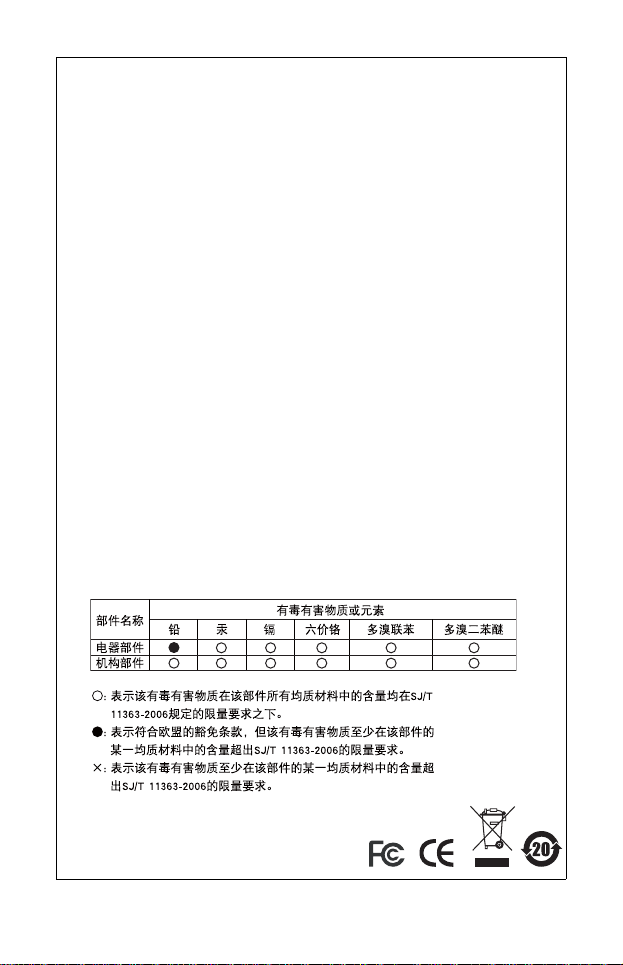
RoHS
This product is RoHS compliant.
SJ/T 11364-2006
The following contains information that relates to China.
Page 3

UC-232A User Manual
Online Registration
You can register your product at our online support center:
International – http://support.aten.com
North America – http://www.aten-usa.com/product_registration
Online Support
Online technical support is available to ATEN customers
through our support center:
International – http://support.aten.com
North America – http:// www.aten-usa.com/support.
Troubleshooting, Documentation (including onli ne manuals),
and Software Updates (firmware and drivers) are available at
the ATEN website:
International – http://www.aten.com
North America – http://www.aten-usa.com
- 3 -
Page 4

Packa ge Conte nts
The UC-232A USB-to-Serial Converter package contains the
following items:
1 UC-232A USB-to-Serial Converter
1 Installation Disk
1 User Manual*
Check to make sure that all the components are present and that
nothing got damaged in shipping. If you encounter a problem,
contact your dealer.
Read this manual thoroughly and follow the installation and
operation procedures carefully to prevent any damage to the unit,
and/or any of the devices connected to it.
* Features may have been added to the UC-232A since this
manual was printed. Please visit our website to download the
most up to date version of the manual.
Copyright © 2007 ATEN® International Co., Ltd.
Manual Part No. PAPE-1144-400G
ATEN and the ATEN logo are trademarks of ATEN International Co., Ltd. All rights
reserved. All other trademarks are the property of their respective owners.
Printing Date: 07/2007
- 4 -
Page 5

Overview
Universal Serial Bus (USB) port technology has emerged in
response to the proliferation of external peripheral devices
(scanners, digital cameras, removable drives, etc.) that are
increasingly being connected to the latest generation of
computers. It is faster than traditional bus ports and, since it does
not require any IRQs, the problem of IRQ conflict is eliminated,
which means more peripheral devices can be attached to the
system.
The UC-232A USB-to-Serial Converter provides an external
plug-and-play RS-232 serial connection for computers,
notebooks, laptops, and handheld computing devices that
support the USB specification. It comes with a standard DB-9
male connector for the peripherals to plug into, and an attached
35 cm USB cable with a type A plug for connecting to the
computer's USB port, or to a USB hub.
The UC-232A provides mobile phones, PDAs, digital cameras,
modems and ISDN terminal adapters with high quality serial
connections at a data transfer rate of up to 230 Kbps. It makes
the USB interface transparent to the peripherals, allowing them
to easily interface with the USB, eliminating the setup hassle
found with traditional serial port connections. As a USB
specification compliant device, the UC-232A also supports
energy-saving suspend and resume operations.
Note: The UC-232A does not support devices, such as serial
mice, that require an IRQ number or IO Address.
- 5 -
Page 6
Features
Full compliance with USB specification v1.1
Supports RS-232 serial interface
Supports automatic handshake mode
Up to 230 Kbps data transfer rate
Supports remote wake up and power management
Provides a 96 byte buffer for each upstream and downstream
data transfer
Works with cellular phones, PDAs, digital cameras, modems
and ISDN terminal adapters
Easy way to install an additional RS-232 port
No IRQ required
System Requirements
USB Host Controller installed on the system
Operating Systems
Supported operating systems are shown in the table, below:
OS Version
Windows 2000 and higher, Vista
Mac OS 9 and higher
Linux RedHat 7.3 and higher
- 6 -
Page 7

Windows Installation (2000 and higher)
Installing the Driver(s)
The installation disk included in the package contains Autorun
software that will install the necessary driver(s) on your Windows
system. Carefully follow the steps below. If at any point you
encounter problems with the installation, you should cancel the
installation process and start over from the beginning.
1. Insert the installation disk into your CD-ROM drive. After a
few moments, the following dialog box appears:
2. Click Next to install the necessary driver(s) for your new UC232A.
- 7 -
Page 8

3. Windows displays the following warning:
4. You can safely ignore this warning. Click Continue Anyway
to continue installing the new software. When the installation
is complete, the following dialog box appears:
5. Click Finish to close the wizard. You have successfully
installed the driver(s).
- 8 -
Page 9

Connecting the UC-232A
1. Connect the UC-232A USB-to-Serial Converter to a USB port
on your computer. The New Hardware Wizard appears:
2. Select No, not this time, and then click Next to continue. The
following dialog box appears:
3. Leave the default choice (Install the software automatically),
and then click Next to continue.
- 9 -
Page 10

4. Windows displays the following warning:
5. You can safely ignore this warning. Click Continue Anyway
to continue installing the new hardware. When the installation
is complete, the following dialog box appears:
6. Click Finish to close the wizard. You have successfu lly
installed the UC-232A.
- 10 -
Page 11

Uninstalling the Driver(s)
1. Insert the installation disk into the CD-ROM drive. The
following dialog box appears:
2. Select Uninstall the driver, and then click Next. The following
dialog box appears:
3. Click Finish. You have successfully uninstalled the driver(s).
- 11 -
Page 12

Windows Vista Installation
Installing the Driver
First, check that Vista’s language for non-Unicode programs is
set to English by checking Regional and Language Options, then
Administrative.
1. Insert the installation disk into your CD-ROM drive and click
on the Vista driver installer. The following dialog box appears:
2. Click Next and the following License Agreement dialog box
appears:
- 12 -
Page 13

3. Click to accept the terms of the license agreement, then click
Next to install the driver. When the installation is complete,
the following dialog box appears:
4. Click Finish to close the wizard. You have successfully
installed the driver. You can now proceed to connect the UC232A.
Connecting the UC-232A
1. Connect the UC-232A USB-to-Serial Converter to a USB port
in your computer. The following dialog box appears to confirm
that the driver has been installed and that your UC-232A is
ready to use:
- 13 -
Page 14

Mac Installation
Installing the Software
Mac OS 9
1. Insert the installation disk into the CD-ROM drive.
2. Open the CD-ROM Folder, then open the MAC folder.
3. Copy the Mac OS 9 file (UC-232_OS9_vxxxxx.hqx) to your
hard disk.
4. Double-click on the file icon to extract the compressed file(s).
5. Copy the extracted file(s) to the Hard Disk > System Folder >
Extensions folder.
Note: If you are using a non-English language version, copy
the files to the corresponding folder for your system.
Mac OS X
1. Insert the installation disk into the CD-ROM drive.
2. Open the CD-ROM folder, then open the MAC folder.
3. Copy the Mac OS X file (UC-232_OSX_vxxxxx.hqx) to your
hard disk.
4. Double-click on the file icon to extract the compressed file.
5. Double-click the extracted file to begin installing the software.
6. Follow the on-screen instructions to complete the software
installation.
Connecting the UC-232A
Connect the UC-232A to a USB port on your Mac.
Note: The UC-232A will not function properly unless the
software was previously installed.
- 14 -
Page 15

Linux Installation
Installing the Driver(s)
1. Insert the installation disk into your CD-ROM drive.
2. Open a command line.
3. Move to the CD-ROM directory and then to the Linux
subdirectory.
4. Move to the subdirectory that corresponds to the version of
your operating system. (For example, if your operating
system is Red Hat 7.3, then move to the Redhat73
subdirectory.)
5. Enter the following commands to copy the files in the
subdirectory to a directory on your hard disk:
cp pl2303.c /directory_name
cp Makefile /directory_name/makefile
where directory_name is the name of the directory on your
hard disk to which you are copying the files.
Note: You must change the capital “M” in “Makefile” to a
lowercase “m” when you copy the file to the new
directory.
6. Move to the directory where you copied the files.
7. Enter the following command:
make inst
8. Connect the UC-232A to a USB port on your computer.
Note: The UC-232A will not function properly unless the
driver(s) were previously installed.
- 15 -
Page 16

Uninstalling the Driver(s)
1. Open a command line.
2. Move to the directory where you installed the driver(s).
3. Enter the following command:
To uninstall the driver:
make uninst
To uninstall all drivers (including the base driver):
make uninst_all
Yo u have successfully uninstalled the driver(s).
- 16 -
Page 17

Peripheral Installation
1. After you have finished the software installation procedures
for your operating system and have connected the UC-232A
to your computer, connect the peripheral device to the UC232A, and then turn the peripheral on.
2. Follow the Installation Wizard's on-screen instructions to
complete the installation.
Note: 1. This procedure only occurs the first time you connect
the peripheral. If your peripheral was previously
connected and configured for the RS-232 (COM) port,
after you perform the Adapter Installation and click
Finish, the driver will detect it and install it automatically.
However, some peripheral devices, such as older
PDAs, require that you re-install the software for the
peripheral device before it will work properly.
2. Under Windows 2000, if you connect a modem, you
must specify it as a Standard Modem.
- 17 -
Page 18

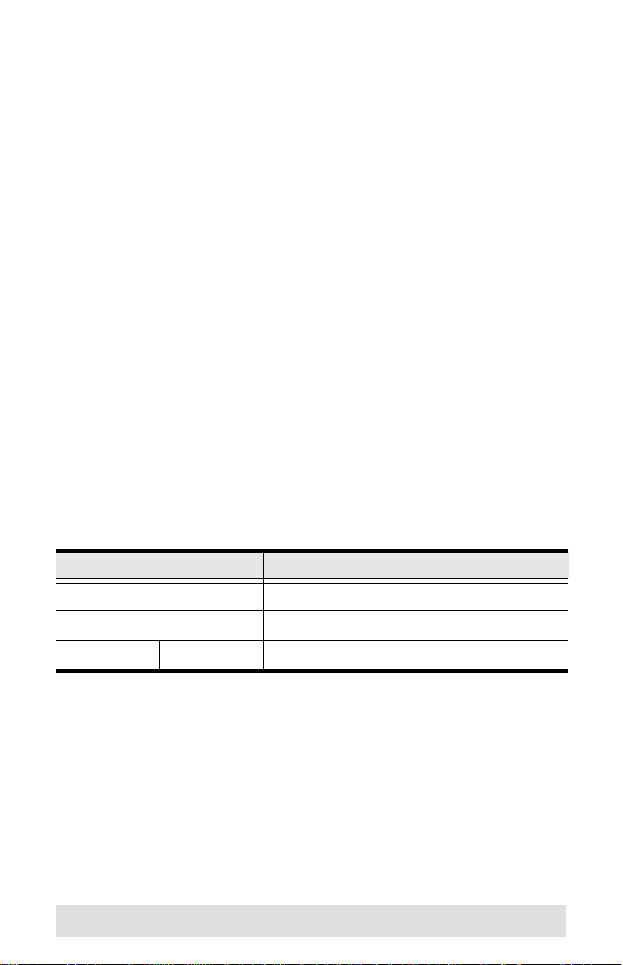
Specifications
Function Specification
Connectors USB Type A Plug
Serial DB-9 Male
LEDs Data Transfer / Handshaking (Orange)
Data Transfer Rate Up to 230 Kbps
Cable Length 35 cm
Power Consumption 450mW
Power Mode Bus Powered
USB Specification 1.1 Compliant
Environment Operating
Physical
Properties
Temp.
Storage
Temp.
Humidity 0–80% RH, Non-condensing
Housing Plastic
Weight 60 g
Dimensions
(L x W x H)
o
C
5–40
o
-20–60
C
6.59 x 3.4 x 1.6 cm
- 18 -
Page 19

DB-9 Pin Assignments
Pin Assignment
1CD
2RXD
3TXD
4DTR
5GND
6DSR
7RTS
8CTS
9RI
- 19 -
Page 20

Limited Warranty
IN NO EVENT SHALL THE DIRECT VENDOR'S LIABILITY EXCEED THE PRICE
PAID FOR THE PRODUCT FROM THE DIRECT, INDIRECT, SPECIAL,
INCIDENTAL OR CONSEQUENTIAL DAMAGES RESULTING FROM THE USE
OF THE PRODUCT, DISK OR ITS DOCUMENTATION.
The direct vendor makes no warranty or representation, expressed, implied, or
statutory with respect to the contents or use of this documentation, and specially
disclaims its quality, performance, merchantability, or fitness for any particular
purpose.
The direct vendor also reserves the right to revise or update the device or
documentation without obligation to notify a ny individual or ent ity of such revisions,
or update. For further inquires please contact your direct vendor.
- 20 -
 Loading...