

CV211
USER MANUAL
Laptop USB Console Adapter
EMC Information
FEDERAL COMMUNICATIONS COMMISSION INTERFERENCE
STATEMENT: This equipment has been tested and found to comply with
the limits for a Class A digit al device, pursuant to Part 15 of the FCC Rules.
These limits are designed to provide reasonable protection against harmful
interference when the equipment is operated in a commercial
environment. This equipment generates, uses, and can radiate radio
frequency energy and, if not installed and used in accordance with the
instruction manual, may cause harmful interference to radio
communications. Operation of this equipment in a residential area is likely
to cause harmful interference in which case the user will be required to
correct the interference at his own expense.
The device complies with Part 15 of the FCC Rules. Operation is subject
to the following two conditions: (1) this device may not cause harmful
interference, and (2) this device must accept any interference received,
including interference that may cause undesired operation.
FCC Caution: Any changes or modifications not expressly approved by
the party responsible for compliance could void the user's authority to
operate this equipment.
Warning: Warning: This equipment is compliant with Class A of CISPR 32.
In a residential environment this equipment may cause radio interference.
KCC Statement
유선 제품용 / A 급 기기 ( 업무용 방송 통신 기기 )
이 기기는 업무용 (A 급 ) 전자파적합기기로서 판매자 또는 사용자는 이점
을 주의하시기 바라며 , 가정 외의 지역에서 사용하는 것을 목적으로 합니다
.
RoHS
This product is RoHS compliant.
CV211 User Manual
Online Registration
You can register your product at our online support center:
International http://eservice.aten.com
Online Support
International
Email Support support@aten.com
Online
Support
Telephone Support 886-2-8692-6959
Telephone Support
International 886-2-8692-6959
China 86-400-810-0-810
Japan 81-3-5615-5811
Korea 82-2-467-6789
North America 1-888-999-ATEN ext 4988
United Kingdom 44-8-4481-58923
Technical Support http://eservice.aten.com
Product Information http://www.aten.com
- 3 -

Packa ge Co nten ts
Copyright © 2017 ATEN® International Co., Ltd.
Manual Date: 2017-05-16
ATEN and the ATEN logo are trademarks of ATEN International Co., Ltd. All rights
reserved. All other trademarks are the property of their respective owners.
The CV211 Laptop USB Console Adapter package contains the
following items:
1 CV211 Laptop USB Console Adapter
1 USB Type A to USB Mini-B Cable
1 User Instructions*
Check to make sure that all the components are present and that
nothing got damaged in shipping. If you encounter a problem,
contact your dealer.
Read this manual thoroughly and follow the installation and
operation procedures carefully to prevent any damage to the unit,
and/or any of the devices connected to it.
* Features may have been added to the CV211 since this
manual was printed. Please visit our website to download the
most up-to-date version of the manual.
- 4 -

Overview
The CV211 Laptop USB Console Adapter provides a direct
Laptop-to-Computer connection with instant desktop access.
Through its USB 2.0 and VGA cables, the CV211 gives a laptop
direct access*, bi-directional file transfers, video recording and
screenshots on the connected computer. Simply connect the
cables between a laptop and computer for fast and easy remote
desktop access with no software to install.
In addition to offering simple plug-and-play desktop KVM
(keyboard, video, mouse) access to servers, the CV211 also
allows you to transfer files between the two computers using an
innovative virtual media function through our intuitive graphical
user interface (GUI).
The intuitive GUI console application can be run from the CV211
or copied to and run on the laptop to provide access to the target
computer. The console window can be adjusted to fit the size and
resolution of the target computer's desktop by resizing the pane
automatically. This allows you to view the entire desktop of a the
target computer without needing to use a scroll bar. The CV211
provides IT professionals with an effective hardware-based
access tool that offers direct Laptop-to-Computer desktop control
at any target computer's location.
Note: The CV21 1 offers plug-and-play console functionality that
gives you complete control of the connected computer
from a laptop.
- 5 -

System Requirements
A laptop with a USB Type A port.
A computer with a USB Type A and VGA port.
Note: 1. The CV211 only controls the target computer through
a direct cable connection. It cannot be used to
control two standalone PCs, as it only provides one
computer with desktop access, as a one-to-one
direct KVM console.
2. The user must know the login credentials of the
target computer being accessed if this is a system
requirement.
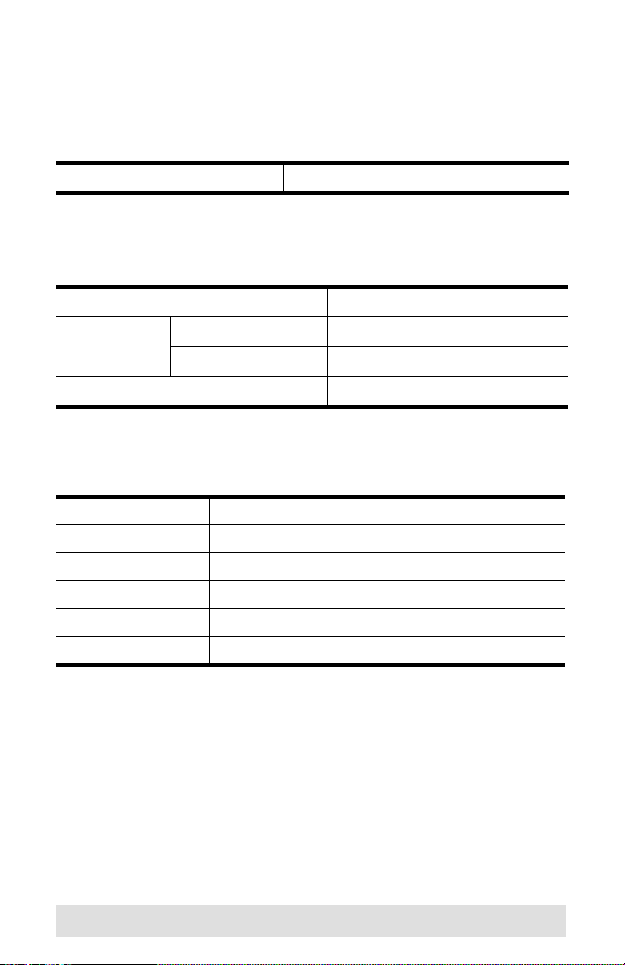
Operating Systems
Supported operating systems are shown in the table, below:
Operating Systems
Windows 2000 / XP / Vista / 8 / 10 / 10.1
- 6 -

Features
USB Console Adapter provides direct Laptop-to-Computer
desktop access
Bi-directional file transfers between the laptop and connected
computer
Supports analogue video resolutions up to 1920 x 1200 @ 60
Hz
Virtual media enables file applications, OS patching, software
installation and diagnostic testing
Video recording and image capture of remote desktop
Mouse DynaSync™ – automatically synchronizes the laptop
and connected computer's mouse movements
On-screen keyboard with multi-language support
Supports macros for user defined hotkeys
Supports multi-platform environments: Windows 2000, XP,
Vista and higher
Desktop scaling – user can adjust the size/resolution of the
remote desktop window by size or ratio
Supports hot-plugging
Plug-and-Play – no software to install
Firmware upgradeable
- 7 -
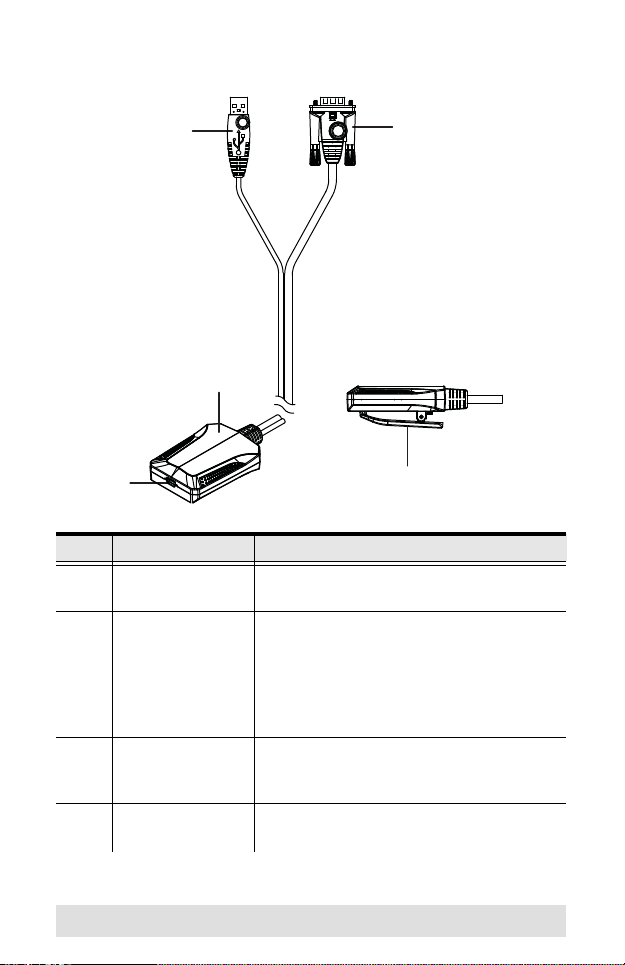
Components
4
3
5
1
Side View
2
No. Component Description
1 Mini USB Port This connects the CV211 to the USB port
2 Connection LED Lights solid blue when the USB
3 USB Type A
Connector
4 VGA Connector Connects to the VGA port of the target
on the laptop.
connection is established with the laptop
and connected computer.
Flashes blue when the laptop is accessing
the connected computer through a remote
client session.
Connects to the target computer to
provide keyboard, mouse and virtual
media access.
computer to provide the video signals.
- 8 -

No. Component Description
5 Cable Clip Use this clip to secure the USB and VGA
cables to avoid unnecessary tension.
- 9 -

Installation
Setting up the CV211 is quick and easy with plug-and-play
functionality in just a few steps. Numbers 1–4 below refer to the
diagram on the next page:
1. Connect the USB Type A end of the USB Type A to USB
Mini-B Cable (included with this package) to the USB port of
the laptop.
2. Connect the USB Mini-B end of the USB Type A to USB MiniB Cable (included with this package) to the Mini USB port of
the CV211.
3. Connect the CV211’s USB T ype A connector to a USB port on
the target computer.
4. Connect the CV211's VGA connector to a VGA port on the
target computer.
5. When a successful connection between the target computer
and the laptop is established, the CV211’s blue LED will flash
on/off at a fast pace.
- 10 -
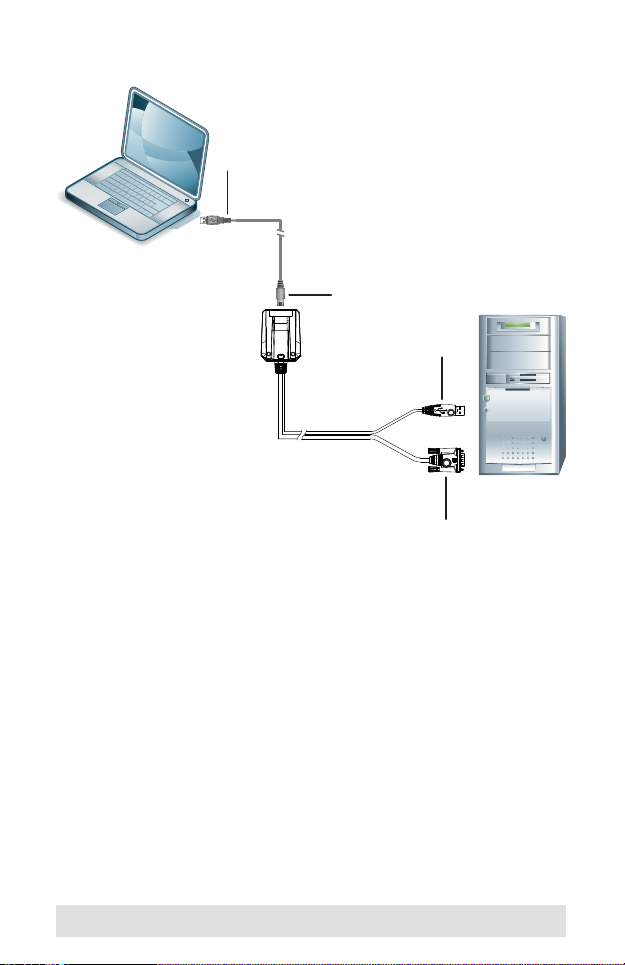
Installation Diagram
1
2
3
4
- 11 -
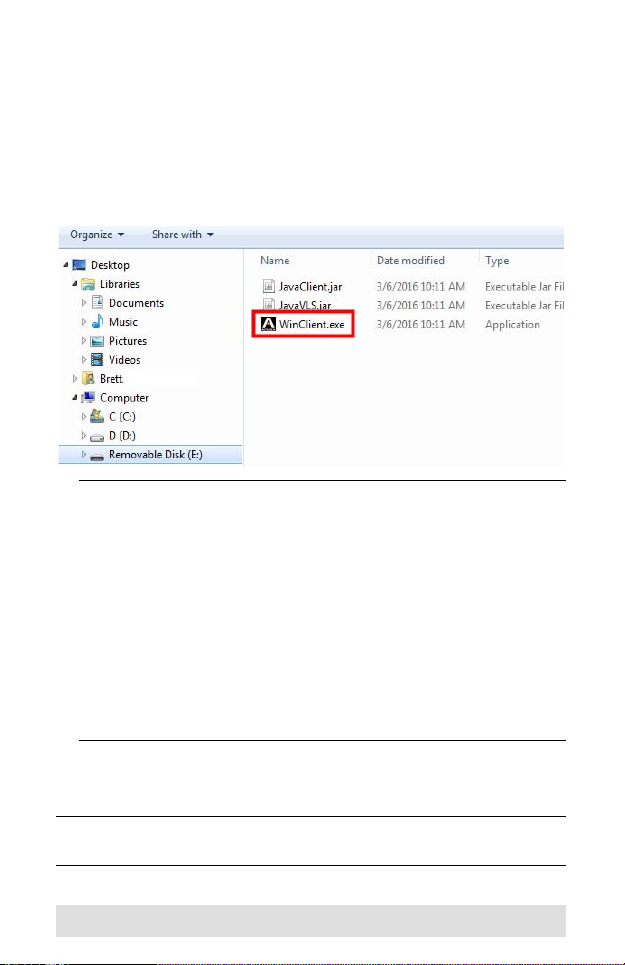
Operation
To establish a remote session from a laptop, do the following:
1. Connect the hardware.
2. On the laptop, a USB device will install as a Removable Disk.
3. Open an explorer window, click on the Removable Disk, and
then double-click: WinClient.exe.*
Note: 1. If the Removable Disk doesn’t install check the
laptop’s USB connection to the CV211.
2. If the computer isn't running Windows, the Java AP
Client provides remote access. To connect via the
Java AP Client, double-click the JavaClient.jar file
on the Removable Disk.
3. The WinClient.exe and JavaClient.jar can be copied
from the removable disk to the laptop where it can be
executed locally.
4. The Vplayer.jar program is used to play the videos
which are captured by the CV211.
4. The WinClient will search for the computer* and then open a
remote session once a connection is established.
Note: If the Client AP cannot connect to the computer, check the
cable connections and click Enumerate.
- 12 -
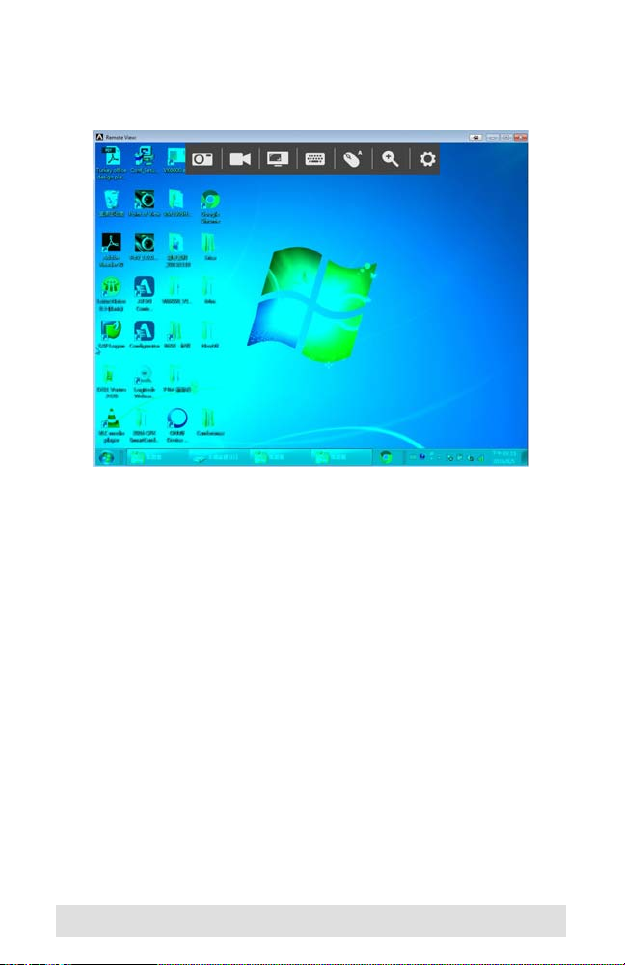
Desktop View
The WinClient AP provides a Desktop View window with Control
Panel to access the computer, as shown below:
The WinClient Control Panel is hidden at the upper center of the
screen, and becomes visible when you mouseover it. The panel
consists of seven icons, as described on the next page.
As the mouse pointer moves over the icons in the panel,
menus appear with options. If a menu does not appear, the
icon can be clicked directly to use that function.
To move the Control Panel to a different location on the top of
the window, place the mouse pointer over the bar, then click
and drag it to a new location.
- 13 -
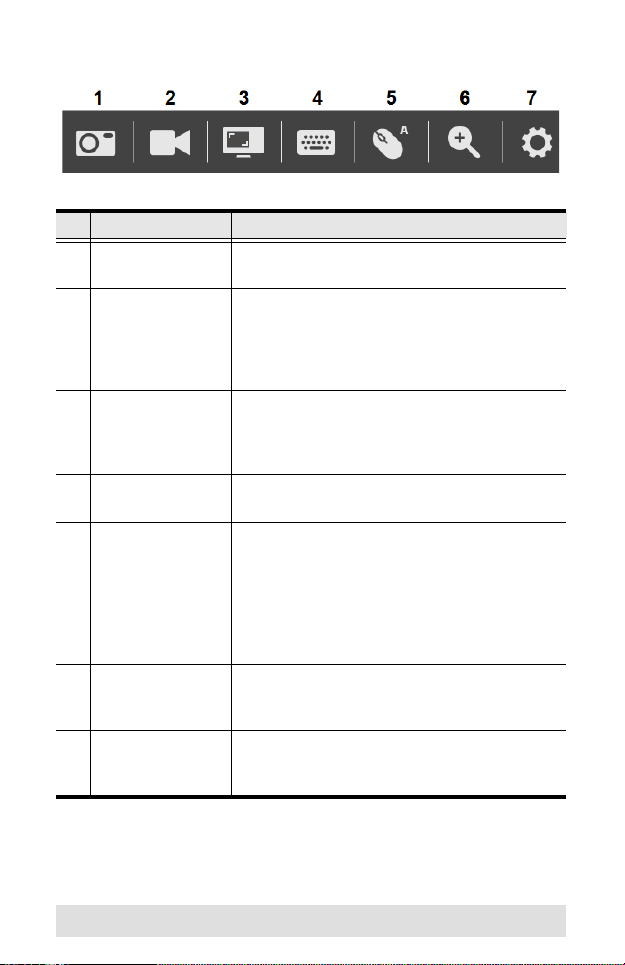
Control Panel
# Icon Description
1 Capture Click to take a snapshot (screen capture) of
2 Record Click to record a video of the target
3 Video Sync Click Video Sync to have the vertical and
4 On-Screen
Keyboard
5 Settings
(Mouse)
6 Zoom Click to zoom the remote display window.
7 Settings
(Control Panel)
the target computer’s display (see page 38).
computer’s display. The video is saved on the
laptop’s desktop. You can change the save to
path in the Configure Panel (see page 38). T o
play video files, see VSR Viewer, page42.
horizontal offset values of the connected
computer's screen detected and automatically
synchronized with the laptop's screen.
Click to open the on-screen keyboard (see
page 33).
Click to toggle between Automatic or Manual
mouse sync modes (see page 36).
When the selection is Automatic, an A
appears on the icon.
When the selection is Manual, an M
appears on the icon.
Options are 25%, 50%, 75%, 100%, 1:1, and
Full Screen (see page 28).
Click to open an extended menu-style version
of the Control Panel, as described on the next
page.
- 14 -
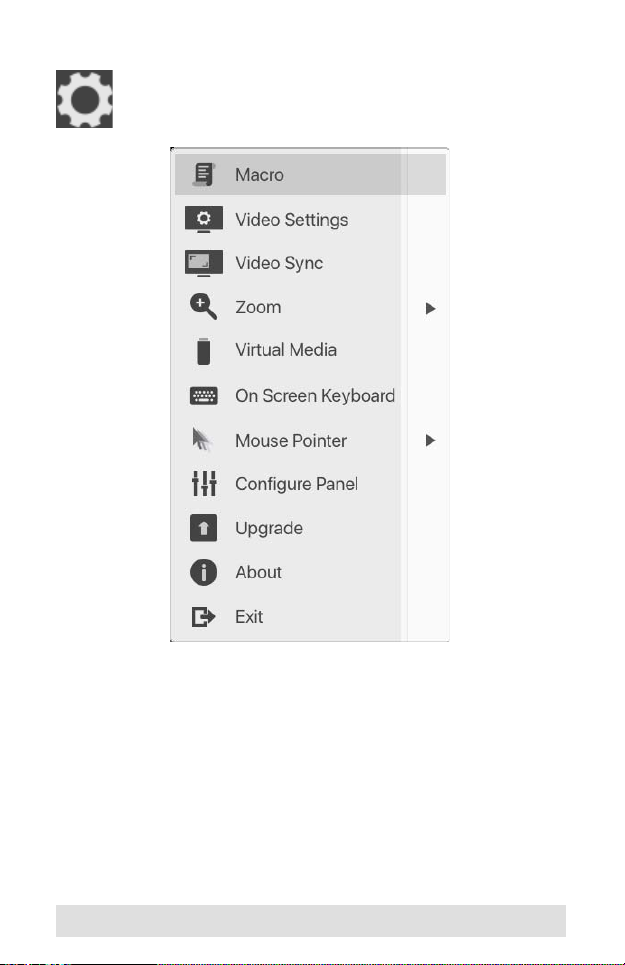
Control Panel Settings
When you click the last icon on the far right, it brings up
a menu-style version of the Control Panel that allows you
to select additional options, as shown below:
- 15 -
 Loading...