How it Works
Log In / Sign Up
Buy Points
How it Works
FAQ
Contact Us
Questions and Suggestions
Users
ATEN
Loading...
C
CS1732B-AT-E
CS1734A
CS1734B
6
CS1734B-AT-E
CS1742
5
CS1744C
3
CS1754
3
CS1758
4
CS1762
5
CS1762A
5
CS1764
2
CS1764A
6
CS1768
5
CS1768,CS1788
CS1772
CS1782
5
CS1782A
6
CS1784
6
CS1784A
4
CS1788
5
CS17916
CS17916-AT-E
CS1792
8
CS1794
8
CS1798
4
CS1798 ,CS17916
CS18208
3
CS18216
3
CS1822
4
CS1824
5
CS1842
4
CS1842 ,CS1844
CS1844
3
CS1912
3
CS1914
3
CS19208
3
CS19216
3
CS1922
6
CS1922ATC
2
CS1922M
8
CS1924
2
CS1924M
7
CS1942
2
CS1942ATC
2
CS1942DP
4
CS1944
3
CS1944DP
7
CS1953
3
CS1964
4
CS228
5
CS22D
3
CS22DP
4
CS22H
2
CS22HF
CS22U
5
CS231C
3
CS231TK
CS261
5
CS261TK
3
CS52
CS52A
CS52D
2
CS52DP
2
CS533
4
CS533 Tap
2
CS62
3
CS62A
2
CS62D
CS62DU
CS62KM
5
CS62S
CS62T
CS62U
6
CS62US
6
CS64A
3
CS64US
6
CS661
3
CS682
3
CS682-AT
3
CS692
4
CS692-AT
3
CS724KM
7
CS72A
2
CS72D
4
CS72E
3
CS72U
4
CS74A
2
CS74D
3
CS74E
3
CS74U
4
CS78
CS782DP
4
CS78A
CS82AC
2
CS82U
5
CS82U-AT
CS84AC
2
CS84U
4
CS84U-AT
CS88A
2
Loading...
Loading...
Nothing found
CS22D
Datasheet
1 pgs
924.11 Kb
0
Quick Start Guide
2 pgs
1.43 Mb
0
User guide [ml]
2 pgs
1.8 Mb
0
Table of contents
Loading...
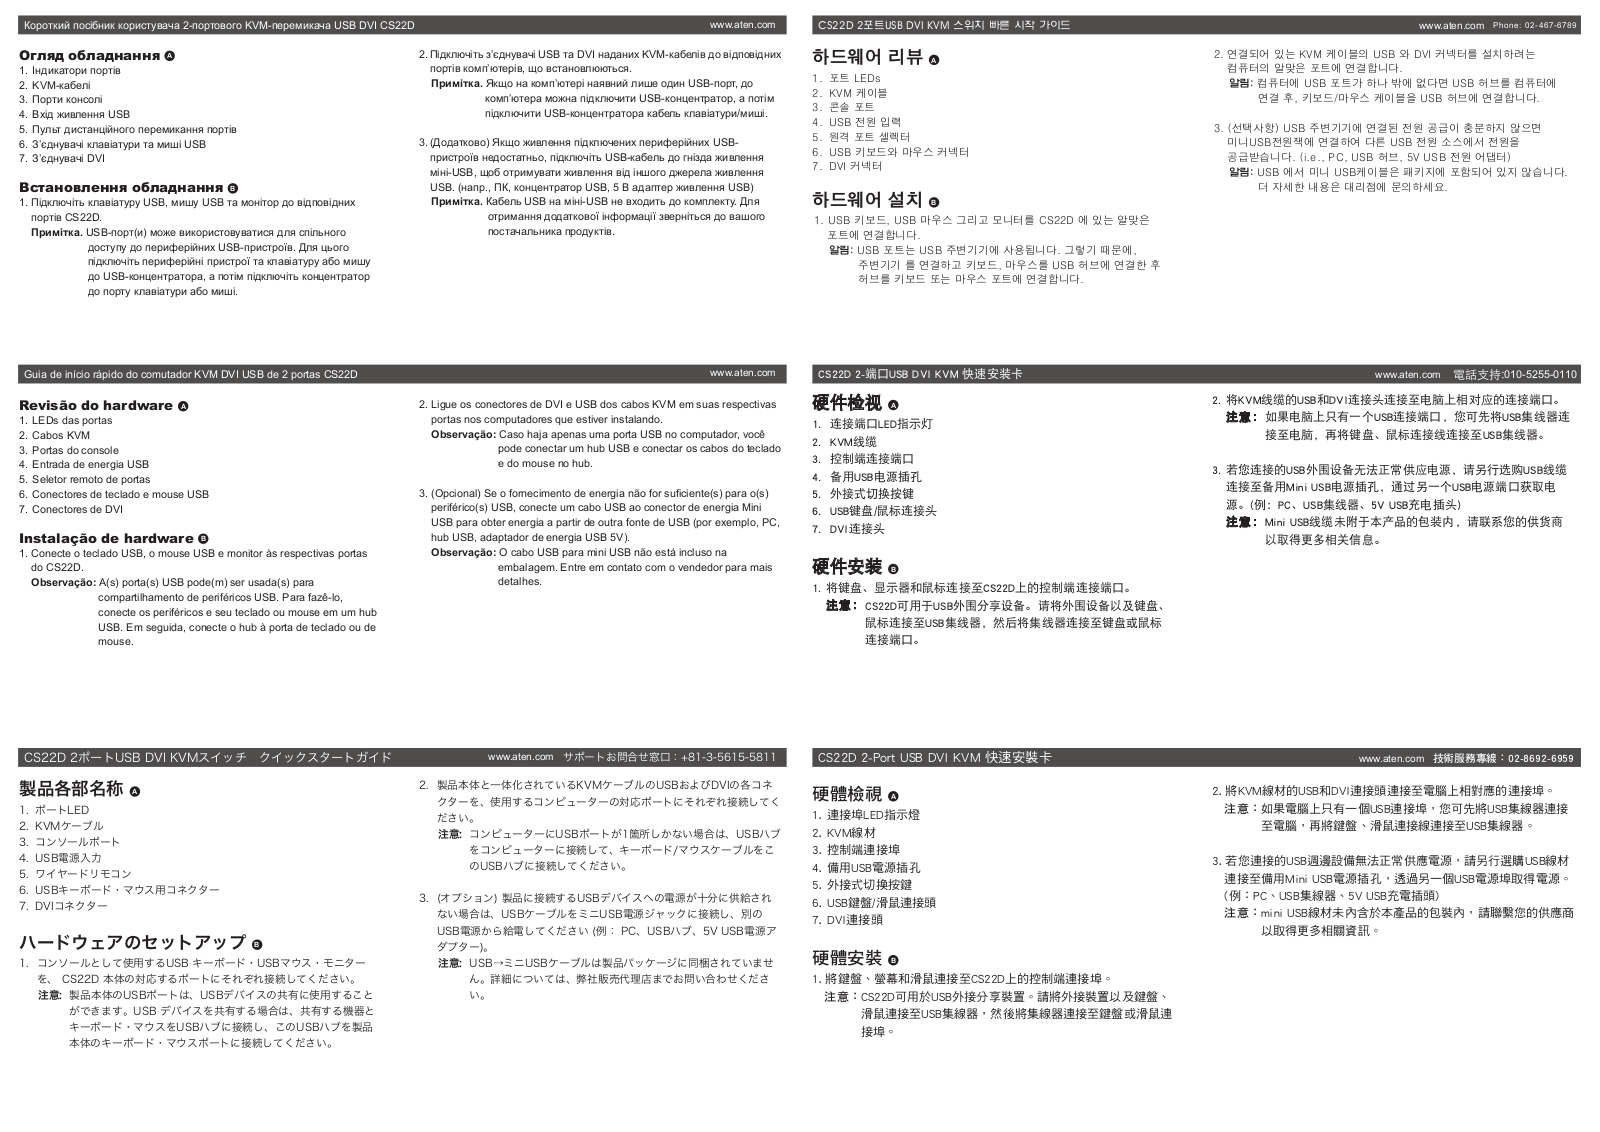
ATEN CS22D Quick Start Guide
...
ATEN Quick Start Guide
Download
Specifications and Main Features
Frequently Asked Questions
User Manual
Download
Loading...
+
hidden pages
Unhide
You need points to download manuals.
1 point = 1 manual.
You can buy points or you can get point for every manual you upload.
Buy points
Upload your manuals
 Loading...