


User Guide
For Network Attached Storage
Ver.3.4.0.0514 (For ADM 3.4)

Table of Contents |
|
Introduction .................................................................................................. |
4 |
Getting Started with ASUSTOR Data Master ...................................................... |
9 |
Installing ASUSTOR NAS and ADM................................................................................................... |
9 |
Logging in to ASUSTOR Data Master ............................................................................................ |
9 |
Searchlight ............................................................................................................................. |
11 |
Taskbar.................................................................................................................................. |
12 |
Pre-Installed Apps........................................................................................ |
13 |
Settings ................................................................................................................................. |
13 |
See More................................................................................................................................ |
29 |
Services ................................................................................................................................. |
30 |
Storage Manager..................................................................................................................... |
42 |
Snapshot Center ..................................................................................................................... |
50 |
EZ Sync Manager .................................................................................................................... |
59 |
Access Control ........................................................................................................................ |
69 |
Backup & Restore .................................................................................................................... |
79 |
App Central ............................................................................................................................ |
86 |
External Devices ..................................................................................................................... |
87 |
System Information ................................................................................................................. |
91 |
Activity Monitor ....................................................................................................................... |
94 |
File Explorer ........................................................................................................................... |
95 |
From App Central ......................................................................................... |
98 |
Download Center..................................................................................................................... |
98 |
FTP Explorer ........................................................................................................................... |
99 |
Surveillance Center ................................................................................................................ |
100 |
UPnP AV Media Server ............................................................................................................ |
101 |
iTunes Server ........................................................................................................................ |
102 |
SoundsGood .......................................................................................................................... |
103 |
LooksGood ............................................................................................................................ |
104 |
Photo Gallery ......................................................................................................................... |
105 |
VPN Server ............................................................................................................................ |
106 |
Takeasy ................................................................................................................................ |
106 |
ASUSTOR Portal ..................................................................................................................... |
107 |
Antivirus Protection ................................................................................................................ |
109 |
Mail Server ............................................................................................................................ |
109 |
Syslog Server ........................................................................................................................ |
110 |
DataSync for Dropbox............................................................................................................. |
110 |
2

DataSync for Microsoft OneDrive .............................................................................................. |
111 |
DataSync for Google Drive....................................................................................................... |
112 |
HiDrive Backup ...................................................................................................................... |
112 |
DataSync for hubiC................................................................................................................. |
113 |
DataSync for Yandex .............................................................................................................. |
114 |
Utilities ..................................................................................................... |
116 |
ACC (ASUSTOR Control Center)................................................................................................ |
116 |
AEC (ASUSTOR EZ Connect) .................................................................................................... |
117 |
ABP (ASUSTOR Backup Plan) ................................................................................................... |
117 |
ADA (ASUSTOR Download Assistant) ........................................................................................ |
118 |
Mobile Apps............................................................................................... |
119 |
AiData .................................................................................................................................. |
119 |
AiMaster................................................................................................................................ |
120 |
AiRemote .............................................................................................................................. |
121 |
AiDownload ........................................................................................................................... |
122 |
AiMusic ................................................................................................................................. |
123 |
AiFoto ................................................................................................................................... |
123 |
AiVideos ................................................................................................................................ |
124 |
AiSecure ............................................................................................................................... |
125 |
Appendix .................................................................................................. |
127 |
Permission Mapping Table ....................................................................................................... |
127 |
EULA ........................................................................................................ |
128 |
GNU General Public License ......................................................................... |
130 |
3
Introduction
Thank you for choosing ASUSTOR network attached storage (NAS).
From cross-platform file sharing to multimedia server applications to App Central, ASUSTOR NAS provides you with a rich assortment of features, allowing you to explore the unlimited potential of NAS.
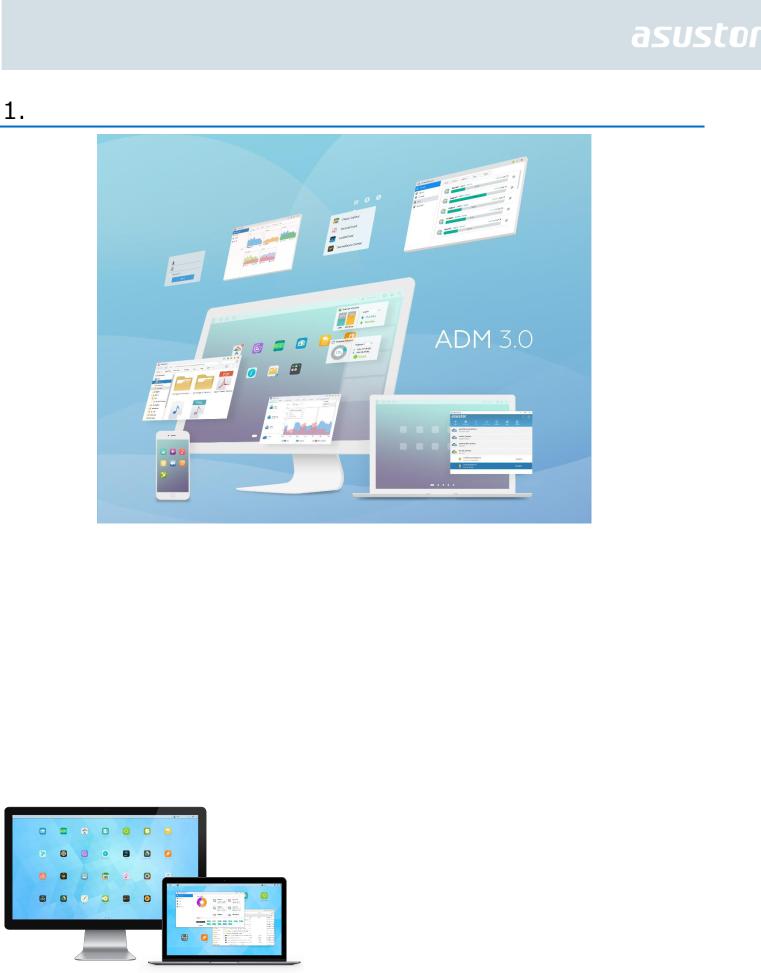
ADM: The Amazing Starts Here
Your NAS comes preloaded with ASUSTOR Data Master (ADM), an operating system developed by ASUSTOR. Designed around the use of Apps, ADM’s intuitive web-based interface allows for easy organization and a user-friendly experience. This user manual will introduce you to all the rich assortment of preloaded applications (Apps) on your NAS.
4

Your Ideal Private Cloud
ASUSTOR’s exclusive EZ ConnectTM technology lets you access your NAS from almost anywhere on the planet. Whether by computer or mobile device you need only an Internet connection to access your NAS from anywhere and at any time.
Cross-Platform File Sharing
ASUSTOR NAS provides flawless cross-platform file sharing. No matter what operating system you are using, you can still effortlessly connect to your NAS and access your data.
Embrace the Cloud, Enjoy Peace of Mind
Experience the convenience of cloud computing in a stress free environment. ASUSTOR’s ADM Defender and support for encryption provide the highest standard of security for your system.
5

Your Data is Safe with Us
ASUSTOR NAS offers a complete host of data protection and backup solutions. Features such as RAID and two-way transfer support offer bullet-proof protection and flexible application. Savor a stress free and liberating user experience.
The Hub of Your Home Entertainment
Make ASUSTOR NAS the hub of your home entertainment and enjoy digital entertainment like you never have before. Countless Apps such as ASUSTOR Portal, LooksGood, SoundsGood, Photo Gallery, iTunes Server and UPnP AV Multimedia Server allow you to enjoy digital entertainment in every corner of your home.
Vigilant Security
ASUSTOR’s Surveillance Center lets you collectively manage an array of IP cameras, helping you keep an eye on your most valued assets. You can even take snapshots and control the pan, tilt and zoom functions of all cameras. In the event of any disruptions, Surveillance Center will notify you at once, giving you complete peace of mind.
6
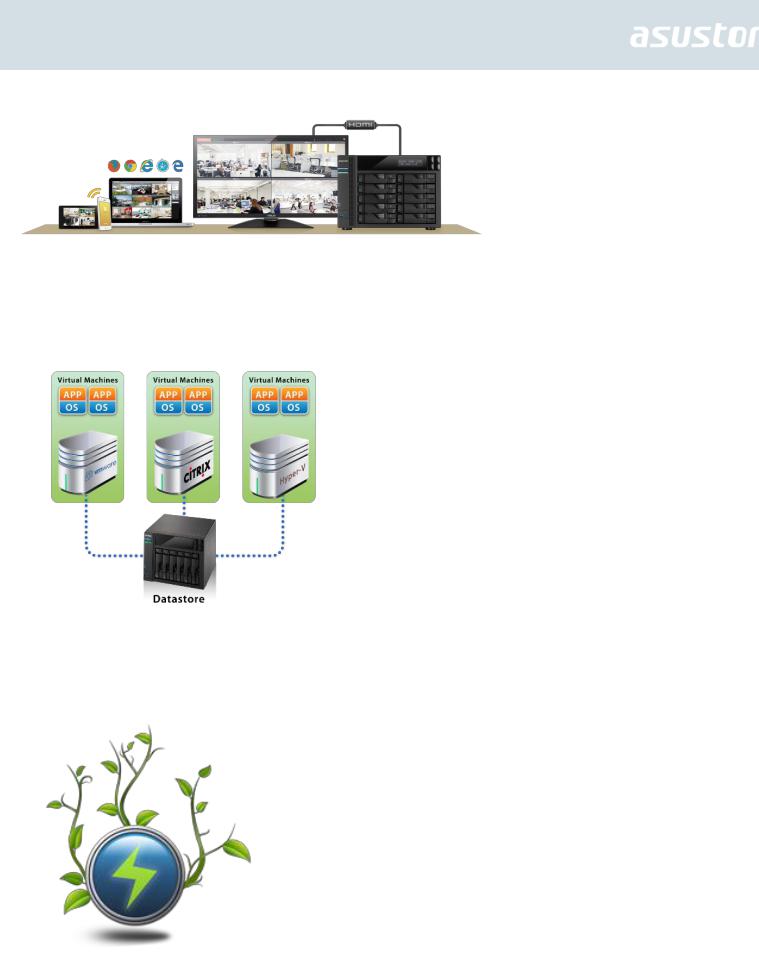
iSCSI and Virtualization
Seamlessly integrate with any existing IT environments. Enjoy flexible and cost-efficient shared storage. ASUSTOR NAS supports the use of iSCSI and NFS in addition to being verified as, Citrix and Hyper-V ready.
Protect Our Planet with ASUSTOR
It is our mission to continue to develop exceptionally energy efficient products. From their inception, all ASUTOR NAS products are designed and developed around ecologically friendly concepts. Features such as, Night Mode, disk hibernation, power scheduling and fan control all help you to save power. Furthermore, each ASUSTOR NAS is fully compliant with EuP standards (EuP 2.0).
7

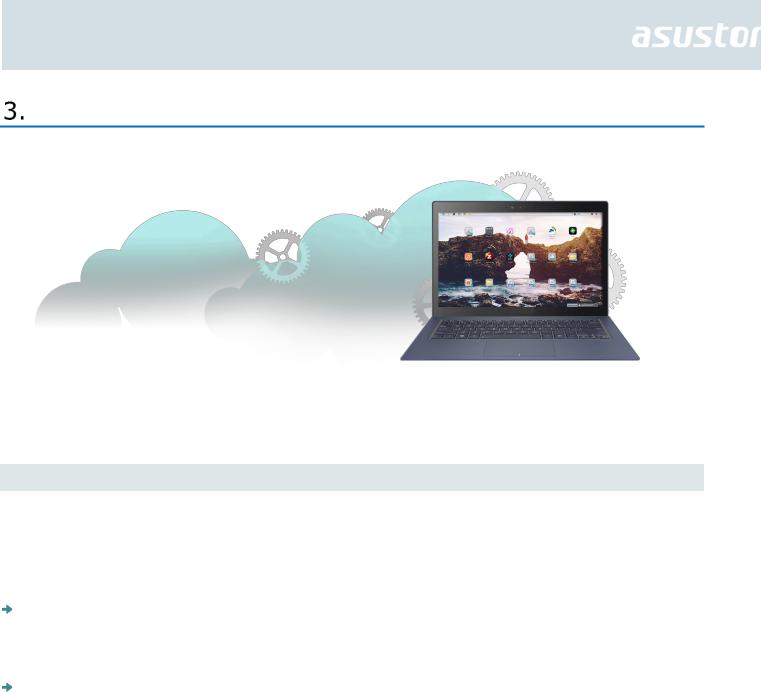
Enrich Your Mobile Life
Imagine having your photos, media files and important documents always at your fingertips. ASUSTOR offers an array of mobile applications to make your digital lifestyle complete.
App Central: Unleash the Unlimited Potential of NAS
The Apps that come pre-installed with ASUSTOR NAS are just the beginning. At your convenience, browse through and download any additional Apps that peak your interest from App Central. Explore the unlimited potential of ASUSTOR NAS while creating a personalized NAS for yourself.
Online Resources
Forum (English): http://forum.asustor.com
Downloads: http://www.asustor.com/service/downloads
Technical Support: http://support.asustor.com
Terms of Use
All ASUSTOR products have undergone stringent and comprehensive testing. Under normal user operation and within the warranty period, ASUSTOR will assume responsibility for any hardware failures. Before using this product, please read the End-User License Agreement (EULA) located at the end of this user manual.
8

Getting Started with ASUSTOR Data Master
This section will introduce you to the process of logging in, using Searchlight and using the taskbar in ASUSTOR Data Master (ADM).
Installing ASUSTOR NAS and ADM
Before you begin using your NAS, please make sure that you have installed hard disks, connected the NAS and have properly initialized it. For detailed instructions on setting up your ASUSTOR NAS and installing ADM, please see the Quick Installation Guide for your ASUSTOR NAS model. The Quick Installation Guide may be found on the Installation CD that came with your NAS or downloaded from the Downloads section of the ASUSTOR website (http://www.asustor.com/service/downloads).
Logging in to ASUSTOR Data Master
After installation and initialization, you can use the following methods to log in to your ASUSTOR NAS:
Use ASUSTOR Control Center to scan your local area network for ASUSTOR NAS devices. Select your NAS and then click on the “Open” button to go to bring up the login screen.
9
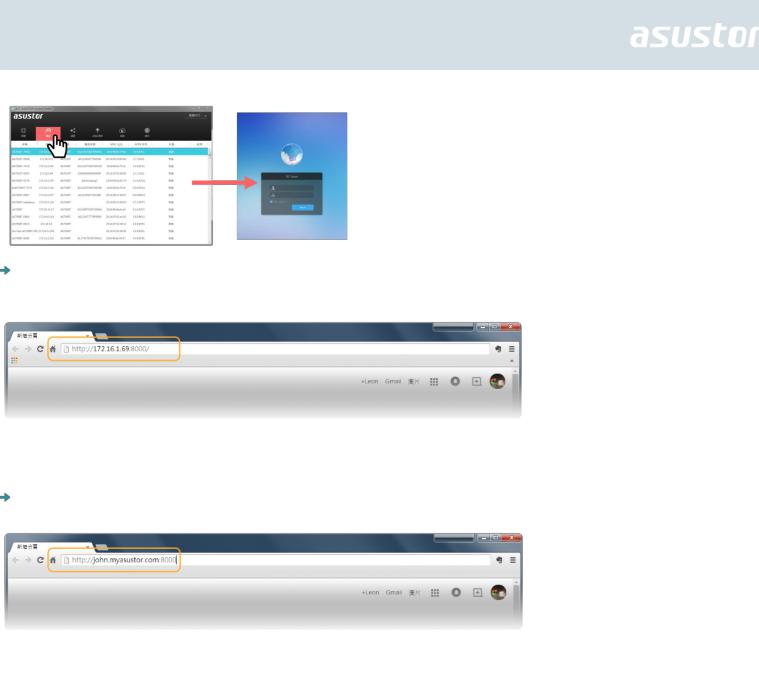
If you already know the IP address for your ASUSTOR NAS on your local area network, you can directly enter it into your web browser to connect to your NAS. For example: http://172.16.1.69:8000/
If you are connecting to your ASUSTOR NAS remotely, you can enter your personalized hostname into your web browser to connect to your NAS. For example: http://john.myasustor.com:8000
Reminder: When connecting remotely, please remember to register your NAS and then enable EZ Connect under [Settings] → [EZ-Connect] → [Enable EZ-Connect Service].
After configuring a Cloud ID for your NAS, you will be able to connect to it remotely using your customized hostname.
10

Searchlight
Developed by ASUSTOR, Searchlight is a rapid search technology that is built into ADM and provides quick and precise searches allowing you to easily find the files that you need. After logging in to ADM you will be able to find Searchlight’s magnifying glass icon on the taskbar in the upper right-hand corner of the screen.
11

Taskbar
The ADM taskbar allows you to directly [Pin to taskbar], [Restore], [Minimize], [Close] any Apps that are on it. In the [Account] menu you will see items for [Settings], [Sleep], [Restart], [Restart], [Shut down] and [Sign out].activity
Selecting [Settings] will provide you with tabs for [Personal], [Volume Usage] and [Theme].
Personal: Here, you can configure the account password, E-mail address, description and ADM language.
Volume Usage: Here, you can view information regarding your hard disk storage volumes such as usage and storage quota.
Theme: Here you can upload images to the NAS or select an image from the NAS to customize your desktop. You can also customize the ADM text colors, position of desktop wallpaper and remove desktop wallpaper. Desktop background themes can be changed according to user preferences. You can also upload their own images to use as the desktop background. The interface font and window button colors can now also be customized for added visual comfort.
12
Pre-Installed Apps
Pre-installed Apps include the configuration of function and service settings for hard disks and hardware. You can configure everything from system related settings to user access rights.
Settings
General
Here you can manage the system HTTP port and auto logout settings. Auto logout will logout users if they remain idle past the specified period of time.
System HTTP Port: This is used to specify the port you wish to use to connect to ADM’s web based user interface. You can access your NAS by opening a web browser and entering your IP address followed by a colon and the specified port number.
For example: http://192.168.1.168:8000
Timeout timer: For security concerns, users that remain idle past the specified period of time after logging on will be automatically logged off.
13
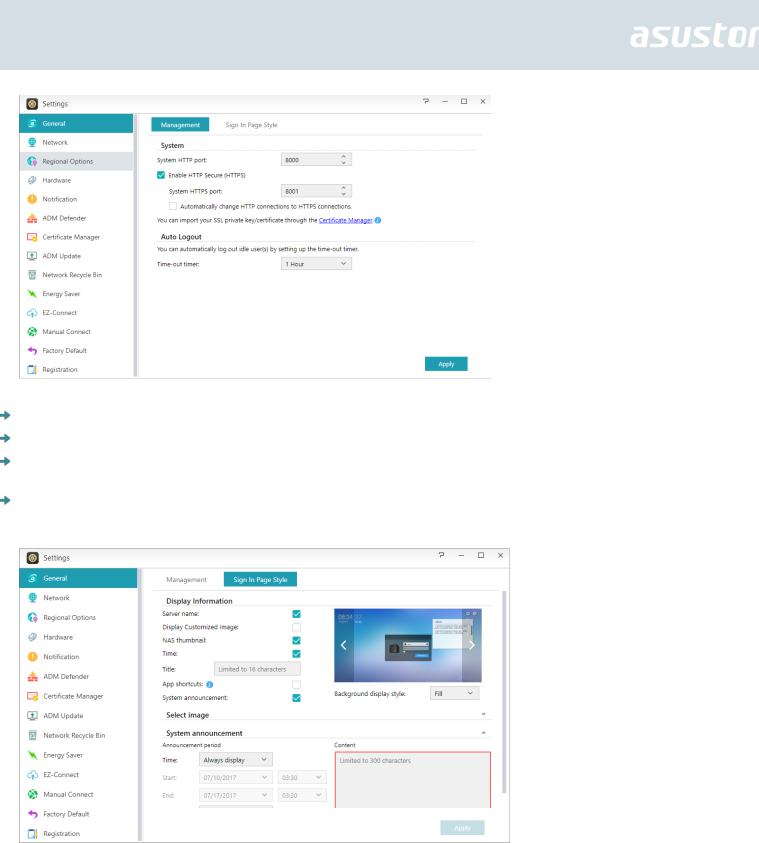
Sign in page: Under Sign In Page Style you will be able to configure the following: Sign In Page Title: The text entered here will be displayed on the sign in page.
Sign In Page Background Image: Here you can change the background image of the sign in page. The image formats currently supported are: JPG
Sign In Page Customized Image: Here you can choose to enable or disable the sign in page customized image. Using the crop function you can configure the position and size of the customized image. The image formats currently supported are: JPG
Network
Note: This function may differ depending on the NAS model in use.
Here you can configure the server name, LAN and Wi-Fi settings. Other settings include IP address, DNS server and default gateway.
14
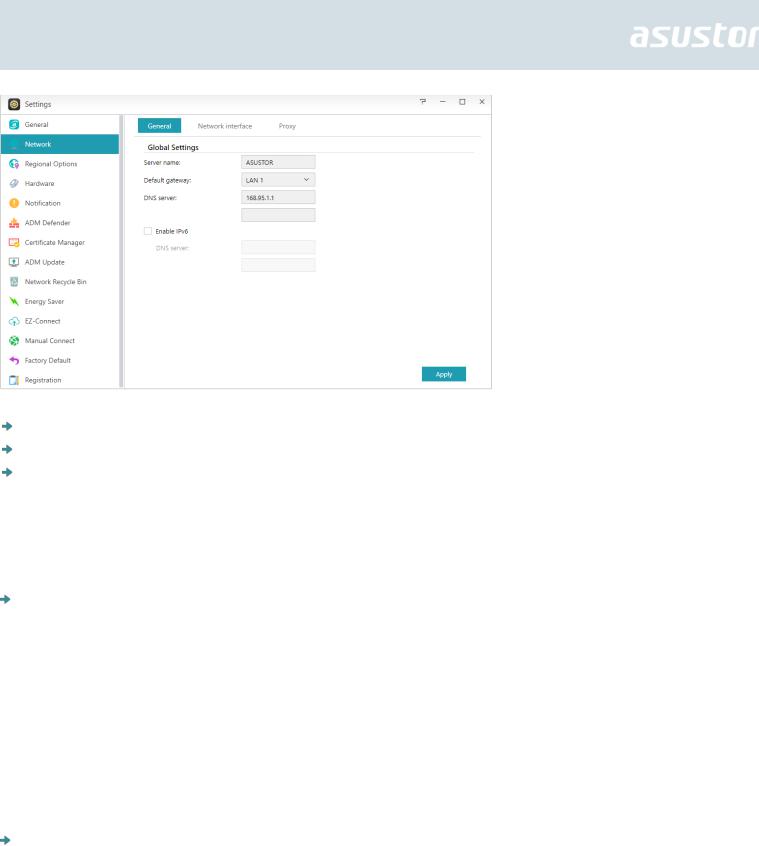
Server Name: An online name for your NAS.
Default Gateway: The default gateway that you wish to use.
DNS Server: Here you can set the DNS server that you wish to use. Should you choose to obtain your IP address via DHCP the system will automatically obtain the available DNS servers for you. If you choose to manually enter an IP address then you will have to manually enter a DNS server as well.
Reminder: Using an invalid DNS server will affect some network related functions. (i.e., Download Center). If you are uncertain about how to proceed, please choose to obtain your IP address automatically.
DHCP DHCP Server Settings: You can configure the DHCP settings only if the IP address was configured manually.
Lease time (hr): Enter a value (1-720) to set the DHCP lease time (in hours) for IP addresses assigned to DHCP clients.
Primary/Secondary DNS: Enter the Primary/Secondary DNS address for DHCP clients. Domain Name: Set the domain name for the DHCP server.
Subnet List: You can add subnets here.
DHCP Client List: Here you can check the list of DHCP clients and their network configurations (e.g. MAC address, IP address, hostname, and the amount of time left before the DHCP lease expires).
DHCP Reservations: If you want a client to always receive the same IP address during DHCP lease renewal, you can add the client to the DHCP reservation list.
Proxy: Here you can enable proxy server connections, allowing the NAS to connect to the internet via a proxy server.
Proxy Server: The address of the proxy server you wish to connect to. (Supports HTTP and HTTPS)
Port: The communications port of the proxy server.
Authentication: If the proxy server you are using requires authentication, you can enable it here and then enter your username and password.
15

PPPoE
If you are using DSL or a cable modem to connect to the Internet and your Internet service provider uses PPPoE (Point to Point Protocol over Ethernet), you can go to [Settings] > [Network] > [PPPoE] and enter your account information to allow the system to connect to the Internet without having to go through a router. If you wish to get more information about PPPoE, please contact your Internet service provider or network administrator.
VPN
Here you can let your ASUSTOR NAS become a VPN client, and via PPTP or Open VPN, connect to a VPN server to access a virtual private network. ASUSTOR NAS supports the use of different connection settings files, allowing you to connect to the VPN server of your choice. The ASUSTOR VPN client currently supports the two most common connection protocols: PPTP and OpenVPN.
Reminder: The VPN client cannot be used simultaneously with the VPN Server. If you need to use the VPN client, please first stop any use of the VPN server.
Link Aggregation
See More
NAS 105 – Networking: A Beginner’s Guide
NAS 307 – Networking: Link Aggregation
NAS 322 - Connecting Your NAS to a VPN
Regional Options
Here you can adjust the settings for date and time, display format, time zone and daylight saving time.
16

Hardware
Note: This function may differ depending on the NAS model in use.
Here you can configure settings for the LED indicators, buzzer, hard disk hibernation, power usage, fan speed and LCD display panel.
System: Here you can choose to disable any of the LED indicators to save power. By selecting "night mode", only the system power LED indicator will be enabled. It will flash an orange light every 10 seconds. "Night mode scheduling" will allow you to configure the start time and duration of night mode. You can also configure settings for the buzzer, reset button and infrared receiver here.
Disk Hibernation: Your hard disks will enter hibernation mode when left idle for the period of time specified here. Once in hibernation, the hard disk LED indicator on the front of the disk tray will flash
17
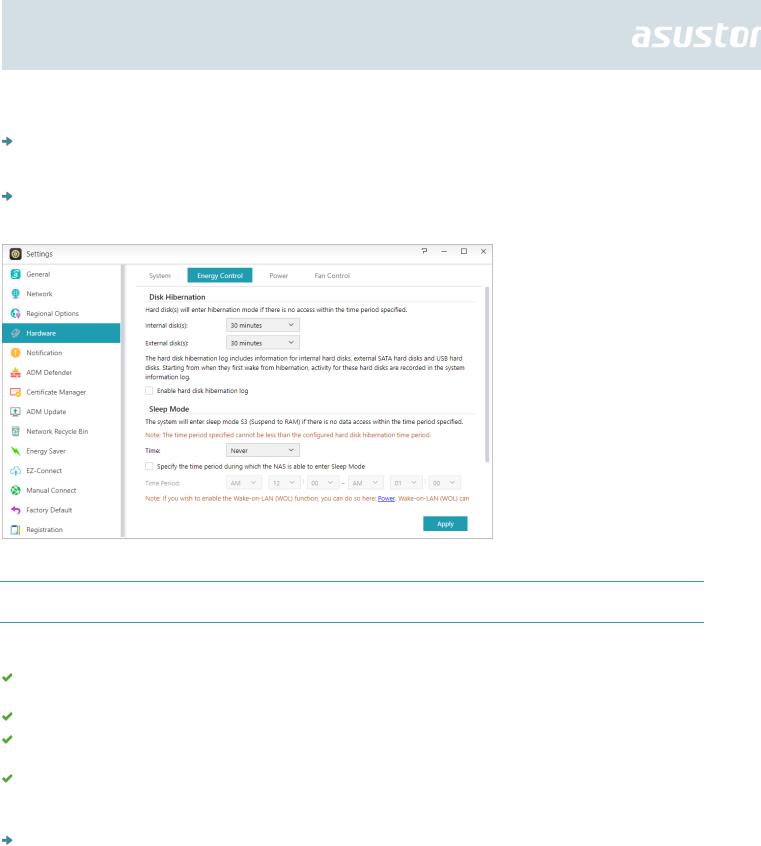
once every 10 seconds to indicate that the disk is hibernating. If an access error is detected on a hard disk, the LED indicator on the front of the disk tray will be lit red.
Sleep Mode: Here you can configure the time period the NAS will remain idle before automatically entering Sleep Mode (S3). In addition to RAM, all of the NAS’s hardware will stop running in order to conserve energy.
Diagnostic Tool: If the hard disk or system has not yet entered sleep mode during the specified time, you can click on "Diagnostic Tool" to find out which services and applications are still accessing the hard disk.
Why won’t my ASUSTOR NAS enter into Sleep Mode (S3)?
The following services will affect the NAS’s ability to enter into Sleep Mode (S3) as they require hard disk access while running.
Download Center, Takeasy download tasks, RSS scheduled downloads, unable to enter Sleep Mode (S3) when subscription downloads from multimedia websites are in progress
Unable to enter into Sleep Mode (S3) when Surveillance Center is recording
Unable to enter into Sleep Mode (S3) when the following Apps are syncing:Dropbox, Google Drive, ASUS WebStorage, BitTorrent Sync
Unable to enter into Sleep Mode (S3) when the following Apps are executing backup tasks: HiDrive, RALUS, WonderBox, Xcloud
Power: Here you can manage power usage settings such as Wake-On-LAN (WOL) and power scheduling.
18

Fan Control: Here you can set the rotation speed for the fan. If you are not sure about which speed to select, you can simply select Auto. This will automatically adjust the fan speed in accordance with the temperature of the system.
LCD Panel: You can have the LCD panel display a customized scrolling message or the local temperature. This function is only available on the following models: AS-604T, AS-606T, AS-608T, AS5104T, AS5108T, AS5110T, AS6204T, AS6208T, AS6210T, AS6404T, AS7004T, AS7008T, AS7010T.
19

Reminder: If you choose to display the local temperature, the system will use your current
IP address to determine the temperature at your present location. The results of this may vary, depending on your exact location.
Reset Button
If for some reason you cannot connect to your NAS, this button can be used to return a portion of the settings to their default values.
The system administrator account (admin) password will be reset back to “admin”.
The system HTTP and HTTPS ports will be reset back to 8000 and 8001 respectively.
The system will revert to automatically obtaining an IP address. You can then use ASUSTOR Control Center to search for your NAS.
ADM Defender will be reset and will allow all connections.
Reminder: You must hold the reset button down until you hear a "beep" for the settings mentioned above to be reset.
20
Notification
You can configure this setting to send you notification immediately in the event that the system encounters any problems.
Send: Here you can set the accounts that will be used for sending e-mail or SMS notifications. Multiple accounts can be set up but only one may be used as the primary account.
Receive: Here you can set up the accounts that will be used to receive e-mail and SMS notifications. You can also set the type of system notifications that will be received by these accounts.
Push Notification: Here you can enable the push notification setting for the AiMaster mobile app which can be downloaded from the Apple App Store or Google Play. When designated system events
21

occur, your ASUSTOR NAS will immediately send notification to the Apple/Google push notification server which will then forward it to your mobile device.
About Push Notification
If you wish to use this feature, you must first install AiMaster on your mobile device and enable push notifications on the device. Currently, AiMaster is available for both iOS and Android devices.
•Supports iOS 5.0 and onwards •Supports Android 2.2 and onwards
Downloading AiMaster
In order to download AiMaster please open the App Store (for Apple devices) or Google Play (for Android devices) on your mobile device and search for the keywords “asustor” and “AiMaster”.
22
Warning: Push notifications are transmitted to your device from Apple/Google’s push notification servers. A poor Internet connection or abnormalities in Apple/Google’s push notification service could potentially prevent AiMaster from correctly receiving notifications.
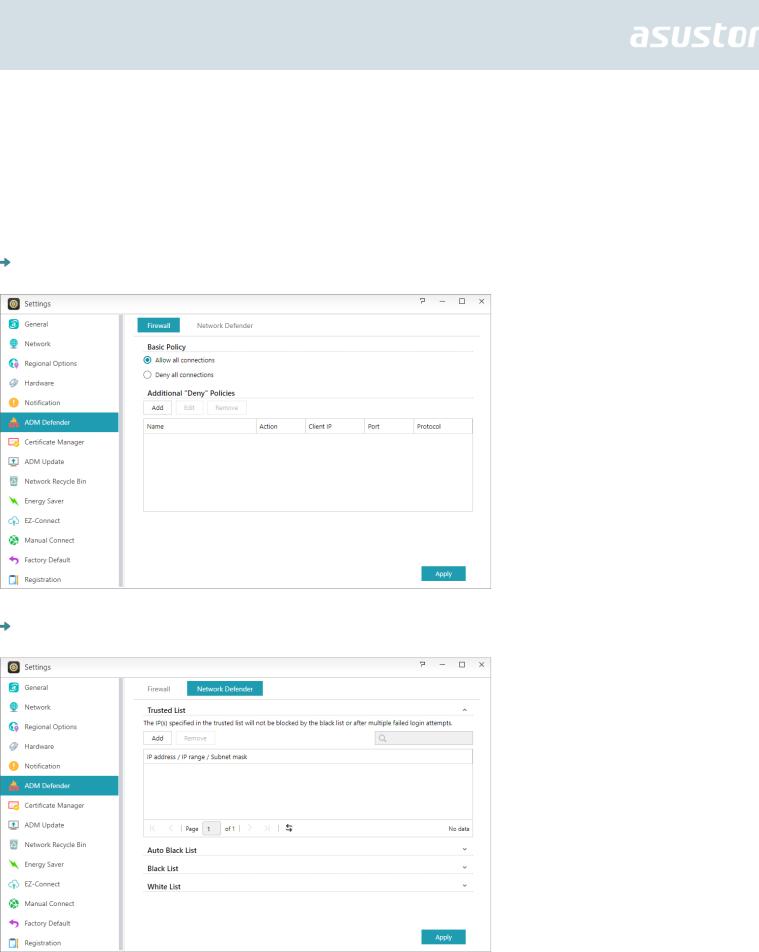
ADM Defender
ADM Defender can protect your NAS from malicious Internet attacks, ensuring the security of your system.
Firewall: Here you can block specific IP addresses or only allow specific IP addresses to access your NAS.
Trusted List: The IP(s) specified in the trusted list will not be blocked by the black list or after multiple failed login attempts.
23

Auto Black List: After enabling this function, the client IP address will be blocked if there are too many unsuccessful login attempts within the specified time period.
Black and White List: The Black and White list can be defined using IP address, range, and geolocation. If you wish to define the Black and White list using geolocation, please first install the Geo IP Database App.
About the Black and White List
The Black and White List can protect you from malicious attacks and prevent hackers from trying to access your NAS. Supported protocols are as follows:
ADM system login (HTTP & HTTPS)
Windows File Service (CIFS/SAMBA)
Apple Filing Protocol (AFP)
File Transfer Protocol (FTP) Secure Shell (SSH)
Certificate Manager
Using Certificate Manager, you can import a valid certificate to establish an SSL connection. All communication data (including identity credentials and transmitted information) among your NAS and all clients will be automatically encrypted over the SSL connection. This helps prevent the data from being eavesdropped on or modified over Internet. SSL applicable services on ASUSTOR NAS include:
ADM management connections (HTTPS)
Web server connections (HTTPS)
FTP server connections (FTPS)
Mail server connections (POP3s, IMAPs)
24

The Certificate Manager in ASUSTOR NAS can directly connect to Let’s Encrypt to generate a valid certificate and install it automatically. This helps you to enhance NAS security with an SSL connection in a fast and easy way at zero cost. Moreover, before the Let’s Encrypt issued certificate expires,
Certificate Manager can be configured to perform an automatic renewal.
See More
NAS 324 - Using HTTPS to Secure NAS Communication
ADM Update
Here you can obtain the latest version of ADM to ensure system stability and to upgrade software features.
Live Update: After enabling Live Update, the system will notify you of any available updates when you log in to ADM.
Set automatic scheduled updates: After enabling this option, the system will automatically check for available updates for Apps during the configured time. If updates are available, the system will automatically proceed to download and install them.
Note: If, during ASUSTOR App upgrades, the system shuts down or the upgrades are interrupted due to unknown causes, the system will attempt the upgrades again at the next scheduled time.
Manual Update: You can go to ASUSTOR’s official website http://www.asustor.com to download the latest version of ADM.
Network Recycle Bin
In order to enable the Network Recycle Bin for specific shared folders, please select “Access Control” > “Shared Folders”, and then select the desired shared folder. Next, click on the “Edit” button to configure it.
25
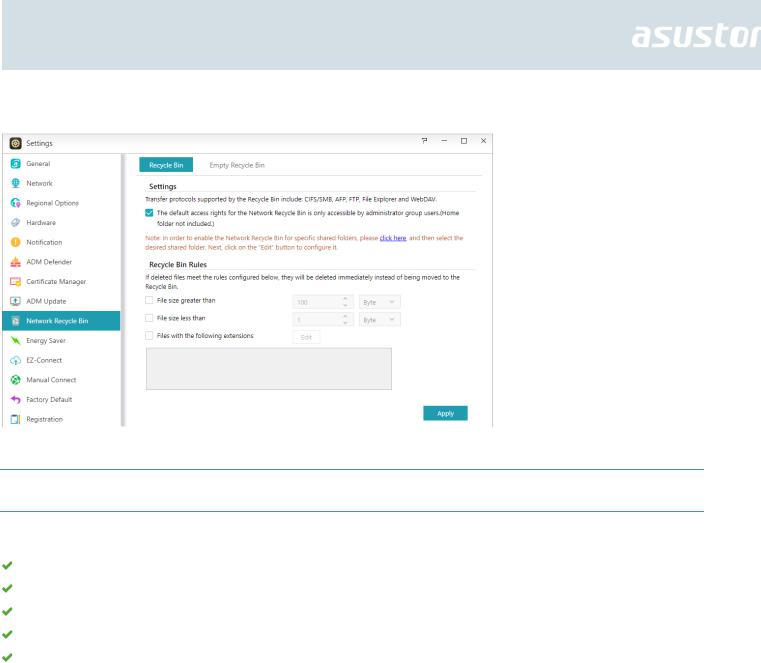
The configurations made on the “Recycle Bin” and “Empty Recycle Bin” tabs will be applied to all enabled Network Recycle Bins.
About Network Recycle Bin
After enabling Network Recycle Bin, all files deleted via the following protocols will be moved to the Recycle Bin.
Windows File Service (CIFS/SAMBA)
Apple Filing Protocol (AFP)
File Transfer Protocol (FTP)
File Explorer
WebDAV
Energy Saver
Energy Saver can help you to reduce power consumption when your NAS is inactive or being lightly used.
26

EZ-Connect
Here you can configure all the necessary settings for remote access.
EZ-Connect: Here you can obtain a Cloud ID for your NAS. By entering the Cloud ID into ASUSTOR client applications, you can access your NAS without having to enter the host/IP information.
Internet Passthrough: When your internal network environment contains multiple routers, you will be unable to use your Cloud ID to connect to your NAS. This function can help you to create a connection between the Internet and your NAS, allowing you to connect smoothly.
Manually Connect
27

Here you can configure all the necessary settings for remote access.
 EZ-Router: Here you can set up your network router automatically for direct NAS access from any device with Internet access.
Reminder: Your router must support UPnP/NAT-PMP. Please note that not all routers support automatic configuration. Please see the hardware compatibility list found on the ASUSTOR website for more information.
DDNS: Here you can create or configure your DDNS account. DDNS allows you to use a persistent host name (i.e., nas.asustor.com) to connect to your NAS. You won’t have to worry about remembering your NAS’s IP address. This feature is often used in dynamic IP environments.
Reminder: To know the network ports list used by ASUSTOR services, please refer to: What network ports are used by asustor services
28
See More
NAS 227 - Introduction to AEC (ASUSTOR EZ Connect)
NAS 224 - Remote Access - Manual Connect
Compatibility - EZ-Router
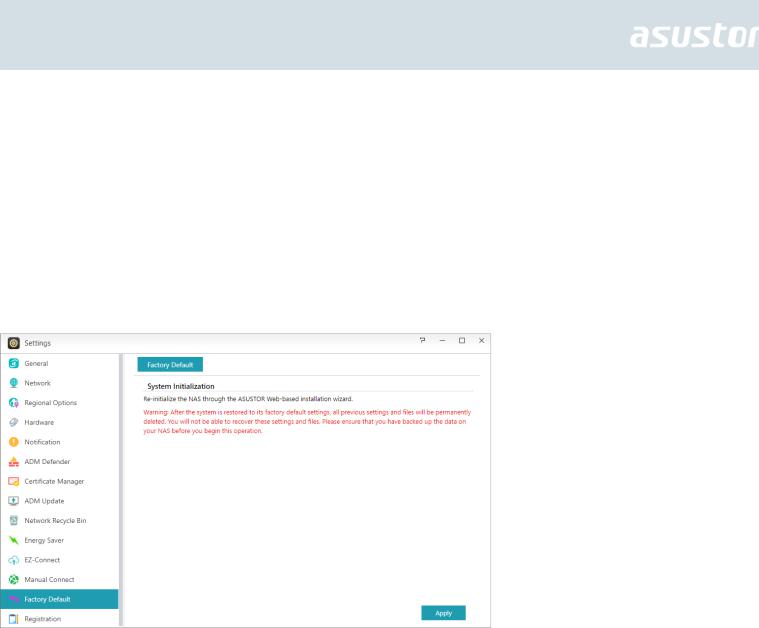
Factory Default
Here you can restore the system back to its factory default settings. After this, the system will return to its pre-initialized state. For security reasons, you will be asked to enter the administrator password before performing this operation. You can then initialize the system again through Control Center or by logging into ADM.
Warning: After the system is restored to its factory default settings, all previous settings and files will be permanently deleted. You will not be able to recover these settings and files. Please ensure that you have backed up the data on your NAS before you begin this operation.
Registration
Here you can sign up for a personal account (ASUSTOR ID) and register your product. Once the product has been registered, your ASUSTOR ID will be automatically enabled.
29

Reminder: A valid ASUSTOR ID is required for downloading any apps from the App Central or applying Cloud ID service.
Services
Here you can configure network related services such as FTP server, Web server and MySQL server.
Windows
After enabling Windows File Service, you can access your NAS via any Windows operating system (i.e., Windows 7). Windows File Service is also known as CIFS or SAMBA. If you are using Windows
Active Directory (hereafter referred to as “AD”), you can add your NAS to your AD domain.
Workgroup: This is the workgroup on your local area network that your NAS belongs to.
WINS server: Microsoft Windows Internet Name Service (WINS) is a NetBIOS name-to-IP- address mapping service. Window users will locate the system more easily on TCP/IP networks if the system has been configured to register with a WINS server.
Max protocol for Windows File Service: Here you can set the highest SMB level that will be supported by your ASUSTOR NAS depending on your network environment.
SMB 3: SMB 3 has been supported since Windows 8 and Windows Server 2012. It is the enhanced version of SMB 2.
SMB 2: SMB (Server Message Block) 2 has been supported since Windows Vista and is the enhanced version of SMB. SMB 2 adds the ability to compound multiple SMB actions into a single request to reduce the number of network packets and enhance performance.
Local Master Browser: After enabling this option, your NAS will, from your local area network, collect the names of all other computers in its workgroup.
Reminder: Enabling this feature may prevent your hard disk(s) from going into hibernation.
Allow only NTLMv2 authentication: NTLMv2 stands for NT LAN Manager version 2. When this option is enabled, login to the shared folders by Microsoft Networking will only be allowed using
30
 Loading...