

Asus RT-N66W Dual Band 3x3 Quick Start Manual

Quick Start Guide
RT-N66W Dual Band 3x3
Wireless-N900 Gigabit Router
®
E8665/ First Edition / Sept. 2013
E8665_RT-N66W_QSG.indd 1 9/17/13 12:43:38 PM
NOTE: For more details, refer to the user manual included in the
support CD.
E8665_RT-N66W_QSG.indd 2 9/17/13 12:43:39 PM
3
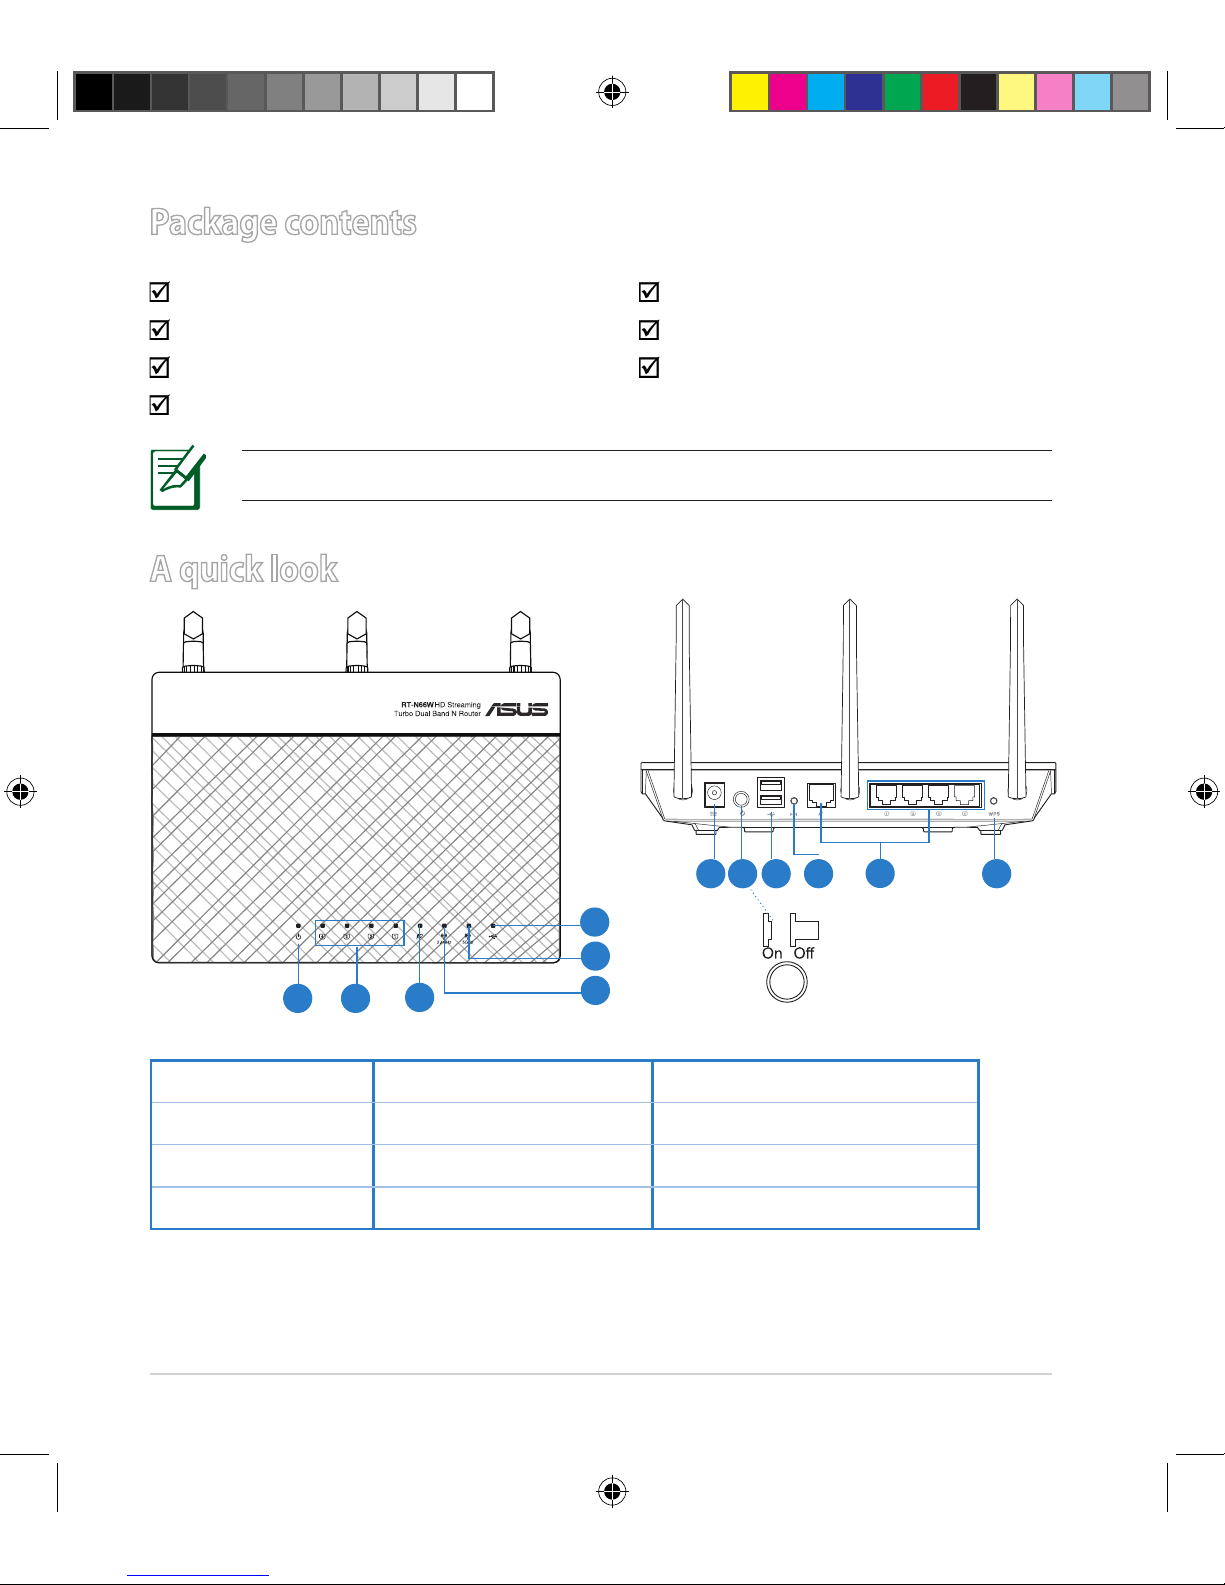
Package contents
RT-N66W AC adapter
Network cable Quick Start Guide
Support CD (User Manual/utilities) Warranty card
Stand
A quick look
1) Power LED 5) 5GHz LED 9) USB 2.0 ports
2) LAN LED 6) USB 2.0 LED 10) Reset button
3) WAN LED 7) Power (DC-In) port 11) Internet & LAN ports
4) 2.4GHz LED 8) Power switch 12) WPS button
NOTE: If any of the items is damaged or missing, contact your retailer.
7 9 10 12
11
8
1 2
3
5
6
4
E8665_RT-N66W_QSG.indd 3 9/17/13 12:43:40 PM

4
NOTES:
• USB External HDD/Flash disk:
• The wireless router works with most USB HDDs/Flash disks up to
3TB and supports read-write access for FAT16, FAT32, EXT2, EXT3,
and NTFS.
• To safely remove the USB disk, launch the web GUI
(http://192.168.1.1 or http://router.asus.com), then in the
Network Map page's upper right corner, click the USB icon and
click Eject USB 1.
• Incorrect removal of the USB disk may cause data corruption.
• For the list of le system and hard disk partitions that the wireless
router supports, visit
http://event.asus.com/networks/disksupport
• For the list of printers that the wireless router supports, visit
http://event.asus.com/networks/printersupport
E8665_RT-N66W_QSG.indd 4 9/17/13 12:43:41 PM
5
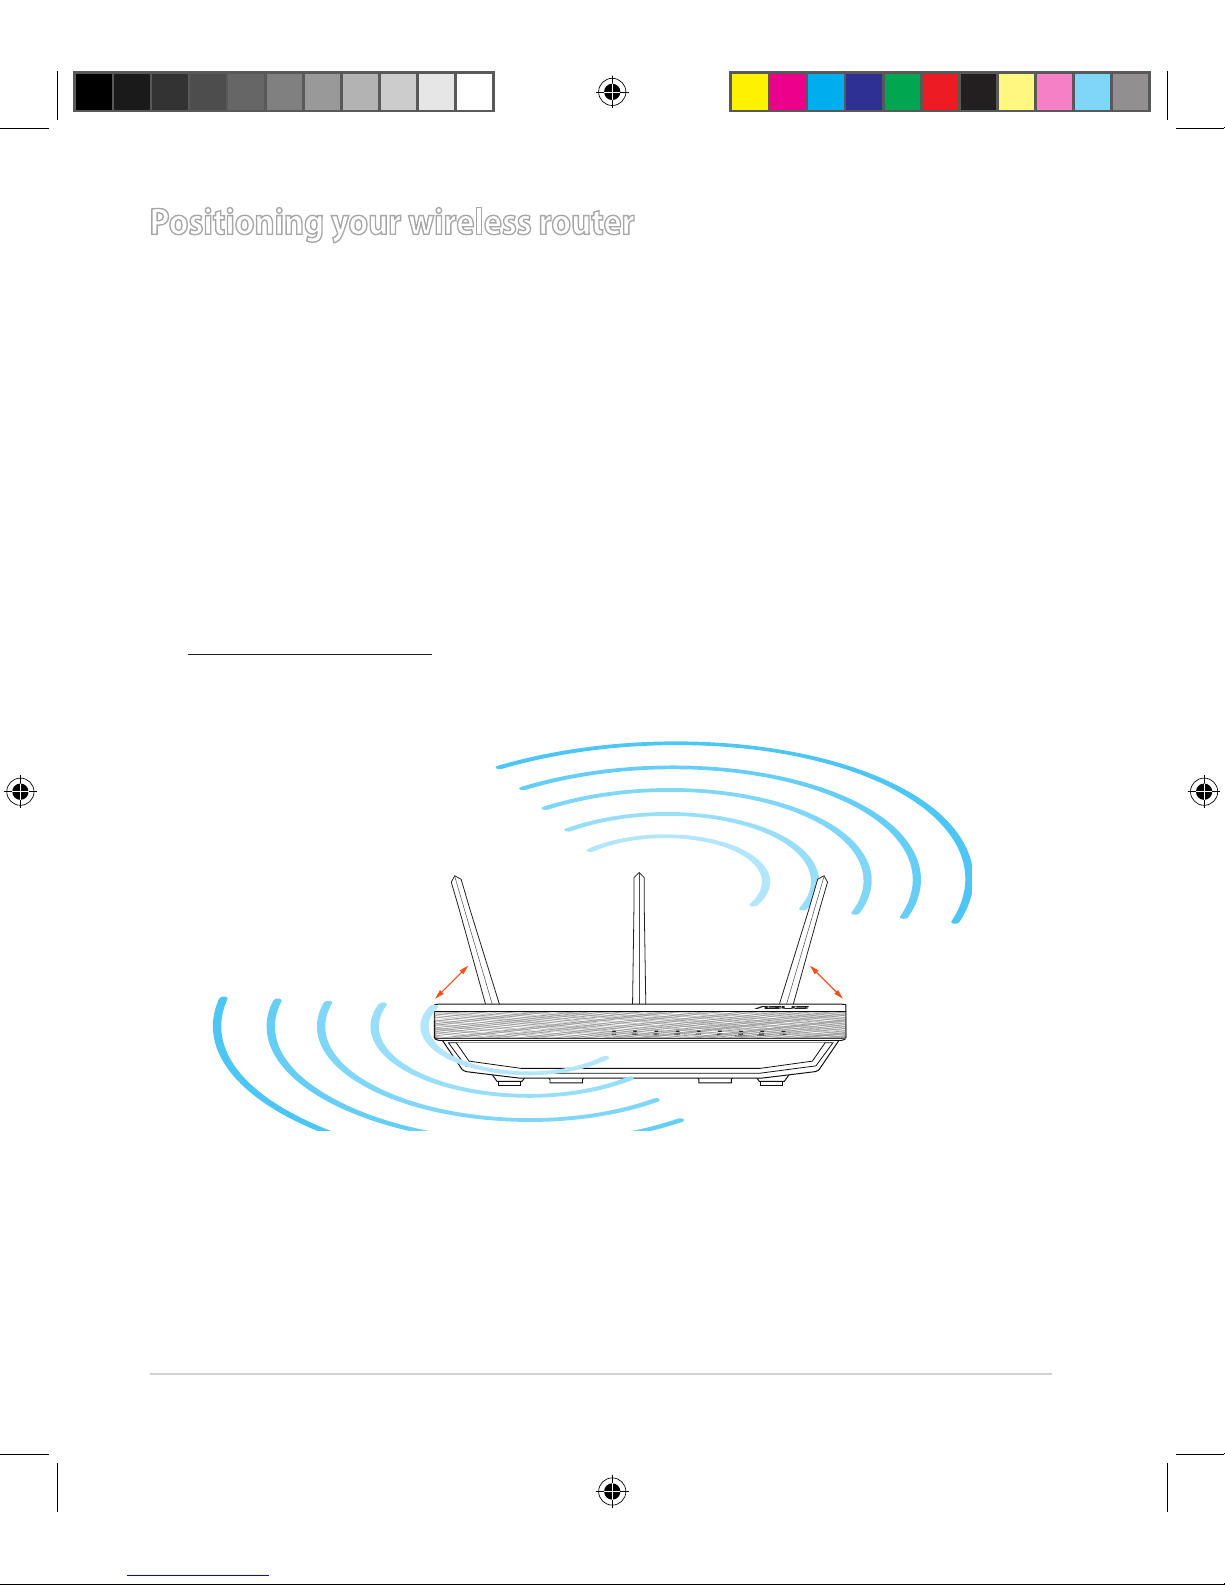
Positioning your wireless router
For the best wireless signal transmission between the wireless router and the
network devices connected to it, ensure that you:
• Place the wireless router in a centralized area for a maximum wireless coverage
for the network devices.
• Keep the device away from metal obstructions and away from direct sunlight.
• Keep the device away from 802.11g or 20MHz only Wi-Fi devices, 2.4GHz
computer peripherals, Bluetooth devices, cordless phones, transformers,
heavy-duty motors, uorescent lights, microwave ovens, refrigerators, and other
industrial equipment to prevent signal interference or loss.
• To ensure the best wireless signal, orient the three detachable antennas as
shown in the drawing below.
• Always update to the latest rmware. Visit the ASUS website at
http://www.asus.com to get the latest rmware updates.
45°45°
90°
E8665_RT-N66W_QSG.indd 5 9/17/13 12:43:41 PM
6
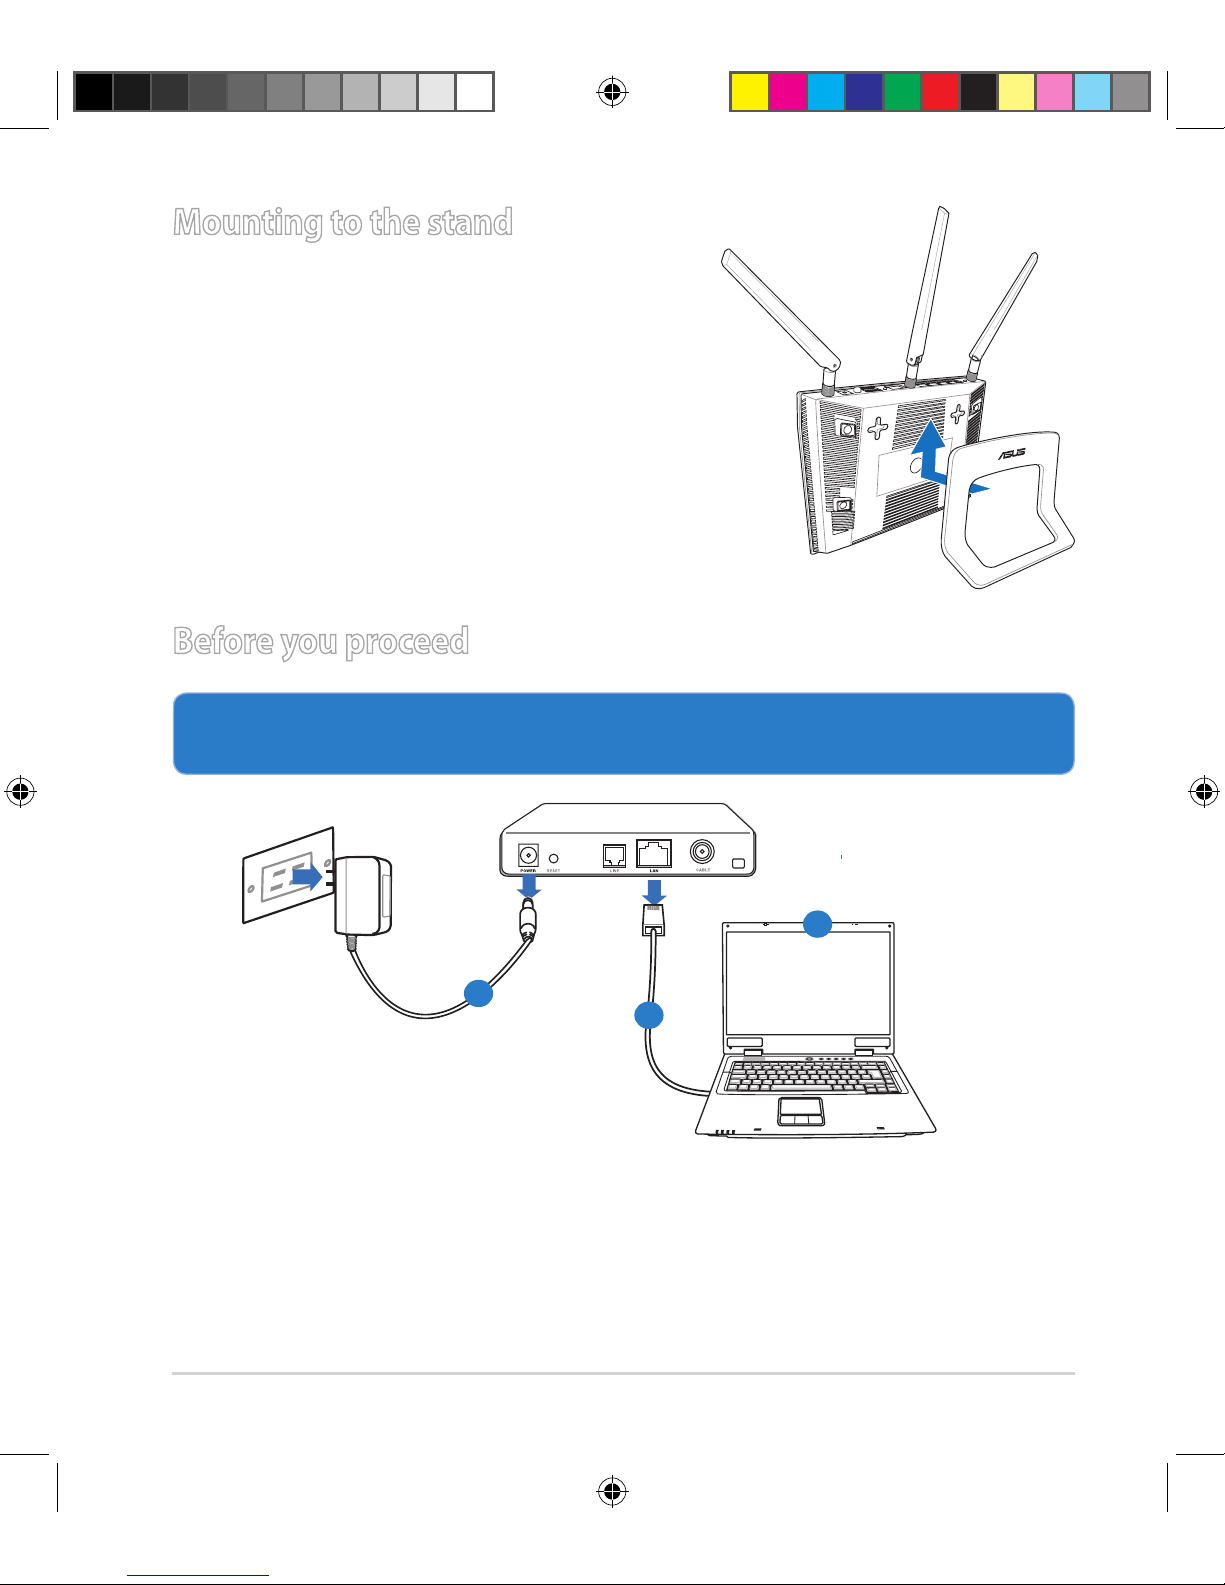
Mounting to the stand
• Align and insert the stand’s mounting hooks
to the wireless router’s mounting holes.
Before you proceed
1. Unplug and disconnect the wires/cables from your existing modem setup
and release your computer’s outmoded IP address.
a: Unplug the AC adapter from the power outlet and disconnect it from your
cable/ADSL modem.
b: Disconnect the network cable from your cable/ADSL modem.
c: Reboot your computer (recommended).
Modem
OFF
!
a
b
c
E8665_RT-N66W_QSG.indd 6 9/17/13 12:43:43 PM
7
WARNING! Before disconnecting the wires/cables, ensure that your
cable/ADSL modem has been turned o for at least two minutes. If your
modem has a backup battery, remove it as well.
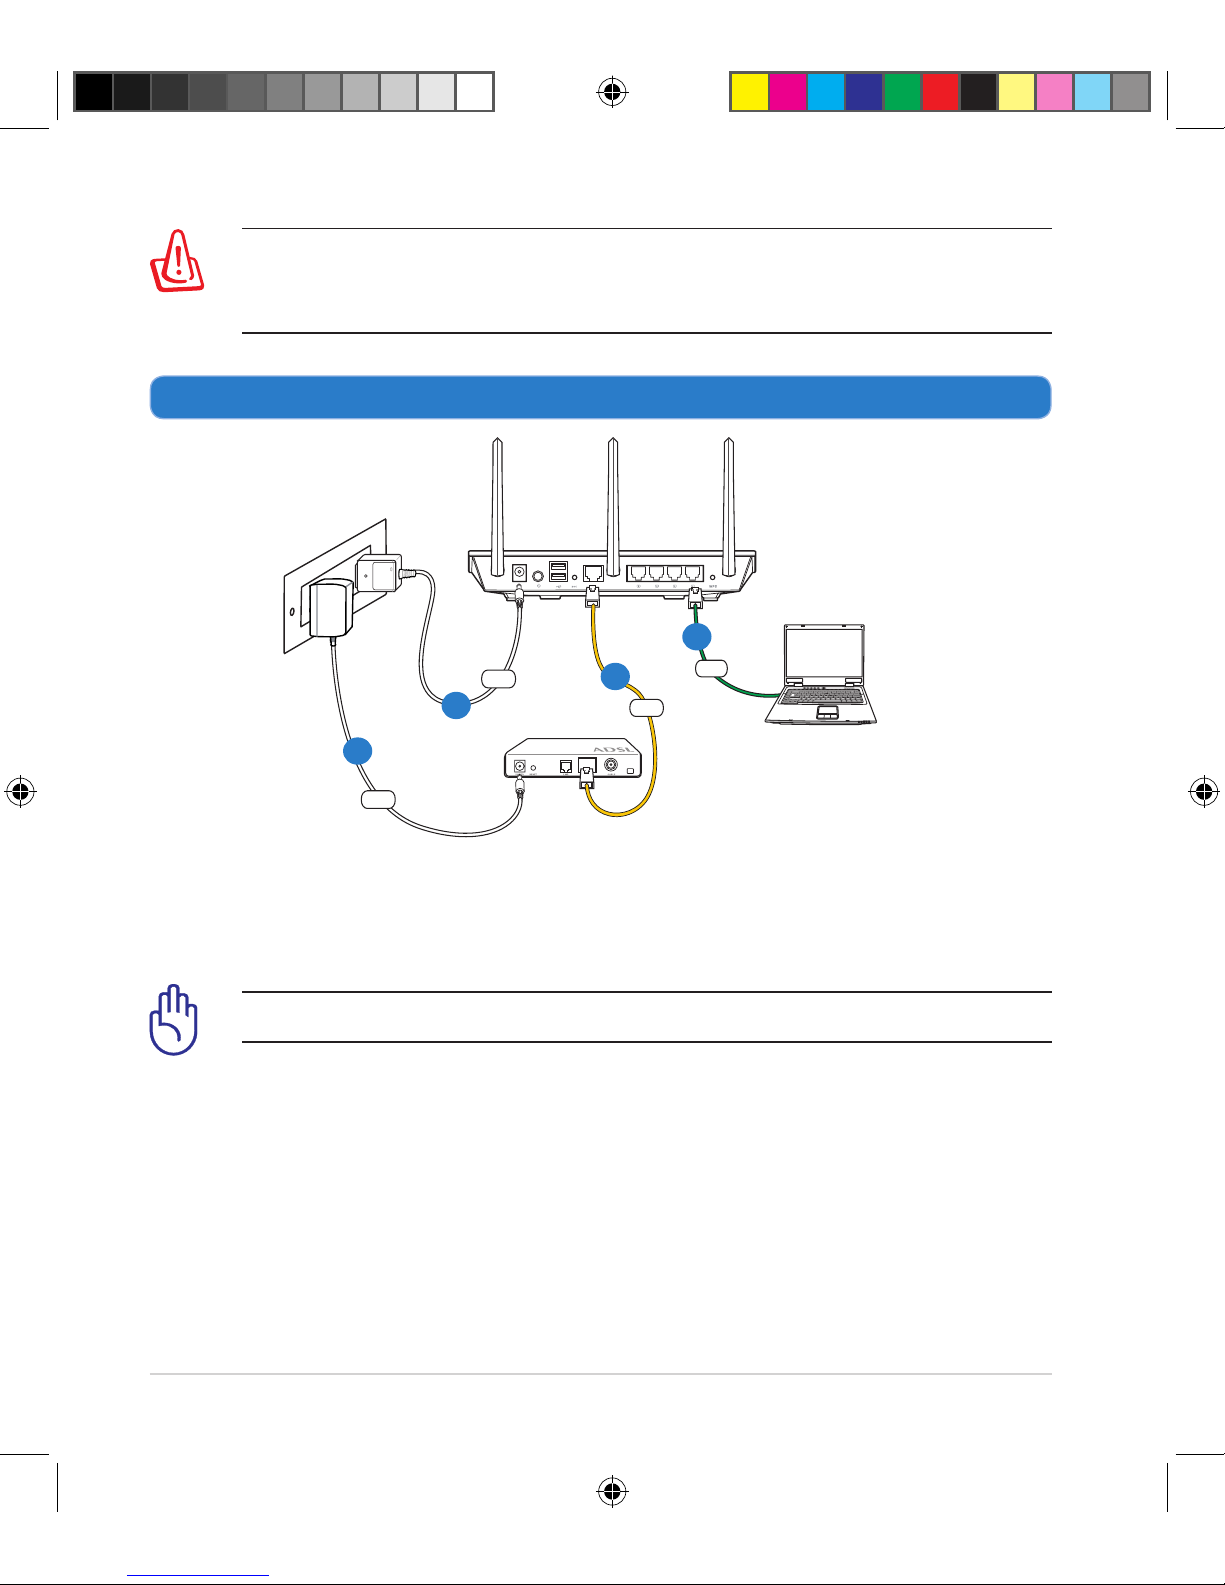
2. Set up your wireless environment.
RT-N66U
Computer
Modem
LAN
Power
Wall Power Outlet
Power
WAN
a
b
c
d
a: Insert your wireless router’s AC adapter to the DC-In port and plug it to a
power outlet.
b: Using the bundled network cable, connect your computer to your wireless
router’s LAN port.
IMPORTANT! Ensure that the WAN and LAN LEDs are blinking.
c: Using another network cable, connect your modem to your wireless router’s
WAN port.
d: Insert your modem’s AC adapter to the DC-In port and plug it to a power
outlet.
E8665_RT-N66W_QSG.indd 7 9/17/13 12:43:44 PM
8
3. Disable some settings on your computer.
A. Disable the proxy server, if enabled.
B. Set the TCP/IP settings to automatically obtain an IP address.
C. Disable the dial-up connection, if enabled.
NOTE: For more details on disabling your computer settings, refer to
Frequently Asked Questions (FAQs).
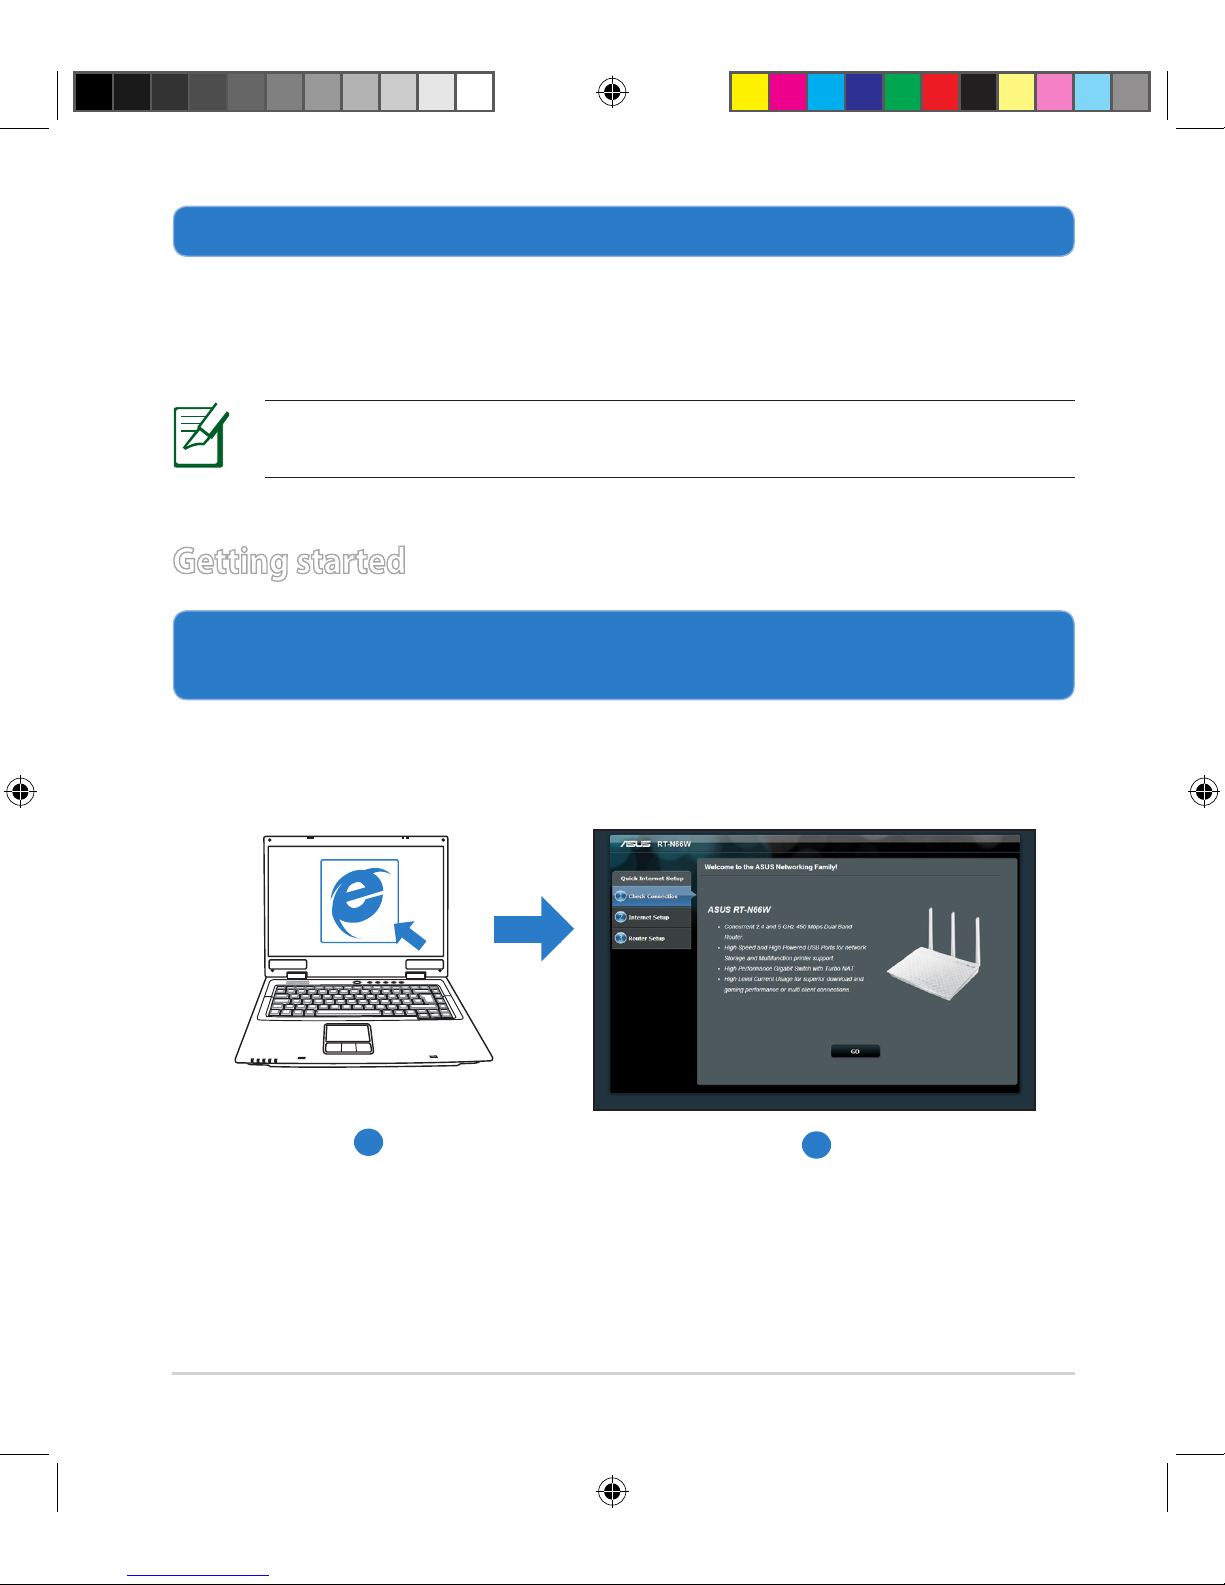
1. Congure your wireless settings via the wireless router’s web graphics
user interface (web GUI).
a: Launch your web browser such as Internet Explorer, Firefox, Google Chrome,
or Safari.
Getting started
b
a
E8665_RT-N66W_QSG.indd 8 9/17/13 12:43:46 PM
 Loading...