

Asus RMAPretest User Manual

1
AASSUUSS CCuussttoommeerr SSeerrvviiccee CCeenntteerr
RMA Pretest user Manual
Motherboard
Rev. 1.01

2
1.ASUS PRETEST FIXTURE PACK…………………………………………………………….3
Package Contests………………………………………………………………………………4
2.Customer pretest flow chart……………………………………………………………….5
3.Pretest operate description….……………………………………………………….6~12
4.Visual inspect fail description………………………………………………………13~14
5.ASUS Test program installation guide…………………………………………..15~18
6.Visual inspection………………………………………………………………………..19~25
7.Customer induce description……………………………………………………….26~30
8.Test tools introduction………………………………………………………………..31~40
9.Motherboard function test…………………………………………………………………41
10.Caution…………………………………………………………………………………………42
Contents

3
ASUS Pretest Fixtures Pack Rev. 1.00
Copyright (C)
ASUSTeK COMPUTER INC. All Rights Reserved.
Please read this document carefully; it contains important information about the “ASUS Pretest
Fixtures Pack (Rev. 1.00)”. Topics include:
- Customer Benefit
- Customer Responsibility
- Package Contents
Customer Benefit
Customers who have purchased the “ASUS Pretest Fixtures Pack” will obtain the advantage as shown
below:
1. Process RMA pretest on-site.
2. Process troubleshooting efficiently.
3. Reduce NDF(No Defect Found) rate and save shipping cost.
Save TAT(Turn Around Time). ASUS will keep auditing the return NDF rate monthly. If it keeps
under 10%, ASUS will provide higher RMA priority and 10 working days of TAT for customers who
have done the Pretest.
4. ASUS will provide one year non-periodical software update.
Customer Responsibility
Any documents, software, fixtures or know-how, which relates to the “ASUS Pretest Fixtures Pack” are
belong to ASUS confidential information. Customers must follow the items to purchase this package
and than get the advantage from it:
1. Sign the NDA(Non-Disclosure Agreement) before purchasing it.
2. Following ASUS RMA return procedure and fill in the necessary documents to
send the RMA products back to ASUS.
3. Provide test report to ASUS for future analysis.
4. All testing fixtures are forbidded to be resold.
Notice:
Customers who doesn’t follow the instruction to fill in & provide the necessary documents won’t get
higher RMA priority.ASUS have the right to decide whether to stop providing software updates to
customers.
4
Package Contents (70R-R00FT1000)
Test Fixtures
15-093004001 M017 CD-ROM TX97 Test CD *1
22-060000210 CABLE 20P IDC (L:100mm) *1
22-060000310 PGA 296P SOCK *1
22-060000320 PGA 370P SOCK *1
22-060001031 PGA 423P SOCK *1
22-060001020 PGA 462P SOCK *1
08-900006600 KLAMATH SIGNAL CARD (1.6m/m,2L,14*4.5cm ) *1
08-900009900 ENG_K7-S2K PIN TO NAME TEST (R1.00,4L,1.6mm,5670*2331 ) *1
60R-R00IR1000 IR LOOP BACK (1*5) *1
60R-R00IR1001 IR LOOP BACK (2*5) *1
60R-R00LA1000 LAN Fixture *1
70R-R00FT1010
MR MODEM CARD WS-5614DML (SOFTWARE MODEM CARD FCC) *1
20-201100075 ATX TO AT Cable *1
22-060001280 AUDIO CABLE (HOUSING*3(BLACK)) *1
22-060001290 AUDIO CABLE ( HOUSING*1B+HOUSING*2W ) *1
70-C1OG10-01 COM PORT-1 (REV1.00) *1
70-C1OG14-02 SWBO-OEM (REV2.00) *1
70-C1OG15-02 SWBO-ASUS (REV2.00) *1
80-C1G002-0202 ENG_PRT (R2.02) *1
80-C1G024-0100 ENG_GPORT_A (R1.00) *1
80-C1OG29-0100 PORT80M (R1.00) *1
22-210005890 User Manual
AND Test Program CD *1
5
Customer Pretest flow chart
N
Y
N
Y
N
N Y
N
l
Y
Y
N
END
Y
Visual inspection
Repairable?
Return
to customer
Plug in CPU test card on
CPU_Slot(Socket).
1.Turn on the power supply
2.Check CPU volta
g
e
Please fill the Diagnostic
card
No component
dama
g
ed
Paste arrow
sticker on
damage
component
1. Turn off power supply
2. Plug in (Com_port,Printer_port,USB,LAN,game,IR
port)Loopback and connect
floppy,hardisk,CD_ROM
Swbo board….
CMOS load Setup
Defaults
Update
BIOS
Execute Asus M/B
Pretest program
Test M/B
Function
Windows OS
(USB TEST)
1. Turn OFF Power supply
2. Remove CPU test card
Plug in cpu,Ram,port80M
1.Turn on the power supply
2.Check post code”C1”is
Asus mainboard test ok,Please
fill pretest report
1.Customer company
2.Pretest finish date
3.Mainboard model
4.Mainboard S/N
Send Report to ASUS TSD
contact window
Send M/B to Asus RMA
6
Pretest operate description
1
2
3
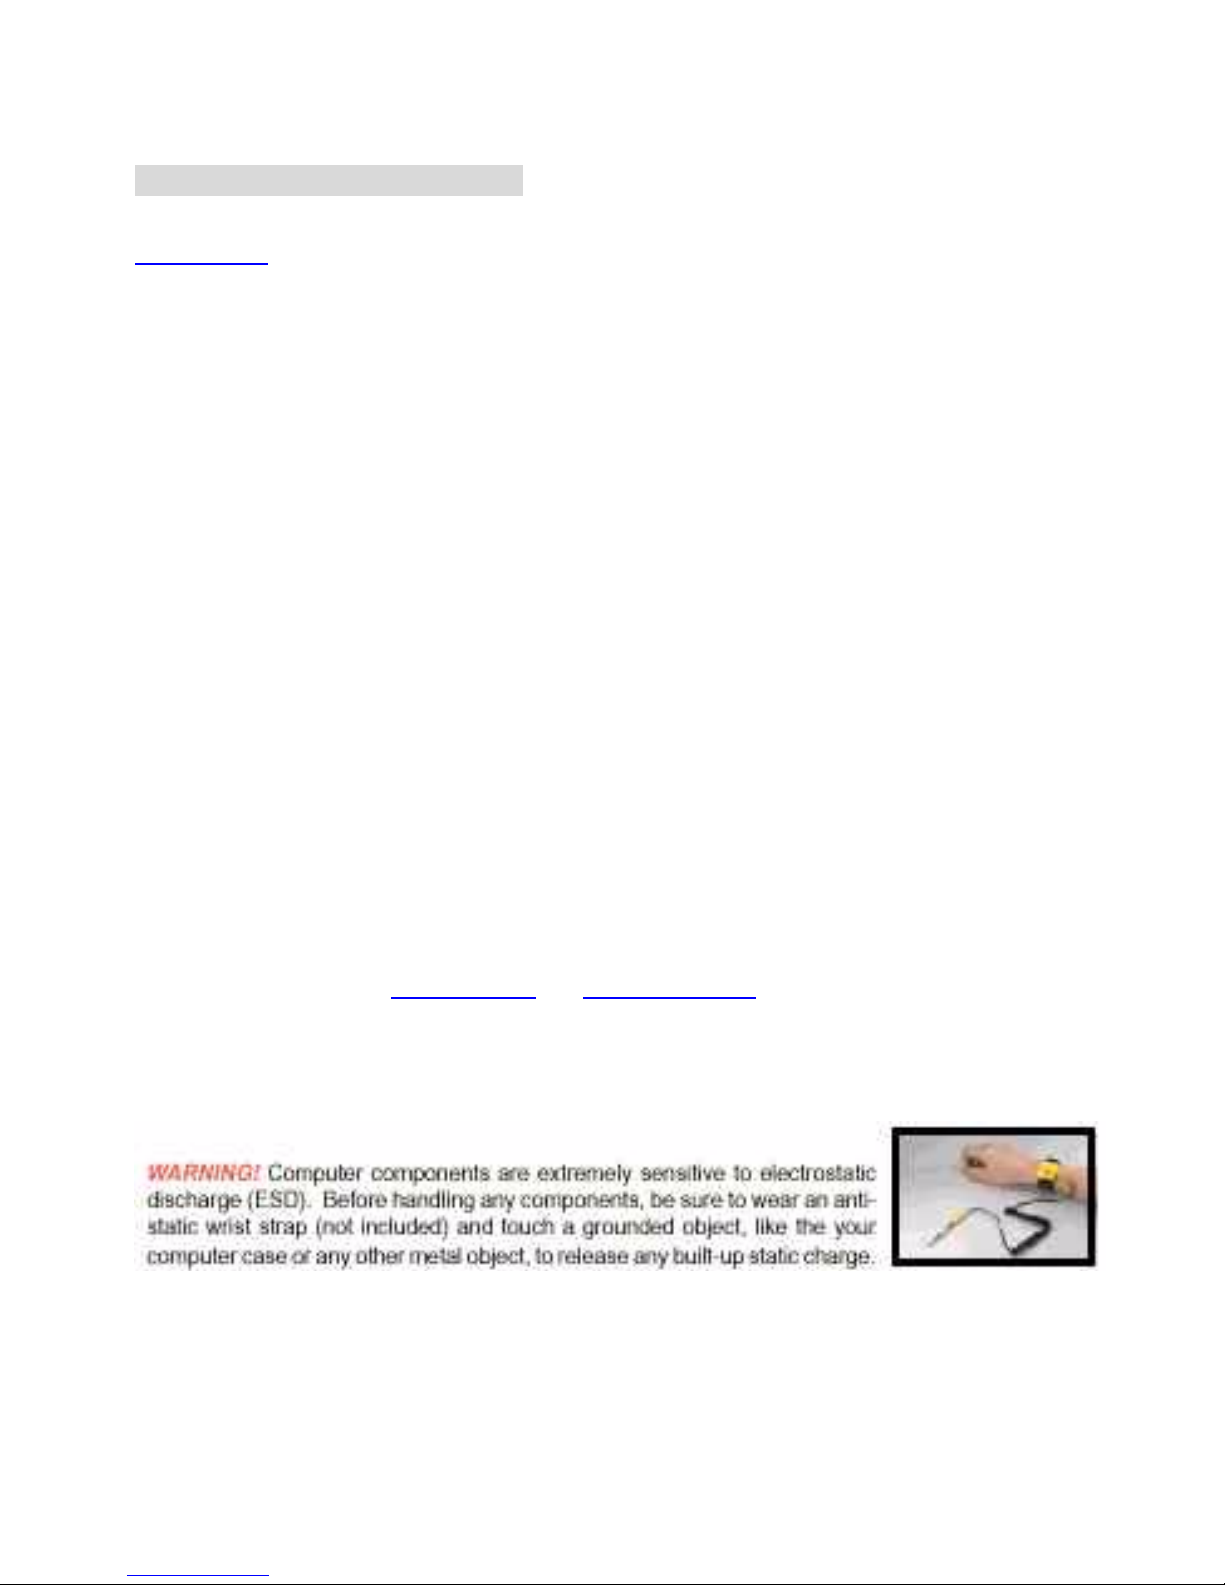
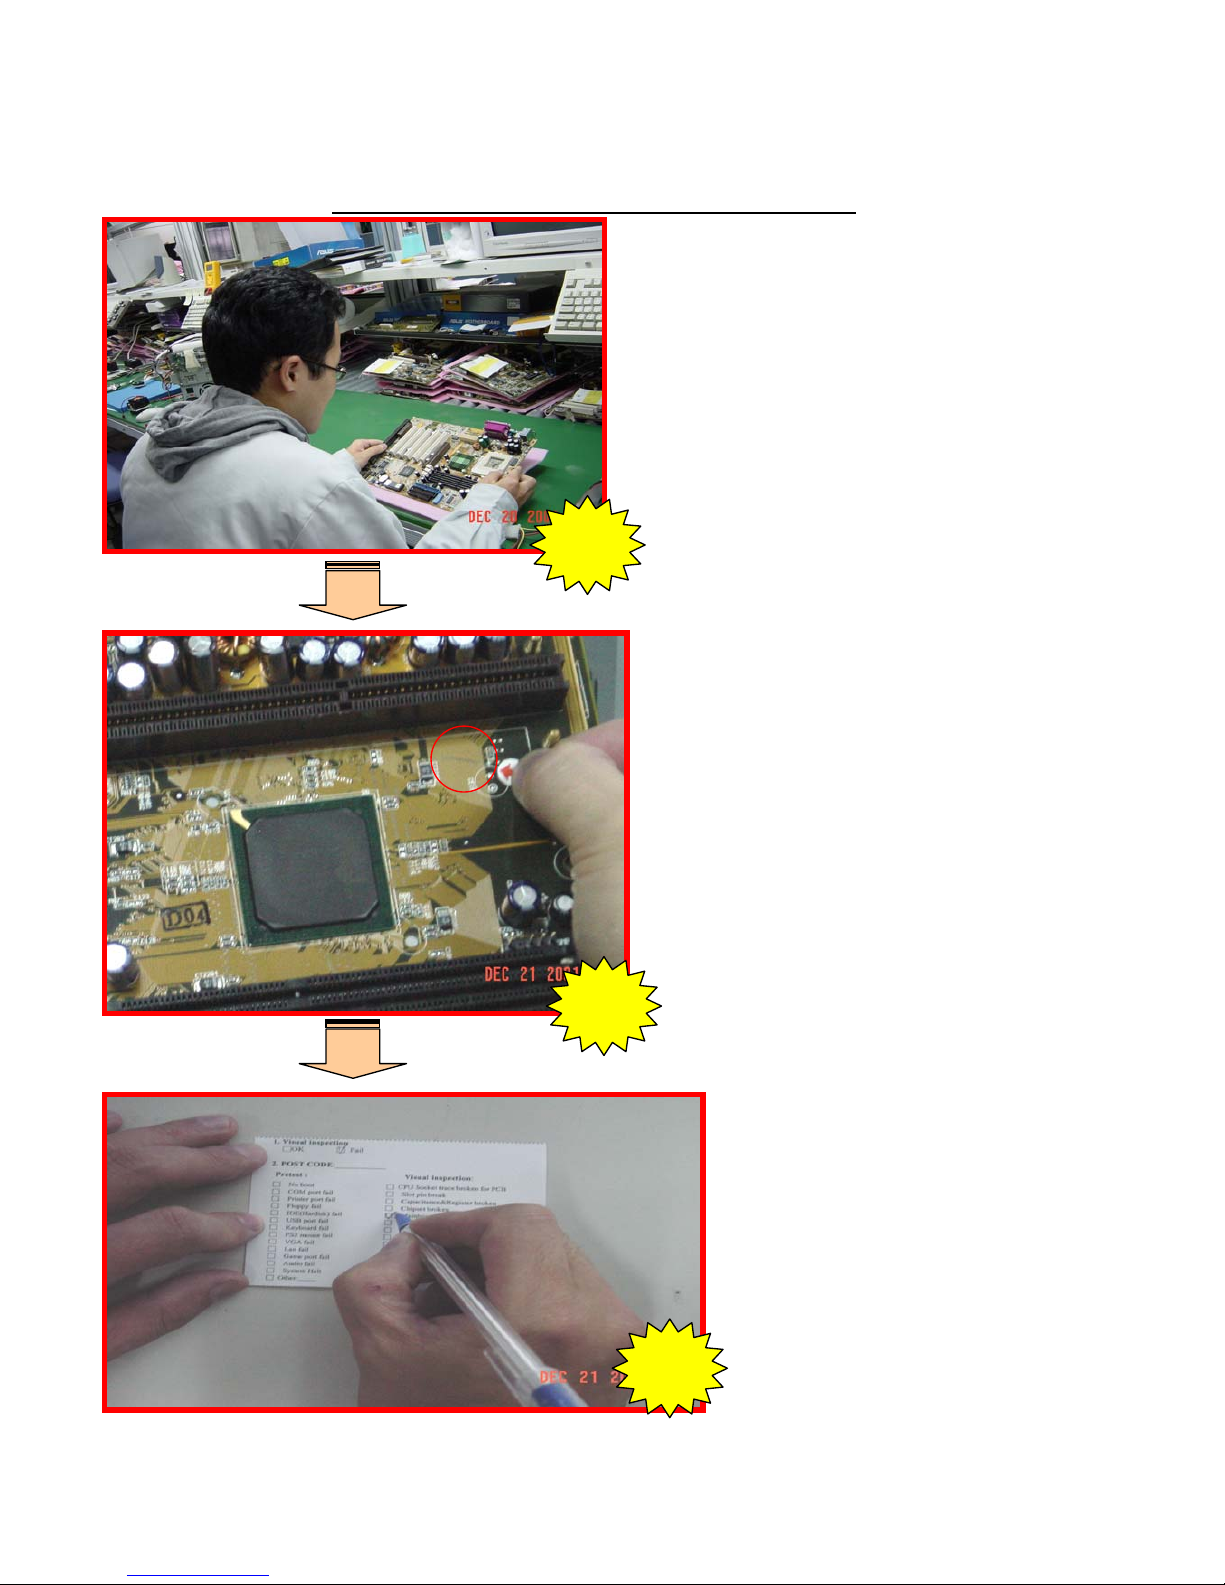
Visual inspection:
1. Inspect M/B have broken,oxidized…..
(Please refer
Visual inspection description)
2. Customer induce or not.
(Please refer
Customer Induce Description)
3. If any M/B components failed to work
after inspection,please paste the arrow
stacker and write on Diagnostic Card
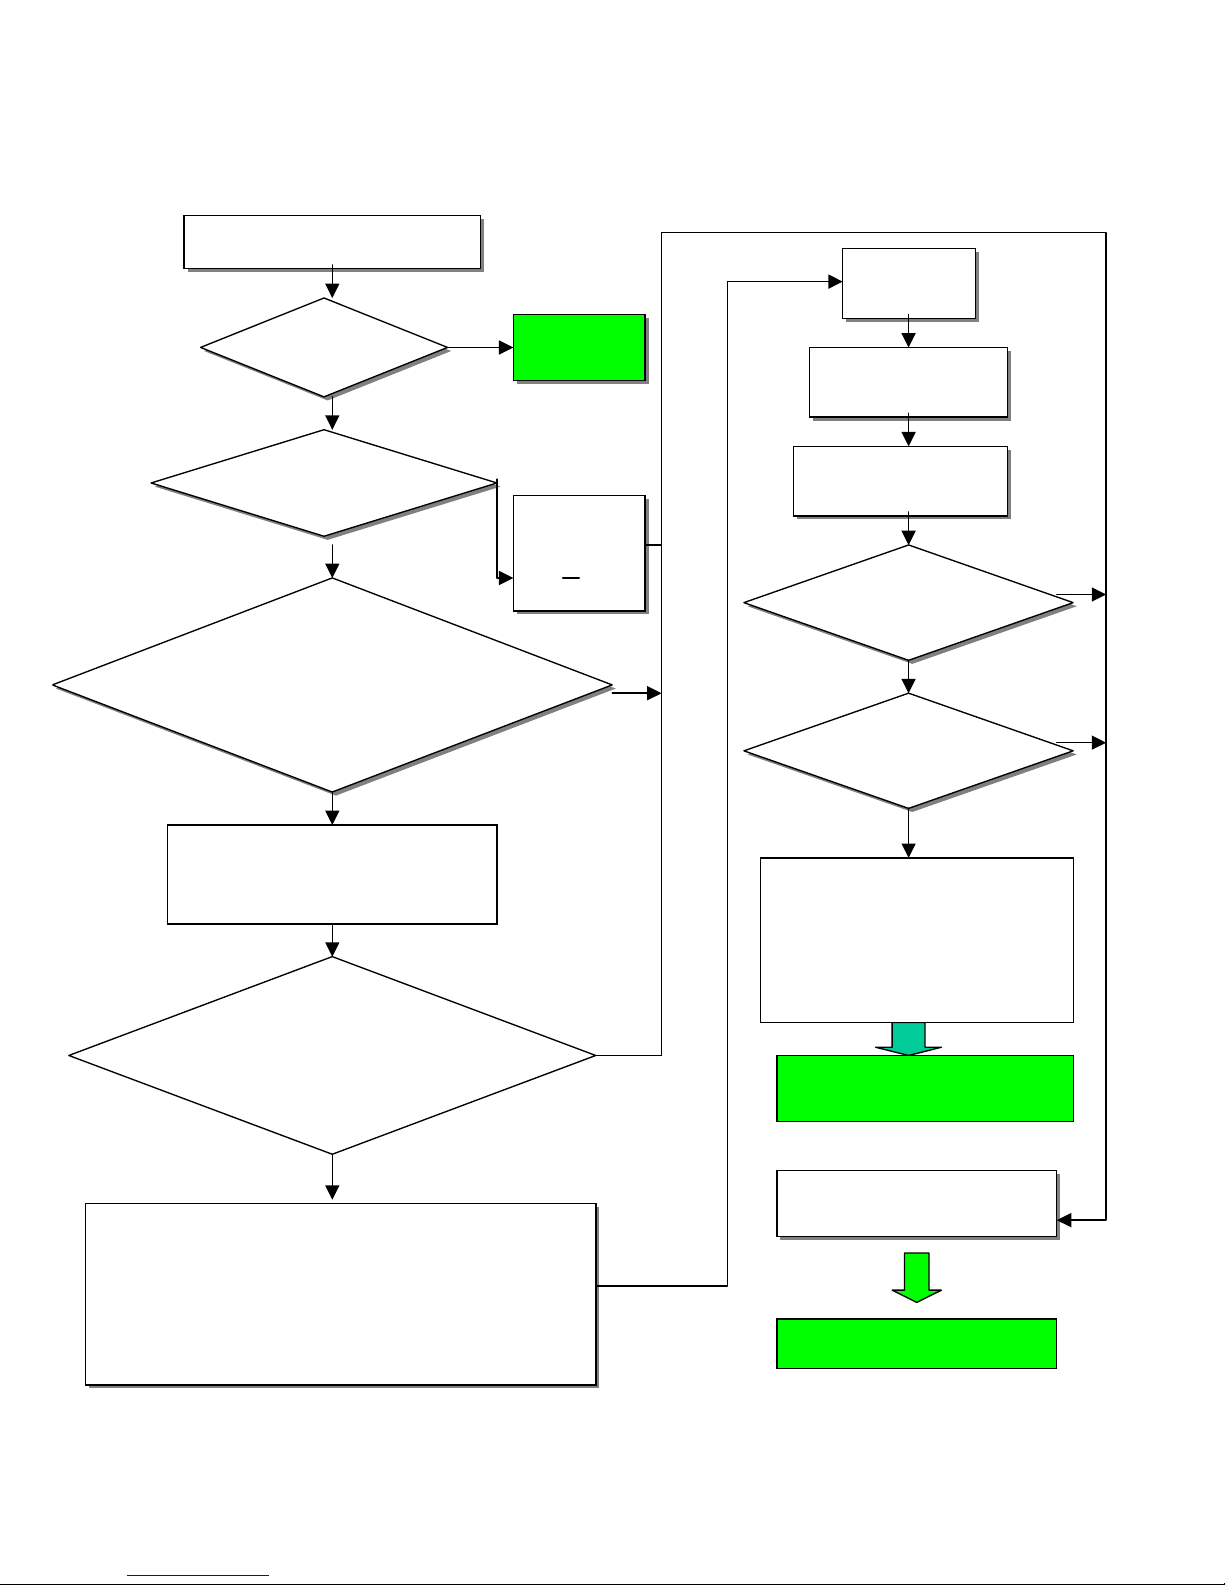
If Visual inspection is OK.
Please plug in the power connector on Motherboard
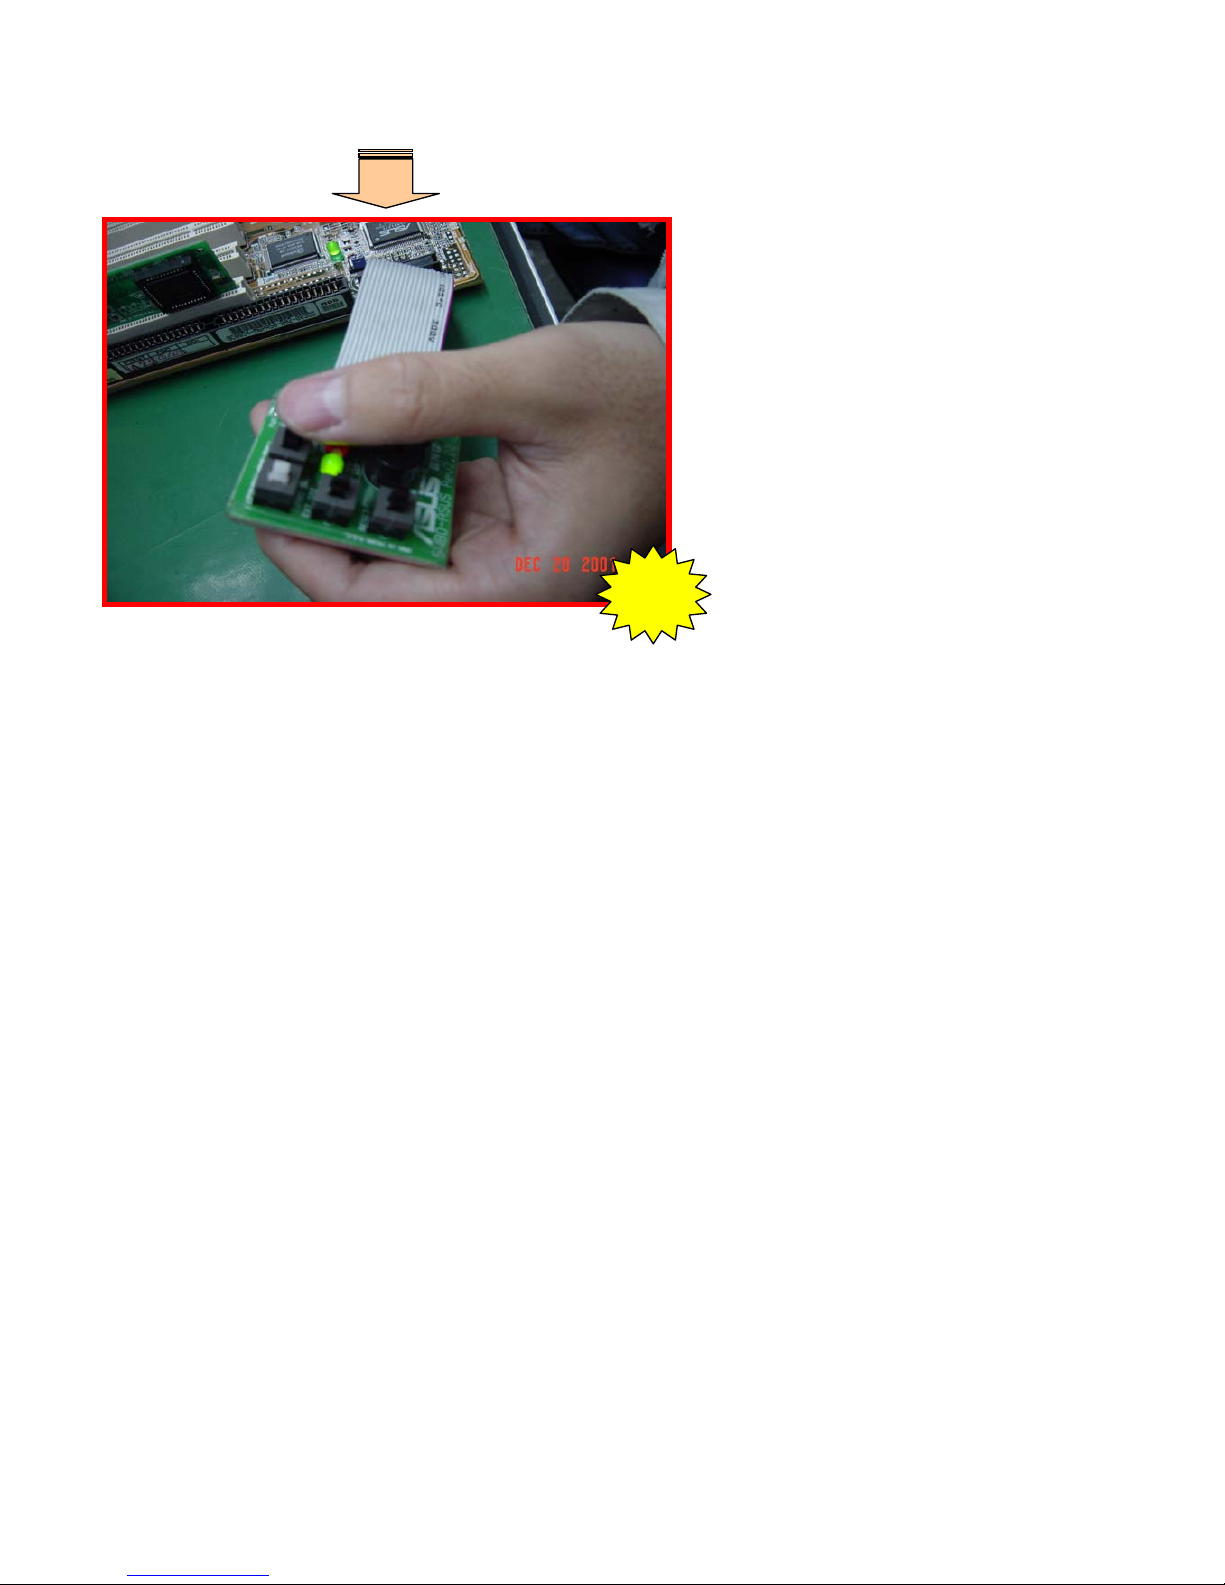
Plug in CPU test Card on CPU_Slot(Socket) and
Turn on power supply.
7
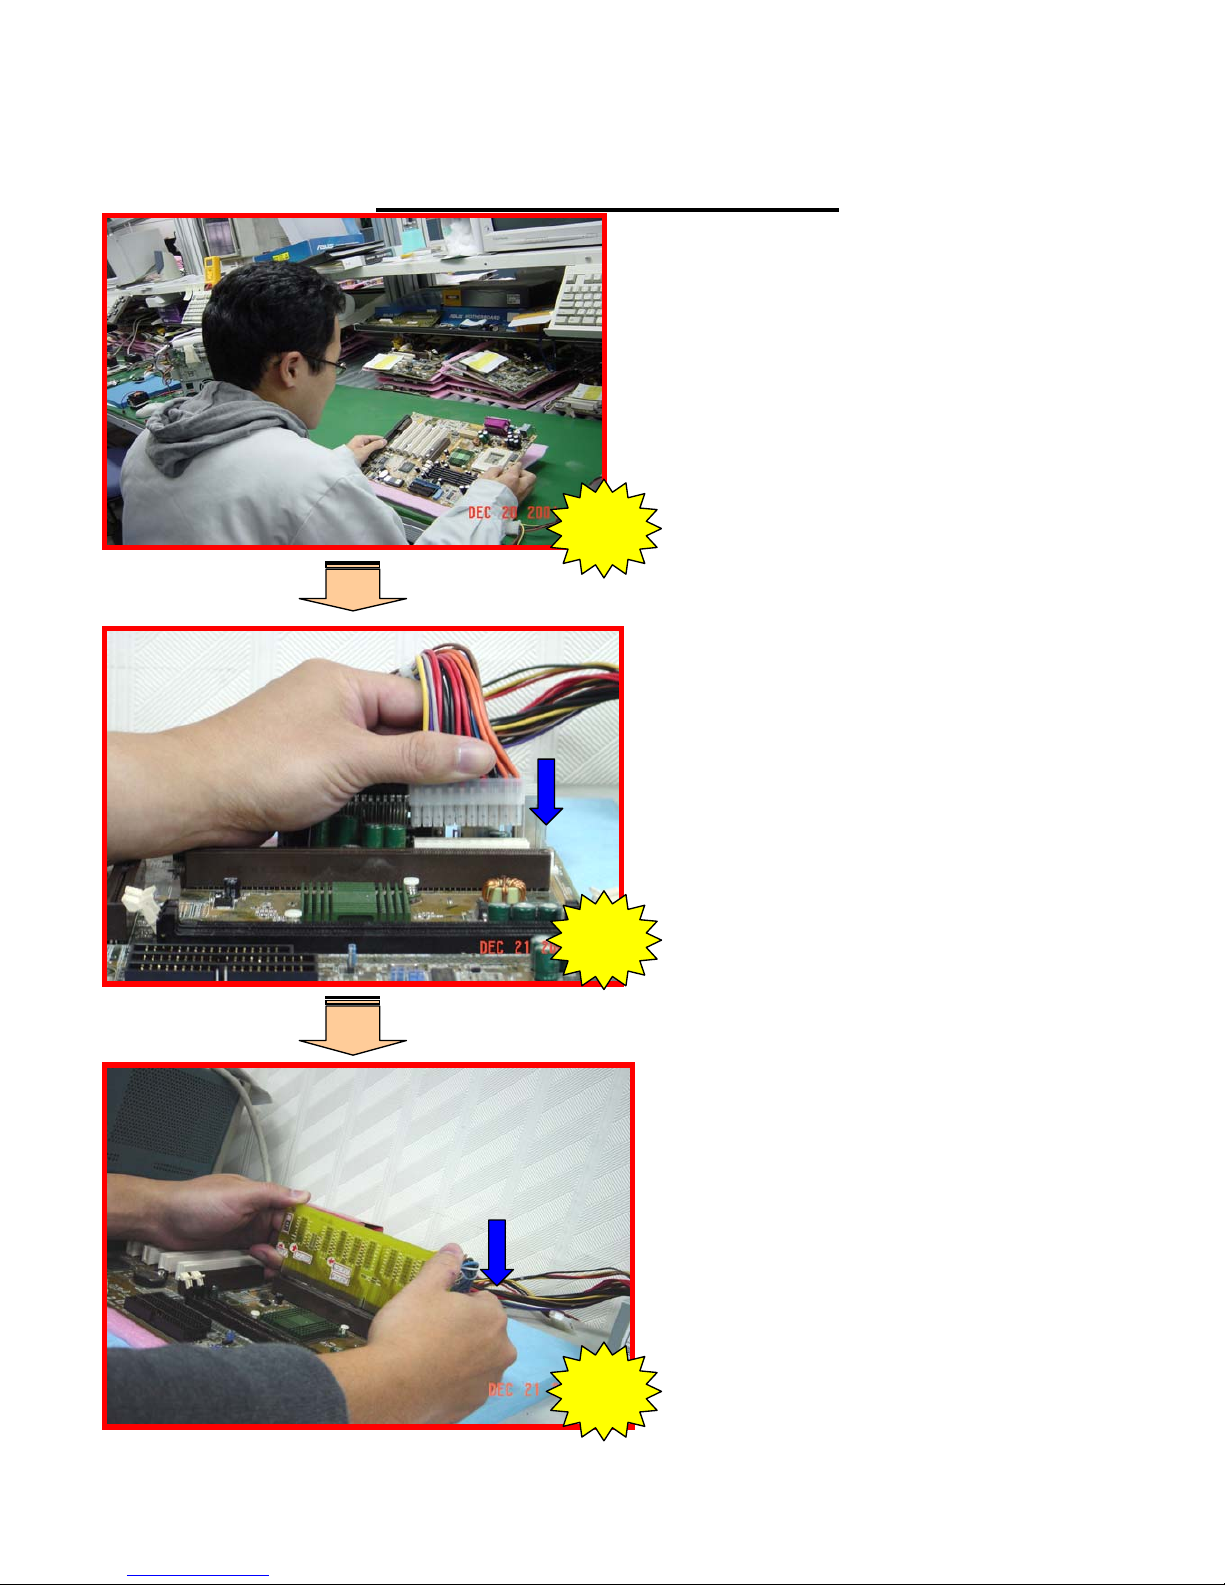
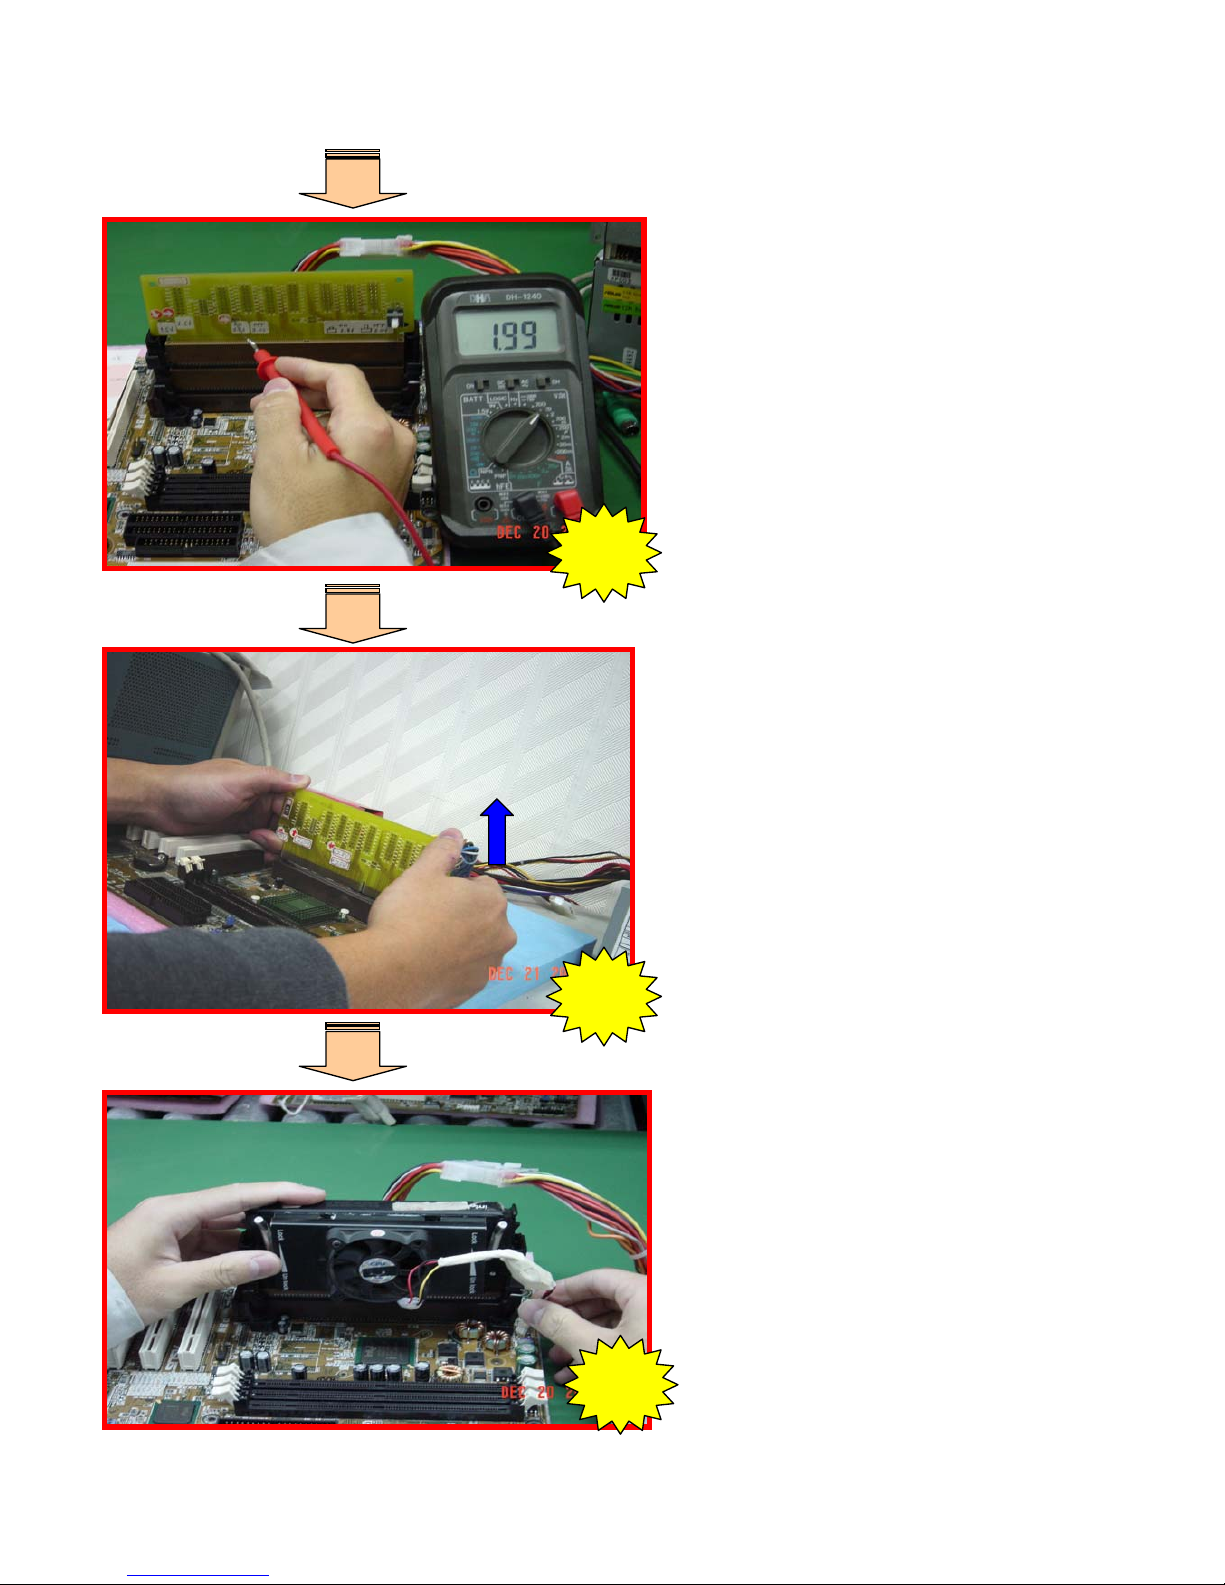
4
5
6
Check CPU voltage on CPU test card
Turn OFF Power supply and Remove CPU
Tes t Ca rd
Plug in CPU on Motherboard CPU Slot
and CPU FAN connector
8
7
8
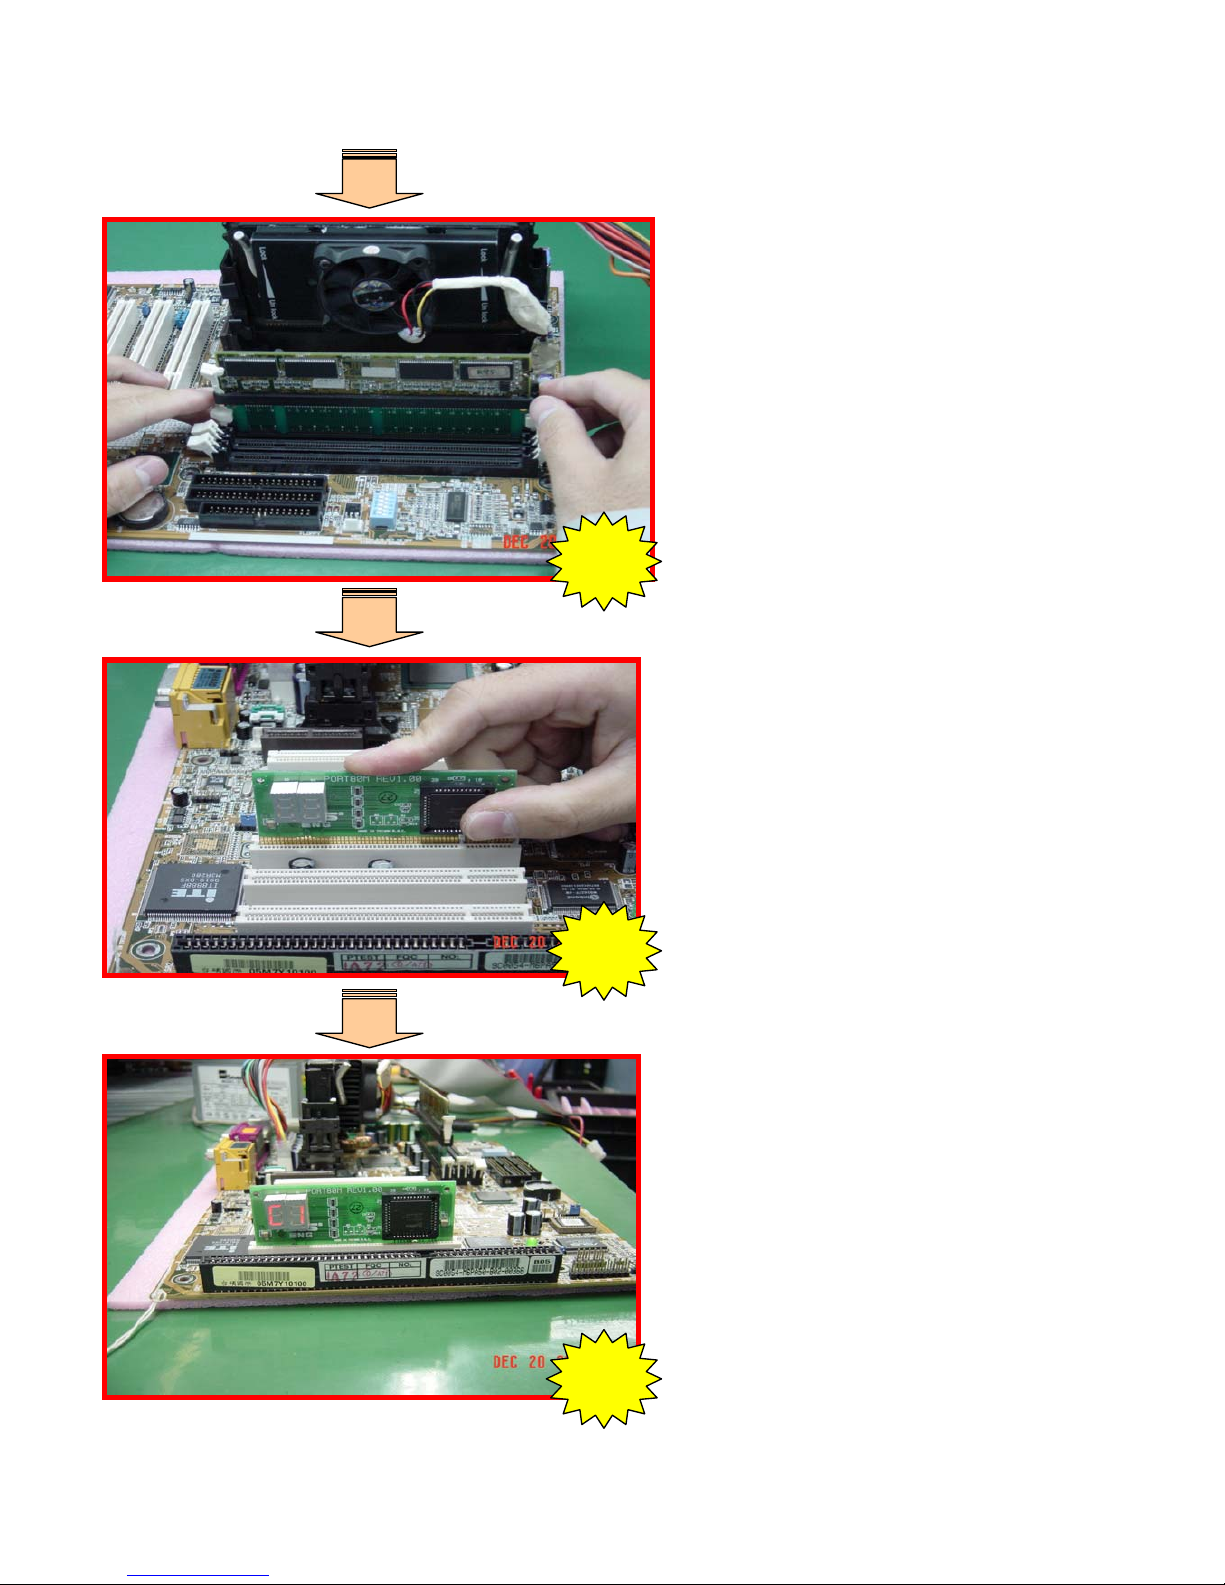
9
Plug in memory on Motherboard DIMM Slot
Plug in Port80M on Motherboard PCI Slot
1. Turn on the power supply
2. Check post code “C1” is display
9
10
11
12
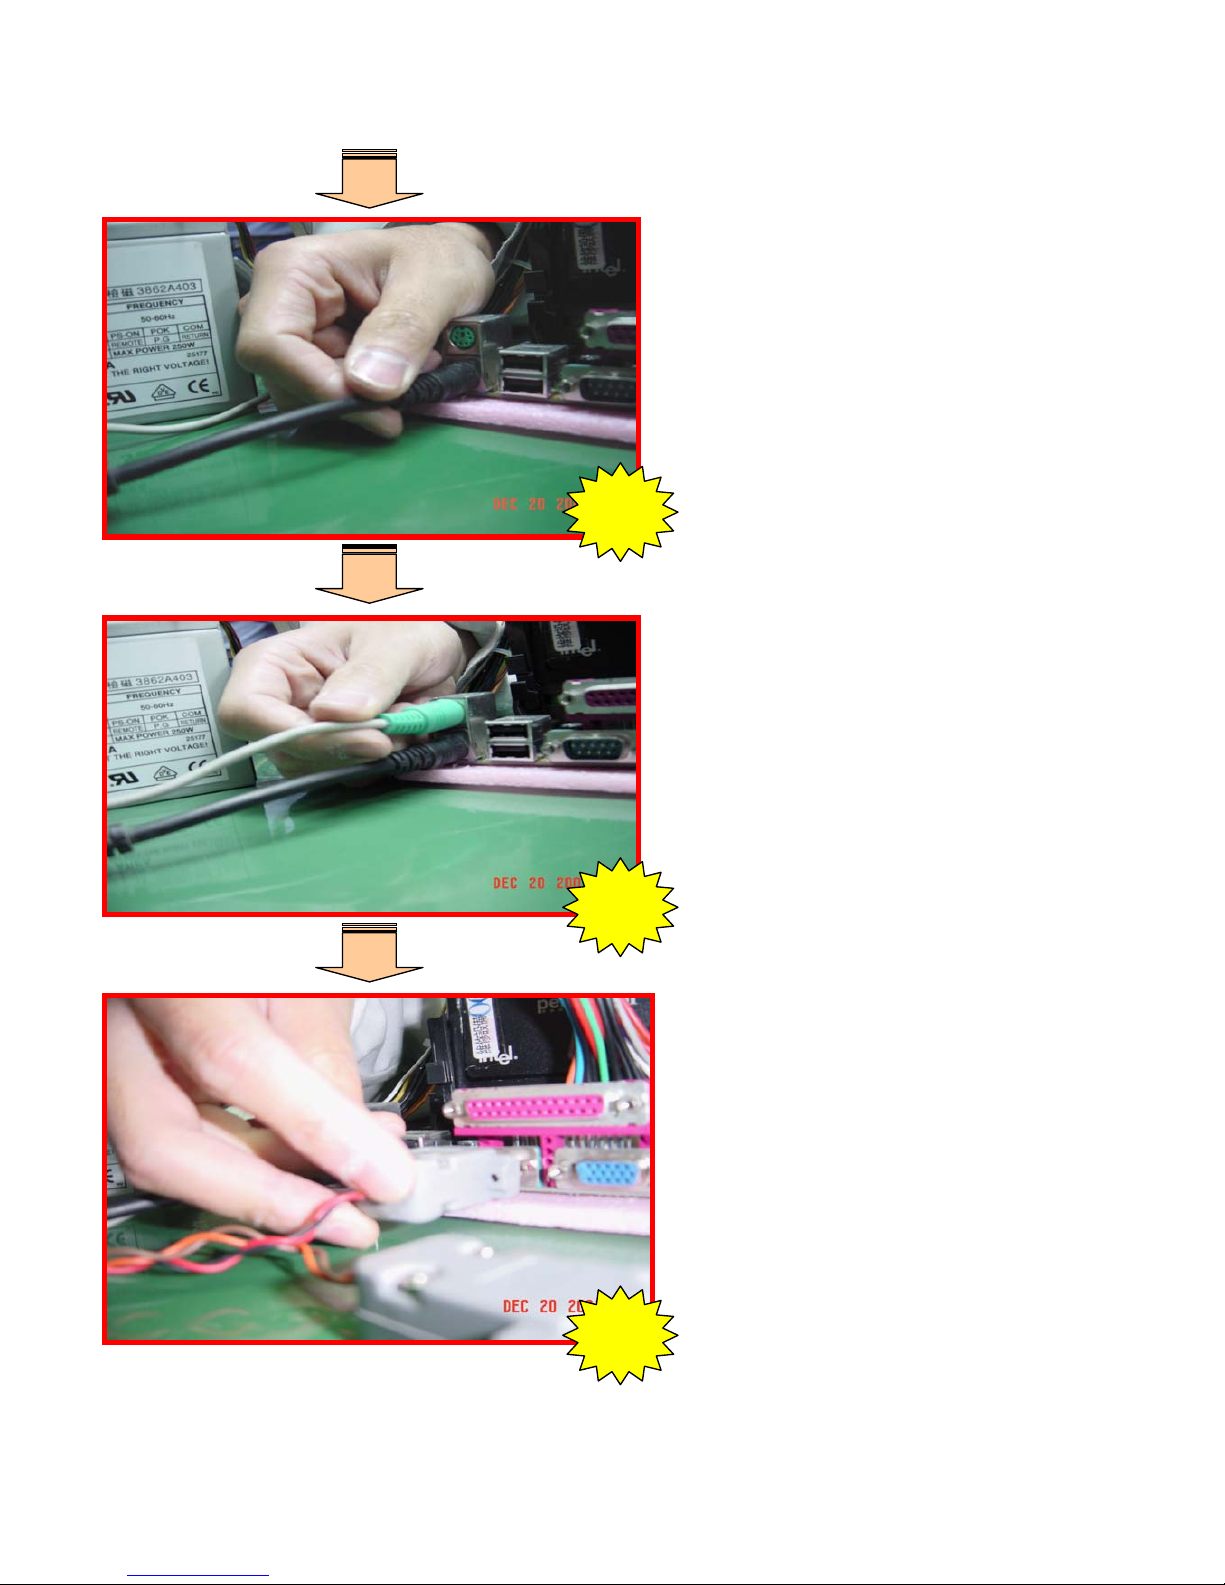
1. Turn OFF the power supply
2. Plug in PS2 Keyboard
Plug in PS2 Mouse
Plug in COM_ports
10
13
14
15
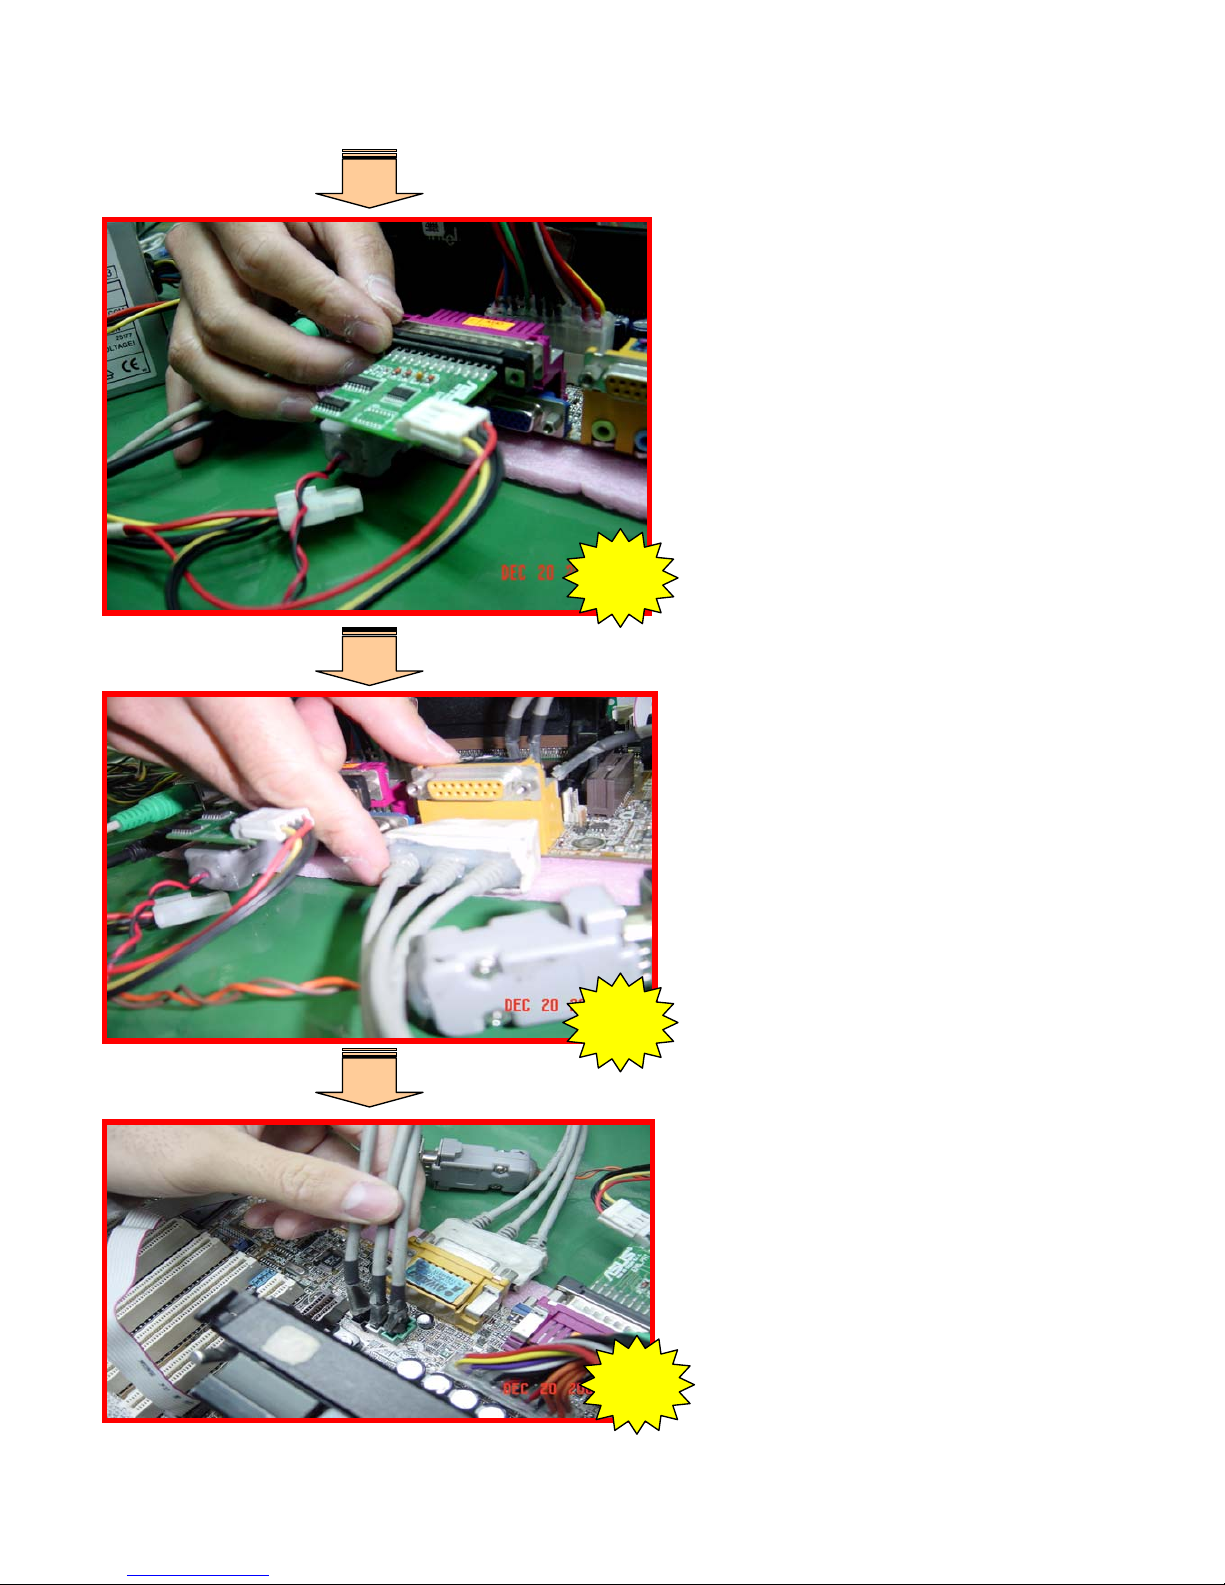
Plug in Printer_port
Plug in Audio_port
Plug in Audio_port Loopback tail on
Motherboard audio connectors
11
16
17
18
Plug in VGA_port on Motherboard VGA
Connector or VGA Card
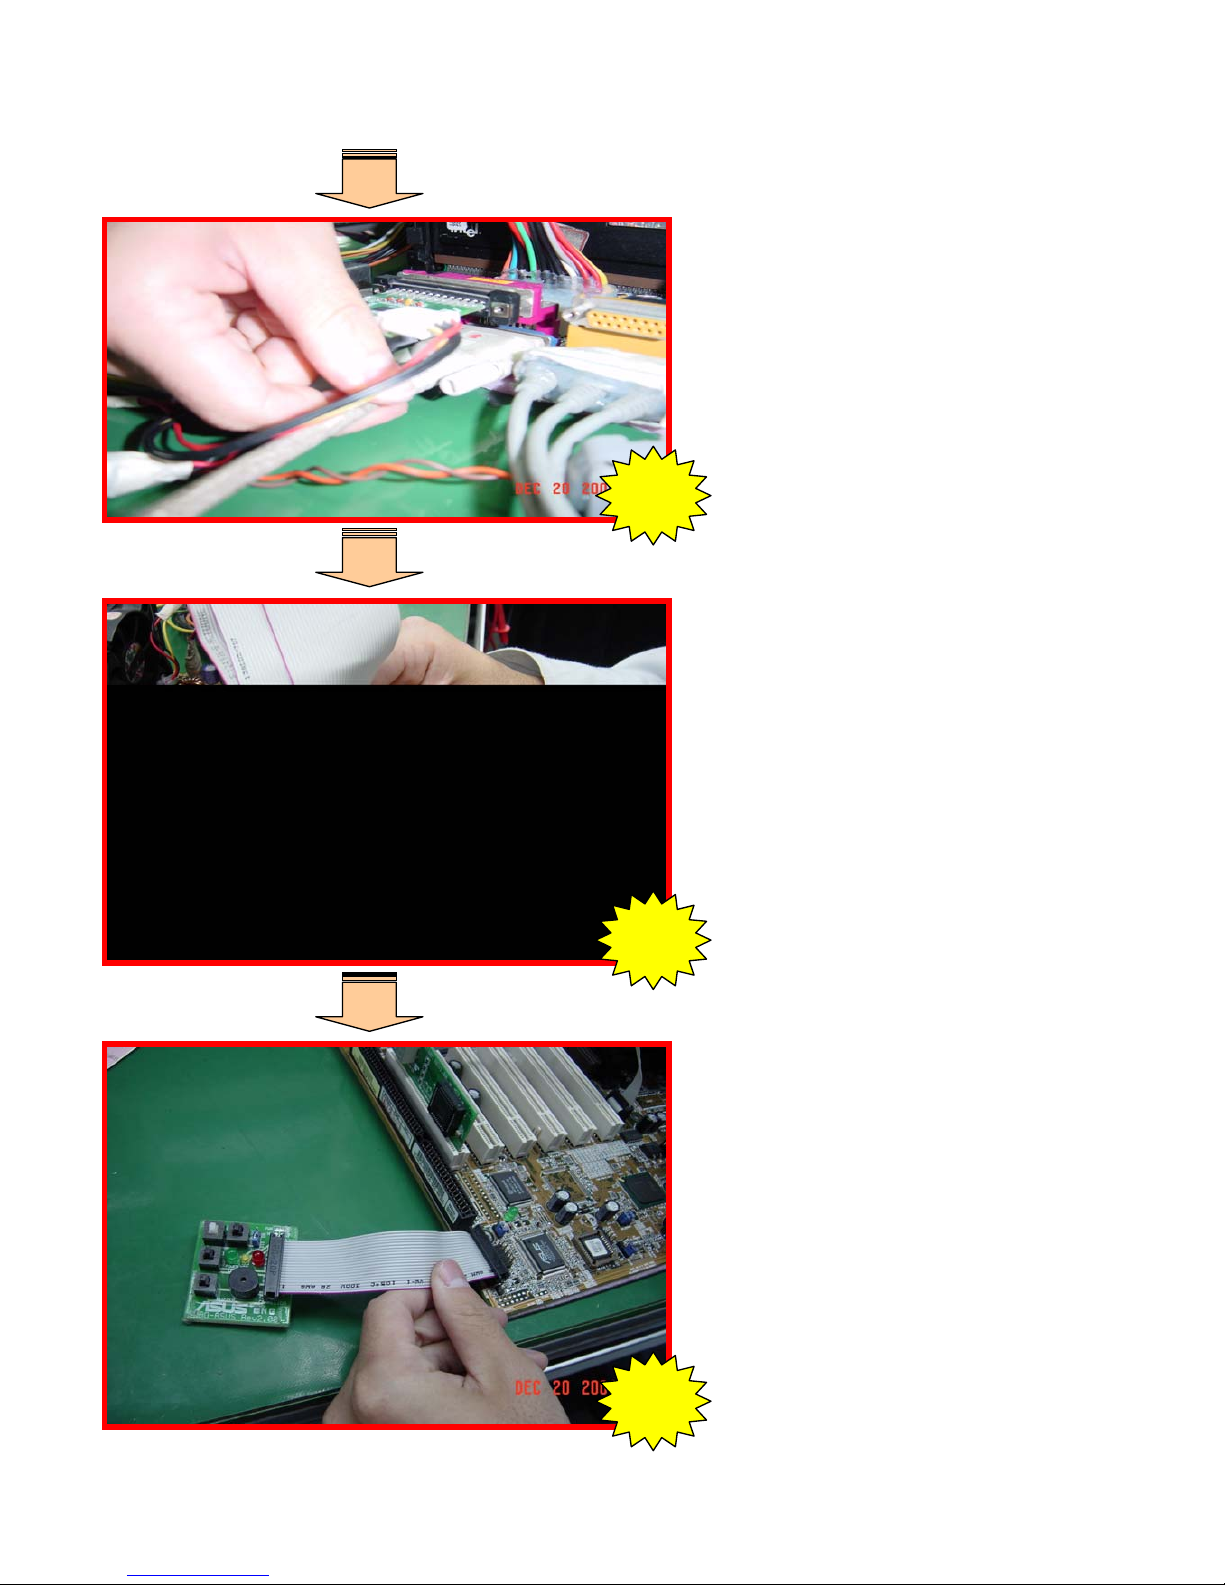
Plug in Floppy,Hardisk and CD_ROM on
Motherboard Connector
NOTE:
Primary IDE connect Hardisk
Secondary IDE connect CD_ROM
Plug in SWBO_ASUS on Motherboard Panel
Connector
NOTE:
Orient the red markings on the
PANEL ribbon cable to PIN 1
12
19
Push (SWBO_ASUS) the PWR.SW switch
button once will switch on the system and
test motherboard function.
13
Visual inspect fail description
Visual inspection:
4. Inspect M/B have broken,oxidized…..
(Please refer
Visual inspection description)
5. Customer induce or not.
(Please refer
Customer Induce Description)
6. If any M/B components failed to work after
inspection, please paste the arrow stacker and
write on Diagnostic Card
Paste arrow sticker on damage component
Fill in the Diagnostic card
1
2
3
 Loading...